Transcripts
1. Intro: [MUSIC] Hi there, creative friend. Welcome to class. I'm Sarah. I'm an artist and designer, and in this class, I'll show you my
process for creating beautiful repeating patterns
using the Procreate app. We'll start by creating
a custom canvas. Then I'll show you how to
set up a pattern template. We'll move on to sketching and designing elements
for our pattern. Then comes the fun part. We will ink and color
all the motifs. Next, we will use our pattern template to create the repeat, and guess what? We get to test our
brand new pattern. As a bonus, I'll show you how to recolor the motifs before we finally export and save our
final repeating pattern type. [MUSIC] All you'll need for
the class is an iPad, a stylus, I'll be
using my Apple Pencil, and the Procreate app. Are you ready?
Let's get started. [MUSIC]
2. Downloads : [MUSIC] I'm going to quickly
show you how to download the class resources
and something important to note is that you
will need to be on a web browser and not
the Skillshare app. I'm using Safari. Right below this video, you will see some tabs. Go to the Projects
and Resources and you will see the files
available for download. Click on the brush
set and tap on download and you will do the same thing to the
color swatches file. Now, we'll go to the download folder located
at the top of your screen, click on the first, and that will take you
to the file's app, click on the Brush file, and it will automatically
import it into Procreate. Most of the time it
places the new brush set at the very top of
your brush library. Now, we will do the same thing for the
color swatches file, so we'll go back
to our files app, click on the Swatches file, and again, it will
automatically import it into Procreate and for
the color palettes, it usually places it at the very bottom of
your palettes panel. So we can just move
that up to the top. If you don't have
the file's app, go to the App Store, type in files and it should be the first app that pops up and you can
download it for free. I've included a bright
color palette and fine brush set if you'd like to follow along with me in class, but please feel free to use any color palette or
brushes you'd like.
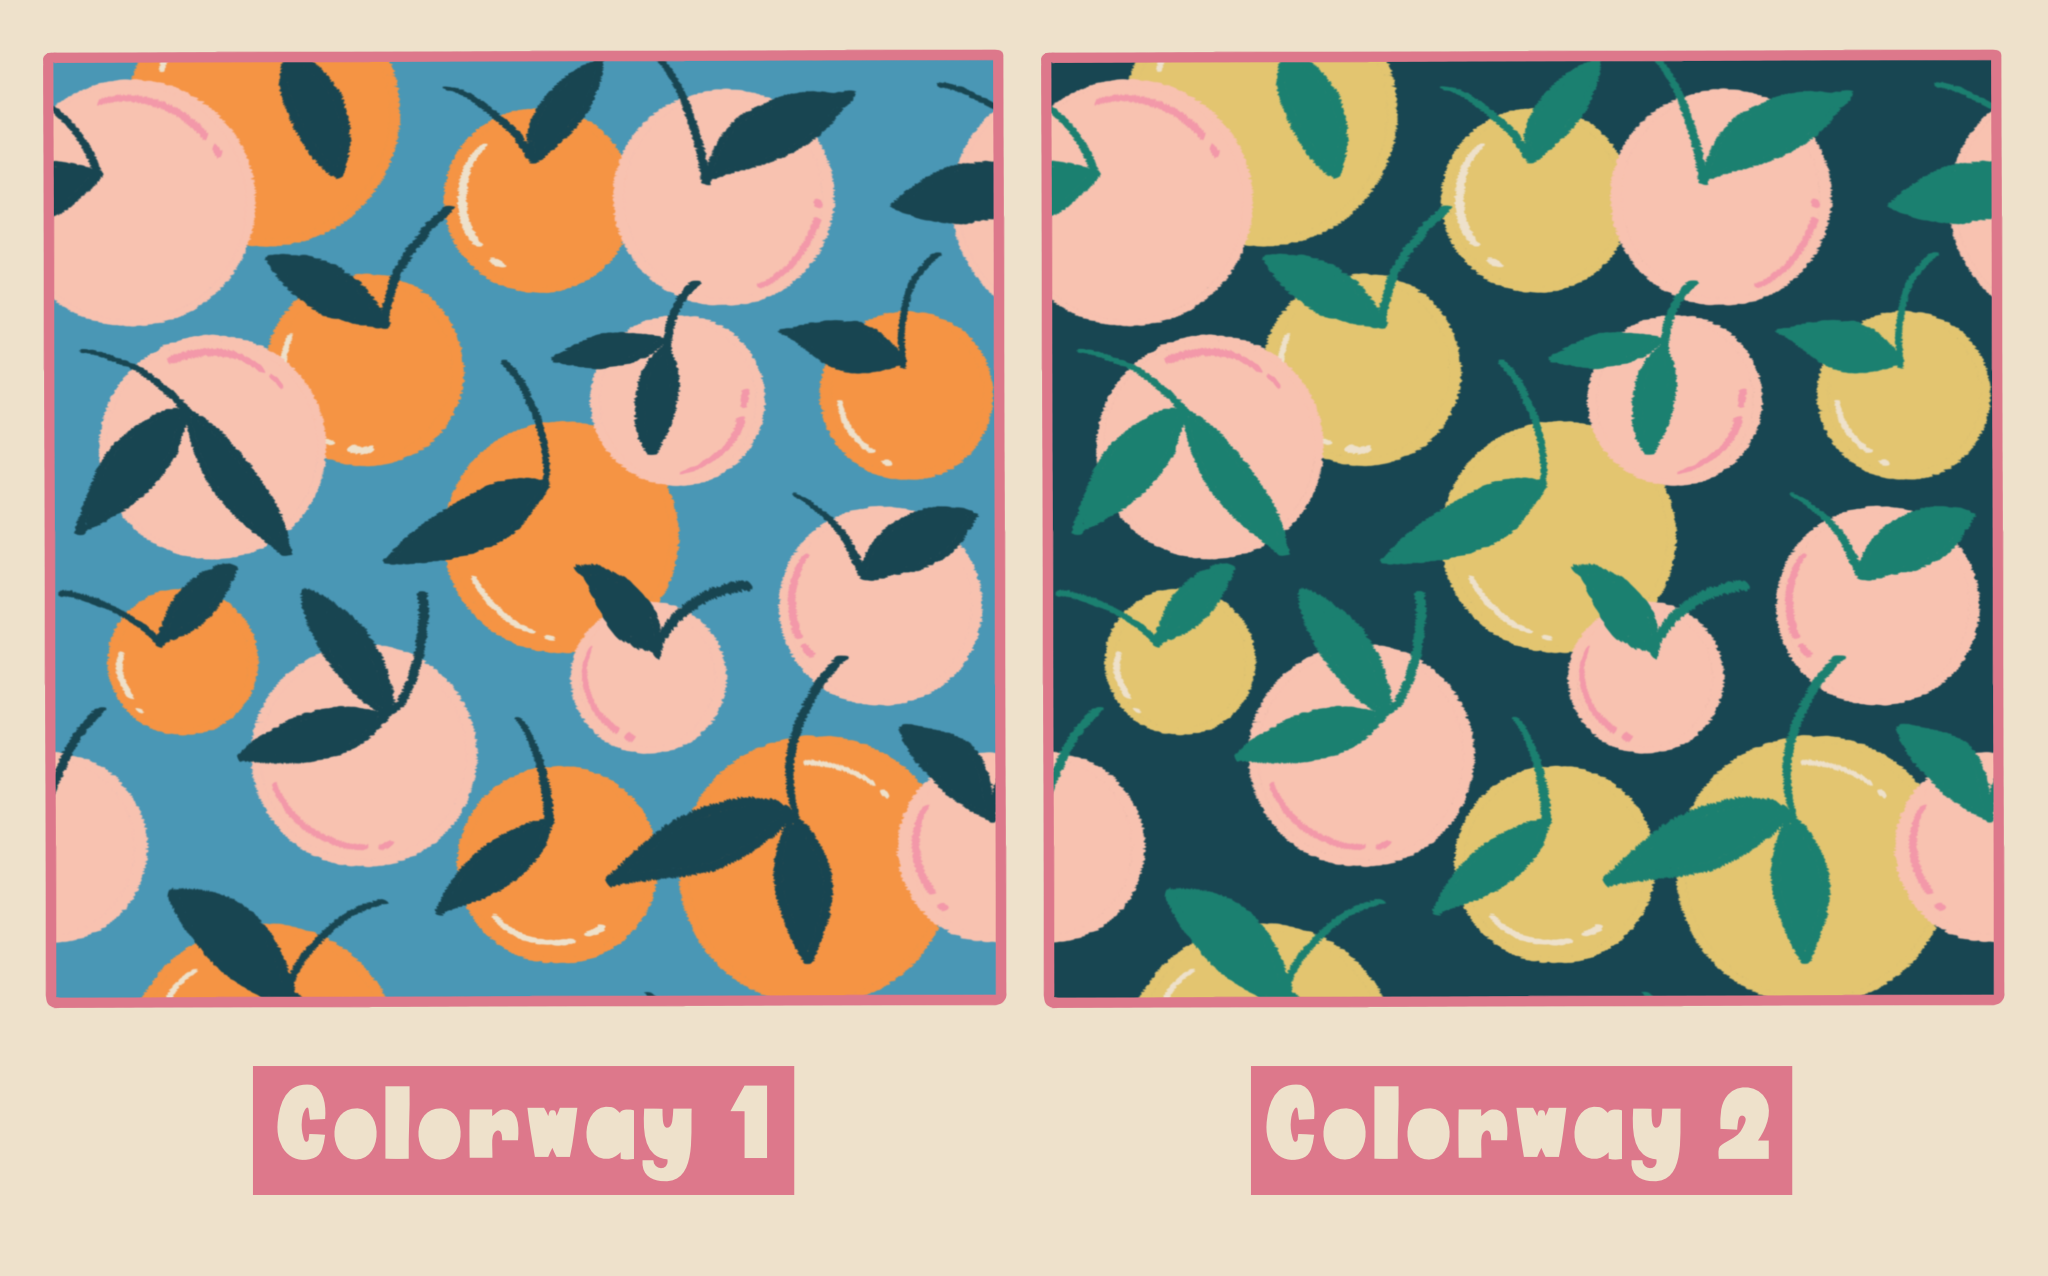
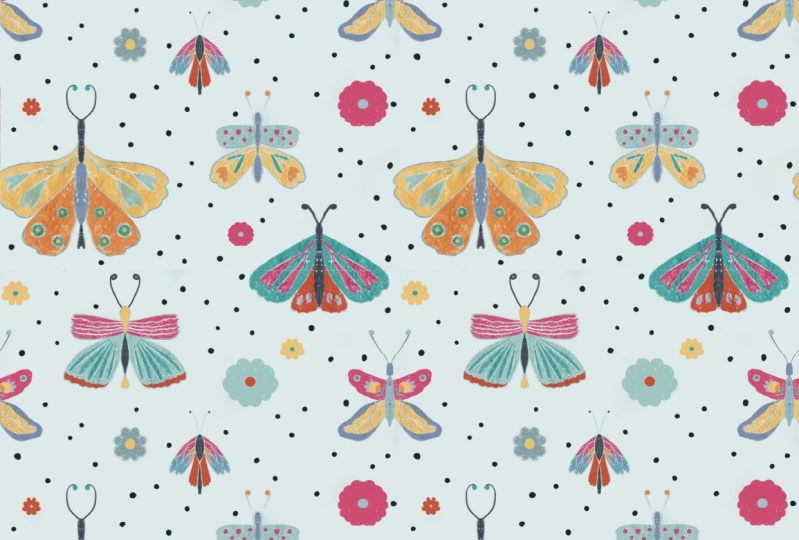
3. Class Project: [MUSIC] For your class project, you will create a seamless
repeating pattern tile. As a bonus, you will make an alternative color variation
of that very same design. All right. Let's get started.
4. Canvas Set-Up: [MUSIC] The very first thing we're going to do when we open our Procreate app
is create a canvas. Right here at the very top, you're going to see
a little plus sign. You're going to click on that. You'll see another little
plus sign right here, and you'll just click on that. This is where we
create a canvas. Here are units of measure. We have millimeters,
centimeters, inches, and pixels. I'll be working with pixels, so I'll make sure
that's selected. I always like to use
a squared canvas when I create
repeating patterns. My favorite size is
3,000 by 3,000 pixels, so I'll just type that
right here, 3,000 by 3,000. We'll make sure
our DPI is at 300, and that's going to
give me 55 layers. Now, I can click on "Create". Here, we have our canvas. Now we're ready for
our next step where we will create our
pattern template.
5. Template Set-Up: [MUSIC] Now that we
have our Canvas setup, we can create our
pattern template. The first thing we're
going to do is divide our Canvas into
four equal squares. Right here at the very top, you'll see this
little wrench icon. We're going to click on that
and we're going to make sure our drawing
guides are turned on. Right here where it
says Edit Drawing Guide we're going to click on that. We're going to make
sure our grid size is all the way up to max. Now we can click on "Done." How we're going to create this template is we're
going to make sure each one of these
individual squares will be filled with a color. How we will start that is
going to our Layers panel. We're going to want to make
sure we're on a new layer. We will not be using this
background color layer. We will make sure we're
on a brand new layer. We're just going to fill
that layer full with color. I'm going to grab
this dark pink color and just drag and drop, drop it into the Canvas. Now I need my full color to be only on this individual square. We'll click on this
little arrow icon. Right here where
it says snapping, we're going to make
sure our magnetics and snapping are both turned on. Now, we'll grab the corner of our large square
and match it up to the center of the Canvas to fit into the first smaller square. As you see when it
snaps to the middle, these yellow crosshairs
will come on. We will double-check
our work by zooming all the way in and making sure these dash lines or little marching ants are
right on our guidelines. As you can see the color bleeds out from
these dashed lines. We'll ignore that. We're going to make sure it's the dashed lines that are
matching up to our guidelines, not our color like this
or this will not work. Make sure it is our
little marching ants that are matching up
right on our guidelines. You'll see it turns
this yellow color when it's right at the corner. Now that we have that
and we know that our square is perfectly placed, we can deselect it. Now we'll go to our
Layers panel again, we'll click on our layer
and then click "Select". We'll make sure
we're on free head. Right here where it
says Save & load, you're going to click there and click on this little plus sign. There's our first selection. Now we'll do that to each one
of the individual squares. We'll grab our pink square, move it over to our next square. We'll zoom in to
double-check and make sure we're directly
in our space. We're going to
click on the layer, select "Save & load" plus and we have our
second selection. This might seem a little bit strange and not really make
a lot of sense right now. But in the upcoming
lesson where we start creating our
repeating pattern, you'll see why we're
doing this and I think you'll absolutely
love this technique. Now we'll do our
very last square. Just zoom in and make
sure it's in place. Click and select our "Layer", "Save & load" and we have
our four selections done. Now that I completed filling
in each one of my squares, we don't need this
color layer anymore. I will just go to my Layers
panel and clear that color. Now that we have our Canvas set up and our
template ready to go, we can begin the fun part and in the next lesson we'll start
sketching our pattern.
6. Sketching: [MUSIC] Now is the fun part. We get to start sketching our elements for our
repeating pattern. I'm going to be drawing some
oranges with some leaves. But feel free to sketch
anything you'd like. You can create geometrics or maybe just some
dots for your pattern. Maybe you want to
make some florals. It's totally up to you, but you can also just follow
along with me if you'd like. The first thing we're going
to do is I'm going to give myself a filled
background color layer. Right here on our layer panel, we're going to make sure
we're on a brand new layer. We're not going to be using
the background layer and I'm going to just pick a
color to fill in my Canvas. I'm going to go with
this blue color. Now I can just drag
and drop it into the Canvas and that will
be our background layer. Now I need to create a
layer on top of that, and that will be our
sketching layer. We'll get our sketching pencil, [NOISE] and I can just make sure I have a color that will show through
the background, so I'm going to grab
this dark green color. I know I want to have different oranges
overlapping each other with stems and leaves, so I can just begin sketching some circles to
represent my oranges, and I'm going to keep this very loose and just it's
the brainstorming part, so I don't need to
worry about making this sketch perfect or
anything like that. I'm just planning out where
I want my motifs to be. I will just start
filling in the Canvas. Something important to keep in mind is that I don't
want to draw any of my elements going off of
the Canvas like this. I want to make sure everything
stays within my Canvas. I will just continue drawing [NOISE] and I know I want my space to
be pretty filled in. I want more of a dense pattern. I'm going to add
lots of oranges. We can move things
around and don't worry if at this point we
scale up or down, we don't need to worry about it being pixelated
right now because this is just our sketch layer, so we won't worry about that. We're just going to
move things around and just plan everything out. Now I think I'll start
adding my stems and leaves. I can just add that in. I know I want some of
my oranges to have two leaves and some to have one. I have my stem going this way, so I'll make my stem
goal this way on this orange and I'll just continue adding more
details to my sketch. Just remember to have fun
with this sketching process. Keep it loose and just let yourself draw
anything you'd like. I really like the
way this is looking, so I think I'm going
to center my sketch to the Canvas just so I
can get an idea if I need to add anything and I really like
the way that looks, so I think I'm
ready to move on to my inking and adding color. But feel free to make as
many sketches as you'd like. If you'd like to start
on a sketchbook first, before you go digital, please feel free to do that, whatever you feel most
comfortable with. Now that I have my sketch layer pretty much how I want it. I can move on to inking all my illustrations
and adding color, so in the next lesson, we will begin
fine-tuning our sketch.
7. Inking & Coloring: [MUSIC] Now is the part where our illustration
will really come to life. In this lesson, we'll be adding color to each of our elements. The first thing we're
going to do is create a brand new layer and every layer will be
assigned to its color. For example, all the pinks
will be on one layer, all the greens on one layer, all the creams will
be on one layer, and this is so we will have an editable pattern if later on we want to change the colors
of our repeating pattern. I'm going to create a brand new layer and I'm going to make sure it's sandwiched in between my background layer
and my sketch layer. I will put my sketch
layer on multiply. Right here, where you
see this little N, you will click there, and scroll all the way up
till you see Multiply, and now we can
lower the opacity. It's just very light, just a guideline
for us to follow. Now I'll go to my
new layer and I will begin coloring in certain ones of my oranges in the same color. I'll start with
this orange color and I will grab
my jagged marker. I can just choose the
oranges that I want to be orange and I want
to space them out, so it's a nice, even distribution and
I want some to be orange and some to
be a pink color. I always go for bold
bright colors in my work. I just really like the feel of it being
cheery and bright. Now I can drag and
drop the color into my shapes and as you can see, we are coloring in our sketch, but you can still see our sketch on top of
our colored layer. That's why we put our
sketch layer on multiply. We can still see where
our guidelines are. Next, I'm going to fill
in the pink oranges, so we will create a new
layer with all our pinks. I'll grab this
darker pink color. Let me see if I want
lighter or the darker. I think I'll go with
the lighter pink color. We can always change
the color later. That's why we're creating
each color to its own layer. Now I will go in and draw
in all of my pink oranges, and I can just drag
and drop the color in to fill in the shapes. We can turn off our sketch layer just to see how
everything is looking, and that's looking
really good so now I'll turn my sketch layer back on and now I'll draw in
all the leaves in steps. I will create a new layer above both of the orange layers, which is the orange
and the pink color, because this one will
be a dark green color, and I'll do the
exact same thing. I will just go in and start
drawing in my leaves. I'm just following
my sketch layer and just basically tracing over it and adding in the color. Now that we have our stems
and leaves sketched in, I can drag and drop
color into those pieces and we can just turn
off our sketch layer to get an idea and see
how everything looks, and that looks super cute
and I really like that. If you want to add any more
details, we can do that. Maybe if we add this white color to give some highlight
to the oranges. Again, I'm using a new color. I'll create a brand new layer and I will adjust the size of my brush and just go in
and add in some details. Maybe I'll add a dark
pink for the pinks. Again, we'll create
a new layer since we are introducing a new color. That is super cute and
I absolutely love it. I already am loving the
way everything is looking. Now, I am ready to start actually creating my
repeating pattern. In the next lesson, we will start
creating our pattern using the template
we created earlier. I can't wait to show you.
8. Pattern Construction 1: [MUSIC] Before we begin using our pattern template we created in Procreate earlier, I want to explain to
you how it works. I made this visual to show you. Let's pretend this is
our canvas in Procreate. If we were going to create this pattern
manually in the app, we would have to
get this side of the canvas and move
it over to this side, and we would have to
get this bottom portion and move it up to the top, and we would make
sure everything lined up right here in the middle. That would allow us
to finish filling in all the empty spaces to
create our repeating pattern. Since we created a template, we won't need to be
shifting anything around. All we will have
to do is click on our selection and the
computer will automatically know where to place each one of our individual squares so we can achieve the same
effect and finish filling in our
repeating pattern. This makes for a much
smoother workflow and it saves a lot of time. You don't need to
regroup layers, find the right colored layers, everything stays intact, and you can keep
moving your styles around to finish creating
your repeating pattern. Now let me show you on the app. In the last lesson, we finished inking and
coloring in all of our motifs. This is now our original
Illustrator file. I always like to keep
an original file in case I need to change something
or reference it later. I'm going to go to my gallery and I'm going to
duplicate this original file, but I will first name it
original template file. Now I'm going to swipe left
and click on "Duplicate", and here's my duplicated file. I will name that
copy template file. This is the file we
will be working with, so I will just click on that. Now I'm going to group
all my layers together and you will just swipe right on each one of your layers, and we will include
our background layer. Now we can click on "Group". Now that we have our group, I'm going to click on the
New Group tab right here, and I'm going to make
sure I am on that tab, not any of the
individual layers. I will make sure my
selection is on New Group. This is where we will
now use our templates. We know that our whole
group is selected, so we will click up here
on the selection tool, right here where it
says Save & Load, we will click on that, and we will click on our
very first selection. With it still all selected, I'm going to click on
my little arrow icon, and we will click on flip horizontally and
flip vertically. Now we can deselect it. We're going to do that to
each one of the squares. Again, we will click
on our selection, Save & Load, Selection 2, we'll click
on our little arrow icon, Flip Horizontal, flip
vertically, de-select. Our selection, Save & Load, Selection 3, flip horizontally, flip
vertically, de-select. Now we'll do that one more
time for our last square. Again, we'll click on our
Selection 2, Save & Load, we're going to click
on Selection 4, click on our little arrow icon, flip horizontally and flip
vertically, and de-select it. Now the pattern is backwards so we're just going to make sure we flip it the right side up. We will click again on our little arrow icon and
we will just rotate it 45 degrees till it is perfectly straight,
facing forward. Now that we have all of our little squares positioned
in the right places, we can begin filling in these empty spaces to finish
creating our pattern tile. If we come to our layers panel, you can see everything
has remained the same. It has just moved and
repositioned our pattern in the correct spaces so we can finish creating our
repeating pattern. I'm going to turn on
my sketch layer again, and as you can see, our
same original sketch is still here. I'm going to do the
same thing as I did earlier and
I'm going to start sketching in some new
oranges on my sketch layer. I will grab my sketching pencil, make sure I have my
dark color selected, and make sure I'm
on my sketch layer, and I can just now start
planning out and filling in the empty gaps on my pattern. Everything is the same
like we did last time, and now we're just going to
fill in all the empty spaces. I will just start drawing some oranges and filling
in the empty spaces. Remember everything on this
side will be repeated on this side and everything that is cut up here will be
repeated on this side. This orange will be
around right here, so this space right here, this orange will be
somewhere up here. We can just start getting an idea of how things will fall. Now I can add my
stems and leaves. That looks good. We'll add in our color and
see if we like it. We can still move things
around and change them. I'm going to start with
the orange oranges and I will make sure I
go to my orange layer. I'll grab my color and my jagged marker and I can come and start filling in
my orange oranges. I can just drag and
drop the color. Now I can do my pink oranges. We'll make sure we go
to our pink layer, select our pink color, and just start tracing
over our sketch. Now I can drag and drop in
the color to fill the spaces. I want to make this
one this orange color. So I will go back
to my orange layer, grab my orange color, and just trace over that. Drag and drop the color. Now I can add my
stems and leaves. I will go to my dark green color where my stems and leaves are, I'm going to grab my
dark green color, and just start filling in
all four leaves and stems. Now I can just go drag
and drop the color in. If you want to fill
in the color faster, you can drag and
drop the color in, and right here, it says recolor. So let me show
you. You can drag, drop it in right here, continue filling with recolor, you will click on that. Drag and drop, click on that and you'll see this
little cross hair. You make sure you put it on the area you want to get
filled in and then you can just tap on all the spaces you want
filled in with that color. That looks good. Now we need to add
our highlights in. I'm going to rearrange
some of these layers. I want to make sure that my white cream color
highlights that belong to the orange oranges
are together and that my dark pink highlights that belong to the pink
oranges are together. I am going to find my layer, and that's the dark pink. I'm going to bring my
dark pink highlights just above my pink oranges and now I will bring my
cream color highlights above my orange oranges. That way it stays together. These two are together. Here are the orange oranges
and its highlights and here are the pink oranges
and its highlights. That just makes it easier when I go in to add in the highlights, I know exactly where they are. Now I can just finish adding in all the highlights and I'll start with my
cream-colored ones. I will go to that layer, grab my cream color, and finish filling
in my highlights. Now I can go to the pink
highlights and I know they're right above
my pink oranges. I'll grab my dark pink
color and just go in and finish adding
in the highlights. I think we got everything. Now I can turn off
my sketch layer to see how everything
is looking. That looks pretty good and full. It's nice and dense. In the next lesson, we will fine-tune our
pattern and test it out.
9. Pattern Construction 2: Now that we finished filling in all the spaces for
our pattern tile, we can test it. I'm going to make sure my
drawing guides are on. I will go to my layers panel. I make sure my
group is selected. Now with three fingers
I will swipe down on the canvas and click on Copy All and then I will swipe again with three fingers
and click on Paste. This will give us a flattened
pattern tile to test. It places it at the very
top of our layers panel. Now I will get the corner
of this large square and place it in the middle
to test out my pattern. I will make sure my snapping
and magnetics are turned on and I can just drag
the corner to the center. It should snap right into
place and you will see the yellow crosshairs will go on when it's right
in the middle. Now I can deselect it. I'm going to duplicate
this tile and place it on each one of my squares. I will go to my layer panel. I will swipe left and
click on Duplicate. Now I can drag it over
to the next square. Now I'll turn off my guides
so I can get a better look. That looks really good. I like that it's dense and full. I do see a few adjustments
I want to make. I see this orange right here. I want to move it
over a bit to fill in this empty space and
this orange right here, I want to move it up a bit
to fill in that empty space. I will turn off some
of my tiles so I can identify where those oranges
are on my big pattern tile. I will just turn
off these squares and here is a miniature version of my larger pattern tile, so I can see where
my oranges are. I know this orange is
this one right here, and this orange is
this one right here. Now I know I will move this one over a bit
and this one up a bit. Now that I identified where the elements are
that I need to move, I can delete my test swatches. I'm going to start
with this orange right here and I will go to my layers panel and
I know I want to move the entire
orange to the side. I will just grab those layers, which is my stem and leaf, my highlight, and
my orange, orange. You will just swipe right on the layers you want to
select at the same time. She will just grab the layer you want and
then you will just wipe right on the other ones
you want to select as well. Now I'll grab my selection
tool and I can just closely trace around
that element. I'm going to make
sure my snapping and magnetics are off so I can
easily move it around. I am going to bring
it close to the edge. I'm not going to make it go
over the edge of the canvas. I'm just going to bring
it right to the edge. That's very important
to keep in mind. Anything you move around, make sure it stays
inside the canvas. Nothing can be
hanging off the edge or it will not
repeat seamlessly. I will bring that pretty
close to the edge right here. Now I can deselect it. I'm going to do the
same thing with this orange right here. But since we have this
pink one in front, it's hard to see the
edges of this orange. I am just going to lower the opacity of this
layer for now. I will go to my pink layer
and just lower the opacity. That way we can
see exactly where the edges of our orange are. Now I'll grab my stem
layer, my highlights layer, and my orange layer and we'll do the same thing we did
as we did to this one. We will grab my selection
tool and I will carefully trace
around my elements. Now I can move it into place and I want to make sure
nothing is getting cut off. I will just scoot it up a bit to the very edge and over a bit. Now I can deselect it. I will bring my pink, orange layers opacity all
the way up to a 100 again. Now we could retest our pattern tile to see
how our changes look. I will make sure my
group is selected. Again, I will swipe down with
three fingers, copy all. Swipe down again with
three fingers and paste. I'm going to turn my guides back on and make sure my snapping
and magnetics are turned on. Now I can do the same
thing as we did before. Now I will turn off my
guides to see how it looks. That looks so much better. I'm very happy with
the way that looks. I think I am ready
now to re-color and save it and export it
to a final pattern tile. But before we do that, I want to show you what
you would do if you wanted to edit anything that
is falling off the canvas. Let's say you want to edit
this orange right here. You would follow the exact
same steps we did in the previous lesson where
we used our template. All we would do would
be to go to our group. We will go through
the same steps as we did where we click on
the selection tool, save and load selection
1, flip horizontally, flip vertically, and we would do that to each one of our squares. You would repeat that same
pattern every time you want to change anything that is falling off the edge of the canvas. In the next lesson,
we will work on recoloring our pattern tile.
10. Recolor: [MUSIC] Now that we've finished
testing and adjusting our repeating pattern tile, I am going to show you how
to recolor your elements. I am going to go
to my layers panel and I'm going to delete the
test swatches we used earlier. We won't be needing
those anymore. Now I have my
original group layer and I am going to just
duplicate the entire group. On the new, I will be recoloring
on the new group layer. I will open that panel and I will start with
my stems and leaves. I will pick a new color. I'm going to pick
this light color. We can drag and
drop the color in to each of our leaves like this, or we can use Alpha lock. You just go to your
layers panel again. Click on the layer
you want recolor. With two fingers, you will
swipe right and you will see this little checkerboard
pattern come on behind your illustration and that
means Alpha lock is turned on. Now you will just click on your layer and click fill layer. As you can see, it fills the entire layer
with that color. Now let's try these
orange oranges. Let's get a new color. Let's pick this yellow color. I will go to my
orange oranges layer and with two fingers, I will swipe right, and it will change
it to Alpha lock. Now I can click on my layer
and click fill layer. That's how you can
recolor your elements. You would do the
same thing to any of the layers you want to recolor. If you want to get
rid of Alpha Lock, you would do the same thing. Two fingers swipe right and Alpha Lock will
be turned off. That's how you can easily recolor your elements in
your repeating pattern. In the next lesson, I
will show you how to save and export your
final pattern tile.
11. Save & Export : Congratulations, you
made it to the very end. Now it's time to save and export our final repeating
pattern tile. So I'm going to click
on my wrench icon, and I'm going to click on Share. Here are all my file
types that I can save to. I can save it as
a Procreate file, a PSD file for Photoshop, a PDF, a JPEG, PNG, and TIFF. I'm going to be using a JPEG, so I will click on that. Here are your
options for saving. You can save to your Google
Drive or your Dropbox, or you can save it to
your image library. I'm going to save it to
my image library for now. Now we can go and find it in our images and here is our final repeating
pattern swatch, ready to use or to share.
12. Final Thoughts: [MUSIC] Thank you so much
for taking the time and joining the class. I hope you enjoyed
watching my process for creating seamless repeating
patterns in Procreate. I would absolutely love seeing your beautiful designs so don't forget to share your pattern
in the project gallery. If you have any questions, please don't hesitate to ask. You can post your question
in the discussion tab, and you can find that
right below this video. Thanks again, and I'll
see you next time.
 Sarah Raquel, Artist & Designer