Transcripts
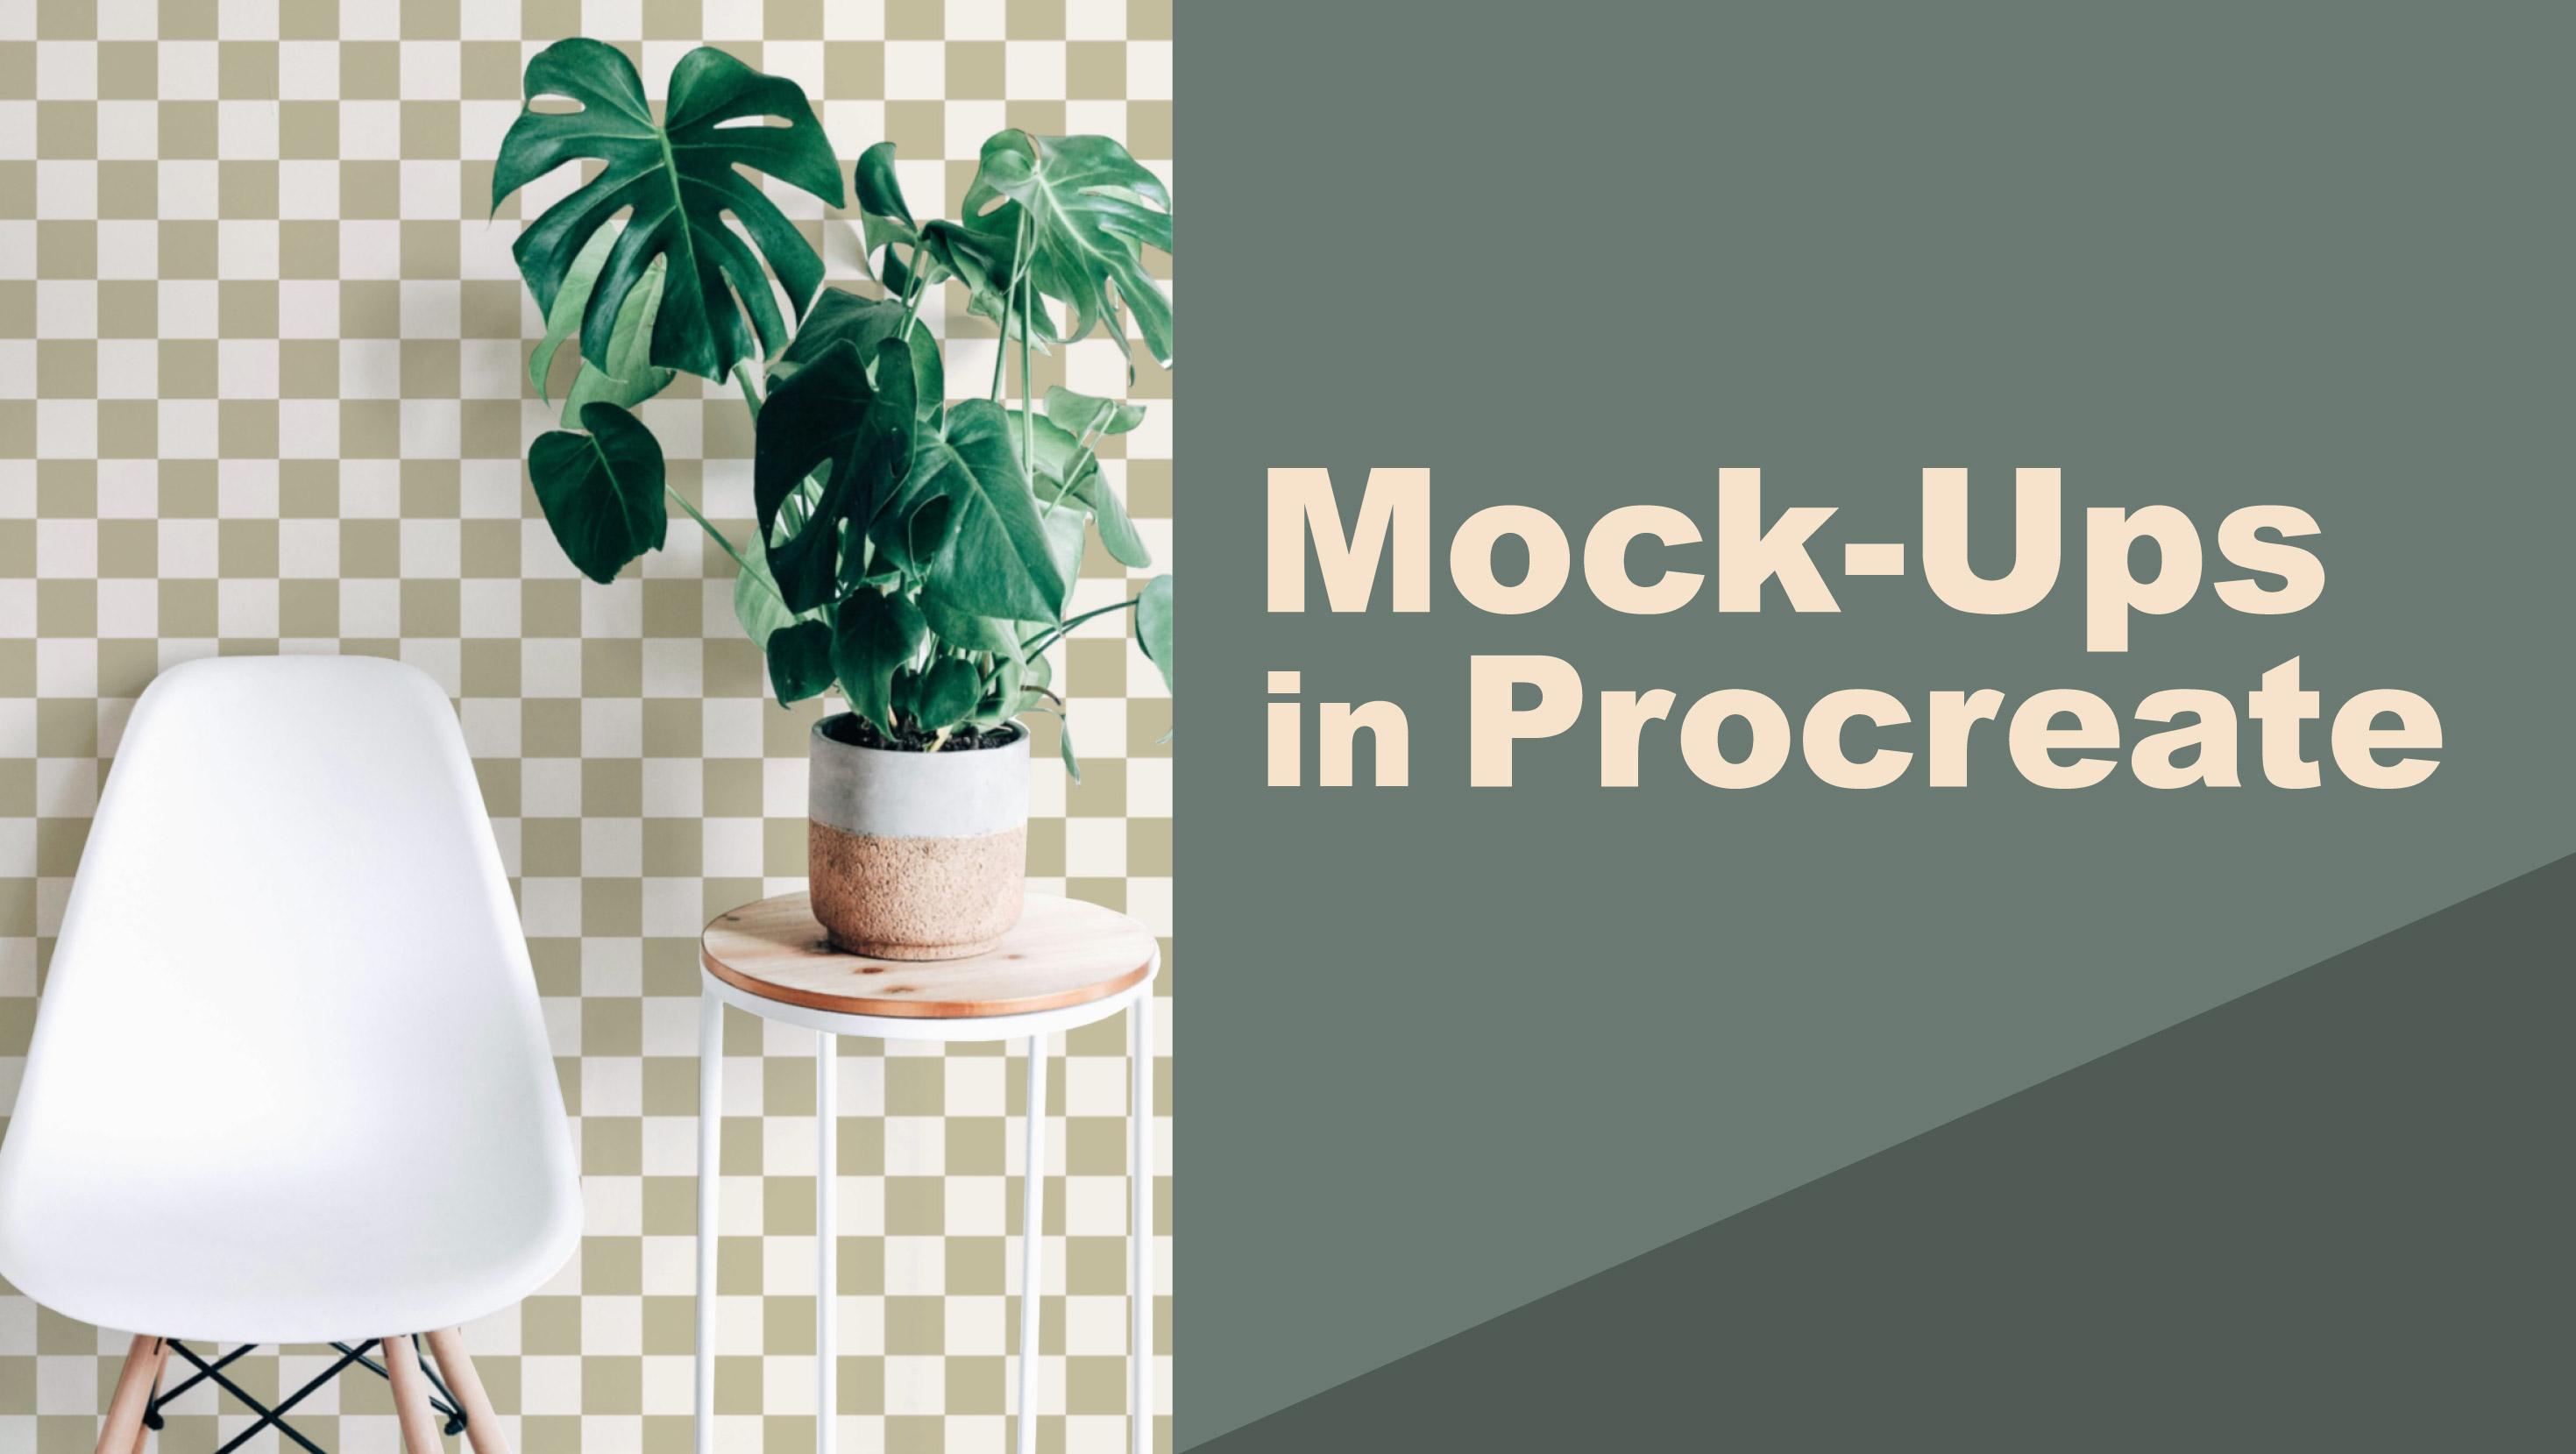
1. Intro: Hi there, creative friend. Welcome. I'm Sarah. I'm an artist and designer. In this class, I'll
show you how to create realistic mock ups using
the procreate app. We'll start off with a
simple pillow mock up, then move on in complexity to create three
beautiful projects. By the end of the class, you'll be a pro at
mock ups in procreate. Grab your ipad, a Stylus. I'll be using my Apple pencil
and the procreate app. Are you ready? I can't wait to show you.
Let's get started.
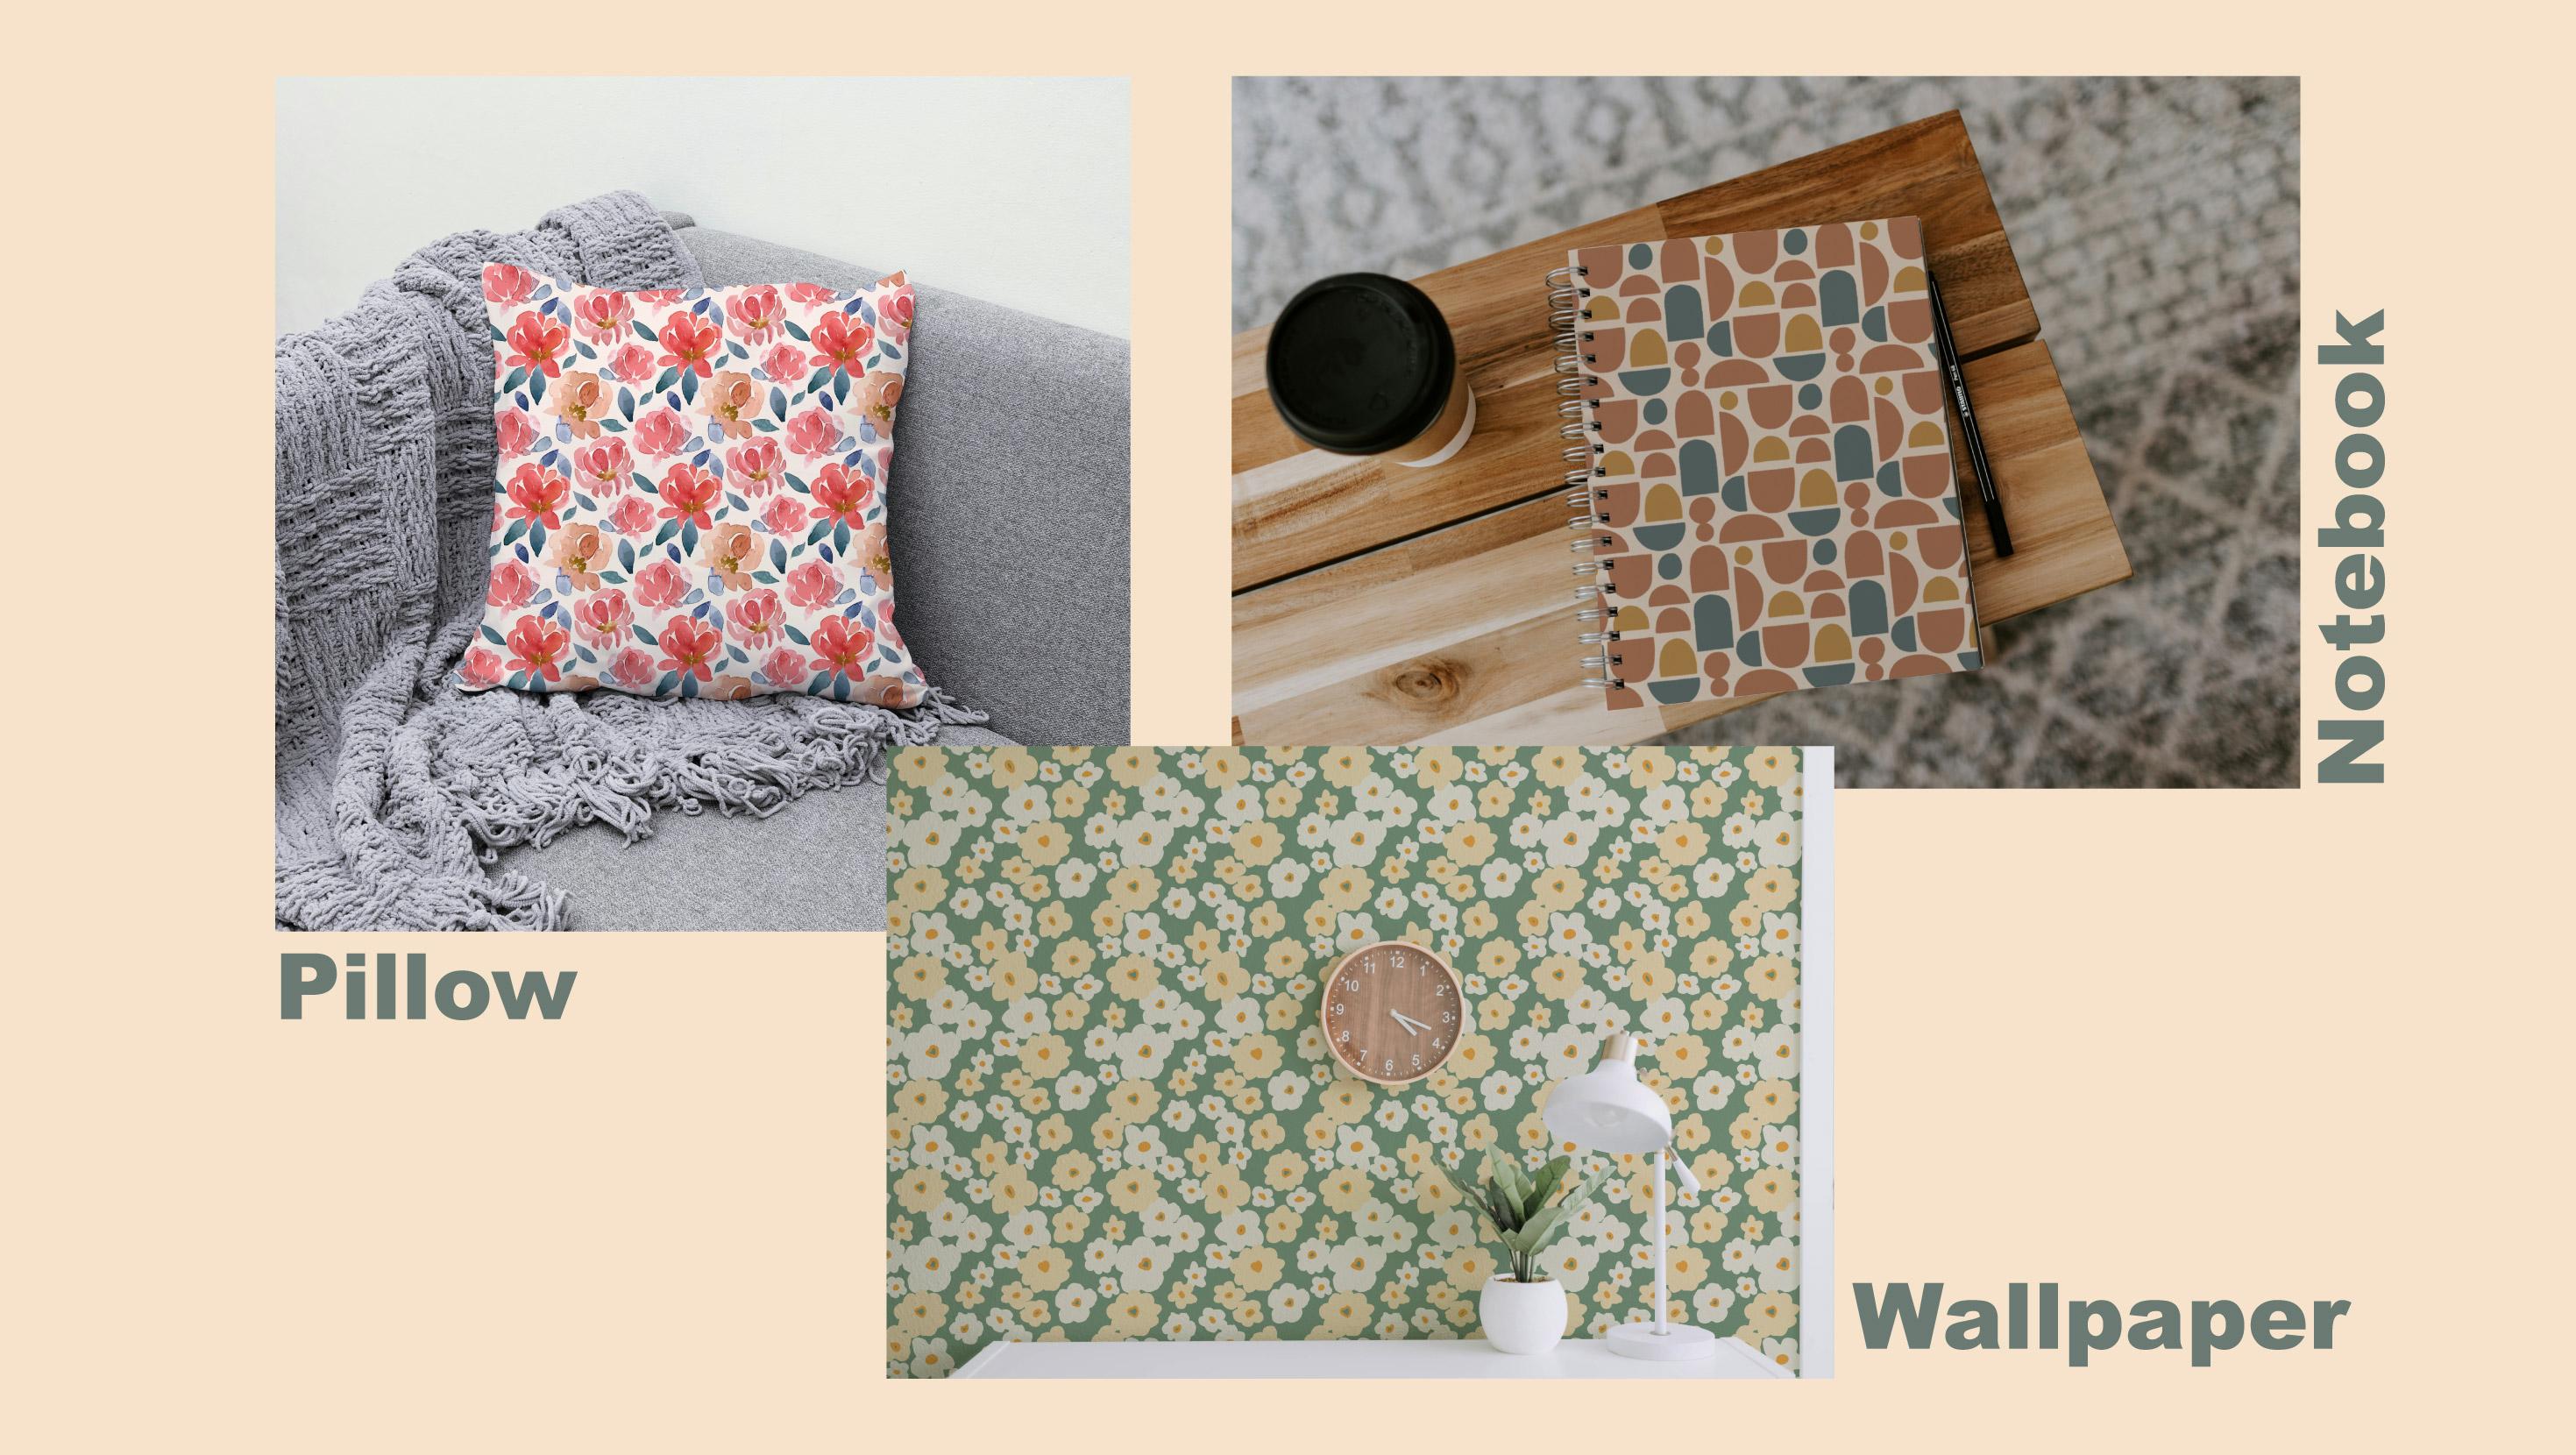
2. Class Project & Resources: For your class project, create a mock up image using the techniques
demonstrated in class. I'll be using stock
images for our projects, but please feel free to
use your own photos. I've listed some helpful tips
for taking your own photos. You can find that under the
Projects and Resources tab. I'm going to quickly
show you how to download the images we will be using
for our class projects. Something important to note is that you will need to be on a web browser and not the Skillshare app
to access the downloads. I'll be using Safari
right below this video. Make sure you go to the Project and Resources tab and scroll all the
way to the bottom, you will see the three
downloads of our images. We'll tap on the first one, which is our pillow
image download. You will see right here at
the top right hand corner, the download menu, tap on the
image and then save image. We will do that to each one. We will do that to our Notebook, download, go to our Downloads, tap on Notebook, and
then save image, finally our wall image. Now that we have our images, we are ready to go and start
on our very first project.
3. Sourcing Images : In this lesson, I will
show you how I source my stock image photos
to use as mock ups. My favorite website
to get my images is unsplashed because they have beautiful, royalty free images. Something important
to keep in mind is to always look at the terms of use before using any
images from any website. You can go to the
license menu here. It will tell you what you are allowed and what you are not allowed to do with the photos. Always make sure to
look at that and not just get images off of say, Google search or Pinterest, because a lot of those
belong to somebody. You want to make sure you
use royalty free images. Now we will go to the
home page of unsplashed. I will begin searching for some nice photos to
use as mock ups. I'll be mocking
up some patterns, but you can mock up
anything you'd like, like illustrations or other
things you might like. Something important
to keep in mind is that you will want
to find images that have a white background with not a lot of
texture on them. For example, if you want
to mock up a pillow, you'll want to make sure
that pillow is white and doesn't have a lot of
texture to the fabric. Our file can apply
nice and smooth. I'll show you some examples. I'll start by typing
in white pillow, then we'll just scroll down
and start looking for images that we may be interested
in using right away. I see several that would
be great images to use. Here's a good example of a
great image for a mock up. As you can see, it has
a beautiful background, but the pillow itself
is just a nice clean, white pillow that's ideal
when mocking up photos, or illustrations or patterns. Here's another great example of a photo that would
work great as a mock up. I'm especially really
loving this one right here. It's nice, clean,
white background. I'm going to download this one, so we can just tap on
download for free. Now I can just grab my image
and save it to my images. You can just look through the search and see
which ones you like best. And think of what might look best with your pattern
or your illustration. Now let's look up
a spiral notebook. I will type in spiral notebook. Again, we're going to try
to find something that has a nice clean white
surface for our design. This would be a
really nice mock up. As you can see, it
is just a clean, solid, white no cover. Here's another great one. I'm really loving this one with the coffee cup on
this wooden table. I will download this one.
We'll do the same thing. We'll tap, download and then
we can just save our image. The last thing I'm
going to look up is a wall background for a
wallpaper I want to mock up. I will put white wall. I wanted to have a
sofa. Let's do it. Sofa. I can just start looking and seeing
if I like anything. This would be a nice
one right here. There are several nices. Here's
an example of something. You would not want to get something like this
because as you can see, the background is a dark blue and it will not mock up well, you want to make sure you
have a clean white surface. I can just keep looking and
see if I like something. If I don't see something I like, I can go and refine my search
or type something else. This dry white wall mock up, I've seen a lot of
really nice mock ups. This would be a great
mock up we could use. And I think I'll download
that one to have, in case I use that one, you can just look through them and if you see
stuff you like, you can just save and start a
folder with mock up images. So you can always come back later and use them
for your projects. You can just continue looking to see if you find
anything you like. Once you have the images
you're happy with, make sure you save them
in your image library, then we can begin mocking up
our designs and patterns. In the next lesson, we'll work
on our very first mock up. We will be mocking up a pillow.
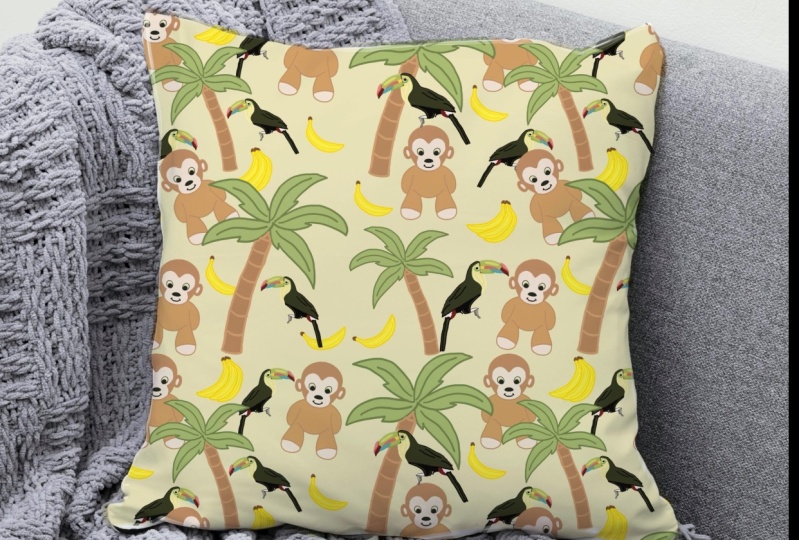
4. Pillow Mock-Up: In this lesson, I'm
going to show you how to use the photos we
sourced to make mock ups. The first thing
we're going to do is a pillow up here on
the right hand corner. You'll see it says
Select import photo and a little plus symbol. We're going to tap on photo now. I will select the
photo I want to use. I want to use the
pillow photo that we got earlier from our
unsplashed website. The first thing we're going
to want to do is create a little like a area where we
will clip our pattern to, that would be this white pillow. We will grab any random
color at this point, I just am going to grab
a green color so we can see where we are drawing. We're going to have
our photo image. I'm going to create a brand
new layer above the image. Now I can just grab
a regular brush. I'm just going to use the monoline brush that comes
with the procreate app, and you can find it under
the calligraphy section. I will just start drawing
around tracing this pillow. I'm going to zoom way in
and I'm going to make sure my brush is
pretty small size. I can get all those
small corners. That's a pretty good size. I am at 3% now. I'm going to just start
tracing all around the area that is my pillow. I'm going to make
sure I stay inside, right inside the
lines of the pillow. I don't want to
go out like this. I want to stay nice and tight with the pillow,
just like this. And I'm going to
trace all around it, completely around the pillow. I will just trace over as close as possible as I
can get to the edge. Now that I outlined
my pillow completely, I can fill it in
with a solid color. This will be where our pattern or illustration
will be mocked to. As you can see right
now, it's just the very flat, solid color. We're going to change the mode
to make it look realistic. Now that we've got
that, I want to change this green flat color layer to just be a plain white color. I'll make sure I get
just a solid white. I'm going to turn alpha
lock on with two fingers. I will swipe right. It will turn alpha lock on. Now I can tap on my layer
and tap on fill layer. We have that set now. We can play with the color molds and we want to set
it to multiply. Right here where you see
the little n on the layer. We will tap on that. I will go down to
select multiply. Just need a fine multiply and it's right here at the very. Now, I will turn alpha lock
off with two fingers wipe. Right now my image is set up as a mock up and you can't tell anything's on there. Like you can't tell
where we drew anything. But as soon as we
add our pattern, you will see why we did that. Now that we are ready, we have our clipping layer, our image. Now we can add a pattern
or illustration. For this class, I'll be using patterns if you
want to see how to create repeating patterns
on in the procreate app. I have two classes, I will link below if you
want to learn how to do that and bring in
your pattern file, or if you have some pattern
files already saved, you can use those as well. Now I will tap up here
on my Actions panel. I will tap on Ad, then insert a photo. I have this watercolor pattern
that I created earlier. I'll be using that for
this pillow mock up. Now that I brought
my pattern in, I will go to my layers. I will make sure
that my pattern file is above my clipping file
that we drew earlier. Always make sure
it is at the top. Now I can tap on that layer. And I will tap where
it says clipping mask. It will clip it
to the flat shape of the pillow that
we drew earlier. You can see that looks so nice. And if you way in, you can see the
shadows at the bottom. That's how we set
it to multiply. If we don't, it
just will look like this flat shape that we just
paste it over the image. By setting it to multiply, it gives it a very
realistic look. If we wanted to adjust
our pattern layer, we can just make sure we
are on our pattern layer. We can go to the adjustments, this little arrow icon
at the top and we can and play with the
scale or move it around. Once we're happy we can de
select it and that's how we would play with exactly
where we want it to be. That's how you create a realistic mock up
in the procreate app. This was for our pillow mock up. Then the next lesson, I will show you how to create
a spiral notebook mock up.
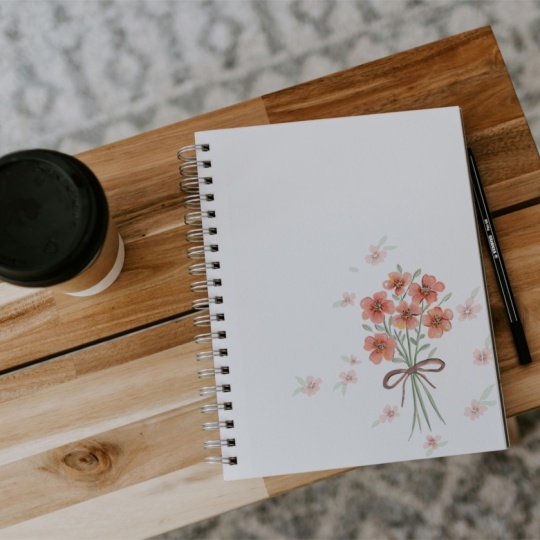
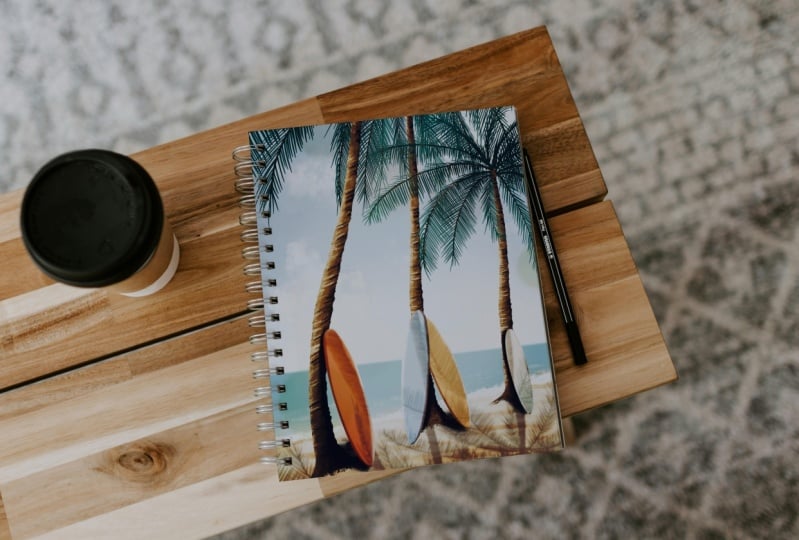
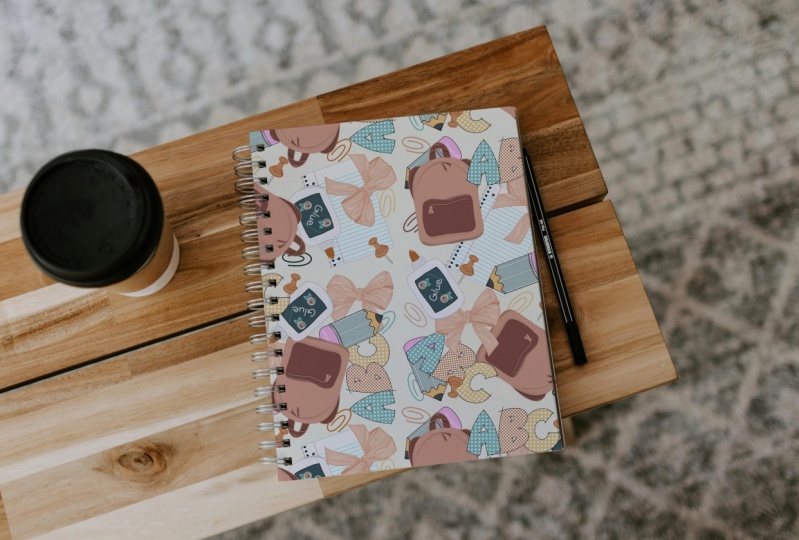
5. Notebook Mock-Up: In this next lesson, we are going to mock
up a spiral notebook. It's basically the same process as we did for our
pillow mock up. Again, we'll tap on photo, we'll grab our spiral notebook mock up photo that
we chose earlier. I'm going to do the
exact same thing as I did with the pillow. We're going to trace over
the portions we want to add our pattern
to on this notebook. It would be all of
these little areas here on the side around the entire cover of
the spiral notebook. I will create a new layer
above my photo layer. Again, I'll grab
just a random color for now so I can see
where I'm drawing. We will just be using
the monoline brush. Now that we've got all that, we can now start just tracing. I will start in this corner and there is a lot of small details. We'll make sure we have
a good brush size. I think I'm going to go for the smallest 1% on this brush. Since we have such tiny
details for this photo. This takes a little bit
of time because there are so many tiny little
details on this photo. But once we get all of them, it's going to look incredible. Then we can mock up anything we'd like on any pattern
or illustration, and it will look so nice. Once you have your
mockup file set, you can just reuse them as
many times as you'd like. I will just go arod spiral notebook like
I did with my pillow image and I will just traced
the entire cover of this notebook on all the
white areas of this image. Now that we have our
notebook fully traced, I can fill in the color. I'll make sure I get all
the small little details, all these little pieces
of the spiral notebook. Just remember,
take your time and go in and get real close, you know exactly where to add
in those little tiny bits, and that's what really makes
the mock up look realistic. All the tiny little details. Now that we've finished
adding in the color, we're going to do the same
thing we did last time. We're going to turn this shape completely white and then
put the layer to multiply. I will just make sure I have a white color to
turn on alpha lock, tap on the layer and fill layer. Now I can set my
mode to multiply. I will now turn off alpha lock, and now our mock up is ready. Now we can apply our pattern. We will go again to
our actions panel. Tap on Add, insert a photo. For this one, I have this
fun geometric pattern. I can just adjust it. I know it's going to
have to be rotated, but for now I'm going to
clip it first and then I'll rotate it to see
where it will look best. I will go to my layers panel. I will make sure my image, my artwork is at the top
of my clipping layer. I will tap on my layer
and tap on clipping mask. As you can see, it
has applied it, but now we need to adjust it
since it is on a diagonal, I will make sure I
am on my art layer. I will click on my
Adjustments right here. I will make sure snapping
and magnetics are turned off so I can easily
rotate and adjust this. I will start rotating it
and fitting it in till I am happy with the position so I can
go smaller or larger. This is totally up to you
and just adjust it where you feel it looks the most
realistic. And you like. I think that looks good. I like the way that looks. Now I can deselect it. There is our next mock up photo. You can see it looks
super realistic. And you can use this for really anything you'd
like to advertise on your social media to send out to clients or just
on your website. In the next lesson, we
will do our final mock up, and I will show you how
to mock up a wallpaper.
6. Wallpapaer Mock-Up: For our final mock up, we will be mocking
up a wallpaper. Again, it will be the
exact same steps we'll tap on photo right here in the
upper right hand corner. We will get our wallpaper mock up photo that
we chose earlier. This one does have a
lot of small details, but I'll show you
how to do that. And we'll get around
the plant and the lamp and this clock again, we will grab a random color. I will make sure I create a
new layer above my image. Again, we'll just be
using the monoline brush. I will start by zooming way in. I like to zoom way, way in so I can get all
these small little details. And you can see there's
these tiny little details inside the plant area. You want to make sure
you get all those. Your mock up looks realistic by including all
these tiny little details. Your mock up will
look very realistic. It will look very, very nice. I'll just make sure I get
all those tiny areas. I will just keep working
my way around the photo, just like we did
for the other ones. It's the same thing basically. It will depend on the
complexity of your image. The skills are all, it's exactly going to be
the same thing you do. You're just going to trace
around wherever you want to apply your illustration
or pattern. Depending on how much detail. That's what's going to depend
on how long it takes you. I'm just going to trace
all around the areas. I want to add my wallpaper, so that will be ad the plant
and this lamp and the clock. I'll just finish tracing
all around the objects. Now everything is outlined
and as you can see, I just went around everything. The clock plant, the lamp, now I can fill the color. I will just fill in
the entire color. That looks really good. Now
we'll do the same thing. We're going to change this to white and then put
it on multiply. I'm going to turn on alpha lock. You can also do
that by tapping on the layer and then
clicking alpha lock. We'll fill it in
completely with white. Now we can set it to multiply and we can
turn off alpha o. Now our mock up is ready to go. Now I will insert the photo
I want to use as wallpaper. I will tap on my actions panel. I'm going to insert a
photo for this one, I have this nice floral
pattern I want to use. I'm just going to
size it up a little bit to cover the entire image. Now I will tap on my art layer
and tap on clipping mask. As you can see, it added it
very nicely to the photo. As you can see, um, in these lovely shadows and you can see the wall
texture a little bit. That's because we set our
clipping layer to multiply. Say you see adjustments
you need to make. Like if something isn't
perfectly like right here, I might need to erase this
little piece right here. If you need to make
some adjustments to your clipping layer, you can go to your
clipping layer, You can just erase
portions from it that or even add If you need
to add some more to it, that's how you make
small adjustments. Once you add your image, if you see small adjustments
you need to make, you can always adjust it. Like right here, I went
over a bit too much. I can just come and
erase some of that. Make sure you're on
your clipping layer. When you do that, that is
how you mock up a wallpaper. I think it looks so cute and so, so realistic and nice. In the next lesson,
I will show you how to export all your photos to use for your projects.
7. File Saving: Now that we have all of our designs and
patterns mocked up, now we can save
all of our images. We'll start with our pillow. I will go to my Actions panel. I will tap on Share. Now I can save in any
file type I'd like. I'm just going to
save it as a J Pi. I will just save image, now it is in my image library. I will do that for
my spiral notebook and for my wallpaper. I will share J save image. Last is my wallpaper, sees a J peg. And see now you can see they are all
here in my library. I love to use these on
my social media and also in my portfolio and website to show to potential clients. And it just looks really nice on your feed that my friends is how you create mock
ups from stock images.
8. Final Thoughts: Thank you so much for taking the time and joining the class. I hope it is a helpful resource
in your creative process. I'd absolutely love
to see your mock ups. Don't forget to post your
project in the project gallery. If you have any questions, please don't hesitate to ask. You can start a new discussion
in the Discussions tab, you will find that located
right below this video. Thanks again and I'll
see you next time.
 Sarah Raquel, Artist & Designer