Transcripts
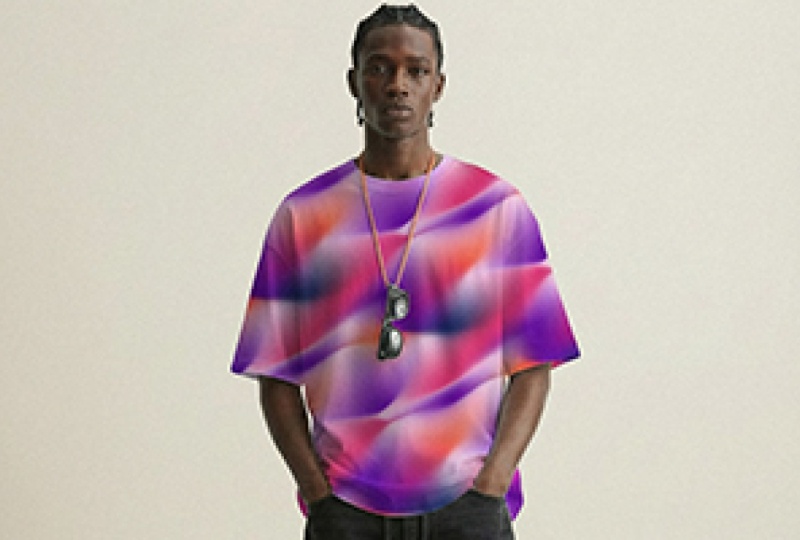
1. Introduction & Class Overview: If you ever wanted to create an organic surface pattern using a gradient mesh
in a illustrator, but couldn't quite work out how to make it
seamlessly repeatable, or if you never thought
about doing so, but like the idea and the look
of these kind of patterns, then this class is for you. I'm Janie from
attitude creative, and I love pushing
the boundaries of Adobe Illustrator tools for
creating gradient designs, and I'm a huge fan of abstract
artworks and buttons, and I teach a few popular
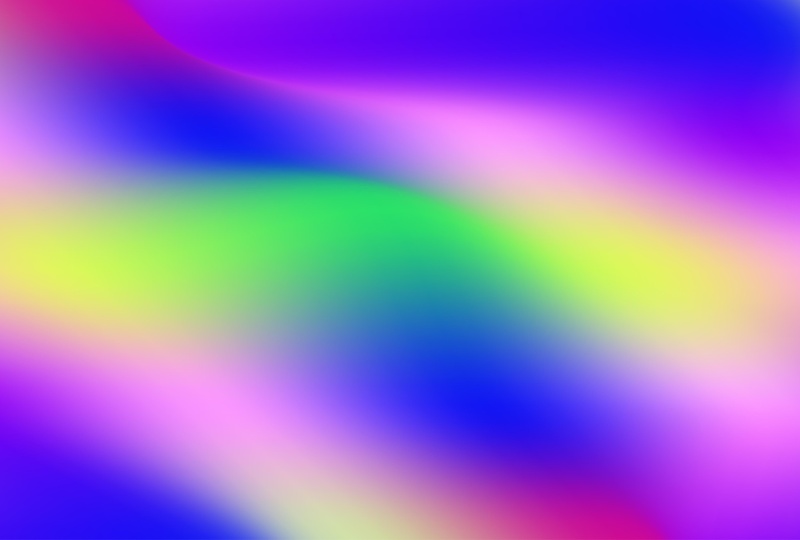
classes on these subjects. And in this class, I'm excited to share with you a
technique for creating seamlessly repeatable
patterns using distorted gradient measures
in Adobe Illustrator. I will step by step,
walk you through the process of setting
up and manipulating gradient meses to ensure seamless repetition and then show you how to create
regular grid repeats, as well as have drop and have brick patterns in
the Illustrator. To follow along with this class, you'll need a de portion
of A Illustrator and ideally have some experience of working with gradient meshes. I cannot wait to share with you this surface pattern
design technique and see how you integrate the sort of patterns into your project. So join me in this class, and let's make
something awesome.
2. Document Setup & Colour Swatches: Let's begin by creating
and setting up a new document for the
patterns, I Adobe Illustrator. To create your patterns, you
need to start working with a square rd board
size to begin with. For the e of cculation, I'll recommend using
some round numbers. For example, I am going to
be working in a document, which is 1,000 by 1,000 pixels. You will need just one r board. Then make sure that the
bleeds are set to zero. In the advanced options, select your desired cal mode. I am going to be working in RGB. Set ster effects 2300
PPA, and heat create. As soon as your new
document opens up, let's go ahead and save it. Give it some descriptive name. For example, I'm going to call my document gradient
Mash patterns. Set former TB Illustrator
and Hit save. Next, make sure that these settings look
like this and it. Before we start setting
up our gradient mesh, let's go ahead and sort out our switches so that there
is no clutter in this panel. If you don't load your favorite color swatches by default, and you don't want to use any of the standard
color swatches here, click on this button here. S, select all unused. And then go ahead and
delete all the switches. Let's quickly also delete this black color
swatch from here. And next, let's go and
load any switches, which we want to use
in our patterns. If you have your own color
groups you want to use, go ahead and add them
to your switches. Alternatively, you can use
the color swatches I have provided in the class
resources. So download them. Then go to the
other library here. Locate the downloaded
switch file, select it and hit open. Then quickly add
these color groups to your document swatches. Close this panel.
Now we're ready to start creating our
gradient mesh. T.
3. Initial Gradient Mesh Setup: I. With the document and
colors, which is ready. Now we can move on to setting
up the gradient mesh. Start by switching to
the rectangle tool, and create a rectangle with the dimensions three
times the artboard size. For example, because my artboard is 1,000 by 1,000 pixels, I will need to
create a rectangle, which is three and
by 3,000 pixels. With the rectangle created, switch to the selection tool, and centrally align
your rectangle to your artboard like so. Make sure that both
your rectangle and your artboard don't have any decimal pixel values in the width and height fields
or in the apposition values. With your rectangle ready, go and fill it with any color from the color group
you want to use. For example, I'm going to start with using this color here. Then make sure that the
straw color is set to none, and then bring the fill
attribute back on top. Next, go to the object menu and select create gradient mesh. In the gradient mesh
setup dialogue, you need to enter the
desired number of rows and columns you want
to have in your mesh. This rectangle here
and the mesh will essentially contain
nine pattern tiles, which will allow us to create e seamless pattern out of the
distorted mesh afterward. You have three tiles in a row horizontally and three tiles
in each column vertically, which means that the
number of rows and columns in your gradient mesh should
be multiples of three. To create an exciting
and detailed mesh, I won't recommend going
below 12 overall. I would also advise
you not to go above 24 because then your mesh
will be very complex, and there will be more
chances of making mistakes. So peak between 12, 15, 18, 21, or 24 rows and columns. And for this demonstration, I am going to use 12
by 12 grid to make the process a little faster
and easier to follow. W your number of rows
and columns selected, set the appearance
to flat and at k. And now with the mesh set up, it is time for coloring it.
4. Colouring Your Mesh: With the mesh ready now it
is time for recoloring. To ensure a seamless
repetition later on, you need to make sure that
respective mesh points within each tile are colored and
repositioned the same way. To make this process easier, it is a good idea to start by
recoloring the vertical and the horizontal lines around
the edges of all tiles first. Switch to the direct
selection tool. And start by
selecting the points along one of the edges
of your mesh like this. Then hold down the shift key, select the column of the points along one of the edges
of your artboard, then along the other edge, and then complete
the selection by selecting the other
side of your mesh. With four columns
of points selected, go ahead and assign a
different color to them. Next, let's do the same
for the horizontal lines. Select the top row of points, then select the row of points along the top
edge of the artboard. Then along the bottom
edge of the artboard, and then the bottom
points of the mesh like so and assign yet
another color to them. Now it will be much easier
for you to see all of the respective points in
each tile in your mesh. Now you can go ahead and start changing the colors
of other points. To make it faster, you can
also consider recoloring some other columns
or rows of points, and again, make sure
that you select all of the respective points
within each tile. For example, I am
going to change all these columns for now
to this purple color. And then I'm going to
select these points here, and change them to this
blue color from this group. This is an easy trick for A and AU different colors
to mesh very quickly, but to create something a little bit more interesting
and organic. Next, you need to
start recoloring some of the individual
points in your mesh. When doing so, make sure
that you select all of the respective
points from within each tile by holding
down the shift key. When working with the
points within each tile, your selection should
contain nine points. With your selection ready, go and assign a new color to all these points
in your selection. If you want to change some of the colors along the
edge of each tile, for example, like
this one here, again, carefully select all of
the respective points, and in this case, you should have 12 points in
your selection. Again, pick any new
color you want. And repeat the
process to recolor any other points in your mesh. If you want to
recolor the points at the corners of your tiles, then again, make sure that you carefully
select all of them. In this case, your selection
will contain 16 points. Spend as much time as needed recoloring Image and concentrate your attention on having the exact same coloring within
each tile in your mesh. When you've finished
with recoloring mash, double check that all of
the points within each of the nine tiles are
colored the same way. And after this is done, let's quickly save our document. Next, we can move on to
distorting the mesh in a way, which will ensure
seamless repetition.
5. Distorting Your Mesh: With the coloring
them. The next step is to distort your mesh. But before you do so, it is a good idea to copy
the layer with mesh so that you have a backup copy to fall back on in case you
mess something up. Rename the layer with your
original mesh. Lock it. Hide it. Next let's quickly rename the layer with the mesh which we're
about to distort. Now let's move on to distorting. Frog the following process to
ensure seamless repetition, you need to use just the
direct selection tool and move all of the respective points in your mesh exactly the same way. With a direct selection
tool selected, go to mesh, and start selecting sets of
respective points within each tile in mesh. Again, your selection should contain nine points if you're selecting points from within
each tile, 12 points. If you're working
with some points at the edges of the tile, and 16 points if you're
working with the corners. With your selection ready, you can simply start dragging
by one point and see all of the other
corresponding points move in exactly the same way. If you don't want to move
the points manually, you can also use the arrow keys, and met the points in
the mesh inter place. This process requires even more attention
than recoloring, because unlike when recoloring, you cannot simply
go and move one of the points to the same
place as the other ones. Make sure to pay
attention to what you are selecting and moving
for the process, and if you mess something up, or notice that you have messed something up during
the previous steps, undo any necessary steps, and repeat the process. So don't t rush and take
your time selecting all of the required points and create any desired distortion
in your mesh this way. When moving your points,
try not to move them too far and avoid overlapping
any of the mesh lines. Otherwise, your mesh
won't look smooth. If you want to learn more about working with gradient mashes, do not hesitate to check
out my class about creating abstract artworks
using gradient mashes, which covers a range of other tools you can use
to distort your meshes. But that said, as I
mentioned earlier, for this class, all you need is just a direct selection tool. When you feel like you're
done with a distorting image, have a look at it and see
if there are any points, which might look better
in a different color. For example, I have too
much orange going on here. So I'm going to
quickly try changing the color of these
color stops here. So distort mah, T colors of
set of the mesh points to add more contras to
your mesh and avoid having large clusters
of the same color. And when you're done, join
me in the next lesson, and you so be creating
our first pattern.
6. Creating Basic Grid Repeats: Coloring and distorting
your mesh is the hardest and longest
part of this process, and creating the actual patterns
is considerably faster, easier and more fun. So with your colored and
distorted mesh ready, before we move on, again, let's save this document. Then again, let's
duplicate this layer for backup and look and hide the
original distorted mesh. And we'll be creating
our patterns on new separate layers. As you can see from this mesh, it looks already
seamlessly repeatable. All you need to do
now to make it into A seamless pattern
swatch is select the rectangle tool and create a rectangle in the
size of your art board. For me, it is going to be
1,000 by 1,000 pixels. Heter K, then switch
to the selection tool. Align your rectangle
to the ar board. Double check that its position
is in whole pixel values, and its size is also
in whole pixel values, and there are no decimal
points anywhere. Then select both the
rectangle and the mesh, and hit command seven
or Control seven in windows to create
a clipping mask. Next, select your clip group
and go to the object menu, Pattern, and select make. This will take you into the
pattern options interface, and the first thing
you need to do here is select your square with the pattern and perfectly
align it back to the artboard. For some reason,
illustrator always upsets your pattern tile in
relation to the artboard. You always need
to realign it and double check that it
is placed correctly. Otherwise, you'll end up with all these thin lines
around your pattern tiles, when you start using your
pattern in illustrator, or when you try to export it. Your pattern tile perfectly
aligned to the art board, go to the pattern
options window, and change the width
and height here to the exact dimensions
of your tile. In my case, it is going to
be one fold by one fold. There is also this size
tile to art tick box, but it doesn't work
perfectly every time, and sometimes you might end up with a width and
height of your tile, which is one pixel
too small or too big, which again will
result in having hair lines around your
pattern tile when it is used. With this first
pattern, you need to set the tile type here to grid, and your pattern is ready. Basically, all you need to
do to create a pattern out of the distorted mesh
like this is align it, precise the tile,
and you're done. With this pattern ready, hit them, and you'll see your new patterns
watch pop up here. Now you can quickly
double check how your new pattern
works by creating a new rectangle and filling
it with your new swatch. And after previewing, simply
delete this rectangle, so it doesn't collater
your document. And this is how you can create these basic regular
grid repeats, using your manually
distorted gradient mesh. But this is just the
beginning of the fun. And in the next lesson, I will share with you
a technique for creating more dynamic
pattern variance using the share tool. S.
7. Creating Sheared Grid Repeats: With your first pattern ready. Now you can very quickly create a few alternative versions
which look more dynamic. Let's go back to
the layers panel. Quickly rename this
layer so we can easily identify what kind of
patterns watch it contains. Next, let's create a
copy of this layer. Hide the previous one. Then go to the clip group
in the new layer, and let's quickly drag the
ssh out of the clip group, so we can see it fully without going into
the isolation mode. Now let's select the ssh. Then switch to the share
too and hit enter. In the share setup window, you can change the share
angle and the axis. In this way, create a few alternative versions
of your pattern. To ensure seamless
repetition of your pattern, make sure that you use either a 45 degree angle
or a -45 degree angle. And check between horizontal
and vertical options to see which kind of
distortions you prefer. Using the share tool
will allow you to create four alternative versions
of your pattern. You can create all four
of them if you want, or pick those which
look the best. With my mesh, I really
like how it looks shared at -45 degrees along
the vertical axis. Select your desired
transformation here and hit. Next switch back to the selection tool and drag your mesh back into
the clipping group here. Now you're ready to create
another pattern switch. Select your clip group and
go to the object menu. Pattern and select M. If you're going to be
creating a lot of patterns, I would highly recommend
that you create a custom shortcut for
the pattern make option. By default illustrator doesn't have a shortcut
for this function. To create your own,
you need to go to the edit menu,
keyboard shortcuts. Here, select menu commands, select object, find pattern. Select make, select this field, which in your case is
going to be empty, and then hit the desired
key combination. Most combinations
with the letter P are already assigned to
some other functions. I decided to use option shift P. But if you don't often use alternative commands
which use letter P, you can override the default shortcuts with
anything you want. When you see a new
shortcut pop up here, he K, and save the changes to your custom set of shortcuts. With your shortcut assigned, you can simply hit the
required combination of keys, and this will bring you into the pattern options interface. Again, start by selecting
your pattern tile, align it to the artboard, change the width and height to exactly the
size of your tile. Again, set the
tile type to grid, and it done to create
your new pattern switch. After this is done,
you can repeat the process and create more
versions of your pattern by using the copies of your original mesh pattern and exploring other
share options. Remember to check between
vertical and horizontal options and use 45 and -45
degree angles. Then create more
pattern switches for each share variation. So have fun creating
these alternatives, and then join me in
the next lesson. In which I'll show you
how you can create half drop patterns using your
distorted gradient mesh.
8. Creating Half-drop Repeats: I. If you're up for creating
more dynamic patterns, you can also easily create some half drop and
half brick variants. Let's start with creating
a half drop version. To create it, again,
we'll need to start with the original
distorted mesh. If you haven't done it already, now it is a good idea to rename your previous
shared versions. Then lock and hide them. And then unlock and
reveal the layer containing the copy of your
original mesh pattern. Again, let's quickly
go to the click group and drag the mesh out of
it so we can see it fully. To create a half drop pattern. First of all, select you mesh
with the selection tool. Then switch to the scale tool. Hat Enter and in
the scale dialogue, set it to non uniform, set horizontal two, 100%, and set a vertical 200%. And heat. Then again, switch
to the share tool, it enter, and in the
share setup window, set axis to vertical, and chat between 45 and
-45 degree share angles. Again, I prefer how it
looks at -45 degrees. But it will depend
on the distortions in your original mesh. Select 45 or minus for five
degrees here and heat. Next switch to the
selection tool. Now if you look at meh, you'll notice that because we scale it two to 200% vertically, the repeating segment is
twice as tall as it is wide. Go to the lays panel. Select the rectangle
within the clip group. Switch to the scale tool, at enter and also scale it
two to 200% vertically. And it k. Then switch to the
selection tool, drag your mesh into
the clipping group. Then select the whole group, and go and open the
pattern options. Again, here, I'm using my custom shortcut for quick access. As before start by
selecting your tile, Align it to your board, and then go and
change the tile size. In this case, the width
will still be 1,000 pixels, but the height will be two dd. In the pattern preview,
you'll see that the tiles do not
line up perfectly. Now you need to go
to the tile type here and select brick by column, and set it to half and here's your half
drop pattern ready. Hit them. Next, go to the layer panel, and rename the
layer to half drop. This is how easy it is to
create a half drop pattern, using a distorted mesh. After you have created your
first half drop pattern, you can easily create
an alternative by following the same process starting from the
original mesh and using an alternative
share angle. So create one or two half
drop patterns, if you want. And in the next lesson, I'm going to share
with you how to create Half brick repeats.
9. Creating Half-brick Repeats: In a similar way to how we
have created drop patterns, you can create half
brick patterns. Let's go and hide and
lock our hdp pattern. Then create another copy
of our original pattern. Unlock and reveal it. Again, drag the mesh
out of the clip group. To create a half brick pattern. Again, you need to start
by selecting mesh. Then switch to the
scale tool, it enter. In this case, again, keep it set to non uniform, but set horizontal to
200 and vertical to 100. You will see mesh squashed
like this. When ready, k. Then again, switch
to the share tool. A set the axis to horizontal. As before, check between 45
and -45 degree share angles. In this case, I prefer how
it looks at 45 degrees, but again, feel free
to choose the angle, which works better for you. When ready heat, then again, switch to the selection tool. Goal, select the rectangle
within your clip group. Switch to the scale
tool, at enter, and scale two 200% horizontally, whilst keeping it set to
100% vertically, and heat. Then again, switch to
the selection tool, drag your mesh inside of the clip group, select
the whole group. Open the pattern
options interface, select your tile, align it. Change the tile size. In this case, it
should be 2000 pixels wide and 1,000 pikels in height, and to create E half brick
repeat in the tile type, you need to select brick
barrel and set it to half. Here you have it. Hit the, go to the layers panel
and rename the layer to half brick Then if you want to go ahead and create a second version of
your brick pattern using the other shear angle and create another
pattern swatch. This is how you can take
your gradient mesh and develop it into a number
of different patterns. And after you have created all these patterns
and pattern swatches, you can now easily create a few more iterations of each of the patterns by using pattern tiles in
different aspect ratios. And I'll show you how
in the next lesson.
10. Changing Aspect Ratio of the Tiles: Starting with a
square pattern tile and developing different
shared versions, as well as half drop and half
brick patterns based on it, makes it easy to calculate
everything and create predictable results and
seamlessly repeatable tiles. Using these pattern
tiles as a basis, you can now easily
create any number of alternative patterns
with the tiles in other aspect ratios. For example, let's go back to our original shared
grid pattern, and create another
copy of this layer. Now let's unlock it. Select
the whole clip group. Now if you go to the
transform panel, you can change the
width or height of the whole clip group
to anything you like. But again, make sure that
the width and height of your tiles are in
whole pixel values, and the position also doesn't
contain any decimal points. After creating w
pattern tile this way, again, you need to go and
create a new pattern switch. The process will be exactly
the same as before. Create any number of new
pattern iterations this way. Or alternatively,
you can also create iterations right within the
pattern options interface. For example, I am
going to double click on my H half
drop pattern here, which will allow me to further
edit this pattern swatch. Again, the knowing
thing about Illustrator is that it will upset
the pattern tile, to avoid having any issues, start by realigning new
pattern tile to the artboard. Another thing to keep in mind is that if you click done now, it will save changes to a
previous pattern swatch. If you click Save A copy, it will allow you to create
new pattern swatch based on the latest version
of your pattern setup in the pattern options. For now, I'm going to click Cancel and first make some
changes to my pattern tile. In this case, I am going to
go and change its w15 hundred pixels so that it has a
three to four aspect ratio. After you change the
size of your tile here. Next, you need to go and change the tile size in the
pattern option panel. And you should see your
seamless pattern preview. After you have made
any changes here, remember not to hit done here
and instead, save a copy. Give it a name if you want. It. After this is done, you'll see a new pattern swatch pop up in your swatches panel. And then if you don't want to overwrite your
original pattern swatch, which you shouldn't,
you must hit Csle here. And if you hit them, you
basically end up with two copies of the same patterns swatch and you use
the original pattern, you started to edit. So these are the
two workflows you can use to create iterations
of your patterns, using tiles in different
aspect ratios. Both of them take pretty much
the same amount of time. Just in one case, you'll always have
a separate layer with your tile in
the layers panel, and you'll need to create all new patterns watches
from scratch. And in the other case, you can create new patterns
watches straightaway, but at the same time, risk overwriting your original
pattern swatches. So choose whichever way
works better for you. But all that said, if
you're planning to use your patterns only
with an illustrator, you really don't need to worry about creating
different versions of the patterns with different aspect ratios of the tiles. Because when you come to use your patterns in Illustrator, you can simply use all of
the transformation tools. For example, scale tool, and then check the
transform objects here. Check transform
patterns, and then simply change the scale of
your pattern to your lichen. And apart from using
the scale tool. Of course, you can also play around with the share tool here as well and share your
pattern even further. In this case, you can use any sort of angle
you want because at this point you are
already working with the surface design and
not with the pattern til, which needs to be transformed a certain way in order to
be seamlessly repeatable. You can always have fun
with further developing the way your pattern looks
when filling certain area. Keep these options in mind
and take full advantage of Adobe Illustrator's
transform tools when creating ear designs
within Illustrator. But of course, sometimes, you need to export
your pattern tiles outside of Illustrator. In the next lesson, I will
share with EE technique for exporting pattern tiles
without any ease.
11. Exporting Pattern Tiles in Raster: If you have created patterns in Adobe Illustrator before and
exported them in raster, you most likely came across some pesky thin lines
around the pattern tiles. In this lesson, I'm
going to share with you my favorite trick for
avoiding this issue. Start by going to
the layers panel. Lock and hide all the layers you might have in your document. Then create a new layer, then switch to the
rectangle tool. Yet again, like in
the beginning of the process, create ctangle, which is three times as
wide and three times as tall as your art board
or your pattern tile. Then switch to the
selection tool. Align ctangle to the artboard, and then apply a pattern switch
you want to export to it. Remember that if you
have played with any pattern field
transformations earlier, you will need to click twice
on the pattern switch in the switches panel to
reset all transformations. Then, for example, if
you wanted to export this original square or
shared square pattern, all you would need to do is
simply export the artboard. This is pretty straightforward. If you wanted to export half
drop or half brick pattern, after applying the
pattern switch, you'll need to select
the artboard tool and change the size
of your artboard. If you're struggling to work out what the size of
the artboard should be based on the half brick
or half drop pattern type, you can simply switch
to the selection tool. Then go to your swatches panel, select the same pattern swatch and drag it onto your
artboard like this. Here you'll see a square or a rectangle defining the
size of your pattern tile, which contains your half
brick or half drop repeat, but which can be repeated as a grid outside of illustrator. To find out the size of
the square or rectangle, simply go to the layers panel, go to the group with your
dragged pattern swatch. Scroll down to the
bottom of the group, and here you'll see the
path at the bottom of it. Selected, check out its size
in the transform panel. Remember it, then simply
delete the whole group. Then switch to the
artboard tool, and change the size
of the artboard to the respective size. In this case, it should be two foldan by two oland pixels. If after changing
the artboard size, your field square is not considerably larger
than the artboard, do not worry about it because you still have
all the sames here. But if for some
reason, your square is even smaller
than the artboard, go ahead and increase
its size further. Just make sure you do not scale the size of the actual
pattern at the same time. Again, the ot check that you
filed rectangle doesn't have any decimal values in its
coordinates or dimensions, then the ot check the
same for the art board. When ready to export, go to the file menu, export and select export as
selective designed format. For example, J peg or Ti, select use art boards, select your art board,
and heat export. Selective designed color mode. Set the resolution to i, antis into art optimized. Select compression
if you want to, embed the color
profile and heat. Now, if you go to photoshop
and open this file, if you go ahead and
inspect all its edges, you'll see that there are no annoying empty
pixels anywhere. This little trick works for
me perfectly every time. As long as everything in Illustrator is aligned
perfectly to begin with. So use this trick if
you need to export your patterns watches for
use outside Illustrator, and I hope it will work
for you just as well. So this is it for
the basic techniques for creating gradient
mash patterns. And in the next lesson, before wrapping this class up, I will quickly share with
you a few final thoughts, and it is for creating
these kind of patterns.
12. Final Thoughts & Conclusion: Because coloring and
distorting the mesh in the first place takes
most time and attention. With your initial
distorted mesh ready, you can also experiment with reflecting and or rotating it in the increments of 90
degrees to quickly create more base meshes
for different patterns, and then play around with 45
and -45 degree share angles. These buttons, whether grided
half drop or half brick, will look quite different
from your original set. And then if you go
and play around with the recolor artwork
to swap the colors in your mesh or completely recolor your patterns by using
different color palette, you'll end up with a lot
of different patterns. So be sure to experiment with recoloring your meshes
or finished patterns. And if you want to learn more about working with colors in gradient mashes and creating
beautiful color transitions, be sure to check out my class, abstract gradients
in A Illustrator, step by step guide to create
organic vibrant artworks. And if you are generally in
the surface pattern design, be sure to check out my other abstract pattern design classes. This is it for the tricks
and techniques for creating seamless patterns using
distorted gradient meshes. I hope that you have
enjoyed this class, learned a few new things, and will have a lot of
fun developing a range of exciting patterns
using gradient meshes. I cannot wait to
see the patterns you create using this workflow. So be sure to share your
experiments, final patterns, and any more cups
you end up creating in the project and resources
tab for this class. If you're going to share
your work on Instagram, please tag us at Is creative
in your post so that we can easily discover them and share your work
with our followers. If you have found
this class helpful, please leave a review in the
review tub for this class. If you have any
sort of questions, be sure to leave a comment in the discussion sub
for this class, and I'll happily answer
and provide feedback. And be sure to follow
us here on Skillshare, to be the first to know
about classes and updates. Thank you apaching this class, and I hope to see you
in our other classes. 550 fifo
 Evgeniya & Dominic Righini-Brand, Graphic Design & Photography