Transcripts
1. Trailer: Have you ever tried
creating a 3D environment and you ended up with the
results looking like this. Most people think
that in order to create good 3D environments, you need to be some
sort of a Node Wizard. And that really sucks seeing and imagining
things perfectly in your mind and not being able to achieve those results
is really frustrating. But here's the catch. It
doesn't need to be like that. There is always a solution and the wavelength and
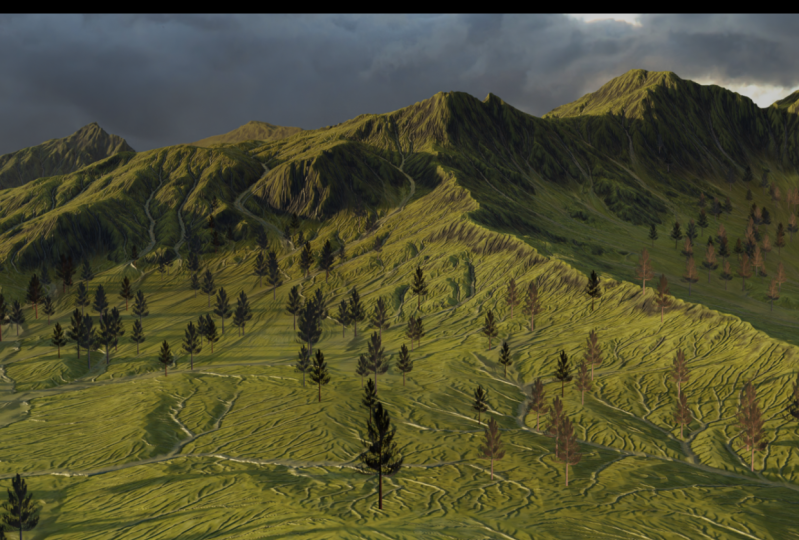
all been there. This course will teach
you how to create realistic looking
environments in Blender. Firstly, we'll start
by learning how to use displacement to create
realistic looking terrains. What is displacement,
how it works? Shade your drain in order to
look realistic used nodes. All of those stuff will be explained thoroughly
throughout the course so that you won't
have to struggle with these concepts again
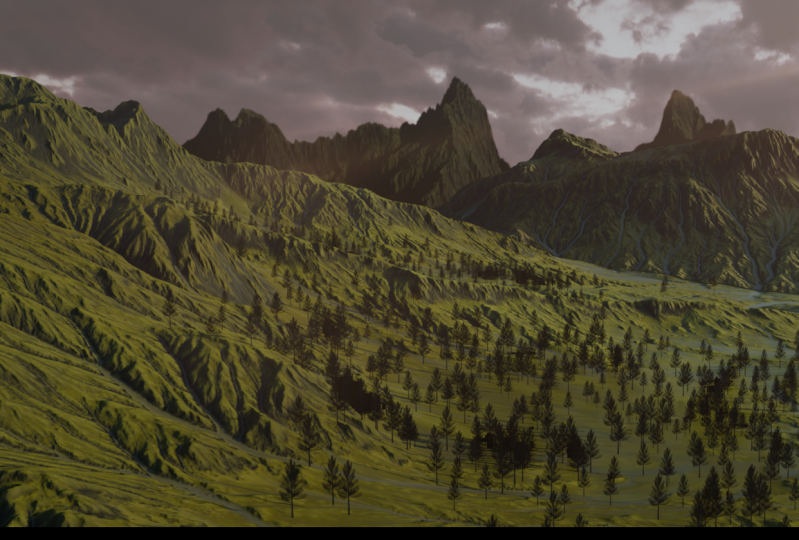
in the future. Then we will move to add
twists to the scene. And instead of wasting your time looking for some good
trees on the internet, you will learn how to create your own custom trees
easily in Blender. And here's the thing. I will also give you a
little secret that will allow you to render millions
of trees with no problem. Then we will move on to
finalizing our scene. And here's the site, all
the stuff that you will learn about shading, lighting, weight painting, how
to use geometric ones, which I will promise you, it will be real fun. We will also focus on how you can optimize your
scene and how you can add things that you thought that will take a lot
of time to render. But there is also a way of
how you can do them without increasing your render time,
like atmospheric elements. And at last he will
learn how you can use layers when it
comes to rendering, which will allow you to
render any scene in Blender, no matter your computer specs. And we'll finish
everything by doing our compositing work and harness the power of
Blender, composter. And actually you will be
surprised at how much you can actually get just
using Blender, composter. The goal of this course is to get you up and running when it comes to creating 3D
environments and blend. But I think the most
valuable thing that you can get out of this
course is to learn the logic and the
thought process of how you can approach your
future projects. And honestly, I don't
care that much about the final result that
you will get out of this course as much as
they want you to learn. The tools and
techniques can divorce to take your skills
to the next level, which is the thing
that made me happy. Now, all of that sounded
exciting for you. I cannot wait to see
you inside the course
2. Before You Start: Hello and welcome everyone
in this first video, where we are going to go over some stuff that you need
to put in mind and some assets and add-ons that you will need throughout the
course so that all of us will be at the same
page and we all have the same settings and the same assets that
we will work from. First of all, let's
start with Blender. There are a couple of add-on that you will need to activate. So in order to activate
your adult mixture, to go to Edit references. And from here make sure
to jump to add ons. And there are three add-ons
that you need to activate. I'm going to start
with the first one. It is really famous add-on. It is called Node Wrangler already activated this
add-on by default. So you're probably it
will be unchecked, so make sure to check it. The next add-on will be
Import Images as Planes. It is this add-on right here. So make sure to
activate this add-on. And the third one is
called a sapling region, which is this one right here
AD curve sapling region, which is basically the
unknown that we will use to create our
trees basically, at some point in the course, these are the main three add-ons that you will need
throughout this course. Make sure that basically
you click here and you click Save Preferences
and you're good to go. You can close this window. Another thing also, I really hate this toolbar right here, so we will probably
find me always like licking the rice mode button
and show tool settings. I always try to maximize
the area and working in. So that's also really
tiny thing I always do just so that I have as much as possible of area in Blender. So yeah, that's basically
it for Blender. We will probably get back
to adjusting plenty of other settings when it comes to rendering and all of that. But we'll do them in
other videos right now. Let's talk a little
bit about some assets that you will need to
download from the Internet. Now for the terrains
that we will use, they're basically free stuff. You can download from
this site called NBN CG. All you have to do is
basically to go to MBA and cgi.com and just
look for terrain. And you will have this terrains, your one, and you will
have this drain 03. These are the two ones that we will be using
throughout this course. So all you have to
do is basically e.g. let's just give an example, terrain 01, I'm going to enter. And from here you
will have plenty of different maps that
you can download. And what I would
recommend is to download the additional maps for KJ JPEG, which is this one right here. This one will have the
color or the details of the flow and the protrusion
and the soil maps, which we will use later to coal, to color our mountain or
to shade our mountain. That's for the additional maps. And you will also
need to download this for k. It is called height maps. It is this one right here. It is basically make sure
that you download the four K version two that we can squeeze as much as possible of details. You don't need the
eight K version. The four K version will work fine for both this terrains
or one makes sure to download the
additional maps at for k and the height maps
at for k. And same thing for terrain zero to
make sure that you download the additional maps for k and also the height
maps at four K, they shouldn't take that long. And you will probably
also find them along with the resources
folder in this course, which is the next thing that
I'm going to talk about, which is the Assets
folder that you can download with this course. Along with this course, you will have the project files folder, which will have
two main folders, the assets and the blender
projects for the render folder that you can see right
here is basically the final render
that we will do. But honestly, I don't
plan to uploading it along with the project files
for one very simple reason, which is that the size of
this folder is kind of huge. And honestly I don't
want to bog you with basically the need to download a huge project file and all of that just so that
you can access the render. But here's the thing in case you want some access to this folder, the render folder just hit me up and I'll make sure to
send you a link for it. But in case you're
rendering your own stuff, you will have the assets folder and the blender projects folder. In the assets folder, you will basically have plenty
of different images, plenty of different textures that we will use
throughout this course. You will have the barks for when we're creating the trees. These are for the three
planes that we will use as basically to
scatter along the scores. You will have the terrains also, these are some extra
treated three planes that I created before that
you can get for free. And along with the 2D mountains that you can use later on in the background
mountain has some lens flare sky image for the seen, the sunrise, which is an HDR, and basically a vignette for
the shot in this folder. All the different things
that you will find music along the scores at
lives in this folder. So this is for the
assets folder, you will have also
blender projects, which is basically the
blend projects that while I was working
right now they're a little bit chaotic that
you will have them in order in new
project files folder. And yeah, that's basically
it for the things that you will need to download
to start this course with. And yeah, that's basically
it for me for this video, make sure to install
all the necessary files and texture and all of that. And then we'll see you
in the first video. Everyone talk to you there
3. Terrain Creation: Hello and welcome inside
of Blender where we will start by creating our terrains, as I just said. So first things first, let's just choose general
because that's what we choose and don't say because
that's an old scene. After that, I'm actually
going to delete this light and this
cube x and then delete, and let's add a plane
shift a mesh plane. This will be our main
terrain and maybe you can hit F2 to rename
it to something, let's say like terrain
and your score 01. So this is our terrain. And actually if you hit Enter, you can see the
dimensions of this plane, which is 2 m by 2 m. Now, usually the
landscape scenes are so huge we talk generally
in kilometers. But the problem is that
blender actually is not that good when it comes to handling
scenes with huge scale. And for the majority of the environments that
are used to create, I always used to basically just crank this up to something, let's say like 2000
meter or 2 km and just deal basically with working with a huge
scenes inside of Blender. But lately I stumbled upon another technique that I
would like to show you, which is actually more
efficient and make more sense. So I'm actually going to
bring this down to 2 m, which is the default value. Let's just have the
dark to zoom on it and enter the scene settings. You will find here
a tab called units. And under units you will, you will have this unit scale. What is the unit scale? Well, it is basically
a multiplier for the scale of
your entire scene. So for now, let's say
we do have 2 m e.g. for the scale of the spleen, it is multiplied by
this unit scale. So let's say e.g. we want it to be 2 km, which means that we will need to multiply this two by 1,000, so it becomes 2,000 m. So if I type right here 1,000,
as you will see, basically Blender will
adjust its settings like literally all of its settings to adapt to this unit scale. By doing this, as you can see, I don't need to do these
crazy scaling objects to astronomical units
and all of that. So this is better and
more efficient, I guess. And actually if you just
jump over this slider, you will find that
basically they tell you a small
or larger in scale respectively can be used to avoid numerical
precision problems. So this is a better
option in case you're working with
really small scenes, you can bring this number down. And if you're working
with huge scenes, you can bring this number up. Anyway, lets our plane, and that's what matters. This is our terrain. And let's start
working everyone. The first thing I'm going to
do is basically to hit Tab, to jump to the edit mode. And I'm going to
sub-divide it a little bit because I'm going to do
a displacement modifier. So just hit the
right mouse button and let's do sub-divide. If you hit Shift R, you will be able to repeat
the last operation you did. The last operation we
did, it was subdivided. So if I hit Shift R, I would
repeat that operation again, edit again, and hit it again. And maybe let's
do one more time. And basically by doing this, we subdivided our plane
multiple times anyway. So this is our plane hit
Tab to exit the edit mode. And it is about time
to start adding the displacement modifier
jumped to the displacement tab, or actually the Modifiers
tab go to Add Modifier. And from here at displays, the modifier that we will use. But what does the
displacement modifier do? Well, the concept
is pretty simple. We need to input right here some sort of a displacement map. But what is a displacement map? A displacement map is basically a black and white image and that tell blender
how to manipulate. Let's save the geometry. So if we feed the
image into Blender, here's what basically
will happen. Blender will push
the areas that are white up because they are white. And it will push down the areas that are black
negative values down. And by doing this,
blender will be able to create these different
formations like that. Basically it looked
like some terrains. So the displacement modifier
is the modifier that will allow us to feed a
displacement map to Blender. Right now the modifier
doesn't have any sort of map, so we need to
figure out a way on how to put the image
inside of Blender. And it is pretty simple. We need a texture,
just click on New, you will create a new texture. So let's e.g. call
that terrain and rescore a zero-one and
rescore a displacement. We created this texture. So we need right now to tell blender What does this
texture look like? To do this, either you
can click on this, which will take you
to the Texture tab, or basically you can directly
just jump right here. It is literally the same thing. Why Blender does have multiple
ways to do the same thing. Hey, just done now. So
let's click on this. And this is basically, as I mentioned, our Texture tab. Right now, we need to tell
blender where is the texture? So if you just click on Open and inside the
Resources folder, of course, you will
find all the resources are used during
this course here. So let's open terrain zero-one, just double-click on it
and we open this map. Now, here's one weird thing, the logical thing to do, and I don't know why they don't do it this way
in Blender is that basically you can directly
pick the image from here. And basically it is suppose
everything would work fine. I don't know why. Basically they decided to go with this approach of like you create a texture right
here and then you go to the settings
of that texture and I don't know why. It is
just how blender works. Anyway, this is our texture. And the most important
thing is that makes sure that your color
space, it is linear. We're working with a
black and white images. That's why we need
a linear workspace or a linear color space. After doing this, Let's get back to our displacement modifier. And actually from here you will have something
called coordinates, which is basically the way
of how this picture or this displacement map will be mapped on the surface
of this plane. The best way to do this is
basically to change it to uv. Bad. If you remember, if we just go to the objects properties
under UV maps, we didn't UV unwrap this model after we did
all the subdivisions. So just hit Tab a to
select all of your mesh. It you to do unwrap
and just do unwrap and UV unwrapped
our modal hit tab again to exit the edit mode. And let's get back
to the modifier. And let's start playing a
little bit with these settings. I'm just going to hit one
to jump to the front view. And as you can see,
basically this mountain or the spleen is
somehow pushed down. It is supposed to be laid on
the ground, the level zero. So we need to fix this issue. And that's basically what this mid-level will
tell blender to do. So if it is zero, it will be computed from
basically the floor level up. If it is one, it
will basically be computed from your
floor level down. And most of the time I
always find myself with just doing zero because
it just makes sense. Right now. The spleen is more
or less, not more or less. It is actually really,
really low poly. So we need to add
more geometry to it. And to do this, That's
a pretty simple. Just go to Add Modifier and just choose subdivision surface. And here's one important thing. The subdivision surface should always be before the
displacement modifier. And let's crank this number
to something like four. And let's do for the
render, Let's do six. You might think that this
is actually overkill, but believe me it is not. Most of the time when you're working with displacement maps, you will find yourself putting these huge number for
the subdivision surface. It is going to be fine. Not worried anyway,
right now there's displacement map is really,
really, really strong. So we need to basically they'll
Blender, blender, chill. We don't want you to have
this crazy thing going on. And actually it's pretty simple. And so dagger
displacement modifier, you will have this
really nice setting which is called strength, which will basically control how strong Blender will do this
displacement operation. Let's say, let's keep it at 0.2. I think it will be good. And yeah, this is basically
our first terrain right now. It is just about
basically doing this another time for
the other terrain. So either you can go
through the process of creating another plane
and doing all of that. Or actually, there's
another way which is basically just by
selecting this terrain, hit Shift D to
duplicate it twice, to move it on the y-axis, let's put it here
and we need to just basically feed to
this other plane a different displacement map or a different height
map or correlate whatever you wanna
call it from here, from my displacement modifier, I'm going to create
a new texture, just like the same way you
do it in the shader editor. When you click on this, you
will create a new material. Same thing here. You will
create a new texture. So just click on this
and let's rename it to zero to jump to the settings, this texture, and from here, click on open to open a new texture into terrain,
the result of three. And yeah, this is our second terrain and it is
already looking pretty good. We literally all we had to do is basically to just
feed to Blender two different
displacement maps and we get our terrains that easy. And that's why this workflow
of using height maps and displacement maps is the most efficient and more or less it will give you a
really good result. Assuming of course, you do have some good
displacement maps, like high-quality
displacement maps. But other than that,
as you can see, like literally in around 10 min, we created to like really nice looking
pieces inside of Blender just by using
a couple of modifiers. One thing before I leave, just make sure to rename
this to terrain there too, because we will need that
later and hit Enter. Perfect. Alright, so that's
it for me for this video. And in the next one
we're going to do some adjustments and edit
camera and all of that. So at least we can start getting a feeling of how our final
scene will look like. See you there?
4. Scene and Render Settings: Welcome to this new
video where we will adjust a couple of settings of our scene to basically prepare blender for all the work
that we will be doing. So yeah, let's just do that. So first things first, I'm just going to start by
changing my render settings. And from here, I'm going to
jump from EB two cycles. And of course you need to change the device from CPU GPU compute. Of course, assuming you do
have a decent GPU card, or as long as you
have a GPU card, you should this option because it will just give
you faster previews. So just big GPU compute for the max samples
in your viewport. Let's do 32 and for the max
samples and your render, Let's do something like 128. That would be good for now. And let's also jump
to the light paths. And let's reduce this to
eight and do diffused 3.4, the glossy also, Let's do three. You might wonder like, hey, you seen what does
these settings, especially the max bounces
and all of that actually do? Well, here's what does
this, all of this stuff do. Let's imagine you have
a sun right here, and please excuse my
garbage drawing in Blender. Here's how the
light will behave. So let's say we will
have a ray coming from here and it will hit here. Generally it will then
after that it will e.g. let's say it will move to here and then maybe
it will hit here, and then it will hit here. So probably it is way
much more complicated. But the general
concept is in reality, there is an infinity
of light bounces and all the different
directions. There is no way we can simulate such thing inside of Blender. So that's why we
specifically can tell blender to use a specific
number of balances. Which means that hey, if e.g. if we do eight, that means that a blender
for your different rays, like we only want it to
bounce, Let's say eight times. So let's say this is 1234, Probably it will bounce
other four times. I don't know. Let's say something like this. And after this, it is done. Blender don't need to
calculate any more balances. So it is kinda self-explanatory. The more balances you have, the slower your render will be. Let's just delete
this whole mess that I just drew. Perfect. Let's write now jump
to our different, to our output settings. As you probably
know, if I hit zero, that will basically take
me to the camera view. This is what my camera
will see right now. We're going to
adjust the settings of the camera, but not yet. I'm going to change
the aspect ratio to something like 25, 60 because it is cinema scope
and it is more cinematic. And I'm a sucker for that. So that's why, and for
the rest of the settings, I'm going to keep them
the way they are. Maybe later on I
might change them, but for now, we're good to go. Let's just jump right now to the Render Settings are
actually to the render passes. And from here, I'm
just going to change one thing which is
de-noising data. What does this option do? Well, basically Blender
when rendering our image. It will also render some
extra data about how to denote this image denoising data we'll
do in a nutshell, here's an important thing when
you check denoising data. Yes, Blender will render
the denoising data, but for whatever reason, it will not use them unless you tell him basically
like a blender, I want you to know that
these generalizing data helped to tell blender that, hey, blender, I want you to
use this de-noising data. Well, that's actually
pretty simple. Just jumped to the compositing
and always remember that compositing is the process that comes after rendering. So we want to denoise our Render after it is basically rendered. That's why we jumped to the
compositing because that's where the after
operations will happen. Just make sure to
use, use nodes. And from here you will
have these two sockets which are called de-noising
normal and de-noising albedo. And just to understand what
exactly happening if I just jump here to the render passes and I disabled the
analyzing data, you will see that there
will basically get hidden. And when I enable them, I will have these
different sockets. And after that, if you
go to add and or filter, you will actually have
a node called de-noise. And I'm just going to
plug it right here. Let's take the normal and
plug it to the normal and take the albedo and
plug it to the albedo. And you're basically done right now after we
finished rendering, Blender will automatically
denoise a render and actually blend or do have
a really nice denoising. So that will allow us to
have less sample when rendering and still
get a decent result. And for now, let's
just jump back to the layout and see what other
settings we might change. And it seems that set
for the Render Settings. And let's see, jump to our
camera settings right now. For the camera, just
click on this and then make sure you are in your
camera settings tab. And from here, let's just change the focal length
to a wider lens. Let's say something like 24 millimeter because
landscapes are huge and we tend to shoot
them in reality with wide focal length. So using a wine
focal length will give us a more realistic result. And the other thing there is
also the viewport display, which is also
really nice option. And the most important
one is that e.g. let's say after setting up
our camera and all of that, we don't want to see all
of these areas right here that the camera will
and C. So basically, if you drag this plus b2, you will basically make Over areas that the camera
will not see black. And this will just save
a little bit of memory, first of all, when
viewing your scene. And it will just make
it easier to adjust, or let's say to frame our scene. And that's basically it
for our camera settings. And right now the last
thing I'm going to do is basically to adjust the
position of our camera. And yeah, let's just
do that pretty quick. I'm just going to
exit the camera view. And let's say I'm
just first of all, I'm just going to push this landscape bees by
hitting G and then y. And let's put it
close to this one. And actually, I'm going, let's
say somewhere right here, or let's say right here. Let's say, Let's pick this angle and then hit
Control Alt and then zero. And by doing this,
you will bring the camera to the position you where basically
seeing the scene from n, that is more or less actually
a decent composition, I guess I might jump interview. You will have this option
called camera to view. And I can just drag this to see the full main camera to view
at end too high the sidebar, which will basically allow me to change the camera position in real time while navigating
my 3D view port. And I guess something
like this will look pretty fine for my taste. Yeah, I guess this will be good. We might add some other
background mountains right here later on, but for now, we're good to go. And just to avoid moving our 3D view port and
therefore moving our camera, make sure to hit N and disable this option because we
don't need it anymore. So even in case e.g. you move, your camera will always stay in the
right position. And one side note, just for your consideration, if you feel like your camera
is actually super huge, you can jump to your
camera settings from here. And you will have
this option under view-port display called size, which will basically
just Change the side of the gizmos of the
gizmo of this camera. So e.g. it's breaking down, let's say something like 200. We'll just make the shape or less say the form of the
cameras slightly smaller. It will not change anything. It is just like
basically it will make the shape of
the cameras smaller. So it is easier basically to
navigate your 3D view port. And if you hit zero, it is
basically the same exact view. The last thing that we need
to do right now is that we need to add any 2D array
to see our final render. So if I jumped to
the rendered view, everything will basically
look super dull because we don't have enough
lighting in our scene, so we need to add some
lighting to our scene. There are multiple
ways to do this. E.g. if you uncheck Seen world, you will be able to
see the rendered view, but this will not show
in the final render, we need to input an actual
attribute, a right to Blender. So to do this, Let's
just enable this option again and jump to
the shader editor. And from here we're on
object mode by default, just make sure to jump to world. And basically we need to
add an HDRI to our world. So just go Shift a and let's look for
environment texture. And I'm writing in Arabic, Let's do environment texture, and let's plug the
color to the color. Everything will be pink
because we didn't open any sort of HDRI, so just open. And from here you will
find in the assets something called Sunrise
Perutz and rise. It is a really nice HD arise. So click on it and yeah, we will be using this HDRI
to light our scene with. Also you can hit Control T
to add a mapping note to it. And this will basically allow
us to change the rotation of our landscape or
actually of our HDRI. One small note, as
you can probably see, we're seeing the HDRI
in the background, so how to hide it, because we'll be adding
our own skylight are on. That's actually pretty simple. If you jump to your
render settings, you will find under film an
option called transparent. So just click on it and boom, areas right now
transparent and we will only see the
effect of the HDRI. Let's adjust the lighting to something that we kind of like, well, let's say something like, Well, I guess this
will be good for now. Let's keep it at 200 for now. And we might change
it later if we want. But yeah, that's it
for me for this video. And probably you
can start to feel how the final result
will probably look like, especially after the next video where we will do a
little bit of shading. And basically after
the next video, we will get a pretty
decent results. So yeah, I will see
you in the next video. Everyone also make
sure to save your file
5. Shading The Terrains: Greetings everyone and welcome to this video where we will do basically a little bit of shading for our
different mountains. So yeah, let's just do that. Okay. This is where we stopped last time and I'm just going to exit my camera view to have a better look at our
different terrains. And yeah, it is pretty much the time to start
doing some shading. I'm going to select
the first terrain. And because if you remember
in the last video, we jumped to the world
settings to add this HDRI. Right now we're going to jump to the object mode so that we can basically change the material
for our different objects. We're going to start
with this terrain 01. And actually by default, Blender will already added material called
surprisingly material. So let's click on this
one and let's e.g. rename it to terrain
underscore 01. I might also bring this slightly up to have
a better view, and I'm going to hide this
tool settings right here. So just click on this and uncheck Show tool settings so we will have a little
bit more space. And believe me, when
working in blender, you always need more space. Let's hit N too
high the sidebar, and this is our
principal, we SDF, after downloading the
different maps from NBN CG, actually they will give
you five different maps. One called the
color, the details, the flow, protrusions
and the soil. And I will be lying
if I will say that, Hey, we will be
using all of them. And actually we will
only use two or actually three if you
want to add some bump. But yeah, let's
start one by one. We're going to
start with a color. So let's just take the color and basically drag
it to Blender. And let's put it right here. So this is our color
and all you have to do is basically to
plug it to base color. And yeah, this is already
looking pretty sick, I guess. Make sure to hit Control T to add a mapping new
to it just in case. And just by doing this, we're already getting
a decent result, but we need to add
more details to it. After that, I'm actually
going to use the flow map, which is basically a
map for that will tell blender which areas basically will have some sort of water. So let's take the flow map and let's drag it to Blender
in the task bar. And let's do it here. And I'm going to plug the
color to the specular. And as you can see,
just by doing this, the water right
here basically will just pop slightly even more if I just disconnect
this control with the right mouse button
and this is the before. And when I plug the
specular, this is the after. If I just select this m, this is the before
and this is the after and this is looking
way better and also make sure to connect mapping
note to this just in case the final map
that I'm going to add is the details map, which will act as a bump
map. Here's what we will do. I'm going to take the details. Let's take it to Blender and
let's put it in our shader. And let's just move this here so that we can have a better
view and also always activate this snapping
menu so that the nodes will start to stick or
to snap to the grid. This will help us to make our different nodes
more organized. Let's put it here and take
the vector and plug it here. And for this details map, we need to plug
it to the normal. But there is a problem. If I hit Control Shift and click on this, That's how our details
map will look like. It is black and white, but
there is a small problem. We're going to plug
this to the normal. The normal is a purple socket. So how can we convert
this black and white data into a vector data which is basically a purple
socket or a normal. Well, there is a
really nice node called bump if I just
add it right here. And as you can see,
the bump will take a height which is gray socket, which means black
and white data, and convert it into some
normal data which is purple. So technically, if I
take the color and plug it to height and
take the bump and plug it to normal and Control Shift and click
on the principle be SDF. We will get a result
looking like this. Now, I know the result right
now is really, really, really strong and we need to
probably chill a little bit. So instead of doing e.g. a. Distance of one, Let's bring
it to something like 0.1, which is less pronounced,
let's say 0.05. And yeah, this is more
or less better, I guess. Actually even we might go 0.01, so it is barely visible
because this is a huge drain. So this bump node will
just help us to add a little bit more details and just buys this environment
a little bit more. And yeah, this is our first material for
the first terrain. And right now we're going to do the same thing for
the second terrain. I'm just going to jump to
this bad boy right here. And let's do the exact
same thing Going right now to select this material
which is called terrain 01. But because I'm going to
use different images, I need to create
another material. So all we have to do
is to just click on this new material and
let's rename it to terrain a zero to right now we literally create another
copy of the same material. So for this material
we're going to change the different
maps we do have. So for the color, just click on this and
let's jump to terrain 03, which is the name of the
terrain we downloaded. And let's pick color
and let's jump to the flow and the terrain 03. And let's pick the flow. And for the details, let's also open the details. And yeah, we just set up our different shaders and different materials for our
different terrain pieces. And if I just bring
this slightly down and do zero to jump
to the camera view. This is how our render is
looking like right now. To be honest, I don't hate it. It is more or less decent,
let's say for now, we're going to add way
more details to it, but we're already
starting to see how the final environment
will look like. This, is it basically
for how you can shade these different
drain pieces. And as you can see right now, we're already starting
to see the final result. It is looking pretty sick. And I guess right
now you can see how easy this displacement
workflow is. It is pretty simple. You just connect the nodes and everything will work because all the hard work of creating the terrain and
creating the materials, it is basically already
done by the guy who created these
different terrain pieces. So yeah, let's add
for me for this video and I will see you in the
next one where we will actually add a sky and add just some scenes settings or let's say our world lighting. Yeah, See you there.
6. World Settings: Along with this course, you will actually have the sky image, which basically will be
our skin in our scene. So let's see how we can
add it to our scene. And surprisingly, it
is also pretty simple. So yeah, let's do
this pretty fast. Okay, so this is
our blender file and where we stopped last time. And yeah, let's add our sky. I'm going to exit
the camera view. And as you probably remember, we already activated an add-on called import images as planes. So just go to File
Import and you will have here something called images
as planes, just click on it. And in your Assets folder you will have this
image called sky. So just click on it, and this is our sky plane. And yeah, right now, we probably need to rotate
it because it should be technically oriented the
same way as our camera. So here's what we will do. I'm just going to
click on my camera and jump to the object properties. And it is basically
rotated minus, I'm just going to hit
Control C to copy this, Let's jump right now to our sky. And in the z rotation, I'm going to do Control V. So it is in the exact same way and basically just hit seven
to jump to the top view. And let's move it somewhere, really, really, really far. And let's say
somewhere right here, because skies are huge
and they should be way, way in the background
really far. Let's hit zero to see how the final result will look like. And it is pretty small, so hit S to scale it up until it cover the
entire horizon. Let's hit J Z to bring it a
little bit up on the z axis. And let's say
something like this. This is looking pretty nice. And right now you will
probably notice that this kind just look
slightly weird. It should be brighter and
it doesn't look right. The main reason for
that is in general, sky do emit light or actually it acts like
a source of light. So basically in our
material settings, make sure you are on the sky. Make sure you select
first of all, your sky. And in the material of the sky, you will have this image. And the most important thing, we don't need this alpha, so control right mouse
button to cut it. Make sure also to take the color and plug to the emission. And by doing this, this
guy will look right, and this is actually working,
looking pretty sick. Also overall, if I just
zoom out a little bit, as you can see this guy,
I know it is super huge. Generally the upper parts of the sky should be closer to us. And how can we
achieve such result? That's pretty simple. Just hit R XX twice and just rotate this
slightly down like this. And if I hit zero, this is
how the sky will look like. I'm seeing some
clipping right here. So just hit S and scale
with a little bit up and maybe do G Z to
bring it slightly up. And yeah, just by doing this, basically this will make these
upper areas closer to us, which is more or
less the same thing that happens in real life. Hashtag realism. And also I think I might add a slightly more contrast to my image or actually to our sky. So let's add curves, RGB curves, and here's
what I will do. I'm going to hit
Control and take the socket and put
it here and take the color and plug it to
color to an S-shaped curve. So to make it way more
contrast as you can see, it's, Let's try even
more or something. It's just like so,
yeah, that's perfect. If I just select this RGB curves and they hit empty muted. This is the before,
and this is the after. This is the before and after and it is looking
pretty sick, I guess. One small problem
that I just noticed, which is that basically
the light is technically coming from here and somehow
it doesn't match that well, our source of
lighting right now. So to fix this problem, Let's jump back to
our world settings. And from here we can adjust
the rotation of our HDRI, let's say to look, or actually it should
look something like, well, surprisingly
in my situation, I'm going to leave it at zero. I'm just going to hide all of these overlays to
have a better view. And yeah, I'm actually
more or less, I'm going to just
leave it at zero. I don't know about your case, to be honest, but
here's the thing, just trying to somehow eyeball
it so that at least e.g. the sun is coming
out of this area for a minute right now and
because I hit on my overlays, so any technical way it will
probably hit this areas. It will probably
also hit this area to also have some
areas are right here. This is more or
less close to how the light will behave
if this was real. So basically in your scene, try to recognize where does
the light is coming from, especially from
your sky and adjust your HDRI from here so
that it matches more or less how the lines are actually the direction
the light is coming from your sky so that everything
will look believable. And right now it is
about time for me to start deleting all of this
month that I just draw. Now the other thing
that I'm actually considering doing, which is the, basically I'm going
for a more of a sunset look because
I love sunsets. So I'm just going to
adjust a couple of settings in my world. Make sure you aren't
in world settings in your shader editor. I want to make this
HDRI more sunset, if that even a word. So I want to make it a
little bit more orange-ish, a little bit more
red so that it gives us those warm tones of sunset. And the best way to do
such thing is basically by adding a curved
RGB, RGB curves. Actually, I don't know
why I said it in reverse. Let's take RGB curves and
let's plug it right here. And let's also hide my overlays. And here's one small thing. Technically, if I bring this up, you will expect that
everything will get brighter. And why drag this down? Everything we will get darker. But actually somehow, when you
are in the world settings, everything is somehow reversed. I don't know why. But here's the thing. When you are in the
world settings, always remember that
everything is reversed. So if you want to
add more light, you do that by dragging
this point down. And if you want less light to make it less
contrasty, bring this up. There is weird. I know it is
just how blender behaves. Anyway, let's bring
this the way it was by deleting this point. And let's start adjusting
a couple of settings. I'm going to do an S-shape
for the general C, which is basically
the general curve in the different channels. So you can do this by doing a reversed S something
and just like so, so this will basically
give us a little bit more of a contrast dealer, which I kinda like to be honest. And after doing this, we need
to add more orange tone. This HD arrived. So how can we do that? Well, we can do that by adding some red and
adding some yellow. This will technically
give us orange. So let's go to the red. Don't drag it up because as I mentioned in the
world, it is reversed. So drag this down to add
a little bit more red, something like so
we're adding some red. This is looking good and we
need to add some yellow. How can we add yellow by
bringing the blue down, Let's jump to B, which
is stands for blue. If you bring this up, you will basically
remove from blue. So let's drag this up. And actually if I just
push, push it like this, as you can see,
we're adding a lot of blue and different
drag it down. As I mentioned,
when I move it up, that's more yellow and when I bring it down
that's more blue. So let's bring this slightly up. And yeah, this is more
or less better at. It is more sensitive. Let's say if I just select
this RGB curves and I hit M, this is the before and
this is the after, this is the before and after. And it is looking
pretty sick, I guess. Alright, so this is how
we adjust our world lighting and how we add
a sky to our scene. And I will see you in the
next video. See you there?
7. Create Your Own Trees: This is where we
stopped last time. And as I mentioned, we are going to create
some vegetation assets, are actually not some
assets actually, we are going to create
some trees to do this. I'm actually going to file and
create a new blender file. I have already saved
this blender file, so I'm not going
to save it again, but please, if you
didn't save your file, make sure to do that. So don't save. And from here I'm
going to hit a to select all the objects
x and then delete. The most important
thing is that we need to enable an add-on called sapling trees or just
go to Edit Preferences. And from here you
will have Add-ons. This is announced and from here, just look for Sapling AD curve, sapling tree Jan, this is
the add-on we will use. I have already
activated and yeah, just make sure to check this
box and you're ready to go. Let's just close this bad
boy and let's start working. Okay, so how to add a tree? Simply just go Shift a and under a curve you will have
the sapling tree Jan, which is basically the generator responsible for
regenerating our tree. Just click on it, and
this is our basic tree. From here, you will have
plenty of different options. The most important thing
is that the first thing we are going to change is
actually the load preset, which basically this add-on comes with a couple
of different, let's say, presets
of different trees. You can of course,
experiment with them just to see how they will look like
some of them actually, it somehow doesn't work
for whatever reason. But yeah, let's add on
is more or less old. So that's why it might not function sometimes
the way you expected. But the most important thing
is that basically we do have a couple of presets
that we can use. Now based on my research
for the highlands, we created basically the
type of trees that grow in those areas are trees that
are basically called spruce. And basically spruce
in terms of shape, we don't have something
similar to it or actually we don't have a preset
for the spruce here. But actually if you
change to this e.g. quaking aspen, this is more or less the look of
a Spruce Street. That's why we are going to
actually use this preset. You do have a couple of
different options right here to change the
shape of this tree. So just to show
you what they do, I'm just going to hit
one from the number of paths to jump
to the front view. And basically the first one
will be responsible for normally changing the scale of the top areas for this one. Why are they not working? Okay, That's weird. Okay. They're not working basically
because you need to change this tent flame to custom shape and you will be able to change the
shape of this tree. So for this one, this will basically control
the size of basically, let's say, over the root. So as you can see,
we're changing the size of these bad
boys that are right here. This one is responsible for changing the size
of the middle area, as you can see, the metal area. And the last one is basically, or actually let's jump
to this one which will basically change the
scale of the top areas. And for this one, it will
basically move the middle. So basically if the
middle is here, and let's just do this
zero and do the zero. Basically, this slider is responsible to changing the
position of the middle. Another might say like why this weird way of
controlling this tree? I don't know. This is just how
this add-on work. So for the custom shape, Let's just bring this for, Let's bring this to one and
bring this to something, let's say like 0.7. And for the size of the top, let's make it one. For the size of the
bottomless, make it one. Or actually let's
bring this little bit down and for the middle, Let's do it like this. So this is more
or less something that looked kind of decent. Let's say this is the preset. I'm going to use it
as a custom shape with these different values. You can copy them if you want. After doing this, I'm
going to jump from geometry to branch radius. And from here as the
name states who are going to change the
radius of our branches, I generally don't change
this value that much. I'm only maybe going to crank
it to something like 0.02. And basically this will add a little bit more thickness to the different branches
and the trunk. And again, if you want, you can try playing with these different values and discover whether
they exactly do. But most of the
time they are just basically some simple
stuff like changing the scale or somehow
trying to change the shape of the tree
after the branch radius, I'm going to directly
jump to branch splitting. And from here, basically, right now we do have like
let's say two splits. Basically what I mean by
that is that we do have the main trunk and from
the main trunk we're only having one
split one branch. So from here, I'm actually going to increase the level 2-3. And this will add way
more details to our tree, which is kind of neat. And after doing this, I'm going to leave the, all of these settings
the way they are. And I'm going to jump from
branch splitting two leaves, which we control the
leaves as a prize. From here, the most important
thing, make sure to check, Show leaves, which will basically show you all
the leaves of this tree. And from here by default, Blender will use
an exact funnel. If you just zoom a little
bit here, as you can see, the shape of the leaves
is actually exactly, which does have six sides. Let's say we don't want them. This is a horrible
thing for topology. That's why we're
going to change it from hexagonal to rectangular, which will make it
quants and blender, love quads, Let's say we're going to change it
to rectangular. And for the leaves, actually, this leaves will basically
change the count of how many liters we do
have for this tree, Let's say try to increase it because we can do
something like 40 This will basically add
more leaves to our tree. The last thing I
might actually change is to change some
settings right here, which are related to the size. We're actually not
these, these ones. They will change the scale
of these different leaves. Generally, if you Google them, the shape of the leaves of the spruce tree
are a little bit, Let's say stretch and they
are a little bit long. That's why we are going to
increase the leaf scale in the x and the
lift scale on the y. Let's write increasing
it in the x. Now we want on the y actually, let's just hit the
right mouse button, Reset to default value and let's try increasing on the why. And why is it acting
a little bit weird? Let's try zero. Okay, That's some weird behavior from the add-on, to be honest, Let's try increasing the
leaf scale on the x, maybe something like 1.5. And let's try to
rotate the leaves. Okay, So from here, leaf rotate on, Let's try
rotating it this way. This will make it a mess. So let's just make this
one and just increase the life scale for
the leaf scale from here to something like 0.2. We're going to increase it
on all the different axes, but this is not a big deal. Okay? What about right now
we'll change the scale on the x. We can do this. This is such a weird behavior. Let's try increasing this to 0.3 and bring the leaf scale on
the x to something like 0.4. Let's try 0.6. And yeah, I guess this is looking
pretty neat and more or less similar to
the shape of a spruce. After doing this, make
sure that you lock your settings for basically
what we will do next. Then, basically right
now you can click out. Nothing happened.
You can collect out. Why? Okay, maybe I need
to select this tree. Now it is gone. And this is basically how
you can generate a tree using the supplementary
Jan. And in the next video, we are going to shade this tree to basically make
it look realistic, and then we will import
it to our project. Some of you might be
wondering why I didn't create more than one
variation of this tree. Well, you can definitely do that and you can
spend some time using the sapling tree Jen to
create different versions. But my main issue
with this approach is that basically whenever I'm
going to create a new tree, for whatever reason,
Blender will just forget the values
that I have inputted. So I need to basically do the whole work again to
create a different tree. And yeah, you can definitely go through that route by
creating different trees. This will definitely
give you more variation. In our case, there are two
things I just want to mention. We are going to render
this tree multiple times out of this
blender file in, let's say, different angles. And this will more or less gives us the look
of a different tree. So it is not a big deal. And the other thing, these
trees will be actually really small compared to the
size of our scene. And there is no way, let's say for someone
to spot that, hey, there's render is using the same trees over
and over again. So that's why I
guess it is okay, and we can work
with just one tree. So make sure to save your file. And I will see you
in the next video where we will shade this tree. See you there?
8. Shading The Trees: Hello and welcome. In this new video where
we will basically shade our tree and make it
basically look realistic. Alright, let's just do that. Okay, So this is our
blender file and where we stopped last time
unless start shading. The first thing I'm going
to do is basically to jump to the rendered view and from here make sure to enable to actually are actually
disabled seen world. And let's choose one of these
HDRI that blender comes with to use it basically
to lighten our scene with, and also probably I need in the render settings to change
it from EV two cycles. Let's do GPU compute. And for the max
samples, let's do 32. And for the max samples, let's do 128 when it comes to the render
for the light paths, Let's make this eight. Let's do both of these three. And yeah, that's basically it
for now. We're good to go. We're probably going
back to these settings later on when we start
rendering this tree. But for now, we're good to go. Now, here's an
important thing about the tree add-on that we used when we've
created this tree, it is not actually
an actual mesh. It is actually a curve. And how can you verify
that if I just select e.g. the trunk and I hit tab, as you can see, this
is not a usual mesh. It is actually a curve. We don't want to use
actually this curve. We want to use an
actual mesh so that we can UV unwrap it easily. So to do this, all we have
to do is basically e.g. let's start with the trunk,
make sure you select it. And then if you go to object, you will have convert. And from here you
will have mesh. And if you click on it, and then I hit tab, yep, we turn this whole thing
that used to be a curve, we turned it into
an actual mesh. And same thing for the leaves. Let's just select
the leaves depth and jump to the edit view. As you can see, Aro, oh, actually they are an actual mesh so we don't have
to transform them. They're not a curve anyways, so just hit Tab to exit
the edit mode and we're good to go and basically
to start shading. So let's bring this
a little bit up and let's just zoom in our
trunk so that we can see it. And from here, I'm going to change it to the shader editor. And let's pick the default
material that already comes with a new blender file and select it and let's e.g. call it trunk, or actually
we can also call it bark. So click on your
principle be SDF, Control Shift T. And from here, just navigate to
your assets folder. You will have this
folder called barks. Click on it and basically
just pick one of these. These are extra ones
in case you want to use them for your
different projects. But for now, I'm
going to use the bark 01, select the albedo, hit Control and select
the displacement, normal and roughness,
and click on principle texture
setup and boom. Nothing will happen
for whatever reason, I don't know why. Let's see why are we apply the material
on the wrong object? We applied it on the leaves. So just click on this to
remove it from the leaves. And let's make sure
to select your bark. And from here, select bark
and boom, we're good to go. Let's just zoom in a little bit. And as you can see,
our texture is weirdly mapped on on the bark
or on the trunk. I don't know actually,
what is the correct word? Let's just call it bark. Anyway. Why is there? Because we need to
UV unwrap our model. How can we UV unwrap our model
basically by hitting tab, hit a to select your
entire object, hit you. And in our case, we're going to use q projection, click on Queue projection and hit tab again to
exit the texture. Right now, it is so, so huge, that's why it is pixelated. That's why let's move here and bring the scale to
something like five. And as you can see, it
is perfectly mapped right now on our bark. This is actually looking
pretty good, I guess, anyway. So this is our bark material. The only thing I'm going to do because I just want to
delete all of these because I'm obsessed over not having these different
labels in this way. I hate seeing my
nodes in this way. So just hit Control X
to delete it and also had this and basically
X to delete this label. I don't know why. I just find it for
the simple material, it is way easier to just
basically use this view instead of the weird labeled the Node Wrangler add-on create. The last thing we are going
to do is basically to create the material
for the leaves. And let's just do that. And this is probably going
to be the trickiest thing, not that it is hard. It is just annoyingly weird and you will
understand what I mean. Okay, so let's select the
trees are actually the leaves, and let's create a
new material and let's call it leaves perfect. From here I'm going to
hit Control Shift D, and let's move to
the leaves folder. And from here you will
have different leaves. Probably let's open leave 01. This doesn't look like
the leaves of a spruce. Leave zero to this one. This one do actually
look like the leaves that you will find
on a spruce tree. So what are the maps
that we will need? We need the albedo, or actually it is the
same thing as the color, displacement, normal and roughness
principle, texture setup. And let's delete all of
these rerouting nodes because I hate them. This will look weird. Why is that? Because first of all, we didn't UV unwrap our model
and we need to do that. And we are going to
do that in a second. So just select Lives had tab hit three
to jump to the face mode. Or actually you can
do it from here. And because all of these leaves are technically identical, we only need to UV unwrap
or only one of them. And basically we can use it
for all the different leaves. Let's select e.g.
this one hit you and select unwrap and hit
tab again to exit. And right now, there is a small problem that
I need to explain. Basically, if I just
open this image, which is the leaves albedo, one thing that you
will notice is that basically, first of all, yes, it does look weird and also it does have
the colors we need. But the issue we're
talking about is that basically there are some areas that should be transparent. E.g. these areas that
are right here should be transparent because we want actually to see through the
leaves and all of that. So we need to
figure out a way to tell blender that table lender, the only thing that
should be visible is only basically the
actual leaves, all of these stuff right
here that is blurred. We don't want to see it. So we basically need
some sort of a mask. And how can we do that? Well, this is actually
pretty simple. In the resources folder. With this texture, you will
actually have this preview. And basically as you can see, it is a transparent image. And we can use the
transparency out of this image to mask
our different leaves. And you will understand
in a second what I mean. Let's just get back to Blender. And from here, let's just
move both of these here. Hit this one and hit
Control Shift D to duplicate it while
keeping this link and click on this or
no, not that one. This, to open a new
image from here, select your leaves preview, which has basically make
sure it is this one, the one with the
transparent background and hit Open Image. And from here make sure to
change the color space from sRGB to non-color data. And basically just
take the alpha, which will tell
blender with this transparent and what is not, and plug it into alpha. And boom, right now, this whole thing is
looking like legit leaves. There is only one small problem. We need to fix their position. As you can see, e.g. right here, it is looking slightly weird. It is like somehow
growing from thin air. And this is actually
a really weird. So let's just fix this issue by jumping to the
UV Editing tab. And from here, hit a to select all of your
different leaves and hit a to basically you
can scale them from here. Here's what we will do. We are going to change this to the rendered view
so that we can see everything and make sure also to disable seen world
for whatever reason, Blender doesn't use
the same lighting that you use in the layout view. Or actually when you
change the view, you need to enable
this option again, is just weird, but it can
be useful, I guess, anyway. So let's e.g. Zoom and one of these
leaves just so that maybe we can fix this issue. So basically the
issue is simple. If we do a to select all
of these different leaves, we can basically just scale them a little bit down
and hit R to rotate them. And let's just use
only this one. Let's see how they
will look like. Okay, there are definitely some areas where we're still
having this weird problem of growing out of thin air that some areas are okay and some areas are still suffering
from the same problem. Anyways, I guess I'm
not going to bother more to basically try to fix this or try to make
it perfect because we're going to use some
cheating, let's say, because this tree
will be really far and we will not actually be able to see all of these
details and that actually there are some leaves
growing out of thin air. And actually if right
now I jumped to a layout from here and I hit one to
jump to the front view. This is our tree and
it is looking good. I guess the rise is
no way actually, I guess to be able
to see that problem, even though the trees in the other scene will be
actually way smaller than this. So this is basically
the tree that we will populate our hills with. And in the next video, I'm actually going
to show you how you need to render this tree to use it later on
in the other file without increasing
your render time. So yeah, see you
in the next video. Everyone also makes
sure to save your file
9. Prepare The Trees For Rendering: Hello and welcome in
this new video where we will basically
render these trees. So as you probably remember
from the last video, I already mentioned that
basically we will not use 3D trees because they
will be super heavy. And I wanted to show you
a different technique by using three planes. In the last video, we
created this tree, which is a 3D model of our tree. We created it
actually in Blender. So right now I'm
going to show you how you can do
typically render it. What we're trying to
do is basically to export an image like the one
you're seeing right now. And then we will use it to populate our scene
with what allows this technique to work is basically that these trees
will be really small. So it will be really, really, really hard to tell
whether they are actually 3D models or they are
just simple 2D trees. And the really nice thing about this workflow is that it will
save a lot of memory and you can literally create
millions and millions of trees without actually putting a lot of heavy load on your computer. Now, it is not as
easy as you just e.g. at a camera and then you
render an image of this tree. It doesn't work
like that exactly. We need to export
some more data, or let's say we need to
extract some more data from this blender scene in order to get the best
result possible. So here's what we will do. First things first, I'm
actually going to go to Shift a and I'm going to
look for a camera. And let's jump to the settings
of this camera from here. And here's the most
important thing and the type it is basically
right, no perspective, which means that if I hit zero
to jump to the number pad, or actually to jump
to the camera view. My camera right now
is a little bit off, so let's hit and to
open the sidebar, Let's go to View and camera
to view so that basically my camera is stuck right
now to this 3D view port. Here's what I mean by
perspective camera. This is a perspective camera. Basically we can see
the distortion that happens because of the
perspective of the camera. I'm going to uncheck this
option and I'm going to get back from perspective
to orthographic. And as you can see when
you choose orthographic, it is basically like you
eliminate the third dimension, which is the depth of the image. You eliminate it. You might ask, why is that? Well, because we want just
a flat image of that tree. So yeah, that's why
we're going to change the type from perspective,
the orthographic. Now, here's just one
important thing. 95% of the times when
you're working in blender, you will only use perspective. So don't like really stress about what
orthographic means. Anyway, let's choose
orthographic. And from the orthographic scale, you can basically change something like the focal
length of the camera. But in my case, I'm actually going
to leave it at six and I'm going
to move the camera. Let's exit the camera
view and let's try to look for
where is the camera? Yeah, it is somewhere
right here. Yeah, This is our camera. Let's make sure we're
selecting it and let's jump to the properties location. Here's what we will do in
the location on the Z. Make sure to put it at zero for now in the rotation on the y, make sure it is also zero. And for the rotation
on the z also make sure it is zero and
the rotation on the x, Let's make sure it is 90. The main reason we're
doing that is that we want this camera to be basically straight
on like looking like this. We don't want any sort of rotation like this or like this. That's what we're doing. And as you can see
for the location, it is not on the y-axis, so makes sure the location
on the why it is also zero. Oh no, I did something wrong. Actually make sure
that let me get back to this to 10 m
or actually -10 m. And the location on the
y are actually on the x. On the x should be zero on the x location x.
Let's put it zero. So right now it is perfectly
looking at this tree, let's say zero to jump
back to the camera view. And that's what our camera
is seeing right now. And I don't want to actually
render an image that does have the aspect
ratio of a full HD video, I want to export it
as a square image. That's why I'm going to jump
to the Output Settings. And from here I'm going to
choose something like 1024, which will give me a
square canvas to render. Now, it is just a
matter of basically changing the location
of the camera so that the entire
tree will be visible. And I will show you
a couple of things that you probably
need to keep in mind. Let's jump back to the camera. Let's jump back to the object properties and let's change the
location on the Y, way, way down, okay,
Nothing will change. Never mind, we need to
change all of those settings from the camera orthographic,
orthographic scale. Let's push it way, way up so that we almost can
see the entire tree lesson, let's say something like 20. And the most important thing
right now we need to change the location of this
camera so that this tree, or let's say the bottom of
this tree will be around here. So the best way to
do this is basically make sure you're
selecting your camera and hit G to move the camera at x0 to only move
it on the z-axis. And let's move it just like so. Basically just make
sure that the bottom, the trunk of the tree is like basically in the
bottom of the frame. And yeah, that's the image
we're having right now. Basically we're having a
flat image of a 2D tree, which is exactly what we want. And this is the main
thing that we will use to render this tree. There are a couple
of things that we probably need to keep in mind for now before we
actually dive into rendering, which is that let's
prepare this tree as best as we can to
implement it in the scene. Let's do a little bit of
optimizing this tree. Let's say I'm going to hit
Enter to close the sidebar, and I'm going to open another 3d view port right here. And also if you
hit the Home key, you will be able to frame this tree in the second preview. Let's hit D to close this, let's close the header. Let's close the
show tool settings. And let's also hide
all the overlays. So we only can see this
beautiful tree right here. And maybe in the
camera settings, Let's jump to viewport
display the best part two, Let's bring it up to one. And yeah, this is our tree. First of all, I want to add a plane and
you will know why. So go shift a mesh plane and maybe let's make the scale
something like 10 m, or let's actually make it 100 m so that it is
huge for this one, basically I'm going to
give it immaterial. Let's not even a material. I'm just gonna give it
a color that is pretty similar to the color of the
scene that we will use. Basically a dark greenish color. From here, I'm going to
pick a new material, I'm going to call
it e.g. ground. And from here, just
make it the dark green that we do have
in our previous scene, which is something
like So I guess, yeah, let's make it like this. Maybe let's push it
even in like this. Now you might be wondering, you're seeing why
are you doing this? If we tried to match
as much as possible, how this tree will look like if it were actually
in that scene, that will make the whole
result basically better. And that's what
I'm trying to do. And the other thing, which is the color of the lighting,
if you remember, in the object world, basically are we still did
an input any HD arise. So basically we're
using the built-in HDRI to light in the scene. So yeah, it is time
to add an HDRI. So let's go shift a search and let's look for
environment texture. Let's put it here, and let's plug this to here. Click on Open, and in
the assets folder you will find the sunrise
XR. Let's click on it. And from here make sure also
to jump from Scene Lights. Let's check scene
world so that we're basically using our
HDRI to light in our scene with nothing
changed because we are using basically the same HDRI that
is built-in in Blender. I'm seeing this rise to
the render settings. And from here makes sure
that you check an option called The remember it is
called film transparent, where it is, alright? And their film, you
will have transparent. So basically the HDRI will be transparent and we will
have a transparent render. Let's get back to
our normal view and let's hide the stools. Sorry for being too nice, neat, picky about the UI of Blender. Anyway, one thing that you might actually want to
do is basically if you go and add a curves node RGB
curves in the world shader, we can bump a little
bit the oranges, which we can do basically
by lowering the blues, if we lower the blues, and as you probably
remember when we are in the world shading,
everything is reversed. So let's bring the blew up
and bring the greens up, which should give us a more
orangey look for the street. Let's make it more subtle. Yeah, I think this is better, this is more sensitive
and it will look better with this lighting
in our other scene. And also one thing I
just noticed here, there is a small gap which might cause some problems later on. So let's do g, z, Let's move it a little bit. Just like so make sure it
is clipping in the bottom. That's how it is
looking right now, perfective, and this
is our 2D tree plane. And right now I'm going to show you how you can render
this whole thing.
10. Rendering The Trees: Hello and welcome. In this
video where I'm going to show you how you can
render these trees. One of the important
things that we need to do right now is
basically to tell blender to denoise our render
from the render passes. Make sure to check de-noising data whereas
denoising data. Yeah, make sure to check this option so that
when rendering Blender will render some extra data on how we can
denoise our render. But for whatever reason,
as I always say, Blender will not use
these inflammations unless you tell it,
actually use it. So let's jump to
the compositing. Compositing is the stuff that
happens after rendering. And I'm going to
check Use nodes. And from here I'm going
to move this here. And let's go to Add Filter. And you will have d noise. Let's put the noise here. And it is as easy as plugging noisy image to or
actually not noisy image, just plug the denoising
normal to the normal and the denoising
albedo, albedo. And let's get back to our
usual seen in the layout. Alright, now our render will
be denoised and it will look super crisp and
clean after rendering. So right now we're
ready to render. We're going to render
a simple image like the one you're
seeing right now, which is just a PNG or a picture with the
transparency of this tree. It is basically the same picture you're seeing right here. And also we're going to render an image
looking like this, which is basically
if you are into 3D, then you will probably
know that this is a normal map for
people who don't know. A normal map is basically just an extra map
that will allow us to squeeze more details from our 2D tree so that we will try, at least to fake that
it looks actually 3D, even though it is
just a 2D tree. And the last thing
we're going to render, which we will actually
only need to render one time the World normal. And basically we
will use it to tell blender What is up
and what is down. Because sometimes blender don't know the different orientations. And fortunately,
so let's do this. This is gonna be fun. Right now. We do have our 2D tree image, which is basically we're
seeing right here. So all you have
to do is to go to Render and render image. This is really hard, I know. And all you have to do
is basically to wait for blender to render
this to the tree. And I'm going to show you
what you need to do next. Our image just
finished rendering, and this is our 2D
tree right now, all we have to do is to
go to Image, Save As, and in the resources folder, you will find two
different folders. One of them is called
the acinus three planes and the other one is called
Course three planes. These are the ones I
used for my past scene basically when I
was preparing for the course and in the
course three planes, these are basically the trees
we're creating right now. I would highly recommend
that you go with these three planes that
we're creating right now because I think they look slightly better in
terms of lighting. Let's jump to the
course three planes. And here's what we're
going to call it. We're going to call
this render tree underscore 01 because
this is the first tree, another underscore,
let's call it color. So basically this is the color
tree number one from here, I'm going to keep these
settings the way they are. You don't need to change them. The most important thing is that make sure you are in PNG and you check RGBA so that you will render also
the alpha channel. In other words, you
will also render the transparency with the image so that we can later use it. These are the things that
you need to keep in mind. And all you have to
do is basically to click on save as image. This is our first colored tree. Right now, we need to render
a normal map for this. This is going to
be super simple. Jumped to this basically
one right here, viewport shading leg on this small arrow and
change to mat cap. There are the mat cap. You will have this
option right here, which is basically for normal. And as you can see right now, this tree-like, looks
like a normal map. That's pretty cool, right? Anyway, here's what
we're gonna do. I'm just going to
bring this like this. And Andrew view, you will have an option called
viewport render image. This one, viewport render image, which if we click on it, it will basically
take a screenshot of what we see right now
in the 3D view port. So if I click on it, boom, this is our tree number one. This is the normal map
that belongs to it. So from here, all we have
to do is basically to go to Image Save As and 301. Yes, and I'm going to
change this to normal, perfect tone and just
click on Save Image. Now, this is our
first story and it is basically a ready
for the next step, which is basically shading it. But before we jump into shading those two,
the three planes, Let's render a
couple of more trees so that we can give
more variations. And this is actually
pretty simple. We're just going to
repeat this process, let's say three or four times. Here's what we're gonna do. Basically, I'm just going to select this tree with the trunk also and hit our Z to basically
rotate it on the z-axis. And let's rotate it to
something like this, which will give us a different
looking tree because the tree does have different
shapes when you rotate it. So instead of creating
multiple trees, we can rotate this
tree, which will give us a slightly different tree. I know this is really
dumb, but it works. Let's go to Render
and render image. This is our second
tree, let it render. And now after we
render this image, let's go to Image Save. As, you know, we don't
want it to be 31. Let's call it 302. And this is color not normal. Let's call it color, Save As image. Let's close this. And from here let's go to
view, Viewport, Render Image, Image Save As actually, here's a really nice trick. Let's select 301 normal. So both of these right now
we'll have the same name. But if you click on this
small plus right here, the 01 will become zero. To look at this, boom,
it is alright, no 02. So this is way
easier than actually changing the name and
just hit Save As image. This is our second tree. Boom, that was easy. Let's rotate it even more. Let's do our z, rotate
it a little bit more. Let's say something like
So render, render image. Let's wait for it to render and boom, it just
finished rendering. Let's go to Image Save As, instead of changing the name, Let's pick 30 to color, and let's click on plus. So this is 303 color
PNG, That's perfect. Save as image. Let's close this view,
viewport render image. This is our tree number three. So go Image, Save As, let's select the zero to normal. Zero to normal. We
need to make it 03. Click on this plus button
303 normal, That's perfect. Let's hit Save As image. Right now we do
have three trees. Let's add another
one just for fun. Let's rotate this
tree even more. Make sure to select
both of them are z and let's rotate it,
something like so. Let's go to render,
render image. Let's wait for it to render. Alright, it finished rendering. Let's go to Image Save
As and from here, let's choose 03 color. Let's make it zero
for Save As image. Let's close this. Go to View, viewport
render image. And let's save this under Image, Save as 03 normal. Let's make it zero for
normal Save As image. And boom, we just rendered for different variations
of this tree. I think that was
easy, It wasn't hard. I guess the last
thing I'm going to do is basically to add a cube. I know this is anticlimactic, the default cube in Blender. While we're finishing our work, Let's go shift a mesh cube. I'm going to hit G, z one. So basically I move
this cube 1 m above, and yeah, let's scale it. Let's hit S and
let's scale it way, way up until it almost filled the entire
frame right here, not worry about it
clipping the tree. That's not a big deal, had GZ and let's move it up. I want it to basically
fill the frame barely for fill the frame,
something like cell. And I'm going to hide this tree. Let's also hide this plane. Oh, not the plane. I
need to also hide it. Okay, it's inside of that. I only want to render this basically solid plane because that's what
will tell blender, What is up and down and all of that basically the
direction of the normal. You don't need to stress
a lot about that. I'm only going to
render this one time. So all you have to do
after you made sure that the cube fills the
entire camera preview, just go to View, View, viewport, render image. And yet it is just solid color, but it will be really helpful. I don't really have to
do is to go to Image, Save As just like before. And let's call
this world normal. What a creative
name, save as image. And let's close this and hit Control S to save
this Blender project. And we just finished
rendering our 2D trees. I think that was easy,
at least I hope so. In the next video, I'm
going to show you how you can basically shave those. Do the trees. See you in the
next video. Bye everyone.
11. Shading 2D Tree Planes: Hello and welcome. In
this new video where we will basically
create the 2D trees. This is where we
stopped last time. And actually to do all the work that we will
do during this video, I'm going to create
a new blender seen. So first of all,
make sure to hit Control S just in case
to save our scene and we don't want to lose
our work and then go to File New and general. And this is a fresh
blender seen, what does the first
thing that you should do when you start a new
blender seen, well, delete everything Hicks and then delete because
are only used for this new blender
seen is basically to just create the trees
and shade them. Uh, later on we will pour them into our main scene, let say. So if you remember in the
first or the second video, we actually activated a
couple of add-ons in Blender. One of those add-ons was
important Images as Planes, and that's the main
add-on we will use to import our trees. So here's what we're gonna do. Go to file, import, Import Images as Planes. In the resources folder you will have two different folders. One of them is called
the acinus three planes, and the other one is called
Course three planes. Basically the symmetry planes
contains the trees that I first used when I was creating the scene
for the first time. And the course three planes, these are basically
the ones that we created during the
last couple of videos. We're going to use
these ones because I think they look
slightly better. So let's double-click. And from here, you will have all the trees that were
rendered during the last video. The most important thing
is that we're only going to import only one image, and later on we will create
different materials for it. So double-click on e.g. 301 color and this is our tree. We're not seeing anything because we're not in
the rendered view. So let's jump to the
rendered view and let's change also a couple of
render settings from here. First thing, render engine, let's change it to
cycles device GPU. Compute for this, let's make it 32 and disable noise threshold, disabled noise threshold
and make this 128. Actually changing their
understanding is unnecessary because we're not gonna do any sort of rendering
from this file. The last thing I'm going
to do is basically to add one of the
H2 arise that comes with Blender and use it to as a light for
our scene from here, make sure to choose
this sunrise one because that's the same HDRI
we used in our main scene. Just click on it and boom, this is our tree and it
is looking super good. Now, there are a couple of
things that we need to do. First of all, as you can see, the tree is on the ground
so we need to rotate it. So just select it,
hit R to rotate it, x to rotate it only on the x-axis and type
90 to rotate it on the x-axis 90 degrees and then hit Enter and boom,
This is our tree. Now, here's an important thing. As you can see, the
origin of this plane is actually somewhere in the middle of the
tree and that's bad. And here's why Blender, when it will distribute
these trees on a plane, it will put the origin on the, basically on the level
of the emitting surface, which mean
hypothetically, let's say we have plainly that
looks like this. This is the ground when
we will ask a blender to distribute these trees on
basically on the ground. We want to basically to
be something like this. We want on a home. We want it to be like this
because this is the ground. We want the tree to
be like right here, but that's not what will happen. Blender will put the
origin on the ground. So what will happen
is that it will basically put it just like so, so we need to move this
origin point right here so that later on when Blender will distribute
those trees, they will look basically normal. It will distribute
them from the origin, which is the bottom
of the trunk. So how can we do this? Well, it is going to
be pretty simple. Hit one from the
number pad to jump to the front view and
actually lend me delete all of these lines that I drew and then hit Tab to
jump to the edit mode. And the really nice thing
when you're in the edit mode, when you move your plane, origin point will
basically stay in place. Meanwhile, if I just jump back for a quick second
to the object mode, when I move the object, the origin point
will move with it. But in the Edit tab, I
can move them separately. So here's what I'm gonna do. I'm going to hit J, z and move it a little bit up and just make sure basically to make this point somewhere in
the bottom of the trunk, this is not the most
precise way to do this, but it is more than enough. And yeah, this basically
is our tree right now. And we made sure that the
origin is in the bottom of the trunk head tab
to exit the edit mode, now we need to do a little
bit of shading and also, it is also pretty simple. From here, I'm going to jump
to the shader editor, okay? And as you can see,
blender already connected all the
different nodes we need. Because one of the benefits
of important images as planes is that it will
create the material for us. If you remember, we actually rendered a normal map
which we need to use. So here's what I'm gonna
do. I'm going to go Shift a and I'm going to look
for image texture. I'm going to put it right here, click on Open and from here, basically because we imported
the trees are one color, I'm going to also import re zero-one normal,
double-click on it. And from these settings, make sure to change
the color space from sRGB tonight in color because the normal map
is not colored data, it is basically hide data. And after doing this,
we need to connect this normal map with
a normal socket, but this is a yellow one
and this is a purple one. So we need to convert
this yellow data, which is a covered data
into a normal data. How can we do this by
adding a normal map? Note, this is really easy, and basically I will connect
the color to the color because they're both yellow and they connect the
normal to the normal. And this, as you can see, will give us some more
details in our tree. Now some stuff you might
say, like Hey, seen, but it is looking somehow weird Actually that's not a problem
related to the normal. It is actually a problem
related to the roughness. So make sure to bring
your roughness up to one. And boom, this is now looking
way, way, way better. We are going right now to
basically use the word normal, which tell blender what's
up and what's down. So make sure to
select your trees or when normal hit Shift D
to duplicate this node. And from here, click on
Open and open the World normal and also make sure that the color space is
set to none color. We're going to mix this
one with this one. You can definitely add a combined color node
and all of that. But here's another handy
shortcut that you might want to use, hit Control Shift. And by clicking on
the rightmost button, you can drag over two nodes
that you want to connect. And when I release, Boom, I combined both of them. Isn't that sick. But from here I'm
going to change the type from x to overlay, and I'm going to drag this
number up to one and boom, this is my tree right now. And as you can see, when
I rotate around it, it is giving me
somehow a 3D look, which is absolutely sick. I guess. Another thing that you
might actually want to do, either you can bring this number up to
something like ten, which will make the effect way, way more strong or make
it more subtle like e.g. 0.5, which will give you
a result more similar to actually like you're not using a normal map in my case, I guess I'm just going
to leave it at one because I think it looks good. Yeah, that's basically it for how we can
texture these tree. Now, of course, you
can go crazier with this shading setup and all of that and add some translucency. But to be honest, for
the sake of keeping everything simple and grounded, I'm not going to dive deeper
into nodes and all of that. The only thing I wanted
to say is that it is not hard to do all of the stuff. It will just take a little
bit more time basically to find the specific values to
get a better looking tree. But for our purposes, this will be more than enough. The only thing we need to do
right now is basically to do the same process for
all the different trees. And this is actually not that hard. So here's
what we're gonna do. I'm going to rename
this tree 012, something like trees or one, remove the word color. And from here, I'm also going
to remove the word color. So basically we do
have a plane called 301 with a material called 301, I'm going to hit Shift
D to duplicate it and hit the right mouse button
to cancel any movement. And I'm going to rename
this decrees or two. And I'm going to
create a copy of this material by clicking on this small button right
here, click on it. And right now we created a new material which I'm
going to call it 02. We created an actual copy of
the material of the tree 01. This will have a material called trees are one and this
is Teresa or two, right now, both of
them are identical. So we need to go to
make sure you're selecting the tree 02
and the material 302, we're going to change
the image right here, which drives the
color Looking of the tree because it is a copy
of the previous material, as you can see right now,
it is called 301 color. We're going to change
this to 30 to color. And also in the normal map, make sure it is 302 normal for the world
Normal, keep it the same. So if I just hit J x, this is our secondary. Boom, that was easy. Right now, I'm going
to hit Shift D again, and let's move it on the x-axis. And I'm going to rename
this to trees or three. And also I'm going to create another copy of this material
and let's call it 303. And the same thing,
we need to change the image of the color 0-203. And from here make
sure also you change the normal two trees
or three normal. This is tree number three
and Shift D on other time. And let's rename
this to 304, boom. And also we need to create
a copy of this material. Click on it and let's
change the name to 304 and we need to
replace these images. Click on this and let's import
304, which is this one. And also true 03 normal, it needs to be
treated for normal. And boom, now we do have four variations of
different trees. And as you can see when
I rotate around them, it is almost there looking 3D. Yes, they are to
the three images that they will give
us the illusion. Like they are actually 3D trees because they
will be really small. And now we're seeing the
only thing that we need to do right now is basically to select all of these
trees and hit Alt J to basically
resist their position. So right now all of them are
in the middle while yes, in are you doing this? Because when scattering
stuff on a surface, blender needs all the
different elements to actually be on the center of the
scene for whatever reason. So that's why we're putting them in the center of the scene. And the other thing,
I'm going to change the name of this collection
from collection, which is a pretty creative name. I'm going to change them to a more creative name,
which is trees. So later on we will be actually, I wrote three,
E's, actually two. Alright, so let's
run when I will import this collection
from this blender file, I will know that
I need to import the collection named trees. The last thing you need
to do is basically to go to File, Save As, and I'm going to
save it as two d, three planes and boom, just click Save As, and yeah, these are our two
dash three planes. In the next video, we're
going to import them to our scene and scatter
them on our mountain. Finally, our journey in
creating trees is over. But yeah, I think it will save us a lot of rendering time. I will see you in the
next video where we will actually scatter those
different tree planes. This will be really nice and we will use some geometry
nodes for that. I promise you it will be easy. Hello, We'll see you
in the next video.
12. Scattering 2D Trees: Hello and welcome. In this new video where
we will basically scatter these different three planes
on our Main Landscape. Okay, so this is where
we stopped last time basically by creating
these 2D tree planes. And as you probably remember at the beginning
of this course, we created the terrain and we created its material
and all of that. So right now we're going
back to that blender file. First of all, make
sure that you've saved your file that belongs to the 2D tree planes that
I'm going to go to File Open in the
resources folder, I will have high land zero
for this is basically the last step we did when we
were creating our terrain. So if you're going
to use my files, you can open
Highlander zero for or in case you saved your
own work previously, just make sure to open
that blender file. In my case, it is called hyaline zero for Double-click on it. Let's wait for a
second for it to open. And boom, this is
our blender file as we left it the last time, I'm just going to jump
to the render view to see how the whole
thing is looking. And boom, this is
our environment from the last video are actually from when we were creating it. So the question right now, how can we scatter those different three
planes on our landscape? This is gonna be
actually super simple. The only annoying thing
is that we need to tell blender basically where
to put these trees. So here's what we will do. I'm just going to jump
back to the normal view and I'm just going to do this
to exit the camera view. And these are our
different drain pieces. And actually I'm going to show all the overlays to
make our life easier. And let's start
basically with this one. This is the main terrain piece
that is in the foreground. I'm going to hit
the Tilde key to basically isolate it
so that I only see it. And let's see how we can
scatter our three planes. First of all, in order to
scatter is those three planes, we need to import them. So go to File append, and from the list
append you will have here something called, let's just jumped
to that list view. Do the three planes. This is the blender file we create that contains the
two, the three planes. So double-click on it. And from here you will
have different folders of all the different elements
that exist within that folder. As you probably remember, we actually created a
collection called tree. So inside collection you will have this collection
called tree. So technically when we will basically on it and hit Append, Blender will import the
collection called tree with all the objects
that are inside it, which are basically the trees. So make sure to click on trees
and then append and boom, this is the collection
that does have the trees. And just to be sure, if I just jumped to
the rendered view, as you can see, our
trees right now are here with the material
and all of that. The really nice thing about this workflow is that you can create different blender file for different assets that you
will use that in the future, all you have to do is
basically to append them, just like the way
you saw right now. I'm just going to disable
this collection for now. And actually I'm going to
create a new collection, or boy, it created
it inside this tree. So let's hit Control
Z and let's create a new collection and
let's call it e.g. assets, basically the
assets we will use. And I'm going to select
this entire collection and I'm going to move it
inside of assets and boom. So right now I have a
separate collection for all the assets files in case
they want to disable it, all they have to do is basically
to just click on this. Right now, start
scattering those trees. How can we do that? Well, there are multiple
techniques to do this. The old way in blender
was basically by creating a particle
system and all of that, which honestly, I
absolutely hate because it does have a lot
of settings and it takes time to
get a good result. That's why we're going
to use geometry notes. And I know a lot of people
are scared of Geometry notes. I always say that,
but actually once you understand the
concepts behind it, it is actually super friendly and way easier to work with. And let's say more logical
because you're the one building the systems and you
know exactly what you want. In this video,
we'll learn how to distribute elements
using geometric notes. And believe me, it is
gonna be super simple. Here's what we will do while I'm selecting these three planes. I'm going to jump to from the shader editor to the
geometric node editor. Yeah, this one right here. So click on it and
we're going to click on New to create a new
geometric node tree. And by the way, if I
jumped to the modifiers, you will see that I have added also a geometric node modifier. Before I start
doing all of that, I'm just going to disable
the subdivision surface from the viewport by
clicking on this just so that we make everything
faster for now. Later on, we'll basically get it back or actually,
you know what, let's get it back
here and maybe let's lower the 3D view port
to something like two. Your computer will not struggle in rendering what we
will do right now, Let's call this
geometric new tree, e.g. let's call it tree
scatter underscore, or let's call it Every
for the foreground, because you will create
different geometric no trees for the foreground and
the background elements. You will understand what I'm,
what I mean in a second. So basically this is our
geometry node right now. It does have a group
input and output. This is the original
geometry, the group input, and basically it is getting outputted here will do
different operations. So how can we scattered
elements on a surface? Here's how it works. First of all, I'm going
to add a node called Distribute points on faces. And as the name says, we are going to distribute
points on a face, which mean that just so that
you can see what it does it do if I take the geometry
and plug it to mesh. This is our original
geometry by the way. And they take this
and plug it to geometry or no, as you can see, basically blender
distributed different points on the surface that we created. I can increase the
density of them, e.g. and I can change this C2
have multiple variations The most important
thing is that right now we distributed points on faces. And the thing is, all we need to tell blender
right now is that hey, blender, just
replace these points wherever the stuff that we
want you to replace web. So in this case, we want
to tell blender that, hey blender, we want you to replace the points
with the trees. So all you have to do
is basically to drag this collection called
tree is right here. Boom. And we will add another node
called instance on points. So go Shift a and let's
look for instance on points where he's
instance on points. Yeah, I'm going to
put it right here. Basically this node will
take the points that we created using the
distribute points on faces, and it will put the
instances on them. I'll say this again. The instance on Boeing snowed. We'll put the instances
of the points. What are the instances? In this case, it is basically the collection called trees
that does have the tree. So if I take
geometry and plug it to instances, look
what will happen. Boom, I will have plenty of
different planes right now. As you can see,
they're just sold planes because I'm not
in the rendered view. But if I jumped to
the rendered view, as you can see, we're
having a lot of trees. Now. Probably there
is some black areas. That's because there is a
transparency problem because the light is trying to penetrate through multiple
transparent layers. That's why it is getting black, but we will fix
that later easily. But yeah, this is the most
simple version of how to distribute certain elements
on a certain surface. But we're going to spice
it up a little bit to make it basically
look way, way better. First things first, I want also to see the dream
that we created. As you can see right now, the data flowing through here is basically our
original terrain. We transformed it into points and then we
put the instances. So basically lost
our original terrain even though we want
it to be back. So how can we do this? Well, this is actually
super simple. I'm going to add another
node called joint geometry. And I'm going to
put it right here. And as the name states, it will combine
different geometries. I want to combine these trees
with the original terrain. And where can I get the original terrain
actually from this? Because as you
probably remember, the thing that is going
out of this node is actually our original geometry that we created, the
original terrain. So technically, if I just take geometry and plug it to
the joint geometry node, boom, I will have the
terrain right here. As you can see, it
is really tiny. The reason for that
is that actually the drain is really small, but actually the trees
are really huge. So we need to change the scale. We can either e.g.
change the scale, e.g. let's say to something
like 0.2 and boom, they're still so huge. Let's try 0.1. Okay, this is slightly better, but right now all the trees will have the exact same scale. So to add more variations to
the scale of these trees, we can add another
node which is called the random, random value. I was going to say
value, random, random value, which does have
a minimum and a maximum. So we will set up a minimum
scale and a maximum scale. If I take this and
plug it to scale, now our scale will go 0-1, but we don't want that. Let's say we want blender
to put the scale from e.g. 0.05 to something,
let's say like 0.1. And right now we will
have trees where scale that varies from 0.05 to 0.1. And actually, this is
still really huge. If I hit zero to jump to the rendered view or actually
to jump to the camera view. As you can see, these
trees are still really, really huge, so we
need to change that. So let's try lowering
these numbers even more. Or if you want to be a
little bit more fancy, Let's add a math node. This is gonna be
simple, don't worry. Let's add a math node and
let's put it here and let's change the operation
from add to multiply. And basically when I
change this value, I will be able to change the scale of the
different trees. So let's try 0.1. This is really small. Let's try 0.2, okay? There is a tiny tree right
here. That's the 0.3. Yeah, I guess this,
Let's try 0.2. Let's leave it as 0.2 for now. So right now we do have these two nodes that
control the scale. Basically the first
one will give us random values and then this
one is like a multiplier. So if we want to
make them bigger, I will bump this number
up as you can see. And if I want them smaller, I will basically put
this number down. And the really nice thing
is whenever I change this, I'm already generating
random values for each tree, so I will keep the variation between the sizes of
the different trees. The second thing that we need to do right now is basically to tell blender where to
distribute these trees. You might wonder why is that? Well, because as you can see, our terrain is really huge and
the trees are really tiny. So in order to basically
fill this entire area, we will need like huge number in the density which
something like probably, I don't know, maybe 500 or 500,000 or something like that. And if we do that, probably
Blender will crash. So to fix this problem, in the next video,
we're going to do, or actually we're going to paint the areas we want the trees
to be distributed on. We don't need to distribute e.g. trees right here because
they will not be visible. We don't need to distribute areas right here because
they will not be visible. But we need to
distribute trees, e.g. right here and right here
because they will be visible so that we can
optimize our scene. And basically we
don't crash blender. I will see you in the next video where we will do all of this. So yeah, see you
in the next video. Bye everyone.
13. Weight Painting The Tree Areas: Hello and welcome. In this new video where we will basically do
a little bit of weight painting to tell blender where we want to our trees. Okay, So this is where
we stopped last time. Basically, if we are going to
render a hundreds of trees, it won't make sense
that we render trees in areas that we will not see simply if I just hit zero from the number pad to
jump to the camera view, I don't need to render any trees that are
outside of this box, which basically the
camera will see all the trees that
will be outside this box will just slow us down and make the render
basically slower. And it will make our life
in the 3D view port harder. And the second reason is generally trees will
not grow on these e.g. and these edges. So it will make sense
to limit the trees to certain areas in a
way that is more similar to how trees in
real life will grow. And as usual, there are
multiple ways to do this. There is an approach that I
did in my previous courses, which basically by creating elaborate nodes setup right
here in geometry nodes, which a valid approach. But for the sake of
making everything easy, within this course,
we are going to use some actual weight painting. Now, of course I
know some of you, maybe they don't
know what his white painting or what does it do? Or maybe it is some
complicated stuff. It is not weight painting is just a way to tell
blender basically where to distribute
certain elements and where you should not
distribute these elements. So in our case,
I'm just going to get back to the
viewport shading. And let's also exit my 3D view port by
moving in 3D view port. And I'm also going to disable this geometry node modifier. And boom, right now, this is my mountain. I'm going to select it
and make sure to jump from the object mode to
the weight paint mode. As you can see right now,
everything is blue and blue in the weight painting
mode means that it is zero. So here's what we will do
using this really nice brush, which by the way, you can access the settings of this brush. From here, I'm going to paint the areas where I want
to tell blender that, hey, blender, I want you to
distribute trees right here. Here's what we'll do, e.g. if you remember my camera
actually look somewhere from this angle and basically there will be
some trees right here. So I'm just going to
paint on the areas where I think there
should be some trees. So here is a really nice trick. I'm just going to drag from here and open another 3D view port. And I'm going to
click on zero on this 3D view port or
jumped to the camera view. So basically by doing this, I will be able to see
exactly where I'm painting. And at the same time, if you jumped to the
overlay options, you will have here an option
called weight paint opacity, which were basically
control the opacity of this overlay so that we can see actually in a clearer way, our mountain is
actually looking like. So let me just bring it also a little bit more to
something like 0.5. So this setup would
basically allow me to do some painting from here and see basically the
result right here. So I will be able to
control in a better way where I actually want
to do wait painting. So probably and it
also paid right here, something like so I'll probably need to do also little bit
of weight painting here. And also probably I will need to draw it a little bit
here on the background. So I'm going to do that here. Let me also bring my
opacity a little bit down so that it looks good and clear. Let's do something like So. I guess also, if you notice there is
this edge right here, probably there will not be any trees basically
growing right here. So I need to change the
radius of my brush from here. Let's make it smaller
and make sure that your weight is set to zero so that we will be
removing from this area. So just went right now
when you start painting, you will be able to
raise some areas. Perfect. This is looking
more or less decent. If you want to refine
it a little bit more, you can bring your
weight up to one and do a little
bit more painting basically to be able to
refine the selection we made. So right now we did our weight painting and only have to do is get back to the
object mode and boom, right now we've actually
finished our white paint. And just for context and
don't follow me in this. If I just jump back
to the white paint, basically the areas
that are blue, which are these
areas right here, as I mentioned, blue
means zero and red means basically a full opacity or
let's say your full string. And all this gradient, basically from blue to red, is basically the
gradual transition from no strength
to full strength. And that's how you can
basically tell blender, where do you want actually
to distribute your elements? Now, let's get back
to the object mode. And while I'm selecting
this terrain 01, if I just jumped to the
object data properties, you will have here something
called the vertex groups. In other words,
this vertex group is basically where we stored these weight paintings or these weight map
that we just drew. Basically the stuff that
we did in the weight pain. These red stuff are stored in
this container right here. It is called group. In my case, I'm actually just
going to rename this e.g. Tree density and let's
also add 01 so that basically Blender will not get confused if we call
another thing, greed and city and just hit. Okay? And after doing this, I'm going back to
my modifiers and I'm going to enable the
geometric node modifier. From here, I need
to tell blender, basically using nodes
that hey, blender, I want you to use this tree density weight map to drive the distribution of
these different trees. In other words, I want
to blend or to use this weight map to drive where basically it is distributing
these different trees. Here's what we will do. Make sure you are in Geometry
nodes and I'm just going to zoom in on this distribute
points on faces node, which as you can
probably remember, it is the node responsible on putting the points
on this terrain. So if we somehow
figure out a way to tell this node where
to put the points, we will be able also to tell blender where
to put the trees. I will say that again, this distribute
points on faces node, it is distributing points
on the entire terrain. If I just hit Control Shift and click on it, as you can see, it is distributing points
on the entire terrain. So if we can figure
out a way to tell blender where to put these points using this
tree density group, who will be able to achieve
the result we want. So here's what we will do. I'm just going to zoom out a little bit and I'm
actually going to stay basically looking at
the distribute points on faces node from here, as you can see, there is
an option called density. If you look right here,
it is a great socket, which mean that it accepts
black and white values. And if you focus
right here, there is this option called random. Basically random,
we'll distribute points randomly on the surface. But when working with vegetations
and especially trees, this form of distribution
doesn't look that realistic. Instead of using random, we are actually going
to use Poisson disk, which is just a fancier
way of how you can distribute your elements
on a certain surface. The really nice thing about all of that is that you will have basically this density maximum
and the distance minimum. So you'll all be able to control the distance between
the different elements. Because generally, trees will
not grow at the same place. Probably they will grow 1 m, 2 m, 3 m away from each other. So this will allow
us to get there more realistic
distributions of our trees. The most important thing
right now is that you will have this option
called density factor, which as the name
states that will basically control the density of the different points which
will later become trees. If I can figure out a way to use this tree density and plug
it to the density factor. I will be able to tell
blender the table and I only want you to
distribute the points, which will basically
later become the points only on the
tree density areas. Here's how we will do this. I'm going to take
this density factor and take it to this point
right here on the group input. I'm just going to
slam it right here. And right now, if I just
jumped to the Modifiers tab, you will have here something
called density factor. Basically we
transfer this option that used to be right here. We moved it to an
option that we can basically control from
the Modifiers tab, I'm going to click on this
small icon right here, which looked like a spreadsheet. I'm just going to click on it. And right now we've changed
it to an attribute. And that's just a fancier way of saying that we can write now use these groups that we
created using the weight paint. Let me get back to the modifiers and if I just click here, you will have right here
something called 0.3 density 01, which is exactly the
weight paint map we drew a couple of minutes ago. So all we have to do is
basically to click on it and boom, as you
can see right now, these points are not distributed
on the entire surface, and you will see
that in a second. Now, here's an important thing when working with
geometric nodes. And basically because
we're going to start cranking this number up, Blender can go
haywire and basically will crash and it will
lose all of our work. That's why when
you're distributing elements using geometric nodes, I would highly
recommend that you save your file more often. That's why right now
I'm scared like a lot. That's why I need
to save my file. So I'm just going
to go File Save As, and let's call it
Thailand 06 and save as perfect right
now if blender brush, I don't need to re-record
this entire video anyway. I'm going to bring this density maximum to a bigger number. Let's say something like 100 or let's say something like 200. And as you can see, the points are limited to certain areas. If I just take a look around
the joint geometry node basically by Control Shift
and clicking on this boom, or actually I don't need
this viewer node anymore, so just click on it and
hit X to delete it. Basically these planes are, the trees are right
now limited to only the areas where we
did our weight paint. And probably we can increase this number a little bit more. Let's say something like 500. And let's also jump
to the rendered view from here to see how it
is actually looking. Okay, this is starting
to look decent. There are a couple of
things that probably I will need to change
about these trees. Mainly the orientation
because right now they're facing somehow
in this direction, which will reveal the fact
that they are just 2D planes. And basically I need to figure out a way of how to make them point to the camera so they look like they're actually 3D. That's number one
and number two, I will probably need to increase the density
of the trees. And number three are probably need to make
these trees smaller. And that's exactly what we will be doing in the next video, where we will basically finalize the look of all of
these different trees. So yeah, make sure to save
your file and I will see you in the next video. These out
14. Finalize The Look of The trees: Hello and welcome. In this new video where we will finalize the look of our trees. So I'm just going to zoom
a little bit out from my geometry nodes setup and
here's what we need to do. The first issue that
we need to address is the orientations of
these different trees. Right now they are
pointing like this. And this is not good because
as I mentioned before, this will reveal that
they are just 2D planes and we'll reveal the fact that we were cheating
and this is bad. So what we need to do is basically to figure out a
way to tell blender that, hey blender, we want you to make these trees points to the
location of the camera. And how can we do this? Now, this is actually super simple and it is not
that complicated. And straightaway,
I'm not going to pretend that I figured
out this by myself. I actually found this
blender StackExchange boast of someone asking
for the same thing, which is basically how to make your different
elements points to the camera or to
a certain object. And there was a
really nice answer, which is right here
by Mr. Hugh bow. I don't know how
to pronounce this, but thank you, sir. And that's exactly the
same setup that we will use and it does
actually work pretty well. So here's what we will do. The first thing, I'm just going
to give myself more space to actually add more nodes so that it won't
be that a messy. Let's move these here
and move these here. As you can see,
there is an option right here called rotation, which will control
the rotation of all the different
instances at this point, what are the instances?
There are trees. So basically this
rotation will allow us to change the rotation of all
of these different trees. But there is a problem if I just jump to the viewport
shading so that you can see in a clearer way what's happening as you can see
when I start rotating, all of them will rotate at the same time and
this is not good. And here's why. Yes, these e.g. these trees right now are
pointing to the camera, but these ones, they should actually going
something like this. Yes, these ones would
point like this, but these ones, they should
be actually slightly rotated. So the main problem with
this approach is that this rotation value will change the value for all the different
trees are the same value. So we need somehow to figure out a smart way to tell
blender that tape, e.g. for the ones that
are right here, point them to the camera. And for these ones right here, they should actually point
something more like so. And that's what this snowed
setup will allow us to do. Here's what we will do. I'm going to go Shift a and let's look for a node
called position. And I also need the location
of my camera because all of these different trees
should point to the cameras. So I'm just going to
bring this camera from my outliner
to geometry nodes. And let's make them closer
because they are friends. And I'm going to add another
node called vector math. We're all scared of math. I know from here
I'm going to change the operation from
add to subtract. Yep, subtract. And I'm going to take the
position to the first socket and take the location
to the second socket. And after doing this, I'm going to add one last node, which is called a line
ruler, the vector. And I'm going to take the
vector and plug into vector. And I'm going to take the
rotation and plug it to the rotation in the
instance on points note, now, uh, probably
everything will go haywire and somehow they will start
acting a little bit weird. In my experience, you
will probably need to change this from x to y. And also you need to
change the pivot from oto do Z because we want to
rotate them on the z-axis. And as you can see
right now, they're all pointing towards one point, which is the location
of the camera. And this is exactly
what we want. This is the node setup that
you can use in the future in order to make your instances
point to a certain point. And the last thing we are
going to work right now is basically to finalize the look
of these different trees. So let's do that really quick. First things first, let
me go to file and save my file because I'm really
scared of losing my work. And I'm going to jump
to the rendered view. And let's hide all
of these overlays. And there are a couple
of things that we need to start
addressing right now. The first thing I'm going to change is basically from here, I'm going to choose the
option pick instance. You might wonder why I'm
checking this option. Well, if you remember in
our trees collection, which are basically
the duty trees, we do have four
different variations. The thing is Blender by default
will only use one tree. And we want to tell blender
that here, blender, we want you to pick different reason from
that collection. And that's what this option
pick instance will do to basically each time we'll pick a random tree
from that collection. So this will give
us more variations. Number two, I still
think that the scale of these trees is a little
bit too huge for my taste. That's why I'm going to bring the scale from this
multiply node, let's say to something like 0.5. I still think they are a little bit too huge, so let's try 0.3. This is way better for my taste. Let's go to File and Save. The last thing we need to
start cranking the density of all of these different trees
from the density maximum. And now you need to be careful
there is a high chance when you start inputting
crazy huge numbers. There is a big probability
that blender or crash. That's why I would really
highly recommend that you save your file right
now just in case. And here's what we will do. We are going to
bring this density maximum to a bigger
number. Right? Now, it is 500. It is really, really low. So let's crank this number two, basically by ten, which
will make it 5,000. 5,000 is a little
bit over killed. So let's kept it by
health to 2,500. Let's try 3,000. Alright, I guess I'm
just going to leave it at 3,000 for now. And maybe let's also
bring the scale down from this multiply
node to something like 0.2. Yeah, this is way better
and I will probably need to scale or actually add to the density to
something like 5,000. If you bring this
distance minimum to one, Let's see how it will look like. Let's try 0.1 or
let's say one again. Maybe bring this density also
up to something like 7500. Okay, I'm just going to leave it for now the way it is right now. This is looking more
or less decent. You can probably spend a little bit more
time playing with these values that basically
the density of the points, which is basically the
density of the trees. And at the same time play
with the scale until you get basically the perfect values
that work with your scene. But the most
important thing from this video is that right now, we already know
how to distribute these different trees and how to make them point
to the camera. And right now, it is just a
matter of changing values. Spend a little bit
more time playing with these different values until you get a result
you are happy with. And I will see you
in the next video where we will distribute some more points on the other
terrain, which by the way, it is not visible
because we need to hit the slash key from the number pad to show all
the different elements. Boom, we will probably need to distribute some more
trees on this terrain. And after that, we
will be ready to start finalizing this scene. So yeah, I will see you
everyone and the next video
15. Add Trees to The Background Mountain: Hello and welcome everyone in
this new video where we are going to add some trees to
the background mountains. Alright, so this is where
we stopped last time. And as I said, we are going to
add some trees to this background mountain
that is lying right here. So first things first, I'm
going to hit the tilta key to basically just see
this background mountain. I don't want to be distracted
by all the other elements, and I'm going to zoom
a little bit on it. And let's just bring
this just like this. And maybe also I'm going to
jump back to the solid view. And from here I'm going to
jump to the weight paint. And I can also from here, I'm already in weight
paint, which is good, but the only thing I might do is actually to jump to
the overlay so that I will be able to see also the painting from
the camera view, from this view right here. I might even make
it slightly bigger. And also because this
is a little bit too blue and I'm not able
to see all the details. So I'm going to jump right
here and right here you will have an option called
weight paint opacity, which as we mentioned before, it is responsible to control the opacity of this
blue areas right here. So just go here and let's lower the opacity
to something like 0.7 just so that we can get a closer look to what
we're doing right now. We are going to do a little
bit of weight painting. And here's the thing. Instead
of basically painting areas that Where we will not
be able to see some trees. I'm going to limit the
weight painting to only these areas
that are right here. So here's what I
will do. I'm just going to zoom a little bit here and just paint
over these areas. Now, if you find your
painting really slow, That's probably because of
the subdivision modifier. So here's what I will
highly recommend. Just make sure to drop e.g. the levels of view port
from something like 42. And basically, it is not
that high-quality right now. It is not that dense. That is not a big deal
because we can always crank this number up again and we'll just lowering
it for the sake of having faster weight
painting process. So yeah, let's just
do that pretty quick. I'm just going to paint
over areas where I think that there
should be some trees. Now, probably, as you
can see from here, it is only now, like I can only see
these edges right here. These edges that are right
here are the ones right here. So basically all of this
area that is right here, it is actually hidden
by the other trees. Even these are not necessary and I'm going
to deal with that later. But for now, let me just keep on painting on the visible areas, at least where I expect
to see some trees. Alright, this is
looking super ugly as a shape that it is totally
okay because it works. The only thing I'm
going to do is to jump to the tool settings. And from here I'm going
to change the weight zero so that I will be able
to erase some areas. And I'm going to erase
these edges right here because they
will not be visible. So let's do that pretty quick. Alright, this is looking
good and decent. We don't need to stress
a lot about that. And as usual, if you
want to polish it a little bit more and
be more meticulous, you can always do that later. Let's just jump back to the Modifiers tab and I'm going to crank this number
back to four. And let's get back
to our usual view, which is the object mode. And also make sure to save
your file just in case. Okay, So we finished doing
our weight painting. And the only thing
that we need to do right now is basically
to distribute the trees on the areas where
we did our weight painting. And just to be organized, I'm just going to jump to
the object properties. And as you can see right here,
I have this vertex group. It is called group. This is our weight map
that we just drew. So I'm just going to change
its name to something like BG tree density and hit Enter. And let's think about it. What is the element
that is responsible to distributing the trees
on the first terrain? It is the geometric
node modifier. If I just jump here,
as you can see, there is a geometric node
called HDRI scatter for ground. So if I just somehow
figure out a way to copy the setup to the background
Mountain, which is this one. I will be able to
distribute the trees. And this is super simple
because as you remember, I already mentioned
that when it comes to the geometry node trees, they are like the materials. You can assign them
to multiple objects. Same thing for geometry nodes, they are just trees. And I'm able to assign the same geometric tree,
two different objects. So from here I'm going to
click first of all on new. Right now I do have
my geometric node added to this object, and I'm going from here to
choose three, scatter FG. I'm just going to
click on it and boom. As you can see, I covered this entire
mountain with a lot of trees. Now, as you can see, basically this entire terrain is covered right now with trees. And we need to fix this issue. We only want the
trees to be visible on the areas where
we want them to be. As you can see right
now, this object as the terrain zero to all areas
of the background mountain. And they added to it
the three scatter FG, which is basically the node tree that I created for
the foreground. I want to have, oh, no tree for the foreground and another one for the
background. And here's why. If I change these
settings right now, these settings
will be applied to the foreground and
the background. And this is not good.
I will probably need lower density right here
and higher density. So in a perfect world, I would love to be able to
control the foreground, basically values
of the node tree on their own and control the values of the notary of the background mountains on their own. This
is pretty simple. All we have to do
is basically to create a copy of this node tree. And here's how we do
that. I'm just going to click on this small
button right here, which is called Copy
geometric node group. If I just click on it right now, you will see that first of all, the name change to
three, scared of g001 Which means that
this is a copy of the node tree that we
created for the foreground. So when a change these
values right here, they will only change for the background mountains because I'm working on a
different node tree, not the same one that I
created for the foreground. I'm just going to
change it from e.g. from f G2, BG and hit Enter. And right now I'm
ready to tell blender, the table lender, I want
you to use the weight map. How can we do this? This is pretty simple from here. Make sure you are in
the Modifiers tab. Make sure that in
your density factor, which is the property
we created to input our weight
map, click on this. And from here I'm
going to change from basically empty box to the BG tree density and just
click on it and boom, right. Now we only do have our trees visible in the areas where
we did our weight paint, which is exactly what we want. And as you can see, if I just
jumped to the render view, but this is looking
pretty decent. The only thing I, actually, I might do is to probably increase the density of these
trees a little bit more, which is absolutely simple. It is as easy as going to make sure you're selecting your
background mountains. And from here in the
density maximum, we can crank this
number to something like 10,000 and boom, right now we're having
way more trees. The last issue that I want
to address is related to these trees that
are right here to understand
exactly what I mean, they are to black and they look like they are really
dense. Here's what I mean. If I just zoom on these
trees that are right here, they look too dense. As you can see,
they are too dense. The main reason for this problem is that basically
the light is trying to pass through different transparent planes,
as you remember, because these trees are just
plains and this is what's giving us this illusion
that they are really, really dense and this actually
look ugly in my opinion. The reason for that
being we do have a really nice tree
density right here, e.g. in these areas right here
and these areas right here. But this is like looks too ugly and to dance for my taste. So we need to lower the
density on only that area. Now, of course, there are
multiple ways to do this, like anything in Blender, but we are going to do
really simple thing. It is not that complicated to lower the density
of these trees. Here's what we will do. I'm going to hit the tilde
key again while I am in this preview to basically
show all the elements, again, I'm going to select my
foreground mountain, and I'm going to hit
again the filter keys so that I can only focus
on this element. And from here, I'm
going to jump from the object mode that
the weight paint mode, which as you can
probably remember, it is where we painted the areas where we want our
trees to be visible. I'm going to jump from
here to the normal view. And I'm going to disable the geometric node Modifier
by clicking on the screen. I will only hide it
on the viewport, but we'll be able
to render it later. So all I have to do is basically to figure out a way to make the density of this
area right here slightly smaller or less? Yeah. Make the density
less or smaller. I don't know. Anyway, this is really simple. All I have to do is
basically to jump from here to the brush tool
of the white paint. And I'm going to e.g. to
drag the way to the hapless, say something like 0.5. And right now, if I just
paint over these areas, I will not remove it, but I will be able to make
it smaller or lesser, whatever it is, I will just basically lower the
value of the density. And this should give us exactly the look what
we're looking for. Basically to lower the density
on this area right here. I think that this is
pretty simple, okay? I'm trying to make
it as green as possible because I'm
a perfectionist. Everyone says that, anyway,
this is looking good. Let's try to activate the modifier again
by clicking on this. And maybe let's hide all the overlays from here and
jump to the rendered view. And yeah, I think this
is way, way better. This is looking more realistic. And as you can see, the
tree density right now, it is not as heavy
as it used to be, and it is more
comforting for the eye. And also I will not have that ugly black blob
that used to be there. So yeah, this is an
issue that we fixed it. So let's just jump back
to the white paint, to the object mode and boom, right now we added
our different trees basically to the foreground
and the background. And in the next video, we are going to start finalizing this scene
for the final render, basically by adding some
background mountains. So yeah, I will see you in
the next video, everyone. And also make sure to
save your file as usual
16. Add Background Mountains: Hello and welcome. In this new video where we will basically add some
background mountains. In this video, we are going to finalize the look of our
different mountains. First of all, by adjusting
a small setting in our background mountain and you will know what
I mean in a second. And secondly, by adding some
more depth to the scene, by adding some
background mountain. And I will show you a
way of how you can do this almost without
increasing your render time. Because if we are
going to duplicate the scene or these
mountains multiple times, That's a great
recipe to increase our render time significantly. And we might
encounter some issues when basically rendering
blender might crash. So let's do this. The first thing I just want to mention is that first of all, the background mountain is
not visible here because the last time I jumped to the local view in the
foreground mountain. So I'm just going to hit the Tilde key to just show
all the different elements. And here's the problem
I'm talking about. If I just zoom on here, you will notice that all of these trees that are on
the background element, they are pointing
like this, okay? Even though my camera
is right here, so they should actually
point to the camera. And I need to solve
this problem. This is actually pretty simple. All we have to do, make
sure you're selecting your background mountain
or it rains there too. And right here in the
geometric node tree, you will have here,
as you remember, an option for a line
older two vector. If you remember, this is
the node responsible to aligning all the different
tree planes to the camera. And all you have to do is
basically to just change the axis from y to z
and boom, right now, all of these planes are
pointing to the camera perfectly and we solve
this issue right now, let's move on to creating
the background mountains. Alright, everyone, here is
what we are going to do. I'm going to create
a new collection and I'm going to call it to De Zhe mountains
and hit Enter. This collection
will basically be the main driver for all
this stuff related to the 2D mountains that are just 2D planes basically,
here's what we will do. I'm going to select
both of these two, basically this one and this one. And I'm going to hit
Shift D to duplicate them and then hit the right mouse button
to cancel any movement. And then I'm going to
hit M to move them to a new collection and
choose to DPG mountains. Boom, right now I created
another copy of these terrains, but in this new collection, I'm going to disable
the first collection. So I only can see
this 2D BG mountains. And I'm going to remove the
geometric node or actually, let's just disable it like this. And also in the
terrain there too, let's just disable it. So I will only have the terrain pieces and make sure you're selecting
this collection. I'm going to go Shift a
and add another camera. And I'm going to
rename this e.g. 2D, BG mountains hammer
super creative names. But the problem is that
whenever I will hit zero, I will still jump to
the first camera, the camera that we
created originally, the one that we will
use for rendering. We need to solve that issue basically by jumping
to the scene. And right here, you will find
an option called camera, which is what Kim or a blender will use to render the scene. In our case, it's still
using the old cameras. So we need to tell blender
that table under we want you to use the second
camera that we created. So just click on here and
right now we're seeing nothing because probably our camera is pointing in a
weird direction. If I just select this camera and jumped
to the camera settings, I can definitely increase
the size to something like, let's say 100 meter, still not visible
when thousand meter. What is this camera
there? It is, right here Beneath
the mountains. Here's what we'll do. I'm going to hit e.g. one to jump to the front view. And I'm going to hit Control Alt zero to basically move the camera to my
point of view, e.g. if I want to move the camera
to an angle like this, I'm going to hit
Control Alt zero. In my case, I want the camera to be pointing straight
to the mountains. So I'm going to hit one, as I mentioned, to jump
to the front view. And from here I'm going
to do Control Alt zero. And right now my camera is pointing straight
to the mountains. And I can be sure
about this by just jumping to the
object properties. And as you can see, the
rotation on the x is 90. And what I'm gonna do right
now is basically e.g. to move slightly back. What I'm trying to do is
basically to put both of these two mountains
close to each other. So let's select the
second terrain and hit G, x and move it like this. Also, I can hit seven to
jump to the top view and g, y to move it somewhere
like this and do this. And maybe let's create
another copy of this bad boy. By hitting, instead
of hitting Shift D, you can hit Alt D to create a linked copy which will be faster to render and all. And let's, It's
similar, rotate z, something like so
that's really perfect. Maybe I can select all of
them and hit S and Z to scale them on the z
axis a little bit to make them bigger and boom, this is what we have right now. And right now, if I just jumped to the rendered
view right here, Let's see how it looks. Boom. I see a small gap right here. So maybe I should lower
this slightly down. Boom. This is perfect.
The whole shebang behind what we're trying to do. We are going to
render this image and we are going to put
it in the background. And because they are
really formed mountains, there is no way someone
will be able to tell like, Hey, that those
are just too deep Mountains. That's the whole idea
behind what I'm doing. Just one important thing
because we play the letter bit with the location and the rotation of the
different mountains, we need, at least
to make sure that our lighting to a certain extent matches the original scene. And just to verify this, I'm just going to disable temporarily this
to DVG mountains. I'm just going to disable
it and I'm going to enable my main collection
and I'm going to change from the
camera to the camera. Okay. So the lighting, as you remember, is coming
from this direction. We need to try to keep the same direction in
our 2D Mountain Plains. I'm going to disable
this and get back to the 2D BG mountains
and make sure also to from camera change
it to do to DVG mountains. And yeah, that's almost
the same direction. I might later change the
color to make them more orange-ish so that it looks like it is actually in sunset. But for the light direction, I think that this will work. Now, it is as easy as just, I'm going to go
File and Save As to save this blender
file just in case, let's say this plus to
make it ten and Save As. And I'm going to
render this image. This will be super simple. I'm just going to jump to
the viewport shading because that does have the potential
to slow the render. And I'm going to go to
Render Render image. And let's wait for this
2D mountains to render. Alright, our render
just finished and here's the final
result we got. And all you have to do is
basically to go to Image Save. As I'm going to jump
to the folder where I want to save in the student
resources under assets. Let's go to the mountains, PNG. And for the settings, make sure it is PNG and
make sure also it is RGBA. The a stands for alpha, so we will also render the
transparency with this image. Keep this at eight.
We don t need 16-bit, and let's give this at 15
and just hit Save As image. And right now we do
have our 2D mountains, and that is about time
to add them, our scene. And this will be super
simple. Let's just do that. I'm going to close the
render tab and I'm going to disable the CDBG
mountains collection because we don't
need it anymore. Let's get back to our
original camera and original angle and let's
enable this view again. This is our usual view
and if you remember, we activated an add-on
in the early videos. It is called Import
Images as Planes, and that's the add
on we will use to import our 2D mountains. So just go to File, Import Images as Planes. And in the assets
folder you will have to the mountains dot PNG and just click Import
Images as Planes. And this is our 2D plane, as you can see right here. It is super huge right
now, but we will fix that. Let me just jumped to
the render view and just hit R to rotate
it on the z-axis. What I'm trying to do
is basically to make it point directly to the camera. So that basically 12 point
directly to the camera in order to hide the illusion
that it is just a 2D plane, you can hit also seven
to jump to the top view. And let me just get back to the viewport shading just to save a little bit
of performance. And let's move this
somewhere right here. Let's say this will
be our first plane. And let's just jumped
to the render view to see the final result,
how it looked like. Okay, as you can see, we're adding some
mountains right here, and they look
actually kinda nice. The only thing I might
consider doing is to move it a little
bit up on the z-axis, hit G to move it on the z-axis. And let's bring it a little
bit up, something like so. That's a little bit
too much because I'm starting to see a
gap right here. So g, Z and move
it slightly down. And this is perfect. Right now we are going to
duplicate this another time to try and hide
this seam right here. If you just focus a little bit, criteria will note is that
this is the end of our image. That's why it is
somehow cut out. So let's hit seven to
jump to the top view and hit Shift D to
create another copy. And let's move it
somewhere right here. What I'm trying to
do is basically to hide that seem right there. So I might move it
a little bit in front of the other one
by hitting G and Z, Z to move on for local axis, Let's move it slightly
forward and hit G to move it on the global axis, on the z axis, a little bit up, I guess this is will
be more than enough. In our case, we added some good background
mountains to add more depth. And I'm just going to
select both of them, hit M to move them to a collection and just
create a new collection. And let's call it 2D
mountains and hit. Okay, and one last thing
before we actually finish, make sure to select this e.g. to the mountains. And let's
jump to the shader editor. Make sure you are in worldview
or it should be an object. And this is older material. Make sure that in your
material make sure to increase the
roughness up to one so that it will not look weird or the light will hit that
2D plane in a weird way. And other than that,
that's it for this video. And I will see you
in the next video where we are going to add some fog planes to add even
more depth to our scene. So yeah, I will see
you in the next video.
17. Add Fog Planes: Hello and welcome everyone in this new video where
we are going to add some fog planes to add a little bit more
depth to our scene. The fault planes are basically just transparent
planes that will act like a layer of haze or
dust or fog in our scene, which will help merge and give the depth that
we need to our scene. Because yes, we added some background mountains and we tried to fake our
way through that, but adding some focal planes will actually take it
to the next level. And surprisingly,
to be super simple, and it will not increase our render time significantly.
Here's what we will do. First of all, I'm just
going to, from here, I'm going to just
jump to the viewport shading to save a little
bit of performance. And I'm going to go Shift a, and let's add mesh, and let's add a plane. This plane right now is
really, really tiny. One I will suggest is
basically you need to increase the size to something, let's say like 2000 or let's say 5,000 m so that it will
cover the entire horizon. Okay, that's 5,000 and maybe I will make it smaller
and the y-axis. So hit Tab to jump
to the edit mode as y only scale
it on the y axis. And let's say 0.1 or let's
say 0.20, 0.3 or 0.40, 0.4 will work and just hit Enter and hit tab again
to exit the edit mode, this plane will
be our fog plane. I'm going to hit R, acts to rotate on the x-axis and type 90 to rotate it 90 degree. And that's number one. Let's hit seven to
jump to the top view. And we need to basically align it the same
way as the camera. They both need to be like this. So if you want to be precise, you can jump e.g. to the camera. So basically you can copy this number Control C and
then jump to the plane. And in your z just hit
Control V and hit Enter. And right now they are perfectly aligned as all things should be. I'm going to hit G and move it slightly to the back ground, something like So I guess I'm going to rotate it
a little bit more just so that it will basically act as a separation between the
foreground and the background. And at the end of the day,
because it is just a 2D plane, it will not show or because we are going
to create a gradient, the effect that it is just a 2D plane will
not be visible. That's what I'm trying to say. So yeah, this will
work, I guess. I hope, and I'm going to hit the Tilde key to just
jump to the local view. And also from here let's
say tilta key to just jump to the local view and let's
jump to the rendered view. This is just a really
boring to the plane and we need to create a material for it to act as a fog plane. I'm going to click on New
to create a new material. And I'm going to
call it fog plane. What we are trying to achieve is basically a gradient
that starts from white. I don't see the overlays
that starts from white and then it
will go transparent. White to transparent. Let's do this. I'm going to add a texture
called the gradient texture. So go shift a, it has to search and look for
gradient texture. This one, I'm going to add it. And if you hit Control
Shift and click on it, as you can see, it
is gradient from white to black and I
need to rotate it. I want it to be
from the bottom up. Rotate it all we have to do, make sure you're selecting
your gradient texture node and hit control D to add
a mapping note to it, which will allow
us to rotate it. We are going to rotate
it basically on the z-axis, let's say -90. And this is not what we want. We want basically the white
from to be on the bottom. So let's try 90. It is right now black. So, but technically if you
move the location of the x, 1 m or less, say 1,000. Yeah, we'll get the result. We want basically gradient
from white to transparent. We are going to turn
the black areas into transparent areas
in just a second. Yeah, this is exactly
the gradient. We want bed somehow the falloff or the gradient is somehow not. It is really short, almost
happened only on this area. We want it to be a
little bit more smooth. To do this, we can add something that a
lot of people hate, which is a math node. So just go Shift a and
let's look for math node. Let's put it here. And in the operation, make sure to change
it from add to power. And when you start
increasing this number, we can start making this
gradient way, way smoother. And let's say
something like five, I guess will be
good or let's try. Yeah, let's give it a three. This will be good. It is as easy as just
connecting this power node. Let's connect it to the Alpha. Let's connect it to
the alpha and Control Shift and click on the
principle be SDF and boom, we created a fog plane. As you can see, it starts
really opaque as white. Let's just hide the overlays and then it will go transparent. And this transparency
right here is what will allow us to get the look like. It is actually a fog plane. I might play a little bit
with some more settings. Let's increase the
roughness up to one where if we
lower the specular, okay, this will
not make a change. So let's just skip
it at 0.5 and boom, this is our fog plane. I'm going to hit the tilta key just to get back
to my usual view. And boom, as you can see, it is really, really hazy. Let's set also the
tilt or key here. And let's move this bad boy slightly down by hitting g, z. Let's move it down,
down, down, down. Let's hit G to move
it a little bit up. It is always a process of
trying to nail the right look. And right now we are
going to duplicate this fog plane another time to put it even further
in the background. So just hit seven to
jump to the top view. And let's hit Alt D to
create another copy. And let's move it
somewhere right here, basically in front of them. Other 2D mountains. So let's say
somewhere right here, I guess it will be good. Let's just jump to
the solid view to have basically blender faster. And let's hit our Z to rotate
it, something like so. And hit G double Z twice to
move it on the local axis. And let's put it here. And this technically should look good. Let's hit the render view
to see how it looked like. And yeah, I'm actually
digging this result. And the last thing
I'm just going to do, because these planes
would abstract my view. I'm going to jump
to in the object. From here, you will have an option called
viewport display. Just make sure to change it
from display as texture, change it to wire so that basically it will be transparent and I can see through it. And same thing for this bad boy. Let's select it and change the display ads from
texture, the wire, and also make sure to
select both of them, hit M to move them to
a new collection rate, a new collection, and let's
call it fog, planes hit. Okay. This is how you can
create 2D planes to add little details and
add more depth to our scene. And I will see you
in the next video where we are going to create the camera animation and
add a gobo to our scene. And you will know
exactly what I mean. I will see you in
the next video. Everyone
18. Adding GOBO and Camera Animation: Hello and welcome. In this new video where we are basically going
to do two things. The first one being creating the camera animation
for the shot, and the second thing,
which is basically we are going to add a gobo
for our lighting. And that's exactly
what I will start with creating a gobo. Now, what is a gobo? Gobo or just a shape that can form or change the
shape of the lighting. And this will allow
us basically to get a better and more moody
lighting in our scene. So here's what we will do. First of all, I'm going to go Shift a and I'm going
to add a plane. This plane would already
be huge because we already created a 5,000
meter plane before. And here's what I'm going to do. I'm going to jump
to the local view by hitting the tilta key. And also I'm going to move
my cursor right here and hit the Tilde key to
only see this 2D plane. And if we're doing this,
I'm going to create a new material and I'm
going to call it gobo. And simply all I have to do is basically to add a
texture to this, I'm going to go Shift a and
let's look for noise texture, this one right here, and hit Control T to add
the mapping note to it. And I'm going to plug the
factor to the base color. And as you can see, this is the texture we have right now. I need it to be a little
bit more contrasty. That's what I'm going to add, a color ramp node, which will allow me to control the levels and the contrast
and all of those stuffs. I go Shift a and let's
look for color ramp. And I'm going to
put it right here. And all you have to
do is basically to crunch this image
a little bit to something like so that's maybe crunch it a
little bit more. Okay, This is good. I can also bring the
roughness a little bit down. You can even like put a zero. It won't matter to be honest, but let's make it,
leave it at 0.5. And for the scale, I mean, probably you can leave
it at five for now. And if we feel the
urge to change it, we can always change it. The most important thing that
you need to do right now is basically to also take the
output which is the color, and also plug it to the trends. The Alpha makes sure to
plug it to the Alpha. So you will have this form
that looks like clouds that imagine what will happen
when the light will hit it. Basically these white
areas will obscure some lighting and
basically it will cast shadow on our terrain. And that's what will give
us a more moody lighting. And that's exactly
what we will do. So I'm going to hide
my overlays again, hit the tilta key to show
my entire scene and also hit the tilde key here also
to show my entire scene. And I'm going to basically Zhe Xie to move it a
little bit, let a bit up. Basically it
shouldn't be visible. My scene is starting
to get slower because we're starting to add a lot of different elements. I think I'm going to increase
the scale a little bit, let's say to something like ten. And also since the lighting is coming from this direction,
basically from here, I probably should rotate this plane to match the
direction of the light so that it will
actually be able to obscure some areas to
make everything faster. I'm just going to jump to the viewport shading
and let's do this. I'm going to hit R to rotate it a little
bit on the y-axis. And maybe also I'm
going to hit S to scale it a little bit
down and hit Control. Apply the scale and g x may be to move it
a little bit like so maybe g z to move it
up so that it will not be visible in
the final shot. Yeah, I guess something
like this will work. I can even e.g. jump to this view which has the viewport shading just temporarily to see
what's happening. Okay, so this is the
texture we do have. Yeah, I guess this will work. So let's see how the
final result is looking. Okay, Part of me
thinks that I need to increase the contrast
a little bit more. I'm going to increase
a little bit more. And lastly, if I change
the location e.g. on the y-axis, I will be
able to move this gobo. As you can see. I know probably
the video might be lagging because it's
kinda slow to render the scene right now that
in your scene you will start to notice that
the shadow is moving. It is like there are
clouds in the scene and the shadow of those clouds
is moving on the ground. So basically it is as easy as finding or basically
experiment with your scene, especially this
location y and location x until you get a result
that you're happy with. In my case, I'm just going to leave this at zero because I kinda like the result
we just have right now. Let's move on to the last part, which is creating the
camera animation. So yeah, Let's do that. For the camera animation. This will be super simple. I'm going to jump
to the viewport, the usual viewport
shading because I don't want to slow blender down. And I'm going to jump
from the shader editor to the timeline to basically be able to create some keyframes. And it seems like I created
some keyframes on an object. Okay, these are the annotation, so I'm just going
to delete them. The annotation is
basically these lines that I tend to draw
to explain stuff. Those are the annotations we
want to animate the camera, the way of how I imagined
this camera to move. If I just hit seven to
jump to the top view, whereas the camera okay,
where's my camera? Okay. What happened to the camera? Okay, it is under this, okay. Basically the way of how I
imagined this camera to be, It's like it will rotate on an arc that looks
something like this. So it will end. It will always be pointing e.g. to the middle of
the scene and it will rotate along this arc. And that's exactly what
we are going to do. We need first of all
to set a point to tell blender where this
camera should rotate, I'm going to go Shift a and
let's add an empty object, empty and plain axis. I'm going to go Zhe Xie to
move it a little bit up. And basically, I'm
going to try and put this empty object on
the point of interest, the point that the cameras
should spin around, if that makes sense. If I just hit seven to see
how everything is looking, let me just for this plane, hide it just for now so that I will be able to see
the empty object. I want e.g. the
camera to spin around this peak that is right here. I'm also going to go GZ to
move it a little bit up. Yeah, that's the point
I want to spin around. And after doing this,
all you have to do, make sure you select
your camera and then select the empty
object and then hit Control P to parent them or to link them and
then select object. Right now what happened
is that this camera is linked to this empty object. And if I just select the empty object and
they hit R, e.g. Z. Notes what will happen? Basically able to get the
movement that I want to do, which is basically spinning
around that point. The whole thing, it
is as easy as just animating this empty object. So here's what we will do. I'm going for the, for the terrain one to
make a blender faster, I'm going to just
disable temporarily the tree scatter so
that I will only see the planes are actually I only want
to see the terrain. So just to make a
blender faster, Let's move to the first
frame, which is number one. Now we are going to set
up the initial position. The initial position, let's
say I want it to be our z and let's move it to something
like so, something like this. And I'm going to go for the location and also
I or the rotation. And let's write now
move to the last frame. The shot will be 5 s, so five multiplied by 24 frames, that will give us 120. So the last chart should
be 120 frames long. So I'm going to go to 120, hit our z and let's move it to somewhere like so until yeah, and hit I for available. And if I get back to my initial frame zero
and I hit play, okay, it is super laggy because there's a lot of
subdivisions in my scene. Let me just jump
back to the terrain and let me disable e.g. the subdivision one
and disabled or to the subdivision two for
both of the terrains. And let's hit Play. Let's
hope it works. Yeah. That's how my camera
animation will look like. As you can see, it is
like slowly flying over the entire landscape when
we're thing that always happen when you do animate is
that the camera animation, we'll start slow
and then it will go fast and then
it will slow down. We wanted to keep the same
velocity on the entire shot. That's why I'm going to
select all the keyframes and hit D and make sure to
change it to linear. And if I play it right now, should keep the same velocity
along the entire shot. And this is the
camera animation. I'm going to use a
super cinematic. It is subtle, but it looks like the self
we see in movies. And that's, I think
the key ingredient. If you want to create a
super realistic or let's say a cinematic camera
movements in your shots. I'm going to leave it at this. I'm just going to re-enable
all the different modifiers so that I will be able to see the final scene also
the geometric note. I forgot that one and yeah, I'm just going to hit file
and save just in case. Let's see our final result. Okay, so this is the
shot we do have. And in the next video, I'm going to show you how you can basically break
down the scene into its different
layers and basically prepare it for the final render. So yeah, I will see you
everyone in the next video.
19. Breakdown the Scene to Render Layers: Hello and welcome. In this new video
where we are basically going to prepare this
blender file for rendering. And what I mean by that
is that basically to break down this scene
into different layers, layers are basically
just different elements that we will render separately. So that first of all, later on we can adjust
them separately. Just as an example, I'm going to render the
foreground mountain on its own to that later on. I can change it and maybe e.g. do some coloring
on its separately. And same thing for the
background mountain, the sky, and all the different Say, components of my scene. So that's the first advantage. I can change and manipulate each element
separately on its own. And the second thing,
there is a high chance that if I try to
render the scene now, all at ones blender might crash and basically stop
middle render. And I don't want that. So to make it easier
for blender to render, I can tell blend with the tag. You can render each
element on its own so that basically we will lower the
computing power on Blender. And we can guarantee
that we will be able to render even like huge scenes, just by the fact
that we can break them into different layers. Okay, so let's discover
how we can do that. Secret behind how you can break down into different layers
is actually in the outliner. From here, we can choose what
other layers we do have. Right now we only
have one layer, which is called the view layer, which I'm actually going to rename to something like master. So this is the master layer. We're not going to render this. This will just act as a reference for all the
stuff that we will do. And here's the most
important thing. Right now. I'm going to disable all the different
elements and I'm going to start to organize all
the different elements. I'm going to organize all
the different objects. So let's start first of
all with this bad boy, which is called the
plane zeros 02. And this is, if you remember, this is the Gobo light. This is the plane that
does have holes in it. I'm going to rename it
to something like gobo. And I'm actually going to put
it inside the collection. It is this collection
right here. I'm going to move it and put
it inside collection, okay? Also, I just forgot to mention
one important concept. You can think of collections
as its own layer. So e.g. I. Want
this terrain 01 to be it's on its own layer
to render it on its own. That's why I need to
select your terrain one, which is the one
on the foreground. I'm going to hit M to move it to a new collection and
hit New Collection. And I'm going to
rename it to e.g. FG mountain or I wrote
I misspelled mountain. Perfect. And hit okay, this is our foreground mountain. I'm just going to
disable this collection. I also want to render this background Mountain which is terrains or two on its own. Make sure you select it, hit M to create a
new collection, new collection, and let's
call it BG mountain and hit. Okay, and let's just
disable this collection. I also have some background to the mountains which
are already here. Perfect. I'm going to
render them on their own. And also for this guy, I'm going to create a separate
collection for this guy. I'm going to hit
M New Collection and let's call it Sky Kay, and Boone VLS element, which is this empty object, which is the empty
object is the one responsible to
animate the camera. I'm going to rename it to
something like camera trawler. Okay. And I'm going to move
it to the main collection, which basically contain
all the different elements in our scene and make sure
it is visible perfective. These are all the
different elements that we are going to render. From here, we can create, as I mentioned,
different layers. This first one is called Master. I'm going to leave
it the way it is. I'm not going to change anything because we will need it later. And then I'm going
to create a new one by clicking on this
button right here. And you will have an option
called Copy Settings. I'm just going to
hit Copy Settings. And from here I'm going to
rename this one to e.g. FG mountain. So this will be our foreground
mountain and I'm going to enable the collection
called Zhe mountain. Just click here and boom, if I just jumped to
the rendered view, basically Blender will render a sequence of images
that looks like this. So I will have the
foreground mountain as a separate image sequence, which is really nice
because later on I can play with this mountain
the way I want. Let me just get back
to the solid view to make everything faster. And I'm going to create to
click here and copy settings. And for this one I'm going
to call it BG mountain. Mountain is only one mountain. I'm going to disable
the foreground mountain and I'm going to
check BG mountain. So this is my collection for
the background mountain. Also, if I just focus
a little bit here, I can see this plane
which is the gobo. I'm just going to hit G to
move it outside the frame. Perfect. So this is our layer for the
background mountain. Let's create another one
by doing copy settings. And for this one, I'm going
to call it 2D mountains, the ones that are in
the far background. And I'm going to disable
the bag, the BG mountain, and I'm going to enable to the BG mountains
or not this one. To the mountains. Yeah, Perfect. If I just jumped to
the render view, that's how my image
sequence will look like. Let's create one less
layer Copy Settings, and this one will be a sky. So just disable the 2D
mountains and enable this kind. And if I click right here, you will have all the
different layers that we are going to
use in this scene. Now, if you remember, I said that we will
need the master later. I just check master, I'm actually going to enable all the different
elements, the sky, the BG mountain, the
foreground mountain, also the fog planes, and the 2D mountains. So these are all the
different elements I need. Oh, actually I forgot one thing. I also need to create
another collection for the fog planes because I'm going also to
render them though. Let me just get back
to the 2D mountains. I'm going to create
this and copy settings, and I'm going to call
this fog planes. I need also to render the
fog planes and I'm going to disable this and
enable the fog planes. But if I just jumped to the
render view, as you can see, if I render this image or a sequence of images
that looks like this. This will basically
just an overlay. This will cover
the entire image. So somehow I need to tell
blender to only render the Fog only where it
should be visible. And how can we do this? That's actually pretty simple. All we have to do is you click
right here on this filter. Make sure you enable this option which
is called hold out. If I just click on
this and I'm going to enable the collections that does have some elements that I
don't want the font to cover. In other words, I want to
enable the FG mountain. And I also need to click on this really tiny
button which is called holdout and look
what will happen. Boom, right now, it
looks like I'm using this foreground
mountain as a mask or the fog planes and that's exactly what I want
because I don't want any sort of func to be in
the foreground mountain. And later on basically
we will have some fog. So make sure to enable
this collection and make sure also to
check hold out. That's for the fog planes. And now we can get
back to our master. And in this master file, I'm going to use it to
render a mist pass. Now, you might wonder, hey, your scene or dismissed as well. There is an image
that looks like this, which will help us later to
composite our shot and add some haze and some extra space
to make our shot better. And that's exactly what we will do we are going to create, and this bears using
this master layer. So yeah, let's just do that in order to tell blender that, Hey, we want you to actually
render a mist pass. There are a couple of steps
that you need to follow. First things first, right
here in the render passes, make sure to check missed so that Blender will start
considering that, Hey, we want to render MS.
bass, that's number one. Number two, you need to
jump to your camera. It is inside camera controller and jumped to the settings. And you will have here
an option for or I guess they moved it safe areas now.
Viewport display. Yeah. You will have here an option under view-port
display cold mist, and make sure to check missed. And if I zoom on my camera, you will notice that
there is this line right now in the camera, and that comes out
of the camera. Here's how the mismatch
will look like. If I just jump from
here and render paths, I'm going to change from
combined to missed. This is how our
misspells is looking. The result we want to achieve
is the foreground should be black and it will
gradually goes white. That's exactly what we want, but how can we do this? Well, you need to go
to the World settings, choose this one right here, or the World properties. And right here you will have
an option called MySpace. And from here we
can tell blender the point of where we want to start calculating them as pairs and where it
will be the end point. And by playing with these
two different values, we will be able to adjust that the storage will
basically control where basically Blender will start calculating and the depth will control the end
point for the start. So let's just lower the start
to something like zero. So basically it will
start from the camera. And let's also make the depth
something like 5,000 meter. Yeah, I'm kinda
digging this result. As you can see, we're
having a gradient that starts from black
and goes to white. Later on we can play by adjusting some contrasts and
all of that we can adjust, this must pass, but this
is good for what we want. And now I'm just going
to go file and save my blender file so that I don't
lose all my organization. And that's it for this video. And the next one, I'm going to show you how
you can basically prepare your rendering no tree inside
the compositing workspace. And that's really
important. So yeah, I will see you in
the next video. Bye everyone.
20. Create The Rendering Node Tree: Hello and welcome everyone
in this new video where we are going to prepare our
compositing node tree. Okay, this is where
we stopped last time. And I'm going to jump back to the viewport shading so that I don't want blender
to slow down. And from here I'm going to jump to the compositing workspace. What is compositing? Compositing is the process. What happens once you finish
a rendering your shot? This is the post
rendered process. Our goal right now is
basically to build a new tree to tell blender where to render each element and
how can we do that? This is actually pretty simple.
Here's what we will do. Make sure that your cursor
is inside the compositor. Hit Control Spacebar to
maximize this editor so it will be full screen so we can see
everything clearly. And from here, I'm going to show you how to render one layer. And we're just
going to duplicate this set-up for all the
different elements. So here's what we will do. I'm going to basically just
move this composite known up and I'm going to go
Shift a and I'm going to look for file output. So let's just put it here and connect the image to the image. Here's how the whole
process will happen. As you can see, this node
is called render layers. So from here, I'm going to tell blender for this first one, I want you to render only
the foreground mountain. After we render the
foreground mountain, it will be denoised and
this file output node, it will output the final result. And basically we need to adjust some settings in
this final output, you can go to options are
actually node Properties. Yeah, right here
we can play with all the different
settings for this node, the file output, what is the
format of the final images? We don't want it to be PNG, we want it to be open edX czar, because that's the
most flexible format, we can use n instead
of the Kodak, instead of using a zip lossless, which will give you huge file. Based on my experience and
what I found on the internet, I would highly recommend
that you use DW a lossy, which almost, almost will
give you the same quality. But we're like
really small files. And I think unless
you're going to screen your video on a
cinema or something, there is no way anyone will
notice that whether it is zip lossless or dw a lawsuit, use DW a lossy because it will give you
a faster render and it is easier for your computer
and it will give you smaller files with no sacrifice
when it comes to quality. So just choose DW, a lossy. And from here make sure
to change the name of these different images
to something like F, G, mountain, boom. And for the path
where we want to save all of these,
just click here. These are some old renders. I'm going to go to
blend of projects and I'm going in the
Student Resources, I'm going to create a new folder and I'm going to call it a render and just click on
Render and hit accept. And by the way, Blender
will automatically create a folder inside this folder inside,
if you remember, because we created
this folder called Render Blender will create a
folder for each element and that's what this
file subpath do to create a folder inside that
folder called every mountain. And it will put over different
image inside that folder. That's really handy option also, I'm just going to cut
this option right here so that I don't want
to see this composite node. And this is the basic
setup for each layer. What I need to do
right now is as easy as just hitting Shift D
to duplicate the setup. And I'm going to change Zhe
mountain to Biji mountain. And also I need to change
this to be G mountain, to change the name of the
basically all the files and then select both of these
Shift D to duplicate them. And let's choose the next
layer which will be, it doesn't matter honestly
the order of selecting them. I just want to render them in the order of I want
to composite them, but you can randomly
select them. I'm going to choose
to the mountains and make sure you select this. And let's rename this to know
from here to 2D mountain. Alright, nice. Let's also select both
of these shift D, and let's run choose from here, let's choose the fog planes. Let's select this and let's
rename this to fog explains, enter and select both of
these shift D1 less time, or actually we still need
to do it one more time. And from fog plane, I'm going to choose sky. And let's rename this to sky. And the last one, which is that the mist bass, as you remember, I'm going to render it using
the master layer. So I'm going to select one or all of these one
last time Shift D to duplicate them. And I'm going to choose
the master and the master. I don't want to render
any of these like denoising normal and albedo
and all of these stuff. I only want it to
render messed pass. So I'll just connect
the midst to the image and it
will get denoised. And then it will be basically
saved to my hard drive. And I'm going to
rename this to missed. The last thing we are going
to do right now is to just, first of all, let's
check our node tree. We do have five layers
to render 12,345.6. Yeah, I forgot them as best. We do have six layers to render. This one for the midst
and five other layers. Right now, if I just go
render and render animation, I will start rendering. But there is one
other thing that you can do to make
your render faster. Basically, here's
what we will do. I'm going to jump back to, back to previous to get to my usual view and in
my render settings, if you remember, we do
have this option for the max samples for the render by default
or not by default. In the beginning of this course, we adjusted this
number to be 128. And that's the main
basically number I'm going to use to render all
the different elements, but there are some layers that doesn't need all of
these samples, e.g. the sky doesn't need
to use 128 samples, and we will just waste some computer resources on layers that doesn't need
all of these samples. That's why I would highly
recommend that we go through each one
layer and we adjust like the render
settings or let's say the samples each
layer separately. So let's just do that. First of all, for the master, which is the layer
we are going to use for the midst pass. I don't want it to be 128. I want it to be only 32
because I don't need like high sample count when
it comes to the misspells, I'm not going to
render the image out of master when it
comes to the master, if you remember
in the node tree, I'm only going to render the midst pass and I
don't need 128 samples, I'm going to lower to 32. But the catch is, you don't change it from here. You need to jump to your output
properties or actually to your hair properties or in the view layer and
in the bottom, you should have override
this option called override. And I can choose a different
sample count for this one, I'm going to put it 32. This layer, the master, which is basically
the best path, will only render a 32 samples
which is more than enough. Then let's go to the sky, Let's jump to the sky. And also for this guy, I'm going to use 32 because
it is just an image. It doesn't have any 3D data. So it makes more sense
to only render it at 32. But yeah, this is
our final setup. I'm going to go File, Save As, and I need to, I need
to make sure that I save my blender
file just in case. And right now, dear friends, you are ready for rendering. You can let your computer
render overnight or you can use some render forums
if you have access to it, or if you have a
really beefy computer, you can render your
scene on your own. The thing is, what will
happen right now is a very long process
that everyone hates. It is called rendering.
It takes time. So just go to Render
and Render Animation and just wait for blender to
render your entire scene. Hopefully, I will see you on the other side
once you've finished rendering to do the final
step which is compositing. See you everyone there.
21. Compositing Part 1: Hello and welcome. In this new video where
we are basically going to start doing the
compositing work. What is compositing,
as they always say, it is basically combining
all the different elements together to create
the final shot. Now, technically
after we finished rendering from the last video, you should have these
different folders. And in each folder you will have an image sequence of
the different elements. Each folder correspond
to one rendering layer, the 2D mountains
background, mountain, foreground mountain,
fog, mist, and sky. Now, some of you said that, hey, after the
render is finished, we found that blender dumped or the image sequences
in one folder. It didn't create these
subfolders, honestly, I think that's some sort
of a glitch in Blender. But in case that
happened to you, I guess you have two options. Either you can just
leave them the way they are and basically
just deal with them. Because blender
later, we'll import each image sequence on its own. That's why it's not a big
deal even if they are in the same folder or to
make them more organized, you can easily just create these subfolders
yourself and put each image sequence on its own folder and they shouldn't be actually
in sequence. So we don't need to look for all the different
images and all of that. It should be either way. Let's right now jump
into compositing. And the first thing some of you might think that I'm going to actually open the blender
seen from before. Actually, I'm not
going to do that. I'm going to start a fresh blender seem to
make everything faster. So from here I'm just going
to open lender launcher. And this is just a
custom installer I always used for basically
recording the videos. But in your case, all you
have to do is to just launch the usual Blender
version you do have, it should work the same. Anyway, this is Blender and I'm not gonna
do anything here. The first thing I'm
going to do is to directly jump into compositing. Compositing, I'm going to hit
into high the sidebar also. Let me just move this below
and make sure to check use notes and let's start
working first things first, I'm going to delete both
of these two nodes by selecting them and just
hit X to delete them. Then I'm going to
start importing all the different image
sequences that I have rendered. So go to add. You should have input
and you will have image. And let's just put
it right here. This node is basically the node responsible for importing
the image sequence. We will use click on Open. And from here I'm going to jump to render and I'm going to import the first thing
which is this guy which is the farthest
element from us. Let's select the sky. Make sure to select the first image. Let's move way, way down, select Shift, click Shift, and then select the last
photo to basically select all of them and
click on Open Image. And boom, right now we imported the image sequence that
belongs to the sky. As you can see, we have
frame number one, frame, the number of frames is 120, which is the exact
length of our animation. And all of these settings, they should be fine for now. Right now, I'm going to hit
Shift D to duplicate it also makes sure to click on
this tiny magnet right here, so they will stick
nicely to the grid. Let's click on this and let's
write num after the sky. Let's import for
the 2D mountains. I'm trying to import them, let's say in order from the farthest element to the closest element
to the camera. Also when weird quirk in blender that when
you hit Control a, I'm not able to select all
of the different elements. I don't know why. So you always need to just
select them like this by hitting Shift and then selecting all the
different images. Let's click on Open Image, Shift D to duplicate it. Again, click on this. Let's move up and let's write
now after the 2D mountains, we will have the
background mountain. And actually, I guess let's
click on this relative. Yeah, I guess there is no
option for image sequence. You will need to select them in this really stupid way, shift. And let's do this open image. Let's hit Shift D again, and let's click on this. Right now in poor the
foreground mountain, boom. Click on Open Image. Okay, So these are
the main elements. We still have the midst
pairs and the fog. We're going to add them later. But right now we're
just going to combine all of these
different elements together. But before I start
combining them, there are a couple of
things that we need to change because this is
fresh blender scene. It doesn't have the same
resolution and aspect ratio as basically the images that were basically
inputting into Blender. That's why I'm going to jump to the output tab and make
sure that this is 25, 60, which has exact resolution
of the images we rendered. That's number one for
the frame rate is 24, but we only have 120 frames. We're just basically adjusting all the different
settings so that it matches the image
sequences we do have. Right now, let's start combining all the different
elements together. I'm going to start with
the sky and I'm going to hit Shift a to search. And I'm going to look
for a node called Alpha over this node right here, the Alpha over node, it will put the image that is in the second socket above the image that is in
the first socket. So what we will do, I'm
going to take the sky and plug it to the
image number one. And I want to put the
2D mountain above it. So I'm going to take
image number two, which is the 2D mountains. And let's plug it to image. We're not seeing anything. And the main reason for that is that if you want
to preview a node, as you probably remember
from the shader editor You need to hit
Control Shift and click on it to be
able to see it. Right now the image is so
huge because that's how weird the viewer in
blender works in order to make your
image smaller, just hit V to make it smaller. And if you want to make it
bigger, you need to hit Alt V. I know it's one of those weird things in Blender there to get to work with it. Maybe move it a little bit up. And also, here's a
really handy shortcut. If you hit Control Space bar while you are in a
certain editor, e.g. if I am here and I hit
Control Space bar, I will maximize it. If I hit e.g. Control
Space bar here, I'm going to maximize
this editor. I want to maximize
the compositor, so we'll make sure
your cursor somewhere in the compositor and
hit Control Spacebar. And right now we're just
seeing our compositor. Let's move this slightly
up, something like so. And let's zoom in,
zoom out slightly. The really nice
thing is that when you zoom in and zoom out, you will only zoom on the nodes, but the Video Preview will
always stay the same. So, yeah, this is
nice right now, after adding 0, make
sure to check his Alpha. After doing this, we need to put the background mountains
above the 2D mountains. Select your offer over
Shift D to duplicate it. Let's put it here
and we want to put the background
mountain above it. So let's put it here. Yeah, This is looking good. Shift D one last time. And let's put the foreground
mountain and boom, right now we do have our
entire scene combined. And the really nice
thing right now about this setup is that e.g. if I want to only play a little bit with the
settings of the sky. So let's say e.g. I'm just going and don't
follow me in this. I'm going to add a
curve, Every be curves. If I play right now with
the settings of this, I'm only going to
affect the sky because the sky and the RGB curve,
and then we'll combine it. So as you can see,
this will give us huge flexibility later
when it comes to changing and combining all
the different elements and making them work together. But I'm not going to
use this RGB curves, so I'm just going
to hit Control X to delete it while you're keeping
this really nice link. But yeah, this is
how you can combine all the different images
you do have right now, let me just hit
Control Space bar to minimize the editor and get
back to the normal view. And I'm going to slide this to just see how
all the different, the different
images are looking. And yeah, this is our animation. Now, of course,
blender is not able to play this in real time, but yeah, this is our animation. We still have to render layers that we still
didn't import, which are the mist and fog, which actually just
seeing this right now, I think we may not
need them, but, and probably I'm not going to use them for this composite, but I'm just going to
show you how you can basically important
just in case. So here's what we will do. First of all, let's start
with the midst pass. So I'm going to duplicate
this 11 last time, basically the
foreground mountain. And I'm going to
click on this to import the messed click
on the first one. Let's move down and let's
select miss 2,120 open image. And the thing about
if I just hit Control Shift to see the mess, it is not your usual image. We're not going to use
the usual way when it comes to counting it because
this is black and white, we cannot just put it over. That's why we need to use a custom node which is
called a mixed RGB. If I actually, it is just
called mix surprise. I'm going to click on Next. I'm going to put it right here. And from the mess, I'm going to plug it
to the second socket. Now by default, this mixed node, we'll just put the
second socket, which is the messed
over the image. And you need to
change it from mixed to screen or you
can change it to n, the one that works
the best I guess. But in our case, I'm
actually going to use add and you need to lower probability the
factor way, way down. And the really nice thing about the mismatches that it will allow you to add like this, some sort of haze or something
like that to the scene. If you want to play a
little bit more with it, I'm going to go Shift
a and you can add an RGB curves and you
can play a little bit more with their settings
and all of that until you start getting a
look that you are happy with. So yeah, you can
definitely use it. Honestly, if I
just select all of these and hitting
empty mute them, just seeing the
results like this, it is already looking good, so probably I will
not end up using it. This is for the
midst pass lemon. Just make them neater. By doing this. We're actually probably
we can delete them, but I'm just going
to leave them in the project files so that
you can play with them. And also you can add the font. Let's do Shift D to duplicate
this one more time. And let's open the fog, fog, 014,100.20, open image, Shift D to
duplicate the Alpha over. And let's put it here. And yeah, this is
actually looking way better than the best pass. Probably we didn't need to
render them as pairs, I guess, but maybe we can use it
somehow. Either way. This is for the fog
planes, as you can see, if I just select
this node and hit m, this is the before,
and this is the after, this is before, and
this is the after. Here's something that you
always need to put in mind. These fog planes, e.g. this gradient that we
created and all of that. If I were to do the
compositing work, not in Blender, but e.g. in Nuke or individual result, which is by the way free, I will probably not bother even rendering this fog Plains
because it is like really easy to replicate this effect just using
some basic gradients. Bad because we're inside of a blender and I want to
keep everything in Blender. It is not that easy to actually replicate this in
the compositor. And that's why basically we're
rendering it in the scene. So yeah, other than that, I'm actually also going to select both of these
and I'm going to hit mute because there probably
will not use them for now. And I'm going to select
all of these and let's put them here just in case e.g. in the future, I
might need them. Other than that, I'm
going to go to File Save, and I'm going to save it
in the blender project, I'm going to call it, let's say compositing 01 and hit
Save blender file. And yeah, this is
how you can combine all the different elements
from your render. And in the next
video we're going to play a little bit with all of these different elements and just some colors
and all of that. And I will see you
should be ready to go. So yeah, I will see
you in the next video.
22. Compositing Part 2: Hello and welcome
to the second part of the compositing video, where we will basically do our real adjustments
in the last video, basically just put it all the
elements above each other. And in this video we'll start playing a little bit
with the colors, with some curves
and all of that. And it's going to be really fun. So yeah, let's just do that. Okay, first of all, as usual, I'm going to hit
Control Space bar to maximize my editor right here to see basically
the full image, let's just move it
a little bit up. And yeah, first element
I'm going to start playing with is
basically the sky. So the way of how I imagined
this guy to be is basically, let's say to make
it a little bit darker, that's number one. And number two, I'm
planning to make it a little bit more contrasty. So my favorite node to start basically adjusting the lighting and all of that is to basically add a node
called RGB curve. So I'm going to go Shift a and
let's look for RGB curves. Let's put it right here. And the first thing
I'm going to create a point right here
in the middle. And I'm going to lower
this slightly down. And here's an important concept or something that you will find. It always happens. Focus right here, even
though I'm moving this line. Notice that also this
part is also moving. I guess this is called shouldering or something
like that in coloring. I don't know the exact
name of this phenomenon. Basically, when you change
your curves are no, when you change your
curves and also it changes in another area. And this is not what we want. What I want to do is basically
to select this point, you will have something
called Victor handle. And if I click on it, basically each part right now, we'll move on its own, which is exactly what I want. So here's what I do.
I'm going to lower this slightly down to
something like so. Basically, I'm somehow
clipping like the highlights. And at the same time, I'm going to move this
point slightly like this. Oh, no, this is too much. If you want to move
a certain point in a really precise value, I would highly
recommend that you use this slider right here. And also, this is when quirk in Blender and that I don't know why they don't work on that. Which is that even
though note is that like a barely change the
position of this point, notice that the drastic effect, even if you do like
small changes, tend to have like huge
influence on the image. You can not do these
granular setting changes without basically
just starting to input like really tiny
numbers right here. That's why I'm going to get
back right here to zero, which is the default value. And let's start increasing these values basically
by typing them. So let's do 0.00. No, 0.002. Yeah, Let's try 0.01. Yeah, 0.01 seems to do the job. And if I just select
this node and hit m, this is the before,
and this is the after, this is the before and
this is the after. I'm kinda digging this result. And I can also probably, Let's try 0.02 to make a double. Now, this is too much. Let's try 15 when two. Yeah, I can definitely work with this and it looks
decent to be honest. So yeah, this is
for the RGB curves. And the other thing I'm going to do is to play a little bit with the hues and maybe lower the saturation a
little bit of the sky. So let's go Shift a and let's look for hue and
saturation and value. Let's put it here.
Basically, the hue will basically change
the color of the sky. By default, it will be 0.5. But what I noticed is
that when you lower it to something like 0.49, e.g. it tend to get a
little bit warmer if I just select this and hit
em, is it the before? This is the after, this is
before, and this is the after. You can barely probably
see their effect. But let's try 0.45. Yeah, this is too much. The 0.49 or 0.48. Yeah. This is, this is nice, like it made this guy
is slightly more cyan, which is exactly what I want. And I'm digging this result. Most of compositing
honestly is just changing different values
slightly until you start getting a result
that you're happy with. I'm going to leave it
at this for the sky. And right now I'm going to focus a little bit on the 2D Mountain, which is the next element. And just to organize my notary, I'm going to move this here and maybe select all of these nodes. And let's just move them really, really far because you don't need to work on them right now. This here. And let's play a
little bit right now with the 2D mountain, which are these mountains that are right here
in the background. Okay, First things first, I'm going to start
with the same node, which is the RGB curves shift a and let's look for curves. That would be curves. Let's put it here. For this RGB Curves, I'm only going to do one thing, or actually two things. I'm going to start moving
this point slightly up, okay, here's one we're thinking that will
start to happen. As you can see somehow, the effects that I'm
doing right here are also applied on the sky, even though I have
the 2D mountains. And then I'm doing
the RGB curves, I'm doing the adjustments
after the 2D mountain node. So I shouldn't see this
effect be applied on here because there is
no relation between this RGB curves and the sky. This is also a new thing
that you will learn is that you need to check this convert
pre-multiplied right here. And if you click on it, boom, right now this RGB curves will only be applied
on the 2D mountain. We will need to check
this box called convert pre-multiplied for all
the alphas over nodes. Either way, I'm
going to get back to my RGB curves and I'm going to hit the backspace to reset this node to
the default state. Let's create a point
in the middle. And I'm going to move
this slightly up just to basically make it slightly faded if that even makes sense. Because in general Objects that are already in the background tend to
have lower contrast. So just basically
some tiny adjustment to get the look
we're trying to get. Maybe let's try to move
it a little bit more. Know, this is getting too much. Let's do this. Yeah, okay. This is looking good. I wish blender. They can they can
change how sensitive, What's this zoom in, okay, there's an option for
zooming in and zooming out, but I wish they
do give an option for how sensitive this curve is. This is number one. Number two, I want to make it
slightly or niche. How can we do that? Well, you can get the
red color basically by jumping or actually the orange
color by jumping to read, we need to add some red
basically by in the shadows, by moving this slightly up. And as you can see,
this is way too much. So we need to play a
little bit with this hair. So let's try 0.01
is still too much. 0.0 005. Let's try one. Yeah, this is more like it. And also make sure
to jump to blue. And we need to move this point
to the left or actually to the right to subtract some blue from the
shadows to get yellow. So let's go here or no, not that one. This one. And let's try 0.00
10.00 to 0.005. Yeah. This I guess is looking slightly
better, more orange-ish. If I deselect this node
and this is the before, and this is the after,
this is the before. This is the after. And as you can see just by
the fact that it is less contrasty is already making
that mountain like a. It is actually far
in the background. I might even add another hue and saturation known to sell
this effect even more, not the brightness and
contrast, hue and saturation. I'm going to put it here. Let's make the 0.49 and let's lower the saturation
to something like 0.8. And yeah, I'm kinda taking
this result honestly, sin is this element technically should be like four
in the background. I guess it makes
sense if I go Shift a and add a blur node, a blur basically
to blur slightly the elements so that we
get rid of that CG look, which is really sharp. I'm just going to put here too really tiny value just to
sell this effect even more. Other than that, I'm good to go. I basically right now, I just did two elements
and still do to go. Let's move this here, or actually let's do this to get really nice looking no tree. Right now I'm going to
play a little bit with the background mountain and let's basically check convert, pre-multiply it so that
all the settings of the background
mountain will only be applied on the
background mountain. I'm going to go Shift a
and my favorite node, which is the RGB curves. Let's put it here. And from here I'm going to
put a point in the middle, something like so let's
make sure it is 05. And also here 05 to be
perfectly in the middle. And let's select this
point right here. And we need to move it
something like 0.00, 50.007. And yeah, this is good. There's the before. There's the after. This is before. And
this is the after. It is the fact that
it is right now less contrasty is already
making it look good. Let's jump right now
to the red channel. And let's move this e.g. let's say 0.002 to make it
a little bit more reddish. There's the before, there's
the after. That is nice. And let's also
jumped to the blue to add a little bit
more blue into it. Let's select this point
and let's move it up or something like that too. Okay. There's the before, there's the after before and
this is the after. And it is looking
slightly weird, I guess. I guess I'm going to leave the blue channel the way it is, so I'm not going to play
with the blue channel. The only thing I'm
going to do right now is to basically add
hue and saturation. Hue saturation, let's
put it here, 0.49. And for the saturation, I'm going to lower it to
something like 0.9 or 0.95 so that it is slightly more vivid than the 2D mountains that are on the background. So if I select both of
these two nodes, hit em. This is before, this is
after, this is before. This is the after. I'm digging this result. And right now, let's play
on the last element, which is the
foreground mountain. Let's organize our node tree. So for this foreground mountain, I'm going to go Shift a and
let's look for RGB curves. Let's put it here and let's create a point
and the middle, make sure it is 05.05. And I'm going to move
this point slightly up to add a little
bit of contrast. This is too much. And also I need to check
convert pre-multiplied to only, so that will only be applied
on the foreground mountain. Let's try it. Really
tiny, very like 0.005. So those are the before, there's the after,
before and the after. Maybe you can also probably remove some red from the shadows, but you
need to move it. No, this will not look good. It's not look good. Maybe let's try to lower the
blue to add more yellow. Yeah, and this also won't work. Let's remove it from
the highlights. Maybe we're actually
removing a little bit of blue from the
highlights kinda works. So this is the before
and the after. There's the before and
this is the after. Maybe let's try add some
red to the highlights. This is actually Looking nice. This is looking nice. Let's see. This is the before
and this is the after. It is definitely looking better. And the cherry on top, which is the hue and
saturation node Shift a. And let's look for hue,
saturation and value. Let's put it here and
let's adjust e.g. the hue to something
like 0.4, 9.4, the saturation maybe you can 0.95 to make it less saturated. And this is the look that
we are getting right now. Let's say
hypothetically, we want to see the original image. Make sure that you
select only the effects. You should not select
the Alpha over nodes. Let's sit em. This is the before, there's the after, before,
and this is the after. And I guess there's a huge
difference between them. This is for the first part which is adjusting the coloring and all of those cells that are related to each
element on its own. Right now we are going to
do some global adjustments. The global adjustments
are basically the things that you will do at the
end of your node tree. The first thing I like to do after I finish
basically adjusting the coloring and
all of those stuff for all the individual elements, I'm going to do,
first of all to add another curves, the RGB curves. And basically this is
more of a creative thing. You can play with this
curve the way you want. And basically what I'm
trying to do right now is to nail a certain look
that I'm trying to get. So first of all, I'm going to maybe increase a little
bit the highlights, maybe create one of those S-curves basically by
doing something like so, basically trying to get a
look that you're happy with. That's what I'm trying to say. Maybe let's add a
little bit of contrast. Now this is too much,
even lower, it even more. Let's try really tiny
value like 0.00, 10.002. You can probably
also, let's say, what if we lower a little bit the red to get more
cyan into the short, or let's actually
bring it a little bit up and remove a little bit of blue and also move a little
bit of green to magenta. Yeah, this is the before, there's the after before
and this is the after. You can definitely see
like this lighting right now is a little
bit way more moody and more pinkish or more orangeish or whatever
you call that color. And yeah, I think
that this is better. After this, I'm going
to add a lens flare. What is a lens flare? It is basically an image that
looks basically like this, which we will put on top of the image to add like there is some sort of a sunflower or something like that, if
you know what I mean. So this is really easy
to add in Blender in the resources folder you will
have actually lens flare. So all we have to do
is basically to just drag it and put it
inside of a blender. And let's put it here. This is our lens flare. And let's add a mixed node
Shift a and let's add mix, not the Alpha over, we
need to make snowed. Next, let's put it here. We want to put the lens
of layer above the image. Right now, it will fill
the entire screen. This is not what we want. What we want is
basically first of all, to change the operation
from Max Mosley, you will find
yourself either using ad or you can also use screen. They both would give you
a really similar result. I'm going to leave
it as screen for now and we need to
change its location. To change the location, you
will need another node, and this node is gold transform. So go Shift a and let's
look for transform. Let's put it here and you will play with the x and
y until basically tried to put this sun or this
flare somewhere right here. So let's play a little
bit with the x. As you can see, I'm moving it. Let's for the location. I'm also probably going to
make it a little bit bigger. Let's say 1.2 or
let's try 1.31, 0.5. Yeah, this is more like
right now because it fills the entire screen
and it looks really nice. Honestly, from this
factor right here, you can change the
intensity of the sun, but honestly, I will probably
just leave it at one, so that doesn't look weird. Okay, So this is
for the transform. And one important
thing right now, because if you remember,
this shot is moving. So in case you're just going to render when
image, you're good to go. You don't need to
do the next step. But in case you also
rendered animation, you will need to
do this next step. This next step is
basically we need to animate the position. Why is that? Because if you remember, our
camera is moving. So here's what we will do. I'm going to hit
Control Space bar. I'm going to jump to
frame number one. So this is where
our sun flare is. Maybe let's try to move it. Okay, I need to select the viewer has moved
slightly down. Okay, let's get back
to our Transform. And I'm going to move slightly
too to the right. Okay? And I'm going to with the right mouse
button insert keyframe. And with the right mouse
button insert keyframe. I'm going to jump to the
last frame and I'm going to probably move this somewhere. It will probably disappear
behind something like so. And right mouse button and insert keyframe
selected both of them, hit D and make sure to change it to linear
so that animation doesn't go fast and then
slow down and then go fast. This is important because as I mentioned, our
camera is moving. So technically also the sun
should move with the shot. This should give you some really nice parallax if you
know what I mean? The last element
I'm going to add, which is a little
bit of vignetting, which is also
really easy to add. And you will find an image in the resources folder
called vignette, which is the picture
I'm going to use. Just take it and let's
open it inside of Blender. Let's put it here. Let's go Shift a and
let's look for mics. Put it here and I'm going
to mix it with black. Right now. Everything is black,
but I'm going to use this vignette as
a mask for this. I'm going to take the
Alpha and plug it to the factor and boom,
visited before. And this is the after, this
is the before and the after. As you can see, we made the edges of this
picture slightly darker to basically draw our focus to the most
important area of the shot, which is around here. And yeah, if I just
hit Control Space bar, this is the shant we
do have right now. I'm going to try and select all the different effects that
we did so that we can see the image we started with and the images and the image
that we will end up with. So let's select all
of these right here. Also these, also these, these, these technically right
now, if I hit em, I will see the original render without any sort of effect. So this is the before, this is the image
was started with, and this is the after as it did before. And
this is the after. And you can see how much
you can actually push your renders in the
compositing stage like this is a huge difference. It is almost doesn't look
like it, is it the same shot? And this is just
basically by virtue, doing some simple operation like curves and adjusting
some colors and hues and all of that here and
there until we start getting a result that
you're actually happy with. And yeah, this is basically
how you do your composite. The last step to basically
right now how to render this, because some people might
not know how to render this right now out of Blender.
Here's what we'll do. First of all, at the
end of my node tree, as you can see,
there is the Smiths, which are basically
the fog pass and the best paths which we didn't
use, unfortunately bad. Here's what I will do. I'm going to cut both of these two links and let's
connect mixed to the viewer. And these nodes, I'm
just going to leave them somewhere like far here
in case in the future. Somehow I needed them all. Let's put them right here. I will probably know
because they are muted, that I don't need these
notes either way. When it comes to rendering, we need to do the same thing
that we did before in the, when we were setting up
our rendering notary, go Shift a and let's look for
a node called file output. Let's put it here and
connect the image, which is our last node, basically connected
to the final output. Let's make slightly bigger. Hit Enter to open the sidebar. And from node properties right now we are going to
adjust the settings of the final render generally because this is the last step when we are going to render, I will highly recommend that you will live with the
way it is just render at P&G RGBA doesn't matter, honestly because we don't
have an alpha channel, but I'm going to leave it there. And for the compression
and all of these settings, just leave them
the way they are. The only thing I'm doing,
I'm going to change the location to a
more suitable folder. So I'm going to jump to
the Student Resources and inside of render. And I already rendered this image which has
called final render. So just create a
folder called final render and you can
basically call it e.g. highlights how he lands
underscore final. As you can see, this
is the Render amusing. So create a folder called
a Thailand's final. So I'm going to actually
just show you how to do it. Create another folder, e.g. let's call it final shot. Inside this folder,
I'm going to call it Thailand's final underscore. Accept Let's call it high
lands underscore, final, boom. All you have to do is
basically to go to Render and Render Animation. This shouldn't take so much time because
blender right now are just rendering an
image sequence of images. So it should happen like really fast and a couple of minutes. And I will see you
on the other side to show you the last step, which is basically
converting it to a video. Once you render is finished, you will have a sequence of
images, basically 1-120. And our job right now is
basically to convert all of these images into a video.
This is really simple. I'm going to also start
a flesh blender scene. And right away, right away, just don't choose the template
called video editing. From video editing
right now you will have a timeline and all that. I'm going to go to
Add Image Sequence, navigate to where you
saved your render, render, final render,
and select all of these images and click
on Add Image strip. Right now you will have all
of your images right here. The most important thing, we need to adjust our settings, which is 25, 60, so that we will have
the same aspect ratio. If you find that your image is slightly smaller than
the Video Preview, make sure to select
it and go to image. And you will have an option
for Apply Scale to Fit. Make sure to check scale to
fit and you'll be good to go. Our frame rate is 24, which is exactly what we want. The end is actually we'd
only have 120 frames. Let's keep scrolling down. And yeah, this is the most
important thing in the output. Make sure to select e.g. in the Student Resources
and the render, I'm going to call this high
lands underscore final, except make sure it is set to
this FFmpeg which has or F, F MPG, or know what they
call it, is basically MP4. Make sure you select this
option and you're encoding. Make sure it is MPEG4, which is basically MP4. I don't know why they use
these complicated names or the video codec. Make sure it is H.264
basically to render it as mp4. And for the medium quality, make sure I always said this
to high-quality just to basically squeeze as much as possible of quality
out of Blender. And yeah, that's basically it. You don't need to play with
any of the other settings. And right away just go to
Render, Render Animation. And right now Blender
will convert this into an actual video that you can watch and wants you to
render is finished. If I just jumped to my folder, you will find technically
in the render, you will have final shot,
which is your render, which is in the mp4 format
as you can see right here. So yeah, that's basically it. Thank you everyone for
tuning into this course. I hope you enjoyed it. I hope you learned
a lot and I will see you in future courses.
 Yassine Larayedh, VFX Artist