Transcripts
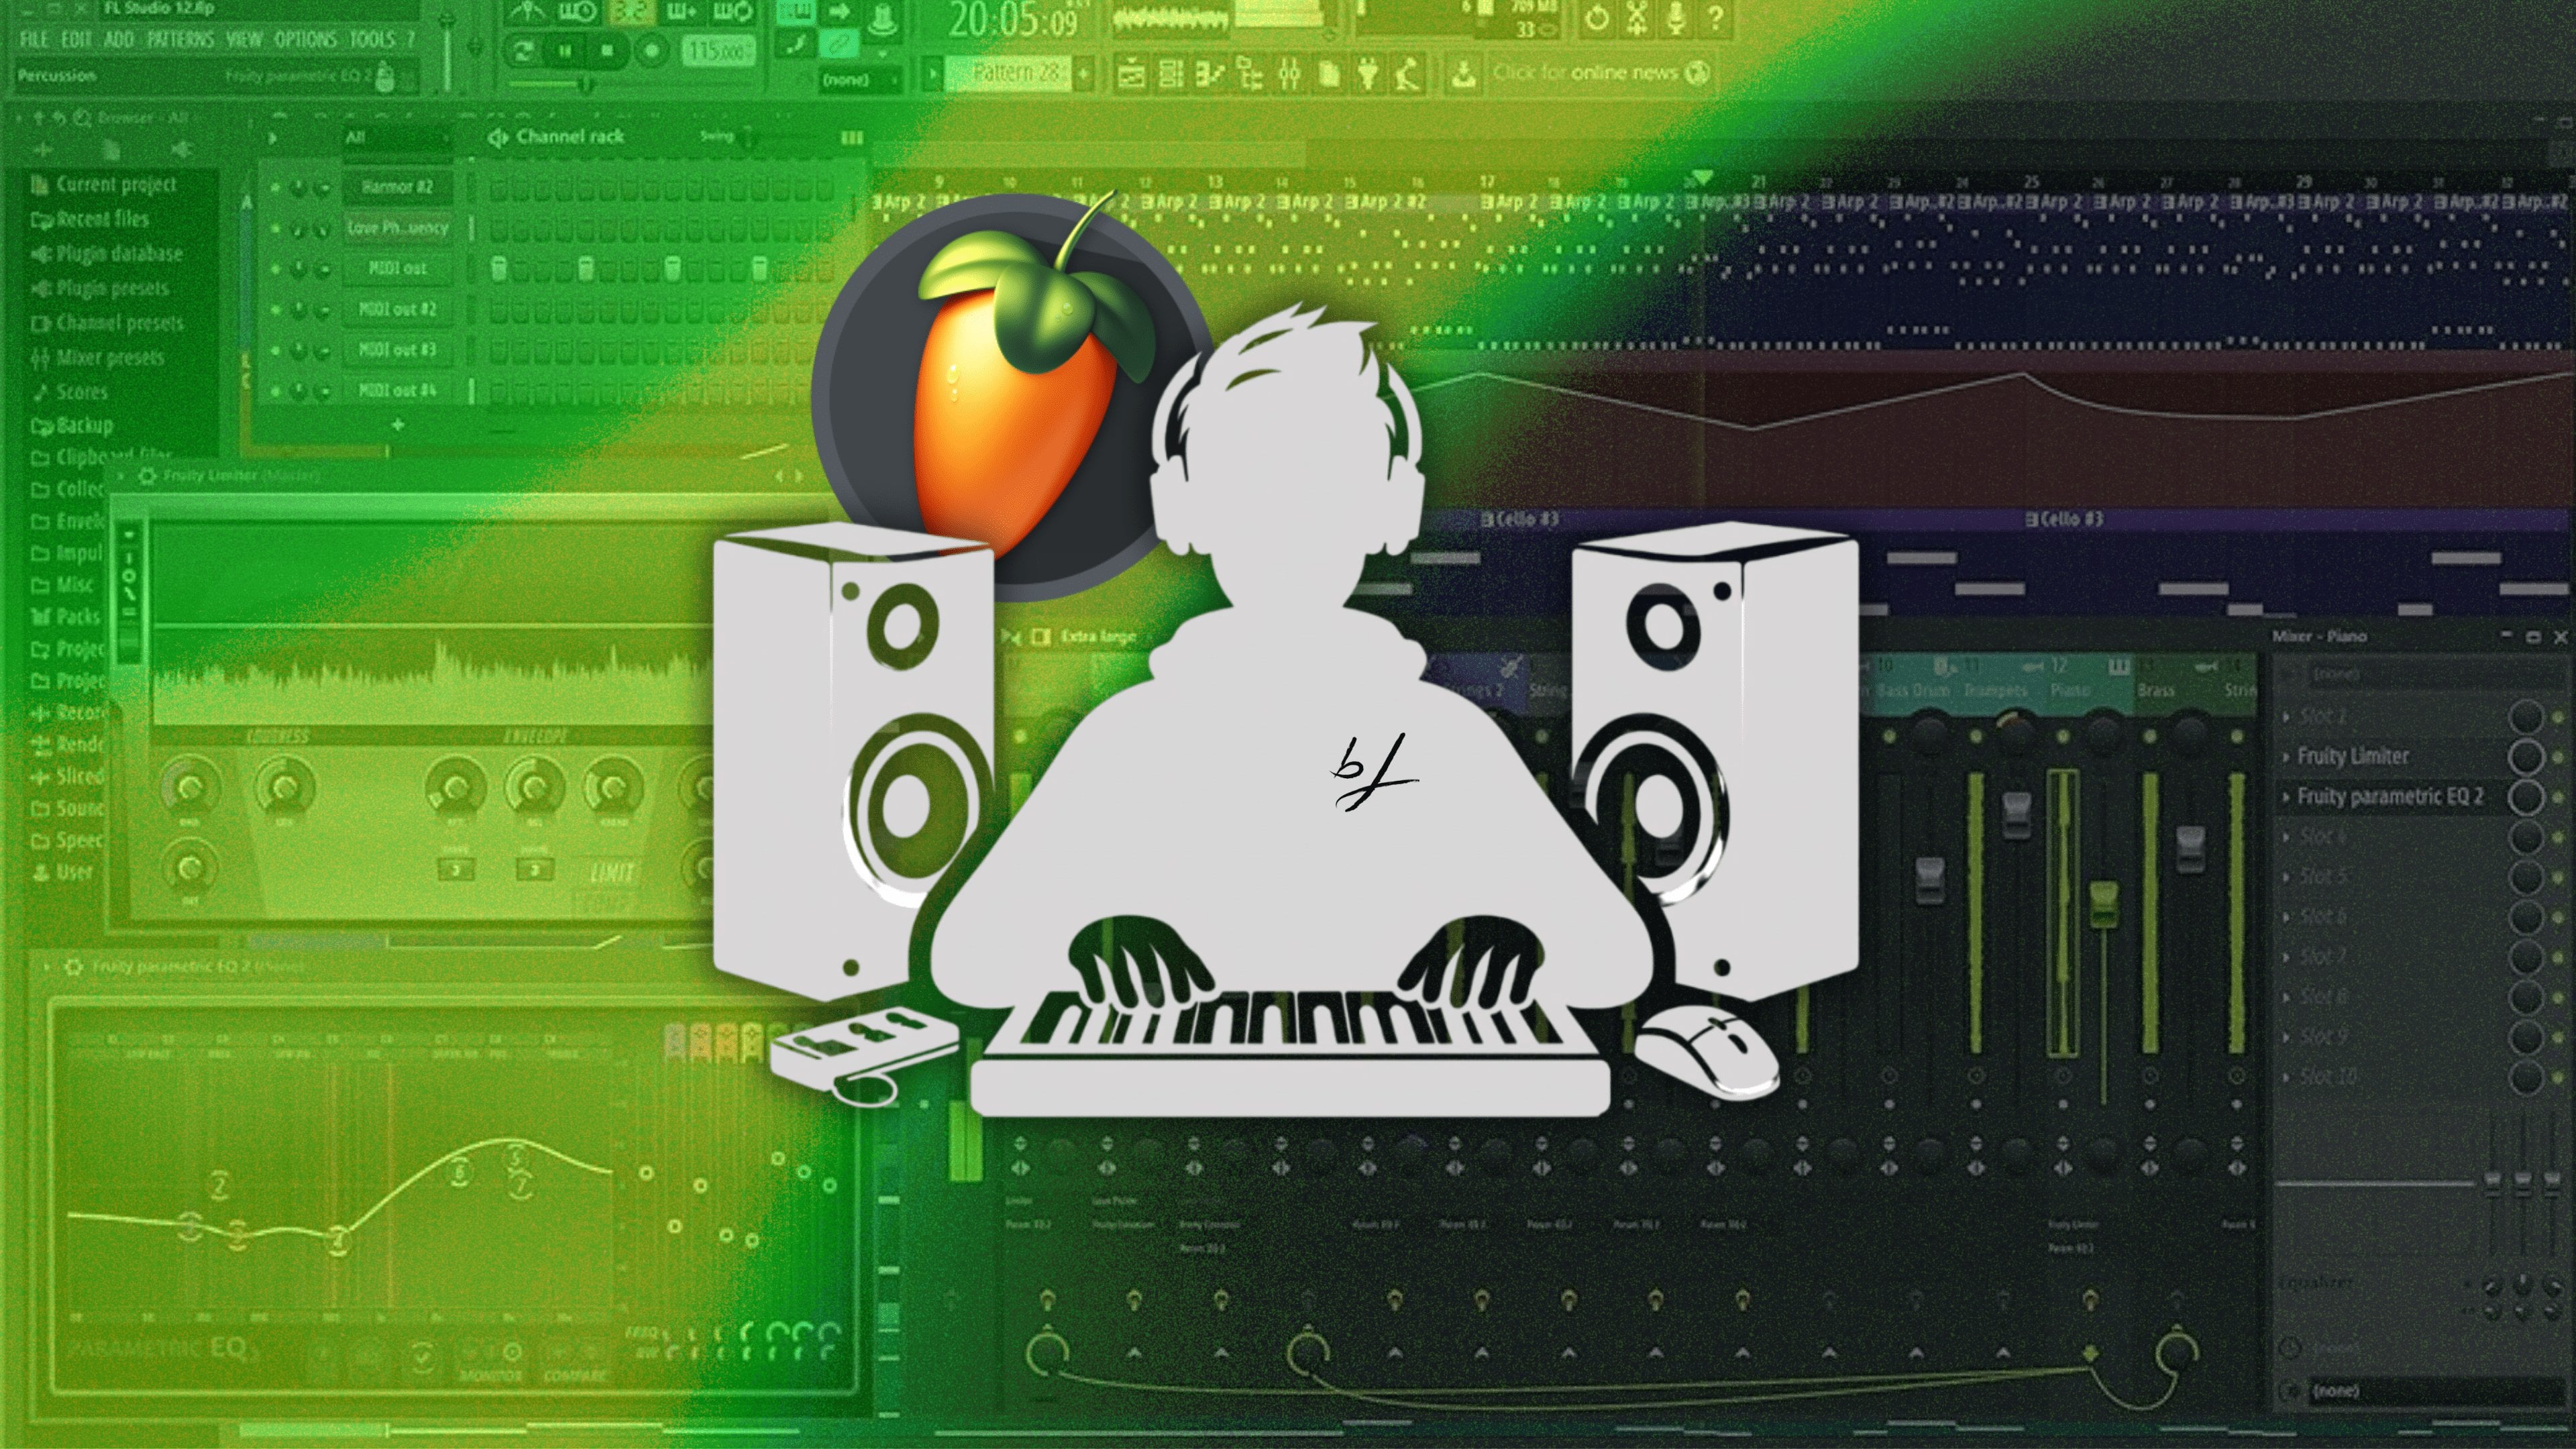
1. Introduction: You do not need to spend thousands of dollars at a
commercial recording studio, or wait to be signed by a major label to release your songs to
streaming platforms. Hi. I'm Jam. I'm a musician, music producer, and the owner of Dink Studios, located on 30 wooded acres in beautiful Southern Virginia. My whole life has
basically been music. I've been a musician
since I was 10-years-old, and am really
passionate about making music production accessible
to people like me. Women, non binary, and
the LGBTQ IA community. I'm a professional mixing
and mastering engineer who specializes in
singer songwriter, Americana, and Brock music. I have taught recording, mixing and mastering, to musicians like you
very successful. Home recording can
seem so intimidating. But that's just a
lie told to you by people trying to
gatekeep centistry. You don't need expensive gear. All you need is the proper
workflow and a gradar. So in this class, you will
learn how to record, produce, mix and master
your very own song so that it's ready for
any streaming platform. Throughout this process, we will cover how to sound
treat your room, what gear you need, and
what gear you don't need. How to use mite in
your productions, How to use a digital
audio workstation. Or Da to record, mix, and master your songs. And finally, how to distribute your music without
a major label. This class is for anyone
who's constantly asked, Where can I hear your songs? And your answer is nowhere. Whether you've never
recorded a song before, or you have a little bit of studio experience,
this class is for you. There is tons of information out there on mixing and
producing pop music. But there's a serious lack
of education on Americana, singer songwriter,
and rock music. This is why I wanted
to create this class. To provide you with
the skills you need to make your
music sound great. By the end of it, you
will not only have a finished song you are proud
to share with your fans, but a consistent workflow that you can replicate
over and over again to create quality music from your bedroom and put
it out into the world. I cannot wait to hear your
songs. Let's get started.
2. Orientation : Hello, and welcome to my class. I am so excited to share my years of knowledge
on recording, mixing, and mastering with you. I chose this topic
because making music is so much more accessible
now than it used to be. You no longer have to spend
thousands of dollars in a commercial recording
studio to get great sound and release your music to all
streaming platforms. Now, with a lot of practice
and a little investment, you can make great
sounding tracks right from your bedroom. This class is for beginners
and intermediate folks who feel empowered to release their own music on
their own terms. By the end of this
class, you will have a fully recorded, mixed, and mastered song ready to be distributed on all major
streaming platforms. I have also prepared a class guidebook that
will have links to every piece of gear
and every plug in that I use
throughout this class. You can upload your song to the project
gallery at any time. I highly recommend that
you upload in each stage, rec, mixing and mastering. This will allow me to help
you throughout the process, to make sure that you're
getting great sound, that your recording
levels are proper, that you've mixed it properly before going into
the mastering stage. I have great ears,
and I'm happy to help you stay on track to make
the best song possible. I hope that you enjoy
this class as much as I enjoyed making it.
Happy recording.
3. Picking Your Spot : Picking a perfect place to record is crucial to
having great sound. You want to pick a
spot in your room that has very little noise. So you wouldn't want to
pick a room that's right by a busy street or
next to a highway. One of the best spots to pick is your bedroom. For a few reasons. One, you probably have
some curtains in there, a bed, a bookshelf. All of these things help with reflective sounds that you don't want getting
into your recording. On top of things that are
already in your bedroom, if you want a little bit
more sound dampening, you can invest in things like base straps
for your corners, or you can get things
called acoustic paneling. That helps really
deaden the sound. I also recommend if
you're able to walk into your closet where all your clothes are
and shut the door, that's going to be the best
spot to record vocals because all of your clothes
are naturally going to dampen that sound. You could also purchase some acoustic foam or things like that to
hang up on your walls. If you have a book shelf, you can go ahead and arrange the books so that
it's a large book, little book, large book, little book, and sing
directly in front of that. It acts as a natural sound
effuser for your vocal. Try to incorporate items in
your room that you already have so that you
don't have to spend a lot of extra money
on sound treatment. The more cushioned or
soft items in your room, the better your recording
is going to sound. If you do live in a place like New York City where you
can't help street noise, things going on around
you constantly, you can invest in something
called a dynamic microphone. And what a dynamic
microphone does is it only picks up what's
right in front of it. And now that we've
picked a nice, quiet, well treated space in our
home, let's get to recording.
4. Guide To Gear: In order to start recording at home, you're going
to need some gear. Here's a list of things that you're going to need
to get started. First thing you're going
to need is a computer. You can have a desktop or a laptop. It doesn't
really matter. I do recommend getting a computer with at
least eight gigs of RAM so that you can run all the plug ins that we
list throughout the course. The next thing that you need is a digital audio
workstation or D, such as Logic, Pro
Tools, garage band. The one that I'm
going to be using for this course is reaper. It's very affordable
at $60 for life. The next thing that
you're going to need is a set of headphones. These are the one
Odio DJ headphones. There are 39 bucks on Amazon. They work great.
The next thing that you're going to need
is a microphone. I highly recommend getting
condenser microphone because they're best for vocals
and multiple instruments. You're also going to
need a pop filter. This helps keep plosives
and unwanted mouth sounds from entering your microphone and makes for really
clean vocals. The next thing that
you're going to need is an audio interface. An audio interface
basically just takes analog sounds and
converts them to digital. So that things that
you're playing on your guitar or
other instruments, your voice can be taken from the real world and put into a virtual sound card
into the computer. For this class, you'll only need a one to two preamp audio
interface with 48 volt power. If you're going to be doing
a lot of work with Midi, which we'll explain later, you're going to want
to get yourself a keyboard or midi controller. Any keyboard with a
USB port that you can plug into your computer
works as a mid Controller. You don't need to spend a
bunch of money on fancy stuff. I use a $89 Cassio keyboard
as my Mt Controller. We will also be using a lot of slate digital plug ins
throughout the class. So you can go ahead
and grab the slate all access pass to use the same plug ins
that I'll be using, or you can use similar plug
ins that come with your dw. And now that you know what gear you need, let's get going.
5. Introduction to Reaper DAW: Now that we have
all of our gear, let's learn our digital
audio workstation, Reaper. When you open reaper, this is what the screen is
going to look like. It might seem
intimidating at first, but it's really easy
to use. I'll show you. The first thing that we're
going to do is go to options, preferences, audio device. Then we're going to look
at our audio system here. And we want to pick ASIO. Then your audio interface driver should be available here. You want to select
the correct driver for your audio interface. All the inputs
should automatically be appropriate for your
particular audio interface. We're going to hit,
and we're ready to go. To get started, you can
just double click anywhere here or here to create a track. Once your track is created,
you're ready to record. You can pick what input
you want to record from on your audio interface by clicking in this
black section here. You're going to go
down to input mono and select which input you're
going to be recording from. Most of you are going
to be recording from one or two. So we're
going to select one. Then all you have to do is arm your track to record by
hitting this button here. And when you're ready to record, you're going to go ahead and
hit this record right here. To create another track, all
you have to do is double click anywhere in either
of these sections. To remove this track,
you just click on it. Right click, go down
to Remove Tracks. If you want to remove
multiple tracks, you can click on it, it Control, click, click, Right click, and remove those tracks. Let's look at some of
our project settings. You can hit this I
for information, and it will open up your
project settings right here. You can change your sample rate. Most people are fine to
record 441 or 4,800, just depending on
your preferences. 441 is perfectly fine,
pretty standard, 48 is a little bit clearer, and captures the sound
just a little bit better. So we're going to
select that one. You can change
your project's BPM here or your time
signature if needed. And then we're just
going to hit. You can also change your beats
per minute later in this section here by
either tapping here and typing something in to
change it and hitting Inter, or there's a tap feature. So if you want to tap along to your song to find
out how long it is, it will change the
BPM as you tap. Up here is your metronome. If you right click
on this, you can see all of the settings
for your metronome. You can turn the
primary beat volume up, secondary beat up or down. You can choose the pattern. So if you wanted to go beet, boop, boop, boop, or beet, boot, beet, boot, either one of those is
controlled right here. If you have a midi
device to set up, you can go to options,
preferences, Mi device, and select which medi device
that you'd like to use and hit K. To change the
input to the MDI device, click here, Input Midi and select which medi device that
you'd like to record from. To undo something
you've just done, you can click here for or
if you undoed by mistake. To save your
project, you can hit Control S or File Save Project. This is the basics of reaper that you'll need to get started. We'll go into some of the
more advanced features as we go through the class. Now we'll see it in action in the next class,
recording at home.
6. Recording: Now that we know how to use our digital audio
workstation Reaper. Let's do some recording. We're going to start by
recording acoustic guitar. Recording acoustic
guitar is super easy. We're going to put the
condenser microphone about 1 ft from the 14th threat. We're going to take it and
we're going to angle it slightly towards
the hole, slightly. You don't want to put
your microphone in the hole of the guitar
because that creates a lot of that boomy
sound and takes away from the brightness
of the guitar itself. We want to make
sure that we're not wearing any bracelets or anything that's going
to make a noise when it clicks
against the guitar. My necklace sometimes can hit. And you don't want
that to happen. We're going to tuck that in. We're going to make sure that
when we strum the guitar, our levels are between
negative 12 and negative 18 DB on the meters. If we find that the guitar
is too loud or too quiet, we can turn up the
gain or down the gain by using the knob on
the audio interface, not the meter itself. We're going to play along to
a click track or Metronome. If we want to add
any instruments such as drums or mite,
we can do that. This is what it looks like
while it's recording. If you can, try to double
your rhythm guitars, which means playing
the part completely Then creating another track and playing that
exact part again. This will help you a lot in the mixing process to have
wider sounding guitars. If you're unable to
do this, don't worry. I'm going to tell you a
mixed tip later on that can help you have wider guitars
without playing the doubles. But if you can,
play your doubles. For electric guitar,
you have two options. You can plug your electric
guitar directly into the audio interface using a quarter inch cable
like this one, or you can use your microphone to capture the sound of the amp. If using the same condenser mic that you're using
for everything else, simply aim the condenser mic
to the center of the amp, and pull it away until the levels and sound
are to your liking. When recording vocals,
you'll want to use a pop filter and a condenser
microphone together. Simply put the pop filter about one fist away from
the condenser microphone, and you'll want to sing just a few inches
from the pop filter. Sing in the song
for skill share. You're also going to
want to keep your levels between negative 12 and
negative 18 DB while recording. Make sure while you're recording that
you're not clipping. Clipping simply
means that you're singing or playing your
instrument so loud that it's going beyond the level of the meter into
the yellow or the red zone, causing distortion,
harsh noises, and not great sound. We'll worry about how
loud it is later. It's better to record a little too quiet than a
little too loud. Now that we know how
to record at home, let's learn how to mix it.
7. Using MIDI: Let's talk about Midi. Midi is just a term for using virtual instruments that live
inside of your computer. You can program drums, violins, synthesizers, even guitar,
by using this powerful tool. I'm going to show you
right now how to use Midi to make your songs
better in reaper. First thing that we want to
do is create a new track. We're going to make sure that
our midi Controller is on. We're going to go to options, preferences, Cassio USB My
because that's what I'm using. Then we're going to
click here, Input M, Cassio, A channels.
That's very important. Now when we arm this to record, you'll see when I
press a button that it is picking up audio with
this yellow bounce, but you can't hear anything. That's because MDI requires a virtual instrument
to make sound. All we have to do is
go here to our F X, and we can look at
the instruments that are available to us. By clicking instruments. The one that I'm
going to be using for this example is the
A two ultra bundle, which is included in the slate
digital All Access Pass. We're going to select
that and hit ad. I know this instrument
looks a little crazy, but all it is is a bunch of
synthesizers. Don't worry. All we have to do is click here and decide what sound we want. We can select any of these instruments here and
they will show up as a MD. I like this sound.
Let's pick house grand. We're going to
close the plug in, and when I hit a
key on my keyboard, It makes a sound now. There's two ways to record mite. One is you can simply hit the record button
and play along. Or you can program
it with your mouse. Select the amount
of bars that you'd like to add mit to by holding down your mouse and dragging across until you
get to what you like. Then you're going to click here, go to Insert new Mi item, and now you have the Mt mapper. This is your midi mapper. It shows you all of the keys
here on this left side, as well as your timing
map here on the right. This is great if
you'd like to program instruments with your mouse and don't have a
midi controller, or if you need to
make adjustments to a Mt that you've
already recorded. Let's say I want to
select this D here. I can just hold
down my mouse and draw where I want
the notes to be. Then when I play it,
It plays those notes. Now let's say I wanted
to change a note. All I have to do is
hold this down with my mouse and drag it
to the note I'd like. Now it'll play that note. I can make notes longer or shorter by just
holding up my mouse, dragging back and forth. Now we just close
the mini mapper, and the notes will play. Now, let's say I don't
really like this sound anymore and I want to make
it something different. You don't have to
delete your work. All you do is click the F X again and change it to the instrument that
you want it to be. Now, let's say you
want to add an entire drum kit to your song. You can do that in My as well. I'm going to show you one
of my favorite programs. This is the Stephen
Slate drum kit, and it's totally free. You can download it online to select a kit that you'd
like to play and double click. Hit this grooves button here, and it has a wide
variety of fills, drum beats, all kinds of
stuff in there for your song. Let's just pick
one. You're going to take this, drag and drop. Move it to wherever
you want it to be by holding down the
mouse and dragging, and there is your drum beat. Let's add a fill for fun. Close this plug in. And
there's our drum beat. A. Now, let's say that we wanted to
move the kick drum or snare drum around to fit it. We can just double click here, scroll in, and we can use the midi Mapper to
change where the kick is. Here's the kick. Now let's say that we wanted to
add another one here. All we would have
to do is draw here. If we wanted to remove this one, we could double
click to remove it. If we want to put it back, we
can hit control Z to undo. We could also add symbols, snare, more high hat,
whatever we want to do. Super simple way to add really cool drum
set to your song. Now you know how to use
this powerful tool to make your songs incredible.
See you on the next one.
8. Using Plug Ins: Before we can start mixing, we need to know what tools
we're going to need to mix. The tools that I will be
showing you in this class are called plug ins.
What is a plug in? Plug ins are just
a digital replica of outboard gear that you
might find in a studio. They're a more affordable
way to mix music. Analog gear can be very hard
to learn and very expensive. So we're going to do something called A in the box mixing, which is just using plug ins to make our song sound great. A plug in can be anything from
an equalizer, compressor, saturator, to a
virtual instrument like we learned in our intramit. Here's how we open and
choose plug ins in reaper. To add a plug into your track, all you have to do is
click this F x button. A list of plug ins will pop up. You can either type the
name here under filter, or if you see it right away, you can click on it and hit add. This will add the plug
in to your track. To remove the plug in, all you have to do is select the plug in you want to remove and hit,
you guessed it, remove. Plug ins will always work in the order in which
you place them. If you have an EQ and you
want to add a compressor, the compressor will work
after the EQ, etc, et. Now that we know what a plug in is and how to add
it to our track, we can use it in
the mixing process.
9. Equalization and Compression: Before we can mix,
we need to have some understanding of a
few fundamental things. The first thing being
EQ or equalization. The next thing is compression, how to use a compressor
and what does it do? Let's dive in. The first thing that we're going to
take a look at is EQ. Here we have our equalizer. I'm just going to explain to you what some of the stuff means. On the bottom, we
have our hertz. The human ear can
only hear from about 20 to 20,000 hertz. This is just a
measurement of frequency. 20 being very low
low frequencies, such as a sub base, and 20 k being very, very high frequencies, maybe
like a symbol or a high hat. We need to be able to
balance these frequencies to make everything fit and
sound really good in the mix. I'm going to play for
you this guitar part, and I'm just going to sweep the EQ through the entire thing, so you can get an idea of
what frequencies go where. As you can see, as
I'm sweeping through, all the low end
starts to disappear and you get to hear these
really high frequencies. There's a few terms
that you need to know. High pass, which means
to cut out the low end, and low pass, which means
to cut out the high end. There's also, which means to remove a frequency and boost, which means to make
a frequency in sod. I'm going to show you
an example of boosting. Now I'm going to show
you a sample of cutting. As we go through the
mix, we want to boost pleasant frequencies and
cut unpleasant frequencies. That is Q. Next,
I'm going to show you compression.
What is compression? All it is is basically
taking anything that is too loud and dampening it down and anything
that is too quiet and raising it up closer to the volume that
you want it to be. Here we have a
compressor by waves. This one's a really
easy one to take a look at and be able to visually
see what's going on. Few terms we need to know first. One is threshold. This is at what
volume or what DB, do you want the
compressor to start working to start bringing
down that volume. Then we have makeup
gain, which is, how much do you want
those lower volumes to be closer to the main volume
in which you want it to be? Then we have ratio. How
many dB do you want the compressor to bring down
the volume when it hits? If you have a ratio
of three to one, it means that for every one DB that that volume is going
over what you want it, it brings it down three dB. We have the attack,
which means how fast do you want that compressor
to actually grab that sound? We have release,
which is how fast do you want the compressor
to go of that sound. Let's play this guitar
and show you how the threshold and the
ratio actually work. We're going to bring our
threshold just down enough to where you can see the
yellow line bouncing above. We're going to take our
threshold three to one, which means every
DB that I go over, I want to bring it
down that much. Then we're going to increase
the makeup gain so that those little d does
will go back up. Then we decide, we want the compressor to
act a little faster. We're going to bring in
the attack. Pretty simple. Here's another example
of a compressor. This one looks more like an analog compressor or one that you might
find in a studio. Everything's exactly the same. You have threshold ratio, make up gains right here, and you have your
attack and release. This one, we're going to watch
a little bit differently. We're going to pay attention
to this meter here. We're going to start by taking
our ratio to three to one, and we're just going
to move the threshold up until we see this
meter slightly grab. Then we're going to increase our makeup game
just a little bit. Maybe we want the compressor
to act a little faster. We go to turn up our attack. And to get a more natural sound, I'm going to just take the
release down a little bit. That's it. Compression is
how we increase volumes, turn down things, and make things sound really
even in the mix. And now that you understand
EQ and compression, we can mix ourselves.
10. Mixing Drums: Now that we've
recorded our track, we have to mix it
so that it sounds well balanced for streaming
services. What is mixing? Mixing is basically
taking all of the instruments and the vocals and making everything
sound cohesive. So you want to make sure
your levels are correct. You want to make sure
nothing is sticking out. Nothing is too loud, nothing is too quiet, and everything's
blended well together. We also want to
make sure there's no competing frequencies, so everything is audible and sounds pleasant
to the listener. Don't worry about
loudness during the mixing stage.
That's mastering. Right now, we're just going
to make sure the song sounds good and
is well balanced, we'll make it louder later. So let's get into it. All right, here we have all of
our instruments. We have our midi drums.
We have our shaker. We have a bass guitar,
an acoustic guitar, a lead guitar, and
a middy synth. We're not going to worry
about vocals right now. We'll cover that in
the next course. I like to mix like how I read. I start left to
right, I put drums, bass, guitar, keys,
vocals, all in that order. Then we're going to add in
one instrument at a time. We're going to start
with our midi drums. We're going to mute
everything else, and just listen to
our midi drums. Now, we have the
Stephen Slate drums that I showed you earlier
in the minting course. So we're going to do is we're going to hit this mixed button. And right here, we get control
over every single drum. There's a few different aspects. There's overheads, which are the microphones that would
be placed over the drum set. Right here, overheads.
We have room mics, which kind of capture the
sound around the room. And then we have a microphone on each one of the instruments. We also have snare top, stare bottom, snare ring. These are just different
ways of miking a snare drum. We have a kick in kick out. So kick in is basically
when they stick the microphone inside
the kick drum, and kick out is when they place the microphone on the
outside of the kick drum. So I'm going to use the mix inside this plug in
to mix my drums. And I want to make sure that everything sounds
really well balanced. Usually, the settings
are pretty good. One thing that I
like to do is take the snare bottom and the
snare ring if it's down, leave it alone, but the
snare bottom and snare top, and I like to pan the snare
bottom just a little bit. And then I'm going to turn the
ring up just a little bit, and I'm going to pan
that to the right. And what this does
is it just makes my snare sound a little
bigger in the mix. Then the kick in and kick out. I want to listen
to those and just see how those are
sounding together. If I wanted to be a
little bit more boomy, I'll pull this kick out up
in the mix a little bit, which I always like
a good boomy kick. I'm also gonna turn the
overheads up just a little bit. And I'm gonna turn the mic down. The reason is I'm gonna add a
little bit of reverb later. Sounds great. Nice and punchy. So what I'm going to
do right now is I am going to add something
a little something, something to get these
to sound more real. So we're going to
go with the virtual mix rack by slate digital. Once this is loaded, we're
going to go to drums, and we're going to
go to drum bus. We're going to go to drum
bus tight and punchy. We have thick, we
have polish vintage. I'm just going to go
with tight and punchy. This is going to add
a compressor and a little bit of EQ
onto these drums. Now, you notice right away that we're already in this
red zone yellow zone. So what we're going to do
is, I'm going to close this. I'm going to select
all these tracks and just turn them down. This is called gain staging, making sure that all the tracks start off nice and
quiet and have lots of head room for when we throw on things like
compressors, as you just saw. So now we can open this
back up and not worry about the red or yellow that
makes it go distortion. All right. So here we go again. We noticed that the compressor
isn't moving at all, which means that it's
not really doing much. So we're going to
up our threshold just to see this
knob right here, this little meter bounce. And now that it's bouncing
just a little bit, we're going to turn the make
up game just up a hair. Those are sounding
nice and balanced. Now, one super secret
trick that I like to do to make middy drums sound just a little
bit more realistic, as I put a saturator on them. What a saturate does is it just adds a
little bit of grit. Into the signal, and
this causes it to just sound a little bit
more punchy and real. This is the Abbey road
saturator by waves, but you can use anyone you want. I kind of click this down to the 750 frequency range there. And I'm just going to
turn down the post E Q, which means that I don't
really want a lot of those high end getting
elevated, just the low. And we're gonna hit play, and I'm going to use this button right here to make the kick
sound a little more punchy. So you'll notice when I
put it a post D Q here, all those highs just
start ringing out. So that's what we're listening for when we pull this back down. So that's just making it
sound a little bit more real. Now, what I'm going
to do is this is the blend cause we don't want
100% of this going in, just enough to make it feel
a little bit more punchy. So we're just going to bring
this down a little bit. And that's making our drum
sound a little bit more real. Now we're going to do
something called bussing. Basically, all
bussing is is sending one audio to another track
where we put an auxiliary, effect, plug in,
anything that you want onto the separate track that the original
audio is going to. What this does is it
allows a percentage of the signal to be
affected by the plug in, so that we're not changing
the entire audio. We're just changing a
little bit at a time. Busing is really important, especially when it comes to
adding effects on vocals, and you can use it to create an entire effect for an entire chunk of instruments,
if you would like to. So busing is very simple. Don't overcomplicated. All it is is sending
one signal to another track in order to have less of that track
affected by a plug. To create a bus and reaper, you just double click
anywhere in this empty space, and that creates a track. Then we're going to
move that over next to the track because it's
helpful for organization. It's not required, but it's
helpful for organization. Another thing we're going to
do is we're going to label it by double clicking
and typing drum bus. Then we're going to go right
here in this route section, and we're just going
to hold this down with our mouse and we're
going to drag and drop. Boom. That's all it is. Then we're going to add
the plug in to x track. We're going to add
reverb to our drum set. We're going to pick this
slate digital te classic. We're just going
to add that there. And now we have our reverb, and we're going to go
ahead and we're going to do a little bit of
low pass and high pass, which means that some of those high highs
and the low lows, we don't want reverb on them. So we're just cutting them
out of the desired reverb. That's all that means.
For anything drums, you can mess with all
of these two taste. Please do not turn pre
delay on drums for reverb. Because what this does
is it pre delay means, the reverb is going to come on before the actual drum hit. This can make your drums
sound off in the mix, like they have bad timing. You can do pre delay for
anything except for drums. With means we want
the reverb wider, so it's going further
into your headphones. So we're going to make
that wider because we want to make it sound like
our drums are in a big room. We're going to go ahead
and turn the decay down. Decay and rever basically
means the tail. How long is the reverb
stretching out? We don't want it
stretching out too far in a drum set because then
things get a little muddled. They were going to hit play,
and we're going to use this meter to turn
down or up our reverb. And now our drums
sound like they're being played by a real
human and an actual.
11. Mixing Instruments: Now, here's the important part. When you're finished
mixing one instrument, you don't want to mute that one and then
mix the next one. What you want to do is turn them on one by one and mix
everything together. The instruments do make a team. You do not want to mix
one, turn it off, mute it, go mix the other because
you don't know if they're blending well together or if their frequencies are competing. So we're just going to
unmute our bass guitar. We're going to play the bass
guitar along with the drums. Very good. Alright. Don't
be afraid to use presets. We're going to be using
a lot of presets in this class because it's
just an easy way to learn. So we're going to go here and
we're going to click this, and we're going to
go down to Rock. And we're going to
go to base guitar. We're going to go to click that. And that's going to show you typically how a bass
guitar should be Eque. We're doing a little bit
of a high pass filter, and you're boosting a lot
of these high frequencies. These are the frequencies that cut through the mix
on a bass guitar. They do exaggerate a little bit in this particular plug in. So I'm just going to
bring that down ale bit. But then we can hear that those frequencies
are popping out. And that allows the
base to cut through. Next, we're just going to add a little bit of compression, which we learned about earlier. And we're going to do we are going to do about
a two ratio here. And we're going to move
this threshold while it's playing until this meter
grabs just a little bit. Then we're going to
turn up our drive and a little bit of makeup game. The reason that we do this is
so that those hard plucks, dum, da dum, d, dum, dum, dum. Anywhere where the bassist
is really hitting it. It takes those, and it just
pushes those volumes down. It grabs it and contains
it a little bit better. It also makes the bass
guitar sound super even. So throughout the entire
song, it's just super even. And that's usually all
I do to a bass guitar. I also make sure
that I'm matching it using my ears to the
volume of the drum. You want the bass and the
drums to kind of be equal. Maybe the bass poking out
just a little bit more, but you want to be able
to hear everything that's going on. All right. Now we're down to
our acoustic guitar. And I'm going to show
you a trick with acoustic guitar that you
won't learn anywhere else. So, for our acoustic guitar, we've only recorded
one line, right? We want to make sure
that our acoustic guitar sounds big and full. And a couple of ways
you can do this, as we talked about before,
is recording a double. So you would record
one guitar part. You'd pan that to the left, you'd record another
guitar part, and you'd pan that to the right. Panning just means moving that signal to the
other speakers. But let's say that
we didn't get that. We didn't do two guitars.
We only did one. This is how I create something
called a fake double, and it makes your guitars sound thick and wide and
lovely in the mix. So all we do is we take
this acoustic guitar track, and we are going to
first add some EQ. And again, we can just
use a preset because we want to make sure that
we're learning here. So let's go to rock, and
let's go to acoustic guitar. Now, this preset again pushes those highs really
high for my taste. So I usually just grab them and just pull them
down a little bit. And then we'll watch the
frequencies around here. And maybe I do want
a little brighter. And we are going to also add just a little bit of that
same compression to grab. So we're gonna do
two, and we're just gonna move this till
this meter bumps. Okay, now that we
have our effects. We're gonna go to acoustic atar. We're gonna right
click, and we're just gonna hit duplicate tracks. Okay? Now we have two of
the exact same track, and we're going to turn
off our snap to grid. We're gonna zoom
way in till we can almost see every ounce of
these wave files here. And we're just gonna grab
this by holding on the mouse, and we're just gonna move
it over like a tiny bit, like that. Okay?
So unnoticeable. When you scroll
back in. Then this is how you pan. There's
a little button here. You're just going to pull
that all the way to the left, and you're going to
take this track, and you're going to pan that
all the way to the right. Okay? And now our
acoustic guitar is going to sound fuller
and wider in the mix. And we can even pan it a
little less if we wanted to, just to get it a fuller, but you want to make
sure they're the same. So this says 88%. You want to make sure this
says 88% as well. All right. And here's how that sounds. And I am noticing you can hit control to select
multiple tracks at once. I'm gonna pull it down
just a little bit, 'cause it is coming up a
little too loud for me. Okay. And now we're gonna
create a bus for the guitar. So we're gonna double
click on this empty space. Drag this over. We're going to name this
acoustic guitar bus. All right. And we're going to
drag both tracks into that. And then we're going
to go ahead and add a little bit of
reverb on that bus. Alright. Maybe a little chorus, maybe a little width, decay. We can leave it alone. And
then we'll blend to taste. Perfect. Sounding
great. All right. Now we have this lead guitar. We're going to keep
this shaker for last. Now I have this lead guitar. Now, there's a few things
that we can do with the lead. We can do the same
doubling trick where we put it wider in the mi. We could choose to just pan the lead guitar off to the left. We could add a
virtual guitar amp, which I'm actually
going to show you now. Let's hear what
it sounds like. And I do notice it is
kind of hard to hear. So let's do this first. Let's go ahead and put some EQ on here,
because the best way. The best way to get frequencies to balance within your
mix is by using E Q. So we're going to do a severe
high pass filter on this. And if you want to lead guitar
to cut through the mix, you can boost in this
three K area right here, so you're just gonna
click there. Boom. Boost that up. And after that, let's
go ahead and add, 'cause I really want
to show you these. Don't forget to save
your project a lot. I really want to show
you the virtual ams. So let's do one. This is a DI guitar, which means that we
recorded it by plugging the chord directly into
the audio interface. So a lot of times that
sounds kind of thin. So we can use something
called a virtual amp. And it shows you all these
amps that you have, like, such a good choice of
what amps that you want to make that guitar sound like it was actually
recorded in an amp. So we'll go through, and let's get something
kind of like, here we go. Here's like a marshal,
like an old marshal, and it'll say, do you want
the amp and the cabin. I always say yes. And then we
can go ahead and play this. Miss Solis, you can hear. And it sounds great. It
sounds like an actual amp, that we can go down
and pick some petals. Like, let's say that we
wanted to put a chorus on it or some fuzz or
distortion or maybe, like, a tube thing. Let's put that on there,
just so we can play with it. And that makes it
sound kind of fun. It's like a little
lo fi kind of thing. Let's see how it
sounds in the mix. Kind of fun. So how we're going
to get it to pop out even more is we're going to go ahead and choose a side.
It doesn't matter. Humans choice. You can
pick it right, left. Just make sure that
when you're panning, that if you choose one
thing to go right, at a certain frequency, if you have another thing
in the similar frequency, it needs to go left. So keep that in
mind for balance. But right now, we're
just going to pan that to the right about 45%. Sound and groovy already. Alright, next, we
have this synth. It is just a middy
synth from the ant two. And what we're going
to do is because we want this one to not compete with the one coming out of the right is we're gonna pan this one a little
bit to the left. And it might not need
anything, but we can check. What we're going to do is
just add a little bit of EQ. And the only reason
we're doing this is anything from like, zero to 100 hertz is going to be boosted
in a high five speaker. So any commercial headphones or any high five speaker is going to boost
those frequencies. So you really want to make sure that if those aren't needed. So, like, a base guitar and
a kick drum needs them. But a high pitched synth
doesn't need them. So we're gonna cut them out so that they don't
build on top of each other and cause
our mix to sound muddy. That's where the muddy
sound comes from. It's from not cutting
out those zero to 80 hertz on non
base instruments. So even though this synth
sounds really good, we're just going to get rid
of the stuff we don't need. Perfect. Alright, and now we have this
little auxiliary shaker, which is way too loud on the mix right now, but
I'll play it for you. So all we're gonna
do with this one is maybe I'll just pan it a little bit to the left
and turn it way down. And that's already
sounding great. See how easy it is? It's not hard to
just balance bus, reverbs, a little
bit of panning, a little bit of EQ
and compression. And your mix is almost done. Now, let's do the
hard part. Vocals.
12. Mixing Lead Vocals: Mixing vocals is
definitely one of the more challenging
things about mixing. Takes a lot of practice, but if you keep
going and you follow these instructions and you
adjust to your vocal style, you'll be able to mix vocals. No problem very soon. So let's get into it. So
here we have one main vocal. We have a secondary lead vocal for a little
bit of doubling. We have background vocals,
three sets of them. So we're just going to listen
through this section with these raw vocal tracks to see what they sound
like altogether. Then we're going to blend
them in one by one, and we're going to
start with the lead. I never found my brain
back during the story. I know mistakes. I made the fun. So we have a few different
things going on here. We have the main vocal
and the backgrounds, and we even have this little
whistle part in here, so this is very interesting. Let's go ahead and mute
all of these vocals here. And here we have our main vocal. Now, one thing we want
to do is we're going to take if you hold down the
mouse and you move it, you can remove audio. I highly recommend removing any audio that isn't
necessary on the vocal. And the reason is because this is where we're
picking up a lot of sounds maybe from the room or the computer or
things like that, and we just want to make sure
that they're not in there. So we can go ahead
and click here and we have S for split drag. Real close. And we're just going to do this
for all the vocals. S for split, kind of get
in there. Me in here. And this might also get
rid of some breaths, so we have to be really
careful when we're doing vocals that close to one another. We'll
just do those for now. Go to play this
and make sure that there's no big breaths
that we don't want. Sometimes we do want
breaths for e motion. In that case, we
just take our mouse. We go to the top of the
track, and you'll see this kind of angled thing. You're going to pull on it, and that's a fader, and
that'll fade in. And then you're going
to go to the end of the track, and you're
going to fade out. And the reason we're doing
this is so that there's no hard pops or clicks when
the audio starts coming in, and it also fades the breadths. I never found my way
back to the story. Perfect. So we're going to
just work with this section. We're going to open up our F X, and the first thing
that we're going to start with is you guested EQ. Now, this is where
Pop, Americana, and rock all differ in some way. For Pop, you really want a lot of this high
air over here. You really want a lot of
that, like, shiny crispiness. But in Americana, di, like this song is a
little bit more indy. We don't really want to
highlight those bright areas. We want her to
sound more natural. So we are going to go ahead and not use any kind of
preset for our EQ. And the reason we're doing
this is just because we are honoring a singer
songwriter genre. The first thing that you
want to do is you want to create a high pass, and we're going to move that in before we even get started. Again, we're doing that because we don't
want any of the mud. Now, in vocal, body is going to be in
this hertz here 200-500. This is going to be your
body of your voice. If you recorded your vocal
and it's a little too boomy, you can cut a little bit here. But if it's not
boomy and you want more fullness, you
can boost in here. This is going to be kind
of your boxy nasally area for about two to five. So if you're singing or you're dealing with
a singer that has a little bit of
the nasally thing going on, you can cut it there. This is going to be
your sparkle area. So shine. It's also
your syllas area, which is your hard Ss, your harsh frequencies
like Ss and et cetera. So you want to be
careful boosting this if you have a lot of ess in your
song or harsh sounds. So we're going to
listen through, and I'm going to use those
EQ tools to EQ my vocal. I never found my way
back to the story. I never found my wad. That do the story. I never found my way. That do the story. So she has a lot of
low end in the voice, and I really want
to highlight that. And then I also want to take out some of this boxiness here. I never found my way. That do the story. Perfect. See, we didn't have to get too
crazy with the EQ. Now we're going to add a D S. What a D SR does is
it takes those harsh Ss, it removes them or softens
them from the vocal. You don't want to DS too hard. So Ss are okay, but you just want to get
them sounding less sharp. If you DS too hard, you might sound a little lispy or like they're not
speaking properly. I never found my way. That dear the story. So just where she says store, we're bringing this
down so that it just hits a little
bit over that. I never found my way. That dear the story. We could even ease up a little
bit. Let's just do story. Hear the story. Hear the story. Perfect. Easy, pas. Now we're going to add
our first compressor. I like this compressor. By waves. And the
reason is visually, it's really easy to
see what's going on. So this is going to be our
first compressor on here. So we just want
to make sure that this one is just
grabbing the peaks, so anything that's
really popping up, 'cause we're going to
use multiple compressors to grab different
parts of the vocal. It's our first one.
So we're gonna do is we're going to take
this threshold down. We're going to see a
yellow line bouncing up. We're gonna take it just so
that at the loudest part, the yellow line bounces
right above the threshold. I love story. There we go. And then I like to use a ratio of three to one. I found my way. The story. And I'm gonna leave the makeup
game alone on this one. And I'm gonna bring
in my release. And what this is
going to do is make the vocal seem closer
to the listener. I never found my wad. B the story. Perfect. Next. We are going to add the virtual
mix Rack by slate digital. This is another one that has
a lot of presets for vocals, but most of them are pop. So I'm going to teach
you how to build your own Americana singer song writer virtual mix Rack Rack. The first thing we're
going to do is just get rid of all of these.
We do not need them. Okay. We're going to
go down and select a virtual preamp because
most of us are not going to be recording with
super fancy preamps at home. So I'm going to grab
this Hollywood. The next thing that
we're going to grab is this FG four
oh one compressor. And the next thing that
we're going to grab is this revival. All right. And these three do really well in the rock Mercana
t type thing. So this one, we're
going to create just a little bit of saturation to make the vocal sound
a little bit warmer. So we'll probably do like three. And the output is
where we're going to get a little bit
more volume if we need. For this compressor, we're
just going to hit play, and we're going to
move the threshold until this meter
grabs even further. I found. So that's perfect. So
that's about three there. We're going to move
this up to 2.5. We're gonna leave the release at fast and the attack
a little bit slower. I never found my way. That do the story. And we're gonna
increase the shimmer just a little bit and the
thickness just a little bit. I vo found my way. That do the story. And if we wanted to increase
the saturation amount, we could just turn the
output a little bit. I never found my way. That do the story. And that sounds really warm and nice for this genre of music. If you go use the preset, you'll start to
notice things like the vocal becomes really airy. It has that, like,
pop crispiness to it that we don't really
want in this genre. Next thing that
we're going to add is our final compressor, and this one's just going
to give us a nice smooth, make up gain and really
glue everything together. I like the r Vox by waves. This plug in is
amazing. All right. This gate right here
will take down again, some of that background
noise that we eQed out, but I like to put
it just a 60 to get that cleanliness of all that under frequency or background
noise out of there. And then we're going to
bring down the compressor, and if it's a little loud,
we can bring down the game. I, nev found Lam. That the story. It's a little loud, so we're
gonna bring that down. Ivo found. That do the story. Perfect. And now we have a nice warm
vocal that's very present.
13. Blending Vocals: What you'll notice right
now is this vocal is actually sitting on top of the mix instead of
blending with the mix. We want to make sure our vocal
is not sounding karaoke. Like, it's just up
here all by itself, and the music is
doing something else. So how do we do that? There's a few things
that we're going to do. The first thing that
we're going to do is we're just going
to right click here, and we're going to
duplicate the track. Then we're going to leave all of our effects on here like normal, and we're going to add a
slate plug in called Metatun. And I'm using this
not to tune my vocal. I'm going to be using this
just for the doubler feature. I'm gonna be using this
not to tune my vocal, but for the doubler feature. You can use any doubler
that's available to you. We're gonna turn
the tuning down to nothing 'cause we do
not want to tune. This is a good tuned vocal. And we are going to
take this button here, and you'll see these
circles appear. And we're just gonna move these in and out until we get a, a nice, wide double. I never found my. That do the story. I never found my. That D on the story. It kind of sounds like
you have three singers. You have two on the side
and one up the middle. And that's what we're
going for for a blend. So we're gonna close
this, and we're just gonna turn this down until
it's almost inaudible, but the feeling is still there. I never found my way. That do s? Like that. Then we're going to do you guessed
it. Create a bus. We're going to create two buses. One is going to be delay, and
one is going to be reverb. We're going to
double click here. Move that on over, double
click, move that on over. We're going to take
just the main vocal, not the doubled one, and we're going to drop it right here into this first bus, and then we're going
to take it again and drop it into the second bus. And we're going to automatically
just control, click. You can control both volumes. We're going to
automatically turn that down just a little bit. This one I'm going
to mute for now, and we're going to do our delay. Make sure that you're
saving your project a lot. I'm going to say that
every time I save. All right, so we're going to go here and we're going
to get a delay. And we're going to
use the repeater because it's in the
slate All Access Pass, and that is what
you have access to. Alright, and we're
going to click this feedback link so
that these go together. We're going to leave
this kind of low. We're going to grab
this, and we're going to bring it to one 32nd. We're going to click
this Ping Pong. And we're gonna do a
high pass low pass so that we're just
laying the mid range. We're gonna leave the
output right at zero. And we're gonna go
ahead and play, and then we're gonna
turn that down to blend. I nev found my wad. This is what that
sounds like alone. I found story. So you can see there's like
a little bit of delay. So what we're gonna do
is just blend that in. Ivo found my wad. That to the story. Here it is in the
isolated vocal. I never found my way
back to the store. So you'll notice that when
the music isn't playing, you can really hear the delay. But once the music starts, you can't, and that
causes a nice blending. Alright, now we're going
to unmute this other bus, and we're going to put
our reverb on there. This is still the verb
sweet from slate digital. We're going to do high, low, and we are going to
increase the predlay, because the predlay will cause
blending with the reverb. We're gonna increase the chorus, and we're going to
increase the width. We're gonna increase the
decay just a little bit. We're gonna hit play, and
we're gonna blend to taste. We're gonna leave
dry wet alone. Okay? I novo found. That Darby. You notice it's very verb. We'll pull that down to taste. I No found. That depo? Maybe a little more. I Nev found. That D M story. We also notice that our vocal is getting a little bit louder
with all these effects. So feel free to pull that
down a little bit, too. I Nev Found. D Moy. And now we have this really nice blended vocal
with our music. Always turn your own vocal up a little bit louder
than you think. And if you feel that your
vocals are too loud, ask your friend hot
tip because a lot of people when they're
mixing their own music won't turn their
vocals up enough. Most songs feature vocalists and people want to hear
what you're singing, so make sure that your
vocals are at a good volume. Well balanced, but
that you should be able to hear every single
word that you're saying. Alright. Now, let's listen
to that in the mix. I never found my way. That to the story. I know mistakes. I've played before. Z going. F t f. So one thing you can do here is that big breath. So the rain. Fall. So we can
just go ahead and blend that in by again clicking and dragging
in our mouth. Z going. We'll leave
that one, too. Z going. T f. And give you up.
Another one there. We just go ahead
and take that out. You can also leave
them in the double and blend them if you
want a little bit of reality to your song. And go. Just. Now, what we're noticing here is that is kind of quiet, right? So what we can do is we can
click this trim button here. And we're gonna click volume.
We're going to close that. And we're going to control
twice creating two dots. Control on the other side of where we want to
leave it, two dots. And then we can grab this. This is called automation.
We just pull up. And what this does
is it only increases the volume in this
particular section. I like to automate
vocals because then you don't have to crush them
so much with compressors. You can actually just automate. You can do this with
your instruments as well. Very easy to do. Snow. Now, we notice that it. It's coming in a little late, so we'll zoom in by
scrolling your mouse button, and we can pull
this back by just holding on these dots
and pulling them back. And that way we can
grab it right away. Just sow. We can pull
it down just a snow. And if we wanted to do
something super cool, like, a delay on in love, and we just wanted to love. And. So that. Man. So right there in love. Man. We can go ahead
and hit split. Alright? And we can
hit copy items. Now, I like to, after I copy it, hit control Z to undo because
it leaves the integrity. We're going to double
click. I'm going to drag over next to this lead. A blank track. And right
where we did the split, we're going to do
control V to paste. And you'll hear
just the in love. Love. Just love. I love. Then we can take our repeater, do the same steps, but we're going to leave
it at one eighth, and we're going to not
put the ping pong on. And we're going to make
sure we low and high pass, and maybe add a
little color to this, and you'll hear the
love delay. I love. I love. We can make it longer. I love. I love. And love. We can make the delay quicker. I love. We can make it longer. And, Now, when we have
this delay like this, and we want, L, L,
we can always move this audio closer so that the
delay picks up right away. But let's see how
that sounds together. M. No, no. Alright, let's nudge
this just a little bit. La, no, no. Mm. No, no. Mm. No, no, no. We could even move it back
to full quarter note. And, no, no, no. And that sounds pretty cool. Let's see how that
sounds in the mix. And I can you even turn it
down just a little bit. And. And no. So, that sounds really cool. Let's listen to
the whole phrase. And you get this
really cool love, love, like, delay, which
I love doing that stuff.
14. Mixing Background Vocals: Okay, so let's talk
about real quick. We have this doubled vocal here. Hi, funds. T the story. What I like to do, just
to make my life really easy is, first, I'm gonna save. I I go and open this up, and then I right click here, and I do copy all effects. This is my main vocal. I'm
copying all effects here. And then I'm closing this down, and I'm going to go
down to my Double here. And I'm just going to paste those effects in
by clicking here, right clicking here
and past effects. Okay. And now you'll know that
they're at the same volume, so we're definitely gonna have to bring those
down a little bit. I found have. That story. And what I'm gonna do is
just drag and drop this into my River bus here that I
had on the main vocal. I found vea. Story. And we have this nice plt. And what I'm gonna do to
make it poke out just a bit more is I'm
just gonna pan it a. That's like 12% left. I found. That story. I know how do days. I've made the fun. And I do notice it's
poking out a little bit, so I'm just gonna
drag and drop it to this delay bus here. So what we're gonna do is
we're gonna drag this into the Raver bus right there
and give it a listen. I sound. That story. Nice. I know I thetas. I've played the fun. And that just sounds really
pretty and well put together. We could go in and delay some of those store and
other things like that, like we did before, if we feel
creative choices to do so. It's fun, have fun with it. Play with it, put the
delays wherever you like. Now we're going to stew this
background vocal real quick. Back to the store. And it looks like these
are just gonna be kind of little highlights. So what we're gonna do is I am Go to duplicate this track, right click, Duplicate track. Okay. And we are going to take 16 and 17
track numbers here. And I'm going to pan them
hard left and hard right, and then I'm going
to create a new bus. We're going to drag that over. And in this bus, I'm
just going to put a few things on here to
warm the background up. They don't need to be as
processed as the main focal. We're just going to give
them a little sparkle, cut out a little
bit of boxiness, do a little body boost here. Back do on the star in our bus. And before we continue, we're going to drag
and drop these into our bus so we can
see what's going on. Ba do on the s.
That do on the s. Great. And then we're
just gonna add a DSR. And we're gonna hit the
DSR on the background vocals a lot harder than we would on the regular vocals because we don't
want S's piling up. That's the worst thing
that you can do. So we want them to
not be piling up. Back to the sty. Back to the sty. Perfect. And then we're
just gonna hit it with one compressor, the R Vox. Back to the sty. Back to the star. Great. And this is where we're going to
put our reverb on here. We're gonna do pred,
C chorus, width. And this is where the
dry wet knob comes in handy because we have put all these other
effects on here. So we don't want it
to be super verb, so we can use this dry wet knob to control the amount of ver. Ba do on the sti. Ba do the st. Perfect. And now, we're just gonna
turn them down just a little bit 'cause they're
poking out just a little bit. I no sound bad. Back to the story. Well, maybe we'll pan
them a little bit less. It's all about choices. I sound my bad. Back to the story. Because we don't want them
to overwhelm the main vocal. And that's why I'm
just adjusting this volume as I listen. I no sound my ad. Back do the story. Perfect. Perfect
blending. Alright, now, let's take a listen to these. T. Now, what I'm going to do is because
this whistle is so different from this
background vocal is I want to put it
on its own track. So I'm going to take this,
and I'm going to go ahead, and I'm going to
duplicate this track, and I'm going to do
split, split with the. We're going to split, split. And we are going to
delete what's not a whistle by just clicking
on it and hitting delete. And then on this one, we'll
delete what is a whistle. We'll just drag and
drop this track up, and we're going to
name this Whistle. We're gonna do the
exact same thing on the second track
because I believe. These are both whistles.
Is this a whistle? H. Alright, so these
two are whistles. We're gonna split
there, split there. We're gonna duplicate the track. Do the same thing.
Billy, Billy, Billy. Alright, we're gonna
call this whistle two. Alright. And now we
have our whistle, so we can deal with those
totally separately. So here's the background vocal. So, let's go ahead because these need to poke
out a little bit more. We're gonna go ahead and
actually, you know what? Let's just drop 19 and 20 into that same bus we made for the other
background vocals. Make our lives
easier. Dragon drop. H i. Alright, now, we're
gonna volume match. Hi Hi, novo sound. And then we're
going to pan them. Hi novo sound my bad. Hi. Let's just make them a little separate 'cause they're
very different. Hi novo sound my bad. Back to the store. Let's check this section. Oh. H. Okay, now, these two are not ah. So what we're going to do
is, we're actually going to we're going to do
our volume automation. We're just going to
turn these up so that we can turn
all of these down much easier than
automating the other way. Op. And then that way, we can
just turn these down. They're very overpowering
when you get to the second. We'll take it slow. We'll take it slow. Babyan. And if they go. Alright. Perfect. And there's one last anything goes here, and I think it's this track. So I'm actually going
to do something crazy. I'm gonna split this. I'm
going to copy this item. I'm going to go up to
my main lead vocal. Control V to paste. And then that way I
can have it in there. And then I think I'll
actually put it in this delay track
that we made for. And then I'll put it in
this delay track for fun. Make sure it lines up. And
we might have to nudge it. Let's just do goes. I think
that's this last one here. Perfect. So let's go
and just turn this down with our control
volume. Pull it down. Perfect. Now we're just
going to go through. I'm gonna click on
these and bring them back just 'cause there's
no sound going on here. And I don't want any kind
of background noise, which there is a little
bit in this vocal, but that's okay because
we record at home. Sometimes there's
background noise. And the best way
to mitigate that is to just hold the mouse and drag and get rid of any noise at the end when
the music disappears. Perfect. Alright,
let's do that whistle, and then we'll be
ready to master it up. Alright, I think
with the whistle, what we're going to do is, we're just going to do some EQ to kind of get out any of
that unwanted load end. Make sure to save project. Hi. My you. Oh. So we're just keeping
the whistle part. We're getting rid of any of
this nastiness down here. And then we're just gonna
add a little bit of the ar voc so we can get a little bit of makeup
gain and compression. Oh. Oh. A. Perfect. Then we're going to make our lives easier.
Just right click. We're going to copy all effects, and then we're going
to paste all effects. Okay, and then unmute. Listen. This one's much louder, so we can open this up. You go to bring the R Vox
down just a little bit. May ticker cap. Perfect. So we're
going to just I'm gonna pan these a little bit
so they're not in our face. Mayer cap. And then I'm going to create
a bus for them so we can get their own reverb by
double clicking, drag and drop. Drag and drop. And I'm going to
use a more intense. I'm going to use a
more intense reverb called Illustrious plates. It's also included in this
late All Access Pass bundle. We're gonna use the
platinum plate, and we are going to play a little bit with the levels
and stuff once we hear it. Si. So very intense. Si. So that sounds very cool, but we're gonna just go ahead and turn it down
just a little bit. And then we're gonna
turn down the reverb. Tri Sine that f. And I think the main vocal might be just a
little bit too quiet. So we're gonna
open this back up. Let's see here. So we're gonna open
up the main vocal. I'm just gonna use this to
turn it up a little bit. I know the mistakes. I've made the fun. C and phones that fall. And your mom calls let go. And I'm just gonna go pull
the virtual mix rack. And I'm gonna turn it
up a little bit here. I know how the mistakes. I've made the fun. S C pons that fall. And I'm gonna turn
the whistle down just a little bit more,
and I might panic. Let's see what a hard
pan sounds like. I know how the mistakes. I've made the fun. Sure. So little us. I know all the mistakes. I've made the fun. S f. And that's just what mixing is. You have to play
with the levels, move things up and down, make sure that everything is sounding balanced and together. And sometimes that just takes some practice of going through
and say, This is too loud. This is too quiet, kind of
moving it back and forth. So we have vocal
mixing into the music. Sounding really good. You can also go after you make
your vocal and say, Oh, maybe the guitar needs
to be turned up, et cetera. And that's okay, too. But right now we have a pretty
successful song. Let's listen to this
loud part just to make sure that the vocals are
matching the loud part. And then we'll do one more step for the mixing and
go into mastering. Oh. And no Won't give up. And no. Let's take this breath out. Let's just do a split, pull, and make sure to fade. Pull and make sure to fade. And no. We'll take
it slow. Baby win. Also, this B and baby
is really sharp, so we're just going
to do a split, and we're just going
to do a little fade in. Make sure to fade out. Baby win B. I go. Cool. There's only one
thing that I noticed, and that's the whistle. In this section is all
alone on that side. So let's just copy the item, and we'll go ahead and we'll make sure
we're dead on here. Control V to paste. And we'll do something cool. We'll zoom way in and we'll nudge it like we did
with the guitar. That'll just make
it sound wider. And the on. Perfect. Alright, we're
going to throw something on our mix bus that I love.
It comes with reaper. It's called X comp, and it is a multiband
compressor. And what this does
is it compresses frequencies instead of
volumes, which is pretty cool. I like the super
solid two preset, and I like to turn it
down to the line there. You'll see me talking on
it. Yeah, yeah, yeah. Bring the base
down a little bit. And then we'll hit play
and make some adjustments. And g. And no. We'll take it slow. Perfect. Alright.
Our song is mixed. Congratulations on
mixing your track. Now, let's do the final
step that you need. And that is mastering. And I'm gonna show you
some really cool presets that are gonna demystify
the process for you. Alright, Sega in the next one.
15. Mastering: Okay, so our song
is perfectly mixed, but now we have to get it loud enough to put it on
streaming services. This is called Mastering. This adds just a
little bit of umph, a little extra compression, some limiting onto the track
in order to make it sound. It's perceived loudness. Competitive with other songs
on streaming services. We're going to use
a little bit of EQ. We're going to use a little
bit of the mix rack. We're going to use a
limiter that I personally love in order to make
this track sound fat, tight, and ready for
streaming services. We're going to do
something a little bit different than your
traditional master. And the reason we're going to do this is because we're beginners, so we want to be
able to manipulate things during the mastering
process if needed. We're going to be working
in our master bus, which is this right here. You're going to see
this right here. We're going to open this up, and you'll see where
the effects are. You can go ahead and
ignore this re stream. This is how I'm speaking to you right now. You will
not need that. And our multiband compressor
is already on our bus, so we're good to go there. As I'm putting on
mastering plug ins, you might notice a little
bit of change in my voice. That's because the
rea stream that I'm talking to you on is on the same master bus as
the mastering software. So I hope this doesn't
throw you off too much. First thing that we're
going to add is EQ. We're going to use the
infinite EQ by slate. There's some really great presets on here that
I'm going to show you. So to get a preset, select here, we're going to go
down to mastering. We're going to drop
that down, and we're going to click balance. That's the one we
want to use today. Immediately, it creates
these bands for you. It's doing a little
bit of high pass here to get of some
of that muck out. It's raising these
wanted frequencies here. One thing I do notice about this particular preset is it usually puts in a
little too high end, but we're going to listen to it, and if it's too much high
end, we'll turn it down. So here's how it sounds. If the fine. Falls that
f. And give you monks. So it was a little too much. So all I did was I
grab these bands, and I just kind of
pulled them down to my taste. Easy, easy. The next thing that
we're going to add is we're going to add the virtual mix rack
by slate digital. And the preset we're going
to use is the mix bus strip, and we're going to
decide what we want. So fat just means a lot of base. Punch means a lot of kick, and the mix bus strip is just
a generic overall balance. So we're actually going
to take the regular one, mix bus strip, because we're not trying to add a lot of things
like you would in pop. This just adds a little bit of dynamics and balance
into your track. You can mess with these
settings if you'd like to, but I kind of like
to leave them alone. The only one that I mess
with is this one over here. If you turn this output up, you can get a little
bit more of low inpush, which usually makes
your master sound a little bit thicker.
So let's take a listen. I the fun remember that f. So when I push this knob up, that's when you noticed
a little bit of low end. So let's go ahead
and put it back to normal and then watch me as I push it up and see
the increase in low end. If the fine ones that is fine. And if you go. Now, during this process, if you notice anything is
sticking out too much, if the drums are too loud
or the guitar is too loud, you can actually go
into your project and change these volumes,
including the vocals. And this is something
that you wouldn't be able to do if you're doing
a two track master. That's why I'm showing
you how to do this. It is a really good way to
help you as a beginner. The next thing that
we're going to add is our very last item. This is going to be the FG
X two by slate digital. I highly recommend
this for mastering. It is Wizard. Here we go. Now, I'm going to leave
it on bypass while I explain it to you because it will delay my voice
a little bit. I'm going to show you all the different things that
we're going to use. You can use presets. But again, with the rock in the singer
songwriter type stuff, I highly recommend not
using presets for these because it's going
to push a lot of unwanted frequencies
into your music. But we're going to take
a look at this here. So if you move this
one, the GR width, it is going to be kind of
a side chain compressor. It will actually make
your mixes sound wider, which is kind of a
pleasant experience in the stereo field. So
we're going to move that. Then we have this extra
compressor over here. You have to be careful
with this, especially if you're using real drums
and real guitars. Because if you
compress too hard, it might sound a little
tiny or a little flat. So I'm going to leave it at one ratio because we did a lot of compressing
throughout our track, and we have some compressors in that virtual mix rack mix bus. So we're just going
to leave that at one. Now you come over here. This
is low punch and detail. So this will turn your low end up and make your
mix more punchy, so more kick drum more base. This is your detail, which is a lot of higher
or mid high frequencies, such as a breathy vocal, tambourine, shaker,
anything that you want to kind of stick out. Usually, the detail
button I leave at none unless I notice that that vocal frequency
needs to come up a little bit, or if the snare is not hitting quite right, I'll move that up. This is your gain,
so this is what's going to make your
track actually louder. These are your transients. So you can see right there. Negative tin smooths
limiting artifacts, and tin increases
transient punch. Let me explain that to you. Artifacts are little things like little pops and clicks that might be throughout your song that you don't
realize are there. They're not perceived
to your ear. But once you turn the volume
up, they might come through, such as the sounds that my
mouth is making right now. There's little pops and clicks throughout
the entire thing. What I usually do is I like
to limit the artifacts, but you can also increase
transient punch, which means the transients
are any kind of echo or anything in the frequency that's kind of lingering around. So if you want to increase
a really re verbi song or you want the base to kind of ring out
a little bit more, you could increase
the transient punch. Drive is your saturation button. So if you wanted to add more
saturation to the master, which means like a little
bit of distortion, maybe that you would
get on a tape, just to warm it up a little bit, you can push up the drive. Now we have your balance. So your balance
is, do you want to prioritize low end or high end? Usually, I want to
prioritize low end because that's
what makes the mix sound a little bit more punchy. You have to be careful
with this, because if you didn't during
the mixing process, high pass those instruments
that are non base, moving your low end up could cause the mix to
get a little bit muddy. This is the process
where you really have to use your ears and see
what sounds good to you. Right here is going
to be your ceiling. You want to make sure that it's at negative
two, negative three. This is how close to the peak range that we're going to allow this to get.
This is like your limiter. If you don't leave this at
negative two or negative one, as you turn it up, you mi
it clipping in your render, and you don't want to do that. Over here is your loof meter. Loofs are perceived loudness, so how we measure how your
ear perceives loudness. For example, a base could have negative six loofs at
negative plus 12 dB. Because a bass sound is
going to perceivedly be quieter than let's say a high pitch sound,
like an alarm. So if you have a
kitchen fire and your fire alarm is going
off and it's making that horrible, B sound, it could be at the
same decibel level as a sub exploding in your TV, and your brain will
always perceive that kitchen alarm
as being louder. That's LUFS exp. So we want to make sure that our entire track has a good loudness by
looking at that meter. I have noticed that this
meter isn't the most correct. Usually I aim for negative nine negative eight
LUFS on this meter, and that will render to negative 12 to 13 on the reaper render. Most streaming services
require a minimum of negative 14 LUFS to be put
onto their streaming services. As long as you're going above
that, you should be fine. You don't want to get too loud like negative
six or negative five because the
streaming services will just turn them down anyway. But anywhere between
negative ten and negative 14 is going to be competitive with what you
hear on Spotify already. So what I'm going to do is
I'm going to turn the song, and I'm just going
to move the buttons, and you're going to see
how the sound changes. F. Falls, let it fall. And give your mos let it go. Just s and And Okay. Now we've got a good balance. We're just going
to make it louder, and you're going to
hear how loud it gets, and we're gonna watch this
little meter down here, okay? And the fs. And your And we love. And Don't give up. Okay, so as you notice that we get into the louder
part of the song, that the LOS meter starts going crazy into
like six or seven. So, what I like to do is always check the loudest
part of the song to make sure that we're
not too loud there. So I'm gonna go ahead and put into the loudest
part of the song, and we're gonna turn down
the game just a little bit. We'll take it slow. Baby went Oh. And go. Go Okay, great. So now we can go back and
play with it and say, Okay, well, was our vocal the proper level,
anything like that? How's that working?
Blah, blah, blah? Is the kick too loud, is the bass too loud, and we can manipulate it from there
since we're beginning. Then the last step that we need to do
is render our track. So to show you how to
do that real quick. First, we're going to save it. We're going to go to file, render, and you're going to see this screen.
This is important. Here I have song for Skill
Share, my file name. You can name your song,
whatever the name is. You're going to leave the
sample rate at default, whatever you started at. So if you started at 441,
you want to leave it that. You want to make sure
this is stereo here. You want to make sure
it is a wave format, and it is either
24 bit or 16 bit. Streaming services will
take either one of those. I like 24 bit because it's just a little
bit more quality. All of this stuff is just leave
it alone. Don't touch it. And then you're going
to hit render one file. And I'm going to show you what the rendering
screen looks like. I know of. There. I of s. One thing you notice on
the rendering screen is the LUFS was at negative 12 at the
highest part of the song. There was no red lines, so it wasn't clipping or
anything crazy like that. It was the whole project. So another thing that you
can do if you don't want the whole project is you
can select T selection. I'm going to close that out. And what Tim selection does is you can actually grab just
highlight right here, push down your mouse
and drag to the end. And now you can
control how much of the song that you
want to render. So it doesn't just
go on in silence, and there's not this
four bar intro here. And you can practice that by just touching here
and hitting play. It's a good amount of silence. You can go to the
end. That silence. And that's pretty good because that's when the
symbol rings out, and we can just do
that selection only. Highly recommend this
when you're rendering if everything doesn't start and end at the very beginning
and the very end. So now we have a
fully mastered track, and we're going to need to
put it on streaming services. How do we do this? We
need a distributor. So up next, distribution. H
16. Distribution : So your song is
mixed and mastered and ready to be put on
streaming platforms. But how do you go
about doing that? It's actually really simple. All you need is a distributor. There are many
distributors available. They all have different features and things that they offer, but they will put all of your music onto every
single platform, including Instagram,
Tik Tok, et cetera. There are a few
that I really like. One is Distro Kid. You pay a certain amount
every single month, and it puts all your
music out for you. It allows you to add credits, including production
credits, mixing credits, and it allows you to add
collaborators if you had someone else performing
or singing on your song. It allows you to
put credits such as other people that
might have performed on your song or if you had outsourced mixing and
mastering for that song. It also allows you
to have splits. So let's say that you
collaborated with another artist, and they're going
to be getting a percentage of your song, you can set that up as well. One downside to distro kid is
you have to continue to pay the monthly fee every
single month in order to keep your music
on streaming platforms. So if you're only distributing
a few songs a year, I highly recommend you go
for a one time payment. If you're going to be
releasing a lot of songs, District kid is the best
bang for your buck. But remember, you have to pay every single month to keep
your music out there. Another one that I
really like is CD Baby. CD Baby allows you to pay a one time fee to put your
music onto distribution. You pay once, and that's it, and the music is
on there forever. You do have to be careful on CD Baby to make sure that you're clicking that you
want your music on Instagram, Tik
Tok, et cetera. Because it doesn't
automatically do it. CD Baby is great if you're only releasing a
few songs a year, and you just want
to pay the $10 per song to put out the music and
not have to ever pay again. When looking for a distributor, there's a few things that
you want to look into. There are a few that only let
you upload MP three files, which is not a great
choice because Spotify and other streaming services
sometimes will take that one MP three and crush it to
an even smaller MP three, and your music doesn't
have the best quality. You want to pick a distributor
that lets you upload high quality 24 bit wave files, in order to make
sure that your music is being heard in the
way that you like it. There are also free distribution services such as SoundCloud, YouTube, where you can put up your music without
paying any fee. However, it will not reach ones that most people
listen to music on. You can also try
uploading your music to Soundcloud to make sure that
it sounds good on streaming, which is a little pro tip. Soundcloud adds even more
compression than Spotify. So if you put it on SoundCloud, and it sounds good, it will
sound good on Spotify. You can also release
your music as an independent
artist on Band camp where people can go and
buy that track from you. It's also a good idea
to make yourself a little lyric video or just film some footage of you playing
your song and putting that up on YouTube so people can listen to it there as well. That costs nothing. There are a lot of distribution
companies out there, so make sure that you do
your research and pick one that fits what
is best for you. Congratulations on your release.
17. Conclusion : So now you're ready
to record, mix, master and distribute your
own songs from your bedroom. I hope that you've
learned a lot. Don't forget that you can upload your projects into the class, and I will give you
personal feedback on all of your mixes. This way, you have a second ear on your project before
you distribute. If you need any further help, please upload anything that
you need to the class, and I will do my
best to answer it. Thank you for spending
your time with me. I've had a lot of fun teaching you how to do this on your own. I can't wait to hear
your songs. Goodbye.
 Jam Phelps