Transcripts
1. Introduction: would you like to learn how to create easy borders and banners for your lettering, doodling and note taking these air also great to use in your planners. Hi, my name is Shelly Hits. I'm an artist and I love adding borders and banners to my artwork. It is a great addition to multiple forms of artwork that you create. Borders and banners are super simple to create, but unfortunately, I sometimes have trouble coming up with an idea for a lettering piece or for my notes in the spur of the moment. And so what I did was I created a visual vocabulary. Basically, you're creating a reference sheet you can refer back to again and again, and it will give you an easy way to come up with ideas when you're staring at the blank page. So in this class I'm gonna take you step by stuff through how to create these simple borders and banners that you can use right away plus their Superfund, and it will make your notes your planner and your lettering look so much more professional . And I thought people will start asking you about the things you're creating because you start adding borders and banners to your work. All you need for this class is a simple paper and pencil. I actually recommend creating a visual vocabulary that you can refer back to, either in a sketchbook or on note cards of some kind. This way it will be easy to refer back to any time you need inspiration. So what are you waiting for? Let's get out our pen and paper and let's get started.
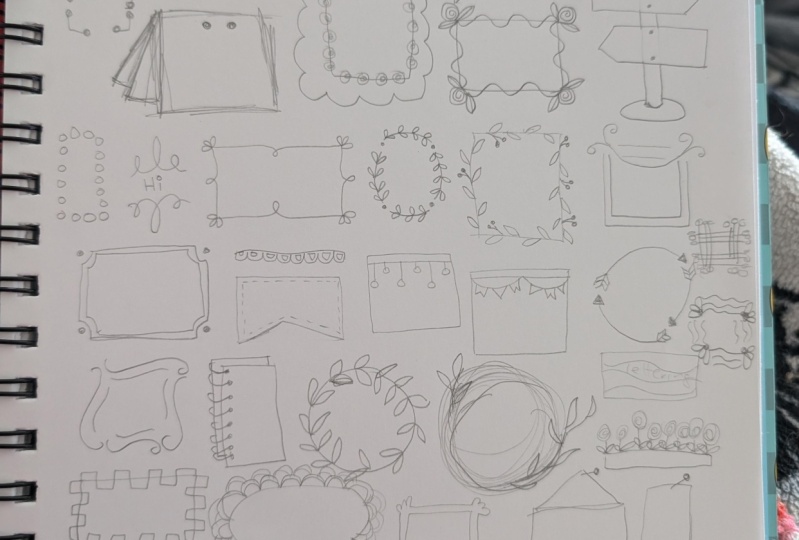
2. Borders #1: So in this class, what we're gonna cover is we're going to go step by step through different borders and the N'Dour's. You could also call them boxes or frames. And what I've done is I've created a visual library for myself, of some different things that I can use with my lettering with my note taking and with really any kind of artwork that I have even sketching. And so what I'm gonna do is I'm gonna share these with you. One by one, we're going to be creating them from scratch on a piece of paper, and all you need is a paper and a pen. I like to use these technical pens because they are fine liners, which means there's no pressure. So for this particular class, that type of pen will work better instead of a brush pen. So the micron 05 is a great one. This is from Penn Talic. It's an illustration pen 10.5, and then the sensations technical drawing pens from zebra are great, too. I typically like to use the 0.5 size, but so that you can see a little bit better in this class. I'm gonna be using the 0.8 sighs from zebra because there's so many to share with you, I'm gonna be breaking them down into smaller videos that you can follow one by one. So what I recommend that you do is get out your paper or you could have a sketchbook that you keep these in as a reference so you could keep just one sketchbook, for example, that is your visual vocabulary. For things like this. You could even put the patterns in there from my class, create patterns easily so you could have your visual vocabulary of patterns, botanicals and also then, with this class, the borders and the banners. So let's go ahead and get started. The 1st 1 is a simple one. It's just a rectangle. I really think the best way to go through this class is to do it right along with me. If you wanna watch it 1st 1 time through and then go back and sketch it out with me, that's fine, too, but I think you'll be fine, just following along with your pen and paper. Then you're gonna add a little bit bigger of a rectangle around that one. I'm not aiming for perfection here. I like the hand drawn look, but you can be as neat and tidy as you want If you want to get out rulers and things like that. I'm not going to do that. But I just want to let you know. Soon I'm gonna connect the two corners of these boxes to each other. So I'm just connecting those like that, and this creates just a simple frame, and you can use this any time. But then the thing that really sets it off is just adding little dots for the Neil's. So on each side of that line, you just created you're gonna just put two little dots and it's gonna look just adding those nail dots is really going to make it look just a little bit more special. A lot of times, it's, you know, in the details and the little things. So that's a very simple thing you can write in here. Let's say you're doing your planner. You could write the date, you know, the day of the week, like Monday in there. If you're doing lettering, you can do your lettering in there. You could doodle in there, so there's so many different options once you have these sketched out. All right, let's go to the next one. And I just do squiggly line and again, just kind of squiggle, And then you're gonna make this is more of like a rounded curves. I'm gonna make this more like a straight edge, make this more of around it, and then this more of a straight so you can do whatever you want. So you have that kind of messy look, Now we're gonna go over and do it again and, you know, just kind of go over toe where, you know, both lines are now showing. Gives it some interest. You could just be real messy with this. It doesn't have to be perfect. That's what I love about part. Now we're gonna make some little vines now. I taught you some vines in my patterns class, but we're gonna go ahead and do some in this particular border. And you can do these however you want. You do not have to do them exactly like I'm doing. I'm here. You can put your vines anywhere you want. You're basically just doing little curlicues and a lot of times doing it in sets of three gives it a good balanced field. So that's the second border. Now we're going to do something similar to what we're gonna do a rectangle and we're going to do the loose lines. But this time, instead of overlapping them, we're going toe. Have them kind of create Hey, like little rope. So starting at the corner, I'm going to come out and just add a little bit of extra. You can kind of see it. It created like a little little rope there. Do that on this side here, and you can even cross over the line if you want. See how I kind of crossed over that one. We're just creating a little frame around there. So now, toe, add some extra in there, we can just little stripes. There's gonna fill in those little stripes and it gives it a nice look to it. And you can put these anywhere. You don't have to do them the whole the whole way around. You can really do whatever you want And this one thing I want you to take away from this classes. I want you to take away some ideas. So what could be a spinoff you could do of this. Well, you could do maybe dots inside of here. And if you again need some ideas for patterns, check out my patterns class as we go through 88 different patterns that you can dio, it's then we're gonna come up here and just add some stripes appear. But I want you to be thinking as you go through the class, not just of this exact design, but how can you make it your own? How can you edited or change it up a little bit and add in your personality or just be creative with, um I love seeing how you kind of taken idea and then make it your own. Okay, so now moving onto the next one, it's kind of similar to this 1st 1 We're going to make two rectangles, but we're going to make the second rectangle thinner. So we're not gonna make it us fix. You're just gonna make a thinner line outside the first rectangle. It's a little bit harder for me to dio when I'm tryingto record this, but and then what you're going to do is you're just gonna have scallops around the edge. So you're just gonna come and on the scallops? I don't know. I keep talking about it, but if you took my patterns class, you know, scallops or something that I taught you in that class. And it's just a really simple pattern that's really fun to incorporate in many different ways. And again, you can spice this up even more by adding some sort of design or pattern in the actual rectangle frame. Like in here. Like you could fill this all in, you could put patterns. And here you go. Put little dots in each scallop. Just want to show you the basic one that you can get started with their. All right, let's go ahead and do a circle one. So the circle we're going to again have two circles and the outer circles just gonna be a little bit of a thinner edge like that. Then what you're gonna do is around the edge. You're gonna add these little lines that go out. I've actually seen mirrors that are kind of like this just kind of fun. Just gonna put these little lines all the way around the edge. And then the final thing is you're gonna put a circle on the edge of each line and one way you could adopt this is you could adopt the size of the circle, the size of the lines. You can do every other one longer, and there's so many different things you could make the lines like a thicker line and do a design in that I mean, there's all sorts of little ways that you can start to adapt this basic idea to something that you're working on. There you go. Wait. So the next we're going to do it's gonna look like a little note pad that's standing up. We're gonna do a square. Then what we're gonna do is from this top left hand corner, we're gonna bring a line down, and then we're gonna bring it in before we reach the end of that line. Then we're gonna do one more bring it down and in, and what you could do is keep those lines straight towards aside, that one kind of got off a little bit, but that's OK. And then you can just put two little holes here toe. I had to make it stand out like it was something to be posted, so that's just a real simple one as well. Something really simple is just doing a cloud, so you can literally just do a cloud like that. Now you could do another edge. Kind of like we've done here with the double edge is those are very common in these borders . But you could just leave it like that. You could make any size you want. You can adopt it to any lettering, any phrase, and so it makes it very versatile. Something else you could do is something that looks almost like a map. And so you're going to do like a zigzag like that. And then you're gonna take the bottom line and you're gonna do lines perpendicular to the one you already did at the top. So these ones, they're gonna need to follow what you've already created like that. And then what you can do is just add like, some little dots along the line. And let's go ahead and put these lines in first. They haven't really makes it stand out. So once you add these lines, you're just connecting the the corners to each other really makes it look like a folded piece. And then you could just do, like, little dots along the bottom. Make it look a little bit like writing. And what you could do is you could even do one letter per fold so you could do see 12345 So creates Could do c r e a t wait. C r e a t hopes that's the money. I would need another one e But you get my point like you can do one letter per fold, and that's a really fun thing to do. There goes to another rectangle, and then what we're gonna dio is we're gonna do a scallop. What? We're gonna do every other side. So basically, it's like a curvy line, and there's a scallop on each side. I'm just making at a curvy line. I'm not worrying. You can lift your pen between each scallop if you want. That is something that you could dio just to make it easy on myself. I'm student at this way and again, you can do whatever you want to make this your own. All right, So now that we have that, let's go ahead at a rose in each corner so a really, really simple Rose is just to do a curlicue and kind of come out a little bit more in the end. And then I'm just gonna do a leaf. Really? Simple leaf on each side like that hadn't just do rose on each corner with a leaf, okay? And then to finish this off, we're just gonna add a dog in each scallop. So just add a dot here. It's kind of make it stand out. You can see how you can mix this up. This idea with the roses, you could actually just do with, like, this frame here without the scallops and then just add the roses instead so you can mix and match a lot of the things that I'm showing you to really find different styles. The final one For this videos, we're gonna do a sign post. So this is kind of fun to dio Let's start with the signs. So it's just gonna be like an open rectangle open on the right side and on this side, you're just going to bring these two sides into a point, then we're going to do the same thing on the other side except We're going to have the open end on the left and you could do these any size. You can do as many as you want. Then we're going to make the wooden pole here. I just want to make sure the that wouldn't pull kind of lines up as best as possible. We're going to just do like a circle at the bottom here. You could do different things at the bottom as well. And then you can just add nails on these little signs. And if you want, you could add a shadow like you could put some shadow on the side here a little bit if you wanted, and you have a really nice thing and you can do like two words here. You could have a longer sign and have, like, one word per sign. There's so many different things you could do with us. There you have your very first video of different borders. Let's go ahead and move on to video to
3. Borders #2: and video to We're going to continue our borders. So let's say you have the word, for instance Hello? Just going to write this out in a print form out just to show you this particular design. So what you could do is to go above and beyond these words. You could just add a few little curly cues and make the one in the middle bigger and then do the same thing on the bottom and you can see that just really frames that word well, and you can do anything you want. You can do all the curly cues like the same height. You could do anything you want with up. So another really simple one is to do a rectangle. But to make it all circles, who's going to do his little circles and make it into a rectangle says super simple one. But just une Zewe toe add a quick border. So whatever you're doing, okay, the next one is gonna be similar to that curly Q one. We're gonna dio really tiny curlicues and we're going to do it in a wreck. Tingled So this one, the curlicue came on the inside. Now we're gonna do this side. The Curly Q's gonna come on the outside like that, and then we're gonna calm and do curlicue on the inside. And what I'm doing is when I'm coming out kind of coming into a point a little bit like that. Then what you can do is just do a little thing of, like, three leaves in the corner just for a little bit of extra decoration. There you have a really fun frame, so you can use leaves in all sorts of different ways. Now, this next one is kind of like more of a wreath. And if you wanted, you could get something out and really have a nice circle. I'm just gonna eyeball ICS. That's the way I tend to work. And I was going to do four different lines here to at the top and two at the sides like that. And then I'm going to do a dot in between each of these lines and then I'm gonna add leaves . So I'm gonna add little teardrop leaves and they're gonna be side by side. So they're gonna go side by side, and you can space thes out. However you want whatever you feel works best, and at the end you can do just one little leave there. So it may have been better for me to have we left just a little bit more room for that last leaf on the end. But, you know, you could just take that line and bring it back to So usually there's always a way to fix things. Don't worry. We're just doing these nice little teardrop leaves. Just adds a real nice effect. And this is really simple to do. Doesn't take long. Almost looks like little hearts. There you go. That is a really simple little wreath that you can do now continuing on with the leaves theme. Let's kind of make squiggly lines almost like it's a twig. We're going to do an upright rectangle and then what we're gonna do is we're gonna add leaves, and these are gonna be more pointed at the end. We're gonna go side one side and another another side, and you can. Spacey's out however you want. These are not gonna be side by side like the teardrops were. And now that we have the leaves on there, we're gonna odd little Berries. And so you can. Ah, these in different places that you want like there I did a why And then I'm just doing too little dots at the end. And you can just kind of spread these out where you feel like they fit the best. You can leave your little Berries, open the dots at the end, or you can fill them in like I'm doing so whatever you feel looks best and that just gives a really simple border. Now you can put a little line in the middle of the leaves. You could do a line and give it veins. There's all different things you could do with the leaves. If you want to get more detailed and the next one is going to be somewhat of a rectangle, we're gonna leave the rectangle open at the top, and then we're going Teoh do a thinner line around that rectangle like that. And then what we're gonna do is we're gonna do a little bit of those vines. So I'm going to do a curlicue here and I'm gonna come around, do kind of like a little bit of a wave, and then on each side, I'm gonna bring this side up. I'm gonna bring this side up. So now you have a little fine. And then what? You can dio this Bring two lines over that way, and so it's almost like you have a rectangle minds a little off center here or it's not perfectly aligned. But then you leave the these corners open. You put those vines in there so there's a 1,000,000 different variations you could do with that, and this one is similar to one we've already done. But let's go ahead and do it as well and do a rectangle. This just shows you how easy it is to make a variation. So instead of making a second rectangle around, let's just do the scallops on the outside. I hope you're really having fun just seeing all the different possibilities in different combinations and things that you can dio to make fun. Borders were going to get into beginners as well, right? So now that you have that a simple way to add more designed to this is just to do a line of dots along the inside of the rectangle. Okay, there you have just a really simple border. The next we're going to do is another variation of a rectangle that you're gonna have the corners be scalloped. We're gonna do that, scallop. Look, come down straight. Have a scallop gonna come across and any of these rectangles you could make into squares just by changing the shape. Bring that across and then you're just gonna have another line outside of that one, and then to finish this one awful. Just put dots in each corner. Easy peasy, right? Next one is more of just a Would you call it like a pennant Or like, a ah ah, simple. Like, one sided border me. Go ahead and just put it right here. Was Could make it a little curvy. And then I'm just gonna bring this down each side just a little bit. And then I'm gonna do scallops. And then inside those scallops, I'm going to do like a cutout. Almost looks like three D glasses just like that. And then you're good. You can add a little bit of a shading like into the corner. Like to show a little bit of a shadow here. If you wanted, you could do this just on one side, or you could do an entire box of that. The next one is maybe a little bit more like a banner. But we're gonna go ahead, include it here in the borders. Just going to be almost like a square to make this one bigger. Then you're going to just make an upside down V here. It's a really, really simple one. Then you're just gonna do dash lines around the edges, almost indicating like a stone Look like someone sit sewed an edge to this. Anyways, that's just a real simple one There. You just have a couple more. This one's kind of fun. You just kind of go crazy a little bit almost like crazy here. Then you're gonna bring a line out. You're going to do that same kind of V shape at the end, and then you're just gonna do the crazy hair of the bottom, too. All right, two more and then we'll be done for this video. So let's go ahead into this one here, and we're just gonna make a small line at the top and then lines that come down and I'm gonna do, like, every other one a little bit longer that I'm gonna add circles to the ends of those, and this is almost like ornaments there hanging or something like that. Then you could do different designs in here if you want. You don't have to do that, but you can do little designs. And just like this, one could be all filled in. This one has, uh, like that, And then the last one is similar. And again, you can do these as rectangles or squares. Gonna have the same top there this time. They were going to more of like a pennant and bring it down and around, and we're gonna do those. So do that. And then during do, like a V and every other one, you're gonna have be the's shapes so could do it like that and again. And here you could put different letters. If you make it big enough, you could do different letters in each one of these. Or you could just leave these as design and do it that way. Awesome. We're now done with video to Let's go to video three for more borders
4. Borders #3: here we are in video three. And I hope you're having tons of fun following along with me. I hope that you do have your pen and paper out and that you're sketching these as we go, this next one is a circle, and then it has arrows. So I'm just going to this sketch in this first narrow, you can see there's just a triangle at that side, and then at the bottom, you're gonna have, like, an upside down V. Then you're gonna bring a line straight down from each of the ends. Then you're gonna have another upside down V like that. So we're just gonna do three of these. And if you wanted, you could do the two V's at the same time and then connect them Either way works. So now that we have that, what I'm gonna do is I'm gonna add a line down the center of each of these ends, so let's go ahead. Just add that line down the center, and then I'm gonna divide each of these with a line on each side that looks like feathers at the end there, and then what I'm gonna do to finish this off is just to color in the arrowhead. And there are so many ways to make arrows that maybe another class, I could dio But there's so many different varieties. This is just one option, right? So now let's do a simple one. That's just kind with the vines. Look, since like, a backward s and we're gonna come up and over on the top here, this was gonna look more like an s long skinny s and then an s on its side. And then what you're gonna do is you're gonna do a line on the inside of each of these. It just makes a really simple I feel like it's kind of elegant border. The next one we're gonna do looks kind of like a notebook gonna do a rectangle and then going to come up at the top, and we're gonna come in just a little bit due an upward line. We're going to bring this out so there's gonna look like a notebook that's open. Then we're gonna bring this line perpendicular to that one down and bring it in. Now what we're gonna do is the holes for the wires says will be like a wire notebook. And if you wanted, you could make thes even a little bit closer. Now we're gonna just do little loops kind of connecting these like that. That's why I think if you even made this little space skinnier, it would probably look more realistic. I think I got just a little bit too thick there now, fun. Is this Just with a few dots and then curved lines. It can really look like you have a notebook right here. Then you can write your message right here, and you're good to go. Still a couple more ones with leaves. You could just do a simple circle and then do more of the point of leaves, but do them side by side the whole way around. Hey, there you go. And what you can do is you can odd like little lines down the center of the leaves were some additional interest. If you want another one with leaves is we're just gonna have a line on each side, almost like a crust. And then we're gonna do the teardrop leaves side by side, up and down each of these lines. What I like to do is like toe end at the top with just a single leaf at the top, Right, One more leaf one. We're just gonna do a couple of Messi circles here that kind of overlap like that. And then what you can do is you can do just some leaves and some different branches. Maybe one more up here. You can do these however you want, but that's just a simple idea. And again, you can do like a line all the way through the center if you want for the leaves or like I did and the previous one just do a line. Partially through are so many different things you can do with leaves. Another simple one is similar to that. We're just gonna make some different overlapping circular lines and leave it like that now . I probably didn't do that the very, very best I could, but you get the idea. How about a clipboard? Let's do an open rectangle, leave the top open, and then let's come over. Leave a space for the Clipper at the top, and then you're just gonna make those three humps there just come down a little bit further than what you did and Then you can just come a little bit more out to the side here and then, if you want, you can add little diagonal lines. Kind of like a shadow effect on that outer part there. Okay, here's another one. That's different arrows. And what you're going to do is kind of do different exes. And then we'll make one of one side the arrow, make both arrows on the top, and the other side is gonna be those, like double Weise, that you bring together like that. So you're doing two V's upside down V's. You're connecting the ends connecting the middle and then dividing them in half. That's how you do that. And so basically, you're going to do that the whole way around so you can see this kind of forms like a box around it. You could make this any size. You make it more of a rectangle by lengthening the arrows at the top in the bottom. You could make the X a little bit narrower to make it thinner, so it's not so big around. And then the final step you could just fill in the arrowheads. Okay, so let's go on to the next one. It's kind of fun. It's like a floral border, but this would be something you could more have at the bottom of your page. So let's say you have something you want to just accent or Dockery at the bottom of your page, then you could bring different lines up from that. This is almost gonna look like a flower box. Then we're going to do just this simple rose. That's just the curly Q type Rose. Then you could do any kind of flower you want here. I share several other different florals you can do in my patterns class, and then you'll just do the teardrop leaves at the bottom from that fun. And it's so many different variations you could dio with all the different flower types. And then, if you wanted, you could decorate this flower box at the bottom, or I'm just gonna leave it open for now. So something else fun that you could do. Let's say your page is here. You can actually just create different lines that your words will go in. So let's say we do something like this. We do something bigger here, do a swoop there and then another swoop at the bottom so you could just write your words. Gonna say lettering. You can spread it out the whole distance if you want, and like your letters can then fit these areas, which is really fun. Lettering goes here, then at the bottom, I could say so fun. Uh huh. So there's an unending number of ways you can vary this depending on the types of lines that you put in there. And now we're done with video. Three. Let's move on to video for
5. Borders #4: right. Let's continue on with some other fun options. You can do just ah, whole bunch of curly cues and just connect them along the edges. Been trying to do without lifting my pen, but I think it works better when you lift your pen and you can just kind of go along like that. Try another simple one where you have a rectangle and then you just have boxes that are kind of like thes scallops We did before, But the boxes go on every other side, and then the options are really endless. For how you decorate thes boxes, you could fill them in. You could put patterns in them. There's so many different things that you can dio to these boxes to decorate. Hm if you want and even spread out thes a little bit wider, make him thicker or making thinner, you could have them. The boxes be more like little rectangles. Looks like braces or something to me. I don't know. Another simple one you can do are just like these little brackets. If you've seen those before, it's just a simple little bracket, and then you could just do those all around the edge So he's kind of remind me of eyes on the sides and then h is on the top. Okay, this next one's kind of fun do an oval, and then we're going to scallops around the edges, so we're gonna do a scallop, but then we're going to do a double scallop, and then you're just gonna add these, however you want around the edges here, kind of like toe. Overlap them a little bit, but you can do whatever you want. That's the beauty of art is everyone has different opinions and different ways, and there is no right or wrong and art you take in my class embrace the artist in you. You already know that. So then, once you have that basic edge you're gonna do, you could do as many as you want. But I'm gonna suggest just doing a second layer is going to a second layer around that first. It's okay of some of them go a little bit further than the other ones. This is not having to be a certain way, and basically it's just gonna be a big goals layer of scallops, which I think it looks really cool. Right? So then you have a really neat looking frame. And again you can put different patterns in these scallops if you want, or you can leave it like this. OK, this next one kind of reminds me of, like a radio frequency or something. You're gonna come up and go. We're like a A test that they do on your heart. You know, you get all the little lines here making it smaller on each side and then bigger in the middle. And it's as simple as that. And you could make these really thin. You don't have to put as many lines in there as I did. Okay, A really simple one. Just a square. Then you're gonna dio like three little loops there gonna come around 23 little loops in the with the loops. The middle one tends to be a little bit longer. It's definitely reminds me of like a photo frame or something that you might use. Another simple one similar to the arrows is just doing excess. So instead of having it be an arrow on each end, it's just a necks. Another one that's kind of neat is you know, these little brackets here then you're going to connect them with the loop so you can just do the things and then do the loop at the end. That might be easier to do all four of the low brackets. And then when you're done, come to the Four Corners and just add a little loop and it's still gonna look like you did that all at once. But it's just a little bit easier. This is a fun little post it note one. Just add the little nails in each corner like it's nailed up. Next one, you're gonna do just like a rectangle, and then you're gonna do another rectangle. Maybe leave it a little bit thicker than we have in the past. But again, artistic license, right? And then the corners. You're going to add little boxes, and again, it's almost like they were done originally with the peace. But instead of doing it, you know all at once, you just do the rectangles first and then add the little boxes at the end. Okay, so we have a couple of other little post it note ones, so this one just looks like it's hanging on the wall. Gonna do a rectangle. You're gonna do an upside down V, and then you're gonna have this coming out like it's a nail and then add a little circle for a nail head. The next one is kind of like that. We're gonna come down, over and around, almost like, um, an open rectangle. It's gonna bring a little bit of, ah, curve up and over, down And then we're gonna connect to that, and then it's gonna look like it's kind of curved and just add a nail like it's a nail there. Now, if you want, you can add a little bit of shading to this side. You don't have to, right? So I think this is the last one we're gonna do, like a taped a post it note. So what you need to do is leave some space in the corners or you can and of draw them in. So you know where they're gonna be like that. Bring this down over and then it looks like it's a piece of paper with tape taping it up. Yes, we do have one more that I didn't do yet. Just gonna do a square and then we're going Teoh, make this shape on the outside. Some reason it reminds me of the Alamo, and then from here, we're going to come up and around. So we're gonna do that on the other side. I don't know if I got that exactly e t mirrored, but you get the idea. All right, So this was video for so fun. Let's go on to video five. You're doing amazing.
6. Borders #5: Hey, this one, we're going to start with a circle. We're going to come out with another little circle. And if you need more space for your words or whatever, you can make that circle bigger. Obviously. Then you were gonna do scallops around the edge starting to see some things. And then from there, we're just going to come out with a variety of sizes of lines. And I'm just doing these real messy. You could do these a little bit cleaner. If you like that look better. You could add a little circle in the end. I'm not gonna do that. But you could. Could have patterns, too, the scallops. And so that's just a really simple one. There another one kind of wisdom lines coming out. It's gonna be a rectangle. Then you're just gonna have lines coming out from the top and the bottom that kind of go from short so long in the middle and then short again like that. Next one is super simple. We're just gonna dio little corners. You just do this around your words around your lettering, your doodle and then we're just gonna add But all circles on the end I look like knobs. So simple. All right, so let's do another line. One gonna have these kind of go like that, and then we're gonna do a flower and each side, and you can do any kind of flower you want. This is kind of my go to flower. Gonna put this little thing behind it. Make sure it looks filled out here. I'm just gonna add some little lines in the center coming out. Okay, so now that we have about let's come down here going to do a similar flower on this side here, they said, if you want to learn somewhere patterns and botanicals, this is a flower that I teach in my patterns class, so definitely recommend that. And then let's go ahead over here. Then what we're gonna do is we're going, Teoh have the little teardrop, but not side by side. Just kind of every other one. You could do it side by side to That's a different look. You can do what you want, you know, just giving you ideas in this class. And then you can take these ideas and run with them. I like to put a little one on the end, just so it it looks finish next. What we're gonna do is a rectangle We're just gonna do circles that intersect all the way down and around, and we're gonna add a dot in the middle of each circle. And as you'll know, if you take many of my classes, I don't aim for perfection. I love the hand drawn look, and that is a little bit in perfect things that were drawing of things in nature. You know, if you want perfect than you know, you would get a computer generated illustration or icon, so that's not what we're going for. But you can make your style however you want, so each of us have a different style, and that's where you can make yours a little bit more perfect like this here. You know it's not even closed. You know, you could really try toe, take your time and make your circles even better. That's not my style. But feel free to do that if you want. Right, so here's one. We're just gonna have a line across the top and it come down and do like a curve and then come down. One thing you may want to pay attention to are the shapes of frames that you see. So when you see a unique frame, you might be like, Oh, this is something I could actually create as a border. And this that's what this reminds me of this reminds We have, ah, frame. You might see handcrafted frame or something that you might see in someone's home. So what we're gonna do now is we're gonna add little dots here, like there nails, and then, if you want, you don't have to. But you can just have a little lime here, here and maybe here just to kind of give it that Warren in. Look. Hey, just a real simple one. Just gonna have some different lines, different lengths and just connecting them And then, at the end of each line, an open circle. So again, there are so many different variations of this that you could do just depending on how many lines I just did three lines and then how the lengths you make each line? That's kind of a fun one. It's super easy. Let's go ahead and do this Next one is gonna be like three curvy lines on each side. And then we're gonna do a circle and we're going to Teoh. Teardrop leaves out. From there. You go ahead and fill in the circle if you want. Then you're just going to do that. Reach corner. I didn't leave enough space on this corner here, and you can make these smaller. So you make these like they look like flowers. Now you could make them look more like leaves by making them smaller. It's another one is just to kind of make some overlapping circles trying to be a little more intentional on this one, and then just do the little teardrop leaves throughout, just kind of randomly throughout. This is a fun little design, super easy, but it really makes things look really need kind of spread them out, make sure you're kind of going on each line. I think that's pretty good. And then the last one for this one. Let's just make a rectangle. This is kind of similar to one we've done before, where we have the three little loops. I call them loops, but they're really not loops. Yes, we have that basic design and then gonna do circles in here. Little filled in dots basically, and then we're just gonna dio like little teardrops in each of these, it's to give it more definition. So again you can see how we can combine a lot of these different designs to get different variations of something that's very similar, right? We're done with video five now starting in video six, we're going to start working on the banners. So far, we've been doing mostly borders. So now let's get into some banners, starting with some super simple banners moving into some more complex banners.
7. Banners: right. So now we're gonna get into ***. The 1st 1 is one that we've kind of done before. Gonna start with, like a rod, do a circle line circle That's almost like a rod that you would hang something by. We're gonna have to lines, comes straight down, Then we're gonna connect those two lines by an upside down V, and you're basically gonna come right in the middle of that and bring it down like that. Then you're gonna have just a thinner edge. Most like it was had a sewn border like that. Now there's some that are more like penance. Yes. You could call him like that, Me to show you a couple options for those were into three different ones. I'm just going to have three rods across the top, and then let's go ahead and I'm gonna have three sets of lines of two lines and then each those lines were going to do like a lower V. So it almost comes down, like in a to an arrow like that. The next one, we're gonna do the exact same thing, except we're gonna do an upside down V. When do the two are the three sets of lines, then these air gonna actually come up like the previous one. And basically you're splitting it in half and then you're bringing each of the sides up. Then the last one is just triangles. So you're going to come down like that. Next one is kind of fun. What we're gonna do is come around and we're gonna kind of make that side a little bit rounded ish They were to make the site come out and around and down. This is gonna come down like this. You could make that a little bit smaller if you want. Could make this a little bit darker on the edge. So it kind of looks like the edges bent. And then you're gonna bring a line out, come down like that, going to do a dotted line on this side, and then we're gonna bring a pool down and out. Hopefully that made sense to you. One of my go to banners is just doing a curve. We're gonna do a straight line perpendicular the side of the paper, another curve. You're gonna do this v here and then what you can dio is at the one side, You're gonna do a little triangle, it's gonna come down from the edge. I like to fill this ends that makes it look shaded in the middle of this, you're gonna come out, you're gonna do another V. So that's a really simple way to do a V inner. Let's do a curled be inner. So we're gonna do just like a curlicue and a curved edge here, we're gonna do the same thing on the bottom, and we're going to kind of make sure it comes down from right here and like that. So they're kind of just opposite lines of each other, and then we're gonna connect thes sides here like that, and then we're going to connect all of these areas. We're gonna bring that down. We're gonna bring this down and bring this down. We're gonna connect this down, this down and that down, and then you, if you want, you can fill in thes inner parts here to make it look shaded. That's the part that's most inside. And then you can add a little shading to that section as well. And that's a really cool, curved be inner. Another easy one is just a rectangle and then what you're gonna do, you're gonna bring two lines this way. Bring these lines a little bit em. You're gonna bring these lines up this way, and you're gonna connect these at the sides. And finally, you're gonna create this little triangle in the corners and you can fill this and then or just do little lines for shading and you have another simple banner. Now you can do the same thing with a curved banner so very similar to this one. What you're gonna dio is your gonna have a curved top, and then you're gonna have a gonna bring this in, like towards the inside, and then you're gonna have a curved bottom that's smaller. Then you're going to go ahead and bring this out, and then you're going to connect these two corners, and that's where you can just out some shading. So that's a really simple one. And it's kind of similar to that, except it's curved. Another one similar to this is to make a narrow, which is kind of fun. So you do this and then let's go ahead and make that side and then on the narrow side instead of doing a little flag at the end, you're going to do an arrow at the end, and then you'll fill in these little triangles again so you can see how you can just start to adapt. Even what you know, the simple things that you know into other banners and shapes, which is really fun. Similar to this curved one. Let's make another curved one, but just on one side. So let's make a curlicue, and then you're kind of kind of come down from this side and have it come up. You're gonna fill in the V shaped there, and you're going to connect these ends here and then the last part is to connect all of these sides. So you're just you're coming towards the banner with all of that. You can fill in this most inner part again, and you can have some shading. And here if you want. And then that's just a one sided curled the inner. Let's try one more banner before we end, and this one we're going to do a rectangle, we're gonna stack it. So we're going to do one down here. We have the end like that and we're going to do one up here like that. So now we're gonna connect all of these and what you want to think about is connecting them at an angle. And so we're going to think about connecting this right here in connecting this right here . This should have probably been over a little bit further. So let me come over here and that way that way. Come down here and here. That way, it's It's wider. I'm gonna go ahead and fill this in. So one thing you can dio if you make mistakes in, try using a white jelly roll pen to go over it. And at least this will help you Teoh to see what I was trying to dio. You see, sometimes it's easier if you pencil sketch it out so that you make sure that you have what you need, But this one we need to make sure we go over far enough, so we have enough space. So now we want to think about this line connecting with this than this line connecting here and again. It's probably still a little bit thin, but I'm just going to go with it. Go and fill this in, and then we're done. So that one's definitely a little bit tricky. Eerie with the you have to really get your pieces in the right place. You can see how now you have just a bunch of different banners that you can use. And not only that, we've also I've also given you a ton of borders, so I cannot wait to see what you create for your class project. Go ahead and upload a picture of some of the borders and beginners you've created as you've went along this class with me and I'm excited to see what you post.
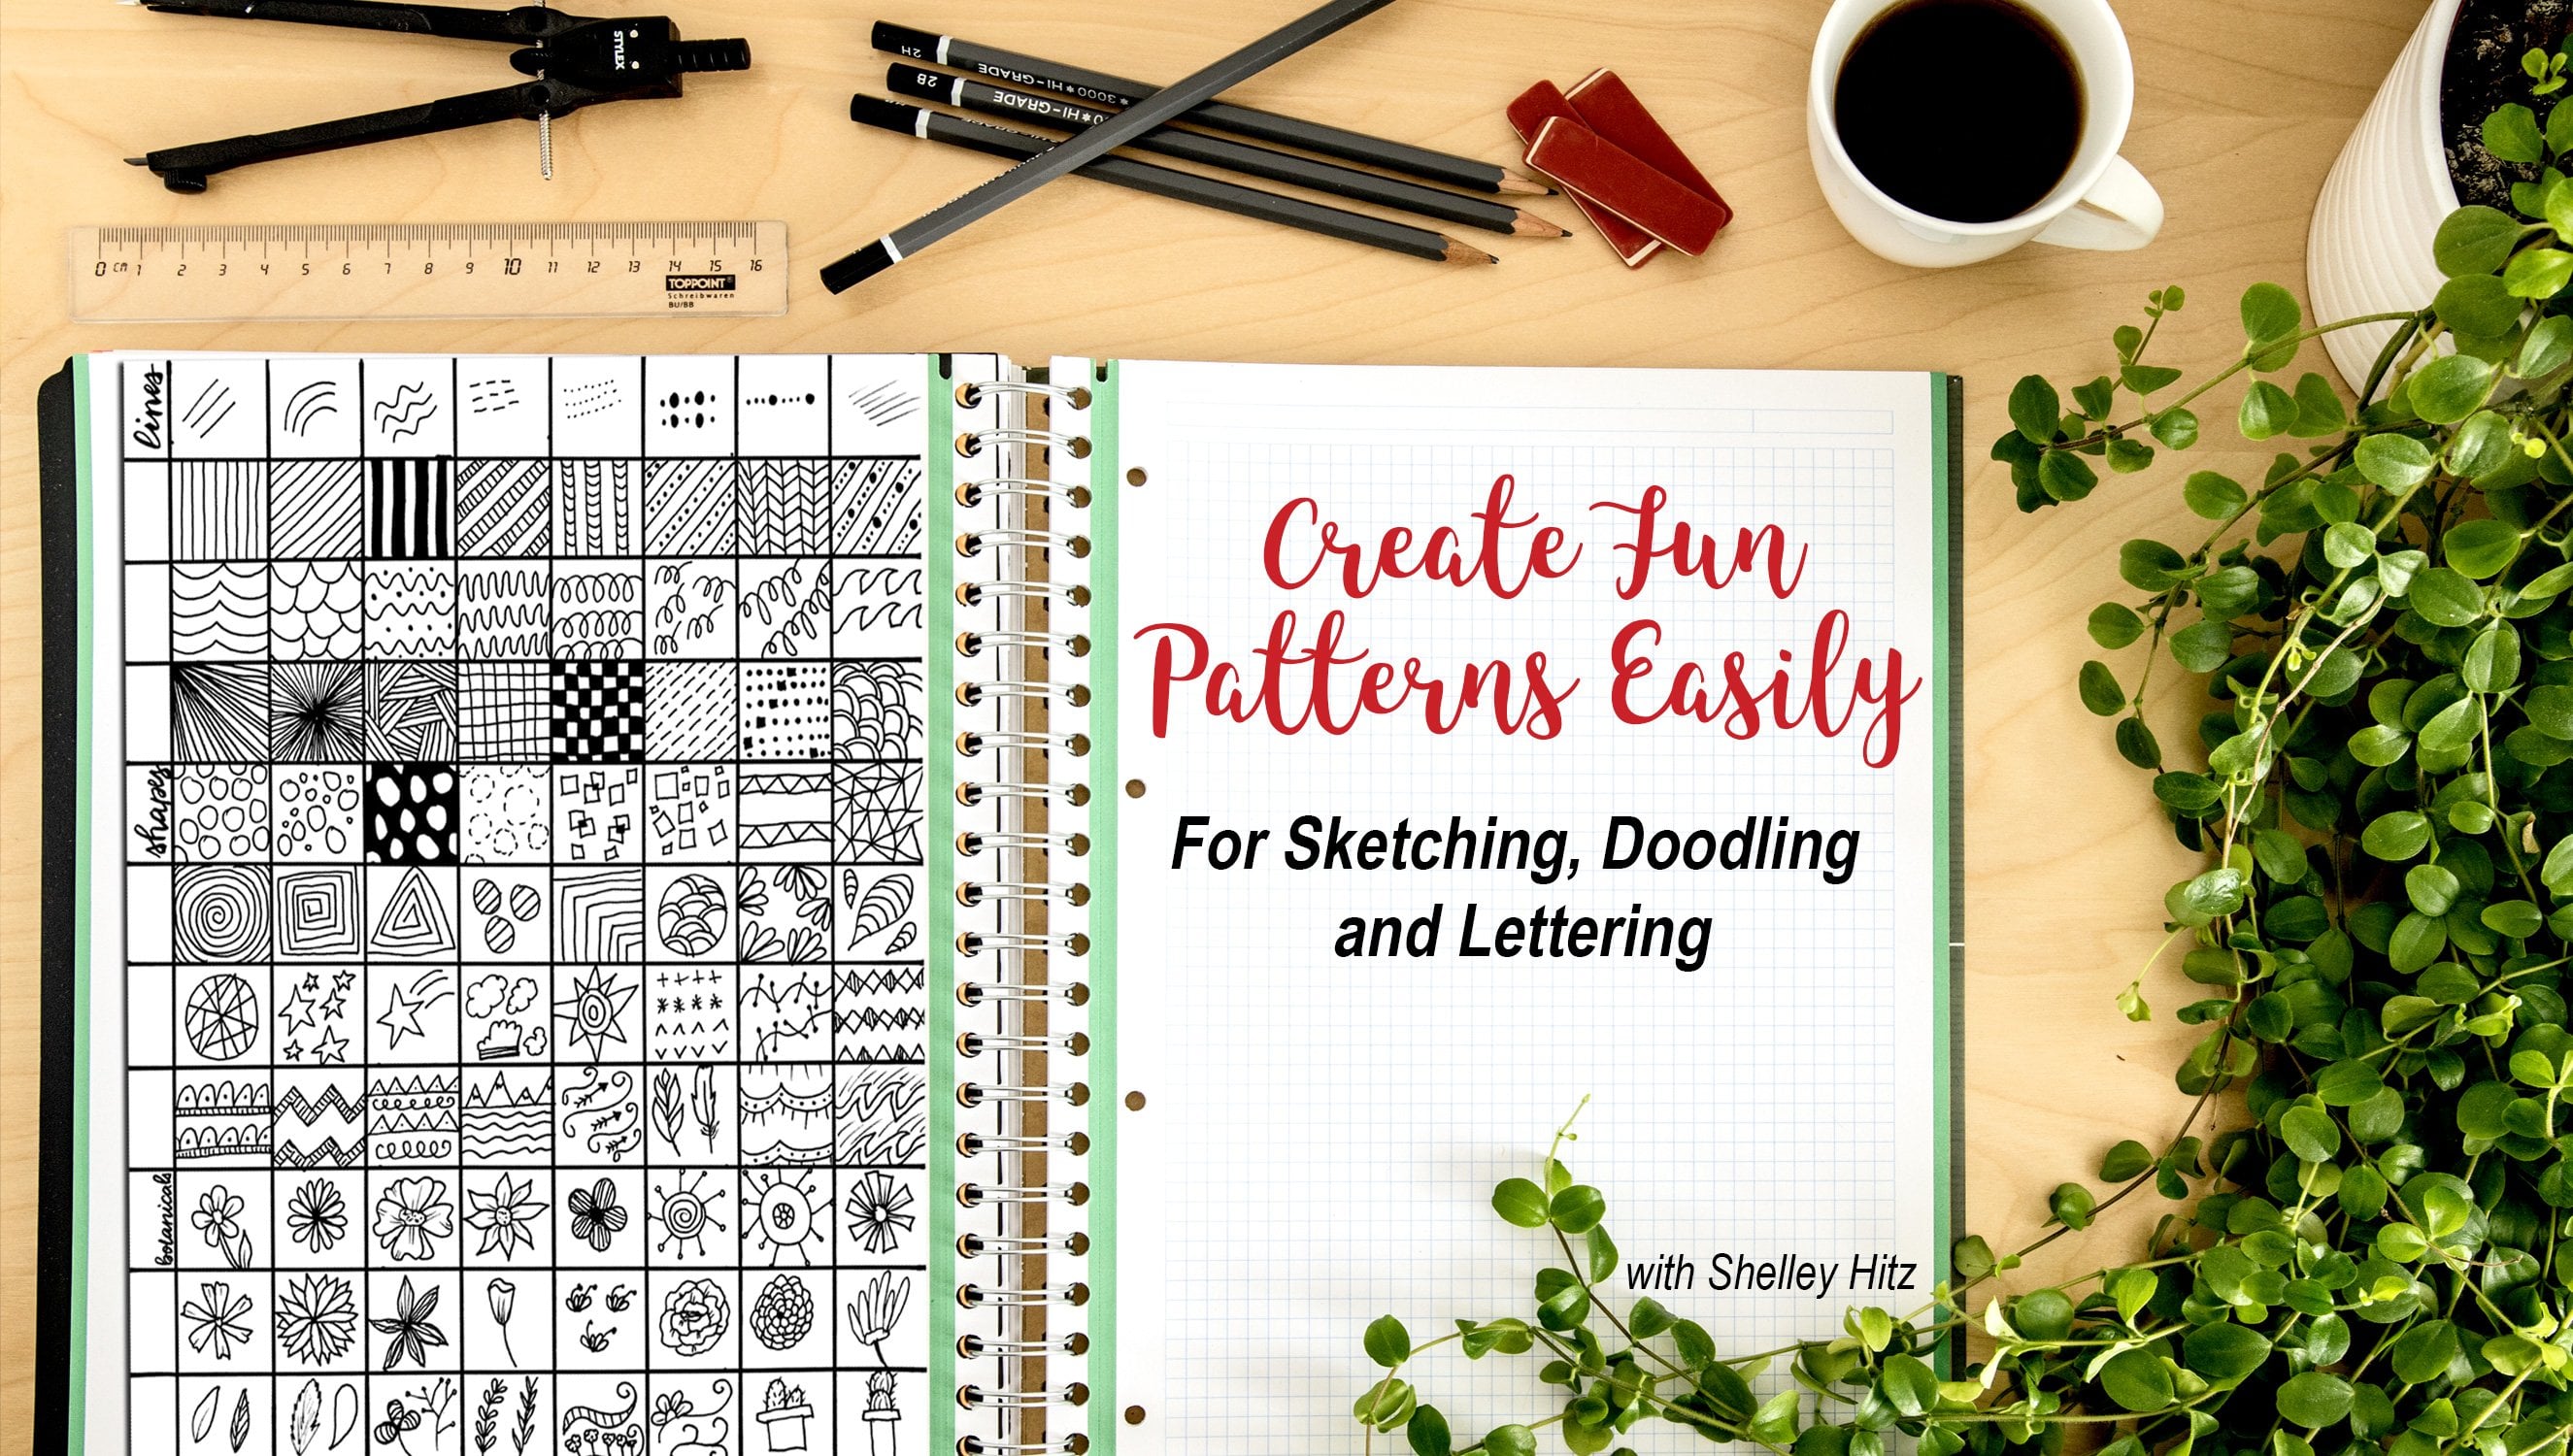
8. Next Steps: there you have it. Now you have a visual vocabulary of borders and banners you can put to use right away for this class. Your class project is to post a picture of your favorite borders and banners that we covered in this class. I'd also love to see any creative spinoffs or ideas you got for some different borders and banners. I'd love to see your ideas, So please post your project in the class project area of this class. If you enjoy this class, I would really appreciate you simply taking a moment to post your review here on Skill Chair. There should be a pop up at the top of your screen that says, Would you recommend this class to other students? Simply click yes and post a sentence or two about what you learned, what you appreciated or what you've gained from this class. And it would mean the world to me. It also helps to reach more people with this training. And so I appreciate you taking a moment to do that. Thank you so much for joining me in this class. I hope you had as much fun as I had creating it. If you haven't yet taken my class on how to create fun patterns easily that maybe another class that you'll enjoy for sketching, doodling and note taking. In that class, we cover 88 different lines, patterns, shapes and botanicals that you can add to your artwork. I'd like to invite you to join my private Facebook group and also to get all of the bonuses I have for you in my bonus library. You can sign up for free at your creative adventure dot com for its last free. The link is also in your class. Resource is for daily inspiration. Follow me on Instagram, your creative adventure. I also often post in instagram stories. You'll find inspiration, tips and tutorials that I post their daily again. My name is Shelly Hits, and it is my joy to share this class with you. I cannot wait to see your class projects, and I'll see you in the next class
 Shelley Hitz, Watercolor and Lettering Artist