Transcripts
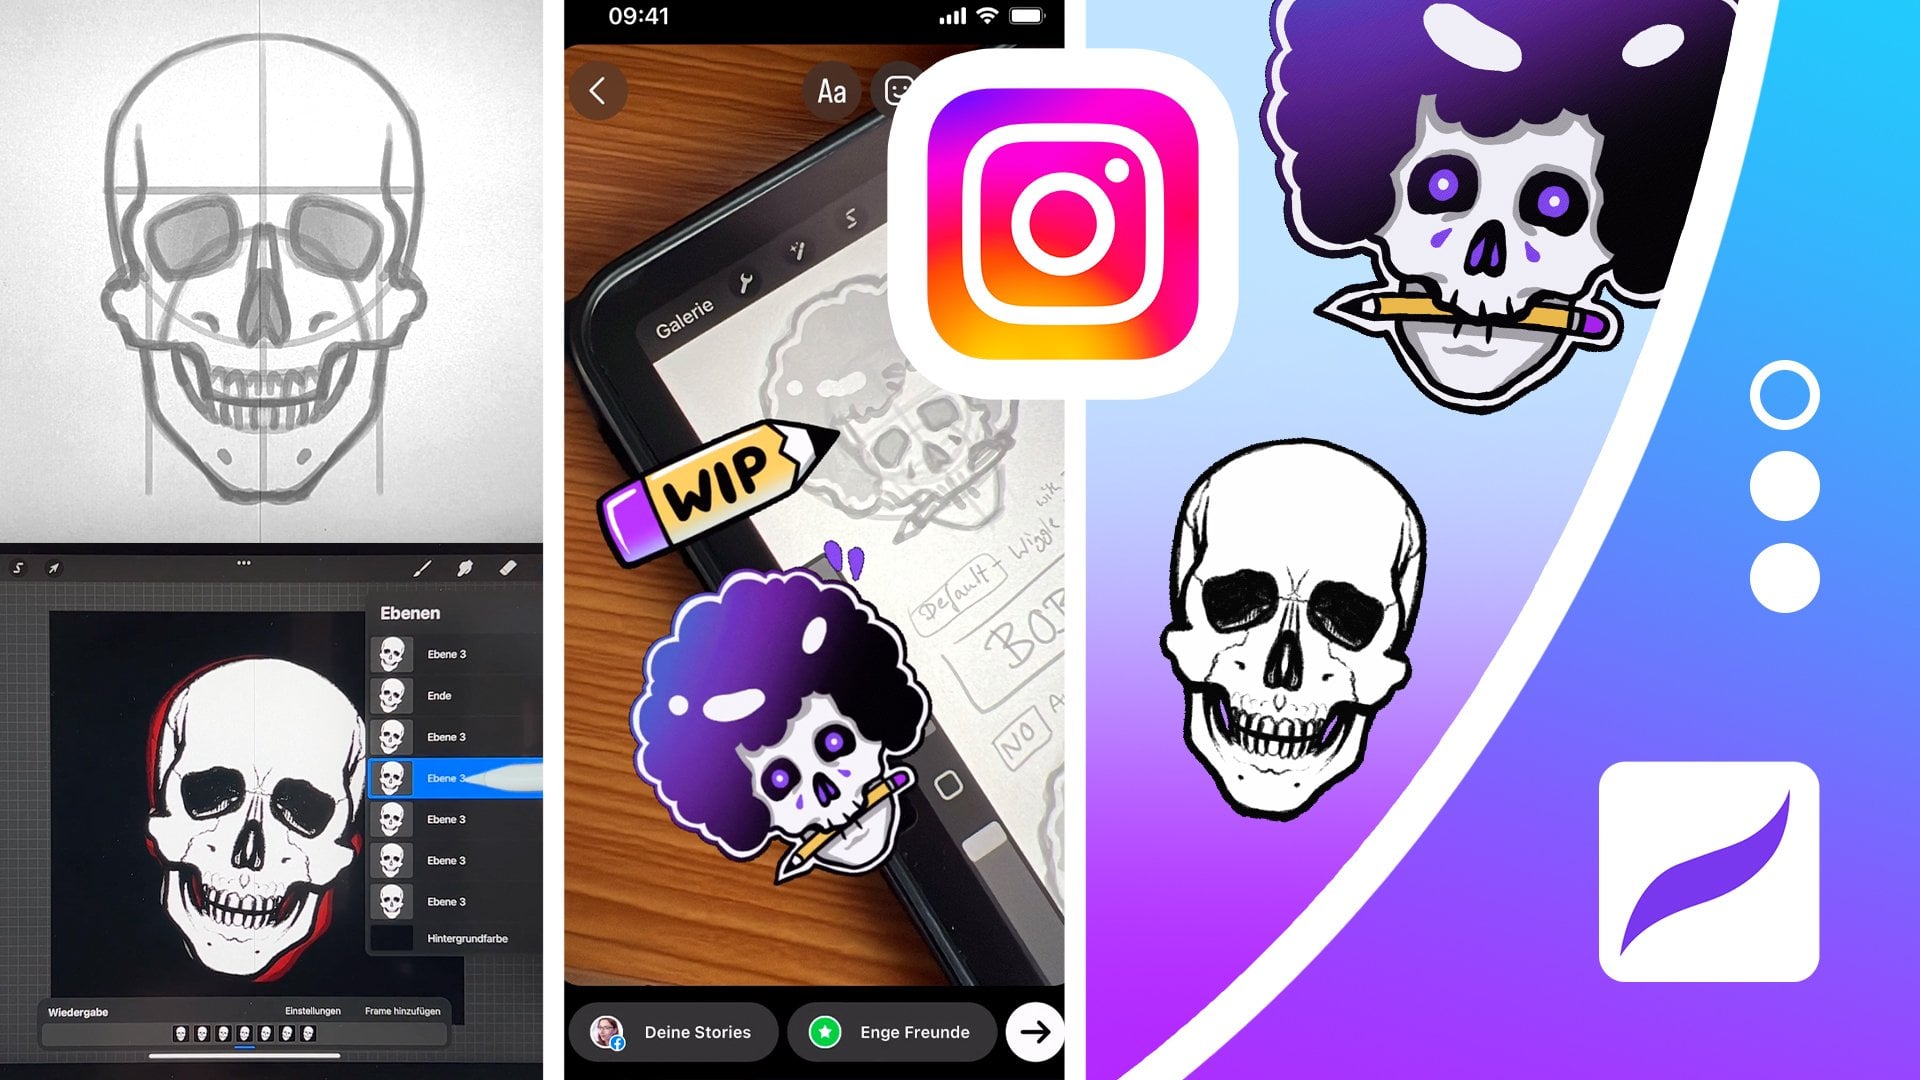
1. Intro Tutorial | Instagram Skull Sticker: In this tutorial, I will
demonstrate to you how you can effortlessly create and animate a sticker for Instagram
using procreate. For instance, you will learn precisely how to
sketch a human skull, which is appropriate for Halloween or anytime
in the middle. However, you can also skip the drawing sections of
this tutorial and draw any other motif as a basis
for your sticker and animation. Let's get started.
2. Drawing | 1 Sketch Skull Cranium: First, the preparation,
create a square canvas, for example, in the size
of 1,000 x 1,000 pixels. Start by drawing a circle to begin with the
cranium of the skull. To do this, simply draw multiple circles on
top of each other. You don't have to get
it perfect in one go. Alternatively, use
the drawing assist in procreate by quickly
drawing a circle, no matter how it looks. If you hold it briefly and then tap the canvas with
an additional finger, you will get a truly perfect
circle in procreate. Subsequently, draw a center
line lengthwise through this circle to
facilitate drawing symmetrically later
on for added ease. Yes, because the two halves
of the skull are symmetrical, especially here in Procreate, you can make it even easier by simply going to
the action menu, selecting Canvas, activating
the drawing assist, and finally, under
drawing assist settings, activating symmetry
with the symmetry axis exactly on the center
line that you just drew. Position it, and then
you can effortlessly generate the rest of the content with ease and convenience. When you draw on one half, the other half will be
automatically projected. This way, you'll save a lot
of time and frustration. However, make sure that
for a realistic look, you slightly modify the sphere, the cranium from the skull at the top and curve it slightly more outward as the skull actually has more space
for the brain there. The skull is not
a perfect sphere, so make slight
adjustments to it, then should divide
the circle in half once to locate the eye
sockets accurately. Because these are positions
slightly below this half at approximately three
quarters of the entire circle. Sketch them not just in any way and definitely
not circular, but instead with an angled and more square to
rectangular shape. If you desire, you also
have the option to draw or erase the eyeballs if you have already shaded
the eye sockets.
3. Drawing | 2 Sketch Skull Finish: Subsequently, proceed to extend the midline downwards by
an exact measurement of one half of the cranium to accurately ascertain
the total height of the skull structure. Now, thirds should
be established, indicating that you should mark the jaw end at the final
third of the measurement. At approximately
the middle point or slightly above the middle
point of this last third, you can make a mark to indicate the end of
the upper jaw bone. Due to the fact that we will require this as a
reference point, it is now necessary to
proceed with drawing the lower jaw in the last third of the
height of the skull. To be more specific, start by descending to the
outer ends of the eye sockets, and then proceed to draw an angle in order to
represent the lower jaw. At the same level as the previously drawn
line for the upper jaw. At this particular
point in time, the lower jaw runs diagonally towards the
chin area of the face, but sure to maintain a small
distance in this area. You do not want to create an anime skull with
a pointed chin, but instead it should
possess volume. Just make sure that in men, the tendency is a bit wider, while in women, it's
a bit narrower. Now, in addition,
you can also sketch the upper jaw in the
third and second thirds of the height of the skull. Specifically by envisioning
a simplified shell shape that extends across
the eye sockets. In its center, you can then
also draw the nasal cavity, which extends to just
below the second third. Next, finish the skull
silhouette by adding lines to represent the lateral boundaries of the anterior
portion of the skull. This includes on one
hand, the temporal line, the side line of the skull, walls for the eye sockets, and other such structures,
the edges of it. The zygomatic arch, which
protrudes fest outward, and the cheek bone,
which is slightly curved inward diagonally towards
the center of the face. Notice this angle. The
zygomatic arch is the part that protrudes farthest outward when viewed frontally on the skull.
4. Drawing | 3 Line Art: Yes. At this stage, you should have everything
sketched out and prepared in order to
create the line art, which is the clean outline for your sticker on a
brand new layer. Proceed to the layers menu, decrease the opacity
of your sketch layer, rename it if you
haven't already, and then create a new layer specifically for your line art. Now utilize a black
opaque brush in order to meticulously trace over the entirety of the
subject matter. Here, you can also enable
the stabilization feature of your brush if you
want to achieve a cleaner and more precise
result in your work. In any case, now trace
your sketch once and feel free to add
more details afterwards, such as the nasal bone, teeth and other similar features that you may want to include. However, ensure that
you do not include an excessive amount of
details because ultimately, it needs to be a
sticker and it performs optimally when it is not
excessively detailed. Also needs to function in small sizes when you later decrease the
size of the sticker. Therefore, do not overload it and only include
essential details. Keep it minimalistic. However, regardless
of the approach, proceed to draw the sticker
in your own unique style. If you want to test the
appearance even more effectively, you can also select
a black background. Simply set the background layer to black in the layers menu. This way, you can
see even better how your sticker will
actually look in the end. Here I'll show you the whole
process in a time lapse. Yes. And by this time,
you should already possess your own sketched
skull in front of you. Great, is it not? Okay.
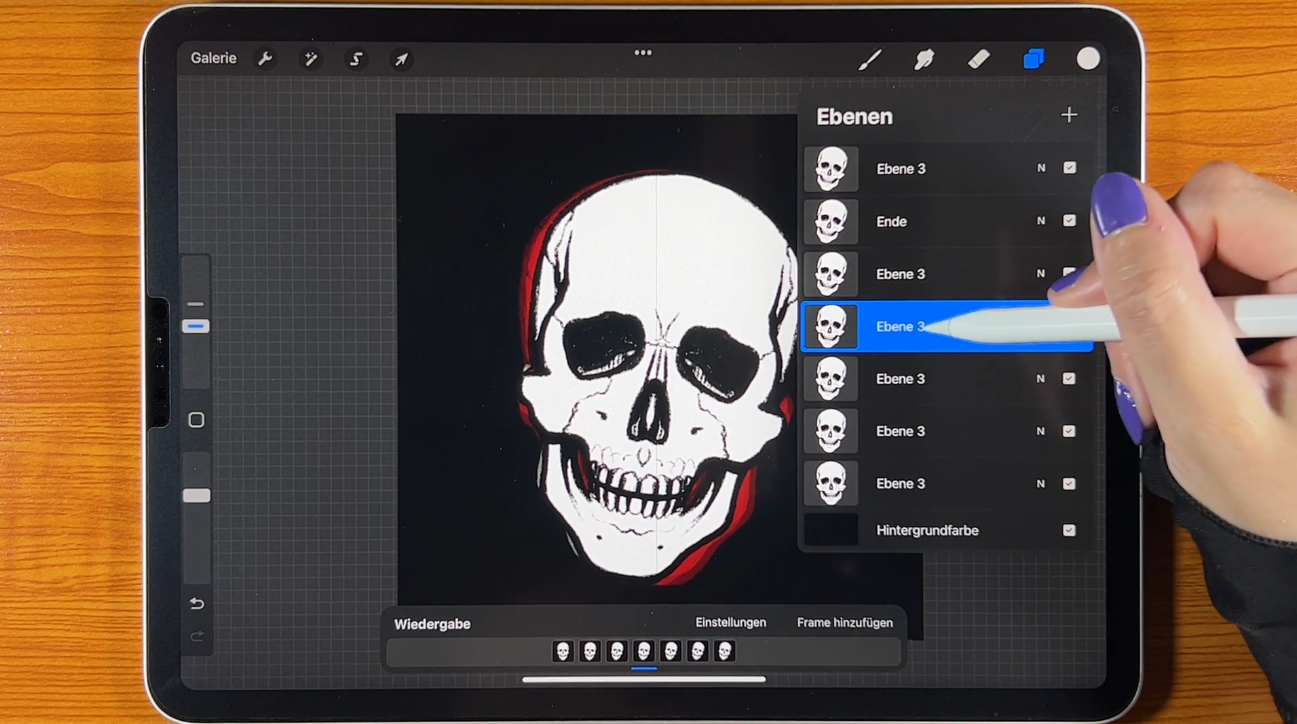
5. Animation | Skull Movement: However, of course,
that is not all. We would like to create
an animated sticker. Now, you can go to
the Actions menu in Procreate and activate the animation assistant
that is available there to assist you
with your animations. Now, a small field
should open in the lower area where you can
see your frames accordingly, indicating the
location where you see the individual images
of the animation. At this moment, we
not only possess the completed drawing
but also have in our possession a
relevant frame for it. Consequently, when you
create extra layers, you will obtain a larger number of frames on which you could theoretically draw
alternative versions of the shape of your skull. But we make it very simple. We duplicate this skull, and then you can do various
things by, for example, tilting your skull slowly to one side in each frame
and then back again, creating a movement so
that the skull tilts from left to right or vice
versa, you can do that. It's a straightforward
process that involves duplicating
the skull and manipulating its
position in each frame to achieve the desired
effect of a tilting motion. When you click on playback, you can then always
check it again, always duplicate the layer, then apply a transformation, and finally play it back. Then you have the
option to always check how the animation looks. Another thing you can
do is create a bit of a wobbly sticker
that rears up a bit, giving it a playful effect. In order to achieve this, you can play around with the
transform tool by moving from right to left instead of tilting the skull
at each layer, adding an interesting
dynamic to the design. Merely choose the entire
thing and then, for instance, make slight adjustments to
the skull a little more in each frame by utilizing the transform option that
is available to you. Then you will also receive a fairly pleasant
sticker appearance. In any case, after you have created your desired animation, all we need to do is
export the entire thing. You achieve this by returning
to the action menu, but on this particular occasion, selecting the option for share. In that place, you will discover a range of
different choices. It is recommended
to solely export an animated gift file
from this location. Then you can already see
what we have just done. Either at maximum resolution or best prepared for the web, then the whole thing will
be further compressed. You can also see here at the top the number indicating
the size of the file. Click on port, and then
you are essentially finished when you save it in a designated location
on your device. Alternatively, you
can also send it directly to your iPhone
to keep working on it, allowing you to
import the sticker directly into Instagram for seamless integration and enhanced creativity
in your posts. However, it is advisable to save it on your
tablet initially, and subsequently, we will
proceed in the next step.
6. Sticker Set-Up | 1 Variant for iPhone users: All right, now that you have completed the animation
of your stickers, we naturally desire
to utilize them. Therefore, you should proceed to set it up in a manner
that allows you to utilize the stickers effectively in your
Instagram stories, and there are numerous
ways to accomplish that. The simplest method would be
if you possess an iPhone. Yes, like I am here. I am currently filming
this from my iPhone. Accordingly, as you can
see in the gallery, I have loaded the various
gifts that we created in the previous lesson onto here
via air drop from my iPad. You should have it
here now as well. As I mentioned, that would be the simplest method if
you possess an iPhone. If you are a user of Android, I have given you an additional
link in the materials. I cannot display that here at this moment as it is a
bit more complicated. However, I will also demonstrate an
alternative method of how both Android and iPhone users can directly access the
stickers on Instagram. There is another slightly
more elaborate way where you can make your
stickers available to others. But now I'll show you the first method where basically you insert everything directly from your gallery into
the Instagram story. The best thing to do is
to first go on Instagram, open the app, and then create a new story
using the plus sign. Proceed to story mode and
capture a photo at this moment. As you can observe, I also possess my iPad
position just below. To begin with, I will
take a photo of it. When you go back
to your gallery, simply select a sticker, and then instead of
sending it somewhere, you just need to tap on the copy icon at the
bottom left corner. This way, you can
easily duplicate the image without having to
send it to another location. This is presently
in the clipboard. When you go back to Instagram now and pretend to
write something, just click and then click again where the cursor is
currently positioned. Click there again and now
perform the insertion. You click on it and
suddenly, bam, there you go, your sticker is already
added and ready to use, also in high resolution, exactly in the resolution
as you saved it. There is no loss of quality. This is a major advantage
of this method. With the other one, you will usually have a bit
of quality loss. That is how you
can, for example, establish a folder in
your gallery where you place all of these
elements, all of these gifts. As an illustration, you can
select all and then tap the share icon to share to a shared album or add to
an album, for example. I already have
something like that. It's called business templates, but I'll create a
new album for now. That is what I refer
to as stickers. Please remember to save your
stickers for future use. Then they were already
generated within this album. I am able to subsequently
retrieve them at any point. Here I have various albums. I was just in there
at this moment, and then you have the ability to access them
much more quickly. This is practical. Let me
give you another example. Here, for example,
our hard ice sticker. To split, duplicate, share
on Instagram, write, and insert into a
document or image, ensuring accuracy and preserving the original content intact. In this manner, you have the ability to
effortlessly include different stickers
to your stories by utilizing the iPhone device. Then, similar to what
I did in this place, you cannot currently
see my hands. Obviously, simply perform
this Zoom motion where you can enlarge the stickers or move them using one finger
as you prefer. This would be much
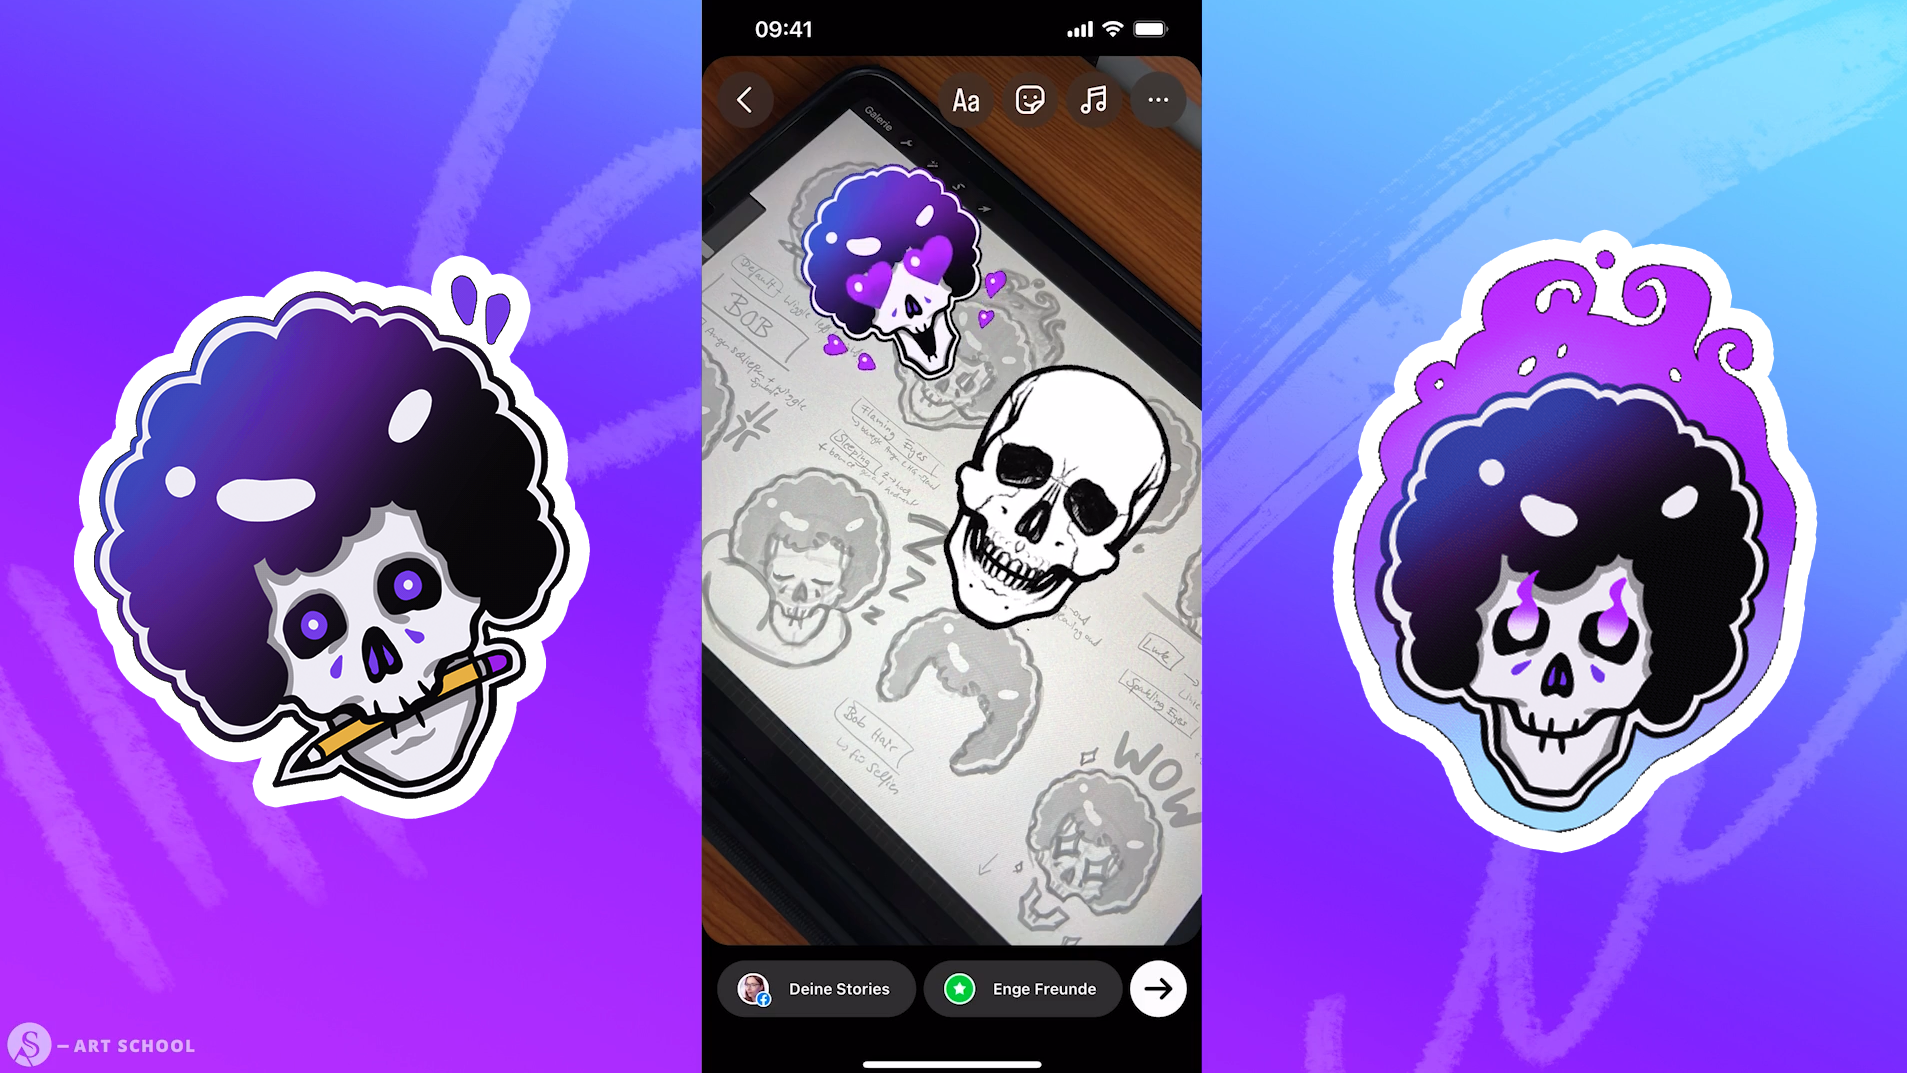
more appropriate here. Here I have the rough sketch of the sticker at the top and
the actual sticker below. I could post this now. However, I won't
because on one hand, I've already posted
it like this, on the other hand, I want to show you another
way, of course. Because you will naturally
discover when you click on this sticker icon itself in Instagram up here on
the right hand side, you will find a way to add gifts here under gift from
the GiffeGallery, which is a collection
of animated images. The section that
says Search Giffe, I will perform the
search quickly. I will simply type
in as art school, and then my stickers
should promptly appear in this location because I have naturally already
completed that in advance. I have included my stickers
in the giffeGallery, and that is how I can also
utilize the gifts of it. The issue is, they do not automatically appear
in this location. Have to go through
a small process. There are a few
steps to take for them to appear in that location. I will demonstrate
that at this moment. If you also desire these stickers to be
visible worldwide, meaning accessible
to all individuals, then you can also proceed with
this action at this time. As mentioned, This is now also the step that you as an Android user could participate in.
7. Sticker Set-Up | 2 Variant for everyone: Now, I would like to
demonstrate to you the alternative method
regarding how you can make your gifts accessible for Instagram in a
manner that allows both iPhone and Android
users to retrieve them specifically through the
GIE search functionality within the story function. As the name already suggests, it is necessary to have a gif account in order
to perform that action. It is all free of charge, so you do not need to worry. Simply open the
web page gift com one time in your browser. To start, create a complimentary
account on the platform. I've already
completed this step, and as you can observe, that's why my stickers
were readily accessible. A few stickers have already been uploaded and unlocked
on this platform. Let us do the entire
thing once more now with the sticker that I
created in the tutorial. I have already downloaded
this one to my computer. You can also do
it from the iPad, but I'll just do it
from the computer now because I can record
everything better here. But that doesn't matter for now. Create a new account, it's important to mention here that you will
only be able to use the whole thing once you have at least five animated stickers. This a process is applicable
when we go through it, it will only be possible for
you to have all of that on Instagram and for your account to be verified for
further steps. If you actually upload
a total of five gifts, five different gifts
in order to meet the requirements. This
is important again. If I only had this one here now, the whole thing
wouldn't work. If you have only
created this one, make sure to create four more. Alternatively, you
can observe me doing it here initially
because otherwise, this option will not
be accessible to you. You require a minimum
of five distinct gifts. In any case, once
you possess those and have generated your
complimentary account, proceed with the following
steps or instructions. You take your gift, which you have loaded somewhere
on your computer, then go to GIF up here in the
bar where it says upload. Click on it once and you will be prompted what
you want to upload, and I want to upload a
sticker here in the middle. I want to upload this once, please ensure that
the gift is properly selected and click
the upload button to complete the process. Can click here once,
or what I like to do very much is simply
drag my sticker there, making use of the drag
and drop functionality, and then you're already
in the creation window. Let's go through the
individual items here. At the very top is visibility where you can
control whether you want to make your gift
publicly available or just upload it
privately for yourself. Of course, if it's supposed
to appear on Instagram, then you have to keep the whole
thing set to public here. Here on the left, you can see a small preview of what
would appear in it. It also looks very good, has not suffered any
loss of quality, so it would work very well. Then the most crucial aspect here is actually to
insert specific tags here with which individuals essentially search for gifts
on Instagram platform, ideally, your sticker should
appear in that location. In addition, you will also be provided with a list
of suggested tags, which are called suggested tags. The first one fits very
well in my opinion, skull. Usually you will enter
this in English here. I can try entering
shadow here as well, but then very few people using Instagram will
search for that. It's better to use
English tags here. For example, skeleton would
also fit quite well here. Halloween is
approaching rapidly. Don't hesitate to utilize
seasonal phrases such as these. That fits perfectly.
Perhaps choose dark. Additionally, I
would include art. Ensure that you use approximately
ten tags in this area, neither more nor less as any deviation may result in
it being flagged as spam. You don't want that. Just
take a quick look there. I'll see what else
I'll take here and then we'll see each
other again shortly. Sometimes, depending on
the type of your sticker, special tags can
also be meaningful. For instance, this
other sticker that belongs to me is a
form of reaction. Excited, one is in love with something they see
or find fascinating. In this case, you can and should definitely enter
a reaction here, as it is a special
category of stickers, or what I also have are
these text stickers, where you can enter
text accordingly. These are then
special categories, perhaps even
transparent because it is a sticker that is
transparent and so on. So pay attention to things like that and also to viral tags, such as skull and generally
love, scary, creepy. These are very popular searches. It's very crowded. You should take both very frequently
searched items and also some more niche
items so that you can be found having both items with
very high search volume, where there is a
lot of competition, but also items where there
is not so much competition, ideally, the best
would be if you create individual tags just for yourself that point
to you as an artist. For example, I would
now remove shaking here and instead add my
artist name Sandra Suite, and ideally also SAT school, my school for which
this is intended. Now I'm looking again at three, six, seven, eight, nine,
weight right next. Yes, those should be
ten, fits perfectly. Otherwise, ensure you
truly reach ten here. That's where I've had
the best experiences. Yes, and then you have
something like skull, which everyone is searching for, as well as individual tags that will distinguish
you or your brand. You can emphasize it
more effectively, ensure you come up with
something similar to that. Then the final thing
we absolutely should do here is to include
a source URL. It is advisable to link to a profile where you want
to generate traffic. Individuals should direct
their attention to. That would be Instagram
for me as an example. All you have to do
is go to Instagram, navigate to your profile, and copy the URL from there, ensuring you have the
correct link to share. That's where I want
to send people. In this case, you could also
use something like YouTube. But generally because we're
using it on Instagram, it makes the most sense here. Click on Save
button, that is all. What you are able
to do at the end is to add the entire
thing to a collection. This doesn't quite fit
with the other rows now. I'll leave that out for now, but theoretically you could say, when you have your
five stickers, they should all belong
to a collection. Then you create a new
collection here and click on it accordingly each time. Yes. Otherwise, you see it's actually a relatively simple process. You don't have to do
much more at this point. That is the reason
why I'm going to click on upload to
GIF at this moment. After that, it will be
uploaded and is expected to appear in your dashboard shortly after a brief
period of time. Here it is at the moment
being displayed individually. I am returning back
to my profile, and there it is already
accessible here. However, the appearances
are somewhat deceiving because it has
not yet been activated. That always takes a day or two, a few days until the moderators have a
chance to look at it. Yes. You also have to ensure
that on the one hand, of course, you must only
make sure to ensure, including content that is
copyrighted and belongs to you, for which you have the
legal rights and ownership. That is original and also
does not violate any rules. Maybe read through the
rules of GIF again. It is actually relatively
self explanatory. Yes. Nothing that would be to obscene or
glorifying violence. That is not the case
with this cartoon sky. I do not need to worry, yes, but maybe think again about
what you upload there. It should be clear, and then it will be
unlocked at some point. One time, but that is
not sufficient for it to actually show up on
Instagram as of now. In my case already, in
your case, not yet, what you still need to
do now is to verify yourself as a brand
or creator in general so that you can also receive the statistics here
and so that the gifts are generally unlocked on all other connected
platforms such as Instagram. Now I will demonstrate
to you how all of this works in order to provide
a clear understanding.
8. Sticker Set-Up | 3 Giphy verification: So considering the fact that I am already a registered
brand on Gee, I am unable to show
you the window again. However, the simple
process is to go to Google and search for
becoming a giffe artist. For instance, click on to search and then select
the first result. After that, you can apply
for an artist channel, which actually fits quite
well with your requirements. Then the complete
process will be explained to you in a
very pleasant manner. Somewhere in this vicinity, there is a corresponding
hyperlink. Then you click on the
hyperlink and then it will display that you are
already a giffe artist. If you click on this link, Then, as it's already
showing me here, you're already a giffy artist. That's why I can't go there
now and click on this link. In all other cases, just follow the instructions that will be presented to you
at that location. Just read through this here, you'll find everything here. If you've done
everything correctly, then usually everything will be unlocked for you in
the next few days. If you similar to me, desire to create
genuinely branded items, I will go back once more. Yes, here. This bob
character, the skull. Those are my
original characters, but I have a brand
with the S art school, which is why I registered
as a brand accordingly. Yes, then you don't have to register as a creator,
but as a brand. You also have the choice
between artist and brand, then you should rather
choose something like that. If you have created
such general stickers like the skull
here, for example, which does not necessarily
refer to a specific brand, but is simply a general sticker, then you can verify
yourself as a creator. Yes, but as I said, just
follow the instructions. It's relatively
self explanatory. If you have any problems, I had them too
because I actually wanted to verify
myself as a creator, then the support will
actually help you. They are very, very friendly. You don't need to
worry about it. The main thing is
that you really have at least five stickers that
comply with the rules, don't violate any rules, upload them accordingly,
apply for creator, and then everything
should go smoothly so that you can soon use the
stickers on Instagram. I may still take some time
even after you are approved another day or two for it to
be available on Instagram. Do not be surprised, it
always takes a little time. But once you have uploaded it, it is just a matter
of time until it is available to
everyone. Okay.
9. Sticker Set-Up | 4 Instagram Story Example: Once your stickers are
available in the GII gallery, and through this gift
function on Instagram, you can of course announce
it to your followers. Yes. In Instagram, create a story and show how others
can access your stickers. To accomplish this, you
need to follow these steps. Access Instagram,
create a new story, and then opt for a
pleasing background to enhance the visual appeal. Have loaded several
templates onto my phone that I always use as the default
options for my tasks, which I also created myself, like this white background here, I employ it very
frequently because it has a subtle texture that
adds depth to my designs. He is not completely white, and now I'll add
my stickers to it. I access the gift function
and perform a search for my hashtag Sart school
to find relevant gifts. Then they should appear
right away right here. Now I'll add these
one by one in order. Currently, the stickers
are already here, but what is still
missing naturally is the announcement
of the reason for now having the stickers
and the hash tag. So I would write
the hashtag once and somehow indicate, Hey, guys, you are now able to utilize
these stickers as well, and that too, by using this link I'm providing this hashtag. Text field and then write
something in it, for instance, you have the ability to now also employ these new stickers
or something comparable. Yes, and with that, I would have already created
my template. At this point, I will proceed
to add that to my stories. Share it one time and then other individuals
have the capability to access it in addition. You have effectively made
your gifts accessible on Instagram by utilizing
the gif platform.
10. Tutorial Result | Instagram Skull Sticker: All right, apart from that, you have now already reached the end point of the tutorial. Certainly, that was merely a very approximate overview for sketching a skull and solely
in a frontal perspective. If you want to explore
further into drawing, particularly faces or portraits, which also encompass
different skull perspectives, I suggest enrolling in my online drawing course called Digital Portraitsing
Master class. At this moment, you also
have the ability to generate completely unique motifs using a similar approach just
like animated stickers. Feel free to express
yourself here and share your results for the opportunity to be featured in the community. If you have not done it yet, if you have not
created a sticker yet, then grab your pens now
and see you next time.
 Sandra S., The Coaching Artist