Transcripts
1. Welcome!: D. Welcome to this course. My name is Martin, and I'm
so glad to have you here. If you have ever
wanted to create your own digital
product in the past, but you first stop because
you don't know how to create a full PDF
guide on your own, you are not a designer,
and also you don't have hours to spend building
everything from scratch. Now, this course
is made for you. In this course, I'm going to show you how to create and sell your own digital products using AI to do the
heavy lifting for you. Here is what makes
this class different. In this class, you don't need any writing experience or design skills to be
able to do this. This class was designed to
work for a complete beginner with an idea and the will to
implement what they learn. So here is a quick
work through on what to expect on this class. We are going to be
using Claude AI to research and
write your guide, hit GPT to create
your images and cover design and lovable to
build your sales page. I will walk you through each
of these two step by step. So even if you have not used
any of these tool before, you will know exactly what you need to do on each of them. And by the end of this class, you will not just
understand the process, but you have a finished
PDF product with a sales page and a cover
page ready to list and sell.
2. Class Project: Before we jump into
the court lessons, here is what I want you to
do for your class project. Now, for your class project, I would like you to
submit the link of your first PDF product down in the project section in this particular course so that I can go ahead to be
able to review it, and other students can also review it and be
able to give you feedback that will help you to improve your first PDF product. So if you follow
through the EA steps I shared in this
particular video, you will have your
first PDF product that is ready to
list and sell and go ahead and paste the link
down in the project section so that we can be able to go
through it with you, right? So that's all I need you to do, and let's get started
in the next lesson.
3. Our 7 Step Roadmap: So here are the seven steps
PDF creation roadmap. We are going to be following
in this course to create and sell our AI generated
PDFs using AI proms. Now the first step is the
NinchOTpic selection. So we walk you through on
how you can be able to find the most profitable
ninch or topic to create your PDF guide
using AI proms. The second step is
the sales page setup. So once we have
discovered the ninch or the topic we want to
create our PDF guide on, the second thing that
we will do is to go ahead and set
up our sales page. Now the reason why
we are setting up our sales page before
writing the PDF, which is going to be step four is so that we want to
make sure that we cover all the promises that
we are going to be making on our sales
page in the PDF. So this is the reason
why we are setting up our sales page first before
creating our PDF guide. Now the third step is
the PDF cover creation. I will show you how
you can be able to use AI prompts to
generate beautiful, very good looking PDF covers that looks
extremely amazing. Now, the first step is the
full PDF guide creation. Now, this is where we will
now go ahead to create a professional PDF guide that provide great value
to the customer. So we are going to make sure that the PDF guide we are
going to be creating right here solves all the problem or the challenges that
the customer is having, which we promise them
on the sales page. Now, the fifth step is
the inner image creation. Now, inside our PDF guide, we need to or include
some images in them. I will show you how
you can be able to get AI prompt that
you can use to generate outstanding images for any type of PDF guide
you're creating. Now, the system is where
you can be able to host your PDF file online so that will be easy for
people to access it. So I'm going to be showing you
the best platforms you are going to be using to
host your PDF files. Now the seven step is how
to promote your PDF guide. So I'm going to be showing
you the EAP way you can follow to go ahead and start
promoting your PDF guide, which will attract
customers to buy it. So this is the ER workflow that we are going to be
following in this course.
4. Deciding on the PDF Product to Create: Decide on the PDF
products to create, here are the top four
markets that I always recommend that you
create your PDF under. Now, the core reason
why I recommend these four market is because
these markets are evergreen and you can be able to
package your knowledge and sell it globally under
these four markets. Now, the first market right
here is the health market. People wants to be
healthy, right? And this is something that is evergreen that
people will always want now, the second one
is the wealth market. This is also another
thriving market that people are always interested
in all year round. Now, the third one is
the relationship market. People wants to feel loved and be loved and people
wants to love better, and they want to
know how they can take better care
of their partner. So providing information on this particular market
is evergreen, too. Now, the fourth one is the
self development market. People always wants to
improve themselves. That's the reason why we buy
books for self development. That's the reason why
people learn skills. That's the reason why
people go to school anything that they can do to be able to better
improve themselves. So these four markets
are always evergreen, meaning that whichever
product that you create under them will also be an
evergreen product. Now, one important thing
I need to say is that your PDF don't need to
serve these four markets. So in our last lecture, I'll be showing you
how you can be able to get a profitable niche from each of these markets that we
have right here, okay? So you have to ensure that you are picking just one market, and you are finding your
profitable niche or topic under that
particular market, okay? So, see you in the next lecture.
5. How to Find Profitable PDF Niches & Topics Using AI: Alright, so we are
now getting into the more practical
aspect of this course. So in this video, I'm going to be showing
you how to find profitable PDF niches or
topics using Cloud AI. So I've already prepared a niche discovery prompt
that you can be able to use to find your profitable niche or
topic to create your PDF. So I'm going to be attaching this particular prompt down in the resource center
of this course. So make sure you
go ahead and check the resource center for all the prompts that
I'm going to be giving you so that you can
be able to use it to create your professional AI PDF. So right here, for you to
be able to go ahead and start building anything
right now using Cloud AI, what you have to do
first is to go ahead and you are going to see project right here on the
left hand side. Click on Project. So it's going to bring you
over right here. So go ahead and click
on New Project. Go ahead and title your project based on what you're working on. So I titled mine right now, my first AI digital product. So you can title yours based on what you're
trying to create or the type of PDF you're
trying to create or the type of market
you're trying to target. So this particular
one is left on you. Now, once you have
titled your project, you can also go
ahead right now to add some description, but
I don't like doing that. So I'll simply go ahead right
now and click concrete. Now, once you create
your project, as you can see
right here, we have my first AI digital product. Now, the next thing
that you have to do for you to be able to find your profitable PDF niche or
topic using this Cloud AI, all you have to do
right now is just to go ahead and click on this plus sign right now
and click on Attach File. So you're going to
see AT file right here. Click on AD file. So right here, I will select
the Niche Discovery prompt, upload it right here. Now, you are going to find
this Niche discovery prompt in the resource center of this particular course
right here on Skillshare. Okay? So once you have
uploaded it right now, now, the next thing you
need to do is to go ahead and click on Send. Now, this prompt is
going to run you through some questions so
that be able to understand you better
and help you pick the best niche and topic
for your digital products. So once I click on
Stand right now now, you can see how it's going to
walk me through right here. Like you said, I will walk you through this conversation
one stage at a time. You know, it's going
to walk me through it, ask me some questions, and you go ahead and provide the questions that is
asking you right here. Try as much as
possible to be very, very honest with it so that it can be able to know
your interest and help you to find the
best possible niche and topics to
create your PDF on. Okay? So as I can see how it keep on asking me
questions right now, and I keep on, you know, giving it answers right here. Just follow you through. It's going to run you
through everything. Now once you're done with
answering all the questions, it's going to ask
you right here, it's going to go
ahead and present you with a validated niche, a real buyer persona, a clear PDF product you can
go ahead and create and also the title that sells
that particular product. Okay? As you can see,
that's the exact thing that it helped me to be
able to do right now. And remember what I all you just need to do to be able
to do this is just to upload that niche
discovery prompt and give it an honest answer for all the questions
it's going to ask you. And once you're done
giving it the answer, it's going to give you
a validated niche, a real buyer persona, a clear product to create, and also the title that
will sell that product. So this is the first
action that we can be able to take
that will help us to be able to create
a professional PDF that we know that is already validated that people will
be interested in before we go ahead and start
creating that PDF. Doing this we help
you to avoid creating PDF that people are not going
to be interested in, okay? So I encourage you to go
ahead and run this right now so that you can be able to get these things that I
mentioned right here, again, it's going to give you a validated ninch a
real buyer persona, a clear product and a title. So in my case right here, you can see how it
was able to give me the ninch that I'm
going to be selling on. It gives me the buyer persona. It gives me the title and the subtitle that I
should also sell on, and it give me some
other information like the promise and all that. Now, in our next video, when it comes to
building our sales page, I will show you
how we can be able to use this information
that you provided us right here to be
able to go ahead and create our sales
page also using AI.
6. Building a High-Converting PDF Sales Page Using AI: Once you have gotten
a validated niche, a real buyer persona, a clear product to create, and also the title that sells, which is what we did
in our last class. Now the next thing for us to go ahead and do is for us to go ahead and set up our sales
page because like I said, the reasons why
we are setting up our sales page first
before creating the PDF product is to make sure that any promise that we
make on that sales page, we are going to cover it in the PDF that we are
creating so that the customers or the
people that will buy the PDF will not
feel cheated at all. Now, before we go ahead and start creating our sales page, there is something else
that we need to do. Now, what we need to do is
that we need to go ahead and fill up our product details. So I'm going to present with you guys with
a form like this. I'm going to put
it in the resource section so that you can go ahead and fill up your own
product details right now. You can see I've already filled up my own product details. So now you can see here
are my product details. I included a blog name right here because the sales
page that we are going to be building is a blog
style sales page, okay? That's one of the best
high converting sales page that you can be able to create. So right here in the blog name, you can just type to
your own blog name that you want to
give it right here, but it has to be related to
the PDF that you're creating. So since right here that the AI after I answered the
entire questions right here, and it was able to give me
this particular ninch to go ahead and create my PDF of
which is this AI powered PDF. And he gave me this
particular title right here. So this actually
shows me that, okay, I have to make
sure that the name that I'm going to
give the blog has to align with both the ninch and also the title and
the subtitle, okay? So that's why I named my
own welcome to Hustle. With Martin Blog, number one digital
Income blog in Africa. Then blog autonym. You go ahead and put in
the name that you want to use as the blog
author right here. Put Martin publication date, you put the
publication date right here. Then the headline. Now, how I was able to get this particular
headline right here, you can see that my own
says the uroduRceptionist, reveals how she turned her phone into a PDF
selling machine, no laptop, no capital,
just 24 hours. So I was able to
get this right here from the information that
Claude gave me right here, which is what he used to help me to get my
validitd niche, the real buyer persona,
and declare product. So if you take a look at the promise that we are promising the
customer right here. So it says promise right here, turn your phone into a PDF selling machine using free AI tools within 24 hours, no laptop and no capital. So as you can see, that's
how we're able to get this. Turn your phone into
PDF selling machine, no laptop, no capital. Then this ECR Do
receptionist where we get it right here is
from our buyer persona. You can see that our buyer
right here is a farmer who is 26-years-old and is from Ecorodo and is a
receptionist, okay? So this is actually how combining this buyer
and also the promise, you can be able to come up with a very enticing headline
for your own product, okay? Now, the niche right here, I just pasted the niche that
it gives us right here. See if I screw up here, you see our ninche right here. So go ahead and
include your ninche. Then the target buyer is also this buyer that we
have right here, okay? So you go ahead and include it. Then the core problem, the personal backstory,
and all that, you can be able to find it if
you follow this thing very, very well, you can
be able to find all these information
right here, okay? So to make it easier for you
guys to go ahead and fill. So instead of you
just, you know, going ahead to copy most
of these information right here from this
particular place right here, Claude gave you a
validated niche, real buyer and clear product
and titles and all that. Ite of copying all these
things from here to paste it under these
particular titles right here, like the headline, the niche, and the target buyer
and so on and so forth. So what I'm going to do
is I'm going to attach the entire product details that I have right
here. On my own. So all you simply have to
do, I'm going to attach it. Maybe I will title it
my product details. So if you go to the
research session, you're going to see
my product details. Now, all you simply have
to do is to go ahead and open up a new hot on Cloud. So once you open up a new
chart on Cloud AI, now, you are going to go ahead and click on this attach
because you're going to be adding this
my product details, this particular one now that I have already created, okay? Because you're trying
to remodel it. So you simply have to
do right now is just to go ahead and click
on this Attach Ple. But I always encourage people to do this under
that same project. So just go back to the project. You see the project that
you have already created. So anything that you're doing, do it under this project so that you'll be more organized, okay? So just from here, we can go ahead and
click on Attach File. Upload that my own
product details, as you can see, here
are my product details. So now here is the prompt that you go ahead
and paste, okay? So go ahead and paste
this ERT prompt. I'm going to attach
this particular prompt inside this particular
docs, okay? So all you have to do is just to edit it, copy
out this prompt. Now, this prompt thread
model after they attach content brief for AI powered
PDF income Bprint, okay? Because that's what this particular my product
details is all about, okay? Remember, you're trying
to remodel this for your own information
that I help you to be able to get right here
depending on the market and the product you're trying
to create PDF on, right? So once we have come right here, so and generate a new
remodel content brief. Oh, now, right here,
this for right now, you now have to go ahead and put your own title right here. For example, if my own
title, if I come right here, my own title is let me
come up right here. I'm going to say my own title is this EDF income blueprint, go ahead and copy your
own title right here and go back the and
paste it right here. Okay? Now, the notes
that I put right here, it says, notes, disregard
the information. You did not need to
generate this brief, maintain the same structure as the content brief for AI
PowR PDF income blueprint. Now, I'm telling you to maintain this same structure that
I have right here, okay? So that's why I'm giving
you guys this now so that you make sure that it's maintaining the same structure. So once we have done that the last thing that we
are going to do is that here we say below is some other information you can extract to create new brief because right now
you are trying to remodel what I have right here and create your
own product details, just like I have my own product details right there, okay? So we simply have to do now. So here that I say, below is some other information you can extract to create
the new brief. Just go over right here and copy everything from this
niche downwards, okay? Copy everything from this niche and stop where you stop, okay? Just read it and
make sure you're not copying things
that you do not need. Okay, so I'll just go back here under this stage
seven, right here. I'll just copy everything
under stage seven. Okay, I'll stop before
opening line for an art. Okay, so I'll just
copy it right here. Go back here, and I'll
paste it under here. I'll just paste everything
right here, okay? So as you can see,
this is what I paste. I select from this niche. So I pasted everything down here. Once you get ahead right now and click on this sent right here. So what it will do is that
it will go ahead and change everything that we
have right here to match your own product details. Okay? As you can see, it's going to change the blog name for you. It's going to change headline is going to
change the niche. It's going to change the targets buyer and the core problem. And it's changing
all this thing. It's getting it from this whole information that you have already
operated right here, because remember,
this information gave you the validated niche, the real buyer, a clear
product and the title. So it has all the information it needs right now to be able to create your own product details because it's these product
details that you can use. So now go ahead and
generate your sales page. But before you do that,
I will encourage you to read through all the
product details that it generated for you so that
you can be able to make the necessary dis
you want to make should in case
there is something that is directed that is not, for example, if it uses a name that you don't want it to use, you can
change the name. If it uses a date that you don't want to use,
you can change it. If it uses a blog name that you don't want to
use, you can change it. If you use a headline that you don't want it to use,
you can change it, okay? So this is the best place
to most of these changes. And once you are done,
go ahead and save that file as a Google document, okay, like a dog file. So once you do this, you have similar product details just
like I have right here, but your own informations are going to be different
depending on the market you're targeting and the PDF product you're
trying to create, okay? But you're going to have
this same structure that I have right here. Now, to be able to now go ahead and create our sales page, I'm going to be using this
my own product details that I've already
generated right here, following everything that
I've shown you so far, okay? Now, for me to be
able to do that, for us to be able to
create our sales page, we are going to be
using this AI two right here known as
lovable dot DEV. So go to lovable dot Dev
and create an account. As you can see, I am using
my free account right here. As you can see,
this is actually a Plan right now. So create
an account for free. Now, once you have created
an account for free, go ahead and paste this prompt that I
pasted right here, okay? Now, once you have
pasted this prompt, I'm going to include
most of this prompt, all this prompt in
the resource section, and I'm going to
title it very well so that you know the prompt
you're pasting on Claude and the one
you're pasting on lovable or any other platform
I'm showing you right now. Lovable is going to be
helping us to be able to create our sales page, okay? Now, once you've pasted this now, the next thing
that you have to do, go ahead now and copy your product details
that CBT give you right. You can copy
everything right here or you can go ahead and click on copy from here so
you can see copage. Now, once you copy it,
go back to lovable. Now, once you've pasted this plump now that you're
supposed to paste on lovable, now under it, go ahead and paste that your product details, okay? As you can see, if I
come up right here, you can see where the here and my product details started. So this is how you're going to paste your own product details. And first of all, you have
to include this form that I have right here so that you know what you ask
it to do for you. Now, once you've done,
go ahead and click on this stand right here
for you to start building. Alright, so we have
pasted our own right now, and I've gone ahead to create this HTML and CSL file
that you see right here, which is what you are seeing on the right hand
sand right now, okay? So let me go ahead and expand this so that we can see what it created
for us right here. You can see that it
is going to help to create a block style sales page for us that we can
use to be able to promote the PDF
that we are creating. Now, mind you, we have
not created this PDF, but the reason why
we first of all, create our sales page is to make sure that all the promises and everything that was set in this particular
sales page, we are going to
cover it in our PDF, and I'm going to be showing you how you can be
able to do that. You can see right
here is even giving out some bonuses right here. Okay, I gave out two
bonuses right here. So we're going to be creating these whole things that
you see right here, the images that it added for us, the testimonials right here, we're going to be editing
them and all that, as you can see, this is actually a full blown sales page that
was created just by using my product details
that Claude AI helped me to be able to
generate and also by putting the prompt that
I add right here on the lovable platform to help us to be able to
create this sales page. As you can see that some of the information right
here matters very well. I see it maintains the
same headline that we gave it right here
from our product details. It maintain that
same headline there. So most of the things is going to be maintaining
it right here, but some other things
that you create on your sales page is
from the information that you provided it right here, from your persona's
backstory and the target buyer and every other information that you are going to be
providing it right here. It knows the best information to pick that you will
go ahead and create a very high converting
sales page for you, okay? That includes
bonuses, the prizes, because you are going to
be adding everything. And like I said, if you have followed everything that I
showed you guys how to do, you'll be able to
have your sales page right now written
right here, okay? Now, the next thing that
we can also do right now that we are
still unlovable is that we can ask it publish this particular code that
he has created right here, live on lovable, and
he's going to go ahead and publish it right
here and give us a link. So if I go ahead and open
up this link right here, now you are going
to see the site that he created
for us right now. So we might end up not even needing a website
for us to be able to use this particular
link because this is the link for our
sales page, okay? But for some of you
that owns a website, let's say you have a WordPress
website and you want to host your own sales page
on your Wordpress website, all you simply have to do is
just to go to your website BOD Go ahead and install the
plugin known as elemental. You can see this plougin
right here called Elemental. Go ahead and add this plougin. Now, once you add this plougin, go to your pages, go ahead and click
on Agnew pages. Once you've done that, give the titooname and call it PDF or you can just title
it the name of your course. My own name of my
course right here is, let me come right
here and pick it up. Right here, we call it AI
Power digital product. I'll just go here and copy it. So go back here, I'll just name it, give
you that name, right? So once you do
that, go ahead and click on Edit with elemental. Remember, you're adding
elemental plugin. So once the elemental
file open up right here, now go to page settings, scroll down right here. Now go ahead and hide the title and change
this page layout, change the page layout
to elemental Canvas. As you can see, you now
have an entire blank page. So go to the search widget on the top left hand side
and search for HTML. So once you do that, drag this HTML on top of
this drag widget here. Now you can see this
box will open up right here for us to
enter our HTML code. So now, go back to Love Ebo. So you can just decide
to go ahead and copy this entire code
that it gives you right here or you can just come over right here to the
page it created for you. Right, click on your mouse. Go ahead and click on
this view page source. Now, go ahead and do
Control A to be able to copy all the files or the
codes that it has right here. Okay? Let's copy
this entire code. Now go back to your side. Now go ahead and paste DSN code in this your
HTML code folder. And once you paste it, as
you can see right here, the side is now showing
up right here, okay? So can just go a little
bit back right here. So right here, you
can see this side. Now, if you want to
go ahead and make this thing to align well,
let me show you how to. But I believe you
know how to so if you don't know how to use the
elemental, this how you do it. Go ahead right now and click on this top sees icons right here. Now go to Advance. If you go to Advance,
remove padding, okay? So the pattern is
no longer there. Then the next thing you
have to do go to layout. Now change this content with
from boss to full with. Now, once you do
that, as you can see, everything has stretched
right here, okay? So this one right here is
hosted on our website. As you can see, everything right here is hosted
on our website. Whereas, if I go
ahead and click on preview now so that you will
see the URL of the website, you can see the URL of
our website right here, and this one is hosted
on the website, okay? So it's the same
thing with the one that Lovable hosts for us because ovablew is going to stop with lovable dot app, okay? So you can see the
one that Lovable hosted and the one that
is hosted on our website. So whether you want to host
on your own website or you want to publish it
right there on ovable, you already have your sell
page set up right here. So we are also
going to be able to change these images
right here and also add any other information that you want to add or change any information that
we want to change. You can change it directly
right here on lovable by just telling the AI tool to change
this particular image. Maybe you upload an image
right here and ask you to add that particular image to
this high hero image here and go ahead and add the
image right here, okay? So that's how you can be
able to make most changes. But we are going to be
doing that once we are done creating our PDF and other materials that we need
to add right here, okay? Because right here,
you can see that it give some bonuses right here. We have two bonuses right here. So we're going to create
the two bonuses right here. And right here is even
have a bondu image. So we're going to also be
creating a Bondu image. And we're going to
be adding all of them right here, okay? Now, the next thing that we also need to do right here before we go is to create
our TQ page, okay? Because when someone
buys our product, when somebody wants
to get the PDF, they will first of all, learn on the sales page, which is what we
have right here. Now, once they finally buys the product and click on get the Blueprint
and make payment, they are going to learn
on the TQ page, okay? So for us to be able
to create our TQ page. So once you already have this, now just simply go ahead
and paste this simple code. So go ahead and paste this
thank you page prompt, okay? I'm also going to include
the thank you page prompt in the resource
section right here. Now, here is what
you need to change. So go ahead and change
your own sales page URL. So you can say I included
my own right now, okay? So, but it's going
to come like this. So go ahead and input
your own sales page URL, ER from the one that you
hosted on your own website, or from the one that LoveB have already helped
you to be able to generate, which is this particular one that we have right here, okay. So go ahead and copy the link of your own
sales page right here. Once you copy the link, go back to Love. Then where you see,
read the sales page go ahead and page your own sales
page right there, okay? So you can also do well
to read the entire prompt right now and click on Send. Now, once you click Onsen,
you to go ahead and generate the thank
you page for you, as you can see the
thank you page is generated for me right
now once I click OSN. If I go ahead and expand this, you can see the Thank you
page that we have right here. Okay? Now, it's on this TQ page now that we're
going to be adding the downloadable link of our
PDFfle that we have created. So once we create the
PDFfle and host it, online, we can go ahead and put the link here so that once they go
ahead and click on this link, they will download all the PDF and the promises that
we made for them, okay? As you can see, it even
included the download link to all the other bonuses
that we offered them. That's why we instructed you to reach our sales page, okay? And this is the reason why
we are doing this step by step without jumping
any step, okay? So if you follow this right now, you now already have
your sales page, and now you now have
your thank you page. Like I said, always
do well to reach the entire word that AI
generated for you right here. So if there's any mistake, you can instruct it to make
those necessary edits, okay? So here is our thank you page. Here is our sales page. So once someone landed on
this sales page and they love the PDF product and they click to Make purchase
and they finish buying, they will land on
this thank page for them to now go ahead and download the PDF they
have already paid for. So when we get to
the section where we are going to host
the PDF online, I'm going to be showing how you can be able to connect
all these things, even include the
link so that once a customer purchases the
product and make payment, they can get this
thank you page link. Now go ahead and
download the PDF, okay? And I'll also show
you how you can go ahead and connect
all the things up.
7. Creating a Beautiful PDF Cover with AI: In this lesson, I'm going
to be showing you how to create beautiful
PDF cover using AI. So now that we already have our sales page and also
our thank you page. Now, before we go
ahead to start using our sales page to be able to
create our full PDF content, let's go ahead to create the PDF covers that
we are going to be including in these areas. Like, for example, we have to showcase the product that
we are trying to sell, and we have to make sure
that the product looks very, very presentable right here. So that's why we're
going to be creating PDF covers that shows the
title of the product, the subtitles, so that people have an idea of what they
are going to be getting. So we are going to be creating the PDF cover for
our main product, which is the AI powered PDF
income blueprint, okay? And right here on
our source page, we are offering them
two bonuses right here. The first bonus right here is the first ten buyers
scripts pack, and the second bonus is the
pricing sheet sheet, okay? And also, we are going to
create an image bundle right here that's going to add the three products
together, okay? So that's what we
are going to be doing right here in this video. So let's first four
go ahead and create the first cover for the AI
Powered PDF income preprint, which is the main
product that we are promoting using this
sales page, okay? Now, the tool that we're
going to use to do that is Chat GPT, okay? I've tried several
tools out there, and Chat GPT has given me the best quality
PDF covers, okay? Now, I already formulated
a prompts that we are going to be using to be
able to do that, okay? So you can see, I
have a prompt for the single PDF mockup
template right here, okay? So go ahead and download this prompt in the
resource section. So just make some necessary
adjustments right here like, where I'm going to ask you
to put your product title, change the product title to
the title of your product. Right here, where I talk
about the background color, put the color that
you want to use, where I talk about Tito, put the main title
of your product, where I talk about subtitle,
put your subtitles. Now, in this middle section,
it's very important. If you want to add any
specific graphics, or if you want AI to create
any specific graphics or image that is going to be
in front of your PDF cover, this is where you want
to state the graphics or the image you wanted
to add right here. Then at the bottom, it's
going to add the autonym, the auto credential,
and all that. Just go ahead and make
this necessary edit and copy all the whole stuff, okay? So just go ahead and
right click and copy it. Now, once you copy it, go back to Char giPT
and make the paste. So right here, I've gone
ahead to base the prom writes I was going
to say I've changed the book title to the
title of my book, which is the AI Powered
PDF income reprint. If I scroll down right here, you see that I've
changed the subtitle to, you know, the subtitle
that we have for the book. And right here, you can see even the color that I
gave it right here, which is emerald green. If I come down right here, you can see where I included the author's name right here, which is Martin Also Autos
credential number one, digital and computor, right? So you can see how you can be able to make all these edits. So I'll just simply
come over right here and click on SendPmpt. Now once I've sent this prompt, AI went ahead to create this professional looking
eBook cover for me right now. As you can see how it was
able to add the title, add the subtitle right. And this is the middle section, which is the graphics that
I wanted to add right. So since I'm creating an
eBook that people can just use their phone to create
the AI PDF books, right? So that's actually what I asked you to do right
here, to put a phone, put PDF and show the PDF that is printing
out cash, right? So that's how it was
able to now create these graphics and
edit right here. And then here you
can see Martin's also and the number one
digital income total. Alright? So if I still come up right here and show you
the middle section, you can see how I explain it. Under the middle
section, I said, add realistic graphics of a
phon printing money through PDF files and sure it blends well with the
styling of the entire page. So you know what your
topic is all about. So ask it to give you what
you want it to give you. And that's how it's going
ahead and come up with this very professional
looking eBook cover. Now, the next cover that
will go ahead right now and create is the bonus
covers, right? So this particular first
one right now that says the first ten buyers, okay? So that's the thing
that we're going to go. So we're going to
go ahead and copy this entire script right now
and make these same changes, change the color that
I want it to be there, change the titles,
change it of titles, and ask AI to put the graphics that I want it to put put autonom and credential. So that's how we are
going to do again. And go ahead and
generate that, okay? So let me go back to Thar
JPT and do that again, okay? So I have sent this
particular one right now. You see, I changed the
background to Deep Ridge Brown. I changed the title to the
first ten buyer script p subtitle Era ready and I put the middle
section description. I instructed it on what I
wanted to add right now, okay? So, and air I've already gone
ahead to create it again. As you can see, the PDF
you created right here, the first then buyer script
pack, put the subtitles, put the phone, you know, put the graphics just like
the way I wanted to do it and the autonym
and credentials. Okay? So the same thing is what I'm going to do
for the Bonus two, which is the present
sheet sheet, right? So I'll still go ahead, copy this entire stuff, then make the necessary edit again to match what
I'm trying to promote. So particular this is
actually the headline and a week reference guide for pricing any future
digital products. I think this is actually
the subtitles, okay. So this is what I'm going
to use as the subtitles. So all I say pre you
have to do is just to go back to CharPT and
go ahead and make the paste again to
start creating this and make the necessary edit and the colors I want
to add right there. Okay? So once you
are done making the edit that you want to make, just go ahead and click on this tend prompt to
be able to generate. So yeah, I'm done
making the edit. I've gone ahead to
click consent prompt. As you can see, I
changed the paragram of this one to this
deep crimson red. Right, and I change the titles, and I change all these
other information. And if I come down right here, so you can see what it
gave us right here. So it gave us the title, subtitle, and the graphics I want to include
there and all that. Okay? So this is exactly
how you can be able to generate your PDF cover mockups. Okay? These are very, very
vital because it's good to present your
PDS in this format because this particular
format actually increases the perceive value of the PDF that you
are creating, okay? Now, the next thing that we
have to do now is now go ahead and do the
bundle markup, okay? As you can see right here, we have to insert a
bundle right here. So this bundle have to come with the main guide then plus
the bonuses right here. So the main guide is the
first one that we created, and the bonuses is this Okay, so we are going to be having the three of them joined
together, okay? And like I said, I have also
prepared a prompt for that. So you simply you have to do, go to the screen of the video. You are going to see this
bundle mockup prompt. I think it's going to be under this single PDF
mockup prompt, okay? So just go ahead
and copy it right. So once you copy it, just
tell AI how you want it to be where you want the left book to be the center book is
going to be the main book, and the right book will be
the second bonus book, okay? So I'll just copy this
stuff right here and go ahead and upload and
make the necessary edits, which is what I'm going to
go ahead and do right now. Okay? So I'll just first of all, go ahead and copy everything. So I'll just go
ahead and copy this. Once I copy this, I'll go
back to harGPT right here. So these are the single
single ones created so far. So I'll go ahead and paste this. If I pay this, I will
just go ahead and change the left book or let
me first of all, change the center
book because I want the center book to be
the main PDF title. So I will tell it to
include the main PDF title, which is the AI PowerH Let
me get the name again. AI Power PDF income. Print. Now, to make sure that AI use the same images that
you have already generated, what we are going to
do is to go ahead and attach these three
images right here, okay? So just go ahead and click on
this share icon right here. If you click on it, you're
going to see download. Go ahead and download
all the three images. Now, once we have downloaded it, we'll just go ahead and
upload the tre right here. So I will go ahead and add
the three images right here. So as I can say, I'm uploading the three images right here. So once I finish uploading it, then I'll go ahead and
change the left book. I can put anyone
to be on the left, any of the bonos to be on the left I'll put the other
bonos to be on the right. So once this is
finished uploading, I'll just go ahead right now and click on this end prompt, and you're going to see the
professional looking e book more calls or it's going to
give us the three bundles. Alright, so so it's finished uploading another
preconsent prompt, as you can see how I
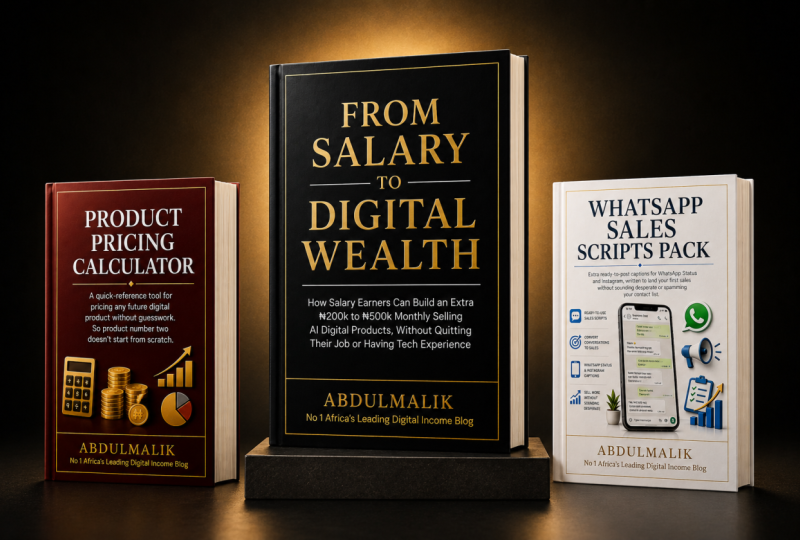
edited everything. So the left book, I added the pricing sheet
sheet to be on the left. The center book is the main book that we
are writing about, which is the AI Power
PDF income preprint. Then the right book
is going to be the first then buyer script
pack, right preconsent. And once I did that,
you can see right here what is generated
for me right now, okay? You can see how he joined the three book right here so
that we can be able to have the bundle that we
are going to be attaching right here
on the sales page. Okay? So go to the
screen of this video to download the product mockup
prompt so you can get the prompt you can use to
start giting high quality PDF covers just like this one that I just
created right here.
8. Generating AI Prompts for Your PDF Guide: In this lesson, I'm going to be showing you how to generate AI prompts you'll be using to create your entire PDF guide. Now, here is exactly how
the workflow is like. So the step one, the prompt
will help us to be able to do research and create
content outline for our PDF. Now, this step two is going to help us to
be able to write the entire full PDF content
chapter by chapter. So these are some of the instructions
that we are going to be using to generate
those prompts, right? Now, this step three will help us to generate prompt
that can be able to help us to run content
review and make sure that it passes
some criterias, right? Now, for step four, we will go ahead and
generate image prompt will use to create images
that will be inside the PDF. So these informations
right there are informations that will help
us to generate those prompts. Now for step five, we are going to go ahead and generate a prompt that
will now help us to add these images
that we generated in step four inside the
PDF we have created. Now, the step six will
help us to also run another quality
shake to make sure that we have no
errors in our PDF. And the step seven is where
we just add is where we generate prompt that
will help us to include the TQ page inside our PDF. So I will attach these
instructions right here in the result section
of this particular call. So make sure that you go
ahead and download that. Once you have downloaded that, go back to your Cloud project. So go ahead right
now and click on this plus line and
click on Ater Ad file. So right here, you go ahead and attach that particular file that you downloaded
right now, okay? Which is this seven step
workflow PDF creation prompts. So go ahead and
upload it right here. Now the next thing
that we're going to be uploading to help us to match everything together
is our sales page. So remember in sales page we created with lovable right here. You can also even create
this sales page using Cloud, but I want to use lovable
right here because if you paste the same code that
we pasted on lovable, cloud will help us to generate
a sales page like this. So right here, all you have
to do right now is just to come over right here and write click on
your mouse, right? If you write click
on your mouse, you are going to save us. Click on the sa us. So go ahead and save
this HTML file, so you can decide to title it whatever thing that
you want to title it. So here, I'm going to title it also talk with Martin, right? So I'll just go ahead
now and click on Save. So once you save that, now, go ahead and upload it, attach it alongside the seven step WloPDF creation prompt. Now, it's important for me to let you know that if we go ahead and open the HTM that
we save right here, you can see it to load up our entire page
right here, okay? So that's why we attach it right here because
we want Claude to be able to help us to merge this
whole stuff together and help us to gireate the prompt we'll be using to
create our PDF. Right? Now, the next thing
that we're going to add right here is our
product cover image. So those images that we
created right here on ChargPT, so we are going to be
adding this particular one because this is the main
product we're creating. The ones under it right
here are the bonuses. But the one we need right
now is this particular one, the AI Powered PDF
income Blueprint. For your own PDF, go ahead
and add your main PDF. So we're going to add
this image right here. So I've downloaded all
the image right here. So I'll just go ahead and upload that's one image right here, the main image, okay? So now that I've attached
this T files right here, now the next thing that
you're going to do is to go ahead and paste in this prompt
that I have right here. So this prompt says, adapt the seven step workflow
PDF creation prompt for my PDF product titled AI
Powered PDF income reprint. So right here, you're
going to be including your own products title
right here, right? So now, and I
instructed that I have also attached my PDF sales page, which is this hustle to with martin dot HTML and book cover, which is the book cover
that we have right here. Then once you have done that, go ahead and click
on Send prompt. And once you do that Cloud, we go ahead and adapt the
PDF creation prompt to match your product using
the sales page HTML that you proloded and
also your product images. So right here, once it's done, it's going to provide
an AI prompt like this. So if we go ahead and click on it right
now to open it up, so you can see the
PDF creation prompt that he has been able to create. So right here, he
has been able to map out everything from
your sales page. So now you understand what your product title is
about the subtitle, the auto, the style, the buyer avatar,
the call promise that you're making
on your sales page, the structures, and every
other thing right now. The most important thing
that we have right now is the theft like I
showed you guys area, which is what we are
looking to create, okay? So right here, you
can see that it's on the research and content
outline right here, we have the instructions
that we are going to be using to generate
our content outline. So it has helped us
to be able to add all the information
that we will need to generate our content
outline right now, okay? So because if we go back to where we generate this
information from, you can see that
we don't have most of the information that
Claude helped us to include. As we just give it
instructions right now. But right now, the prompt
you gave us is something that we can use to generate
our content outline. And you can also see this
particular one right here, the image prompt for every section is going to give us instructions that we use to generate image prompt for all sections of our eBook, okay? So that it keeps on going. This particular one, they write the full content,
chapter by chapter, is going to give
us the prompt to use to write the content. Now, I'm going to advise
you to make sure that you read all these
prompts to understand it. And if you want to
make any changes, you can tell Claude to make a change or if you say that
Claude made a mistake, inform it to go ahead and correct that
particular mistake, you can see the content review. I will give us prompt
writer that we use to review our content and
so on and so forth. So you can also see the
PDF assembly with images. I give us this prompt, we used to do that, right? So let me expand this. So you can see, so
we also have the, also run another quality
check and everything. And the last one is to add
the Thank you page, right?
9. Creating Your Full PDF Guide with AI: To start using this prompt
to start creating our PDF, all we have to do
is to go ahead and read the prompt and implement what the prompt asks us to do. So that's how we can
be able to do it. So the step one
prompt right here is for the research
and content outline, which is what we need to do. Now, under instruction,
you will see the instruction that you asked
us to do right now, right? So it's ask us to go ahead. To attach our
product, right here. So you said I've attached
the sour page HTML for my digital PDF product
called this, right? Then I will tell it
to task right here. But right here is going to give you based on your own product. So all I simply have
to do is just to go ahead and read
through everything. Please read through everything
right here so that you understand everything this
prompt is saying, okay? So all I have to do right
now is just to go ahead, I will copy this prompt, right? So I will go back to
my project right here. I'll just go ahead and paste in the prompt right here, okay? Well, if you read the prompts, you will see that at
the beginning, it says, I've attached the sales page
HTML for my PDF product. The purchase the AI Power
PDF income blueprint, okay? So I would have to do
is to go ahead and attach the HTML, right? So this is the HTML right here, which is the hos top
with Martin Dot HTML. I'll go ahead and
upload it right here. So what Claude we do right
now is to help us to extract the content outline
we need to create our PDF. Okay? So all I have to do
right now is just now come down right here and
click on Send prompt. Now, once I click
on send prompt, so Claude took some
time to be able to run through the entire page to understand the prompt and
also go ahead and follow the instruction to generate
our content outline. Okay you can see right here, this is the PDF income
preprint content outline. So if I go ahead and click on Open right now to
open it right here, so you can see that Claude has been able to go
ahead and generate the content outline that we
needed right here, okay? So you can see
everything right here. So this is the entire
content outline it was able to do for us just by using the prompt that we uploaded and adding
our sales page, right? So now that we have our
PDF content outline, the next thing that we
need to do is to go back and add the next
prompt right here. Okay, so the next
prom that we're going to be adding is
the prom that will help us to be able to write the full content right
here, Shafter by Shafter. So this is the
instruction again. So go ahead and read the instruction again
that I gave you. So right here, I said I have
attached the sales page, HTML right here and also
the content outline, which is this content
outline that I gave us. So go ahead right now and
download this content outline. I'll go ahead right now
and click download. So right here, it has
downloaded right here. So all I simply have
to do is to go ahead and upload both this
content outline and also the HTMO okay sells page TMOcRC these are the two things that we are uploading
right here, okay? So what I simply
have to do right now is just to go ahead and copy this and go ahead right
here and put it right here. Then once I put it, I'll go
ahead and attach bowels. So I will attach both
the content outline and also the HTML. I'll go ahead and click
on Upload right here. Now, once they are
done uploading, I'll go ahead and
click onsen prompt. Now once I've sent the prompt, Cloude went ahead
to be able to now provide us with the
PDF manuscript, o? So right now, it has
written the Chapter one, because if you read the prompt that we
gave it right here, we ask you to write both the Introduction
and Chapter one, following the
content outline and also our HTML that we
uploaded right here. So what Claude is doing right
now is that it's making sure that creating a PDF that answers or provide the information that
we promise that we're going to be providing right
here on our sales page. Okay? So that's what it is
doing right here, okay? So right here, you can
see that it's created the introduction and also
the Chapter one, okay? So this is it right here. So if I go ahead right
now and click on it to open it up right here so that I will see
what is ts created. So you can see the
introduction right here, AI Power PDF income blueprint. I put the subtitle right here, it design and sell your
face digital products using on your phone and
free tools by Martin, also talk with Martin, okay? So you can see the
introduction right here. Okay? So after writing
the introduction, so let me see, I think I saw
the Chapter one right here, so you can see Chapter
one right here. So it went ahead to create a very detailed
information right here. Now, if you read
this information, make sure that you read it
thoroughly before you go ahead and continue with
Chapter two, okay? As you can see, it generated Chapter one
for us right now. So the next thing that
we're going to ask it is to go ahead and generate
Chapter two, as you can see, from the
prompts that we pasted, which is the prompts that
we copyate from here. Now, part of the writing rules right here is that we are
telling it that, Okay, after creating the introduction
and the Chapter one, no, you have to let
me to review it. Then when I review it,
then I can now tell you to continue to create
Chapter two, okay? Now, once I tell you to go
ahead and create Chapter two, it already knows what Chapter two is going to be
all about because we have already uploaded
our content outline and also our sales page TML. So now I've gone ahead to tell
you that this is approved. Continue with Chapter two. So right here, it will go ahead and write the
Chapter two for us. You can see once it's done, if I go ahead and open up
the Chapter two right here. So right here, you
can be able to see the Chapter two right here, which is the own
only tool kit, okay? So this is also part of
the content outline. Now, let me show you the content out outline how it's
going to look like. So you can see my own
content outline right here. So if I scroll down, let me come to Chapter
one and Chapter two. Okay, so we want to get to the. So you see the introduction
the 11:00 P.M. Search, which is part of
the first thing he created for us, alright? So let's go down and
see Chapter one. Okay, so this is the
Chapter two. You see? Chapter two is the
phone only two kits, which is what it
created right here, which is the Chapter two, the phone only two kit. Now, if you take a good look at this content outline
that we have right here, you can be able to see
that the information it has right here is
actually what helps it to be able to generate
this full PDF content that provide massive
value to people, okay? So you can see that in
our content out line, we also have Chapter
three right here. And if you go down,
you see Chapter four, if you go down, you
see Chapter five. So these are where is picking up most of this information and
creating this PDF for us. Now, once you are satisfied
with Chapter two, go ahead and tell
you that this is approved and continue
with Chapter three. So this is how you continue
doing it chapter by chapter. So that cloud, we
continue to give you high quality information
that you can your PDF, which is what is already
created right here. Please do not try to create
the entire chapters at once. It's going to give you a very, very weak information, okay? So, but if you read this, once it generates any
information right now, make sure that you
go ahead and read through everything it
generated for you, okay? Make sure you read through
if there is any mistake, before continuing
to Chapter three, you can inform me
to go ahead and correct any mistake that
you're seeing, okay? Now, go ahead and
speed run this thing. I'll just go ahead and
say this is approved. Continue with Chapter three.
And so on and so forth, to be able to create
the entire chapter for the PDF, okay? Alright, so right now,
I've already gone ahead and say this is approved,
continue with Chapter three. So it went ahead and create
the Chapter three right now. So I was okay with it. I went ahead and tell it, Okay, this is approved, continue
with Chapter four. I went ahead and wrote
the Chapter four. That's how I continue. This is approved, continue
with Chapter five. So I continue doing
this until it was able to write the last chapter,
right here, okay? So as you can see, this
is I said Chapter nine, okay, I provided Chapter
nine for us right here. Okay? So now, once it's done, it says that that's the
last full teaching chapter. Now, the only piece
left closed is, you know, the bonus section. So he asked me
whether he should go ahead and continue to
create the bonus section. Then, I said, yes, continue. So it also went ahead to create the bonus sections right
here to include in our PDF. So if I go ahead and open
up everything right here, so you can see that the entire
chapter is already here. So we have the Chapter three,
but I screw down right now, you will see the Chapter four, the introduction and
closing chapter. If I slow down writer,
you see the Chapter four, right, from draft document. So if I come down, you will also see
Chapter five right here. The full only cover
design walk through. So this is how he
was able to do it until it gets to Chapter nine. This is actually a very
long PDF right here, built with quality information. So you see the last
chapter writer, which is the Chapter 91 PDF
into a small product lineup. If we go ahead and open up our
content outline right now, let's see our Chapter nine, so you can see the
Chapter nine is the one PDF into a
small product lineup. Okay? So this shows you
that it created everything. Like I said, make sure
that you read everything. Now, it also went
ahead to create the bonus section
for us right here. Okay? So let me see
the bonus section. I still Chapter nine.
So if you come down, Okay, so you can see
the bonus section. This is the bonus one, the
first ten buyers script park. Now remember that this is
one of the bonus we are promising our customers in
the sales page right here. So if you come to
the sales page, you can see that the bonus one is the first ten buyers
script park, okay? So it went ahead to be
able to create bonus one. Now it will also create
the bonus two right here. So let's just scroll down. Now
you can see the bonus two, which is the pricing
sheet sheet, okay? So it tells people how
they would better price their product because that's actually the PDF we are
creating right here, okay? So now that it's done creating
the entire chapter for us, now the next instruction
that we have on our prompt is so let me go to the next
instruction right here. So the instruction says content
review and enhancement. So to make sure that there is no issue with the
content it has written. So we are going to go ahead and copy this prompt right here, go back right here
and paste the prompt. Once you paste it, you go ahead
and click on Send prompt. So once I click on the send
prompt right here, so, hat went ahead to make
sure to check everything for instruction that is in that prompt to make sure
that everything is okay. Now, if everything
is okay right here, you can see, let me
scroll down and show you. So you can see right
here. It shows that everything has
been corrected. You can see credibility
enhancement done, bridge sentences, enhance
engagement shake on fis apply. So to fix everything just by following the
instruction that is already on this particular form. That's why I said,
Make sure that you read this prompt very well to understand what
is doing right here. Okay? So once we are done with the content review
and enhancement. Now the next thing
is for us now go ahead and start generating our images and adding the
images to the PDF, okay? Because right now it has not generated any image right here. We just have the test document. So what you have to
do, just go ahead and copy the entire test right here. You can see this is the entire
PDF manuscript right here. So go ahead and copy everything. This one contained
from Chapter one, both the introduction from the Chapter one to Chapter nine, and also the bonuses and
everything right here. So go ahead right
here click on copy. Now, once you click on copy, Go ahead and open up a
fresh document right here and paste the entire
information right here, okay? So once you paste it, make sure everything
is properly aligned that this one is in the head
up which is heading one. So all the chapters are
in the Heading two. You know, this is actually
what you need to do, okay? So, make sure that everything
is properly aligned. You can go ahead and read it again if there is any
mistake in your PDF, because remember this is what you're sending to
your customers. If there is any mistake, correct it right here. Or inform club to go ahead
and fix that mistake. So now that we have
our PDF content, all the chapters, introductions,
bonuses and everything. Now the next thing is for
us to go ahead and add images to this PDF that we
already have right now, okay? Now, for us to be
able to do that, all we have to do is just to
go back to the prompt, okay? Remember that we are
doing everything using this particular prompt right here that we have created area. So this is where we
have the image prompt. You will see the image
prompt section, okay? So all we have to do
now is just to go ahead and copy the
entire prompt. But make sure that
you read this prompt. Like I said, read this prompt to know what it will
require you to include, for you to be able to generate what you are looking
to do, okay? So once you have gone
ahead to read this prompt, you will see that
one of the things is going to ask us to be
able to include right here is the content
outline so to create an image that is
going to match it, okay? So remember, this is how your content outline
is going to look like, which is one of the things that the prompt help us to
be able to do, okay? So all I have to do
right now is just to go ahead and copy this. Then I'll go back to my project. So I'll go ahead and paste it. If I paste it right here, I will go ahead and attach
the content outline. So this is the contenta outline
that we created earlier. So I'll go ahead and
attach it right here. Now, I'll go ahead and
click on this send prompt. And if I click on Send prompt, it will go ahead and generate different prompts
that will match each chapters and introductions for all these pages
that we have created. So as you can see right now,
I've clicked on send prompt. You can see the prompt you
gave me for the cover image. So this is the prompt
that I'm going to use to generate the cover
image right here. So he gave me prompts
for introduction image. And it also give prompt to
all the chapters right here. So it will give you
the prompt that we're going to be
adding there, okay? So all I simply have
to do is just to copy each of these
prompts right here to be able to use it and go to image generation tools like
Char GPT or Mid journey or any other image generation
tool that you want to use to start creating
these images, okay? So these are actually
very quick run, okay? But I don't actually suggest we using the prompt
you gave us right here for the cover
image because, remember, we already generated
a product cover mockup. So if we use this
particle, it might generate something
entirely different from what we showed our customers on the
sales page right here, which is the main product that is going to be
right here, okay? So I'm going to be showing
you how you can be able to turn the product cover
that you created right here or the product
cover mockup that you created already using CharPT
which is this product cover. I'm going to show you how you
can be able to turn it to be the first image that will be the cover image for your PDF, because this one has to be on your PDF so that when people are going to see it
first and know that yes, this is the product that I actually bought before
they go ahead and start seeing the
content outline and start reading the entire
content on the PDF. Now, so the first thing that we are going
to go ahead and do now is now turn this
particular product cover mocop to
normal product cover that can be inside
our PDF file, okay? Now to convert your book cover mocop into a normal
standard portrait format. So you simply have to do,
you can open up new RPT, right here, hat, right, okay? So all I simply
did is that I went ahead and opened up new hat and uploaded the normal
P dot cover mockup, and I gave you this instruction to convert the book cover to a standard PDF with a
portrait cover ratio. Now I put the dimension, okay? And I also included I should not include any
background, okay? But for this
particular dimension, you can even decide to go with the dimension that Claude gave you right here because you
can see the dimension. This dash dash A two is 23. So you can just copy that, go ahead and remove
this dimension that I included right here in PizzLs and just attach that particular one or you
can just go with this. Now, once I did that,
it was able to give me the portrag versions that
we have right here, okay? But I actually
noticed that he made a mistake from some
of the letters that you can see right here on the credential dam after
the Martins, right? So he missed the F, D F to T. When it comes
to Africa right here, you can see it did
ATRs ICA instead of AF so I went ahead
to notify it again. So I told you to fix
the mistake, right? So once I told you
to fix the mistake, it went ahead and
fixed the mistake right here and everything
is now perfect, okay? So all I did is just went
ahead and download this, okay? I just went ahead and
click on this share. So go ahead and
click on download. So this will now be
the cover image, okay? So instead of using
what Claude gave us right here to start directing
an entirely different, you know, image from
what we already have, we just go ahead and turn the
mockup we already have for our normal product and convert
it into a portrait version to use it as the first
image of the PDF, which is going to
be the cover image. Okay? Now, the next
image right here is the introductory image, okay? This is the prompt for
the introductory image. Now note that Cloud
has already went through your entire
also outline. So it knows the best images
that fit each section, be it introduction
or all the chapters. So all I did is that I copied the prompt that you
gave me writing, and I went back to Chat GBT. Like I said, I like using
Chat GVT to create my images, but you can use any other AI
image creation to out there. There are so many of them that you can go
ahead and explore. You can even explore
Gemini, okay? But like I said, I prefer using
Chagpt because once I use Taji I've compared it with Gemini right here to be
able to create some images. But the images ChargePT give me looks more better than that. Okay? So right here, I went ahead to paste
the prompt right here. So all I did is that all the prompts that it
gives me right here, I was pasting it one by one,
one by one, one by one, one by one until I
get to the last one, which is the closed image. And I'm going to show you
the results right now. Because once I pasted
it right here, it went ahead to create
this image right now, and this particular
image matches what I was saying in
that introduction. So your own is also
going to match what you were saying on the
introduction because remember, it generated this prompt right here from your cost outline, which is what we uploaded right here for you to be able to generate all these
prompts, okay? So now, once you are done
with introductory image, I went ahead and
give you the prompt for the Chapter one image. So let me show you what
it's created again. If I come down right now, you see the Chapter one image, you see the Chapter two image, you see the Chapter three image. So this was how I was able to keep on pacing in the prompt, and it kept on creating the
images that I need, okay? So this is actually the closing
image right here, okay? So all you just have to do just click on Share
once you're done creating save this and save
it in a particular folder, all the images because we are going to be combining
these images with the content that it has already created
for us right here, okay, so that it can be
able to match very well. And like I said, we are not going to be doing
this ourselves. So we're going to be
instructing AI to be able to add these images that it has created right here and added to this file and now go ahead
to now create a well, properly designed
professional PDF for us. Okay? Now, for us to be able
to go ahead and do that, we'll go back to the
instruction center right now, which is the prompt
generation center, which is the prompt we've
been using to do all this. So we come to the
section that says the PDF assembly section. So this is the PDF
assembly with images. So here you can see that
right here is saying that we have uploaded the
flowing into the conversation, the completed test content for the AI powered
PDF income repping, which is that contains
all the chapter, which is this particular
information that contains all the
chapters of our PDF. And the second thing
right now that we included is that we added and we added all the images that
is also included in the PDF. Now note that you have to
title these images very well. Now, the one that is
for the cover image, which is this particular one
that we have right here, the top one, title
this particular one, cover dot PNG or
cover image dot PNG. Now for the introductory image, title the introductory
image introductory dot PG or introductory image dot PNG, once you're saving the and the same thing with
the Chapter one image, title all the image accordingly because you are
going to be uploading them, and it's going to be matching any title that you give to
that particular chapter. Okay? So if you
take a look right, you will see how I was able to title my own
images right now. Chapter one images were title, Chapter one, dot PNG. Chapter two was Chapter two, dot PNG, and introduction
was Introduction dot PNG. Cover was cover Dot PNG. So this is how you
should go ahead. And title your images appropriately
so that I can be able to match it to the content
that we have right here, okay? So that's what we
are now going to do. So what I have to do
is for us to now go ahead and join this
whole thing together and get AI to be able
to create or design a professional PDF for us and add the images for us, okay? So to do that now, we
just go ahead and copy the prompt under this PDF
assembly with images. So just copy it. So just go back, you know, to cloud right here. Based on the prompt. Now, remember what
the prompt is saying. Like I said, always read it. Now the instruction is one that we are going to
go ahead and attach the files that contain all the PDF contents
chapter by chapter, okay? Which is this particular file
that we have right here. So what I have to do is just
to title this right now, AI Power PDF income pprint. So I'll just go ahead and
click on file to download it. So I'll just go
ahead and download it as a Microsoft watch. So right now is
done downloading. So I will just come
over right here. I will go ahead and upload
it, right, add file. This is the file
right here I saved. I'll go ahead and
upload this right here. Now the second thing that
I need to add right now is those images that I have
already titled properly, okay? So I'll just go ahead and add the entire image right here. So I'll go ahead and click on Ad files or photos
here are the images. Make sure you're only selecting the images that's supposed
to be there, okay? So you see Chapter one
to the introduction. So I'll just select
them like this. I will go ahead and upload them. So I'll just wait for them
to upload finish, okay? Just wait for them
to upload finish. I might just take
a minute or two. And once it's done uploading, we just go ahead and
click on Send right now and it will go ahead and start designing this
entire stuff for us. So wait for it still
uploading right now. Alright, so it's done uploading. I went ahead to click
Onsend and right now, it went ahead to read
the whole instruction, which are the instruction in this PDF assembly images to understand what
we wanted to do. So that's what it was
actually reading. So it was, you know, matching
everything together. It was creating and designing a proper PDF for us right now. So, you know, it's going
to ask you once it's done, ask us whether to continue. We say, yes, continue. You know. This is actually in
the prompt, okay? So once you're doing
this, you also see it. So once it's done, it's going to present you with the file
that it has created. So if I click on this right now, you're going to see how it has properly designed our PDF, okay? So let's wait for you
to load up right here. Okay? So you can see, let me just expand this so you can see PDF or
let me minimize it. So you can see the PDF, I created for us
right here, right? You can see how the
PDF is now looking. It has added the images
very, very well. It maps it out very well, okay? So this is what I'm saying. You know, this is
what I'm saying. If you follow this instruction, if you miss any part, please go back and reward the video. This thing is self explanatory. Right? You can see how
it was able to create everything and map it
very well right here. So you can even see, Okay, this Chapter eight, let's
go to the bonus section. Chapter nine, after
Chapter nine, that's supposed to be the close. So this is the close,
after the close, so we have the bonus
section right here, okay? So you can see
that everything is now properly, properly,
properly designed. Okay? So you can just simply go ahead and download this PDF. So if I click on
download as PDF now, so you can see to go ahead
and download the PDF, I'll go ahead and open it
full right here, okay? So once you open it, please make sure to read
this PDF for any mistake. You can go ahead and
open it right here. You can also open it on your
phone so that you make sure that all the information
that it puts right here, there's no mistake, okay? Verted thoroughly, tic
thoroughly is very, very important that
you do so, okay? So when you are
reading through this, if you find any mistake, go back and inform Claude to go ahead and fix
that mistake, okay? So that's why we have this final quality check
prompt right here. So you can see where I say like here that list any
issues that you found. So if you find any issue, just list anything right here, just tell it that, Okay, this is the issues
that you want it to fix and it will go ahead
and fix it for you. Make sure that you're
posting it under the Ebook or the
section that has already created that
eBook for you so that I can go ahead and fix
that issue for you. Okay? Now, with this, now
you already have your ebook. So go ahead and download
your eBook right now. Now I'm going to show you the
next class where you can go and host your eBook online so that you can be
able to start promoting
10. Listing & Pricing Your PDF Product for Sale: That your PDF guide
has been created. Now the next thing
is where to host the PDF guide so that you can be able to sell to customers. Now, the platform that
I recommend you to host your PDF guide is either
Nest Tug or seller. Now there are different reasons why I recommend these
two platforms mostly, but the most important
reason is because you can be able to sell in
all major currencies. So if you take a look at
the dashboard right now, you can be able to
see the difference between Netg and seller. Then you cannot pick the
one you want to sell with. But know that the support
payment with Stripe, you can be able to, you know, do a lot of things with
any or each of these two. Now, you can even decide to host your cost on two of them, okay? So whichever works best for you. Now, let me go ahead and
show you how you can be able to list your cost
on this platform. Now on Nestoog, once
you go tonstoog.com, now, go ahead and click
on Get Started for free. Here to ask you which of
these best describe you, you are going to select
a creator, right? So how do you hear
about? You can select anything right here. So go ahead right now and
fill in your full name, your email address,
your password, and also what stage are you. So you can just
say, I already have a product ready to sell. Now, go ahead and click on NST. And once you click on NES
you can be able to now go ahead and sign up for
your NST T account. So once you sign up, this is how your account is going to look because that's
a fresh account. Now, to go ahead and host
your PDF on this platform, go ahead and click on M NEST so right here that
you are on minus right now, now just go ahead and
click on new product. So right here, you are going to see where we have
custom right here, which is sell eBooks, templates
and classes on WhatsApp, select it and click on Continue. So right here, you can
now go ahead and fill in all these details to be able to create
your new product. So the first thing right now is going to be the basic details. So go ahead and put the title
of your product right here. So our own right now is
AI PWAch PDF, right? So let me make sure that I
get the information right. I'll just go back right it to
PDF income reprint, right? So so that's the title
of the description. You can get clot to be able to create the
description for you. But right here, I will just use our subtitle as description. But create a well
detailed description right here and add
it right here, people will understand what
the product is all about. Right here is going to ask
me to add few shot image. Now, the image I'm actually
going to add right here is going to be the Bundu image
that we created earlier. Okay? So here's the
Bondu image we created. I'll go ahead and
upload it right here. So once it's uploaded,
we select it and click on Des it as
this right here. Now, product item, so go ahead and click
on add new product. So you're going to ask us
what do you want to share? Want to share a file. So ask us the title of file. You can still go ahead and
put the title right here. Our own is the AI. Let me go back here and copy the AI PDF income blueprints. So AI EDF. AI Power PD gripping. Then they will say, W should these be accessible to customer? They will just say immediately
after horses, right? Or you can just set
any other thing, but this is the
best way to choose. Now they're going to ask you
to upload the Power writes. And if you have a new item that you want to give
them, let's say, for example, that the bonuses that I'm giving them right now, I created it separately. So I can just
simply go ahead and add a new item you know, put the bonuses right here. So one of the bonuses that
we have right here is, let me come down right
now from our sales page. So you can see this is the
first the buyer script pad. So I'll just copy it, right? I'll go over our criteria,
paste it right here. Immediately after
purchase the images, so I'll go ahead and, you know, upload that particular image for that particular
one, which is this one. Okay, and upload it right here. And once uploaded, I'll select it and click on Done, right. So it means that
once they purchase, they are going to gain
access to the two file. So you can also do the same
for the second one right now, which is the pricing
sheet sheet. Okay we already showed you
how to add all these things. So no matter how many items you have, you can
add this right now. Now, when it comes to
pricing, it's going to ask you to add a new price
right here, okay? So right here, if it's a one time payment
subscription, you know, pay what you want or
pay instrumental, you can select go RS advice
go for one time payment. So it's going to ask you
to name the pricing. So we can just call this the, you know, basic Prim. Now, it's going to ask us how
much do you want to sell? Now, RAS advise you
if you're selling to the local markets like
you are selling in Nigeria, you can either try and price your PDF below 10,000 NRR, okay? So we can decide that we
are going to sell this for 9,800 NAR, right? So it's going to ask you to enable conversion
for other currencies. You know, check it right here. Okay. But if you are selling to the international
market like US, you can charge them like $29.99. You are selling to UK,
you can charge them like, you know, 21 pounds
or 25 pounds. So you're going to ask them
accessible to this plan, so you can go ahead and select the items accessible
to the plan. Okay? Now, once you are done, just go ahead and click on Done. Right? So you can see we
have added the pricing. There you go to ask
you visibility, put it as public, if you want everybody to
be able to see it. But if you only want people that are coming through
your sales page, to be able to see
the pricing link and everything so that they can have to get to
your sales page. Because remember,
we are going to be adding the pricing right now here so that once they click on get the blueprint,
they will first of all, land on Nestoh to make
payment before they wouldn't get to our
Thank you page, okay, to be able to see
this link to download because you can also
include this rightideO they can just immediately
download it from NexToh so whichever one
that works best for them. Right here, we can
just set it private. So you can see that only
people with the link can access this product,
which is what we want. Now, this share URL, so you can leave your
URL IDs or you can just title it anything that you
want to title it right here. So I will go ahead and
call our own AI UnlaSco PowerT Underscore PDF underscore
Income Olascblueprint. All right? So you
can also do your own like that if that's
how you want it to be. Then it's going to ask
you to go ahead and add a refund policy right here. So this is very important. So go ahead and add
your reform policy. So you can see you can even
include example completed, which is all sales are final. No refund will be issued
after 48 hours of phase. So if somebody does
not ask for refund, after the 48 hours of process, they are not going to be
able to get refund again. But within that amount, they can still ask
for your refund. So you can also put
your contact email but then to contact you with it. So right here, I've
gone ahead to include our refund policy right now. So once they have done
yours, so Foam field, right here is going to ask you what information you want to
collect from your customers. So I advise just leave it at the full name, email
and phone number. Okay? So automated
action after purchase, send the welcome email. Okay? So if you want to
add a new follow up email, you can do that
additional settings. Now, if you actually
want to do a pre launch, this is where you
can go ahead and select a pre launch
that you want to do, but we're not doing that, okay? So any other thing, just go ahead and read
through this thing. If you are doing cross sales, let's say that you want
to upsell them after they have bought this
particular product, you can actually do
it right here by adding a new item that
you want to upsell. So after buying this one, let's say they want
to buy another, you have another product
that might interest them, you can list it right
here for them to also go ahead and and
the Afflet marketing, if you want other
people to promote your product for you so that you can share
commission for them, you can go ahead and check this Affilt marketing and then give them the percentage
that you want them to get. So you can say they can get 50% when they help to promote
this particular product. But if you don't want to
do any afflet marketing, you can just remove
it right there. So you are the one
that is actually selling your product yourself. So whichever one that
you want to do, okay? Now, so make sure that
everything is okay right now. And once everything is fine, just go ahead and
click on Publish. So right I say, please
review one row below. So there is one arrow
that we're missing. Oh, so we are supposed to
customize our welcome email. It's true. So go ahead and click on this. And once
you click on this. So here, this is the image you're actually
going to send people, which is going to be
the welcome email after they have purchased
the product, okay? So you can see, thank
you for your porches. So hi sname thank you for your poches. Here
is the next step. So if you have any nesting
that you want them to do after they have
purchased your product, you can just let them to
know right here, okay? So I'll just simply
push right here if you have any questions On that met put your
email address right here. Okay? So you can use
your Gmail address or anything, put it right here. So call to action link
to purchase items. So yeah, that's what
the button test, view more or you can titulate anything you
want to title it. So where would I see
this immediately after Pushes, okay?
So that's fine. Click on Done. So right now we have set up our email
right now, okay? So all we simply have to
do just to go back right here and click on Publish
to be able to get our link. Right? So as you can see, we have been able
to publish this, so you can see the
products right here. So I click into it right now, you can be able to see when you start making sales right here, you can be able to
see it right now. Now, to copy your link, just come over right here
and click on thistreedt, you are going to see
copy share link. I copied it right now. So if I go ahead right now
to open it in a new file, so you can see the products
properly restal here, AI Power PDF income
blueprint by Martin ER. You see the price
that we are selling. So anybody can simply come
over right here and make payment to purchase this
particular product, and you can see the
product that they are getting that we included
right here, okay? So this is how you
can be able to list your products right here
on the Ns touch platform. Also take note of this particular URL that we have here that is
leading us to purchase our book right here because
this is the URL that we are going to be adding
right here on our sales page. So this place that it says, get the blueprint now. So since we say that we are giving them a
discount right now, so this is the current
price that we are selling this product for
instead of this 98. So you can still simply
go ahead and, you know, edit your pricing right here to match what you
have on your sales page. Always make sure that
what you have right here matches what you
have on your sales page. So if I go over to the
pricing right here. So I can simply go ahead
and just, you know, remove this pricing right
here and set it to be 4,800. Okay? Because we
have to make sure that it matches what we are giving them right here
on our sales page. Okay? So once I've done that, go ahead and click
on Save changes. Okay, so it has been
saved right here. So if I come over write
again and refresh this, so it has to match
that 4,800 Nira, okay? So as you can see,
it's now 4,800, which corresponds to what
we have on our sales page. So the next thing
is for you to just go ahead and copy
this link and go ahead and include
it right here on this button that we have to get the blueprint right now or any place that we have
the button that says, Yes, I want the blueprint. Let's get the blueprint because
this is where they got to click to be able to go
and get the blueprint. Now, since we created this particular page
using lovable right now, all you simply have
to do is just to go ahead and instruct
lovable to go ahead and attach this URL to
the sales page button. Okay, just say attach it to the sales page button because
you just go ahead and edit in all the buttons
that we have right here. So once you do that, just go ahead and, you know, click on Send right now. So once we click on Send, you can see it will go ahead and start building this immediately. So as you can see
right here, it says, updated DT link
across all pages. So if we go ahead right
now to review this, so let's go ahead and open
up our sales page again. So if I come down right
here to where we have the button and click on guide
the preprint right now, it's going to take
us to Nest Touch, right here, to go ahead and
buy the products, okay? So you can see it has taken us here to go ahead
and buy the product. Now the last now, I'd like
to show you is how to withdraw your money on this
particular NetTooch platform. So once you start making
sale right here, now, you need to go ahead
right now and go to settings and go over
to brand settings. So it's going to require you to make some verifications, right? So go ahead. Do
the verification. Once you're done doing
the verification, now go ahead and click on this
payment section right now. So there are different
ways you can be able to get paid
on this platform. Now, one of the ways that I
actually like to get paid on this platform is to actually get paid to
my res account, okay? So that whether I'm
receiving money from USD, I'm receiving money in British pounds or in
NIR or any currency, I'm going to receiving directly to my reins
account so that they will not be converting it
and sending it to my local bank account, okay? So you can even be
able to contact their customer support to
guide you on how you can be able to go ahead and add your res account right now or to choose the best
payment method for you. So this is actually the
ress platform that you can use to receive and
spend money globally. So go ahead and create
your account for free and do the
entire verification. So once you are done, they
are going to give you a tag. You can see my own
tag right now. So the tag that is what
you're going to use to connect your accounts
from Nestog to Ras, so that once you
start getting paid, you can easily withdraw it to your RNS account in both USD, British pounds, your
local currency, or any currency that you
want to withdraw in. Okay? Now, let me also
quickly walk you on how to list your product
on sellar.com. So go to seller and go ahead
and click on Start selling. Once you do that, go ahead and create your account
by adding your name, your email address,
your password, and click on create
your free account. So since I already
have an account, I'll just simply go ahead
and click on Login, login into my account. Now, once you log
in on seller now your own Dagbard is
going to be brank, you're not going to be seeing any inconvenient or any products being listed because you just created a new account, okay? But make sure that your account is on the creator profile as Cans you can be able to switch to Affiliate profile
or customer profile. But once your account is
on creator profile, now, all you need to do
to go ahead and start adding your
PDF file right here. All you have to do
just go ahead and click on the ad products. So right here, go
ahead and select the digital products
right here, okay? So select digital products. So here, seller is very,
very straightforward. Let's go ahead and upload the image of your product, okay? So just go ahead
and add the image of our product right here, or select that and, you know, upload it right here. So now the next thing is for
us to put the product name. So our product name is AI
Power PDF income blueprint. All right, so it's
going to ask us what's going to be the sale price. So remember, we are going
to be selling it for 48 according to our
sales page right here. So go to sales page. So these are sales page. So we're saying for sales page, we cancel out the 9,800, right? So it's going to ask us to show you strike out original plan. So let's do that. So let's
strike out the 9,800. All right. So now, it's going to ask Cos to go ahead and insert
the description. So this is where you put your description right now, okay. So I'll just, you know, go back here and, you
know, just copy this. Try and like I said, try and write out a well
detailed description. You can put all your information on Claude and then need to generate a description to sell
the PDF you're promoting. So category, go
ahead right now and select the right category, okay? So depending on your PDF, go ahead and select the
right category for your PDF. So just go ahead and select
book and education right now. There's just education and
academic product variation. Now, this product does not have any multiple valiant, right? So what's the product
digital product pre order? We're
not selecting that. So, I'm going to ask you
give a access to the file. Yes, it's going to be
a downloadable file or a non downloadable file. So want them to download it, so we leave it at
downloadable file. So we go ahead and upload
the file right here, okay? So this is the file
right here that I want to give them access
to once they make payment. So go ahead and upload it right here because you can see it has added the
file right here. It's going to say
automatically direct the buyer to an external URL
after purchase. So we can just go
ahead and select this. Is going to ask you
what's the URL. So the URL I'm going to put here is the URL of your TQ page, which is this URL
right here, okay? That's love creador for us, can just go back
right here. Past it. But remember, if you
have your own website, you can go ahead and
include the Thank you page of the website right here. But if you don't have
any thank you page, you just want the
buyer to just download the PDF directly from seller
and just go their way. You can just switch
this off, okay? But we want to
include this, okay? So once they are done,
just go ahead and click on great products. As you can see, our product has been created, and
this is the link. If I go ahead and click
on the link right here, it to go ahead and open up
the products right here. So you can see our product. You can see that strike out the 9,008 and they are
going to pay 4,008. And once they click
on this register, they can just go ahead
and make payment. Now we can just
go ahead and copy this link that they have right here they gave us right here. Okay? So if you copy this link and go back to
lovable right now, and go back to lovable. Now you can even
tell Love Ebo just like we did earlier to go ahead and attach this URL to
the same page button, okay? So if you're not
signing on a seller, you can just use
this particular one and tell you to do the same
thing right there include daling upload to update the sales page buttons to have daling so that
once people click on Ding, you will be able to
land right here on seller to go ahead and
purchase this book, okay? So this is how you can be able to list and price your product, both on the NSTUch platform and also on the seller platform.
11. Adding Finishing Touches: This lesson, I'll be showing you how to add some
finishing touches right here on our sales page
and also the Thank you page. So what we are going to be doing here is we are
going to be adding the necessary images that
we need to add right here, both on the hero image and
also the images down here. And also we are going
to be including the bonus images or
mockups that we have already created and also
the boondo that we have created in the image
creation section, right? So we are also
going to be adding links the right link
right here, okay? So that once people click
on that particular link, they can be able to land on
your product to purchase it. So for us to be able to do this, all we have to do is
to go back to lovable, if you're using lovable to
create your sales page, or you can go to Cloud if you use Cloude to create
your sales page, right? So, since we worked
with lovable, so all I have to do is
once I'm here on lovable, and I'm here where it created
the homepage right here, which is the sales page, right? So now past in the
following instruction, I'll ask you to add
the following images and links to the sales page. I'll go ahead and ask
you to replace this. So let's start with
the hero image. I'll just copy everything
right here, based it here. And ask you to replace this with then I'll go to the
hero image that I have. So I've already created
a hero image, right? So this is the hero image I created right here because
you have to make sure that the hero image
you're creating matches well with what you
are promoting, okay? Because right here,
you can see that the headline right
here says, you know, Korado receptionist
reveals how she turned her phone into a PDF
selling machine, right? So we have to use the image of a receptionist that matches the blog story that we wrote right here on
the south page, okay. So make sure that you also go
ahead and get an image that matches the headline of
your article, right? So I was able to generate
this using CharPT. I've already shown you guys
how you be able to use CharPT to be able to
generate images, okay? And as you can see,
these images right here matches very well with
the headline, okay? So all I have to do right
now is just to go back and copy the image right here. So it's hero image dot PNG. I will still upload all
these images right here, but I'm just giving it
the instruction first. So I will go back right
here and ask you to replace this with
hero image dot PNG. So that's how I keep doing. I'll ask you to again replace so go down and pick
the second image, which is the product mockup, which is the real cover of the AI Power PDF income V
print that we created, right? So come over right here, ask you to replace it with. So we go back to our folder, just copy how we
were able to tight right here so that it can be
able to match it very well. Once we go ahead and
start, you know, uploading this right here, ask you to replace it with. So this is exactly what I'm
going to do to be able to replace all these remaining one or anything that you
want to change right here, just ask you to replace
what we already have on the sales page with what you
are giving it right here. So the same thing is
what I'm going to do right here for the Bonus one, bonus two, and the
Bundle images. Okay? All right, so I'm
going ahead to include the remaining bonuses
right here asking it to replace these bonuses that
we have right here and also the Bundle image with what we have already
created right here, okay? So all we have to do now is
just to go ahead and upload all these images right here on lovable so that it will have the images
it's working with. So I'll go ahead and
click on Ad right here. So I'll go ahead and
click on attach. I will go ahead and select
all these images right here and upload them here. Now, while they are uploading, now the next thing that we
also need to do right now is to go ahead and change the
links that we have right here. As you can see, the links
right here is going to sell of CO to your product. So if you go ahead and open
up this link right here, it's not going to lead
us to our product. Right? As you can see, it's leading us to a page
that is not found. But we actually want
it to either lead us to our next Touch product or to lead us to the product that we hosted on
SLA D CEO, okay? So all we simply have to do we can just go into our
Next STOOh account to copy this link or just copy
this link directly from here. So all we do right now
is just to come right here and also ask it to
replace the link, right? I'll ask you to replace the
first link we'll ask you to replace right here
is the Seller SO link. So just go ahead and copy the link right here
from the button. Right? So just copy, go back here, paste it, and we ask you to
replace it with. Then we go to our next rink. Go ahead and copy the link or you can use your cellar link any one that you want to use. So go ahead and copy the link, and we go back and we
add it right here, okay? So just go through what you've
already asked you to do. Add the following images and
links to the sales page. So click is this sales
page right here. Okay? So we have already done that and we have uploaded
the whole images. So once you are done with that, just go ahead right
now and click on SendPmpt to go ahead
and send these prompts. So now that we have
sent the prompt, the right here is going to think after thinking to start
matching these whole things up. So now you can see
it's replacing the asset and links
on the sales page. So this will take a while, so come back once it's done. So now you can see that
all images embedded and the CT is already pointing
to the right URL, as you can see the
images right here, okay? Then just go ahead
and review this and it full right here.
If you preview it. So now you can now see
how it's now looking, add the image right here. Okay, so scroll down. You can see it has replaced this with the Box image that we have. And also, Okay, so even this
customer review writing, you can just get
your customer review and just copy it and ask you to replace it just like
we did with the images. So you can see it has added
the bonus images right here. And also the mockup that
we have right here, okay? And if you check the link, now you can see that
the link is now pointing to the NESTShPlatform. So if I go ahead and click
on this link right here, you can see it's going
to take me directly to the NESTSHPlatform
to go ahead and purchase the product that
we are selling right here. Okay? So this is exactly
how you can be able to make changes right here on
the lovable platform. Now the next thing that
we're going to do right now is for the Thank page, right? So if you go over to
the TQ page right now, let's say that you want to go
ahead and include the link that people can use to now download the PDF
once they are paid. Because the only time
they land on this thank you page is after they have gone ahead to purchase
the product, okay? So after they have
purchased this product, that's the only time they can land on this thank you page. So if you want to
go ahead and upload the file right here or the
link to the file right here, the best way for us to do it
right now is first of all, go ahead and add the PDF file, upload it on Google Drive and grab the link right there. Okay? So all I have to do
now is just to go over to my file and
go to Google Drive. Click on add new and
click on F Upload. So right here, I'll go ahead and get my PDF, which is this. That's the PDF that we created or that we
are selling to them. So I'll go ahead and
upload it right here. But once it has uploaded, just click it right here
so that you can be able to see and make sure that you uploaded to the right
thing right here. So you can see the PDF right
here, well structured. Okay? So now, the next
thing that you have to do right now you
can click on file. You click on Share. All right, so you can go
ahead and copy the link. Or the best way you can even do it is just
click on share right here to remove it from restricted to
anyone with the link. So you can see anyone with the link can be able
to view this, right? So just go ahead and click
on Poppy Link right here, and you just click on Done. So just go back to lovable. So once we come to
lovable, go right there. This place we are seeing
homepage right now, okay? We're going to switch it
to the Thank you page, which is the thank
you right now. So we switch it
to the thank you. So you show start showing us our thank you page
that we have created. So all we just simply
have to do we just ask it to replace let's first of all, pass the link, okay? Or just add it to
just ask it to add, not replace. Add this link. Add this link. So
this particular link go here and ask you to add it let's go to our Thank
you page on this body. So let me copy the
test right here. Right, make sure you are
copying the right test. Okay? I think I copied
it with download. So yeah, this is the right test. I'll just go back here. I'll ask you to add this link. I put the link on download or AI Powered PDF income
Blueprint button. The thing you page, right? So now that I've done
that now if I also have another link for the
first ten buyers, another link for the
pricing sheet sheet, I will still go ahead and just ask it to
include those link just like this just by uploading those things right here
on our Google Drive. Once you upload
it, grab the link. So now, all I simply
have to do once I've given it this particular
instruction right now to add this link on the download button or the AI
Powered PDF income reprint, I'll just go ahead and
click Consent, right? So it will just go
ahead right now and add this particular link right
here because right now, if people go ahead and
click on this link, you know, it's not
taking them anywhere. Look away, it's taking. I say, thank you dothM so which
is distant please, right? So we have to change
the link that is there with the new link, right? So let's wait for it to
finish working right here. So right here, ask
see it says that the drive link has been added
to the PDF button, okay? Now, even if you over
this download right now, you can see that we can
see our drive link, okay? So let's go ahead and you know, expand this right now. Okay? So you can see if I go
ahead now and click on this, it's going to take me
directly to the Google Drive, as you can see the
file right now, okay? So it means that these people
can now be able to have access this file to be
able to read it, okay? And also, if they
want to download it, they go ahead right here
and click on download and have it on their
phone to start reading. So right now, we have added the PDF download link to
our Thank you page, and also we have also
added the images right here on our main
sales page, right? Okay? So if I go and
click on Preview, so you can see the images
that has been added. So if there is any other
correction that you want to make right here,
just instruct it. If you have your testimonial, just go ahead and instruct
you to add those testimonial, just like we added these images
and also the link, okay? Ovable will help you to be
able to replace all that. And like I said,
you can also use Cloud AI to also create
your sales page and make the same changes
that we're making just as we are doing it
right here on lovable.
12. How to Promote Your PDF for Free: In this lesson, I will
show you how you can generate free traffic
to promote your PDF. Now, there is this famous quote
by Zig Ziegler that says, you will get all you
want in life if you help enough other people
get what they want. And this is the ideology that we are going to
be utilizing right here to generate free
traffic to promote our PDF. Now, the first platform
that we are definitely going to be using to
do this is Facebook. So what you need to do
is to, first of all, go ahead and create a
fresh Facebook account. Now, that account
that you're creating, please try as much
as possible to make sure that the name
that you're using in account matches the
name you have on your sales page or
the name that you're using to promote your book. So in my case, since my AI
Power PDF income reprint book, the name that I use
here is Martin's Husel. So this is the name
I will definitely be using to be able to create
my new Facebook account. So once I created the accounts, now the next thing that you
need to do after creating your accounts is to go ahead
and update your intro. Now you have to try as much
as possible to make sure that your intro include the link of the sales page you
have already created, and you have a headline that will make people to
click into that link. It depends on the
market you're in. So whether you are in the
health market or you are in the wealth market or you're in the relationship market or you're in the self
improvement market, ensure that your
intro that you put right here has some tests that will lead people to click that particular link to
land on your sales page. Because as I put this
link right here, if someone come to my page and click on this
particular link, is going to redirect them to the south page that
I have right here, to be able to read the
story and be able to go ahead and get the book that
I'm promoting right here. So once you have set
up your account, you've set up your
profile picture and everything is okay. Now the next thing you need
to do is to go ahead and find join groups that are related to the PDF
product you have created. So since I created a PDF product
about AI generated PDFs, so I can simply go to the
search bar right here and make a simple search like
AI generated PDF. So I'll go ahead and make
that particular search. Now, once you make that search, what you need to do right
now is to go ahead and check out groups that you are going to be joining because these are the groups
where you are going to be using to generate traffic. So if I take on CO groups, now, the groups that I
advise people to join are groups that are
very, very, very active. You can see this
particular group that says AI Academy for beginners. Now, this group has
three K members, and it has ten plus
posts per day. Now, when people
are consistently making posts in a group, it shows that that group
is very, very active. Okay? So right here, just shack out the groups, all of them, and join all the groups that
are very, very active. So I can decide to go
ahead and click on join to join this
particular group. So if I go ahead and visit
this group right here, so you can be able to
see the group, okay? So they will show you the
rules and regulations. And as you can
see, this is very, very important to
read the rules. No promotion or spam, do
not promote anything, no hate speech, respect
everyone and all that. So all group is going to tell you that they
don't want you to run any promotion and that we are not going to
be running any promotion. I'm going to be showing
you how you can be able to attract people from these groups directly
to your Facebook page, or your Facebook profile to see or know more about you
and see what you're selling. So all we have to do right now is that once we
have joined this group, so we can just
simply take a day or two to be able to see what
is going on right here, the type of post people
are making right here and what is getting
the most engagement. Now, I already know the
best type of posts that are getting engagement
right here on Facebook. Now there's another AI
group that I also joined, which is the AI prompts, Thieves to Africa, right? So if you come down right here, you can see that this post is getting or this
group is getting a lot of engagement right
here when people make a post. So right here, I'm going
to be sharing with you the type of post that you're going
to be making right here, that's actually a
promotional post, but it is not going
to be a spam post or Admin is not going to
see it as a spam post. It's going to look
like a post that you're trying to
help people, right? So here are some free
traffic posting script that I'm going to include
in the resource section of this video that you can use to create your Facebook post
on those group, okay? Once you are using
this free value post, this step one that
I have right here, Admin will always
approve your post, and people will be
more interested in what you are saying
in the group. So to be able to do this, now, the first one
right here, I said, Copy and adapt this structure, which is this sample one, this is actually what I
call the mistake fixer. Now, if you read this prom, this thing says something I see a lot of people
get wrong with, then you put the topic, which has to be like the topic you're talking about right now. For example, I can say something I see a lot of people get with creating AI
generated PDFs, right? So people are
interested in this. So this is what I can use
right here for my own topic. So I can now go ahead and add the common mistake that
people are already making. So people will just go over on ChRGPT and tell
CRGPT that I want to create so so PDF book in so
so Ninch with so so topic. Please go ahead and
write out the PDF book, the entire chapter,
and all that. Okay? So this the common
mistake people make, which I can include right here. Now go ahead and say, here is
what actually work instead. So I will now go ahead and work them the step by step process or tips that I use to be
able to create these PDF. In your case, it depends
on what you're selling. So if it's talking about how somebody can be able to lose
weight on your own PDF, you can go ahead and show
the step by step tips that AI has already helped you to create
in your own book, but you're just
giving them, like, the headlines or
some of the tips in the books that
they can follow. And these are going
to be valuable tips that they are going
to find value in. Okay? So in this case, I will just go ahead and say, Okay, step one, do this, step two, do this, step three, do this, like I did in this
particular training that you just watched, right? So once you have done this, I can hope this
help someone here. So once I've made this
post right there, I will just go ahead and post
it right here on the group. Now, this type of post, which is the post that I
called the free value post, are the type of post you should continually make on
this type of group. So for the next three to five days that you're
on this group, try as much as possible
to be creating only this free value post, okay, especially
the mistake fixer for the next three to five days. Now, after that three
to five days, now, the next post that you
can go ahead and make is what I call the
question starter. Now, these are posts
that you will make that will let people draw a lot
of engagement to your post. So right here, I said,
this is how you do it. Quick question to this group, how many of you are
currently struggling with, then I'll put a problem
my topic solve, okay? So I can say something like, how many of you are
currently struggling with generating a professionally
designed AI PDF. Or any type of problem that
I know that people are struggling with that is related to the topic or
the PDF I created. Now, once I ask that
particular question, I Karam go ahead and say, I've got a few things
that helps me a lot. Happy to share if
people are interested. Now, once you make this
particular type of post on this Facebook group or any
of the arou I are following, you see a lot of people coming
to drop. I'm interested. I'm interested,
interested because you ask them to drop interested. And some people will drop
interested and they will ask you to please share,
please share, right? So this is how you can
be able to get a lot of engagement to your pose and a lot of eyeballs to your pose. Now note that when you're doing this two thing that I
just mentioned right now, most of these people that
you see right here will be going to your profile
to check out your profile. Now, as you're making this post right here on this
particular Facebook group, you are also sharing
those valuable tips also on your normal Facebook
account right here, okay? So you have to ensure
that you are also making those posts right
here on your own account. And when people come over
right here to check you out, obviously they are going
to look at your intro because your intro is one of the first thing
they're going to see, and they are going
to see the link that you have that
they can go ahead and click to check out the
product you are offering. And this is exactly how you can be able to be driving people directly from Facebook groups like these and
getting them down to your profile just by creating valuable post right there that is helping a lot of people. Now, the next style of post or free value
post that I advise people to do is the
mini guide post, okay? So right here, you can see
how the prompt goes sharing this for free because I wish someone had told
me earlier, okay? Something like this grab
people's attention. They'll be like, Okay, what do you want to share
for free that people, you know, you have wish that people have told you earlier? So right here, I will drop like three to four line mini walk through of one more useful piece Of my topic. In this case, I'm going to be sharing
something that probably answers the question that I
ask them in the sample two, which is the question
starter, right? So once I drop the entire
information for them, right, that will be
filled with value. Now I can go ahead and I
t that there's no card, just something that
helps me, right? So I'm sharing this as if it
is something that helps me, and I know is an information that a lot of people
will find useful. And when people find
value from your post, they will want to
learn more from you. And that's the
reason why most of these people what
they will now do is that they will now go back
and visit your profile. Some of them will send you
a DM and ask you, please, I would like to learn more
on this thing that you're sharing or some of them once
they come to your profile, they will see that you already
put out an intro writing, pointing them to a
particular article that you have already shared, most of the information
that we'll be looking at. Now, these people don't already know that you are trying
to sell anything to them. They just see that you're
still providing free value or information for them,
which is valuable. So most of them were going to go ahead and click on Darink and once they click on they
will land on your sales page. So now you have removed them
from Facebook and you have brought them to your own
sales phone right now, but in this case, a sales page. So all they have to do now is just to take
their time to go ahead and read everything
that you have right here. And if you write a very
high converting sales page, once they are here,
for them to be able to buy this product is going
to be very, very easy. And once they want to get it
and they click right here, because you have
connected everything. You have connected your
sales page buttons to your next to your account
or to your seller products, they can just go
ahead right here and purchase your product. Okay? So that's it
about generating traffic right here
on Facebook group. Like I said, these type of posts are the ones that you're going to be using
on Facebook Group, which is this step
one that I have, the free value post. And as you're making this
post on Facebook Group, also be making it on your
own Facebook profile, okay? Because it's all
going to be getting you free traffic
from there also. Now, the step two is actually
the soft launch post, okay? Now, this particular one, I already recommend you to do this particular one on
your own Facebook profile. So please do not go ahead and do this one on Facebook Group, because most Admin, we dictate
what you're trying to do, and they're going to bind
you from the platform. So try as much as
possible to do this only on your own
Facebook profile. And also, you can also
do it on Twitter. So also go ahead and create
a fresh Twitter account. Make sure it has the
name that you're using to promote your book. Like I have my own writer,
Martins Hazel, right? And also go ahead
and put your intro, just like we did right here on Facebook that we
have this intro writer. So go ahead and put your intro, putting the link to a PDF that people can always
click that it will redirect them to the product you're trying to sell to them. Okay? So now, all you have to do in this step two is
to go ahead and copy and adapt this
structure to match the product you're promoting or the market that
you're selling to. So this particular one is
actually combined to get it. So right here, I a
few people ask me to put everything about
this topic in one place. So I did a Shop PDF
guide as pages, like 30 pages straight
to the point is price, you know, then I'll tell
them comment this below, and I will send you the link. Okay? Now, this
particular stuff, if you make this post right here on the Facebook group,
they are going to ban you. They're not going to
allow you to make it. But you can be able
to make this post right here on your own profile. So you can generate traffic
from people that are following you or people that
are already your friends. So they are going to be
seeing this post, okay? And if they're
interested, they can say interested and you
can share the link, or they can visit your
profile and click the link. Now you can also make this
type of post right here on S, which we also make people that
are also following you and other people on social
media to be able to see what you're posting
and they're interested. They will go ahead and say, I'm interested or they can visit your profile and
click your sales page link that you have
added on your profile. Other pro tip I will advise you guys to go ahead and do is to go ahead and upload
your PDF book, okay? So the book you have already
generated using Claude, upload it right here and also upload the free traffic
posting script, which is this information writer I'm going to attach to the
resource section also. Now, once you do
that, go ahead and ask Claude to go ahead and adapt the free traffic
posting script with your PDF information because you have uploaded two of them. So I'll just go ahead right here and click Consent prompt. And once you go
ahead and do this. So as you can see right now, it have come up with some of
the sample posts that we can use to be able to
now go ahead and start creating our post, okay? So this is actually one
of the best way for you to be able to come up
with some sample posts. And remember what I said
that this free value post, which is on the Step
one, is what you should post more right here on
the Facebook group, okay? So you can even ask Clau to go ahead and generate
more than three samples. You can ask you to direct
20 samples for you. So you always have
something that you can go ahead and copy and start sharing it right there on these Facebook groups that
you have already joined, remember what I said, join as many Facebook
groups as possible. You can join 20, 30, 50, hundred Facebook groups, and you can go
ahead and be making similar posts on all those groups right
there to be able to generate more and
more free traffic directly to the product
you're trying to promote.
13. Host Your Salespage On Your Own Domain & Hosting Account: Now, if you know
on your website, being hosted on Lovable, let's say that you want
to own your own website. You want to own your own domain name and
your own hosting, where you can be able to host your sales page and start using it to be able
to promote your PDF. In this lesson, I'm
going to be showing you how you can be
able to go ahead to secure your domain name and also your hosting
account so that you can be able to host your sales page for your PDF on
your own website. And there are different
reasons why you might want to a domain name and
also a hosting account. It is easier for you to be
able to control your website, and also you know you
are the one that owned that particular
website and you can configure it the way you want. And the second reason is that when you want
to start promoting your PDF using Facebook ad or
any type of advertisement, it is easier for you to install your PizL code right there on your own website because
we are going to be using WordPress to be able to do
that, which is very easy. So go to ww.hosting.com slash MATIEU so there
is going to bring you to this particular ASAT page where you can be able to get their domain name for free and also their hosting account
for a very cheap price. Okay? Once you're on this page, go over to services
right here and select Manage hosting
for WordPress. This is simply because we are going to be using WordPress, which is an easy CMS to be
able to set up our sales page. So once you're here, go ahead
and click on Start now. So right here, you
can be able to see the different pricing structures that they have right here. So we are going to go ahead and choose this particular plan. So once we go ahead
and select this. So here we can decide to go for the for eight months period, or we can change it to the 12 months period so that they can be able to also
see the pricing right now. Now, if you change
it to 12 months, they are going to be charging
you 3,900 per month. But if you keep it
at eight months, they're going to be charging
you 2,900 per month, okay? But if you go with
just one month, they are going to be
charging you the full price, which is 11,909.
Per month, okay? So let's go ahead and
select the 12 month plan, which is actually one
of the best option that they are giving
us right here, okay? So with this plan,
you are going to be getting a free
domain for one year. But if you go with this
particular one month plan, you are not going to be
getting any domain at all. And most times, domain cost upwards to $15,000
for one domain. So it's advisable to go with
either the 12 month plan, 24 months plan or the 48 months plan for a better discount. Now, to be able to
get more discount before you purchase your domain, go ahead and click on this. I have a couple. So once you click on
this, go and type in Martin EU right here in
calves and click on Apply. Now, this is actually going
to give you an extra 20% off. So as you can see, our
price has gone down all the way to tht 7440 NIR, which is very, very cheap for a 12 month premium web hosting. So now that you
have done that, go ahead and click on Continue. Adding your email and password
and click on Register. Once you register, go over here and adding your
billing address. Once you've added
your billing address, click on Continue. It will bring you
here to make payment. So you can pay using
your card details, or you can pay using Papal
or Open or even coin gate. Okay? Once you've added
your payment information, go ahead and click
on submit payments. And right here, you can
see your payments done. Let's go and set up your
services right away. So I'll go ahead and
click on Get Started. Now, it will bring
out here to go ahead and start setting
up our website. So who is this website for? Is for my business, click on NEST do you want to create or migrate,
create a website? Here, to ask us to create a login details to our
Wordpress account. So go ahead and add in your Wordpress email
address you want to use for your Wordpress account
and also your password. Once you've done
that, click on NST. So over here, it's going to
ask choose a prebut website. Now, we don't want to
choose a prebuilt. We're going to use
a Team instead. So click or use
TIM so over here, we can just go ahead and select anything that we want
to use right here. We can easily delete it once we log into our
Wordplas website. So let's just use this default
one and click on Nest. So here we're going to deselect all the plugins
and click on Nest. Now, here is going to
ask us for domain name. Now, remember that hosting guide is giving us one free domain. As you can see, you have
one free domain available. So we have to go
ahead and make use of that one free domain right here instead of purchasing
a new domain name. So depending on the domin
name you want to use, go ahead and search
each right here. So we can search something
like By Well Niger, for example, to know
if it's available. So we can search buywwniga.com. As you can see, this
particular domain name right here is free
for us to use. Now, you can see would have
been able to pay between 7,900 NIR to be able
to use this domain. But because we are getting
a hosting account from Hosting guard is giving us
this domain, free of charge. As you can see 0.0 NIR right
here for the first year. So I will go ahead right now and select this By Well Niger, okay and go ahead
and click on NEST, and Hosting guard is going to go ahead and get this
domain for us. So now, right here,
it's going to ask us register your domain
vileniga.com. So yes, the country is Nigeria, South Goha and click on
NetTb, Enter contact details. So it's going to prepopulate your contact details right here. Once you're okay, go ahead and click on finish registration. Now, it's going to
bring us right here. Simply go ahead right
now and click on Nest. So right here, it's
going to go ahead and install WordPre for us. Now it's adding our domain
name to our hosting account. So now it has
successfully installed WordPress to our
domain name right now. And if we go back
to hosinga.com, go to my account. There are a few things
we need to do right now. We need to go ahead and
verify our email address. So go back to the email you use in creating
Hosting account. You see where it's going
to ask you to confirm. Email for your domain. So go ahead and click on
this verify email. As you can see, your
email is verifib. So by doing that,
our hosting account has been fully verified. And if you go to the
domain name that we just registered right
now using hostinja. So this is buwllniga.com, you can see that we now
owns this domain name. And to easily access
this domain name, all you simply have to do, you can go to your domains right now and click on
Domain portfolio, and you will see the
domain name that you have right now as you can
see, it is active. Or if you want to access your website or log
into your website, you can go to
website right here, then you are going
to see your domain. Then you can go ahead and
click on This manage. And once you're here, just
simply scroll down right now. You're going to
manage your website. Click on This manage
your website. It's going to bring
you right here. So click on this
WordPress at me. So it's going to
take you directly your Wordpress dashboard, as you can see right here,
pwniga.com slash wp ADM, okay? So right here, we
can now go ahead and start adding in our plugins, our teams and start
setting up our sales page. But before we start
setting up our sales page, there are a few things I
would like to point out. Now, if you notice where we
are choosing our domain, we actually choose
something that is very, very generic, and there
is a reason for that. So instead of us going for something that has
to do with our title, in this case, the PDF
income Blueprint, we went for something
that is entirely generic simply because
we want a name that if we change our
niche because right now that we are in the make
money niche with this title, let's say that we change to
the relationship niche or we change to the Health niche
or any niche that we change, we want a domain name that can
also represent that niche, even without being so
specific to niche, so that we always
go back here and start trying to
buy a new domain. So this particular domain
right now that we have, we can use it to sell
both in the health niche. We can use it to be able to sell both in the
relationship niche. We can use it to sell both in
the make money niche, okay? So, but the reason why we included this Niger
right here is simply because this is actually the market we are
trying to target, okay? So you can also use any random
name as your domain name. It must be specific to that particular eBook that you're creating
because you might decide to change the
particular niche that you're targeting
and start targeting another niche or create an eBook to test another niche
so that in that way, you don't need to go ahead and start getting a new domain. You can still use
this same domain name to be able to do that. Okay? Now, the next thing I also want to point
out right now is that Hosting always
changes their prices and also the interface, okay? So all you always do once
you come over right here, whenever if everything
is confusing, you just scroll down. You can be able to see
the prices of everything. So right now, as he's showing
me these prices in USD, he can easily go over right
here and add your country, so that you can be
able to see your prices in your country. So if I go right
here and change it right now and I scroll
down right now, so you can see, you know, the prizes that it is
on right now, okay? So this is just to let you
guys know that everything is still the same because if I go ahead and click on
this right now, it's going to bring me over
right here for me to go ahead and also get my
domain and hosting. So please ensure that you are choosing a generic domain name. Don't choose something that
is specific right here for your domain name
because most people don't even look at
your domain name. They won't even see
your domain name when you are promoting your PDF. Alright, so let's
get started towards creating our sales
page for our PDF. Now to get started to creating our sales
page for our PDF. Now, the first thing
we need to do is to go over to this plugin section. So we are going to go ahead and install a plugin
called elemental. So go ahead and click on
Art plugin and over here, come right here and
search for elemental. So this is going to be the free page builder we are going to be
using right here. So go ahead and click
on Install now, which is this elemental
website builder by elemental that has over 10
million active installation. So once you have installed it, go ahead and click on
Activate so right here, we have installed the
elementor right now. Just click on continue
as a guest, right? So who are you building this? Just Skip all this. We don't need all this, right? So we just continue skipping. All right. So just
skip everything. Right here is going to load up an elemental page
for us right now. We'll be able to start
building our sites. So as you can see, an
elemental page has loaded up, but that's not what
we're going to do. So what we're going to do
right now we just to go over right here and
click this icon, the elemental icon
right here and click on Exit to WordPress. Because before we
start building, there is one thing that
we also need to do, okay? So close this, go back and
click on this WordPress icon, this arrow that is
sending view pages. Go ahead and click on
click on Leaf page. So when we come back to
this particular page. Now the next thing
that we need to do is to go over to this setting, hover over these settings. So you're going to see
general connectors, writing, reading, discussion,
media, and permer links. Go ahead and click
on the permer links. So these permer links now, if your permer link
structure is on plane or on day a name
or month or name, go ahead and change
it to post name. Okay? It's very important that you do this
so that you know the exact page or
where your link is pointing to or the
link you're copying. Now, once you have
done that, just come down right here and
click on Save changes. So now that we have done that, just go back and click on pages. So once you click on pages, now the next thing that
you need to do right now is to go ahead and add a page so that for us to be able to start
creating our sales page. Now, for us to be
able to do that, just go ahead and
click on this ad page. So the name of our
products right now, so just close this
pattern. We don't need it. So right now, all we
simply have to do just to go back to Lovable
and we'll copy, you know, the title
of our sales page. So this one is Causal
T with Martin. So we just copy it right here, go back here and we'll
just put it here, Hazle talk with Martin. So you can also include
sales page, right? So Azo talk with
Martin sales page. So once you have done
this, just go ahead and click on this edit
with elemental. So right now, we're going to
wait for you to edit. Okay? So let's close up
all these things. So right now, now that you're
training up like this, now the next thing
that we need to do is just to go
over right here. You see page setting on
top of the left hand side, click on the page settings. Now, scroll down, go ahead and click on High
Tit two, right? So once you click
on High tit two, go ahead and change
the page layout from default to elemental Canvas. Right? So right now, you can see there
is nothing else that is showing up
on this page, okay? Now, all you simply
have to do right now is just to come down right here. So we are going to drag
a container right here. So you can easily drag
a container right here. So let us see we
have a container. Now, click on that container. Now inside this
container right now, we are going to
insert an HTML code. So go ahead and search for HTML, drag that HTML inside
this container that we have added and
drop it right here, okay? Now, all you simply
have to do or you can even decide to just go ahead instead of
adding a container, you can just decide
to just type in HTML and drag the HTML like this and just
drop it right here, as you can see we
have added the HTML. So right now, the elemental
have already added a container for us
before adding the HTML, as you can see, that's
added the container. What we simply have
to do right now, once we have the HTML right now, we just go back to our
sales page and copy this entire code because this
is actually the code that gave us the website that
you see right here, okay? So this website
that you see right here was generated
using this code. So if we go ahead right now to copy this code that
we see right now, go back to our HTML code and go ahead and
paste it right here. As you can see, our website is already showing
up right here. Now, the next thing
that we can easily do is now to go ahead
and start adjusting these images that you see right here because we need
to add our image right here and also add the mockup
images right here and, you know, adjust
our testimonials and add the links that
is supposed to be here. Now, since you are
not a developer, you might not know
how to be able to read this code that
we have right here, and you might end up
breaking something. Okay? Now, what I advise,
the best way to do this, before you go ahead and past
in your code right here, before you go ahead
and copy your code from Lovable and go ahead
and paste it right here. And the first thing you
need to do is to ask Lovable to be able
to add those images, change your testimonials, and, you know, add your link. Your product link because right there you can see
this is where we say, get the blueprints right now. So if people go ahead and
click on this link right now, it's supposed to take them
to either our seller page or our NetTohPage which is what we are using to
promote this product, okay? I've already done this. Now, if you come
down right, this is how you can do
it with prompt. So the first thing
that I did was I asked lovable to go ahead
and add these images. Okay? So if you take
a look, these are the images that I ask you to replace most of
these images using this one that I gave
it right here, okay? And it went ahead to
replace the images. And I also ask you to go ahead and update these links
that we have here, all these links
that we have here to our seller link, okay? So these are the instruction
that I gave you. You can see when I
ask you to replace button link I gave it my seller link for the
product because if I go ahead and open up
this link right now, you can see that it
take us directly to the PDF product that we're going to
be hosting on seller. Okay? So this is actually the best way for
you to be able to do it. Now, once it has
done everything, so if I go ahead right
now and click on Preview, you can see right here
that it has been able to adjust all these things
that you see right here. You can see all the
all the changes that he has been able
to do right here, okay? And also, if I go
ahead and click on this link right now,
let me expand this. If I go ahead right now to
open up the link right here, you see it will take us to this particular page because we have already changed
everything right there using Lovable
because Lovable, you're just giving it
instruction on what you want, and it will help you
to be able to do that. So all simply you
have to do now is now to go ahead and
copy this code now. Now, this is the
code that I need to go ahead and add Lovable. But before I do that,
all these images that I uploaded right
here, you know, all these images that
I uploaded right there that I ask
Glovo to replace, I will have to first of
all, go ahead and add those images to
my website. Okay? So all we simply have to do
right now is just, you know, so we can decide to
save this as draft. So just save this as draft, then we just, you know, edit this particular page. Let's it back to Wordpress so that we can go ahead and upload
all those images, go back to main WordPress and go ahead and
click on this media. Now once you click on Media, go ahead and click on Add Media. Now, go ahead and drop all
those files right here. Now, these are the files that
we are dropping right here, which are those files that we ask Lovable to replace for us. So instead of us doing
it by ourselves, is my end up breaking the code. So we already ask Loveg to
go ahead and replace it. So all I simply have to do
now just to go ahead and click on select files to
upload all these images. So here is the images that are needed for
this sales page. Now, I also showed you
guys how you can be able to create or git these images. Once you go ahead
and watch this, creating a beautiful
PDF cover with AI. You're going to be
able to see how to generate all these images. So add all these images
in a particular folder. So just go ahead right
now and select all of them and go ahead and
upload it right here, okay? So right now they are
already uploading. Now, once you are done
uploading these images, now the next thing that
you have to do is just to go over to Lovable where
you have your sales page, and you're going to give
it a simple prompt. Now, this is what you're
going to tell you to do. So you're going to
tell you to replace the image press folders with The image URL from my website. And once you do that,
you come down right now, and all you simply have to do is just go over
to your website. The first image right
here is the hero image. Right now, this is
our hero image. Click on that hero image. You're going to see
this file URL that is, click on this copy
URL to click Board. Okay. Now, go back to Lovable. Now, all you simply
have to do go ahead and preview this first. Go
ahead and preview this. When you preview this? So
all we have to do now, just go ahead and copy all the test that is
in the hero image. We just copy it right here and we just tell it right
now. Just go back. Go back right here
and tell it to replace put all the
tests right here. Then we go ahead and
copy that image we Rl again on our website
and put it right here. So what it's doing is
that it will go ahead and change all these URL
that it added right here or the place so that I
add for the image and replace it with the URL or the image
we are on our website. So the once we copy this source code and clinch our website, those images we show, okay? So that's the same thing
that I'm going to do for all these images right here. So I will scroll down right now. So right now, this
is the other image. I'll copy this one.
Go to Lovable. I'll go ahead and
add replace again. I paste it, and I'll say add my columns,
go back to the image. This one is how are we
replacing? What are we in here? So, this is the main product. This is the main product mockup. So we close this one. So this is our main product. So where you get to where I show you
how to design covers. You see how you can design
these kind of covers. I'll go ahead and click
and copy URL to clipboard. I'll go right there, put
it inside my hold ones. So this is exactly what I'm
going to do right now until I replace all these entire
images right now. So I just man the mockup one Mockup two and
the mockup bundle. So let me quickly go
ahead and do that. Alright, so I've gone
ahead to be able to add all the links right here from our website to
help us to replace. So this is the
instruction again. Ask it to replace the
image price holders, which are all these
image placeholders that we have right here, right? So I ask you to replace
the image pres hoolder on the sales page with the
image URLs from my website. Now, I did I put the
information that they put for each of
those image placeholders, and I will put the link that
I wanted to replace it with. So that once we go ahead and
place it on our website, the link will already be there. Since we have already uploaded the images right
here on our website, it will pre populate on its own. Okay? So let's just go
ahead and run this. Now, you see if you
come down right, you also say I ask
you to replace the button links with the
product link on seller. Okay? So this particular
product link right now is the product link that we have
already listed on seller. So once you have
listed your product, you can just come
back right here and ask it to be able to help you to be able to
replace the link, okay? So I need to replace
all the button links that you have right here, all these link like says
that give the blueprint now, it will replace it for you. Okay. So once you are done, I just go ahead and click on this Enter and it will go ahead and run
this code for you. Alright, so right here, it
is going to help to pull all the images from our website
and it has replaced it, and it has also replaced
the button right now. So if I go ahead right now
and click on this preview, so you can see right here that it has been able
to go ahead and, you know, replace
all these images and even the link
right here, okay? So if we go ahead and
open up the link, it will take us directly
to the seller page, okay, for the products. Okay? So that's actually
what you need to do. Now the thing that we need
to do is now to go ahead and get this source
code now because this is the source code
that we're going to be adding on our website because it now has the images and all the information that
we want it to have, okay? But like I said, before
you go ahead and do that, if you have testimonials, you have testimonial, bring
your testimony and ask you to replace it just
the way we ask you to replace the link
and all these images. It will replace
everything before you go ahead and copy
your source code. It's very important so that
you not mess up your code. Now, to go ahead and
get this source code that we're going to
paste on our website. Now, go ahead and just ask
Lovable this instruction. And just ask it to
provide the code. We can paste straight into an elemental HTML widget
or a custom HTML block. Okay? So just go ahead
and click on it. So it will go ahead
right now to be able to write out
the code for us. So as you can see right now, it started writing the code for us. So just wait for you to finish writing the code and we'll
go ahead and copy it. So now that it's done writing
out the entire code for us, all we simply have
to do is just to go ahead and click on this copy. Just screw up and click on copy. We just copy the code, go back to our website, right? So just go ahead and delete this particular one that
we have right here. So you can just go over
right here and do Control O and backspace so that we can
only have the HTML code. And come over right here and go ahead and paste the one
that we just copied. As you can see right now,
this particular one now has all the images right here and all the edits that
we have already made. Okay? So let me just go
down, see the images. Even the link right
here is going to point out to the seller section. Okay? So this is actually how
you can be able to set up your sales page using Lovable without knowing how
to write code at top. Now the next thing that
you can do because if we close this
particular store writers, you can see, we have some
brank spaces right here. So just go ahead right
now and click on this edit container which is
at the top side right now, click on Edit container. Once you click on
Edit container, go over right here where
we have content with, select it and click on full W. Now the next
thing that you do, go ahead and click on Advance. You click on Advance,
go ahead and uncheck this pattern
that we have right here. Once you on scape
pattern, as you can see, everything is now
properly aligned. Okay? See how it's looking. So if we check the
mobile version, you see how it's going
to be looking on mobile. So everything is looking
fine right here, right? So this is how you can be
able to set up sales page. So now, the next thing
that we need to do just go over here
and click Publish. And once we click on
Publish right now, you can just go ahead and say,
let's go and have a look. If you click on Have
a Look right now, you can see that our
sales page right here at.com slash CSO T with
Martin sales page. So this is how our sales
page is looking like, okay? So this is the sales page that
we are going to be adding. This is the link that
we're going to be adding in our ads. The ads that we are going to
be creating in Facebook or if you want to send somebody
the link of our sales page, this is exactly what
we are going to be sending to them, okay? But make sure that everything
is fine right here. If there is a
mistake right here, ease of you to go ahead and use your hand to start
editing this code. If you don't know
how to write code, do not go ahead and
touch anything right here because it can
break your website. All you simply have to do once you want to change
anything right here, let's say there is a
mistake that you made, even in the test, or you made a mistake in
the price then. So anything that you
forgot to add right now, do not try to add it
directly from this code. Just go back to Lovable
and instruct Lovable to replace or to add this particular thing in
that particular section. Okay? You're just using plain wares to ask it
to do that for you. And when it's done, ask it
to now go ahead and give you the HTML code or it just like we ask
it right there to provide the code for us, or we can pay straight to
the elemental HTML wages. I need to go ahead and
write out the entire copy it and go back to your
website and paste it. That's everything
you need to know about setting up
your sales page. So now that we have
our sales page, the next thing you need
to do now is to go ahead and set up our thank
you page, okay? So go back right here and go ahead and click
on Pages again. So right now, you
can even decide to remove all these other
pages that we do not need. So can trash this one and trash
this privacy policy page. Do not need them. So let's have on our sales
page right here. So the next thing we
need to do is to go ahead and create
our Thank you page. Now I need to do now is just to go ahead and click on Ad page. So I'll just at
page on a new tab because I don't want to you
know, add this right here. So once it open up right here, just go ahead and close this
as usual. Now, add title. So we'll add this title, but right now we are
going to be removing the sales page because we're
not creating sales page now, so it will be Hoz talk
with Martin Bank, page. Okay? So you can give it any
title you want to give it. So once we have done that, we
go ahead and click on this, edit with Elementor again. So it will go ahead
and open up elemental. Once that is done, we do the same thing we did
for the sales page, go to page 13, throw
down, hi title, click on page layout, change it from default to elemental canvas
because we don't want anything to be
showing up right here. Okay? So now that we have done this particular the same
thing that we're going to do, we go ahead and search for HTML. So go ahead and
drag the HTML code and paste it right here. So now we have our HTM code
to go ahead and add our HTML. So we just simply come back
right here to Lovable. Now remember that
we have created our thank you page in
our last training. So all we simply have to do, we are going to go ahead
and switch this from this homepage. This
is the homepage. This is the Thank you
page. So go ahead and click on this Thank you, right? So if we switch it to
Thank you page now, it's going to show us our thank you page right here, okay? Now, the next thing that
you need to do before you go ahead and get
the source code of this thank you page is to
simply make sure that this download right now
already your file, okay? I showed you in a
video that will have the finishing
This video, okay? So in this particular
video right here, if you go to the
adding finishing This, I showed you how you can also go ahead to be
able to start adding, you know, your link right here, just like the same way we ask Lovable to help
us to replace things. So that video will show
you how you can be able to add your PDF to Google Drive and
copy this link from Google Drive and add it right
here because as of now, you're watching this video,
you might not have created your PDF right now, but we have already created
this PDF right now, okay? So right now you
can see that right now this link for the main PDF, which is the AI Power
PDF income blueprint. We have already added
this right now. So if I go ahead right
now and open up the link, so you can see the
PDF right here, okay? So when somebody buys
this particular product, that's when they are going
to get to our TQ page, and they can be able
to see the link of the PDF that they bought, okay? So now for the bonuses
that we have right here, which is the first
ten buyer script and the Nigeria prize script. Once we have created
that PDF too, we just install Lea Book to go ahead and add those
links for us. That's exactly how you
can be able to do this. Now, once you are
okay with this, just make sure that
everything looks perfectly well the way you
want it to look, right? So this is how our Thank you
page is looking right now. So I would simply have to
do is just to go ahead and copy the source code or the code and go ahead and
paste it directly into our thank you
page on our website. So to do that, we just
come over right now. We just give Loggable the same instruction we
gave it for our sales page. So I can copy this
one and I did it. So I'll paste this
right there and I'll ask you to provide the code. We can page straight into our thank page or we
just ask you to provide the T page code page code. All right. Provide
the TQ page code, we can page straight into
an elemental HM hand. So that's how you can
just instruct it. So right now, we just go
ahead and click on T. But like I said,
before you ask this, make sure that you ask it to replace all the links
that you want to have, which your customers are
going to use to download the PDF that they have already
bought from you, okay? So once you're done, go
ahead and click Consent, right now, it's done
writing the code. All we simply have to do just to come over right here and go ahead and copy the code that
you gave us right here. Go back to our TQ page to go ahead and write
click and you know, pat it right here. So as you can see, our thank you page is now on our website. Now the next thing,
go ahead and click on this container,
the same thing, change content with to full Wit and go to Advance
and remove the padding. Just displace you see
link values together. Just go ahead and
click on it, okay, so that everything will properly arraign right there on
our thank you page. So once you have
done that also, now, go ahead and click
on published Okay. So now you can go ahead
and click on Have a Look, so you can see our thank
you page right here. Okay? So now, let
me refresh this. Let me walk you through
how these things work. Let's just close
this entire file. So right now you can
see that we have Hazle Talk with Martin sales page and Hazle T with Martin
Thank you page. Now, this is the one
that we are sending. If we click on this view, and I click on Openlink this is the one that the
customers or anybody that is coming from any
traffic we are sending either from Facebook traffic
is going to be seeing. So this is the one
they will read. Now, once they are interested
in buying the book, they will go ahead and
do what and click on get the blueprint or get the book or buy the book,
any link that we put there. So that link could not take
them to our seller page. So once they come over
to this seller or our Next Tug page where
we are hosting that book, and they go ahead
and buy this book. Now, Inside seller, I'm
going to be showing you when you're uploading
your book in seller, where to add your thank you
page because this thank you page ring is the one that will see once they
have made payment. Okay, this one is the one they will see when they
have made payment. So we are going to be adding
the link of this TTuPage directly right here on
the Teller app, okay? Because once they have this
link of this set T page, that means they
have made payment. Okay? So once they are
purchased the product, they are going to get a link that will take them to this
TC page so that they can go ahead and click on this download to download
all the files that we are, you know, selling to them, or they just purchase, okay? So for example, if I go
ahead and click on this one, you can see to go
ahead and open up the book that we are selling to them,
which they are paid for. Now, let me just quickly
show you where you add this your Thank you
page link, okay? Because we have
already added this. So this is the link
to our own product, which is this exact product
that you see right here. So right here, you can be able
to see that we have okay, so the way we are doing it right now is that when people buy, it will just show them
the PDF right now. So because we don't have a
Thank you page link before. So we just uploaded
the PDF directly right here on seller so that people can
just go ahead and, you know, once they
make purchase, they will get access to
the eBook immediately. But right now, if you want them to go to your Thank you page, because you need your Thank you page because once we
start running ads, you will need your
Thank you page. So since you want them to
go to our Thank you page, all we simply have
to do go ahead and copy the link of
your thank you page. You can copy it from here, or you can go to your pages. You see view, just go ahead and copy the link
of your Thank you page. Go back to your
seller right now. So this page, you
see automatically the direct buyer to an external, you are a after purchase. Go ahead and check it. Now
once you check it right here, go ahead and put the link
of your TQ page right here, okay and click on
Updates product. So what that means is that
once somebody goes to this particular product right now and purchases the product, they are going to
be automatically directed to our TQ page to go ahead and download the PDF they have
purchased from us. So this is exactly how
you can be able to create your sales page
and your thank you page on your own website using your own domain
and your own hosting.
14. High Converting Facebook Ads Creation Setup: This lesson, I'm going to be walking you through
how you can be able to create a
high-converting Facebook ad. But before we go ahead to start
creating our Facebook ad, there are different assets that we need to be
able to create, which will help us to create a high-converting Facebook ad. Now, the first thing that you
need to do first is to go ahead and create your
business portfolio. So go to business.facebook.com. And once you come
over right there, you will see where you can
be able to go ahead and enter your business
portfolio name. So go ahead and click on Enter your business portfolio
name and go ahead and click to create your
Business portfolio. So, for example, if
I go ahead and click on this Create a
Business portfolio, you can just go right here, enter your business
portfolio name, enter your face name and enter your business
email address. Now, the email address
you're entering here is very important
because Facebook we need you to confirm
your business portfolio before you get started. So once you have entered
those information, go ahead and click on Create. So right now, I already have my own business portfolio that
I just created right now. Okay? So once you have created
your business portfolio, that's the first asset
you need to create. Now the second asset
is our Facebook page. So go under these accounts, you are going to see pages. So go ahead and click on pages. Right here, you are going
to see ad right here. Go ahead and click on this ad. And here you can see
that you can be able to add an existing Facebook page, request shared access to a Facebook page or create
a new Facebook page. Now, if you have an
existing Facebook page, go ahead and use that
existing Facebook page. But if you don't have,
you can go ahead and create a new Facebook
page, right? So right now, I have an
existing Facebook page, so I'll just go
ahead and click on add existing Facebook page. So I'll go ahead and type in that Facebook page right here. So the Facebook page will pop up A Guide and select
it is a Jenny store. Click on Nest. So
give people access. Yes. I'll give myself Access
right here, click on Nest. So request approval.
I click here. I understand that just select all these things right
here and click on Ad page. So here is going to send a
WhatsApp message to our phone, so go ahead and
confirm it right away. So once you enter the code, you can see page
added successfully, go ahead and click
on done right here. You can be able to see your page right here that you just added. Now the next asset
that we need to add right now is our Ad account. So go ahead and click on Ad accounts and
once you do that, go ahead and click on Add. So right here, if you have
an existing A account, click on add an
existing A account, you can also request from access of an A account from
another business portfolio. But since we don't
have all this, we cannot go ahead and click
and create a new A account. So right now they will
ask us what's the name? Let just cite to the
Jenny Store and account. Right? So you can just give you the type two
that you want to give your other tons. Note that the customers
are not seeing this. So time zone, select your
time zone right here. So currency, I would
like to sell this to GN. So So this engine, select that, click on
NEST usage, my business. So you can see that
this other account will be greater than added to this particular business
portfolio that we are using. I know that once you add this, you can remove the other account from the business portfolio. So we click on I Agree, and I will guided and click
on create other accounts. So right now you can see that the other account has
been created for us. Now here, it's going to ask
us to add payment info, but we're going to
be doing that later. Just go ahead and
click on De right? So now you can see that
we have our A account. So we have created
our Facebook page. We have created our A account, and we have created our
business portfolio, right? Now, the next thing that is also advisable for you
to go ahead and do is to go ahead and add
an Instagram account, okay? So just use your phone and go ahead and create an
Instagram account. But if you already have an Instagram account
you're not using, but you want to use
it for this business, go ahead and edit it to the title of your PDF for the needs that
you're targeting. Anything that you want to
name your Instagram account. Once you name it, go
ahead right now and click on AD Instagram account. So right, it's going to come
up to this particular place. Now, you have to make
sure that you convert to Instagram accounts from
a personal account with a professional account before
you go ahead and start adding your Instagram
accounts right away, right? So once you have done that, you are good to do. Now, the next asset that we are going to
be creating right here is under data
sources, okay? So we need to go ahead and
create or set up our PizzLs. Now, PizzLs are what
Facebook will use to keep track of what is
happening on your website. So Facebook can be able to use the Facebook PizL that
you're going to be installing on your website to be able to know the type of people
that are interested in the type of PDF that you're selling so that
you can be able to recommend more of those people to your website or to
your sales page, okay? So go ahead right now and click
on this dataset and PizL. Now, under this
dataset and PizL, go ahead and click
on AD so right here, go ahead and add in the
dataset right here, okay? Now, I like to always
use the name of the product or the niche
of the product that I'm trying to advertise, okay? So in this particular case,
since we are trying to market our AIPDF product as an example, I will just go
right here and put, you know, AIPDF data, right? So on check this AD
conversion API right here. Now in these categories, you can leave it like
this and go ahead and click on this rate. Now, to ask you to choose an account that you want
to connect to the dataset, we go ahead and select that
same A account right here, which is this one that
we're using to write here, which is this one
that we just created. So right here will just go
ahead and click on Nest. So now you can see that we have been able to
create our data set. Okay? Now, the next thing that we are start
doing now is now to start adding the event to
One of Track on our website. So to be able to do that, just go ahead right
now and click on Go to Events Manager. Now on this page,
you can see that we can be able to now set up
our events right here, which is this conversion API, and also we can go ahead
and set up our meta PizL. So this meta PizL is what we need right here
because this is what is going to help us
to keep track of the visitors that are
coming to our website and also help Facebook to be able
to optimize our ad to show our ad to rightly people that are interested in
our product, right? So go ahead right now and
click on this setup Meta PizL. So add Meta PizL code to
your website yourself. Go ahead and click on NST. So right here is
going to give you the code right now to
add on your website. So go ahead and copy this
base code from here. So if you copy this
base code, now, go to your website, go to
plugins and click on AD plugin. Over here, go ahead
and type in WP code. So you will see this pug in
right here that says WP code, insert headers and footers that has three plus million
active installation. Go ahead and click on Install. Now, once it has installed, go ahead and click on Activate. So once this has activated, look at the left hand side and you're going to see code Nipt. Go ahead and click on
this Header and Footer. Now, once you click
on that, you're going to see Heather right here. Just come down right here
and paste in that code that you just copied right there
from Facebook, right? So once you've pasted the code, click on Save Changes. Now, refresh it to make sure
that the code is well saved. Now, go back to Facebook. So go ahead and click on Nest, click on Nest, then turn on automatic Advance
machine, right? So once you've done
that, click on done. As you can see, you have
completed your PSL setup steps. So click on Continue. So now that we have
added our PSL. Now, let's go ahead
and test and make sure that our PSL is firing. So go ahead and click
on this test event. Now, select website right here. Now, under this,
select confirm that your website event
has set correctly. So just come over
right here and copy our sales page URL, right? So come over right
here and, you know, base this right
here and go ahead and click on Test event. So right now, the
page has loaded, so we go back right
here so you can see that it's recorded
page view right there. So showing that our event
was set up correctly. So if I go over right here
now and click a button, let's say I go ahead and
click this button right now. So let's see what
it will record. So here, it's
recorded, subscribe. Now, but it's actually not
supposed to be subscribed. So let's go ahead and set up these events very well so
that Facebook will know what these buttons are and what we expect it to track right
here on this page. Now, for us to be
able to do that, all you simply
have to do is just to go ahead and
click on Settings. Scroll down right here. You are going to
see, scroll down. So you're going to see event set up too. I think
that's the name. Yeah. You can see this
open event set up too, go ahead and click on it. So go ahead and paste in
your website URL again, especially the sales page
and click on Ad event. So once you click
on that, you're going to receive a pop
up right here, okay? Now, make sure that
you do not have an ad blocker installed on your On your Chrome browser or any browser that you're using because if you have
an app broker, this thing will
not come up, okay? So if you're having issue
with this thing coming out, try as much as possible
to try another browser, but you not have any issue. Now, the first thing
that we are going to be tracking right here is the URL. So go ahead and click
on this track a URL. Change this URL equals to URL contains this URL that we
have right here, okay? So change this event right
here to be a view content. So take it to view content. So what it means that whenever anybody comes to this page, Facebook will track the
person or the person that used this
particular content. Okay? So once you
have done that, simply come down right
here and click on Confirm. Now, once you are done, go ahead and click on this
done right here, okay? So now the next thing that
we need to track right there is these buttons that people are going to be
clicking to go ahead and get the PDF that we
are promoting, right? So go ahead and click on
this track a New button. So Facebook select all
the button on this page. So we start with this first one, so click on it, so
we set of the event. So we're going to set it
as initiate shakeout, because when somebody
click on this, it means that the
person want to go ahead and buy the
product, right? So once you have done
that, now you can choose to add the value on the page right now or you can just choose not include the value anyone, but I always like to do don't
include the value, right? So I'll just go ahead
and click on confirm. So the next thing, so you can see the check icon right here. We have
set of this one. So we have a lot of
buttons right here. You see this one, so
we're going to go ahead and click on track
a new button again. Select this one,
select the event. Let's initial checkout. Don't include value, confirm. So do it for all the buttons that we have right here.
So remains these two. I'll click on button, delete this, initi curves. Confirm. So remember
the last one, a new button, delete
this one, initi curves. Confirm. Now, once we are
done with this right now, just go ahead and click
on this finish setup, and go ahead and click on
this finish right here. Okay? Was the event set up too helpful?
Yes, it so helpful? We just go ahead and click on submit to click on D, right? So now we have
successfully track this particular sales page and also the buttons
right here, okay? Now, the next thing
that we need to go ahead right now
and start tracking is when people have finally
purchased this book, right? Because know that when somebody read this or sales
page and the person is interested in buying
this the person will now go ahead
and click on this, get the PDF right now, and need to take them to
Cellar or Nest tog or pay Stack or Gum Ro depending on the platform you use
to host your eBook. Now, when they make payment, we need to know the
people that are making this payment because once they make this
payment right now, now we need to send them
to our thank you page, which is this particular page that we have right here, okay? Because it's from this thank you page that they can
now go ahead and download the book that they
purchased from us, right? Now, for us to be able to track anybody that comes here
because anybody that comes here means that the
person has bought PDF. Okay? So all we simply have
to do right now is just to, you know, go back to
our Facebook, right? So we just go back
to the same event. We just go ahead and close
this particular one right now. So just go ahead and open
the event setup to again. Now, in this case,
we're not going to be adding our sales page, right? So we're going to be
adding this Thank you page URL because that's
what we want on track now. So once we go ahead
and copy the URL, we just go ahead
and past in the URL right here until we can events. So the pop up will now
come over right here. So once it's come right here, click on track URL, let URL contains, then change this select and event
right here to purchase. Okay? So because anybody that comes here means that
they have finally purchased the PDF that we are promoting or the product
that we are promoting. So once you have done
that, go ahead and click on the confirm
button right here. So once you are done, go ahead and click on this done, and go ahead and click
on finish setup, the set right here,
finish, submit. So now we have
successfully set up our Facebook PizzL and event
right there on our website. So if you come over to this
overview section right now, now, this is going to take
a while, as you can see, it can take almost
up to 30 minutes for the results to start
bearing right here, right, for the things
that we have done. But we know that our event is working because we have gone to test event and we see that everything is working very fine. Okay? Now, the next thing that
we have to do right now is to go ahead and start
creating our ads. Now, for you to start
creating your ad, just go ahead this place
that you see create, go ahead and click on Crete and come over right here and
click on Create AD, right? Once you click that, it's going to bring you to this
particular page right here for you to now go ahead and start setting up your ads, okay? So as you can see right here, you can be able to choose
a campaign objective. You can choose for brand
awareness, for traffic, for engagement, for leads, for app promotion,
and for sales, right? Now, when you run
a sales campaign, Facebook will be sending you
people that has the ability to be able to purchase the product that you
are selling, okay? So Facebook will be sending the right audience to your
ad or to your sales page. Those people that are more interested in buying
your product. And since you have
already installed our PSL and we are keeping track of everything
that is happening here, the people that are going to that page and they
are buying our PDF, Facebook will now go ahead and find more people
like those people to get them to go and buy
the PDF we are promoting. Alright? But now before you go ahead and start
running a sales campaign, since this is a
new ad account and a new business portfolio and everything that
we just created. Now, the first
thing that we need or I will advise you to do, which is what professionals
do for any PDF they want to promote is to go ahead
and run an engagement ad. Now, an engagement ad, we're going to help
more people to be able to engage with
your page and, you know, so that it will look as if something is
happening on your page. We're going to get
more followers and more people following your
page and more people liking your page and more
people engaging in your content because
I also advise you to go to that Facebook
page that we created and drop some few posts
relating to your eBook. Right there, you can
use chargeability to generate most of the information you can put there. All right. So right now, let's go ahead and create an engagement
post because that's the first ad you should
go ahead and create before you start creating
a sales campaign. So select the
engagement right here, go ahead and click on Continue. So once you come right here, go ahead and give it a title. So I can call it AI PDF. Engagement campaign, right?
So once you have done that, just scroll down right here. So budget strategy, change
it to Asset budget, you know, remove this
share right here, go ahead and click on NST. So right here, they're
going to ask you for the Aset name, okay? So you can still title
it AIPDF ad set. So right now, I don't ask
you the conversion location. So for conversion location, we are not sending them
to our website, okay? Remember, we are trying
to send people to our Facebook page with
this particular ad. So go ahead and selet this conversion
location and change it to Instagram or Facebook. Okay? So send it to Instagram
or Facebook right here. So once you have done
that, it's going to ask you for the performance
goal right now, so you can see Mazm's number of Facebook page visits, okay? So right now, Facebook is now currently
allowing people to run Mazms number of
Facebook page likes. But most of these
people that will visit your page will definitely
follow your page, okay? Because these are people that
will probably be interested the type of products
you're trying to promote on that
particular page. So right now, you can see that it has automatically selected our Facebook page that we have added to our business portfolio. Okay? That's why it's important. Now, also, you can
now go ahead and also connect your Instagram
profile right here. If you have not added
your Instagram profile when we are creating
the business portfolio. Once you have added that, so
just scroll up right here, then go ahead and set up your
daily budget right here. So you can actually decide to just start with 2000 NIR right here or 1,000 NIR depending on the amount of
money you want to spend. Now, you can actually do this
for just two days, okay? You can spend 1,000
for two days. That's two K. Or you can
spend 2000 for two days, that's four K, okay? Now, once you have
done that, now I normally like to start
this the next day, so I can come over right here and start this on
the ninth, right? Then the time right here, I like to start this by
four, Okay, 4:00 A.M. So once you have done
that, just go ahead. You can try to set the end date, but I will just leave the end
date because I can just go ahead and add just
4,000 to the account. You should just pend it
and finish it, right? So just scroll down right here. So location, which
location do you want? So select your target location. I want to set your ad
to just by clicking this edit icon write it then select your target
location, right? Now, scroll up right here. So we under placement, you can see if Facebook
will automatically show your ad in places where people
can write it to respond. You know, we are not that too serious with this
particular ad right now. So we are going to
leave everything like this and go ahead
and click on Nest. Now this is now the place
we need to now go ahead and start creating
our ad, right? So we can just go
ahead and type to this AI PDF. Ad, right? So right now, we're going to be doing this Tingo Image ad. So here is going
to ask us to now go ahead and set up a creative. So go ahead and click
on this Setup Pretive and go ahead and click
on this image ad, right? So right now, I'm
going to be showing you how you can easily create your image
ad using harGPT, Cloud, Gemini, or any of these AI tools
that you would like to use. Now, to start creating our
ad image, well first of all, head over to Claude
AI first of all, let's go ahead and
generate the prompt to use to generate
our image, right? So I can just go ahead
right here and ask Claude that I want to run a Facebook ad campaign or
a brand new page that I will use to promote my AI
PDF, digital products. All right? So right
here, this place puts AI AI PDF digital products. You can go ahead and put in your own you know, pro
that right there. So I'll just ask it that
I want you to output an image frommt I can use to generate an image relative
for this purpose. Make it compliant. Okay? So I'll make sure you generating something
that is compliant. With Facebook. So
this is what I said. I want to run a
Facebook ad campaign for a brand new page that I will use to promote my AI
PDF digital uploader. I want you to output
an image prompt. I can use to generate
an image creative for this purpose,
make it compliant. So I'll just go ahead and
click Consent right now. Now, Claude will now go
ahead right now to be able to create the prompt that we
are going to use right here, so you can see the prompt is actually creating
right here, okay? So for us to be able to do that, just go ahead right now and open either charge GPT
or Gemini, right? So let me go ahead and open
gemini dot Google right here. So once you open it, I'll
just come over right here and copy the prompt that
Claude gave us right here. Go over to Gemini, over here and paste the prompt right here and click on Send. Okay? So I can also even open ChatGPT and also paste the same prompt right
here and click on Send. So let's see the result that each of these
is going to give us. So you can see what Gemini
gave us right here. You know, which is actually a very good image that
we can use for our art. So let's also see what CharPT
is going to present us with so that we don't choose the one that
we are going to go with. All right, CharPT
is done sketching. So let's see what it created. All right, so see what
CharPT created right here. Alright, so I think I prefer
what's Gemini created. So I'm going to be using
this Gemini image. So I'll just go ahead and
download this right here. So here, I'll now
come over right here and click on Upload. I'll add the image right
here. We'll click on Nest. Now for the primary test, let's quickly go ahead and
ask Claude to go ahead and, you know, get the hard
copy for us right here. Or can just ask you to
just create the arch copy for people to follow
and our page. Now, I ask you to
make it compliant. Now, I can even ask you to
create a short hard copy. So to not go ahead and start writing something
that is very picky. All right. Alright, I said, learn how everyday
people are creating PDF simple PDF products
from their phone, no laptop, no descu, no Wahala. You know, we share
practical tips, real examples, so
on and so forth. I'll just go ahead and
copy this right here. I'll paste it here. Now, call to action Visit Facebook page. That's what we have. So go ahead and click on Nest, right? So I don't like
using these things, so I'll just go ahead
and click on Done. You can see how it's going
to be showing up right here. So let me just go ahead and display them right
now so you can see how it's going to be
showing in our platform. So on Facebook page right now, this is how people are
going to be seeing it. Now, I remember
also on your page, go ahead and add the profile
picture on your page and also a cover photo on your page that is
related to your niche. Okay? I didn't add that here,
but I just saw this now. I remember. So add
something that is related. You can use Gemini. You can use Claude
to create a prompt, Gemini to generate your image and use it to add those
images right here. These things are
very easy to now, once we go ahead
and launch this ad, people will start seeing this. And the people that
are interested in this will go ahead
and start visiting our page and start following us and liking
our page, right? So now you are okay with this. All you simply have to
do right now is to now go ahead and click
on Publish, okay? But if you click on
Publish right now, since we have not added
our payment method, it's going to require
us to be able to go ahead and add our
payment method. So we can actually do this. You can add your payment method before doing all this, okay? Or you can still do this before adding your
payment method. All you simply have
to do is to come over right here where we have
the billing and payment. Go ahead and click on
billing and payment. So once you click on that,
to go ahead and click on this art payment method.
So click on NST. So right here I was going to ask you, how do you want to pay? So edually I like paying pay
with bank transfer, okay? I don't like adding my
credit card right here. So once you are
done, click on NST. So right here keep this. Now, it's now to ask you,
how much do you want to add? So choose the amount you
want to fund the account. So for example, since
I want to fold 4,000, I can just click on 4,000
right here, click on NST. So right here, it will now
load right here and bring out the account number for
me to now go ahead and transfer the 4,000
NRR right now. So right here, you can see,
open pay by bank transfer. So if I click on this right now, it will now bring out the
account number that I should go ahead and at 4,000
NRA right here. Okay? So all simply
I have to do now. Now, for the purpose
of this training, I'll go ahead and transfer book right here to
the Opa account. Now, as you can
see, we have added 4,000 NRA right now
to the account. So go ahead and click on Dong and you can see the money
you added right here. So once you have
added the money, you just go back and click on
your campaigns right here. So once you click
on your campaign, you will see our campaign
right here is saved in draft. So just go ahead right now
and click on the Edit, or you can even click on Publish right here
to publish it. Now, once you click on the Edit, so just come down to the odd one right here, which is the ad. So after the ad
set, we see the ad. So make sure that
everything is set up well the way you
want it to be, right? So you can see your
ad right here. Everything is set up
the way we want it to be. That we
simply have to do. Let's just go ahead
and click on publish. So right now, as you can see, we have published this
particular art right now. So this arrow that is showing us right now is that you
need us to be able to, you know, verify our
phone number right here. So all we simply have to do is just to go ahead
and fix this arrow. Alright, so you can see that
I verified the phone number. So I'll just go back to campaigns right now
to go to the ad. Click on the ad right now. Then go ahead and
click on Publish. Right, what is this
showing arrow again? No payment method. We've already added payment right here. So just go ahead and click on try to publish
items with arrow. So right here, you can see that our ad has been
published right here. So this is the first engagement
campaign you should go ahead and create for
your ad account. So now, Facebook is going
to help to approve our ad. So their ad is on
schedule right now, and it will start running, starting from the
time that we gave it. So now, let me show you how
you can now go ahead and create a hide convert
conversion ad, which is the type of ad
that can help us to be able to make sale of our
products, right? Now, to get started, just go ahead and allow this particular
one that we set up, which is this, you know, page visit campaign to run
for like two or three days. So once this one has run
for two or three days, and Facebook has been able to and the other account
is now well warmed. Now, go ahead and start creating this particular one that I want to show you
right now, okay? So once you click
on Create, now, go ahead and select
sales right here. So once you select on sales, come down right here and
click on Continue, right? So we're about to set up a
sales campaign right here. So we can still go
ahead and title it AIPDF sales campaign, right? You can just give you the title of your product or your niche. So come down right now. So change this
campaign budget right here to the outset budget. I always like to use
Outset budget, okay? So once I've done that,
I'll just come down right here and I'll click on NST. So once I come here, the Aset name just
do the same thing. So AIPDF ATSet, right? So right here, just
scroll down right here. Now, the conversion, so one conversion right here
is going to be website. So if website is not selected, go ahead and select
website right here. Performance Msmiznumber
of conversion. That's what we are
looking for right here. Now, this dataset now remember when we
created our dataset. So this is what is show of cert, the AI PDF data set, right? Now, the conversion event
that we want to track, so right here, selecting
initiate shakeout, but that's not what we on track. W on Track purchases. So click on this and
scroll down right now. So we are going to see
purchases right here. Select purchases, because
that's what we want to track. So here, it's telling
us that the ad might not optimize for
conversion because they haven't received
any activity from the conversion that I selected in more
than 14 days, right? So it's simply because people
have not gone ahead to, you know, visit the
Thank you page. But that's fine. When people start getting the product and start visiting our thank
you page right here, the Facebook will start getting and start tracking
it very, very well. But that's what we want
on track right here. So come down right
now, we go to budget. So right here, daily budget. Now you can decide to leave it the amount that Facebook
left it right here or you can even put 5,000 error right here or you can just
put 3,000 error right here. But I like to leave it 3000-5 thousand error
from one account, right? So come down right now. Then I always change this
date to the next date. I always send it to 4:00. The money, so I will
start from then. Now for this audience, go ahead and stay
select your audience. I'll still leave it at
Nigeria right here. For minimum age, now, since the product I'm
trying to promote Re, which is this particular AI powered PDF income
reprint right here. So this particular
product is actually for people that are probably looking for side houses and so on. And so what I'm going to do right here
for this minimum age, I'm not going to be
living it as 18-years-old because most of these
people are still in school. They might not have
money to pay, right? So I can just decide to increase this to 21-years-old, right? Include people on Wasap
whose age is known. I'll just check this, right? So once I've done that, just select your minimum age based on the type of
product that you're selecting and the people
that it appeals to. Now, once you're done, just
scroll down right now. Now, if you're this ten, if your p dot is actually
gender specific, you can go ahead and click
on this show set in, right? So if you click Control set,
if it's only for women, you can just go on
this gender right and change this from O to women. If only for men, go ahead
and select it for men. But this particular
prodot is for all, so I'll leave it
at all right now. And these demographics, we're not doing
anything right here because Facebook already
know how to be able to get the best people that will be interested in the
product we are selling. Once we go ahead and
start creating our ad, it can be able to
extract information from there using their
artificial intelligence. Okay? So right now, just come down right here. So placement right here is where Facebook is going to
be showing your art, right? So just scroll down right here. I think everything is now
well set right now, right? So all you have to
do right now is just to go ahead and click on NST. So let's go ahead and
now, set up the ad. Okay? So this is where
we are going to be doing the main work right here. That will help us to be able
to get more conversions too. Okay? So I'll still go ahead
and title this AIPDF urge. I can't even put
it tails g, right? So I'll come down right now. So make sure that you select
right Facebook page and also the Instagram accounts
that you're using, okay? So go ahead and select the Instagram account
that you're using. So if you select on
Instagram account, if it's advertising on Facebook, it's going to use the Facebook
profile that you have, as you can see,
it's going to use Facebook page right here
as our Instagram account. So if you don't have Instagram, that's what it's
going to do, right? So just scroll them right now. Now the next thing
that we have to do is to under create ad, so you see manner of growth, you're going to see
single image or video. So just do ahead first of all, and check this multi advertiser
ads right now, okay? So once you have done this now, the first thing that we
have to do is now for us now go ahead and
create our ad, right? So for us to be able to
set up our ad creative, we have to go ahead and select this particular press right
here and click on Image ad. So once we select
image ad underneath creative set of just go
ahead and click on Nest. So here, we now have
to go ahead and upload the image
you are going to be using to run
this particular ad. Now, this is now
where you can be able to now put an image that will make people
to be able to click on your ad to land on your website. This is actually where
you're going to do your best work because if you do not get
this place, right, people are now going to click to get to your sales page to even read about the
product you have to offer and non vital product. So right now, I'm
going to be showing you how you can be able to create an image ad
and the primary test and the call to action that
will help you to be able to get more people to be able to click on your ad to run
on your sales page, which will increase the chances
of getting your product. Okay? So right now, I've already prepared this
particular AI prompts right here that's
going to help you to be able to generate
your image ads using AI and also your ad test. Okay? So you simply
have to do right now is just to go
to the project you created on Claude and
go ahead and upload this ad creative for image and test generator
prompt that I have right here. So go ahead and upload
this right here. Now, once you upload
it right here, now go ahead and click on Send. So once you click
Onsend right now, so Claude is actually
going to run you through some few
questions right here so that it can be
able to give you the right prompt
you use to generate your image using either
ChatGPT or Gemini, and also we provide
you with a test that we are going to
be using right here. Okay? So as you can
see right here, it has read the prompt right now and this prompt
read that this is your FB and IGAt creative
generator prompt setup as an intake process that works through
your buyer's pinpoint before generating the actual
art concept and copy. We follow it exactly as written. One question at a time,
waiting for your answer. Before moving to the next, let's start with the first one, C pinpoint the product source. Now, to ask you to
describe it without naming the AI
powered PDF income. So right now, it's
asking me not to name my product, okay? That's why I ask you to
when you're doing this, make sure you're doing
everything right here under the same
project that you created earlier when we are doing our product name and their
niche research. Okay? Now, most of the question
that's going to ask here, we are going to be
getting them from the niche discovery
that prompts that we actually run earlier
in the beginning of the video that help us to
be able to find our niche, the coping point and
everything, right. So as you can see,
this question right here says the coping points, the
15. Thank You!: There, thank you for
taking this course. I believe by now,
you already have your first PDF product
ready to list and sell. Now, one thing I want
you to do right now is if you find value in this
particular training, go to the review section
right here and drop a review. And also, if you have any
question or if you want us to talk about anything in relation to this
particular training, go to the discussion tab. Use that to drop your
questions or your comments, and I'm going to be there
to engage with you. Thank you once again
for taking this course, and I hope to see you
on my next training.
 Martin Iyooh, Internet Marketer + Youtuber