Transcripts
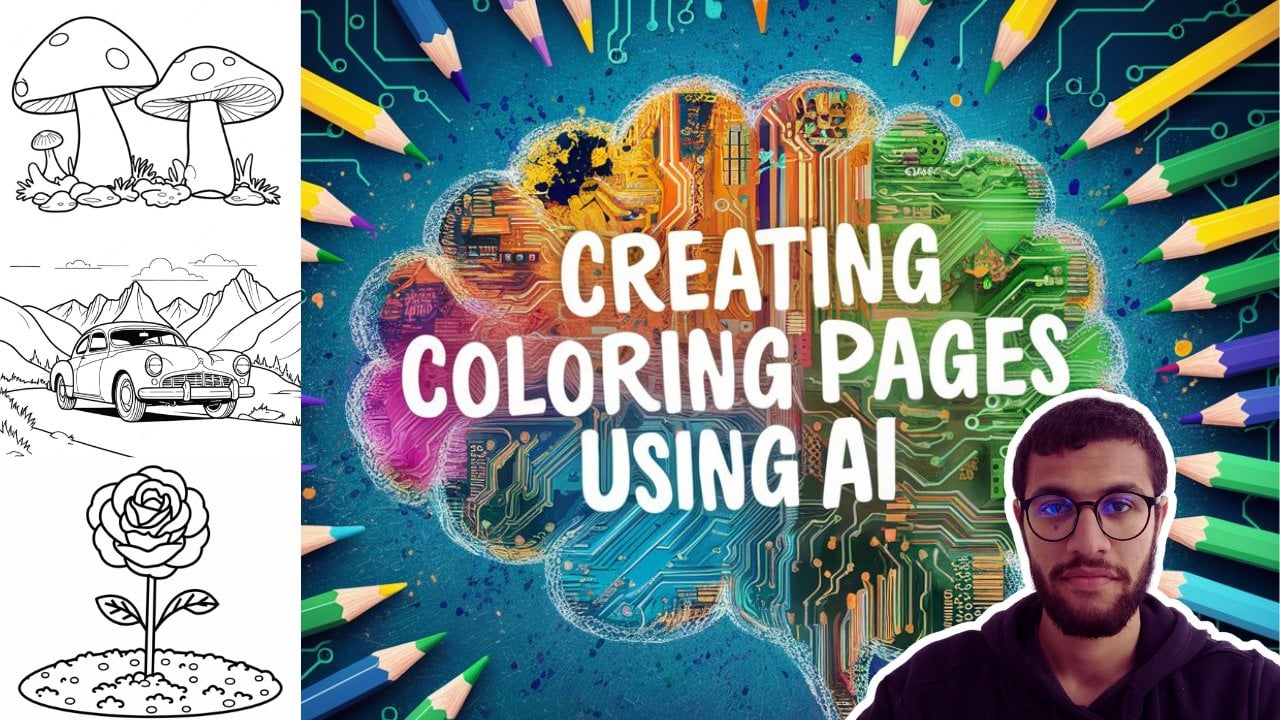
1. Intro: Welcome. In this class, I will teach you how to create a Corning book and
publish it amazon KP. We would use AI for creating the interior
and the book cover. We would use AI
specifically Ed grab Ahmad, and I will be your
guide for creating your first Corning book
and published amazon Kp. Ready, let's get started.
2. Choose a Theme: Thing we must do before
start creating our book, we must know this
book is for who. I'm creating this book I'm
creating this book for kids. I'm creating this
book for adults. I'm creating this
book for women. Before I start, I must know my trogt audience.
This book is for who. This is the first
thing that we must do. For example, let's
make look at amo. For example, here, I
write kids Corning book. Here, I will make kids ing book. So here, my book, it's for kids. So now I have clear version that my book my
book is for kids, or it can be Cing
book for adults. So here, my book. It's for adult. I
know that my book. It's for adult or I
can be more specific, and I make, for example, here, a ing book form. So here, I know that
the book it's for adults and specifically
specifically it's for or for me. So in my book, it's for adult
form, according book form, or for example, here, I can make a Coric book for people
who suffer from anxiety. I make stress relief
or book, for example, like those book, for example, he stress relief oring book. He I'm creating a ing book for adults and specifically for people who suffer from anxiety. I make stress
relief coring book. For people enjoy and forget stress and
relief some stress. Here, I'm creating
a book for adults, specifically for stress relief for people who
suffer from anxiety. Good. The most important thing is we must know our
book, it's for who. For example, here, I can
create Halloween or book, a totally different
Halloween or book. Halloween can be for
kids or for adult or general Halloween or book,
it's for kids in general. But for example, here,
a Halloween or book, look, we have lots of results, Halloween coring book,
for example here. Or for example, here,
a car coring book, or it can be a
truck coring book. For example, here,
if you make look, you'll find like the
majority of book, it's for is when you make a truck coring book,
it's for kids. So the first thing you must do, it's know your audience. For example, I can create
here a flower coring book. Flower coring book can be for adult and for kids,
it can be for both. The first thing I must do
before starts creating my book, I know my target audience. I know the books for you. I'm going to create
a book for adult. Specifically for
women, specifically for women who suffer
from anxiety, or I'm going to create a
ic book adult in general. I'm going to create a
chic book for kids, or chronic book for
kids specifically about car or about sport
car or about truck. So I must know before start everything,
my target audience. This is the first
step that we must do. So before you start
creating your book, take a paper and write my
book is my book is for kids. My book is for adult,
my book is for women. My books for men. Write my book, it's for whom. This is the first
thing that we must do. Now, that's all for this
video, see you in the next
3. Ideogram: Let's make quick look at
gram to know how to use it. This is Agra, it's a
tool made by Google. This is the link of
it, just write digraI. Let's start here. You write your prompt. Here
you are prompt here. You choose the type
you photo illustration three D typography poster. You have all those here. From here, you can change
the size as you can see, all those are size, you can change it from
here. What is it? If you want to make
the image private, you are the only
one who can see it, you must go for
the paid version. I use the free version, we'll talk about the pay version data. So this is you can change it, you can choose the model, and
you can change all those. If you're talking to
the paid version, let's make look at
the paid version. For example, here, I don't I use only the
free version by way. Version give you a ten prompt
a day like ten image a day. For me, it's enough
for me. I'm talking about myself. For
me, it's enough. And if you are going
to design a cog book, every day you make ten image,
it's more than enough. If you want to go
to the basic plan, like you pay $7 and
take all the advantage, for example, gram
editor advance, you take image at high quality, you can change the ti, you
can change lots of thing. If you want to for me,
I use the f version. So from here, you write the prompt that you
want, for example, let's say for example, just car and we generate. For example here,
this is the result. We just write car. That's all. You give me this is
just simple prompt. We'll see how write effective
prompt in the class. F here, to give
you magic prompt. I give you prompt from gram, gram give you prompt
if you want to use it. And that's all for if you
want to create images, write to prompt here
and click generate. We will see how to
create cre page in the next lesson. See
you in the next lesson.
4. Create Coloring Page: No Let's start creating
our coring page. The first thing I must do, it's writing the prompt. Because here we go to his AI, I must write prompt to
get the best result. Let's see the first
prop that I write. Look. Here, I write
Corin page four kits, truck, the angle, thick line, low detail, no shudding. You told me why you
write Corning page kits. Look, when I write
Corin page for kits, this is for the AI, to understand that the image
must be simple and easy. Because if I write for adults, you'll give
you more detail, he will understand
this corr page, it's for someone who
grew up for adults. But here when I told
them, it's four kids. So here it will give
me a simple image. Good. Here, the first, I say coring page four
kids. The subject truck. I choose specific angle view. I choose line style, thick line, I choose detail. Low detail, no shudd good. Now, let's see the result
for this prompt exactly. Look, this is the result for this prompt coring
page for truck. No shudding, low detail, good. This is the result. You told me this is not according page. This is not black and
white, which is okay. I can make mistake and I was
make mistake, which is okay. This one, this one maybe
I'm not going to take it. This one I will take it,
but I must remove this. You can remove it in
Canva or photoshop. It's very simple. It's not that hard to remove it in
Canva or photoshop, or this one for me is perfect. This one, it's perfect. It's amazing. Look, this
coring page I liked. Good. Now, the same prompt. But here, when I write
conic Patro kids, I write Sammy truck. I told more information, look at the result. We is good. She's me. Look at
the result here. This one is good. Perfect.
This one is good. This one, there is this mistake. I can remove it, which is okay, not that hard. A the result. It's good. And the same here, there is like this color here, the yellow color,
I can remove it, and the result is good. Here, this is the magic prompt. This is like magic prompt, the hydrogram give it to us. You can use it. You can try it, copy paste and see the result
that she's going to do. She's okay. Always try the
magic prompt that he give you. Sometime give you incredible
result, good result. But here I'm happy with
the result of this. Like I'm happy.
You told me Ahmad. Those coring page.
It can be for adult, as I write for kids. It can be absolutely. Even if we make
look at Amazon and we write a stress
referring book for adult. We score down here, we see the best seller the
best seller here, stress relief coring book, and all his illustration all his coring page
are simple look. Simple and easy look. All
the coring page look. All of the simple
and easy make look. If we score down here,
this is the information. All the coning page
are simple and easy. Look at this one,
this one, this one. The coring page that we create, even if we write for kids, we can use it for adults, which is this type of book now trending in
Amazon, trending, if I just write coring book
like that. And take this one. You see this type
of book trending and lots of people
look best seller, best seller, best
seller, best seller. So this type of book
chronic in our Amazon. So even this image is for kids, we write for kids, we
can use it for adults. Look. The image, it's
incredible. It's amazing. Like you can use it under the
stress relief coring book. As we see here, stress relief
Corning book for adults. Look, this one is a best seller. Good. Now let's go to
our second prompt. Now, here, I make a change. Instead, I say, a coring
page for kids, no, I told them a simple
and easy two color, black and white
illustration for kids. Here I make a change here. Easy to color black and
white illustration for kids. I didn't told them a
coring page for kids. No. I told them easy to color black and
white illustration. Look, there is important
information you must know. Writing prompt, S that. Just write p you
out in your mind. There something that you
imagine in your mind. Just make it as prompt. That's not that art
creating prompt. Look. I told them in the past
coring page for kids here, I changed it simple and easy to color black and white
stration for kids. And I will get a good
result, even if I make that. Good. Let's continue. O here, main subject, the select that I want with additional element. The station should be in the specific view
with line style, level of detail with no shading. If we see this prompt,
we told them here, I'm going to add
the main subject, additional element, the view, the line style, and
the level of detail. This is example of prompt. A what I do, just put the
prompt and filling the black. I here is simple and easy to color black and
white etration four. Here I write. For kits, here. This is, I change it by a car
on the road, and this. I change it with a mountain
entry in the background. The station, and I
change this is the view. I change it by this
with lines here, I sold thick line, level of detail, It low
detail with notion. Let's see result for
exactly the pump. This is the result for this pmt. As you can see here, there is some mistake which is
okay, but this one, not very good, the te
are not that good, but the road, the
truck, which is good. This one. We can see
this one is good. Even there is lots of
detail, it's not low detail. As you can see the truck, there is lots of
detail, which is okay. But overall, it's okay. This one is very simple
like a simple mountain, the sun here and only one tree. This one very simple. This one, you can
see it is for kids. We can use this one for adults. Good. Here, we have the magic prompt, if
you want to use it. Let's see the result for
the magic pomp together. This is the result
for the magic pump. It's not that good. This
image is not that good. Maybe this one, maybe
I will take this one, but it's not that well. This one is the same. This one, of course, I'm not
going to take. But maybe I will take this
one or this one. Good. Now this is another
type of prompt. Instead of write cording page for kits or coring
page for adults. I say simple and AZ two color black and
white llustration. Here, I told them
illustration for kits for illustration
for adults. It depends. Now let's move
to another type of prompt. Here, I told them create a smooth line drawing
of the subject. The drawing should be
in black and white. Here I didn't told them
according page, no, I told them smoothlne
drawing of car of tree of mountain drone
should be in black and white, and suitable for a coring book. Instead I say Corning book for kids, Corning
book for Adult. No. I say what I want, and at the end, I told them
suitable for coring book. This is another way
to write prompt. So if you make look,
this create a clean, a smooth line drawing
of subject this is specific the style and subject of the drawing
clean and smooth. And here, the drawing should
be in black and white to ensure the drawing
must be black and white. And he sold to Coric book
for the AI to understand the specific that the
drawing should be simple and clear
enough to cover it. Good. Now, let's go to
another type of prompt. For example, here. Here, I told him simple look at this prompt. Corin page four kids. And I emphasize, I told
him simple and easy. I told him four kids, and I emphasize simple and easy. Here, I say the subject, bot line art, on the
black and white, full image, no chat. So let's see the result for
specifically this prompt. If you make look here,
Look here, I told you. This is the same problem.
I only change this. That's all what I may change. If you make this
result, of course, it's not that good.
The same here. It's not that good. Maybe I would take this one and
this one. This one. This one I will take
100% ta It's amazing. I liked. For the
result, I liked. Let's see another
type of prompt. Here, we can use just
simple, simple prompt. C page, rows in the
growth, glyphic outline. So Corin page, the something that's going to change is this. Write your subject,
write what you want, C anything you want. So only thing that's
going to change is here, rows in the growth, change
by the thing that you want. Let's see the results
for exactly this prompt. The result here is this, as you can see the
prompt coin page, rows in the growth
glyphic outline. So this one for me it's
amazing. This one. It's good. Not that
bad. It's amazing. This one, I'm not
going to take it. I don't like the here. I don't like it. This one,
maybe I will take it. It's not that bad, and
it's not that good. It's not something well
and it's not that bad. It's good. I can cover it. Good. But I like this
one and this one specifically this one and this
one is amazing. Look here. I make a simple change. I didn't see in the ground. I just write cooing
page for kids rows. Corfic outline. I don't
see rows in the ground. No. I just write
simple pond. This one. This one is amazing.
This one is good. This one, I don't like it. This one the same. There
is vibration on the line. This one, this one,
I can take it. It's good. It's not that bad. This one, but this one, it's the best. This one, it's good. Now, this is another
example, calling page. Clari fic outline. I only
changed the subject. Look. This one and
I don't like it. I don't like this one.
I don't like this one, but this one is amazing. For me, this one is amazing. Let's make look for
another prompt. Here corning page for key
simple and easy Mandela, bot line art, only black and white for image
moti illustration. This one, I'm not going to take it. It's very complicated. Maybe I will take this one.
No, this one absolutely, no, but I will take this
one. I will take this one. Now, before we finish, let's make look when we change the angle view,
what's happened? No. If we make look at
this one, look here. This is the angle of. I
take this image, this one. Maybe I'll I will go with
this one and this one. This one is not that bad,
but this one and this one. Now look when I change
the angle of you. Here, look. Diagonal angle. Here I take a diagonal,
look how the image change. Look. Did you see how
the image change? If you compare to this one, it's like a drone,
take the photo. But look at this one now.
You see the difference? And when I change
another time angle. Here I say white angle. Look. Even this image
is not that good, but I just want to show
you the different angle. So look at the angle. So
you can change the angle of the photo and let me see
you the type of angle look. In general, this is the majority of type
of gle that we use. Good. Gal white close up
macro high angle, low angle. If you want to pose the
video and take screenshot for those photo to know
the majority of angle. So this is the
angle that we use. Now, a quick conclusion. So the conclusion here. For the writing prompt. Just write what you have in
your mind. Just write it. It's not that complicated.
It's not rocket science. As you can see, we choose
Coric page for kits, and we get good results. We take simple and easy to c black and
white illustration, and we have a good result. You can choose a
different prompt. He'll create a smooth line
drawing, and at the end, we say stable for Coric book, we good best result. Here, simple and easy. We just write Cing
page for kits. Simple and easy,
good good result. Coric page rows subject
and clistic outline, and we get best results, which is like, write the prompt that you
have in your mind. Keep in your mind. A, you
can make mistake as we see. And try multiple time with
the same prompt. It's okay. If you write the
prompt, you don't get the best result, give
it another chance. Write it three times
four time, five times. It's okay. With
the same problem. It's okay. We'll take
a different result. A I give you a different result, like if me and you
write the same prompt, at the same time, we're not going to
take the same result. So it's okay to try multiple time with the
same prompt. It's okay. And keep in your mind,
mistake and me and you. If we write at the same time, we'll not get the same result. Keep this in your
mind. Maybe when you go and write
specifically this prompt, you'll not get the same
result that I get, which is okay. Now,
see you in the next.
5. Bleed or No Bleed ?: First thing we must know,
there is two type of size, bled and no bled, what is bled and what is noble. Let's go to the
official website of Amazon KTP and read this
and see this example. Look. This one in
the left, this one. It's no bleat, and this one is ble What
is the difference? The difference here
is the photo here, take all the image. Take all the page. The
photo take all the page. There is no space here. She take all the page.
But this one, no. This one, there is this pa
is this little bit space. So to understand more.
Let's take an example here. Let's assume this is our page. This photo here like this. This is a bleed or no
bleed. This is no bleed y. Look, the photo didn't
take all the image. This is no bleed. If we do like that, we take this image.
We do it like that. And we take this one
now, bleed or no bleed. This one is bleed. We take all the page. There
is no white space. Here, here, here, here. This photo take all the page. If we take all the
page, we call it bleed. I like this one, like that, and let's
make this to understand. Let's take this example. We take it. We do it like
that, and we do this. Let me make this one. Yes. Good. The image now, it's here. There is a white space
here, there is space. There is space here, there is space here, and
there is space here. So this is no bled. If we take this image, and we change it, we
put it like that. Like that, and we make it this. This one, it's a bleed. It's the same as this
example look. No bleed. There is a space. Bleed
No, you take all the page. This is a different
between bleed and no blit. Now there is another
thing that we must know. The the margin, when
we put our image, when we create our page, we must do the margin if
you scroll down here. We see Amazon make quick
video and explain the margin. And we told us between
24 page and 150, you must put inside margin, 9.6 millimeter and
the outside margin. It's 6.4 millimeter for no
bled and for the bleed 6.9, what is the inside margin
and the outside margin? Let's take this
example to understand. So we will understand
by this example. Did you see those page here? This is the inside
margin, the space here. Do you see here,
this this and this, this is the outside margin. Let me show you
example by this book. Lo this and this. This is the inside margin
this place from here to here. This is the inside mark
from here to here. This is the outside from
here to this outside margin. And from here to here,
this is the outside mark. This is the inside mark
from here to here. This is the inside
martin like here in red. The one in red. It's
the inside margin, the one in blue, it's
the outside margin. Amazon told us, when
you're creating a book, if you have 24-150, you must make the inside, which is in red. Which is this one in. The space, this. You must put 9.6 millimet and
the outside module, which is this in blue, this one, in blue. You must put it at
least at least minimum, the minimum for no bleed, 6.4, and for bleed 9.6. Let's see this example
to understand. Before we go to the margin, I just want to make sure that you guys understand
the bleed at noble. This image, this image bleed or no bled. This image, look. There is no distance here, and it take the four image. This one is bleed or noblet. This one, it's a bleed, y look, she take all the paper. This one, it's bled.
One it's ble, Good. Now let's go to the margin. But if you make look
here at this book. This paper here, this one, it's a bled or noblet.
This one is no bleat. Look. There is a distance
here, the distance here, the distance here, the distance here, this one is no bleat. Look, look at this one.
This one it's bleat. Look, there is no distance.
This one it's bleat, this one, it's no bleat. Good. Now, let's do the margin. Let's start with
the inside margin. Told me where is
the inside margin. You must know the inside margin. This one, the distance
between this and this, this is the inside margin, the outside margin now, the outside margin is this, this This distance this
and distance this. This distance. So
this p this port. And this part, this
is the outside mod. This one here, this one here. This is the inside mode,
the same at this page. This one here from here to here. This is the inside margin. This is the outside margin. This is the outside margin. This is the outsider. Go, good. Now for the outside margin, for the outside margin, in no b in this
example, in no bled. Amazon told us it must
be 6.4 millimeters, so I must come here and count
6.4 millimeters from here. From here, and from here. And for the inside
margin, 9.6 millimeter. I come here, and I
take 9.6 millimeter. So I think now it's
clear the inside margin were in bled and the
outside margin we. This is the inside margin. This is the outside motion. This is the outside margin. This is the outside motion. Now for this. This is good. This is the inside motion. This is the outside margin, this is the outside margin, and this is the outside motion. Here quick conclusion, quick. This is bleed or noble,
this page bleed or noble. The page are bt good this page here. This
page, it's bleed. This one, no bled. And this one is bleed. Good, good. Good. Now, I think the
bleed and no bled. It's clear, and the motion, the inside motion, and the
outside motion, it's clear. No less srt formatting our book. So in coring book, we have three popular size. We have this one.
Scroll down here. What is it? We have 8.5 11 inch. And we have this one, which
is trending now in Amazon, this type of book,
bold and easy. We have this one, 8.58 0.5 inch. And we have this one, which
is 6.9 inch, 69 inch. We have the most popular
one in the marked 8.5 11. This one is trending now, 8.58 0.5, and this 169 inch. Good. Now, let's make
example. We go to Campa. You can use Ca photo
shop any one you want. It doesn't matter here, I'm going to create
it with Canva. You can use anyone you want. Here, I will shop with Campa. We go here. We take custom size. We take it inches, take 1.5 and 11. You can make it 8.58 0.5. It depends up the book that
you're going to create. Here I'll do 8.5 11 and
create a new design. Good. Let's say
this is our pages. The minimum is 24 page. Good. And let's start. Let's say here, we will put our first core
page. What we must do. If we put it like
that, No, it's wrong. Why? Because we have the inside
margin and the outside margin. Good. The first
thing we must do, we must do 9.6 millimeter for the inside margin and for the outside margin, if no bleed, 6.4 and this one, this one is no ble
I don't worry. I'll show you the bled,
but let's do now no bleed. What we do, we must take here. Zero, like that. This is the inside margin, like that between
24 page 03 inch, which is this one, 03 inch. Good. Now, the outside
margin for no bled, at least 0.25, 0.25
inch at least. I must come here and
take 2.25 at least. You want to make it it's okay, it's up to you, but
at least the minimum. The minimum is 0.25. Good. The same thing for here. The minimum, it's 0.25, the minimum and the same thing. The minimum, it's 0.25. Now, if you don't have
this rule, show you, just come here, sitingck here. Maybe you dwt it like this now. What you must do,
you must come here, sitting and click here, show rule and guide
or like that. So you'll have this, and you can change it as you want.
Here the minimum. Here we say 0.3 like that, and in those at least 0.25, you can put it like that, for example, for example, like that, like that, for example, and you
put your image here. Your image must be here. Like that? Your image
must be at those lines. You can't put your
image like that. No like that. No, like that. No wait. Yeah, I can
put it like that. Did you see the image? It's. Good. For example, in no bleed, if I take this image and put it
like that, what is it? Like that? No, it's wrong. Why? Look. The image must be at this triangle at this
one, the one that we do. So to for this image
to get accepted, it must be like that. From here. This one now, it's good. This is for no bled. You can for example, if you're going to do
for all your page, take here the size that
you want from here 0.3, and if you want to take this, take this, for example, and apply it for page. Put it like that. Same here, like that to make
it easy for you. Good. Now it's clear. Now, if you go to our image, the inside margin this in red, it's this, this,
exactly is this. This is the right image. This is the right
page, this page. It. Good. All what we need to do is just
put our image here, for example, this image. This mage must be like that. Got our page, page, it's read. So this page here is the
same as this page here. I think it's clear and do the same for the
rest of the page. The minimum number of
page is 24 as amazon say. The minimum is 24. Good. Now, this is for no bled. If you want to make
a bled, look what Amazon say here for the size. You must add zero g 125 for the high and 0125 for the width. So if we have 6.9 inch, we must add 0125 for the
width, and for the g, we take zero g
hundred multiple two, it's 0.5, always, for example, our book size, it's
8.5 by 11 inch. What we do? Take the
calculator. Amazon say. For the weight at 0.1, we take the calculator
here 8.5 plus. We must do it 8.6
and for the height. So here we change it. 8.6.
How much exactly? 25. And for the height.
Amazon here, what is it? Amazon say here, take
zero which is 25, but let's do the
calculate multiple two, which is zero, 25. So we have 11, we take 11 plus 025. Now we come here
and we change 25. I think it's clear.
If it's bleed, we don't take it 0.5 by 11 inch. No, Amazon add Lo Amazon
say here a add some inches, for the height at
0.125, multiple two, which is 0.25, and for
the white at 0.125. Good. Here, for this one, we add plus 020. We add plus zero, gin 125. Point. I didn't
do it. It's okay. And here we add 0.25. I think it's clear, good, and we create a new design. Good. This is four bleed. F no bled, no, you
put it the same 0.5 11 inch and we
create our design. I think now it's different
between bleed and no bled. W bleed, we don't
add nothing 0.5. 88.5 inch and UC design. If it's a bled, we add, we add ad this 10.25, and add this one, we add 025. I think now it's clear
plus This is plus plus. We do it plus y.
I think now it's clear the difference
between bleed and nob. Good. Now, I think
everything is clear. So what we must
do, we must create our corning page and
formatting our book. Then when we continue, we come here, what is it? And we share it as down. We take it not PNG,
no we take it PDF, print or PDF stater is
the same. It depends. PDF stater and we
click D. That's all. Now the interior
of our book, it. Now that's all for the C
D, see in the next CD.
6. Book Templates: After we finish creating
our coning page, after we finish our book
interior, we go to the cover. The first thing we do is we must download the template
of the cover. First step we do,
we go to Google and write KDP, cover calculated. KDP, cover calculate like that. And we click at the
first. This one. First result, click here. This is the official
website of Amazon, by the way. We go here. We selecting our book. It's hard cover or paperback. In general, in general, we do paperback in coring book, but you can choose hard
cover. It's up to you. I'm going to click paperback. The interior type, there
is three type of color, black and white, premium
color and standard color. Here we go to choose black and white because it's coring page, we're going to color it. Then we go to paper type, we choose white paper or cram paper, of
course, white paper. Here, reading direction,
of course, left to right. You have option right to left, but here we're going
to do left to right. Here, we choose
inch or millimeter. It's up to you. Here I'm
going to choose inch, of course, and here
we choose the size. There is all those size ready. Those are common size, or you choose your custom size. We have this one, this option. If you want the book
squared, as we see, we can choose this option, or we choose this,
or we choose this. Let's go with six pin
nine or 8.5 or 8.58 0.5. Let's go to six pin ne. This is here, the page count. How many page are in our book, The minimum that I'm
as allow it's 24. Look, if I write 20 like that, he's going to told me
must be between 24. The minimum is 24. In general, let's say we
have 100 page in general, maybe less maybe more, but let's say we have 100 page, and we calculate dime. So he he's going to give me
a description of the book. He's going to
explain everything. So here, number three, for example, this one. He say it's the safe area. So everything
important in our book like a font or image
must be in this spa. We'll see together when we
start creating our book cover. And here he explain everything. For example, here is pin. For example, here. This
port is exactly the sport. It's the port.
Exactly this port. For example, here, when
you see spin margin. This is number eight and
the seven spin safe area. He mean by he mean that He mean, for example, you're going to write your name
here, for example. Number seven, it's
the safe area. You must write your name, for example, at number
seven at this area. We will see together
when we start creating just
general explanation. And here, for example,
describe everything here. Here we're going to put a code, and this is our template. After we finish, we click
Dolan template, like that. You can name it, for example, or you put it like that,
Let me name it here, test and click safe. Now we go to our file,
which is this one. Test. We click here, and we exactly here like that. He give us a PDF version and a PNG version both PDF
version and PNG version. Now we go to CVA, and we click create design. You can choose Foot
Shop by the way. It's up to you, but
here I'm going to use CA and we click
Pont Customer file, no, which click and Port file. This is our PDF file. I click here. No the PNG No. We're going to work at the PDF. We click our PDF and we click
up Now here is our cover, we open it, and this
is our template. Let's make look at our template. The first thing we do, we
this one for not moving. Here, he explained to you. So explanations,
some explanations he say the barcode must be here, so the barcode is
going to be here. Let me delete this this and
this and this, the same here. Delete this. Let's understand the book. Here, for example. Here, when you're going to put your name or
something like that, like this example as we
see like this example. And here, you're going
to put the cuff. This is the front cover,
and this is the backup. So it's like this. Everything important
in your book cover, must be in the weight area
like this, in the weight area. Everything important.
Example, you have image or you
have your phone, so everything important,
must be in the weight area. This is the back area,
which is this one. This one here. The bar code, it's going to be here
here exactly here. It's going to be here, not like this one, exam is
going to be here. This is the front cover
and the back cover. Now we can start
creating our book cover. Now in the next
video, we will start creating our book see
you in the next video.
7. How to Make a Book Cover with AI: Now let's go to the
most important part. Which is the book cover. Look for creating a book
cover, you have to option. Option number one,
get all the idea in your hand and just
start creating a book. Option number two, which
is creating by AA. This is what we are going to do. We're going to create
our book cover with AA. The first thing for creating a book cover, which
is the prompt. We must write the prompt. Look. Instead of all the idea that you have in your mind
and your imagination, and you start
creating by yourself, all that, just
write it in prompt. That's all, and our book will be ready in less than a second. So let's get started. Creating a conic book cover titled flower Coring book
with elegant script. The word flower writing
in elegant style, featuring various
intricate flower. Include partially
colored flower. Now let's take a deep
look at this point. The first thing I wrote here
is create a Coric book. The first thing I say it's the subject. This
is the first thing. I say the subject. Then
title flower Corning book. I told the title, it's going
to be a flower coring book. Then I choose the font style. I told them with elegant script, and the word flower write in elegant style or in
the font that you want, if you have a name of
the font just write. Then the design element, which is various flower,
and then the background. The background, I will
explain it. Wait a second. So here, you told
me if I write this, I will get a result
of a book cover, and with the flower Coring book as a title, the A is
going to do this. I will told you absolutely. Let's make look at this example. Look here. This this
image, it's by AI. Look at the prompt. We'll
come back just wait a second. Look at this one, for
example, I like this one. Look, large print relaxing flow. So the AI is the one who created this title
and create this image. Told me, I want to change the
font style told you, wait. Look, go to here this website, it's from gram,
right, this article. Here, he explained everything. He told you the prompt. And here he told you you can use the text simple text like here or you can use the
text as a logo. So here. We just
with elegant keep, that's what we don't go deep, but you can use it as text as a logo, you
can make it like this. You can even make it like
this, look at this one. Text format by object. Look, if we make look
here, look, he say, milk come out of the class
forming the word milk. Look at the result. So you can just imagine what you
want and write it in prompt. That's all. Imagine what
how the text want to be. And writ it. And here we
give you some example. Here text as a part
of the object. Lo here. Here text as a design, here text as a logo or a design. And here, he even told you you can change
the phone style. Look. Here here, here, here, this, this look
at the font desk. Even the font you can change it, you can make it as a object as a design as a
object like this one. I like this one to be honest, or as a part of object, or you can put as a logo. So it's up to you just
write this article and use the type of font that you like and the text
format that you like. Now, let's go back
to our prompt. So here, we say the first thing, we write the subject, then
the title the font and style. Then the design element. Here, the background told me how the background, look
at this example. Here, design a large
print corning book cover. We say the subject, then
the title relaxing flower. With bold AZ to read font. So here I told them, I
want AZ to read font. We will see the
result, just a second. Then I told them highlight a large pink flower on a dark blue background
with a star. So here, I mentioned the type of background
that I want the color, what must be in the background. So you can use this one.
We don't use it here. So here we just use
design element. But here in this font, we use the design element
and we use the background. So let's see the
result for this font. This is our prompt
design large plant. Coric book covers
title relaxing flow with bot as you to read font, highlight a large pink flower on a dark blue
background with stock. So if you make look at
this one, this one, I like it to bonus, but maybe if I remove this, I
don't like this part. Let's go to this one. This
one, I didn't like it. You can even change
the type of flow. You can choose if you have
specific type of flow rows, for example, just
write it or here. I like this one. This one,
I like it to be bonus. And this one I really really liked,
this one and this one. So this is the result of
the prom that we see, which is this one,
the same here, design a large pink corn book. This is the same. You
can change everything. For example, you can
choose the type of flow. Here, I just told pink flow. No, you can change the color. You can instead of
saying a flower, you can say a rose, any type
of flower in your mind. Writ Now, let's see another example. Here, large print coring
book cover for adult. Here, I told the books for the title xing
flower volume one. If you're going to do a
series of coring book, so you can mention this part or you don't. It's up to you. Then bolts to read font here, if you noticed, I always
say bolts to read font. I want a big title big font,
but you can change it. We'll see some examples
just 1 second. Then I told the
background is dark. Blue with a large,
detail pink flower as the sun fox and small stop. Let's see example four
specifically this point. Those are the result, which let's start with this one.
This one, I don't like it. To be honest, the phone doesn't match the
background at all. I don't like it.
This one is simple. I like it. Look at the color
of the background, the rose. I like it. But this one, I
don't like it that much. But this one, I really like
look. This one I like. And even he gave
us magic prompt, we can use the magic prompt
that he recommended. Now let's see some examples for our prompt. Let's
start with this one. Look at this one. This one
is good. I like this one. This one, no, no. No, I don't like this. No this. Now, this one, I don't like it. It's the same. It's the
same prompt, by the way. Create a corn book cover, title the same, this one. So this one, it's good to b. This one is good. I can use
it as a cover for my book. Look, especially the title with the flower in it.
Look, I like this one. I can change the name, and I like this one to b. So this one, no,
I don't like it. Maybe I will go
with this one. Yes. Maybe I'll go with this one.
Let's see another example. This one, we see it, this. I like this one. This one,
for example, is for kids. So of course, you can use
a flower coining book for adult or general flower Cic book or flower conic book. F kids. It's up to you. So I
just write a simple prompt. He cover for flower
co book for kids. The background is
bright and playful, featuring simple cute
illustration of flower. The text flow coining
book in blood, fun font. He choose fun font. If you make look, in adult, I say easy to read font. B easy to read font No, I told him fun font
because it's for kids. Lo for example, if
you make look here. This type of phone is for kids, even the title I don't like it, but I like the type of I
can take only this part, for example, only the text.
Let's make look at this one. This one I don't like that much. Maybe I'll go with this one. But the B here, maybe I
will remove those B, look. They are AI generating,
I don't like them. But we can improve
this coverage. This is just a simple prompt. We can improve this pmt.
Let's see another example. This is the same, it's for kids. If you make look at this one. Maybe this one is good. Here, he and cool cover for
flower conic book for kids. The background is
bright and playful, featuring simptration of
smiling flower and butterfly. The text flower Cico bold, ff the same he fft to be honest. He understand what I say.
It's really fun font. It's focus type of font. It's focus, look at the text. I like to be honest. I
really like the font. Let's see those example.
This one, we see it. This one, I'm not
going to use it of course. This one of courts. No. But keep in your mind. This is my prompt, just
like simple prompt. You just write your own prompt. The idea that you
have in your mind. Just write them in
prompt. That's all. Here, I just make it simple, but you can use your own prompt and
write your own prompt. It's up to you. But
the thing I recommend, which is using step. Just mention the subject. The title, this is like
a simple, simple prompt, mentioning the
subject, the title, the font style, design
element and the background. How you want to be
the background. The subject, it's a book cover, the title just write your
title and the font style. This is just simple prompt. I mentioned the subject, title font style and the background. So this is simple prompt. You can prove it, you
can add something. You can add more detail, description for the
type of flower, the color, everything,
everything you can change it. Now, if you make look, even I don't write a
detailed prompt here, you give me a result like A understand me and give
me a good result here. Look what I write here. Create a cover for kids
flower conic book. I don't told them text. I
don't told the title, no. I just write large print
and for conic book. And to be honest. You give me it's not
that bad for this pump. The result is not that
bad for this pump. It's just simple pump. Of course, this one, I'm
not going to go with it. What is it? This one is good? Maybe I'll remove this. I
like this one to be honest. This one is good. I'm not
going to go with this one. Maybe this one is simple,
look at the font. It's good. He understand
create a cover for kids. He understand it's for kids, without font style,
without nothing. Told them for kids.
He understand and he gave me this funny font. Same cover for font,
the same here. No here he didn't
understand, which is okay. Another example, I
do the same here, I told him create a
cover for flower book. I told him the
text or something. I just told him that
and look, She's good to the tubs.
Look at this one. He didn't understand here because I didn't
told him nothing. I just write Lord Brant
and draw coring book. This one he didn't do
nothing, this one, nothing. But this one he
giving good results. Even I don't write
detailed prompt, he understand and
give me good results. The last example here, look, I told him create Let's open it. Create a coring book, cover title nature Cing book with organic hand drawing
font and look at the results. It's not that perfect because
it's just simple prompt. It's like those prompt. I don't try detail prompt. But of course. Maybe I'll go with this
one. I like this font. Maybe I'll go with this
one, which is simple, simple co and good cover. But of course, it's not
professional, of course. Let's now take some example. Let's take this
photo for example. Kick down and save take
another example of this one. Save Let's go with this
one here, ke safe. Now we go to Campa. We applaud our image. Let's start with this one. For example, let's
go with this one. Like that, you make
that. Like that second. To heal like that. Good. If you make look, look at the image pixel. You
must improve it. We can go to Google
and use a free AI, just write upscale
image with AI, or if you have Cva Pro, just use upscale image. I don't know if
there is in free Ca, but because I have Ca Pro I
ab and click upscale image. It's going to take
a few seconds. We click p and see the
result. This is the result. Yeah, it's good. If
we compare it look. This one is speak at it. If you compare this
one and this one. Yeah, it's better. Always upcate the image that you get from Gun. They don't give you the
image with high quality only if you purchase
their subscription. Now, let's make the back. You can put image here. Or put this one. For example, here,
Let's change the color. Let's take this color.
This one, this one. Let's go with this
one. Let's go with this one, like that. Or if I don't like this one, we can take this one, remove it. This one, for example,
like that, and I do that. Look. Of not that
good. But it's better. Of it's not that good here. I'm just showing you
an example and here. What is it good? Now, we do this pin. We take this one
here, like that. Like that. We make sure here. Yeah, everything is good. We take it. The same here. Let's change the color. Maybe we'll put it this
color. This one is good. Now our book cover. We
can add some image here. Take frame. Use any frame you want, Let me choose this
one or this one. It is the different.
Let me take this one, like that, and we put some of the coring
page in the back. For the client when
he come to pushes our book, see some image. L that, let me aloud the page. Here, I app my page. Pase this one, put
it here, this one. This one, finally, this one. He for the one who
going to buy the book, see it from the back,
see some of the photo. You can choose any type
of frame by the way, choose the one that you
like and put it like that. Now our book is ready. Let's make sure
here everything is. Yeah. Now if you
finish our book. If you want to change the
cover, it's come here, if you have another image or just want to use a sample,
for example, like that. Like that. We send the
light to the back. Wait. Yeah. Now it's good. And
we change the color. You can use this color, up to you which type of color
you want? It's up to you. Or you can choose
image like this one. Let me go back like
this. For example. It's up to you. Example, let
me change the color of it. Maybe you make it
black just second. Yeah. Change all.
Now it's better. Now our book covers ready. We do everything with everything from the beginning to the end, everything we do with. Now when we finish. Just make
sure everything is good. Put this one here,
everything is good. When we put those frame here, we make sure, for example, when you see transparency, look, the bar code, it's
going to hide this one. We put it ways here. Like that. Yeah, now. Is good. Now, everything is
good. Now everything is good. Now after we finish,
we just click Share. Down, we go to PDF and Dd. We name it, and here we go. We just create a book
cover and the interior, all that with AI. Now in the next video,
name it Flower test, for example. Lower test. Save it. Now in the next video, we will see how to alot
it amazon Cp and how to write the title at
the description. Now see you in the next.
8. How to Publish Your Book on Amazon: We finished creating our book interior and we finished
creating the cover. Now let's approach our
book to Amazon Kp. The first step, we go
Android Amazon Kp, we click the first result. We open account. It's like
opening account in Facebook. It's not that hard after we
open account a Amazon Kp. We will find this
dashboard like this. We'll find this.
We go to Create. We click at D Create. Like that. So now the first step we do, we write the book title
and the subtitle. But look, don't open
multiple accounts. Amazon allow you to have only one Amazon GP
account. That's all. For example, let's say you
have someone in your family, one open account, he must
open it in his own PC. So don't open multiple
account in the same computer. So he must have
his own computer. Amazon, don't allow you to
have multiple accounts. So for example, you open an account and open
another account, Amazon will close both of them. So you will get banned. So be careful from this.
Now, let's come back. So the first thing, we say,
we write the book title. For example, our book,
it's Flow Coring book. So we write flow Corning. Book. Now, I make mistake here. What is the mistake?
The book title. Our book. Yes, it's
flower Corning book, but look in the copy is
not flower Corning book. You must write the same
thing that exists. For example, here, you
find rose Corning book, you must write
rose Corning book. For me, I write flower
Corning book, which is wrong. I must write it the same as the book title. Keep
this in your mind. I came here and correct. Now, our book title is correct. So the subtitle, it's up to you. You can write anything you want, but you say it's optional
for me, it's not optional. I always write it for me. It's not optional. And before
we go to the next step, we must read this book
title guidelines. So here, Amazon, there is something that
doesn't allow us to do. For example, for example, I write the word free in the
title or in the subtitle. By the way, it's the same look. Here, if you read all the same
guidelines as your title. So same thing for title
and subtitle, for example, you can write a subtitle in subtitle free or best
selling or best seller. Refers to sell rank, et cetera like best
selling, for example. Best selling, you can
write free, you can write. You can write Haste tag. For example, if there is
Hashtag, you are not allowed. You are not allowed to repeat
genero keyword, repeating. You are not allowed to repeat, for example, or notebook,
notebook, notebook. You're not allowed to repeat. For example, the word gifts. Or not allowed to
repeat the word gift. You can read this. You must read it before you do anything. You must read it. Here, I just give you some idea. But be careful from repeating the keyword, like
gift, for example, you write flower coring book, gift for you write gift for me. So here you're repeating
the word gift. So be careful. For example, in the subtitle, I choose this. He if you're going to do ser, you're not going
to use it now, H, you write the
author of the book. You can write your own
name. Your real name. Or you can choose another name. It's okay, by the way. You can choose your old name
or another name. It's up to you. Now here, wet the
description, L, when it come to write
the description, you can write your description like this here, for example. But I don't prefer
what I prefer, it's click at source, and click here and
go to this website. This one HTML Online
Pc. It's free. By the way, it's
free HTML online. Pc here you write
your description and lit it formatted in HTML to understand more, let
me give you this example. For example here, I'm not
going to mention. Good. Now, for example, here,
this is my description. For example. What I must do now. I must take this hash
email take like that, copy paste and come here and paste has look and
click source again, like that. Look now. This is the best way to format
your description because, for example, if you
write it like that, let me just For example, sometime if you write it here, you will do some mistake
in the formatting. The best thing you do, it's formatting your
description here, like that, simply, and take
it as tem tag and paste. Like I show you here.
Just go to source. Copy past your description, and click again, and this
is your description. Now, for the
copyright, of course, you click on the copyright, or this is a public domain work. No, all the copyright. Here I all the
copyright. Here, no. It's a flower Cling book. No, we don't have
nothing. If you have you click yes, I no, no. Here in the age minimum. For example, here
flow Cing book, let's say the minimum age five. Maximum it's this. By
the way, it's optional. It's up to you, if you
want to do it or not. Then choose Marketplace.
For example, here, it's our book,
it's Flow Corning book. Let's say we have a Coric book. But the majority of people who use this Coric
book, it's from Canada. So it's a Canadian Coric
book, for example. So here, the primary
marketplace, I'm going to choos Canada. When you publish it in Canada, it's going to be live
in United Kingdom and United States. But the primary
market place it's for Canada here for
Amazon to understand. For example, you
make Coric book, but the people who use this type of Coric
book, it's from UK. So you choose the primary
marketplace from UK. For example, you do a Coric book for the Germany marketplace. So what is the primary
marketplace here? Germany for example, in Italy. The primary mark
pace. It's Italy. Here, you do it for
Amazon, I understand. But when you publish
your book in Italy as a primary place, yes, your book going to be in
Amazon Pong and Amazon, Canada, and Amazon,
United Kingdom it's going to be in
all those marketplace. Here. We're going to publish it in Amazon, Amazon,
United States. So I'm going to choose
the primary marketplace. It's Amazon Pc Here, you choose the category,
for example, here. Look. L et me remove this look.
You have three category. You can o. You can choose three. For example, here, I
have a flower Cing book. So I'm going to go come
here. Select category. It's Cing book for grow up. Here I'm talking adult. I'm talking adult people. And here, it's animal. No. It's Mandela. No. It's flower, yes flower landscape
and click, yes. Fashion if there is fashion, click here, fashion
safe category. You have three category,
you can choose. Then I choose here. It's cont book I
it's in journal. Notebook planner no. My book is not journal's
notebook's planner. I don't click at nothing here. Here, I don't click at nothing. Here come to keyword. Here, when someone
search for Amazon, our books can appear when we
write the right keywords. For example, for Co Rose C book. For example, our book, it's flower flower Coloring Book F for example. Here write the keyword
that target your book. Then the publication date there I release my
book for Sen now, click and save and continue. Here for the next four ISBN. I click, get a free KDPP. Here Amazon is going to give
you the PN. What is the PN? Is this a this. This barcode. This Amazon
will give it to you. So click yes, get free KB BN. Then I scroll down, I
choose the type of paper. Black white inch with
clean paper. It's this no. Standard color,
no, premium color, no, O book, it's black
and white white paper. Then I scroll down. I choose the size of my book,
size of fine book. For example, if you have
slick different size, you can choose the
size you want or write your own size here. You
can choose from me. This is the most popular
standard size in Amazon, this and this, but you can chos your own size from me or
write your own size here. Then I choose bleed or no bleed. Then the paperback cover you
want to mate all glossy. It's up to you for this. It's up to you. It's your own choice. Here I'm going to put
me, here no bleed, then plod the interior for
uploading the interior, we click here and
upload our interior. Then for the cover the same
click plod you cover file, and plod you on the cover
that we upload it here. We just click aplod and we
take the PDF file and plod. When you finish
this, we go here. For example, here, you told you, did you use AI for
generate a content? If no, click no like that. If yes, click yes I. You told you, text, you
use AI, you told them not. Translation. No. In the image. Yes, told them here,
he give you option. I use many AI generic image
with minimal or no editing. That's what I do. And here,
write the For example, use GBT, use another AI
two. Here I use Ira. I write Dogram. Then I click Lunch preview. Now, this is the view. As you can see, if there is
any error or any mistake, he will come here and
told you you have a mistake you must
fix it, for example. But for us, there
is nothing here. Everything it's good,
think it's okay. For the famil view, if you want to see it like that, to see the photo that you
create When you finish, click here and click approve. Approve, and go
to the next step. We scroll down again, and click save and continue. Here the printing cost here
to the printing cost in Amazon Pono here in Italy, in French, United Kingdom, in Canada, click Save, continue. So the less step here, it's pricing our book. Look here, it's up to you
for pricing your book. For example, you're going
to price your book 999. This is the printing cost here. This is how much money
you're going to make. This is here, the same here for the United
States marketplace. Here for the United
Kingdom This is the pent cos, how
much money you make. This is for example, French, for example,
this is Canada. This is the pent cos, how much money you
make when you finish, if you request a proof, for example, to see your book before it's
being going to be live. Just click Quest Book proof. If you don't, you don't want
our question book proof, just click publish
your paper B book. So you click here and it's
going to take one, two, three day to get prove it
and be live in Amazon Poco. So this is how we publish
our book in Amazon. Now, what I want you to do? I want you to publish
in the project section, your book cover like that, and show me the interior of
your book in the back cover. So this is your project. I want you to take action to go and start creating
your book cover, and the book interior
the coning page. When you finish, just
submit the book cover. And in the back cover, show me the image
that you create. This is your project. So
you must take action. You must do it. Not
only just watch me. No. Go take action, and do it and submit in the
project section. I'm waiting for you
to see your work. By the way, just try. It's okay. Just try
and show me your work. I'm waiting to see your book
in the project section. Now, that's all for this
video, see you in the next
 Ahmed
Ahmed