Transcripts
1. Welcome to the Class!: Welcome to the class. I'm glad, and I'm so excited to
walk you through one of the coolest projects you'll
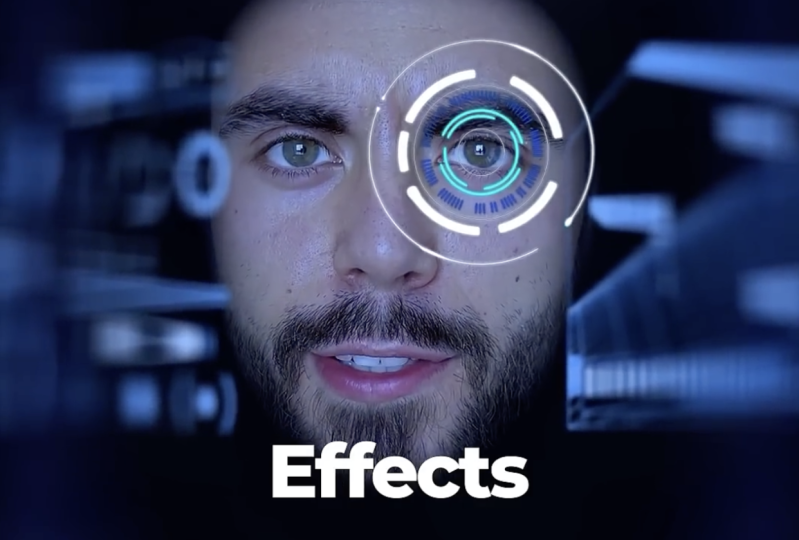
ever do after effect. Becoming an Ironman. In this class, you
learn how to create the iconic Haup display effect
from the Iron Man movies. Step by step, we'll go
from raw footage to full blown cinematic
V effects shot. Here's what we'll
cover together, how to import your footage
and create compositions. Mask and roto brush your
face to isolate it cleanly. Your facial movements, where to get the heads up
elements for free, how to mask, add Luma
keys, track mats, and animate everything in three
D spans, how to add haze, camera focus, noise, and colors to make
everything look real. You'll also learn how
to use null objects, three D cameras,
top view previews, like a true VFX artist. Don't worry if you've never done this kind of effect before. I'll walk you through
every single step. Whether you're a
beginner or just looking to sharpen
your VFX skills, this class is about having
fun while leveling up. By the way, don't worry if you don't want to record yourself, I'll provide do
food shop myself. Just the speed and the
quality of the video by clicking the settings icon in the bottom right
corner of your screen. If you get stuck or
have any questions, be sure to drop them
in the Q&A section below. I'll be
there to help you. Finally, when you
are done, I would love if you could share
your own experience. It will help hundreds
of future students in deciding the best
course for them, and it also helps me to
know what I'm doing well. All right. Let's
power up the suit, drop into after effects, and create your own um and hot. I'll see you
in the next video.
2. Part 1: Cut Yourself Out & Track the Face (Masking + Rotobrush): Welcome. You know the deal. So let's jump
straight into this. In the resources section
below this video, you will find a
link to this file. You can download this file
and practice on this file, or you can create a very
similar video of yourself, record yourself, and
it's going to be enough. So it's just me looking at the camera and
saying how to create this effect in after effects. This was actually a
video for social media, so that's why it's in
the vertical format. However, it doesn't matter. If it's vertical or horizontal, we are going to create
it in horizontal. It's exactly the same for
the vertical content, but in the original, and this is the original,
Tony Stark has it. Well, because it's a
movie, it's horizontal, so Go ahead and
download this file, and then let's import it. And by the way, we are going
to use this step by step. When I did it the first
time, these are like, 95% of all the steps. Maybe I missed one or two
steps here, or actually, it's a description of what
to do with the effects, but this is everything
you need to do. You can technically pause the
video, take a screenshot, and then just follow
these steps or you can see how it's actually done in real life, whichever you prefer. So we imported the footage, and we'll create a composition. We just track this clip here. Increase composition.
The composition that's created is exactly the
same size as the video. So it's 1920 by 1080. You've pressed Command
key or Control key, we can actually see. So 1080 by 1920. Let's see the next step. Create composition,
select the clip and create a mask
around the face. So this is very interesting. You can create mask if you press on any of these
or you can press on Q. So let's say I have a person
V and I have selection tool, I press on Q, it's going
to select the rectangle. If I press on Q
again, it's going to select rectangle with
rounded cordiners. If I press on Q again, it's going to select
a circle or an oval. Okay. So I will create
a mask around my face, by the way, we will copy. So we'll call this one in case in case
something goes wrong. Okay. For this one, we will create a
mask around my face. I will move a little bit
further because by the way, let me completely
dislike this one. The reason why I moved a
little bit further is because I want to see my face in fold, not just the side of
it, but the full face. And after that, go to the top right corner,
motion tracking. And here, we're going to select face tracking
outline only. And by pressing here is going to select to
track the mask forward. And let's do this. Okay. You can see
what's happening. And this is what I did. And now we'll just come to
this to the first frame. We can press on you to make sure we actually
opened the key frames. And then what happened here? Okay, I just pressed
Commands and do that. I'm not sure what happened,
but okay, track forward. And then we will track
backwards as well. Okay, so we have the mask, and we have the face create a
mask around the face. Done. Oops, tract the mask, and now we're going to rot across the face to
make it even better. So we can come to
vertical for now. And we're going to
press actually, I have a shortcut for
myself, Option W. I'm not sure if this is the one that was created by
D that's default, but if you want to
chinge your shortcut, you can press Option Command, then apostrophe, and
it's going to open, or you can just
search for shortcuts, keyboard shortcuts, and this is the shortcut to
open the shortcuts. And anyway, to open
the roto Brush. So we are going to roto Brush, double click on the video, and now we're going to
Roto Brush myself. Okay. Don't worry that it selected me like this. It's not a problem. The reason we're
doing both the mask and the roto brushing is because the mask
kind of isolates the area that we need to
select and the roto brush, then does it even further. So you can see we will kind
of cut the nose a little bit, but don't worry
because we'll then increase the feather of the mask and it's not
going to be a problem. So let's press on space. By the way, the shortcut to
minimize the screen is shift, and then this sort of not
sure this one, this line. Okay. So I'll press on space. Okay, let's just double
check in the very beginning that so good. So good. Now we're going to open
it and press and freeze. The way I opened it is by pressing I think
it's called Tilde. Something like that. I'm
sorry for the pronunciation. By the way, it might be a
little different on Windows, but you can always
open the shortcuts and then double
check for yourself. Okay, let's close and open it. We'll go to effects Roto Brush. And by the way, we are
going to close the layer, the open layer, we're going to come back
to the composition. So now you can see it's
a little bit better. If I was to select
the roto brush, you can see we have
this white line, and without it,
it's a lot better. So now we're going
to come to here. We're going to
increase the feather so that it's a
little bit better. Shift edge. We're going to
do a little bit inward. I mean, you just play around with the footage
the way you like. If you're doing
yourself, play around if you are doing something similar. If you are using my footage, then you can follow along. What we're trying to do
here is just to minimize the white stuff
around my face so that we are just like
the iron man. Okay. So this is enough. We
did the rote brush, increased the feather,
decrease the shiftge. Mm hmm. Now we're going to
track the eyes. Great. Okay, now we'll come
back to the motion tracking. Why do I have two, by the way? Oh, I know why, but
it doesn't matter. We're going to use
the two later. So we can track motion, and we can track
both the position, rotation, and the scale. And I think it would be
easier to do it with position because the first time I did it, it's not perfect. This tracking, especially
with the face tracking. And you can kind
of track camera, but for some reason, it
doesn't work on this footage. So that's why we're doing it a bit more manually
with this footage. But this way, you learn more. So if you check the
position, rotation, and scale, so if I choose the
two, any of the two, right, it's going to create a
second tracking point, and by the way, does it always have two now, if we close it, and
then we track motion? Okay, so in the beginning, if we have just the position, we're going to have
just one tracker. And it's a lot easier to do it with one tracker
than with two. I mean, it's easy
kind of overall, but it's even easier
if you have just one. So let's try to do it with one. Basically, we need
to find a point and then track that point. And the thing with my face
is that when I move here, if I choose anything on the
right side, it's hidden. So let's say I choose kind
of this point on my face, and then when I join like
this, it's kind of hidden. So we'll have to do a little
bit of the manual work. So actually, let's
choose this space here, and then I'll show you
what we do with it. So we selected, and then we're just
going to increase this. Both of these things do is
we are setting the point. This is the first rectangle, and then the second rectangle is saying relative to other stuff, where is this point located? I believe that's how it works. Okay, and now we're going to
press Track Analyze forward. Okay. And you can see we
are already losing it. So we can just come back to the point where
it starts losing. I can move in the timeline
frame by frame if I press command and then
go with the arrow keys, and then I can see
exactly where it went wrong on this frame. So I will just put it back and
analyze one frame forward. Okay? Next frame was okay, and so we can continue. Ooh. What happened? Okay. So we just
find this place and then put it back light
forward. Not perfect. Forward. Not perfect forward. I think it's because
of the motion blur this is happening. I'm just putting it to this location until
it works properly. That's how I know it works best. Or at least in my experience, it works best like this. Here's the interesting
thing about this. We can now move the
tracker to another place, and it's going to analyze it relative to this other place. So if I press on option, you can see the
cursor turns white. When it turns white, it
means if I move the tracker, it's going to track
basically this position, but relative to another place. So this is what
we can do because it's not visible very well here. So we can track it based
on this dot on my face, or whatever this is calledon. So by pressing Option
or Alt on Windows, this is what you can
do and track forward. It's tracking well.
Let's track it forward. Oops. It was pretty well
until it wasn't Okay. Forward. Okay, I think
that's it, right? Yeah, this is the end. Okay. Option this line, I don't
know what it's called. And now we're going to press
Shift Option Command Y, to create a null object. On PC, basically,
instead of option, it's Alt, instead of
command, it's control. So it's option Alt, control, Y should be like that. And we're going to edit target. We're going to select
a null and press Okay. And then we're going to
press Apply X and Y. Okay, what we did is we put
the tracking into the null. And so whenever we attach
something to the null, it's going to follow this
path that we just tracked. Let's see the next steps
to track your eyes. You know, you can
track your eyes, you can track whatever. So we created the null and we applied track into the null, go to Freepik and
search for HAT. So something we can do freepi And you can
download stuff here for free, and we can search for HD. By the way, I'm not
sure if it's pronounced Hot or something else. You can download
whatever you like. Hm. By the way, this is premium. So let's see free. Okay. This one is interesting. We'll download it.
Okay, and then we will take it out of that. I'm not sure what EPS is. I asked HPT, but
I don't remember. So we'll just put it here. By the way, what we
could do is we could just grab it and put it here first, and
then put it there. But I just put it there. Doesn't matter. Okay,
import drug into the comp. Okay. Mask it out by selecting grade. So first of all, let's press Shift Option Command
Shift Option command H makes whatever layer you
have fit the screen. If I press Shift
Option command G, it's going to make
it fit vertically. Shift Option command
H fits horizontally. So we're making sure that
it is in the screen. Now we're going to select the rectangle tool and we're going to mask
out whatever we want. So let's mask out
this error, this map. So Something like that? Great. Apply Luma key. Luma key. I'm using the effXs
console by video copilot. It's what this thing is called. If you don't have it,
you can just come to vertical or to default. And then in the
effects controls, you can search for Luma key, and it's going to be
exactly the same. So key out darker. This is how it is. You honestly, just play around a little bit
with these settings, based on what you download, it's going to be
slightly different. But overall, Luma key is
going to work great unless you download something
that's completely different to what I downloaded. And you can see right
now it is like this. It's like transparent,
pingyi Luma, make Hod three D.
Let's make it three D. You can switch this view by pressing Control S
or by pressing here. I'm not sure what the control
equivalent is on Windows, but take a look
at the shortcuts. Okay, we'll make it three
D. Parent it to the null. Let's parent it to the
null. To the null. So now it's going to move
with my face. Perfect. Now, we need to
animate the rotation, this kind of rotation
because you can see, it doesn't rotate like that. Let's find a start moving here. We'll put a keyframe here. We'll go a little bit further and going to move it like this. By the way, we're going to
work with the position. Don't worry. We're just
animating the rotation. Copy paste because I'm
seeing the same position. I start moving from here, and then we will move it
to something like this. So let's see how it works. We can even rotate it even more. It should be like that. Copy K to go to the next
keyframe and paste it. Okay, great. Now, let's
change its position. Let's see if this works. Okay, so now we
just need to play around with this position. Honestly, a lot of it
is just stylistic. So whatever you like. I think the way this
looks is pretty good. I think we can just drag this
a bit further. Okay, great.
3. Part 2: Build & Animate the 3D HUD (Nulls, Camera, Effects): So animate the rotation,
create a new camera, so we can press Shift
Option Command C. This is rocket to
create a camera. Great. Now, is this
the camera view? Yes, camera. Great. Let's make the next two steps. So make sure you select here, and then you can come and
search for new viewer. Okay, New view. So it's in view. New viewer. And here, we're going to select
Custom View three. We need to select the top. The reason we're
selecting the top is because and just overall, why do we have a camera? Because this is the focus point. It's like, on your phone or on a camera whenever
you zoom in, some things are in focus, some things are out of focus. The reason we're
doing this is to create this three
D effect so that the part of this d that's closer to the camera
is going to be in focus, and the stuff that's outside of the frame is going
to be out of focus. Wonder why it has no blur. Okay, after a couple of
back and forth with AGPT, I was able to
identify the issue. So make sure if you're
having the same issue. I was using the
advanced three D view, and we need to use the classic three D. So if I
use the advanced three D, you will see that if
I create a camera, this part is grade
out and doesn't work. If e's okay, npapres here and camera options,
I only have Zoom. But if I change it to where
is this classic three D, now you see that we
have camera options, a lot more different options. Okay, so it's like this will
come to view, new viewer. This is the focus distance. We have our Hud here, and you can already see that the back of it is a lot more
blurred than the foreground, which is great, which is
what we're looking for. So now we just need to place
it in the right direction. Let's take a look
at the next steps. Let's double check
that it's correct. Change the position of it. Move it a bit closer. So now you can see that it
is very good quality here. It's in focus, and there
it's out of focus. We can also increase
the aperture and, you know, make it like that.
But it's really hard to see. We don't want to go too
much. Okay, this is great. Check the next steps. Okay? Double click on
the rectangle to make it full screen. Why
are we doing this? Because we want to create
something interesting. Actually, before we go there, let's create another.
This is the one, yes. Okay. I will duplicate. I will close this camera. Actually, let's do it the
other way. Where's this one? We'll drag it into
the compass again. We'll make sure it fits to make sure we
can see everything. Let's do something else.
Let's add something else. Let's add, something like this. Okay, we will just
come to this one. Copy we'll come to the effect. We'll copy the luma ke and paste the luma key
onto the new one. We'll make the new 13d
actually before we do that. Let's make sure we put
it somewhere over here. Let's make it three D. And let's parent it to the
null. Why did I come here? Because when I place it here, basically, the rotation is perfect and the
position is perfect. If I parent it here, whenever
if I move back and forth, it's going to stick
from this point on. So see, see how it does it. By the way, we can change
the position of this thing. The Yeah. Okay. Let's do the
animation for this one, as well of the rotation. So we will rotate it
probably like that here. We'll come here.
Make it like this. Here. Oh, it's the same, and then come to the
end and rotate it. Something like that. Now, we're just going to change
the position. But by the way, let's
open the new viewer. Change the position,
bit to left, bit to the fronts
that was in front. This is front.
Okay. Let's change slightly the position
of the other one. Move it a bit to the right. So this is what we
have. Take a look. Of course, we can change
the position a little bit, move it a bit to the left. This one a bit to the right like this so that
there is a bit more space, more room to breathe. Okay. Double click on the
rectangle tool to make it full screen like that, and we'll put it to the bottom. Create an ovel and track met it. We're going to create an oval. Something like that. Let's put it in the middle. And I was creating a
mask. Apologies for that. I was creating mask for in case. Make sure that
nothing is selected, and then we are
able to create it. We'll put it in the middle. And we're going to track mat we're going to call this haze. We're going to
track mat the haze. To this one to the oval, and we're going to invert by pressing here
to invert the mat. So now we cut out the
hole in the middle. We're going to put this one to the bottom so that these are
let's rename it to oval. To rename something,
compress on enter, and it's going to
start renaming. And let's make these guys three D double check about
their position. Because it might not be the
best position for that. Yeah, let's put it up
top like that. Okay. And now let's parent
the haze to the oval, so the rectangle to
the oval so that we can just animate one of them, and we're going to Move it. Mnh mnh. Let's not do that. Let's not parent it. Let's Let's we're basically
moving closer to the camera. Let me let me open the new
viewer so that you see. We are moving it
closer to the camera, as you can see, like that. And at the same time,
we are going to make it smaller so that by doing this, we are able to S, Shift P to open both of these, this way, we can create
this very blurred edge. There are many ways
to achieve this, but this is just
the way I like it. Can we, we cannot put it
in the middle this way. So let's just
change the position to move it a little
bit like that. Okay. Super. Now, we made it three D. Now let's apply the
turbulent noise to this thing. By the way, I'm sorry for
the background noise. The hailstorm just started. Okay, turbulent noise,
turbulent noise. And now we're just going to play around with the
settings a little bit. So you can see it
created this kind of interesting texture, right? And we can actually
animate this texture, and it's going to move a
little bit with evolution. So we can time the
evolution here. We can press on you and it's
going to open the animation. And then we're just going to, you know, draw a
couple of circles, and let's see what kind
of effect we have yeah, you can see some stuff is
moving around a little bit. We can actually create another. Let's press Command Y or
Control Y and create a solid. It's going to be our background. We're going to put it
to the very background so that the background is dark. And then we are going to
decrease the opacity. We can press on T to open
the opacity and decrease the opacity of the
haze that's around. Now you can see,
slightly animated. Yeah, it has a little
bit of movement. We have this interesting
three D effect. For my face, this
is my face, right? Okay. We can actually
open the roto brush tool. So we come to
effects, Roto Brush, and we're going to
increase the feather. A bit more and decrease the shift edge so that
it's not as abrupt. So the way it used to be, like, a bit too abrupt, and we just created a bit more
like a shadow, so that it's not as a probe. You can do many different
effects that you can add. On top of this, to
make it even better, this is sort of what I created, then that's it, to be honest. Now, let's try to
make it horizontal. So we will just in case, actually, we can just revert it. So we'll make it 1980 by 1080. Mm hmm. So everything
is staying the same. Now we just basically
need to rotate. And now we're going to
parent the haze to the null. We're going to rotate it 90. We're going to rotate it 90% so that both are
rotated for solid. We're going to
rotate it as well. And we'll make sure we'll just make sure to put
it because you can see, like, at the edge here,
it's not perfect. Actually, it's come to
vertical to see better. We can increase the
scale to a bit more. Okay, let's see what we have. And we would also need
to increase let's connect the null to my face and increase the increase my face so that It looks like this. Maybe let's put it
a little bit lower. I'm just trying to
achieve the same effect as Robert Downey junior. So what do you guys think?
Have we achieved it? Obviously we can add
a bit more stuff. We can I think the
biggest difference here is having a lot more on the screen in terms
of the heads up display. So he's definitely got a lot more of all sorts of animations
on the screen happening. We can change the
blending mode or we can change the color on my face as well because I look
pretty orange, and there's no because you can see here is kind of
the reflection is orange. Here is blue, so we can
try and make myself blue doing by adding
the metric color. And making the
temperature bit color. Let's try to increase the
scale of both of these. S Los and change the position
for it to be higher. Great. Et's just change
the position of this guy. Oops a bit to the right so
that we have more room. I would decrease a little bit here because we can
see the white wall behind. It would be best to record myself with the
black background, which is what they
did in Marvel. I'm pretty sure it was
in the white background. So let's come to my
face. Rote brush. Shift edge to a bit more the mask ate a little
bit of my nose here. Okay, let's decrease
the feathers slightly. We could probably try
and use it without mask. So let's run it out. Let's see. So what do you guys think? The only thing I really,
really don't like is that my nose has cut out, but this is something we
did with the mask, right? If we were to do it
without a mask and do it just with the htoprstol,
it would be better. So that's one way we
could make it better. Other than that, I really liked the way
the three D looks, the way it's all animated. Oh, it's so good. By the way, one trick that I think when I
studied photography, I was taught that that when you want to put
things together, they're not supposed
to be together. You want to make sure
you overlay some sort of effect on both of them,
and it looks better. So in this case,
we could also add some sort of like an overlay, like another haze on top, which is something
we can try and do. We're just not
going to export it, and it's going to look
a little bit better. So we can actually do the W is this so let me select
everything, close everything. Let's duplicate the
oval and the haze. We're going to we're not
going to do the luma. Sir, we're not going
to invert the mat. We're just going to add
this sort of effect on top. And I think we can just decrease the opacity in this case. How is it that with opacity
zero, it's still visible? Okay, maybe. Oh, yeah, this is the one we
need to decrease. So now we're going to
have this very slight, you know, just a
little bit better so that they are both
under the same effect. It's just going to sell
it a little bit better. Okay, so we went through
every single one of the seps, apply turbulent noise, repeat
it for the other hods. Repeat is just kind of
last couple of steps. From masking it out
to about this point, it's just making the
same seps for the hods. As you saw, it's pretty
quickly to do it, and this is the effect. If you have any
questions, let me know. But other than that, you'll
see in the next video.
4. Class Project: Submit Your Iron Man-Inspired Edit: Video, I like to share how you can share your own project. Below this video, you can come onto the project and resources. On the right side, you can
press and submit a project. It would be great
if you could share your own experience
because other people can learn
from you as well. If not, no worries, you can just past the link here and publish. If you have any
questions, let me know, but other than that, I'll
see you in the next video.
5. Last step!: Well, I hope you had
fun during this class. If you haven't
created your video yet, go ahead and do it. As Kafuha said, a journey of 1,000 miles begins
with a single step. Lastly, if you found value,
learn something new, I would really appreciate
if you could take 60 seconds to leave
you honest feedback. I'm super grateful to you. A feedback will massively help future students in deciding
the best course for them. If there's anything
you need, don't hesitate to reach out to
the Q&A section below. Thanks again for choosing
me as your instructor, and I'll see you in
the future class.
 Vladislav Sateev, Video Editor