Transcripts
1. Introduction: This class will show
you how to create a Spoonflower shop
in minutes and sell your pattern designs to the world, all while
working from home. Hey there, my name is Maria. And if you're like me, you
love all things creative, especially when it comes to designing your own
repeat patterns. But sometimes navigating
print-on-demand platforms can leave you feeling
confused and overwhelmed. That's why I created
this course. I'm so excited to
show you just how easy it is the open a
Spoonflower shop. Spoonflower is a
great platform for designers of all levels,
from beginner to expert. Whether you're just starting or have been designing for years, this class will
teach you everything you need to know
about setting up your Spoonflower shop and getting started with
selling your art. I'll be walking you step-by-step through the entire process. But before we begin, let me tell you a
bit of who I am. I've always loved art
and creating things. In 2012, I stumbled across a Spoonflower
design competition. I entered the
challenge on a whim. It was the first time I
created a repeat pattern, and honestly, my first
attempt was a struggle. But I eventually figured
it out and placed third. I was hooked on pattern
design from that point on and it has truly
changed my life. Now, not only am I a power
seller on Spoonflower, but I'm helping
other designers sell more than they ever
imagined possible. And I can help you do the same. So let's begin, continue to the next video to learn
about the class project.
2. Class Project: Welcome to the class! I'm so happy you're here. The project for this
course is simple. Under the Project
and Resources tab, you'll find a follow-along worksheet that
you can print out. This worksheet will
help guide you through the setup of your Spoonflower
shop--step by step. It will ensure you
don't miss any actions, and it will give you a
huge advantage over the others who are setting
up their shops right now. Because I guarantee you
they will skip or neglect some important
steps that make a Spoonflower shop the
powerful tool it can be. You'll want to watch
the videos though, as I'll share a
lot more tips and information that you won't
find on the worksheet. Once you've viewed
all the videos and fulfilled all the
steps on the worksheet, your shop should be live. Take a screenshot of your
new Spoonflower storefront, then head back to this class's
"Project and Resources" tab. Click "Create Project"
and follow the prompts. When you're done,
click "Publish" for your project to show up
in the student gallery. If you already have an
existing Spoonflower shop, you will take a screenshot
of your revised storefront. Posting your class project is a great way to show that
you've completed the class. It's also a lot of
fun to get to know, support and interact
with your classmates. Okay, let's move on to the
first part of this course. In the next video, you will
learn more about Spoonflower.
3. What is Spoonflower?: I want to begin this
course by giving you a brief overview of Spoonflower. Spoonflower is a digital,
print on-demand platform that allows anyone, from professional
designers to hobbyists, to upload a design and
have it printed on fabric, wallpaper, and home decor items. And, most important: you always keep the
rights to your work. Spoonflower offers more than
25 fabric basis to print on, plus non-pasted, prepasted, and peel-and-stick wallpaper. Spoonflower describes itself
as a global marketplace, with a community of over 25,000
independent artists, all empowered to make a
living doing what they love while also allowing
buyers to find the unique pattern
designs that they love. As a part of the Shutterfly
family of brands, Spoonflower increases what
Shutterfly users can create, customize, and buy by
connecting them to the Spoonflower marketplace of more than one million designs. Are you ready to turn
your dreams into an online business and start selling your
pattern designs? Go to the next video, create a Spoonflower account,
and let's get started.
4. Create a Spoonflower Account: Nothing beats making money doing something you love. Seeing others use your
artwork to create amazing things is both
rewarding and loads of fun. Creating your Spoonflower
account is super easy. All you need to do is go to Spoonflower.com/register/new, and fill out the
registration form. The screen name you enter here determines the name of
your Spoonflower shop. In the next video lesson
naming your Spoonflower shop, you'll learn more about
selecting a name. You must have an
account in order to get your designs printed
on Spoonflower fabric, wallpaper, or home
decor products. And a great part about having a Spoonflower account
is now you have a platform where you can sell your designs and
start making money. I'll let this sink
in for a minute. Let's take a step back and
look at the big picture. You can sign up for a free
account on Spoonflower, set up an online shop, then create and upload
any of your designs. And, here's what's even crazier. Not only the Spoonflower provide
this platform to work from, but they will also promote
selected designs on other well-known
platforms, such as eBay, amazon, Etsy, and more. You will need to opt-in to expanded distribution
for this opportunity to sell on third-party marketplaces. Spoonflower then
pays a commission based on the sales
of your designs. When you think about it,
it's a pretty amazing thing: a provided platform
where you don't have to worry about inventory,
production, shipping, customer service, or driving traffic
to the platform. And with a wide variety of
designs to choose from, the platform appeals
to thousands of customers every day who are searching for
something unique, interesting, niche, or on trend. Sarah Ward, Senior Vice
President of Brand marketing, once challenged anyone to
search for something, anything, and if they couldn't find it, to let her know. As far
as she was concerned, Spoonflower had a design for everything. However, in my experience, design topics are
far from exhausted. Even though hundreds,
maybe thousands, of topics are
already represented, I continue to find subject
matter not designed for yet. And when you do find a
new, untouched niche, you've unlocked one of the keys to success for this platform! To demonstrate my point, I'll provide a few examples. According to the Parkinson's
Disease Foundation, about one million people in the United States
have Parkinson's. However, I could not
find one design on Spoonflower when I
first looked for it. Today, there are only five,
four of which are mine. Here's another one. All over the world, thousands of kids prepare for their First Holy
Communion every year. How many designs would you guess are on
Spoonflower for this? Well, let's take a look. Less than one page! You're looking at a very
low competition niche. And that's why come
March and April, I'll start seeing
sales for this design. Finding a popular topic with low competition is
like striking gold! You can get started by digging into your own interests and hobbies and checking them against what's already
on the platform. You may be surprised by what
you find. Or don't find. In the next video, I'll dive into naming your
Spoonflower shop. Should you use your
own name or not?
5. Name your Spoonflower Shop: The first step in creating your storefront is
deciding on the name. Should you use your
own name or not? You can go either way. Some people are comfortable using their names,
and some are not. So use whichever is most
comfortable for you. Using your own name for your shop does have
some benefits. The most important is
that it is unique to you and probably not something
anyone else would select. Using your name also gives a more personal touch to
the art you've created. Imagine how strange
it would be if we remembered Picasso
as Artsy Abstracts? I hear some of you saying, yeah, but you don't have a name
like mine! And you're right. Often, some names can be
hard to pronounce or spell and are probably best avoided when
naming a business. A pseudonym might
instead work better. Andy Warhol simplified his
name from Andrew Warhola. The main point here
is to keep it simple. You may also want
to use a pseudonym if you have a common name and prefer something
more unique. Pseudonyms are also
used to conceal one's identity for
privacy purposes. If you don't want to
use your personal name, there's nothing wrong with creating a unique business name instead. Think about a name that's long-lasting
and non-restrictive. That is to say, choose a name
that will allow you to grow. You never know where you will be in five to ten
years from now. For example, I would shy away from names that
include your location. What did you decide to move? You'll also want to avoid names that include your art's medium. Words like "watercolor"
and "pastels", can be restrictive
in the future. What if you fall in
love with creating digitalized art? And adding
product lines to your name, such as home interior designs, can be another limiting factor. You may decide later
that you don't want to design for the home
decor market anymore. Instead, you prefer to design cute animal prints for
children's apparel. All this to say, consider a business name that allows you to pivot as you grow. It's difficult to predict
what the future holds. Your business name will be
with you for a long time. Make sure you like it and
think your customers will too. Okay, now that you've
decided on a name, you should check
its availability by conducting a thorough
Internet search. You'll want to know
if anyone else is using the name you
are considering. This will also be an
excellent time to secure the.com domain name. You can check on
the availability of a domain name on sites such as GoDaddy.com and
NetworkSolutions.com. And make sure to grab your
desired business name on social media
sites like Facebook, Instagram, Pinterest,
and LinkedIn. Brandsnag.com is a free
website that allows you to quickly check if
the name you are considering is
already being used as a domain or social
media username. Even if you don't
think you'll need a domain or social media
presence right now, it will keep others from using
a name on those platforms, which might confuse
customers down the road. Plus, you might change
your mind later. Now get out there and
make a name for yourself! The next video, will
show you how to create the visual elements
of your storefront.
6. Build a Spoonflower Storefront: First impressions matter and your Spoonflower shop
is no different! Your storefront is the
first thing buyers see when they arrive at
your Spoonflower shop. And for many, their
first impression of you as a designer. Outstanding shop
elements, such as a compelling banner
image, and engaging profile, and a well-written bio, are essential to making your
visitors feel welcome. The graphic header that
appears at the top of your Spoonflower shop
is known as your banner. It's entirely up to you
how you want to style it. This is your chance to express your creativity and make the
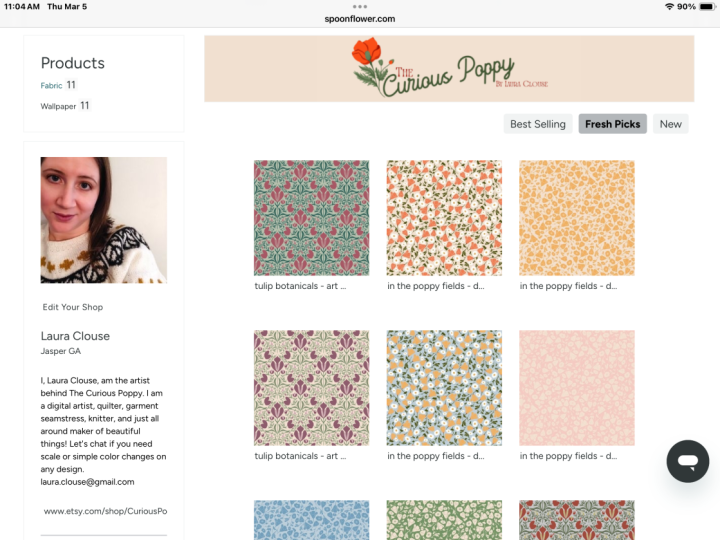
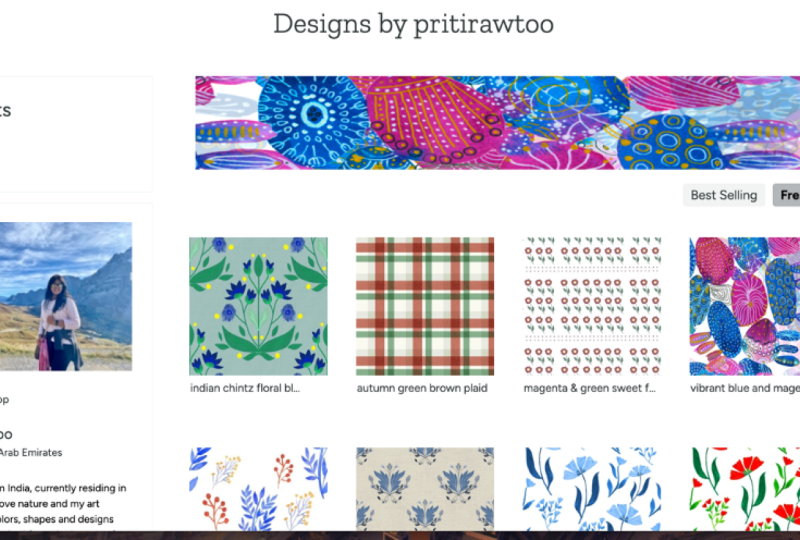
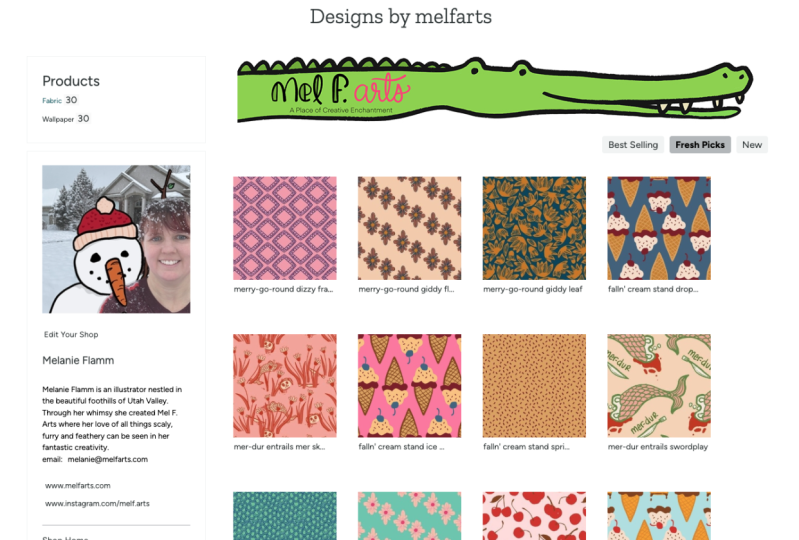
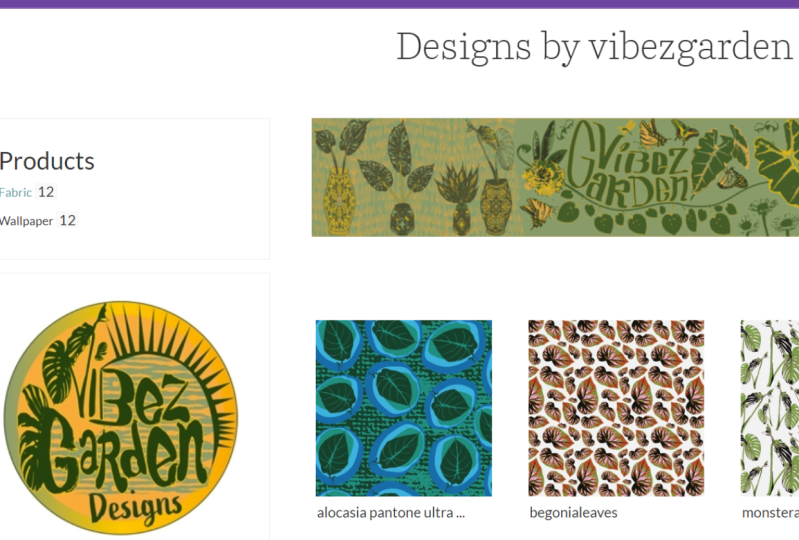
shop unique to you. For inspiration, here
are a few accounts I think have done a great job. Your banner art should
be the same style as your pattern designs for
unified and cohesive look. Some designers display
a medley of their work and often change it to reflect
the holiday or season. The banner is also an excellent
place to put your logo if you have one. You'll want to save your banner
file with the dimensions of 868 pixels by 117 pixels, ensures that it will fit proportionately
without distortion. The file size must be under two megabytes and saved
as a JPEG or PNG. To upload your banner image,
click on "edit your shop." You will then see this section
to "Upload a shop banner." Click "Choose File" and then "Upload once the
file is processed. If no banner is uploaded, a generic banner
that says "Designs by me" will appear in its place. Don't let that happen to you. Upload your own banner design. To make your shop more engaging, you'll need to add
a shop image, also referred to as
your profile pic. I recommend that you use
a photo of yourself, as people like seeing
who they support! Don't be shy. Your audience wants to see your face, and it will help
make your shop more personal. You can also use
this self-portrait if you don't want to
use an actual photo. If you do not wish to
use your own face, a logo will do. Designers have also used examples of their work
as their profile pic. You'll want to save your shop image with the dimensions of 250 pixels by 250 pixels. Images with dimensions
over 250 pixels will be cropped and re-sized. The file must be under 500 kilobytes and saved
as a JPEG or PNG. To upload your shop image, first. go to "View my shop" in
the user drop-down menu. Click on "edit your shop." You will then see the option
to "Add a shop image." Click "Choose File"
and then "Upload" once the file is processed. The more personality
your shop has, the more people
will remember it. Your 160 characters bio is the perfect place to show off your personality and let potential customers know
a little more about you. Be sure to keep the tone
friendly and informative. Many designers share their
Instagram handles and prompt customers to tag
them and project posts using their designs. Others use it to inform buyers about their availability for customer requests or licensing and include their email
for such inquiries. Whatever you do, don't
overlook this section. This small space can hold
a lot of information. Finally, don't pass up the chance to include
to external links! To upload your external links, first go to "View My Shop" in
the user drop-down menu. Click on "edit your shop." The "Optional Links" prompt will ask you to add your
store and blog links, but these can be
anything you want. It's up to you what goes here! You can share your website, blog, or Etsy shop
with the world. It's also an excellent spot for designers to link
their Instagram, Facebook, or YouTube channels. Now that you've completed
your shop elements, it's time to start adding
in your pattern designs! The next video will
go over how to save a design file for success.
7. Design Requirements and Upload: Learn design file
basics and how to upload your artwork into the Spoonflower
Marketplace effectively. When creating a
Spoonflower design, make sure to use the
accepted file type, file size, and color
mode requirements. Your files should
be a JPEG or PNG, and saved at your preferred
print dimensions at 150 dpi. When uploading your
file to Spoonflower, it needs to be
under 40 megabytes. Spoonflower prints all
products in sRGB color space, so you need to save and
upload your designs in this mode rather
than CMYK or PMS. Check the colors of
your art against a physical example for the
best final printed results. A design displayed on
your computer screen is an unreliable representation of the printed color
from Spoonflower. Also the printed version on your home printer will not be the same as the
Spoonflower print. The inks, materials, and
technology are different. I recommend purchasing the Color Map Spoonflower
sells for color checking. The map is designed
to fit on one yard of any Spoonflower fabric or
4 ft of wallpaper. The Color Map comprises nearly
1500 individual colors and their corresponding
hex codes. Hex codes are a six-digit combination of numbers and letters
used to identify specific colors, resulting in a more efficient color
identification system. Now that you've
learned how to prepare art files with
compatible colors, I'll show you how to upload
your design to Spoonflower. Once you log into your
Spoonflower account, click on "Design and Sell"
in the navigation bar. Then select, "Upload your Design." Or, you can go to the upper left and select
"Upload your Design." Once you arrive on
the upload page, click the "Choose Files" button to select the file or files
you wish to upload. You can upload up the eight
files at one time. Then, check the box to confirm that you have
the right to use the image and comply with Spoonflowers copyright
terms of service. Finally, click the
"Upload" button. It usually takes
less than a minute but can take up
the five-minutes, depending on the number
and size of your files. Once your files are processed, you will be able to view and manage them in your
Design Library. By default, all designs
are private and will remain so until you choose
to make them public. Even if you have the
most beautiful designs, you need descriptive texts and dynamic tags for
customers to find them. The name, also known as
the title of your design, is a crucial element, and it needs to be simple and to the point. If you
don't include a name, Spoonflower will use the
file name as the title, which may or may not make
sense to a customer, so don't overlook this
important detail. A good title contains
the keywords that a customer is
likely to search for. When it comes to creating a compelling design description, it's all about
painting a picture for your potential customers. Who might want to use this design? What might they want
to make from it? Use descriptive language to
bring your design to life, and don't forget to mention any particular features
that set it apart. The additional details box is the place to include any
essential details that customers need to know
before ordering your design. For example, if you've
uploaded a tea towel design to be printed as a fat
quarter on linen cotton, you'll want to
specify the design's dimensions and the fabric type. Here's a tip for when
you need to recommend your design to print on
a specific fabric type. You can change the default
fabric on any uploaded design. When initially
uploading a new design, save the preferred fabric type from the "Choose a Fabric" dropdown. This way, whenever a customer comes
to the design page, the fabric will default to the one you originally selected. Adding tags is an important step that should not be
overlooked or taken lightly. When customers search
on Spoonflower, the algorithm generates
results based on the title and tags that the
designers have entered. That means strong keywords are essential for helping
customers find your designs! You have up to 13 tags available for each
of your designs. Use them all. They can mean the difference
between your design being discovered or remaining hidden in the depths of Spoonflower. Here's a tip. You can add multiple tags
to a design at once by separating the words and
phrases with a comma. Tags can be single words or short phrases of up to
20 characters in length; letters, numbers, spaces,
and hyphens may be used. When selecting your tags,
include relevant keywords that accurately describe the design and the predominant colors. Think of terms
that a customer might use specific
to your design. A good rule of thumb is
to think about the words you would use a search
for the design. Then take those words
and search Spoonflower, noting any additional tags
used by the top results. With some thoughtful tagging, you'll be well on
your way to helping customers find your
beautiful designs. In the next video, I'll go through the seller verification process.
8. Spoonflower Seller Verification: Once you've uploaded
your design and included it in your
public gallery, you're ready to start selling
and earning commissions. Wait, there's one more
thing you need to do. You must first authenticate your account through the
seller verification process. The United States government requires Spoonflower to collect tax information
from all designers who make their work
available for sale in the Spoonflower marketplace; this includes those
based outside the USA. This means you must verify your Spoonflower
account before you can start selling or earning commissions in
their marketplace. To become a verified seller, you need to complete four steps. • Verify your email address • Read and accept the Seller Agreement • Verify your home address, and • Fill out the tax form Let's begin. In the upper right corner, hover your mouse over
the user icon and select "Account Settings"
from the drop-down menu. Now, click on the
"Verify Account" tab. The first step is to verify
an active email address. Spoonflower wants to be sure they have a way of
contacting you. Click on the "Send
Verification Email" button to auto-generate an email
to your address on file. When you receive this e-mail, click the "Verify Email
Address" button found in the body of the email
to finish the process. As you finish each task, a checkmark indicates that you have successfully completed it. Next, click on the "Read the Seller Agreement" button
and review all the details. The seller agreement covers all you need to know about selling your designs
on Spoonflower. After reading the agreement, click the "Accept Seller
Agreement" button at the bottom, returning you to the Seller
Verification page. You now need to verify
your home address. Place an order with the
design you've uploaded. The shipping address
used will auto-populate as your address
for verification. If you prefer to use
an alternate address, you will need a contact
Spoonflower directly at help@spoonflower.com to
have the address manually added to your account. Finally, you will need to
fill out your tax form. Click the "Fill out tax
forms" button to begin; this will open a new window and prompt you to confirm
your site password for security purposes. Navigate to "Complete
Seller W8 or W9 Tax Form" and answer the question that applies to your
specific situation. Click the button to
have RightSignature send an email to your
email address on file; this is the most secure way to complete the
form electronically. The email will walk you through the steps necessary to submit your W-8/W-9
documentation correctly. If you do not
receive this email, try searching your inbox
for documents@rightsignature.com
and check
your spam folder. Please direct any questions
regarding the tax forms to Spoonflower customer
service team at taxinfo@spoonflower.com. Correctly completing these
steps will ensure that Spoonflower does not withhold
30% of your earnings. After verification,
any proofed design can now be made available
for sale on the site. In the next video, I'll go over design proofs and
how to order them.
9. Ordering Design Proofs: To sell your designs on the
Spoonflower marketplace, you must first order a proof, also known as a swatch. You may proof your design
on any product type and size, including fabric, wallpaper,
and home decor items. Most designers find that
an 8" swatch on fabric or wallpaper is
usually sufficient. If you need more than an
individual swatch or two, you can order a
"swatch sampler." The sampler prints 8-inch
swatches of each design from a collection of designs onto a single piece of fabric. Creating a collection
is a simple process. Hover over the user icon in the upper right corner and click "Collections" from
the dropdown menu. Now, click on the plus sign
to create a new collection. Give you a collection
a name and description, then click Create. I will call my
collection "Proofs" since I only plan to use
it for proofing designs. I will also keep the
collection private, so I will not check the box
to make the design public. A private design can only
be viewed from your account. When you upload your work, it will be saved as
private by default. Click on "Create" to finalize
your new collection. To add the designs
you want to proof, head over to your
library of designs. To get there, hover
over the user icon, and from the dropdown menu,
select "Design Library." The Design Library
is where you'll find all the designs
you've uploaded. Click on the "Select Collections"
box for each design you want to add and
choose a collection. Select "Collection" from
the top left list under "Show" to view
your collections. Find and select the collection from which you want a sampler. Click the blue-highlighted "See this collection in your
design library link." The price of a swatch
sampler will vary depending on the number of
designs and the fabric you select the print on. Click the "Get a Sampler" button. I recommend checking
the designs you want to proof to see
how they will print. Do this by clicking
the design thumbnail, which directs you
to the design page. Select "Test Swatch (8" x 8") in the size and amount
dropdown. After you've double-check
your designs, you'll need to
choose the fabric your sampler will print on. You can do this from the
dropdown menu for "Order this swatch sampler
on your choice of fabric." A price will be displayed next to
each fabric option for the number of
designs included. Click the "Order a fabric sampler" button to add to
your shopping cart. Here's a tip for those
on a tight budget. To get the lowest
proofing price, you can test up to 42
designs on a Cheater Quilt 6" Squares,
Fill-a-Yard template. Purchasing proofs
lets you see how your design will print
before releasing it the customer. Colors
on fabric and wallpaper might appear
significantly different from those on your
computer screen. Your files may also include unforeseen design issues that may not be visible
until printed. For your designs to be visible and available
for purchase, you must first update your information to enable
your shop for public view. To do this, hover
over the user icon and click on "View my Shop," then click on "Edit Your Shop." Select, "Show my
profile to the public" and click the Update button
at the bottom right. Once your Spoonflower
shop is public, you can now make any
already-proofed designs available for purchase. First, scroll down to the Marketing &
Selling section of the preview page for
the design you want to sell. In the Sell and Display area, click the checkbox next to "I would like to
sell this design." A blue checkmark should
appear when activated. Once you have a blue checkmark confirming you'd like
to sell a design, you may select the
items you'd like to print and sell your artwork on. You can choose fabric,
wallpaper, or both. When you select
to sell on fabric, your design will also
be made for sale on all Spoonflower
home decor products. Your designs will now appear in
Spoonflower's search results and are available for purchase on the Spoonflower marketplace. Before moving on, I have one more tip about
ordering proofs. Once you've made a design
available for sale, you can submit any
rescaled or rotated versions for approval
at no additional cost. You are limited to ten rescale or rotated requests per week. Be sure to give the new version a new design name that differentiates it
from the original. For example, adding size
descriptors - such as 'mini', 'medium-scale', or 'jumbo' - after the original
name works well. Or, adding actual dimensions such as '4-inch repeat'
or '12-inch version' can be another way to
create distinction. Once you've uploaded
the new design, contact Spoonflower with your request. Click on the 'Submit a
Message' button and use the email address associated
with your account. Use the following
format to group the approved design names with the new scaled or
rotated versions. First, list the approved design
name and note it as already approved, and include the direct URL design
link to this design. Then, list the new
scale design name, and include the direct
URL design link to the design. Spoonflower will send you an email once the
designs have been approved. Now that you know
how to proof and set your designs for sale on the
Spoonflower marketplace. Let's talk commissions,
aka royalties.
10. Earnings and Redemption Details: As an artist who sells
artwork on Spoonflower, you can earn money from
commissions every time a customer purchases one of
your pattern designs. When someone buys
your designs on Spoonflower fabric or wallpaper, you will earn 10%
base commission on the retail price
of their purchase, regardless of any
Spoonflower discounts or promotional pricing. So even if the
product is on sale, you still earn 10% commission
based on the retail price and not the sale price. Commissions paid on home decor products are slightly different. When someone buys your design
on a finished product, such as a pillow
or a duvet cover, you earn a commission based on the fabric used to
make the product, not the product's retail price. For example, if someone
were to buy a tea towel- the commission would be 10% of a quarter
yard of fabric (the amount of material needed
to make the tea towel) and not 10%
of the tea towel's retail price. Commissions get credited to your account in
the form of Spoondollars. Spoonflower's
in-house currency. You can keep your
Spoondollars in your Spoonflower account
for Spoonflower purchases, OR you can transfer
them the PayPal. One Spoonflower dollar
equals one US dollar. So you are, in essence, converting Spoonflower dollars to real money once you
transfer it to PayPal. And, of course, once it's in PayPal, you can move the funds
to your bank account. Spoondollars are also used as in-house credit for refunds, redeemed gift certificates, and prizes for giveaways
and weekly challenges. Spoondollars earned in these
ways will be marked as "Other Credits" and cannot
be paid out to PayPal. However, they are still
a valuable currency that you can use to make
purchases on Spoonflower. Let's now look at
how you can link your Spoonflower
account so that you can redeem your commissions
through PayPal. Setting up your account to transfer your
commission payments to PayPal is a quick
and easy process. This can be done by following
a few simple steps. First, hover your mouse over the user icon and choose
"Account Settings." Next, navigate to the
Spoondollars tab and select "Redemption Details." This will open a new
window and prompt you to confirm your site password
for security purposes. Here, you will have
the option to redeem Spoondollars to
your PayPal account. Simply enter the email
address associated with your PayPal account and click the "Update Redemption
Details" button. Once you have entered your
PayPal email address, Spoonflower will send
all future commissions to you through PayPal. However, if you'd like to keep your earnings in your
Spoonflower account, all you have to do is uncheck the box in your
redemption details. Earnings are paid
out every 14 days, provided your commission
balance is greater than $10.00. That is, if your commission
balance is less than $10, it will remain in your
Spoonflower account in the form of Spoondollars. Once your commission
earnings exceed $10, the money will be transferred to your PayPal account on the
next scheduled payout date. That's it. You're now ready to start redeeming your
Spoondollars for cash. Now let's learn how to earn even more with bonus commissions. Every month, there are opportunities to
make more than 10% in commissions by
meeting certain thresholds. Monthly commission
totals between $300 and $999 qualify for an
additional 1% commission on top of the base rate. Monthly commission totals
between $1,000 and $1,499, qualify for an
additional 3% commission on top of the base rate. Monthly commission
totals above $1,500, qualify for an
additional 5% commission on top of the base rate. Here's how it works: On the 8th of every month, your bonus from
the previous month will be calculated and added to your Spoondollar account
balance, available for payout on the
next payout date. The calculation resets on
the first day of each month, so you'll need to hit one of
the bonus thresholds again, to earn more than
the standard 10%. I have to admit--in 2016 when Spoonflower started
offering bonus commissions, I thought there was no way anyone could
reach those thresholds. I was wrong. I received my first bonus
in February of 2017. Coincidentally around that time, Spoonflower had begun expanding
distribution channels. I reached the bonus threshold
five more times that year. Since January 2018, I received the bonus
commission every month. And for the first time
in April of 2020, I reached the highest
bonus level of 5%. I'm grateful to
Spoonflower for giving me this opportunity to
earn extra income. And I'm proud to say I'm one of the top-selling
designers on this site. You too, might be surprised
at how much you can earn! Now that your Spoonflower
shop is up and running, you'll want to be able to access your Spoondollars balance and keep track of your earnings. Once you've signed into
your Spoonflower account, go to Account Settings, and
click the Spoondollars tab. In the "Your Spoondollars"
section, you will find the information
on your available balance, earned commissions, credits,
and the next payout date. You can click on a the gray,
encircled question marks or additional information
about that content. With this information
at your fingertips, you can easily manage your
Spoonflower earnings. Meet me in the next video for my final thoughts on achieving your pattern
design dreams.
11. Final Thoughts: Dream big, but don't just dream. Plan your way to success! Congratulations! You did it!
By completing this course, you have taken the
first step toward realizing your dream
of pattern design! The creative process
is always in motion. It's not just about
what we create, is also about how we create, and knowing what
to do with our creation once it's completed. And the key to your success is planning out every
step of that process. Which I will lay out for
you in future courses. For example, in
upcoming courses I will teach you what
you need to know about choosing the right colors
for pattern designs, as well as provide tips on
how to optimize your shop. In other courses, I'll reveal some secrets to getting
discovered on Spoonflower, and I'll share some
strategies that will help on the weekly
design challenges. And that is just the
tip of the iceberg. Your future vision
begins right now! Once you've completed
your storefront, I'd love to see your
project screenshot posted to the Student Gallery. I can't wait to
see your new shop and follow you along
your creative path! When moving forward
in your journey, practice, practice, practice designing repeating patterns; the more you do,
the better you get. Do not wait for that
perfect moment to start. Challenge yourself to upload at least one design a
week the Spoonflower. You can keep yourself
motivated and consistent by participating in the Spoonflower
Weekly Design Challenges. It's a great way to
stay inspired and experiment with new design
ideas and techniques. In order to be notified
when I post a new class, be sure to follow me
here on Skillshare. Thank you for watching! See you next time!
 Maria Faith Garcia, Create Courageously