Transcripts
1. Introduction Trailer: My name is Emil Sligas. I'm a lead three environment
artist, and in this course, I will guide you step by
step through the process of creating an entire environment
from start to finish, even if you have little
to no experience. We've made this course
even more special by creating it in three
different software programs. Blender, Tres Max and Maya so that you can choose
the modeling software that you are most
comfortable with. In addition to these programs, this course will also
cover brush, Mum Setubak, substance painter,
substance designer, Unreelgend five, Spetre
and a bit of Photoshop. This might sound overwhelming, but rest assured that
we have organized this course in a way that
makes it easy to navigate. We'll start by planning out our environment and setting
up our project folders. Next, we'll give you
an introduction to the modeling software you
prefer and Unreal Engine five, which we'll use to create the blockout of our environment. From there, we'll show you
how to turn the blockout into final models using
various techniques like modular acid creation, hydapoly acid creation, and
sculpted asset creation. We'll also cover how to do UV unwrapping and
baking of our models. After that, we will
go over on how to create procedural materials
in substance designer, as well as creating unique
textures in substance painter. Finally, we'll put the
entire environment together in Unreal engine five, covering topics like
setting up assets, creating materials
and decals, lighting, level art in composition, and creating our IV
foliage in speed tree. We'll finish this
course off with some final polish and creating our portfolio
screenshots and videos. With over 25 hours of content, I'm confident that at
the end of this course, you'll have the skills
needed to create various types of
environments, big and small. This course is designed
for beginner artists, and while it is helpful, if you have knowledge of
the software mentioned, it is not a requirement. This course will
also come without generated subtitles in
English, Chinese, and Spanish. I hope that you will enjoy
this course and that it will have a positive
impact on your life.
2. 01 Introduction And Finding Our Main Reference: Okay, welcome, everyone, and thanks for watching
this tutorial course. So before we get started, just like a super
quick introduction. My name is Mil Sligas. I've been three
environment artists, and I'm currently a lead
environment artist with about eight to ten
years of experience, I would guess,
something like that. And I specialize mostly in creating assets and large
scale environments. I have worked for companies like Ubisoft Entertainment
on D Division two, the DLCs and some
unannounced projects. I've also worked for playground
games on Force Horizon, and I'm currently
running my own studio, which is called
Fast Track Studio, and you will most
likely have gotten this course from our sub studio, which is Fast Track Tutorials, which dedicates itself
fully to tutorial courses. So that's just like
a super quick recap. And what we're going to go
over in this course is, as you probably already know, we are going to go over
the complete guide or introduction to
environment art. And the goal of this course is basically not to show you like an introduction for
every single software, but just go from
completely start to finish on a beginner level and getting a full environment completed and ready in
a video game engine, in this case, unreal engine. Now, we will be covering
multiple different softwares. So for example, we will do a very quick introduction in
both Maya, Max and Blender. We will go over, like, the
specific tools that we would need and that we would often use when we
create environments. And just like that, we will basically run through a bunch of different software to
get the final result. These software include, so
for the modeling, Maya, Max, and Blender, however, you can choose the
one that you want. That's why we created the
course with all of them. We will also do a bonus course on how to do UV unwrapping in RsmUV we will go ahead and show how to do baking in
both mums and painter. So like you can see,
we are trying to cover a broad range to not limit you to the software
that you want to use. And, of course, we
will give advice on, which software we recommend. We will also go a
little bit over Zebras, and we will go ahead and go over substance designer,
substance painter. And for the rest, we
will go over Unle engine five and a
little bit of Spettr. So Chapter 01, what
we're going to do now is what I always do when I want to go ahead
and create an artwork. It does not matter if it's an asset, if it is
an environment. Hell, even if you're making concept art or if you're making, for example, like
Cox's art, whatever. The first thing that you want
to do next to, of course, having a little bit of an idea is to gather your reference. So what we're going to do is we are going to gather
our main reference. Now, there are many ways that you can gather your
main reference. So we have the first way, which I am going to
use in this course, which is that we are going to
use an AI image generator. This is something that I've
only been using lately. And because of ATCL reasons, I only really use it for
inspiration and images. I don't really like to use
it to replace the jobs of other artists because that feels a little bit
conflicting to me. For example, if I would use
this to generate all of my concept art that
I would need for commercial projects that
would feel a little bit won. But I do like to use it to quickly generate
some inspiration. For example, I want some
inspiration online, generally what kind of
environment I want to. Now, next to this, of course, we have Google Images. Quite a simple one. I rarely use Google images for
my main concepts. Most of the time I already
have quite a good idea. But what you can do
is I do always use Google images for, like,
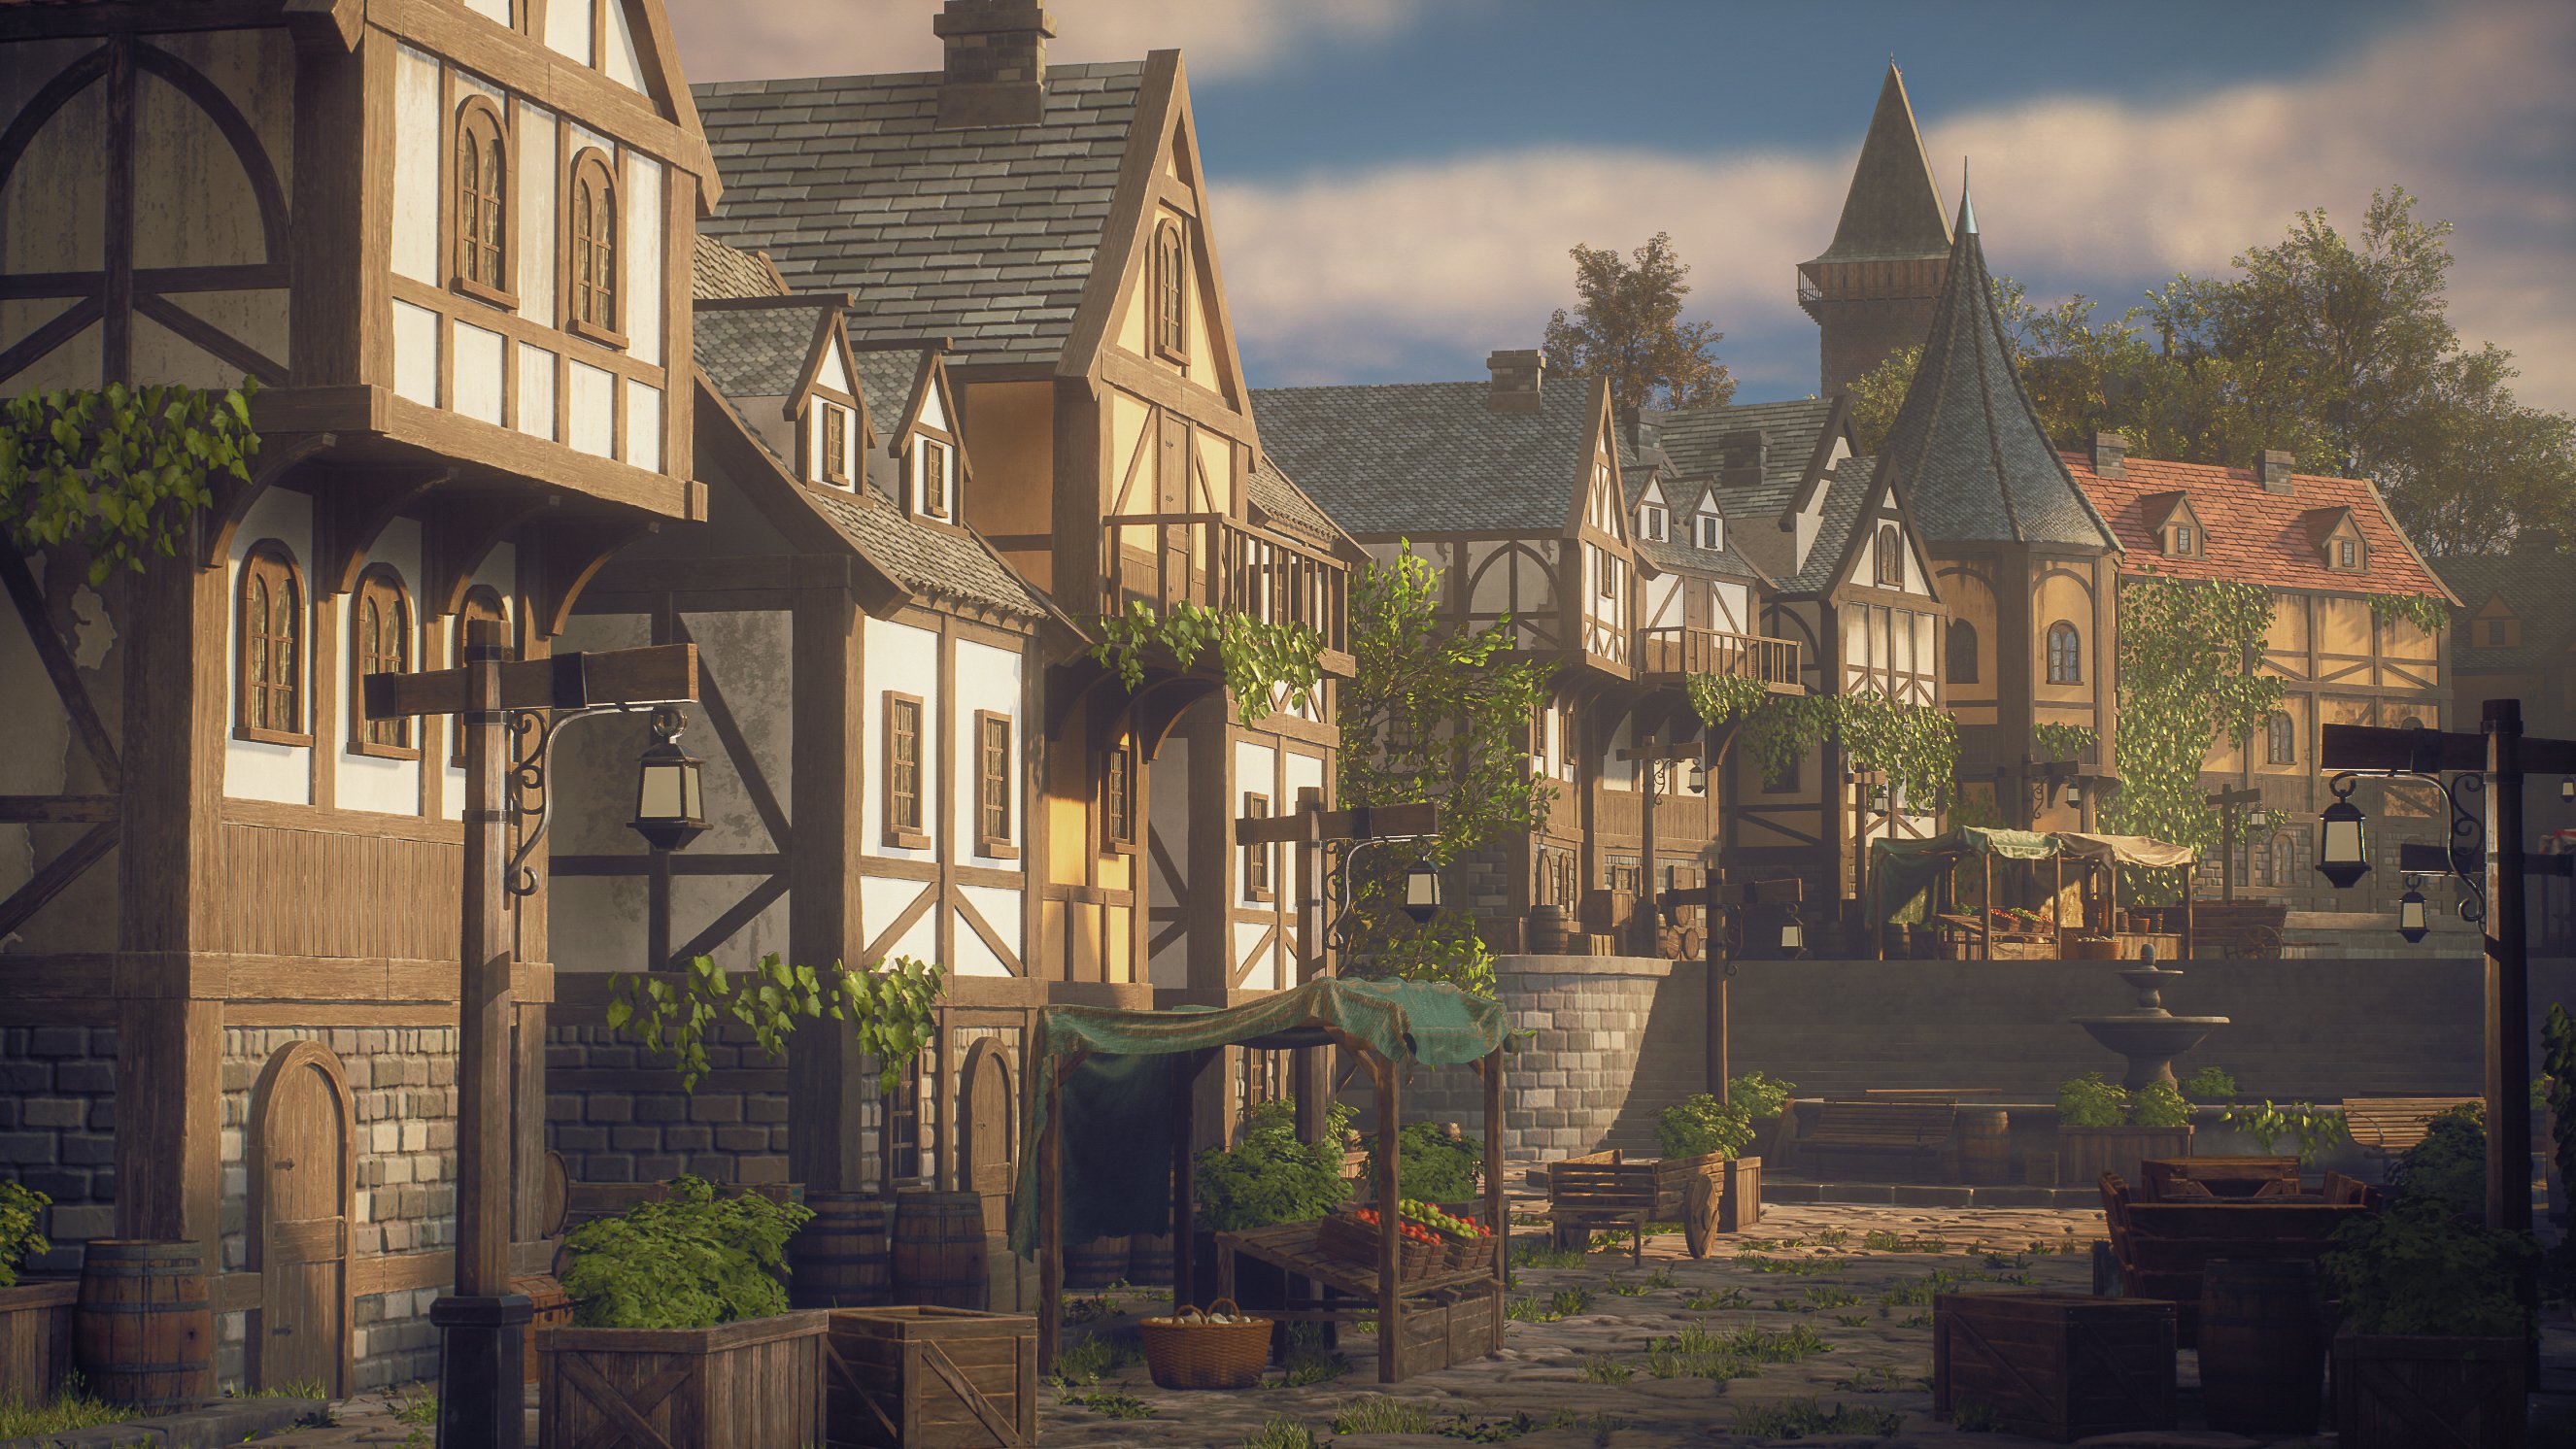
additional concepts. So let's say that over here, let's say that, Okay, you
want to create a castle. By the way, this
environment is way too big to do for your very
first environment. But let's say you want
to create the castle, then you can go in
here and you can go German castles over
here, for example. And just like that,
you can find, quite a lot of reference images. Of course, I'm sure that
most of you know this, but like I said,
begin of course. So I'm just really going to
go over everything in detail. That is my favorites
is ArtStation. So for art Station, what
I do recommend is if you, for example, want
some concept art. So let's say we want to
make some Post apocpi. So here what I like to
do is if I am looking for concept art in a specific area, I
type in what I want. For example, post acalyptic
and then press okay. And then in here, what you get
now is you get everything. Three assets to the
assets, whatever. So I like to go ahead and I
like to go over here in sort. You can do likes if you
want to have very popular. Artworks, but I like to go, for example, for
relevance or likes. And then in the
medium, I like to do digital two D to make sure
that it is concept art. And then if you want, you can
also go in subject matter, and in here, you can
go environmental concept art and design. And now we are
getting a little bit closer to some
interesting concept art. For example, over here,
this kind of stuff. Now, Okay, it's not loading. Let's do this one. There we go. So once again, this is way too complicated because concept
art likes to go quite large, so we will go way simpler than
this for beginner course. But it's just about
the general idea. Now, with this type of concept art, it is
a bit of balance. It's always very
respectful to ask the actual artist to send
the artist an image and ask, A, can I use this for
a personal project? Now, what I would say is
if you are ever doing a commercial project and you use a concept
art to base it on, you always need to
get permission from the artist because is the same as stealing because you are
making money of their idea. If you are like a student and it is a personal project
that you just want to, like, practice on,
then most of the time, if you ask for permission and the concept artist does
not say anything back, take it with a grain
of salt, of course, but most of the time they don't really mind for, like,
a personal project. But it is always
best to just get some permission because you
never know how the artist is. Maybe the artist used it for something else and
they don't want to have anything linked to it. So that's why it's tricky to, like, to just risk it by getting the
concept out like that. But yeah, most time they are happy to just give
you permission. And, of course, if it is from
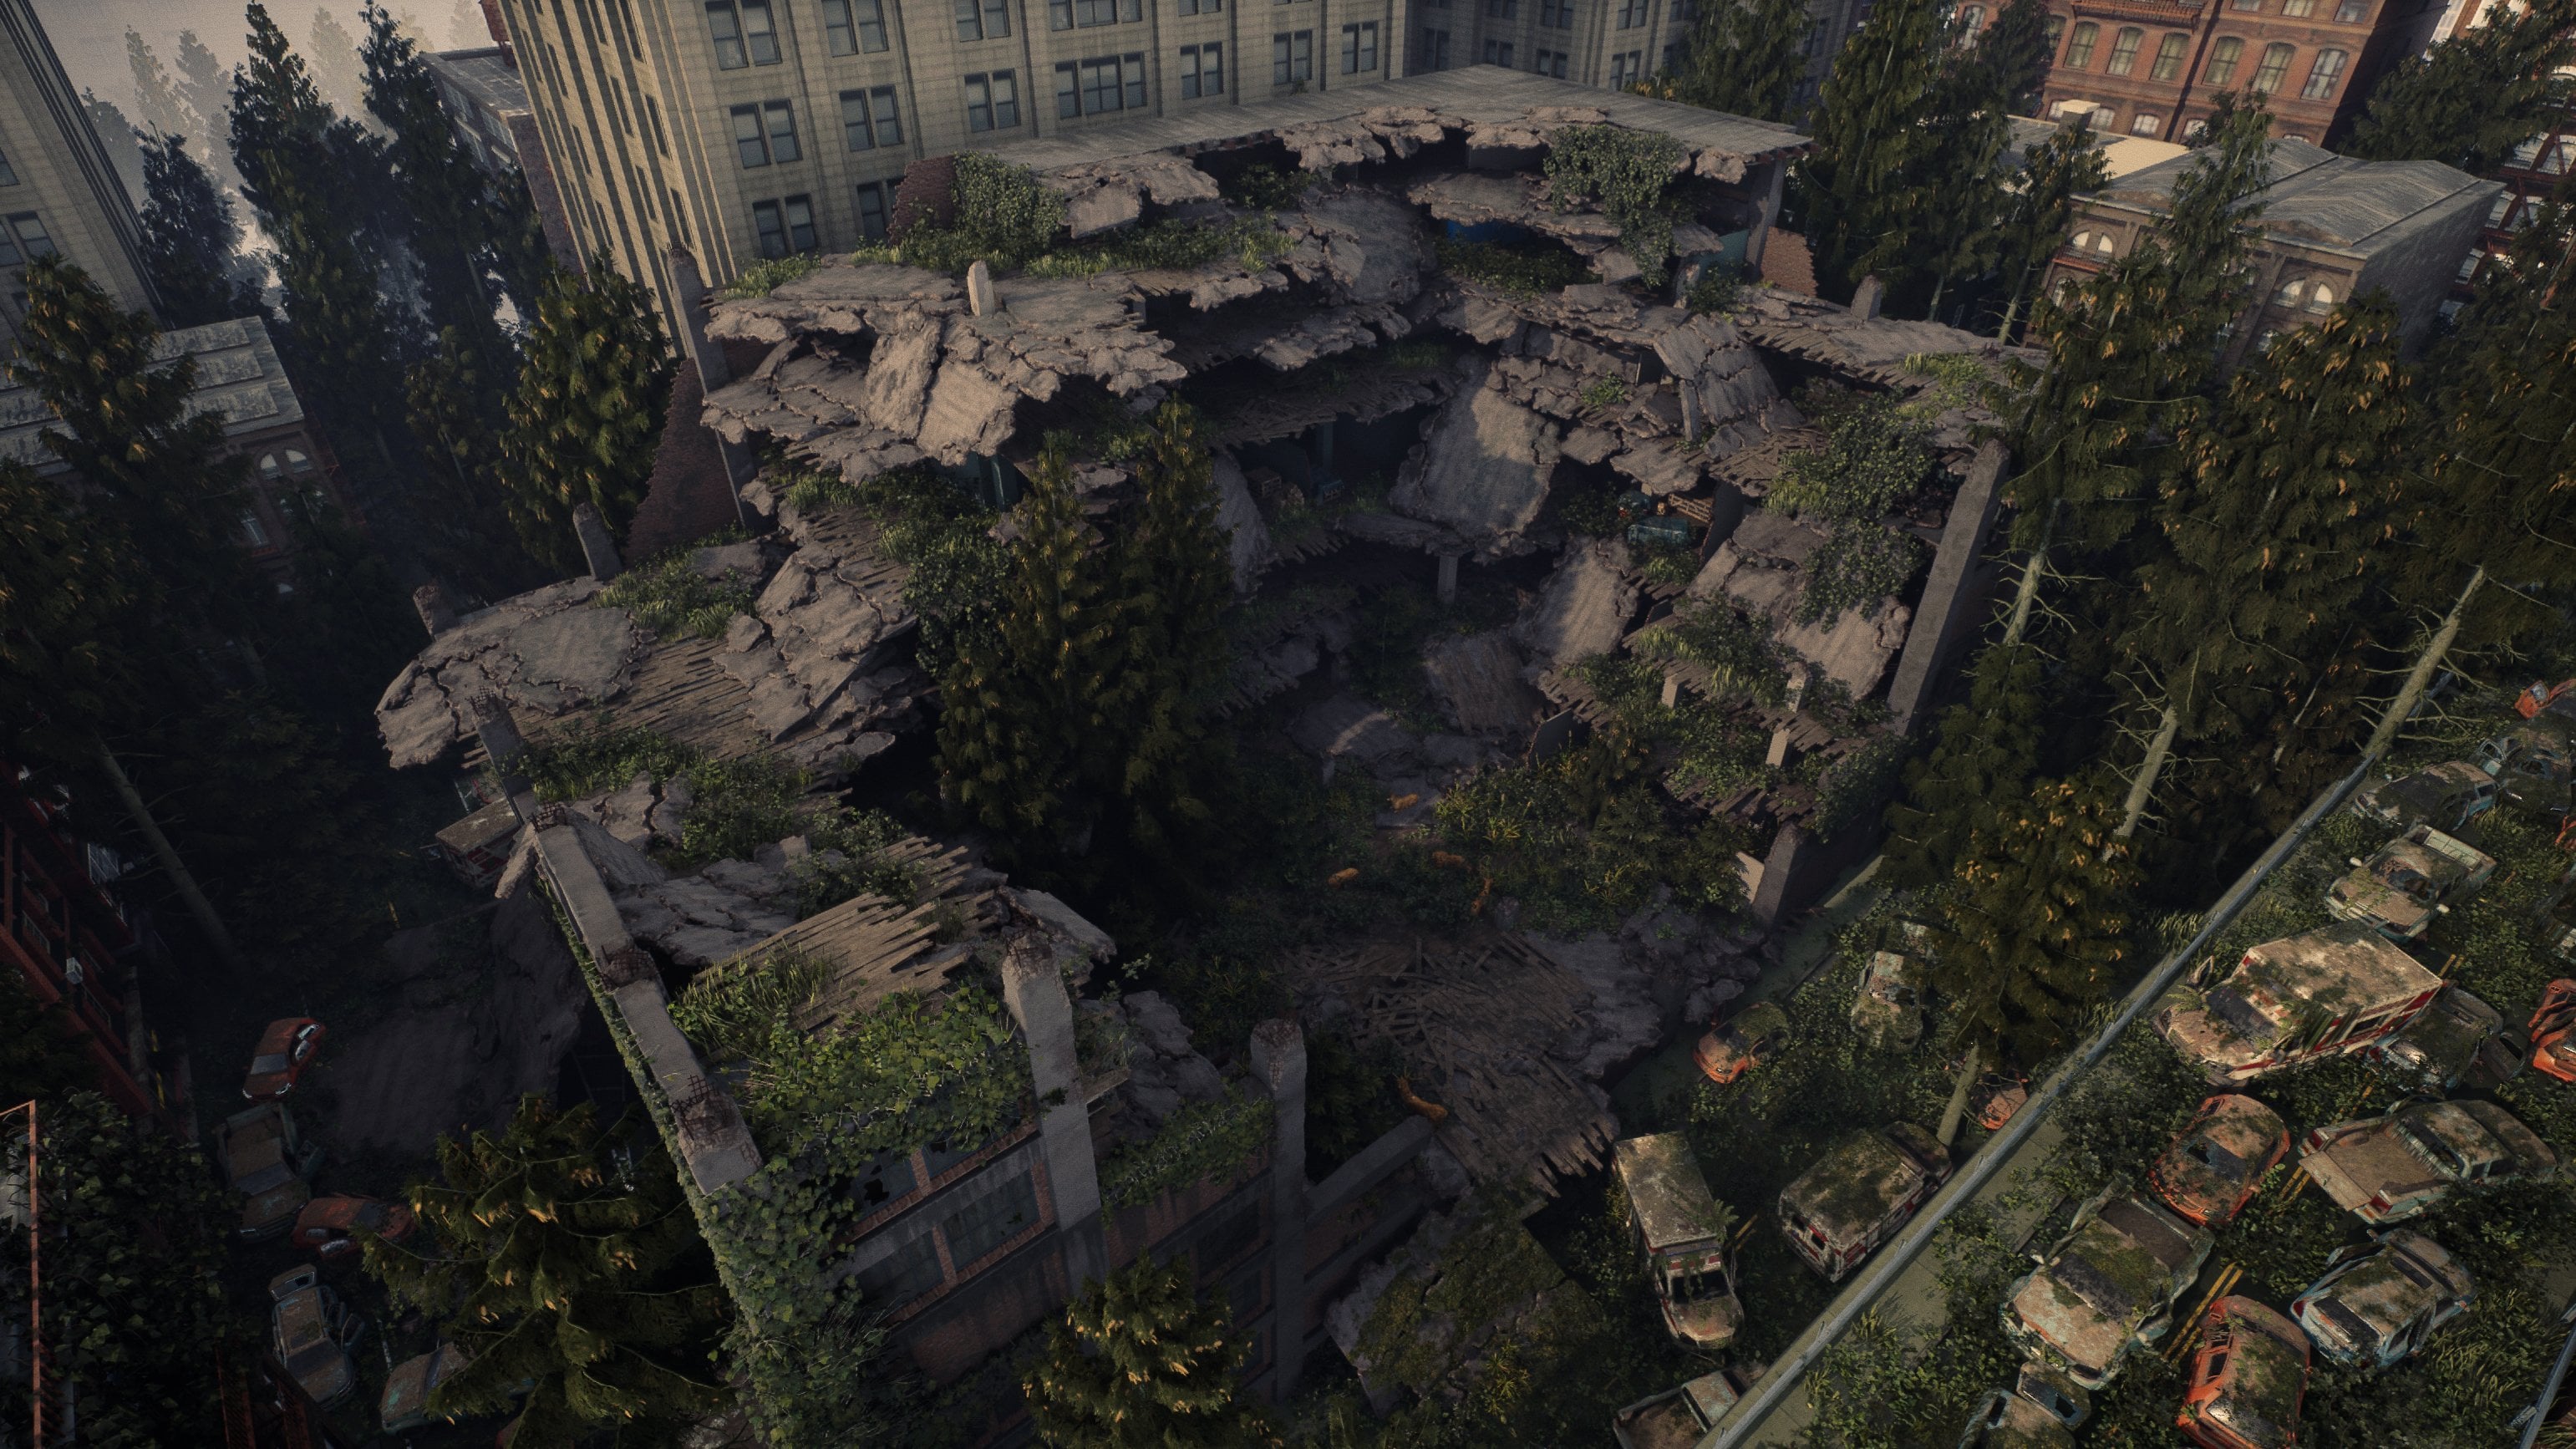
a video game, for example, you use concept art
from the last of us, for example, um, the last of us. What I find is that often
big studios like that, they do not care if you're making it for a
personal project. You can never make
it for commercial, but if it is anything that
is like concept out from a video game that is already
existing they honestly, as far as I can see,
they do not care. Once again, this is
not legal advice. If for some reason, you use it in a wrong way, can always come to you
if they actually really care about it and say that
you need to take it down. So once again, these are
my personal opinions. Take it with a grain of salt. I'm not responsible for
anything that happens if you misuse my information
in this case, as like a little disclaimer. But like the last of us, it
has some great reference. And we are actually going to create something quite similar. Now, we will not create
anything based upon lass. Simple reason is
because copyright. This is a tutorial course. I am selling this tutorial
course, and therefore, I'm not allowed to use anything because I use it for
commercial rights. Often how it works in
these type of cases. But we can still use
it as inspiration. So there are many more ways. So for example, you can also go into the marketplace,
and in here, you can often also find a
graft studio where are you? Here, Graffit Studio. If you just go to their profile, they often have really cool. They also have a lot of
character reference, but here they have really cool, abandoned reference
here, this one. And it's often like many, many reference images like that. And that is also a great way to, for example, find
good reference images that you can base
your environs on. Like, this looks really
cool. So, stuff like that. Okay. Now, just to flow
with the hype a little bit, lately, image generators
are really a big hype. It is quite conflicting
as an artist because I can see value in it,
but I can also see, especially later on,
if they move over to Tred that it can threaten
like on our territory. So what I like to do is I like to use image
generators sometimes, and in this case, I
will use it for, like, inspiration, but I like to
use it at a minimal level. I don't like to replace other people's jobs in that
sense, if that makes sense. Um, it's just like
a personal thing. So I have no problem with
people using image generators. Although, what I would say is that if you in my
personal opinion, you are not if you, for example, some of those people that
use an image generator, and then they say, This is my art work, and I'm an artist, that kind of stuff, that's a
little bit conflicting to me because entering a prompt
or entering some text, I would not really
consider that art. And at this point, I will stop
with my personal opinions. It's just trying to give you
a right base to start off. Because I assume many people here are beginners
to watch this. And the right base, I would say is use
it with respect. And if you are a
beginner, it is fine. But imagine like you are a
concept artist and all of the big studios are
starting to just use AI. That is not going to feel
nice, stuff like that. So anyway, we are at
about 10 minutes, so that's enough
talking for now. So what we're going to do now is we have two image generators. We will be using DL E, and DL E is an image
generator that is mostly a little bit more
towards real life images. You also have mid
journey over here. And mid journey, it's
most about like, it can do real life images, but it's also a little
bit more fictional. Let me say it like that. So what we're first going to
do is we are going to use Dali together roughly
like our main image, and then I will give you a super quick overview of Mid Journey. We will not be using
Mid journey for this project because
it's a little bit more complicated and I want
something a little bit more precise, but I
still want to show you. So Dali, it is free. You can go to labs dotai.com. However, you can also buy
credits to do more generations. But you can do, I
believe, 15 generations per month for free. So first of all, we
want to have an idea. Now, when you want to gather an idea for
your environment, it is good to have a plan not
only what you want to make, but what your goal will be. So, for example, in my case, this is a beginner course. What will be my goal?
My goal is to create a simple looking environment
with interesting lighting. I want to be able to not have too many materials
that I need to create, so not too many textures. So I want to have
the textures to be quite simplistic because, else, it will be too
overwhelming for you guys. I want to have a
little asset in there, and I want to have a bit
of foliage in there. So those are, like, a few
points that I want to capture, and for the rest, I just needs to look
cool and interesting. Okay, that's my goal. So you can choose your own goal for your portfolio, for example. The second aspect is,
what do I like to make? Personally, I'm a big fan of
post ecalyptic abandoned, and sometimes I also
like to combine with, like, sci fi and
stuff like that. That's the stuff
that I really like. So, of course, before
going into this, I already had a rough
idea what I want, but we are going to go
through this in real time. Now, there might be a tiny time laps where I
will just, like, play around with the prompts
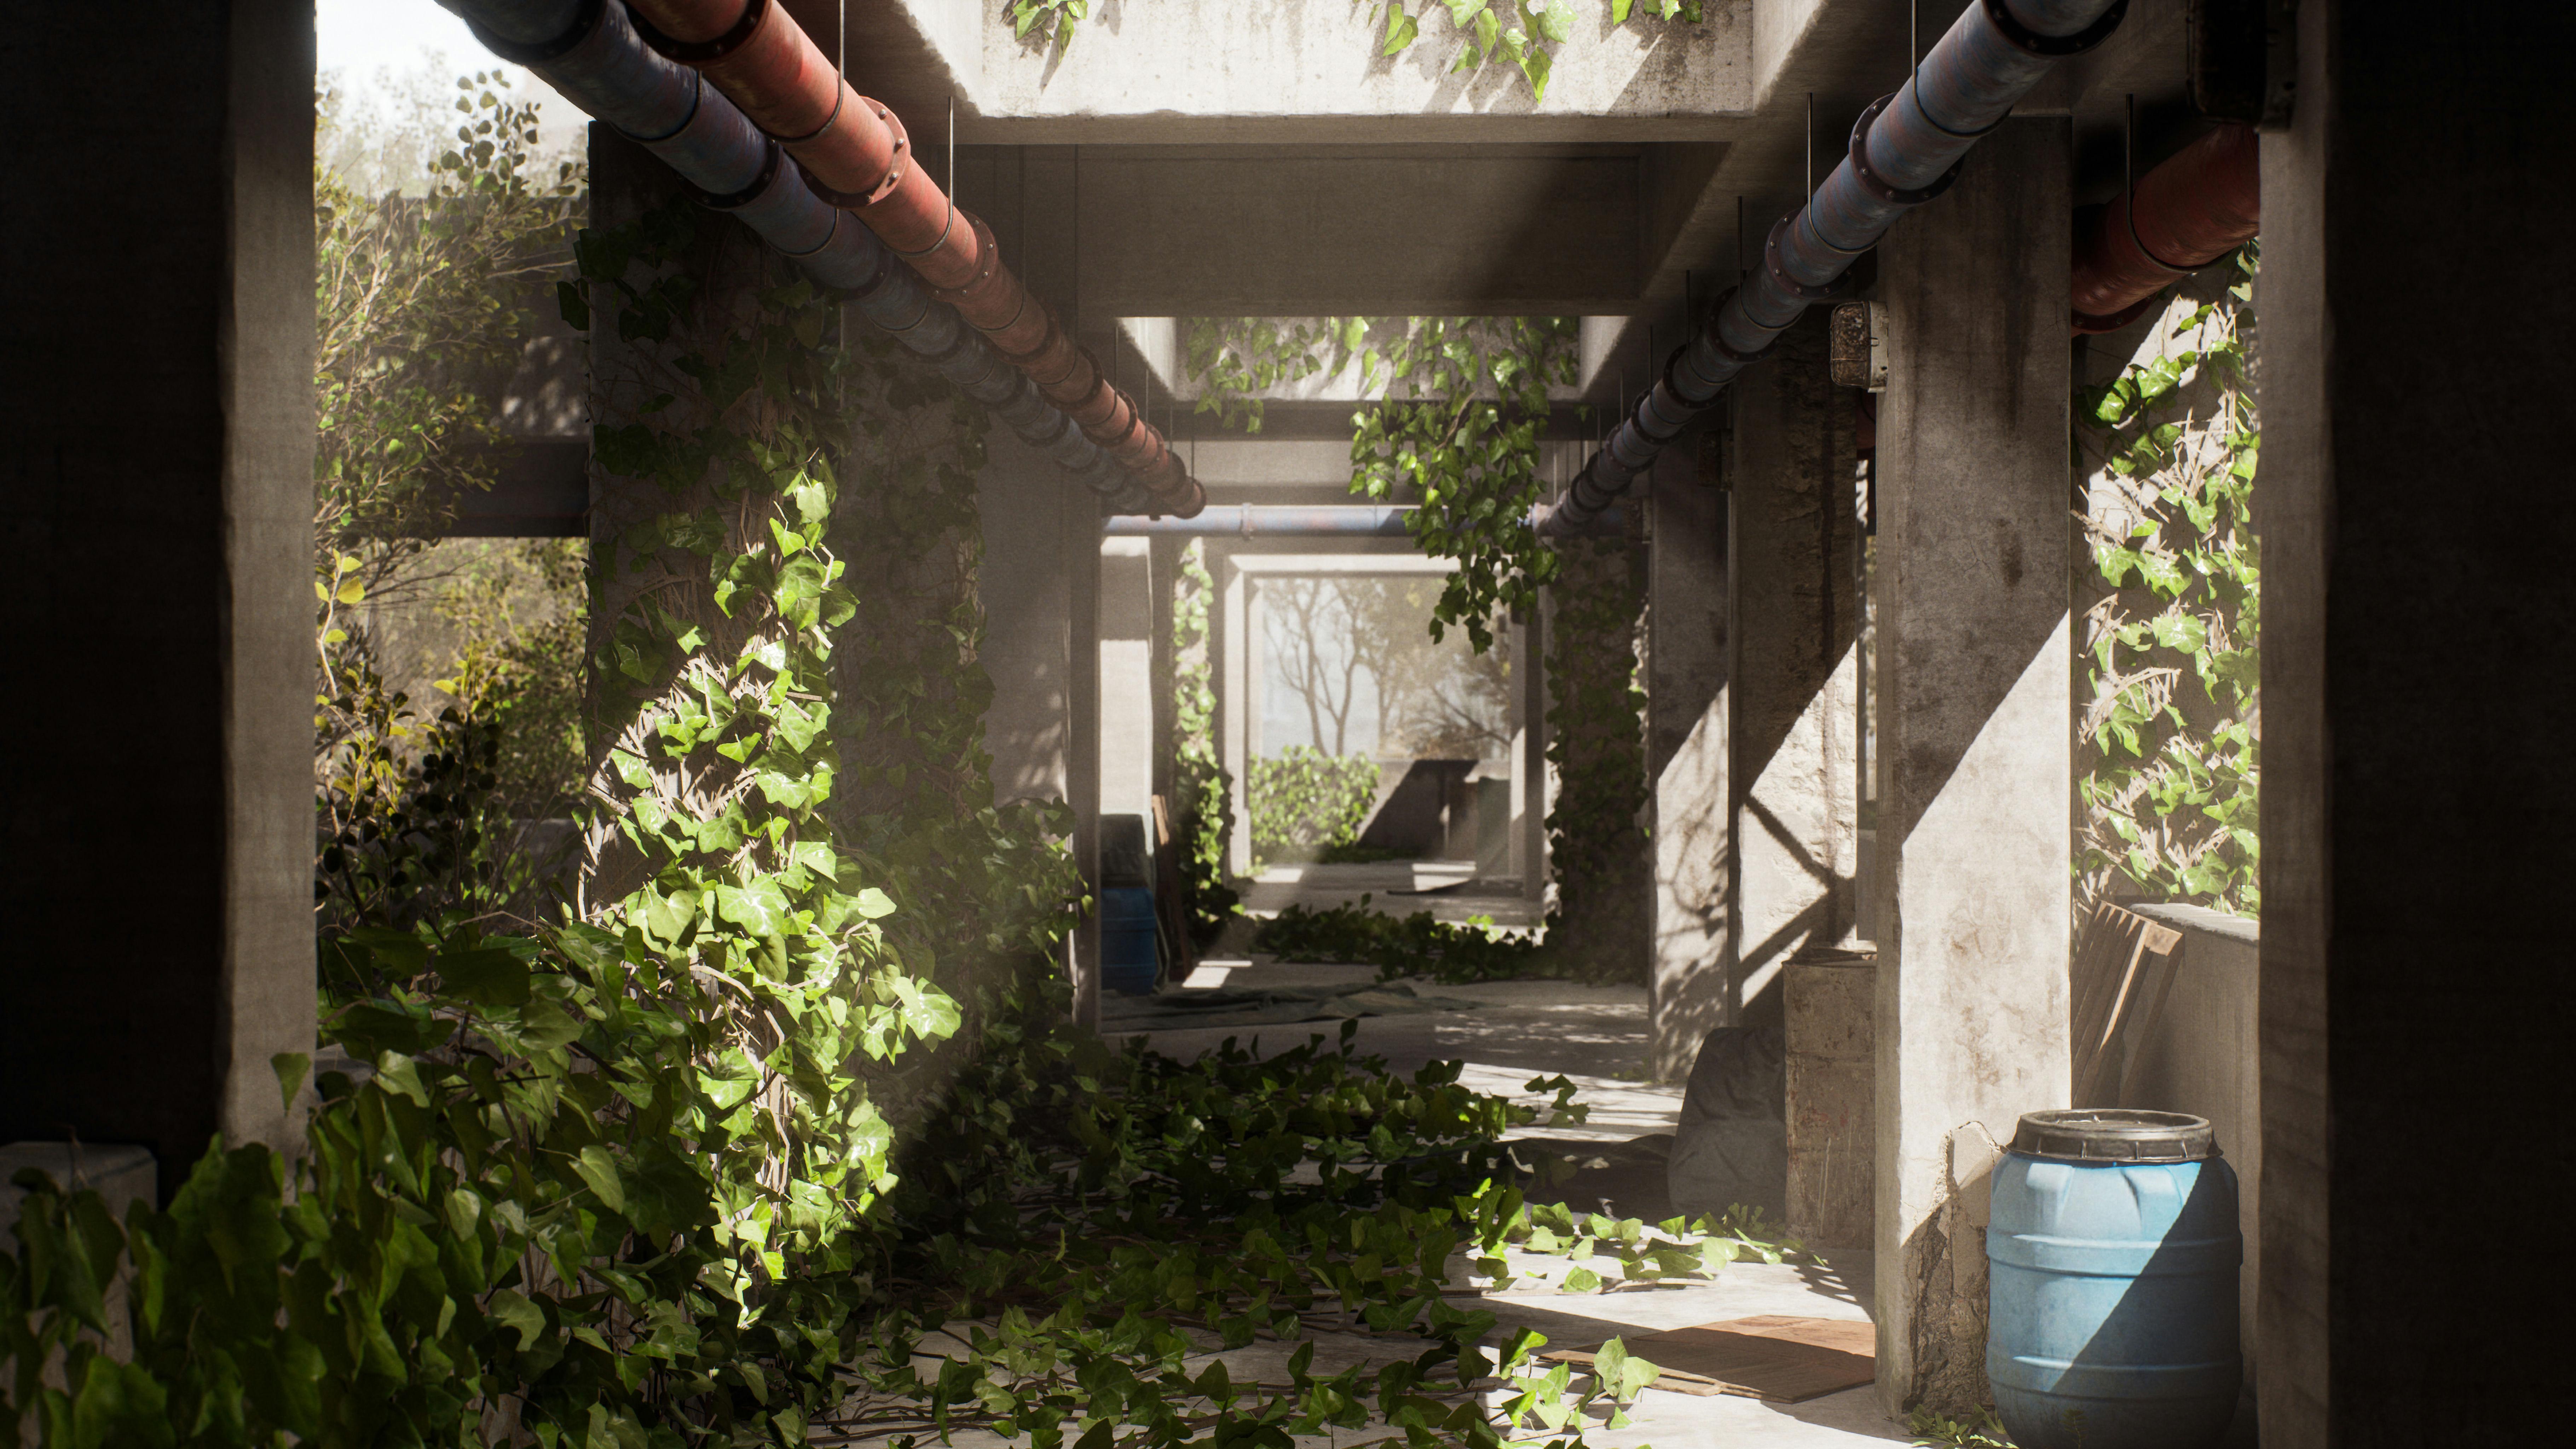
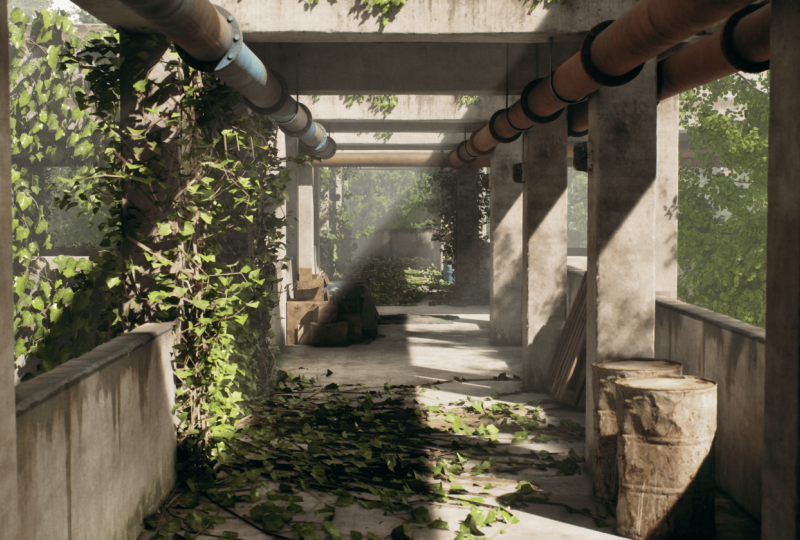
until I get what I want, but we will go really close. So the first thing that I
now think about is that if I have these things like I recently played the game
Stray about the cat. Awesome game. Really love it. Love the art, love the
gameplay, and stuff like that. And in the very beginning,
they had, like, this really big, like,
ravine made out of concrete, but like foliage and
stuff like that. And I quite like that. I like concrete
because concrete is often white or, like, grayish. And then foliage,
because it is green, it gives a nice contrast. And we can do some
interesting lighting. So let's go for something like a now you want to basically give in your
pumped on what you want. So a large concrete
ravine ravine. I think that's how you
wide it with pillars on both sides and foliage
growing growing on it. So Dali is really user friendly with the sentess
that you want to create. So like a sense like this, it can totally understand. However, in mid journey, it would have a
little bit of trouble to get exactly what
you want like this. Now, after this, you
can give it a style. You can do coma, and then
you can whiten your style. This can be concept
art is a style, stylized is a style. Here you can see, for
example, painted. You can see like vector drawing. There are hyper realistic. There's a bunch of styles
that you can use for this. Now, in our case,
what I like to do is I always like to
start because I want to go for something realistic and the default is realistic. I want to start without a style. So you then want to go
ahead and press generate, and then we just need to
give it a second to wait. Ta ta ta. And then we can slowly like art iterations
to it like this. See? This is actually really
cool. This is really cool. So here we can see some
big concrete pillars and just like a bunch of stuff. So we are already
getting quite close. Like I quite like having the
overhead bridge over here. That is looking really cool. And it also reminds me a little bit of, like,
the last of us too. But what I then want to keep in mind is that if we
have bridges overhead, the lighting will be
a little bit low. So what I can do is so
large concrete ravine with pillars on both sides. A concrete. How do you call it? Aqueduct? Oh bridge. I can try bridge first and else and we will go
for, like, aqueduct. A concrete bridge. Going across. We can try something like that.
It doesn't need to be Oh, sorry, I knocked
against my microphone. It doesn't need to
be too precise. So large concrete ravine
with pills on both sides, a concrete bridge going across
and foliage growing on it. By the way, you will always have something
different than me. It's an AI. It will never produce
the same image twice, which is why I'm
starting from scratch. But this can often take, like a little while. So I hope that we get
something quite cool. Oh, this is really cool.
Oh, I quite like this. The reason I like it is because
it shows a little bit of that lighting over here and we have these large
concrete pillars going on. And now, so you can click on it to
make it a little bit bigger. So let's have a look. So
this is also pretty cool. It's like a wall,
and then it goes up, but I'm not completely sure yet. This one I also quite like. The foliage is quite heavy, but what we can do is I will show you how
to make foliage, and then we can supplement it
with some free foliage to, like, enhance the
scene a little bit. I quite like this. I don't yet know what's going on on
the floor over here, but what you can do is, let's say that you
like this image, you can then go ahead and you
can add variations to it. So you simply press variations, and then it will generate a
few different variations. So let's give that a
second to generate. Okay, so the flooring is starting to get a
little bit better. However, a variation
is always like, for some reason, they
always look like less good. It's a bit weird, so hmm. What I'm going to do
is I'm going to ty. I'm going to go back to my ravine, which is
this one over here. And I'm just going to try a few more different
ties over here. So, large concrete ravine with pillars on both
large concrete. Let's do walls,
large concrete walls with pillars on both sides, a concrete bridge going
over across and ivy. Let's do ivy growing on it. By the way, you can
also press generate multiple times if the
images are close, but not exactly what
you want. Okay. Sorry, I passed the
video because I wanted to take a sip of my drink. So this is actually this is
also quite cool over here. So we're getting quite close. This one is maybe a little
bit too simplistic. I do want to make
it look visually interesting. So we
got like this one. So we can imagine being like a concrete
bridge with, like, large pillars and then a lower
bridge going next to it, and then maybe have a wall
or something like that. So we are really
just going to focus mostly on like a specific
angle in this case. This is also quite interesting. Mm, this one is
tricky, you know. Large concrete walls. Let's try generate
again. Don't worry. You will save the images in here whenever you
make an environment. So we are getting quite close. While we are at this over here, what we can do is we can try to find a little bit
more of inspiration. So yeah, this definitely begins to toil that
I will literally just handhold you in just
going through everything. So this style definitely
is like the last of us. The last of style. So what
I can do is the last of us. I can go ahead and
digital to the over here. And then I can just middle
click on some images that I think are visually interesting just based upon the thumbnail. This one I quite like
and this one over here, I am going to go for
like an exterior, something with bridges
and stuff like that. Yeah, there we go. Okay, so oh, sorry,
that's the wrong one. So this one simple bridge, actually, that's not exactly
what I'm looking for. Oh, I can still remember
playing this level over here. I quite like the
foliage over here, but it is quite
difficult to do this in a beginner soil because foliage is quite difficult in general. Okay, so this I quite like. So it's like a large bridge,
overgrown with foliage. And now, of course, over here, it is like a really
large environment. So we would need to limit that. I quite like the
lighting of this. So it's like a soft lighting. So what you can do is
you can definitely press Download over here, and I will place this
in my reference folder. I will go over folders
in the next chapter. So I'm just going
to download these. Just so that I can
remember them. Similar, but quite cool. And let's do this one over here. Okay, so we have this kind of stuff. That's
looking quite cool. So what we're going to do
now is based upon, like, knowing this, we can go, for example, I will not
go for a broken bridge. Once again, broken is quite difficult to make
and way too complicated. I have utils on this
that you can follow. So let's go back to mid journey, and let's try something else. Large concrete overhead
bridge with concrete, support, pillars, and
ivy growing on them. Let's try. This is
probably going to be too much concrete,
but we can just, like, give this a little
try. Here we go. So we get, like an
interesting, like, network of bridges that
might be quite interesting. Over here. And now, so we now got these variations. Basically, the reality is
that now I will just need to, like, play around
with this many, many times before we
continue on to get, like, something that I like because I kind of
want to have, like, a balance between this over here and between like
almost like this, like, just having, like, some interesting concrete
pillars or something like this, like a balance between
this one and that one. And that's kind of
what I want to strike. And I just need to come
across the right image. So what I will do
now is I will go ahead and I will stop
this video here. Next video, I will go ahead and I will time
laps the beginning of it. But then at the end, there
will be a real time chapter. So if you don't want
to see the time laps, you can just move along it. And with any time
laps that I create, I will make sure to also
include a real time version, but just without
audio because it is no use for me talking for
20 minutes about nothing. So let me just go ahead
and pass the video here. Next video, I will just basically go ahead and
just play around with a bunch of different
prompts to get something that goes a little bit closer
to what we have over here, just as a general inspiration.
3. 02 Continue Finding Our Reference: I Okay, so I think I found something. I found something at
the right scale with interesting lighting and
just like a nice concept. And it's like this
type of stuff. So it's almost like
an overhead bridge, but there's, like, gaps of light in there, and I
will like this one. But with this one, I really like the extra gap that is in here. So we can definitely,
do something with that. And maybe we can combine some interesting
concrete structures. So for example, like this one, the concrete is quite basic, which is also quite nice. But I can remember
before our last chapter, like we generated
this one over here. Like this is quite an
interesting concept to have the zigzagging in
the concrete like this. So basically, let's
see, where are we? This one over here. So I got this one and I
have this gap here. Now, I tried to generate
a few variations, but they went too far away. What we can do is so we
have this one over here, and we can actually using
Doll E specifically, extend the concept or
change it a little bit. And I just want to
show you the tools. I don't really need it because I can just do it out of my head, pretty much, but just to see if we can find
something interesting. So if you have this image
and you press Edit, there's a few things
that you can do. The first one that you
can do is you can use the eraser tool for which I can go over here
at the Sitmle. And let's say that I
want to have over here, uh let's say this one over here. Let's say that I want to
maybe, like, remove this part. What I can do is I
can click on it, and I can say, Oh, that's actually a tricky one. Um, gap showing the sky in the concrete bridge
with ivy growing. For example, something
like that. I have no idea if this will work. This tool, most of the time for me, only works with, like, Willy small changes, but
nothing like heavily altering. But we can give it a try,
so we can go ahead and, like, generate this
using that variation. And if that doesn't work, I'm just going to give
up because honestly, it's not worth my time
because we can just leave a gap Oh, okay. Yeah, so it's tight.
Twit it's best. What if I do gap showing the
sky with concrete bridge and ivy growing and sun
shining through it? I will do the ivy growing gun. Gap showing the sky in the concrete bridge and
sun shining through it. Let's try something like that. Maybe that will
work a little bit better. And after
this, I will give up. But yeah, just like that, you can add small alterations
to your concept. But of course, you
are still an artist, so you can interpret things
your own way later on. And that's what we also will be doing using something
called a blockout. So over here, let's
see what we have. We have this one, here
that looks like ice. It is trying to have the
sun shining through it. I think the reason it cannot have the sun shining through it because I told it to only
edit this area over here. But, um, yeah. Okay, let's use
this one over here. Cool. So, we now have a
concept that we like. Let's say that we want to
extend it a little bit. I also want to show you
that one as the last one. So we have this
concept over here, but we don't know what's
happening on the other frame. What we can do is we can press
this art generation frame. And then what I like
to do is if you just select right next to it, what will happen
is it is not able to interact with our
current image as well. So what I like to
do is I like to overlap it a little bit with
our current image over here. Like this. And then what
you can do is you can ask it to generate
something more. So over here, what
I can do is say, small overhead
concrete bridge with sport pillars and
foliage growing, um, in between the gaps,
something like that. I have no idea how it will look, but it will try to
match this to the style of our image because we have
it overlapping a little bit. And sometimes it does a really good job,
sometimes absolutely not. It's AI. Like, you just
need to give sometimes. Like here, see, like
a twit to match it. But then there
isn't really, like, a lot of logic
going on over here. So what I can do is I can check the variations.
You'll see. Most variations make
no sense at all. So I can go ahead and cancel. And sometimes what
you want to do is I need to have the
original prompt for this. What was the original prompt? Because often if I
pick the original one, Over here. So let's copy
the original prompt. So we had this one, and then
we had this one over here. So let's add it
generation frame, place it next to it, and then go ahead and say, large concrete corridor
peels and overeat. Yeah, you know what, sometimes
just doing the same prompt might actually work
because of course, the same prompt will
automatically be fairly similar than trying to do something
completely different. So let's do one more
generation in else. We will just leave it with
this if this does not work. I mean, interesting. I try to kind of
match up the road, as you can see over here. This one would make no sense. This one also not. Yeah, here. I just thinks too much that
these are separate corridors. No problem medal, then we
will cover this inside of the blockout where we will enhance the
things a little bit. So let's go outside
of Edit image. And then if you are happy with the image that
you have generated, you can go ahead and you
can just press Download over here. Okay, awesome. So we now have this done. So we have, like,
a few main images that I placed in here. What I'm going to do
that one can go away? I'm going to just go through and if I because I had a few
more interesting images. So this one, I want to go ahead and why can I not download? Maybe because it's
not like There we go. So this one I'm going
to download over here because it is all
about inspiration. Like we are not chrome to
create exactly what we see. It's all about inspiration. I'm going to also
download this one because this one also has some interesting elements going on. And let's see over here. No. No, there was one I
like the lighting here. I like the lighting
of this quite a lot. So let's just go ahead
and download that. And then there was the
one with the overhead, the interesting
concrete pillars. This one over here. Oh, wait, it's because it is editing. So that means that I need
to get the original one. Mm. There we go. This one's download that. And now we have gotten to the end of our
history. Don't worry. You can always go to
history over here, and here you can see all
of your generations. So here we can just see, all of the stuff that we
generated so far, which is actually
quite a lot of images. I don't know if there's
anything else in here that was really visually
striking to me. This one I quite like. So let's just go ahead
and also download this one. Okay, awesome. So we now got a bunch of
reference images over here. And these images
they will give us quite a good idea of
what we want to get. So we got mostly
these ones over here, and then we have just also
some from the last of us. And if we grab our sorry, my screen is going a bit crazy. If we grab our main
image over here. So when I see this, what kind of other
reference would I need? There's two types of references that I often want to gather. One of them is the
environment reference. This has to do with the mood, the layout of the environment, and just like the general
flow and stuff like that. And the other one is
material reference. So what I always like to do is I like to and I will go over the folder structures
in the next chapter. But I always like to start
with a reference folder and, of course, have a main
folder that you call, whatever you want to
call this project. In my case, I just
call it source files. And in here, we have
a main reference, and then I'm just
going to also create a folder called materials. And in here, we can
do texture reference. Materials and textures are
pretty much the same thing, although it depends
on the software. For example, in real,
they are not the same. So we got this stuff over here. And then what we
can do is we can, for example, let's say that
we go to Google Images, and we can go for an Walkway with overhead concrete bridges. Yeah, I expect Like Google
images is not like the pumps, so it's a little
bit harder to get the stuff concrete with
ivy growing on it. It's a bit harder to get
like something interesting. But what I basically wanted to show you is that if you
want to use Google Images, you can go ahead and
you can go to tools. And then in the size, you can set the size to large so that you only get these
nice large images. And this is more like
this kind of stuff that I was just like,
thinking about. But, yeah, it's a bit difficult to get
exactly what you want. Concrete, bridge with ivy. Now we get, like, a little
bit closer to what we want. Oh, every time you
do a new search, you do need to set
it back to large. So I like to just, like, middle click on the View Image tab. And it's just like
getting, like, some general just like reference and inspiration
from this kind of stuff. Like, how does it look
exactly in real life? Because you cannot always trust AI with this kind of stuff. So let's say that we have this, and I will just use a
bridge because it's easier. What you can also do
is you can always just go to, like,
related images. And basically, what
I'm looking for is I just want to see how
the ivy grows on the concrete and how that
the concrete looks what the concrete looks
like because of all of the ivy
growing on top of it. If that makes sense. Let's do. So another
thing that we can do, although this one I
actually rarely do, but I just remember is
we can enter an image. So what we might try is
to enter our AI image, and then it will try to find
visually similar images, which could be very
interesting over here. So we can search. And here, see, so now we can get some
really interesting stuff. Although I believe it is
Oh, yeah, it's sending me. I used to just like
visual matches, but it used to just have
I believe image source. Oh, yeah, image source. Visually interesting, but
then all of a sudden, it just does not give me
what I want. That's too bad. I wish that Google made
that a little bit better. Like, we can go into the
website to find the images, but that feels like
a little bit of a hassle for
something like that. So I will just do,
like, a few like this. And then, I guess, I can
just drag in this image. Yeah, see here, this is why
I don't like going into the website because
most of these things, you cannot really get,
like, proper stuff from it. But basically, so we have
these images over here, and I'm just going to go
ahead and I'm going to drag these into my scene, or into my folder. And then we have a nice
amount of reference. I actually recommend getting way more reference than I do, but I don't want to prolong
the search too much. So we now got a bunch of actual reference just from our general
environment over here. The next one that we want is
we want to have materials. Now, I on purpose
chose this one because the only material that we
really have here that we need is concrete
and some decals. So this is great as
like an introduction to substance designer because
concrete is not too difficult, but still difficult enough that you will learn
a lot from it. So what we're going to do
is so for the concrete, I just want to get,
like, a baseline for the type of concrete
that I want. Now, with this, what
I like to do is I have my own image library of, like, I just went outside
and I search for images. What you can also do if you
don't want to go outside, but I will, of course,
include these images, is you can try to have
a look on texture.com. And then if you go into, like, concrete, we can
go over here for, like, I don't know, maybe, like, dirty or
old concrete or bare. And here you can often
find some images for, like, concrete and
stuff like that. So it does have some
interesting images that are, you know, like, a little bit
damaged and stuff like that. And we can use those as a base, but I highly recommend
getting, like, really high resolution
reference images, and I will be releasing all of my reference images
in the near future, but for now because I don't
really have them. Once again, We can also do.
And maybe this is a good time for me to quickly
show you mid journey. So let's say let's try to generate a reference image
of concrete in mid journey. It will probably
not work because it's not the best
thing for mid journey. So in mid journey, the
way that it works, it works via discord, basically. So what you want to
do is you want to, for example, join the Beta, and then it will ask you to
sign up with your discord. So when you arrived at Discord, you will be able to see
the Mid journey server. Now, if you have paid
for Mid journey, you will be able to get
your own personal bot. But I assume most of you are not going to just right
away pay for this. So what you want to
do is you want to go to one of the Newbie rooms. So over here we have,
for example, this one, and here you can
see that everyone can generate their
own images here. So what we can do
is we need to do, like a long scroll down. What you want to do
is you want to press slash and then prompt. Do you know why that? Does Oh, no, sorry, slash, imagine. Slash Imagine, and then it will say prompt.
Sorry about that. So you want to do
slash, Imagine, and then it will
ask you for prompt, which is the same as the
text that we entered. So and someone is
spamming. Buta. So what we can do over here is we can go ahead and you
can have a look at, like, other people and what
they are generating, dirty concrete while let's
do old dirty concretoiil. Now, next to this, there is a few things that you can art. So you can do a
comma and you can do realistic to make
it like realistic. Here, you can see someone
saying, like, hyper realistic. You can also someone saying like eight K and
that kind of stuff. Basically, the two that
I am interested in is some person is just
like entering images. The only one that I'm
interested is doing dash dash, and then you want to
go ahead and you want to go for V four. And what this is it's a new
version of Mid journey. It is telling Mid Journey to
add a new version of itself. Oh, sorry, I'm getting distracted by the
images so I can talk. It is asking Mad Journey
to use the latest version, and then dash dash up Beta is basically the Beta for
a new resolution style. So once we've done that, we
can go ahead and press Enter. And then we just need to keep track of it by just using your
skull wheel over here. This is why I have
paid for it so that I have my personal
bot over here. But let's just go
ahead and see how it generates over here, and it should at one point, like when it is done generating, it
should show our image. But I will just pass the
video until it is done. And here it is. So
you can see that it, tags you and stuff like that. And although it is completely
not what I'm looking for, this is what I said about Mid journey being a little bit more on the creative side rather
than the realistic side. If you would want to upscale
one of these images, let's say, number three, we
go one, two, three, four. So number three, we want to go ahead and just plus U three. And then it will put
out a larger image, but once again, like
this can take a while. So that's basically just like a super quick
overview of M journey. I don't want to spend
too much time on it. And just in general,
you can also use Dali, of course, to just
generate some concrete. So what I'm going to do is I'm going to have a quick
look in my own library. Okay. So I found some reference
images in my library. Now, I will go ahead
and show you this. While I cannot stress enough, it is so important. Have high resolution and really good and detailed
reference images. So this one over here is
actually not very good. Now I look at it because the compression is really intense, but these ones over
here are a lot better. So as you can see
over here, I got an interesting reference
image of some concrete. It's a little bit too damaged, but these are really high
resolution reference images. Although I do wonder
Oh, yeah, 6,000. So this one is an old one. My newer ones are
9,000 resolution. So that is probably why I see a little bit of weird
sharpness going on. But here we can also see some light response and
stuff like that. That's why I like to take
my own images because I choose to do different angles
and different close ups, which is really good because
that means that I can just, like, see everything
from the material. But also, I often
try to capture, like, some lighting
response like that. Here we have a much cleaner
version, but you can see, this one is more what
we will probably be going for to keep it
a little bit simple. And then we will
probably combine it with something like
this in terms of, like, the dirtiness on it. So this is also like
a really good one, as you can see over here. I can zoom in and get some
quite interesting stuff. I am sometimes
embarrassed that I should have set my camera settings
is a bit different. But yeah, so we got some really
good concrete images now, and then you can see the difference between
my images that I took with my own camera
and text.com, of course. Of course, if you
pay for text.com, you can get high resolution
images. But yeah, still. So, we now got our
material images, and we have our
environment images, which means that I would
probably call finally I I can probably call the
reference collection done. Now, normally, gathering
this reference would go a little bit faster, but of course, I had to
explain quite a bit. So with this done, what
we're going to do next is we are going to go over
setting up a project folders. So let's go ahead and continue over to the next
chapter to do that.
4. 03 Folder Structure: In this chapter, I
just want to go over our folder structure
that we will be using. When you are working
on a project, it is quite important
and also quite useful to always have the same folder structure and to keep everything
nice and organized. Especially when you're
working on larger projects, you have to do this because
else after a while, you just won't be able to
find anything anymore. And the nice thing
about standardizing, which means always having the same folder structure
is that even if you are making a project two years down the line and you need
to go all the way back to, like, a project two years ago, you will still be able to know
where to find everything. So in here, what I always have is I always
have a main folder. In my case, source
files because I'm creating a tutorial course
and not an actual project. But I would give
this a descriptive name like, for example, this one would be like well, beginner tutorial or
something or just like a concrete
overpass, whatever. I would just give it like a
name that you can remember. Then in here, we always have a few folders as
the main folders. One of them is saves in my case. By the way, this is my
folder structure that I use and that I
find very useful. The Saves folder will contain
all of my save files, including my modeling files, my texturing files,
stuff like that. Then we will have
a textures folder. In this folder, I will export and have any additional
information to my texture. So for example, in
my text folder, when I'm going to create
my concrete texture, I will go ahead and
call this concrete, or I like to do something
more descriptive, so dirty underscore concrete. Actually, I don't use
underscores anymore. You can choose. Sometimes I like to use underscores,
sometimes not. It's a little bit of
that's the only thing that I'm not very good at that I'm not very consistent with it. So we have a textures,
we have our SAS folder. We also want to have
an export folder. In here, we will
export any measures. These measures can go to Cbs. They can go to Unreal, whatever. So speaking about Unreal, because we are working
on Unreal project, I always have a two
underscore Unreal folder. The reason I have
this one specific is because it makes
it easy for me to know that all of the assets in this folder can go
to Unreal Engine. Finally, I will have another
folder that I always do in capitals that I
will call Unreal. So in here we will place
our Unreal project. So let's see, Unreal texture saves. Yeah, that
looks pretty good. We sometimes also
have an other folder for additional stuff. But this is often my
main folder structure. Then in here, of course, we have reference and then
materials, all that stuff. Our Sage folder will not
have anything in it. And if I need to create
any extra folders, I can always do that
during the progress. So what we will do next in
next chapter is we will go ahead and we will go over the
layout of various programs. We will go over the layout
of Max, Maya, and Blender. Of course, remember, you can
just pick whatever you want. You don't have to
follow all of them. You just want to pick
the one that you want. As a personal preference,
I like to use Max. However, probably the most
useful one to use is Maya. But if you don't
want to pay for it, then I would do blender. That is my personal
opinion and what I see in the game industry because not many game studios are still using Blender
and stuff like that. And personally, I just like out desk programs more mostly
also because of experience. So yeah, Max Maya blender. And I will just make sure
that in the fine names, it looks logical how
you can choose it. Okay, let's go ahead and
continue on to the next chapter.
5. 04 Blender Layout And Navigation: Okay, welcome to a very quick
introduction in Blender. Now, before we get started, one thing that I do want to mention that I also mentioned, I believe in the other chapters, is that we are only going to focus on using blender for
our specific purposes, which is often environment art. This means that this is not a complete introduction
to blender. Absolutely not because
an introduction to Blender can literally be an entire tutorial
course on its own. I will simply show you the most common features
that you would use like 80 or 90% of the time whenever you are working on environment
art within Blender. So what we're going to do
in this chapter is I just want to quickly go over
the layout and navigation. Now, there are a
few changes that I specifically am going
to do for myself, and I will also explain to you
that when we arrive there. But right now, what I did
is I completely reset it my viewpoint of
blender to default. Now, over here, Blender works quite differently to Tris Max and Maya, which I
just came from. So let's hope that I do
not make any mistakes. Also, what I want to show you is that we now have over here a keyboard registration
that I turned on. This way, you can
see the keys that I am pressing over here,
see, Middle click. And let's start with that. So moving around our viewboard, you can use your middle click
to basically rotate around your viewboard simply middle click hold and then just
move your mouse around. You can use Shift Middle click
to pen around like this. And with these two motions, you can already pretty much watch everywhere
in tree space. And, of course, a
classic, you can use your scroll wheel to zoom in and out like
that. Just like that. If you want to select something, just simply click on
it, and now we have, for example, box selected. And if you are, for example,
quite far away from it and you want to zoom
in onto this box, you want to press
the What was it? The dot on your numpad,
if that makes sense. So like the delete or
dot on your numpad. I don't know if my yeah, yeah, my keyboard registration
doesn't show it very well. It's a weird one because
the other software just use F for find or Z for Zoom in. But yeah, so it's the dot on your numpad next to
the Enter button, depending on how
your keyboard looks. Okay, and that is
basically how we would move around in our Tweed space. I do highly recommend
that even next digit oil, if you are deciding that you
really want to use Blender, to also, watch a
little bit of, like, a better introduction
to blender, just to give you, like,
a better foundation. So, okay, we are now
able to move around. So we have quite
a few viewpoints. Now, one thing is that blender
loves their shortcuts. Let me say like that. However, I personally do not
like shortcuts. So there's a few things
that I will change around just to make my
life a little bit easier. The reason for this is
with the things that I'm about to change, it is
because, for example, let's say this
tutorial, right now, I am teaching you how to do tree mulling in Maya,
Max, and blender. I'm doing all of them
at the same time. So literally today,
I have touched Max, I have touched Maya, and
now I'm touching Blender. You can imagine that
this along with all of the other software like
unreal engine, marmoset, substance painter,
designer, brush, it can become quite overwhelming with the amount
of shortcuts you have. And that is my personal reason why I like to have
Blender look a little bit more like all
of the other softwares. So just to show you what
I'm going to change, right now in default
for blender, if you want to go
ahead and you want to rotate your object,
you can press R, and this allows you to
basically rotate your object around based upon roughly
where you are looking at. And I believe you can also do R, and then if you hold Control, you can snap rotate like that. You can also, of
course, go up here into your what's called
object properties. And in here, you can
manually set well, 90 would not work. Here we go. You can manually
set your rotation. Now, if you want to go ahead
and you want to scale, you would press the S button, and that's where you can
scale your model up and down. And if you want to move, you want to press the G button, and on the G button, you
can basically move around. So that is the default
inside of blender. Totally fine if you use that. However, blender also
has a pivot point. And if I go up here
to move, for example, you can see the shortcut right
now is shift space bar G. That is not a nice shortcut. So we have move,
rotate and scale. Once you start looking at all of the other three software, you will know that the
pivot is often the default. And by the way, this
stuff over here, you can just delete on. Delete just means removing
it because we don't need it. So I personally like
to use my pivot point. I just feel like some people
say that it is slower, and in certain
situations, it is slower, but I prefer it
because it's more precise and it just works
a bit better for me. You can also do
rotate over here. And you can do your scaling in which I can scale
in multiple axes quite easily like this and have more control
over everything. So what I like to do is I like
to set these shortcuts to the most common
shortcuts used in any program like Max and Maya. To set this shortcut super easy, all I want to do is
right click or move Assign shortcut and
press W. Go to next one. Assign shortcut, E. Next
one, assign shortcut, R. So now W ER, C. So now I can very quickly
switch between them. That is one of the few
things that I will change from the default
inside of blender. Now that is done, it's just easier for me to, like, now move around
and stuff like that. Let's go ahead and
go over our menus. So up here, we have
some classic menus. We have the file where
we can save our scene. We can create new
scenes over here, file, new general. Don't
Save. There we go. Brand new scene, for example, we can once again
delete this stuff. And we can export our models. Those are the main things
that we want to focus on. You can also in here reset your entire blender to default, which would remove the
shortcuts that we just set. It. Quite basic. It's just Indo redo,
but of course, we would use the ControZ
and shift contro ze, in this case, for
blender to redo. And you have your preferences. In your preferences,
you can find everything you need from dons, which we are actually going
to use a few dons later on. But also just in general, like stuff about your interface, about your viewport,
about your hot keys. Sorry, hot keys. Yes,
that's the word. And the system and, like, a bunch of extra stuff that
you might want to use. So in this kind of in
this case, let's see. Is there anything I would want to kind of, like, show you. I feel like most of the stuff you would honestly
never really touch. Yeah, you probably would
not really touch it. I was just looking for
something specific, but I don't think it's
in here. No, yeah. So I feel confident that you
would not really touch this. Most of the settings
that we want to touch are in the bottom right. Now we have our render. This is if you are
rendering in blender. We will not touch
this subject at all because we are rendering unreal. Windows in which we can basically create
additional windows, additional windows like this. Basically, the way
the blender works is if we just go
ahead and blender, you can basically
create new windows, and then in here, you can select the window you
want, for example. So let's say that I want
to have a tree viewpod, This is a tree viewpod. Let's say I want to have
like a UV editor for my UVs, I can open up the UV editor. I personally don't really use it because I use it in here. And next, what we have over here is basically just like layouts. I often work with
just a normal layout. However, if you want to be
more focused on modeling, you can go to your modeling
layout, which we'll remove, for example, the
bar at the bottom, the timeline bar for animations
and stuff like that. If you want to do sculpting, the sculpting one
is quite specific. UV editing is also quite
specific, one that we will use. So there's just like a bunch of different bars that
we would want to use. Personally, myself, I switch between layout and UV
editing, most of the time. I don't really use sculpting
inside of Blender, and we will also not be doing that because we will be
using Zbrush for it. Okay, so the bar below that, we just have a few
different settings. So over here, these
are just like some general settings that
you can use for your layout. The one that you would use most of the time
is that in here, there are some settings that have to do with your transforms, and of course, you can here
duplicate your objects. Although nicely enough, you can also see the
shortcuts next to it. And we sometimes
want to go in here, but that's something
that will come in the chapter after this. No, no, not the
chapter after this, but the chapter after
that, I believe. So in two chapters,
we will cover that kind of stuff a
little bit more closely. The ones that we want to mostly focus on is
here at the top. So first of all, we have global. Global is the direction
of our Pivot point. Right now, we are moving
in a global direction, so X, Y, and Z. But let's say that
we rotate our pivot like this or sorry,
our object like this. Now, you can see that our
pivot point stays the same. But what if I want
to move my object in the same rotation or in the same direction
as the rotation? I can go from global to local. Those are the two you
would use the most. And in local, I'm now
able to basically move my object along the rotation,
as you can see over here. Now, next this, we
also have this one. This one has to do with
your tree de cursor. You have your tree
cursor over here, and the treaty
cursor in blender, it's a little bit confusing. Personally, I do
not like to use it, so I will simply not
cover it in here. I do not feel comfortable also explaining you because
I simply rarely use it. However, your Trini
cursor would be used more in conjunction with
your shortcuts if you are not using
the IVA point. However, when you're using
the BVPoint things become, to me, at least a
bit more simplified. So let's just go ahead and set this rotation back to zero. And you can also by the way, if you want to set multiple pieces to zero
right away. Oh no, wait. That does not work.
Oh, yeah, there we go. You can click and drag, and then you can set all
of them to zero. So just click and drag in
your transforms over here, in your object to
set it back to zero. Now the next one is snapping. This one we will be
using quite often. Basically, snapping, you have a few snapping modes,
and snapping means, if I turn on absolute grid snap, it means that it will, for
example, snap along the grid. This is great if you need to
do really precise modeling. For example, something that
we call the modular workflow. We need to very
precise modeling. So let's say that
I go ahead and I duplicate my model over here simply by pressing
Control C CtraV. Although I believe you can also use the duplicate Chef
D you can also use. So it doesn't really matter
Chef D. Duplicates it, but it duplicates it
without your Pivot point, so you can kind of
move it like this. And Contra C Contrave
also duplicates it, but it will duplicate it in
place, like in its own place. So next to the increment, the one that we will
most of the time be using is vertex, also. What you can do
with Vertex is if you move your model
to another model, it will snap this model
to its vertex over here, although do I have something
set snap to center. There we go. So now it will basically snap your
model wherever your Pivot point is to
the vertex of this model. Vertices are these
points. Don't worry. We will go over this
later. They are the points that are basically connecting all of our faces
and all of our polygons. So that is vertex snapping, and you can also snap
to faces, I believe. But snapping to faces over here you can see
that it will just basically move along
on your faces. Go ahead and delete that.
So that's that one. The last one over here is
soft select and soft select, if you just ignore what
I'm doing right now. Soft select is basically this. Let's say that you have a
selection, and don't worry. We will go over this. What you can do is you can turn this on. And now, Oh, by the way, in your, that's annoying. I will show you that later on. Basically, with
Softselect and on, I can move my pivot and I
can use my scroll wheel to, like, softly select all of my wordss like this,
which can be quite nice. So that is the soft select. Now, let's have a look. Over here, we have
some viewpod settings. Most of these settings I
will not really touch. These two I don't really touch. In here, we have a
setting for wireframe, which will always show
our wireframe on here, which is one that I quite
liked and often use. And in here, we have X ray mode. X ray mode allows us to
make our model see through. This is really good, and we
will need to use it a lot, although we will actually
set a shortcut for it. Right now, the shortcut is Alt and I actually like to
use Alt x for that. Here, because ALC is set to
my NVDA stuff, my recorder. So I can actually
right click here. I can change shortcut Alt x. There we go. So now it works. The reason why this is handy is because if we are selecting in blender, one sec. Like this. I know it's annoying. We will go over this later.
If we are selecting blender, it never selects whatever
is behind your camera. But if you press Alt
X and now select it, it will select throughout
your entire model like that. And that's why X ray
mode is quite handy. And next, we have some
viewpoint modes like wireframe mode, shaded mode, and then we have also
one with textures, but we don't have
any textures and one that actually has that renders. However, we are also not
rendering anything inside of blender. Okay, awesome. The little Tobar over
here to the side, you can see that it was like a little arrow that you
might need to press. Can I don't know how to actually show you
that. Like this. So here, see? So there's
this little arrow over here. If you just click
on it. Here, you can also find your transforms. It's often easier because if I'm on this window, for example, I would need to navigate to this window just to
change my transforms, or I can go in here
and I can very quickly change all of these
and make my cue bigger. And I can change all of
these settings over here. Tool settings we don't use, viewpod settings we
also really don't use. Viewpod setting is, for example, how close can you zoom
in your clipping or how far can you zoom out before your grid starts to disappear? So if I set this to 2000, see? You can see that it takes longer for your
grid to disappear. It's that kind of stuff, but we don't really need
it, to be honest. So right next to that,
on the right side, we have our scene explorer or scene collection, whatever
you want to call it. It basically shows
everything that is in our scene. Right
now, it is a cube. But if I would, for example, go ahead and like I
don't know, here. I don't know why it's huh? Oh, I have soft
selection turn on. That's why it was
moving. Here we go. So now we have three cubes, and now you can see that we have three cubes
in our scene. So it just shows
everything that is in our scene, which
is really useful. So let me just
create a new cube. I will go over that shortcut later on. Let's move this out. Here we go. Okay. So that
is our scene explorer. We just use it basically
to select Slove. And then down here, quite
an important window. This window will have
all of our settings. So whenever we have a cube, of course, it also has some
viewpod settings, by the way. So up here, it has some
settings for rendering. It has some settings. This
one is also for rendering. This one is for rendering,
lighting, pretty much. Ah, over here, this one is quite important. The scene properties. The scene properties, the
only one that I'm often interested interested in here is the unit so the units
you can choose like if you want to use metric or
if you want to use imperial, if you are from America or
from the rest of the world. And you can also say,
how are we working? Are we working in
meters or centimeters? So right now we are
working in a meter, and I can see that this object is 2 meters by 2
meters by 2 meters. If I would say this
2 centimeters, you can see that it says 200
centimeters by 200 by 200. So it allows you to work
more or less precise. This is something you
will only really get used to when you do
a lot of modeling, and you need to sometimes
switch them up. This one never used it, and over here, this one, it's just like some
random settings. Again, this is not a
complete introduction, so I will not actually go
over that kind of stuff. Now, over here, you
have some settings relating to this one cube
like your transforms. Honestly, to be with
all of this stuff, you can also change your viewpod settings
or something like that. To be honest, I never really touch this one because I have my
transforms up here. This one is more important. It's the modifier tab. We will actually go
over extensively into how to use this
a little bit later. But modifiers are basically ways that we can
manipulate our mesh. And they have a bunch of
modifiers like adding more geometry, see, like this. And there's a bunch
of stuff in here, but we actually have
a special chapter just on modifiers and
that kind of stuff. Now, next this we
can ignore this tab, we can ignore this one
because this one is for simulations, this
one we can ignore. This one, it's the object data. Honestly, the only
times that I will use this is for my UV maps, which we will dive
into a little bit later and for the
rest for my normals, if I want to do some
outer smoothing. Once again, we will dive
into that a little later. A tricky thing about showing you the layout first because
I need to have you know where everything is located without actually
being able to really show the tools yet
because those come in later chapters since
it's more advanced. And over here we have a tab for materials in which
we can, for example, create materials
and we can change the color of our
object like this, see? And that kind of stuff. I can just go ahead and
I can remove that one. So that is it for materials, and this one is specifically for some textures which I
also don't really use. So basically, most of the
settings in your model, you will be able
to find over here. Okay, so I would say the
last thing is that up here, of course, as I've
already showed you, we have our move rotate scale, and then we have a
hypertol which basically allows you to have everything
in one tool like this, which could be also
quite interesting if I never really use it
just because of habit, because there's so much
stuff that I need to, like, precisely select, see? Here, I'm already
doing something wrong. So I just like to do
them individually. Annotate tool, which
allows you to basically if you ever I wish that
three Max and I had this. So I can, like, very
quickly give feedback. I can say, like,
Hey, look, uh Okay, I cannot white because
I'm on using my mouse. But I can just make these type of annotations,
which is quite cool. And the cool thing is also
like they are actually tree D, which is quite fun. Of course, it does
mean that it rarely actually matches up properly. But I know it's a
fun thing to have. You also have a measure tool which allows you to
basically measure. So if I, for example, click here to here,
I can see that it's around 2 meters,
which makes sense. But of course, yeah, take it with a grain of salt. And the one that I'm really
interested in is in here. If you click and hold, you
can select using a box. However, you can
also select using, for example, circle
or like a eso tool. So if you ever used
Photoshop or something, this is just like the
kind of selections that you can make with this. I would say that
that is about it. So the last thing
that I will say, and then we will move over to the next chapter where we will
go over the actual tools, is that if you select an object and you want
to start modeling, you want to press
the tab button. The tab button
basically switches from object mode to edit mode. And in edit mode,
you are able to basically add all of
your changes like this. You can see that our bar has also become a
little bit bigger. We will go over these
tools later on. The only thing that I
want to do is I want to also go in here
because the shortcuts are different between
object mode and dit mode. So I want to go in
here, right click assigned shortcut W E, and R. Now there will most
likely be a conflict. So let's see, W C here, there is a conflict over here, and R, that conflict basically means that we have two shortcuts that use
the exact same function, and I know which one it is. So the one that it is using
is right now E means extrude. However, I want E to be rotate because I want
to set it like that. So what I can do is I can go
to my edit and preferences. And I can find the key map. I can do this by
basically clicking on key binding and typing
just the letter E in. Now, in here, you often get
a lot of stuff in here. But the one that
you want to focus on is you want to focus on the Act I cannot see it myself. Oh, wait, scroll
was not working. You want to focus
over here on mesh, and then you want
to have the extrude and move on normals. I want to set this one to So we already have
this one over here. Let's do this one on Control. Actually, let's do
this one Alt E, and this one on
Control E over here. And that should do the twig. I don't think we
have anything else? No. So mesh means the added mode, everything
that is in mesh. Now, if I would press W E, there we go, and R, C. And I can still
extrude by pressing Alt E. And I can also do the other
extrude using Control E, which is like a setting, which I actually like more. I like to use
settings more most of the time for Wi
precise modeling. So that's the only little
bit that I would show you just so that we are ready
to go in the next chapter. So yes, yeah. In the next chapter, I
will go over my tool bars because there is a
tool bar that's called Quick Favorites that technically belongs to the layout section, but you need to understand the tools
before I can go over that. So let's go ahead and continue
on to next chapter where we will go over our
modeling tools. And then I will show you, like all of the
modeling tools that we have that we will often use. And yeah, let's go ahead and
continue to next chapter.
6. 04 Max Layout And Navigation: In this chapter, we
will go over the layout and navigation inside of TSMAx. Now, please keep in
mind this tutorial is not a complete
introduction to TSMx. We will only be
covering the tools that you would most commonly
use within Environct and, of course, the tools that we specifically need to
create our environment. I still want to give
you an overview. But I'm saying this
because I recommend that once you have settled on the software
that you want to use, to simply also watch
an introduction Tutoria on that software. That is very useful even when following
this tutorial course. So this is pretty
much the default that you get in three years Max. I am using TSMx 2022, in this case, and a few
things that you want to know. So first of all, down here, I have added my
keyboard registration so that you can actually see
the stuff that I'm clicking. Whenever you open
up this viewpod and you want to make
your viewpod bigger, you can select the
viewpoint that you want, for example, perspective
and press Alt W. This will make your
viewpod bigger. So first of all, let's just go ahead and go over the
general navigation, and then we will go
over the layout. So for the general navigation,
it's not too difficult. If you hold your
middle mouse button, you can pen around like this. Your scroll wheel, you can
simply zoom in and out. If you hold Alt and your
middle mouse button, you can rotate around. And if you do contra Alt
middle mouse button, you can zoom in a little
bit more precisely. So once again, penning
middle mouse button, Alt middle mouse
button to rotate, scroll wheel to zoom in and out. So those are the
three main ones. And that will allow you to go into every single axis you want. Now, next this, if we now
go ahead and quickly, first of all, go over
our layout because we need to create some stuff in
order to show you the rest. What you will most
of the time have is you will most time
see this view. We have our top layout, and as I said, this is
not an introduction, so the top layout has a few key things that
we would like to use like saving our scenes,
importing and exporting. Those are the three main ones that we want to use,
and, of course, you can press or you
can create a new scene, or you can press reset, which will completely reset
your scene to default. There are a bunch of extra
settings in At and in tools, I would say that in dit I
rarely enter dit because I have different places where
I can use the same tools. In tools, you can find
your array modifiers. And basically, an array
modifier allows you to if you drag over
it, it will tell you. It allows you to very quickly copy and paste multiple models. The stuff that I'm
talking about right now, this is stuff that we
might go over later on, or we will cover it later on
and actually show examples. This chapter is not about
showing you examples. We have one to group, which means combining
assets together in a group. We have some views,
some viewpod settings. We don't need it. The creatab we don't need it because you can
find it over here. The modifier step we don't need. Once again, you can find
most of the stuff we need on the right
side panel over here. Animation, we don't need graphs,
we don't need rendering, we don't need the customize
we will be using also. The customize is everything that has to do with
your settings, your layouts, your hot
keys, stuff like that. So we will go over this
a little bit later on when we actually install some plugins that
we want to use. Scripting we don't need, content, we don't
need substance. The rest we all don't need. It's not needed for what
we have right here. Then below this,
we have a tab that we will be using a
little bit more. So here we have a tab where
we can link and unlink. So I will just very quickly show you by creating two cubes. Right now, if I move one cube around, it is a single cube. However, if I press
the Link button and click and drag
to the second cube, it basically Sorry, I had to
do it the other way around. If you link it to
the second cube, it'll basically link
the objects together, so that when you
move them around, they will stay in the
same position together. And you can just
press the unlinked button to turn it into oh, sorry, press the unlinked button to turn it into one
object again like that. So that's those months. Over here, we have
some selection tools. For example, right now, I can
click and drag to Select. However, I can also
click and hold, and you will see this with
many buttons in TSMx. When you click and hold,
you will get more settings. So here you can see,
click and hold, and you can see by the tiny
little arrow at the bottom. That one will show you when you can click and hold on something. So yeah, selection arrow. So we have this one if
I click and hold and let's say that I use
the lesser tool, I can select using the lesser
Tool and stuff like that. These ones are move tools, move, rotate and scale. We don't really use these
ones because we can use W, E, or R to basically
switch between them, see? So rotate, move, and scale. So those ones we will of course be using later on when
we do our tree modeling. I will go over the hot keys also a little bit more later on. So next to this over here, this one allows you to basically change the way
that your pivot reacts. Your pivot is this
piece over here. We call it pivot, and basically, it allows us to do any
types of movements. And these are also
called pivots over here. So let's say that right
now it is set to view, and view is the same
as that basically, it just goes X, Y, and Z, like this. You can see this little
view pot button over here, and it shows you like, northeast southwest,
it shows you the directions and in which
case you are looking at. However, let's say that you
rotate this object like this, and now that you
have rotated it, you want to move it in the
direction of your object. What you would then
do is you would go from view to local, and then it will
set it based upon the direction of your
local object like this. Those are the only two
we will really be using. So you have view, which allows
you to set it like this. And I believe world is the
exact same, here or see. World is the exact same one. The reason I say that is because in unreal, it's called world. So it might be easier for you to understand if
you ever used Unreal. And then we have our local, which allows us to
move it up and down. So those are those ones. Over here, we have some
more combining stuff. We don't really
use it too often. But you can see that it
automatically changes. So if you select one model, it will use the
model as its own. If you select two models, it will basically with a plus, it means that these
two models will act. If they are one model like this, while if I would set this to, I believe, this one over here, they would act as
their own rotation. See? So own rotation. And if I click and hold and
press a little plus sign, it basically keeps the
entire rotation like that. So those are those ones. Now, again, if this goes a
little bit too quick for you, of course, you can
pass the video. What you can do is you can
simply follow along in the later chapters where we will actually be using these tools. So over here we have
some snapping tools. Basically, what
snapping means is if I select this
one, for example, I'm able to click and snap, in this case, to
my grid, my asset. This is really useful if you
want to work very precisely. So you have a bunch
of snapping options. The way that you can access these options is
by right clicking, and then it will
show you options. Once again, right
clicking is again something that often opens up like an extra view
like this over here. But I often only right click
for the snapping options. So in here, I can
choose where to snap. For example, if I only snap to vertices, nothing will work, but if I move it to one
of my models here, see, it will snap to the vertice, which is the point that you can see over here to this model. Now, next this, we can
also snap the edges, faces, a bunch of stuff. We will go over this a
little bit later on. By the way, since we're here
anyway, in these options, you can also find this one I would not really
use too often, but you can also
find the home grid. In this, you can change
the size of your grid. For example, right
now, every grid point from here to here
is 10 centimeters. However, if you want
to, for example, work with meters, you can
set this to 100 centimeters. And now every grid point
is 1 meter like that. So every time I move
it, it's 1 meter. This is very useful for when you're creating
larger objects, like we are going to
do with our pillars. But for now, let's
just keep it to ten so that we are
back at default. And I can close this. Over here, we have some mirror options, does not really work like this. Just ignore what I'm
doing right now. It's just because I need
to show you something. So just give me 1 second. Yeah, you can see that it
is really fast to model. Also inside of TSMC like that, but I will go over that later. So mirror options, see? It allows you to
basically mirror, and it also allows you
to basically hold copy, which means that you create
two objects like this. Unfortunately, you cannot move your viewpoint around
when you are mirroring. Just keep that in mind. We
have some align options. You can click it, and then if you click
on another object, it will give you some settings. And basically what it
allows you to do is place this one object on top of the
other object very quickly. We don't use it that often. These two viewpots over here are very important. We
will be using it. You have the toggle scene
explorer over here, and you have the layer explorer. Basically, the way
that we use these two is we use them
for organization. For example, let's say that
we have created a model, then in order to keep
things organized, we can press the plus
button and we can say model 01, for example. What allows us to do
is it allows us to, like, nicely hide it and
continue on to our next model. This way, we don't have
to keep things organized, make a new scene for
every single model. We can have everything
in one single scene. And the scene explorer
basically just shows all of the models
that we have in our scene. I will go over the window
tracking later on. So over here, You guys probably have the default,
which is this one. And this is basically
your material editor. I personally like to use
the simpler version, which is this version, and I always takes a second to load. So oh, no, sorry, it's
on my other screen. So this version, it allows
you to add materials, and materials are basically
the textures and the colors. For example, if I press assign
over here on this button, I can assign the material, and let's say that I go
over here to this color, I can change the
color of my asset. But of course, we would use it for textures and
stuff like that. So that is the materials. Once again, this is one
we will go for more. These three over here,
they are custom and they are something that
I will install and I will show
you guys later on. We have some rendering setups, but because we are
working in a game engine, we don't use them, and the rest you can
pretty much ignore. These are some simulation stuff. And if you don't have
the simulation stuff, you can always right click and here you can find some more. So this one is the
mass FX toolbar. But if you right, click on the toolbar,
you can add more stuff. So if you feel like
you're missing something, you can probably add it here. Okay, so that is the top bar. Now comes the most
important ones, which is going to be our
modeling tools and our side bar. For our modeling tools, what you want to
do is you want to double click over here on modeling, and then
it will show up. It will remember that
it is collapsed, so you can also always use it. Let's go ahead and first
of all, go to our sidebar. So our sidebar has a
few different views. We have the create,
we have the modify, we have the hierarchy,
and then we have motion. This one, I don't even know
because I never used display, and we have our
tools or utilities. Ones that you will
spend most of your time in it's going to be de create and by far demodify because this one will contain all of the information
for your models. We will sometimes
use the hierarchy just to change our pivot
and stuff like that. So very easy. We hold
Middle Mouse button. I'll middle click
to, for example, nicely position. Are seen. In this case, I'm
positioning it to the front. It is a good practice to
always position it to facing the front over here because that way you know
you're facing forward. And let's say that we
want to create a cube. We can simply click on the
box and then click and drag. And then what you
want to do is you want to click and hold again. Oh, sorry, I have
snapping still turn on. I can do that again if you want. So click and drag
and then release, and then you can
just move it up. And that way you have
created a cube over here. Now, with this cube
that you have now, as soon as you press W, you go outside of the creation mode. So I do this, and
you can right click, or you can press W to basically
accept to press Enter, so to speak. So we
have this cube. Now, over here, you can create
a bunch of stuff in here. So have a look around.
You can create spheres. We will, of course,
go over this again. You can create cylinders. And honestly, these are the
three that we will use most, but you can also create like Wi random stuff like a teapot. There's also a drop down
where you can create some more extensive stuff over here and do
some more functions, but those we will not really
go over too much right now. Now, next this, we
also have shapes. In our shapes, this is one
that we might use yeah, we will have a bonus chap
on how to use this one. And basically, in
shapes, what you can do is you can create
something called a spline. A spline is basically
like a line. And if you click
and hold the line, you can nicely,
softly manipulate it. However, if you click
without holding, you can also
manipulate like this. You can see that I
can very quickly generate special spins here. If I click again on the
first point over here, I can close the spine,
so I can press yes. So this way, I can
very quickly click and hold to basically
drag around my spine. Have a look at these settings. If it doesn't work the way you want it to work or the
way it works for me, make sure that the
initial type is set to corner and the drag
type is set to Basier. So like this, we will
often only use the line, but you can also create circles
or rectangles like this. So that is just like
creating the lines. So let me just here, do like a wave. There you go. Okay. Cool. So there's a bunch more stuff
like creating lights, creating cameras,
creating forces, all that stuff we don't need. Like I said before, not
a complete introduction because I can literally
Tres Max is so large, we could literally have
a completed introduction as a standalone course. That's how large Tres Max is. So I don't want to overwhelm you with too much information. I will also do,
like, a quick recap at the end of this
chapter about, like, which tools we
will be using the most. Now, let's select our cube. If you go over here
to the modified tab, you will have your box
that you just created. You can set over here
still the length if you want to change
it after, like this. So let's say that
I set this to 25, and then I press tab to
go into next 125 by 25. Now this is really
nice because now I have a perfect cube over here. Next to this, what I can also do is if I just
quickly go up here to default shading and
turn on edges and faces, I can see my edges. I will go over this in a bit. So in here, I can
add more segments. Once again, this will
make sense in a minute. So here I can add extra edges, which allow me to manipulate
things a little bit more. Like this. Let's say it to four. Okay, so we have that. By the way, the one here,
let me just do this, your view will look like this, and I will show you how to make it look like mine later on. So we have this now. Now what we're going to do is we are going to go
ahead and we can right click convert to and then convert to added
poly over here. When you do that, it allows you to edit your
asset, basically. So now we can add a bunch
of edits to our asset. Now, what I will do is these tools and these tools over here, our modeling tools and
the tools over here, along with our modifiers. This is so much stuff
that I will make it as its own separate
chapter, basically. So bear in mind, the next chapter will be
about our modifier tools and how to actually
edit our assets. So yes, this we will go over a little bit
later on this one also. The last one I want to show
you is the hierarchy tab, and in here, you can
affect your pivot. This is useful
because sometimes you want to set your pivot
in a specific way. For example, let's say that now it's rotating from this point. Let's say that I want to snap my pivot to like this corner to rotate it
from this point over here. What I can do is I can turn on Snap and make sure that
vertex is selected over here. And then I can press
effect pivot only. And then I can simply click
and drag and snap the pivot, and I drag on the circle. I don't drag over here,
but on the circle, that allows me to
drag in all axes. I select the pivot over here, and I turn off
effect pivot only. Now that I've done that,
I can turn off snapping, and you can see that now I
can rotate from this point. Next that I can also press effect pivot only
and I can center it. This will automatically snap it to the center of your object. Also, one thing that I might
have forgotten to show you is that we have
also angle snapping. In here, what you can do
is you can click on this. And this way, when you rotate, it will snap by
increments of five. You can change these
increments by right clicking on it, and here angle. It's right now it's at
five, if I set this two, for example, 30
degrees over here. Now you can see that if
you look at the numbers, see, it will snap by
30 degrees like that. So that is very useful. I always like to keep it at. Okay. So that is it. All I would show you now is our actual viewpod
and then we will move on to the modeling tools. So because the
modeling tools are, of course, the ones that
we are interested in. In your viewpoard, you have
a little plus sign in here. You can find some
viewpoard settings. You can also restore the viewpod which is the same
as pressing dw, remember, from the beginning. Now, next this, we can
also switch over here between perspective and different modes
like the top view, and for example, the front
view and stuff like that. However, what I like to
do is I like to press LW, and then if I just click
or middle click over here, the nice thing is you
can click to select it. But if you have an object
selected and you don't want to turn off that selection,
you can also middle click. And middle click will keep
the selection of your object. And then you just press W and
now we are in our top view. And just like that, actually, you can honestly even hover
over your mouse, see? I'll W, W. So you don't even
have to do middle click. It's just force of habit. Now over here we have
some shading models. You can do a high quality
shading, which doesn't really. You can see some
shadows and stuff. But the one that
you often want to use is you just want to
use the standard shading, which is the fastest one
and the easiest one. Now, you can go in
here and Oh, no, sorry, I will show you that after this.
So we have this one. Here you can show
your random mode. So the edges and faces is the one that we will most
of the time have on. But you can also change,
for example, flat colors. If you need it for some reason, you can make it look like
clay and that kind of stuff. However, we will
simply keep it to default chaining
with edge and faces. Those are the only two
that we will touch. The last thing I
will show you is that you can go up
here to the plus sign, and you can go to
configure viewports. These are your viewpot setting. So in here, if you want
to set the anti alysing, which if you are
playing any games, I assume you already know, and just look at the
edges over here. When I press apply, see,
the edges are softer. So that is the antializing. It just basically makes your
edges a little bit softer. But of course, it does
also take performance. I recommend setting
your textures to 40 96 by 40 96 by 40 96. When you do this,
you will show or the viewpoints will show
high resolution textures. So if you ever create a
texture and input it and it looks very blurry and not like the resolution
that you created it on, this is why because you
want to set this to 40 96. The last one that I want to show you is if you go to statistics, you want to go ahead and
turn on triangle count. Total plus selection. And then or you can
press this button over here or you can just press Okay. So what that will do is it will show you the actual plcunt. This is great for optimization. So it will show me, as
you can see over here, how many polygons one asset is because since we're
working for video games, we want to keep our assets quite optimized that they
run nice and smooth. Yeah. So of course, there are some
exceptions to the rule, but we will go over
that later on. So over here we will show our Polycount,
which is quite nice. You can press seven to turn
this option on and off. Okay, I think like down here, this is mostly animation stuff like the timeline and stuff, so we will not be covering that. And I would say
that the last thing is that if you open up a window, let's say we open up
our layer explorer, just like any other software or most of software, you
can click and drag. And if you just hold until
it shows blue over here, you can assign this, as you can see over
here to your site, and then it will always stay. You can also click
and drag it using the top view like this. Here we go. Oh, sorry, you should have it
just next to it. It's a bit tricky
sometimes. There we go. So you can also use this top
view over here to assign it. And if you then
have, for example, also your scene explorer, you can simply click and drag, and then it will create tabs over here for your
scene explorer. Okay, awesome. So this was
a very quick overview of the layout and the
navigation inside of Ts Max. In the next chapter for Ty Max, we will go ahead and we
will go over how to use the actual modeling tools and how to do some basic
modeling in here. So let's go ahead and go over
this in our next chapter. Hey, von. I just
wanted to quickly add a few settings that
I forgot to mention. So they are actually
really basic. So one of them is that if you go to your Create tab
and you want to, for example, create a box, you can use a tool
called the Oto grid. The Oto grid allows you to snap your box on the surface
of another model. So as you can see
over here, see? I can simply place my
model on another model. This can be quite useful. Another one is that
if we have our cube and let's set this to
ten by ten by ten, and we convert this to an added poly, if you have a selection, let's say that we have
a selection like this, but we want to select all of the vertices that are
within this selection, you can hold Shift and click
on vertex on the right, and now it will
basically select all of the vertices at the
edge of the selection. You can still go back into polygons and it will
still remember that. And you can do the same
with, for example, edges, as you can see over here. And of course, you cannot do the same with border and element. So that's another nice way that you can select
stuff like this. Now, next to this, there's one more that I
wanted to show you, and that is that you
can select by angle. If I, for example,
create a sphere, let's turn of outer grid, over here, convert this to
add a pool and select a pace. I can select based upon angles. Now, I'm selecting every
phase that has an angle or 45 degrees that is
connected to my selection. If I set this to like 20, you probably need
to go lower seven. Maybe sphere is not actually
the best one to choose. 15 yeah, because I think all of the
spheres because it's round, they have the exact same angle. So this might actually
be the worst here. Yeah, okay. With 11, you can see that it selects everything that has
this specific angle. But as you can imagine, this was not the best option. So normally it is like in
really specific use cases. Maybe a cylinder looks a
bit better where over here, I can select by
angle 45 degrees, it will easily picket but
if I do like ten degrees, 20 I probably still won't work. Oh, yeah, here. So with
20 degrees, it does. It is able to select
everything that is connected to my
selection by 20 degrees. So I just wanted to
quickly show you these. There might be some extra stuff that I've still forgotten, but let's just go
ahead and go into our actual modeling
chapters later on, and then hopefully we will come across those, and
then I will cover them.
7. 04 Maya Layout And Navigation: Okay. So in this chapter, what we will do is
we will go over the layout and
navigation of Maya. Now, at this point,
what I have also activated is, as you
can see over here, my keyboard registration
so that you can actually see the buttons
that I am pressing. So as I have explained at the very beginning
of this tutorial course, we are laser focused on creating environment art
for games in this case. So what that means
is this will not be a complete introduction to Maya. We simply don't have the time because a complete introduction to Maya would literally be
an entire course on its own. So I will go ahead and I
will cover in general, the layout and the navigation. And then what we
will do is we will cover some of the
modeling tools, and we will also have
some bonus chapters, which will give you
a good foundation to use the tools that we need or that we most of the time use within specifically
environment art. So here we go with, like, the layout of Maya. Now, there's a few things
I want to start off with, and that is how to actually navigate around in your viewpod. So first of all, there
are many viewpoints. So over here, we have
a perspective viewbod. You can press space. And if you press space
one, you can also find your front facing
viewpod I believe, your left and your
right viewpod. These viewpod you can
you press space again. You can select and you can switch to the
different viewpoints. Now, next is, if you
hold space in here, what you can also do is you
also have a few options, and these are the
options in which you can also control your viewpoint. Sorry, it's not space, actually. Yeah, yeah, this
space. Space click. That's it. Sorry,
space, right, click, and then you can go
also to your left view, right, view, bottom
view, top view. So this is just very handy to navigate to your
different views. I just wanted to white off
the bat, show you this. I just kind of forgot
that you need to, like, click on Maya, and then it's a bit messy, and then you can switch views. But I just like to press space, and then I can just, like, switch to the views like
this. Okay, awesome. So in Maya, if you go ahead and you want to
press Alt middle click, you can pen around
your viewpoard. Alt left click allows you to
rotate around your viewpod. Normal scroll wheel allows
you to normally scroll. And I believe if you do
contra Alt Mill mouse button, you are able to also
zoom in more precisely, but you need to have
something selected for that. Oh, no, sorry, sorry, not Uh, Yeah, yeah, I think
you just need to have something selected.
That's why it's not working. But honestly, I never
really use that one. I just use my skull wheel to
basically zoom in and out. So once again, old middle
mouse button panning around, old left mouse button, going at and just
rotating everything, and skull wheel to
zoom in and out. Okay, so that is it for
super basic navigation. This is something
that you will get a little bit more
comfortable with. I do also highly recommend that once you have
decided that you are, for example, going to use
Maya or Max or Blender, and you've watched our video, if you've never even
touched these softwares, I do recommend that you watch some more extensive
introduction courses or just even introduction
videos on YouTube. So let's go ahead and go over
our general layout first. Over here at the top.
We have a layout. Which is quite a classic
for most software. So I will only really discuss the things that we
will be using in this case. In our file over here, we have some handy
stuff like new scenes, opening scenes and saving our scenes just to
save our progress. And in here, we will also handle exporting any models
to Unreal Engine, for example, or importing
any models if needed. Just as an extra,
you can also go to recent files over here, and here you can find, like, files that you have recently opened if you just want
to quickly, load them in. In your edit, most of the things that we have in
almost all of these bars, we will have, shortcuts, or we will have it
in our tool bar, which you can find over here. But I will go over this later. So yes, you can find
all of this stuff here, but we wouldn't actually use it. In your edit, you can
find copy pasting, but, of course, just use Control C, Contra V, and stuff like that. Duplicating, but you can use Contra D. So there's
a bunch of shortcuts. You can group pieces together, which allows you to
basic a group models into a specific group and change all of them
at the same time. We have to create tab in which
we can create some cubes. We can create some splines. Once again, we have
shortcuts for that. Select allows us for specific selection modes,
once again, shortcuts. Modify. In here, you can
reset your transformations. This is handy if you ever
have any bugs within your model and you don't
really know what's going on. You can always just try to reset transformations,
and that often works. We have some more
specific modes like converting one model
to another model, you can convert a mesh that is smoothed to a mesh that
actually has polygons. And if you are a
complete beginner, most of this stuff
wouldn't make sense, so I will not really
go over it too much. Our display display
is quite nice. It allows us to basically
display our grid in here, and we can also press the
little square button. Whenever you see
the square button next to a setting
inside of Maya, it means additional settings. So in here, I can turn on
these additional settings, and I can, for example, set the subdivisions to
ten and press Apply. And now you can
see that this will basically change our grid. And you can also set the units of the grid, which
is quite nice. Next this yeah, heads up
display is quite handy. In your heads up display,
the one that we would often want to find
is the Pol count, and it allows us to
basically in here. It's these text
pieces over here. It allows us to read
how many polygons we have in our scene
or we have selected. And for the rest,
show and height, you often just use shortcuts and the rest we
don't really need. In our window, we can
find different windows, and let's already dive into this one because
we can use it. There's a few windows that
we want to actually use. In here, you can also find
your settings and preferences. And here you can find
all of your settings, your hot keys, Maya
specific software settings, all that kind of stuff. What I like to do is there's a few windows that by default, you do not have inside of Maya and you want
to open them up. If we just go ahead
and we want to go to let's start
with the outliner. Let's click on the
outliner over here, and the outliner basically shows all of the objects that
you have in your scene. With this window, you can
just click and if you just hold over here until
you see a blue bar, it will basically
snap the outliner nicely to your view,
and it will stay there. Now let's go ahead
and go to Windows, and then we want to go
to our general editors. And I also want to just
add my tool settings. My tool settings are handy. If I ever want to
change any whoops, let's move it in, like, the center over here. Come on, or to the site. Let's to the site. There we go. So our tool settings are really handy because it shows
us some settings. If you just go ahead
and ignore what I'm doing right now because we
will go over that later on, you can see that when I
have a cube selected, I can have some extra settings
like editing the pivot, and the pivot is
this tool over here, which allows us to move
and rotate our tool. It also gives us some selection types
and that kind of stuff. And you can also reset
your pivot back to center. So quite useful to have, and we will actually make
quite a bit of use to this. However, we will
go over this more in deep when we actually
do the modeling. So let's see, Windows, there was one more if we go
to our modeling editors and grab our modeling toolkit over here and also drag it on here. A modeling toolkit also just like a few
tools that we will go over when we have
our MdingTols chapter. So for now, you don't have
to worry about it yet. It's just something
that you just want to already have to
decide over here. Let's have a look, mesh bunch of stuff to change your mesh. With this one, what
we will do is we will create a toolbar
in this chapter, and then I will basically show you which ones
we are going to use, and I will give you a
very quick description. Same for added mesh
and added tools, these are all tools we can
use to manipulate our mesh. In our mesh display,
we also have a few, but we don't often use this. The only ones we
really use are like the softened edge
and hardened edge, which I will go over a
little bit later on. We have a curves where we can create curves and
we can edit them. Once again, we have a
different window for that. Same for surfaces.
Same for the form, UV unwrapping. This
one is quite nice. So the UV unwrapping, basically what UV unwrapping is, it is displaying
your Tweed asset into TD so that you can
apply textures to it. But textures is something
that you would create in TD and it would
be an image map. Now, what I like to do is I
like to just go ahead and open up my UV editor over here, and I like to move this
to the site like this. And let's move this one
to this side over here. And the reason I'd like
to do that is now I can just click on the top, see? And now it will
basically just the UV editor and I can
make it smaller. We'll just be here to the side. Because when you are
working on game assets, specifically, you will be using the UV editor quite a bit. So you can just go ahead
and have it over there. So that is a nice layout
to have right away. So UVs and the rest we don't really need because
we are not going to use it. Over here, these are
just some shortcuts like opening and saving. These shortcuts over
here are really nice. These are the
snapping shortcuts. What you can do with this is
if you turn, for example, on snapping with grid, your
model will snap to the grid, as you can see over here. This is super useful if you
want to work very precisely, which is something that
we do often need to do when creating
assets for games. We can also snap splines, which are curves.
It kind of depends. In some software,
it's called splines. In Maya, they call it curves. But for example, in Max, they call it spins
and Blender also. But I'm just going to try and keep it to curves when
we are working with Maya. You can also snap to points, and snapping the points
is basically this. Let's say that we copy our
model and we snap to points, we are able to snap our model to the points of
our other model. And the points in
this case, is ertzes. You can find your here see
these ertzis. Don't worry. I will go over this menu later on that I'm
showing you right now. So that is a snapping. For the rest, you have some more snapping settings
which we will not go over. Uh, the symmetry
tools over here, I never actually use, and these are rendering tools, and this is license information. So that's basically it
for the second bar. You have over here, you
can change your bar if you are specializing in
rigging or animation. It will basically
change the top bar, as you can see over here, see? And it will show you
different tools. However, of course, we are not working with
rigging or animation, so we don't really need it. Next up, over here, we
have our tools bar. This one is quite important. Your tools bar, it is
basically like a shortcut bar. It allows you to have a lot of different shortcuts
for different topics. But of course, more importantly, it allows you to create your own custom shortcuts
like I have here. These are the shortcuts
that I was talking about. So I can literally have the
settings that I use most of the time in my meshes or
ddt meshes or mesh tools. I can actually create
a shortcut for that so that I can very
quickly whenever I'm working, I can very quickly,
I don't know, I can, select the model, select both of them,
press combine, and now it's like one model. So I can very quickly change
all of these settings. We will be creating
our custom toolbar. However, I want to leave that
to the end of this chapter. So here you can just
find a bunch of different tools all depending on the topic that
you want to make. Let's get back to
this one later on. So over here to the right side, we have some selection modes. You can go ahead and you can do a lesser selection
using this button, a normal selection like this, and you can move,
rotate and scale. However, you rarely
use these buttons because for moving,
rotating, and scaling, you would simply
press W for move, E for rotate, and R for scaling, and that's how you would very quickly switch between the two. I have not ever seen
an artist actually use these buttons up here unless it's for very specific reasons. Okay. So over here, you also have like what I showed you with space, this stuff. You can also do over here by C, switching between
these different areas. But once again, it's not
really something we use. So the windows that we are our outliner shows
everything in our scene. This is going to be our cube, a group that I created that I
was not supposed to create, and our cameras, which
we have over here. So right now we don't have too much, but if I
would, for example, duplicate this, so it
throws it into a group, I will go over that later on. Hold shift to duplicate if you don't want to
do it in a group. So there's a few ways
that you can duplicate. You can pass Control C
contro V to copy paste. However, for some reason, it
always arts it into a group. You can hold Shift and
move to duplicate, or you can hold Shift
D contra sorry, contra D to duplicate. So I will go over those
shortcuts in the next, yes, that will go in
the next chapter. So I'm just looking at my notes. So that is the outliner. Right now, we're really
focusing on just the layout. Our tool settings
over here just has a bunch of settings for tools,
as I showed you before. So tools of interest is changing our pivot like that,
and resetting it. It is also axis orientation. Right now when we want
to move our model, we are moving it
on the world axis, which means we have X, Y, and Z, very precise. But let's say you
rotate your asset and you want to move it in the
direction of your rotation, you can go up here from
access orientation, from world to object. And now it will
rotate or it will set your pivot points in the direction of your
object like this. So that is very
useful if you want to make any changes like that. Preserved UVs allows you to edit your model without
changing your UVs. You will only know what this means if you actually
know what U VN reps are, but that will come a bit later. And we have some
cool stuff like, for example, soft selection. If I just go ahead and
oops, Wong shortcut. If I just go ahead and I will I don't have my
shortcuts turned on. Of course, because
I was going to make the hot keys for you guys. Let me just do it manually with my tool because I need
to show you something, but of course, I
was going to make the hot keys with
you guys together. So I actually reset
all of my hot keys. Anyway, so in our tool settings, let's say you have
a selection and we will go over
selections later on, you can go ahead and you can go up here to soft selection, turn this on, and it allows
you to basically here, select based upon the radius. So if I set it is
quite low and it's quite sensitive like this, whenever you have
something selected, it will basically softly move
everything with selection. That's why it's called
a soft selection. And the rest of the settings I don't
really tend to use often. So now we have our
modeling tools in here. We just have a few tools
that we will go over in our next chapter that helps us with the modeling and
things like extruding, although we would use shortcut, but it's like a classic, see? A classic one, extrude,
stuff like that. There's a bunch
of tools in here. We will go over that
a little bit later. I already explained the UV
editor and the UV toolkit. They are all about
UVs, but of course, UVs are going to be their own chapter because
it's really important. It would not do justice if I tried to quickly
explain it here. We have our channel box
and our layer editor. So these two are
quite important. The channel box contains all of your transforms
from your model. Let's say that I want to I
have my model over here. You can see that the
transform change. Let's say I want
to set it back to the center of our scene, which we need to do later
on for Unreal engine. I can Oh set them
individually to zero. Or what I can do is I
can click and hold to drag everything and
then set it to zero. So just like this, and you
can also change the scale, I can set the scale to five, and now my cube is bigger. Over here, this is history. History is the way of Maya to say that the
muddling is non destructive. I personally don't really
use Maya in this way myself, but you can always whenever
you do a function, it will be saved here, and you can actually
change it and you can also heres you can control it. I already broke it. So
it is very specific. So yeah, it is really specific towards the
settings that you use. So it doesn't work
with many settings. If you want to get rid of
your history, you can always, which you often want to do because the
longer your history, the slower your
scene starts to run. So sometimes you simply
want to go to oh, God, I have mine in here. So my tool is in here. Edit, delete all
by type history. That's the one. And
when you do that, you can see that the
history is gone. This is something
we will go more in depth over in the actual
modeling chapters. And down here we
have a layer editor. A layer editor is great
to organize things. Let's say that you
have two models, but you want to
nicely organize them. You can select the model and press this little
button over here, which will apply a layer and assign your
model and call this, for example, if you double
click. Oh, it's over here. Model 01. This now allows you to very
quickly with pressing the V, turn this model on
or off like this. So I hope that you
can imagine that this is very easy
for organization, especially if you need
to have another model in the exact same location, which we will need later on
when we are actually working with Unreal engine, yes. So that is it for
our layer editor. We also have an
attributes editor, which is almost like a
detailed settings tab. In here, we can, for example, change stuff like the material
and some quick properties. So it's almost like
it is a settings tab but it's like a summary of all of the settings
that are on your model. We only really go to this channel whenever we
want to vary quickly, for example, change the
color of our mesh like this. See? If we want to do Vers
on very quick functions, this is a great map to
basically change that. And I want to try
and set this back to Original there we go.
Yeah, good enough. So that's what this
tab over here is for. Now, down here, you have some animation taps, but honestly, we are not going to cover those because we are not
going to use those. Okay, so now the
most important menus are going to be few
port shortcut menus. So the way that Maya works is that you have a
lot of viewport settings. You can access them by, for example, pressing Shift, and it is always the right
click button. So right click. If you click and
hold, you can see that now I'm holding
Shift, I have a menu. If I do not hold Shift,
I have a different menu, if I hold Control or Alt. Oh. Oh yeah, sorry, if I hold Contra shift, I have another different menu. I always forget
which ones they are. But most of them are
in the modeling tools, and of course, you have space. So let's go ahead
and go over them. Space, I rarely use. I only honestly use it to quickly switch between
my viewpoints. The biggest one I use
is Shift right click, which allows you to
create new models. All of the settings
you see here, you can also find at the top. Here, create polygons,
but you can see that this is a lot slower
than shift right click. So let's say that I
want to create a cube. I shift right click and I create a cube over here like this. You can also always,
if you need to, you can go and go to the settings, which
is the box over here, and then you can set
very specific settings into your cube like width, height, and depth divisions. So let's say that we
have a cube over here. Now, in this cube, what you can do in
here is if you go to your channel box
and layer editor, you are actually able
to go into your cube, which is the polo cube here, and you can still change
the settings here. So let's say that I set
my segments to five, you can see that now my settings
are nicely set to five. So that's one of the times that I use the channel
box view over here. So when you have or when
you have an actual model, that's when more menus
start to get disclosed. If we now shift right click, we get a bunch of
tools for our models. Most of these tools
we will not go over, but they are tools like
cutting up our model, filling holes in our model, optimizing our model,
extruding stuff in our model. So there's a bunch of stuff in here, combining, separating, but most of the settings
that you find here, we will actually
add to our toolbar. You can also control
Right Click. And with Control right click, you have some selection options. So let's say that
I first of all, right click, normal right click, right click allows you to
switch between vertex, edge, face, and object. And vertices are the
points over here. These points are always
connected by edges, and these edges make up faces. So a vertex is always
connected by at least oh, no, sorry, a vertex
can be standalone, although it would not work. Usually, a vertex
is connected by a minimum of two or three edges. The edges over here,
they are created, and a pace is often
created when there are three or more edges that
are enclosed into it. So, for example, if I
select these two and do just like a setting here, see, it is still a pace
even with three edges. But if it is lower than
three, it's not a face. So basically we use this tool to very quickly switch between our different selection modes. And then we can use
our top bar or we can hold contro right click to
change our selection mode, like growing our selection, see? And that we'll basically select everything
around our selection. We can select these two edges, which basically converts
our pase selection to an edge selection. And just like that, we
can also go to vertices, which will select
all of the vertices connected to our selection. And then we also have a menu
that is shift right click, which is the menu I most of the time use if I'm
not using my toolbar, and it allows us to basically do a few different things like the ones in this menu
that we will often use is extracting faces
and duplicating faces. What this allows you to do
is allows you to basically detach your face from
the rest of your model. And over here, you
can also bevel stuff. I will go over this in
the modeling chapter. I think it will be too much
information if I do this now. For the rest, all I would
say is that selection mode. Double click allows you to basically select all of
the edges connected. This, of course,
does not work with vertices, but with phases, it allows you to basically select all of the
phases connected, which in this case happens
to be the entire model. Double click allows
you to do that. Normal click holding Shift allows you to add
to your selection. Holding Control allows you
to remove your selection. If you click here and then double click on the
one next to it, it allows you to
ring your selection. So this way, we call it a loop. And this direction over here, if we double click, we call it a ring because it's like a ring
that goes around it. If you, for example,
have a vertex, I said before selection mode, you can click
Control Right click, and then you just
basically move your mouse, and that's where you
can navigate the menus. You can grow and swing
your selections over here. And yeah, the those are the main selection points
that we would use. So double click Shift Double click on faces will once again, just loop around our
selection and just like this, you can just select
all of your meshes. Sorry, my throat starts
to hurt a little bit, so I will stop
talking after this. So just do not make
this too overwhelming. Those are your selection modes. And once again,
depending on the vertex, you'll see, your menus change. So shift right click
with VertCs has a different menu
than with faces. So in our next chapter. Oh, sorry. Yeah, you know what? I will do the tool
bar also because we are having quite
a long chapter. Next chapter, what we
will do is we will go over our toolbar and then we'll go over our
modeling tools. I think that is a better split than spending another 10
minutes in this chapter. So let's go ahead and continue
with that chapter next. Sea. Okay. Sorry about
that. We are almost done. I forgot to show
you one extra tab, which is the tab up here, which is actually quite important. This is your viewpod tab. In here, you can find
some viewpoard settings. But what we are most
interested in is that in here, you can switch between
your wireframe mode, you can see over here,
your shaded mode, and the one that
is more important is to wireframe unshaded, this one over here,
which basically shows our wires on top
of our shaded model, which is very nice to look at. You also have a mode where
you can show textures, but, of course, we don't
have any textures yet. We have a mode where
we can show lights, but we don't have any
lights in our scene yet, and some more stuff like screen
space ambient occlusion, which is quite cool
and motion blur. But motion blur, yeah,
it does not really work. Basically, what the screen space on ambient occlusion
does is if I, for example, move to
meshes and I turn, for example, off my wife frame. You can see that over here,
it creates a little bit of occlusion in
between the corners, which can sometimes
look quite nice. Although in this case, it
does not look very nice. Now, lastly, what we have is we have over here
a isolate selected. If you simply select a model
and press this button, or you can press I
or contra I Aldi. Okay. I forgot what the
shortcut is because oh, yeah, shift I, that's it. You can press Shift I, and
that will isolate or you can press this button
and that will also isolate your mesh over here. Speaking of hiding, you
can also press H to height and shift H to unhide. I have a button over here
for Show in my toolbar. Later on, we have
a chapter where we are going to create
our own custom toolbar. We already did,
but I, of course, forgot to show you this part. When that chapter comes,
you can find this by going to, let's see. It's in here somewhere. Um, modify or display. Display Show and then Al and you can add this
one to your toolbar. Basically, if you have hidden
a bunch of stuff and you don't know yet any more
which stuff you have hidden, you can press the
Show Al button, which will just
unhide everything. And lastly, although I will
show you this later on, it is something that
I forgot to show you. If you hold J and then rotate, it will snap rotate in
incumbents of 15 centimeters. You can find the
incumbents over here. If I set them over here to
90 while you keep holding J, well, of course,
90 would not work. 30 because it's a cube. If I do 30, you can
see that over here, it snaps in increments of 30. So those are a few small
things that I forgot. Unfortunately, that's the thing when we work in a large
software like Maya, I just sometimes forget about
some really small stuff. You also up here have Xray mode. I don't use it too often. Xray mode is nice
if you need to see one asset to another asset, for example, like this, and you just want to select
something specific. But it's quite a specific thing. People most time
use it when they are modeling from an image. That's most time when
they use this stuff. So that is all I
wanted to show you. And now let's go ahead and continue on to the next chapter.
8. 05 Blender Going Over Our Modeling Tools: Okay, so in this chapter, what we will do is
we will go over the modeling tools
inside of Blender. Now, this one is so I also created
chapters on Max and Maya, and I need to switch
things around a little bit because Blender
is just so different. This all works a
little bit different. I cannot really keep
everything contained into, like, one small chapter. So what I will do is, first of all, I want to go ahead and I want to show
you some of the tools. I want to show you how to create a menu on where to
place those tools. So in here, as I said before, you can use the tab button
to switch to dit mode. This is always needed whenever you want to have an
object over here. Let's get started with our
object mode over here. You can just look at it
at the top, like that. So let's say that we have
this object over here, and let's say that
we have two objects. Now, one thing that I want
to show you is a shortcut. So if you select an object, you can hold Shift
to basically select another object, not
very difficult. So this will also go over
selections and stuff like that. In blender, selections
are ordered. You can see it by the color. Even if I have, for example, three objects over here, you can see that this
one is now yellow. Now this one becomes yellow
or orange and now this one. And this is basically
because there are some modifiers and
functions inside of blender that
actually need to have an order in how you select
stuff. Keep that in mind. This means that the one that
is orange is always active. You can always click again by holding Shift
on another object, and that will become
the active object. This will become more
useful later on. So for now, it might
not make much sense, but when we start working with materials and stuff
like that, it does. Let's say that you
want to edit this. In the latest blend of versions, you are able to select
all of the models and then press tab to go into
Edit mode over here. This used to not be the case. However, if you want
to, for some reason, combine all of these
models together into one models that you don't
have to select all of them, you can press
Control J over here. And now you can see
that now it has become one model and it will behave like one model,
something I wanted to show you. So yes, as I said before, Blender has a lot of shortcuts. I will first of all, go over the shortcuts that
I actually use. And then what I will
do is I will go ahead and I will show you my way of using blender that is
a little bit more user friendly when you use
many other softwares. So another shortcut
that I like to use is in the
default of blender, it is E for extrude. However, in the last chapter, we changed this to Alt E. And Alt E just does simple
extrusions like this. I also changed one to contra E, which does extrusions along
normal. So what is that? Basically right now, if, for example, extrude on
a corner with Alt E, you can see that
it will basically pick the average direction of this corner and it will push it out towards that direction. However, what if
I want to extrude this based upon the
direction of every phase. So this phase is pointing up. This phase is pointing left. I want to extrude all of
them at those directions. What I can do is I
can press Contra E, or I can go to extrude pass along normals. You
can also do this one. And if I just press CtraE here, C, if I press that one, you can see that now it will ty to push the faces along
the correct direction. Of course, it will look
a little bit strange, and this is because
the faces, of course, get pushed together over here. There is another one
if I press Contra E, and that is extrude
individual faces. Extrude individual faces
allows you to basically, as you can see
over here, extrude the faces as if they are
their own little thing. So that is something
that I wanted to quickly show you over here. If you ever do the extrude
faces along normal, and by the way, you can find
these settings up here, see? So you can just set your
own shortcuts if you want. What I recommend, and
this is a trick that I often use in other software
is that you go to scale. You just slightly move
your top scale down. And whenever you change
something inside of blender that has settings
at the bottom left, you often get this little window with the current settings. As long as you don't
click anything else, these settings will change
or will stay, sorry. What I can do is on the Z axis, which I can see is
now less than one. I can set this to zero. And this means that now
it is perfectly flat. I can go here and scale
it flat like this, and I can see that
this is the Y axis, although you can also
read it up here. Y axis. I can also set that one to zero, and now it is perfectly flat. Just like a Wi handy trick
that I quickly want to show you that we will actually
be using quite a bit. Speaking about these settings, these settings you can actually use with like a bunch of stuff. So let's go back into our
object mode because I forgot, the most common
thing to show you. And that is how to
create objects. Now, to create objects, I believe you can go
to Object over here, and is there like
a Create button? Maybe they don't have that. Basically, the way that I create objects is I press Shift A. When you press Shift A, you get a special menu that has
everything you would want to create everything from your meshes to
curves or splines, however you want to call
it, to, for example, lights and cameras
and stuff like that. So I can go to mesh, and I can, for example, say, I want
to create a cylinder. Now, one thing I
wanted to show you is that just like that,
whenever you have a cylinder, you can see down here that
you can choose the amount of ertzes which is like the
polygon count of your cylinder. You can also choose the radius, and you can choose
the depth if you want to have something
very specific. You can even set the
positions if you want. Super annoying
inside of blender is that as soon as you
press any other button, like I move my cylinder, it removes those settings. I can no longer change them. Willy annoying? I don't know
why they still have that. There are plug ins,
of course, to fixes, but I feel like that's
the thing with blender. Like, they fix it by
having community plug ins, and I feel like
that's not always the right way to do stuff, which is probably, in
my personal opinion, why Blender is my least
favorite program to use. But for you guys, of
course, I will use it. So, don't worry. I
do have actually, a couple of years of
experience in blender. Just doesn't mean
I like to use it. Same is that I know
how to use Sebush even though I don't really
enjoy using it too much. H anyway, let's go back
into our edit mode. Now, another one that I
want to show you is by pressing I. I is the inset mode, and the inset mode
basically like insets, I don't know how else
to say it, your mesh. Once again, you can see
settings based upon the I. You can imagine that this
can go quite quickly. So I can press, for example, I, and then I can go to Move tool, move this down, press I again, press Alt E again, press I again,
press Alt E again, you can see that I can very quickly create interesting
shapes like this. Just like that, see? So once
you get to know these two, they are actually
really powerful to use. Now, let's go a little bit back to selecting,
for example. Selecting in Blender is often sometimes a little
bit messy I find. So you can press one to
go into Vertex mode. You can press two to
go into edge mode, and I really apologize. I should have showed
you this before. I'm so focused on the tools that I forget about selecting. You can press three to
go into your face mode. So this is how it works. Vertices are needed to
connect everything. So that's why you have vertices. Vertices can be standalone,
but they are useless. So often you will have
at least two edges connected to one vertice.
Like over here, you have two. Edges are basically the lines
in between the vertices, and you will always have or at least the edges always need to be
connected by a vertice. And then you have
faces. Whenever an edge is connected by three vertices. So right now we have
four, for example. But even if for example, Oh, wait, because I
don't have my shortcuts. Sorry, it's because I don't have my shortcuts. There we go. Okay. I will set up these
shortcuts later on. So then I get a bit confused. Yeah, even though
it's three verts, as long as it is three,
it will be connected, and it will be able
to create a face. And the faces we call polygons. Next to that, we also have another one that I want to set, but that one needs to be
shortcut, and that is four. Right now, four does
not do anything. What I like to do is I like
to go to select and then I want to go to select
Linked and Linked. Right now it is set to
control L. I want to right click change my
shortcut to four. This is once again something
that stems from Max and Maya because I like to
call four elements select. It basically selects
my entire model. This is super useful for
when I, for example, have Models over here that are, for example,
intersecting like this. Let's say this, and I
join them together. I can now press four to select
all the individual models. So that's why it is
useful and I can move them and do whatever
I want with them. Or I can, of course,
delete them. Speaking about the lead,
that is another one. The lead has a lot of
options inside of blender. So if I press delete, you can see over here that
there's so many options. The one that you
want is the faces, and that one will
delete the pass. You are also able to do more
specific deletions like VertSs which will remove all of the vertices and
everything connected to it. You can also do dissolve phases, which Oh, no, wait, that one does not work.
Only phases, sorry. And that will delete
only the face, however. As far as I can remember, that's the exact same thing as
phases now that I think of. Only edge of face? Yeah,
honestly, just use faces. I don't know why I'm trying
to show you like all of these other ones because
we simply don't have it. If you want to remove edges, so let's say that we go ahead and we select this
edge over here. And what you want to
do is you want to go ahead and come on. I've got a it was select Alt. That's it. So if you want to
select like a loop around, you can then go ahead and
you can select one edge and then hold Alt and then
select the edge next to it. And that will basically
loop all the way around. And the way that this
works is if you want to, for example, delete this one
edge, you can press Delete. And then you can say only edges and not only edges and phases. This time, you want to
go for Dissolve eedges? Yeah, dissolve eedges. And that will only
remove the edge, like you can see over here. And it will leave
nothing behind. So those are the
two we want to use. We want to use pass
if we just want to do normal deletions and
dissolving the edges if we want to remove an
edge without actually removing any phases that
are connected to it. So now that we have done
that, as I said before, selection, you can press
Alt to select like this. If you want to select more, you want to press Alt Shift, and then you can
select more loops, as you can see over here. See? So that is another
way to do that. You can just simply
hold select something. You can hold Control and select an edge further down the line, and it will try to find the
best part to this edge. So if I go here, see, it will try to find a
part towards this edge. Personally, I only need
it if, for example, just want to quickly select like half a face or
something like that. For the rest, normal selecting
is by holding Shift, if you want to add
to your selection. And of course, just like
clicking selects a single thing. So by holding Shift, you can add more stuff to your selection. Now, in phases, Alt
is also a loop. Control, does the same thing, and shift does the same thing. So it is pretty much
the exact same thing for selecting of pass. Yeah. Okay. So we
got that one done. Another one is, as I
showed you before, you can click and
drag to select. However, in blender, it
never selects the backside. To do this, you want
to turn on X ray mode, which you can find up here
or you can use the shortcut. In our case, we set
our shortcut to Alt x. And then you can select all
of the edges around it. So that's quite
nice. You can also select the etching if you
want to ring around it. We call this ring.
What was it Control? No. Oh, God. Alt, Contralt. There we go. Contra Alt.
Sorry, brain freeze. It's because so many software that I'm using today and it
becomes a bit confusing. Contra Alt and clicking again
will ring around your mesh. So it allows you to basically select not the loop,
but like the ring. It doesn't really matter
where you select the ring. I can select one here and then go over here, and
it will still work. So that is mostly like the main selection points
that we want to work with. So let's go ahead and press Alt click and
create a loop here. One of my last shortcuts
that I want to show you is Contra B. Contra B, and this is the one that I
actually Oh, sorry about that. Ah, Contra B is the one that I actually
favor inside of blender compared to
any other software. So with this, we can add a chamfer or a bevel,
however you want to call it. The cool thing about this
one is that you can use your scroll wheel to basically
add more or less segments. So you can very quickly
make this like nice and round or just make
this like quite harsh. Soon as you click again
using your left click, you can see that now
it stays in place, and I have a bunch of settings. So in here, I can still
change my settings. I can even change, the shape, so I can have this inserted or pushing out and all
that kind of stuff. So there's quite a
few settings that you might want to play
around with in here. Just like that, we
can very quickly create interesting shapes. So that is mostly it
for our shortcuts. There is one more,
actually, one more. But I believe I'm not sure if it's already
the right shortcut. If you press Contra R. Oh,
sorry, go in edit mode. Contra R. Okay, it is right. Contra R allows you to
basically place an edge. I cannot I thought contra R was not the default,
but it looks like it is. If you want to place one edge, you simply click and now you can move to place the edge
wherever you want. Once again, over here, you can still later on also change it. If you press cdr again and
you use your scroll wheel, you can place multiple
edges like this, and then you can move them
also around again like that. And over here, there are a few
settings that you can use. This is super useful,
something that we will use many times whenever
we want to, for example, create some new pass, and then we can go
ahead and we can, for example, select our faces. There are some more
selection modes like you can go to Select, and in here, there's like, for example, Checker Deselect. Check or D select is this one. For example, let's say
that I have a loop, I can go to select,
check or D select, and it will select
every other phase. At which point I
can, for example, do Q Q. Contra E, extrude pass along normal, C, and I can extrude this. So there are a bunch of selection modes that
you can find in here. Other one is growing
our selection, and it is NonpaDPlus
and nonpaD minus. If you press that, sorry, I think we need to hold Shift. Yeah, control. Sorry. Hold Control plus. And that's why you can
grow your selection. And Control minus
on your non PAD will minimize your selection. Anything else in
here that you really care about. To be
honest, not really. Art? Oh, yeah, here you can art your models, but I
don't care about that. Mesh, this one is tricky to explain because
it is like for bug fixing. So in here, we have some merging and we have some
splitting and separating. Let's focus on those first. Of course, we have
duplicate and extrude, but we don't really
care about that. Let's start with merging. So if you go ahead and you
can go to mesh and merge, there's a few settings
that you have over here. At center at cursor
and collapse. So collapse will basically merge everything into one
singular point. At center actually
does the same thing. So if you go mesh,
merge at center, it will collapse everything into the center of whatever
points you have selected. And then we also
have B distance. The way that B
distance works is, let's say that we go
into vertex mode, select a bunch of
vertices over here. There we go. The B distance one. Merge. Don't worry. I will show you how to create a custom menu
for this later on. It allows you to basically merge based upon the distance
of measure, see? The higher I set my distance
in the bottom left, the more it will try to merge
things together like that. So that is it for merging. Split. Basically, what
the split does is, let's say that I want to
split some of my model. I can select this
model and then I want to turn this
into its own model. I can actually also right
click and press split, which is why or I can go to
my mesh, split and selection. What it does is it will separate this model from the rest
of the model over here. Yes, yes, that is correct. So we have that one to split. I was a little bit confused because this is how to split it. However, if you want to separate your model
into a new model, you want to use separate. So over here, if you go to separate and separate selection, now it has become its own model. See, we are now in object mode, and it is now its own
little model over here. That is the separate selection. Let's go ahead and have a look. So these ones we
don't really use. These ones we don't really use. The shading. The
shading, I can show you. Yeah. Let's go
ahead and I'm just going to create a new
cylinder to show you. Right now, if I turn
off my wireframe mode, you can see that this cylinder
does not look very nice. It has, like, all of
these quite harsh faces or polygons, yes. So what you can do is you
can actually apply shading. Shading is a way to basically fake the look of
your model to make it seem like it is
nice and hipoly and it does not have all
of these faces over here. The way that you would
do that is or you would right click and
press shade smooth, shade outer smooth
or shade flat. Or you can, of course, find them also in here
if you want to do it per pass in your
shading over here. So just to show
you, right click, Shade Smooth makes your entire model look
very, very smooth. Shade flat makes your
model look very sharp. Shade outer smooth, basically arts the shading
based upon an angle. So here you can see that
we set the angle to 30, which means that every face that has a 30 degree
angle will be shaded. But because the stop face over here is a 90 degree
angle from the rest, it will not be shaded, and that is the correct look
for a cylinder. I can also go in here, shade
out the smooth and you can see that that instantly
looks a lot better already. Just like that, you can
also manually do it. You can go into your faces, manually select some vases, and then you can go in
here and you can go shading and you can
make these faces flat. And then if I go, for example, to my object view, you can see that now these
faces are hard shaded. So that is basically
our shading. Um, wow, this chapter is starting to go on
for really long. I don't think we are able to fix to finish this
in one chapter. So I will move a bit of
stuff to the next chapter in which we're going to go over
our modifiers over here. So over here, we have a bunch more pieces over
here, so we have Vertzs. But the annoying thing
is that these menus, they change based upon our mode. If I go to Vertex mode, they often Oh, no. Okay. For some reason, I
thought they would change. Vertices, we are able
to extrude vertices. We don't use this.
Most of this stuff, honestly, we never use. I rarely go into
the vertex mode. The edge mode, extruding edges is the same as just
like extruding faces. You want to select an edge. And then if you press Alt E, it would extrude this edge out. Extruding edges we
don't use too often. So what else do we have? We
have our bridge edge loops. That one is quite important. Bridge edge loops, what
it allows you to do is, let's say that I
delete this vase. I now have a hole in my mesh. What I can do is I can select two opposite
edges like this, and I can right click and here I can find them also
Bridge edge loops. Or I can go up here
to bridge edge loops, and that will basically bridge, make a bridge between
these two edges, which creates a polygon. So now that one is also fixed. Let's see. Subdivide
unsubdivd we don't use those. Loop cut and slide is contra R, the one that I
already showed you, and the rest, honestly, the rest we don't really need right now. Faces, extruding faces, I
already showed you inset, I already showed you
triangulate faces. That one is very specific. It basically is if you
have all of your faces, you can go to face
and triangulate, which will basically
arch triangles. You often only really need this. Yeah, you need it for
very specific cases, but there is a modifier for it. So here, there's like a modifier that's also called triangulate that is more non destructive. It often has to do with or
cleanup if your mesh is really messy and
you want to clean it up by connecting some stuff. For example, over here, you can see that all
of these vertices, they are not connected
by anything. So one way that you would be able to clean
up is by going to face and triangulate
phases to connect them. However, this is actually a
really bad way to do this. The official way
and the best way to do this is by pressing inset, and then by going to your mesh, merge, and then collapse them. That is the official way to properly fix that kind of stuff. So yeah, I would not really worry about it too much right now until you
actually need it. Phil field is quite interesting. Fil is similar to bridge. However, it is able to basically fill in multiple pass
at the same time. Yeah, I think these
ones, no way, these ones would not work
because there's nothing here. Let's say that I have a
bunch of faces missing. What I can do is I can go
ahead and I can go into my object mode most of the time or sorry,
not object mode. I can go into my Addit mode
and then select on my edges. That's the one. And then I can go to face and
I can press Fill. I know. Okay, fair enough. This one does not work the same as that it does in Maxomya. I rarely use it, so that's why I guess what we need
to do is we need to select all of our edges
over here, face and fill. And now you can see
that it will fill. And there's another one that
is called is it not in here. I think if we right click, it's called New face from
Edges, where are you? New face from Edges,
is similar to fill. However, what it does is it does not triangulate your mesh. So the fill load and the
new face from edges, Oh, what's the best
way to explain it? Bridge is very accurate
because it is manual. Fill mode is a little bit harsher. Let
me say it like that. If I press Altclick to select this loop and I right
click, so the fill mode, it is able to do
pretty good job, but you also have the
new face from Edges, which basically does not
have any vertices connected. So it will try to
fill the best it can, but in really
complicated phases, it's not able to do this. A good example is if I literally grab a chunk over
here and delete it, and then I go to Edge mode and I select the entire loop
around it like this. I'm able to still fill this. I can fill this, but you can
see that it's not able to accurately predict where all
of the filling needs to go. I can do the same with
new face from edges, and it's just like a big mess. So that's basically
what fill is used for. It is quite specific on
when you would use it. So that is something
that we will go over a little bit later. Sorry, that's something that we will not be using too much. So yeah, shade smooth and shade flat, I
already showed you. I can go in here
and shade smooth. And I can do the same
with shade flat, but I believe that
we have Outer smooth turned on, don't we? Yeah. Whenever we right click and
press Shade Outer Smooth, in our object data properties, it turns on Outer smooth. Whenever we do that, we are no longer able to add
custom smoothing. So now you can see
that now if I right click shade flat, see? I can actually mess
this up quite bit. So let's just shade
Outer smooth. That looks quite a bit better. So yeah, that's it
for faces. And UVs. So this is for UV unwrapping. However, we will have
a special chapter dedicated to UV unwrapping because it is quite complicated. So I will not really
go over that. All I would say is that
you can use this menu up here to go to your
UV unwrapping tools. And now you can see
that we actually see the UV unwrap of a model. UV unwrapping is
basically grabbing a three D model and turning
it into two D so that you can paint on it so that
you can create what we call textures on it for the people that are Wi beginners in this. But I feel like that if you
know what environment art is, you will probably you are spending time,
paying for a course. You probably would
have seen like a few videos on what tree
the artists and everything. And I kind of do count on that because we are simply going
a little bit too fast for, like, a complete introduction, since we have so
much stuff to do. Like, yeah, there is honestly, I'm looking at a list right now, and there's a lot of stuff that we still
need to do for this. Oh, that is basically
it for the overview. There are a few
settings in here, but they are just like
extruding in setting. So they are the same settings
that we have found up here. What I'm going to do now is I'm going to end
the chapter here. In the next chapter,
I will show you how to create that special menu for our modifiers
for our shortcuts, and I will show you how to use
the modifier menu in here. So let's go ahead and continue
with that chapter next.
9. 05 Max Going Over Our Modeling Tools: Okay, so we are now going to go over the modeling tools
inside of TS Max. These are the tools that
we will mainly be using. By the way, you can
just press delete if you want to get
rid of an object. So let's use this
cube over here. So the mulling tools in three is Max, it is kind of funny. So there's two ways where
you can access most of them. I always just use the mulling tab over here just
by double clicking on it, and it will have
everything you need almost 80%, 90%
of what you need. However, you can find most of the same tools also in here. So it is kind of like
almost like a habit on what you want to use most. So first of all, let's just go ahead
and go over the Muding tools here at the top. Now, when you have your
Adili selected over here, what you can do is you can press one to go into vertex mode. I'm not going to go over what
vertices and everything. Well, I will go over it, but I do expect that you
know a little bit of the basics of three
D at the very least, it is a beginner course, but I assume if you know
what environment arts, you already have played
around with things a bit. So over here we
have our vertices. With our vertices,
they are basically the points that
connect everything, which we can move around
to manipulate our mesh. If we press two, we go to edges. Edges are the lines that are in between the connected
vertices over here. So you see that every vertice is connected with at
least a couple edges. Then we have a border,
which is number three. In order for me to
show you that one, I first need to show
you number four. Four is polygons,
quite a common word. It's basically the
faces that are created whenever you connect three
or four vertices over here. So in order to show
you what border is, I basically want to delete by pressing delete
one of these edges. So now we can see that we
have a hole in our mesh. Border, what it allows
you to do is it allows you to instantly
select that entire whole, and it doesn't matter
if it looks weird. So even if I do this,
border allows us to it just links up all of
these connections like this, see? And that is border. Then what we also
have is we have five and five basically selects your entire
model like this. However, this is only in
specific cases where you have combined multiple models together and you just
want to select them. If you just want to
normally select your model, don't use element and
then move it around. Rather, just click
once on the Adi poly, and then you are back in your original model view over here. Okay, so let's go ahead
and let's go over here. Whenever you press
one or two or three, you can see that the
modeling tools change. See? One, two, three, four. And this is why I
was telling you that that almost everything
you can find in here. So let's just go ahead and
go from left to right. So what do we have here? We have some selection modes over here. They are the exact same
that you can find in your selections over here or by using one, two, and
three, basically. And now another one is that if you click on an edge,
and now I'm at two, you can hold Control and
you can double click to basically select everything that is connected to this edge. We call this a loop. You can also middle click, by the way. Middle click is
for a single edge. Control, double click. Sorry about that. Double
click is for a single Edge. Control DoubleClick is to
select additional edges. But out of habit, I always hold Control. Sorry,
that's just a habit. However, you can also go in here and you can
also press Loop, but there's of
course, a slower way to loop around your mesh. Now, what you can also do is, let's say that we have
this edge and we want to go ahead and want select all of these edges, which is a ring. What you want to do is there
is a shortcut. Oh, yeah. Click and Controld double click. So doesn't always work. Come on. That's why I don't
like to use this one. You saw me do it
in a second ago, but for some reason, it's
not able to register now. The way that I always
use it if I want to ring it is I
press ring up here. Sorry about that. I don't know. Control. Huh. There we go. So I guess control, control,
control, double click. Oh, there we go.
Sorry about that. So yeah, I was mistaken
with the shortcut, so you can click Hold Control and double click
to ring around it. But personally, I always
just press the ring, and it's once again,
like a habit. You can find these
two also up here. See, Loop and ring.
This is what I was talking about with having
multiple selections. Now, the grow and the shrink, what it allows you to do is if you select one
vertice for example, and you press grow or swing, you can find them in both. It will basically select the vertices that
are closest to it. You see, I can keep
growing my mesh. I can also swinging it so that it deselects di
vertices around it. Okay, so the edit.
Here we have a CAT. This is a tool that we
will be using a lot. What you can do with
the CAT tool is you can create new edges and vertzs. I can click on one, and I
don't even have to go here. I can go in the center
of an edge like this. And then let's say that I now
go down here and do this. And then you can right click to basically go outside
of Cut mode, you can see that now
we have new polygons. This is great because
this allows us to add new selection so we can actually create our
specific shapes. Now, what you can
also do with CAT is you can also go ahead and you can click and hold, and you can basically
create like a almost like a line over here, which allows you to basically
Oh, sorry about that. Click and hold, which
allows you to basically, create a very sharp line like
this in case you need it. I'm going to show you a
differentechnique on how I would actually cut something all
the way across a model, but that comes a little bit
later. So we have that one. Oh, wait, this is the
technique, the quick slice. Although I use a modify for it. With quick slice, you
can click and drag. And then what it will do is it will once you click on
it again, so click. Sorry, click and then
click right click again. That will apply it.
What it will do is it will place a cut all the
way across your model, see? The version that I use is
actually a little bit accurate, more accurate, but that will
come a little bit later. We have the Swift
loop. This one we will be using most of the time. This probably the most
used note you want. And basically,
what it allows you to do is it allows you to add entire extra loops like
this very precisely. See? So that is great
to add extra loops. For the rest, we don't really
need to use most of these. In here, we have
attach and detach. You can also find
these over here in your dit geometry and
attach and detach. Personally, I often
use them here. For some reason
I'm used to that. And what it allows you to
do is if, for example, select or create
another box like this, let's say you have this box, but you want to edit both of these boxes at the same time. What you can do is
you can simply press attach as you do that over here. You can press attach, click on this AdSet and there we go. Now we have both of
them as one model, and we can also press four
and then select them. Is also where element
select comes in handy. This is now one model. However, if I press five to
go into the element select, you can see that I can select the different models right away. Detach very easy,
simply press detach, and then you can
have some options. But you often just
want to press Okay. Now they are two models again. Now, another thing
that you can do is, if you go down here to your attach and press this
little button next to it, it allows you to select all of the models in your scene
Explorer to attach. This is useful if you have
multiple different models that are difficult to select. So you can press attach,
and there you go. Now it is also attached. Okay. So we have that one. Let's have a look at the rest. So we got that one attached detach. The
next one is collapse. If you, for example,
have a few ertzes, what you can do with collapse is it will collapse them at center. So it will merge them
together in the center. Great for optimization. However, also great if you, for example, want to quickly change the shape of
your mesh like that. Cap poly is quite useful. What you can do with cap
pool is if you have holes, you can press it
and it will quickly fill in the hole like this. The only problem with this
is that if you, for example, have a strange shape like this and you press the
cap poly again, it will not create any of these edges that you
can see over here. We call this an engon.
An gun is basically a face like this that has more than four vertices that are just openly
connected to it, like you can see over here,
there's no connections. And that is where the
next tool comes in. So let's say that we
select these two edges. Next to the cap poly, we have also one that we use
often, which is the bridge. Also, all of these instructions, you can find them just
by hovering over. The bridge allows
you to basically select two edges, press bridge. And then it will just
go ahead and it will Merge those together like this. See? So that is also quite easy. The Capli I would
just use if I need to very quickly, merge
something together. The reason why cap poli is quite easy is because the bridge,
you need to do it one by one. But let's say that I have
all these random holes in my mesh over here. What I can do is I can
go ahead and I can go to my border Select,
click and drag. And because it only
selects borders, it will select all
of these holes. And then if I press Capli it will instantly fill
in all of these holes. So it's just all about
speeding up your workflow. Now, the next one that we have
over here is we have weld. What we can do with weld
is if we, for example, have a bunch of ertzes
selected like this, I actually don't use I always
use the weld settings. You to go from weld to
little drop down down here, weld settings, and it allows you to weld these vertss
based upon a distance. This works better if I, for
example, show you this. Here, see, I'm just like a bunch of really nasty edge loops. And let's say that
I want to weld it based upon the
distance from each other. I can go down here to
weld and weld settings. And if I click and hold this,
see it's quite sensitive. You can see that it
will start welding based upon the distance,
which is great. So it's very useful for
optimization techniques. We also have the target welt. This is the one that
I use most time. What you can do with target
belt is you can click on one Vert C and then
click on another, and it will basically weld the first clicked vert C to the second one, as
you can see over here. I believe that you can also
click and drag if you want, but it doesn't really
make a big difference. And you can do this
quite quickly. As you can see over here, we can select this quite
quickly like this. Although with those
type of situations, let's say that I have these
four, what I want to do, and I will show you
another technique is, let's say I want to select
them, I have a problem. I want to select
these four to weld. However, sometimes it also
selects vertices behind it, see, that are on
the other side of the model. Super easy to fix. Simply press Ignore
back facing over here. And what it will do
is it will ignore selecting whatever is
behind these faces. And then when you
have them selected, you can press collapse that's
where you can collapse them like this. Even faster. Simply double click on
these three edges and hold Control Double click so that
you have one edge left, and then you can just
go ahead and you can press Control Backspace. Control B space
removes your edges. Delete removes
your actual faces. It removes everything. Control B space. Oh, no, sorry, backspace,
force of habit. Once again, you will sometimes see me use a force of habit. No, no, no, no, sorry. I'm Wong. Sorry about that. I am doing it correct. I was
already confused. Contra backspace will remove
your edges and vertices. Backspace will leave your words, C, and you don't want that. That's why you want to
use control backspace. So it is bit I've been using Max for nine years right now. So after nine years, it just becomes such
a habit that you sometimes forget why
you use a shortcut, and that is why I sometimes need to backtrack a little bit. So that is another good way to basically optimize your mesh
and get rid of some edges. So let's go on with next one. This one I will keep for later. We have over here.
If you want to, you have break, and it
splits your Vert C into two. Or, it will split
your vert C into, like, different pieces, see? I personally don't really
like using that one. You have remove, which will just basically backspace
or just delete. It will just remove your erz. Now, another one that I use
quite often is connect. If you, for example,
want to very quickly connect something
in a very precise way, what you can do is I'm just
going to delete that one. Yeah, you know what?
Let's create a new cube just to keep it nice and simple. I'm just going to remove all
of my segments over here and right click Convert
Adipol. Cool twig. You can right click on the little arrow
buttons over here, and it will automatically
reset it to default, which is one or
reset it to zero, I should say, even here, if I move this, Okay. I guess that does not. Let's
try rotate. There we go. Even if I rotate this, I can see down here my
X, Y, and Z rotation. I can right click and it
will set it back to zero. Just something I forgot to
show you in the last chapter. Anyway, right click convert to Add a poly in
order to edit it. Now if I go to edges and I
click and drag my edges, what I can do with Connect, and the one that I
actually want to use is the connect settings. I have some settings which
allows me to basically dd evenly different
edges like this, and it also allows
me to, for example, push them in and out
or shift them around. So this is very useful
if you need to create very specific separations
between your edges, like you want to get
exactly the same space between your edges. We also have distance
Connect, which I never use, and I believe if you select
two edges over here, it will try to select those
edges all the way around. Honestly, I don't
use it. So that is it basically for the
most tools that I use, we have a few more tools that if I double click over here, and you can see the double
click on the corner, will not actually
move all the way around because this is a
natural breaking point. If I, for example, do this, and let's say that I want to
make these edges straight. I can click CtleClick to basically select
all of these edges, and this is the same as
when we did like our um when we did it
with our edges, now we are doing it
with our polygons, you can press Make planer. Make plainer, make planer
would not work right now. Make plainer only
works if I do this. By the way, you can hold Alt and drag or Alt and click
to deselect edges. See, Alt click Deselect,
Controlick select. So let's say I do
this, for example, and the nice thing also is that when you
select something, even if you add more edges, it will remember your selection. Make planer will basically
just make this edge straight. These X Y and Zs will
basically make it straight based upon a
specific axis, see? So this is the Y axis. So it will make it
straight on the Y axis. And on the Z axis, of course, it doesn't work because it's trying to force it
all the way up. And that is honestly all of
the ones that I use in here. We have a few more tools that we won't really be using.
We have free form. Free form allows us to
basically sculpt on our mesh. We simply won't be using this. You also use it for topology. We have some more
selection settings that we would rarely use, but you can, for example,
select by angle. Here, select by angles of
30 degrees, 60 degrees, 40. Come on. Trying to find an
angle where it you'll see. So it will basically just select based upon the angle
and that kind of stuff. You can select percentages. You can do a bunch
of stuff in here. However, I don't these are
all super specific use cases, so I don't really
use them myself. So that is it for this view. Now, if we go ahead
and we can go to this view over here, very easy. All of these settings, the
edit geometry settings, you have most of these
settings over here. We have one that sometimes use, which is called preserve UVs. This would not make sense
if you don't know yet what UVs are because this is something we
will cover way later. But basically, when you
then move a edge around, it will not change your UV for the people that already
know what UV unwrapping is. Now, when we select polygons, we get our extrude and
all of this stuff. Oh, sorry. One I forgot
that is really important. Let's go to Edges, and there's
one that is called hAFR. So HAMFR you can
also press Contra B. Sorry, not Contra B. What was it? Sorry, I forgot the short. I forgot the shirt. Got for it. You can go to HAMFR AldE. Contra E. Shift E. Okay. Sorry, I forgot I
forgot the shortcut. But you can look it up and I
will go over that in a bit. So in CHEMFa, you can go
to your ChEVA settings. And in here, you can basically
split your mesh into two. You can choose to only
have only split them. However, you can also
chose to add more segments to instantly make your
mesh round like this. And just like this, you can
also control some settings. There are some more settings
over here you can control, which are very specific, like quads, which will not rotate. But often you just want
to keep it to uniform. That's the Janva. I
just want to show you you can also
find it in here. You can find your belt in
here, your target's belt. Now, a classic,
which is extrude, the reason I did
not show you yet, you can find it in here
and you can click and extrude is because basically, there's a few ways to
extrude using shortcuts. Personally, I am someone that doesn't like to
use a lot of shortcuts. The reason for that is simply because I need to use
so many programs. Like even in this
tutorial course, I am showing you how to do stuff in Maya,
Max, and blender. If I have different shortcuts
for all three programs, it will be such a
mess in my head. I will keep forgetting stuff. However, if I set custom shortcuts for all
three programs, it's not good for tutorials because you guys will not
have those shortcuts, and you would have to be or you would be forced to basically
set the same shortcuts. To extrude, you can hold Shift. Move to extrude. Extrude settings, you can go
ahead and we need to set up a shortcut for that that I
will show you in just a bit. So the extrude settings that
you can find over here, it allows you to
basically move like this, but it also allows you
to change the settings. So these settings
are very useful. For example, if I do this, you can see that if I switch
this to local normal, it will extrude based upon
the direction of your face. So this phase is
pointing this direction, this phase is pointing a little bit more and a little bit more. However, doing it by group, it will just try to find the general direction of
all of your faces combined, and it will extrude it
based upon those pass. Now, we also have bi polygon, which will basically extrude all of the polygon separately. That's why I like to
use extrude settings, and I like to be very precise. Like that. You can press
the Okay button to accept or you can press
the X button to Undo. So let's have a look over here. Attach detach is here. We have a few extra
settings in here also. Some of these settings
is tessellate, which will add more geometry. I rarely use it like
this and MS smooth, which will basically
add geometry, but it will also
smooth your mesh, which will make it
look very funny if you don't know how to use it. So that is those two measures. Here you can find
the quick slice. So most of these settings, and if you go to your
polygon settings, you can again find all of these settings that
you have over here. Most of these settings
you don't really want to use. We have the inset. The inset is one
that I also use, but I still need to
set up a shortcut because for this
tutorial course, I reset my shortcuts. I did that on purpose
because I wanted to basically have a chapter where we will set up everything. So if you press
Inset, can basically, it's a bit or depends.
Sorry about that. It depends how you
move your face, but it allows you to basically
inset your mesh like that. We also have bevel, and bevel, I often need to use settings. And basically what allows you to do is you have two settings. One to extrude it up
and one to inset it, and it allows you very quickly to create some bevels like this. Bevels are similar
to the ham fa only, of course, with the Jamf, you have a little
bit more control. Data. Honestly, most
of these settings, they are all a little bit more fancy, you don't need them. You have flip, which can
flip around your edges, but it will show you an error. So it's mostly for
fixing problems. We might have those problems,
and then we will fix them. And for the rest, I don't really want to overwhelm you with the amount of settings
that we have over here. Smoothing is no, I'm not going
to go over smoothing also. I will do that in a
different chapter. I think at this point, the last one I want to show
you is soft selection. With soft selection, what
you can do is you can click to turn it on and
you can set the f off. Basically, this fall
off means that it will softly when
you move something, it will softly move
based upon the file off. If I set the file
off really high, most of my model moves with it. But if I set the file off
really low like this, only a few meshes move
with it or a few polygons. So that is the last
one I want to show you in the next chapter, what I will show you is I will show you how to
set up your modifiers, how to set up your shortcuts, and also how to use a few key modifiers
that we will be using. And once that is done, there will be some
bonus chapters. And then what we
can do is we can actually get started by creating the assets that we are meant to create for our environment. So let's go ahead and continue
on to the next chapter.
10. 05 Maya Going Over Our Modeling Tools: Okay, so in this chapter, what we're going to do is
we are going to go over our mulling tools and our shelf
over here inside of Maya. So to make our life easier so that I can show
you an example, let's go ahead and
create an actual cube. So shift right click and let's go ahead and
create a cube over here. Just like that, we can go ahead and go
into our cube segments, click and drag and set
these to, for example, ten. There we go. And then just press W so that we can move it up. Okay, so let's get started. Now, what I will do
is, first of all, I want to just quickly
show you the shelf, and then we will go ahead and add some stuff to the shelf, and I will actually show
you what this stuff is. I think that is
the easiest way to go, and then we
will go for, like, some more traditional ding techniques like extruding
and stuff like that. I'm already going to select my MdingTolkit over here because this is the one I often have
open whenever I'm modeling. And so in our
shelves, if you go to the little menu item over here, you can go to your
shelf editor or you can right away,
create a new shelf. So let's just go ahead
and create a new shelf, and then I will show
you how to add things. So remember, a shelf is like
a shortcut list, basically. So we can just
create a new shelf. And because I already have one, I'm just going to call this one, like, test or
something like that. And basically, the
way that this works is any menu item you can see, you can add to the shelf. So whenever I need to
set up a new shelf, what I like to do is I like
to go from the top over here, and I like to just start
and see which ones I need. For example, here we have
combine and we have separate. Let's say that I
want to add combine. What combine does is it combines multiple
meshes and separate, I guess, you understand
will separate your meshes. So the way to artist do yourself is you have your shelf selected. Then you go to mesh,
and you simply press Control Shift
and then click ones on Combine and
click ones on separate. As you can see,
these are now here. Just to show you what
combine and separate does, it is quite useful if you, for example, have two
meshes over here. You can simply select both
of them and press combine. And now they have
become one mesh, so you can do whatever
you want with them as if it is one mesh. And if you press separate, they will separate again
into two measures. Although as you might see,
the pivot point does change. So sometimes you might want
to go to your tool settings, select your models and
press reset pivot. That's why the tool
settings are quite useful. So that is combined
and separate. Let's go ahead and go down. So we have a fill
hole over here. However, I don't use
it enough for my tool, but I do want to show you. So the fill hole because we might be able we
might end up using it. Let's say that you
have a hole over here. The way that this
works is basically, if you double click on the
hole to select the border, which is all edges,
you can shift click and you can find
fill hole also in here. Sorry, shift right click. I should really say that. Although it's
always right click. Whenever I forget to say,
it's always right click. So this one, as you
can see over here, when you select it, it
will just fill the hole. But that is why I do not
really need it in here. I guess the way that
you can use it in here is if you have multiple
different holes like this, and you want to fill
them right away, I believe that without
even needing to select it, you can go up here and you
can press fill hole in here, and then it will automatically fill all of the
holes right away. So let's go ahead and go down. Rtpology stuff we don't really need right now,
smoothening stuff, also not triangulate and dupulate these basically turn
your faces into triangles. I can show you like this. The way that this works is basically easiest way to say it is that
whenever you export something to a game engine, game engines look at triangles. You can also find
them up here in Tris. They do not actually look at the polygons and the
faces and stuff, so they will
automatically convert your model to triangles
like we have done here. So the reason why
you would want to use triangulate
in here sometimes is if you have any
errors or you want to triangulate your model in a specific way so that the game engine does
not do it for you. But honestly, that is
way more advanced. We honestly don't
need it right now. Mirroring. So our mirroring, I guess we can add that
one. So let's add that one. What we can do with
mirroring is if we just go ahead and select on it. It's like a symmetry mode. Mirroring, symmetry, whatever. So what you can do is you
can choose the axis in which you want the
mirror of ARC. The nice thing is that when you have merge borders
turned on over here, it will automatically merge
your models together, so it will just nicely
combine the models into two. Extra cool. What you can do with mirror is you can
also rotate it. So you can very quickly create some interesting
shapes like that. So that's one I do
like to use sometimes. In order to undo it, you need to undo every movement. So that is the mirroring one. Honestly, the rest, right now, we don't use enough
to really go over. They are very specific stuff. If you, for example, want to
transfer one UV to another, you can use transfer attributes, but it's stuff
that is not really worth picking your brain over when you're
just a beginner. So let's go ahead and
have a look on sec, let me just adjust
my mic so that it's a little bit closer.
There we go. Okay, so in added mesh, I don't really use bevels
because I use a shortcut, which is the contro
B shortcut for it. I don't really use bridge
because I'm adding a bridge. So let's go over these. Let's go over these
three over here. Um, yeah, circularize. You can add it to
yourself if you want, but I don't use it
enough for that. So the first one that I want to go over is Bevel. Super easy. If you, for example, select an edge and you
want to bevel it, which means splitting
it into two or more, you can simply press Control B. And now you can see that
we have beveled it. We can use the fraction over
here to control how much. And the nice thing is that
if you add more segments, you can turn this into,
like, a nice round bevel. That's it. That is bevel. It's a Wi common one
in tree modeling. We will be using it
quite a bit, actually. So that is quite
nice. The next one that I wanted to show
you was the bridge. Bridge is also a classic. So let's say that you have
over here, two edges missing. Now, I can, of course,
select the edge, and I can shift right click
and try to fill them. But what happens is
that filling a hole, it does not respect
any of these edges. It will literally just fill
in whatever space is there. Even if you do it on a
corner, it's quite insane. Let's say that we
literally have a corner here and do this. I will literally
just try to make a mess and it will try
to fill in that hole. So for those more
specific stuff, we have something
called a bridge. What you can do with a
bridge is you can select. Let's go to Edge
mode. Edges, and then you can select the opposite
direction of the edges. At this point, if you just go ahead and shift right click, you can find the bridge
above fill hole. It will basically fill in
the edges individually. So also over here, you just
need to select two edges, shift right click bridge. And of course, you can do
this also more complicated. So if you have, for example, here and then shift double
click to do a loop. I can also go ahead
and double click this, hold control and
deselect the sites because a bridge
requires opposite edges. So I just deselect the sites, and I can also bridge it instantly like that.
So that is the bridge. Let's see. Circularize.
Circleriz is pretty cool. I just don't tend
to use it too much. So first of all, something that I want
to show you is how we can grow because I believe
I forgot to show you this, how that we can grow
and swing selections. I do actually like
to have that one. Now, there is a button for this, and it's like Can you see it
on my keyboard registration? It's like on the dot C.
Let's say it like that. But it's really like the arrows
pointing left and right, and it allows you to swing or grow your
selection like this. You can also find it in
select grow and swing. So this is the one I mean.
Sorry, I forgot the name, the specific name of it. Now, why am I doing
this quite easy? Because I want to
show you something. If I would delete this stuff, let's say that I want to
turn this into a cylinder. Now, we don't have a lot
of segments over here, so it will be quite
a low poly cylinder. But if I go ahead and I
select, for example, this one, what you can see
over here is that it will instantly turn
whatever we have selected or it will tie to turn it into a
cylinder in here. I believe that you can also do some controls with
the normal and like the radial offset
and stuff like that. But just in general,
the cool thing is that it's now a cylinder, and now you can go
ahead and you can just, like, quickly do
whatever you want to. Let's say that over here, the geometry is not perfect, so you might need to
select around it. But you can imagine that
now you have a cylinder and you do contre B and you
give it like a nice bevel, and now all of a sudden,
it looks like quite cool. So that's basically how
that we can quickly turn something circularized
into like a cylinder. I don't use it too often. I use it Whenever I use it, it's often to avoid using
something called a boolean, and we will have a bonus
chapter on Booleans later on. Booleans are just cutting one
shape out of another shape. So over here, if I just go ahead and use this one
again like this, I want to always keep backup because I'm messing up
these cubes quite fast. So we have that one. Collapse, I don't really
need to show you. I will show you,
like, the welding Have we arrived at
the welding stuff? I think we have arrived
at the welding stuff, so I can probably show you that. Um yeah, let's show
you the welding stuff. Okay. So welding inside of Maya goes a little
bit different than inside of Blender and Tris Max because we
don't actually have, well, we have tools
for the welding, but we are using
a floating menu. So there's a few things
that we can do for welding. First of all, what we have
is we have a target weld. This one I often just like to select in my modeling tools, but I believe I forgot
it is T T, the shortcut. No, sorry, I forgot
the shortcut, but I often just use it
in my modeling tools. This is the one I use
most of the time. I can simply select it, and you could also add it in here by the way, just
by Chef clicking. Oh, no way, you need
to find it in here. Target Weld. Where are you? Target belt. There we go, see? So you can also add it in here. So you can choose
if you don't have this window open, you
can just select it here. So what Target Weld does
is it allows you to select one VRC and click and
move it to another, see? And then it will automatically merge these vertices together, meaning that it becomes
one instead of two. So this is quite useful
if you just want to do some really specific quick
optimizations like that. Now there is another one, and that is if you, for example, select multiple ertzes and let's say that all
of these verts, they can just leave.
Like we don't want them. We want to have all of them
merged into one point. You can shift right click, move up to merge vertices. And here you have
a bunch of tools. So you have your targets
well tool if you want to, but I feel like it's
slower to find it here. Or you can merge
vertices to center. And now, as you can see, it has merged all of our
vertices to the center, which makes it easier for
us to do optimizations. Now, another one is, let's say that you want to
remove all of your edges. You can simply double
click and let's say that I want to
remove this line. If I would press delete, there, it does not work
because it leaves like these leftover
vertices over here. Instead, what I do
is that in May, I believe you can
just press backspace, although in Tres Max
it's contrabgspace. I have a look? No, no. Okay, so in Maya, it's also
controbgspace. You want to press contrabgspace. And what it does is
it removes that edge, but it also removes the vertices because you do not want to have floating
vertices like that. You just want to,
like, nicely and cleanly remove your edge
very quickly like this. That also works
really well here. Let's say that we
merge this at a point and we just want to
get rid of this loop. I can actually click. I can hold Control Shift. Let's leave that one to
add more loops like this, and I can press Control
Backspace to remove them. Now it's like a
single loop until we, of course, mess up our shape
again. So we have that one. And finally, the
last one that we often use is if you shift right click Merge Vertzs and go to the little settings
box in Merge Vertzs. What you can do with
this is you can merge them based upon distance. So I can set a distance
here and it will try to merge everything that is
within this distance. So if I press, I believe I
can just press Merge Oh, no, I always forget
which one it is, Merge or apply. Let's try again. Merge VertzsO here. Let's make this bit
bigger. Just press Apply. No, big. Uh, maybe that's
just the settings. Oh, that's really weird,
that it does not work. 100? To be honest, I'm not sure why that
one isn't working. That is really strange. But
let's get back to that. If that becomes a problem, we
will get back to that one. Because that one should
work totally fine. It's quite a common
tool, actually, to have. So I'm quite curious. But maybe it just has
to do with this model. Maybe or maybe it's Ah, it might look for
like a selection. That's it. Let's try
that one last time. It might look for, like, a selection. Ah, I see. I forgot that so inside of Tres, Max, you don't actually
need to make a selection. But in here, if I now set
the threshold lower, Okay? So you see now it's
really sensive. You need to select
all of your verties, which is sometimes a
little bit annoying. And then you can set
quite a low level. So you can see that
now we are too low and it does not
actually apply. But of course, because all of these edges are evenly spaced, this is not really a
good example because as soon as we hit the threshold where they are evenly spaced, they will all merged together. But so that tool is working. Now let's go ahead and
have a look around. I don't want to spend
too much time on this. Symmetrized, we use mirror. We don't need these
tools most of the time, so I will not really
go over it right now. Like, I rarely use them. What I'm showing you
right now is literally the tools that I just
use 80% of the time and that I just useful
to know whenever you are doing environA specifically. So let's go to the last
let's see, actually. Is there something
I yeah, the detach, by the way, I think I already showed you shift right click. It's the same as
extracting phases. And when you extract the pace, it just becomes, oh, I need to go to my tool
settings and reset. It just separates
the phase basically. I will go over this
menu later on to see if I did not forget
anything Mesh tools. So we have Connect. I want to art this
one to my tool shelf. Insert Edge Loop, I want
to art to my tool shelf. Multi cut, I want to
art to my tool shelf. Office, I don't really
use it one too often. I think, I think
that's about it. So let's go into
our modeling tools, and let's just go ahead
and grab a new cube again. So we have a few over here. First of all, the one
that we have is we have our connect vertices that
share the same phase. So what you can do with that is you can just select an edge, and then it will connect
a vertex over here. Now, strangely enough,
ah, there we go. In our tool settings, you can find actually some
settings in here. The reason why this
one is nice is because we can evenly
space our connections. So here you can see that
I selected an edge, and you can see that
I believe that Oh, no, sorry, I only works
with a single etche. I forgot about that. Else, it
gets a little bit confused. You can choose the
amount of segments. So let's say I set this to five. I will add five edges. And if I set it back
to one, it will add one. Let's say I add two. You can also choose to
slide it for this one. There is actually normally
an easier tool for this. I can't remember. It's weird
that it shows me like this, but I don't use it too often. Let's say that I set it to 0.3, you can see that
it slides to 0.3. The only strange thing is that I swear I was like an
easier tool for this. Maybe in here, insert. Huh. Remove. No, I'm not
sure. That's strange. But basically, also
pinching allows you to basically move it away from
each other, like this. The reason why I'm a little bit confused is because it does not allow me to drag
and drop so sorry, to drag in my values the same way as I believe I
can probably show it in here. Oh, no, I cannot.
Ah, that's too bad. So okay, strange. This tool, normally, it works better.
Let me say it like that. Normally, I can remember having like a little
menu where I can, like, drag in and out
the different settings. So that is the connect tool. Now the next one,
one of my favorites and one that we will
use the most is just simply a tool that
allows you to click and drag to very
precisely art edges. See? That's all.
That's the tool, but it is useful. And finally, we have
the multi cut tool, which you can also find in
your modeling tools over here. And basically, it allows you to create new edges manually. You can click from one point to another to create an edge, or you can even
literally just create edges from one point like this. Is how I always recommend
doing it. Do not do this. You can do it, but
only do it if you have a really intended
purpose because what will happen is that now you have this random verts that's just kind of like
floating in here. Within games, this
can cause errors. This is why you would want
to, like, triangulate stuff, or in this case, you would use a multi cut tool to
quickly select it. And you right click
to basically Accept. Although I believe you
can also use Enter. Yeah, yeah, you can
also use Enter, but Enter is a lot
more annoying. So let's see, mesh tools, we have the multicud
yeah, we have that stuff. Let's see did I forget anything? Oh, it looks like I did Aart
fill Hall in my custom one. Oh, yeah, the smooth
as smooth vases. That one is quite a classic, and it is in mesh display. So in mesh display, if you do harden edge and soften edge, to be honest, I actually use them mostly not via this menu, but via different menu. What this allows you to do is it allows you to
add smoothening. If I, for example,
said this too smooth, you can see that over here, my entire mesh
looks very smooth. Now, of course, this is not the right match to do it with, but to give you
the best example, let's create a
cylinder over here. You look at it, the cylinder
is nice and smooth. It's a shading technique. It's basically faking, the smoothening to make it seem like there
are more polygons. If I would set this
to heart shading, this is how a cylinder
really looks like. And that's basically
what this is about. You can smooth shade
and heart shade. Now, the ones over here, they basically now try to
shade your entire model. However, if you
would, for example, only select these edges
and then smooth shade, so shift right click. I forgot. Normally, I can. So there is another
one, but I was hoping that I can, smooth
faces. There we go. No, that's not the
one. I'm really blind. I must be really blind. There you. So let me just
show you another one. And that is if you go and mesh display, soft and
hardened edges. That one does it automatically
based upon angle. So if I now press
apply, it does work, but I swear to God, there is a tool that allows
me to smooth the faces. Manually. But I'm just not
understanding is why it is picking up the top
also face normals? No, that's not the one.
Ah, that's annoying. It's like something Oh, wait. If you ever do this,
this is quite annoying. Sometimes you have
like these few pods, and you want to just like if you want to just talk
a little back off. Where are you? Yeah,
you know what? I'm not going to
spend too much time because I really need this. Control Shift, no. But there are so many menus
inside of Maya like this. So we need this. So let's not worry
about it too much. It's just something that I
forgot, but there is a way to, of course, only smooth
your selection. You can find these
smoothing also by just simply going, I believe
it was in here. Shift right click on
your actual model allows you to find the smooth. It used to be here. Um, Wow, I'm having a complete
brain freeze here. Sorry about that. Oh, yeah, soften and
harden edges. There we go. And here you are able to
also find it in here. So, in general, I tend to,
I tend to use it here. I can remember there was,
like, a faster menu. So I'm a little bit
confused right now, but okay, sorry about that. So anyway, the rest of
the stuff over here, we don't really need,
and just as before all of the other stuff I
also don't really need. With this stuff, we can already make like 90% of the models
that we want to make. So let's have a quick look. One more thing I want to show you whenever we are
working in Maya, high ply to low poly modeling, which means creating
a really high detailed version of your mesh, and then also a low
detailed version. And the reason you do
that is because you can manipulate the
textures to make your lowly your low detailed
version look like your high detail version without actually having
a lot of polygons, because the more polygons, the more expensive your model and the slower your
game will run. That's why it takes
games years to, like, improve from these
really basic levels to these really massive levels because they have
a bigger budget for polygons and for
textures and stuff. However, inside of Maya, if you ever want to actually
smooth your geometry, you have the number
one tool for heart, number two tool for, like, a preview, and
number three tool to actually smooth your
mesh like this. As you can see one, three. And this is how
we would kind of, like, smooth our polygons. One thing to keep in
mind is that in Maya, if you are ever used to
blender, in blender, it is called multi resolution, and in three years max, it
is called turbo smooth. If you are ever inside of Maya and you have
not used it yet, this is fake geometry. Right now, this geometry
does not exist. As soon as I go to Edge, like, it still keeps the
exact same amount of edges. However, if you want
to, for example, turn this into actual geometry, this is where that one tool comes in that I
was talking about. If you go to modify and convert, here you can see your smooth
mesh preview to polygons. And now you can see
that it actually turns into actual geometry. This is something we
will go over way more in depth in a later chapter
where we will actually be creating some high pool to low poly assets. So
we have that one. Let's quickly just double check my menus to see if I have
not forgot anything. So shift right click. So
we went over Extrude. We went over multicud,
Target Weld. Oh, hey, Target
Weld also up here. Like you might notice, there are often many places where you
can find the same tool. So let's see, we mirror,
we talked about. We talked about the
topology separate. Yeah, that one looks fine. Right, click. We talked about that we can
go to object mode, face mode, all that stuff. Let's go to vertss
shift right click. Vertzs don't have
a lot of tools? Yeah, I don't see, like, connecting stuff, that's fine. Merging of vertss that's the most important one that
you will be using in Vertzs. The HAMFA Vertis is the same as bevel, but
then with Vertzs, I don't really like
using it because it is you rarely need it, but you can HEMFO which means like beveling
your actual ertzis over. But it is very
specific use cases. So edges, collapsing
them or merging them. You can do the same
with edges and faces with merging and stuff. Multi cut, we did. I don't care about that spinning stuff. So it's a bit annoying that it twice like automatically
throw me into a menu. So creases, we don't
need insert edge loops, we talked about circles, we talked about bridges
we talked about. Yeah, that seems all fine. And let's have a
look at our faces, extruding our Oh, Extrude. Of course, of course, of course. The most common one
and also inset, actually, is another common
one that I completely forgot. The reason I forget is because
I use shortcuts for them. Extrude, if you go ahead
and press Control E, you can extrude the mesh. Extrude literally means
that we can go up here and we can just like, push out our mesh to
create more mesh. You can also find it in here. There are a few settings,
let's say that I select a corner and I press chtraE. So there are a few settings. First of all, of course,
the thickness over here. However, you can
just use your pivot. The second one is your offset, which allows you, it's
really sensitive, 0.05, it allows you
to create a bevel, but in here, it's not working very well because
it's on the corner. Divisions allows you to add some divisions to your
extrusion on the side. And quite a nice one is
keep faces together. If you turn it off, it will basically extrude all
of your pieces separately. So if I now would, for
example, select them, you can see that every face has been extruded
separately over here. And just to show you
the bevel stuff, if I do CtraE, we can go ahead
and we can move this out. And you can actually
do the beveling. So you can do the offset
with the beveling, or you can literally just press this scale button over here. Was this one. Here, this one, you can actually scale
it and bevel it. I believe the offset just
does it at the same time. So 0.1. It's too much, 0.01. Here, see? I don't know why
it's so sensitive right now. I might have set my settings
a little bit wrong, but basically, this
allows you to, like, slightly bevel your mesh to
create something like this. So we got that one over here. The inset, you probably
know it as inset, I think, if you have ever done
any type of tree molling. Maya does not have inset. The way that inset works in Maya is you go to
your scale tool, and you basically hold shift, and then you grab
one of your scalers, for example, this
square one over here, and shift also extrudes. So CtraE extrudes with settings, and shift basically doesn't normal extrude without settings. So it's my force of habit to often use the
one with settings just because I often need to do
quite specific extruding. So the inset, it
is quite simple. You simply go ahead and extrude, but then you scale on your root. I believe you can even
just use a center scale over here if it is a flat face. Of course, you cannot use a
center scale if it is like this because then what will happen is it
will push it down, which can actually be useful. So whenever you have a model like this and
you want to inset it, what I recommend doing
is to press contra E, and then do not
change the thickness, but only change the
offset to like 0.01, see? And then it will even
inset it like this. And then you can, of course, manipulate
it however you want, keep vases together, for
example, whatever you want. So you can just do
that kind of stuff. So that is the
inset and extrude. They are kind of like combined into their own little piece. So inset extrude, bevel, yeah. To be honest, I
think that is it. I think we have gone on
long enough right now. So that was the overview
of our modeling tools. So now you know, kind of,
like where all the tools are. You now know how to use your
tool bar, and by the way, you can also go up here into, like, your shelf editor. And although you
don't even need to, you can save all shelves, but I realize that you
can also just go in here and press save all shelves, just to save to make sure that
your shelf has been saved. I do believe it out of saves, but just in case we
want to do this. Now, there's also a
section to Maya modeling, which is splines, but we will have a bonus
chapter on that. So in the next chapter, we will go over on how to actually use splines
inside of Maya, which will be just like
a nice quick overview. We will most likely not need it for this specific project, but it is super useful
for you to know. So I would say that is about it. Like we have a few
tools over here, but like selection tools, and I showed you soft
selection before. They are really specific. They are selecting
based upon an angle, for example, stuff like that, which works great if you, for example, have a cylinder. Like, I can show you super
quickly is the last thing. So if you have a select,
you can select over here selection constraint in your
modeling toolkit by angle. And then if you set
your angle to 25, it doesn't work 30. 40? A here, see? Oh, sorry,
I had to re click. It will select every
phase connected to your selection based upon
the angle if the angle is if the angle is 40 or
less in degrees, I mean. So that is just like
the select Bangle, and you have a few more
selection modes in here. I recommend just playing
around with it if you are interested in it. We
don't use it too often. It's quite specific. Okay, let's finish
this chapter off, and let's go on to
our bonus chapter about how to use splines. And after that, we will
have another bonus chapter on how to use Booleans.
11. 06 Blender Going Over Our Modifiers And Hotkeys: Okay, welcome. So what we're
going to do in this chapter is we are going to go
over our modifiers, and I will also show you how to create a quick favorites menu. And that's like the one that
is the most useful to me. So what I'm going to do is I'm going to create a
new cube over here. And basically, let's
go into dit mode with this cube so that
we can actually start applying some stuff. Now, the first thing
I want to do is I want to create my
quick favorites menu. Now, the quick favorites
menu, if you press Q, you can see that it says,
like quick favorites, no menu items found. Quick favorites is super
useful because all of those little menus up here that I do not always
want to use shortcuts for, I can basically create my own custom menu in
which I can use it. So the general takeaway
is that I simply want to go by here
and have a look. So let's see I select, I don't need anything
from Select No. Mesh, let's see. Let's do mesh,
transform and TSphere. That is one that I might want to use, and I will show you why. So if you right click on it, you can simply press
art to Quick Favorites. And now if I press Q, you can see that now
two sphere is working. What this one does is basically, if I would add like a
bunch of segments to my cylinder, believe
this is the right one. I can go ahead and by the way, if you go in your object mode, your menu is different, so I will go ahead and show
you the object mode later on. If I would select everything, Q and press two sphere, you can see that I can
turn this into sphere. Now the thing is
that is more useful. At least I hope
that this is how it worked because I
forgot a little bit. If I press contro plus
to grow my selection, do one less and
delete this stuff, and if I then go to Edge mode
and just select my loop, I should be able to press Q two sphere and
make this round. Perfect, see? And that's quite a handy way if
I want to just very quickly turn stuff into
a round shape like this. And then, of course,
I can, for example, go ahead and I can select it, and then I can nicely bevel this edge over here like this, which will give me quite
a nice look as soon as I press out a smooth or
just like a normal. Smooth. So, oh, wait, it's the one way around. That's why it is
looking strange. So that is one that I do
quite like to have over here. So let's see, mesh
transforms. That's the rest. Duplicate extrude. So I want to go for merge, and I want to do the at center. I want ArtiquikFavorites,
and the B distance, I want Aarti Quick favorites. Separate selection, I want
Aarti Quick favorites, and we already went
over all of these. That's about it.
Let's go vertex. Uh let's see. I don't think I need
anything in here. Edges, Extrude. Bridge. Let's do that one
to quick favorites. And the rest we are
using shortcuts for as far as I can
see. Let's go face. Extrude face along normal. I like to actually have this one also in my quick favorites, although I can press Control E, but sometimes I forget
which one it was. Let's see, is there
anything else? Shade Smooth and shade flat. Ah, I often only use that
one in the object mode, so I rarely actually
use it in here. So I probably don't
think I need that. So now if we press Q, you can see that we now have
this little menu, which allows us to very easily basically go ahead
and press Q and then, for example, extrude long faces. The nice thing is also, no
matter where your cursor is, it will remember your selection. So if I go ahead and press selection, and now
I, for example, move my cursor here
and press Q again, it will stay on selection, which is nice if you need
to do a repetitive task. So that is it for the
dit mode for now. We might add more
later on, but for now, I cannot really
think of any other ones that I would really need. Now, if we go into object mode, I just want to add a object, and then I want to add
apply all transforms. This one, it resets
your transforms. Right now, you can
see that if I do, for example, my scaling like this and my rotation like this, sometimes what happens
is that in blender, if you change your
transforms around a lot, your modifiers, which
we are going to go over later on, get confused. When they get confused, they do not work
the way they want, and it's something
you will notice. For example, beveling
is not even, that kind of stuff, bending, it's not bending
in the right way when we use our bend modifier. So in those cases, you just want to add
the apply transforms. And reset them. And as you
can see when you reset them, the location, rotation
and scale is set to zero. So this is now the new position and transform of our
object over here. And that is one that
I just wanted to add. Yeah, contra J. I don't need
to really add that one. And these ones we can
just right click, so it's probably also overkill
to do anything there. So I think for now,
that's about it. Yeah, that's about all of
them that I want to use. I think, Okay. Awesome. So having that done, let's go ahead and create
a new cube over here. And what I'm going to do is I'm going to go ahead and maybe I can even break the transforms
to show you an example. Let's go ahead and
create a cube like this. Let's add a bunch of segments
over here so that I can start showing you
some modifiers. So we have a cube over here. Now, if you go over here to
your modifier property step, I just want to show
you a few modifiers that we often tend to use. Modifiers is something
that we do tend to use often inside of here, I'm just turning on Wi frame,
inside of object mode. We don't really use them too
often inside of added mode. So if we press our
art modifiers, there's a few ones that we
want to that we want to use. Let's go from left to right. The first one is weight normals. What are weighted
normals? Very easy. Weighted normals is a way to
basically fake the look of your model to make it feel higher resolution and higher
data than it really is. Right now, if I
turn off wireframe, you can see that this
is quite a harsh cube. This is not very desirable. If you've ever
played a video game, you see, these harsh lines, and it just doesn't
look really nice. Now, there's two ways
that we can fix this. One way is to select all
of our edges over here, press contre B and give them
like a bunch of segments. And let me just reset my width. That's shape. I think I need segment
shape to 0.5. There we go. Like this, and then right click, and then I will do shade smooth. So like this, now our
edge does look really nice and it has a
nice softening to it. But you can imagine that
these are a lot of polygons. The more polygons, the
slower our game will run. So it is something that
we want to optimize. There's another
way that we can do it with weighted normals. Basically, we select our
edges and we bevel them. However, this time, we only give it a single bevel like this. Now, we can use the smoothing, the same type of smoothing that we use here with
shade smooth, like this. We can use our
smoothening by basically faking this effect where
it looks nice and soft. The way that we do this
is we go ahead and we add a modifier and we add a
weighted nonmalsmdifier. Now, it'll probably
show me an error saying enable out of smooth. The way that you can fix
this error is by going into your object data properties
and turning on outer smooth. And now you can see that over here and especially if I set this phase weight to 100 to make the larger pass
a little bit sharper, you can see that this
looks very similar, only I made my bevel
a bit smaller. However, the geometry is
still nice and low poly. This is a very common
technique that we will actually use on
almost every single model. Even high pole models, I tend to use this technique on. So this weight the normals. Now, next to this, let's go ahead and so we have
done this stuff. Let's leave my cube over here. Another one is the
array modifier. That one is also quite nice. If you select it,
what you can do is you can set the
position over here and you can basically use
the count to basically even positions duplicate
your model like this. Now, if we go into edit mode, we can still change
this one model, and it will change all of them. If you want to apply this modifiers that every
model is its own unique model, you want to press Control A, while clicking on the modifier. Now it has become its
own model like that. That is something to
always keep in mind. If you want to apply a modifier, Control A is the way to go. Let's see. So what
else do we have? We have a Bevel modifier. If you want to bevel
everything in one go. As you can see over here
instead of selecting stuff, but I like to do it manually because I like to have control. Boolean modifier,
we will go over a little bit later in
the bonus chapter, our mirror modifier basically allows us to mirror our asset. This might be actually a little bit hard to see on a cube. So let's go ahead and try
it on let's use, like a UV Sphere over here.
Let's try it over here. Okay, so the way that the mirror works is it allows us to basically
mirror our geometry. The only thing that
is a bit annoying is that I always use a plug in that shows me that allows
you to do the mirroring. Ooh, that is actually
really annoying, yes. Hmm. I'm not completely sure. I'm going to leave
the mirror for now. Let's leave it until the
actual modeling chapters because in the moding chapters, we will actually apply some custom scripts
because right now, using the mirror as is, it's super annoying in
the way that I want to use it because then
you would need to use this little
cursor over here, and I have a way
easier way to use it. So let's go over that
a little bit later. Our multi resolution over here, it basically turns our model
from a low poly model to a hypoly model by being
able to press subdivide. It will basically smooth
our model like this, and we use this often
whenever we need to create a really high data model that is way too hypole for
our actual here, because if I apply this, here, it's way too hypoly for games, but there is a technique that we will call norm map baking, and it says a technique where
you can basically apply a really hypoly model to your low poly model and a little bit similar
to weight normals, it will fake using lighting. It will kind of fake
the effect of making your model look high resolution. This is something I would
really recommend just having more detailed look at. There are many videos on YouTube that go extensively into this. Or what you can do is you
can just follow this course, and you will literally see
it being used in practice. So that's another
way, of course. So multi resolution
remeasure is for resplog. We don't really need it. Most of these we don't need
to triangulate one, triangulation model like we've
spoken about that before. Deform. I don't really like
to use most of these yeah, I'm not going to go
over those right now except for the simple deform. The simple deform is
probably the last one I use. These are the ones,
they are useful. It's just like I only use them like one
or 2% of the time. So it's not really logical for me to bother you with this
information right now. So the simple
deform allows us to basically add specific deforms, like a twist, a bend, a taper, and a stretch. Actually, this is perfect. So now you can see
that I do the bend, but my bend does
not feel correct. If I do a 90 degree bend,
it looks really warm. This is the applied transforms. If I remove this, press Q and apply my transforms, remember, object, apply
transforms, all transforms. Let's try that. Now let's try to add a bend
modifier again. Bend, C, 90 degrees. Now you can see that
it works a lot better. This is one of the key
times when you can see that the transforms are so messed up that you don't
want to do that. But yeah, with the bend, you can bend it by using the angle. You can also change the
axis over here like this. Now we will go over bending a little bit more
in detail later on. We also have twisting, and for twisting on
the Z axis over here, you can see that it can
basically twist our model, which can sometimes be useful. Taper, Taper, basically
what it does is it like push our model from the base to the top
into, like, a point. And stretching you guessed it, it basically just like
stretches our model out, almost like an elastic type. This always works from the
position of the PivoPoint. And this is the same
rule as with the mirror, why I'm not going to
cover this more because I have a technique
on using a script in which I can very easily
change my PivoPoint in order to basically very quickly, like, change the ways that I
mirror and stuff like that. But it is a script that I use. So this is something
that we will go over a little bit later. I would say that
that is already it. I don't think there's much
more to cover right now. There might be some
things that we will cover later on when we
actually start doing the final modeling
of our assets. But for now, I want to
leave this chapter, and let's continue
to the next chapter, which is a bonus
chapter on how to use Bollians inside of Blender. And there will also be a bonus chapter on how to use splines. The spline tool will
actually be first, and then we will
go over Booleans. Although the splines
one or the curves one, that bonus chapter
will be very fast. So let's go ahead and continue
with this in next chapter.
12. 06 Max Going Over Our Modifiers And Hotkeys: In this chapter, what I
want to do is I want to go over our hot keys
and our modifiers. Especially our
modifiers are really powerful inside of trees Max and one of my favorite feature. So let's get started
with an easy one, which is going to
be our hot keys. So as I showed you before, there were a few hot keys
that I was currently missing. The ones that I like to set to a hot key is going to
be my extrude settings, my inset settings, and I also like to have my
chamfers to a hot key. So normally what I
do is I often have Alt E for my extrude
settings and I often have I and I believe
I currently has yeah, currently, I does not
have something important. By now, what I does
is it just basically snaps the view to
where your mouse is, but I never use that one. So you can replace hot
keys and Control B. So if I go over here, because Control B is like
a classic one for Bevl. Yeah, right now, that one also does not have
anything important. You want to make sure
before you create hot keys, to try them out,
make sure that it is not using something very
important, for example. So the way to change
these hot keys, you simply want to
go to customize, and then over here, you
have your hot key editor. So what we want
to do is you can, of course, also
search by an action. So what I can do
is I can search, for example, for
extrude settings. And we have two
extrude settings. Added poly and editable poly. This is a little bit confusing. AitbPol is the one that we have. Addipol we do often use, and Addipol is basically a modifier that is almost
the same as editable poly. I will talk to you about
this a little bit later. What I want to do is I
simply want to press Alt E when selecting
it and press a sign. And I want to do the same for the other one because these two never interfere because this one only works when you have
an added poli turned on. So we have that one going on. Okay. Now we want to
have Inset over here, and we have Inset settings. And just want to check. Yeah, so these all
don't have hot keys, and I want to set this
to just I assign, and I assign. There we go. I always like to do the settings one because I like
to have control. And I want to have
my che fa settings over here to Contra B, assign contra B, assign. And if you want,
you can also set your bevel over here
also to Contra B because often the bevel you would only use
when you do faces, you would not use it when
you actually have edges. But I pers, we can here. If I do bevel, Bevel over here. Oh, Control Chef B. So right now, this one is set to ControlsvB if you
want to do the bevel, or you can do bevel settings. Here. If I do Control
B for this one, Okay, so here you can see
that it is conflicting. I thought it would not conflict. And the reason I thought
it would not conflict is because hanfs are for edges
and bevels are for faces, but I guess there is a conflict somewhere. So I
will not do that. I will simply press Done, and I will press Save over here, and you can save it
wherever you want. Um I would just call this fast
track and save over here. And now if I do Alt E, you can see that I have
my extrude settings. If I do I, you can see I
have my inset settings, and if I go ahead and select
an edge and do Cotre B, you can see that
over here and now I have my EMF settings. So that will speed things
along a little bit more. You can set as many or as
little hot keys as you want. I will, especially for this
util, keep it to a minimum. I sometimes do use a few more. But the reason I keep it
to a minimum is because it's way easier for you
to follow the tutorial. If you see me physically
pressing a button, than for me very quickly
using shortcuts. So having this done, now what I want to go over is, I want to go over modifiers. So here we have our modifiers. It is a massive list. There's so much stuff in here, but much of the stuff in here
we will not actually use. What I like to do is, I like to create shortcuts of these. You can do these by
going up here to your modifier set and
press show buttons. Now, you have a lot
of shortcuts in here. So what I will do is I
will go ahead and select that little button down here again and press
Configure Modifier sets. In here, you can find all of the modifiers
in that large list, and you can also find
the buttons in here. The way that you
would apply this is you would simply
click and drag. And if you want to
have more buttons, you simply want to press the
plus button over here, see? And then it will
add more buttons. So for example, if I go ahead and do this
and click and drag, it will apply here, and as soon as I press Okay,
it will show up here. For now, what I will do is I will revert this and press because I already
alight on my buttons. Once again, all of these
modifiers you can find in here, although it might
take you a second. I will run through
them very quickly. However, many of these
we would not be using for this project because this
is quite a basic project. The way that Tres
Max works is that everything is very
non destructive. You can actually stack
multiple modifiers to keep things nondestructive. For example, I have
my added pool. Let's say that now
what I want to do is I want to add another
added pool on top. With this added pool selected, I want to go ahead and I want to extrude this out like this. Now what I can do is, let's say that now I
have a I don't know, what can I use in here? Let's do an FFD box. So I don't want to spend.
Okay, let's do this. Let's do a turbos mood, just because I don't want
to go over these later on. So now you can see
that I have done my Adipol and I've
done my turbosmod. Let's say that I changed my mind and the edits that I
made, I want them gone. I can actually just turn off the Adipol and then
they're gone, see? So it's very non destructive. I can, of course, also
select the AdipolR click, and press delete.
And there we go. If you ever are on the dipole, you want to be able to
see your turbo smooth, simply press this button. It will show everything. This is something that
comes clear later on. So that is the Adiple It allows us to work
very non destructive. We also have our bend,
and with our bend, if, for example, um, change
my mesh like this. By the way, in your scale, if you just click and wag, you want to use this
icon for scale. Sometimes if I miss
click my shortcut, it will change to
this icon over here. But you also always want to make sure that
it's this one because this one it scales
everything uniformly. So we have our bend. If
I click on the bend, all it does is it allows
me to bend my model. Right now, what I need to do
is I have actually a bug, and I will show you
how to fix this bug. This sometimes happens. Because I scaled my model,
the bending modifier, it does not yet realize that
the scale has happened, that I made it thin and long. In order to do that, what I want to do is I basically want to
reset my transforms. This is a topic that comes
back also in Max and Blender. Basically, if you ever feel like something is
wrong with your model, like a modifier is not working the way
it's supposed to work, all you need to
do is you need to go up here to your utilities, and this is the only time that
you will use it and press Reset X form, Reset selected. And now you can see that
there is a modifier added. What I recommend is
to always turn right click and collapses back
into an added pool. Now what has happened
is that the transforms, all of the scaling is set
back to 100 by 100 by 100. This is sometimes a bit
hard to understand. It just basically
means that whenever we do wily strange
scaling and stuff, sometimes your model gets
confused and you need to reset it so that you
can apply modifiers. Now if I add my bad modifier, see? Now it works perfectly. So a badmdifier allows you to bend on multiple different axes, as you can see over here, very
useful to use. Like that. Our cap holes, we already
know what it does. I just have like a
button to instantly cap holes because it
makes it easy that if I, for example, select
a bunch of stuff over here, like this. Instead of me doing the
whole selection stuff, I can just press cap holes, and it will instantly
fix all of my problems. Of course, the second
option would be to select all of my objects and
then press cap holes. So that's just that one. FFD box, it allows us to basically set if we
set a number of points, it allows us to basically manipulate our asset
based upon a box. Let's say that I do only
four in the height. You can see that now this one is almost like a smooth select. If I move this point, it will softly select and move my
points, also like this. However, we can set as
many points as we want. So we can do really
precise movements like this, and then
I can, for example, select one over here, and you can create quite
complicated shapes with this, as you
can see like this. And of course, you
can set the number of points higher to like
five by five by five. It will reset when you do that. But now you can see that now, I can do really
accurate scaling. So this is great if you need to do quite complicated modeling, or you just want
to make some very specific alterations like that. And that's basically
FFD box. Pro optimizer. If you press Calculate
on P optimizer, and then use your
slider over here, the percentage, it will try
to optimize your model. So this is just great for
really quick optimization. It works awful for
our surface models, but it works great
for organic models, like rocks and stuff like that. Push Push basically
just pushes out your model or pushes it in very specific use cases.
We will not use it. Shell, basically what a shell
does is if I have a plane, for example, here, let me
create a plane like this, a shell because a plane
only is one side. You can see that
the back is black. This is because the polygons, there are no polygons
on the back. There are only
polygons on the front. See? So what a shell does, it basically builds a
shell around this plane, which basically turns this into, like, a solid object. This is great if you have
really complicated shapes, like you're working on
something that's, like, really complicated
and it has a lot of intricate shapes instead of you managing so many
different polygons, because this would be quite
annoying to, for example, do when you need to have
actual thickness also to it. Can use planes to
create a general shape, and then you can use a shell to basically convert that shape, and then from there, you can
use, for example, turbosut. And there we go. Now we have a funky looking
shape really quickly. So that is basically
how you would kind of use them all combined
and stuff like that. I'm just going to delete
this. So that is shell. Slice is really cool. What you can do with
slice is over here, the same as the quick slice, but this time, I have this cube, so I can do really
precise slicing across the entire model. This is great if you have really complicated models and
you just want to, like, slice something
very specifically, you can actually, like,
manually place it like that. Symmetry. Symmetry is
similar to mirror. However, with our symmetry, what we can do is if
we click on it once, we go into the actual
mirror selection, and we can rotate our symmetry, and it will actually
combine our meshes. And of course, you
can do symmetry on X, Y, and Z axis like this, but it allows you
to basically do really cool rotations and
instantly combine it together, like these Edges over here, they are welded together,
which is really awesome. So I can completely
weld them together. And this is great if I,
for example, combine it. Let's say I have a
symmetry like this, I would now be able to, like, add another
symmetry on top, and I can press flip. And what the flip does is it basically flips it
around like this. And just like that, I can
create really intricate shapes. I can even right click
and copy modifiers, right click and
paste them again. And if I go in this
symmetry, I can, like, go in here and I can create really complicated
and interesting shapes on top of all of this. So that is quite cool. And you can also always go back
into your symmetry, and you can always, of course, make changes to it, also, see? So I can just keep making
changes over and over and over again thanks to the
nondestructive workflow. So that is symmetry. I can also select all of
them, right click and delete. Turbo Smoot, I've already
showed you this is for if you do high ply
to low poly modeling, we will actually go
over this later on. We just don't need to
go over it right now. We have our material. It allows you to basically set a material ID. You
don't really need this. This is super specific stuff. And way too complicated to
explain to you right now. Normal, remember how
I pressed flip in our added Bly that when
I select a face and I press flip, that's
what normal does. Sometimes I want to flip a
face, especially when we have, for example, plane, and I want to quickly flip
around the plane, instead of me going to rotate, turn on rotation
snapping and rotate it 180 degrees like
this, I can just press. Where are you? I can just press normal over here
and it will instantly rotate. So it's quite useful.
Smooth, really important. Smoothing groups basically allow for your mesh to
look soft or hard. If I, for example,
create a cylinder, and turn off my height segments and said turn off edge and face. This looks nice and
smooth the cylinder. That is a smoothing group. Is basically a way to fake the look of your model
to make it look smooth. If I turn on my smooth mesh, you can see that now this
is the actual model. So this allows me to
do outer smoothing, which basically smooths
based upon an angle, or it allows me to
smooth everything, which basically tries to
smooth your entire mesh. This also comes in handy
once again when you do, like, a few different workflows, but we will go over that
a little bit later. So we have our UVW map. This has to do with
UV unwrapping. You can set this to a box. And let me just let's see what is the easiest way for me to show you this? We will have an entire
chapter on unwrapping, but that chapter will actually
be on our actual models. So let's say that quickly, you
can ignore what I'm doing. Let's say that I'm
adding in material. Here we go check material. 50 by 50. There we go. See this material, looks
really bad, not acud at all. It's all stretched
because we made our model really
stretched. UVW map. If I set this to box
and make this box perfectly square by going
for eight by eight by eight, what you can see now is that now everything is perfectly square. So this is for when we
apply our textures. Our textures are
now nicely applied. So we will be using
this one a lot also. You can even click once, and now you can actually
scale up this gizmo to make it larger or smaller, and you can do very
quick movements. This one is a little
bit one of a kind in three years Max. I love it. I wish the other software had
something as good as this, but it is just great to use and very quickly do UVunwpping. Now, well, if you
want to apply it, you can always just
collapse to add a poly, and now it will be applied. Let me just go ahead and
do a normal material to at your face again. And the next one's
weighted normals. Actually, what I'm
going to do is I'm going to create a
new cube for this. So new cube 20 by 20 by 20, right, click, right, click,
right, click, to reset. And also, my position
I can reset over here. So weighted normals. What are weighted normals? Weighted normals
are very important, especially within
the game industry because we use them to basically make a model look higher quality
than it really is. Right now, this model, if I go turn of edge and
face, it looks sharp. However, in games, it's not very desirable to have your
edges looking very sharp. So what can you do?
You could select all of your edges
and cham for them. This is something you need to do for weights and normals also. And I'd like a little chamF.
Now, there's two ways. So we have this way over here. Actually, let me. Let
me do it like this. That's easier to show you. So we have this way over here, where we jump our edges, and then we need to add multiple different edges over here, as you can see, just to make our mesh look nice and
smooth on the edges. However, as you can imagine, this is really expensive because we are adding
all of these polygons, and the more polygons, the slower your computer and your scene and
everything will run. Of course, nowadays you can
handle millions of polygons, and right now we only
have 400 or something, but you get the point. However, there's another way, and that is to fake your edges using the
weighted normals. What you basically want
to do is you want to add a single chamfer like this
and just keep it at zero. You don't need to add
any extra segments. So it is a few more polygons, but now if I press weighted normals and I like to press turn
snap to largest face, you can see that now they
are almost identical, although this one
is completely fake. See? Yeah, completely fake. And it's just a way to
basically fake your edges. This kind of stuff
will come more clear later on when we actually
start working on our scene. And then finally, we have a unwrap we have a
Unwrap UVW modifier, and this one basically allows
us to do UV unwrapping, similar to the UVW
map, but then manual. And when you do manually,
you can, of course, be way more precise about
every single piece. Wow. Okay. Those are all of the main
modifiers that I use. There are two more here, but these two we will cover
in a bonus chapter that will come after this
about how to use splines. So that is basically it for the overview of our hot
keys and of our modifiers. We will now go
ahead and continue on with two bonus chapters, one for splines and
one for Booleans. The reason these are bonus
chapters is because we don't really need to use these tools for this
specific environment, but they are super useful for
most environments to know. And once that is done, we
will actually jump in and start by creating
all of our pieces. So let's go ahead and continue with this
in the next chapter.
13. 06 Maya Going Over Our Modifiers And Hotkeys: Okay, so in this chapter, what I want to do is I just
want to very quickly go over some very basic
modifiers inside of Maya and also go over where we can find hot keys and
find our settings. So this is something
that is way more extensive inside of
Max and Blender, because Maya is a little bit
more limiting in this case, but I think it's still
useful to show you. So first of all, let's
go over our settings. If you ever want to
change any settings, although I am personally
quite happy with mine, you can go ahead and
you can go to Window. Settings and preferences.
And in here, you have your hot key editor, your preferences,
and you can even have plug in managers
and stuff like that. So if you open up your hot
key editor, you are able to, for example, change your hot
key, and you can do this by, I believe we go to editors, and then we need to select No, no, wait, that's not correct. Menu items. Oh, there we go. It did not show up
for some reason. So go to menu items,
and then in here, let's say that you want to, for example, find something. Let's say I want to
change my extrude. I can type extrude down here, and then I can find
polygon modeling. And then here we can
find extruding phases. And here you could
change your hot key. So you could say Control R. And now CtraR you
can see that over here. It already shows
an arrow saying, like, Oh, this hot
key already exists. Do you want to override
it? I'm going to press No, because I'm happy
with my hot keys. But in here, you can basically
find whatever you want. So if you want to extrude
your edges and vertss, you can basically set
whatever hot key you want if you want to change it
from the Maya default. So let's go ahead
and close that. Same. You can also go to
settings and preferences. And in your preferences, you can find all of the
settings in Maya. You will need to go in here unless you want to do
something really specific. For example, in settings, we can set our units from
centimeters to meters. If, for example, working on a project that is really
large like buildings. But I often tend to go for
centimeters and then just say like 100 centimeters
for 1 meter. And for the rest, you can have some display settings in here. But honestly, most of this stuff you would
not really touch unless there is a reason
for you to touch it. So most of time you just
would go to settings and the working units when you get more
experience with Maya, that's one that you might
end up using quite often. Okay, so that was basically where to actually
find your settings. Next this, by the
way, you can press F to zoom into your model. And one that I completely forgot to say, and
I'm really sorry. I will cover it more later on for the people that do
not watch this chapter, is if you hold J, while
rotating, you can snap rotate. See? It snaps in
increments of five. Oh, no, sorry, of
15 centimeters. So that's something that
I just wanted to very quickly show you because I just completely
forgot about it, and I'm sorry about
that. So modifiers. Inside of Maya, we
call them just deform. And there is a
bunch of stuff here that I absolutely
do not care about. I rarely use modifiers
inside of Maya. The only ones that I use are
the I always say lettuce, but I know that lettuce
is also like a plant. Late? No, because late
is something else. So this one over here. And what you can do with this is if you go to your settings, you can basically divide this really high poly model up into, like, a few divisions. So let's keep it at like two, five, and two and press Apply. Now, what will happen is that
these divisions as you can. Oh, that's strange that
it try again. The form. So these divisions, okay okay, yeah, yeah. It does work. It's confusing because it shows like two models
at the same time. What it allows me to do, although now I completely
messed things up, I think. Yeah, I mess things
up. 1 second. Let me just go ahead
and Oh, by the way, in your on way we
go over that later. So on the form
late, there we go. And now I can write, click
and go to the point. So the visual feedback is a
little bit more annoying, I would say, because
right now we are combining this into or we
are simplifying this mesh. However, the Wi complicated
mesh still exists. So what this allows us to
do is it allows us to edit this really
complicated mesh using just a few will small points
like you can see over here. And then if we
click on it again, you can see that now the
mesh has changed like this. Take it with a grain of salt. This one works. Once again, it works a little bit
better in threes Max. I don't know why they don't give us the threes Max version, but it allows you if you have a really complicated
mesh and you need to evenly change the shape, you can use this technique. So let me just go ahead and
change that. There we go. Okay. And the way that
you can completely, like, confirm your
lettuce, late, whatever is by going to dt, the lead albitype in history, and then it will no longer show up when you
select it like this. Okay. So another thing that
I wanted to show you is that if you go ahead
and you can go to the form and non linear, here you have a few
more that squashing things or twisting this
cube and stuff like that. Have a playound with
them if you want. The one that I
only care about to show you is the bend modifier, because with the bend
modifier, you might guess it. Let's go at these two segments. We can go ahead and we can
set the curvature up here. It allows us, well, we
need to set it to 90. It allows us to bend. Now, the cool thing is
that this band modifier is actually like a shape
that we can move around, so we can make our
bend bigger or smaller and we can
rotate our bends around, which allows us to create some
quite interesting shapes. In your band settings,
you can also change some settings like the
low bound and high bound. If, for example, set
the low bound to zero, it will only bend
from one direction, which as you might imagine, can once again be
quite useful for us to create a very
specific looking shape. And we can manipulate
it however you want. So the bad modifier
is something that's useful and that we might
also end up using. That's all. I just
wanted to very quickly show you these
extra modifiers. They are quite specific. You
can see in my custom shelf, these are the only two
that I have in here also. So take us with a grain of salt. And that was about
it. So let's go ahead and continue on
to the next chapter.
14. 07 Bonus Blender Splines: Okay, so what we're going to do in this bonus chapter is we will go over splines or curves
inside of blender. Now, this is going to be
a very quick chapter. And full disclosure,
fill honesty. I absolutely hate using
splines inside of blender. If you have seen my tree
as Max part about splines, the bonus part, you
will see that you will hear me say that I love
using splines and blender. They are okay to use
in Maya, but in Max, they are okay to use in
Mia, but in blender, they are very much
left to be desirable. So I will only show you
how to place a spline, how to extrude it, and how
to create a cable for it, because that's honestly
like the extent that I would ever use it
inside of blender. Now a spine. If
you press Shift A, instead of a mesh, you can
find a curve over here. So spline curve doesn't really matter how
you would call it. And then we want to
pick a Basier curve. Now, and that is one of the annoying things inside
of blender is that it just drops a curve to
the ground instead of allowing you to just
draw out the curve. But anyway, I will stop
complaining at this point. So we now have this
curve over here. We can go to tab to go to Edit boat and then we
will have two points. Please remember that these
two points over here, the shortcuts that
we have setup, they are still because
this is a curve, it is a different
type of shortcut, meaning that the move tools, like the cursor tools
and everything, they do not yet have the
shortcuts that I am using. I can, of course, just press G, if I want to very quickly
move some stuff around. But what I'm going to
do is I'm just going to go up here, assign shortcut, cut W, E and R. So
let's see W. Oops. Oh, no, sorry, E needs to be
also different because we are extruding using E. So that is the thing
with this one. So in order to
extrude the curve, you, of course, want to
also add an extrusion. Can I maybe go to,
like, Control points, extrude, right click, change shortcut to
Alt E. There we go. Okay. So of course, you can use the main
tools if you want. So we now have this
curve over here. If you want to go ahead
and rotate the curve, you can see that
you get a smooth rotation from this curve. This is because it
is a Bezier curve. A Bzier curve has a center
with two endpoints. These two endpoints, as
you can see over here, they allow you to basically manipulate
and move the curve. By moving it closer
and further away, we can make everything
look softer round or sharper and just in general, it allows us for a smooth curve. If we want to
extrude this curve, we can simply press Alt E, and then we can move
our curve over here. What I like to do then
is just quickly rotate my curve around so that we
have a nice smooth curve, and you can see that it
stays nice and smooth unless I of course move my
Bzier like that. So that is how you would
basically extrude your curves. You can, of course,
also just move it up. You can rotate it up, and this may be one of
the few times that the rotations using deva blender might actually be nicer to use. And we can just go ahead
and we can press Alt again, and we can push this up
once more like this. So you can see already from
the movement and everything, it's not the best or
not the easiest to use, and that's why I tend to
limit using curves inside of let's say that we now have a curve
that we like over here. Now, the last thing
that I want to show you is I simply want to
show you and you can, by the way, use
the round rotation over here to rotate based
upon your camerangle. The last thing I want
to show you is how to turn this into
actual geometry. So if you go up here to your
object data properties, you can go to geometry, and in here, you have a bevel. In the bevel, if you
pick round over here, you can simply select a depth, and that we'll add some geometry
to your curve over here. So that makes it quite
easy to turn this into, like, a cable. You can also change
the resolution, which will add
more segments if I turn on my wireframe over here. It will simply add
some more segments to our curve over here. So having that done, you are also able
to select object in which you would need to press an object that will
follow along the curve. I've not really used
that one before, but let's try to maybe,
like, grab a cube, and let's see if that
works. I guess not. Okay, doesn't really matter. The one that I wanted to
show you is the profile one. And the profile
one, it basically allows you right
now it is square, but it basically
allows you to set like a profile over here and paint it in like this to draw
out a specific profile. It's a bit messy to use, but just in general, you can create some quite
interesting shapes. You can also go
down here and set the points to be sharp by
pressing this button over here, which allows you to go like
a more sharper profile. Like that, see? And you can
see that the profile is basically a quarter
of your curve. That's basically how it works. You see? So it's just like a quarter of the curve
that you have created. Over here. That is also just an interesting
way in case you want to create some 1 second. Now I'm distracted. There we go. That's also just like an
interesting way if you want to create a specific
profile for your curve. Now, I will leave it at
this because personally, we will not be using the curves
at all inside of blender. We might not even
use it at all in general in this tutorial course. And let's move on to
our next bonus chapter, which will be about using
booleans inside of Blender.
15. 07 Bonus Max Splines: In this bonus chapter, I want to go over on how to use splines instead of TS Max. Splines are super powerful, and although we most likely will not be using it
for this project, I just wanted to add
this bonus chapter just so that you at least
see the use of it. So splines in Tres Max
are called shapes, although they're also
called splines, whatever. But basically, the
one that we are interested in is the line. I already showed you a
little bit about this. Let's say that we pass W and go to our front
view over here. Nice thing about spins inside of Tres Max compared to
most other software is that they are very robust and I personally prefer to use
them mostly in Tres Max. They're okay in Maya, but I do avoid using them. And in Blender, I just
don't use them because Blender is not able to really get up to
this level right now. So with the spines, if
you just click like this, you can do sharp spines. If you click and you hold Shift, it will keep the line straight, see, on a specific axis. So you can imagine that if I want to be a little
bit more precise, I can definitely go
ahead and do this. Now next to this,
you can also use snapping, and that way, you can snap your
spine to your grid, for example, like this, if you want to work really precisely. Now, next to this, what we
also have is you can also click and then let's say that if we go over here, we
want to make this round. We can click and drag
and just like that, our spine will be around. We can then click on
the next one, and then, for example, we can go for something sharp
again, like that. Now, these are the main modes that you can create the spine. You can also set your
spine to smooth. And when you set it to
smooth in your drag type, it will oh, sorry, smooth in the initial type. It will basically
always stay smooth. So you cannot do harsh
angles like this. But that's why I like to set this to corner
because then I can just make this very sharp and then I can turn over to
smooth whenever I want to. So now, let's say that
we have this mesh. Your spine is also an edit. You can still edit it. There's a few edits
that you can do. If you press one, you
can go to point mode, which is similar to Vertex mode. Here you can still select
the points of your spine. And what you can see over
here is that your spine, because they are a Bazier they
have two points over here. When I would rotate my spine, you can see these
points more accurately. With these points,
what you can do is if you want to edit both
of them at the same time, you can just leave
them as they are, and you can see that over
here, I can click and drag by selecting the
point in the move tool, or I can rotate by having
the rotate tool turn on. I can even do scaling. I can
even scale them up and down. However, if you want to edit them individually, for
example, over here, you can see that we
have a problem where this spline is moved downwards, which means that it's
not exactly on the line. You can right click,
and then in here, you can go from a Basier
to a Basier corner. A Basie corner allows you to basically move these
pieces manually, and you can see that
it kind of snaps. You can see that when
we get close enough, it just snaps
straight like that. So this way, you can move
it individually and you can also add some extra
specific scaling. Now, next to this, another
thing that I wanted to quickly show you
is that over here, you can clearly see the
polygons of our bend. If you want to increase this so that you have
more polygons so that you can see that the
cylinder looks smoother. And scroll down over
here to interpolation, and you can set
the steps up, see? And when the steps are moved up, we get a nice smooth cylinder. Finally, there are
a few added modes, but these modes you
would not use too often. So there's a few
ones I would like. You have the Insert node, which allows you to
click on a point and continue on your
spine like this. So it just allows you to
continue on your spine. You also have a weld node. That's if you select two
points, you can have the fuse, which is the same as collapse, and then you can weld
them together like that. Going to undo that. One that is one of my favorites is
the filled note over here. Fillet notes allows you to
nicely create round corners. And you also have the HNF node, which I'm sure you
guys already know, the HNFer note just does like
a sharp corner like that. And those are the ones
that I honestly use most. You have Connect, which I
believe if you do this, on a wait to connect, I believe if you
select two points, it will connect together. You need to click and
drag. There you go. See you can connect
by clicking and dragging two points together
if you want, for example. So that is most of the notes
that I would be using. Now, what I'm going to do is let's say that I
want to go ahead and I want to create a more like a better spline to show
you the other tools. Let's say that I go over here. Then I'm going to make
this a little bit round, go like this, go down, up, down in here. Let's say just something like
that. It's a random shape. It has no meaning, no architectural stuff
or something like that. We now have this
spine over here. Now, to turn the
spine into geometry, there are a few ways
that we can use. And this is why I absolutely love doing spines
in three years Max. The two most important
ones is we have over here, we have the extrude node. You can find this also, of
course, in your modifiers. The extrude basically extrudes
a plane out of your spine. See? So you can instantly just extrude your shape
out of your spine. Then you can simply
go back to your line. And if you, for example,
turn on the show end result up here to
show everything, I can still go in and I can still change my spine
however I want. So you can imagine
how powerful this is to do non destructive modeling. That's one way to turn this into something, and if you want, you can then even turn this into a shell or you can
add a shell on top. And now it is just a
nice shell of a shape. Other one, my
absolute favorite one is the Sweep modifier. The Sweep modifier is amazing. Maya has recently added it also, although it's still
a little bit iffy. But the one in Max
is really great. What you can do
is you can choose a shape to guide
along your spine. Right now it is, for
example, an angle. I can go up here, I can go
bar, which is like a cube. I can go up here and I can do a channel, like
whatever you want. Let's say that this is
like a metal joint. Every shape has parameters, which you can control over
here to control the thickness, the width, all that
kind of stuff. I can do a pipe over here. One of the most common
one is a cylinder because a cylinder allows us to, for example, create wires. So you can imagine that if you
want to create some wires, you create a spine, and
you basically go in here, and then you basically, have some wires hanging like this. Like that. So let's
say that you have a wire hanging out
of the ceiling. You can add a sweep modifier, and you can set the radius
down. And there you go. Now you have a wire or a
rope super, super quickly. That also looks quite nice. And you can, of
course, combine this with many different spins. You can also go ahead
and you can press Control V to copy your spine. Oh, I didn't show you that yet. Yeah, Contrave basically
allows you to copy your spine. I will go ahead and I will also add this in the later chapters. And now this spine, if I go
ahead and go to my etches, I will turn on end result. You can see that now I can very quickly create
like another spine. Let's say that I have
this one over here. See? And now I have two
splines and now that already starts to look even more interesting with our ropes
and stuff like that. So spines are freaking amazing to use. I
really love them. It's just too bad
that I only love using them inside of Tresmex. So you have a bunch of shapes over here
that you can choose. But what is extra cool is, let's say you want to
have your own shape. You can also do that. You
can create another spine. Just like making something up. Let's say that you create
your own spine over here. You can actually select
your original spine, press use custom selection, and then pick your spine. And now over here, you can see that it is using your spine. At this point, you
can mirror it. Sometimes, you need
to do some mirroring, and you can also rotate it. So here you can see
that I'm rotating it. For example, it's a bit difficult to see because this is not the best shape
for me to use, but I can change the angle, so I can rotate this like
90 degrees over here, and let's say that I now
want to go in to this spine, insert and I want to, like, insert one shape here,
another shape like this. And now you can see that
over here, I have a problem. So this one, I'm
just going to right click and turn this into corner. Corner means that it is
perfectly straight. Here we go. And now I can set my angle. I can go in here and
I can, of course, control, like, let's see, the amount of or amounts I can
control the actual shapes. This one over here,
we would need to, like, make it a
little bit smoother. So now you can see that
now we have a shape. Let's say that over
here, this one, for example, I can see that we have a buck over
here that it is clipping. I could always just go ahead and I could add like
a Chem For tool. Sometimes better to do emf tool from the side because it can be really sensitive like this. Or what I can do is I can use a fillet if
that works better. Yeah, here, fillet works
a little bit better. And now you can see
that the shape nicely gets extruded among this side. And we can keep
changing this shape, and that's why I like it so much because I can just go back in, change my shape however I want, make sure that it looks correct. And then over here, we still have our shape
sitting all the way around. You can also change your
pivot points over here, which basically controls
where your shape starts. But that's one I don't use that one too often in
this specific case, and you can change the offset
of where your shape starts. But that's something you would just want to play around with. And that's pretty much it. That is a very quick overview. If you are using, for
example, the cylinder, you can also use
interpolation over here in your cylinder to add
more segments like this. So the interpolation
on the line will add more segments in
your actual line, as you can see over here. See. But the one in your sweep just adds more
to your actual well, sweep. Okay, and that is pretty much
it for our spline overview. Now, in our next chapter, we will have another
bonus chapter, and there we will
go over Booleans. So let's go ahead and continue with this in our next chapter.
16. 07 Bonus Maya Splines: Okay. Welcome to
this bonus chapter. So in this bonus chapter, what we are going to do
is we are going to go ahead and go over some
splines inside of Maya. So this is something that
we most likely will not be using for our
specific project, but because they're still
super useful to know, I just wanted to create
this quick bonus chapter. So splines inside of
Maya are called curves. So you can find them or by going up to curves and
surfaces in here. Or you can find them
by going to create, and then they are in
curve tools in here. What I personally
like to do because there are so much stuff in here that you don't need
is in our custom shelf. I like to go ahead and
you can see that I actually did my own
shelf over here. You can go to
create curve tools, and you want to probably
add a CV curve, a Basier curve, and an EP curve. So these curves, they
are quite similar. So the one that I personally prefer is to always
use a Bazier curve, but I will try to explain
to you the other ones. Let's start with
my favorite ones, which is the Bazier curve. You can simply click on it, and then if you
click in your face, although what might
be in your face, sorry, what might be
nice is to just go to, for example, like a
front view over here. You can see that this
is the front view. And basically just
want to click once, and now it will create a curve. Then if you click again, you can see that it will
have created curve. If you click and hold, you are able to manipulate
this curve like this. You're able to rotate it. If you just do like a single click, it will just be a sharp corner. However, once again, if I, for example, want to bend this, I can click and hold
and then simply move my mouse until I
like a bend like this. So that is how we can create
easy curves like this. Next, this, you can
also snap to grid. So if I turn on snap
the grids over here, it should actually
snap to the grid, as you can see like this, see? So that is really useful
for accurate working. I do not recommend doing this. What I just did, I recommend to always try to minimize the amount of points
that you have. And once you have arrived
near the end over here, you are able to, like,
place it quite close, and then we can
merge it later on. So now if I would press W, this has now become just like
well, it is still a curve. You basically have a
few different tools. If you right click and
go to Control vertex, you are still able to
select these vertices. You can just see
them as vertices, and you can simply
move them around. You can even go in
and snap them to the grid over here and
over here like this. And same over here, just like snap it all to the
grid, stuff like that. However, you can also, if, for example, have
this one, you can see that we have these
points over here. These points you can select and you can turn
off snap to grid. You can use them to manipulate
your curve even more. You can move them up and down like this and left and right. If you, for example, because what you can see now is that when I move this point, because it is a bezier, on the other side,
the point also moves. But if I, for example, only
want to move like one point. So for example,
this one is, like, nicely snapped into,
like, the corner. So I want to keep this kind
of stuff over here straight, but I want to, like,
change my curve, for example, I can select the top over here and turn
off snapping to grid. Then if you go ahead
and shift right click, you want to press
break anchor tangents and just look at the word break. You don't really need to
worry about the rest. When you do that,
because it is broken, it will no longer be connected. Now you can see that
now I can control this one curve all on
its own, just like that. I can also go in here
and if I go ahead and spiteno with over here, shift right click, I can
also press even, no. I might have the
Wong one selected. So the way that this
works inside of Maya is that you don't really merge
the curves together per se. I will show you that in a bit. I just wanted to show
you that over here. I think it's just this one. I think we just need to edit
this one and then if we go, sometimes the menu
is a bit different. So basically, if you select the center, it's
a bit confusing. If you select the center, you can find the same
options in here. But if you select
the top, you can find the options
like this. I know. It's a bit confusing. It's a common theme inside
of Maya that you can find the same options over
and over and over again. But it doesn't matter. So even if you do this
in the center and then move the top, here we go. So this is what I wanted. For some reason, I was
distracted by this one. You can see that we can still have quite a bit of
control over here. Now, having this, I
should be able to also turn this one into
a Bezier over here. So Shift click. Let's
do Bezier corn. Ah, there we go. Bezier Corner. So it was not turned
into a bezier yet. So what that allows
us to do is it allows us to also add like a
manipulation point in here. And, of course, with
that, I can, for example, make my corner tighter
and stuff like that. And I can just, like, add
different changes to that. Now, one thing oops that I find quite annoying inside of
Maya is that if I want to, for example, close these curves, inside of Max, I would
be able to weld them. But I believe, as far
as I can remember, if you go up here to curves, you are not able to
actually weld them in here. And the only way like, I hope that I say this way. There might be by this
point a better way because it's been
quite a long time. But what I find is
that the best way to close these points together, even though they look
really close by, they are not actually closed is to right click and
go to object mode. And then you want
to go to curves, and then you want to
press Open close. Now, what you can see is
because this is a Basier, that's why I don't like it,
it has moved this curve out. So if I go to Control vertex, you can see that now. Oh, no. Wait, it's supposed to like
that is really strange. It is supposed to basically
have our mesh closed, but it looks like it's nuts. Let's try it again. Let's
go to Control vertex, and can I just, like,
delete this one? Let's try this. Let's
move it like this. That might be a little bit
easier. So object mode. Curves, open, close. Okay, so now it does work weird. Anyway, so the
annoying thing about this is that now because
this is a Basier I would need to right click and I would need to
break even tangents, select this one, and
basically move here, and then it will at one point, kind of snap to become
straight like this. And of course, this one,
I could set on the grid. And like that, we would
have our curve closed. Now, I can vaguely remember
that there is a way to weld your curves together
when they are basically really close by. But to be very honest, because it was not attached. Like, this is why it's annoying. Like, I just want a weld. Like, it should not
be very difficult, but apparently it
is quite difficult. So there are a bunch
of options in here. I don't know if I can find
the actual weld option. Else, I would probably
also be able to find it like two Now, else, I would
probably also be able to find it in those menus. So for now, I use the open close technique
whenever I need it, but I don't need to close
my curves too often. What I wanted to
show you is that there are a few extra
options in here. So if you go into your curves, there are a bunch of options
like you can bend them, but, of course,
when we are placing curves, we don't
need to bend them. Most of these, I only
use the open close. And I believe that the
fill it over here, although I rarely use it by
gas, I do everything by hand, since these tools I
don't find reliable, I could try and show
you if it works. Let me say it like
that. And if we just go ahead and press
Apply, Yeah, see? You need to press
a pair of curves. It, yeah, it doesn't work the
way that I want it to work. I think what happens is,
for, for some reason, the filler does work over here, but it's not working
the way that I'm used to it working
because I'm a Tris Maxuser. And it's really weird because they're both out
of desk programs. Max and Maya are owned
by the same creator. However, in this case, it
doesn't work differently. What I recommend is that
when you need to use curves, which I don't use a
lot inside of Maya, just use them, um
how you say it? Just do it by hand. Now,
you also have over here, you have this curve, which is the EP curve. I forgot the name. CV curve. That one
is a CV curve. And basically, what
it allows you to do is if you create
three points, two points means that
it is like straight. And as soon as you can create
a third point, it will Oh, am I not creating
That is strange. Oh, four points. Ah, I thought it was
always three points. So let me just show you that again because I was
a bit confused. I thought it was three points, but I guess it is four points. As soon as you can
create four points, it will start to
turn it into, like, a soft flow like this. See? So you can create something that has
like Wi soft flows. Now, one thing I
wanted to show you is that if your curve is
quite low resolution, like you can see over here, you can go to your attribute editor, and in here, you should
be able to a find it, although it's or is it
in our tool settings? No, no, not in our
tool settings. Our tool settings
does have you can switch the curve over to
Bezier curve, for example. Now, it is somewhere in here. I just kind of like I forgot where to find it
because it should be in here. Maybe because I have
it, maybe I need to, like, select the
actual tool like that. And then have a look around
because you are, of course, able to control how
many segments you want. The only thing is I
use a Bezier curve. And in a bezier curve, you can change spends over here. But for some reason, they are great out right now. So, that's just
give me 1 second. I'm sure I can find
it in here somewhere, and else I need to double
check because maybe I'm just like maybe I just
forgot something. So I had to look around, and although I find
it quite strange, apparently, I can remember
vaguely about this, but I thought there
was also a setting. Apparently, if you
just press three, you can control, the amount of segments to make
your curve smoother. But I swear to God, there was like a
setting here somewhere. Maybe that is just me because,
of course, right now, I'm teaching you a
tutorial in both Max, Maya and Blender, and I'm doing all of them
at the same time. Like, literally, after
the next chapter, I'm going to switch
over to blender, just to give you like insight
on, like, the back end. And so I might just be confused with a
different software. In that case, I am very sorry. Um, we because this is
just a bonus chapter, I highly recommend if you want to learn
more about curves, to just have a Luke online. But, okay, so let's say
that now we go into our perspective mode
over here like this. And we have our curves. This one over here, you
have the this curve also. Oh, this curve is three points. So I forgot which one, but it is called, because
I never used them EPCurve. So the EP curve smooths
at three points. That's why I was
confused about that. So that's another way
to art the curve. Personal recommendation, just
stay with the Basier curve. It's the most robust one. I find it the easiest one to use if you want to
do precise ding. If you want to do very
basic mulling and you want to have perfect smooth corners or corners. That
doesn't make sense. Perfect smooth arches like this, then I recommend this one. So, okay, what I want to show you last is
that, of course, these curves, you
would want to find a way to turn them
into actual geometry. Now, in Maya 2022, before this, I actually avoided
using curves altogether in Maya because I just did not like the way
that they worked. However, in Maya 2022, there are new curve tools which are called
the sweep tools. They are basically you have the exact same
thing in TS Max. However, in TS Max, it's
way, way, way better. And Mu, I said, way really fast. But it is still doable
inside of Maya. So if you go just buggy. If you go to create and use
a sweep mesh over here, what you will see is in
your attribute editors, you can now see that
it has added a mesh. Now, next this, it also allows you to add
the interpolation. And this is what I
was talking about. So maybe I was just
confused about this one. It allows me to make my
mesh smoother like this. I'm able to, of
course, scale it. So you can see that
this is, for example, like a cable like that. And you can also rotate it, but it's a cylinder, so
that would not work. Now, like this, there are
a few different tools. So we can use the polygon tool. I tend to sometimes use the line tool because
I use the line tool to basically turn my curve into
an extrusion like this. Before this, you had to, like, duplicate your curve
and create two curves, and then you had to go to
surfaces and press loft. I'm sure that it
might still work. So you had to do this,
I believe, and at this. And go to, like,
surfaces and then loft. And that's how you would
create an extrusion. But honestly, and then there's still that the meshes
are a bit weird, and it's a mess, I feel like compared
to doing this. So I prefer this way
better way more. So by the way, if you click away from your curve in order
to get your window back, click on the curve
again and then find the sweep mesh creator
in your attributes. So this one is great
if you want to quickly extrude your
shape out like this. And because this
is a normal shape, I believe, already, yes, this is a normal shape already. You are able to now
just go ahead and, for example, edit your mesh. Let's say that we do an extrude
like this. There we go. And now we have an actual wave that is all extruded
out and everything. So if we just go ahead
and undo that Okay. So another one is
the custom one. That one is still a bit
buggy, but the custom one, if you click on that, you are able to basically select
a different curve. So I am able to basically go to the profile and select
this curve and press Okay. And now you can basically
grab the shape from one curve and make it follow around your second curve,
if that makes sense. So you can see that this shape is now following around here. Now, from this point, you can manipulate it. You
can change the scale. The twist allows you to
basically Oh, no, sorry, that's not the twist.
Ah, that's 20. The rotate profile allows you to basically rotate
your profile to 90 degrees -90 or,
of course, 180. There we go. And now
you can see that our shape does match up. And the cool thing about
this kind of stuff is that if we want to go
ahead and edit this shape, it will automatically
edit here also. If I go to Control vertex
and I, for example, grab these two and move them up, see, it automatically
keeps editing. So it is quite non destructive. And this way, you can go
ahead and you can change your shapes around and do
whatever you want with them. So that is also really nice way to just quickly add some curves. To be honest, I'm
quite surprised. I think they updated it, because the last time that
I checked this, it was not this easy, like there were bugs in it. There are a bunch of
settings in here also, but I recommend personally to make your life easier
to just use this kind of use the sweep
tools along with curves if you need them to create cables and
that kind of stuff, or if you just like me to create custom shapes that
are a bit more complicated. And as you can see, we
have a nice S. Okay, so that's pretty much it for
our bonus chapter over here. So let's go ahead and continue
on to the next chapter, which will also be
a bonus chapter on how to use Booleans in Maya. And after that, we have
some exciting stuff because then we are going
to actually already move to Annual gen five to make some preparations before we
continue on inside yeah. So let's go ahead and continue with this
in our next chapter.
17. 08 Bonus Blender Booleans: Okay. So in this bonus chapter, we will go over Booleans
inside of blender. Booleans, to say it simple, are a way to basically cut out or unify one shape
with another shape. Let's say that we have
a cube over here, and let's also create
a cylinder over here. Now, let me just turn
on my wire frame, and I'm just going to
rotate this cylinder. I'm going to scale it
down a little bit, and I'm going to push it
out a bit. There we go. Okay. Let's say that I
now have this cylinder and I want to cut out the
cylinder for my cube. Now, this would be quite a hassle to do it
in the traditional way. However, we can
also use Booleans. The way that Bleians work
is that it is a modifier. You can go to your modifiers, art modifier and press Boolean. Now, there are three types. There is difference,
union, and intersect. Difference means that
we cut out our shape. Union means that this will
become one big shape, so it will basically cut out whatever is
inside of the cube, and it will merge
everything together. And intersect will
be that it will only leave over whatever is
inside of the cylinder. So intersect basically is
like an inverted cut out. So it will only
leave, for example, this plane here on the inside. Most of the time you
only use difference. That's the most common one. You basically select your model, click over here, and
now it is already done. You can still move
around your model, and you can see that the
Boolean is still working. But once you are happy with it, what you can do is
you can go ahead and press Control A to
apply your Boleian. And now if you move
your cylinder away, you can see that now the
boolean has been applied. So Booleans are quite
amazing, however, they often leave really messy geometry as you
can see over here. Jump tro here, we
call these Ngons and they are basically
massive faces that have a bunch of random vertices that are not connected
to anything. Now, triangulating your mesh
could fix this problem. However, in general,
what I like to do is, I like to do it by
hand because it gives me a lot more control
over my mesh, and it will keep
everything a lot cleaner. So just take it from
me, do it by hand. En guns, although they are
not as bad as people say, they are not very good whenever you want to export something to a
video game engine. Whenever you export this mesh like this to a
video game engine, the game engine will try to fix these problems by
adding connections. However, these connections
can cause a lot of extra problems like
smoothening errors. It can simply look wong, or it can conflict with
your texture maps. And these problems happen because you don't
have control over how these pieces are fixed. So instead, what we can do
is we can use the cut tool. So the CAT tool, if
you just press K, which is your knife tool, you can simply click to cut and then I can wide away move
back and click again. I can right click to basically
accept this or actually, sorry, I need to press
Enter in Blender. I need to press
Enter in Blender, and that's why it is accepted. And this is like a way that
I recommend to of course, you can get quite a
bit faster with this. This is a way that I would
recommend to clean up my mesh, and also don't make your etches too stretchy because that can also cause
smoothing problems. So in general, that's why I tend to often avoid booleans and use different techniques unless it's a really difficult shape
that I need to use. But in general, I can, for example, do this kind of stuff. And this way, I can
properly clean it up. Let's go here, and let's
finally go in here. And also in here. There we go. So now this mesh is correctly placed and
if I press Alt click, you can see that I can create
a nice loop around it. While if I would
press Alt click here. See? The loop breaks
a little bit. So having this done,
you can press Contra B, for example, to, like, bevel this and do a bunch
of different stuff. Sometimes whenever you
bevel it like this, it might show a little bit of squeezing where you need to, like, move these pieces over
here that are too intense. A little bit round.
In those cases, what I recommend is
to go, for example, down here and select these
two edges over here, delete and dissolve them. Now, does it not It does not allow me to
dissolve it because it's not able to Okay,
that's too bad. It does not allow me to
dissolve it. That's no problem. Basically, what I
want to show you is if you bevel before connecting, your geometry looks
cleaner, see? And then you can just go ahead and start connecting stuff. So that's just
something that's like a quick tip that I
wanted to show you. Now, just like that,
we can also use union. So if we, for example, go ahead and move this shape over here, Add a Boolean modifier, press Union and then
select our object. Now if we press Control A and we would remove the
original cylinder, you can see that now this
cylinder has become ped, see, it has become part
of the rest of our mesh. And at this point,
you would once again want to go
ahead and you want to connect these pieces
together like this using K. So that is another
one that you can just, like, nicely connect
and stuff like that. Okay, so those are the two main booleans that
I wanted to show you. Of course, I could also
show you this one, which is, we just select
the Boolean intersect. However, what that will do
is, as you can see over here, it will only leave left whatever is inside
of my cylinder. And if I would press okay now, you can see that all that
is left is this piece, which was inside my cylinder, which can also actually
be quite interesting, of course, like this. Okay. Awesome. So that was everything I
wanted to show you. And now what we can do is we can actually go ahead and move
on to nvleEengine five, because we are going to
have the introduction to UnleEengine five and
then prepare our level, after which we are going
to go back inside of blender to actually
create our final assets. So let's go ahead and continue with this in the next chapter.
18. 08 Bonus Max Booleans: In this bonus chapter, we
will go over Booleans. Booleans are a really
powerful way to cut or merge one shape
from another shape. The only thing is that it's also a little bit
tricky because it doesn't always work and at least behind really
messy geometry. Just to show you an example, let's say that we create
a simple cube again over here and we can make
this cube 20 by 20 by 20. Now, if you go ahead and create a cylinder and also cool trick, you can press out
of grid over here. And what it will do
is it will apply the grid on your cube, which as you can see over here, it has now placed a
cylinder on top of my cube. Let's say that I want to cut this cylinder
out of this cube. The way that this
would work is I would grab my cube over here, and then in my Gritab
I would go from standard primitives
to compound objects. And I want to press P Boolean. Now in Pro Boolean, what you want to do
is you want to start picking and select
your cylinder. Another thing that you want to do is you want to scroll down to advanced options and turn
on remove only invisible. This will basically
clean things up. If you remove, it
will also remove stuff that you might not
want to have removed. So remove only visible.
We have two versions. We have subtraction. Actually, two versions that
you would often use. And you have union, now, merch let's go over here. I think you need
to select it wide away before you start picking, and that's
why it doesn't work. So let me just go ahead and grab another cylinder over here. Like this. And with
this one selected, we can, for example, collapse
it down to an addi pool. Let's say that we do
another pro Boolean, but this time, we want to set this to union and start picking. There we go, see. And now it will actually combine this mesh. If we would, for
example, convert this to an Ada pole, go to
element select. You can see that now
it is one element. However, if you
would, for example, select this kind of stuff, you can see that
if I delete this, it actually did cut out
the shape correctly. So a few things that I
want to mention right now. Remember how I said about guns. Ngns they are not
very favorable. They are not as bad as
people say they are. But an Gun, where we have vertss that are just
floating in mid air, they can cause problems when we export things to
the unreal engine. So a bullion, you would want
to clean up a little bit, because it always leaves
like quite messy geometry. Also, you cannot select with
double click like this, and doing bevels is
also really annoying. So what I recommend,
there's a few ways. There's the correct way, which is by using your cut
tool and nicely clicking, and I just click right back right away because
this will save time. So nicely clicking and merging all of these
vertices together like this. There is another way,
which is that you select your faces over here, and then you hold Shift and
then you convert to vertex. You can do this by holding Shift and simply pressing vertex. What it will do is
it will now grab that phase selection and it will turn it into a
vertex selection. At this point, what
you can do is you can go ahead and you can
press Connect over here, and that will connect
all the vertices. The reason why this one
is not always favorable is because you don't have control where they
get connected, and sometimes they do a
double connection like here. You don't need to have
a double connection, so then you would want to
select the double connections and press Control
Backspace. Remove it. Now at this point,
you can see that now I'm able to double click because there's no
missing vertss. And now I'm also able
to, for example, add a EMF to this,
however I want. HNFosObleans are not
always the best. There are ways to improve it by actually adding a HNFO before
we do the connections, but it's like a
bunch of different. It's something you
will get used to. Let me say it like
that. So you can also try to work with different. So I like to do uniform, and uniform does seem to often work quite well if you
don't push it too much. Yeah, so like this, we
can add HMV like that. So that's basically it for
Bollians. Same with Union. You just want to use
your cat tool to basically connect them once
you do something like that. As I said before, we will not
be using booleans too much. I personally do try
to often avoid them, if possible, just because they are quite messy to work with. But they can save a lot of time. I do really love
using them inside of UnwelEngine using the new tools, but that's something that we
will go over in just a bit. So we got this stuff here
ready to go like that. And, yeah, that's pretty
much it for this chapter. Now, in the next chapter, what we will do is we will go ahead and start working
on our blockout, and I will go over what that is and everything in
the next chapter.
19. 08 Bonus Maya Booleans: Okay. So in this bonus chapter, I want to go over
Booleans inside of Maya. Now, Booleans are quite
nice to use inside of Maya, however, they create
messy geometry, and I will show you
what I mean with that. And because of that, I
don't use them too often in general. So
what is a boolean? To say it as easy as possible, the most common one you
would use is to cut out one shape from
another shape instantly. Now, you also have booleans
that can actually turn these two shapes into
one single chunk of mesh into, like, one shape. And that one I can
also show you. I can just, like,
clone that for now. But let's get started
with the first one, and I will just
show you and then you will understand right away. So what you want to do is
you want to go ahead and you want to select your main
object that you want to keep. And then you want to
select the object using a shift that
you want to cut out. Then all you need to
do is you need to go to mesh, Booleans, and you have difference, which is the one that I
was talking about, where you cut out the shape. You have union, which means
that you unite the two shape, so they will become one shape. And yeah, you have
intersection which basically cuts out the inverted
version of your shape. So if we have a
cylinder, it would leave the mesh inside
of the cylinder, but that one I rarely use. So let's press difference. Now, as you can see, as
soon as press difference, and I can press W to accept
you can see that over here, we now have the shape cut out. However, we have all
of these vertices. This is called an engon. Now, engons they are not as
bad as people say they are. However, whenever you
are working with engons, it is better to manually or procedurally clean them up by connecting all of your edges, simply by doing, for example, a multi cut tool like this and just nicely
connecting your edges. This is because right now, when all of our vertices
are not connected, whenever we export
this to a game engine, it could cause errors. Now, I said before that game engines do
triangulate your model, and that triangulation
can of course, often fix these problems. However, the problem is that you do not have any
control over the triangulation. And if you are making
a high eat out version of your model and
a low teat out version, and you are baking,
then especially, you need to be sure what
your jomtry looks like. So over here, for
example, like this one, now I did this, this one, I feel like it's a
little bit too stretchy. I would actually
personally remove it, and I would place my cut here because that feels a
little bit more even. So that's the kind of stuff
that a person can decide, but Maya itself is not
very good at deciding. So I high recommend just
as a best practice that when you are before you
export your model to unreal, for example, just
clean things up. And now that it is cleaned
up, you can see I can double click to select
the entire mesh. If I would go here, you can see that double click does not work because nothing is connected. And of course, at this point,
what you can do is you can, for example, bevel it or do
whatever you want with it. So now it is like a clean mesh
that we can continue with. You want to make
sure that you, of course, as I said before, clean up your meshes
and just connect everything together and make sure that there's no messiness. The more complicated
Bleian often, the more messiness
you will have. So this one is quite easy, but, of course, yeah, it's just like something
to keep in mind. Now, another one, if
you select this object, and then this one
is the union one. I rarely use it, but
just to show you, if you go Booleans and Union, it will turn this
into one single chunk of mesh, as you
can see over here. It should also remove the inside of the measure
if I move inside C. Like, there's no more inside faces over here
from the cylinder. And once again, just like
this, here you can see, more of a messiness that's going on because you can
imagine a cylinder. You want to make sure
that the cylinder has even spacing because else
it's no longer cylinder. If you like add
random edges to it, and it just breaks in many ways. So with this one, you
would, for example, target welt these pieces
together to clean them up. Like this for the ones
that you can target well, and for the rest, you would,
of course, do some cutting. Now, in this case,
what I recommend whenever you have
cases like these, just to keep things
clean, nicely, like, cut all the way
around it until you reach the end and then
press Enter or right click. And then this one can
just be moved over here. See? So now it is
nicely cut around. Sure, it adds a
bit more polygons. But I personally feel
like that is often nicer than doing
something like this, where you have on
a cylinder because a cylinder is quite
sensitive to changes. Having on a cylinder like
really strong lines like this, it can cause your
smoothing to go broke. See, you can see the tiny bit. See? You can see a
tiny bit of smoothing. I don't know if you
guys can see it with the skin resolution. But those are just like
some best practices. And most of these best practices they come from experience. So, the more you work
on this stuff, like, the more you start recognizing I will try to mention
them when I can. But, yeah, that's pretty
much how we would do booleans inside
of Unreal Engine. Sorry inside of Maya. It's because I'm
looking at my notes. The next chapter, we will actually go ahead
and we will go over the introduction
to Unreal Engine five because before we
can move on into Maya, we first need to define our
level in Unreal Engine. So in our next chapter, we will move on to
Unreal Engine five, have a nice break from Maya,
do some really cool stuff, and then we will come
back and actually start creating our final pieces. So let's go ahead and continue with that in our next chapter.
20. 09 Introduction To Unreal Engine 5: Okay, welcome everyone
to this chapter. So what we're going to do in this chapter is we are going to do a quick introduction
into Unreel Engine five. Now, you might be wondering, why have we only just barely scratched the surface of
our modeling software, and already we are going
to somewhere else. Now, this is because
I had two choices. Oh, I could have everything
combined together. So we would do all of
the modeling together. All of the engine work together, which is unreal engine, all
of the texture work together. But what will
happen is you don't work like that when you
are creating environments. When you do that, everything
feels very disconnected. Now, you can work
like that if you are very experienced
with environ dat. But of course, this
is a beginner course. The second option is
that I am going to go with the flow that we
would normally follow. So basically, even though I need to give you
guys introductions, in the end of the day, this is the general flow that
I would be following. So, of course, we have
prepared our modeling chapter. And now we're going
to go into Unreal. The only reason we are going
to go into Unreel right now is because we are going to create a blockout
of our environment, and a blockout is basically
like setting up all of the really rough shapes to get the scale and the layout
of our environment done. And when we know this layout and all of the correct scaling
and stuff like that, what we can do is we can
then go ahead and move back into our modeling software, whichever ones you use, blender Max or Maya, and we can actually start by
creating our final models. So that is the key
takeaway for this. Now, let's go ahead
and get started. So whenever you open
up Unreal engine, and we are using the latest one, which is Unreal Agent 5.0 0.3, I recommend to follow
this course, well, definitely do not go lower
than Unreal agent five because then things will
look very different. But I recommend to not go
lower than Unreal agent 5.1. Because there have been
some updates to how to use foliage inside of
UnwilEngine that started at 5.1. And since we are creating
a lot of foliage later on, you just want to make
sure that you don't get any weird
inconsistencies between My tutorial and your version. So anyway, okay,
games, quite easy. Now, you can choose what
kind of game that you want. Just a blank scene will
not have anything in it, just a camera that
we can fly around. This is what I
would normally do. But for editorial,
I would like to use a third person
character so that we can actually walk around
our environment and just have a
good feel for it. So you just want to
pick the third person, and then you can leave all
of these settings correct. So quality preset,
maximum desktop. For now, we are not going
to use rate racing. Tracing is still able to work inside of
Unhel Engine five. However, it has kind of
been replaced with lumen. So although racing
is quite nice, we are going to use lumen, which is a new way of lighting your environment and your
scenes in UnhelEngine. Now we want to select our project location and
remember that in our location, we made a folder called Unreal. Perfect. That's exactly
where we want to place this. So we will press Select Folder, and this sometimes happens. It sometimes tells us
that our project part cannot be longer
than 130 characters. It's quite an
annoying limitation, but this is because I have my project set in my
like in my dropbox, which is often quite
a large file format. So what I can do instead
is just for you guys. So I recommend whenever
you download this project, do not place it in, like, a really long folder. So what I will do is, I'm just going to go
ahead and I'm going to create a folder over here. And let's open this up. I just create the
folder on my C Drive, and this way, I'm
still able to use it. Now you can see that
the arrow is gone. So it's pretty good that I got that arrow because if you are importing existing projects
like you downloaded, for example, this project and you have your file
part too long, it will actually not
give you that arrow. It will just not be able
to load the project. So if you ever feel like
your project isn't loading, double check your
project location. And let's call this one, completely because now
I'm in, like, Oh, God. Now I'm in different folders. What are we going
to call this one? We are going to call
this one, like, um, concrete walkway.
Let's do that. Concrete. W way. For example, it
doesn't really matter. Just give it something
descriptive. But as far as I can know, it's a pain if you want
to change it after. So let's leave it like this. And then we can
simply press Create. And now it will create
the project for us over here. I
shouldn't take too long. And then what we're going to do is the same stuff
that we've done with modeling software is I
will just quickly go over the UI where everything
is located for you guys. So this is what
we get right now. However, I probably want
to go to Window and Oh, God. I've never
actually done this. I wanted to, like, remove
my load my layout, so default editor layout. There we go. The reason I'm doing this is just so
that you guys can follow along exactly with what you have if you have never opened
up Unreal engine. So this is what we would get if we've never opened
up n real engine. Now, let's go ahead
and get started. Unreal engine is super simple, especially compared to like
Max or Maya or blender. So very easy to navigate
around your engine. What I recommend is
simply right click and use your W ASD. Notes over here, which are the same ones that
you would use to move around inside
of video games. And then you can just simply
move around and look around. You are able to hold Alt
left mouse button to, for example, rotate rout, Alt, middle mouse button
to pen round, and you can use
your scroll wheel. But I'm so used to simply using my camera to basically do stuff. Now, next this, what I would say is that if you
have a object, what you can do is you can press F to basically zoom
in on that object, as you can see over
here, and then you can still use it
however you want. If you are flying
around using WASD, you can use your skull wheel to go faster or to go slower. However, you can also
find the setting up here, but we will go over these
settings a little bit later. Honestly, that's most of
it, what I would use. The only thing I would say, one that I sometimes use is that if I have an object and you can see your Pivot
point over here, it is the same as your
modeling software. W, E, and R will switch between
move, rotate and scale. And at this point,
I'm not going to explain to you anymore
what a pivot point is, since you should have
already gone over that. But yeah, so we now
have a Pivot point, which is just this stuff. Nice, a pretty cool thing instead of reels if
you hold Shift and then move your camera kind
of moves with your object, which can sometimes be
nice if you need to do some really precise
movement or if you, for example, need to
move stuff up and down. So that is quite an
interesting feature that you might be able
to use if you want to. And for the rest,
I would say that that is about it
for what we have. Now, having that done, let's go ahead and let's
start at the top quite easy. So at the top, we have our
default windows over here, which you see in many software. Once again, file in which we can save our scenes,
create new projects, open projects, new levels, that kind of stuff.
Edit the classics. UduRdo, copy paste cut,
and some settings. However, you can also find
these settings up here, and I often use them up here. I rarely use this window. Windows. Windows is quite nice. The only one that we would
really use is in our viewpod. You can sometimes create a
double viewpod over here, which is nice if
you, for example, want to look at stuff
at multiple angles at the same time and you
have multiple screens. For the rest, it's just here in case you
ever lose something. So for example, here
you can see that the outliner is checked
because we have it. But just like that, let's say that I want to open
up my world settings. Now my world settings
over here are opened up, although we don't need them, so we can just
press close again. So these are your windows. Once you have a specific layout, you are also able to save
the layout over here. And when I say layout, I
mean that if you moved windows around and you
change stuff around, which we will do in just a bit, you are able to
save your layout. So we have tools. I
rarely use these tools. I sometimes maybe use them for debugging if I have a problem, but that is quite advanced
for a beginner to toil. So most of these tools you
wouldn't use right now. Built built has to do
with building lighting, if you ever want to
build lighting or building building
specific workflows, textures, that kind of stuff. It's not something that
we would really touch. The only one that we
would probably touch is the built reflection captures. What it does is when we
actually have it set up, it will make sure
that our reflections on anything that we made
shiny looks correct. Now, of course, we
are making concrete, which is not very shiny, but just go with the flow. We have select. Honestly, I've never even been in this window. You can select Al and
do that kind of stuff. But of course, you can simply select over here to
select your models, and you can hold Control to select more over here like this. And for the rest, you can use Control Alt to click and drag. And then if you release the Alt It will select everything
within this view. However, this one
is very unreliable, so I personally do not use it. Actor, we don't really
need, to be honest. That is more like if you are actually making a
game and stuff, and the rest of these windows we can find in other places. And the help if you
ever want to go to the forums or you want to
know about Unreal Engine, C, we're using version 5.0
0.3, that kind of stuff. So below this, we have
this mode over here. This one is a little bit more important. So what
do we have here? We have a simple one where
we can save our level. And then over here we
have a mode in which we can switch between
different functions. Now, most of these functions
we will not cover right now. The only one that we
are going to cover in the next chapter is the
modeling function over here. But just to show you like, oh, sorry about that. Not sure if you
heard that, but I spilled my drink,
which is great. Anyway, it's fixed. So anyway, the modes. So these modes, you
have a landscape mode, and this mode basically
allows you to create landscapes and paint on them and work with
stuff like that. This is one of the things
that we will not be covering because it's
a bit more advanced. The foliage mode allows you to paint in foliage when
you actually have it, so you can paint in grass,
trees, whatever you want. That's one we might use a
little bit just to cover it. Mesh paint is, if you want
to paint in vertex colors. Quite specific, we
will not be using it. The modeling tools
is one that we will definitely be using
because we use the modeling tools which
have some tools that are similar to the one you can
find in Maya Max or Blender. And we use them
basically to create our blockout very quickly,
which is really nice. So they are a brand new
feature to Unual Engine five. I'm really loving them.
I've been using them a lot. Um, fracture is
basically if you want to break up models and simulate them and animate them,
all that kind of stuff. It's not really something
that we are going to use. Brush editing and animation are also too that are
not related to us. So those are a few
modes that will just basically bring up a
window with some settings. You can get a better idea throughout the tutorial
course what they do. Now, next, we have a
quick art mode over here. This allows us to very
quickly add some basic stuff. These are stuff like if
we go to the basics, these ones are really
like for game art, sorry, game design and
programming and stuff. But, for example, over here,
it allows us to add lights. It allows us to add
shapes like here, I can art a simple cube,
as you can see like this. So it just basically
allows us to add a bunch of shapes
and lights, and, of course, also some
more other stuff like cameras and visual effects. And that's the kind of
stuff that we would also be using so it allows us
to add those also. We will, of course,
go over most of these effects that we
will be using later on. But as you can see,
there's a lot of stuff, so we will only be
covering a fraction. Of it. Down here, this is all about blueprints. Blueprints is a way of programming
inside of UnwilEngine, so we will definitely
not be using that. This one is for animation. We will also not be using that. This one over here, it
is to play the game. You can or press this button, or you can right click
and press Play from here. The difference is that when
you press this button, your character spouns
on a specific location, and you can see that
I can just use it as a normal game, WASD. Okay, it looks like I
can I'll jump there. And I can just jump, move around, do all
that kind of stuff. So if you press play from here, it will spawn the character, see, on the location
where you clicked. So that might be handy
if, for example, have a really large level
and you just need to quickly check on
like a smart thing. So those are the
controls over here. And then we have a control over here if you actually
want to, like, pack your game into an XC file or if you
want to launch it on different platforms like on your phone or whatever,
stuff like that. But we won't be using that also. Finally, we have our
settings over here, which is something
we will be using. You have just general settings like your graphics
set over here, and then we have
some world settings which we won't really use. And the project settings is something that is
quite important. So in here, you can
set anything to the defaults for your
graphics, like for example, you can go to engine
and rendering, and then here you can see that
we can set if we want to, for example, use lumen for our lighting and
that kind of stuff. So it can also set if we want to use if we want to use rate raising over here. So these are quite advanced. I recommend don't touch them. Only if you know
what you're doing, then you can touch
them, but else, just don't touch them
because right now the defaults inside of unreal are often
already really good. So let's go ahead and go down one to our viewpod over here. Now, over here, we have
just a setting that gives us a few different
random settings. The ones that we are
really interested in is we can show our FPS, which right now is
just kept at 60, so that's why it's
going a bit crazy. This is not an
accurate FBS reader, but it is handy if you want
to see what is happening. You can change the
field of view of your main cameras you
can see over here. However, let's go
and set that to 90. You can say set the
screen resolution. It will always try
to go for, like, a base number that
keeps your FPS, right? If I would set this to 150, everything will look a
little bit more crisp. Well, okay, I have a 30 90, so of course, it
doesn't do much. But if you have a slower PCA, you have a really
heavy level here, see? Now I'm running at 58 FPS. What I'm doing right now
is the equivalent of running it at twice my
current resolution. So this resolution
is around 2.5 K, so I'm running at five
K resolution right now, which will make everything
look really nice and crisp, as you can see over here,
compared to, for example, if I said it's super low to 30, you see, at 30, it all looks like a little less. That's the general
idea behind it. I only use this feature if I'm taking high
resolution screenshots. Then I like to, like, boost up my graphics a
little bit more. And down here, as I said before, high
resolution screenshot. It allows us to
take a screenshot, so you can basically
just look at something, up as capture, and
then over here, it will give you a link, Tada, and then we have captured
the screenshot of our game, which is great for later on
for our final screenshots. So of course, we will
go over that later. And you can also create
cameras over here. Once again, something
we will go over later. And for the rest, there
is some layout stuff and some advanced settings, but we will not go
over that right now. Right next to that, perspective. This is just you will not really touch this
most of the time, but you can go to your top view, bottom view, right
view, all that stuff. However, we often only
work in perspective mode. Next to that, we have
our rendering mode or a view mode,
how they call it. And it is the one that we
will often be using in. But we can also, for example, only look at our lighting. So this is the one that
only shows lighting. This one shows like lighting
with extra details. Why frame is pretty much useless inside of unreel to be honest. Unlit mode shows no
lighting at all, and it's a mode
that will run very fast if you have
really large levels. Uh, it even shows our
reflections over here. So there's a bunch of fun stuff in here
that you can look at. You can even use nanite
which is new feature, which allows us to push
in a lot more polygons. But these pieces over
here are not nanite. So a bunch of stuff you
can play around with it. You can have a look online
on what they all do. But honestly, we only will
be interested in lit, maybe unlit, and maybe like
the lighting features. The rest we won't
really be using. Show basically allows us to turn a lot of
stuff on and off. Something as basic as over
here, you can see the grid. I can literally
turn off the grid. It's just like
turning things on and off on many different levels, but honestly, we don't really
need it most of the time. Okay, let's go ahead and
go over to our right side. Over here, we just
have the simple move rotate scale stuff so we can switch between them. In our tree molding software, I showed you the difference
between local and world. It's the same over
here. Right now, the Pivot point is set in World. But if I want to move across
the direction of my cube, I can press this button
and no it is set to local. So a lot of stuff
comes back again in unhel that we already learned inside of our modeling software. This one you don't
really need to touch. These ones are really cool. So with these ones, these are basically
our snapping tools. We have quite a simple one. So this one is grid snapping, so you can see that
it actually exactly snaps to the grid by
increments of ten. If I do increments of
100 by clicking here, it will snap by 1 meter. E. So that is really nice. You will use it a lot
inside of wheel engine. I often even just leave it to
ten and never turn it off. Our rotation snapping is basically just like
when we rotate, it will snap rotate. And if I turn it off, it will no longer snap rotate,
as you can see over here. And same with our scaling. Our scaling identity
is turned off. Right now, if I scale, it
scales at like an increment, but scaling is one of
those things where I often rather just like Have them custom myself. And then we have a
camera, and in here, we have a camera
speed, and that's just the speed in which
you can fly around. If you set is higher, for
really large environments, you can fly around really fast. And if you set it lower,
then of course, you can, will zoom in and be very up close and personal
with your asset. So let's go ahead and
set this back to four. But of course, you can also
use your scroll wheel. Okay. So that basically
covers most of our viewpoint. We have our outliner over here, which is the same as
your scene hierarchy or in Maximia I believe
it's also called outliner. It shows everything
in your level. You can create folders by pressing the little
folder button here. And then you can, of
course, go ahead and you can click and drag stuff
into these folders, which allows you to easily turn them on and off like this. So you can hide stuff. And just everything that will be in your scene is in here. And this can be quite crowded. For example, I've created
environments with more than 7,000 assets in one environment. So definitely I recommend that you work quite
clean with this, or at least clean it up
after you're done with your environment in
case you ever want to get back to it and you
want to use it again. Now, yes, you have some
settings over here, but we don't really use those. So down here, we have
our detail step, and this will be all
of our settings. Whenever we select
a model over here, it shows all of our
settings from our position, our rotation, our scaling. So if I set this back to zero, you can see that our rotation changes, all that kind of stuff. And with a scale, a nice one is if you press
this little button up here, what it will do is it
will scale uniformly, which means that
all of the scaling will always be exactly the same. While if I turn it off
and set this to two, you can see that now
it's no longer uniform. Now it will scale based upon
its own axis like this, see? So that is it for scaling,
that kind of stuff. Down here, it just shows
you, which mesh we have. The cool thing about
Unreal engine, which is something
that I will show you is that you
can pick any mesh. So I just need to quickly
show my content browser. Actually, you know what? I
will show you that in a bit because we want the content
browser is really important. So there's something
you want to go over. And yeah, for the
rest, it will show you the material on your model, which you can also change
and just a bunch of settings that are
connected to this model. But there's only some small settings that we will go over. So what I was talking about
is the content browser. You can find the
content browser. In your default,
Y, it is hidden. You can find it by clicking
on Content Browser down here. And what I like to do is I
like to press Doc and layout. What it does is it will always have my content browser here, which is useful because it's the second most
used one you use. Next to your viewpod, it's the one that you
will be using the most. Just move my keyboard. So now if I, for example, press little button over here, which is browse in
our content browser, it can find the cube. And what I was talking about
is that you can simply click and drag and you
can replace your model. See? So that is quite cool that you can
do that so easily. Same with our material. Right
now our material is blue. I can just click and drag
in a different material. And now you can see
that we have changed the material of our object. So your content browser, it basically has
all of the folders, which will have all
of our content. In here, we are going to
basically have all of the content for our level,
which, for example, if we right click and
we can already do that, sorry, we need to go into
the content folder for this. You need to start with
your content folder, right click New folder. And let's go ahead and call
this concrete on the score. Way over here. And in here, we can now, for example, set up a folder structure
that we want to use. So for example, right
click and when you click, you get a bunch of more settings that you
don't really need. The classics like saving, deleting, all that stuff. We just want to
press new folder. And what I like to do is I always like to have
the same folders, same thing as we talked
about in Chapter number 02. So what I like to have? I like to have a folder called assets for all of my models. Right click New folder. I like to have a folder called textures for all of my textures. Right click New folder. I like to have a
folder for all of my materials, right
click New Folder, and I like to have a folder
that I will call SN, which is the same as
our saves folder, and it will just contain our
level and stuff like that. And for now, let's
keep it to this. So we now have a nice structure that we can already build from. Okay. You have some buttons
like the Savel button, which allows you to
save your scene. You have a button
to import files, but you can just
drag and drop files, so we won't really
be using that. Some bread crumbs,
which basically shows you in which folder you are by just
navigating through them. And some settings settings like showing what kind of thumbnails you are using, your
thumbnail size. Like if I said it's too large, you can see my
thumbnails go bigger. So there are a
bunch of settings, but we rarely really
need to touch those. Like I said before, we are laser focused on just
environment art and not so much on a complete
introduction to all of the programs
that we are using. Okay. So that was generally like an
introduction over our layout, of course, because
we don't have well, we will go over our
modeling tools, but that is going to
be its own chapter. So there is, of course,
a lot less stuff that we really need
to focus on in here, and it is a little bit
more user friendly to use. So let's go ahead
and continue on with the next chapter where we will start by creating
our blockout, and I will go over like a
bit what the blockout is. And then I will go
ahead and we can get started bit our modeling tools and all that cool stuff. So let's go ahead and continue with this in our next chapter.
21. 10 Creating Our Blockout Part1: Okay. So what we're
going to do in this chapter is we are going to create a blockout
of our scene, and we will go over the
modeling tools and just generally how to work
inside of nil engine. So a blockout scene is basically a very low resolution scene of whatever we want to create. And when I say low resolution, I mean that the shapes are not final and they are
just, like, very simple. They are made out of
basic shapes like cubes, cylinders and stuff like that. Now, the reason we do this is so that we can
plan out our layout. It's almost like creating
a three d blueprint, and we will do
this very quickly. And then on top of that, we can also get the scaling white. With that, what I
mean is, for example, I don't want to accidentally make this like 5 meters long. I want to make sure
that the scaling is correct based upon a person. So if a person is
180 centimeters, I would expect this
to be, for example, 2.5 meters or
something like that. So just to give you
a general idea. Funny enough, we actually
hosted a challenge a while ago about creating like blockout
blockout, just in general. So let's go ahead
and have a look at, like, the final
submissions over here. And now, what you can see,
is if I scroll through it, you can see over here that
these are all blockouts and they are all very
basic looking scenes. These scenes do have a little bit more lighting
than we will have. But you can see that
like all the shapes, they are nowhere near final. They are very basic, especially
here where you can see, just to give you a
general sense of the layout and the scaling of your scene. And
here you can see. Sometimes they also use the
blockout to generate a mood, but take that with a grain
of salt because, of course, when you start adding textures, the lighting and everything
in your scene changes. So that is what you
can see over here, like a nice simple scenes that just have the
general shape. And then you would go
ahead and start turning this into an actual
treed environment. So that is the general
idea behind this, and that is what
we will be doing. Now, I would say that, let's just go ahead
and jump right in. So what I want you to do
is I want you to have your reference that you can find over here on another screen. Now, since we are
now going to really get started by previewing
our reference, I want to go ahead and I
want to download a program, although I already
have it downloaded. And it is called PUR Rv. Let me just go ahead and
quickly find it for you. Here we go. So it is free. You can go to prev.com and then just press
Get Pure Rv over here. I believe you can donate. So make sure to do
that if you want. And PUR Rv is awesome. So basically, it's
an image viewer, but it is very robust
and very easy to use, and it allows you to preview all of your images
at the same time. Let me just go ahead and open it up over here, and
then I will show you. So when you have the image
editor, this is what you get. You get like an empty view. Now, what you can do is you
can simply select all of your images and click
and drag them in here. And now what it will
do is it will go ahead and it will
load up those images. Although I don't know
why it's taking so long. Let me just pass the
video because I feel like something is going wrong.
Okay, there we go. For some reason, a drag and
drop function was broken. It's actually the
very first time ever that I noticed that. So if you also have that,
just right click Load, and then you can also
load images here. So what you can do is you can select images and you
can simply scale them. You can also go up here to the corner and rotate
them if you want. And what I want to
do is I'm just going to these because they
are not the main images, I'm just going to
scale those down and move them nicely over here. You can actually
also sort stuff. You can select everything,
right click and go to images, arrange, and then
say, for example, optimal, and now you can see that everything's
nicely arranged. Now, the cool thing about
this is that these images, they all maintain their
original resolution, as you can see over here. So we can very quickly preview
all of these images to get the right inspiration and to create some really cool
stuff. So we have these ones. And what I want to do is
I also want to go ahead and have my materials. I
hope that they load in. Oh, this time, they do load in. Strange. Over here,
we have my materials. I also want to go ahead and move those probably like down here. Let's make these a bit
bigger. There we go. So now we also
have our materials ready to go so that
we can very quickly, just like review everything and make sure that
everything looks correct. Okay, awesome. So I'm going to have this
on my other screen. It just makes it so much easier. So I have like a screen that
I have above my main screen, which I tend to only use for reference because it just
allows for very quick looking, but you might see
me like switching up and down like
that quite often. Now, inside of
unreal, for this one, what I want to do is because
this is a begin toil, let's get started with an
absolutely clean scenes that I can give you
a better overview. However, please keep in
mind that nothing what we are doing now is
going to be final. So let's go ahead
and go to file and create a new scene or
a new level, sorry. And let's go ahead and
go for an empty level. We want nothing in it over
here, and let's press Create. And we don't need to save this. Okay, so the first
thing I want to do is, let's go ahead and
save this level. We can go file and we can
do a save current level, and let's go into
concrete hallway scenes. And in here, I will just call
this hallway, for example. And then I can save
it. Now there's one last thing
that I want to do. We now have created this level. However, if we would close down unreal and start it up again, it will once again go back to that other level
that we created. You can set this
level to open up by default by going into
settings, project settings. And then if you go
into maps and modes, you want to set the
editor start up map to B. And if you just scroll up
and down, where are you? Hallway. Game default map, let's just in case
I also set this one to Hallway. There we go. Now, whenever we, for example, close down in reel,
it will always show up with this
scene over here. Now, you can see it is
very dark right now. So what I'm going
to do is I'm going to add a few things in here. First of all, I want to add some very basic
temporary lighting. I can go down here and I can
go ahead and go to lights, and I want to add a
directional light over here. I want to go ahead
and go to Light and I want to add a skylight. These are just a few things, and then I will go over them. I want to go ahead and I want
to go to visual effects, and I want to add
a sky atmosphere. And you can see that now
things start to change. I want to go to visual effect, and I want to add where are you? So we have the sky atmosphere that's two volumetric clouds. Let's once again, go
to visual effects, and I believe we also need
a exponential height fog. There we go. Okay, so now
you can see that things have started to look quite
a bit different over here. Now, there's a few things
I want to go over. First of all, we have
our directional light. If we go ahead and just create a quick cube in here just
so that you can see. So let's go down here
to shapes and cube. And now we have a cube so
we can kind of see it. So first of all, we
have a light over here. Now, I'm going to turn off my snapping for rotation
and for my grid. With this light, if you go ahead and you want to set
the mobility to movable, movable means that this
is a real time light, which will work with lumen. This light is our sun. It is basically going to be the
direction of our sun, and you can see that
the sky changes because we are using
a procedural sky. Our sky changes based
upon our light. So I can move this light down. I can move it to the
side. And just like that, we can now probably
see our cube. So we can go ahead and
we can play with this. Now, next, what we have is we have our exponential
height fog. Our exponential height
fog just add like this fogginess, and later on, we can also use it
to, for example, give it like that whitish
glow in the background. For now, it's mostly used just so that we have a
surface over here. Our sky atmosphere
is our atmosphere. It's basically
just like our sky, and it basically helps
us with our lighting. Now we have our skylight. We want to set this
one also to movable, and now you can see that
everything changes. Our skylight basically
bounces the light around. When you have light in
real life, the light, it hits an object,
it bounces away, and I won't go too
much in depth. We actually have
lighting course on our profile that goes
really in depth into this. But what it allows
us to do is if we would have this
turnoff you can see that everything the sun
does not hit is pitch black because it does not
register any lighting. But if we have this
one turned on, because it is
hitting our object, it is hitting the sky and the sky in general,
gives off light. Like the sun is not the only
thing that gives off light. The entire sky gives off light. You can see that now we have a much better view over here so that we can properly
create our blockout. The volumetric clouds over here, I just tend to do them just
to give it some clouds. They are not looking
very good often, and we will change this method later on, but for
now it is fine. You can set your skylight to real time if you want, but
I'm not going to do that. What that will do is it
will basically look in real time at the sky so
that if the sky changes, it will also change you see, I will also make our cube
orange and stuff like that. And although I believe that even if we
turn off real time, yeah, it's still pretty good. But like, real time basically means like
it automatically updates while in here, if I would go ahead and I don't think I can
really show you. You can see the cube stays
orange if I change my light. So I need to scroll
all the way down on my skylight and press recapture
in order to fix that. So that's basically what
the real time is for. So that no matter how
I change my light, it will automatically
update everything. So that is a general
overview of our lights. Now, to work nice and organized, what I like to do is I
like to create a folder. So let's select everything,
create a folder. Call it lighting. So
now we can nicely, hide this if we want to go ahead and work with something else. Awesome. So now what we're going to do is we are going
to build our environment, and we are going to
build everything except for Ivy because Ivy is like this extra prop
that we art on top of it. So we want to have a general
layout of our environment, and it's probably best if we
get started by just going over our floor over
here and just have a general look for that. So let's go ahead and go into our mulling tools by going up here to selectimde and mulling. Now, I want to get started
by creating the floor. And what we need to do is we
kind of need to figure out what kind of a scale
and distance this is. So this one right now, it goes more by feel. What I like to do is I like
to have this floor to be like a straight floor that has
two hallways on the left, and maybe also two
hallways on the end. The reason I do the
two hallways on the end is because then
we can add some concrete here to kind of close off our vibment and to make
it feel more logical. So that's the general
idea for this, and then I do have an extra idea of how we are going
to manage this. So let's go ahead and in our
modeling tools over here, we can create some shapes. These shapes are different
than the ones that you can find in here because these ones allow us to actually
art editing. You can see that they
also snap quite nicely. So let's go ahead
and let's decide how large one hallway over
here will roughly be. I'm thinking if we
have the pillars, and let's say that the pillars are three to 4 meters apart, I'm thinking of maybe
making it like 8 meters. So this is centimeters. So what we can do is
we can set our width, for example, to 800,
which is 8 meters. And now you can see
that over here, yeah. And you can move around your
camera just by moving it. I have not placed
it yet, by the way. As soon as you place it, you
will lose these settings. I'm just, like, right
clicking and moving. And I'm basically just
trying to have a look. And I feel like eight is
for now, it's pretty good. Now, I want to have my
height to be maybe, like, to make it like 20 centimeters thick this concrete over here. And let's make my depth, and my depth is going to
be like the width of this. Let's make this width Uh, it has room for pillars, so maybe 4 meters, let's do t 400. Yeah, 400 looks pretty good. Let's go ahead and
place this cube and press complete at the bottom. Now, the first thing I want to do is I want to go up here to my location and press
this little arrow button, which will reset my cube to 000, which is like the
center of our world. So let's go ahead and start
with something like this. So we have this cube over here, and that is looking
pretty good right now. Now, what I want to do is,
I just want to go ahead and build out this one
hallway over here, and then we can go
ahead and we can continue with the rest, and then we will do
the ceiling after. So we have this one. Let's go ahead and also create a wall, so we go ahead and
create another cube, and our wall I'm
guessing that often a wall is around 80 centimeters high so that you can lean on it. So that's just from
an experience. So if we go for a height
of 80 centimeters, that is not looking or am I
wrong with 80 centimeters? By owner weight, it's also, of course, snapping
to, like, the base. It's not snapping to my cube. Let's set the depth to
2020 looks pretty good. And the width, we can
keep the width right now, and we might make
it lower later on. So let's see. So we got
something like this. Um, I don't know. 80 feels. Let's go for maybe, like, a
person is 180 centimeters. I'm just thinking a little bit. Person is 180 centimeters, so let's go for, like, 120 centimeters, maybe. It's a little bit too
much. Let's do 110. I feel like 110 centimeters
feels pretty good. Don't worry. We will, of course, measure this out like
a character later on. I'm just going to
go ahead and I'm going to set this value back to zero over here to make sure
that it's exactly aligned. And then I'm going to
set my location to 20 because I know that my
cube is 20 centimeters. You don't have to work
this precise right now, but it's just nice
because if I do this, I can turn on snapping and
because we use even values, I can nicely snap this
to the side over here. Okay, so cool. So
we got this one. This is also something that we have to keep in
mind when we have this cube that some space gets
taken up by this concrete. What we can do is we can actually go down in
our content browser, and let's go to our
third person character. No, that's not the one. Level, no starter content. Let's do starter
content, and Oh, God. I never what is this
character called again? Let's try and just
go in content, and let's type in character. I basically want to look
for, like, the actual mesh. So we have many over here. That was the name
of the character. Many, and then we
have another one that is the female character. And what I'm going
to do is I want to look for something
that's called attic mesh. Now, a great way that
I can actually show you is that if you are looking for
specifically static mesh, you can go down here to asset filters and only
turn static mesh. What will happen is it with
an only show aesthetic mesh. So if I now type in many, which was the name, no. Okay, then I can just go ahead
and just type in nothing, and now I get all of
the static meshes in my scene. Oh, Wi. That is interesting.
Maybe it's in here. If you want, if there is another way, of
course, that we can do it. I was just hoping that I could
find the character here. Okay. If I cannot find
the character here, what you can do is you can go to third person and you can, for example, quickly grab
the blueprint over here, and you can use that
as a character. Or what you can do is you
can simply create a box, and you can make the
box, for example, 25 by 25 by 180, and then you can
see that this is roughly the same
size as character. So it kind of depends
what you want to use. So you can use the
blueprint if you want, but the blueprint is, of course, quite a heavy character. And if you want to press play, you might get some arrow. So if we press play here, so it looks like we
don't get any arrows, but sometimes it's a
little bit iffy to use. So it's up to you
what you want to use. For now, what I
will do is I will just go and I will use my, I think I want to
use the character. It depends. In this case, I want to use character
because I want to be able to see where the arms are and I want to be
able to see that she can lean her arms
on the railing. That gives me confidence that this railing is on
the right height. So what I'm going to
do is I'm going to duplicate this railing
again over here. So that we have a full railing. And now what I want to do
is I want to figure out how high my pills over
here are going to be. So in order to do that, I'm
going to get another box. And I would say that it feels
like this is quite high. Like it feels like something
where the character is still able to walk
around quite comfortably. So let's make the width
and the depth around 30. And let's go for height. Let's Let's start
with 2 meters ten. I often go for
different heights. No, that's not enough.
Let's do 2 meters 50. I feel like it's a little bit
higher. Let's do 3 meters. Yeah, I think 3 meters is
probably the right one, and then it feels like it's
a little bit too thin. So let's go 40 by
40 centimeters. We can later on mimic, actually, these values also inside of
our other three software. This is looking pretty good. So let's go ahead
and let's press click and press complete. So I quite like this. Yeah, I quite like this. I'm going to have
this one over here. And I want to define how
far away so I can see, it's quite cool that
there's a bit of, like, a distance between
these two pillars, because it allows us to
add some interesting, like grass or like ivy
and stuff like that. Now, because pillars are
often very evenly spaced, what I'm going to
do is I'm going to set my snapping to, for example, 100, and I'm going
to simply press ControZ Controv and let's say
that we space it in four. So, one, two, three, four. Wait, did I do that white? One, two, three, four. Yes. So let's go ahead and go
with 4 meters by 4 meters. Awesome. So we now have roughly defined these
shapes over here. What we can do is we
can go ahead and we can push these ones back just
by duplicating them. And because this will be
like our main camera angle, we don't really need to create anything that is behind here. You can create that if you want, and it would not actually be that much extra effort because the way that
we are going to work, we can reuse our pieces a lot. So what I'm going to do
is I have these pieces, and over here, I want
to create a junction. I'm going to go ahead
and basically grab this piece and turn on
snapping in our rotations. And nicely, I'm going to
rotate this around over here. And I want to place
it in the center. You can look at the grid points to see if this
one is in the center. Okay, awesome. So
I have this one, and let's say that we want to go ahead and we want
to go around here. We want to go around here
because we are going to almost create like I can
bear to show you. I have an idea, but it's
basically just like a random creative idea because we don't have
that much reference. So I'm going to create something interesting
that allows us for foliage in
between these areas. But then we have a walkway. So just bear with me, and I will show you what
I have in mind. I'm going to create one here, and I will just show
you the layout. And then what I want
to do is I want to create one more over here. Next, what I'm going
to do is I'm going to select these three GtalCGtoV, and this is why snapping is so important because you can
see how flexible it is. So I think you can already imagine what I'm talking about. Now that we have this one, I can go ahead and I can
duplicate this one, rotate it exactly
90 degrees like this thanks to snapping
and move it up here. And now I can go up here. And I can go up here again. And now, in this case,
what I want to do is I want to duplicate
these and I want to move them exactly aligned like that so that we basically close off our
environment at this point. We might actually even
create like a wall, like it would not be
that much extra effort to create a wall there. So what I can do is I
can now go ahead and I can duplicate this over here. And now, of course, if you want, you are able
to, for example, move. Actually, we can do
that with all of these. We are able to, for example, select all of these pieces and to finally perfectly
close of our environment, we can also place
them over here. And then over here, we do have a little mismatch where
it's only 4 meters. So you can choose to
create an extra piece, or what you can do is you
can simply move this and Oh, yeah, wait, we can
of course, do that. And we can move it over here. So it's almost like puzzling. And then what we can
do is if we now have 24 pieces, it's
really like a puzzle. We can move this one here
and this one over here. See? So now what we are
going to have is in here, we are going to basically be able to add foliage
and stuff like that, so we will have a wall that
just goes around there. But then we still have
this nice view over here. So what I want to do basically to make this
transition easier. So we now have this balcony, which we would want to lead all the way around it over here. As you can see, but oh, sorry, let's set the
snapping back to ten. There we go. What I want to do is I want to basically also have a
pillar on this corner, which will make this transition
a little bit easier. You can sort of see that
happening over here also. So we need to have a little bit of creative
freedom with our pills. The pills over here don't make too much sense because it's AI, but we are still able to, for example, play round with it and gamify
it a little bit. Let's go ahead and duplicate
this pillar, for example. And if we place
this pillar here, and then I'm going to
turn off my snapping and move it forward a
little bit so that there's no, Z fighting. You can even move forward
a little bit more if you want. Like this. See? Now it feels like quite
a nice transition. Actually, you know what?
Let's move it like this. Let's move it in the center of both these pillars over
here. There we go, see? So like that, we can be
quite flexible with this. Now, what we probably need to
have is because, of course, these pieces do not
line up exactly, is that we want to have a
shorter piece from this. We will probably later on,
actually make these pieces only 4 meters and then just duplicate them a few more times. So what I'm going to do is
I'm going to set my scale, and you can look at the
red arrow of your pivot or to go ahead and match it up with your
scale set to 0.5. Of course, because I rotated it, this does not work anymore. In that case, just
find the scale. In this case, it
was the green one. That is sometimes a
bit confusing, I know. So having this one, I'm now
able to have a short scale, which allows me to
basically go in here and it might not
make too much sense, but I want to try and scale
these measures as little as possible once I have
the final scale. So this one is 4
meters right now. Now, what you can imagine,
you can actually see it over here is that right now, this one is 8 meters, and you can see that the
UVs are nice squares. You can see that the more
that we scale it down, the more our UVs are
going to be squashed, like they're going to be pushed in, which will not look good. With our UVs, I mean,
like our textures. So what we want to do is we are going to basically use 4
meters as our base scale. I know I used eight over here, but that does not really
matter for a blockout. But it means that whenever I
have a situation like this, instead of me grabbing one extra piece and scaling it all the
way down like this, which you can see, oops, it just does not look the best. Instead, what I like to
do is I like to select both pieces, move
them in the center. And then just carefully
scale them up. Because right now
because we are scaling them over such a large area, you will not really notice that the textures are a little
bit stretched, basically. And now at this point,
we can just go ahead and we can grab these pieces. And by the way, what you can do is if you want to
move your pivot, you can Control click and
click against on the model. And whatever model
is selected last, that's the model
where your pivot will be. So that makes it easier. Oh, by the way, when
you are duplicating, it does reset the pivot, so you might need
to do it again. So now what we can do is we
can nicely duplicate this. Move this over here. We can nicely move our pillow
to make sure that it is looking correct over here. And now we just want to
go ahead and we want to set the scaling of
this one a little bit bigger again. Like that. It's no problem if it is sitting inside of
the other model, you will not really notice
that. Okay, so we got those. Now what we can do is we
can simply select all of these, duplicate them. You can try to turn
on snapping and often snapping will
still work fine. However, these pieces, they are not often the best
with snapping. That's Okay, they're
pretty good now. But they're often not like the absolute best when it
comes to snapping. So that is something that we'll actually work on when
we create our finer models. We will make them absolutely
perfect for our snapping. So having this one
done because I know that these squares are all
the exact same height, what I size exact same size. What I can do is I can
simply select this stuff. And this is why this is a great environment for
beginners because you don't have to be overwhelmed with the
amount of assets, but you can add
as many assets as you want to enhance
the environment. I'm simply going to go in
here and I want to line up this wall, like this. Perfect. Duplicate it again. Let's go in here, line up the wall with the
floor over here, we just move in a
bit closer like that and duplicate again. Let's go ahead and move it a
little bit closer like that. Awesome. So we now have this piece already done over here, and we
have our pillars. So what I like to
do is I like to, for example, have these pillars, almost like decorative pillars, but I like to only have them
in the center hallways. The outside hallways, I want
to create walls, basically. So what I will do
is I will go ahead and turn on my
snapping back to 100. One, two, three, four,
and that's probably good. So what I'm going to do is I'm going to select these over here. And this is just like
an artistic vision, what I want to do now. I'm going to place them
nicely in the center to also give them a
little bit more space from this bill or over here. And I can also then
now duplicate them and place them nicely in
the center over here. You'll like that. Okay, cool. So we now already have a little place that
we can walk around. Let's go ahead and
finally create our walls. And our walls will actually
also be used like down here. So what I will do is
I will create a box, and let's make the depth
20. Yeah, 20 is fine. Often, you don't want to go lower than 20
when it comes to walls. The reason for that is
because you can get lighting errors when they
become lower than 20. But it is not often a
rule for outdoor scenes. It's more rule when you're
working on indoor scenes. But that's why I tend to
always just go for 20. Now what I'm going to do is I'm actually going to turn
on my snapping again. Here we go in that we
do like pop snapping. Let's make the width. Once again, 400 so that we have an even
width from the rest. And then we can
just place this on the corner and press complete. There we go, because
the height is the same height that we're
going to have later on. What I can do now is I can
simply keep duplicating this. And if you want, you can set
your snapping to like 100. And let's have L. I
want to have this duplicated on like a few areas
so that we can no longer See what is behind it. And the reason we don't
want to do that is because we do not have anything
behind this environment. I'm just making a
small environment, so I kind of need to
fake and block off my view so that when
we look forward, like this, and we
are looking here and we look at this wall that we don't have empty space here, but that we actually have
something that feels logical. Now, what I'm going to do here is I'm going
to go ahead and I'm going to rotate this 190. Oh, and now I need
to set this back to snapping of ten. There we go. Let's make this nicely fit. Now, what most likely will
happen is that over here, because of the scaling,
we actually want to move this inside of
a mesh like this. And that way, now if
we go and snap it, we are not left off with 40
centimeters at the very end. So we can go ahead and we
can simply duplicate this. And this is also
good way where you can press duplicate and you can hold Shift and then you can
move this with your camera. That's one of the few
times where I would, for example, use this over here. Awesome. Now, all we
need to do is go ahead and select these
pieces over here also. And now we can set our snapping probably
back to like ten. Duplicate it, and then I
just want to, first of all, move it and then
just click twice on the first model so that I have my pivot point
in the right location. And now what I can do is I can simply move this over here. There we go. Okay. Awesome. So we now have the
school enclosure, but as you can see over here, what I quite like
is that there's like it's almost like a
distance view over here. And I do want to do
something with that, and we will probably like block it off with foliage or
something like that. I'm going to grab this one over here because this one
I have not yet scaled, so it's better to use this one. Move it here. Like that. And I'm simply going to use
this one. It's like a back. And, of course, the
actual back over here, we will work on that
later on when we actually create our
final environment. So we have this.
And if you want, it might be nice
to just place like a little pillar in these
corners over here. And don't worry about this. This happens because the assets are exactly on top
of each other, so the engine doesn't know
which one to show first. However, because we cannot
see that from this point, it is great to like
from this point on simply place
these pillows here. Okay, so we still
need to place, like, a few more pillows,
but for that, we first of all need
to work on our roof. So at this point, let's
go ahead and press Save AL in our scene
and save selected. And now what you can
do is you can right click Play from here. And then it looks like that I crashed. I don't
know why I crashed. That is a little bit strange. It is Unreal engine five. There is, of course, sometimes still some
problems with it. But here you can see that now it loads up the level again. Let's delete my blueprint,
and let's try again. Let's go here. Oh, that's weird that it doesn't remember
my content browser layout. Maybe after you place
your content browser, we need to go to our
windows, safe layouts, and then maybe safe layout
as a yeah, press safe. Okay. Anyway, right click. Let's try again. If
it crashes again, then I will need to
have a closer look. Okay, this time it works. So now you can see that now we
can play around with our level and we
can just simply run around and we can look
around and stuff like that. It might not be the very
best level for, like, gameplay because you have a lot of these pills and
stuff like that, but we are going for,
like, a pretty view. We are not so much
going for, like, a perfect gameplay level. But you can see that
all of this stuff that we generated has,
like, collisions. And you can imagine
that now later on, we have a cool ceiling
and some light, and we will have
some foliage and stuff that it can
look quite awesome. So let's go ahead and press Escape to go back
into our normal view. And let's go ahead and
finish this chapter of here. And in the next chapter,
what we all do is we will start working on creating
our ceiling over here. So let's go ahead and
continue with that chapter.
22. 11 Creating Our Blockout Part2: Okay, so let's go ahead and
continue where we left off. And we are going to get started
with, like, the ceiling. So for the ceiling, let's have a look
round because we have, like, a few different
ceilings over here. And I do want to ty and not
make it like how we say it? I want to make it in as
little pieces as possible, if that makes sense, because
it's a beginner tutorial, and it's just easier if we have, like, very little pieces. Now, we do have
something like this, but I feel like I don't know. Something like this might
not actually fit in here. It just doesn't feel right to have that in here, to be honest. Uh, let's see. So we can start with, like, just like some
construction beams that we can use over
and over again. Most likely, see, we have, like, so you can see, like, often they are just like simple construction beams
that they use. Hmm. That is a bit having a tin. So, yeah, I guess we
can use this one. It will look interesting enough. What I'm going to
do is because we are also I already
had this plant. I don't just now make up it for it is that we also going to create a high
poly to low poly model, and I want this model
to be metal pipes. So what we can do is we can have metal pipes running
over the ceiling, and that can be quite cool. So let's go ahead
and work with that. So let's see, ceiling, ceiling. I'm going to start
with, like, a beam, and then I think the
actual roof part, we can actually pick our wall, and we can just rotate our
wall and change the texture. And that's the easiest
way to do that stuff. So I don't know why I'm outside. Oh, yeah, wait, I'm
outside of Mlling mode because we crashed
last time. So box. And what was it? So we went for, like, 40 by 40, and I want to have it probably like two h centimeters high. Let's have a look
at that. I want the thickness and the width
to be exactly the same, which right now it
looks like it is. But then, of course, I want to have this a little bit higher. So let's do 60. Ah, 60. Yes. Although that
might make my ceiling. No, no, wait. That will not make my ceiling too
high, actually. Well, I can actually do is I can maybe even
place it like here. Now, that's too low. Okay, so
let's do 60 or let's do 50. Let's have a look at 50. And if we just set our
depth, I believe, to 400? Oh, no, wait. Let's
do our width to 400. Okay. So that's a nice thing that as soon as you
made a placement, you can right click and you can just move your camera around, and then you can
kind of, like, guess what the placement looks like. Okay, I'm quite happy with that. I think that will
work quite well. So what I will do is,
with having this piece, let's just go ahead and
place it, press complete. And now the
interesting thing is, of course, how are we
going to place this? Because we have a few
different placements over here that we
want to kind of use. So let's get started by working
on our default placement. And our default placement
would be going from here. And then if we just
duplicate this and move this ta
ta ta over here, oh, yeah, we would
probably need to make one piece that is
a little bit thinner, although we can probably just, like, scale this piece down. Now I think of it if I
just move this one here, the only thing I want
to make sure basically, that if I just scale
this up a little bit, these pieces over here, I want to make sure that there's
some visual interest in it. So right now, what
I notice is that, of course, over here, there
isn't too much logic. So they place the pillar here, but then these
pillars are separate. And what will happen is if we do that because if we don't
have any pillows here, we can do that, but
it will feel like an inconsistency between
the environment. The other problem is
that if I do this, if I grab these pieces, and move those over here. This will feel like it feels like almost
too much symmetry, but it also feels
like too crampy. But however, I don't want to
make my walkway, too big. So I quite like having
this difference between these two pillars. And then over here,
what I would probably do is I would probably
grab one of these pillars. And if we go for, like, one, two, three, four, five, six, seven, eight, yeah, I think eight will
probably be enough. So we probably want to
place it sort of in the center over here like this. And let's just go ahead and play around with things. That's
just the thing about this. It's like making a drawing. We are playing around to this. Sometimes we will have
to erase some stuff, and sometimes we get
some nice stuff in here. So right now what's
quite interesting is that because this pillar
is pushed out over here, it is no longer
even on this side. So what would happen
is we would place one, see, over here. We need to turn this back
to ten in our snapping. We will need to place one,
let's say, over here. And then, over here, we would just like to do some scaling. So, okay, so we have
the pillows over here. And what I can do is,
what if I do this? What if we keep the
pills like this, but we will have them I don't think I can
actually snap like that because of the way. Let's just go ahead
and let's turn off snapping and let's
just move it like this. That's no problem. Okay,
what if I do this? What if I have the pillars
like this, let's see. We will copy this one
over here and over here and over here like this. Then we would grab this pillar. Nicely move it towards the side. Yeah, that's roughly
in the center. That's also not perfect. Let's move it a bit
more. There we go. So those two are in the center, and this would
actually also go a bit more in the center
over here. Okay. So those are now in the center, and then let's say that we grab one pillar that goes along here, and then we would just
makeu how we will do the pipes and how we will
run them across here. So if we have this over here, now what I'm thinking
about is like, what kind of open spaces can
we have in between here? So let's move this last one over here,
something like this. And let's see. So it does look visually quite interesting having
something like this. Now, I would have the
urge to actually move these pillars because right now we have this really
heavy concrete block, and we will have
concrete on top of that. But then it feels a
bit off if there's no support going on over here. So there's two ways
we can fix it, or we can simply
place pillars here. And we can of course, just have a look and see
how that works. Or what we can do is if we want to keep more open space here, we can have these pillars on the other side and just have the concrete
block run all the way through there to basically
indicate that that is the point where the load
bearing pillars continue. So if I go ahead and I do this, yeah, you know
what? I like this. We can have some ivy
growing on here, so that should be quite good if we just work with
something like this. So we have this pillar
structure over here, and then let's say
that over here, we will have the same,
but then it starts to simplify around the rest. So this is like
the main walkway, and that is why they made it a little bit more complicated. So what I can do is
I can go ahead and I can duplicate
this one over here. And to be honest, we can
just keep duplicating it. So we are just going to
continue this one on here, and we will have some cool
ivy growing here and there. So that will all look
quite interesting. We want to go ahead and
continue this one over here. Only thing that
I'm thinking about is for the pipes that are
running over the ceiling. Now what we can do is we
can make one of the pipes that I don't actually
have reference for pipes. I will gather some
of those, but we can have the pipes
going around here, something like
that, or maybe have them running just below here, and oh, yeah, we can do that. We can have them running just below the
pillars and then have them hooked up against
the ceiling using wires. I have an idea of how to
do that kind of stuff. But we will, of
course, go ahead and get some reference before
we go on with that. Okay, so we got this one, and now we want to, for example, have
another pillar here. Now, I just want to check
would this pillar over here? Is that overkill? If I
go here and I delete it. No, actually, it makes
more sense if it is there. So we will just have a
smaller gap over here. Not everything always has
to be perfect symmetry. Real life is never like that. So let's go ahead and start by moving these
pillars over here. And I'm not using
snapping right now just because these pills have a slightly
different snapping towards the rest of
the environment, so it's easier if I
just move it manually. Okay, like this.
And then we have our final one sitting
nicely up here. Okay. So we got those ones. Now we just want to grab,
I believe this one. Let's move it up here. And let's also quickly
just double check. You see, we want to move
this one in a little bit. Over here, you can also
move it a little bit, although it will be less noticeable with
this one because we are going to have more
concrete pillars across it. So we got this one here. This one over here. And yeah, I'm basically trying
to make really smart use of my assets. A key goal within
environment art is to reuse as many assets as
possible while still keeping your environment
look really interesting because reuse means that you
need to make less stuff. I could make like five different
builders and everything, but it would just take
up too much time, and it would, it would not be the most logical
way of doing things. So what I can do over here is I can just go
ahead and, like, carefully scale these but like this. And then for this one, because it's going to run
all the way across, it might be better if
we simply move it up here and then simply
duplicate it again. And it is okay to have
this many models. You don't want to
go too intense, so don't make these like 1 meter because if you
make them 1 meter, you will have so many models. But for a small
environment like this, this is not that many models, especially not if we
save a lot of time in how we basically
construct this environment. So let's see that now we
have something like this. That's looking
quite interesting. Like we got a little bit
of symmetry going on. And just in general, we have, like an interesting
flow to things. I'm going to grab
these, set my scaling to 100 and I'm going to start by placing these in,
like, the centers. So I also want to overhear, I want to only have a
single one in the center. And the same over here, have a single one in the center. I know it might not be
exactly the center, but if you want, you can calculate
the exact centers. I'm just going to
eyeball it a little bit. So technically, if
I look at this, I can probably look
at this seam over here because we know that
we have even values, and I can use that to
move it into the center. And over here, we
probably want to go ahead and this one is a bit trickier. So I'm just going to eyeball it. If I cannot really
see the difference, then most of the time the
users or the players and the people watching
your environment can also not see the difference. That's the general idea
behind this stuff. So let's have one
here, one here. And all these pillars,
they have supports. We are also going to
have walls down here, so we need to continue
on these supports. So there is total logic
in just having all of these supports in here and
making everything work. Yeah, that feels like
the center to me. Okay. Because concrete
pillars this large, they probably would not go
that long without having another supporting
pillar to hold the weight because
especially if there's, like, stuff on top, like, we don't know
what's on top of this. There could be an entire
parking garage on top of this like heavy cars and
all that kind of stuff. So you want always
whenever you're working on environments,
have a little think about, like how things are constructed, what is happening even in the
parts of the environment, you are not creating,
all that kind of stuff. It all helps for, like,
the bigger picture. What I can do now
is I can move this, and I'm just going to
snap it like this, and then we might need
to do some scaling. Oh, wait, over
here, this is one. So what you can see
is I move this. However, I want to make
sure that my scaling is reset back to one over here. It's always best to try and keep as close
to one as possible. Now, this one is a
little bit awkward, actually, because
it is so far away. However, what we can do
is we can just do this. Like that. And of course, the reason that we can do this
is because our environment will basically be
blocked off over here. Although I do realize now that I might need to
actually make my walls a little bit bigger because
I did not think about that, that, of course,
we have a ceiling sitting on top of
everything else. So that's something that
we are also going to do. That is why we are
creating the blockout. If I would go in and create all of my final
pieces right away, it's really difficult
for me to have a good logical look in
which pieces I need, how big they need to be and how they need to look and work. While if I make my
blockout over here, you can see that slowly with, like, very simple pieces, we can make this because
what do we have? We have a floor piece,
we have a side piece. We have two pill pieces,
and a wall piece. That's literally
all we need, which for a beginner environment
is really good. That's a really nice
number of pieces to just go ahead and work with. So I'm going to go ahead and
move this one over here. And let's go ahead and
continue to duplicate this. And we will make it so
that these pieces like perfectly continue over
and all that stuff. Over here for now, I am going to leave it
clipped in there. I'm not too worried
about that myself, because you should not be
able to see the clipping. And when I say clipping, I
mean that flickering that you can see whenever two meshes are exactly on top
of each other. Here and if I now
go, for example, over here, you can see that
Oh, that's really close. I just the tiniest
bit does not align. So let me just
quickly scale this up and now turn off
snapping because over here, you will be able to
see the clipping, see? Because it is in full view. However, over here,
because it is on the top, you will not be able
to see the clipping, so we can be a little bit
more flexible in that area. So let's just carefully
move this over here, and that should do the trick. Now, I can just grab all
of these pieces, actually. That's a nice thing
whenever we have an environment that's
like Willy symmetrical, is that we can grab
all of these pieces, and now we can simply
move them all over here. And it looks like I do need to change the ends a little bit. So let's move this here. And for this end, I'm going to it's probably best if
I just continue it on. Let's move this one out here, and I probably also want to continue this one
on here like this. And I want to then also
continue this one over here, although I need to probably, like, turn off snapping and
move it a bit more manually. Same over here. Just
wherever there is a pillow, it makes sense to continue
on these support. Like this. Okay, great. Let's continue this
one on over here. You can probably use snapping
for this. Let's try. I like to always use
snapping wherever I can just to make sure that
everything is correct. So we got this one. Letre off snapping again
because these ones are a little bit more
manually placed. So we have one over here. I think this will be a cool little environment
for us to create. And as you can see,
this environment because it's not too difficult, it takes very little skill. Well, it does take skill, but in terms of time, it's not too complicated. So it's a great start to
your journey, I would say. And then, of course,
you can pick up more complicated
tutorial courses. Sorry, environments. And of course, if you want, we have more complicated
tutorial courses. Just to do a shameless plug. If you enjoy this course, I would say, check
out our profile. We have a lot more stuff. This one, I'm just, like, kind of, like,
moving like that. Okay. So let's see. Let's go ahead and move this
one just like across here because we will
continue its wait. Let's do it differently. Let's start this one over here. And then just go ahead, and I believe we can clip it in here. Yeah, you probably won't see it. If we do see it, of course,
we will simply change it. Like I we see like Wi intense or weird clipping
going on in our final models, we can simply
change it later on. All of this stuff is really non destructive
that's we're doing. So we can just keep
changing it over and over again until we are happy
with our end result. So what I'm going to
do now is I'm going to grab these pieces. No, no. I was thinking if I
want to grab these. It would make somewhat sense, to probably continue things on. Yeah, okay, let's just do this. I was just thinking
like, do I maybe want more or less builders? But it's as easy as just removing them if I
end up wanting less. So let's move this one, for example, like in
the center over here. And let's say that
I now go over here, and I want to say like this one. I definitely do not
want to place one in the center because that
will completely here. That looks really strange when we have like
this nice view. So let's start with this. And now let's go ahead and
grab these pillars over here. And I might want to
actually keep this open. I might not want to have any horizontal pillars
sitting on top of this. It might look more interesting if we just leave
it open as like, it's like a continuation. So just to leave it like this. And then what I do want
to do is I want to, like, match up my pillars with the top a
little bit better. So let's grab these. Move them back a little bit. There we go, just to make
it a little bit nice. Even though our camera will probably not get very
close to this part, it's still good to do this. Let's go ahead and turn off or turn on our snapping
and snap this back. It looks like we need to
manually move it a little bit. There we go. So
we have one here. So these are like these
really large openings to let in more light. Like here. And I think
just double check. Have we not forgotten
any pillows? No, I think that is pretty good. So we got now an
interesting structure. We got all of our
pillars here that we can work with. That is quite cool. Now, what I will do is
I will get started by grabbing my plane over here. And I'm just going to
go to my mulling tools because I wanted
to show you this. So you can actually
addi polygons. If you have used
these shapes up here, what you can do is you can
actually press poli dit, which allows you to, for
example, select a polygon. And now what I can do
is I can move this up. So what I want to do is
I want to move this up. I don't need to be too precise
because it's a blockout. I know that now we are going
away from our scaling. However, the reason
I did that scaling was for the snapping
and we don't, we do need to do,
like, a little bit of snapping moved upwards. So I guess what you
can do is you can try to turn on the grid
point and snap to 100. And that should I don't think that one will work perfect because it's
not on the grid, so let's have a look. So if we can we do this. Okay, so ten, 20, 30, 40, 50, 60, 70, 80, 90, 100. So this is like 100
centimeters extra, which, um is I think it's okay. Yeah, I think 100 centimeters is okay. So let's press Accept. And now we can see that
because all of these cubes are the same, they
instantly update. So yeah, that should work. We probably still
want to place like some pillars against
the sides over here. So we can grab these ones. And that will also
break up the flat wall. So it's nice because the
wall right now looks really boring and flat
and stuff like that. So if I just grab this pillar, I just push it halfway
in here like this, instantly, this wall looks
a lot more interesting. And now just to keep
things extra consistent, let's grab these
pillows over here. And let's also go ahead
and move these up here. Okay, so we got that. Now, as you can see, our roof has been divided up into solid pieces along with, of course, open pieces. Now, we can watch again, we can probably use this wall, and else what we will do is we will just create
a ceiling piece. It kind of depends. But let's go ahead and start
by placing these, and then we can
kind of figure out how we want to do
things. So let's see. We right now have like a wall, so let me just quickly
grab this wall, and I'm just going
to turn on snapping. And I want to, first of all, double check that my wall, if I move it up here, if I duplicate it again, is the snapping still working? Yes, the snapping is still
working from all sides. That is correct. So that's why we went for
an exact scaling. So what I can do
is what if I move this here and I can
turn off snapping for now and just move this
into like a location. Let's say that our camera
is going to be here. So let's say that we want
this one to be solid. We only want to make these
pieces over here solid. So what I will do is we
have this now over here. However, I'm not too
happy about the, I don't know why that's working. I'm not too happy about,
like, the positioning of it. I know that you can
probably not see it. Yeah, you can
probably not see it, to be honest. Let's do that. Let's keep it like this
because we cannot see it because it will save
us an entire piece. Normally, I would say,
like, Oh, you know what? Let's make just,
like, an extra piece, but because this will save us an entire extra
piece of modeling, what I'm going to do is
I'm just going to go ahead and I'm going
to leave this open. I want to go in and let's see. Do I want to keep the
center one open over here or closed? That is a tricky one. Let's go. So this one
would probably be closed. This one would be
closed. No, wait, if I have that one, this
one would be closed. So this one would be closed
just to keep things even. And I will probably
also close this one and this one we would probably
cut our wall in half. To make it fit here. So for now, we can just kind of use this. The reason I'm not worried
about these edges is because we are going to use
these railings and place those on top of this to
basically block off our view. So right now, let's see, say, we make a checkerboard design, and then over here, we
make everything closed. I'm just thinking
about, like, what would the architecture have thought
about when he had, like, lighting coming in over here, and there is already, like,
a lot of light there. So I'm just basically
thinking about, like, how would he have thought about
doing this kind of stuff. We can go ahead and we
can move this one here. And let's see if I make this
completely blocked off. So we're turning on snapping, and we are just completely
blocking this off and just run it straight through
the ceiling over here. Another thing would be like, we need to make
sure that we cannot actually see the
ceiling sticking out, but I have a trick for that that I will
show you later on. So over here, there will
be a lot of shadow. I can't imagine if it's
raining and stuff like that, that you allow people
different pathways to walk. So, if it is nice weather, you allow them to basically
walk on the main pathway, and there's some sun falling through it and
that kind of stuff. And if it is bad weather, the people basically just, like, walk around here where it's nice and dry and they can
go this direction. That's how I like to think
about this specific design. Of course, this design has
been created by an AI, so I need to keep that
in mind and not follow it exactly because it might
not always be logical. Another thing is over
here, we can see clipping. But as long as there's
like a pillar, as you can see over here
sitting in front of it, that should be fine. So I can just go ahead
and continue this one on. Here we go. This one I'm going
to just like I want to keep this tilable,
but there is a pillar there. Tilable basically means
that whenever I have these two assets and
I duplicate them. So I move these across, you can see that the boxes are exactly flowing
over correctly. They do not do something like this where they're like halfway. That's something called tilable. We will go over that
later on because we're literally going to make a
special texture for that, but it's something that I
just want to keep in mind already that I want to make sure that whenever I move my
cube up and down like this, that there are pillars
below it that kind of like height the nasty effect
that it creates. Okay, so we have this
one and then we have a half one again over here. Let's go ahead and continue on. Like this. Yeah, I just hope that there
isn't too much shadows. If there is, then
we can just remove some pieces to make it
light up a little bit more. So we got this one, and
would I have a ceiling? It feels quite open
in those areas. I don't know if I would actually continue on my ceiling until the very end like this that
I can twy a few of them. Twilight a few of them. I think for now, what I will
do is I will leave it open, and I can always close it off later on if it
is really needed. So let's go in here. And then this is what I mean
where I need a pillar in between because you can see that there's quite a big
difference in the cubes. You can see that over here, the cubes do not align anymore. That's the easiest way I can
show you unless you have extensive knowledge
about UVonwrapping and tile materials and stuff. Then of course, you already know what I'm
talking about, I guess. But so let's say it as we
have those open, those open. And then here, we would
basically move this one here. And of course, it doesn't
line up perfectly because I did this
scaling really quickly. Don't worry, most
of this blockout, we will literally just
replace it later on. So it's almost like
we will place it now, but we will later on just replace it with the
correct models. So let's say that
we have that one, and then we want to have
this one also closed off to keep things consistent
and that one closed off. It does give us a checkerboard. So it might make sense
to have like this. Look, and we can now get
some heavy shadows and you can somewhere see the
fog coming through them, and we can have some nice
lighting in between. Okay. So now that
we have this part, I can see that we are
running quite late already. Let's save scene. Now we would go in and we
would have this piece, which I want to set to 0.5 because it is going
to be 4 meters long. And my general idea
was to basically block off these arches using these pieces in a way that
you can no longer see them. So I would place these here, and it is okay, actually, to have a little bit
of the pill showing. So I would place these here, and then now let's go ahead
and go over to snapping mode. And place this. The only thing that I'm worried about is that if I
do it like this, what will happen is it will look good from this
point of view, see? Here, like that looks fine. However, if I'm ever making a picture or
looking at it like this, it will look quite silly. So instead, what I probably want to do is I
just want to, like, have these cages go
all the way across the entire things
that we basically block off our ceiling. And that is something that we will work on in
the next chapter, and we will in next
chapter also work on our pipes and
that kind of stuff. There's one last thing
I want to do right now, and that is that we need to add something
to our lighting, and we need to go up here, visual effects and add something called a post process volume. Now, this one or you
can right click and scroll all the way up
to apply it up, sorry, to apply it to your
made a mess of this to drag it into
your lighting folder, or you can right click
and you can go let's see. Move to and then lighting. And that way, it is now in the lighting folder
over here, see? So what we want to
do is two things, we want to scroll
all the way down, and I will not go over this
right now because it's quite an extensive
note and simply scroll all the way down and
turn on infinite extent. Then you want to go ahead
and scroll all the way up, go to exposure, and you want to turn on
the exposure compensation, min brightness and
max brightness. I want to set the min
brightness and max brightness to one over here. And what that will do is
it will make sure that no matter where we look
in our environment, the brightness stays the same. So now if we just turn on our exposure
compensation and make it a bit brighter like 3.5. Now it doesn't matter
how close I am. Okay, maybe like a
little bit more. We are still able to, like,
preview our environment. I will actually go for
3.5 because our scene is, of course, gray, so that's something we will
change later on. So as you can see now, we have, quite a nice looking
environment already. So let's go ahead and
save, save our scene. And if you want to get right click and you
can play again. To, like, play around your
environment once more. And now we get, like, a
nice contrast between having these walls and these
shadows and everything, and also having the open feel with all of our sunlight
coming through it, although we still
need to work on sunlight and all that
kind of fancy stuff. Okay, cool. So let's go
ahead and continue on to next chapter where we
will finish our ceiling, and then we will also prepare our walls to go down over here. So let's go ahead and continue with this
in the next chapter.
23. 12 Creating Our Blockout Part3: Okay, so let's go ahead and
continue with our level. Now, what I mainly
want to do here is I just want to basically grab, let's say, one of these
long pieces here, and I want to push
it a little bit. Oh, I think I'm actually
going to go into my post effects that
we created last time. Over here, and I'm
just going to tone down the amount a little
bit more like this. Okay. So what I want to do is I want to actually make
this a little bit lower. I'm actually going
to push this into my concrete pillars so that we can no longer really
see it as well. And now this one is way
more flexible, I would say. So you can basically just,
like, push it down here, and then we can go
ahead and we can set the snapping to 100 and we can literally
just go like this. So just go all the
way across here. It's no problem. It's all about just blocking off our view. Did this move? Okay. And then over here, what
we would do is we would transition over to the
one that is 4 meters. So I can duplicate this, and I guess I can
just set this to 0.5 to mimic the
four meter version that we are going
to create later on. And now I'm just going
to turn off snapping, and I just need to make this a little bit
bigger over here. There we go. So we
have this one and I can now just go ahead
and I can grab this. That's a nice thing when
it's something that's not in an area where you can
walk around and stuff. You can just vary quickly. Add this extra stuff in here. So we can just have one here,
and then also one there. And then all we need
to do is block off these sideway areas,
and that's about it. So we have this one over here, and let's grab one of these
pieces, duplicate it. Move it There we go. Just go ahead and simply
cut it all the way across again until we have that one. Duplicate it again and check
where your pivot point is and move it here,
duplicate it again. Move one over here. I can see that there's a little spacing in between
there, but not there. So what I will do is
I will just kind of like up, do that. And finally, it's
duplicated and I believe that it would still
be beneficial if we place one over
here to kind of, like, close off that area. I can see that I forgot
to place one there. What I also want to
do is I just want to select these ones over here, and I want to move
them in a little bit. So yes, we wanted to grab
this version over here. Duplicated. Place it here. There we go. And now, finally, all we need to do is
we need to grab one of these versions and
set these also to like 0.5 to make it like
a four meter version. And this is just like the
version that basically goes wherever we have these stylistic
holes over here in our roof to basically
close off this area also. For this one, what I'm
going to do is I'm actually going to basically
place like another one up here because I want
to have it closer to the edge and also place
another one up here. Up here, I'm I don't know. Yeah, actually, that hole
might be a little bit too big. So let's also just go
ahead and clip one in here and move it like this. Move another one
here. Let's continue. See one here and one over here. Okay, so we got those,
and now I just want to grab these pieces over here. And I believe that over here, we should still be able
to do the same stuff. Yeah, that does
not look too bad. Because, of course, we are
looking at it from above, but you need to remember
that when you look at it from here, it
looks totally fine. It looks like there's
no clipping going on. Everything looks quite normal. So that's why we want
to kind of, like, just fake our effect and make as much use as we can of all of our pieces. And there we go. So now our roofing is also done, and once this looks like a
different concrete and it has, like, ivy and everything
growing on it, I think that this will
look quite logical. So yeah, that is
looking quite nice. Okay, so what we're going to do now is we are going
to basically grab all of the pillars on the
internal sides over here. I did not realize how
many bills I placed, so this might take a sack. But we are going to
basically copy these down probably by two floors. And then what we will do is
we will play some walls. And then what we have is we
have a quite nice looking Oh, hey, I did not place
anything in the center here. I'm not going to
ruin my selection now because I'm already doing
all of these selection, so I will go ahead
and just place that one after we finished this. Yeah, actually, needs to look like this now
I think of it. Or not. What did we do here? Oh, no, no, I just needs
like a center one, but I just forgot to place it. I can happen. So let's see. Is that everything? I think so. Let's turn on our snapping, Contras Contrave It pivot points all the way over here
and just snap this down. Contrac Contrave, snap it
down again. Like that. Okay. And what we're
going to do now is we are going to grab
a wall over here. And we are going to
place these walls, you guessed it down here. Then we will just create
a floor and then I will probably move my
entire environment up a little bit just because I
like to have the base of the environment always
on the very center. But what I can do now
is I can go ahead and I can duplicate this. I should only need
to duplicate this in one square and then
I should be able to just copy paste it everywhere. Let's go ahead and grab this one and just move it down like this. Scrape this version over
here and rotate it. Push it in here. That I don't like. It needs
to be pushed back. So it looks like
that I need to copy my walls over one more time. But first, let's go ahead and
just finish this one off, here and here, here, so that pushes back in. I will go ahead
and it might just be as easy as
turning off snapping and moving this forward a bit, but maybe not
because, of course, then we will get the same
problem on the other side. So it's something that
we'll have to double check. Let's go ahead and
duplicate this one here. I see. That will give
the same problem. In that case, what I will
do is, first of all, let's make sure that
this wall is behind it. We can also move it. Okay. So in that case, just grab one of these
walls and just duplicate it one last time like this. Then what we can do is we can
simply select this stuff, all of them, duplicate
them, rotate them. And move them here and
I'm going to turn off my snapping and just move
it a little bit nicer. Now, at this point, these are
actually quite a few walls, and we need to duplicate
them quite a few times. So what might be useful is to simply select all of the walls that we have right now to keep things a bit
more organized. Normally, I'm not
too worried about organization in my blockout because I simply am going to
change everything later on. But you can select them and just press the new
folder button. And just call these base
valves underscore zero, one, and doing that, it makes it easy because
what you can do is you can now go ahead and just
do a simple duplicate. Then later on, this is
more something, of course, for later on that if needed, we can easily select them. Double check your work.
That looks correct. Duplicate them again over here. Yeah, that looks correct.
And duplicate them again. Once again, double
check your work. Take T can go a little
bit further in Okay. Yeah, that's looking
pretty good. Now, all I'm going to
do is I'm going to go ahead and decide how
deep I want this to go, and I can just go ahead and
go back to my molling tools, create a box, and place the box roughly with how deep
you want the floor to be. So I want, like, trees and stuff to grow and just come out of it. So let's do something
like this. And now I'm going to go
into my added pool. And because this floor
is like really rough, I can simply zoom out
and simply select my faces over here or click and drag to
select your ertzes. And then simply place the
entire floor like that, click and drag to
select my word Cs over here and also move it and then
make sure to press accept. Okay, awesome. So we now
have our environment. What we can now pretty much
do is we can press A in our outliner to select literally everything except our lighting, and because our lighting
is in a folder, it has not been selected. However, because our base
walls are also in folder, you need to make sure
to, like, it's weird. You need to make
sure to drop down your folder because else
contra A does not work. Now you can see that now we
have dropped down our folder. Contra A is working. And the only thing
that is not selected is our lighting because
we have our lighting. Of course. For some reason, right now, the lighting
does get selected. That is weird, that
I may be exposed. There's an annoying bug
that when you want to deselect something in
a large selection, it keeps scrolling it all
the way down at the bottom. I don't know really why this is, but it's quite annoying
because it means that if I want to deselect my lighting because those are the only ones, I don't really care for moving, you can move them if you want. It's just habit. But now what I can do
is I can move this all up and I can look at my grid. Over here to nicely
have this on the grid. So this is our little environment
that we have over here, and I think our blockout is pretty much ready
to go right now. Of course, without foliage, there isn't too much going on. But what I want to do is
I want to save my scene. And I'm already going
to show you how to create a plane material. So plain material means that
we can turn this into, like, a nice white box, like the classic white
blockout that you often see. What you want to do is you
want to go to content, concrete hallway
and then materials, and we can just right click
and then press material. And just call this plane
underscore Master. I always call it underscore master when I create a material because you have
a normal material and you have something
called an instance. An instance is almost
like a copy of your normal material where
you can change some values. So just follow along
and I will show you. You want to open this up, and
now you can right click and move your mouse around to
go into this material view. What we need to do,
we are going to keep the super basic for now, simply right click
and type in constant and find as soon as you type in C as you can already find it, move your arrow keys down
to constant three vector. Constant three
vectors are colors. Now, when you have this color, you want to right click and
you want to convert this to a parameter and call this color. Basically, what the
parameter is is it is a way of
telling unreal that we want to be able to change this value in our
instant material, and I will show you later on. So now I want to set this value to be a little bit grayish, and I want to drag the white
slot into your base color. Next, you want to add something called a scalar parameter. You can right click
and type in S, CAL, and then you can
find it scalar parameter. Or you can hold S
and click once, and then you can create one. You want to call this Roughness. Oh, I mistyped. Roughness over here. And this is basically the
shine of our material. We want to set this
to 0.8 by default, and then drag this into
our roughness slot. That's all. We can now
basically save our scene. And the way that the
material instance works is because we turned this
into a parameter here, you can see that
this is a parameter because it says perm, and this says also perm. Now, if you save your material, you can right click
and you can create a material instance and call
this, for example, gray. Now when we open this, you can see that this is not
a real material, but it is like a view that only has these two
parameters in which I can change the color and I can change the roughness
amount over here. And that's basically
it. Now the reason I'm doing this is because I still have everything selected, and now if I drag my gray
on the materials up here, now my entire scene is white. At this point, what I
can do is I can go to my post process volume and temporarily move
the exposure down a little bit to let's
say zero. There we go. So that now we have this classic white look environment
over here. So we can go ahead and we can
save our scene like this. And what we want to do is we now want to go ahead and I
think we are already ready. Like, you can work
with the lighting, but I like to keep the lighting
separate until we really start getting invested
in this workflow. I'm just going to
quickly select all of my shapes by clicking
on the first one, holding Shift, and
clicking the rest. And then what I'm going to do is I'm going to go ahead and add a new folder and
call it blockout. I also want to grab my
base walls and also drag those folders into
blockout. There we go. Now, if you select a blockout, you can right click and you can press Select all descendants, and that we literally select our entire environment
in one go and ERC, so we can do whatever
you want with it. So that is now ready to go. We can have some nice tees and stuff in here. We
will have some foliage. We are now going to go ahead
and work on the pipes. And for the pipes, basically
what we want to do is we just want to
have a general idea of it because right now, I do not have any references for pipes or
something like that. So what I'm going to do
is I'm just going to go ahead and go online. And if I go to Google
Images and, for example, type in sealing pipes, and let's set the size to
large or something like that. Yeah, this is
great. This is like the kind of stuff
that I'm looking for. So let's open up that
image in another view. This one, let's try this one because this
is like the type of, like, mounting that I
was thinking about. So we can get quite some interesting
sealing pipes up here. Here, we once again, have that mounting system
that we can create. So yeah, that should be fine. Let's go ahead and
just drag this into my reference folder
on my other screen. And that should give
us a general idea of what we want so
we can go in here. And I can drag in my sealing
pipes just like that. Awesome. Okay. So we now have some sealing pipes, and
over here, what you can see, I probably want to
create a straight piece and like a band piece, and that might already be
enough in our instance because, of course, we are working on
quite a basic environment. Now, what I'm going
to do in here is I'm just going to create some very basic pipes that
will run along my scene. And what I will most likely do is I will have
them, let's say, come out of this wall
and let's have them run across here and then
have them go there. And maybe also have another one that goes across this side, and maybe you also have one
that goes in between here, like a bigger one that goes around here and that
goes into that well, I think that's enough. So what I want to do is let's
go into our modeling tools. Let's go grab a
cylinder over here. And I'm just going to
go ahead and I'm going to just place the cylinder. We can already turn
it into gray by dragging all our gray material simply on the
cylinder like that. And now, the first thing
that I want to do is I want to scale it down to, like, a size that I like. And this one we are not
going to make modular yet. We will do this inside of Maya or blender or
max, all of them. So what I'm going to do is I'm going to move this roughly to the height that I want, which
is something like this. And now what I'm going
to do is I'm going to basically move this
piece over here. It's going to edit, polly edit and select it,
and then move it out. And I'm going to
duplicate this piece. The reason I want to
duplicate it is so that I can later on create
an easy corner. Now, whenever you
duplicate a mesh, it is still the same mesh. You'll see when I select them,
it's still the same mesh, which means that if I
start changing this one, this one will
automatically also change. A way to fix that is by
basically going to mesh, duplicate and then just press accept now it will create
a copy of this mesh. Now, at this point,
what we can do? What's that? That's a weird graphical error. Now it's gone. Okay, weird. I don't know what that
is, so sorry about that. But basically, what
I'm going to do now is I'm going to
select the original one, and I'm going to go ahead
and I'm going to select it, and I'm simply going
to move it all the way up until the point where
I want to start bending it, which is up until
here, like that. So what I can now do is I can, for example, let's say that
I have two of those here. And then what I can do over here is I can grab this version. And I can bend this version. Now, bending is not an easy way to do inside
of the modeling tools. So instead, what I'm going to do is I'm simply
going to do this. This is how I often
just do my bend is I rotate my mesh using snapping, and then I press
extrude up here. And when you press extrude, it does like a small extrusion. I extrude it I rotate it again. I extrude it a little bit
more. I rotate it again. So like this, I'm doing
a custom extrusion. I extrude it again,
rotate it again. And because I'm SNAP
rotating, in the end, we will end up with a
simple 90 degree angle in which we can just go ahead
and continue our pipes. So that's not the best way, but a quick way to get a
pretty acrid looking bend. So this is probably the
last one that we need. There we go. And let's
just go ahead and do this. See? So we now have this one, and what I can do is I
can go ahead and I can duplicate this, move it here. And now I can see that for
this one, I would want to, for example, move this
one out a little bit. Now, the annoying thing
is that over here, we, of course, have a pivot
point all the way there. I'm just going to press mesh
duplicate because that's often the easier way
and then just move this over here and accept. And that's also how
we will later on fix this issue
where we of course, have two different lengths. Now what I can do is I can go ahead and I can
duplicate this. Actually, you know what? I can probably duplicate both of them. Duplicate both of them. Rotated 90 degrees. And let's go ahead and
move these in here. And because they can
just clip into the wall, we don't need to do much else, so we can move this one
here, and this one, I'm just going to
move a bit back. And it does not
have to be precise. I just need to see if it looks
good. That's basically it. So now having this, I just
want to see that if I look at it like this,
if it looks quite nice. The first thing that I
notice is that I want to probably grab my
cylinders and I want to move them down a little
bit to give a little bit more like a height effect. So we now have these ones done. The next thing that
I'm going to do is I'm going to select
these two over here, duplicate them, do
a quick rotation. And now what I want to do is
I want to move it up here, and I want to select
only my white one, and I want to go to scaling, and I want to set my cursor in the center between
these two scaling points. What that will do
is it will scale on two axis at the same time. So what I can do
is I can now scale this up to make it
quite a bigger one. And because, of
course, over here, this one would not look
very nice when we scale it up with only two axis points
because it is a bend. We want to push this back. Let's do a mesh
duplicate on this one. And we can now push this
one back over here, see? And now we instantly
have a thicker version that we can use, so we can right
click 90 degrees. And what we can also do is later on when we have
our final assets, we can probably, place
a lot more pipes if we want and really spend the time
in properly placing these. For now, I can just do
this. I can also grab, for example, one of these pipes that I have created already. And I can move them here to
basically have a pipe going. Let's see. I have the
pipe going across here. I think that will
look quite nice. So let's just clip this
one into the wall for now. Here we go. So let's see. So now we have a pipe over here, we
have another one here. This is starting to
look pretty cool. Now what I'm going to
do is let's say that I grab one of these
pipes and let's say if I also place like one right
here. I quite like that. I quite like having
another one here. But then the problem that we have over here
is that if I would go ahead and mash duplicate and move it here and
then do added poly, we do have a problem
over here that it is, of course, clipping
into another pipe. However, what we can do
is we can probably create like a joint version
over here where we have, like a T split. So that might look quite nice. So let's go ahead and do that. I leave this one here. And then we have basically
three pieces of pipe. I think having three pieces, a straight piece,
a corner piece, and a t piece should give us a pretty good foundation on how to do high ply
to low poly modeling, and it will also
make our environment look like a little
bit more interesting. Awesome. The last thing that
we are going to do now is, well, actually, we can
select our cylinders and just add a folder called Pipes. The last thing that we
basically want to do now is we want to
create a camera that resembles the position
that we have over here. Of course, this
is like a square, and we are going to go
for, like, a white view. But the way that this
works is you want to use your normal
viewpoint camera. To generate a position
that you like. And then you want
to go up here to the little tree dots and you want to go to
create camera here, and we want to create
a cine camera actor, which is basically
a cinematic camera. Now, if we go to perspective,
we can select it. And you can see that now this
is our cinematic camera. There are a few settings in here which we are not going to bother with too much right now. The only thing that
I want to do right now is when we have it selected, you can go ahead and
you can let's see. You can go up here and yes, you want to go
probably for, like, 16 by nine digital film, which will give
us a typical 1920 by 1080 L. You can, if you want. So our lens settings, we can often do
different lenses. These are basically
like the Zoom funks. If I go for, like, a
lens setting like this, you can see that it looks like a diesel camera. It
is really zoomed in. But I probably want
to go let's do 35. Let's set this to 35 to 35. And that might give us, still a similar look to what we have over here
where everything is, like, a little bit
closed off and that we only see
what we want to see. And, of course, we can
make more views like we can make a cool
view like this. So let's start with 35. And move it a little bit
in the center like this, like a cool center
view over here. And then another thing
that I just wanted to show you is that
in the film back, you are able to change
your sensor height, and what censor height
does is it allows you to give that really
cinematic look if you want. You can even do the
look where you have the eyes from the old movies when they are starting to fight. But that often can give you, quite a cinematic look, and you can use the sensor
width to basically zoom it out to make it also
whatever you want. I'm going to go 16 by nine. Here we go. And I will probably keep it
at this end for now. Another nice thing for
composition is if you have something dark over here
on the foregrounds. Whenever you have
something like that, it will work with
your composition to make everything feel
a little bit nicer. All of this is going to
change. Keep that in mind. We are going to change
all of this stuff, but we are now ready with
our unreal engine chapters. So what we're going to do
next is we are going to move back into our
tree Dmlling software, and we are going to start by basically grabbing the pieces
that we have created now, and we are going to
start by creating the final pieces inside of our treaty software and also inside of, for example, Zebras. So let's go ahead
and go over this in our next few chapters.
24. 13 Exporting Our Blockout Assets: Okay. So what we're going
to do in this chapter, this will be a
super short chapter is we are just going to
export some of these models that we have created in wheel so that we can input it into our three modeling software and we can actually turn
it into final models. So for that, all I want to do is I want to grab, let's see. So we have a pillar
that we need. We have a square piece, and I will make it. For now, I can do
this, but I know that I will make it like
half the size. We will have a floor
piece over here, and I believe yeah, the eight me, okay, so we use like an eight
meter piece, the most. You basically want to
grab the pieces that you want to end up turning
into, like, a final asset. We will have a
Horizontal? No, wait. That's not a horizontal
pillar piece. That one is this piece, but I can remember that we had, like, was it this
one? There we go. Yeah, horizontal pillar
piece over here. This is going to be a floor. And then the last one
is probably going to be a wallpiece which we
also use over here. And the rest like the floors
like these floors over here. And how you call them pipes. I don't really need to go ahead and grab something
from a wheel for that. I can do that without Okay. Okay, so these are
all the pieces. Nice, only four small
pieces or five. Let's go ahead and duplicate these and move them over here. And now what I'm going to do is I'm just going to go ahead and, like, nicely place them into
the location that I want. So that's I'm not really sure. The annoying thing about
reels that you never know which area is facing forward, because it's three
dimensional space, and there's no good way. I guess what we can do is you can go here and go to, like, front but it's not exactly like the easiest way to properly see if you're facing forward or
something like that. So oops perspective.
There we go. So what I'm going to do is,
I'm just going to guess that this is the front and we
could always rotate them. I want to just kind of
like line them all up a little bit over here
so that they are easy to place inside of
whatever program we use, of course, this tutorial course uses Max, Maya, and blender, so we will actually go over how to create
these in all of them. And this one, I wanted
to go ahead and set the red axis to 0.5. No, not the red axis.
There is a mismatch. Even though this
arrow shows red, it doesn't always mean that
the actual axis is red, looks like 0.5 for the
green axis, which is the Y. There we go. Okay. So we
got these pieces over here. Now, if you want, you can
figure out where the center is. However, the center
is all the way down here where it is covered
with all these assets, so then it might be easier to just go ahead
and select them. So what are we going
to do? Quite easy. I want to go ahead and I want
to go to my modeling tools, and I will start by simply selecting all of these
tools over here. And then I want to press
the mesh merge button over here, the MSHmRG. And then you can simply
go ahead and say, Modular two M for two modeling
or something like that. It doesn't matter. Just give
it a name and press accept. And now if you see the
static measure over here, you can press a little
search button with the folder to find it inside
of your content browser. So now we have a nice
collection of these models. Last thing that we need
to do is we need to go ahead and see our folder, and let's make Exports folder, and we have two Unreal. Let's make another folder
called From Unreal. Let's copy that location. And I would just
want to right click Asset Actions and press Export. And then you can
just go ahead and export it to the
location that we just created and just call it
modular two M and press Save. Now, we don't need
Vertex colors, collisions, or
anything like that. We just want the
raw models so that we can use them in our
tree modeling software. And that's it. Of
course, double check. There we go. It
has been exported. It is very easy to export stuff
outside of Unreal engine. So now I can go ahead
and I can delete this one and we can go ahead and we can save
our unreal scene. And in the next chapter,
we will go ahead and turn these modular models
into our final assets. So let's go ahead and continue with this
in the next chapter.
25. 14 Blender Creating Our Final Modular Assets: Okay, welcome. So in these chapters, what
we're going to do? These are the blender chapters. We already did the Max
and Maya chapters, if you wanted to follow those, we are going to get
started by turning our modular assets
into final assets, and then we will do some high to low polymodeling with our pipes, Uvon wrapping and just general, preparing everything
for the next stage. So in Blender, of course, we already went over the quick
introduction to Blender. Now I can start by just deleting everything
I have in my scene. And as you might remember, we have exported over
here are modular assets. So what I can do is I
can go File Import, and this is an FBX over here. And then if you just go ahead
and navigate to the scene, we can simply click on it and we can press
Import over here. Now, next to this, I also want
to just quickly go up here and check my metrics to
make sure that I'm at, like, because I just
want to know where I am. So if we go, where are you? Tools. Am I Oh, there we go. Item. I'm just really blind. Okay, so we are working
in meters, it looks like. You can also go up here
and just which one is it? I always forget. Ah, here, units in scene properties. Okay, so we are using
a metric system and we are working in meters. Yeah, that should look
fine. That looks correct. Okay. Awesome. I just
want to make sure that, like, my scene is correct. So what we're going to do is we are going to
use the MaxifstTols, which I believe is
something I have not shown showed you yet. So the MaxifstTols, they are
basically a set of tools. You do need to
install it. So let me just go ahead and bring up the webpage. Here we go. So if my audio sometimes sounds a little bit
strange whenever I say, we bring up the webpage, it's because I'm looking
on my other screen and my microphone is super sensitive when I'm
not talking into it. So basically, if you go ahead and go to maxivzt.gumrod.com, and then this link, or
you can simply look for Maxie Vs Quest, I hope
I said it correctly. Or what you can, of course, do is just type it into Google, maxVsTols or interactive
tools for blender. It's completely free. So it
is really, really great. And it's like a tiny script, they will tell you, like, documentation how to install it, although installing it
inside of Blender is very easy because all you have to do is go to edit preferences. And then here in your dens, you just need to press
Install and select the file that you got from
Gumroad. That's literally it. So what are the Maxfs tools? The Maxfs tools are a few
modeling tools that I prefer to use because
they are more standardized across
Maya, Max, and blender. These are a few tools
that you will also recognize inside of
Maya and inside of Max. As someone who is a heavy user of all
programs at the same time, this is just very useful because
it keeps everything more familiar because blender is quite a bit different
from the other software. So there isn't a lot that
we need to use in this. A few things that
we want to use is, for example, you have
the added pivot. The added pivot is really nice because instead of
dealing with my cursor, I can just simply move my pivot, press Add the pivot
again, and now my pivot is in a
different location. And also the quick pivot, which will just
center your pivot. Those are the two that
I use most of the time. It just feels quicker. Now we
have easy wireframe toggle. So instead I need to go
here and turn on wireframe, I can just quickly
toggle it here. The target well toggle, that one is it's like
for the welding. So if we go ahead
and if, for example, grab this one and you
would want to weld it, you can press Target Weld and you can then weld like this. Without this function, what
you would need to do is you need to go up
here to snapping. You need to set the
snapping to Vertzi. Then you need to go to your
tool settings up here, and then you need to
turn on outer merge, and then you might need
to play with Trashel. It's like a whole thing just
to do the same function, or what you can do is you can simply turn on
target Weltgle. You can see that it just
turns on some settings. So it's almost like a shortcut for some settings
and stuff like that. There's a bunch of
more tools in here, which we will not be using because the tools that
we have in Blender, they are quite enough already. So I just wanted to
quickly show you this. Okay, awesome. So now
that we have done this, what I'm going to do
is I'm first of all, going to go up here to my material and click on the base cool and I'm
going to make this a bit. Or, actually, you know what?
Let's just get rid of it. Let's get rid of our material to make it a little bit
easier to see everything. So we are going to
separate these models. We are going to place them
in the right location, then we are going to place
them in collections. This is all preparation for actually having them
into Unreal engine. Now, to separate these models, it is actually quite easy. All we really need to do is if we just go ahead and
go to Phase Select, you basically just want
to select the model. And although I believe
that can you do it? Oh, God. I'm now thinking of
Maya and stuff like that. You might be able to do
it all at the same time, although I normally
don't use that one. Yeah, I think you can join
them at the same time, but I don't think
you can actually separate at the same
time. No problem. So we basically go into
Addit mode by pressing tab, and then we press four, which if you remember is
a shortcut we set. It basically is the select linked shortcut
over here. So four. And then what we want to do
is we just want to press Q and press selection, which will separate selection. So four Q selection
four Q selection for Q. So it goes quite quickly. And Q is your quick favorites, which we also set
a shortcut for. And selection is simply the
where did we find it mesh, separate and selection
is this one over here. Or I guess what we could have
done is we could have just done separating loose parts, which would have
done all of them at the same time. Oh, well. So yes, I am warming
up in Blender. I do apologize. So I might sometimes press
the wrong buttons. This will become
less quite quickly, something because
I'm switching from Maya to max to blender
in a single day. So it's like a lot of stuff. Now the next thing
that we need to do is we need to decide where
our pivot needs to be. Whenever you export
a model to unreal, you want to export the
model when it is on 000 where these two red
and green lines meet. This is because the way
that unreal works is that it will always
place the pivot on 000. So if you have your
model on top of it, you will get this effect
where we have our pivot exactly in the
center of our cube. Now there are two ways that
we can work inside of unreal. But there's one way
where we can try and preserve the pivots,
which we will do. For example, over here, it is in the wall and the pivot
is in the center. If we place the pivot in the exact same location
inside of blender, this is good because
it will help us simply replacing our model. So then what we can
do is we can simply drag and drop our new
model in our static mesh, and it will instantly
replace it. However, something that might that's often nicer when you
work with modular assets, which are the assets
that are repetitive, is to have to pivot
in the corner because if you have to
pivot in the corner, now if I need to do any
type of precise placement, I need to go over here and you can see that
doing precise placement, if we don't use snapping,
it is quite annoying. However, you can imagine if your pivot is in the
corner over here. Sorry, I can't show
you because then I would ruin all of these assets. If your pivot is in the corner, you will be able to simply
go with your camera here, and then you will
be able to go way more precise in terms of, like, movement, and then you can also use some more
snapping features. So in general, what
I would say is, if you are willing to rebuild this entire
environment again, but using your final assets, then you can simply place your Pivot points
in the corners. I will show you how to
do this with this one. This is going to be our
example because we need to replace them anyway
since we did some scale. So for example, we have
over here our wall. Now, what do we
know of our wall? We know that we want to
press a quick pivot, which will exactly move
our pivot into the corner. And then what we want to do is we want to go ahead and snap the pivot to the base because this is in and reel.
You can simply check. It is always at the base in the center whenever we
use our modeling tools, so it's quite easy to remember. So we can go ahead and
we can press at a pivot, go to snapping and we want to snap to our faces over here. And then we want to move
this down like this, and now it has
snapped to our face. We can then turn off at a pivot, and now this pivot is
in the right location. Now, you can Imagine that now it is quite
easy because all we need to do is we
need to go to item, and then here we
have our location. We can simply click and
drag to select all of them and set them to zero, 00. And now this one is exactly in the same location as in reel. So it's nicely in the pivot. You can see that it takes
up exactly four boxes, which means 4 meters. So now what we would want to do is we would want to go ahead and separate this so that we can properly hide it and
later on can work on it. So all we need to
do is right click Move it to a collection
and grab a new collection. And we will call this one. Wall underscore 01. I always use Underscore 01 because I never know if I
want to make more variations, and I hate to have it like
Wall and the Wall 0102, it just feels disconnected. So you simply press
Okay. And this is really nice because now
in our seam collection, you can see that we now
get like a will 01 and we can simply turn it
on and off to hide it, which you can imagine, makes it really easy for us
to work on this. And just like that,
we can continue on. So we have over here a pillar. A pillar is also in the centre, so we can do a quick pivot, maybe move it up a
bit, add a pivot, turn on face snapping. Oh. Snap it to our face,
turn off, add a pivot, make sure that you turn it off because else you can no longer move it and simply set
this back to zero. Right click, move to collection. New collection. Vertical
pillar underscore 01. Let's do something like that,
and we can hide it again. Now, this one over here, our pivot point doesn't need to be in the
center. I believe so. The center bottom pivot needs
to mean the center bottom, which means that we can
just go to Max vistals. Quick pivot, add a pivot, turn on our snapping again, nicely snap it to the
bottom face, turn off, add a pivot, and once again, set it back to zero. And we can right click,
move to collection, new collection Arizon so
Pillar and score zero, one. Here we go. And just like
that, it is quite easy. So, for our railing, this is the one where we are going to make a
slight difference. And this is because our railing, remember how we did all
this random scaling. So this one has completely
different scale, which means that we need
to replace it anyway. So this is a perfect moment
for us to do proper snapping. So what we want to do is we
want to press Add a pivot. Then we want to
turn on snapping, but this time we want
to snap to vertices. And then what we can
do is we can simply grab and snap our
pivot to a vertice. And you can choose
which one you want. I tend to always use the
font facing vertice. I'm sure there is
some logic in it, but by now, I cannot tell you logic is more
like preference. It just often is
easier to place. Turn off Ade pivot,
and we can also turn off snapping and set
this one to zero, 00. And now just to really quickly show you if you
would, for example, mimic our grid snapping by going to increments
and absolute grid snap. So now you can imagine that
if this would be unreal, I can go ahead and
duplicate this and I can really closely
and perfectly, and if I would
turn off snapping, I can really closely
and perfectly snap. Also, cool thing is that if you are working off the
grid inside of Unreal, unreal also has vertex snapping. So what you can do is in unreal, you can also just snap to
the verte which makes it way easier if your PIV point is here compared to in the center. I un reel, you just
press you hold V, and then you move
your curse around, and then it will snap towards C. I believe that's the one. But anyway, so this one is now also ready to go.
Move to collection. New collection, ailing score 01. Let's do that. Height. And then we have this one over here. We can just go ahead
and do a quick pivot, and I assume it will
be at the bottom. Yeah. So if you sometimes
hear me sniffing a bit, it's because I have
a slight cold, but I'm really trying to
keep it to a minimum, even to the point of passing
the video sometimes. So what we can do is
quick pivot, add a pivot, snap it two faces, Tah dah, turn off snapping, turn off add a pivot,
and set it to zero. Okay. Awesome. So all of these are now ready
to go. Oh, wait. I need to move this to
collection floor score 01 now we have one leftover, but this is just like
an empty because we separated all of our models, so all that is left is just like an empty shell,
which we can delete. Okay, awesome. Now, as
you can see over here, because we exported this model from unreal engine,
it is triangulated. Now there's a few
things you can do. You could go ahead
and just, like, create a new model
by going to mesh and cube and perfectly place it
in the exact same location. However, it is way
easier to simply remove the triangulation
of these models because they are really easy. The most basic way of
doing it is simply by going to Edge select, holding Shift, and
selecting all of the edges and then pressing delete and pressing
dissolve edges over here. That's the easiest
way of doing it. There was another
way of doing it. Inside of blender, you go
to Oh, God. Why did I? So it's like Quadify
but to be very honest, or was it in my modifiers? I completely forgot
where it was. If I can find it
in a few seconds, I will just leave it because
it's not that important. So it would have just
been cool to show you, but I don't think I can find it. I think it's called
something like Quadify. That's what it's called in
all the other softwares. But to be honest, I rarely use it inside of
unreal or inside of blender. So I'm not sure if it
is somewhere in here. They're like, Oh,
yeah, Trist to quads. I think that's, okay. So here, they do not
call it Quadify but Trist to quads
inside of our face. Yeah, we can add it to our
quick favorites. Why not? And then what you can
see is thy it's best, and I say Twy it's best to remove all of
the triangulations. For very simple models, this is totally fine because
it is able to do that. However, for more
complicated models, if you just do, Scott, for more complicated models, it can cause problems, and it can break your geometry. So if you have a more complicated model
and you want to do this, absolutely triple
check your work to make sure that it does
not accidentally remove Virzi because you
cannot always see that it has removed an edge
with those models. But okay, everything
is now done. So now, to turn this into final, our wall is going to be
the most as easy one. It's done. That's it. We're done. So basically, the reason why we don't need to do anything on our wall is because it needs to be
repetitive from all sides. So this wall pretty much
only relies on textures. We are not making anything in here because it's a
plain concrete wall, so we don't need to really
do anything for this one. Now, our vertical pillar, for example, it only needs to repeat on the top
and the bottom. Which means that
we can just like a small bevel over here. So, let me just do this. I press Alt x whenever I want
to select all of my edges. So everything behind our model, which is just our X ray mode. And what I can do is I can
press Control B. Yeah, just ignore the UV lights for now and we can just
give it a nice bevel. Now, I like to then go
down here into my bevel. And it looks like I set
the width to 1.3 meters. That's a bit Strange. But okay. Don't
worry about this. This is not 1.3 metres long
or something like that. I'm gonna go for an
even value of 1.5. The reason I want to
do that is so that I can do it with our other assets. So we now have this bevel, and this is because we are
later on going to sculpt these assets inside
of sea brush. And when we are going to sculpt these inside
of sea brush, it's nice to have an
extra bevel to work with. Now, the next thing
that we're going to do we can also use weighted
normals on it if you want. So these bevels work the
same way where you can go in art your weighted
normals, like this. And then yeah, you would need to separate these pass in order
to basically remove them. But basically, we're not
going to do that right now. That's something for later.
I'm going to press contre R, and I'm going to place a
few segments over here. Something like this, quite
uneven, just like that. Now, why do I do
this? Very important. In real life, nothing is
ever completely straight. Right now, because this is TD, this pillar is absolutely
perfectly straight up until, like, the micro whatever. However, in real life,
this doesn't work, especially with something
organic like concrete. So it will feel more realistic whenever you
just kind of, like, wiggle around the Oh, I
didn't mean to press that. Whenever you kind of wiggle
around some of the edges, you don't want to
go too intense, but it's a very seldom
detail to kind of, like, move them around. And the nice thing is that
because this is a pillar, whenever we move these
around like this, we can simply rotate
the pillar around, and then it will look like we have four different pillars, because the pillar will look
different from this side, this side, this
side and this side. So as you can see here, I'm just going to basically
give it some very small And you can do this with
almost every asset. Of course, if you have
an asset that is metal, it would not make
too much sense. And you most you
want to go ahead and you want to do this
on long assets. So if an asset is really short, it also doesn't make sense. But if you have a
long organic asset, like for example, over here, we have our pillar, of course, then it is great to do this kind
of stuff over here. And we will also be doing
this for multiple pieces. So just like that, we now have other some small variation. I feel like maybe this one might be a little bit too much, so let's turn this back. And also, I don't just do it
in one Axis, I try to, like, always just grab the center of my pivot because else I need, just doing this, it often feels not as nice as when I
just, like, mainly do it. I do feel like this one is
also a little bit too much, so Yeah, let's go for
something like that. Okay, so we got that one done. Now we can move on
to the next one, which is our horizontal pillar, and our horizontal
pillar needs to repeat on these two ends over here. So we can just select all
of these hatches, contra B, give the bevel, and set it once again to 1.5 so that we can keep this
nice and consistent. Now, for this one, we also want to go ahead
and press contre R and just give it a
few segments like this. Be a little bit more careful
about moving it for this one because it needs to support a lot of stuff over
here at the top. This means that we don't want to make really drastic
changes to it. And most of the changes
that we do want to make, we want to make near the bottom. So we can go ahead and we can
move this one, for example, over here a little bit,
and let's say that I move, let's grab these And I also
want to always in this case, I want to always extend them in because if we
extend them out, it might cause problems with other messes clipping into it, which basically means
that the meshes are intersecting with these. Here, see, I'm just going to
make this one really subtle, but you can see that there is some slight
variation going on. Okay, so that is this one. Now we have the next one,
which is our railing, and our railing needs to
repeat from here and here. And the bottom of the
railing is on the floor, so we also don't
want to change that. So we basically only want to change these values over here. But because it's a
railing, I'm going to make my bevels a
little bit bigger, just because it might feel a bit nicer, something like that. And once again, let's
give it a few segments. Like this. And this railing, we will be using also a lot, so don't go too intense. Another thing is that if you
make this way too specific, because we are using the
railing a lot of times, you will be able to see the same variation over
and over again. So that's why you
don't want to go too intense with the variation. Now, I personally won't be using these specific assets because I will use the three
SMx version I created. However, I still, of course, want to show you the right
way of doing things. And our floor, we don't
need to do anything because it needs to
repeat on all four sides. Okay. Awesome. So I would say that let's press dot on
your numpad to zoom in. I would say that at this point, we are ready with
our modular assets. So what we can do later on is
we can go ahead and we can export them to brush for sculpting and all
that kind of stuff. But that's something that we will work on a little bit later. So what we're going to do is we are going to
save our scene. So in our safe folder, we can call this modular
assets and press Save. And now in our next chapter, we will go for a little bit
more complicated modeling where we will be
modeling our pipes. And in this technique, we will use high poly
to low poly modeling, but I will go over how to
do that a little bit later. So let's go ahead and continue with this in our next chapter.
26. 14 Max Creating Our Final Modular Assets: Okay, so what we're going to do now is
we are going to get started by actually creating our modular models
inside of three S Max. And of course, you can also find the same chapters in
Blender and in Maya. Just know that once we are
done with all of our models, I will be using the models
I make in three as Max. So if you are following the
Blender or Maya versions, there might be a slight
difference in how they look, but that should be
nothing too special. So what we're going to do is we are going
to get started by importing by going to
File Import and Import, and we are going to import that FBX file that we
exported from Unreal. So here, exports from Unreal. So that's a very easy one. And let's press
Okay. There we go. So this is what
we got right now. What I like to do, of course, we already went over the
basics in previous chapters, so I will not go
over that again. I'm going to go down here and
turn on my edge surfaces. And I want to probably turn on the layer explorer up here, which will show up, or you can just drag it to the site over here,
which is great. I like to use this one a lot. Okay, now, a few things that we're going to do
is we first of all, need to split up these models. So the way that we can
do that is I want to actually show you two scripts
that we are going to use. And these scripts,
they are super useful, but they are
specific, of course, to three a Max compared
to other software. Now the first one is called
Text tools over here. Text tools is a really
powerful UV unwrapping tool. You actually also
have it in Blender. So you can also find in Blender. All you need to do is
go to renderhjsdt net, and then you can
find text tools, and you want to get
the trees Max version. So having this, I will just
show you how to actually install this kind
of stuff just to get started with this wide away. You will basically
just simply press this button over here,
text toools MsB. And in the case of this one, what you would do is you would
simply drag this into Max. And then you have this button which say
what you want to do, and you just want to press
Quick Install, and that's all. So, of course, I
already have it, so we will go for
HowTAx artist later on. The second one, which
is Willy Awesome, and I wish the other
software had this one. It is called Sol Burn Scripts. You can go tonallevins.com slash ActstScIpS
SolbnScIptF TES Max. Although you can just
go to his main website, or you can just go into
Google and type in Sol Burn scripts for Tres Max
and you can find it here. You basically want
to scroll down, and you want to get
the latest one, which is this one over here. You would simply click
it and then open it up. This one installation works
a little bit different. All you need to Oops. For some reason, my
window is massive. Let me just fix
that. There we go. So for this one, all you need to do is go to your installation
folder for Tres Max, which is like Windows, program files out the desk, Tres Max most of the time. And you simply want
to drag these scripts in here like this, and then it will ask you,
do you want to continue? Yes. Let me just
turn that for all. And then they will be now dded automatically in
the correct locations. So that's often the
two ways that you would install scripts
inside of Tres Max. Then you would want
to restart Trees Max. I don't have to do that because I already have them installed. But what we are going
to do is we are going to add them to a
toolbar up here. You can do this by simply going to customize user interface. And in here, we will have
our tool bars over here. Now, in our tool bars,
what we want to do is we want to just go for
the group menu Y. It might be a bit
overwhelming sometimes, but you often only need
to use the main UY because that's everything that has to do what you can see. And if we scroll down here, the first one that
we want to find is text tools in the
list, text tools. Now if you want
artist to a toolbar, it's as simple as clicking
and dragging it on here. Now, I already had this one, so I will just go ahead
and right click and delete it again because
I already have it. And now it is just
a simple button that you can press,
and there we go. The script is active, and
we have our text tools. UV Nmapping we will, of course, go over
a little bit later. Now the next one is
the sorben scripts, which you can find over
here, sorben scripts. And it might be a
bit overwhelming, but the one that you
want is you want to get the listener why. Let's see. I can see it based
upon the icon. Sorbn scripts, listener Ui and just do the same thing in dragging it into your toolbar. Now, with that done, I just wanted to install these scripts because
they're very useful. The Sorbonn script,
it is basically a collection of a massive
amount of scripts. So this is super
useful if you want to do a bunch of
stuff. I don't know. We probably won't
use a lot of it, but I just wanted to
give you this resource. So why would I install this one right now mostly
for fun and to show you. But also, one thing
that I want to do is whenever I import a model, I want to right click, convert to and convert it
to an AddiplePol. You don't really want
to use an Addiple mesh because the Adtb mesh is basically the old
version of Added Polly. Added poly is the
more modern version. So if we press five, we can go to Element select. Now, I have all these models, and they are one big chunk. I want to go ahead and I want to just separate them
into their own models. I could go in and select
one, scroll down here, press detach, and press Okay, select another one and
another one and another one. Now, what I can also do is I can go ahead and go
to SolburnScripts. Scroll down and find the object detacher and
press Apply and apply, and then it will instantly just separate every single
elemental object. So I just wanted to
basically show you this. Okay, now, the next
thing that we want to do is we want to
organize this in layers. The reason for this is
because when we export something to Unreal
engine, the Pivot point, which is this one,
will always be at 000, which if you look on
your grid is where the black lines meet. As it is always at 000, we would need to have
all of these objects overlapping in order to have the pivot point on
the right location, but we cannot work like that. And this is where layers
basically comes in. I can select a piece.
I can add a layer, and the cool thing
is I can right away give it also a name. So I can call this, for
example, floor underscore 01. I always like to do
underscore 01 because I never know if I need
to make more variations. Right now, even if I have one, I just want to make sure now what I want to do is I
want to select the second one. Go ahead and create the layer, and I will call this one
ailing Ling underscore 01. Now, a thing in Tris Max I will see if I can find you the
bug. It is a bit annoying. When you have created a
layer and you want to create one white after. So let's say I select this. It still has that
layer selected. What will happen is if I now
create a layer right away, you can see that it gets
added into the other layer. So this one would be, for
example, Sonto filler one. And then what I would need
to do is I would need to click on the layer
and drag it out. But if you have a lot of models and everything like
that, this might be annoying. So what I recommend is, let's say that we have this one and I want to now
grab this piece. One sec. Let me just see
if I can There we go. So now we have this
situation over here where we still have our layer select
that our model selected. Simply click empty space, click on the model
again, and now it will just have the
layer in the base. So this will be Pilar
underscore 01, see? And then or you can
just simply click an empty space right
away over here. And then the last one is going
to be Well, underscore 01. Perfect. Okay, so now
everything is nicely organized. We can, for example,
minimize this, and now we can use the I icon to quickly hide and
unhide our pieces. So before we create
our final models, let's talk about pivot points because that is quite important. Sometimes things
are a little bit tricky when you create
blockouts inside of NWL and then need to
convert them into final models inside of
your modeling software. So for example, here in NWL, the thing why it is tricky is
because the BIVAPoints are set always into the center of the model when we
create them in Unwel. Now, this is fine for pillows, but sometimes for walls, what you want to do is you want to have the
center in the corners because that way you can
snap a little bit easier. Now, it's not totally needed, but it's like a habit that I have that makes
things a bit easy. So I will show you if I go ahead and just turn everything
off except for the wall, here we have our wall. So inside of unreal engine, the way that this would work is you would go to hierarchy, and the pivot point
would be here. Let's press effect pivot
only, center to object. And now what we need to
do is we need to set the Z xs over here to zero. Oh, yeah, here, see? So
this is what I mean. So we actually don't
need to sell it to zero. We need to snap it all the
way to the base over here. This might actually be a little bit tricky
now I think of it. And what's the best way? So there's a few ways
that we can do it. We can turn on snapping. And then if you right click on the snapping, we
get our settings, you might want to try snapping
to your faces over here. And now quite important, if you go to
options, you want to turn on enable
access constraint. The reason you want to
do this is that you can carefully snap based
upon all these axes. Sorry, depending on how I move, I know, or was it already
enabled. Oh, yeah, sorry. Enable axis constraints. Sorry about that. I
did not realize that. Normally, it's
disabled by default, so that you can properly
move around these axis. And if you turn this
off, you are ending up moving in every
axis at the same time. So turning this on,
we might be able to move this down there we go, and then it will
automatically snap on our face because we have
face snapping selected. So that is one way that we
could have this over here. This is probably the
most accurate way. Or what you can do is
you can simply turn off snapping and very carefully
move your model and zoom in. Move it again. Zoom in. But of course, this is
not super accurate. There will always be the
tiniest bit of, like, a change. But see like this, you
can place it on the grid. That's more if you are in a hurry and you just want to
quickly get something in. So we now have to pivot point in the exact same position as
we have into Unreal engine, as you can see over here, see? Now, this is fine, because this mesh is exactly what was it four by 4 meters or
something like that? This is fine. And what
I would do is I would set this in the
center of my scene by right clicking on the
little arrow buttons down here to snap it
back to the center. And just like this, I can go
ahead and turn on snapping. And if I snap to my grid points and let's set my home grid over here to 100 so
that it is one meters, I am able to nicely snap
this by one meters. However, if you ever
have a model that is not at an even snapping
point and stuff like that, this becomes a lot
more annoying, and that is why sometimes it is preferable to press
effect pivot only. And set the settings to be vertex snapping and snap this
over here to the corner. And if I now turn off
a fact PIV only and snap this back because
now you can see that now, if I go ahead and
duplicate this, I am able to snap this
much more accurately, and I'm also able to if ever needed inside of
unreal engine, do, why acrid snapping like this or simply zoom in if I
need to do any changes. So trust me for experience, having the pivot point on
the corners like this for things that need to snap
together is often way easier. Problem with this is
if I do that now and I will replace this model
with the one from Tris Max, all of my walls will shift up a little bit because the piv and point is no
longer at the center, and I would need to
replace my walls. So based upon with
that information, it is up to you to think
about if it is needed. If you want to spend the
extra time to fixing the walls after you
did the snapping, that is totally fine. This might be useful if you are creating a much larger
environment than we are, and the environment
needs to have way more wild pieces
and stuff like that, then I recommend to set
the PivPoint correct. However, for a quick small
environment like this, it is probably easier if we simply keep the pivot
point in the center. That is basically my take on it. So just take it with
a grain of salt. That is what we are going to do. Maybe for these pieces, we might be able to do normal snapping because we need to change
them a lot anyway. So, we can do the normal
snapping for that. But for the walls, I'm going
to keep it at the center. So this is really like a case
by case basis, so to speak. So for my wall, a fact pivot
only center to object, and then set the Z
axis exactly to zero because you do want
to have the pivot at the bottom else when
you drag it in, you will drag it
in in your wall. Whenever you drag in your well, it would literally
be like, here, this is how you would
drag it in like this. And you don't want
that. You want to Oops. You want to be able
to drag it in and that it is at the
base like that. So that is the general take. So now let's go
ahead and just start by doing all of
our pivot points. I don't want to
spend too much time. So pivot, moving it down. Let's just double check. Yeah,
that's all looking good. Great. Now we can go
ahead and turn off a wall railing one
in railing one. What I want to do
is effect pivot, and this time, I will move it. And I will simply select the little circle to move it on every axis and
move it down here, turn off efectPivot only, and reset this one
to the center. Our pillar. Our
pillar is quite easy. What we can do is we can go
ahead and effect pivot only, center the object, turn on face snapping and simply
move this down at the base. And you can just keep
this window open. I often just have it on
my other screen even. And then I can just go
ahead and reset this because pillars are totally
fine to have in the center, since it is a standalone object, it doesn't have to snap
against another object. So we have that one,
a horizontal pillar. That one is a bit
more interesting. So let's have a look
how the pivot point is tweeted for this at
the bottom base. And we use this one
a lot, don't we? Yeah, so this one is probably easier if we just keep
it at the bottom base. So that's a fact
Pivotl center object, turn on face snapping, and I will from now on, do this on my other
screen and just tell you whenever I turn it
on. There we go. And we can just go
ahead and once again, reset this to zero. And our floor piece over here, just double check
how we did the. So the floor piece is just
simply in the center, which is also fine. Once again, if you want, you
can set it to the corner. But for such small environment, it would change a lot
in the environment. So effect pivot only
and simply leave it in the center and
reset it over here. Just want to double check or is my pivot point at the base. Oh, yeah, my pivotoints
at the base. Sorry. So you want to go
ahead and you want to just simply snap
based on the faces, move it down, and
then reset it back. There we go. Okay, awesome. So all of these pieces
are now ready to go. We can turn off our snapping,
and now what we can do is we can turn these
into final measures. Now, for these measures, if you want, you can
create brand new models. You can go to box and
just a quick trick. So yes, you can go to box
and set the length width, and height exactly the same. Or what you can do
is you can turn on snapping and you can
snap it to vertex, and then you simply
basically drag here. Sorry, whenever this happens, this happens because we don't have the correct layer selected. So press a bot and over here in our layers because we are working on
the floor piece, select the little layer
button over here, and then you'll have the
floor piece layer selected. We create a box and we
simply click on this vertex, and then we click on
this vertex over here. And now we can see
800 by 400 by 20, exactly the same dimensions. This is great if you,
of course, have cubes. If you have anything
more complicated, then it makes sense to
simply create a new model. Now, why am I showing you this? So we can now
delete the old one? I want to show you
some more techniques just because I want to give you I want you to cover a lot of other areas that you can use. Another one is that we can
remove these triangulations. So these triangulations,
right now, they are not handy. Let me just turn on snapping. And the reason for that is because we cannot do
proper modeling with them. Whenever you model, you
don't really want to have too many triangulations because it will limit your modeling. For example, now it
might just work, but let's say I want to
add bevels over here. I can do Contra B.
And I can do this. And sometimes now
it doesn't work. Oh, I have a little UI bug
because of my resolution, but sometimes it will break the model and we
don't really like that. I don't know if I
can make it break. Here, I can sort of see? Like, it's not the best. So what you would want
to do is you can or simply select all of these triangles over here and press control backspace,
and that will remove them. So now it is just
like a default cube. Or what you can do and this one, take it with a grain of salt. This only works
with simple objects that have very
basic triangulation like cubes and stuff like that. Else, you might create bugs. And if you are a beginner, you might not notice
these bugs yet, and it will just give
you more trouble. But you can go to
Geometry over here, and then you can press
this little button and press Quadify selection. And that will basically try to get rid of all of the triangles, which it is really good at
doing in these square models. Those are the three ways that we can create a clean slate. So let me just go ahead and use the qualify because this
is a very simple object, and you can see that
if I do it quickly, you can very quickly
prepare your models. This is also a way that you can see about the triangulation. Remember how I told you that game engines automatically
triangulate their models, and this is what will happen. When you export it
from the game engine, it will stay triangulated. So we now have our models
prepared and ready to go. So what we're going
to do now is we are going to turn these into
final modular pieces. This is actually really, really simple because these
are the most basic models you can have because they're
simple concrete pieces. Let's start with, for
example, our floor piece. Our floor piece needs to
be modular and it needs to just be repetitive over
and over and over again. Now, this almost feels like
cheating, but it's done. We literally don't have
to do anything because this floor piece relies mostly on like the
concrete texture. It's simply a flat
concrete plane. There is nothing else that
I need on it, to be honest. So that's also one of
the reasons I took this because we can go for
something really simple. Now, let's take the next one. Our horizontal pillar over here. Our horizontal pillar
needs to be repetitive. Sorry, so it needs to snap. In these directions in
the horizontal direction. However, it never has to snap
in the vertical direction. This means that all I want
to do is I want to add some bevels on the vertical
direction over here, and I will show you what I mean. So right now, if I would go ahead and
I would add some bevels, we add these bevels for
our weighted normals, which is the one we
talked about before. Weighted normals can make our
model feel hi ply and high detail without
actually having a lot of high resolution
geometry in here. If I would go ahead and press Control B and I would go
ahead and bevel this, you can wide away
see the problem. If I would now go ahead
and want to snap this, and here you can see a
perfect moment when here, see the snapping
is not quad, see? So with this one,
the snapping is not adequate because our
models are not equate, and I think the reason our models are not
accurate is because I might have accidentally
exported one that we scaled. So what I'm going to do is let's just go ahead and do this. And for this one, let's go
ahead and go to our scaling. I'm going to turn on
my snapping select this piece and snap
it to the grid point. You always want to make
sure that you stay on grid points and try to
go for even numbers. If this grid is 100
centimeters because, remember, we set it to 100. I recommend to go
from, like, 25, 50, 100 and then often I
do like 200, 400, 800. Those are often
like my increments. Try to stay with even numbers. If you go uneven
and never ever go like 25.7 centimeters
because then it's useless, then it's no longer modular. So try to stay with
even numbers like this. So now I have fixed this. Let's go ahead and continue
with my explanation. What I was saying is, let's
say that we bevel this. What will happen is if
I would duplicate this, you will see a wide way here, see, now it works that we now have a seam
in between here. Sometimes this might be nice, but we want to make
it seem like this is a really long concrete
pillar that keeps going and not like a pillar
that is made out of sections. So the way that we would
fix this is simply, in this case, yes. I would only bevel
these sites over here. So simply cham for them, and then we can decide on how
big we want the hava to be. I would want this to be
quite a small chamfer. It's going to be quite
sharp, concrete. But even here, you can see even in the AI generated images, but also in the
real live images. Here, you can see that there are chamfers often on concrete. See? That's what I mean. Like this is just a
default often on concrete, which is great to use. So what we're going to do is
we are going to go ahead. And chan for this. Let this let's set them at like one
centimeters over here, and then simply press
the Okay button. Now, don't forget these
might be simple now, but these meshes that have the actual concrete
that we can cha, we will also do some
sculpting on them. So right now, this
is pretty much fine. Yeah, this is fine because we will need to do some
sculpting inside of seabush so this mesh will
actually change later on. There's a few more things
that I want to do. First of all, a general rule, and please pay
attention to this. A very important rule
is that in real life, nothing is perfectly straight. In three D, right now, this is a perfectly
straight piece of concrete. This never, ever happens. Even if you look over here, I know that it's AI generated, but you can see that the concrete is never
perfectly straight. Now, of course, whenever
you look at something, you look at concrete or you look at metal, if
it is, for example, a small piece of metal, let's say over here, it
looks very straight. So this rule that we're
going to do now applies mostly to really long pieces
or really organic pieces. So what am I talking about? What you always want to do is in your model, if
you, for example, have an organic piece that
you know will never be really straight inside
of real life, like, for example, concrete, bricks, that kind of stuff, or you have a really long piece like a
really long metal pillar. You want to just
go ahead and add your swift loop over here and you want to add
a few segments. Let's say we add three. The reason you want to do
this is because you want to make this mesh
feel less perfect. Now, this can be subtle, but it can be more intense
than in real life. So let's say that I
move these two vertices down a little bit over here, and let's now click and track, and let's say I move
these ones up a bit. Don't make this too intense. If you make this too intense, it will be too noticeable whenever we duplicate
this over and over again. But right now if I turn
off my edges and faces, which yeah, I need
to reset my blender. You can see that over here
now it feels less perfect, which already feels
a little bit nicer. Yeah, I need to restart
Max after this chapter. So this will basically make things feel a
little bit uneven. Never touch these because
if you touch these, it will no longer be modular. They need to be
exactly the same on both sides so that
we can repeat them. So what I will do is I will go ahead and I will
move this one. Over here. And we
are only looking for big changes right now and
this one over here like this. Yeah, that's pretty much fine. It just needs to be subtle. So why are we not going to go in more detail,
like, for example, moving this one down here to
give it even more variation. Quite simple because
we are going to sculpt on this mesh
inside of C brush, and that will also add additional variations.
You can do it. If you want, you can go
in here and you can, let's say, let's move
this a little bit closer and stuff like that. And let's say that we also
move these ones here, see. So we are just like
some micro variation. It is also a good way to add detail to very
simple models. Now having this, there is one thing that I
want to teach you. So yes, we will use
weighted normals. However, if weighted
normals require bevels, this is because the bevel
is like the buffer zone. If I add a weighted normals now, let me just turn
off my edges and faces by using the weighted normals
modifier script over here, and I will turn on
Snap to largest face, yeah, that's fine,
actually, blending of one. Now, what you will
see happening is that the weightedomals work fine on the beveled corners
because we have a buffer, but because we did not
bevel these corners, things are broken over here. Not very nice. So
what we're going to do is we are going to go
back into my added poly, and I want to go to Phase select and I want to
select these side faces. What I want to do
is I want to go ahead and press clear
A out of habit, set these side faces
to, for example, one in our polygon
smoothing groups down here. And then if you press control
I to invert your selection, you want to go ahead
and once again, press clear and set these
faces to, for example, two. So what we did now is we
gave it to smoothing groups. This means the smoothing
group is basically like to make something look soft or make
something look harsh. I have spoken about that before. I, for example, when I use a
let's go horizontal pillar. For example, when I
use a cylinder over here and turn off my
edges and faces, see? This is now smooth,
and this is harsh. It's just a way to manipulate
our smoothing look. So basically, now
having this done, we can go to our weight normals modifier and press
use smoothing groups. And then it will ignore
these two faces, but it will still add our really nice weight
normals edges over here. And snap the largest phase. Let's see. In this case, snap the largest phase creates it looks like some harsh lines, so take it with a grain of salt, but it's honestly not
really needed right now. We need this a little bit later. But for now, I just
wanted to show you So let's go ahead and go
back to Edge and faces. And at this point, actually, it might be a good idea
to save our scene. So file, I will
restart my max because I have a UI bug that happens whenever you change
your screen resolution, which I do for recording. Okay, so I restart Tres Max. So what I was saying is go to File Save or Save S. And
I already save my file, give it a name and save it in our saves folder
inside of our project. So let's go ahead
and continue on. And now I will take
things a bit quicker because now I've gone
over everything. Our pillar will also
contain some sculpting. So what we're going to
do is for our pillar, in case I want to
make it repetitive from the top and the bottom, which I do want to do
because we use it over here. I want to go ahead
and only bevel these corners, and
let's go ahead for, again, a bevel of one, set this to zero over
here. There we go. And then what we can
do is we can give it a few swift loops like
that. Give some variation. And the reason I
changed the variation on all of the sides
is because this way, I can simply rotate my
pillar around and make one pillar seem like we actually have like ten different pillars, just by simply
rotating it around because that way you don't
always see the same angle. So I can go ahead and I can move it in here. And this one also. And as you can see, I never
touch the top or the bottom. And then I just want to
go ahead and sometimes, have a quick look down the side and make sure that nothing is
looking too intense. So for example, like this one over here feels
a little bit too intense. Let me just minimize
it a little bit more. Yeah, there we go. That should that should work. Okay. Awesome, so
we have this one. I'm not yet going to
art weight normals because that was
just an example. So let's go ahead and
go to the railing. And for our railing, it needs to be repetitive
from this and this side. This side will always
be on the floor, so we don't need to
do anything there. So all we need to do
is we simply need to bevel this area and
maybe make the bevel a little bit bigger
this time because it's like a railing and you often see this with
concrete railings that they are a
bit more stylized. So let's make the bevel like 2 centimeters over here,
and you guessed it. Create a few swift loops
over here. And let's see. I'm going to move this
one down a little bit. This one, because we
are using it a lot. I really want to
be quite careful. So I'm just going to go
really subtle changes. So let's move this
one down here a bit more and maybe
down a little bit. And like, maybe make this a little bit more
interesting. See? It's the small details. Often, the small details are
really what makes or breaks your model whenever we work in twin the art,
including vim art. Now, a vim art is a little
bit more relaxed than, for example, specifically prop art or even like character
art or something like that. And that beaks in a Vmat you can rely on the
bigger picture, which is something that
we are also doing. We can rely on, like, having this really large
scale environment that just looks cool so that you don't really notice small
imperfections. Got that one, and our wall
can just stay the same, because we need to
use our wall on all four sides over here, over here, and the side so it's, and we use it down here, so it is simply better to
leave it as is right now. Okay, awesome. So
that is now done. We will go ahead and
get back to these in a few chapters where we will actually start with
the sculpting process. What we will do in the
next chapter is we will go ahead and we will go over
on how to create our pipes, which is going to be
the first time that I will discuss how to
create a low pool and high pole model and also how to do a little bit more
complicated modeling. And after that, what
we will do is we will also Unmap these models, and I will go over on how to
bake the models down to show you definitively the concept of high to low ply so that
you really understand it. So let's go ahead and continue with this
in our next chapter.
27. 14 Maya Creating Our Final Modular Assets: Okay, so let's go
ahead and get started by creating our modular
models inside of Maya. Now, full disclosure. I have been sick in bed with
the flu for like a week, and this is the first day
I'm feeling better again. So my voice might still sound
a little bit different, but let's just go ahead and jump into
this and warm up again. So we left off by exporting
our blockout models. So if we just go ahead and
export final, there we go. Modular to M. And
now what we can do is we can go file over here in Maya and simply import them. Oh, that's a really big
view. Move it down. And I just like to always
quickly paste in my location. It's always so much faster
than trying to navigate to it. And let's go ahead and nipt. So when we import, what we
will see is that the models, they are quite large. However, the models
that we import, they should be the correct size. So rather, the grid
is just really small. So what I want to
do is I want to actually keep this
size because I want to keep everything consistent
and not that if you want, if you need to do, like,
really precise work, you can go down to the
scale and set this to like 0.1 to make
it a lot smaller, but that means that inside
of unreal, when you import, you need to take on
the setting that says to scale everything up by ten? Yeah, by ten. So but let's just go ahead and
keep it consistent. I just want to let you know that there is a
setting for that. We will go over it later. So if we just go ahead and go to our display and then
here in our grid, just press a little
settings button next to it. And here we can
see. So, actually, let me just go because these
are quite large pieces. Let's go to window settings and preferences and my preferences, and I just want to
go to settings. Oh, okay, so we're set to
centimeters in our working. Is it easier maybe
to go for meters? It's probably easier
if we go for meters. So let's set it from centimeters to meters and then press Save. And then we actually
don't need to change the grid or
anything like that, because yeah, working in
meters is a little bit easier. Okay, so the next
thing that we're going to do is we are going to place these assets on
the correct locations. So first of all,
what we want to do is we kind of want
to separate them. Now, remember how you created your own little shelf over
here, I will use this one. We have the separate button. So if we just press
that, it will separate all of your models into
their individual elements. And by the way, if you want
to keep seeing the wireframe, just turn on this button over here, wireframe when shaded. So positions. Okay,
let's have a look. If we go ahead and open
up in reel, here we go. Then we can check and
we can see that if we, for example, going
for the floor, the pivot points are most of the time at the bottom center, yes, because that's
how we create it. So there's two ways that
I like to do snapping. So there's the way where I completely rebuilt the environment using
easier snapping, or there is the way
where we simply replace our existing models
with our final models. Now, basically for
this environment, because it is a
small environment, I want to use the second way, which is that we are going
to create our final models, and then we can
simply drag them in here in aesthetic
mesh to replace them with our blockout models. If we want to do this, we
need to make sure that our pivot points are in
the correct location, which is always center bottom. So I'm just going to show you
something really quickly. Let's just go ahead
and isolate this one. So for this one, we want to go ahead and go for
the center bottom. Now, what we can do is if
we go to our tool settings, remember, if you don't
have these windows, you can find them all in here. So if we go to our
tool settings, we can just first of
all, press Reset pivot. This will reset our pivot
to the center of our model, which is already pretty good. Now, next thing that we're
going to do is we are going to use a snapping
mode over here, which is our snapping to grid, and we are going to snap
this to the grid over here. And then I probably want to snap my pivot point
actually down. The cool thing is
that you can actually press dit pivot to
edit your pivot, and you can still use snapping. So we have edited our pivot, and then what I can do
is we have snap to grid, so that one will
most likely, that one is not accurate enough. This one is for curves, this one is for points, but these are specifically
vertex points which will most likely Okay, for some reason, that's
snap to the top. That's interesting.
Okay, there we go. So it does snap the points. You simply snap your pivot
point down to the base, and then you go here to your
translate and you set this back to 00. Okay? That does not work. Let's go ahead and snap it to our pivot. The translates sometimes
get a little bit confused. That's why. So here we go. So now, this is all correct. If you want to reset
your translates, you sometimes want
to do this also if you have any errors or
you just want to make sure that this model now
counts as zero, zero, zero. You can always go
into modify and then freeze, freeze
transformations. There we go. So okay. This is now in the
right location. So what we can do now is, let's say that this is unreal. What we would want
to do is we want to snap based on the points. So what would happen is that we simply snap by 1
meter increments. That works totally fine
with a model like this. However, sometimes
what I like to do to make the snapping a
little bit more precise. And this is something I just
want to explain to you that sometimes we would
use this technique. However, we will not
use it right now. But like I don't know, 70 or 80% of the time you
would use this technique, which is that you
snap the points, you added your
pivot, and you set your pivot to one
of the corners. And then if you go ahead and
then snap this over here. And the reason you would
want to snap it like this is because it is way easier
to press shifty and to, like, do more precise
snapping because you are setting the
pivot at the corner. And then, of course, in Maya, you can press Shift D to
just keep duplicating it. So that is just something
that I wanted to show you that this way, it is often easier to snap. However, if we would do this, let me just do this work. If we would do that
with our models, what will happen is
that inside of unreal, all of our models
would all of a sudden, shift, and then we would
need to replace all of them. So we are not going to do that. We'll see if there's one model. Maybe we can actually
do it for this model because we probably need to, like, change the position of them since all of
these are scaled. Yeah, yeah, so we can
do it for this model. Just to show you, I'm going
to go ahead and do it for this specific model
over here because we need to replace all
of them anyway, since we did some
scaling, remember? Like, we made this one
smaller and stuff like that. And of course, in real,
then it would not work. So let's just do this, and
let's just leave it at that. I hope that's not
too complicated. Because I feel like
I explained it in a way too complicated fashion, but okay. So we got this one. And whenever you have finalized
the position of a model, you can go up here and
create a new layer, and we'll go ahead and
we will call this one. Oh, God. Let's call this
ailing ailing underscore 01. I always do underscore 01. Because I never know if I
want to make more variation. So it's better to do 01. So now let's go ahead and go for this one over here,
which is our wall. And if we go ahead
and have a look, our wall is also, well, I know that all the
position are the same, so we don't really
have to keep checking. So if I go ahead and go
back to Maya over here, we can go ahead and we can
isolate this one over here, and then we can reset the pivot, snap the points, add a pivot, move it down like this, and then we can go ahead and snap the grid C. So it is quite quickly once you get
used to it, a new layer. While the score zero, one. See? So it is quite
quick to do this stuff, and then you can press
the V button to hide it. This one, sea pivot. Add a pivot, move it down. Only annoying thing
is that in Maya, you need to snap to the center while in three is
Max, for example, you can just set
it to zero, zero, zero, because it
contains its space. But that's just like
the slight differences between Maya and Max and in blender, everything
is different. So we have this one prefer to
call pillar underscore 01, just because the other
one is horizontal. Horizontal pillar is also
still in the center. Just check center, bottom. Okay, center bottom. So reset pivot, add the points, snap the points, move it down, and snap the grid. There we go. Hosanto Biller, underscore 01. And all of the scalings
are, of course, already correct
because that's what we focused on inside of
wheel to make sure that all of the
scalings are correct except for the railing. So we got this one,
and there we go. And this is going to be floor
under score 01, I guess. That's easy enough. Okay. So now what we want to do is we
want to go ahead and we want to start turning these
into final models. So over here we have
our floor piece. Now, what you can see
is whenever you export something from a game engine, it will be triangulated, which
does not look very nice. Like, we are not able to Well, we probably are able to edit it, but often it gives bugs. Let's see if we can edit it, and hopefully I can
show you like a bug. Okay, so this time, I was
not able to show you. But sometimes doing edits on these type of models,
they can be quite messy. So what I like to do is I like to start with a clean slate. Because these meshes
are very easy, what we can do is we can
simply or select over here our triangles and press
backspace or control backspace. Sorry. I always do
contrabadspace. I don't know if it makes
a difference in Maya. It does in Max. And it also does inside of non Blender has
something different. So I just always
use Contrabckspace. And saying that I
realized that I did not have my keyboard
registration turned on, so I turned that on right
now. So that's one way. And if we just go
ahead and go to a horizontal pillar,
there is another way, but this one is a little
bit more prone to problems. That's that you can go to
mesh and quadrangulate. Oh, let's try it
again. Let's go here. Angle threshold 90. Huh. Okay. Normally, that A removes all of our meshes because we have
triangulate and quadanglate. Maybe that's interesting. I honestly don't really know
why it does not do that. Okay, then we are just
going to ignore that one, then we're just going
to do it by hand because it's still
faster than creating a new cube to just quickly
select these pieces. Wow, a lot is going
wrong, by the way, I really need to warm
up after being sick for a week. But that's no problem. We are going to just
go ahead and clean up these meshes so that
we can use them again. And of course, if you want, you can also just create
brand new meshes. That's no problem at
all as long as they have the exact same
dimensions and position. But for something this easy, often just scaling the meshes, the newly created meshes and placing them in
position takes longer and simply removing a
few etches. There we go. Okay. Awesome. So
we have this done. Now, let's get started
with the floor. Our floor needs to be
repetitive from all angles. This means that we cannot
really do anything on our floor because it needs to
be if we just go snapping. We need to be able to
basically snap it on all sides and have everything
perfectly transition over. If we would add a bevel, for example, on here to make
it look a little bit nicer, what would happen if just
press Contra B is, of course, that our floor will no longer I will always have these seams in it,
and I don't want that. So our floor, we can
leave exactly the same. There's literally nothing
we have to do about it. Then we have our
horizontal pillar. And let's have a look. So for our horizontal pillar, these only need to
be repetitive from the front and the back as
far as I can remember. Yeah, see? Yeah, we made them repetive from
the front and the back. However, we can
give it a bevel on all other sides. So let's
go ahead and do that. Let's give it the bevel. And
the reason we are creating a bevel is one because we are going to sculpt this
inside of brush, we can make it look
a little bit nicer. And it's also good
practice if you ever want to use weighted normals
inside of here. So we have these,
and don't worry, we will go over weighted normals and stuff like that
a little bit later. So if we just press contra B, let's make the
bevel not too big. Let's do 0.05, for
example. There we go. So now we just have
a simple bevel, and that's honestly all that
we need to do right now. Now, I quickly want to once again give you
an extra bit of information that you might not specifically need
for this project, but it is super, super important for
almost any other project. And that is weighted normals. So I already explained weight
normals inside of Blender, the blender chapters and inside
of the three Mx chapters, already at the very beginning, but we have a little problem. And that is that in Maya, weighted normals is
not yet completely integrated as of the
time I'm recording this. So I want to pay
attention over here. If you go to Gum Road
and you look for a guy called Valtin nodulu. I
hope I say it correctly. He has a script for
Maya that is called VR N normal Q. Wow,
that's really difficult. Basically, with the script, it will also go ahead and it will explain a little
bit of information. It will also say,
where do you want to copy the script and
all that kind of stuff. So what you want to do
is with the script, you can go ahead and if we
just go ahead and go in here, I can explain to you
weighted normals. Weighted normals are
basically a way to fake the smoothening on your model to make
it seem higher polly and higher resolution
than it really is. It is easier if I
just simply show you. So we have our model over here. Right now, you can see we
can clearly see our bevels. They are quite harsh, and this model still
looks quite low poly. Now, your first instinct
would be, Okay, let's go ahead and
let's, for example, go over here to mesh display and let's press
soften edges, for example. So what we can do is we
can press soften edges. And although these
edges now look better, we have these really strong
smoothening problems over here, especially
on the end. The reason we have one on the end is because we
don't have a baffle, and this baffle works
as like a buffer zone. It basically combines
smoothly in a curve, these two faces over here, which makes it look
nice and smooth. So the next thing that we would want to do is we
would want to select, for example, ends over here. And then if we just
what was it Shift click I always forget, I'm just going to
go to mesh display and press hard and
edge on these two. So now I set these
edges to hard. Now, this already
looks pretty good. Like, you can see that
now these edges are hard, so that we don't have
those smoothing palms, but don't worry
because we repeat it. And it is looking okay, but it's still not
looking perfect. And that is where this
script over here comes in. So as script says,
and I actually don't have the script installed. So what I will do
is I will simply, go ahead and download it. And it will ask us to
go to my documents, My version scripts, let's just go ahead and quickly
navigate there. Here we go. So I
added my scripts over here and in the location
as it was told. And then what you want to do is you want to go ahead and we want to restart our scene. Now, to restart our
scene, what we, of course, want to do is first of all, want to save our scene. So let's go ahead and go file, and then we can go save scenes, and I'm going to save
it into my SAS folder, and I will call this
Modular underscore assets and just go ahead
and press Save. And now we can close this
off or restart my I mean. Here we go. Okay, so
I restarted my scene. Now, the scripts
are now installed. They automatically run because we put them in specific folder. And if you look at the Readmt we have two commands over here. We have this one and this one. I'm not even going
to twin and sate. This one will basically
allow for our normals in our selection to
outpperateed normals. Now, there's a few ways that
you can run this script. So for example, what we can
do is we can select face. We can go down here into Mel, copy this command,
and press Enter, and now it will have
run the script. You can see here, see you can see that this one is
not perfectly flat, while this one you
can see, I don't know if you guys can see
because of the recording. Now there is another
way, although this way, I have a bug that it never
seems to work for me, but I have a new PC,
so let's try it again. That's if we go down here
to our shelf editor, we are now in our test shelf, and what we can do is
we can add a new item, and we can call this WNM for
example, weighted normals. Then what you want to do
is you want to go ahead and I always forget
where I need to go. Do not paste it in
the icon label, paste it in the command over
here. So that was just me. I knew that there was
a place to place it, but it has been so long
since I've done it. So you want to basically
create yourself. And then if you go to command, this command is
linked to the shelf. See if I press this one, you can see that the
command is different. So you just want to basically
create this in your shelf, art decommand and
then press Save. And now, if I press
it, see, it does work. I believe that you can also press multiple at the same time. There you go. So that
will solve that. So that is basic for
weighted normals. Now, because we are
going to go ahead and go inside of ZBrush, models are high enough polygon, have a high enough polygon
count that we do not actually need to do any type of weighted normals like that. So we have these ones done. Now, let's go ahead and
go to our Vert copular. Our Vert coplla is very similar. We just want to go
ahead and bevel only these sites because I do want to be able to repeat this. So contra B 0.05 there we go. Now what we can
do is once again, we can select these faces, and let's go display. I will just go ahead and Oh, wait, I already did
that. Sorry. The lets. Here we go. Soften display. And harden display.
Select our four faces, and just for the fun of it, let's add our weighted
normals again. Here we go. So you can see that
now this one does look really nice
and hypol already, just by using weighted normals. Wall, we don't have to
do anything because it needs to be able to
repeat on all four sides, so we don't want to
make any changes. And our railing over
here needs to repeat on the ends and the base will
always be on the floor. So the only ones
where we need to add some weighted
normals is over here. And let's make this one
a little bit bigger. Let's do 0.0 0.15 maybe. Yeah, let's do 0.15 over here. And once again, if you want,
you can go ahead and you can select these sides
over here, soften it. Control Shift I to invert
your selection in case you did not know about that
shortcut and harden these ones. Oh. That is strange. It should fix that. Let's just go ahead
and try and see if I flatten my normals. I can try to flatten these. Okay. So we can flatten
these flat faces, but I don't know why they are giving me some
smoothing rums, but, flattening flat faces will basically just
reset the normal. And since the smoothing is pretty much the
same as normals, this seemed to have worked fine. But okay. So we got these
pieces now also done. Now there's one last
thing that I want to do to our modular assets, and then I would consider
these already ready to be sent to Zbrush for sculpting and
everything like that. So what we want to do is we want to give it
some slight variation. This is because in real life, nothing is ever
perfectly straight. You can even go over here, and although this one's AI generated, so I don't
really trust it. But in general, in real life, even if you look over here, nothing is perfectly straight. Now, of course, really hard metals like metal or something, they will appear
perfectly straight to us. However, more organic
pieces like for example, concrete, especially
when they're quite long. What we want to do
is we want to add some very subtle variation to mimic the same
stuff as in real life. Now, what we are going to do
is we are actually going to, let's say, exaggerate
this a little bit. So what you want to
do is you want to add a few loops like here,
using us with loops. And then we for
example, want to select like one corner and you
simply want to do this. Move it down a bit and for
example, move it in a bit. It is super subtle changes. This one also, let's move
it down a little bit. And maybe over here,
let's move this one down and maybe this
one in a little bit. It is very subtle changes, and you often won't even notice. But here, if you look, see, that already just feels a
little bit more natural, having not a perfectly
straight piece, but now it feels more like this slightly warped piece
of concrete, for example. And that's pretty much the
only thing that we want to do that we want to do to this. So we got this one. We don't
want to do it on walls. We do want to do it, for example, on the
vertical pillars, so we can go ahead and
go in here and just add, like, a few loops.
And don't worry. Like, this is such
a small poly count. We are actually going to
increase the polis when we start sculpting
and everything. But it's just like art,
it's nice variation. So over here, I see that
I'm literally just using my X and Y OX and Y or X
and Z xs at the same time. I always get mistaken
about those. And the only thing
that you do not want to do is never change the base and top verses because remember, we
need to repeat them. So it would not make much
sense if we change those. So I do this, and I just, like, look at it from the side. And just see where I can add small variations and stuff like that to make this look a little
bit more interesting. Yeah. And see now we have four pillars and
every side or we have one pillar and every side will look slightly different,
which is also great. So we got that one.
We got the well, yes, the horizontal pillar. So this one go quite subtle with it because it needs to support a lot of stuff. So I don't want to
go too intense. So, let's see that I move this one and let's say that I just move
like this stuff in here. Like, I don't want to
push it up too much. I guess sinking it in a
little bit should be fine, but you don't want to create gaps whenever you
use this pillar. So rather, just like
kind of pushes in. There we go. And
our floor piece, we also don't want to
make any changes to. Okay. Awesome. So,
I would say that our modular assets are now done. So yes, this chapter did not
went completely perfect. Mostly, it was about the
weighted normal stuff, but that's simply just
me being mistaken. So I do apologize to that. But yeah, okay, so this is
how we would go over on how to quickly convert our blockouts
into modular measures, and quickly went over on how
to use our weighted normals, stuff like that, and do some really, really
basic modeling. So what we're going
to do next chapter, is we are going to ramp
this up and we are going to go for something a
little bit more complicated, which is that we
are going to create our pipes that we
have over here. So this will be a little
bit more advanced modeling, and we will do something that's called high to low
poly modeling, which means creating a
very high detailed version and a low detailed version. And then later on we will
use textures to manipulate our low detailed version to make it look like our high
detailed version. I know that's a lot of words
in one row, but don't worry, it's something that
when I show you visually how to do it,
it will all make sense. So let's go ahead and continue with this
in our next chapter.
28. 15 Blender High Poly To Low Poly Modeling Part1: Okay, so we are now
going to get started by creating a high pool
and low poly pipes. And for this, I want to create
a new scene just to keep everything nice and organized.
We can delete everything. So what do we need? We need three types of pipes. We need a straight
one. We need a bend, and we need, like, a T joint. We already defined
this inside of unreal engine where we are going to create
the straight one. A bend one, and over here
like a T joint like that. So not too much
should be quite easy. Where's my reference.
Here we go. So basically, the
way that this works is we are going to start by
creating a straight one, and that will be
most of the work. Creating the bend
and the T version are actually quite
quick to create, as they all divert from
our straight version. Now, because I already
made these pipes before, I do know the dimensions. So first of all, what we want to do is want to go
ahead and create a Shift A mesh
cylinder over here. And then if you click down here, you can choose for your
cylinder segments. Oh, you know what 32 is
actually pretty good. Yeah, yeah, you know what?
Let's leave it at 32. Might even be a little bit high, ply, but I'm fine with that. So we got this one over here, and then what we can do is
we can go ahead and hold Control and zoom those out. Now, I want this one
to be 3 meters long. That's something that
I already decided on. So what I want to do
is I want to go on a Z dimensions and
set this to three. And what did I use? For a diameter over here, I used like zero
point what did I do? 0.3, two, five, I think I
have a feeling it was 0.2. It's just like this
is something that, of course, whenever
you create this, you're doing a lot of playing
around and making sure that everything works correctly.
Let's do point to five. But I do like to go for
quite even numbers. Yeah, I think it was 0.25. So we just want to
define the scale. And for our scale, you can, of course,
play around with it. But what I recommend to
start with even values, like 3 meters or 4 meters
or stuff like that. And, of course, this is modular, which means that once again, we will just be
repeating it over and over and over
again over here. So that's something we
also want to keep in mind. And now, at this point,
now that we have our rough scale and
diameter defined, now what we're going
to do is we are going to create these ends over here. I want to put special focus
on the bevel down here. And the reason for that is
because I would love to have to add welding inside of substance painter, where
we have this bevel. And for the rest, we need to make sure
that we, of course, have enough space for
our bolts and that our bolts do not like look really tiny or
anything like that. So what we can do is we
can go into added mode, and I like to go ahead
and press contre R and then use my scroll wheel to
place two lines over here. Then I just right click
to leave them in place, and then I use my scaling
tool to basically push them out. To a thickness. Don't make it too thick.
I know that over here, it's like two solid
pieces of metal, but the ones that we
are going to use, they are sitting on
top of each other, which means that, of course, the thickness will
look double as thick whenever we repeat them. And I want to add some
additional details to this. So we got this over
here, which, 2.95 maybe. I think this looks quite nice. So 2.95, you can see that I love using Wi clean values over here. So now that we have something like this, that's
looking pretty good. Now what we can do is we
can go ahead and we can oh, sorry, Alt Shift. I
always forget about that. We can go ahead and we can select these two ring faces
over here using Al Shift. And now the one that I want to use is I don't
want to use extrude, because if I use extrude, which I said to Korda
that one does not work. So instead, what I want to
do is I want to go ahead and go to oh, do I not have this one? Well, normally, this one, normally, I add this
to my quick favorites. I guess because we
said a new shortcut Shift E. Honestly, I forgot. I forgot which
shortcut that we used. But anyway, let's go Q, and now I extrude faces along normals.
That's the one I wanted. And now you just basically
want to it's mostly guessing work over here and
going by feel. That's mostly what
we're doing here to get something that looks like, it can hold enough bolts, but it does not look silly. Like, over here,
it already looks a little bit silly,
to be honest. Like, it feels so thin
compared to the rest. So I want to try and, like, find a nice balance, and I think that this is
quite a good balance. So what I'm going to
do is I'm going to go ahead and select that line. I'll shift and select
this line over here. And then what I like to do is I like to go ahead and I
like to press Control B. Oh, this is pretty good. So here you can see a problem. Now, this is great to show you. So this bevel, it's
not working correctly. This is because we added
so many changes to our transforms that
our transforms has gotten a bit confused. The way that we fix this is
by going into object mode. And then if you go
ahead and go to object, apply and all transforms. This will reset your transforms, and it will also often
fix these problems. Let me just add it to
a quick favorites. So now if I press Apply
transforms and try again, you can see that now because
the transforms are reset, it just solves most
of these problems. So we want to just
give the nice bevel. Oh. Let's do that because I want to make
my bevels the same time. You can also choose to
mirror this if you want. So it kind of depends
what you want to do. So you can Oh do it this
way or you can mirror it. So, oh, my God. I keep messing up. You know what? I will show you the mirror way just because I
keep definitely messing up. So let's place a single line over here just to keep track
of where the center is. And the way that the mirror
way works is because these are both exactly
the same sites. We can go ahead and we can
only focus on this side. So let's only focus
on this side. So we do a contra B here. And now what I like
to do is I like to like a little detail in here. So let's place two lines. Maybe scale them in a bit more. I just like the art like
a dent and then place another two lines in between here. Yeah, that should work. Let's go ahead and let's
go to our Come on. There we go. It did
not want to select. So what I did just I got a little bit confused because
I was thinking of Maya. But basically, if this one
and then Alt doesn't work, you basically want
to click Hold Shift, and then hold Wow,
I still mess it up. Click Hold Shift,
and then hold Alt. Really? Double click? Okay. Confusing. I know. I'm not a big fan of Blender selecting,
to be honest. But anyway, select
this loop around. Sorry about that. So
select this loop around. But now I'm, like, curious.
Like, why didn't you? Yeah. So I'll shift, double click. So
now it does work. Oh, that's so confusing. So okay, sorry about that. It's just me. Messing up. So Alt Shift, double
click, select the loop. Didn't work the first time,
but now it works. So, okay. So what we are going to do
is we are going to scale it using the red square over here, which means that we can
scale this down like this. And yeah, I think that looks
like a pretty good scaling. I don't know if it's
too much, maybe. Here, let's make it a
little bit more subtle. You can also go in here and
set this two, for example, 1.015. Oh, wait a minute. 1.01. There we go. So make it like a
little bit deeper. So now that we've done
this, what we want to do is we want to use weighted
normals on this model. Now, we are going to use
high poly to low poly. However, from experience, if you have the budget to spend a
little bit more geometry, what I highly recommend is
to use weighted normals alongside your high poly model because your bakes often
look really, really good. So we are going to
give it a nice bevel on these two sides over here, and I'm going to make this
one a little bit bigger, and then I'm going
to select these two let's make these ones
not a little bit smaller. And then, even these ones,
I like to give barrel. But in this case, I like
to give barrels to give it a little bit of a more
round look over here. And that's pretty much
it, to be honest. So that's looking pretty good. So now what I would do is I would go ahead and let's
select, like the center one. And if you then press
your shift, oh, oh, God. No, control, and then non PAD plus
to grow your selection. This end over here, we
can basically delete it. Oh. There we go. No, which one is it? Pass. There we go. Okay. So
we can delete this because, of course, this is
going to be repeated. We are going to repeat this
pipe over and over again. Now that this is removed, and we are ready with
this mesh over here. And this is our low poly, by the way, so
keep that in mind. We will do our high
polys later on. We will start with our low poly. What I can do now is with my pivot point still
being at the center, I can go over here
to my modifiers, Art modifier and add
a mirror modifier. Now, in my mirror modifier, what I want to do is I want to press flip X because it
looks like it's flipped. Let's have a look. No way
bisect X and then flip. It's always confusing
which ones I need to use. There we go. Oh, all three.
Wow. Okay. So basically, this one controls the axis. This one controls if you want to cut away part of your mesh. So if I do not do this, what it will do is it will overlay. It will mirror, but it will
keep overlaying my mesh. And this one basically
just flips the direction. So if I turn this off,
it will use this side. If I turn this on, it will
use our correct site. So you basically want
to just end up with something like this that
you can see over here. We can use our IFrame toggle also to make sure
that looks good, where we have the same
details that we created here. Also on this side. And the
reason that this works perfectly in line is because a pivot point is
exactly in the center. If it's not exactly
in the center, I can literally
show you by editing my pivot and then
turning off at a pivot, see, then it no longer works. You can even edit your pivot, and I believe you
can even rotate it, and then I no, okay, so rotations don't work. But basically, so
let's undo this. There we go. So now it
is exactly in center, and then if we want to apply because we have merge turned on, which means that it
will merge our meshes. If we press Control A, while clicking on a modifier, it will apply our modifier. And then if you want, you
can even go to Ed Select. Select this one loop over here, and you can go ahead and delete and then
dissolve edges to make extra sure
that your mesh has completely merged
together, which it has. Okay, so this one now, there's one last thing
that we want to do. And that is then just
like our modular assets, we just want to go to Edit mode, and we want to place a few
random edges over here. And this one, we need
to be a little bit more careful because we are
using this one a lot. But I just want to give it some slight movements over here. Here, see, now I'm
starting to warm up in lender again. There we go. Just to give it some
very slight variation to make it look extra nice. Awesome. Okay. So we
got this one done. Now the next one that we would
probably want to do is we want to go ahead and start
working on our bolts. So if we just go ahead
and at this point, probably a good moment to
save our scene and call this pipes and it will just
be like a blender file. So we only need to
create one single bolt. However, of course, we
need to create two sides. We need to create
the front side. And we need to
create the backside of it, but that's about it. If we create one, we
can basically copy it over and over and over again because they all look
the same anyway. So having our pipe now
done, yes, I'm done. Okay. What I'm going to do
is I'm going to go ahead and I'm going to shift a mesh, and let's start with
a simple cylinder. And let's make this one. This is not going
to be the bolt. This is going to be the
little ring around the bolt. So we want to set this
one not too high. 14 maybe just, I don't know. 14 is probably enough. Maybe you can go 16 if you
really want to push it. Let's will push it. And the reason I might
want to push it because I might want to take
pictures this close up. So I might want to take
pictures so close to our mesh that our mesh
needs to be high quality. If this would be like
a willy small mesh that I know that I will only see from this
direction over here, I would go for like 12 or even like nine or something
like that segments because it will be so difficult
to even see that it is lower polly that's not worth
adding that extra geometry. But now what we can
do is with this one, we can go ahead and
we can or I can just press S because I still
have that shortcut. Only one that I really like in the blender is pressing S to
do the scaling like this. For the rest, I like
to use my pivot. But basically, what we can
do is we can scale it down, and you want to
kind of make sure that the center edge aligns with the center of our pipe over here because it keeps everything nice and consistent. So let's go for
something like this. We can now go ahead
and move this in, go to face mode and
move this one in, and there we go. We
already have the ring. The face on the other side
over here, just delete it. Like we don't I keep
pressing the wrong one pass. There we go. So just delete
it, and that's already fine. Now what we want to do
Imol to create the bolt, and the bolt is, of
course, the biggest one, which is also the
most complicated one. Let's create another cylinder. And a bolt is one, two, three, four,
five, six, six sides. So we can set this
third sis to six, and then we have automatically this amount of
sides for our bolt. Then we can go ahead
and we can rotate it, scale it way down. Move it over here. Supposed
dot on a num pad to zoom in. And we just want to
go ahead and start with creating our standard bolt. Now, what I'm going
to do is this bolt, I will also use my
symmetry on it. So I will only focus
Wi on the front side, and then I will just
merge it onto the back. The reason why we don't want
to just remove the back is because if you can
see over here, see, the bolt flares
up like a bevel, and we want to kind
of capture that. So what we're going to do is we are simply going to select these ertzes over
here. Like that. And then we want to
bevel these verts. This is one of the
very, very few times that I would actually
use this technique. But basically, we
are going to get started by Contra B. Oh, it reads it as a
that's annoying. Vertex bevel erzes because it reads it now that's
only in blender. Whenever you select
all of your vertis, it reads it as a face. So verts, bevel erzes. And now you can see that
over here, we get like that. It's a bit difficult
maybe to see, but give me 1 second. Over here, and now, basically, if we go reference here you can see that there
is this little corner, and that's kind of what we are trying to capture over here. So we got these ones like that. Now, next thing that
we need to do is this stuff is often
a little bit round inside of or inside
of real life. However, we cannot just place
an extra line over here. So we kind of need to
do some manual work. So first of all,
make sure that I'm happy with this. I am. And then what I like to
do is if I like to or if I press Oh, God. Shift age, sorry, shift
age to isolate my mesh, to hide unselected basically. I can press K to
enter my knife tool. And I want to get
started by first of all, simply placing some
lines over here. This will all make
sense later on. First of all, we are now
just cleaning up a mesh, but we can actually use this
geometry later on also. You don't have to
be too precise, but try to just go
somewhat straight. But as you can see, I'm also
quite flexible with it. There we go. Okay, so
we got those done. Now I can press contra R because
these are now connected. This is now a quad, and I can
place two lines over here. And what I want to do is I
want to place two lines on every phase over here like this. And now what I want
to do is I want to go ahead and I want to
basically keep these. I think all I need to do
is grab these one, right? Yes, I want to do that,
but before I do that, there's one more
thing I need to do. Let's go ahead and
press I select the front face and
press I to insert it roughly to around I feel like around
here should be fine. And then what we want to do is we want to turn
this into a cylinder. Itis actually really easy. We can just go to phase. Tata. It is really easy. I just rarely use this specific version. It was here somewhere.
I always forget. I always forget where it is. It's like, not sperify circle
rise, I think it's called. 1 second. If I cannot find it in a few seconds,
I will, of course. Um, have a look. Let me just quickly find it. 1 second. Okay, so I found it. So I can still not
find it in the menus, but I found the short gut, which is Alt Shift S. And then
when you move your cursor, oh, God, that does not maybe I need to zoom out. Al shifts. That is still not
doing, to be honest. All shifts again. That is still not doing exactly
what I was hoping for. Let's Maybe let's try this. Let's delete our face. Alshifts I guess maybe it is a little bit
confused because there is no edge over here, which is interesting
because other software do not have this problem. It is no problem, Willie. What this means is what I would then do if this
technique does not work, because I'm actually quite
surprised it doesn't work, is I would grab another
cylinder and 612. Let's do probably
around 16 segments, like, one, two, three, four, eight, 12, 16, 20
maybe 23, actually. Yeah, let's try 23
segments over here. And let's go ahead
and rotate this, move it, scale it. So instead, what we can do is we can just use like
a Boolean function. So there are many
ways to do this. The technique that I normally
use is just a sperify, but mistakes were made. I don't know why it doesn't
work, so basically, what I can then do is I
can also just go in here, grab this, grab my bolt, go to modifiers and add
a Boolean modifier, and then simply select over here my cylinder and press contra A. And that will
basically do like a cutout if I delete the cylinder. And you can see now over
here that this now works. OltisO course, this requires
a little bit more cleanup. So if I just press
Control plus and delete these faces
over here to have a clean slate.
Yeah, there we go. So this one does, of course, require a
little bit more cleanup. But now that we
have this, if we go ahead and just use our cut tool, and this is why I tried
to go for even values. And I think I
managed to do that. I think I managed
to go for even. So let me just probably pass the video until this
cutting over here is done. Here we go. Okay. And now my
idea was in order to push these back that we select these out of sides because I just
know how a bolt looks. You can look up more
reference if you want for exactly
how a bolt looks. Oh, that's something
I need to fix, but I don't want to
lose my selection. But a bolt is often round
on the flatfass like this. And I want to try and
capture that also. So first of all, let's turn on Target
Well toggle in Maxftols, select this RTC and
just move it here. So yeah, a bolt is often
round on those faces. So what we can do is now if we go ahead and
we have this one, maybe scale it up a little bit. See? Yeah, you see a problem. It's basically a duplicate
Vert C. Easy way, if you have this problem, what you can always
try to do is just to press A in vertex bote, and then you can go to oh,
do I not have that one? Then you can go
to Where are you? Weld by distance. Mash, merge by distance. Quick favorites. There we go. Then we can press by
distance, and then over here, it will basically
merge based upon a specific distance
that we choose. And then down here you
can see if it removed any vertices, which
in this case, it did. So we have this one. We can go ahead and we can press Q and then extrude the
faces along normal. Oh, cool. That does not work. In that case, after
you extrude it, just press S to scale
your face a bit. Here we go. So we
have this one done. So we have our bolt over here. And once we turn this bolt into a hypol it should look
quite a bit better. Now we need two different
variations of the bolts. We need a flat variation, and we need a variation that
actually holds a screw. So what I like to do at
this point is I like to always just press like extrude
and then scale it down, and I like to always already prepare for the
second variation. So this is going to be
the flat variation. But by adding this
extra edge over here, what I can do is I can later on simply remove this phase
to quickly convert it. So at this point,
what I would do is I would extrude
one more time. And then Q, and then I
would just go ahead, Wow, I really don't
have a lot of these. Verte mesh, merge at center. I normally always although
I have shortcuts, but I want to show
you the visual way. So I normally art these do
like my quick favorites. There we go. Just
quick favorites. And now what we can do later
on is we can just open up this way to art
a bolt through it, which actually is something
that we will do in a second. So we now have this
one over here done. I feel like when I look at this, that I want to select this ring, Control Numpad plus,
and I feel like I want to move this out a
little bit more over here. That feels a bit more logical
in terms like a bolt, so we push this out
a little bit more. And now we have pretty much
like half of our bolt done. At this point, what
we can do is we can press Alshift Ui God, I forgot the shortcut. Object, and then we can go
show in height or butt. Show him ld age. I pressed ld age. Or not. Okay, I guess I
did not press it. See, that's what I mean
with blender and shortcuts. Unless you are a
main blender user and you are only using
Blender nonstop, then it's easy to remember, but often I just cannot
remember all these shortcuts. They're all the different
between Max, Maya. So I do hope you can bear
with me in that aspect. But anyway, what I'm
going to do is I'm going to go ahead and
do a quick pivot. And now I'm going to add my
mirror modifier over here. And I want to add my
mirror modifier looks like on the Z axis. And I want to bisect it also. And now you can see
that this is not looking completely
correct because the bolt is way too thin. You could apply your mirror, select the vertices,
and then just move it. Or what you can do is
you can try to press Add the pivot and move it a bit
further from the center. And then you can see
that but of course, it is not like a live update. But honestly, yeah, I think that looks quite nice.
I like this one. So let's go ahead and press A to apply a mirror, move this back, and then just for good measure, select the center ring and delete it and just
dissolve the edge. So there we go. So we now
have our bolt ready to go. By the way, for
this one, I never like having a massive
end gun like this, so I often like to press I to ISAT and then Q and then
merge it at center. There we go. That looks better because else we might cause problems whenever we export if we leave it like
a big end gun. Now what I'm going
to do temporarily is I'm going to temporarily
select this edge, and I'm going to go ahead and
right click, for example, and this one was new
face from Edges, or you can just press F.
But if I select this one, it just gives me a flat polygon. The reason I want to do that is because we are now going
to create the backside, and for that, it's easier if I actually have
something to work with. So two quick pivots over here. Let's do a shift D, and
let's just nicely move it. Hold control to rotate it. And because we did
a quick pivot, it should be exactly in the same center so that it aligns. And then we can go up here and just move it
somewhere over here. Now, remember, for this one, if we go ahead and
press Shift Alt. Sorry. Shift H. Sorry. Oh, yeah, Shift H I get it. Shift H. Then what we want to do is we want to go ahead and we
want to select this center. I can just go ahead
and I can click and just drag like this, that's probably the quick sway. Delete and then delete
the faces over here. And now what we want to do
is, let's first of all, just fill this up by
selecting both of these, and press bridge edge loops, and that we'll basically
fill them all up like this. Now, what I'm all about is
that I want to make sure that the hole is big enough
for my bolt and that it also looks logical
and not looks like a really silly size or
something like that. Now for this, we first of
all, want to create our bolt. So let's go ahead and
create another cylinder. 23 feels a little bit big
for something like this. Let's go like 14 Well, I mean, we already
use more than this. So let's do 16 over here. And let's go ahead
and scale this down, move this over here. And let's go ahead and move this into its
location. You want to ty. Actually, I'm probably
not happy with this. The reason I'm not
happy with this, although I will have to see is because you can
clearly see that one of the meshes C is lower
ply than the other mesh, and I do not really like that. The annoying thing is
that inside of Blender, you cannot change
the segments of a cylinder after you
have created it. Now, MaxivisTols does have
an option for this somewhat, and it's basically over here, the set cylinder object site
But I forgot how to do that. Was it like selecting,
you imagine, and set yeah, it just
it's not really worth it. Like, it doesn't
really work well. So instead, what I'm going to do is I'm just going
to go ahead and one, two, three, four,
five, six, seven, eight, nine, ten, 11, 12, 13, 14, 50, 60, 70, 80, 90, 2021, 22. Okay. So let's create
a new cylinder. This time, set it to 22. And let's just go ahead
and try that again. That's often easier than
trying to find a way to, like, increase your cylinder count and all that
kind of stuff. This is often just easier. And let's just go ahead
and use this one. And we want to nicely place
this into, like, the center. Yeah. I don't need to
fill the entire hole. One thing I want
to do is I want to select this side over here, and I want to do contra B
and give it a little bevel. That will also make it
look a little bit better. And then for the rest, I just want to have
a quick look from a distance and make sure that
this cylinder looks normal. If it doesn't look normal, you can scale it up and down and then keep looking
at it until you feel like you got
the right size. But honestly, I like the size. I just want to probably push
it back a little bit more. Yeah, you know what?
I quite like this. Okay, awesome. So we now
have this one also done. For now, this is the only
thing that we need to do on this cylinder over here
is that we need to, we can just leave
it because all of those ridges that we
are going to create, we are going to create
those in the next chapter, which will be converting
this to our hipoli. So for now, that is
fine. I would say maybe if you go
at and shift age, I guess that this
ring we don't need. And this ring we don't need? Because if I do Aldage, yeah, you can never ever
see that because now this one is closed up. And now that we
have that version, we can also go in here. And we can also probably, like, delete and dissolve this edge and also dissolve this edge. And if I just go at Shift ge
and also on the other side. Let's also dissolve
these edges over here. Here we go. Okay, so we
got our bolt ready to go. Now, last thing I
would do is I would just grab my bolt and
I would just move it up because we want to not have this
intersect with the rest. Now, with this stuff done, we are going to
select all of it. Right click, move to
collection, New collection, and we are going to call
this one Pipe underscore. Straight underscore P over here. And then later on
we can, of course, create the HP, the hypols. I'm going to go
ahead and I'm going to copy over my straight pipe. And while the copy
is still selected, right click, move to
collection, New collection. Pipe underscore. Bend. And then what I'm going to do is I'm
going to copy it over again. Right, click Move to
collection New collection. Pipe underscore T. Oh, sorry, nscore LP. I
forgot to say that. And this one Pipe bend, you can right click ID data, and then you can press Rename. Don't know why it's so
difficult to rename nscore P. There we go. So now we can turn off our lowly pipe and we
can turn off our T, and we can start with
this one over here. Now, one thing I just
realized is that my pipe is not in the
correct location. Now, this should not really be that difficult because
all we need to do is because we want
to have the pipe sitting on the end
in the center. So let's just go ahead and
snap the faces, at a pivot, snap this to the face,
turn off at a pivot, and then we should be
able to simply set our location to zero over here. Oh, actually, you know what?
-1.5. Knowing that value, you can even grab, for
example, your pipe straight, and you can go over here
and set this to 1.5, and then it will do
the exact same thing. Although you probably
want to move your bolt also alongside over here. So that's quite funny. So you can just do
that kind of stuff. And as long as you know
values, you can do a lot. So 1.5. There we go. Now we know that they are all exactly in the
same location. Not that it really matters because we are going to move them a little
bit later on anyway. Okay, so our band
version over here. Now, with our band version, what we want to do is
we want to go ahead and not create like
a really large band, more like something like
you can see over here. So what I'm going to do is
I'm going to get started by getting rid of the ops of
these edges over here. I feel kind of self
conscious about the keyboard registration,
because, of course, now you can see whenever
I press something won because me and buttons in
Blender is always a mess. But anyway, let's just
dissolve the edges. Okay, so we want
to create a bend, but we want to somewhat
keep it on our grid. It doesn't have to be perfect, but we do want to try and keep this in like a sort
of modular fashion. Bends are a little bit of a pain to do that kind of stuff with. So what I'm going to do is I'm going to go ahead
and press Shift D, and I'm going to just
duplicate this one. And then with this bend,
I'm going to rotate it. Now, I need to adjust my grid because right now my
grid is one by 1 meter, and let's just say I'm not
really in the mood to create a bend that is one by 1 meter. So what we can do
is we can go to edit and preferences for it. What was it down here? Oh, God, I already forgot. So much stuff. It's because I blender
is, to be honest, the software I use the least in terms of
like tree moding. But I like to think I
still know good enough to be able to teach you
at least like something. So I forgot. It's not in there. It should be somewhere in here. Yeah, here's the grid line. Okay, so right now
it is 1 meter. 0.5. Let's do 0.25. Is that enough? Basically, we want to
go for, like, a square. So let's do 0.5. Ah, I don't Let's try 0.25,
and we work with that. So 0.25 over here. And basically, the
general goal is that now we have a mesh and we have to pivot
in the right location, and we want to use this
one is like a guideline. So we want to turn
on snapping and set this the increments
with absolute grid snap, which means that it will
snap to our grid points. And then we want to basically probably move this
one over here. Although I'm not super
comfortable with this one yet, to be honest, this does
not feel like right bend, but this one feels like
too short of bend. So we might want to change this a little bit more later on. But before we do
that, let's actually create our band because
if we create our bend, we know roughly
where we need to be. So this is going to
be our Bnd model. We can go ahead and we can select this backside over here. And yeah, it looks like we still have grid
snapping turn on, which we don't really
need in this case. What we are going to do is, let's make it roughly
around like this size. Next, what you want to do is you want to select
all of these pass, Q, and you want to
separate the selection. The reason you want to
do that because you cannot really do proper
bends whenever you have something like this around it because it would squash. If you bend something like this, it will simply
Well, yeah, squash. You can go to I can
probably show you here. If I go to let's
Indo this just to show you the example.
Add modifiers. And then we want to go
ahead and we want to add a simple deform over
here and set to a bend. And this is on the Y Z axis. Although I don't have
my segments yet, you can see over here if you
bend this, C, it's squashes. And that's why we
basically want to get rid of this side for now. So Q separate selection, and merge it later on again. Now, for this one, normally, what I would do is I
would literally set this one to the
correct location. However, I don't know exactly
yet where the location is. So for now, we will leave
it as is over here. We simply want to
grab this bend. Contra R in ddt mode and
give it a bunch of segments. So you can choose let's
like 24 segments, for example, so that it
can actually bend around. You just saw the example what happens if you don't
give it enough segments. Now we just need to add
a simple deform, bend. And then we want to set
this on the C axis, it looks like and
the angle to -90. So -90, take this
with a grain of salt. It's not actually -90. So first of all, what I see over here is that my PIVOPoint is
not at the right location, so let's move this over here. There we go. That's
a little bit better. So okay, so we do end up
roughly at this point. I want to make double
sure by Q and applying all my transforms because bending often breaks
a little bit. So I want to just make
double sure that -90. Oh, really? Need to set
my PIV point back again. Oh, that's not enough. Let's move it a
bit forward again. Oh, that's close enough. Okay. So right now, what happens is that
it is pretty good, but yeah, I feel like it's
just off the grid line. What I want to do
at this point is, let's say that this is going
to then be our grid line. I just wanted to make sure
that our band looks correct. You can do quite a bit
of stuff with your band, so we can also make
it shorter or longer. The way that you would
do this just to show you because I do feel
like maybe it would look nicer if our band
is quite a bit smaller, is we can go ahead and
add a empty origin. I'll show you what I mean.
So you want to shift A, and then you want to go
to empty and you want to pick a plain axis over here, which you'll place
in the center. Now, what you can do is
you can select your model, and then in the origin, you can grab this plane axis. Now what happens is
with plane axis, whenever you move it around, you can see that it kind
of changed the bend. But if you move it up and down, it will make our bend
shorter and look at that. This already looks a lot better if we have
the bend over here. So now that we kind of have defined where we
want our bend to be we can grab our original
end model over here. Do a quick pivot. And then what you want to do is you want to edit your pivot, and if we turn on snapping, we want to snap it to
ertzes and we want to snap it to the very end
over here so that our pivot point is sitting
on the end of our model. And then we can press
Add a pivot again. And this time, we want to
do absolute grid snapping in increments. You
guessed it why. We just want to make sure
that we snap the No, sorry, Wong, one, won one.
We want to snap this. So add a pivot to this end. Tunnel snapping,
actually. There we go. To this end, we want
to snap it because this side needs to be on
the point of our grid. So add the pivot again,
incumbent snapping. So now if we move this
over here, there we go.
29. 15 Max High Poly To Low Poly Modeling Part1: Okay, so what we're
going to work on now is we are going to
create a little bit more like a
complicated asset. And this will be an
asset which we will call a high pole
to low poly asset, which is a common
phrase for creating a very detailed version of
the asset and creating a game optimized version of the asset and using texti
maps to basically manipulate the look of
your asset to make it feel like it is higher
detail than it really is. So this will all make sense
throughout the process. Or, of course, if you want,
you can probably find some really detailed
and technical papers online on how it all works. So we are going to
create some pipes, and I just want to go ahead and I want to create
three variations. One of them will just
be a straight version, like you can see
over here with also these round areas and also some welding
and stuff like that. The second version will
be like a joint version, sorry that you see over here,
where we can, for example, add another pipe to this or
we can add I don't know, if you want, you can add, what do you call the handles. Sorry, I forgot screw
It's not screw, so I forgot what it is called. And we are going to create a band version also like
you can see over here. So, yeah, we are going to
keep this quite basic. If we just have a very quick
look in the wheel, so yeah, so we need straight version, round version, and
joint version. Should be totally doable. Okay. Now, and I will keep it nice and simple because this is a
beginner course, but of course, you
can go way more complicated with this kind of stuff if you really want to. What I like to do is, although you can use
this scene if you want, we call it modular asset. I think it is better for organization if we just
go ahead and go to file a new to create a
brand new scene over here. Sometimes your grid disappears
whenever you do that. So you kind of just
want to create a new asset and then your
grid will appear again. I don't really know why. It's just something
that happens. So let's get started with
the straight version. Once we have created
a straight version, we can basically
create everything. Now, we are going to get started with our
low poly versions, and then we will go ahead
and convert those to hipoly. Sometimes it depends on the
complexity of your model. If your model is very complex, it might sometimes
be easier to create the hipoly first and
then low poly version. But this is something
based on experience, you will go ahead and,
um where's my grid. There we go. There's my grid. I accidentally pressed G.
Based on the experience, you will start to learn which
one you want to use first, if you first want
to high poly to low poly or low
poly to high poly. In general, it honestly doesn't really matter
because in the end, you just end up with
the same result. The only thing that
matters is that sometimes depending on
the technique you use, it might take a little bit
longer to create your asset. I'm going to go in my grid
settings and set this back to 10 centimeters over here to make it a
bit more sensical. Let's just go ahead and create a brand new cylinder over here. So we want these cylinders
probably to be around, like let's say that this
is like a long one. So we probably want it
to be around 3 meters. I feel like 3 meters is pretty good because
every 3 meters, it will have one
of those joints. So we don't want to
make it too small, because if we make it too small, we will just have
in joint, joint, joint, and it looks a
little bit too much. So I can go in here
and I can go ahead and I can set my radius, my radius, I probably want to go ahead and go for
like 15 centimeters. And then 300 centimeters long. Yeah, something like
that should work. Now, I'm going to set
my height segments to one over here
to remove those. And because this is a pipe
and it's only 15 centimeters, we can probably get away
with, like, 18 sides. However, deciding the sides of your cylinder is
really important because it's really hard to
change that one later on. So 18 is most likely
fine for this, especially when it is so small. So I will leave it to
18 while I recommend the steps that you might want
to take is so you have 18, and then I would have,
for example, 22. Let's say that I will use 22. You can also use 24 sometimes, and after that, I
often go to like 32. Or I go to 64. So it's like these increments
that I like to take. Do not make your
sites uneven numbers. Do not make it 43. If you do that,
sometimes it's fine, but if you need
to do any type of specific modeling,
it will be a pain. So just make it a habit
to use even numbers. So let's say 24 or 22. I'm just going to go
for 22 in this case. Now I'm going to turn
on my snap rotation. I'm going to rotate 90 degrees, and I quite like having
it where it is right now. So I'm just going to
go ahead and set this nicely to the center
to have, like, the end on one side, and that makes it easier for
us to snap. Okay, awesome. So what do we need
to first of all, we need to create these
extensions over here. This cylinder hits
just a cylinder, we can add some variation
to it later on. But for now, let's go ahead
and make some extensions. It's right click,
convert to add the ply. And now a quick little trick
that you can do is if you go to edge mode by pressing two and select all
of these edges, you can go to Connect, connect settings and set the
connect settings to two, and then you can use this slider over here to evenly
push them out. This way, we are sure that the centers are exactly
the same width. So we can go ahead and press. Okay. And now what we want to do is we want to click using our Face mode on this one and Control Double click
to loop it around. So click Control Double
click to loop it round. Now we need to
decide on the width. So you just want to have a feel for
perspective and also just, have a look at your reference to go with something
that feels logical, or what you can do is you can actually go in Google and try researching the actual width of specific pipes
and stuff like that. I'm going to go up here to
extrude and extrude settings, and I want to set my
settings to the local normal so that it pushes out based upon the direction
of your faces. And let's see. I'm going to probably make it
not too intense. Let's say that I will
make it 5.5 centimeters. That's actually a
little bit too much. Let's say five. Yeah, I'm going to go for 5 centimeters.
And let's press Okay. Awesome. Okay. Now, these sites, we have all of these segments over here, but we
don't need them. So Oh, no, wait. Actually, I will
leave them for now. We are going to
change that later on, but it's easier if we
leave it now and to then later on after we've
done a hypo, we optimize it. What I'm going to
do is I'm going to give it a little detail in here simply by going
ahead and let's see. So I want to do
that on both sides. So let's select both of these. And then we can go
ahead and for example, press ring over here
to ring it all around, and it will do the
same over there. And I'm just going to go to
connect connect settings. Push this in a little
bit over here. Something like minus four. And now what I want to do
is I just like to give it a little ring around
it just as a detail. I'm going to select
these two again. And this time, I want to
use, for example, a bevel. So we can go bevel
settings, local normal. And if you just right click to reset your bevel because
bevels are really sensitive, you can then carefully just click because sometimes
dragging is even too sensitive. And I'm just going
to, like, nicely drag this in over here. And play around
to did it to give it a little bit of, like,
an interesting detail. If you ever want to,
like, change it later on, you can go to Edge mode, select these two edges and
simply use your scale. Sorry. Yeah. Oh, yeah,
my scale is correct. But that makes me wonder. Go down here. Sometimes this happens if your scale doesn't
do anything with edges. Just go down here and
press the little plus so that it tweets it
as one model, see, and now you can scale it because s thinks they are
individual edges, and because edges do
not have a width, it doesn't actually
scale anything. But I'm going to
leave it like this. Next, what I want to do
is I want to add a bevel here and here and
also on these side. Just a small bevel for
our weighted normals and to just make sure that
everything looks correct. Now, of course, because
it is a low poly model, we could not even use
weighted normals, but nowadays, what I prefer
to do for AA assets, definitely don't do this
for mobile assets or VR. But for AA assets, I like to add an extra
bit of geometry in my low poly just to push the
quality a little bit more. So what I'm now doing
over here is I'm just selecting this one
and I want to go for a slightly bigger bevel. Because this is a
bevel that's going to have welding on it, as
you can see over here, which we will do inside
of substance painter, but that looks really nice. So we have this over here done. So that's already starting
to look quite interesting. Let's add a few swift
loops over here. And for example,
this swift loop to, like, make the changes very, very subtle. Uh, let's see. Is that too much? Yeah, I feel like that might be
a little bit too much. Let's push this one back a
little bit. There we go. Okay. So those changes
are now also made. That's top to Google. Cool. Sorry. So we now
already have our base pipe. The next thing would be that
we need to create a bolt. So let's have a look over here. A bolt is quite simple. It's just like a cylinder with another cylinder and
another cylinder. It's really not that difficult. So the only thing is, of course, like
placing them around. So we are going to
create one bolt, and then what we will
do is we will go ahead and so I'm just having
then we'll move it around. The thing I have a
think about is that here, we have a bolt. But then on this
side, of course, the bolt is sticking out. That's just how these
type of cylinders work. However, because we
have a modular asset, this might not be the easiest
thing to do unless we, we are copying it
over, don't we? Like we keep copying this over. So we could make it so that
one side has it sticking out, and the other side
has it sticking in. Might be Yeah, that
might be best. Let's do that and
else we can always change it later on. It
doesn't really matter. I'm going to go up here and
I'm going to use the segments of my cylinder to basically
measure things out. I'm going to create
a new cylinder, and I'm going to turn on
auto grid, in this case. This cylinder, we want to make eight sides or six. Count them. One, two, three,
four, five, six. Okay, we want to
make them six sides. There's a nice thing
about cylinders. Next, what we can do is we can
simply click over here and drag. And push it out. Looks like it pushed
out in the wrong way, but that does not really matter. I'm going to give it
the thickness I want, which is going to be a little
bit thicker over here. I'm actually going to make
it a little bit smaller. Because I don't want to
change the thickness, I'm just going to select this side angle
over here and then put this side in our pivot
and do something like this. Oh, actually, now I do
want to change thickness. Probably something like this. Now what I'm going to do is I'm going to duplicate the ciler
by holding Shift and move. Go to go ahead and make
it a little bit thinner. A bit bigger, and
I'm going to go up here and I'm going
to make this one probably like 12 sides. Is 12 sites enough? Maybe we can go for 16, just to keep it
extra high quality. But 12 sites is probably enough. I just like to push in a
little bit more polys, because nowadays there are
optimization techniques inside of game engines that make it so
that our main model can be quite high poly, and we don't really
have to worry about it because there are
ways to optimize it. So we now have the center ring, which I feel like can be
a little bit thinner. And I am taking my
time with this because I know that after this is done, it will be a pain to
change it later on. Okay, cool. So we
have this one now, for this one, there isn't
much that we need to do. What we can do is we
can isolate this by going up here to isolate
selected or pressing LQ, convert it to an ply and
just delete the back phase. The reason we delete it is
because you cannot see it. So it was wasted polygons. Then for the font phase, I'm just going to
go ahead and hold Shift and scale this in to
basically through this, and then I press
collapse so that we have a nice polygon model. Now for this one,
you can see that a bolt is actually quite an
interesting looking shape. What you can see over here is that the bolt,
like it is square, but then it goes into,
like, a round shape, and then on the corners, it kind of just,
like, tapers off. This is one of the very, very few times that I
would actually use, how do you call it, the
vertex chamfer mode. So it's just coincidentally that I'm using it in a
beginner to toil. Now, first of all, I don't think we need the
back of the bolt, do we? Yeah, let's keep the
back of the bolt. We can use some
interesting bevel stuff. So let's first of all, only create a front, and then we can use a mirror
to basically change it. I'm going to go ahead and
I'm going to right click, Covert at a Poli,
and I'm going to select all of these
front verts over here. Then I want to go to
Jefa and Jevo settings. Let's turn this to zero. And let's give this like a
chem for settings over here. So what you can see over here
is that now we are creating the roughly the chem that I
want. It's not perfect yet. So let's make this, like, quite a large am for like this. Now, let's d W, and let's find our top view. Quickly sag these edges,
and I'm going to move these a little bit
closer over here. Okay, we're getting there.
We're getting there. Now, we have this one, and then the next thing
that I want to do is, so these are square and I'm going to make it a
little bit around. I'm going to make a
simpler version of this bolt and not the
complete accurate version. I'm going to hold Shift and
I'm going to simply scale this in or of course,
you can use inset. I'm just used to using
Shift scale because that's what other
software often use. And now, having this one, what I'm going to do is, let's get started
by isolating this, deleting the back face, and we are basically going to this is actually
quite nice and round. Yeah, I don't know if
Rate needs any more roundness. Mm let's have a look. I was going to say maybe add some extra segments to
make it more round, but maybe for a bolt
that is this small. If I turn off my edge
and faces, for example, if I just add a
smooth modifier over here and turn on
smoothing or maybe turn on out of smoothing
and clting If you press out of smoothing and turn on vent indirect smoothing, you can use this value to increase or decrease
the smoothing, see? So now I have increased it so that I include
those extra edges. I take what I'm going to do. I'm going to use
one extra segment to probably make
this bit over here. And I don't know. Do I want to make the tow?
So I'm just having, like, a think about it because I don't want to make
this too difficult, but to be honest, this actually feels fine
if I just use like this. Yeah, if I just make this, like, a little bit less over here, this might just work fine. I think the last thing
that I want to try it most likely will be overkill. So I most likely will not
use it for our low poly, but I just want to see what it looks like if I
add a quick bevel. And just like you, like,
I like to try things out, even, I know how to make a bolt, of course, but sometimes
I like to just, like, have a look and see
if doing a bevel, and maybe if we set the
bevel to not uniform, maybe try over here. Here, see, you can, like, select this and you can have
a quick look around. If this maybe looks nice, this does look a little bit closer to what we
have over here. So at this point, it is up
to you to make the decision. Do I want my bolt to
be such high quality that you can literally see like all of these
tiny little details, or do I just want
to make it only the high pool in the
high resolution version, and leave it in the low poly? I'm going to decide that this bolt is Good enough? Yeah, I'm going to decide
that this bolt is good enough to keep it
inside of the low poly. And then what we
will do is when we turn this into a
high poly version, that's when we will add
all those extra details. So what I'm going to
do is I have this bolt over here. Like this. And you already want to set
this at a correct scale. And now we are going
to symmetry this. This is going to be quite easy. All we really need to do is
turn on a symmetry modifier, and I think we need to go
ahead and click once on it, we go into our mirror
and move it, see? And then move the
bolt over here. Now, at this point, you can also decide if you want to
make the ball ticker, you can just move it
a bit further and then go outside of the symmetry modifier
and move it back. And yeah, that looks
a little bit better. So we now have our bolt done and we have our back end done. The next thing
that we want to do is we want to also right away, create the other
side of the bolt. So the other side of the bolt is a little bit different as in we want to shift click and
just copy, duplicate it. So I mean shift track. And then we want to
go ahead and rotate this 180 degrees and move this against this side
over here like that. Now, this one, and
this is the reason why we made those pieces over here, we want to go ahead and we want to create a hole in
here, basically. And I'm going to make this
hole yeah, you know what? I'm going to make it a
little bit wider like that. Okay, so the cool thing is, even if we change
something in added pole, the symmetry will
still work and update. Now the next thing
that what to do is we can decide to convert
this to a added pole. But what you can also do if you for some reason want
to keep the symmetry, you can turn on
added poly modifier, and then we can change it. So we are going to
select these two faces and we are going
to press delete. Next, we are going to press three to go into border select, and we are going to
select these two borders, and we're going to press
bridge. There we go. And now it is like a ring, like an actual bolt. Next stop, what we want
to do is we want to create a cylinder that
goes inside of here. So what we can do is we
can grab, for example, this cylinder that we have
over here and nicely move it. Now, one thing you might notice is that now
this cylinder, it has a different poly count than this one over here
because we went basically, this one is 12. Yeah, this one is 12, and this one is, I believe, like that we did for 16. This will not look very nice because now if you
would push this out, you will right away, be able to notice
all the clipping. Sometimes it's good to keep
the same polygon count. So instead, what I'm going
to do is I'm going to go ahead and I'm going to there's multiple ways that
you can do this. The easiest way is
probably just press Contra V to copy your model. And then with this
model, what I want to do is I'm just going to go
ahead and I'm going to, um, basically select this ring, Control I and delete
everything else. There we go. Then what I can do with this one is I
can just go ahead and I can collapse this and scale this in. There are
many ways to do this. You can also go ahead
and you can here, I'm just going to
push this back. You can also go in and you can only duplicate a specific
phase and that kind of stuff. But I know, force of habit
for me to use this way. Now, I'm just going to
double click on it, and I'm going to press Extrude. When you extrude a plane, it will just normally
extrude like this. And I'm going to extrude
this out so that it is sticking out a little bit
like you can see over here. I don't want to have
it sticking out too much, just a little bit. Now that we have a
little bit sticking out, the first thing that I notice is that compared to my reference, it feels way too thick. So this is a good way
to now just like, first of all, just
center your pivot to make sure that it is correct. This is a good way for me to
just basically scale it down until I get a
version that I like, see? I quite like this. And then I can just go in on
my original one over here. So select the inside. And once again on just
the Z and the Y axis, I can also scale
this down over here. So that is looking a lot better. Okay. So we now got our bolts and we got all
of this stuff ready to go. So what we're going to do now is we are going to turn
this into a hypolymdel. Now, you might ask
me, but, Emil, why are we not duplicating these bolts all over the
place and stuff like that? Quite easy. I want to go ahead and I want to
basically reuse these bolts. So I want to only
texture two of them, and then simply use these two over and over
and over again. This will make our textures feel higher pool because
we don't need to or we don't need to push like 20 bolts into one
texture, but only two. Second one it is good practice to show
you this technique. And the third one,
I first of all, want to turn this into high ply because else
we would need to turn all of them into high
ply every single time. So we got over here these two bolts and that is now totally fine.
We are ready to go. I am going to go
ahead and I'm going to select them like this. And move them up a little
bit because I don't want to have them interfering
with this piece. Now, let's get started with our actual bolt over
here. Oh, you know what? No. Let's start with this one so that I can show you
the concept better. Let's get started by turning
this into a hi poly model. You want to, first
of all, select your mesh, and you
want to go ahead, create a new layer and call this pipe underscore straight. Underscore LP for low poly. Select it again, Contrave
and in copy, okay. And whenever you copy, it will keep your copy selected. Select the new layer again. Pipe underscore. Straight unscoe HP for hipoly and turn off
the low poly version. Now we can be
assured that we are only working on
the hipleversion, and the low poly version
will stay the same. So now we can do
whatever we want. What we're going to do
now is we are going to basically turn this
into a hi poly version. You do this by adding
smoothing, sorry, adding supporting loops, and then using something
called the turbo smooth. So for this, we want
to have added pool, and on top of that
a turbo smooth. Now, what you see
happening right now if I turn off
my edge and faces is that the turbo
smooth it works, but it destroys our shape,
and we don't want it. We want to keep
some of our shape. So the way that we can
fix this is we can go into Edge pass and by the way, in Turbo smooth, turn
on isolate display to, like, see less geometry. And you want to add something
called Subpoting loops. Let's say that we go
into my added pool and I turn off the show
end result on off. Want to add a swift loop, and that is a supporting loop, and I want to add it
close to the corners, not too close, but close to the corners over here so that
the smoothing will stop. So the smoothing will
begin at this edge, and it will stop at this edge. Doing this, it will basically make sure that the
smoothing doesn't go crazy. The further you go away from the edge, the
smoother things look. But because we are working with a low poly version and
a high pole version, these two versions need
to be very similar. They don't have to
be exactly the same, but they can also not be completely different because
then this does not work. So I want to make
my bevel smooth, so I'm going to have
one here and none in my bevel because I want to have this bevel to
be nice and smooth. I can show you an
example later on. I would want to have one
here, and this part, I do want to have quite strong. So as you can see
over here, I'm just adding edges on both
corners and once again, here, here, and here. Now, I'm also going to
dd one here and here, and I'm moving it a bit further away just to give it that bevel. So just to give you
an example, if, for example, go ahead and add another supporting loop here, you will see the difference. If I turn on my smooth toggle and I will go ahead and
turn off my edgier faces, you can see that now
it looks a lot better. It keeps that bevel, but the bevel is super,
super smooth. And by the way, you can
press Show cage if you want to be able to see some
of your geometry over here. I tend not to use
this too often, but it basically shows you your lobo geometry
before you turbo smooth. And here you can see
what happens when I actually add a
segment to the bevel. See, smooth bevel. But because I added one extra segment
here, it looks strong. If I would select this and
press control backspace, you can see,
especially like over here that it slightly changes. And we want to keep
the sharpness in here, and we want to nicely
make this smooth. So that's basically the
general idea behind this. Once again, you can
use a smooth cage, but as you can see,
it is a bit messy. So I prefer to simply use my edges and aces and then
turn off my turbomoot. You can also just hide
it. It doesn't matter. Now, once you get used this, you can actually do
your entire model without ever needing to check your turbo smooth because you just know how
it will respond. So I will do the
exact same thing. Over here. And there is no rocket science against how close you need
to go to the edges. Just don't go super close because then your
edge will look like a low poliag which will defeat the purpose of why we are spending so much effort in this. So we have this
one. If you want, you can also go
ahead and collapse this down at this point. There we go. And
the reason we did not collapse it down
before is because you cannot create swift loops when you have
everything collapsed. So that's why we kept it so that now we can create swift loops. Just wanted to let
you know that. So we have this turn on
Turbosmooth, and there we go. That is our hypol version. So now you can imagine
hi poly and low poly, and we will actually
using textures, make this version over here. Look like this version, believe it or not, but
that's what will happen. So we can now go ahead and
we can go in here and we can grab this piece and make sure that you
are in your hypole. This one is a little
bit more difficult because the geometry
is not very clean, but that's also good practice. What I'm going to do
here is that I'm going to go before my symmetry, so in my added pole, and
I do always like to add my supporting loops
to a new added pool. I'm going to go ahead
and I'm going to go to vertex mode and
start with simply connecting these vertices
because right now they are just floating in mid air
which makes this a end gone. And, um it means that when I want to add
my supporting loops, it's not as easy to add them. So I'm just going to
basically do this. And the reason I'm doing
this before my symmetry so that I don't have to redo
my work again later on. Okay, so we got this one. Now, funny enough, over here, we already have a
supporting loop. See? That is literally
our supporting loop. I forgot to add one here, so let me just do this and this. And now we want to make
this one quite smooth. So I will add a support loop. And because I added
these edges now, I'm able to right away add a
support loop also over here. Now, at this point,
what I can do is I can go ahead and
check my symmetry. And then, of course, remember that I also need to add a support loop over here, and these are quite important. So what I can do is I
can add a loop here. And what you can see is that because I added
the loop here, it gets a bit confused
with my loops. So I'm only adding
a loop on one side. This is because I want to keep these corners sharp
since it is a bolt. So I'm adding it on
one side like this, and this is just something
you get used to. So whenever you have
this, just add it on one side and then use your cat tool and simply
with your cut tool. Continue because these
supporting loops, you can also just
use your cat tool, but, of course, cat
tools take really long. So that's why I
even with this one, still place it to one side, and then I basically just
loop it around like this. Now, I need to see how smoothening will react to
this one bolt over here. So I might want to add a loop in the center just
by doing, for example, something like this over here, and I can already do that just to see and then
aro turbo smooth. Now Imatobasmoot, turn on isolate display and set
the iterations to three. I don't know if I did
that with the other one. Oh, yeah, I did. I
just did not tell you. Sorry, that's instinct.
Not instinct, but like something
I'm just using. Turn off my edge and faces, and now we can see
the difference. So this one is without adding
something in the center, and this one is with adding
something in the center. It is up to you how smooth
you want this to be. I actually like it without more. So what I'm going to do is I'm going to go back
to my added pool. And I'm going to remove
this part over here. I was just a bit
worried that it did not make this nice and smooth.
That's looking pretty good. Already. Yeah, see? Yeah, so we have a
nice smooth bolt, but we still have
these sharp corners. Now for this one over here, quite easy, add a poly,
add one loop here, and then we want to go ahead
and if we just isolate this, remember how we
said that we cannot add a swift loop in here. Another thing that you can do is you can and what
I like to do is just press Select ba angle up here and then select
it like this. And then I like to just hold
shift and extrude this in. Because when we extrude this, it's the same as just
adding a support loop. And then we can select
the support loop and maybe move to a little
bit closer over here. Now, another thing
is you don't need support loops if there
are no faces behind it because there's nothing too smooth because no
faces is nothing. Isolate display, iterations
to three. And there you go. Now if I turn off my age faces, see, nice and high polly. So that's the high
Polly version. Another cool thing
is if you have a direct copy of your bolt, you can go in here and you can copy the turbo smooth
and the added pol, simply select them
using control, right, click copy, but it has to
be the exact same model. Here, right, click paste, see? Now, for this
version, I could go in and completely
change my smoothing. Or what I can do is I can
simply duplicate this again. And just this time, turn of turbo smooth and make sure that it is in the
exact same location. It can be offset by a tiny bit, but it needs to be
very much the same. Select the original version,
and let's delete that. All I'm going to
do in this version is I'm going to go ahead and because I cannot see it, I need to select both this
one and our cylinder. Try it again, add a ply. Move my added pool down. Ah, 1 second. Smoothing groups. I think
I will actually do this on my added poly over here. That's the one it's
probably better. The only annoying thing
is that because now, of course, I cannot
see what I'm doing. So what I might want
to do is I might want to turn on over here my lowpol and then isolate
both my lowply and hypol. I have both of them turned
on and now I can just select my hypolG to the
added pool modifier. I can now just go ahead and
I can move this down so that it is exactly
the same, like this. And then I can just
push this in over here. And what will happen is as
soon as we turn on symmetry, it will cut a hole because the symmetry basically
removes that one piece. So having that done, now I can turn off my low poly in my added poly over here, we can actually
delete that phase. There we go. I'm
just going to add a loop here, a loop here, just in case I will
add a loop there, we symmetrize it and
then we turbo smooth it. So now we have our second
bolts ready to go, and you can see that it is very close to our low poly again. So this is about the
max that you want to probably differentiate
in this specific case, your low poly from high pole. We only differentiate it this much because our model is small. If this would be a
really large model, this would probably be
too much and you would want to follow the
jomtre better. But because this
is so small and we will only see it
from this distance, we don't need to be that
specific in the details. Now, finally, we have over
here, for example, this bolt, and you can see
that it has a lot of little rings around it. So what I'm going to do is
I have my bolt over here, and this is like the end. I'm going to go
ahead and we will only have this detail in the
hypol and then bake it down. Let's add a swift
loop over here to mark the end. Yeah,
let's do that. And over here, you can use
the biangleO I can just, like, very quickly do this. And then scale this in. There we go, our
second spot loop. Now, to create these ridges, we all know that screws, they have these ridges and they are actually interconnecting. So they are not just
like standalone they properly connect together. I can show you like, we're really way too over the
top way of doing this. But let's be very honest. This is going to be
such a small screw. You will never, ever be
able to notice that. So what we are going
to do is we are going to use the
simpler version, which is to simply go ahead and select these
edges over here. Go to connect and
connect settings and add a bunch of
connections like this. Let's actually go outside of isolation mode that I can see. Yeah. And then what we're going to do is
we are simply going to Control double click
every other edge over here. You could play around with
your ring mode over here, but it's not a long piece. So let's say that we just
leave it up until this point, I can press isolate and maybe go a little bit
further like this. And then what I'm going
to do is I'm just going to go ahead and
extrude settings. Because this one is
only in our high ply, we can be way more
liberal with, like, the shape and
everything like that because basically what will happen is we will bake
these details down, and it will look like these details are on the
low poly using a texture. So having this one, let's go ahead and just get
rid of these areas. This is like a piece
that we cannot see, but just in case I
want to keep it. And now, what we
have right now it is way too perfect for a hypol. Because a hypol often looks
directly from every angle, what will happen is
if we look at this, you can see that you
don't really see if I maybe go to default
shading to show you better. You don't really see that
there is a difference in shape because a
hypols not like us. It doesn't look into
these directions. So the way to fix
that and to make your hypol look
better and smoother, you simply want to
select for example, these edges or the center ones, it doesn't really
matter in this case. And then you want
to go to scale, and you want to
set your scale to local to scale every
phase locally. And Okay, that's a
bit annoying that sometimes it does that where it doesn't know
which one to choose. And then you want
to simply Oh, okay. Maybe if I do it separately, This is a strange problem, but it might be just because our transforms
are a bit confused. Let's right click, convert to Adipol and go to tool utilities, reset X form, and reset it. I have spoken about this before
in the beginner chapters, and now it will remember our
shape. So let's try this. Local, that is very interesting. It is not supposed
to normally do that. So if local doesn't work, let's just keep it at world. World should actually World
should work. Let's have look. Okay. That is my bat. That is very interesting
for some reason, this one time in a tutorial after using it for
hundreds of times.
30. 15 Maya High Poly To Low Poly Modeling Part1: Okay. Happy New Year, everyone, as I am recording
this on 1 January. So what we're going to do in this chapter is we
are going to go ahead and go for something a
little bit more complicated, which is going to be that we are going to start by
creating our pipes. Now, these pipes will use the high ply to
low poly workflow, which as I said before, it is a workflow that allows
us to manipulate the look of our model to make it look much higher quality
using textures. The actual workings
of this comes later. For now, just to keep
it as easy as possible, we are going to create a
low detailed version and a high detailed version of our model. Let's
leave it at that. So we are going to
create some pipes. Now, we are going to go ahead and create three variations. So if we have a look, we want to have a straight variation, which is quite obvious. We want to have a bend
variation over here, and we want to have this T
pose variation over here. The nice thing is that we can actually only create
a straight variation, and then we can
basically use those to create the other two
variations right away. So it will not take too long, and we will still use all
of the techniques needed. So first of all, what
we want to do is, let's go ahead and go to Windows settings and preferences and go to our preferences. And then in our settings,
I just want to set my working units
to meters because it's a little bit easier
since we are working with really large assets as
these pipes are probably, well, I know how long
they are going to be. They are going to be 3 meters long for the straight version. The reason why I already know all of my dimensions
is because I already did the
three is Max part in which I already
created these pipes. So having that done, let's go ahead and get started. We are going to get started
by shift right click and creating a simple
cylinder over here. Let's hold J and
rotate this cylinder, and we are now going
to define the height, which is the length, depending on how you look
at it and the radius. So for our height, we want
to go ahead and well, I want to make it 3 meters. Yeah, let's make it 3 meters. And then, so it just says three. My radius, I'm going
to go for it needs to be quite simple,
I think 0.15. Oh, 0.12. Maybe 0.13. Let's go for 0.13. I'm quite picky with this stuff. Now the next thing,
which is quite important is that
we need to define, first of all, how many segments we want our cylinder to be. Now, right now, we have 20, which might be fine, but I'm looking to create
more of like a hero asset. Although 20 is
probably fine over here because you will not be
able to see your segments, I am making these assets on
purpose for this tutorial in with the idea that I might
even go like this close, like, I might go really close up with my camera to the model. So I got distracted
because I see some glitches over here. I hope that's fine. So because I want to go really
close up with the model, I'm going to go ahead and set
this a little bit higher. So let's set this.
Let's see, 24. Yeah, 24 seems fine. You can, of course,
just deselect, and then you can
have a better look. Basically, what I'm looking
for is if I look over here, I don't want to be able to
count these segments too easy. So maybe even 28. Of course, we can
still count it, but we are like super close. So, of course, if you
imagine it like this, see? Now it is really
hard for us to count the amount of segments
that our cylinder has, and that's kind of
what I'm looking for. So let's stay with, like, 28 or something. So
we have that done. Now what we're going
to do? Oh, hey, where's my reference?
Oh, there it is. Now what I'm going to
do is we are going to get started and create
these extensions over here. So if we have a look, we want to make sure
that our extensions are large enough so that we can keep these bolts in here
and that we still have some space at the
top and the bottom. And also really important
is I want to create a bevel over here so that
inside of substance painter, when we do our texturing, we can create some nice
welding details. So let's go ahead and
right click Go to Edge, select our Edges,
and then over here, we have a Connect button. Remember, you can find
it also over here. Connect. Now, if you go
to your tool settings, oh, it's already set the two. You want to set your
segments to two. Sorry, normally, you
guys will have this. So we just want to set our
segments to two over here. Now, you can use your pinch by clicking on it and setting
this, for example, to one to push it out, but I never like doing it this way because
it takes too long. Instead, I just
press W to confirm, go to my scale tools, and then I simply scale
it out like this. And we do not want
to go too thick. The reason for that is,
remember, we are repeating this. So when we put two
next to each other, this metal part will
be double as thick. So because of that,
you don't want to go for a really thick metal because that will instantly
make it look bad, basically. So we got this one
done. Now, let's click. So you sometimes need
to zoom in so that you don't accidentally
hit your pivot. So we are now going to
go ahead and we are going to grab these. To be honest, is that
too thin? Double click. Let's maybe move it because I want to create
some extra details here. Mm. Just having a
thing over here. Yeah, no, that should be
fine. That should be fine. Yeah. Just making sure that
my dimensions are correct. So let's go ahead
and go over here and select these faces, and then we want to press
CtraE which is extrude. Now what we can do is we can simply go ahead
and push this out. And at this point, I am mostly just kind
of like eyeballing it, but I want to, of
course, make sure that I have enough space, but not too much
space for my bolts. I think something
around 0.05 over here in our local
translate C looks fine. Yeah, see, that will work. Okay, awesome.
Now, first of all, let's start by creating
the most important bevel. We can do is we can
actually select our pipe, and we can place
a single connect over here in the center and press Enter or W. And this is because I don't
want to duplicate. I don't even know why
I did it this time. I don't want to keep duplicating
over all my details, so we are going to
mirror it later on. And this collector helps me remember exactly where
the center point is, although it's exactly online in this case. It's
just good practice. So yeah, I don't know why
I did it over here also, but it's just easier to
even the pass sometimes. So we are only going to focus
on this point over here. I want to go ahead
and press contra B, and I want to make this
bevel a little bit bigger. Let's do 0.15 over here. And since I am here, anyway, and since I'm going
to mirror it, what I will do is let's just quickly press space and go
into our top view over here. I hope this is the
site that I wanted. I'm just going to
go to Vertex mode, select these erzes and I'm going to make it a
little bit thicker. Just a little bit over here. Yeah, that should work. Okay. Now, I just want to create
a little detail in here. Although these pipes
don't have it, you can see that
this is just like a solid chunk of metal. I know it feels boring to me. So I want to Oh, wait here, you can sort of see
like something, although that's probably
because there's an end here. Just in general, I just want to make it look a little
bit more interesting. We are artists.
We are allowed to just add our own additional
details to this. It's no problem unless
you're working for like a factory or
something and you're designing their products. But let's go ahead and just
add like a Let's do like two connects. See
that scale them. Oh, that's actually a pretty
good scaling already. Next, what I want
to do is I want to add two more connects over here. But enter right away,
and scale these in. And then if you
just go ahead and loop these pass by
holding Shift click, you can scale them using
the green square over here, which is scaling on two axis. In this case, the
Y and the Z axis. And then we push this in
to create a little bevel. That's not enough. There we go. I create like a little bevel. And that's pretty
good at this point. So what I'm going to
do now is let's go ahead and prepare
weighted normals. So, we already went over weighted normals in
the previous chapter. Even on high pool models, I always like to use
weighted normals unless I need to go for
something super optimized. The reason for that
is because your BACs, which is converting your
high poly to low poly, look great when you
have weighted normals. They always look a bit better. They always feel up close. They feel higher resolution
and stuff like that. So often when you're
working on AA games, especially nowadays, we are able to afford this
extra bit of geometry. And hell, if you are using nanite then you are
definitely able to afford it. So I'm going to get started by selecting these
two out of sites. And by the way, although I
don't know if it will work, the reason I left
this etche over here is because I
believe if I remove it, okay, does still loop around. In some softwares, whenever
you remove this edge, you can no longer double click to loop around your cylinder. I guess in this one, you can. That is the annoying
when you are working on three different modeling
softwares in the same day. Like after this, I'm
switching to blender. Then I'm switching back to Max, then back to Maya. So it's a whole thing. But I'm going to select these and I'm going
to give them a bevel, not too large, but also not too small, something like this. And now for these ones, I'm going to give them
also a bevel once again. These ones are even smaller. And then over here,
I even want to give this one a bevel just to
really push the quality and to give it also that
feeling that it just like nicely flows into
like a gap over here. So this is now ready
for weight normals. What we can do is
we can remove this. And actually, honestly, we can even remove these
pieces over here. And there's multiple ways. So if you have the time, sure, you can select it like
this. That's so to fine. Or you can quickly go
to your modeling tools, go to selection constraints and set the angle and just set it to like one because then it will basically select
everything on a flat face. And then we can delete this. The reason we are
deleting this is because you will never
be able to see it. Now that we have a
bevel, what will happen? Is, as soon as we, of course, duplicate this over like that, you will simply not be
able to see the ends. So if we would include them, it would be wasted UV space,
that's what we call it. And UVing is something
we go over later on. It's the act of converting our tree model into T D so
that we can give it textures. Of course, we have
limited space into the, so anything we can
remove that you will not see is a benefit. So we are now ready
with this one. Our Pivot point is still at the center, which is important. If it is not, you
can always go to your tool settings and you can press reset to get it
exactly in the center. And then we're going to go
ahead and use a mirror, which we have over here already. Although I believe you can
also find it taking mesh. Yeah, here, mirror. So let's
go ahead and apply it. And now what you
want to do is you can see that now our
mirror is working, but it is in the
wrong direction. So what is at the
direction to the plus. And now instantly,
you can see that all these details have
been copied over here. Next to this, just
make sure that merge border is turned on. What merge border does
is it will merge, as you can see over here,
your vertices in this area. So that's why it is important. We can press W, and that is looking pretty
good right now. Anything else that I
need to do for this one? I think the last thing
that I want to do, remember this is still
the low poly by the way. Last thing I want to do
is I want to just give it a few segments here,
here, here and here. And you probably
guessed it because even with this pipe
because it's quite long, I want to give it
some slight variation over here to just in general, make things feel a
little bit more natural. And because it's
games, you can often exaggerate the
variation a bit more. But here, see, although it might be a little bit
difficult to see right now. Oh, God, I can try to show you because there
is like a setting, but I forgot where it was where
you can basically turn up your anti alsing display. Is it in display?
I totally forgot. I know where this
in three is Max, but basically what it allows
you to do it allows you to boost up that antializing effect that
you have over here. But to be very honest, it was one of these Multi
sample anti alysing. There we go. I knew
it was somewhere. So this button here,
see, of course, if your computer is really slow, it will take a little
bit extra performance, but it allows us to apply antializing and now
we can see a bit better how our model looks. The only annoying thing is
that makes for some reason, our lines really thick, so I tend to just
have it turned off. So we got this one
now ready to go. And now what you will see is that if we look
in our channel box, this is what I
mean with history. Our entire history is in here, but it has become quite a bit of stuff that will
no longer work. And well, first of all, before I show this
save my scene. So file, save CNS navigate
to our safe folder. And this one we will call pipes. I will do, no, I wanted to say pipes Maya, but it's literally a Maya file. So I might make the
naming a little bit more logical later on for people who are not aware
of it, but well. So as I said before, yes, we have a history. Some of these pieces
we are able to edit, so you can click on it and edit it, although
I rarely do that. But if I, for example, go here and would want to
change the segments, it's not smart
enough to understand how to apply all of
our settings later on. So that's Uo that. So what we are going to
do is we are going to go ahead and go to modify Oh, no, modify, edit, delete
all by type and history. And I'm just going to press
Control Shift and click to apply it to our
shelf. Yeah, see? And that's what
delete our history. So now we have, like, a
clean version over here. Now, at this point, there
are a few things we can do. We can go ahead and
convert this to a hypoly model and then
do our other pieces. And then what we would
need to do later on, we need to optimize
these other pieces, or we can now create other
pieces like our band and T, and then we can convert
everything to a hypoly model. I think in this case, because it is a tutorial, it is easier for you to
understand if we now just, first of all, create
our other pieces. So what we're going to do
is we are going to use layers to basically
organize this one. Now we have this one over here. Remember how I was telling you about our pivot points that we want to have our
pivot points often to the ends because at the ends, they will look a
little bit better, or they will Oh, brain freeze. Sorry. They will snap better
inside of unreal if we have a pivot point to the end
because it makes it easier for us to showcase
or to look at it. Wow, I will have a
brain freeze over here. Anyway, I explained this in
the modular tutorial one. So what we're going to do
is we are going to edit our pivot, snap to points, and I want to basically
go over here, and I want to make sure that I am snapping to the right point. Only don't move the center, only move this key over here and snap it to points and
then turn off at a pivot. And if you want to double check, you can press space and go to
like a side view over here. And then you can zoom in.
Yeah, that looks correct. Okay, so our pivot points now exactly at the end of our model. And at this point, we can
just go ahead and snap to grid and nicely
snap it over here. Don't worry, doesn't need to be literally on the grid like this. This is totally fine. So we
now have it in location. That just makes it easier for us when we create our other models. So in our layers, we are going
to press the last button, which means making a layer and right away
assigning our model. And I'm going to call this
pipe unscoe straight score. LP and press safe. And then what I'm going to do
is I'm going to wide away, press Shift D. And
then what I'm going to do is I'm going to with this duplication selected,
create another layer. Pipe score. Straight
nscore Bend, Shifty. Pipes straight underscore
T. Sorry, I don't need x. I don't know why I say straight. That's unlogical. There we go. Okay, so now we have
our three pipes. You can see that now every
layer has its own pipe. So let's get started with
the band version over here. So bands are actually quite I would say
annoying to create. And the reason that
they are quite annoying to create is because we want to try and keep the
snapping functional in here. First of all, what
I'm going to do with my band is I'm going to
go ahead and I'm going to remove these segments
because we don't need them. So control backspace over here, and we are going to make this
one quite a bit smaller. Now, right now our grid is set to if we go
to displaying grid, uh grid line every 5 meters. And yeah, so there's a major
grid line every 5 meters, one, two, three, four, okay, I don't know why
it doesn't show. And then there's
five subdivisions. This means that every grid
point is 1 meter, basically. So if we go ahead and we want to try to
keep the numbers even, but I don't want to
make a band that is literally going from 1
meter to another meter. That would be a really big band. So if we set our subdivisions
to ten and press apply, now every half meter, we will have a subdivision. And I think this will
work a little bit better. What I can do is I can now go ahead and duplicate my pipe, hold J and snap rotate this, and then turn on grid snapping and I want to move
this one over here. This pipe is basically
going to be like our sample as if that we are snapping it
inside of unreal. So we would snap this over here. And now if we just make
sure that our bend version Ends up at this
intersection over here, then we know that
we did it white. So what we can do is we can
go ahead and get rid of them. Last one. Okay? That was, that's a duplicate verts. Let's quickly go to
our pipe straight. What you just saw
is that we have two edges on top of each other. So let's just
get rid of one. Oh, double even. I think the reason
this happened is because actually, I don't
know why it happened. Maybe something with the mirror,
although that's strange. But let's fix it.
Now that I found it, just by pressing Ctrabegspace. Yeah, I guess maybe in the
mirror, I did something wrong. Oh, well, it does
not matter too much. So what we're going to do is we are going to
move this bed back. And now to the scaling, I don't know if there's, like, really rocket science to it. I believe it's like
scaling times two. So if we want to go
for, like, 1 meter, we probably want to go for like 2 meters. I think it was
something like that. Often, I just kind of wing it. So I'm going to move
this over here. And the reason I
kind of wing it is because we can use
a bad modifier to balance things out a little bit and get them
exactly in the right location. So, oh, hey, what happened? I swear I put it there.
And then I went over here. That's better. Okay, weird.
So we now have this. Now, in order to bend this, we need segments because right now we have nothing
to bend here. It's just a straight line. So what we're going to do is
we are going to select this, and then we go over
here to connect. And now over here
in our segments, what we want to do is we want
to set this to 25 maybe. 24, actually. I never
like to go with uneven numbers because it
ends up biting you later on. So let's do this in
the press Enter. There we go. Now we have a
bunch of segments ready to go. Now what we can do is we
can start with our bending. If we would bend this,
we will have a problem. So you can go to the form, non linear Oh, sorry. Before we do this, what I always like to do is remove my history, and then I like to go to modify and freeze my transformations. The reason you
want to do this is because you are now applying a modifier that will manipulate your geometry
in quite a heavy way. And if it has some
kind of weird history, it sometimes gets confused
and it breaks your model. So let's try again,
the form, non linear. And then over here
we have our bend. Now, with our bend, the way that works. Oh, I wanted to show you, but it looks like I need
to do a lot of stuff. Yeah, I'm still going to show
you because it's important. Let's say that I set this
band to 90 over here. I then hold J, and I rotate this and I rotate this.
You can already see. What will happen is that because it is bending,
also these ends, it basically breaks over here because it's
trying to bend it, and of course, as it
comes with bending, it is starting to
squash things together. And we don't want it. So we
are going to delete this, and we are basically
going to grab, let's say, up until, like, select
this and oh, oh, God. And these select this over here. So grab along with the bevel. And now what you want to do
is shift right click and you want to go ahead and
extract these faces over here. And now it has become
its own model. Now at this point,
all we need to do is we need to go ahead and set at the pivot actually, I don't trust that because I did it manually on this grid point. So instead, let's just
snap the points and snap it to this point over here. Now I can trust that the
BIV point is correct. And now I can go ahead
and snap the grid, J rotate and simply
snap this over here. So whenever we work with bands that are
modular, anything, whenever we work with
anything that is modular, you want to really
look at your numbers. You want to be super
specific for all of your grid points and where
you place everything because the more
accurate you are, the easier it goes. Now, I am someone that
normally outside of the toils, I like to win things because I often work
really, really fast, outside of the toils,
and at those points, it is often faster for me
to quickly try something out and fix it later on than to do it the right way,
if that makes sense. But of course, as a student, especially as a beginner
in a beginner course, definitely work like this until you really, really
know what you're doing. So what I'm going to do is I'm now going to select my center, shift right click and
extract these faces also. Now we are free to extract this entire thing over
here. Yeah, which is great. So all we need to do now is
we just need to give the bend so we can go the
form, non linear. And if you want, you can
actually apply this bend to your shelf. We can apply it. Now, we know that our
bend is going to be 90, and this bend modifier, it has two pieces. So let me just hold J. It's almost like a you know, you can just basically
use it as its own point. And that's why I said it was flexible because if we turn
off grid snapping, see, we can very it's very flexible because we can keep
rotating and snapping it, and that's how we can basically manipulate it to get
exactly the right location. Now, as you might notice, it's now bending on both sides. The low bounds and high bounds, if you set one of those to zero, you can see that now over here, it's only bending on one side. And, of course, if you
do it with a high bound, it would be doing this on the
other side over here, see? So those are lower high bounds. Really useful. You want
to set this to zero. And next what you want to do
is if we let's press height, oxy, no, we don't
need to press height. I forgot because we use low, so all we need to do is
we just need to kind of get this to and it looks like that I went a little bit too large or too long with my
shape, but that is no problem. We can turn on our
grid points that we can see it a bit better.
And you guessed it. Let's nicely line
this up over here. See? And now we have quite
a nice looking bend. So what we can do now is in order to apply
the bend officially, you want to press
remove history, and then the bend goes away and now it is
completely applied. Then what I'm going
to do is let's at this point, remove this one. Let's go to our top view
and delete these faces. Vertex mode. Sorry,
Altex is blender. I want to go up here to Xray, although I kind of want
to set X ray to Altex. I'm used to using
Altex for X ray. So you can set a
shortcut if you want. I won't do it right
now because I rarely use Xray inside of Maya, but I'm basically
now just moving this to be almost on
top of this area. And now that this
is done, we can start by selecting
all of these pieces. Yeah, that's looking
good. We can press Combine over here. And now it's a simple metal because our vertices
are super close together of pressing control
shift A, but be careful. They need to be really
close together because else we will start merging
these areas over here. So it's up to us to
just now go ahead and go to don't I have
this one already? Oh. Oh, my God. It's shift right click, merge vertices, and
then over here. Completely forgot about that. And let's try something 0.05, for example,
something really low. Okay, 0.05 is not enough. You can look over here
at your vertices, and if you see them change, that's when you know that you
are in the right ballpark. Oh, maybe let's try one. Huh. Why are you not working? Let's try something
a bit more specific. Let's try to select only
this site over here. And if you want to
place them even better on location,
scale them flat. Now they are exactly
on top of each other, because that's how you can often scale it. Let's try that again. Shift right click, Birch words. Huh. Okay. I guess that's a weird buck or
something like that. I don't know. Maybe it has
to do with the setting. Let's now try 0.05. Okay, that's still way
too long, way too big. 0.001. There we go. See? And now we went 56-28,
which makes me confident. And if you want to double check, if you can double click your edge on it and it
loops all the way around, you know that it works
if I do this over here. Okay, fair enough. If you move it around,
you know that it works. And if I now go ahead and just do the same over
here on this side, because, of course, yes, you can loop around also an edge. But if there is,
like, one vert C, oh, if there is, like, what's happening here. Let's try again.
Select. Come on. If there's one vertzi
merged to this phase, you can no longer loop around. So just kind of
trust me on that. And now I can just
press merge ertzis because I already set the value, and now we are at 28 again, which once again is
also looking good. And that's our band. That's all we really
need to do for this. And our bend is now done. Cool. You do want to
right click and add the object back to the bend because whenever
we extract pass, it removes it from the layer. And now for our T
pipe over here, that one is going
to be quite easy. What we want to do is we want to get started by once again, removing these
segments over here. C backspace. And I'm going to get started by grabbing
this side over here. And if I then go ahead
and add a pivot, snap to points, snap this
pivot to this point, and then snap to grid. I can snap my pivot temporarily
to this grid like this. And then the pivot, of course, resets itself. It only does that for,
like, one function. But that's enough. And
basically what we want. So for the T, here
you can see it also, but it doesn't
have those joints. So I guess let's use this one, although this is way
too over the top. Want to keep some space between both sides and we still want
to have enough space to, like, properly cut
down our shape. So we now have this
one over here, and there are a few ways
that you can do this. So first of all, what I want to do is I want
to press Shift to duplicate, and I'm just going to press
H to height my duplication. It's like a backup. So one of the ways that we can do this
is we can use our symmetry, but we need to be
super accurate with this symmetry, sorry, mirror. And that is that we apply
a mirror over here. We set this mirror to the plus and then what we want to
do is want to hold J, and we want to snap
this to the top. And then what we want to do
is we want to snap this one, come on to the grid point. Here, wait, let's
not there we go. So to the grid point and then snap it to the top like this. And then, basically
what you want to do is you want to press accept and then
you want to press another mirror in this mirror, we can once again
go to the plus. And once again on snap it
like this, there we go. And if you have everything
exactly snapped on the grid, you will get a perfect
T split like this. And at this point, we
can decide to say, there's too much space
in between here. So we could twine like, Oh, let's turn off our
grid snapping. We could win and, like,
push this back here. And here. And then, of course,
we would also want to push this back over here. So what I can do is, let's
say that I select this one. One, I need to reset my pivot because everything
is now confused. I snap the points at a pivot, temporarily snap my
pivot to this point, snap the grid, set
it on the grid. Next, if we just go
to our side view. So I guess I miscalculate
it a little bit. Oh, hey. Snap to Grid. Thank you. So I guess I like miscalculated things
a little bit more. But now what we can do is
we can move this one over here and turn off snap to grid. Move this one in the
center over here. And now for this
width over here, you don't have to
actually go too precise because the snapping works
a little bit different. But what we can do
is we can try to go precise by going
into display grid, and setting this
to I believe 15. Yeah, I set this to 15 and then snap this to
this grid over here. I know it's a whole thing, snapping everything to the grid. But of course, this grid, that's why we cannot
be too precise because it does not
line up anymore. So basically, I'm just going to wing this one a little bit. Like this. And I guess if
you really, really want to, you can select this
one last line, turn snapping to grid, and then snap it, and then it
technically is on the grid. Like this. There we go. That is this way
of doing things. If I go ahead and just press show over here, show objects, which you can find in display, show and just apply
it to your grid. Another way that I will
not show you completely, but it would basically
be to duplicate this one, rotate it like this. Then what you would
want to do is you want to place in the center. I'm just showing you an
example, by the way. And then over here, what you
would do is you would go to your modeling tools
plus multi cut, and you would basically cut
along this shape like this. And then you would end up
doing the same for this one, although for this one,
you can probably just, like, sorry, I sometimes use Alt and
that's when I turn around. For this one, you can
basically just, like, move it over here, and
then you would, like, delete those faces once you have done an entire cut so that there's, like, a hole. And then it is just
a matter of using your target weld to, like, nicely weld together your faces, which I think you need to combine it, combine target weld. See? And then you would weld your faces together like this. That's the Wi old
school way of doing it. But of course, this
way is faster, so I'm just going to go
ahead and delete this. So we got this one ready now. For some reason, it feels like
it's no longer a cylinder, but that's just perspective, I believe. Yeah,
that's perspective. I guess I'm not completely
happy with it yet. What I'm going to do
is just quickly go to my side view and quickly grab my
grid and set this to 20 subdivisions per supply. And I'm going to move
this one more down. I feel like it will
feel a little bit better whenever I do that. So, let's move this one
more down over here. And then we can go
at a select this. Snap to the grid. There we go. And now I'm going to
set this back to like ten and press apply. Okay. Oops Let's go over here. So we got that one, and
one last thing that I almost forgot to do is let's
add a quick bevel here. And you can even place
extra segments if you want, if you want to make this
like Wi Smooth bevel, which, yeah, I'm going to actually place double
segments like this. There we go. Okay, so
that one is now done. So next chapter,
what we will do is we will work on bolts, turning everything to a hypol. And once that is done, we can move on to next chapters, which are going to
be UV unwrapping and preparing everything for baking. But for now, we have this stuff, and you can see that now we can, nicely repeat this stuff. And then if we turn on
our wireframe and maybe turn on our over here, our occlusion and all
that stuff, yeah, you can see that that
works quite nicely, although we do need to
fix, some small problems, but that's no problem. Okay. Awesome. So let's go
ahead and continue with this stuff in our
next few chapters.
31. 16 Blender High Poly To Low Poly Modeling Part2: Okay, so now let's go ahead and turn our meshes
into high polis. Now, this is quite easy. This is simply the
art of turning our low poly mesh into one that has a lot more
geometry and it has, like, smoother edges
and stuff like that to give the bits of, like, that higher fidelity look. Now, the way that we do this is, first of all, we need to
prepare our layers again. So we want to go ahead
and contraz contra V our pipe straight low poly, move to collection,
new collection. Pipe underscore
straight underscore HP. So here we have
our hypoleversion, and we can just go ahead and
also do this with the band. So here we have our bend. We can copy it, right click, move to collection.
Pipe underscore. Bend underscore, HP. Second, let me just
adjust my mic a little bit so that hopefully
it sounds a bit better. And then we also
have our T pose. So let's duplicate that.
Move to collection. Pipe underscore, T, underscore, H P over here. Okay, cool. So those
are now ready to go. So let's get started
with our pipe straight. Now the way that we would
do this is there is a oh, delete this phase because
else it will cause problems. So the way that we would do this is that there is a modifier. This modifier is called the
Multi resolution modifier, and what it does is it increases the amount of resolution or the amount of
geometry on your model, and on top of that, it will also smooth everything
as much as it can. So right now, what happens
if we press subdivide, it adds resolution to our model. It nicely smooths it. Here I turn off
my Wi Rim toggle. A right click and maybe
press Shade Smooth, but it loses a lot of details. So what we need to do is
we need to tell it inside of our added mode where the
smoothing needs to stop. So right now over here, you can see that the
smoothing it just keeps smoothing it
as much possible. If I go to my wife rentagra you can see that
this one edge over here is all the way over
here, and we don't want that. So we are going to implant something called
supporting loops. Supporting loops are super easy. You simply press contre R, and then you basically
place like a loop, and you want to place it
quite close to the edge. The closer it is to the edge, the sharper your edge will be. However, and this might
make not a lot of sense. You want to keep your edges slightly smoother than they
would be in real life. The reason for this is
because you lose some of that smooth look when
you start texturing, so you want to kind of, like, increase it to
compensate with it. So what you can
see me doing here is I simply add some edges, and I mostly only need to add them over here
because we already have a lot of maybe like a
single one on the sides here. And what will happen now
is that now if I go to Added mode, turn off my Reno, you can see that now
this bevel is a lot more defined and everything in
general is a lot more defined. If we would have a look
at the other side, you can see that here, that's the difference between this one and this one over here. So that is spot loop. So it's mostly just
like practice. Wait, let me just zoom in here. It's mostly just like practice how far they need to
be from the edges, so you kind of want to
play around with it. But just in general, it's not rocket science. It doesn't need to be super precise or anything like that. Sometimes I can even just
use my scroll wheel to place double edges over
here. And there we go. Now this one has been
turned into a hypol. That's all we need. And then, of course, just with
your subdivision levels. So now let's go ahead and have a look at something a little
bit more complicated, which is a bolt over here. Let's go ahead and do a bolt. No, sorry, shift H over here. Now, what we want to
do is, first of all, we want to place a loop here
and a loop here to kind of, like, keep these etges sharp. Now what I'm going to do is
I'm just going to go ahead and I'm going to basically select all these pass because my loop is too
far away from my edge. So this is one of those
moments where I want to basically scale
it so that it's a little bit closer to my edge. Next, I need to also
have a loop over here to basically keep
everything contained and also a loop over here. So what you can see over
here is now what I'm doing is I'm just making sure that we can keep
some of this shape. I can already go ahead
and add my modifier to start seeing one, two, three, four, right click and Shade Smooth to
make it look extra nice. Turn off five and t. So you can see that
now we start to keep already this shape over here. However, we are
completely losing our nice corner that
we have over here. Which not very well nice. So what you can do is you can
go ahead and place a loop. However, because
this is a triangle, it gets a little bit confused. The first loop works, and you can see that it kind
of starts to hold up. But then the second loop,
it's not able to place this because we turned this from
a triangle into a quad, although it doesn't
look like quad because we are at an extra vertice here. It technically has
four vertices, which means that we get
this issue over here. Now, there's a few things
you can do what you can do is you can place
this loop and then select the original one
and delete it. Over here. Or what you can do is you can simply place a
single loop and then press your K to go to your
cut and then cut around it. So it's up to you
what you want to do. So what I will do is I
will go ahead and I feel like using this technique where I just basically
dissolve that. But what I then would do
is I would probably like, first of all, do all of them. Like this, and then I would
go in and select them. So we got this one done. So I can go in here, quickly
select these etches, Okay, I guess that's already it. There we go. Okay, see. So now we are
keeping the shape of our bolt quite a bit better. So that's already
looking a lot better. Now, another one is that we need to add an edge over here. However, we cannot art and
contre R in this type of edge. And the reason for
that is simply because these are triangles, and it does not like to
add edges to triangles. So instead, we can
just click and drag and press I to inset, click and drag here, and
plus I to inset again. There we go. That's it. So it's not too difficult.
You can now go ahead. You can just press Aldag, and that is now our
bolt ready to go. So over here, this
one is quite easy. We will just go ahead
and place one loop here. Whenever you don't have an edge, you don't have to place a loop because there's
nothing here anyway to needing it to go
around. So we can do that. We can go here.
Multi resolution, subdivide it four times
right, click, Shade Smooth. Perfect. Now, with this
one, you can choose. That's so annoying is that
you cannot just copy Well, you can copy paste
these details, but it's a pain to
do inside a blender. So it's often easier for me
to just redo it like this. And a multi resolution
subdivide. Like that. Right click, shag mood. And then for this
one, of course, this one is slightly different. So it's up to you to
choose if you want to redo all of this work, or if you just want to go
ahead and duplicate this one. Of course, when you
duplicate this one, and let's turn off our
multi resolution for now. What you do need to do
is you need to inset. So if we are
duplicating this one, we would need to inset
them exactly the same based upon this
version over here. And then it's often
easier to just move this version a bit closer. And, let me just hide
this stuff over here. And let's go ahead and see if we can do this.
Let's insert this. But to be honest, I'm not too comfortable with this
because the bevel, I did not use a
really precise bevel. It does need to match
100% with our mesh, but it does need to,
like, match a bit closely, quite a bit closer. So here we can see the
bevel. You know what? I'm just going to because I want to show you, but honestly, it's just easier for me
to simply redo this one. There are many ways I
can also just select parts of it if I really wanted to and all that scan stuff. But honestly, in my case, it takes so little time, so I should not try to go, the way which can cause the
most problems in the future, especially not in the titoil.
So I can just do this. I can simply select
these phases. Scale them out. Nto And just place these
extra loops out here. And then it's just a matter
of selecting these loops. So this is about as fast as
the other ways of doing it, but in this case,
it's a bit safer. So we got this one,
multi resolution it four times shade smooth, and just double check your work. But that is looking
totally fine. So we can now go ahead and
just move on to the next one. Okay, so the last one is
going to be this one. Now, this one actually has some special details because
as you can see, we have these ridges over here
in our screw that we want. Now, of course, a screw. Technically speaking,
because it's a screw, all those lines over here, they are all perfectly
connected in, like, a ringing motion which allows
us to screw something in. However, for us, that detail is so small that we can just, like, create a bunch of lines, and it will basically
do the same. So what I will do is I
will start by creating some supporting
loops. Like this. And then I will just
go ahead and do Shift H. The reason I place this sporting up is that I know how far I need to
keep my details going. I then simply add a
bunch of segments, but these segments
need to bevel. Oh well, they don't
need to bevel. We can also just add,
like, a lot of them. So let's do this. And then we need to select them. You want to select them quite close to the edge because
that makes it easier. See? If I select it in
center, it does this, but if you select it
quite close to the edge, I tend to forget about that. Like this, it will
select a bit easier. Next, what you want to
do is we want to go Q, extrude faces along normals. And we want to simply
extrude this down. Now, this will not
work very well yet. And the reason for
that is because if we go at the top view, you can see that because
they are exactly down, whenever we would actually
bake our normal maps, which is something that
we will do later on, it will not be able to
properly read this. However, if you set your view, I hope that local
should be fine. No, not local normal. If you let me just go
to my forgot which one. No, it should be. It's to
individual origins over here. No, that's a Watson
I just need to, like, try to find the right
setting. There we go. Okay, so global
individual origins, and that allows us
to basically scale our planes or our faces as
if they are individual. And when we do that, if
we go to our top now, you can see that now the
top is a lot more readable. So that's basically why we
would do something like that. I will move this
one a bit closer. I will delete this backface
because it's useless. And now if I would add
a multi resolution, subdivide this four times,
this is what we have. Now, it looks a
little bit too Soft. So what I'm going to do is I'm just going to very quickly. Oh, and also over here, I
need to place some segments. Now you can see that it looks already like a
little bit harsher. You can also place one in
the center, if you want. And it's up to you, how harsh you want this
detail to look. And keep in mind that this
is a really small asset. Right now, we look at it
really, will up close. However, it will
literally be like from this distance so it needs to
stay a little bit readable. So, honestly, I'm
quite happy with this. So yeah, I can just
save my scene, and I would consider my hipoli of my straight
pipe to be final right now. The other ones are
super easy because all we need to do is add
some of those same segments. So we literally just
need to add one here. One here, one here, two here, and two here, and do the same on the
other side, and that's it. That's all we will need
to finish the hypol for this one. There we go. Multi resolution, four
times shade smooth. And now the last one,
which is our T over here, same details, but this time, we need to do it three times. Sometimes if you
have this problem where because of a angled shape, what will happen is that
sorry, brain freeze, brain freeze, is that it will try to follow that
angle, even if you go closer. But what you can do is
you can scale it flat, and then down here
in your resize, set this to zero,
and now you have an exactly perfectly
straight edge over here. So what I tend to
do is I tend to, like, just wiggle the scale, send it to zero, and then
move it just like that. But of course, you only
need to do that with these. Never place an edge like
this because then you break the flow of geometry
of your cylinder. And when you do that, I'll
show you what will happen. You'll see, you can see that
there's like a little nick. It might be hard to see, but it just breaks the flow
of your geometry. So whenever you have cylinders, always go with the flow. And if you have to go against
the flow, which we might. No, we don't need
to do in this case. If you have to go
against the flow, then try to minimize the
amount as much as possible. So over here, I'm just
placing another one here. And with this one, I'm
just going to skate it. Zero. There we go. That should do the trick.
Okay. Awesome. So all of our pieces are now completely UV unwrapped,
so that's great. Sorry, all of our pieces are now completely turned into
hi poles, which is great. And the next chapter, what
we will do is we will go ahead and we will UV
unwrap all of our pipes. So let's go ahead and continue with this in our next chapter.
32. 16 Max High Poly To Low Poly Modeling Part2: Okay, so what we're
going to do in this chapter is we are
going to get started by creating a bend version and also a intersect
version over here or a T T version of our pipes. And this should be quite
quick because, of course, we already have our main models, which would have taken
most of the time. So let's go ahead and use our lowly for this, this, sorry. So we have this
version over here. And yes, we have the bolts
and stuff like that. If you want, you
can even go ahead and that we already have
a mental note of it. Duplicate the bolts like this because I want to have two
different variations of bolts. The reason I want to
have two is super easy, it's just that the
texture is not exactly the same on
every single bolt, but we can just
alternate between the different bolts to make
the text feel more unique. So let's go ahead and go in
our pipe straight low ply. Now, for the bend version and
for the intersect version, we only need the actual pipe. We don't actually need
the bolts because we will use those later on
and just place them. So we can grab a pipe, Contrave to copy it. And next, I'm going to go
ahead and create a new layer, and I'm going to call this pipe, underscore bend,
underscore LP. Here we go. And let's just go ahead
and start with this one. Now, for these pipes, doing the bends is
actually quite easy. So I'm going to get
started by first of all, getting rid of these
supporting loops here. And now for the bends, if we would bend this pipe, what will happen is that this section over here has too much detail,
so it will warp. So instead, what I want
to do is I want to select only this section simply by using holding Alt to deselect, and I want to press detach. So for now, we're
just going to simply detach this version over here. Next what I'm going to do is I'm going to grab this version, and let's just go ahead
and center the pivot. And the only thing that's a bit tricky is, of course,
with these pipes, I need to figure out the absolute best location to give this a proper
90 degree turn. We want to make sure that it
has a proper 90 degree turn because then we can sort
of use snapping with it. Snapping will not always be perfect when we work
with the band model, but we can get it pretty close. So I'm just checking, and my PIV point is still
in the right location. So what I can do is I can go, for example, to my top view. Snap rotate is 90 degrees. And I believe that this one, yeah, this one is
snapped to the grid, so I can grab this version, and I can start doing
some grid snapping. So we can turn on snapping
and snapping to grid only. And now let's have a look. So if we want to
make this in, like, a square cause I
want to make this in quite a strong version. Let's get started with
something like this. In this case, it's more just important to be on
the grid points. So, one, two, three, four, five, six, one, two, three, four, five, six. Now, wait. I'm doing this won. Sorry. One, two, three, four, five, one, two, three, four, five, that is six. So if I would go here, this way, it would be a band. We can, of course,
make it a bigger band, but right now it would be pretty much a square, one, two, three, four, five, one, two, three, four, five, yeah. So now, it would
roughly be in a square. It's not rocket science, but this is probably the band
angle that I want to go for. This band angle over here, it is a little bit longer. So if you want to do that,
you probably want to, like, diagonal you probably want to
end up somewhere over here, but then it will not
be a proper corner. So having this piece, so if that's confusing, play around with it.
That's what I would say. It all depends on how white
you want the bend to be. So if you go for a
really short bend like I'm doing over here, then we want to twin and
keep this like a square. If you have a lot
of trouble with it, let me just first
detach this one. If you have a lot
of trouble with it, what you can do is you
can always just create a box, turn off out a grid. And make this box into, like, a square over here. And let's see, so we are
going to go for 50 by 50. So now we know like, Okay, so we are roughly into this square. And then one thing
that will happen that I notice over here is that I
most likely need to, like, push this one You can press P to go into
perspective mode. I would need to push this
one in the right location. The thing is my pivot
point right now, it's in, like, a messy location. So let me just hold shift to extrude this and
quickly collapse it for now. And the only reason
I'm doing that is so that I can affect my pivot, turn on snapping and just snap my pivot to this
vertex over here. See? I'm turning on
vertex snapping. I might seem like, Oh, this is a really difficult
way of doing things, but once you get used to it, it is actually quite quick
and simple way because see, now we know that this
is exactly a square, and we should pretty
much be golden. Yeah, that should
pretty much be correct. And else we can always change
it later on. Okay, cool. So we have over here our mesh. Now, what I'm going to do is I'm going to go ahead
and I'm going to, first of all, probably
make it a little bit smaller like this. But this bend, it does not exactly work the
way that you would think we won't have a set size. Instead, what we are going to do is we are going to give it roughly like a
slightly longer size to give it some more space. Then we're going to
select these edges, and we need to add a bunch
of connecting loops. Right click here to
reset that to zero, and let's say that we will
add 22 connecting loops. Okay, so that is done. Now, in order to bend this, one thing I'm a little bit worried about is
that, of course, the diameter also adds to
our squareness of this. So this one we can
kind of, like, move around a little bit,
but we just need to, like, play around with it. So for now, what I will
do is I will go ahead and I will probably want to, like, scale this in a
little bit more like this until it hits the
same level over here. And Oh, sorry. Of course, I'm scaling, but I'm scaling
with my pivot point being too far away from my mesh,
as you can see over here. So what I can do is I
can turn on snapping. And for this one,
you really need to have enable access
constraint turn on. And I'm just going
to go ahead and I'm just going to snap. Oh. Make sure to turn on
affect Pivot only. Snap. Or pivot to one of the vertices and then it will automatically stay
on this position. Because now if I scale, it
will literally just scale from the pivot point
because it always scales from the
pivotoint like this. So anyway, this one that always takes a bit
of playing around with, creating a bend is actually more difficult than you would think
for something like this. So let's go ahead and set
this to 90 in our angle, and then you can see that it
starts to bend right away. I can see over here that the
bend already is not correct. So let's delete our bend, go to utilities and
reset our transforms. And now let's try this again. So this one, let's go
ahead and angle 90 here, C, and now you can see that
also something changes. So we need to set our axis
to the X axis over here. Yeah, there we go. See now that looks more like a correct bend. In our direction
probably also to 90? Yeah, also to 90. Okay, so this is what
we have right now. Now, you can make some
small adjustments to this. And the way that you
would want to do this is if you go ahead and go
over here to your gizmo, your gizmo is basically
the box for your bend. You can move this up
and down over here to basically increase
the bend size. This one is a bit tricky
because this one, it of course, moves
away our band, so we probably don't
want to change that one. The only thing that I'm a bit worried about is like I want to push this band in like this, but I'm worried that if I do
that, it will, of course, no longer be propar modular. Now, what we can do is we
can just extrude this out, and then it would be modular. But let's have a look
at this right now. So right now, I
just want to double check that my Pivot point, so my pivot point is exactly
on one of the edges. But I think I want my
pivot point to be on the outside because else
the snapping will not work. So let's effect pivot only
and set my pivot point. Oh. Oh, te Oh, wait, yeah, turn on snapping. Set my pivot point over here. Turn off effect pivot only. And now snap this. There we go. That is correct. Because else, what will
happen is that, of course, this thickness counts
towards the snapping, and then it's no longer on
the grid because you always want to stay on the grid
whenever you are snapping, which we discussed before. Snapping is something
that you need practice. You will get used to it
with a bit more practice. And now what I can
do is I can go to my gizmo and I can push
this. There we go, see. And now we can see
that magically, it all seems to
line up correctly because we kept all of
our settings consistent. So we got this one
over here right now, and I'm quite happy about that. I'm now going to go ahead
and select this version, and I'm just going to
go ahead and press Control I because luckily my
selection was still saved. I'm going to delete this. I double check that over here. You want to make these
faces empty because we are going to re merge
this now altogether. So I can now go ahead
and select this one, press attach, and select
the other three pieces. And our cool thing
is that as long as your vertices are
really close together, you can see that they're
not on top of each other, but they're really
close together. You can press Control A, go
to weld and weld settings, and then you can weld based
upon the specific distance. So I can move this up
and you can see that now I'm welding this
way too strong. And I want to make sure that I'm setting the distance exactly to a point that I'm only welding
these vertices over here. So make sure that you don't
weld any of these things. What you can also do
is you can also press seven to show your
polygon count. And then if you go, Oh, I have the buck again
with the settings. If you basically
go to the plus and go to viewport configuration, statistics, Turn on total plus
selection and press Okay. And the reason we want to
do that is because now we can have a better track
of our polygon count. So over here, we are
welding and we can see that it used to
be 970 vertices, and now after the
welding, it's 926. This means that I'm most likely that we have welded
everything correctly, so I can press
Okay and to double check that we did
it, double click. If you are able to double click, it means that it's
welded correctly. You can even move it
around to make extra sure. So this is now all looking good. So we got our pipe
bend low poly. We can go ahead and
just copy this. Artists do a new layer. Pipe bend underscore
HP for high pool. Turn over a low poly version, and you guessed it,
and I will this time do this really quickly. Since we already did this, I'm just going to go
ahead and I'm going to Add my supporting
loops over here. And the bend because
it is a bend, it can just like nicely smooth, since it is already
smooth, basically. So I don't need to add any
supporting loops in there, and I can just go
ahead and I can Oops. Move this here. And
then for this one, I'm just going to
select my angle. I'm going to set my angle
a bit lower because then it is more accurate
with selecting. Because I have two
phases at the same time, this time doing an insert
and inset settings is better because
extruding two phase at the same time
is more annoying. So I could just do an inset. Turbo smooth. Isolate display, set it to three, which
is my favorite number. And now we can go
ahead and there we go. We now have a nicely
bent pipe ready to go. Okay, so that is
those two versions. Now the next version
that we are going to do is going to be like
one of these joints. These are actually super easy. So the way that we're
going to do it, they're super easy where
you know how to do them. Let's grab a lowoli
again over here. Let's done on edge and faces. So we can go ahead
and copy this. And let's go ahead and artist do a new layer pipe underscore T. And the T just already shows even
the shape of the pipe. Turn off the lowly version. And now for this version, we first of all, need to decide how long we
are going to make it. Once again, this has
to do with snapping. So we want to go
for even snapping. So what I will do is I will
delete the centerpieces, and I will just
want to make this on an even spacing on the grid. But I need to, of
course, give it enough space for
the second pipe. So it depends how much
space you also want in between. These pipes. The diameter of
the pipe over here is the exact same diameter
as what we have here. So let's see. Every box right now is
10 centimeters, so one, two, three, four, five, six, seven, eight, nine, ten. So this is 1 meter. That's a little bit too much. One, two, three, four, five. It's a bit too little.
See, this is a bit of annoying shape or annoying
one for snapping. So we need to snap
this quite down, but as long as you go
for increments of ten, it should be fine. I think
I want to go for this. I think I want to go for
something like quite close. By the way, if you hold
Alt while you are in top mode and move you are going accidentally
in orthographic mode, press T to go back into
top mode and then press Al W or you can press P to
go into perspective mode. So we have this one over here. So what I'm going to do is I'm going to go ahead and
turn on my snapping, and I want to snap
this to grid points. But of course, our PivoPoint that's the annoying thing
like our PivoPoint over here. It is using my Pivot points
like a general point. What I tend to do personally, and there are many ways to, of course, once
you can do this. There are often many
ways to do many things. I like to just basically
go over here and just set this really
close to the grid. And then I basically select the last verticee last
phase that needs to snap. And for this phase,
I just turn on snapping and I just snap
it to the grid point. See? And then you
know it is precise, but you don't really
notice any difference. Okay, so we have this
version over here. I'm going to center the pivot and I just
realized that my layer, right click and rename, underscore LP. There we go. So I'm just going to go
ahead and turn off snapping. We have center to pivot and I'm going to go
ahead and I'm going to press Contra V and I'm
going to copy this. You can also try to use a
blend of symmetry for this. So symmetry, you can try. I never really do it this way, but I just remembered. You can where are you?
Try to add a symmetry. Click on the symmetry
once to go into settings, and then using rotation, try to maybe flip it, try to do some snap
rotation over here. And then what you can do
is you can try to add another symmetry in
the center, flip that. Oh, yeah, here that's actually a way better way
to do of doing it. Okay, fair enough.
Let's use this way. So this is a good way
to do the snapping. The original way, the
old school way was to basically hold shift and rotate this 90
degrees over here. And then what I would
do is in this version, I would basically
add a swift loop over here where it ends. Delete this end over here. And then it would just
be a matter of placing a cut along this line and
then merging it together. But that actually
will take way longer. So I would place this cut. I would like, delete
the pass in between, and then I would basically
grab this model, and I would merge it
together with this one. So I just happen to remember
the symmetry reason I forget this sometimes is because Tris Max is
amazing with symmetry, but because other softwares
are not as amazing, some of the stuff that we do
specifically in Tres Max, we cannot always do inside
of Maya or blender. And that kind of forces
me as a tutor to basically swap things
around and just in general, use more generic techniques. So basically, we have this one. I'm quite happy about that. The only thing I'm
not happy about is and I believe it's
even on the grid. Yeah, see, here, it's almost. No, no, yes, it's
perfectly on the grid. Amazing. I did not expect
it to go that easy. I'm not happy about
this segment over here because it breaks up the
evenness of our cylinder. So we can add added poly, double click on this
entire segment over here, and Press, let's just
press Control Backspace. However, over here, we
do need to connect this. You can try a distance connect, selecting these two pieces
and press distance connect, but it looks like it's not
able to properly connect it. Another thing is just simply
use a catol And of course, the cut tool, it can slice
across multiple edges. So you can simply do
this, and there we go. Want to optimize it even more, you can even go ahead and you can collapse this sit like this, although it does create a
triangle which I don't really like that might
cause problems in the hipol and over here. And then you can simply
control backspace on one edge and select the other edge and like nicely
place it in the center. I'm not going to do
this because you run a big risk that you see some
messiness in the hypole. So I'm just going to opt for
a little bit more jump try. Now what I'm going to
do is I'm going to select these sites over here, and I want to bevel them just like we bevel the other sites. And it's up to you
if you want to make the bevel bigger because
it is like a joint, or if you want to
keep it quite modest. So we can make this like a really nice big bevel and even have an extra
segment in between, or we can make it
quite low poly. I quite like having
an extra segment And making it a little
bit bigger over here. And yeah, over here, you
just need to make sure that the shape does
roughly stay the same. I'm going to keep it
like this. I think the shape is totally
fine right now. Awesome. So we can just
press Contra V on this one. Add a new layer pipe
T, underscore HB. Turn off the low poly version. And in this version, I'm just going to add
an extra added poly and I'm just going
to once again, very quickly and I will
just do this in real time again so that in case you
want to take in once again, it's not that special
where I place the edges. It's more from experience. Now, this one, you want
to just go ahead and place one or two edges or sorry, I mean, one edge around
each side, and that's it. That showed nicely smooth
together like that because it is quite well welded and with
bevels and stuff like that. And that's one I will
leave until the end. And now, what I'm going to do is I'm just going to
select by angle. The reason I press Ignore
back facing is so that I do not accidentally
select something behind it. It's once again just habit. Often, you won't even
select something behind it, but just in case, inset
these three faces. And you can see here
that we now have this really nondestructive
workflow where we can turn off our addi poli. We can turn off the beveling. We can turn off symmetry
one, symmetry two. So it's really nice
and non destructive. And then finally, we can
add our turbomoot on top. Turn off edges and faces to double check
and look at that. Really nicely merged together. And that's why like this
kind of quick stuff is why Max is my preferred
modeling tool, compared to Mayo blender, even though I can, of
course, use the other ones. So that is it. All of our pipes are
now ready to go. So we have our pipes done, we have our bolts
done, and here we go. Yeah, our pipes are done,
our bolts are done. So I would consider the
models to be done right now. So what we will do in our
next chapter is we will go ahead and we will go over
UV unwrapping our models. We need to UV unwrap before we can start duplicating all of these models and create
our final versions. Now, in the UV unwrap
chapter, or maybe actually, I will do a separate
chapter that I will call preparing
our models where we will also create the final
version where we will copy paste these bolts over here. So let's go ahead and continue with this in our next chapter.
33. 16 Maya High Poly To Low Poly Modeling Part2: Okay, so what we're
going to do now is we are first going to get
started by creating our bolts, which we can mostly
check out over here. And our base going to
create like a font of the bolt and also like
a back of the bolt, like you can see here. Yeah, here you can see
it a little bit better. So it's not going to
be too difficult, but it is quite an
interesting asset to create. Now, what we're going
to do is we only will need to create one of them, and then we can basically
just copy paste them because as a tree artist, sometimes it's good to
be lazy and just, like, quickly try to reuse
as much as you can. So let's yeah pipe straight, shift right click and start
with a cylinder over here. And I'm going to go ahead
and we're going to make the cylinder quite
small, hold J. And this is going to
be the little ring that we have before our bolt, and then we can just basically
use it for something else. Oh, I have snapping turn on. That's why it was behaving
a little bit strange. Sorry, snapping messed up
my positions a little bit. Okay, so let's have a look. As you can see, I keep
scaling the entire model. The reason I do this is because I want to change my segments. But if I start
scaling like this, sometimes my segments over here get a little bit confused. So what I want to do
is I want to go down here and let's say that this is going to be
the size of our ring. Yeah, that should work. Let's go for something a little bit lower poly
because we still want to use traditional
techniques and not just rely on, for example, Nant. So let's go. And the
reason I do this is because I want to teach you
a broad range of techniques. Uh, 16. Yes, 16. I don't know, maybe 12. Now, let's go a
little bit higher. Let's go for 16 over here. Now we can just go ahead
and we can move this in. I want to just set
my center segment to align with this center so that I'm sure that
this is in the center. Then I'm going to duplicate this now grab my
original over here. Select the vertices
and push this back. So we have this
version over here. And with this version, if
we just press isolate, we can go to face select, turn on angle in
selection constraints and delete over here the back because you cannot see
the back, so it's wasted. Now the reason I duplicate
this one is because I want to will annoying duplications, get rid of your history. I totally forgot about that. So 1 second, let me
just go ahead and maybe this one still works
if I set this now to Yeah, no, see,
it doesn't work. I need to quickly undo this.
Does it still work now? Eight. Okay, so
now it does work. And instead, let's
move this one. So we want to keep the original, and let's only move the
duplicate over here. And now what I can do is, well, sorry if I sometimes do this, it's because I'm confused with trees MX right now. So
let's remove it back. And in trees Max, you
hold Alt to deselect, while in Maya, you hold
control to deselect. So that's the confusion. So basically, we got this
one and now for this one, I want to set this one
to it was six or eight, one, two, three, four,
five, six, six sides. So we can set this one to six. So that just becomes
like a bolt. I have a look at my
reference to kind of, like, guess how large
the bolt would be, and I think this one
looks quite good. So let's move this
back over here. And push this roughly
around this size over here. Yeah, that should
work. Now, we are actually going to keep
the bolt both sides, so we don't want to
remove the back. And the reason we
don't want to do it is because it's hard to see
with this resolution. But these bolts, you can
see that they actually warm up a little
bit on the corners, and we are going to
create a similar effect. So we want to go to tool
settings and just reset our pivot so that we can
easily have both sides. And then I'm going to quickly, I'm going to make it a little
bit thicker over here. Yes, I think that will work. So that's a good thickness. Once again, reset up if it. And let's isolate this. We are going to use
a mirror on this. I only will need to
focus on this side. What we're going to do is we are going to basically use a
technique that I rarely use, which is champing or
beveling the vertices. If we go ahead and press
Control B on this one, what you can see happen
is that it will try and champ for our
vertices over here. Now, when I see this, there's one thing I most likely, there's one thing I want
to do before we do this, and that is that I
want to just quickly duplicate or select
these as over here. Hold shift and extrude this in roughly at this point over here. And let's see if I do I want to chant for
it now or after? I'm just having a Yeah, okay, so I'm basically on the fence about when I
should chant for this. The reason I probably
want to chant for it now is because
if I don't do that, what will happen is
that we don't have enough space because we want to also play
segments over here. So instead, let's just go ahead and try and chat for this. And it does require
a bit more cleanup than most other software. So let's do this one over here. And now what I want to do is I want to go to my multi cut. Let's see. Let's
multi cut here, here. I'm just now needing
to do a little bit of cleanup. Like this. And then what we need
to do is we need to add some segments
because these bolts, if you have a look over here, are always round in the center. See? Yeah, they are always
round in the center, and that's quite
standard with bolts. That's something I
do want to work on. Now, having this
version over here, I'm probably going to
go ahead and place another segment
probably like this. Because we do need to
connect these pieces. However, this is probably
not round enough. So you probably want to
create one last segment, and you can just leave
it at the end over here. You probably want to create
one last segment left. It doesn't need to be super straight or
something like that, that is no problem
because we are going to manipulate
this later on. Let's see. So we do this.
But I'm just having a quick thing in the
background because I do want to make this straight. Yeah, this bolt is this
is the time where working in meters might sometimes get a little bit annoying because this bolt is, of course, so small that our
camera has a bit of trouble with the movements Now, there are ways to fix this, but to be honest, I kind of forgot how to do
it because I normally just tough it out and just continue. So we have our last
one over here. Yeah, a bolt is such
a specific shape. You rarely have to
model like this. It's just, it's a weird one. So we got this. So we have
over here our corners. We just go ahead
and select them, I might want to, like, scale
them in a little bit more. And then the thing is
that we also want to, like, make this stuff
over here, go around. So first of all,
what we can do is we have over here segments, and we can use a sperify
which is the one over here. Sperify think over here, you call it, what
do you call it? Circularized components. That's what you call it in here. And that will
basically instantly just turn this into,
like, cylinder. That's why we needed
a bit more segments and why we evenly want
to divide the segments. Now, the only thing
with this is that I want to capture that roundness that we
have over here too, but without changing the shape. And I just want to
see if I do this. Now, that would
change the shape. So this is probably
already correct. Or maybe you want to go no, I think this should be fine. So we have segments there. I'm just having to think about when we start
beveling this. Yeah, but maybe if we
go ahead and actually, let's go to face mode, turn on angle select. And what you can do is
you can hold Control and then the minus button
on your oh, I forgot. Select Oh, no, this one, sorry, shrink your selection on and
move this out a little bit. I know the shape looks
really strange right now, but once we turn this into
hypol it will make more sense. So we got this one ready to go. Yeah, I still feel like
I'm missing something, but I feel like maybe, I still feel like we
are missing this. I feel like we are missing
the roundness of it. So I might want to after all, select these end segments and give them like the tiniest
bit of like a roundness because else we don't
have the curvature from the side because
from the side, it will just look straight. But we want to have this
curvature to be round on our face like this because that's how it
usually looks like. And then our hypol will
basically take care of the rest. So let's say that we have
something like this. We can go ahead and we
can reset our pivot, and let's throw on
a quick mirror. Let's set the axis position
to object or sorry, bounding box. There we go. And now we can go ahead and we can sort of isolate display. You see, this is what I meant why we did not want
to move our bolt, remove one of our bolts sides. Now, this will look
quite strange right now. But when we turn this into hypol which we will do
in just a second, then it will look more logical. So we got these
pieces over here. Now the next thing is that we also need to create
an end over here. And right now, it's
probably easier if I just very
quickly temporarily. Uh, extrude these faces and collapse them at
the center so that we have something to
have as a back. And then to simply
use these pieces. And if we just reset our pivot, we are resetting our
pivot to the center. Hold Shift J to actually,
let's do this first. Oh, come on. Where's my pivot.
Clone, hold, J. And now you can see that
over here are objects, they are not properly moving. So what we can do with that is I completely forgot where
to do this. Oh, yeah, here. Rotate center, set it to
minip in our tool settings. And MNIP basically means that it will just treat it as
one object over here, and now we can properly
move that back. And because we reset up
PVA point to the center, it should be exactly as
you can see on our center. So we got that one done,
and now over here, what I want to do
is for this one, I'm going to go ahead
and I'm going to just click and drag to
select both centers. And I want to basically
create a hole in this. But the thing is that often
with bolts in three D, whenever you do this, the
hole feels like two small. So we often want
like, let's see. Let's do this. And let's hold Shift and then
push our hole down a bit. So we are manipulating it
a little bit more just because it will visually
look a little bit better. So once we've done
that, we can delete it. We can go ahead and
go to Edge Mode and select the front and the back, shift right click and okay, that looks like a bullet
or like a gun barrel. Whenever that happens, here, I will isolate it so that
you can see it better. Whenever that
happens, just bridge, like one at the bottom
and one at the top, and then double click and deselect the sites
and then you can bridge it because
sometimes the bridge gets a little bit confused
where it needs to well. It is a bit strange because in t is max it doesn't do that. So it's like this weird thing where the makers they
both made Maya next, but here, that stuff
kind of breaks. And then we want to give it like a little bevel over
here, and there we go. So now we have a bolt
with a hole in it, and then the last thing
that we would need to do is we would need to create the actual screw which we have over here and
push it in here. And for our loplyi the screws is actually going
to be quite easy because it will just
stay as a cylinder. We went for 16
segments, I believe. I do want to try and
keep it the same. Now if we just go
ahead and hold, rotate, scale out and we don't want to have this
one sticking out too far. We want to, bit like
this over here. So just have it sticking
out. A subtle way. So let me just go ahead
and move this in position. And this is why it is important to try and keep the segments same because now you can see that it
doesn't feel right. But if I now change this, okay, so we did not scale our cylinder enough
to cause confusion. We cannot get a perfect 24, but we can get it quite close.
Let me say it like that. And sometimes it's
better to just pay for a little bit extra
polygons to make sure that our segments are at the same amount because it
will read a bit better. Because else you can
very clearly see that one clder has lower resolution than the other whenever
they are connected. So what I can do now is I can go ahead and delete that side, push this in here, grab the end and give it roughly like how
far we want to stick it out. And then what we can
do is we can decide if this turn off action phases. If this is too thick, and it does feel a little bit too thick to be very honest, so let's reset a pivot and
make it a bit thinner. Yes, that feels a little
bit more correct. So I'm just going
to push this in. But of course, you
might have guessed it. That means that over here. If we just quickly select
the center and the outsides, let me just quickly
go to There we go, and then turn off
isolate selection. Here, we want to kind
of push this in. Doesn't have to
hit the cylinder. It just has to be like really
close, and there we go. So now we have that
one also ready to go. And if you want,
you can do, like, a shade hard
temporarily to kind of, like, get a better
sense of things. Okay, awesome. So our
bolts are now ready to go. So now what we're going to do is we are going to start turning everything into hypol and then the bolts will also
make a lot more sense. So first of all,
select your meshes, right click and art
select the objects. So as you can see, I am first going to turn everything
into hypol and at the very, very end, I will
actually start placing my cylinders all the way around
to create that variation. So let's get started with, like, our basics over here. First of all, what we want to do is we want to go ahead and remove once again
our back because, remember, we didn't do it and it would
just be extra work. So turning this from
high to low poly, it's basically a very
simple way in which we apply extra geometry
to this to make this model look really nice and smooth and
stuff like that. The same basic concept happens later on also with
our modular assets, but there we are actually adding millions of polis which ends up with some sculpting to
make it look more intense. So this is like a tone
down version of that. So the way that this
works is we are basically smoothening our mesh
using extra geometry. Inside of Maya, you can do
this by pressing three, and then you can see that
your mesh right away smooths. However, we have a problem. It smooths, but it
doesn't too much. See, I loses a lot of the shape. The way that we can fix
this is quite simple. We just need to add a bit of extra geometry by adding
some super loops. And the way that this
works is right now it smooths and you can
see that this segment. If you look at this line, it
moves all the way over here. We are adding something
called Super loops, and we are adding it quite close to the edge
but not too close. And what will happen
is that our smoothing will stop at this edge, see? So now, if I go ahead and
go to object mode, see, now you can see that
the bevel stays more defined because it stops
the smoothing at this edge. And that is the
general concept of it. Now, the closer you place your edge to the corner,
the sharper it will be. However, because we are baking
this down into a texture, we always want to make it
a little bit smoother. Then it would be in real life, just because it will
look better in our bake. So this is something
you just need to, like, practice and experiment with, and then you will
get used to it. You can see over here
that I actually skip the bevels because I want to make the bevels
nice and smooth. So you can see over
here that I place two segments around
these lines and here. And this is already it. Whenever we have no faces, there is nothing to smooth, so it will just stop there. But you can see
that now over here, this already looks a
lot better compared to this one over here, see? And that is basically
how we are turning this into into a hypol
just by doing this. These segments over here,
we can keep the same. So what we can do is
we can go ahead and go over here and place
one here, here, here. Here, here, here, here. Basically do the exact same
thing that we've done before. Like that. And I have
to go into object mode. Oh, let's save Macin
because I have a bug. Oh, there we go.
That's a close one. Now you can see that now this model looks quite
nice and hipoly. And we basically need to do
that for all of our meshes. Of course, when we
have these meshes, so let's move on to these ones, this might become
a little bit more complicated. So let's save cin So for this one, what we can do is we can actually turn this one into hypol
and then quickly, then we can basically have
this one already as a hypole. So let's start with
this one over here. Now, these segments right
now if I would smooth this, you can see that it
no longer looks like a bolt because this one is
a little bit more specific. We want to go ahead and we
want to place a segment here and here to basically
handle these etches. And now we kind of like need to place a segment on the
corners over here. But as you can see over here, this one often does break. So we might need to
do some manual work. And the reason it breaks
is because this is a triangle and
triangles are not very good with repeating
our segments. So let's go ahead and place these here, and then we basically can use the multi cut tool to finish
them off. So we have this. We can go ahead and it's a
bit annoying with camera, but let's go ahead and
look at it from the top. And then we can have
a multi cut here and here and here and here. And you can see
that. Okay, that's a little bit too
close to the edge. But you can see that
it doesn't have to be absolutely perfect where
that we place the edges. Often, those really
small changes, they are not really visible, especially not on such
a small asset as this. Of course, if you are
making something super, super important and it
absolutely needs to be perfect, then yes, of course, spend a little bit more time placing these edges correctly, but we are just placing
something quite quickly, especially because this
is just like forated oil. It's not exactly going to be the highest quality mesh
ever and stuff like that. So when we do this,
what should happen, this is one of the few times in the cylinder where
you would do this, and I can already show you the problems that
we get over here. Now we have this,
you can see that this one wait if we just
place one segment here, and we want to have
this sharp, I believe. So let's place also two
segments here and here. So now I can show you that now this feels a lot
better like a cylinder. However, as soon as we go over
to the actual round part, you can see that now we get these really ugly lines over here, and that's
something we don't want. Easiest way to often fix this is by simply going
to our targets weld, and as soon as we
start with, like, the round areas,
weld them together. So here you can see that this is where the route area starts. So I basically weld
these together at like a point where you cannot really or where there
is not a lot of space. Or should I do? Like, right now, I'm doing No, wait. I'm doing it wrong. Sorry. Let's undo it. I need to
go one higher up here, up here here and Oh, that's all I did it. Okay, so we got those sites, and now let's not forget that over here, we
need to do the same. I just need to go ahead and
place a loop here, here, here and here, and then once
again, target wealth, these. And normally, of
course, when you do this, this goes
quite quickly, like we did with the
pipe, you don't have to do such specific actions. It's just that this is quite
an annoying shape because it's almost square shape that goes into a
cylindrical shape. So basically what
we're doing now is we are double clicking these
segments over here, and this is why we merge
them together so that we do not accidentally
loop all the way around. So we are only selecting
the areas that we want to get rid of and
then control back space. And now, what you can see is that because this one is around, if we now go ahead and we
want to keep this yeah, oops, let's keep
this one also sharp. So let's place a few more
segments here like that. So now you can see that
this one looks nice around, but then it transitions
over and you can see how it only
just holds up. I transitions over into like that bold look over here.
And that's about it. I would say that
although I will not do it for this one because
this is a kind of bit okay of throwaway work. But if you have the time, I would say to
grab these etches, and they probably look
if I press three, they probably look a bit better if we move them
forward like this. But then I would also need to go ahead and do this on the
low poly and everything, and I already did this with our versions that we
are going to bake. So for now, I'm just going
to leave it like this. But I recommend maybe moving it forward and doing
that kind of stuff. But then, of course,
you also need to change your low ply and
all that kind of stuff. Now, at this point, I
have been very stupid, and that is that I forgot to
do one very important thing, and that is that I
forgot to actually duplicate my mesh and
place it into a new layer. I'm just gonna do
that right now just because we are not that far yet, so it's not that big of a deal. What you want to
do is shift the, throw this into a
new mesh and call this Pipe underscore
straight underscore HP. Because of course, I completely forgot, and I sometimes do this. We want to keep our low
poly versions over here. So with our low poly versions, just to show you if
you ever want to optimize it, it is very quick. You simply double click on the supporting loops that you want to gets
rid of over here. And when you do that, you can simply press
Control Backspace, see? And that instantly optimizes
your mesh because we are just getting
rid of supporting loops who do not actually
change the mesh. So you would also go ahead
and do the same over here. Now, that bolt, of
course, takes a bit longer to do the selecting, so I will just do
that off camera. But I hope that you guys have
not gotten this far yet. But, yeah, we can
just basically hop, get rid of that.
And there we go. So now, this one is a low poly. And then if we would go
into our hypol we still have our original versions
in here. S in our hypol. So let me just very quickly. Or what you can do
is you can grab this one and then
apply this mesh. But let me just very
quickly turn this back into a low poly
simply by removing the stuff that we Lily
just applied. Here we go. So that's now optimized,
sorry about that. Now what we can do
is we can go back to our hypol versions over here, let's go ahead and isolate this. And for these ones, I think this is fine, but
of course, if you want, you can also apply
segments in here, but I think that this one is
fine what we have right now. Okay. So what we would
then do is we would, for example, duplicate
this over here. And then what we can do is
we can delete the old one. And the only thing that
we really need to do for this one is we need
to isolate this. Let's get rid of these segments. And these ones. And then we can just select
these cents over here, delete them, and now we can just merge this to
center over here. See, right click
Merge Edge to center, and now it will still
work as a normal hypol. So now we have instantly
turned our low poly version, you can see into our hypole. I can, of course, double check. Yeah, that looks like we
are at the same position. So we got that one also done. This one is very easy. All you will need to do
is place one loop here. And because we cannot play swift loops on
this type of mesh, we just want to go ahead
and do an angle select. And then extrude this in, and that will automatically, as you can see over
here, fix that version. And then for this
version, honestly, it takes so little time to do, so I can just as
well do this one. Oh, uniquely by moving
an edge here and here, sorry, let's do angle select. There we go. I seem to
have a selection problem. I will probably restart Maya, because right now we seem
to have a problem that or C does not select unless
I move my cursor, which is a little bit strange. So let me just go ahead and save my scene and restart Maya. So now we have arrived at
the last one over here. So the last one,
yeah, over here. Sorry, my maya
crashed is our bolt. So you can see that our
bolt has these ridges. I on purpose left these out in our low poly because
this is a detail that we can just have in our texture so that
we don't have to actually pay for all of
those extra geometry pieces. Now, We all know that a
screw these lines, they are not just
straight lines. They are like coiled, which means that you can actually
screw something in. However, this is
something that is way too much overkill
for such a small detail. So what we are going
to do is we are just going to give it
some vertical lines. Now, we are going to go
ahead and isolate this, and I'm going to basically place a segment, turn off isolate, and I just want to
push this in to a point where we can no longer see it so that we know that this is roughly
how far we need to go. I will leave this extra
extension over here on, but we don't really need to add details because
we cannot see it. So the way that
this works is let's place a simple
segment over here, and then this will be our end. You can choose to place a bevel, but I think I will not do that. So I'm just going to
play segment here. And then over here,
we basically want to place a bunch of segments
which we can extrude in. So we would go to connect. Let's go over here. And it's
about selecting the center. So if I go ten, these are the centers that
we want to select, but we also need to
give them a bevel. So here I will show you eight. If I, for example, go
for eight like this, what then want to do is I
want to select also this end, and I want to press
Control B and give this a small bevel over here. And once that is done, let me just quickly go to the top view and select
these segments over here. I want to move these
a little bit in to make this space even
compared to the rest. And now, what I'm going to do is I'm simply going
to select all of these pieces over
here like this, very simple extrude them in, but it's not just
going to be extruding. We are going to
extrude these in. However, if we would now
turn this into a high poly, it will not look very nice. And the reason for that is
because in our texture baking, it's two D, meaning that it looks at it perfectly
from the top. What do you notice when you
look at it from the top? There's no difference between these two height differences because you cannot
see the height since the edges are exactly
on top of each other. So instead, you would grab your scaling over
here on your X axis, you would scale this in and see. Now all of a sudden, you can perfectly
see the height. That's basically
what we want to do. We want to scale it in
like this over here. Now at this point, what
we can do is we can try to simply press tree and see how it looks,
and it looks fine. If you want to, you can go, Oh, God, I lost my
phase selection. There we go. If you want to, you can grab your faces, extrude, and then
simply move this in. And this will
automatically place these supporting loops already. And now you can see
that here it looks a little bit more rigid. So yeah, you can, of course, manually place even more
supporting loops if you want. But I'm going to
probably stick to this. I will place a
supporting loop here. And this asset over here, the reason I don't use
weighted normals is because it is such a small asset
that having a bevel here, you most likely will not actually be able to
see the benefit of it. So the smaller your model, the less it is needed to add
a bevel, because here, see, if we are looking at
this model from here, even if we would add a bevel, it would be so difficult to see. It's just not really
worth it, to be honest. So that is now done. We now have our hypol over here ready so
we can select everything, right click and make sure
that everything is in the correct layer.
So hypol done. For our low poly, I'm
just going to grab this center line and
press control backspace, and the rest is already
low poly enough. Yes, so we don't really
need to do anything else because we modeled
it as a low poly. So that one is also done. We have a pipe bend over here. We can press Shift D. New layer. Pipe, underscore
bend, underscore HP. And let's go into our
original layer and call it underscore P over here. And now what we can
do is we can use these buttons over here to
move our layers up and down. This might be nice for
organization, here, see? So we have low poly, hi poly, low poly, hi pool. And then also we
have our pipe T, which I'm going to call
underscore P. Sorry, I've really been slacking away the naming in this
project for some reason. And then I'm going to shift
the Pipe T underscore HP. And now we also have
this one ready to go. Okay, so our pipe bend hypol
you already know what to do. So all we need to do is we just need to place exactly
the same segments. And the thing is with a bend, you don't need to
play segments on the bend because it's
already bending, so you want to have it
look nice and smooth. So we can place our segments
here, here and here, and then we can just
leave this because this will just like nicely
and smoothly because we have so many segments
here, bend around it. One thing that's quite important
that I think I forgot to say is that you want to make sure that your hypol still looks very close and
similar to your low poly. You don't want to make your
hi pool vastly different from your low poly because the more
different that it is here, see it's done, the harder it is for your texture to
keep up with the changes. So if we are subtle changes like this where we just make
it a little bit softer, these changes are quite
easy for our texture to keep up with everything
with all of the changes. So that's something that you
just want to keep in mind. Now, over here, I
seem to have a bug, and I think it's simply a matter of merging this together. And here also. So
let's do target weld and merge this together, and it looks like that
fixes the bug. Okay. And now with this
one, once again, this stuff is quite
straightforward and make sure that you are in
the right layer, of course. We can just place the same segments that we
have been placing. And this is what I meant
with you can choose to, first of all, create
your hypol and then create the other pieces
or create your low ply. But I like to do
low poles and then convert them to hypol
even if it means needing to redo
some work because it's way easier to manage
low poly geometry. As soon as we have
all these segments, you can imagine that
it gets a little bit more annoying when
we want to make really subtle changes to
adjust this geometry. For example, if I
want to just make these segments between
here a bit shorter, that gets quite a bit more
annoying whenever you do your hypol which is why I tried to wait with
the hi poly before then. I'm going to place
a segment here, and I'm going to place
one here and one here just to
constraint everything. And then let's press three. Look at that. That's
looking nice. Okay, so Everything
is now ready to go. Now, next thing that we
would do is we would go ahead and start with
our UV unwrapping. Now, for our UV
unwrapping, at this point, what I want to do is I
want to grab my bolts, and I need to toll on both my high ply and low poly for this. These select my pipes, and I'm going to move Oh, I'm going to move this up. Let me just remove my history and modify freeze my
transforms. There we go. So now we can move it up
because it was a bit confused. And this way, we are going to already prepare this for baking a
little bit later on. So we move this up here so that it is not interacting
with this piece. And I will explain to you in the next chapter
why we do this. So in our next chapter,
what we will do is we will go ahead and start
working on UVs, which is the art of converting three D mesh into two D so
that we can texture it. So let's go ahead and continue with this
in our next chapter.
34. 17 Blender Uv Unwrapping Our Pipes: Okay. So in this chapter, what we're going to do
is we are going to go ahead and do our UV
unwrapping for our model. Now, I will admit that UV unwrapping inside of Blender is probably the worst UV unwrapper in all of the Tre D
modeling software. So we'll try to do our best, but it's just not the best. There are many different
on tools that you can use that you can download
that you can even pay for. However, I will use a
default of Blender because, of course, it's a
begin tutorial, I want to stay with the default. So we're just going
to go ahead and use a default for this because
those other tools, they are quite extensive and some cost quite a bit of money. So let's go ahead and go into our UV Editing
tab over here. Now, the first thing
that we need to do is we need to press this
little button over here, which is the UV sync selection, which allows us to automatically whenever we select a model, it allows us to see all of the
selected models in our UV. So let's get started
with the first one, which is just this
shape over here. Now, as you can see
with this shape, it is quite a long shape, so there will probably
already be a problem there, but I will explain
to you the problem, and then we will discover
the solution for it. So if we would go ahead
and do a clean UV slate, what I like to do is
I like to just select everything U and unwrap. This will never work because a cylinder is an infinite loop. So with UV, it's the
art of displaying our Twi D asset into two D.
So we need to unfold it. We need to lay it out
in two D. However, if it is infinite,
it can never unfold. So we need to play something which is called a
seam somewhere, and this is basically
a breakpoint. Seams are visible inside of
textures most of the time. You can try to hide them, but they are somewhat visible. Because of that,
you want to twin and glacial seams always in a location where it is really hard for your camera to see it. Um, these can be on
corners on harsh corners. It is good place seems because it's like a
natural breakpoint. Or in terms of the cylinder, you just need to try and
find the best location. In this case, that location
would be at the top, because in our
unreal scene here, our camera is often
looking at it like this. It is not looking at
it from over here. So that's why the top,
in this case is best. What you want to do is
you want to select this. Go to press U, and then you will get your
unwrapping menu over here, and you want to press Mark Sim. Now, if you once again
press and you unwrap, you can see that now
it has unwrapped, although it is
missing part of it. I think this is because we
need to press Q and apply all of our transforms in object
mode. Let's try it again. Unwrap. Oh, oh, that's why. Of course, this phase it cannot handle this phase so let's
dissolve it or remove it. I have been talking about
that before that we want to, like, remove that.
So there we go. So now we have this unwrap
going on over here. But we have a small problem. And that is that in this
unwrap that we have right now, it is really long. And the way that it works in our UVs is that we need to fit our UVs
into like a square, and this square
will be a texture. You often go for square
or you go for rectangle, but square is by far the
most common one to use. So okay, let's say
that now I want to make this a bit
bigger because this is a really large asset, and if it is so small in this square and we have
so much space left, it means that the resolution
is also smaller because the smaller these
things over here are the lower the
resolution will be. So what I can do is
I can decide, okay, I want to let's say that I
place like a loop, not here. I want to place a loop
in the center over here. And let's say that I grab
this loop and I press U, and I mark the seam
over here also. Now, what that allows us
to do is it allows us to basically now move this shape. So now we have two
shapes. We can now also even press and we
can unwrap again. And now you can see that,
although it looks like that. Oh, no, it's not overlapping. Now you can see that
because we have two shapes, it can fill up a lot more space. So this is good, but
we have one problem, and that is that we now have a seam over here that
is very, very visible. So there's a few ways
that we can fix this. We can try and hide this
inside of our texture or by keeping our texture
really clean in these areas or by adding
actually a lot of dirt. Or what we can do is we can hide it by adding
another object on top of it, and that is what we
are going to do. And the reason that we are
also going to do that, so we will hide an object on top is because we happen
to need it anyway, since our pipes are
hanging from our ceiling, we can just as well
create a really simple shape like you can see over here around this
seam to hide the seam. And right away, it will
also have a utility of being able to
attach to our ceiling. So that's what we're
going to do right now. We are going to simply
create a shape around it. You can go way more extensive. You can, like, completely
embed this If you want, you can completely embed
this cylinder or the seam, along with, like, a metal
bracket and stuff like that, but we are going to go for
something quite simple. So what I want to do
is I want to go ahead and for this one, I will most likely normally
I would use a curve, but inside of blender because I hate using curves
inside of blender, I'm going to use a cylinder, and this can be quite thin. Let's say, like 14
is probably enough. Let's turn on our
wife, Rim Toggle. And let's move this and scale this to the
thickness that we want. Yeah, that feels like
a right thickness. And then all we need to do is we just need to go
ahead and we need to place this see over
here over here, something like that should work. And now, first of all, we have the top which
we can just Oops. We can just, like, extrude this. And then I can see that it's actually a little bit too thick. So we want to extrude this
to, like, a nice amount. And the gall is that
here at the top, it will kind of just
sink into the ceiling. So it's up to us
to kind of, like, make it long enough so that it kind of sinks into the ceiling. Next, I'm just going
to go ahead and I'm going to scale it using my blue square a little bit more to make
it a little bit thither. Okay. And now quite
easy for this one, is that we need to
What's going on? Oh, it's because I'm
not in di mode, sorry. Now what we can
do is we can move it so that it's just touching our pipe over here
and hiding that seam. Now it's just a matter of
going over here, moving it. And if you want, I guess, you can do snap rotations if you
want to go more accurate. And what you can also
do is you can also go to your left view, for example, and then press AldX then you can go ahead and move it over here. E, moved again, stuff like that. So we can go in here or well, we can just also
do it over here. So it kind of depends. I guess, in this case, I like doing it from the
left view a bit more just because it's a
bit easier for me to line up my rotations. One. Here we go. And believe me, this is still
faster than using a spline. But I did include a bonus
chapter on how to use splines or curves
inside of blender. It just means that I
don't like to use them. And the reason I
don't like to use them mostly, excuse me. Sorry, keep pressing
the wrong button. The reason I mostly don't
like to use them is simply because they just drop
a spine to the floor. They do not actually
allow you to place a spline wide away
into the place and for me to have a spline dropped
to the floor and then needing to move it around and
extrude it and do all this stuff just to
get it into location. At that point, I can
just as well do this. So we're almost done over here. I think
this is the last one. And then what we can do is we
can just also double check. For example, over here you can see that looks like I missed the
mark a little bit. So I just want to go in and
make sure that it's not like pushing into our pipe
too much because that's not how real life works unless
it is completely welded, but that would be very
logical for something like this. So I can just kind of Move it over here.
Okay. Awesome. And now if we just go ahead and
once again to left, Alt D mean to press that Alt. And let's set both
of them nicely on this grid line over
here. There we go. Okay. Awesome. So we now
have our model ready to go. What we can do is we can
delete these top faces. And now we can see
that over here, the most important parts of our seam has now been hidden because
it is now below here. And what I said about, you can make an entire
bracket around it. If you want to hide
the entire seam, that is totally possible also. So now let's go ahead and go into this one and go
back to our UV editing. And then for this one,
this one is quite easy. Unwrap and then place one
loop all the way around here, and then let's go
ahead and just mark the seam and unwrap it again. So this one, it's okay
if it's really long. The reason why that is okay is because it is also a
really thin asset, so it doesn't need
as much resolution. So this one is now done, and this one is now also done. Now, let's go ahead and
go over to these ones. These ones are often quite easy. So let's start with
this one, and unwrap. Going around corners
normally is not a good thing inside of UVs, but sometimes at
least on cylinders. But sometimes if it's going around the corner,
just a little bit, our UV is able to outlay it enough so that there
is no weird stretching. And what I mean
with stretching is, I guess that's something
that I should show you. If we, for example, let's add a really quick
new material here, just give me 1 second.
You can ignore this. Scale 50. And I want this to be
like a U V. Okay, cool. So now I can show you.
So right now you can see this is also how you
can see that a seam. So you can see here's
a seam and here you can see where it breaks. This is just the break line. That's why we want to hide it because you can imagine in a texture that you are
also able to see this. But right now we have all
these perfect little squares. So what I mean is
the thing that we want to avoid is stretching, which is this kind
of stuff where the squares are no
longer perfectly square, and that means that
something went wrong. So basically, that's the
same thing over here. When we have this
one right here. And yeah, I need to, like, copy my material over
if I want to show you. You can see that now
going around the corner, the stretching is not too bad. However, if this
would ever be longer, you can see that then the
stretching becomes quite bad. So just take it from me. Right now, this is fine, and I'm going to go outside
of texture fue, but be careful with it
that you don't have too much insane
stretching going on. Now, having this one over here, this one is actually
not too difficult. So let's start with just doing an unwrap. Oh,
that's interesting. I did not do the. Anyway, there is another
way that we can fix this, and that's that we can
right away place our seams. So let's say that over here, I want to go ahead
and I want to place a seam all the way around
this area over here. I don't know why it
doesn't just loop around. That's a bit strange, but okay? I can also without doing
any type of resetting, I can just select this mark Sam and then do the
same over here. I'm also going to place
one single seam here. Actually, I will show
you why later on. It might be easier if
I do that separately. I need to keep reminding that
this is a beginner to toil, and there's some stuff that
makes total sense to me, but I should still just
in case, explain it. So, Mark Smear,
this one over here, it's a cylinder. It's
an infinite loop. So we just need to
grab one point, and then we also want to
mark a seam over here. And that's it. Now if
I would go ahead and select everything,
and unwrap it, you can see that now it has
unwrapped around our seams, which means that we have a font, a back, and a side. So yeah, that one
is now also fine. Then for this one, we want to
go ahead and quite similar. So if we just go to edges, I'm just going to
go ahead and select these edges over here. These over here. Still
not completely aware. Like this would look like
something that can loop around, so it's interesting
that it doesn't. One in the center, and while we are selecting, we can just as well also
select this outside. And don't forget that we also
need to do one over here. So just let's place
that like the top. Like this, U, and then we
can go ahead and mark, select everything U and unwrap. Now, because this is a low poly, I actually also want to get rid of this edge, don't worry. Dissolving an edge
will actually leave your UVs intact as long as it doesn't change the
actual shape of your model. So we now have this
one also ready to go. And now all that is
left is this one. And for this one, all
we need to do is, let's call it the Shift H, delete the back because
we don't need the back. And then we have
the font, U unwrap. Control I to invert our
selection, U unwrap. And then for the Control I, I'm just going to go
ahead and do like a mark Sam I know what I did
was not super logical. But okay, we can just unwrap
it again. There we go. So the reason why it's not
superlogical is because I just use two techniques for different techniques for
a really simple shape. I did an automatic
unwrap for this one, and then I used a seam for this, but I could have
just placed a seam around here and around here, and that would instantly
do the same thing. So that's just me taking
the long way around. Anyway, UVs are now ready
to go for this one. However, we are not
going to, of course, create a texture for
every single component. We want to create one texture
for everything combined. So what we will first do is we will first
now go ahead and continue on with our
pipe bend over here. Oh, and this one over here, we can right click move to collection Pipe
straight low poly. Okay. So we have
over here api bend. Now, api bend, normally, well, it should work, I hope, by just placing one seam here. So if we just go
ahead and unwrap it to basically the
reason why I always unwrap it before doing
anything is because I want to reset all of my UVs to make sure that
everything goes correctly. And now if I press and Mark seam and try
to unwrap it again, it should fold out
enough over here that it doesn't create too much weird
stretching or something. So that's already fine.
You can, of course, try it out with the
checker like I showed you, but I know from experience
that this one will be fine. And then I also want to
unwrap here and here a line. So I guess here, if I do Markem, let's see. I guess
it doesn't matter. It's a force of habit for me to unwrap before doing anything, but technically,
that doesn't matter. But you can see over here,
it's also able to, like, nicely unfold this
entire thing like this. So all of our UVs are now done. Now what we need to do is we
need to pack all of our UVs. So if I turn on everything, all of our low polis over here, we need to pack all
of these UVs into this nice square radius because we do not
want to have anything falling outside of it. We will go over
our modular pieces later on on how that works
and stuff like that. But for now, we want to make sure that everything fits
within the square radius, and we want to make sure that
none of these we call them UV islands are overlapping. If they are overlapping,
what will happen is you will see the same texture
on multiple objects, and that's not
something you want. So what we're going to do is we are going to
select everything. And now if you go
over here to UV, you can go ahead
and you can go for, first of all, press
average island scale. See what I need to do
is I need to press Q, I need to reset all of my
transforms before doing that because else
it gets confused. Average island scale,
there we go. Now it works. What that does is it
will make the scale of your UV islands relative to the scale inside of
our three D. So this one, this large pipe gets a bigger scale than,
for example, the bolt. The reason you want
to do this it's because of something
called taxodnsity. What I can do is if I
can go ahead and here, let's select everything and then at last, select the pipe. If I go down here in my materials and press copy
material to select it, it will apply this
checker material to everything because it's copying
it from this large pipe. Right now, what we are after
is to make sure that all of these squares on all of our
models are at a similar size. This is called taxo density. The general logic behind it
is that if we, for example, scale up one model,
let's say that we grab this one and let's say
that we scale it up. Now, this one, all of a sudden, when we would see this
one next to the rest, it would have a super
high resolution, while all of the other ones will have a super low resolution. And this will break the
visuals and the immersion. It will not look nice
because you will see a high resolution version
next to low resolution. This is something in the video games you
probably have seen. If you've ever seen a character
standing next to a rock, you can see in all
the video games, the rock looks really
low resolution and the character looks
really high resolution. Rather, what we want to
do is we want to have everything at a
similar resolution. So let's call it
the mid resolution. So we want to go ahead and
keep everything at the same, and we call those
taxol densities. Now, the nice thing is that what we can do inside a blender, just press UV and average them, and then they all have a similar taxol density based
upon their scale. Next, what we're going
to do is we are going to start with an
automatic packing. So we can go to our UV, and then we can go
ahead and go to our pack islands over here, and then you can go down here into some
settings if you want. But often the default is fine
for what we need to use. So we now have
packed our islands. However, we still have
quite a bit of space left, as you can see over here, and this is space
that is unused. Whenever you have unused
space inside of your UV, if you can make use of it, it's often best
because remember, the bigger shells, the
higher resolution. But, of course, take it
with a grain of salt. And the reason for this
is because we do not want to sacrifice our taxa density just to fill up some UV space. So having all of this stuff, what I would do,
for example, is, oh, God, now I need to
select select linked. I need to set this one back
to four because now I have, of course, a few modes, W E, because I have a few modes over
here that now do not work because your UV view has different shortcuts
than the rest. So I just want to quickly set my own personal
shortcuts here. And for that, I'm just
going to go to Key Map, and I just want to
press number four, and I want to figure out why, we need to go in UV editor, and I want to set four. You know, just said
it to something else. There we go. And now,
if I press four, see, now that one works. And let's see W. We also
need to go ahead and assign shortcut to contro
W. So now, Come on. Are you still let's
remove the shortcut. Contra W. Okay, let me just quickly go
to preferences because I guess there's another
one key binding W. Then if we go
to our UV editor, set tool name,
Contra W over here. Now, this should work. Does
not work. That's strange. W rotate. That's still a bit confused over here. Yeah, okay. You know what? I will just use
these tools for now. I'm not really in the mood for such a small UV to
figure all of this out. Yeah. So, honestly,
I will just use, like, the manual
tools right now. So what I'm going to do
is I'm going to grab my bolts and I leave
those over here for now. And now what I can do is
I can go ahead and I can still use the rotate
tools, which are normal. What I want to try
and do is I want to Ty and basically place these. Yeah, let's move this
one out of the way. I want to try and
place these ones over here a little
bit to the top. And the reason for
that is because now, technically, I should be able to simply select all of this stuff. And if you press this little
transform button over here, you can get this transform box and you can do, even scaling. And now you can
see that I'm able to scale it up just
like a little bit. So I'm just saving a little bit more
resolution over here. And now I can move this one, which is this. This
version, you know what? I will go ahead and I will
scale it up a little bit more. And the reason I'm
going to scale this up a little bit more is because
it's such a thin shape. I want to make sure that I have enough resolution so that you
can see some detail on it. Okay, now we have gotten
to an interesting point. Remember how I said
about texto density, we want to keep everything even. Now, this one is one
of the few exceptions. So the reason why
this is an exception, and let me just go
ahead and rotate it sideways over here is
because our bolts, we are baking our norm maps. However, if our bolts
are too low resolution, those norm details will break. So norm details, they do need a specific amount of
resolution in order to work. Especially over here. This shape has a lot
of these ridges, remember, that we created. And we, of course, want
to make sure that we are able to see the
details in those ridges. If we keep it dismall, there will be so little
space for the ridges in such a massive texture that we will not
be able to see it. It will just look
like a blurry mess. So this is one of
the feca times where I will actually scale
this up a little bit. Not too much. I'm not scaling
it up to an insane amount, just to give it that
extra bit of resolution. And that's where I'm going
to leave our UVs for now. So we now have mapped our
UVs from three D to two D, so everything is
now ready to go. The last thing that
we would need to do is we would need
to in next chapter, prepare our models for baking. So for now, we can
go ahead and save sin and let's go ahead and continue on to the
next chapter where we will prepare all of
these models for baking.
35. 17 Max Uv Unwrapping Our Pipes: Okay, so we are now going to get started with our UV unwrapping. So for the people
that don't know, UV unwrapping is a method
in which you convert your three D models into two D so that you can
properly paint on it, in this case, texture so
that you can give it color, details, all that kind of stuff. This is quite easy. Of course, it doesn't mean that
your model will end up only being two
D. It's just like an extra part of
your model that will be two D specifically so that
we can actually texture it. So we have our model over here. Now, the way that this works, when you are UV unwrapping, the bigger the shape
of your model, the more resolution it needs to get the correct resolution. This will make more
sense later on. However, what I'm
thinking about now is that these faces over here, we probably never see
them because they are attached to
another cylinder. So what I can do is I can
actually remove them, and we only want to, of course, this is low ply over here. I'm going to remove
them because this will basically save us something
we call UV space, and this is something
I will need to show you in order for
you to understand. So at the beginning, we have installed something
called text tools. So we also add it to our Toba, and let's go ahead
and open it up. So in our text tools, if we go ahead and
let's just isolate this model and we
are going to use this model as an explanation. I want to press the dit
UV button over here. However, you can also add
a unwrapped UVW modifier. The reason I like to
use this one is because it also applies some
extra settings. So we now have this window. As you can see over here, this window has a square in
it, and then it has a shape. This shape is actually
our swedie shape. However, it is not yet correct. This is something that
we are going to work on. So what we want to do is
basically in the end, we want to fit all of our shapes into this
square over here, which will mean that we
get a proper texture. Textures within the game and
film industry are always square or they are
rectangular in even sections, but square is by far
the most common one. With this, we often use
resolutions like 512 by 512, 1024 by 1024, 2048 by 2048, et sta, et eta. And it is just like
even divisions. Or what you, of course, can
sometimes do is, for example, 512 by 1024 or 1024 by 2048, but those are less common. So we want to basically unwrap
this almost like a puzzle, lay out this tree D shape
into two D. Right now, if I would press my
checker box over here, you can see that these checkers, they are all stretched and
they are not like nice cubes, not squares, like nice squares. So what we want to
do is if we just go ahead and go down
here to Polygon, we want to turn this
into a nice square. Because right now
you can see that it's worked the
cylinder over here, it plays a cut, but let's just get started
completely from scratch. Let's press the iron button, and what the iron
button does is it will basically try to unwrap
our model for us. Now, a cylinder, because
it goes around infinitely, we need to have a
point where we can break the model so that
we can fold it open. Now at this point,
we want to have at the least visible point. This we call a seam. However, seams are visible because this is
where the texture, where you can sometimes see the texture split because this is where two
textures come together. So we know that this pipe over here will hang at
the ceiling like this. So our best point of action
is going to be here. Sometimes with cylinders, you simply don't have
a point of action, and you just need to keep an
eye out for your material. We want to grab this
point over here. And then in here we have our Explode section and we want to press the brake button. So there's a few
sections in here. We have some
transformation sections. This we don't really use. This one will straighten UV. It's something that I will
show you in just a bit. This one we don't really use. Over here, we only
really use the brake. This one we maybe sometimes use. It basically is
the same stuff as the relax button that we
will go over later on. But it's not yet
exactly the same. And then over here, we have some extra tools for
packing that we will also use. At the top, you have your move, rotate and scale tools, and at the bottom, you just
have your selection tools. So it is quite similar
to our other viewpoints. But for this one, because UVnwpping is
quite a big topic, I'm not going to go over
it that extensively and just show you how
to Uvn es models, including cylinders and
also including the squares. So we now have placed
this point ovary. You can see that there's
now an orange seam. So what I can do now
is I can unfold it. Now, I can press relax, and then what you can see is it starts to the more
times I press it, it starts to carefully unfold. Or what I can do is I can go over here and
press Quick Peel, which will do it
right away in one go. So the relax is
more like you see, for really small increments. But in our case, let's
do a quick peel. So now you can see, now that you can see this, let's turn off our angle snapping. You can see now that
if I go ahead and I increase this size
a little bit for now, just to show you that
we have nice squares. But as you can see, this is what I meant the
squares over here, where wherever we have our seam, they break up, and that's why our texture can look a
little bit different. But if we look at
it from the bottom, we will have really nice shape. Now, this shape, because
it is a cylinder, it is able to also unwrap these pieces because it
can just lay them out. Sometimes this is not
always able to do this. And then what we
would do is we would, for example, unwrap
this one separately, but this is something
we will go over in just a bit because there are models where we
need to do this. So this one is
honestly already fine. It is quite simple.
It's just a model. If you scale, you can accidentally change
the scaling like this, and I'm using the
freeform mode over here. But if you hold Control
and click on the corner, you will evenly scale your model or your UV
to make it smaller. So let's say that this
one is already correct. Now what I can do is I can
simply close this window, go outside of isolation mode, and now I first want to go ahead and continue on
with the next one. So let's say that we have
these ones over here. We are now ready with our model. So what I'm going to do is I
like to just right click and convert this to an added ply
to do a full reset on it. Let's say that we have
this model over here. I want to go ahead
and add a checker, Mark, and I want
to add my did UVW. You can see that this model
is more complicated and the original UVs are just
completely broken, see? So we need to
completely redo this. Now, with this one,
what would make sense to me is to basically have this because this
one is essentially a cylinder as one piece, and to have the front and
the back as one piece. And that's way we can
nicely unfold it. Right now, if I would
click and drag, what will happen is that it
does not properly select. This is because we have
some selection settings automatically turned on
whenever we use text tools. These selection
settings are over here. Ignore back facing, which allows you to basically
select the back, see? And this one basically
selects by angle. So if we turn both of those off, select this side, hold Alt
and deselect the center. We now have the front
selected. We can press iron. And if you want, I
always like to press relax once to make sure
that it is correct. We can now do the other
side, iron, relax. And now all that is left
is this version over here. Of course, because
it is a cylinder, if we would press iron again, you can see that
it does not work. So what we need to
do is go down here, and I always like to
grab my shortest edge, and I always try to have
my seams on corners. Now, this is not
exactly a corner. Oh, Alex, yeah, it
is exactly a corner. So this is often the best
way to place a seam. So I can go ahead
and press break, select my model, and out appeal. See? And now it is
just a nice model. And for now, that's
all we need to do. Now, a cool tick is that just
like any other modifier, we can copy and paste this. I can go ahead and select
everything else and let's add a checker mark over here, and I can go into my bolt, right click and copy my
UV, go to this one, right, click and paste, so that
it is exactly the same, because this is exactly
the same model. This one is going
to be super easy. So with this one,
what we can do is if we add an edit UVW modifier, this edge over here, is small enough
that we can just do one quick iron so that it can still wrap around from here to here without too much errors. However, what you notice right now is that it
doesn't look correct. The reason it doesn't look
correct if we just cover it to added pool is because we need to reset our X forms
on this because it looks like it broke
during the X forms. So let me just quickly
do that for all of them. Select them, reset X forms
in the utility tools. And now if we would rety
again, select everything, res iron now you can see
that it does work correctly. E. So you can wrap it around. If this would be bigger,
this would not work because then it will not be able to properly wrap
all the way around. I can copy this, and I
hope because this doesn't always work that during
the reset X forms, it's still able to retain
the exact same shape, which it does, so that's good. So we can simply copy
these over and then double check our work. Awesome. Now the next one is
going to be this one, which is almost
exactly the same. Let's isolate it. The
only thing is that, of course, we have
the center over here. So let's turn off our
quick selection tool. Select this side and
deselect the center. So we have front number one. Select the other
center number two. And now all that we have
left is these two sides. And what you can do, even
though they are not connected, you can easily just press
iron on both of them, and they will simply become
two different pieces. S one and two, because
they are not selected. Then we just select the edge. So I will select this
one and this one because those are the
least visible most likely. And I'm going to press
break and then once again, select them and do a quick peel over
here, and there we go. Now, I can see that this one, it did not correctly unwrap it. So let's go ahead
and try a relax. A couple of times, maybe try another quick peel.
Okay, now it worked. Sometimes when you have
multiple objects selected, and you do a quick peel
on them at the same time, they sometimes get a
little bit confused. So in those cases, you just want to go
ahead and you want to select it again and
try it individually. So we have this one now done. We can now simply
press right click and copy and paste it over here. So you can see that
we are reusing a lot of the stuff that we create so that we are creating as little new
stuff as possible. For this one, we can
select the font. And then we can press conto
I to invert our selection. Iron, select one edge, break, and quick peel. See? So you will get
quite fast in this. The more you do it. And it is
just puzzling, pretty much. So we are now just
like carefully laying out our weenie
model into Tutti. And then what we will
do is we will put it all together into that square. So now you can see that all
of these models are already UVnmpped and it's only
took us a couple minutes. So what we want to do now is we want to go ahead and
go to our other models. So we have our pipe,
T split low ply. And this one, for example, is a little bit more complicated. Let's go ahead and yeah, let's just convert
it to add a ply. You can, of course, keep
your settings if you want. Add a checker box. And let's have a look. So
how would we unwrap this? You can kind of see that it's already kept a pretty
good unwrap for us. Now I look at it. We would want to split this one
somewhere over here. I'm going to select everything. Oh, actually, sorry.
Before I do that, I would like to Let's
do select by angle. Delete this one, this one, and this one because then we don't have the UV unwrap
it if we cannot see it. And since there will
be pipes always connected to it, you
cannot see it anyway. So it's literally just
like wasted resolution. So whenever you
cannot see a face and you know for sure that you will not be able to see it, it is often, not always, but often better to
simply remove it. But this is more like
experience to know which ones are best to remove
and which ones are not. So let's select everything and press iron for a clean slate. And I'm going to
go ahead and I'm going to probably
place a seam here. And I know this seam is quite visible, but
we have no option. This is just our only
choice. So a seam here. And then I want to also
place a seam here and here, because these areas
over here are really difficult to get,
like, a close look. So it's a great area for seams. And then what we're basically
doing is we are splitting this piece in half because there will be a seam down here, so it just goes all
the way around. And this piece we will split into two pieces here and here. So having that done, we can
now go ahead and press break. Select everything. Quick
peel, and there you go. See? And now you can see that it is a pretty decent looking
resolution over here. And then after we've done that, we can later unpack them. If I can already show you now, let's say that over
here, this one is angled and I want to
straighten it out. I can select one single
edge down at the bottom, and I can press the
align button over here. And what it will do is it will align our shape based
upon that edge. And now you can see that the
cubes are more like square. But this is something we
will go over more later on. It's more like a habit that I do like to sometimes
already do that. So we got our T pipe done, our straight pipe done, and finally we have our bend. Now, because this is a bend, the UV unwrapper cannot as
easily just like unwrap it. So I can show you, if we would, for example, go ahead and iron this, and let's say that over here, I keep forgetting to do that. I keep forgetting
to remove the ends. There we go. Let's
try that again. So remove the ends. So we have this shape, and let's say now I now duplicate
this and I press break. Select everything and peel. So this is what
happens right now. Right now, our shape,
because it is a bend, it's trying its best
to make it straight, but of course, making a bend
straight is not as easy. And what will happen is
that our cubes over here, they start to stretch
a little bit. They start to become a
little bit stretched out. Now, in these type of instances, it's up to you if
you think that, oh, this stretching
is not too bad, it is fine, or if you
think it is too bad. This is a balance. So
what we can do is we can sure remove the
stretching, by, for example, placing
another seam here and doing another break, and
that should do the trick. Yeah, you see, so that kind of, like, removes the
stretching a little bit. See? However, now we have
an additional seam here, and this seam is very visible. So it is up to you to decide
if your texture looks too stretched like
it's stretching out because it is trying
to keep the shape. If you want to have
an extra seam, which is visible, or if you
say, no, you know what? And that's what I'm going to do. You know what? The stretching
is not too bad, I think, because this is like a plain
metal, that this is fine. If this would not be
like plain metal, but like a really
detailed asset that has painting on it and
that kind of stuff, this would not be the
way to go because then those details
will also stretch. But with metal, you probably
won't really notice. So I like to do this and
avoid having too many seams. So this is once again, more experience, like
a use by use case. And don't worry about making mistakes because
that's how you will learn from this
experience. Okay, awesome. So we now have our
assets UV unwrapped. Now, what we're going to do
now is we want to combine all of them because I want to texture all of them
at the same time. So we want to combine all of
them into the very same UV. Do this, what we're going to
do for now is we are simply going to turn on all of
our meshes over here. And yes, I know that they are clipping. Don't worry about it. We can go ahead and we
can select everything. And what I always like to
do is I like to quickly go in here and reset
my transforms, and then quickly just convert
everything to Adiple. This way, we can be sure that we do not have any weird
bugs or anything like that. Next, what I like
to do is I like to add an Adipol modifier. And yes, you can easily add modifiers to multiple
selected objects. That is no Pmadal. So we now have all of
this mess over here. Now, what I like to do is I
always like to automatically, and we call it
packing, automatically pack these shapes into
this one by one square. And then what we
can do is we can manually go in and
improve it if needed. So right now, let's go ahead
and select everything. And the first thing I want to do is I want to press this button. This button is the
rescale elements button. What it does is it will
make sure that the scale of your shapes are the
equivalent scale as they are in T D. For example, right now, our bolts are
willy massive, however, they are really tiny in T D. So they would take up a lot of resolution, which
we don't want. So we press this button, and now you can see that
everything gets scaled roughly equivalent
to the actual size. Now that we've
done that, what we will do is we will do
some outer packing. Want to go ahead
and turn on rescale and rotate over here, which allows the system that
will automatically pack our shapes to rescale and
rotate these UV islands. We call them UVA islands. And the padding,
we want to set to 0.001. That's often my go to. Padding basically means the
space between these shapes. So I like to go ahead
and press this button, the pack normalize. And
this is what I mean. Padding is like the space
between these shapes. So what do we have right now? She can see over here, we have a lot of
space left over here. Now, this one is actually
a tricky balance. So, yes, we have a
lot of space left. And this is because we have one shape that is really long, and it basically pushes all of the other shapes out as
she can see over here. Now, we need to make a decision. What we can do is
we can scale up the other shapes and
leave this one long. However, what will happen
is this pipe over here will look lower resolution than
the other pipes because, of course, we are scaling it up. Or what we can do is we can
place a seam down here. However, this seam over here, it will not look very good. So instead, we are going
to do something different. And this is something
that's a common technique, and I'm totally not doing this because I totally
forgot to do this. So what we're going to
do is we are going to create a bracket because
yes, okay, I forgot. Sorry, guys. I
forgot that we also had to make a bracket to actually place it
to the ceiling. However, this is good
because I can show you. What we're going to do is
we are going to create a very simple and quick bracket, just something to hold the pipe, and we will place this bracket exactly where we are
going to place this seam. So you have this one over here. So we would like break this. And now if I would
select everything again, And try to repack again. You can see that now we are
wasting a lot less space. However, if I just quickly
convert to Adipli, you can now see that we are having this really
harsh seam over here, which we don't want. So we are going to
create a bracket. I am really sorry that
I forgot to do this. But that sometimes happens. You forget about
like this mustf. So if we just go into our
pipe straight over here, now, for this bracket, let's make it, like, super, super simple. Honestly, I don't
think we need much. I can have, like,
a look you know, in real scene, which
for some reason is on my other screen, and
it's really small. Here we go. So yeah, we want to have a bracket
that basically sticks all the way up so
that we can use it. So let's go ahead and make use
of our lines in this case. Let's go ahead and isolate this. And what I'm going
to do is if I'm just going to go to my
side view over here, I want to go ahead and I
want to go to my line tool. Now, I need to have a look, and I think that this is
the line I want to follow. Make sure that you select
the correct layer over here. And then what I'm going to do is I'm going to crab my line. And normally what I
would do is I would click and drag to make it round. However, in this case, because we have actual
geometry that we want to follow for an
even polygon count, I'm going to simply go ahead and click on every
vertex point over here. Doesn't have to be 100% precise. But this way, we can go ahead. And now over here, we now have arrived at
the straight points. What I'm going to do
is I'm going to hold Shift to straighten my line, and I'm going to make this quite long. That might
be a bit too much. Let it, let's make it this long and we can always scale it
out if needed later on. Next, what I'm going to
do is in my modified tap, go to the insert button, and then on the other
side over here, we want to once again
also hold Shift. And place a line over
here, something like this. So this is quite easy. It doesn't need to
be anything special. I just want to create something that will hold our
pieces together. Now, if you know
the exact distance between your pipes
and your ceiling, then of course, you can make
a more interesting shape. However, because we
don't know that, we will just leave it
as simple as this. So we have this shape over here. We are going to place
it where our seam is, and then it is as
simple as adding a sweep modifier, which
we already went over. Setting the belt
to be a cylinder. Go to interpolation
and maybe set, like, a little bit lower like this. And let's set the
radius a bit lower. Uh, maybe a little bit less. Let's do 0.9. And next, what we're
going to do is right now our shape is clipping into
our il into our pipe. This is because we placed our
edge exactly on our pipe. All we need to do is go
to the sweep parameters. And often what I like to do is, I'd like to just play
around with my pivot, and in this case, I'm setting my pivot
to the center right, which means that it will place our shape on the very edge. Of our line. And as you can see over here, this is not perfect yet. You can play around with offset. However, I think in this case, the reason it is not
perfect is because I have mistakenly placed my line
in the wong polygons. So I'm going to go
to line and turn on my show end result. I'm
just going to press one. And I'm going to nicely move this on the
correct position. And this one I'm just going
to move up a little bit, and then I'm going
to also select the top one because
if we don't do that, it will start tilting. There we go. Yeah, that's all. So in our sweep, what
we can do is we can just go ahead and we can set
our interpolation a bit. Oh, sorry, not our sweep. In our line, we can set our interpolation down
here a little bit higher. That's interesting. Eight,
of course, it doesn't. Sorry, the reason
it does not give extra geometry is
simply because, of course, we used
a different tool. So in that case,
I just want to go to my edge and faces
and make sure. And what I notice
right now is that this feels quite loply
Like the polygon count, it works for my cylinder over here because my cylinder is completely smooth,
but this shape, it looks like this shape
is a little bit too specific for these polygon counts over here, which
I don't really like. So this is actually then one of the cases where I would go ahead and let's say that we just temporarily
hide this one. And let's grab a new line. And let's place the line
down here down the center. Then click down the center here, and then click and rotate and then place another
one over here. I click and drag. And now I just need to quickly
go into my line because I accidentally set the interpolation
rate to low over here. And now we press one
to go into our modes. So basically to get a perfect
sorry, perfect semicircle. You want to set this part
over here to be straight. This part to be straight and this part to be
horizontally straight, right click and press
Basier corner to turn it into a proper
straight area like this. And then it is just
a matter of using your scale tool to scale, right click and Basier corner. You'll see to scale this to
be exactly around our shape over here. Like this. So we are just now giving it control over how many
segments we want to make. And you guess it at this point, it would just be as
simple as again, clicking hold Shift, and I believe we did it up
until this point. And this side
clicking Hold Shift. And like that. So we now
just have another line, and now I will show
you the difference. If we just go ahead and unhide, you can right click
and press hide. Whenever you do this, press no, because s will unhide
all of our layers. So now I can show
you the difference. You can simply Oh, it looks like I had to go
one higher. There we go. So you can simply
grab this cylinder, right click and copy our sweep. And then over here, right
click and paste it. And this time, it
looks like that our Pivooint was
a bit different. See, now you can see the
difference because now if we go to our line and let's turn on the
show end result, now we have control over
our interpolation, see? So we can actually control how
smooth we want this to be. So this is a lot better. So what I'm going to do is
I'm going to delete this one. And sorry for wasting
your time on that, but I think it still
shows you something good. And honestly, it doesn't matter how many years of
experience you have. Sometimes you just make still
****** mistakes like that. So we got this one over
here, totally fine. All I'm going to do now is add a added poly and delete the tops because
we don't need it. And then we can add a UVW
wp, select everything. Iron, select the center. And what I'm going to do is, do I want to cut it here? I don't think it's
needed because it's such a small asset, so
we can just scale it up. Let's break. Select it, and let's quick peel it. Now, over here, there might be interesting one
that I can show you. So if we just go ahead
and reset the X forms on this because spines
often break X forms. Add a checker mask and
re art our added UV. You can see that even if you
collapse a UV to add a pool, it will still stay here. Let's do another quick peel, and now we get a better example, but this piece is still
perfectly straight. However, this is something we can make perfectly straight. We simply go to
reshape elements and press this straightened
selection button. This will make it
perfectly straight. However, it does not
abide by any stretching. So what will happen is that when you make it
perfectly straight, it can still look
warm and stretch. So if I go, for example,
heres, this is what I mean. So it did not do a good job. So what I would
like to do then is I like to just press relax. And as soon as I do that, Okay. I think I need to press
relax a few more times. There we go. So I just press
it like three or four times. As soon as I do that,
it is fairly straight. However, it is
also not giving us any really strange
looking shapes over here. So we have that one done. Now what we can do
is we can simply go back to our low polis. And for this one, we can go ahead and
just press Contrave. Copy this and throw this into
our pipe straight hypol. But honestly, like for hypol, it doesn't really need anything we can arotobsm to
it if you want to, but it's a cylinder. So we were arotobsmot, but because it is a
perfect cylinder, it does not actually do much. So anyway, our lopols. We want to select our low
polis and ta Added UV again. And now that we have our
seam over here and sure, we have a seam still down here, but this one will be
difficult to see. If you really want to hide it, you can create a different
type of bracket. So this is a common
technique that we often use, and it's simply hiding our
seams using other assets. It's super, super common, especially in environment
art and in prop art. So I can now go ahead
and I can repack this. And now, what you can see is that because this is
such a small shape, we have this one down
here, and look at that. We have really nicely and tightly packed our
shapes together. So what do I want to do now? The only thing I
want to do now is that we have these
bolts over here. Remember, whenever you make
something in IUVs larger, it will use up more resolution, which means that the
texts look sharper. However, if there is too much inconsistency
between your models. So, for example, these
are very, very large, which ends up creating these
look super high resolution, but these are very small, so
these look low resolution. That does not look
good. Those instances, what you want to do is you
rather just want to try and keep everything as even
resolution as possible. This is something we
call taxol density. It basically just says what we do over here with the
rescale elements, we try to keep all
of these models at a proper scale so that the resolution feels the
same all the way across. However, now comes artistic
and technical vision to this. I know that these bolts need a little bit
more resolution, and the reason why
they need it is simply because we have some really
small details on here. If we keep these
bolts this small, those details will not show up. So this is one of the
few cases where I would artificially
increase the resolution. And the way I do this is simply
by moving this over here, and now I want to pack
this a little bit closer. So I can go ahead and
select these shapes, and I'm using my object or
element select over here. And basically, I want
to give this, like, a nice space so that I
can properly scale this. And this is, of course, more time consuming,
but in the end, it will give us a
better quality. So I just like to, like,
carefully pack this together. And you will often
hear people worrying a lot about packing
it not too close. However, when we use weighted normals and using
the latest baking techniques, this is less of a
problem than it was, like, a couple of years ago. So we can often go
quite close without any without getting any errors. So over here, see? I'm just like nicely packing
this close together. And even this one, I can spend a lot of time to make
this UV over here even better by doing the
same techniques as I'm doing here and just trying to get the absolute
most optimal technique. However, for a tutorial, I won't really be doing that. It is a balance between
time and quality. I can spend half an hour
or not half an hour. I can spend like ten 20 minutes making this UV
absolutely perfect. But if the difference
between this UV and the one that I make Kasami
is only 5% extra resolution. It is often not really worth the time I need to spend on it. So what I'm going
to do with this one is I'm going to hold control, and I'm going to scale this up like this to make
it a bit bigger. Next, I want to just go
ahead and I want to grab, specifically these
versions, these two. And I want to make
these even bigger. This is because these have
those really thin lines on it. And now it's just a matter
of packing it together. You want to make
sure that of course, your UVs are not
touching any other UVs. And the reason we do that, this one is different from what we're going to do later on is because els are baking and everything
will not work correctly, because then we would
end up ops then we would end up baking the details
on top of each other. And I guess you can imagine that that
will not end up well. We have another U VN
wrapping technique that we will use for the
modular pieces. So don't worry. We
will cover those in case you are arguing, but there are cases where
you can overlap them. That is true. There
are many cases where we will overlap them, and we will use
those, but later. So over here, I'm just
basically filling in the gaps. And once again, by
filling in these gaps, I'm again, utilizing my
resolution a lot better. So I'm just and I was hoping that I could have just grabbed this entire chunk and
basically throw it all into, like, one area, but it looks
like that I was mistaken, so I just did it manually. And there we go. We now have UV. Everything is now nicely. Oh, God, I'm missing one. I missed this one,
the pipe bend. That's why it was won. See? Yeah. So I missed this one. It's an easy shape to miss. Now, don't worry.
So I can show you. So we have this one, and now you might think, like, Oh, yeah, but we just did all of this work and all of the
scaling. Don't worry. All you need to do is
select your model, and you want to go
ahead and actually, my bend, I need to make my bend a
little bit bigger like this. I want to select everything. But this time, turn off rescale
and only turn on rotate and again set the bedding to 0.001 and now pack
it again together. So over here, now what you
can see is unfortunately, our UVs are not
packed as nicely. So what we can do now is
we just need to try and get because sometimes it is better for us to do
it than a computer. Going to scale this one
down a tiny bit so that I'm not overlapping my
UVs. And let's see. So what if we grab this one
hold control to snap it Oh, wait, we don't need to wi. Yeah, you can, of course,
scale it if you want. It's okay if we have a bit of resolution that
we have wasted. So what I'm going to
do is I'm going to grab these pieces over here. So you guys probably already noticed that I
missed the bend by this point or even before
we had this point. But basically, I'm just moving
this around a little bit to see if I can get the most
optimal version possible. So here, I move this
up a little bit so that I can let's
move this one here so that I can maybe scale these up and give a little bit more
resolution from these. Like this. And I'm just going to move these two together to keep them nice and close. And these. Now, you might think
that doing this, we now have a lot lot
more UV space left, and you might think that
that is wasted resolution. In a way, it is,
however, for me, it is more important to try and keep the
resolution fairly even than to spend this
resolution, if that makes sense. And this is simply a matter
once again of taxal density. We want to make sure that
our resolution looks even so that we don't have a
really large inconsistency. So we have this stuff
over here done. If you want, you can try to do tiny bits of scaling,
like, for example, scaling this one
up a little bit, and scaling this one
up a little bit. But then, over here doesn't
really work too much. I want to keep this
even, so I'm not going to continue with scaling. I'm just going to leave
my UVs like this. We can even add
additional models to basically fill up the space. But this is a fine UV for, like, some simple pipes, and I want to kind of end
this chapter here. So what we can do now is our UV unwps are
now ready to go, and we have done all of this. We can now prepare our scene for baking and we can actually start baking our models
inside of Marmoset. So let's go ahead and let's prepare our scene for baking in our next chapter.
36. 17 Maya Uv Unwrapping Our Pipes: Okay, so we are now going to get started by UV
unwrapping our models. So for our UV unwrapping, I've said it probably
many times before now, I simply means turning
our three D models into a two D version of them, which we can use
ton texture models to give color and all of
that stuff to our models. So for this, we
need our UV toolkit and our UV editor up here. Now, I already attached them to my sites over here in our very
first chapter, I believe. But you can also go ahead and go to UV and here you can find them also the UV set
editor and the UV editor. So whenever you
select something, you can see right away
that we have this square. Our general goal is that we
end up with a texture or with all of our models displayed into this square
in like a proper way. So this is actually
it's not too difficult. U VNwrappings often even
just boring, to be honest. Now, I don't have too
much space over here, so let me just try and get
this as good as possible. So what we're going to
do is funny enough, cylinders are one of the most
annoying things to UVNwb. This is because it
is an infinite loop. Of course, if we
want to display this in tote, we need to unfold it. We need to display it into Toti. However, the problem
with cylinders is that they just keep going. So I will show you what
we're going to do. Now, we are going to get
started with probably just like a let's start with
like a fresh start. I'm just going to
praise keypress Planer, and there we go. Now we have a fresh start. And basically what planer does, if you have your
entire model selected, it almost, like, resets
your model a little bit. So over here, I also still need to warm
up a little bit with IUVs. What we want to do is we want
to basically create a seam, and a seam is a point where it will break our tree model
so that we can unfold it. Now, the problem with seams is that this is also
a point where you can often see that
textures look slightly different because they are no longer attached
to each other. So you want to try
and get your seams in positions that are as
least visible as possible. Now, we know that these pipes will be hanging from the top. If I place my seam
at the very top, you can see that
when I look at it from the angle that we
will use our pipes, you can not really
see them as well. So this is a good position
to place our seams. Another good position to often
play seams is on corners. On harsh corners, you can
often also not see them. So what I would do is
I would go down to my cut and see in my UV
toolkit, and I would press cut. Now, at this point,
with this being done, what we now have is we now
have this chunk of mesh, and we know that there
is a cut over here. We can then go to unfold and we can simply press
unfold over here. And now, what you can
see is that it is unfolding it into our T space, and we can just use WE
and R to move and rotate. So you can already see what
we have done right now. You can see that this is
definitely our shape, but especially if
we look over here, you can see that it
has, like, nicely mapped it into two
D, which is good. Now, at this point, there is one more thing that we
need to have a think about, and that is that we actually
this is quite a long math. If we scale this mesh down
and have this into our cube, it's not so much that it's
taking up a lot of space, but it just doesn't get
a lot of resolution. The bigger something
is within this cube, the higher the resolution. But because this is a
very long shape and it needs to fit in here,
it doesn't work as well. However, if we place another
seam over here, another cut, now all of a sudden, you can
see that just an example, we will make this bet. But now that we have two pieces, you can see that we
can make them much bigger and they still
fit within a cube. So that's the general
concept behind this. So we now have a small problem, and that is that over here. So if I just go ahead and a see just so that I can see the seams
still, let me do this. So now we have a problem that we have this seam over here. However, it is on a cylinder, and we can most definitely just like we can definitely
see this seam. If we would texture
this, we are able to see it because
it is so visible. And I don't want that. Now, because it's a cylinder,
we have very few options, but one of the
classic options is to hide it with another model, and that's what we are
going to do because and it's something that I totally
did not forget to make. Trust me, what we are going to do is we are
going to give the bracket because we need these anyway in order to have these pipes
hanging on our ceiling. So this bracket is going
to be super, super easy. We just need something
like super basic. So what we can do
is having this if we just go ahead and turn it off and turn on our wire frame. So around the center one, we basically want to
create a bracket. Now, you can, there's a few
ways that you can do it. I guess, in this case, the easiest way is
probably a spline. So let's see if we
go to our side view, and if we go ahead and
grab a Basier curve, what I want to do is
I want to go ahead and I will probably
start like over here, and I think it's it the
inner one or the outer one? I guess it's like the
inner one over here. If you just click
Click and Drag. It doesn't have to
be perfect just yet. Click and Drag. Oh, sorry. I said, click and drag. And then click up,
something like this. Let me just go ahead and
quickly isolate this. The first thing I'm
going to do is go to Control vertex and
move this until I see no longer any end alysing so that I know that it
is exactly straight. The second thing that I
can do is I can actually delete this side because
it's a cylinder. We can just copy it over. And the third thing
that I want to do is I want to go
to my object mode, move this one in the
center over here and now I can see that I did
not properly place it, but don't worry about it yet. I will yeah, you know what? This is probably
fine, this height. It is no problem if
it is sticking to our ceiling later on because
we cannot see our ceiling. So for now, this should be fine. And now what I'm going to do is I'm going to go to create. And remember, we have spoken about in a bonus
chapter about spins. I'm going to add a
sweet mesh, and yeah, we can make it a
pole and just set the scaling way down over here. It sets to like 0.01 to 0.008. I think that's about a
pretty decent scale. Next, what we can do is we can
go into our interpolation. And we can increase this way, all the way up so that this
nicely goes around here. And then we also have
our loops over here, and we can set our
sights a bit more. So I'm going to go for probably like ten, something like that. And you can press
Optimize, by the way, to optimize your mesh because
this is exactly straight, so we don't need all of
these extra segments here. Now, once this is done, you want to select
your curve again, go to Control vertex, and now you basically select both of these at the same time. Now we basically want to
move this out this one in. This one roughly over here. And then you can also still
use your skele tools. To nicely curve it around until you get something
that you like. Okay. And once you're
happy with that, all you need to do is
let's reset a pivot, remove our history over here. And now, what we're going to
do is just a simple mirror, set the mirror to
bounding box again. And this time it looks
like the axis is wrong, so we want to go
polyp Z axis over here in the plus direction
and now we can just kind of, like, basically move this having a look Yeah, probably move it
somewhere like this. There we go. So this is
quite a simple bracket. So what will happen now
with this bracket and we can actually apply
this to our low poly. And if you want, you
can also press Shiv D. Arts right away to your hypol but in your
hiply simply press three. Like, there is not a lot of
difference between the shape. So anyway, now if we
go to our UV editor, what you will see is that most
of us seem is now hidden. Okay, we can see like
a tiny bit here, but it's way more difficult
to properly see it. And sure we have a little bit of the seam still
here at the top. If you want, you can create an enclosed bracket that just
goes all the way around it, all that stuff, if
it's a problem. But since this is going
to be on the ceiling, it will be way more
difficult for us to see the seam. So that's
the general goal. You want to minimize being
able to see your seams, or you want to have
them on really harsh corners where it makes more sense that that there
is a cut over there. So we now have this one done. This one, we can also just UVNwb and that one is also quite basic because
it's also cylinder. So let's just do plainer. Double click on, like
this edge over here, cut, and then we can just
go ahead and unfold, see? And for now, I'm just
going to leave it as it. Fitting it into our
one by one square is something that comes
when we actually have done all of our meshes. So once these are done, we
can move on to the next one. So over here, we have one that's a little
bit more interesting, but actually is
still quite easy. So for this one, the way that you can see it
is we have a front We have a side cylinder
and we have a back. I still call it a cylinder
because it's repeating. That's the only reason
why I call it cylinder. So what I can do is I can
select over here the front. And with our front, what I can do is I can
go ahead and sorry, I can do a best plane and
just select on the front. What that one does is it will
basically and then you can press unfold. Fix. There we go. Doing that, basically,
what it will do is it will grab our mesh based
upon our selection. So if I select it here, it will try to grab it
pointing this direction. I can see that it
slightly changes. So often what I do
is a bass plane. I select my front
and I press Enter, and then I want to press unfold because it's not always perfect. So sometimes you
need to unfold it. Another way that you can do it. And for this way, you need
to rely a lot more unfold. Is, let's say that we
have the back over here. We can also, for example, do a normal, actually, normal based I don't trust. We can do a camera based, which basically grabs it from the point that
we are looking at it. And then when you unfold it, it's the same thing because you are unfolding it and
then it looks good. From the site, what we
want to do is I would just go ahead and grab anything
except automatic. Do not grab automatic, but to reset it doesn't matter. Even if we do like
camera based over here, it does not matter
because we first need to place a cut here. Like that. And now we can grab this shape, and we can unfold it,
and now it's just like a straight shape. And that's it. Now it is UVnwbRady to go, all that fancy stuff over
here. So we got that one done. For this one, we can
pretty much just do, like, a best plane and
select the front and then unfold it because it
is able to unfold this way. Be careful about this. So right now it is able
to web around here. However, whenever
there is cylinder, if it is going on for too long, it will be more difficult for shape to web around it
without the UVs breaking. It's just something you
will notice soon enough, because what we are going to
do is we are going to add a checker, text you do this, and I will go ahead
and show you that, but let me first finish
this stuff because else I will be jumping too much back and forth
between everything. Best plane center, click Unfold. For this one, this one
is slightly different. So what we want to do is we want to go ahead and select the edge, same as before, over here. And yeah, well, it's not that
different, to be honest. We just select this. Unfold. Select the
other edge, remove. Best plane unfold. And now what we can do is we
can select these two edges. And even with both
of these selected, we can still, for
example, do a best plane. It doesn't matter what we do because they
are not connected, we are able over
here to press a cut. And these are separate, see? The reason they are
separate is because they're not connected
by vertices. They are loose from each other. So this one we can unfold, and this one we can also unfold. So we got that one done, and now finally we have this one. And for this one,
all we need to do is let's go ahead and
select the front, Best plane, Control Oh. Control shift I.
Sorry, control shift I, and select this one. Best plane and place a cut, and I'm going to place a
cut over here at the top, because that's where I
will most likely not be able to see it as well and
do another unfold over here. Okay. So now having this done, in order to double
check and make sure that your UVs are correct, we are going to add a
checker mask to this, which is a basically over
here in our textures. So what we want to do is we
want to select our meshes, and we can do this very simple. Right click, go to assign favorite material
and just assign a simple Lambert
material over here. Now, if you cannot find
your lambert material, you want to remove your history, and then you can see it
over here Lambert two. So this is an easy way to
very quickly apply it. Now, next, what I want
to do is I want to click on color over here to the button next to
it and grab my checker. Now, if I turn on
my textured view, you can see that now we
have a checker over here. It is not great yet,
so what you can do is you can go to
your UV coordinates, press a little button to go
inside of our UV coordinates, and we want to repeat
this, let's say, by 20 by 20. So the general goal for this is that here you can see
what I mean with the seams. See how they no longer line up. This is simply
because of the seams. So you can imagine
that in your texture, it would also not line up. That's why you
want to hide them. But in general, you
want to try and have your cubes or your squares
as square as possible. Don't worry about the
rotation right now. You just want to
make sure that they are square and not that they look like
this, for example. If I just go ahead
and this is bad, this kind of stuff, because
that means that it is stretched and that means that your texture will
also look incorrect. So that's the general
idea behind it. So we just want to
basically double check, make sure that all of
our cubes are square, and they are because Uvonpping
is not very difficult, so you get used to it, and
then you can save your. I'm just going to
turn off text view, and I'm just going to go
now into my bend, Lowpli. And if you want to
reuse your text view, you can right click
Assign existing material and assign the Lambert. Or if you want,
what you can do is you can go to your
attribute editor and call this checker in the name
to make it easier to find. So we now have this
one done over here, and over here, we will
see how it works. Let's turn off my check few. The reason is because
a bend is really hard to straighten out if
we only have the top. So I'm just going to
go ahead and I'm going to do best plane on my object. Select the top over here. Actually, for this
one, I might want to select the corner. This might be less visible
over here, to be honest. I think this one. I
think this area over here is probably
the least visible. So let's press the
cut over here. And now, just to show you what will most likely happen
is that it will stretch. So if we turn on
our textured view and try to do an unfold, oh, actually, yeah, it
does a pretty good job. So it has been able to
do a pretty good job. Sometimes what happens
is, you get this stuff. You get that it's not able to
properly handle the shape. And if that happens,
then what you would want to do is you would
want to place, for example, another seam so
that it can unfold, a little bit softer like this. But it looks pretty good, so I'm just going to minimize my amount of seams, and
that's already fine. Now what we can do is we can
go to our T split over here. And for that one,
again, just do like a bass plane and you
get quite fast at this. And now for this one, I want to this one is a
little bit trickier. So we want to place a seam
here and a seam here. But most likely if we do that, we also need to place a seam at the base because it's
probably not able to unfold the way
that I want it to. So if I go ahead and
press unfold because it's one shape, Ah. Okay. Honestly, I'm surprised. I'm surprised if we
are the checker. I am quite surprised
how well it holds up. Yeah, over here, we
can see an error, but that's actually interesting. So why is that error
happening here? I guess because it's
just like, Oh, no, wait. Sorry, I forgot that we need to we did this
on the high poly, but we also on the low
poly need to fix this. So let's merge
this together over here. There we go.
That's better. And now select it and do one extra unfold to
make sure. There we go. See Okay. Awesome. That's
working better than expected. So I'm quite happy about that. And now, with all
of this stuff done, what we can do is we can turn on all of our low poly
models over here. Now, there's one last
thing that I want to do. I want to go ahead and go to
my low ply bolts over here. And what I'm going to
do is I'm going to turn on my high pol and low ply. And I'm going to duplicate this. The reason I want
to duplicate this is because if we have one bolt, the texture we will make for that bolt will be
exactly the same on all of our bolts and because we are going to grab this
one bolt at the end, and we are going to duplicate it over and over and over again. That's why I want to basically
have two bolts that are textures so that we have two different texture
variations for our bolts. Having these two
different variations, it will just add a little
bit more variation in our actual measures. So just trust me on it. Now what we're going to do is we are going to
select everything And now there's a few
things that we need to do. First of all, our
scaling is way off. We have really large assets
that have small scaling, and we have really tiny assets
that have large scaling. Remember, the bigger
something is, the more resolution it is. However, our larger assets need more resolution
than our smaller assets. So why are we going to
fix it? It's quite easy. We're just going to go
ahead and select all of our UV shells by going
right click and UV Shell. And then we want to go
ahead and we want to go to our Modify, and then we want to go
ahead and we want to go to our normally, I
also orient them. But if we just go ahead and
go to our layout, in here, what it will do is it will
also automatically scale, and then it will automatically
do a packing for us. I believe that you can also
go over here to, like, there was another one,
but I never really use it. I'm not completely sure. By the way, orient shells, just to show you, it will
straighten out our shells. But normally layout
does the same stuff. Anyway, so we go to layout to pack this
within our square, and then we want to
make some changes. So if we go over here with
our packing resolution, I like to set this to 496 because our texture
is going to be 40 96. Our packing iterations,
the higher you go, often the better
your packing is, however, the longer it
will take the UVNrap. I'm going to set this
to three because these are quite simple
models to pack. Now, you want to go ahead
and use non overlapping. The goal for this
is that we pack, so we compress everything
into that one square, but we need to make sure
that nothing is overlapping, not like what we see here where everything is
overlapping because then you will have the textures on multiple different objects. We want to go ahead
and turn on preserve three ratios for our scaling, and that's
the important one. What this will do
is it will scale our UV shells based upon
the scale in three D, so the bigger objects get more space than the
smaller objects. Once this is done, you can apply translate shells
and rotate shells. Translate shells means that
we allow it to move around, which is absolutely necessary because else it will
not be able to pack it. Rotate shells means that
we allow it to rotate. Now, we allow it to
rotate by 90 degrees. This is why we went
to modify and orient them to make sure
that our shells are already vertical
or horizontal. If you set this lower to for
example like 30 degrees, what will happen or
one degrees even, is that it will just
randomly rotate our shells until it
finds the best position. However, this is quite messy
when you want to texture it. Now at this point, what you can do in your layout settings is set the taxi
map size to 40 96. And there is some
padding options. Basically what padding means, shell padding is the distance
between these shells, but I first of all, like to just make sure
that this is fine. So I like to press Apply.
And now down here, you can see that it's
starting to pack UVs, number one, and now number two, and then another iteration
and number three over here. There we go. Okay, so this
is what we got right now. You can see that it
has packed our shells. But now, 1 second. Let me, if we can go here. So it has sorry, someone is playing fireworks outside, which is distracting. You guys will not
be able to hear it. So now what you can see is that everything is at the
correct same scaling, which is called taxil density. It basically means that
all of our cubes are exactly the same size,
which is correct, because we want to have
everything relative to our tei scale to be
an even scaling. And that's what I was
talking about with, like, the scaling
and stuff, also. Now if we select this, it
did a pretty good job. Like, don't get me wrong,
did a pretty good job. We can zoom in, and
the annoying thing is that if I turn off text
view, right I can go here. There we go turn off this
button to turn off text view. However, look how close this is. If you are not comfortable
with it being this close, which when we do high poly
to low poly baking is something that is not always
the best thing to do. We can go in here and we
can set our shell padding a little bit higher to,
for example, 0.1. And let's do one iteration
so that I can show you. So if I now press apply again, I guess I need to
select it, apply. What might happen. Okay, it
looks like it doesn't change, and the reason it doesn't
change is probably because I need to go from
padding to UV padding, so that it actually does the
padding based upon our UVs. And now if I press Apply, or
is it just a too low value? I always forget what the
right value is for this. Takes a second to load. Okay, so this is way too big, but now you can see
that you get the idea. Now that we have
set this bigger, it will try to do, like,
a bigger shell bedding. So if we go way lower, so 0.005, for example, and then let's set the packing
iterations to two, because we probably don't
need more than two. And I will pass the video until
this is done. Here we go. You can see that it left
a little bit more space, which is a little bit
more comfortable for me. So at this point, I am happy
with what we have right now. So what I can do is I can
just improve it manually. Now, there's almost oops, no improvements really
needed for this. So improving it manually, of course, computer is good, but sometimes you want to
go ahead and you want to, like, add some extra changes. For example, this is a
really thin, long shape, and I want to scale
this up a little bit to give it a tiny bit more
resolution for our metal. Now, these main pieces, I do not want to scale. If I scale up one, what will happen is that the texture resolution will look way higher resolution
than the other pieces. Now, you probably have
seen this in video games, but when something, for example, have a character
next to like a rock, what you can sometimes see in all the video games is
that the character looks super high resolution and the rock looks super
low resolution, and it breaks the immersion. It doesn't look
good. So we want to also not have one pipe
that looks low resolution, and then another pipe that
looks high resolution. Rather, we want to have all of them at like a
medium resolution. There are a few exemptions,
and this is one of them. One of the exemptions
is that we want to go ahead and if we just go ahead and select all of
our bolts over here, our bolts have very
specific nor map details. They are quite complicated and they have these ridges,
remember, over here. With the resolution
we have right now, what will happen from experience is that
those ridges will be so low resolution
that you can barely be able to see them.
We don't want that. So this is one of
the few times where we will cheat, so to speak, and we will basically
make all of these pieces a slightly higher resolution simply by scaling
them up a little bit. We have more than enough
UV space for this. So you might always hear about, try to fill up as much
UV space as possible, if you've ever done any
research towards this. This is true. You want
to try and fill up as much of this, here we go. You want to try and fill up as much of this space as possible. However, take it with
a grain of salt. You do not want to
break texal density, which is the scaling, just to fill this up. Now, you can, of course, try keep moving this stuff
around until you get the absolute perfect location to fill up as much
space as possible. But if it takes you half
an hour to do that, to save three or 5% of space, it's often not worth
it because you won't notice the
difference nowadays, especially because we
are texturing a four k. You can see that I have scaled this one up a little bit more. And another thing that
I will do is I will actually go ahead and
grab my ridges over here, and I will make
these even bigger, just to really make sure that they have more than
enough resolution. But I'm not going to
go crazy because then, of course, it will
not look very good. So we now have all of
these pieces ready to go. If you want, because
we have the space, you can give them
a bit more space, which often avoids
any baking errors. And we have now UV
unwrapped Oh, look at this. This one is outside
of our field. That's really strange. That
is not supposed to happen. Let's go ahead and
push it inside of our field over here
and over here. Let's scale this
one down and make sure that it's not overlapping
because that's our goal. We want to make sure
that nothing over here is overlapping like this. And then for this one, what I'm going to do some
just going to scale it down a tiny bit. Don't worry, you won't
notice it because else it is touching each other. So there we go. Okay,
so that was weird. Maybe I accidentally
moved something. Anyway, our UVNwps
are now ready to go. You can see that now
everything looks quite nice. It fits. At this point, what you can
do is you can just assign a normal lambert
material if you want to see or you can turn
off your text fuel. But all of our models
are now UV unwrapped. Now what we will do in the
next chapter is we will go ahead and we will start by preparing our
models for baking. So we will start by creating all of our
final models ready to go and export them so that
we can nicely bake them. So let's go ahead and continue with this in our next chapter.
37. 18 Blender Preparing Our Pipes For Baking: Okay, so we are now going to prepare our
assets for baking. This will be quite
a quick chapter. So first of all, what we
need to do is we need to assign correct smoothening
to all of our assets. Now with this one, remember how we were going to
use weight normals. We don't really need weight normals on
something like this. We just need to right
click and Shade Smooth. However, these ones over here, we can definitely go ahead
and modifier weight normals, and then we just want to right
click and press Shade Out smooth to turn on our
Outer smoothing over here. I often like to set it to 100 personally, but there we go. So this is actually really easy. These ones over here
are a bit different. We did not add support
for weighted normals. The reason we did not do
that is because they are so small that it's
just not useful. So I'm going to go ahead and add my normal 100% smoothening here. Let me just do toggle. For this one, I like
to first of all, inset this Q, and
merge that center. And let me just double
check to make sure that Oh, here, see? That breaks everything. That's interesting. That breaks. I think the way that
we can fix this is, let's just see if we just
do a contra E Oh sorry, Alt E and then a right click to leave it and then
Merchant Center? Oh, no. Okay, fair enough. That is a little bit annoying because I want to,
of course, merge it. So I should have done that
in the very beginning. So what I'm going to do is I am going to merge it at Center. However, I'm just going to very quickly turn everything on because now that all of
our models are combined, whenever we make a change
like this, we, of course, need to make sure that we do not overlap
with anything else. So what I can do is I can select this Unweb scale it down
and move it here again. There we go. So now at least
that geometry is crack. So we are now will
just preparing everything for our baking. So, let's see. We
were doing this. This one has the
crack smoothing. No, so let's shade smooth. And it might seem a bit drastic, the shading smooth over here. However, you don't
have to worry because our normal maps in our textures
will compensate for that. So, trust me, it will
look fine later on. We can now go ahead
and go to our pipe bend over here for which
we just do right click, shade outer smooth,
and weight normals. Maybe set weight normals to 100. And then we also
have our T split. Once again, right click out a smooth modifier,
weight normals, 100. That's all we need to do.
It's totally done now. So all of our final
low poly matches are now ready for baking. So what we're going
to do now is we are going to create our
very final version, which is literally going
to be the final versions that will be exported
to Unreal Engine. So for this, what
we want to do is, first of all, I completely forgot to do
one last thing again. And that is that
over here are bolts, what you want to do is
we do a quick pivot. I want you to duplicate one. The reason I want you
to duplicate one, and we are also going to
change our UVs a little bit. So let's first of all, move this back into our
pipe straight low poly. The reason I want
you to duplicate one is because right now,
if we have one bolt, we will have the absolute
exact same texture on every single bolt in our model. Now, you can imagine that
doing that kind of stuff, it will look very
repetitive because we have a lot of different
bolts over here, so you will just see the same texture over and
over and over again. And that's simply why
I have two bolts. One, first of all, two bolts already we
have the texture space. So I can literally
just, like, go in here, move this one over here,
and maybe then need to, like, select this stuff. And then let's go ahead
and rotate it here, see? So we have more than
enough space for this. And what it will do is it will
give us that extra bit of texture variation because now we will have two
different textures. So if we just alternate
between the bolts, you will not notice
so much that they are at that they are
the same textures. Of course, we could not
really do that while we can, but we would not
really want to do that with all of the bolts, because then what
will happen is that you need to spend
so much UV space, so much resolution on all of these little bolts that
it would just be a shame, like it's not really needed. So this is more optimized. So anyway, we now have all
of this stuff ready to go. So what we're going
to do is we are going to start by selecting our pipes straight
low poly selected. And then you want to
go ahead and you want to add a triangulation
modifier, probably first. So you want to go
to art modifier and then just simply
press triangulate. Oh, no, wait, it is not
a multi select, is it? I forgot the blender does
not allow multi selecting. Now, the reason why
you want to do that. Let me just turn
off this. 1 second. We need to move this
one up over here. So the reason why we want to add a triangulation modifier, it once again has to
do with our baking. And that is that just
like I said about Unreal, whenever we export
something from Unreal, it gets triangulated.
Unreal triangulates it. Now, you can see that we have
this We specific smoothing. All of this smoothing
here is we specific. Whenever you change
something to it like this, your smoothing will also change. You might not be able to see it, but your smoothing will
change very slightly. Now, you can imagine that
all of these softwares like blender and marmoset and
substance paint and Unreal, they all have a
slightly different way of triangulating your model. So all that has to happen is for the triangulation to be slightly different between unreal, for example, substance
painter or marmoset. And then when that happens, you will get inconsistencies in your smoothening,
which you can see. They look like visual errors. So instead, what we want
to do is we want to have full control over
our entire mesh. And we simply have this
full control by adding a triangulate modifier and adding it to the top over here. Triangulates modifiers. They do not actually change
our weighted normals, or they should not. So
let me just double check. Yes, they do not change
the weighted normals, but having those on here, we now have full control
over our triangulation. Because we now have full control
over this triangulation, it doesn't count for
polygons, by the way. This triangulation
has to happen, so it's not like we are adding a lot more polygons
all of a sudden. Well, technically, we do, but this has to happen if we export to a game engine anyway. So I rather have full control
over all my geometry. Plus keep normals
also. Then that I risk getting
problems later on. I hope that that
sort of makes sense. So basically, all we
need to do is we just need to trangulate and
press keep normals. Now another annoying
thing inside of blender. Don't ask me why. Maybe they changed that in the
latest update. Let's see. And that's that you
cannot multi art, you see, you still cannot do it. I honestly don't know
why they don't do this. That is so annoying. It has been here for years, so we now need to go
in every single one, and we need to go ahead, triangulate, keep normal,
trangulate, keep normal. So that's just something that
you can hear in my voice. I'm not a big fan of because it seems like such a
standard feature to have. But anyway, so now we are basically just
triangulating our models, and that's the last thing
we need to do before we can start creating
our final meshes. So we have a loply.
Let's not forget that we just need
to quickly also do this on our triangulate, move it up, keep normals. So it might seem like your
geometry is now really messy, but because it is a modifier, we can always turn
it off later on. So we can always just go ahead C and get rid of it
whenever we want to. So this is now done. Now let's go ahead and grab
a pipe straight. And then I want
to go ahead and I want to select everything. And I want to press
Contra C Contrave. Right click, move it
to a new collection. Pipe underscore.
Straight Underscore final, and then press Okay. So these are going to
be our final measures. Everything with underscore
final is going to be the ones that we will
export to Unreal Engine. So now we can go ahead and
we can also go to our bend. We want to once again, although
technically for the bend. Oh yeah, yeah, we do need to do it for
the band, of course. We must go ahead and duplicate
it, move to collection, new collection, pipe underscore,
bend, underscore final. And the T. Duplicate,
move the collection. Pipe T, ncovinl over here. Okay, so we now have our
final versions done. So what are we going to do? Let's go ahead and go
to our pipe straight to get started with the
final version, I mean. And now in here, we are free to basically move these pieces around and start by placing
all of our balls. That's the only thing
that we really want to do in this kind of case. So we are going to go ahead
and I will actually use both of these because
I can remember that we move them a little bit, see? So I need to move them
into location over here. Let's move this up. So we can basically move
this one here. Now, I like to personally
do this by hand. You can try to do like
fancy array modifiers, but doing it by hand
often gives me, like, a bit more control. And what I like to do is I
like to have, for example, let's do, actually,
let's grab this one. Over here. And I want to
keep grabbing this bolt, and this bolt will be
every side interval. So we want to place
one here. And then what we want to do is we
want to rotate it a bit. Rotations will just add like
that extra bit of variation. We then move one here, and we rotate it a bit again because it will just make it
seem even more like it's just like these random
different bolts all of them. Oh, it would be handy when I do that if I actually
also duplicate my mesh. It would be completely
copy paste it, and then you can go ahead and
do this. Sorry about that. After this, I will take
a break because I'm starting to get tired
and when I get tired, I start to make
mistakes, especimender. So now what I can do is
I can grab this one, and I'm going to have this
one every angle like this. So I can go in here, move it. I can go in here, and I'm mostly just eyeballing
it, to be honest. And I can go in here, Al. There we go. Awesome. Okay, so
just like that, we now have our bolts placed. Now you guessed it,
all we really need to do is we need to
go to a top view, select the back side
of our bolts over here and simply move
these on this side. Because whenever we start to repeat this model
over and over again, of course, you
will have one side with normal bolts and one
side with the back of them. And that's about it.
So now what we can do is we can select
everything and then we can, for example, deselect our pipe. We can copy and paste
this, right click, move to collection, and this one is going to
be pipe bend vinyl. And all of this stuff
over here is going to be pipe straight vinyl. So in our bend version, we now already right away, have our bolts on the right
location, which is nice. We can grab this thing over here and let's do a quick pivot. We can grab this one. And we can nicely place it over here, just like that extra
bit of detail, even though it's technically
probably not needed, nice to if we have it, we can just as well
add this extra detail. Take that once again
with a grain of salt because sometimes less is
more and that kind of stuff. And now we can just go ahead
and we can grab these, snap with this one, we need to tweet it all
as like one object. So what you want to do is
you want to go up here, and you want to set this
to bounding box center. And now if you hold control, here it will treat
it as one object. And then it would be nice if I actually rotate it 90 degrees. And now I can just go ahead
and I can move this forward. Move this in center
over here. There we go. Okay. Awesome. So this
one is now Also done. Now we can go back
to a pipe straight. And all I want to
do with this one is I want to go ahead and I want to select only my
bolts over here. And I want to once
again copy paste, move to collection Pipe T final. And with this one, all we
need to do is move this one forward to place
it on this side. This one is already
placed on this side. And then what I'm going to
do is I will probably grab these versions over
here. Move it. Yeah, yeah. Of course, it depends on which direction
pipe gets entered in here. But let's go ahead and grab
these versions, rotate them. And then what we can
do is we can nicely move those in here, and move them in the
center a bit more. Like this. Yeah,
that should work. Awesome. Okay, that's it. We are now ready to go. We just want to go ahead and
select everything, move it to the final
collection over here. And everything is
now ready to be exported so that we
can bake it in Mm set, and we will also
have a bonus chap on how to bake it in
substance painter. Now, I already exported
this because I already made these pipes
three times by now. So basically, in our exports folder,
I have a few folders. The two unreal folder contains the FBXs
of our final pipes. All you need to do with those things is you
need to select them. File, Export, FBX. Then you want to
navigate to your folder, and all you need to do is press selected
objects, scroll down, and in geometry, make sure that apply modifiers
is turned on, which will apply
these modifiers here. And then you can
just export it using the names that are
logical to you. Now, the same works with your
low polis and your hypols, you simply want to go
ahead and in my case, I exported them here, pipes. So pipes, hypol and low pool. With those, what you
want to do is you basically want to go
ahead and turn on, for example, we need to make
some small changes now. So if we turn on
your T pipe hypol and low pool at the same time, simply move it to the side. And do the same with
your bend over here, and the reason you
want to do that is so that they are
not intersecting. Now if I would turn on all
of my pipes, well, actually, let me just turn on my
hypol so you can see Huh? Oh, like this. There we go. So now what you can see is that all of these
pieces over here, they are now separate. I also realize, Wow, I'm really starting
to forget a lot. I am realizing now
that I forgot to duplicate my hypol bolt. So let me just quickly duplicate
it and try to place it as close as possible to the
original bolt over here. Doesn't need to be
absolutely perfect, but just really close. And don't forget to
quickly right click, move to collection.
Pipe straight hypole. There we go. So the
reason we want to do this kind of stuff is because
if they are intersecting, you will be able to see
this in your textures. It will try to or it will think
like it is all one model, separating it like this. And you can do this separation also in your baking software. But let's not go over that. This is just the quickest way
right now, way right now. Separating this,
we'll make sure that we are baking correct
textures right away. We now have our hi polis
and our low poles ready. What you would want
to do is you want to select all of your low polis, export it as a single FBX file, and do the same thing
with your hi polis. And then what you will
end up with is a hi ply, a low poly and also your files that need to go to unreal which
will be separate. Make sure that at this
point that you do not change any positions
or something like that. It's important, especially for our finals to keep the
position the same. So with that now all done, what we can do is we
can save our scene, and we can finally move on in our next chapter in
baking our hypol and low poly models so
that I can show you the logic behind everything
that we've just been doing. So let's go ahead and continue with this in the next chapter.
38. 18 Max Preparing Our Pipes For Baking: Okay, so what we're
going to do in this very quick
chapter is we are just going to prepare
our models for baking. So basically, do prepare them for textures and export them. I want to get started.
While we have all of our low poly
steel turned on, to go up here to my
material editor, and I want to click on
my material editor. Now, you can see that
I'm using this icon. If you click and hold, give
me a second Foot load. If you have this one, just click and hold
and select this one. This is like your
quick material editor, which is a bit easier to use. Just going to leave
the selection to the first one and press
assign material to selection. If you want, you can
even call it pipes, but it doesn't really
matter too much right now. So we now have one material that just makes things
more manageable. What I'm going to do is
I'm going to prepare my smoothening and
everything for baking. And for that, I just want
to use weight normals. So we have this one, and I'm just going to
use weight normals and sort of my edge and faces to double check to make sure that the smoothing looks
quite good over here. An old technique
would have been to add a smooth modifier and
set the smoothing to one. You can see that
this one is less good than weighted normals. But when we start baking, our norm map will
compensate for that. So you can use this technique. However, often the
more better technique is to just use your
weight normals like this. Now what we can do
is we can go to our opo or sorry, our
straight version. For this one, once again,
just add a weighted normals. This one just add smooth and set this to one
to be extra sure. We just want it to be
completely smooth. But now we have
arrived at the bolts. So these bolts, they
cannot actually they don't have weight normals because there are no bevels. If we would outweight
normals, it breaks. In these type of cases, we would want to use our
old school technique, which is going to smooth and setting the
smoothening to one. This might look like
really strong and ugly, and if it gives us
problems, we can fix it. However, most of the time, the normal map that
we are going to bake, which is one of our textures
will compensate for this. So we can go ahead
and set this to one. Now with these ones,
we can also do it. And what I like to
do is I just like to set the smoothing
to one like this. And then simply if I have problems, I will
simply fix them. If I don't have problems,
I kind of leave it. If you have a problem that
you would want to fix, most of the time with this one, this one is quite tricky, or you would want to just add
a weighted normal. Or what you can do is you can keep the
smoothening separate. You can set, for example, if we press one on all
of our smoothening down in our smoothing groups and then select the corner and
set that one to two. Now, this will
create a harsh edge, and it will mean
that in your normal, you can see a slight seam. But for really small assets,
it won't be too noticeable. But of course, in this case,
what we're going to do is just keep the
smoothening to one. And over here, let's do the same because often with really
small models like this, the smoothening will not
be that big of a problem. Now we have our last one, which is our T
split for which we can just use our
weighted normals. Okay, so that is all prepared. Now, if we go to our
pipe straight low poly, what I am going to do is I'm going to go
ahead and actually, we need to do this
with all of them. Let's start with the first
one, which is our bend. We want to press Contra
V and copy our model. And then just press a plus
sign and call this one pipe, underscore bend,
underscore final. So I like to prepare my models for baking inside of my
three D application. However, there are tutorials out there that show you
how to also do it in, for example, marmoset or in substance painter. There
are many ways to do this. This is just my way, which is a bit of an
old school technique, but still a really useful one. T's go ahead and
grab this one, copy. Pipe and the score straight
and the score final. And lastly, we have this one. Copy. Pipe T, underscore, sorry, final over here. Okay. Awesome. So
let's go ahead and go to our Pipe straight
final first. And let's prepare our
bolts for placement. What I'm going to do is I'm just going to go ahead and
select all of them. Actually, let's just
select everything and right click
convert to Added Poly. And just to make
things a bit easier, I'm going to go select my bolt and press attach
in my added geometry. And I'm just basically
attaching my geometry. You might see me going a
little bit faster right now, because this is all stuff that we've covered quite a
few times right now, and I hope that's not too bad. So we have these two
bolts over here. Now, there is a technique on how to really
quickly place them. However, I would want
to alternate the bolt. So I will show you the technique to how to quickly place them, and that technique
is basically this. So we have over here and we place our bolt
roughly somewhere here. And then what you
would want to do is you would want to go
to your hierarchy, affect pivot only,
and we want to set the pivot in the
center of our cylinder. Now, because we kept our
cylinder exactly on 000, we can simply go down
here and type in 000 to set our pivot correctly. Now, next, what we
can do is we can add something that is called
an array modifier. If you go to tools
and array over here, this is basically a duplication. I can press the preview
button to preview the box. And now if, for example, I don't know which
on the rotation, if I move my rotation, you can see that it
nicely and evenly starts to copy over
bolts just like that. Now, this is great to
use, but, of course, it only works with
really like one bolt, and that's a bit of
an annoying thing. So often I don't like
to overthink it. What I do is I have these bolts. I just decide how
many I want of them. You can go down here and set
count to, for example, nine. And then play around
with your ordation to give it a bit more
spacing, like that. And yeah, I quite like this. I then basically just go
ahead and press Okay. And I'm going to
let's go ahead and now effect pivot only
and just center pivots again to make it
easier to select. I like to, first of all, just like move this in
a little bit over here. To make sure that our
bolts are not too close to the edge,
something like this. And next, I just tend to, as I said, not overthink it, grab my second bolt. And what I tend to do
is I tend to, like, place my second bolt, right
click height selection. Delete the old one,
right, click hight. And just press do not show this message again and press no. So this way, we have a bolt. And now what I can do
is I can, for example, now also go in here, place it roughly
in this location, right click, height selection. And don't worry, we will add even more variation after this. Nhight like this. And let's go ahead and
do another one here. Right, click height selection. Delete, right, click height. And let's do another
one probably here. Just to alternate
between the bolts. See? And you can do this quite quickly when you would
not have to explain. So we have this done. Now, what I like to do is I also
like to add rotations. This is quite an easy one. Like, I could go in and
simply add some rotations to all of my bolts to make
them feel more interesting. Or what I can do is I can
quickly select my bolts. I can go to my soul
buurn scripts, and I can try to go
down here and add a transform randomizer
and then press do. And in our transform randomized, what we can do is we
can say -90 and 90, turn off tweet object
tweet group as one object, and then go ahead and
random X. There we go, see? And then it will
just randomly change the rotation of all of my
bolts at the same time. So that is just extra handy to add some
very quick variation. So we have these bolts. Now, all we need to do is go to the top, deselect the front bolts and
simply move these ones over here because we are
having a pipe that we are going to be
using repetitively. So we got all of these done. And yeah, just having one
of these joints is fine. Now what I'm going to
do is I'm just going to go ahead and grab this stuff, press Contrave to copy it. And I'm going to drag this into my pipe bend final over here. And in my pipe bend final, I can grab these
bolts over here. I can make sure that snap
rotation is turned on, rotate them 90 degrees. And then move them in here and move them up
here. There we go. So we got that one.
And if you want, you can also grab this one, and let's say that
this one will be like 45 degrees like this. And then kind of just
like nicely match it up. Although I don't know if it
is really needed, but yeah, we can give it an extra
support over here, which is looking pretty good. Now, let's go ahead and so
that's the pipe bend final. Let's grab our pipe straight final again,
select everything. Actually, for this
one, we don't need brackets, so only
select the bolts, copy, and drag it into our
pipe the final over here. And now we can just once again, place them over
here like normal. So that's pretty much it. We can just go
ahead and do this. And then for this one, we need to decide which
one to have on top because we can never
really be super sure. So what I will do
is, first of all, let me just make sure
this is correct. Let's go ahead and duplicate
this. Rotate it 90. And then move this one also roughly in the center of here. Yeah, that should
line up pretty good. Okay. Awesome. So that's it for our final pieces over here. So we're going to
go at a Sava scene. So we now have our final pieces. Now the next thing I want
to do is I want to open up my high and low poly for
each model separately, and I want to move
it out of the way. So we have this one. Then
we have our straight, which is already correct. Although for us straight one, I'm going to probably
m you can leave it. Yeah, you can leave it
or you can move it away. The reason is we have something
called ambient occlusion, which means that it
will give slight shadows where we have our model. But since we will most
likely I don't know, let's move it away for now, what I'm doing right
here is I'm deciding if I might come across
problems in the future. If I leave this model here, what will happen is
we will be able to see like a shadow on our pipe. However, if I ever want
to remove this model, that shadow will stay. And that's why it is sometimes
better to just leave the model away from our main so that the
shadow does not interact. You will see what I mean when
we actually start baking. And then we will
have a bend version, which I can just move over here so that now if I go in and, for example, let's load up our hypols because that's
what we need to do next. All of our hypolis you can see that none of them
are intersecting. Now with our hi police, all I want to do is in our quickly go into
your turbo smooth, turn off Isolate display. Isolate display
currently gives a bug, which will make your model
geometry break upon export. Now, I have a script which
is called Zorb modifiers. However, it feels
a bit overkill to use it for so little meshes. But that script would basically do this for us. But there we go. We are already
done. So, awesome. We are now ready to
export our meshes. So let's first of all, in our exports folder over here, let's create a
folder called pipes. And in here, we can
just go ahead and nice place our pipe models. So I want to export all of my hypol so of all the
pipes at the same time. So we have all of
the hypol selected, file export, export selection. And let's go ahead
pipes and just call this Pipes underscore HP. And just go at the save
and press Okay. Like this. Now what we're going to do is we are going to go ahead and grab our the pipes low
poly over here. And now what I like to do is I like to go ahead and
export it again. But there's one small change, so let's call this pipes score p and that is that I like to turn on triangulate.
This is important. The reason I like to turn
on triangulate is because I know that my models will be triangulated inside
of the game engine. Now, it might make your
geometry look messier. However, it will make sure
that all of our smoothing, which is our weight to normals
and stuff, stays correct. If we turn off triangulate and we export our model to marmoset, to paint and unreal, every single program has a different algorithm
on triangulation. So basically, the
triangulation will be slightly different in every single
program which can cause errors. So it is best for you to control it by
turning it on here, and then we can
simply press Okay. Now finally, we have our final
measures, and for those, what we're going
to do is you can right click press Rename
and press Control C, for example, File Export
export selection, and this one is going
to be too unreal, pipe bend I don't need to do,
like, the final for this. So pipe bend, it's safe
export. Here we have our pipe. Pipe. Straight? I guess I
don't have to copy the names. You can copy names if
they are really long, which I often have, but
these ones are really short. And we have our Pipe
underscore T. There we go. So now, those are all exported and can even already
be imported into real. So that is it for all of
our baking preparation. What we're going to do
in the next chapter is we are going to actually get started by baking our models, in this case, in
Momset and then all of the stuff that we have done
now will come together. And if you have
not yet completely understood why we do
certain functions, everything will hopefully
become a little bit more clear. So let's go ahead and continue with this
in the next chapter.
39. 18 Maya Preparing Our Pipes For Baking: Okay, so we are now going to prepare our assets for baking. So we need to create one
final type of layer, and that's our final layer. We now have a low polis
and our high polis. However, I want to
create one extra layer, which has our final models, and these models will
have all of our bolts placed and everything ready
to go to UnwilEngine. So, you basically want to now
that you have done our UVs, you can only do this after
you have done your UVs. To prepare this for baking, a few simple things
that we need to do is we need to go ahead and go in here and we want to smooth
shade everything like this. Now, of course, over here, we don't have weight normals, and this might look really
dramatic with this shading, but you don't have to
worry about it because our normal maps will most time fix these kind of problems. The only one that I
might be a little bit worried about is
this one over here in which I'm tempted to only hard
shade this bolt over here. And it's mostly
because I'm going to use these bolts so often. I just want to make sure
that I don't run into any really drastic
problems, so to speak. So we now got these
ones over here done. These are all cylinders,
so we don't need to do any weight normals
or something. Just shading is enough
with our bevels, because our bevels are already almost the same as
weight normals. Of course, if you
want, I guess you can use weight normals on this part over here by
running our script. Yeah, that looks, I guess, a little bit nicer. So if
you want, you can do that. Like this. But for the rest, yeah, don't worry
about it too much. So, we got this one. Let's go now to our low poly over here. This one, a simple
Shade Smooth, we'll do. And this one over here, Shade Smooth, is
also totally fine. Okay, so our shading
is now done, and our models are now
ready to be copied over to our final layer. So let's
start with this one. We are going to go
ahead and shift the new layer and call this. Pipe underscore straight
nscoeFinal and press save, and let's move it
down over here. So we have that one done. Now we have our bend. We can go ahead and shift D. Pipe, uncoe
bend, nscoreFinal. Oops, final. Save. We have done that and's
move this one down here. And finally, we have this one, Shift D. UnscT un
score final and save, and that one can just
stay into its position. Now, if we go back to
our pipe straight. Not a low poly, our final layer. And now what we can do is we can start by placing our bolts. And this will be super easy. I'm going to turn
on my geometry. And for these bolts, now you can use some fancy
array techniques where it will automatically place all
of the bolts around here. However, I like to
often place them manually because we need to
make some small changes. I like to place
one bolt here and the second bolt over here. And at this point,
we can kind of decide how many bolts
we want to place? What I want to do
is I want to place one on pretty much
every corner over here. So we have this one this one, and then I like to basically select this bolt because I want variation and place
this one over here. Now what I like to
do is with this one, I want to already rotate it. Actually, I should have done
that for this one also. I want to rotate them a
little bit to make it seem like the bolts are never
all at the same rotation. And at this point, what we can do is we can have one bolt, let's say, in the center
here, once again, rotate it. We can select this one,
maybe another bolt in the center over here, rotate it. We can have another
one, let's say, maybe over here in the center. And I just tried to balance out. I try to keep them nicely even, but I mostly just try to have
these different types of bolts at different positions
and different rotations. And this is to give us as
much variation as possible. You can even count one,
two, three, one, two, three, to roughly guess
where the center is. Should have been more
accurate over here, one, two, three, one to
three, and there we go. So now these bolts are also placed in the
correct location. Ready to go. So this is
probably enough bolts. You can have more.
You can have less. But now at this point, what
you would want to do is, let's go ahead and
go to our top view, for example, and we
simply want to now select all of the ends of
bolts over here. And we want to move this one. Over here to the other side. Because when we are repeating this stuff, this is
how it will look. When we are repeating
this, this stuff over here. Okay, yeah. I'm not going to bother
showing you now because our transforms are all broken, but this one will simply repeat over here on this side.
So we now have that done. Now what I'm going to do is
I'm going to go ahead and I'm going to grab my bolts, make sure that they are in our correct layer so that if
we turn it off, it works. And now I simply want
to press Shift D and move these to our
bend final over here. And if we go ahead and let's
do actually another one, another shift D and move
these to T final over here. And if we go to our bend final, that's bend lopoli bend final. These ones are already in the correct location
because we never move them. And these ones all
that we need to do is we need to go ahead and set
our X orientation to world. I don't know why
it's set to object. Maybe that was
probably the problem. And then we want to go
ahead and we want to again, set our rotation to world, set it to minip, hold J and
rotate this nine degrees. And let's go ahead and turn on our grid and nicely
move this over here. And because our heights and
everything never changed, it should right away, be in the correct location
because I looked at my This is why it's handy
to use edges as guidelines. I basically looked at
my edges over here. You can even go like, a little bit more accurate. There we go, see? So those are now already in the
right locations. So this one I would
say it's also final. If you want, you can also grab one of these pieces, maybe. Yeah, let's assign these
and have these over here. I'm just going to hold Jade
to snap rotate because I assume that this angle is pretty much like an
even angle or not. Yeah, it was probably
even angle, but well. And over here, you can kind of, like, do something
interested and interesting. S there we go to also
hold this one together. So we have that one
done, and now we have our T over here. And for our T, we are
just going to grab this one, move it over here. And then finally, we
have this top version. Let's clone it,
rotate it or minip and let's go ahead
and go over here. And nicely move this. Oh, this one I cannot
line up in the center. The reason I cannot line up in the center is because
we used a mirror. So the topology is slightly different, but
that is no problem. We can still make a
very rough guess, something like this over here. And there we go. So these ones
are now also ready to go. Okay. Awesome. So we now
have everything done. Now, in order to export this, I have already
exported these pieces because we are going to use
the ones I made in Max. But the final ones I have placed in the two unreal folder, which is as easy as simply
selecting your model. File Export Selection. And then all you need to do
is if you go to your folder, you want to set the type to
be an FBX export over here. And then you simply
want to export it. Oh, and turn on triangulate
in your geometry. So go to geometry, turn
on triangulate and simply export it to
whatever name you want. Now, for the hypol, I Maya works a little
bit different. So whenever you have
a hypol like this, what you want to do is before
you export your hypol and these are located in here. Pipes. Oh, I completely
forgot to do something. Sorry, one last thing
that we need to do. When our final is done, you want to go ahead
and just quickly grab your bent pipe,
move it over here. Don't do this with your final, only do this with the
low polen hi pol. The reason we want to do this is because I don't want
them intersecting. So now what you can
see is if I turn on my hypols and low polis, they are no longer intersecting, and this will make our
bake look cleaner, and it makes everything
a little bit faster to bake compared to if we need to
fix this later on. So we are moving it
far away so that they do not interact with
each other. Do not do this. If you do this, our
ambient clusion, which is the shadows that
we are going to bake, our contact shadows,
they will show up. So try to move it at least like somewhere over
here, like, quite far away. Anyway, so as I was
saying, with this done, if you want to export our loply, you simply select all of these measures, file
export selection. And with these ones, you can once again just go
over here, set this two FBX, and you can export this
as Pipes underscore LP, and I have it exported in
my exports Pipes folder. So this is just very
basic exporting. The only thing to remember
is to turn on triangulate. And the reason we want to
turn on triangulate is because else we can experience baking or smoothening
errors when we import our meshes to
different applications like unreal and painter. But by triangulating it, we have full control
over our mesh so that we can so that we do not get the
smoothing arrows. Because the measure will be 100% the same in every
single treaty software. Without this, whenever you import something into a
different treaty software, it will try to triangulate
it using its own algorithm. However, that algorithm can be slightly different
from other programs. So you can understand
that there is a mismatch. Now, finally, for a hypol
what you would want to do is you would want to select everything
and then of course, press three to go into your hipleview then
just before you export your hypol what I recommend is that you
go well this is needed, you go to modify, convert smooth mesh preview to polygons and give
the second to load. So this one will turn that smooth mesh that
you see into actual geometry. So now you can see that it's
really high poly then you would want to export it just as a normal FBX, the way
that I showed you. And after you have exported it, Undo what you just did. And come on. Give the second its loading. There we go. Undo it. The reason you want to undo
this is because you can never go back whenever
you convert it. However, if we need to make any changes later
on because, like, there is an error or
something like that, we basically lost the mesh that makes it easy for
us to add changes. So you always want to undo it, and then you just
want to go ahead and save your scene once again. So that is now all ready to go. We have our mesh is exported
and prepared for our baking. So what we're going to do in our next chapter is we
are actually going to go ahead and start by yeah, baking our models
inside of Momset. And then there will also
be a bonus on how to bake it inside of Substance
Painter after that. So let's go ahead and continue with this in our next chapter.
40. 19 Baking Our Pipes In Marmoset Toolbag: Okay, so now with
our pipes done, what we can do is we can get started with our baking process. So with our baking process, you can really start
to see why we spent all this effort creating
these two versions. Now, I like to personally
bake inside of marmoset. However, I will also include
a chapter on how to bake inside of Substance Painter,
especially because recently, and I'm literally talking
like a few days ago, Substance Painter released
a very powerful update that makes the baking
very similar to marmoset. So what we're going to
do is let's go ahead and select our hypolloppipes, and we are going to start
with Momset where we will drag this into a empty
Mm set scene over here. And there we go. So you
can just go ahead and alt left mouse button
to rotate rout, alt right mouse
button to zoom in and alter middle mouse
button to pan around. It is all quite similar. I won't really go too much
over the navigation in Mm set because we will go over this a little bit
more in depth later on. Now, what you want
to do with these two pipes is you want to go ahead and press this
little bred icon up here. I want to select the low
poly, drag it into low. Select the high poly
and drag it into high. As soon as you drag the high poly into high,
it will be hidden, and you can unhide it by using this little
icon over here. So let's go ahead and go over
here because what you can do is you can select
an object and press Control F to zoom in. So I'm going to go over
here because this will be the most visible changes
to Wi show off our baking. Now, if we go ahead
and go to our folder, I created in our textis folder, I create the folder called pipes and another
folder called bakes. So this is the folder
where I often like to just place all of my baked
maps over here. And now what I like to do is I like to click, first
of all, my low. And in my outer bake, I like to set this to none. This is because it
will try else to automatically bake before we even have changed any settings. Now what you can see over here
is when we press our low, we get this green
outline over here. This outline is very important
and it is called our cage. What we can do is we
can turn on a high, and the general concept is
you want to make sure that your cage is very close
to the shapes you have, but not too close that it still covers part
of the high poly. So what this allows us
to do is, for example, if you and we will see this
a little bit more later on, if you have a high
poly that looks quite different
from your low poly, this cage basically allows the system to capture all
of those hypolle details. So over here, as you
can see on the inside, when I set my cage very low, you can see that it's not
covering the entire hypol and this will
actually cause errors because it is not able
to see the hypol. It can only see the stuff
inside of the cage. So you want to
make your cage big enough to cover pretty
much everything, but you still try
to keep it quite close to your mesh because it often gives better
baking results. So now my gauge is
pretty much ready to go. I don't see any real
arrows over here. So now what I can
do is if we just go ahead and go over here, we can well, let's first of all, just go ahead and save cine. Why not? So we can save cine, and let's do saves
and let's call this bake scene and press save. And now if we go to
our Bake project, you can if you want, if you are going to bake
multiple objects like we will, we can go ahead and call
this pipes over here. And then, first of all, we
want to have an output, so we can just
select this and we can set the output to be
our pipes and our bags. And let's just call this
Well, simply call this pipes. And you can choose
how to save it. So in my case, I will probably save this PNG
just so that we can easily open it up and I can show you
everything and press save. Now, in my samples, I want to go ahead
and set this to 16. This will give us
a smoother result. You can see it a little
bit like entera alysing. It will give us a slightly
nicer crisp result. I'm going to set my master
to four K by four k, and we can leave the format
to eight bits right now. However, you can also choose 16 bits for
most of these maps. I will explain to you a
little bit more about this. So let's leave this
to eight bits, set our master resolution
to four k resolution. And then in our maps over here, we can press configure and we can choose which maps to pick. Now, what I was just talking about between the
eight bits and 16 bits is that there are some textures in here that require 16 bits. These are the height
and the position. However, the height map we
don't need because this is not the type of model where we would
generate a height map. And then what we have is we have our position map over here. 1 second. Let me just
lower down my audio a bit because it's a
little bit loud. Our position map
requires 16 bits. Now, what I tend to do normally is because a position
map it doesn't so much look at the hipole I tend to
simply bake this inside of painter because
else I would need to bake everything at 16 bits, or I would need to bake
everything at eight bits, then switch to 16 bits
and select my position. Honestly, it's just
easier when I start texturing my model to simply
bake this inside of painter. So what I like to do is I
like my normals object, curvature and ambient occlusion, and we can turn off
the material ID. Material ID basically allows you to create a mask based
upon the materials, but this is something we do not need for this specific model. Now I can go ahead and close this and I can go ahead
and turn all of this on. Now that this is
done, I want to hide my hi poli that we
can see our low poly. And now I can show you the
magic of baking your meshes. So as you can see,
what we will do is, thanks to these maps,
especially the normal map, it will basically
manipulate the lighting and smoothening using
the norm map to make our low poly version look
like our hypoly version. So what we can do is
we can now press bake. The first time pressing bake, it might take a little
bit longer to load. However, after that, whenever you even update your models, it will be quicker to load because it needs like
cache in our model. So over here, it is just
baking and that's it. Done. So it doesn't
take too long. Now, if we go into our folder, you can see that we
have our AO map, and if we open it up, our amid occlusion,
our curvature, our normal and our
normal object space. And you can see, I don't know
if I can really show you, but in our normal, it's a bit difficult to read if
you're not used it. It will have all of our
extra map details in here. So if we go ahead and now press this little
P button up here, it is the preview button. As soon as I press
it, you can see that now, that's what I meant. So now what you
can see is that it has greatly improved the
look of our low poly mesh. This is still our low poly mesh. So that's the amazing
thing about baking. So it is able to improve our low poly mesh and capture
all of these details, including even the little ridges that you can see over here. Also over here with
our smoothing, of course, we are looking
at it very close. We should be looking
at it a little bit further away
because we did not make our mesh like an insane amount of polygons to really
look at it this up close. But just in general, these
pipes are looking really nice and they look at
like a decent resolution. So the preview button just
applies our emit occlusion, which is some shadows
and our norm map. You can also play around
with your roughness to make it less or more shiny. Now, at this point, this
is honestly looking fine. Sometimes what you
can see is over here. Sometimes things feel
a little bit wavy. This is often a balance between the resolution and between IUVs. But you can try to fix
this by going into your low and pressing
paint screw. With paint screw, what
you can do is you can paint the direction from
which your nor map will work. So if I paint this over here, I simply paint on this, and I'm trying to
avoid the corners because if you paint corners,
it will often break. But what we can
try, for example, is we can try to paint this
and see if that improves. If it doesn't improve, honestly, it's not really
that big of a deal, but if it does improve,
then it is great. So let's go ahead and
press Bake again. And give that a second, and then hopefully we should see
slightly straighter lines. And else it is just UV. But as I said before, we
are so far away from this. See? So the scow does definitely work. It
does improve things. Of course, we still have our
problems here at the top, but this is because we
have our UV seam here. So what we can do is we can go at the press
Paine scow again. Let's just make double sure that we have the
top over here painted. There we go, and then
do the same over here. Now, the paint scow, this is something that unfortunately
substance painter, as far as I know, does not yet
have even in a new update. However, subs painter and we will go over this a
little bit later. It does have the cage
features which are brand new. So do make sure that if you are following my
Substance Painter chapter, to update to the absolute
latest version because those versions have all of
the new baking features. The previous baking features, they are not as good. They do the job often, but they're just not as amazing as what we have over here. So I have this now all baked, and that's pretty
much all I had to do. The rest is all looking fine, so I can go ahead and I can
just brass bake once more. And then we are done with the baking of our
assets over here. And then we can continue on to the bonus chapter where I will show you how to also bake
inside of Substance Painter. Okay. Here we go. I do see, like, a little
bit of waviness left here. So I might want to just, like, Porlge just a little bit more, go a little bit closer, but for the rest, honestly,
this is looking fine. I think it is mostly just like a lack of
resolution because this is such a small asset that is causing some of these waves
to not work perfectly. But, yeah, you can just
like, nicely fix this, do a final bake, and
now we are ready to go and use these maps. So let's go ahead
and continue to a quick bonus chapter
where we will be baking, everything is up as painter. And then what we will do
is we will actually move back into some modeling. So let's go ahead and continue with this
in the next chapter.
41. 20 Bonus Baking In Substance Painter: Okay. Welcome to this
quick bonus chapter where I will show you on how to bake your pipes inside
of substance painter. In the previous chapter, we went ahead and we baked
everything and Moms. So in substance
painter, I will not yet go over substance painter because we will have a
complete introduction into this a little bit later. So we will just go over, like, the bare basics that we need in order to get started
with the baking. What you want to do is you
want to go to file and new and then in your template, we can for now just pick like a PBR metallic
roughness over here. So let's just grab that one. And then in your file, what you want to do is you want to go ahead and find your
exports pipes, your low poly pipes. Those are the ones
that you want to select. So we can go to file. And then if we just
grab our pipes, low poly and press
open over here. Now we can choose our
document resolution. I always like to work
at four K resolution. If your computer is not as fast, you can always lower
it down to two K. But the nice thing is that in
painter, this is very flexible. So you can actually
lower it down later on, you don't have to have the
final resolution in here. I always work in OpenGL. It's just a habit. I know that Unreal
engine uses direct X. Basically, the only
difference between OpenGL and direct X is that the green channel of your
norm map is flipped. It just different software use different methods
of rendering. I prefer OpenGL. Next, what I can do is
I can just press Okay. Now what it will do is
it will import our maps. The moving around is very
similar to Max and Maya. So ld left mouse button rotate, old middle Mouse button pen, ld right Mouse button, Zoom, but we won't really go
over this too much. All I want to do is
I want to go up here and do make sure if you are
following my techniques here, make sure you have updated to the latest version, of painter. So the latest
version of Painter, they have just released brand new baking tools like just a few days ago, and
they are really awesome. They are very close
to subs sorry, to Mum set tool Back. And yeah, everything has
changed quite a bit. So if you are on
all the versions, you might not really understand where we are going with this. All the versions you
used to go up here to your mesh maps and
press bake mesh maps. In the newer
versions, you can go over here to the baking channel, which is this little croissant,
and you can click on it. Now, in your baking channel, now what you have is you
have a special view, and in this view, you
can preview your mesh. What we want to do
is we want to go ahead and set the
output size to four K. And then in our high
definition meshes, we want to press this
little icon next to it and grab our hi
poly and press open. Now, what you can see is that
the cage gets activated. Your cage is basically a shell, and the important
part of your shell is to encase both your
hi pool and low ply. If you don't do this,
it will not be able to capture all of the
details from your hypol. This is because it will
only capture all of the details inside of your cage. Now, inside of
substance painter, there is an easy
visualization to show you. If I make my cage too small, you can see that
details become red. This means that these details
will not be rendered out. So you want to make your cage a little bit bigger
to basically capture most of your mesh so that you
don't see any red details. You might see red, but that
is just because we are looking at the backside and
the backside doesn't count. So the goal is to
have your cage, to be quite snug
around your model, so don't make it too white because then you can
get baking errors, but to have it white enough
to encase your entire model. This is often very easy to do with models where
like we made them, where the hypol low
poly are quite similar. Whenever you have a
hypol that is quite a bit different from your
low poly in those cases, you might need to set your cage to be a little bit more intense. So this is totally fine. And the baking methods inside of painter are much
more easy right now. So over here, you have
some visualization where you can go ahead and you can turn off your
hiplymsh which is the blue one. You can turn off the cage
if you don't want to see that one and all
that kind of stuff. However, we don't really need to worry about this too much. All we need to do is we need to go ahead and go down
here and choose our maps. And we want to make a norm
map, a worldspace map. We don't need to make an ID
map, which is like a mask. We want to make embed clusion
curvature and position, and we don't really need
to bake a thickness map. Now with all of
this done, all you have to do is you
just have to go ahead and go down here and
press bake selected textures, and then it will go
through the process of baking all of our textures, which shouldn't take too long. So you can see over
here the process, but you can still move around, which is also new and
everything can be baked. As we can see over here,
everything is now baked. Now, you could preview
your bakes in here, but what I like to
do is, I like to simply go back to
my paint of view. And then in here, I can
instantly see my bake. And here you can see the power. Of baking from high
poly to low poly. So our low poly mesh, which
did not look very nice, is now looking really nice, and it feels much more
like a high poly mash. I explained this much
more inside of marmoset, but this is mostly
because of the norm map. Since thanks to our nor map and a little bit of our
ambentcclusion map, it is manipulating
the smoothing and lighting to make our mesh seem like it comes like it looks higher detail
than it really is. This is also something
that the closer you go, the more you can start seeing the arrows, as you
can see over here. So it is better when
you go further away, and then you will never really be able to
see those arrows. So this is how you would bake
inside of Samson's painter. Now, personally, I
will be using my bakes inside for moms because
I do prefer those bakes, since they often come out
a little bit smoother and a little bit better looking. So what we are going to
do in next chapter is we are actually not going to go
ahead and do any texturing. We will quickly move back to some modeling because we're actually going to
dive into zebras, where we will be sculpting
our modular pieces. And after that what
we will do is, we will fully focus on
all of the texturing, the unique texturing, creating til materials, all
that kind of stuff. So that was it for
baking chapter, and let's go ahead and continue
on to the next chapter.
42. 21 Quick Introduction To Zbrush: Okay. So what we're
going to do in this chapter is we
are going to get started by sculpting
our modular assets inside of Cebush to give them that extra little
push of quality. Now, in previous chapters, we have went over on how to bake and how to create high pole and low poly
models using our pipes. And this is the
same basic concept. Only this time, we are going to make everything
a little bit more intense. So we are going to
actually create another low poly version, similar to this, that we have,
like all of our damages. Now, this will also be a very quick
introduction to brush, but brush is such an
absolutely massive software. Like, literally, you can
spend ten years in it, and you would still not
know the entire software. So we are going to keep it really narrowed
down to just like the basics that we need
right now. So Zebrah. Now, Zebras does
accept FBX files. However, they do not
often work very well. So what we want to do is we want to go ahead
and we want to export our models to OBJ files because as you can remember, we have already exported
them over here to FBA. Oh, no, sorry, these
are just our pipes. Looks like we have
not yet exported our modular pipes, yeah. Oh sorry, I mean,
our modular models. So what I'm going to do is I'm going to go
ahead and I'm going to probably create like
a folder called modular, and then I will create a folder called Z as in two Z brush. And let's go ahead and place
it basically in this folder. Now, a few things
that you should know. Z brush hates it when we do
not have connected vertices. So as you can see over here, these vertices, they
are not connected, and Z brush often gives arrows and even breaks
your mesh at times. So what you want to
do in this case, honestly, with this one because I'm not really
attached to it, I can literally just
extrude scale it down, shift right click, and then just merge my face
to the center. That's honestly already
enough because I'm not really don't really care about this phase because
it's like a dead phase. So it's something that we
won't really be using. It's just there in order to keep our mesh closed. So
we have that one. Let's just go ahead
and horizontal pillar, we need to
do the same thing. So let me just quickly
select and merge over here. And yes, I will show you how
to do this inside of Maya. However, at this point, you should be able to
do the exact same stuff inside of Blender MMX. These ones are fine
because they are quads. And actually, our floor,
we don't need to sculpt. No, we need to sculpt our
horizontal and vertical pillar. We don't need to
sculpt our wall, and we need to sculpt over here. Our what is it called?
Railing, I guess. For this one, I'm just
going to use my cut tool, and all I need to
do is just place a single cut here
to clean it up. See, these are the only meshes that we are really
going to sculpt, our railing over here and
our pillars, which is good. Okay. So once we have
our meshes prepared, what we're going to do
is we are just going to simply go to file
export selection, navigate to our location, and then as an OBJ export, we are just going to go
ahead and export this and call it railing Oops. Ailing underscore 01. And let's go ahead and Export. Next one is going to be
our vertical pillar, so expot selection. And then we can go for vertical
Bill underscore Zeron. I hope you don't
mind if my audio changes a bit
whenever I'm typing. This is because my microphone is blocking my view of my keyboard, and I'm not very good at
blind typing in tutorials. The next one is going to
be our horizontal Biller, so that's like that one, export, and this one will
be horizontal hoops. So Biller, on the score 01. And let's go ahead and x
put that again. Awesome. So this is now over here done. You can pretty much
ignore the MTL files. You can even delete them. They are just like
a byproduct for OBJ if you want to
have materials, but we are not going
to need materials. So we got our OBJ
files ready to go. Now, let's go ahead
and jump into Z brush and quickly go over a few of the
basics of Zbrush. Here we go. Okay, so here
we are inside the brush. Now, as I said before, brush is a really large and sometimes
complicated software. I would argue that it's probably even larger than the modeling
software like Blender, Max, or Mayer, although Blender does also have
a lot of stuff in it. Whenever you open up Cebush,
this is what you will get. The first thing that you
often want to do is you want to turn or
click on Light box, which will hide this one
box that we have over here. Now navigating a Z brush
works a little bit different. I highly, highly recommend
that you use a drawing tablet. Personally, I'm not
even able to use Z brush without a
drawing tablet, just because it's so focused on sculpting for which
you need some more. Yeah, you can't
really use your mouse for proper sculpting. Now, in here, we
have a few views. So over here we
have the top views, which will have all
of the settings. Normally, I would have
gone over these settings, but because there are so many, we won't really be focusing
on these too much. The only thing that I will
do is well, actually, it's really difficult because I can tell you about Alphas, but if you are new to Zebras, you don't even know what
an Alpha is in this case. So over here, we have controls over Alphas and our brushes, which basically
are tools that we use to sculpt and to create
details on our mesh. Let me say it like that.
We have color controls, we have document controls. In our documents controls, there's something
that I always like to do whenever I start with Zbrush. And that's that I first of all, like to press the Zoom
button and just click and drag to make my window
a little bit bigger. And then over here, you
have this little 0.5 range. If you tone this down, your gradients will
not be as strong. I prefer a view where
my gradient is less strong over here and it'll
have a slightly bigger window. Now, for the rest, I don't
need to do much in document. All these tools drawing files, we don't really need
them right now. Files is a way that you
can save your scene, but we will use a
different way because C brushes like three different
ways to save a scene. It has stuff about lighting. It has stuff about materials. It has your default preferences, where we will dive into
a little bit later. See, there's so much
stuff going on in here. It has transform tools. It has brush tools. It has some plug ins, which we will also be using
a little bit later. And for the rest, it
has some classic help. So yeah, I'm really going to stick to the
basic right here. Then what we have over here is we have another tool over here, and this will be all of our tools that have to do
with moving with sculpting, with the intensities
that we have, and with the draw
size of a brush. You can also find
these tools simply by right clicking and then
over here in your view. Now, whenever you right
click in a empty view, you get this view
because it will try to allow you to make a
mesh. Just know that. This is something
that will go away when we actually
import our model. Now on our left side, we have a brush selection. And if I just let's
first of all, go to the right side because
else I can show you. On our right side, we have some selections
to import meshes, load and save our files. And if I for example click
on Cylinder three D, what I can do is I can click on the Cylinder three D and now
I can create a cylinder. I can create this by
clicking and dragging. As soon as you've
dragged in a cylinder, what you want to do is make
sure to press edit up here. If you don't do
that, you are able to drag in multiple cylinders, but we only want one and
then if you indo it, it will break your scene. In this case, drag in a single
cylinder and press dit. So what we were talking
about is on the left side, we have a selection of all of our brushes which we can use and we will go over
this a little bit later. We have the way that
the brushes behave. For example, we can have
them behave in dots. We can have them behave
as sprays or we can have them behave very smoothly. We have Alphas in case we
want to give our brush like a general
shape on top of it. That's what an Alpha is for. Alphas are also used like imprint shapes from
texture files. We add textures if we
want to apply textures. We have materials,
which I often like to set to a basic
material over here, and then we have some
different color controls. Now, your UY, which
is the layout or UX, whatever you want
to call it, it is the layout might look
slightly different. However, we are going
to end this chapter off with importing a custom layout
that I will give to you. Now, over here on the right, you have all of your
settings, basically. These are settings. Honestly,
they are really big, if I just ignore
what I just did. There are a lot of
settings over here. It is quite intense, so we are really
going to once again, minimize it to only the
stuff that we need. But all of the settings
that you would often need specific to your model, in this case, our cylinder,
will be found here. The most important tabs
are the Subtool tab, which will show it's almost
like your scene hierarchy. It will show all of your models. It allows you to merge models, to duplicate them, to separate
them, that kind of stuff. Your geometry tab
is the tab that controls basically the
geometry of your model. With this one, which you can, for example, do is here. You can, subdivide
your model to give it more segments,
that kind of stuff. And also, it also has some topology
tools and some cleanup tools. These ones you can most ignore. Layers allows you to basically It's not the same as
layers inside of Maya. What it allows you
to do is it allows you to sculpt details
on different layers, and then you can turn off
those sculpted details or you can turn them on, and you can also control
the intensity of them. It's something that we will not be using our cells right now, but it is something
that if you want to dive more into zebras, you will probably
be using it more. Most of these you
can honestly ignore. Defamation just allows you to do random deformations
like inflating, smoothing your mesh,
scaling your mesh, just generally manipulating
your entire mesh. Surface allows you to add
noise to your mesh if, for example, turn this on here or see and change the scale. And then what you can
do is you can use this handicraft over
here to, for example, create very quick concrete looking surfaces and
that kind of stuff. Once again, this
is something that we most likely
will not be using. Maybe we will add a little bit, but not a lot. So for the rest, we have some masking tools
for if you want to mask. In zebras, you can hold control to basically
create masks, and then you can
manipulate them. That's what those tools are for. Poly groups, they dictate it's a little bit
like elements select inside of your tree
mulling software. They basically dictate
different parts of your mesh, and what you can do
with this is you are able to select different
types of meshes, manipulate them, all
that kind of stuff. Again, we won't be
using that one. I just want to
quickly go over it. Over here, we have
some tools for texturing, U VN wrapping, that kind of stuff,
and that's about it, but I want to leave it for now. Now, two more tabs or
yeah, two more taps. One of them is over
here. These taps have your move tools and all
of those type of tools. However, you can
also, of course, use these tools using
your down tablet using shortcuts inside
of your viewpod. Next, this, it has also a tool where you can see the wireframe. It has a solar option, which is the same as
your isolate option. So whatever model you have
selected, it will be isolated. And for the rest, yeah, you might have a bit
more tools over here, but that's because you
probably have a default UI. So you will probably have
it looking like this, which has a bit
more like zooming, but these are the
same tools that we found in our document. And then what we have is we have our viewpod and in our viewpod. If you go ahead and hold Alt and left mouse button,
you can pen around. If you simply click in empty space, you
can rotate around. Please note that
you cannot do that when on your model because
then you will start sculpting. And if you go ahead and you
can hold Alt and sorry, Alt hold Control and write mouse button to zoom
in and out over here. On your drawing tablet, of course, you will
use your mouse, and it is slightly different. I currently don't have my
drawing tablet plug in yet because we will do that when we are starting
with our sculpting. So what do I want to do to end this chapter
off now that we have done a quick overview is
because I like to simply jump right
in and actually show you the use cases later on. But I have something for you. I have a custom UI,
which is if we go into our source files and other
this custom UI for Zebras, it will change things
up a little bit more, but it will make it a
little bit easier to use. I did not create this UI.
I've had it for years. Unfortunately, I
cannot give credit to the artist because
I honestly just don't know who the artist
was that created this. But basically, you can go to your preferences and to
load in this custom UI, what you want to do is you
want to go ahead and go to your convict and you
want to press Load UI. Once you've done that,
you can navigate and you can simply select
this and press Open. And now you can see that
this is our custom UY. Not much has changed. The only things that
have changed right now, next to, of course, our colors, and we can again,
go to document like lower down over here, our razza. The only few things that have changed is that down here,
we have some brushes. Now, this is quite nice, and that is because normally, if you would want
to select a brush, you had to go up
here and you had to find your brush and all
that kind of stuff, or you had to go
ahead and press B. On your keyboard to also
find your brush in here. But there's a lot
of stuff in here. A cool trick, however, if
you want to find the brush, is if you press B
and start typing, let's say I press DR, what it will do so let
me try that again, B and T. It will start showing you everything that starts with the letter T. So once you know the
name of your brushes, you can find them like this. However, what we
have is down here, we have shortcuts to our most used brushes or the ones that I
often use the most. You can see that there are
some empty windows in here. These are for brushes that
are not yet loaded in, but we will go over that
a little bit later. It also has some shortcuts for
our masking and over here, it even has some shortcuts
for our materials to very quickly change the
look of our material. Most of this stuff it's just shortcuts to keep
it nice and easy. And for the rest, everything
is pretty much the same. It has a few extra tools over
here where you can, like, clean up your mesh or you can delete some stuff
here and there. But honestly, you don't need to worry about this
too much. Awesome. So with all of this now done, and we have our custom
UI ready to go, what we will do is
in the next chapter is we will simply dive right in, and I will show you what
we will be covering, which is on how to sculpt
etches inside of zebras, which is often for
environment artist, the most common type of sculpting you will
do unless you are a texture artist
or you are really a high fidelty artist that
works very heavily in Zebras. So let's go ahead and continue with this in our next chapter.
43. 22 Sculpting Our Modular Pieces Part1: Okay, so in the
previous chapter, we went a bit over Z brush, and now what we're
going to do is we are just going to dive
right in and we are actually going to
get started with sculpting a mesh because
I believe that it's easier if we just go ahead
and dive in and actually do the stuff than me showing you examples that
are out of context. So I just did a fresh
restart of my ZBrush. I would like to go
ahead and I can go up here to Zoom or I
can use my document. And in our document,
I'm just going to set the range a bit
down so that I get rid of my gradient because I never like that
really strong gradient. So you might need to get
a little bit used to the new UI if you are a
brand new user to ZBrush, because this UY it
is quite extensive, but the more you brush, the more you will
start to love it. What we're going to
do is we want to import the mesh that
we exported from Maya. So we can go ahead and
go to Import over here. And then if we go to our
exports modular two Z, Yeah, let's get started with
our horizontal pillar over here, just like a start. Now, whenever you select it, because we have just
imported a new model, we want to click and
drag to input it in, and then do not
drag anything else. Just go ahead and go up here
and press, dit right away. And there we go. Okay,
so we have our mesh now, and I'm just going
to go ahead and switch over to my
drawing tablet. So I am using the continuous
Pro Sorry, from Wacom? Yeah, so the Wacom ItinuousP
drawing tablet over here. Now, one feature that is really nice about the drawing tablet is that I can control my brush
size using a button on here. So you might sometimes
randomly see me change my brush size without
any indication. This is because I'm
using my drawing tablet. I could, of course,
also go up here or right click and
find it up here. However, this is not very nice to control my
brush size like that when I can literally
just have a slider where I can smoothly control it. Now, finally, what I'm
going to do is I'm going to set my material to
be a basic material. And now let's go
ahead and zoom in. If you click once on your model, and as soon as you rotate, and you can rotate by clicking
outside of your viewpod over here or by clicking in empty space in
your viewboard. When you click Once
on your model, it will rotate around the
point that you just clicked. This is super useful
for when we are sculpting and it's something
that you will get used to. Cebush is quite annoying with its navigation compared
to the other software, so it is something
you will need to get used to quite a bit. So over here, I'm
just using Alt and then I use my drawing tablet
and empty space to basically move around and just use my
drawing tablet and click an empty space to rotate around. Those are
the biggest ones. Of course, you can
also use Control, and I use a button on my
pen to zoom in and out. So what do we need right now? If we go up here
to our geometry, you can see that we do not have enough geometry to sculpt. If I would try to sculpt, you can see that it doesn't
really do anything. So we are going
to use a feature, which if you go to
your geometry tab, it is called dynamesh. So if we just go ahead and oops, I didn't mean to press that
and scroll down this UY, it has quite a lot more features because it has basically
everything exposed. So that's something to keep in mind that if you are
using the default UY, everything will be a little
bit more compressed. But we are going to use
something that is called dynamesh. Dynamesh is awesome. Basically what
dynamesh does is it will grab our model and it will give it an even layer of geometry at a
specific plecunt, which is often going to
be quite a high plcunt. Now, if I would go ahead and
press Dynamesh right now, and I would turn
on my poly frame, you can see that it
tried to capture our shape like an even polycunt, but it was not able to
do it quite perfectly. And this is because we did not set our
resolution high enough. We set a resolution
quite a bit higher, let's say that we
set it to around 900 and press dynamesh, give the second, and then you
can see that now we are at around 400,000 or
450,000 points. So you can see that now this
is getting quite close. It's not yet perfect, but it's getting quite close to
the resolution I want. I'm going to probably
go for, like, around 1,100 in my resolution, and this one it's a bit difficult to say.
You want to get a balance. You don't want to go
to high resolution because if you go
to high resolution, you will not be able to
control your mesh, as well. However, you also
don't want to go to low resolution because
then the sculpting would not look very nice or your shape would
change too much. As you can see over here
the resolution I have now, Ah, let's see. Is this okay? So what you can do is you
can test to go up here and press divide a few times to see if your
resolution is okay. Now, if you just
go ahead and paint on it and it doesn't
matter what brush, you can see how your
resolution behaves. What I'm going to do is
I'm going to Undo this, and I'm going to
set my resolution slightly higher in my dynamesh. This is something that always requires some playing around. Let's try like around 1,400. And give it a second to load. Yeah, 1,400, I like. Now one thing you might also
note is that the dynamesh, it softens our edges. So this is something that
we do need to keep in mind that right now
we technically have broken modularity by softening our edges because when
your eedges are soft, you are able to see like a seam. But this is something
that we will go ahead and we will work on a little bit later to
basically fix this problem. So what we're going
to do right now is we are going to go ahead
and turn off my dynamesh, because the reason I want
it turned off is if you hold Control and click an
empty space, normally, what it would do if
dynamesh is turned on is it will activate
dynamesh again, so it will recalculate.
I can show you. But so here, if we
press dynamesh, if I click and drag, you can see that it will
recalculate the dynamesh. Now, of course, right
now, it doesn't do much because the dynamesh
was already fine, but just keep that in mind. So I'm going to turn this off, and we now have around
1.2 million polys. What I'm going to do is I'm
going to drag all the way up, and I'm going to
subdivide this once to basically push my polygon count to around 5
million pulleys. I now have quite
a nice poly count that I can use to
do some sculpting. So there are a few
brushes that we want to use whenever we use
our dynamih over here. So the first one
that we want to use is we have over here
a trim dynamic. I'm just going to show
you a few brushes before we actually
do the sculpting. With your trim dynamic notes, if, for example, click and
drag, what you can see, is it kind of like damages or edges a little bit over here. However, the damages right now, they are quite smooth. You can see that it
already starts to look a little bit
like concrete damage, but it's not yet exactly
like the damage that I want. One thing I'm also not
too happy about is, do I maybe want
to subdivide this once more, make it
a bit smoother? But that's quite a high polygra. Yeah, Okay, let's now
subdivide it once more because it does give me
a bit of a smoother effect. It is up to you if you can
handle this kind of polycon. We can probably get away
with one less subdivision. But for now, let's try this. So with the trim dynamic, a way to improve the look of a brush because right
now it looks really smooth, as you can see like that is to basically if
I just Undo this, going to Alphas and giving it more like a square
Alpha over here. So if we pick Alpha 28, because what it will do is that when we use our
brush, here, see? You can see that the
brush use an Alpha, which means that it gives us a bit more like a square look, which automatically looks
a little bit harsher, see? And this is great. So this
is like the default brush that you would often use to
sculpt any type of concrete. So if you can see over here, now, the sculpting is
looking a lot better. We can also go ahead
and we can undo the work that we just did, and, for example, go for,
like, a bigger brush. You can also do, by the way, by going up here and
clicking on these points. And then if you want to, like,
do quite a few bits back, because sometimes undoing
on a really high poly mesh, it, is a little bit slow. But what we can also
do is we can also hire a brush size and then go from, like, a bit of a distance, okay whenever you have
done a lot of inning. And now you can see that we
can actually go for, like, some quite strong
damages over here. See? So now it really looks like we are missing
like a chunk. And if we go even zooming
out even further away, you can see that
you can create like that classic concrete
look which you often see just by
simply dragging, and you can really hammer
away at this mesh. Now, of course, we are
going to go for, like, much more subtle changes, so I want to go ahead and
stay quite zoomed in. Now, there's one more brush
that I wanted to show you. However, this brush
actually is not yet in our quick
select over here. This is because we need
to activate the brush. You can find more brushes than the one that we
want by going into your light box. Up down here. And then if you go
ahead and go to brush, you want to go to the folder, which is called trim over here. And in here, there's a brush called the Trim smooth border. It's quite a popular brush. If you just double click on it, what you can see is
that now we have this brush selected over
here. The trim smooth border. Basically what it
allows us to do is it allows us to make
really sharp cuts. If we click and drag, you
can see that over here. It's quite sensitive, but it
allows us to go for, like, quite sharp cuts in
case we ever want to, like, yeah, just great
will sharp cuts, I guess. So that one is also quite nice. With your trim smool border,
if you ever want to, like, some kind of, like,
interesting slashes. So we have, like, cuts like
this where we can here, see, we can carefully create a bunch of sharper
cuts like this, which will look cool and concrete because what you would normally do is you
would have this. Then you would go to
your trim dynamic, and then you would, for
example, you can see over here, use your trim
dynamic to basically balance out those
sharper cuts with some smaller cuts over
here, something like this. And then in general, you can get quite an interesting
damage profile where you would make
your cuts a bit sharper by going sideways
and stuff like that. I do feel that right now my For some reason, my
PC feels a bit slow. I don't know if that's
because of the recording. It wouldn't be because
of the Polycount because we're not that high yet. But now you can see
that we can get some quite interesting
cuts over here. What you can do is if you ever and you can use
this on any branch like the Trim Smooth boarder, which I can find down here
or on the trim dynamic, is that you can go to your see where it is
because I always forget. No, over here, you want
to go to your picker. Then over here, you
have a few notes that you can use to control the way that your brush behaves. The once Auri is the default. If we do count continuous, basically what it does is it will not be as impactful.
It's a bit hard for me to. It has to do with directions. It will not be as
impactful on your mesh. So you can see that it respects the shape of our mesh
a little bit more, which can be quite nice
for our trim smooth border because the other one is used often if you
really want to, like, slash away at your mesh,
but now it's a bit softer. However, what you can also
do and the Auri means orientation if we go back to
where are you? Pick a rove. We can click and hold. And basically, with
this, what we can do is we can set the actual
direction of a mesh. So if I set it sideways, no matter what way we
are looking at it, it will always go
in this direction. And you can see that this can be great if we, for example, want to do a very specific cut or we want to chip
away from a mesh. So just like this,
if I just go ahead and undo these ones, let's say that I want to go
ahead and I want to make quite a strong slash over here, and it does matter a little bit based upon
your camera angle. So I set my camera
angle a bit lower. Like this. What I can do is I
have this one, for example. I can then go ahead and go
to my picker and set it back to once and go to, for example, my trim dynamic, and then I can go in here
and I can soften out these cuts to make them feel
more like smooth concrete. And just like that, you can give it the look as if you have a chip that is missing
inside of the concrete. So, honestly, these are
the only two brushes that we really
need in this case. I want to show you that
you can hold shift if you ever want to
soften your mesh. However, the higher
resolution your mesh, the less the softening effect has the less the
soften has an effect, but you can see over
here that we can soften our mesh a little bit. Next this, I would
say that there are some more classic brushes
you can play around with. For example, the clay
builder brush down here, it allows you to add to your geometry over
here, pretty much. So it allows us to
basically what you can do is sometimes what they
often use this for is they, for example, add some
geometry like this. Or they can remove um tree. And then what they
would do is they can use their trim
dynamic and make it quite sharp to basically create some really
quick cuts over here. And like this, you can
create interesting patterns. Now, I'm doing
this very quickly, so it doesn't look very good. But you can also always
in your clay buildup, you can always go
downwards if you want to create actual cuts
inside of your concrete. And then you can once again
use a trim dynamic over here. Let me just try to do, a little bit of a
better job for you. You can see that in the
trim dynamic and maybe you can also use smoothing on it. You can see that you
can get some quite specific and harsher cuts. And then using the trim
dynamic, you can kind of, like, blend these cuts
back into the concrete. So these are some more
intense situations, but we will not be using
something this intense. And the reason we are
not going to go for such intense details is because we are working
with modular assets. If we use this in
a modular asset, what will end up
happening is you can see this detail repeating over and over and over again.
And we don't want that. Now, next to this, there is one more brush
that we will not be using, but I just wanted to
quickly show you. And if we press B, it is
the DAM standard brush. So if we go over
here and press D, the DAM standard brush
is great if you want to, for example, create like a
bit of cracks over here. So you can use DAM standard to, for example, create some
cracks, and then of course, what you would do is you would use this along
with, for example, your trim dynamic and set
the trim dynamic to be quite flat over here to
basically create some cracks. I'm doing a really bad job here, but I hope that you can
get the idea of it, you can, of course, go back in and do this quite precisely. I don't want to
waste too much time on something that
we won't be using. But, you can use this to
basically create some cracks. Or what you can do is
you can go online, find some height maps of cracks, and you can actually use
it as an Alpha in here. But there are way
more better videos on how to use those
type of things. So I would just recommend some things that you can find on YouTube to look up is how to
use Alphas inside of Cebush, just basic tutorials like
how to do rock sculpting, how to do damage sculpting, how to do wood sculpting. And often using those
type of search terms, you can find really
quick and easy tutorials that will cover
everything a lot more in detail than what I'm
going to do because I'm really going to focus mostly just like on edge
damages in this case. I think that's about it. I
think what we can do now is we can just go
ahead and start with actually sculpting
our mesh over here. There's a bunch more brushes, feel free to try it out,
like the pinch brush, which allows you to pinch stuff, the polish brush,
which allows you to, like, do, like, a soft polish. There's so much stuff in here. But what I'm going to do is I'm just going to
go out down here. I'm just going to go way back
in my and it's a bit slow. I don't know why
it is this slow. I find that quite strange. But what I'm going to
do, I'm just going to go way back into my history over here until we are at,
like, a clean state. Maybe it is because
of the high geometry, although I've never had those
proms before. So let's see. So over here, let me just go ahead and
try to go back to four. Oh, over here to this one. This one is the one underneath. And then if I click once on
my mesh, it will say, like, basically what it is saying is that because we went this
far back in history, it will over wt all of the
stuff that we did before. So as soon as we pass okay, we are now at the
starting point again, and from this point, we can go ahead and we can
do whatever we want. So at this point,
you can choose, as I said before,
your jom recount. I feel like that if I
use this jom recount, it can work, but
it's not as great. So I'm just going to go ahead and I'm going
to subdivide ones. You can balance
out your geometry by setting your
dynamesh a bit higher, and that way you
can, for example, play around with how much
geometry you actually have. But for now, let's just keep
it at something like this. So one last thing
that I wanted to do is that because this
is a modular piece, I kind of want to
be able to have the beginning and the
end to look the same. Okay. Sorry for the
credit card for the quick cut, I
accidentally crashed. I don't know why, but I guess that's why my C
brush was so slow. So I had to redo my scene, and I end up now with
around 7 million poly. So I end up not going for 19, but just seven was fine. Since I crashed, I think this
is a great time before I show you how to fix
the modular stuff to actually save our scene. That would be nice. So
what we are going to do is we are going to
go up here to save, and then we can find where
we want to save our scene. So let's go ahead and go save. And because we have
a few Z brush files, it might be nice to create
a folder or new folder. Called ZBrush. And in here, we can just go ahead and just keep this
name, for example, horizontal pillar 01, that's
fine, and just press Save. And then whenever you want to go ahead and load it up again, you can press Lotool and then
you can just drag it in, and it will have everything
on there that you wanted. Another way that you can save, but it is a little bit more buggy is to go to File and
then save as over here, and that will save your
entire scene along with all of your UY and
everything like that. However, often between
Z brush versions, that one is less compatible. Okay, so modular. Now, as I said before, we want to make sure that
this perfectly transitions. What we can do is in Z brush, we can also use
symmetry for this. We can simply go to our
transform, turn on symmetry. And then what will
happen is that you now see two brushes. Now, I'm lucky enough that the X symmetry was
already the correct one. However, you can also go up here and choose Y or Z or
anything like that. And often it will grab it exactly in the
center of our model. So as you can see over here, if I press over here, C, the symmetry is
exactly the same. I don't want to use
symmetry the entire time. What I want to do is I only want to use
symmetry on the corners. Now, for these corners,
what I'm going to do is I'm going to make
my brush quite small, and I'm just going to go ahead and you do not want to touch
the very end of the corner. I found that it's often
better if we just avoid that very end so that we
have a bit of flexibility. Instead, what I will do is I will go ahead and
just before it, I will start
sculpting like this. And I'm just going
to go ahead and I'm going to do that for
all of the pieces. And you can just choose what kind of sculpt you want to give. Do not make your
details too intense. As I said before,
we are going to go for quite mellow details. And the reason for that is
because we want to go ahead and we do not want to have too specific details because then we can see
that in our modularity. So over here, I'm just going to go for
something like this. And often that little switch that you see in between here where we just in front of it, you won't really notice that it looks a
little bit strange, like maybe this up close, but when you are
from a distance, it will look totally fine. So what you can see
over here now is that everything now seems
to work quite good. Now, at this point, if
you want to save time, we can leave on symmetry, do some sculpting, and then
add some additional details. That is often quite handy
with these kind of brushes. What I would then do
is I would do quite an even sculpt, and then
I would do the rest. Because this is not
a perfect square, I'm afraid we can
only use symmetry like this. I can check. So sometimes you can
also use Y symmetry, and then you can use
four symmetries. Ah. That does look
actually pretty good. So that's Y symmetry. And then I wonder if
we can even do the Z. So symmetry is quite powerful. As long as your
mesh is exactly in the center whenever
you export it, then it's quite powerful. This is honestly
looking pretty good. So what I would do is to
really save a lot of time. I have this symmetry, and
now in the next chapter, what we will do is we
will start sculpting. We are going to sculpt
like a very base layer over here simply by doing very small adjustments
like this. And then what we do need to
do because you don't want to have the exact same
edge everywhere is we need to go in later
on and then just add some unique variation
to every single edge. So let's go ahead and once
again, save my scene. Over here, and let's continue to next chapter where we will start with the
sculpting process.
44. 23 Sculpting Our Modular Pieces Part2: Okay, so let's go ahead and get started with our sculpting. So our symmetry is working actually surprisingly well,
better than expected. So what we can do
is we can start with some default edges. So right now, if we would
sculpt the edges over here, you can see that that's
looking pretty good. If you want to make your
edges even harsher, you can go up here and set
your focus shift to be lower, and then you can see that
it clamps down our edges, so it will make
everything a little bit sharper, you can see over here. And what we want to do is
we just want to go for, like, some quite soft details. So nothing too specific. It's just going to be
some generic details to already break up our edges and make
it look more like this worn down old concrete. So over here, you
can see me trying my best not to add any
super specific details. Sometimes I do like a
little bit like that, but even those details
we will need to fix. There we go. And now you
can see that we very, very quickly got already
some base edges over here. Awesome. Now, at this point, what I want to do is I'm just
going to go ahead and I'm going to go to my transform
and turn off my symmetry. Now at these points,
what we can do is we can go ahead and, like, sculpt in some
harsher details like you can see over here where I
just try to cut out a piece. And if you see any details
that look quite specific, you can just go ahead
and once again, change this up. So
that's our goal. Our goal is to change
things up from our symmetry to make it look a little bit
more interesting. We can at this point
also go, for example, to our Oh, because I crashed,
I don't have it anymore. We can go to our brush, rim trimsmbrder, and we
can set a picker to count. And then we can go over
here, and we can, like, maybe capture some
sharper cuts and areas. Is that too strong? Yeah, to be honest,
I feel like that one might be a little
bit too strong. Go to make my brush a
bit bigger because of the brush size actually changes the behavior of
your brushes quite a bit. So you can see that over here. It's sometimes nice
to just, like, give it a quick cut like
that to break up the shape. So I basically just go
in here and I can do this for a couple of areas. I can also go down to this edge. Let's do these two edges
roughly at the same time. That's too strong of a detail. Let's do that. Yeah,
let's do these two edges, roughly at the same
time, and then we'll do the rest later on. Okay, and let's go back
to my trim smooth border. And just really start
hammering away at this. Is that too big? No,
I can live with that. That's not too big,
but I am going to make my brush a bit smaller to not get too many of those really strong details over here. See, I'm just basically trying to now break up the surface. There, honestly, at this point, there isn't too much
to say about this. So what we will do is I will
do this one in real time, and then the other
two because it's the exact same workflow, I will just go
ahead and I will do those in a little time laps. But just in general, here
you can see that I'm just trying to add visual interest. Sometimes I like to
do some sharp cuts, and then make sure
that you kind of try to blend those cuts into, like, the rest of the
concrete over here. And remember that we will
also be able to rotate this pillar around to make the edges not
exactly the same. But just in general, over here, we have some quite
interesting looking edges. A cool thing that you can
do is you can go up here and press this BBR button
to make a quick render, which often gives you a
slightly better render. Looks like it doesn't
do much in this case, but normally it does give
you more interesting render. And you can also
play around with your materials over here if you want to see
how that looks. And you can also go ahead
and give it a quick subdivide just to make sure that everything
looks quite nice. Okay, awesome. I'm just going to do my subdivide because
I'm not yet done. I will do subdivide
like the end. So let's go ahead
and go up here. Let's say that I
want to make this edge a little bit flatter. I can just simply draw over here and make sure that
you do not draw near the end because then you
would break your symmetry. There we go. That's like flat. And then over here,
let's say that I give it like a little cut. I can see that my
symmetry did not work absolutely perfect
in these areas. See here, it's kind
of like missed parts, but that's no
problem at all that actually is beneficial
for us as long as it looks as long as the ends end up going correctly and
they look correct to me. Probably because I didn't
do a square symmetry. So over here, I'm just trying
to give it like a cut. I think it's just on the
edge of being too big, but if we maybe soften out
like one area of it like this, and maybe, like, break this up a little bit more
also in these areas. I might look fine. So definitely just try to draw your cursor, don't just go up and down. Like, that's quite boring. Try to, like, do
circles, try to, like, go for, like, sideway
cuts and stuff like that, and just have a
good look at, like, the behavior of your concrete, sorry, of your brush
and how that it looks on the concrete
and stuff like that. Here, sometimes, like over here, what I like to do is I'm basically painting my
trim smooth border here, and it will almost give
like a sharp edge, like a sharp cut. You can even make this
stronger by grabbing your pinch brush and
like pinching it down a little bit to make it
even like a stronger cut. Your pinch brush,
you can actually use in multiple areas like this. It does mess up your
geometry a bit, but Ferras is fine. And then over here,
what I'm going to do is I'm just
going to go ahead and paint this a bit flat
again. And there we go. So now we have, again, quite a different looking
edge compared to this one. So this one is really
soft and mellow. This one has, like,
a couple of damages. This one has, like,
medium damages, and now for this
one, once again, let's go for nothing too
intense. There we go. Let's do that and let's
have it like wave around going from one side
to the other side like that, which often also looks
quite interesting. So most of this is just
experience and trial error and looking at references
and stuff like that. Unfortunately,
right now, I don't have too good references, but this is often
really basic sculpting. So we got this one over here. Break up the shape
a bit, maybe, like, make it really soft
on one side of the edges by fading it into
the rest of the pillar. And also, if you are using a rat bit, which I
really hope you do, you can use the
pressure of your pen to art here to make it like stronger or make it
like really soft. So you can see over here that I can make it stronger and softer, using my edges. That
one is a bit strong. So let me just know
that. There we go. That's a bit better.
And now let's go ahead and grab one more
a trim smooth border. Maybe make a brush a bit bigger. And let's see. Let's place like some small flat cuts like that because
often concrete also. Yeah, concrete is
an interesting one. It breaks both in like
these flat cuts sometimes, but it can also break in like
this really soft concrete. However, this
concrete, I like to think it's like
reinforced concrete. So maybe it's like a little
bit harder to break it. So when it breaks, it just very softly chips
off and it doesn't, like, take out entire
chunks of mesh. Yeah, that's cut my
trim smooth border and soften out these
edges over here a bit. Okay. So basically, once you are happy with your base edges
that we have over here, this is looking pretty good. Now what I'm going to do
is I want to basically go ahead and let's try to add
maybe some surface details. So for our surface details, if we just zoom in over here, this is something
you don't have to add. I just want to show you. I don't even know if I
will end up adding it, but you can go ahead
and go to surface. And then if you click on noise, and we can Oh, we should be able to
make this window bigger. Not. We can zoom in over here. And what you can do is you
can give it some noise that we can actually make it look
quite similar to concrete. We basically want to set our
noise strength quite high. And remember that we are going to also have a texture
on top of this. So all of these details, they will actually not be that intense when we have
a texture on it. They will actually
be quite soft. But what we can do is we
can, for example, over here, simply click and drag
to artist details. If you want to get
rid of a point, just click it
outside of the view, and then you will get rid of it. And you can see that
over here, we can create maybe some
bit like soft noise. So I want to twy and get noise. But I want it to be like maybe set our
noise scale a bit higher. I want it to look
almost like flat. Like we still have
flat concrete. So let's just tone
this. There we go. So now we are getting
somewhere a bit better. Let's say something like this might look
quite interesting. So what we can do is
we can press okay. And now what you can see is
now that we have this noise. This noise has not
yet been applied. Now, what we can do and I can
show you this is we can use layers to basically be able to turn this
noise on and off, but still apply it and
then like art addi to it. The way that you want to
do that is you want to go to layers and press
this little button, which means a new layer. At this point, you want
to press applied to mesh. When you apply your noise, often your mesh changes slightly because it
pushes out the noise. So if you press applied
mesh, here we go. See we can see a
very slight change, but the noise
looking pretty good. It's a little bit on the
low resolution side, as you can see. So you might want
to at this point, let's say that we subdivide it. Oh, sorry, we need to turn off my layer before I
get subdivided. Let's say that we
remove this layer. We can subdivide this once. So now we are at 26 million
polis, which is quite a bit. So this is something you
would really do at the end. Then we can apply a layer. Apply our noise over here, and now you can see
that the noise is a little bit higher resolution. Doesn't make too much of
a difference, but still. And then often what is quite
a nice effect is if you use your trim smooth border on
this to soften out here see, you can actually soften out
some of these details on the front to make it feel
more flat on the front, and that often gives a
bit of concrete look. And this, combined
with our textures, which we are going to
make in substance Ziner will make this a really
nice, well rounded asset. See, this is a great
way over here to like paint out some
of the concrete. A have rest sculpting and Zebra, yes, it's a bit time consuming, which is why we will
be time lapsing the other chapters
because else we would be spending quite a bit of time just doing the same stuff
over and over again. But in the end, we have quite an interesting looking concrete pillar
which we can then bake down into a low poly and use inside of
unreal engines. So it will look quite cool. So let me just finish this off. And it is quite satisfying to
do this kind of sculpting, just like breaking up etches. I find it quite relaxing. B over here. It starts to already give that concrete feel. And, of course, once again,
be careful around the edges. We might need to do
some cheating on the end of the edges by cutting
them off in our low poly, but that is something that I will go over a little bit later. So for now, we can simply go
ahead and this over here. There we go. So
yeah, at this point, what I was talking about
the cutting of low poly, you can go to transform, activate symmetry and only
set the symmetry to the side. And then you can cut off
like this little end. And what that will do is if we mask this end over
here and remove it, it will pretty much like
finalize our low poly mesh. So it will prepare our mesh
for low poly conversion. Let me say it like that. So
now because it is symmetry, we have an exact same cut. So what we can do is we
can go to our poly groups, and then we can press
group mast over here. So with our poly groups, what we now did is if we go to our mesh, you can see that we split
our mesh into two groups. We have the end and
we have the font. At this point, what I can
do is I can hold Oh, God. Control, Alt, and then
I click on the end. No, Control Shift. Hi. Control click. For some reason, I always forget what this, but
this one should be. My shortcut is not working. Oh, control shift. Sorry. Control Shift,
click on the mesh. See, that's what I
meant like. I always forget about the shortcuts. So we control shift,
click on the mesh, and now what it will do is it
will hide everything else. If we press Control Shift
and click on the mesh again, it will hide that one mesh
and unhide everything else. So let's say that
this is the low poly that we want to keep. Now at this point,
we can go down here and press Delete hidden. However, if you are
using the original UI, you can also go in geometry, and then down here in
modified geometry, you can go ahead and press
Dead hidden in here also. So having that done, we can go ahead and press
delete hidden. FTCs can be deleted in
subdivision. Oh, yeah. So at this point,
what we do need to do is we need to go ahead
and go to geometry, and we basically, at this point, wouldn't want to
lower our geometry. So what I'm going to do
is I'm just going to do is save us quickly. Save this as a pillar.
And there we go. And now I want to
press Delete lower. I forgot to turn on my layers. Okay. Sorry about that, guys. Show everything by pressing Control shift and
clicking in the center. Bake your layer, which means
that we apply our layer. Then what we need to
do is we need to go to geometry, delete lower. And now what we can do is
now we can press Shift click on the end,
Shift click again. So basically, it was
just that we had some setting stone on which
prevents us deleting stuff. And now what we can do is
we can press delete hidden. So now, all that we have left is our pillar over here
with the ends cut off. And because we use symmetry, these ends should be perfectly transitionable, if
we would snap them. All we need to do later
on is inside of Maya, just quickly snap
them to the grid. So now with this done, I'm going to do a saves, and I'm going to call this
horizontal pillar 01. Underscore P over here
and save it because we prepared this one for our
low poly version. Awesome. So we now have a high
poly version ready to go, and we also already
have prepared. It's not yet prepared as
our low poly version, but it's prepared enough
for me to, first of all, go ahead and do other
types of sculpting. So this is looking pretty good. Let's go ahead and
in the next chapter, we will do a time
labs where we will be sculpting our vertical
pillar and also our railing. And after that, I will show you how to convert these measures to low poly and then we can
do all the uveon wrapping, the baking and all that
kind of fancy stuff. So let's go ahead and continue with this
in our next chapter.
45. 24 Sculpting Our Modular Pieces Part3 Timelapse: I I
46. 25 Turning Our Sculpted Models Into Low Poly: Now rich we are done
with sculpting all of our edge damages and extra
detail on our models. What I want to do is I
want to go ahead and I want to convert these
into low poly models. This is actually really
easy to do inside of brush. So what we're going
to do? Now, there's something that you
need to keep in mind. This technique is specifically
for static objects. This means for objects that do not move in wheel
or any other scene. If you ever want to
animate something, you cannot use this technique because you need
cleaner topology. The technique that
we will be using, it will make the topology
look very messy, but it will also be very quick. So it's like a quick time saver. So over here, what
we went ahead and did is we already saved
our low polly versions, if you can remember. So we went to saves Seabr low poly, low poly and low pool. So all we need to do is we need to optimize these versions. For this, we are
going to use a plug in that is called the
decimation master. If you click on plug ins here, you can click and drag
it over to this window. Then if you go into
your decimation master, what you want to
do is you want to press pre process current. When we are pre processing, what it will do is
it will calculate the entire model and take the
entire shape into account, at which point that
we can decimate it, which means that we can lower
down the geometry count. Right now we are at
11 million polys. Well, not 11 million
polys, 11 million points. This does not mean
polygons inside of brush. But basically what this
means is that it will take a while for us
to preprocess this. But after this,
what we can do is we can start optimizing this. And so what I will do is
I will pass the video, and then we will go over
the process of actually optimizing this. Here we go. So we are now done with
pre processing our mesh, and it took about
three or 2 minutes. Now, over here, you can choose the percentage in which
you want to decimate this. You can also choose how many polygons you want, specifically, but I don't like to
use this one because I like to have visual feedback. So because we are at
11 million points, what I always start with is
I always start by setting my decimation to one when we are very high because even
when we set this to one, we will still have a couple
hundred thousand poles, and we are going to go
way lower with this. So we set this to one, which
means that it will only leave 1% of our
current polygon count, and then we press
decimate current. Thi should not take too long. At this point, you can see
that we have 113,000 polis. Now, not much has happened. Maybe if you look very close up, you can see a little bit, but decimation master is really good at keeping
your mesh intact. If we for example turn
on our wireframe, you can see that now it tried
to keep all of the details and everywhere where there
were no real details. That's where it
left bigger gaps. So what we're going
to do now is we want to go ahead and
preprocess again. But this time, the
preprocessing will be very quick because
we are much lower. And I'm going to set
my percentage to 20. And then what I like to do is, I like to press
decimate current again. And then I like to
keep looking at my points and I like to
keep looking at my mesh. I'm going to pre
process again until I get to a plecon that I
feel comfortable with being low enough quality or
low enough polygons that it is optimized and
that we can easily VNwbit but still to keep
most of the main shapes. I do not care about losing all of these really
small shapes. I just care about keeping the main shapes
that we have over here because those are the shapes that will show
up inside of our norm map. So we can decimate again, and now we are getting closer. So now we have
around 5,000 points. You can see over here that, yes, if you do this by hand, it
could be much more optimized. However, what we
are having now is already getting quite
close to what I want. And you can see
that it also does a pretty good job
keeping the ends intact, although we might still need
to do some balancing on it, but it won't be that intense. Going to pre process again. And now what I'm going to
do is I'm going to set this to around 70%, and then I'm going
to decimate again. So I just going to keep
looking at things, and over here, that is
starting to look much better. And now I feel like
I have gotten to the point where I like
where my edges are. Like, they are
quite high quality, but I like to have them
quite high quality because we can use LODs which is an optimization technique
that I will show you later, or we can even use Nanite
if we want for this. However, on the flat areas, I feel like we still
have a little bit too many polygons
on the flat areas. So what I can do is I can go to my top view and I
can hold control, and I can start adding my masks. Oh, sorry, not that one. I can start adding my
masks to just the corners over here simply by clicking and dragging. Double check my work. So now what I've done is I've created a mask
on my corners, and the cool thing is
that decimation master, it avoids whatever
we have masked. So if I press pre process
again and decimate again, you can see that this time,
okay, this is too much, but you can see that it has
avoided touching our mask. Whenever you have
that happening, that it collapsed, it means
that we went too low. So if we now go to
90% and decimate, you can see that now it's
getting a little bit better. We seem to still have some
problems here at the top. So what I'm going
to do is I'm also going to control click. Let's do it a little bit bigger, the top over here and the bottom so that
it will not change those areas because because
we want to do modular assets, those are quite sensitive. Preprocess again, and now we can go ahead and we
can throw this down. So now what I also want
to do is I want to turn off my lines and turn off my
mask and just double check. Now we are at around
3,000 points, which I think is fine for an asset like this
with this much detail. So that's looking good. As you can see,
we have now quite properly optimized
our scene over here, and I would now consider
this to be a low poly model. Remember, this is low
poly for A games. If this would be a mobile game, I would literally
keep this as like a cube with like a bevel. That would literally bid because even these details, technically, we can bake these
details down to just like our original low polar
cube with the bevels. However, up close, it
will not look as good, but we are going to
go for AA graphics, especially with nul engine five, so we are going to push it a bit more. Now when this is done. Wow, I really cannot speak
English. All of a sudden. When this is done, what we want to do is we want to
go ahead and press Save. And then I'm going to
go to my safe folder, and this is the
vertical pillar low poly so I can go ahead
and replace it over here. And then what I want to
do is I want to export my model because we are now
ready for Uvion wrapping. I can go ahead and I can
go to Export over here, and then in our Export folder, modular, and then we can go ahead and create
folder called From Z. And we can just leave
this with the same name vertical pillar 01
lopoli and save. Awesome. Now at this point, what we can do is we can
simply load our tool. We can go to saves brush and load up our railing
lopoli in this case. You can see over here
that we have our railing, which is looking pretty good. Now what we can do once again, decimation master.
Let's preprocess. And because it's once again
almost 11 million poles, I will pass the video until
this is done. Here we go. Okay, so let's go ahead
and set this back to one, decimate current for the
original one and now we're back at 100,000 preprocess. And let's start with around 20, and I would like to
press decimate current. And yes, I know that
like these end edges, they change a little bit. But what we can do is after
we've baked our low polymsh, basically we need to snap
it to the grid anyway, so then we can snap
it to the grid, align some polygons
and make sure that everything
properly flows over, and it should fix our problems. And else I have some other
ways that we can, of course, fix it, but that's often
the easiest way to fix it. Let's pre process again.
Let's go another time. Okay, so now we are, Oh, this one works really
well at like 800 polis. Yeah, it keeps
everything intact. So I think because it's, like, a simpler shape, it's able to keep everything
much more intact. So honestly, 800 polies
is totally fine for this. So I'm quite happy with
that, you go back? Yeah. See, it still retains most of our basic shape, so I'm quite happy with that. So let's go ahead and
leave it at this. And now what we can
do is once again, we can save this, and let's go ahead and save this in
our railing 01 low pool. And let's also export this Export modular from
si railing 01 low poly. Now the last one that we need is we just need to go
ahead and load up our saves Z brush horizontal
pillar over here, the low poly version. And that's the last
one. And then we are already done with
the Z brush parts. And then what we can do
is we can move over to UVNwapping and
baking these assets to make sure that
everything looks correct. So this 124 million. Wow, that's quite a bit higher. So what we're going to do is we are once again going
to pre process, and I will once again
pass the video. Okay, so the pre
processing is done. Let's set this back
to one decimate. And now we can go ahead
and preprocess again. And then we can just
go ahead and do the same stuff as
we've done before. Although in this one,
we most likely need to once again use
a bit of masking. So let's decimate again, preprocess decimate and now
we're getting closer to our plicon count, decimate 2000. These ones are
really holding up a lot better than the
horizontal bill. But I'm still glad that I
was able to show you that masking technique for
the horizontal bill. I don't use it too often. Let's preprocess and
let's set this to, like, 80% decimate. I think we can go a tiny bit
lower process, decimate. I think, yeah, around 1,200 points is probably as far
as I would want to push it. Yeah, let's do that. Okay, cool. So we got this one also done. So what we can do
is we can save it. Horizontal builder. Yes, save. And then we can also go ahead
and we can export this. Froms horizontal pillar. Awesome. Okay, everything
has now been exported. And if I have a look, so the next thing
that we are going to do is we are going to get started by UVnwrapping
our models, and then we will also go
straight into baking them. So let's go ahead and continue with this
in the next chapter.
47. 26 Uv Unwrapping And Baking Our Sculpted Meshes: Now that we have our
low poly models done, what we're going to do is we
are going to replace them in our original scene with
these models over here. So over here, I have
my vertical pillar, my horizontal pillar,
and my railing. And these three, I'm just
going to select them, throw them into a new layer and I'm going to
call this layer. Backup over here. Always good to keep
a nice backup. And then we can just go
ahead and hide them. Now, let's go ahead
and go to File Import. And I want to go
and modular from Z. Let's go ahead and start
with our horizontal pillar. Let's go ahead import
railing and once again, import our vertical
pillar over here. Okay. Now, as you can see, they are no longer in
the exact same position, so this is something that we definitely would
need to change. Oh, this one is also this
area over here is also won, like this is
supposed to go flat, but that's something that
we can also work on. Yes, that's something that
probably I want to go ahead and right away fix by just
making it slightly flat. This will be clipping
inside of the ground, so we don't have to
go too insane for it. But yeah, that's something
that we will go at and fix. First of all, this is also one of the reasons why
we created a backup. Over here, we have our pillar, and what I'm going to do
is I'm just going to move this up and have a quick look. So it might translate. What we will do is
we will later on. Oh, no, sorry, we can't
move it up right now. Sorry, we will move it up
later on because later on, we are going to snap
it to the grid. The reason why we do not
want to move it up right now is specifically because, of course, our hyolemshes are still in this same position. So if we would move it up now, we would need to import
our hypole meshes. We would need to then optimize them and all that kind of stuff. So for now, let's
leave it as it is. Let's assign these
to the crack layers. So that's something that we will work on a little bit later. For now, all we are going
to do is right click select everything and then shade smooth over here to give
these smooth edges. Now what I'm going to do
over here is I'm going to go ahead and we can
pretty much get width. Let me just turn off everything
except for my railing. And let's go to my side view, which for some reason, is not working. There we go. That's not the side view.
This is the side view. Yeah. Let's go to my side view, select everything, hold control, and then the select
the sites over here. And I should have done this inside of sebush, but I forgot. Let's go ahead and delete
these pieces over here. Now, next, what we're going to do is we are just going to do, like, some quick cleanup. I like to turn on
my target weld. And for example, over
here, we have some etches that are not really straight. So what I can do is I can
just straighten them out a little bit simply by
merging it all down. These changes that
we are making here, they are so small that they will not actually
show up in our hypol. So if you want, you can go quite crazy and you can make
this much more optimized. However, in order to just
simply save some time, I will not go too
crazy with this. But yeah, if this
would be a non mesh, all these type of changes, I would just go in and I would do merging like you
can see over here, just to also make your
geometry a bit cleaner. Next, what you want to
do is you just want to inspect your mesh and
make sure that you don't see any weird vertices or overlapping vertices
or something like that, which can sometimes happen. I hope that I find one
of those problems. This is one of them, if I
just go ahead and zoo in. This, it's really sensitive. Sorry. This is one of them, where, for example, over here, the eedges they are so close together that I just like
to move them a little bit further apart because else I'm worried that it
will cause some problems. Over here, these are also
some of these etches where I could probably just merge it like that, and it
will look better. But, yeah, it's up
to you how intense you want to make this
because this is a tutorial, I will not make it as
detailed as I would do for, for example, a portfolio piece. But I will, of course, still fix some problems
that I feel like might cause some baking errors. So this all looking quite fine. This one over here,
I'm not yet sure. So what I will do
is I will carefully move it up a little bit to
give the bit more space. And let's go to the
other side. Over here. Yeah, and at this point, I'm
not going to be too picky, I do see some problems
that we can fix over here, we could probably do this
to make the jumtree a bit cleaner just by
merging it down. But I don't want to spend too much time on
this kind of stuff. Maybe merge this one here. Merge these ones together
because they are quite close. Merge these ones
like this, probably. And this one is a bit
trickier. Let's see. If I merge this over Oops, make sure that you do
not accidently have multiple vertices
selected because then it will try
to merge multiple. Yeah, there we go. That
looks a bit better. Over here, also,
like we have, like, just a lot of meshes. So I'm just going to, you know, se twin and clean this
up just by simply merging some stuff
together and making sure, of course, that the shape
does not change too much. And then it's often fine as long as the shape
doesn't change too much. This is why we have the gauge to later on, of course,
balance that out. But that is looking fine. Like, you can optimize it more here and there
if you want to. But I will not spend
too much time on this, and I can just kind of,
like, leave it here, see. But all of these ertzes,
we can optimize them. And it's still way
faster than doing polis. The only one that I see
over here that I do want to optimize is this one over here. See? That one doesn't
look very nice. So yeah, okay. I think I'm happy with that one. Maybe last thing I will do
is merge this one here. And it looks like
that over here, I see some kind of error. I don't know if it's just a
smoothening error. Could be. Let's soften again. Harden, soften. No, it's not a smoothing error. This one, let's zoom in. It's something
about accidentally having a edge. Let's undo this. How far can I undo before A, I think I did it
quite a while ago. So let's just redo and let's fix this simply by selecting
these faces over here, deleting them,
selecting this loop, and then shift right click
and then filling the hole. And then if you want, you
can also go ahead and just add a quick connection
here. So that's just me. What I said before
that I accidentally still had like a
vertex selected, and that caused this problem. I want to make sure that
during my undoing process, I did not mess anything up. Note still looks not here. I forgot to do this one. Del. Okay, awesome. So that is our railing. Now we can go to our
vertical pillar over here. And our vertical pillar, yes, it is quite a bit hierply, which means that we
sometimes also get some more arrows like what
you can see over here. This is quite messy geometry, and I don't really like
having it this messy. So what I'm going to do is
I'm going to go ahead and just merge these pieces
down over here like this. And for the rest, once again, I will mostly just, like, check the corners and make sure that there are
no drastic problems. I think we could have optimized this one a little bit more, but it is honestly, it's not that big of a problem. I do see some edges over here that could have been
a little bit better. So let me just redo the check. Because I think I'm trying
to go a little bit too fast, but I still want to
make sure that some of this stuff looks decent. But sometimes it's
hard to talk and also focus on, like,
all of these edges. Yeah, see, this is
a classic problem over here where it has
an overlapping face. And that's the kind of
stuff that we want to fix. Of course, when we are baking, we will notice these
problems soon enough. So as soon as we bake
and we have a problem, then it will clearly show up. However, I would say that it's easier if we just don't
have to go back and forth, at least not in a tutorial. When you are comfortable
with baking, it's not that big of a
deal to go back and forth. But for a tutorial, I
don't want us to have any strange confusion
or something like that. So over here, I'm
just trying to, like, make sure that none
of these meshes are too close together. There we go. And over here, this kind of stuff, I
can also merge together. Yeah, this is definitely the
more boring part of things. But it's still needed in order
for us to get a good mesh. Maybe one day someone
will make an AI that can perfectly do
all of the tropology. That's one of the few
AIs that I welcome. Perfect tapology and
perfect UN mapping. That would be amazing. But yeah, let's not count on
it for a while. So let's have a look. Uh, this one I
don't really like. Over here, I feel like stuff
can optimize a bit more. So most of this is just like experience about the problems. What I expect to
happen for you is that you will simply these
problems will simply occur, and when they occur, you
will be able to fix them. And then next time, of course, you will remember what's happened and how a
problem happened. And over time, over the
years, this, of course, becomes more and
more well defined. And you can be much
faster with this. And I just know if etges are really close
together like over here, it never really looks
that good in our texture. So that's why I'm trying to fix those type of
problems right away. Well, yeah, definitely,
this one we could have optimized
a little bit more. It's not that big of a deal. If I had the time,
I would go back in. So I recommend if you feel the same about the one that you
did, just go back in because, of course, you have quite a
bit more time than I have for this kind of stuff because we still have a lot to
do in the tutorial. But in my case, it's not that big of a deal. It just means I need to spend a few more minutes cleaning
it up, but that's about it. It's not like it's way too hypole for a bill
up because we can just use LODs and other optimization techniques to make things work. Okay. The last corner. I don't like this
kind of geometry clustering that you sometimes
see. Doesn't feel right. Well, there's quite a
bit of stuff that I can improve. There we go. And as she can see, like, the low polly, it is quite flexible. Like, I don't even need to
compare it with my high pol, because as long as
I can see that it doesn't change for more
than a few millimeters, our faces that often
it is totally fine. We don't really need to
worry about it too much. Honestly, you can even
push it way further. But of course, the
more you push it, the more risk you have it
that it doesn't look so good. That's why we kept also
the hiapols and stuff. So it's up to you to
decide how far you want to push these kind of things. Yeah, so we're
pretty much there. The rest of this stuff looks
fine. So, that is that one. That's fine. Let's save sin. And now for our
horizontal pillar, because this one was a
little bit more optimized, I do not expect us needing
to do much more stuff. So let's go ahead
and go in here, and I do want to merge
this stuff together. Over here, but that's mostly because I want to try and, like, keep the ends quite straight before we start
doing our baking process. And over here, so that
feels like a strong cut, but I have a feeling
it's just because of how the hipoly
looks in that area. Okay. The rest of this
is looking not too bad. It's a very quick
look at the front. Make sure that there's
nothing wrong. And we can now move
over to the other side, which is looking fine. Just here and there,
I feel like some of the vertices are a little
bit close to other edges, but that's about it. Yeah, here and there. So, honestly, there
isn't much to tell. Often, I would
just time up this, but we are almost
done and it's not that many models that
we have to do this for. And you never know what
comes across that I might be able or I might want
to, like, talk about. So Okay, let's double check the front. This one can maybe be merged there to give them
a bit more space. Over here, there's no
reason for those to be so up close when we
have so much space, that kind of stuff can
be merged together. And now we have arrived
at the last one. I know that smoothing
looks really strong on here, but don't worry. Once we have our hypolybk, the smoothing will no
longer look like that. Let's move this one like that. Yeah, you know what? I think
that should do the trick. Okay, cool. So our
optimizations are now done. The next thing that
we want to do is we want to do our UvNwrapping, which not take too long. For this, what I first
like to do is I first like to remove my
history on these assets. So we have our vertical,
horizontal, like that. And now for these pieces, so we are going to
have two types of UVs. One of them is going to
be like tilable UVs, which will be used for
our tilable materials, and those ones will be mostly on the floor and on our wall. And then we have
also another set, which will be unique UVs, which will be on the ones
that we are going to bake. This has no real meaning. It just means that with
these type of assets, what we're going to do is we are simply going to UV unwrap it in our one by one
space like we've gone over exactly the same
as with our pipes. So this one is actually
really easy to UV unwrap. So if we just go to our UVTgit, the reason it's easy is because even with all of
this messy geometry, you can see like a cylinder. You can see that it just
goes all the way around. So all I really need to do for this one is I just
need to go ahead and I need to probably just, like, create Yeah, let's do like a best plane
from the top over here. Select this and unfold it. Oh, that's interesting that it doesn't we can try to straighten our UVs,
but it probably breaks. Yeah, see that breaks. That is interesting,
that it doesn't like to unfold exactly the
way that I wanted it. I can press unfold
a few more times. Oh, yeah, here. Now it
starts to look a bit better. When I unfold it
a few more times. And then what I can do is I can, like, nicely scale this up. It doesn't have to be
perfect, honestly. We can just go ahead
and have it go here. I'm just trying to
unfold it a few more times to make sure
that it all looks fine. Yeah, honestly, that
should be fine. So that's already
that one. Very easy. So this is now pretty much done. The only thing that
I can see is I can see a smoothing arrow over here, and smoothing arrows
are stuff that I do want to fix before we move on, and it's something
that you can easily see whenever you unwrap. Looks like once again one of the Oh, this one is a
bit more annoying. It looks like that I
have accidentally, once again, mistaken a vertex. So let's just go ahead and
let's delete this stuff. Let's shift click. Let's fill this hole. And then, in this case,
what I'm going to do is I'm going to, let's see, let's merge these ones
together over here. So now it has become a quad. So that's a problem
that I wanted to fix. Over here, I can see that
there's another problem where we have some
overlapping verts. So what we can do is we
can press Control Shift A, shift right click,
and then merge vertices at quite a low
level and press Apply. And let's see. Is there
any other problems? Your UVs are also really handy to show these
kind of proms. So now what I can do is I can go ahead and I can
select everything again. You know what,
honestly, let's just do a new Bs plane to
make sure unfolded. Here, see, now it
looks even straighter. That looks even
better. So that's more what I expected
our UV to look. So those problems
are now also fixed. Make sure that we
are in between our one by one tile, which we are. And there we go.
So that now looks quite solid. So we
got that one done. Let's go ahead and go
to our Vert copilla. Our V copila we
simply need to place one seam somewhere, basically. What I'm going to do is I'm
just going to go ahead and do a best plane and
give it a second. I don't know why it
takes so long, but okay. And then I want to,
have a look around, see if I see any obvious errors. Sometimes it's nice to just look around without having
your model selected. But that all looks
good. Okay, cool. So as I said before, you can see this as a cylinder. We need to basically place a cut going from one side over
here to the other side. Unfortunately, in the Rhythm
UV, this is super easy. Rhythm UV is a UV
unwrapping tool that I have not covered
in this tutorial, but it is a very useful tool that you can have a look into, and we will be using in
different tutorials, which allows us to do
this very quickly. However, inside of Maya, we need to do, like, a manual selection
going all the way down. Because you cannot loop as well these type of
segments inside of Maya. But honestly, it
doesn't take too long. We just need to do one. That's also why I chose not
to use rhythm because I didn't want to overwhelm you
with even more software. However, I do use often Rhythm U V for these
type of measures. And what you want
to do is you kind of want to guide this seam. Remember, a seam is a cut. It's something that you
can see in your texture. So what I like to do is
I like to try and guide this roughly on
the edge of one of our corners because I
feel like that's in space where there's so much stuff going
under that hopefully, you will not notice that
there is a seam there. You most likely will,
of course, notice, but it won't be as noticeable as having
it in the middle of, like, a flat area or
something like that. It does mean that we need to do a little bit more selecting, but we are pretty much
there. Yeah, there we go. So what we can do now is we can go ahead and we can
go cut and sew, cut it, select it,
and then unfold it. And then what we can do is
we can simply rotate it, and once again, we can
place this over here. If you want, you can
also combine these UVs. Most likely, that
will actually be totally fine if we go ahead and have a look at the railing. Yeah, see here. So there is pretty much enough space
to combine these UVs. However, in this case, I
will just do this uniquely just because it is a little bit easier
and more manageable. So we have the
vertical pillar done. Lastly, we have a
horizontal pillar. So let's do a best play on it. Over here, let's double check. Make sure that there
are no errors. Also, go ahead and
double check it without our model selected, and
that's looking fine. Now all that we have to
do is we just have to go ahead and place a
seam once again. So what I can do
is I can go ahead. And I guess if you want to
select is a bit faster, try to find an edge that has these longer edges which
you can see over here. But luckily, that's also why we want to keep
this optimized. If we did not keep
this optimized and we would not
be using RSM UV, it would take really long for us to properly select all of
these edges just the UVNwp. Although, of course,
in those cases, I would have used RSM UV
because it's very useful, but it is a paid software. So once again, it
is something and I don't want to have people needing to buy another
software that they will only use in
very specific cases. Although I also use it
for normal UVnwrapping. I actually don't do
a lot of UvNwrapping anymore inside of the
default software. But for now, I
recommend just look up a video for ism UV if
you are interested. We can go ahead and just leave this because all we
need to do is cut this, unfold it, unfold
it maybe again. Ooh that's really
nice and straight. That means I want to
quickly go back into my other mesh and make sure I press unfold
a few more times. So we have this one
over here, ready to go. Let's go with our
horizontal pillar and just Okay, that's too bad. So this one does not
unfold straight, I guess, because of the edge. But that's no problem. You can
go ahead and move this and scale down a tiny bit
because else it doesn't fit. Here we go. Okay. Awesome. So these three
pieces are now ready to go. All we need to do now is we need to go ahead and we
need to export them. So if we go start
with our railing, we simply want to
select our railing, make sure to shade smooth because we changed
one of those faces. Export selection. And
we want to export it. Let's go modular. And let's create a
new folder called BS. And in here, I want
to export this as railing underscore LP. Just as an OBJ is fine. OBJ or do I want to use FBX? Actually, you know what
I'm going to use FBX. The reason I want to use FBX
is because I want to turn on triangulate to make sure
that my mesh is the best. So let's go for FBX. Ailing underscore, LP. And I already spoke about why we would triangulate these
models when we did our pipes. It's basically to avoid any smoothing arrows
in the future. So export it, and then we
have our vertical pillar. Although these models
are most likely already perfectly triangulated because
they come from Cebush. So this is vertical Pilar opoli. And then we finally have
our Export selection. Pillar pool. And export. Awesome. Okay, all we need to do now
is we need to go ahead and we need to open up brush and also export
our hipole versions. Here we go. So let's grab our horizontal
pillar to get started with the one before we turn
it into a low poly. So here we go with
our high pool. And you just want to
export this and this one, we'll export as an OBJ
because FBX cannot really handle 26 million polys. It probably can, but it
will be very difficult. Modular Bags horizontal pillar, 01 underscore HP and safe these might take a
little bit longer to export, of course, because
they are quite big. So I will be passing the videos every time
it is exporting. Here we go. That one's done. We can press Low tool again. Brush, railing 01, and
straight up export it again. It's a bit annoying
that you need to go back and forth
between the folders, ailing 01, underscore
HP and save. Okay. And finally,
the last one is going to be our vertical
pillar over here. So we can go ahead
and select that. Export exports modular bakes, Vertical pillar
01, underscore HB. And we will go ahead and also I know this chapter is quite long, but we will just go ahead
and straight up bake it also just to get
this chapter done. So let's go ahead
and just open up Mum's a Tolbag while
it is exporting. And then what you want to do is you just want to
create a new bake. I guess what we can do is we can actually use our
original bake scene. Normally, I would
not care about this, but because it is a tutorial. What I'm going to do is I'm
going to duplicate my pipes, Delta high pool and low poly, duplicate it twice more, and call this one railing. H pillar and V Biller for
vertical and horizontal. There we go. We can turn
off these and we can start with our railing
because this way, at least some of our
settings are saved, which saves a
little bit of time. So for our railing, what we can do is we can
go up here textures, and let's create a modular And then oh, sorry, modular and then another fool
call bags, just to be sure. And in here, I am going to
export this just as a PNG, and I will call this one
railing underscore 01 and safe. Now, for these ones, we actually only need to export our norm map because that's the
only one we are going to use in this case, inside of Unreal engine. We will go more over the
use case of this late Rome because we are
actually not going to create unique textures for this. We are just going
to use the norm map along with our
procedural textures, which we will create in next chapter for this kind of stuff. So you probably guess it. So we have our railing. I
can actually already go in here and do the same
stuff where modular bags, and this one will be
horizontal pillar, PNG, and that's just so that I can quickly show you how to do it and turn everything off. And then over here, we can
once again vertical pillar. Oh, I messed up. And set this to PNG, save. Okay. Once again, set to normals, and now we can go
ahead and say Racine. And all that we need to do is we can just go
ahead and let's see. So this one is the railing. Let's grab the railing high pool and low poly and
drag it in here. Now, these might take
a bit longer to import because they are millions
and millions of polygons. But then once we've
done that, we can throw railing into high and the low poly version
into low, turn the boat on. And in this case, we
just want to go ahead and we want to double
check our cage, because we end up
with scow painting, we need to set this
to show offset. Am I doing something wrong?
It's supposed to show. Huh. That's interesting. That's not Oh, wait. Oh, our low poly because we
exported it from Mamaset. I I messed up our transforms. Now, we can go back into
Momoset and re export this. Or what I can do is I can
most likely just set this to 100 by 100 by 100. And see. Yeah, see here, and then fix it. I think I accidentally
export it as centimeters, while Zebras exports as meters. Don't quote me on that. I'm not exactly sure. But
now, there we go. So, honestly, you
can just scale it up because this is not going
to be our final model. We only need it for
some baking data, which is why it is easy. Make sure to cover
your entire hipole when we bake this like this. And once we've done that, what I will do is I will actually just prepare all of them so
that we can do all of the baking. So save your scene. Let's go to the next one, which
is our horizontal pillar. And yes, your scene will
run quite slow at the end. If your scene is
running too slow, then I recommend baking them one by one and just removing
your files and then importing the next
one so that you don't have to load in all of
these files in our scene. I hope that my
computer is strong enough to just load
in these three files. It should be, but you never
know because in the end, it will still count to be
like 100 million polis. So over here, we have a
horizontal pillar, low and high. Once again, we need
to go to low and we need to set the scale to 100. Because I messed up 100 by 100. You see, so it starts to feel
like a little bit laggy, but it should not be too bad. S Showsc. This one we
definitely need to, like, scale up a little
bit more in order to capture the entire hypole. But that is looking correct. Okay. So we got that one done. And now finally, we
have the last one, which is our vertical pillar. So let's go ahead and import
that one. Here we go. And then we can throw
this one into low. And then all I need
to do is just do a quick bake and that's it. Then we are done with this, and then this chapter is over, and then we are going to create some tilb procedural materials, which is going to be
quite interesting, seeing as I'm actually
a text artist mostly. No, no, I used to be pop artist, then I transitioned
into text artist, so it's a bit of everything, but I definitely do
like to do texturing. So let's push out this cage
a little bit more over here. You can see that my mom set
starts to lag a little bit. I also see that I have a small problem over
here going on, where there's, like,
some messiness. If you ever have this meshiness, you can try to fix it by
painting our offset over here. And if you hold control,
you can try to, like, paint this Oh, no. Sorry, don't hold
control in this case. Paint this out. You see
this is where, like, we had some problems
with the geometry being a little bit
too close together. So that's what those
problems I was fixing where whenever A C was really close to an
edge that I solved it. So it looks like I missed one. But that should pretty
much do the trick. So at this point, we
can go to our railings. We can turn off
our high for this so that we can right
away see our work. And now I will first
of all, save my scene. And we just want to bake it like a nice four k resolution,
only our normals, and we can just go
ahead and press bake, preview, move on to the next
one, to get it all done. So let's press bake. And because it's
only a normal map, it should not take long. Preview. And then I can see
over here that, oh, wait. I have the wong one. I need
to select my railings. It would be nice if I
actually bake those because hiding does not
actually do anything. However, it should still
ignore these files. So let's just press
preview. Yeah, see? Here. So now we have a nice baked
looking meshes over here. You can see those
concrete details. We will, of course,
go ahead and make this look even better later on. But for now you can see quite clearly how all of that
effort we did with our sculpting end up giving us quite an interesting
looking mesh over here. So we can now go ahead
and go to our next one. Which is our horizontal
pilar over here. Let's turn off our
high, select it, bake Preview. There we go. So our horizontal pillar also seems to be working
totally fine. You can see all of those nice
sculpted details that we spent a hard time making are now also
transferred in here, even though we still have it as low poly mesh or
somewhat low poly. It's not the best low poly, but it's good enough. And let's do a final bake on our vertical pilar over here. Preview. If you want, you can
select the pillar, although it's a bit
slow right now, and then you can
press Control F to center it so that you can
easily rotate around it. But that's also
looking really good. Nice. So all of our sculptor
details are now in. I know. If you are not
familiar with this, it looks like magic, but that's
the power of normal maps. They've been used for a long, long time to basically fake the hell out of
all of our qualities. So that's now all done. All of our measures
are ready to go. So what we can do
is we can go ahead and we can save our scene. And if you want, just
give me a second, you can see that over we
have a pillar with all of these nice sculpts
ready to go. Awesome. In the next few chapters, what we will do is we
will start by creating our procedural concrete
materials which will later on be applied to these
very meshes over here, although all of this will come together inside of Uel engine. In those chapters,
we will also go a little bit more
in depth in Mm set. So let's go ahead
and continue with this in our next few chapters.
48. 27 Introduction To Substance Designer: Okay, so in these
next few chapters, what we're going to do is
we are going to dive into substance tweed designer in order to create our
tilable textures. And just for people that don't know a tlable
texture is basically a texture that is able to repeat on all four sides. The
texture is square. It will be repeated
on all four sides, which means that we can
place it on large surfaces, like, for example, walls
and stuff like that. So what we're going
to do in this chapter before we really dive
into the material that we are going to create is we are going to go for a
quick introduction inside of substance designer. So what I will do is I'm
just going to go ahead and I was wondering if I can maybe reset layout over
here for you guys. Yes, there we go. Okay,
so I reset it my layout. So whenever you open up substance designer
for the first time, this is what you will get. Now, in order for me to properly show you where we
can find everything, the first thing I
want to do is I want to create like a
quick new scene. I can just go ahead and
go to File and over here we have our new where
we can create new scenes. You can also actually
do a specific type of modeling inside of
substance designer, and you can do coding and
a bunch of other stuff. Here you can also
open up your scenes. You can open up recent scenes. You can save your scenes,
all that kind of stuff. So I'm just going
to go and file new. And then, basically
what we can start with, and let's just go
ahead and already create the scene
for our concrete. So over here, you have
a bunch of templates. However, the one that
you would most of the time use is the metallic
roughness template. This is a PBR template because we are using
the PBR workflow. I highly recommend that you look up a little bit more
about PBR workflows. It's basically the standard
workflow that we nowadays use in real and in unity and
all those other engines. Then once you've select
that and don't worry, you can actually change
this stuff later on, you want to go for a graph name. Now, I have a bunch
of reference over here for the concrete that
we are going to create, and of course, we have
our main reference, which is this one over here. I will call this one probably like concrete
underscore plane, and we might want to create a variation that also
has the panels on it. Actually, let's call
this concrete nscomin over here. That is
the graph name. Then you can choose your size. I'm going to go for a
nice four K resolution, and for the rest, everything
else I can honestly leave. There is a bunch more stuff
that you can do here, but you can just leave it, and then you want to press Okay. As soon as you
press Okay, this is more like the substance
that you're used to. Now, I actually use a slightly
different UY than this. What I often like to do is I like to often just
drag my explorer, which is this one over here and drag it up here like this. Move this up. Then what I like to do is over here
we have a TreeD view. What you can do in a treat view is you can in real
time see all of your changes happening in this view whenever
we are changes. However, we personally will not actually be using
this view because we will be using Mamas
at Tolbag in order to preview all of our materials. So you can definitely
use this view. However, because we will
not be covering it, I will also not really go
over it in detail right now. So what I can do is I can simply press the X button to close it. Don't worry. You can always
go to Windows and over here, you can always open it up again. So the next thing that I
want to do is I want to grab my library and I want
to move it down here. This is because we have our main graph in which
we will be working, and I like to have that
one to be the biggest one. And then you can just choose the sizes that you want
and everything like that. So at the top, these tools
we won't be using too often. We just have the di tools where we can set
our preferences, just a specific tools button, the Windows button,
and the help button. Honestly, there isn't much that we would be
using over there. Once again, I'm just doing the
same type of introductions as with the other
software where we just quickly go
over the UY first. Next, what we have is over here. In this graph, you
have some shortcuts. The shortcuts that you can
find down here, honestly, I personally rarely use
them because you can get the same shortcuts by pressing space inside of your
graph over here, which is why I don't
really use them up here. In here, there is
some useful stuff. There is some stuff where
you can oops, not that one. There is some stuff where you
can zoom in to your graph. You can ask it to show
specific optimization notes. You can ask it to show specific names,
that kind of stuff. You can ask a way to connect it. It's a bit tricky for me to show you because all of
these things over here, without a big graph, you don't really
see anything on it. So that's something I might
show you a little bit later. And FRs, it also just has some extra tools for grid snapping and
that kind of stuff. Up here, we have a
few small more tools, although we can just right
click to find the same tools, and it's for commenting and
just general graph cleanup. So what I would say is
this note over here, I rarely use myself because most of the
stuff I can find by pressing space in our graph or by right clicking
in our graph. Let's go about the
graph. In our graph, it is a two D space,
so not three, so you can just use your
middle mouse button to move around and your scroll
wheel to zoom in and out. Now, in here, you will be
creating all of your nodes. Substance Zina is a
node based system, which means that we
are able to create our textures using
specific nodes. It can be quite dancing and
complicated in the beginning. However, I will try
to keep it nice and simple with this
concrete material. It's basically simply
manipulating shapes and colors until you get something
called a height map. And this height map you
can then translate into norm maps into your base colors, into your roughness, into all of these textures that
we would want to use. This is something
we will go over, and once you follow
the tutorial, this will all make more sense. Here at the top, we
have our explorer. And in our explorer, if we just go ahead
and saves folder, what you want to do is whenever
you create a new scene, you basically want to go up
here to the unsaved package. Right click, and then
you can press Save. And then we are just going to go ahead and we are going to save this as concrete
main over here. So this way, at least
our graph is saved. And the reason we want to do that is because L's outer
save will not work. It will only work once
we actually saved it. So in our explorer, we can basically find our
main scene and we can find the actual graph which contains all
of our images. The main stuff that you
want to here is you would want to right click if
you want to save your scene. And if you want to
publish something called dot SPSAR file, these files can be used
in substance painter, actually, which we also
will be using later on. And for the rest, it's just as like some extraditional
information. The second one you often
want to use if you want to export your textures.
You would go up here. You would right click and press Export outputs as bitmaps. And here you get a window
where you can actually export your textures using
the format you want, ready to be shown inside
of Mama's at Tolbag. Down here, we have our
properties window. This will contain
all of our settings. Whenever we select a note, it will just contain
the settings. So it doesn't matter
whatever you have. So here, so blend, see, it automatically just
shows you all of the settings. Nothing
too difficult. It's just something that
we will be working on. Your library up here, 1 second. Let me move this here,
is quite important. Your library will contain all
of the notes that we need, everything from
different noises to the notes that we can use to manipulate all
of these noises. We will be using this library mostly to select
noises and patterns. For the rest, what I like
to do is I like to press space because I'm quite
familiar with the software, so I know the names
of the stuff I need. So let's say that I want
a multi directional warp, I can type in ML, and then over here,
I can find it. I can also, of course,
go in here and I can try to go to transforms, and then I can try
to find it in here. I don't know if
it's in this one, but as you can see here, it's quite difficult to
find the one that you want, so it's easier often to type. So that's something
you will get used to. Oh, this one is new. I will
try that out sometime. So basically, in here,
we have our graph. We have all of our notes, everything that
you can find even like preset materials that
you can see over here. There is a lot of stuff in here. There's also coding
stuff in here, but most of the stuff
you can ignore. And I do know that pressing space and typing in a name is not very
good for beginners. However, this is something
that once you place the notes, I hope that you will remember the notes and that you
can recall them later on. You can also find them in here. You can also go, for example, and I believe that we need to go up in filters and
then type in multi, and then you can
find it like this. And what you can
even do is you can even know Oh, they change that. Oh, yeah, wait, you
can click on it. They change the button. And you can add it to favorites, which means that now in
your favorites note, you can find all of the nodes. So if you ever want
to like save all of the notes that I am using because these are notes that we will often
use quite a bit. You can also add them to favorites and find
them over here. Next, we have quite
an important one, and that is, sorry, TD view over here. And in our TD view, we can
actually see our texture. So we will mostly be looking
at like two D textures, and then we can preview them in TD inside of Mom's head tobag. So this is just
something where we can use our scroll wheel and our Middle mouse button to move around and just inspect
everything that we are creating. So definitely, the UI is quite
a lot easier compared to, for example, a TD software. So what we can do at this point is we can simply jump right in and we are going to get started by creating
concrete material.
49. 28 Creating Our Concrete Material Part1: Okay, so let's go ahead and divide in and get started
with our concrete material. So if we have a look at
our references over here, we already gathered all
of our references for our material way back when
we started out this course. So if we have a look at our
main reference over here, what you can see, of course, is AI generated, so it's
not really the best, but we can also look at our real life references
to get an idea. Now I want to go for, like,
a slightly dirty concrete. I don't really want
to go for, like, the really yellowish
concrete over here. Yeah, I want to go for more like this grayish concrete that
we can see over here. Yeah, and that should
look quite good. Over here, we can also
have quite a good view. And then we can also add
some general dirt and everything to that. Yeah. Okay, cool. So if we have a
look at our references, now, the first one that
stands out to me, it's basically like a balance
between this one over here. This is a wy low
resolution image, so that one I probably
won't be using. Yeah, but like this one in general is
looking pretty good. And then maybe I will combine it a bit with this kind of stuff
over here. Zoom in a bit. Let's make our concrete
similar to this, in terms of, like, the roughness and
everything like that. However, let's make the color a little bit closer to this one. So that's nice thing
about being able to make the materials yourself is that you can just
match everything up. So yeah, that's actually
pretty good idea. So if we have this
one over here, let's just double check. What we're going to do is we are going to go
ahead and first of all, create our plain concrete, which is just going to
be like flat concrete. And then what we
will do is later on, we will add our tiles. Now, if I just move this up. Actually, I'm going to
move this to the site over here. Inside of substance. The way that you would
normally work is you would go from your high hypol, you would go from
your height map to your norm map to your base color map to your
roughness and the rest. So your height map basically controls actual
geometry information. It controls the depth
of your texture. However, inside of
substance Ziner, you would often use a height
map and convert it to a norm map because height maps are very easy to
convert to norm maps. Inside of marmoset, however, you would use it to
actually displace the geometry on which you
are showing your texture, and this is something
that we will go over a little bit later on in order to make the texture
feel more high fidelity. Your norm map is probably
the most important one. I think you've already seen how important it is when
we did our baking. Your norm map will
basically capture all of our actual rough details. So our norm map
will capture most of our, just grainy noise. It will capture all of these, little holes, all
of this damage, even all over here, like the damages on our tiles
and all that kind of stuff. So the dorm map is
quite important. Your base color map gives
your texture color. You roughness gives it
a roughness response, which is what you
can see over here, the shine whenever we look at it from a sharp angle
with our lighting. And then we have a
few other maps like your ambient occlusion map
and your metallic map. Now, we are not making
something that is metallic, so we can literally
delete that one. And ambient occlusion often only works whenever we have a
really strong height map. Since we don't really have
that, we will keep it, but it probably won't give us, like, a very big impact. So knowing that
what we want to do is normally we would start
with our height map. However, because our
height map is all about, height information specifically,
the only thing that we would really include
in our height map right now would be tiles. Especially over here, you
can see that a height map would be very clearly shown
in this kind of stuff. And I guess height map can also be used for quicks
and stuff like that. But because we are going to
start with our flat concrete, we actually going to
skip our height map for now and go back to that later
when we create our tiles, and for now we are going
to start by working on our overall noise and our
overall concrete feel. So we will still use
elements of our height maps, and I can show you
how to do that. So the way that you want
to work in substance Ziner is you want to start
from large to small. That is quite important. We are starting from large details, and then we work
our way down to, like, the smaller details. So if I have a look over here at all of this kind of
stuff, with our concrete. So what are the
details that I see? I see quite clearly, we have some holes over here, which come in large
and medium sizes. Then we have Willy small specs capturing all
the way around. These specks, they
look also a little bit like clusters, as
you can see over here. So they're like noise clusters. We have these streaks over here. And the streaks is something that we need to be a little bit careful for because they can be quite overpowering if
we use them too much. So we will probably
tone them down a little bit. Yeah,
we have our streaks. We have, of course,
like, our general noise, which is just like the very fine noise that you
can see over here. Later on, we will also
have some damage and stuff going around our over here around our Seems of our
tiles, sorry, brain freeze. Sometimes we have some large
damages here and there. So I guess we can implant that one and also like over here. Sorry if my voice
sometimes breaks up, I'm still having
a bit of a cold. So we have those type of pieces. We have tiny cracks which
we might be able to make. Just like to add a bit of
those little cracks over here. And for the rest, the
rest would probably be included mostly
like the base color, which is like our dirt and
all that kind of stuff. And let's go ahead
and have a look. So over here, unfortunately, the reference for this
one is not very good. And I do know I'm
saying that while I was the one that
created the reference, but you can see that I had
to shoot up in a dark space. So that's probably
why I messed up with, like, the ISO and stuff. So yeah, in general, so can find what I'm going
to do so I'm going to move this one here so that it's
easier for me to look. Okay. Awesome. So we now have a plan of the stuff
that we want to create. So what I'm going to do is let's keep this view over over here. And what we're going to do
is we are basically going to create every single
detail one by one. So let's get started
with the first one, which is quite an easy one. And that is those specs. Now, the way that we
would create the specs is that we have some
noises over here, and these noises are
your biggest friends. So if you go ahead and you Oh, they turn that off that
you can drag and it will show you a bigger
version of the noise. If we go ahead and
drag in these noises, you can see they all
look slightly different. This one actually looks
quite good because it's like spots and it feels quite
close to what we want. Now, the ones that I often want to use for
these type of specs, because you can see that we
have quite a few stuff over here is that I want
to use a gong spot. That one is quite good to use. And I also want to use, like, a dirt two, which is like
these smaller spots over here. And I also might want to use, like a dirt one over here
for these willy small spots. Although I'm not
sure of dirt one. Maybe I want to go for like
a B&W spots two over here, which looks quite noisy, but what we are going to do
is we are going to manipulate these noises until they look the way that we
want them to look. So let's get started with,
like, the big details, which is going to be over here, these quite larger specks. Now, you can see
that there aren't too many of these specks, and they do have
different sizes, and they are quite smooth
going inside of it. So what we have right now is if we go ahead
and grab this one, you can see that this
one is very flat, and there's quite a bit of it. So the first thing
that we want to do is we want to mask this out. There's a few ways that
you can mask this out. You can mask itout
using another mask. But the one that I like to use, they have fill control over how many specs we want to have, is I like to press space. And when you press space while
having your node selected, it will automatically
attach your node. I'm going to type in flood for flood fill, and
then I press Enter. You can see that because
I had this note selected, it will automatically enter it. What a flood fill
does is it will convert your shapes as
long as they are white, and then as long as
they are not touching other shapes into data, which allows us to select this data separately
or manipulate it. With this, what we can do is we can actually do a few nodes. So the most important
one is we want to use a flood fill to gray
scale node over here. So if you just type in
FLO, you can find it. You can use your key board over here to move it
down and grab this one. The cool thing about
this one is that we are able to basically plug in
a grunge map or a noise, and then we can mask out our
notes based upon that noise. So, for example, let's say
that I grab, for example, a cloud two over here, like this, Cloud two is
quite the standard noise. And then in our Cloud two, we can control the scaling. We can make it bigger or
we can make it smaller. What I'm going to do is I'm
going to set the Skelter two. And then let's go ahead
and add something that is called a histogram scan. A histogram scan,
so if you type in H is similar to a levels, but then it is just
like a simple slider. With this, what we
can do is we can set our contrast all the way up and we can basically control
over here our Hcam scan. Now, what will happen is if
we dig this into the base. Can see that over here, our dots will only show up wherever
we have our noise. So now we have complete control over how many dots we want. Now, the last thing
that I do not like is that there are
too many clusters. So maybe a cloud two
is not the best one. Let's try maybe
like I don't know. We need something like
quite soft noise. Let's try maybe like
a moisture noise. Let's see how that one. Oh, God. No, that
one does not look. So we have a pearl noise. I tend to avoid this one because
it's often really basic, but it definitely does
show like random cluster. So I guess, in this
case, it is pretty good. So over here now we have
fill control over our noise. Now, this is pretty good. Yes. However, it is
not yet perfect. We are going to still
go because this is such an important material
for quite high detail. Now, to show you the
concept behind this, we are wanting to convert
this to a norm map. Whenever something is white in our conversion,
it will stick out. And whenever something is black, it will stick inside
of our norm map. If the background is black, then all we have is sticking something out. So
what would we do? We would go ahead
and we would add, for example, a normal over here. You just add a normal node. And then what you can see is
if we set this to open GL, because that's the mode
that we will be working in, you can see that now these dots over here, they
are sticking out. However, they are not
looking very good, so we want to go ahead
and change that. We want to do two
things to them. First of all, we want
to soften them out. And second of all, you
can see clearly over here that these nodes over here, they are not just pushed in. They actually slope off into
a smooth valley over here. And that's something that
we also want to capture. Now, we can often do both of
them using the same node. And that node is called a
non uniform blur grayscale. It's quite a long node. So if you just go
ahead and click on the non uniform blur grayscale, what you can do is
you can plug in your Grayscale map and
also your blur map. Now, if I just go ahead
and set my intensity down, what this one does is
basically it allows you to plug in a
something, whatever. It allows you to
plug in a bitmap. I would call it a bitmap, and then you can
blur this bitmap using a different
looking bitmap, like, for example, a noise. It's quite complicated
to say it. But basically in this context, because we are using the
same node for both of them, what this shape will
do is it will blur itself while trying to
preserve the shape. I can show you
what I mean. So if we go ahead and set
our samples all the way up and set our intensity up, you
can see that over here. It is softly blurring
itself like this. Now, if we would go
ahead and type in blur and grab a blur high quality gray scale, you can see the difference. In here, it is keeping
the look of our shape. As you can see, it's
just really nicely blurring it and giving it
different detensities. The normal blur, it
simply blurs it. So as you can see,
it breaks the shape. It will just give us a
really soft looking dots. So that's why this one is
often quite a bit nicer. However, because it
keeps the shape, we do sometimes want to, like, soften it out a bit more. If we plug this one
into our normal app, and we can see that
over here right now, that is starting to
look pretty good. However, these are holes. I don't want them sticking
out, I want them sticking in. So what I'm going to
do is I'm going to invert by pressing invert, and then you can grab
something called an invert grayscale node. As you saw, whenever you select a line and
then press space, it will automatically attach it. Now a cool trick. This invert note, we will
never have to touch anymore. So what I recommend is that for really basic notes that
you never have to touch, you press the D button, and with the D button,
it will dock it, which means that it will
just minimize the node. This will keep your
graph a bit cleaner. Now what you can
see is that now you can see that our
dots are sticking in and we have that nice sloping effect
that we have over here. At this point, there is only two things
that we need to do. One of them is, I
want to go ahead and to add a blur high
quality gray scale. And this is basically
to soften our edges. So we basically go ahead
and play around with the intensity a little bit to
slightly soften our edges. So it's really sensitive. So let's set this to 0.1. No 0.05. There's like
a clamp, 0.07 maybe. Yeah, I think 0.07
looks quite good. You can already start
seeing that it starts to feel more like these dots. So that is looking
quite nice already. Now, I know that this might
seem quite overwhelming, all of the notes
that we are doing. However, it is something
that you are used to. In the end, we are
not doing a lot. All we are doing is we are controlling where
we want our dots. And we are softening our dots to make them feel a bit better, and then we are
converting into norm map. Now, there's one last
thing that I want to do, and this is an amazing note. I use it very often, and that is that we want to
make these dots less perfect. Right now, they are perfect little dots and it just
doesn't feel right. So what we're going to do
is we are going to use a multidirectional
warp grayscale. If you've ever used Photoshop, you probably know about the
warping and stuff like that. What this one allows us to
do is it allows us to enter a texture and basically
warp our original input, which is our dots based upon the gray
scales of this texture. So let's say that we grab a Clouds two just to
show you what it does. We grab a Clouds two and we throw this into the intensity. Now, if we go over here, you can see that it's already starting. You can see that right now if I play around with my intensity, it is trying to warp based
upon these clouds too. Now, this one is not
looking very nice. There's a few things
that I want to change. Right now, the mode
is set to average, which means that it will
just try to warp everything. If we set this to minimum, it will only try to warp
the white parts, see? And now you can see
that we are able to basically break this
down a little bit more. You can also choose in how many directions you want to warp it. One direction means that it will just go
in one direction. Two directions is
two and four means that it will warp
from all sides. In this case,
because we are just trying to manipulate our shapes, I like to warp it
from all sides. I like to go in my clouds and set the scaling higher because, of course, these notes, they are so small that it is better if we go
for a small scale. And here, this is
basically what I wanted. I just wanted to break up my shapes and you can
see better over here. You see? I just
wanted to break up my shapes a little
bit like this. Now, that's looking pretty good. One thing, however, what
I want to do is that I noticed that this warping is making our shapes look
a little bit too sharp. So what I'm going to do is I'm going to move
this note down, move this one forward,
the blur note, and I'm going to actually grab our non uniform blur and drag that one into
our multi warp rascal, and then just simply plug
this one into our blur. So we basically just
change the position. So now what we're
doing is we're adding our blur and then we are
slightly softening it. Now, what have we got over here, it is looking pretty good. You might go why
up close and say, like, wait, this
doesn't look correct. But honestly, from, like,
a different big distance, this is looking quite fine. Only thing I'm a little
bit worried about is that right now our
spots are willy big. Remember, this is going
to be a big texture. So I might want to go into
my grunge spots over here. And what I might
want to do is I want to basically tile them twice. Um, By the way, you can also control
details over here, but I don't really do
that kind of stuff. So Oh, wait. I didn't realize. Although, no, I don't
like the coverage because the coverage over here
literally cuts away. So the one that we did, it made sure that it doesn't
cut away these shapes. Anyway, I want to add something
called the transform. What you can do with
the transform is you can press minus two up here, and it will basically
tile our shape twice. In your Tui view, if
you press Space Bar, you can actually see the tiling. So this is what I
meant with tilable. It is repeating on
all four sides. So I'm tiling this twice. Then what I'm doing over here is I'm controlling how
many I want of them. Now, in our non uniform blur, because they are smaller
right now, we might want to, like, maybe set our blades up to make it a bit more softer. We might want to go
ahead and for five, make it a little
bit less intense in our blur and then in our
multidirectional warp, grayscale also make
it a little bit less intense and soften it. And
let's have a look at that. I'm not really a fan of what we got right
now, to be honest. I don't really like that. So
what I'm going to try and do is I'm going to try and undo this until we are back at our large nodes over
here like this. Now what I want to do is I want to probably
scale it up here. So let's do a transform here. Now, doing it this way, it does mean that everything
is tiling a little bit more, but we preserve our shapes a little bit better as
she gens over here. The reason we
preserve our shapes better is because we
are not trying to manipulate such
small little spots because this is all
about resolution. If we try to manipulate
really small spots, we simply don't have
the resolution. However, if we manipulate them
and then scale them down, it sometimes works a bit better. So that's looking pretty
good what we have right now. Now, this one was actually
quite a difficult one, but that's like a good start. So now what I want to do is
I just want to give it like these smaller specs that
you can see all over. That one is way easier. We basically want to
grab a dt two over here. What shall I do dt one? Let's grab a DRT one, probably. We grab a DRT one over here. And then what we want to do is we want to get started by adding a histogram scan to it,
which we've used before. This way, we can just control
the position and we can control how many
of these we want. So these are going
to be small specs, so let's say
something like this. You can also control the
contrast if you really want to make them really strong specs, but I'm fine with just having the contrast a bit
lower over here. Maybe set the contrast a little
bit higher to around 0.2. And honestly, I don't
really use values. I just look and I drag around. Then what we want to do is
mount to give the tiny blur. So let's do a blur
high quity gray scale. Quite up close. Let's make this like 0.1. Now, even lower. 0.05 over here, Tiny blur. Then what we need to do is
we can go ahead and we can copy this normal with the
invert note and paste it, CtraZ Contra v, and
plug this in here. So now what you can see is this is what we
have right now. It's a little bit too noisy, so I'm going to go ahead
and go to my Hcam scan, and that's the
amazing thing about the procedurality of subsiers
we can just go back in, make changes, and it
will update everywhere. So what I'm going to do is
I'm just going to go ahead and try to get these changes. And what I feel
like is right now, I like the smaller specs more. And the specs inside of it. So then the bigger
ones, basically. So I'm just trying
to have a look. Is there maybe something else? Oh, I forgot that we also have
an actual concrete crunch, which we can use
for our bass noise. But let's go over that later. Dt five I don't know if dirt five is like,
Yeah, we can do that. Let's make our probably best to use Dirt one
and set our scale a bit lower over here so that these larger specks actually
become the small specs. That's basically what
I'm trying to do. However, what I don't
like is I don't like how it's like repeating like that, but we can see how it works. Um, what shall we
do a dirt five? I'm basically just
deciding what to do. So a dirt five over here, it's a little bit more
even, as you can see. However, when it is this even, we would want to, like,
break it up a little bit. So right now, it feels
a little bit too boring because it's just, like, all over the place for even, and I don't
really like that. So I think I'm going to stick
with my dirt one over here. And now at this point,
you might think like, Oh, Emil, you don't
know what you're doing. You keep going back and
forth between nodes. This is totally normal. Experimenting is the biggest
part of substance designer. You can never really you can take really good guesses
what a shape will look like, but you can never
have it perfectly. So what I'm going to do is
I'm going to go for, like, small specs like this, and I'm basically just playing with
my position and my contrast. I might want to go into my blur and said it's a
little bit higher. It's 0.06 over here. It's quite sensitive. And yeah, this is like some good overall specs that we can start with. So we have this one done. Let's
nicely move it down here. So we now have these
two specs over here. The next one would be to
create some of those, like, more rougher
spec areas over here. And then we also have like, our base noise and
stuff like that. So for those ones, we
like the B&W spots too. What I can remember
is that when you add a a histogram scan to
the B&W spots too. Here, see, it gives you these clusters that you
can see over here. And those are the clusters
I'm trying to look for. I can go ahead and
set my skelter two, and those clusters, they feel a little bit like the clusters
you can see over here, see? So that's something that I
can just create like this. Now, text will not
look exactly the same. This is because if I want to
make this exactly the same, I can make an entire
tutorial course about that. I am going to simplify this material a little
bit, just for your sake, because I assume
many people have never used or barely
used substance designer. So it is best to do it this way. We do have extensive tutorials, just about substance designer
in case you're interested. So we have this one over here. And once again, we want
to copy our normal no because we just need
the invert over here. And then this one,
we want to set our normal intensity way down. This is going to be like
super super, super soft. Let's do 0.0 here, see? So now it already
starts to feel a bit more like concrete
when it's not this strong. Let's do 0.025. It might be difficult to see, so you will need to zoom in, but this is the one that
we want to capture. Another thing is, I feel like I might actually want to
sharpen this a little bit. You can sharpen it by
adding a sharpen note. Be careful with this one because it will also break
your shape a bit. But if we just go in here
and play around, here, see, we can give it like a
tiny bit of sharpening, which is what I'm
looking for, because concrete often
looks quite sharp. So we have this one. Om. Now, there's two
more that I want to do before we start adding everything together and
previewing it inside of Mamaset. So let's go ahead
and add these two, and then in the next chapter, we will start with
the Mm set stuff. The first one is our waves
that we can see over here. You can see that they
are looking quite wavy. They are denting into our shape a little bit
here and there. So what I'm going to do is there's a difficult way
of doing it in a simple way. I want to try the simple
way for your sake. And one of the simple ways is
to use an anastropic noise, which you can see over here. And this one has a lot
of little stripes. You can control the
Y and X amount, and setting the X amount
all the way to one will basically just give
us different shapes. However, what I'm going to do is I'm going to set
this probably to like three or four to
balance things out a bit. The Y amount, you can go to 512, but you can actually
also type in 1024 to go even smaller, or you can do it by resolution, which is like a
standardized version. What I'm going to do is
I'm just going to go ahead and I'm going to make
my waves not too small. Let's do, I don't know, like 450, something like that. It's probably way too big still, but we can change later on. Just so that now it
is easier to see. So we have our waves. Now what we want to
do is we want to basically reduce the amount
of waves that we have. Once again, we can
use a histogram scan. Hiscram scans always,
first of all, take out the black areas, which means that in this case, if we choose our position, you can see that our
waves over here they are just like slowly reducing more and more because of the gradients that we have. You can go in your anastopic
noise and play around with your smoothness
interpolation and your general smoothness
over here to control how much of it
you want to be taken out. But for now, we are just going
to leave this to default. Okay, so we got these
waves over here. Now what we want to do is
we want to give it like this warping effect that
you can see over here. So that one is not
too difficult. All we need to do is you
can use a directional warp, but what I like to
do is, I like to use a multidirectional warp. Basically, now there
used to be the old node, which the direction warp which can warp something
in one direction. However, nowadays, I use the multidirection warp
because then I have control over all
of the directions, including just like one. So we have this one, and we want to warp this using
something quite soft. And what is better than a purlin noise in
order to warp this. So over here, we can use a Voronoi actually.
You can choose. So the Voronoi noise over here, you can see that it's more dotty while the purlin noise is
more like this soft noise. Let's start with the pearl
noise and then also have this Voronoi down here, and we can see which one
gives the best result. For our pearl noise,
what I want to do is I probably want to scale
this up quite a bit. And now what you
can see over here is it's starting to wave, but I want to set my
directions to one. And then what I can do is
with my directions to one, I can choose the direction
in which I want to wave. So I want to wave
this upwards to give it like these lines over here. You can choose with your mode if you want to set
this to minimum. Oh, but it looks like it doesn't really
do much right now. So as you can see over here,
we have this which can give us some different waves.
You can see it like this. And we can also
choose our Voronoi, which as you can see can
give us a it can give us some more sharper
waves over here. Now, what I like to do
sometimes is I like to simply combine them
if I can choose. So I'm going to use
my pearl noise, and I'm going to make this purlin noise scale quite large. So see this as the large scale waves that
we have over here. Then what I can do is I can add another multidirectional
wall behind it. And this time, I
can use my Voronoi. So for my Voronoi, what I want to do
is I want to set my distance scale
a little bit down. Maybe play around
to just scale bit. And then I want to blur this because right now it is
a little bit too sharp. So I'm going to add a blur,
high quality grayscale. You can see that it feels
similar to our pearl noise, but not too much. We
can plug this in. And for this one, if
we said mo to one, direction warp up and setting
intensity a bit higher, you can see that now we have
a little bit more control over some sharp noises which
we can use often here. See? You can
sometimes see, like, little cuts going on about. So we got this one. What I'm
going to do is I'm going to play around with my distance scale a
bit more over here. And play around with
my warping like this. So these noises or
these lines are going to be very softly embedded
into our concrete. Because they are going to
be very softly embedded, what I want to do is I'm going to get started by
adding my normal, and this is a trick for, like, really soft blending. So if we have a normal
white here and we zoom in, I can see that I need to
blur it a little bit. It's ate blur high quality
gray scale in this case. It's going to a normal and
then just click once back onto your blur to control just the settings of the
blur by looking at a normal, set our intensity bit. Higher to maybe like
zero point story, 0.1. Also, what I can see over
here is that I need to make my Y amount way higher
because right now, these are look like
really flat shapes, and I want to go like ten, 24, I want to make them like
small shapes over here. I can also play around with
my hiscaM scan to basically control the amount that
I want them like this, maybe a little bit
more over here. Let's do 0.12. Okay. So most of it is just
like a bit of balancing. And now that trick that
I was talking about, is that we can blend out this normal using
like nothingness, using a flat normal, and then also using a noise. The way that we do this
is we add something. If you press space
called a blend node, this note will also
be your friend. And then in the top, we add something called a normal color. A normal color is simply a
plain color for your norm map. Now, blending these
two, if you blend these using a noise
in your pasty, it will basically replace
some of these details, wherever there is
white in your noise, using just a flat color. So I will show you what I mean. Let's go for let's see if can
we maybe reuse our clouds? That one looks quite small. Let's just create a new
clouds in this case. Plug this in here and maybe like a histogram scan. There we go. So what you can see over here is that wherever
we have a cloud, it will blend out the shape. So now we have control
over where and how much of these little lines
that we want to show. There we go. Okay, awesome.
So we have this one. The very, very final one that we need is we need just
like some generic noise. Now, there's one
that's literally called grunge
concrete over here. And what I can try to do is
I can try to already use this one because this one actually has quite
a bit of controls. You can see over here
some noisiness controls, some little specks in
here, some scratches even. So it's quite a
good one for, like, some very fine noise, and we can also sharpen
it a little bit. What we can do is we can add
a normal notice to this. Set this to open Gel, and you can see that over here, it's looking a
little bit strong. It actually has
those streaks even. Which is quite interesting, but it's not the streaks
that we are going to go for. So what I'm going to do
is I'm just going to basically play around
with my sharpening. I'm going to set my
intensity of this way lower. So here, see if we can go
quite low to like 0.1, you can see that this just
becomes really fine noise, and it's just like a base layer where everything
will be put on top. So we can play with our
base noisiness and maybe, like, tone this down a bit. We have some specs over here, but I'm going to
set these quite low because we already
have a lot of specs. And let's say that something
like this looks quite good. I'm even going to go
lower like 0.08 probably. Awesome. So we now have all
of these norm maps over here. If you want to keep
diggings organized, you can select all
of your notes, right click and art a frame. This will place all of them in a nice frame which you can
move around and you can even name it normal
map over here. So what are we going to do now? I think you probably
guess that we are going to combine all
of these details. Super easy, there is literally a node which is called
normal combine over here, which will blend to
non map details. What I like to do is, I
like to go high quality, and then I like to plug
in these two nodes. And now, what you
can see already is that it has combined
these two nodes. I do notice that there's something right away
that I want to do, and that is that in our
multidirectional warp after this, add something called
a slow Actually, no, let's add a multidirectional
warp grayscale again. Use that same cloud so that
we used before over here? Huh. Let's go minimum. Yeah, that does. There are two nodes that you often want to use for damages. You have a slope plug gray
scale node over here. And with this one, this one,
chips away from your mesh. So if I grab this and I grab
a moisture noise over here. Actually, no, let's
just use the clouds to for ease of use. Over here. What you can do is you
can set the mode to minimum, samples all the way up, and then if you set
your intensity down C, it literally chips away, and you have this one, which
will basically warp away. I guess, in this case, chipping
away is probably better. So let's set this to 0.01. And use this one. So it's
called the slow block rascal. It's also one of
my favorite notes, great to art general damages. So now you can see
that over here, if we just play around with the intensity a bit
more, 0.02, maybe. See? That already
starts to feel a little bit more like
broken up concrete, especially when we start
blending it with other noises. What I'm going to do is I'm
going to set my intensity to 0.02 in these lines. And next, we can add
another normal combine. Set the normal combine
to high quality. Let's move it up a bit, and let's get started with our Well, the order doesn't really
matter in this case, because it's just blending.
So we can do this. Normal combine, and even let's add another
normal combine, high quality, high quality, and just plug in all of
your normal maps over here. Let's keep in a
nice row like this. Now what you can see is that
if we click on last one, all of our details have
now been combined. At this point, what we
can do is we can go ahead and I like the
intensity of this one. These small specs, let's
have a look. You see? These small specs, we
can go ahead and, like, tone down the intensity a bit, so we're just
balancing everything. Let's do 0.12. And then we have our
large specs over here. Which I also want to
once again tone down the intensity to make
them feel a little bit more grounded into this
shape like that. Awesome. And just like that, we have something that
already starts to really look like concrete,
which I'm quite happy about. I still feel like these specs
are a little bit too big, but that's something
that we can check out. So we have this done. I'm going to select these,
click Ara frame and call this. Normal combine over here. And now, when you
are happy with it, what you can do is over here, you have your output notes if
you just delete the stuff.
50. 29 Setting Up Our Marmoset Material Render Scene And Balancing Normal Map: Okay. So what we're
going to do now is we are going to set up a preview
scene inside of Momset. And we can later on
also use this scene to, like, render out our materials. Now, this is optional. I would say, I really
like to do this. However, you can use the three D window
that you have in here. If you want to preview
it and you can then preview it inside
of Unreal engine, which we are going
to do later on. But basically, the scene that
we are going to set up now, it's not only for previewing, but it will also give us, like, a nice final portfolio render. So, first of all,
what I'm going to do is let's go textures. We call this dirty
concrete in here, but I don't even know
when I made this. Concrete underscore
main. Let's replace it. There we go. And in here we
are just going to export. And we can do that by right clicking on our concrete main. Export outputs as bitmap, select where you
want to export it, which is our concrete main
stuff. Select the format. I like to always export as TGA. The only time when I do
not really like that is when I am exporting
height maps. And that's because height
maps need to be 16 bits, and TGA is only eight bits. So I guess you can choose
there is so little difference between TGA and P and
G and stuff like that. So you can even do
TIV if you want. But yeah, let's just
stick with TJ for now. Now, over here, what you can see is you can ignore this.
This is just a name. So here you can see
preview it will be called Concrete nscore
main uncorre height. And it just grabs the name of the graph, which
is concrete main. And then the identifier, which is the name of this node. So that's all there is to it. Over here, you can choose
which maps you want export. I'm just going to
export all of them. This one is quite
important. Turn on automatic export
when outputs change. What this does it will
automatically export your texture whenever we
make a change to our graph. This is great because it means that if we now press
export outputs, as soon as we make
a change here, it will automatically
update inside of Momset because it
automatically exports. So let's dive into Momset. Now, I will not really
go over Momset per se. Because it's such
a basic software. So you can literally learn it by just following along
with what I'm doing. So what we want to do is we are just going to
throw in a cylinder, a camera, and some lights. That's all. Now,
for this cylinder, there is a really good cylinder that substance designer
actually made. They use it in their
Tree D software. You can often find it over here. If you go to your
program files into your installation folder of substance designer, you
can find it in here, if you go to Resources
view TD shapes, and in here, you can
find a bunch of shapes, including our sphere to tiles. That's the one that
we want. And you can also find some other shapes. Now, what you can, of course, also do is once I input
this into Momset, you can just find it
into our source files. So let's go into
Momset and drag in the sphere to tiles
FBX. There we go. Easy does it. So we
have our sphere. Now the next thing
that we want to do is we want to create
a new camera. We can right click and add a camera in our
scene over here. And call this main underscore. C. Now, what I like to do is, I like to go to my transforms, and I like to make sure that my rotations are set to zero, zero, zero, so that we are looking at it exactly
from the front. You can then al right click to just zoom it in altermal
mouse button to center it. Now, right now, what happens is that we
have this Wilicol sphere, but we have so much empty space all the way around our sphere. So what we are going to do is we are going to cop this out. There is a cool trick for this. All you have to do
is go to render. So if we go down
here in our output, all we need to do
is we need to set the X resolution the same
as the Y resolution. So just copy paste it, and then it becomes
an exact square. Now, the cool thing
is that if we now go to our main camera over here, although that might
be confusing. Let's call it camera one because we have already main camera. Came one over here. Let's move this down here. Then what we can
do is we can turn on something that's
called save frames. Now if you set to
paste all the way up, you can see that now it will
basically show the frames of the resolution that we
have given in our render, which means in this case,
that we get a nice square, which draws all of the focus on our view to
our sphere over here. Now, at this point, what we can do is we can go into a sky. And then if we go to
library over here, you can choose a bunch
of different skies. These skies will
influence the lighting. It's just the general bounce
lighting that we have. Let's have a look what I want. So we are going to go
for something like, yeah, a lot of concrete. So maybe something like the
city hall, I don't know. Just try to find something that does not look
too overpowering. There's another one
that I often like, which is the bridge
pond over here. Although, in this case,
yeah, that one could work. So yeah, of course, when you have your
film material, then this becomes a lot more
easy to find a nice sky. But right now we have, very
limited material response. So we just kind of, like,
need to guess here. But, you can quite clearly
see the difference between, like, the more orange skies and, of course, the more cleaner. Let's use the bridge
bond that I had before. Which is over here. And what I'm going to do is I'm now going to go ahead
and art some lights. So we are going to go for a
really basic lighting setup, which is a three
point lighting setup. It's basically one light from the front, two lights
from the back. So we right click Art a light, and we want to art a
directional light over here. You can just click on
it, and if you press W, you can see your pivot,
and then you can shoot W E and R to basically
move your light. I want this light to basically
cover around half over here of my sphere,
something like this. And what I'm going to
do is I'm going to set the color because it's
like a little bit of, like, sunlight to be
very slightly orange. Like this, and there we go. Now, another thing
that you can do is you can play around with
your shape diameter. What this will do is it will
soften out your shadows. If you set it's
higher, here see, you can see that the shadows
get softened a little bit. So that can be quite
nice sometimes. Let's set this to around 4.5. Now that we have this
light, all we have to do is we have to right
click and duplicate it, and this will become
our rim light. Our rim light is basically
a light that comes from the back that shows
the rim of your asset. So if we just go ahead
and make this one quite cold over here, because I always like to go
for a strong blue color. And this is, of course,
you can see I've done this lighting
setup quite often. Then we can go ahead
and we can just rotate this light until it
shows just the back, as you can see over here. And, of course, these lights, we definitely need to
adjust them later on when we actually start
applying our material. I then press Contra D again, and the second rim light
will be from the base. Something like that. And
then what I'm going to do for this one is I'm going to make the color like white. There we go. So we just have three
colors, three colors, sorry. And a general goal
for this is not just to create a pretty picture, but it is also so that
we can see all of our roughness response that we are going to create later on. Now at this point,
all I would say is quickly go into your camera. And in here, what you
can do is you can set your sharpening to
around midway point, maybe give it a little
bit of bloom by setting the brightness to 0.001. If you want, you can add some
vignetting to it like this. And what you can do is you
can set the tone mapping, which is your exposure,
contrast, and everything. I always like to go for ACS, which is the most
realistic one over here. You can see that that makes
quite a big difference. And then I like to
click on curves. And in here, this is like your level curve just
like in Photoshop, you can click and drag
and you can give it a little slight curve like this, just to implant a little
bit more contrast, and let's leave it
like this for now. So that's like a very
basic lighting setup. You can see how just like
these few specific things that we did make quite
a big difference. You are also able
to rotate your sky around by holding shift
and then right clicking. And like that, you
can rotate your sky, which can once again give a
slightly different effect. Now, I think, at this point, we are at a good point to concrete main
to save our scene. So file, save scene. Let's do saves. You know what? Let's do this one in Yeah. Okay, let's do it in saves
fold to keep it consistent. Material render
over here and safe. So now the moment you've
been waiting for, we will go ahead and
apply our concrete. I like to always create
a brand new material, and I will call this one
concrete sce main over here, and track this onto our sphere. Now that we need to do
is we need to input our nor map because that's the
only one we have right now. So if we just go ahead and
go to texts concrete main, you can see that it
exported everything, but most of these
maps are empty. So we are going to track
the norm map on here. And now you can see that
we already get something. Your roughnes let's set your roughness slider a
little bit lower because concrete doesn't have
such a strong roughness. And what I always
like to do is I like to set my texture tiling to two because it gives me a better representation
of the stuff that I want. So this is what we
have right now. Let's go ahead and
in our do color, we can click on the
color next to it, and we can tone this down a bit. May play around to
the roughness bit to see how everything looks. And now, in general,
what I'm going to do is I'm just going to go
ahead and first of all, tone my lighting down a bit. Over here, it's
soft than the sky. These lightings over here, they are a little
bit too visible. So see see now we can
really see it much better. He'll see, that's more what I was looking for
something like this. And then in our first light, I'm going to set the diameter way softer and maybe set my brightness a
little bit brighter. It's a little bit
lighter over here. And then you can also
rotate your sky and you can also go in your sky
and you can set the brightness of your
sky a little bit up. To just give it a
general good look. Oh, 1.3, I meant to
say. There we go. Okay, so that's
looking pretty good. If you ever want to
make sure that you don't move your camera
or something like that, you can press the
little log button, and that will allow it so that you cannot
move your camera. So in general, this is a great start
that we have right now. So now what we're going to do
is we are going to look at our reference and
we are going to simply balance things
out based upon that. So if I ever look
at my reference, the first thing that I want
to do is I'm going to tone down these really strong spots,
and this is how it works. You simply go in here. You
tone down the intensity, for example, for these,
let's say, 0.12. And then if you go back to
Mum set, if you give it, at least 1 second, you
can see that it will automatically update.
So this has updated. Now what I see is like those
little specks that we have, I quite like them, but I feel like we don't
have enough of them. Those are these
specks over here. So what we can do is we
can go into our position. And sit up position a little
bit higher over here. And if that doesn't work, there's another trick
that we can do. So let's go ahead and
do this. Here, see? I feel like I want more specs. So what I'm going to do is another trick is that
in our HCAm scan, we can simply blend this if
we just place a blend in between and add a
transform in the center. What you can do is if you
plug in your HCAm scan in the transform and throw both
of these into the blend, and set your blending mode to, for example, Max ten or art. Both of them work. Then
in your transform, you can click and move around to your transform to
literally move it. And that way we can basically
duplicate our noise, and now we have double as much. Now if we go back here, you can see that now we have
quite a bit more noise. Okay, so we got our specs going on. That's
looking pretty good. Sometimes if you want, you can go to your main camera and you can zoom in a little bit to really make sure that
everything looks fine. So let's have a look what
else that we want to do. I'm just going to zoom
this in a bit more. Also, one thing to
keep in mind is that although in my case, I'm recording at a lower
resolution than my screen, which means that
I would want to, like, render out an image, which I will show you in a bit to Wi show of all the details. So we got this stuff. Now, I
don't know for the warping. I might want to set my warping like a tiny bit less strong. So let's go into our
warping over here and set this to like 0.17 or
something like that. So a tiny bit less strong. And we have this sharper noise over here, which I quite like. And that's this one,
I believe, yes. I'm going to set
this one to 0.03. And what I want to
do is I want to just go in my histam scan and maybe boost up my position to
give it a little bit more. Okay, so now we get some of those more sharper
details in there, which are quite nice. And lastly, what I would do is just plain noise over here. Let's set this to 0.1. And let's set the sharpen all the way up for this one to make it a little bit sharper. I feel like 0.1 enough. Maybe tiny bit more, maybe 0.15. Yeah, there we go.
Okay. Awesome. So we now have a pretty
decent concrete. The reason I'm not
going to balance it out anymore is because we
really need a base scholar and we really need
a roughness map to properly see how
everything looks. But that's looking
really good. We can go ahead and we can
save our scene. And now at this point, one thing that I will show you to finish off this
quick chapter, and then we will move on to our Bseolar is that if you
want to render out an image, what you can do is, let's go ahead and
in our source files, create a folder called Images you can go to
your Render tab up here, and then you can go ahead and in here just to give you Oh, wow, I was not using rate
racing. Turn on rate racing. That actually makes a
really big difference. So turning on rate racing will give us a much nicer result. Let's use advanced
lighting sampling. We are going to go for,
like, the highest quality. Set our bounces
maybe to like two. So we are really going to go for the highest quality possible, and rate racing definitely gives us a much higher quality
than the default. Now, you can choose for your
samples in the view pod, which means how
long it will take. And here, now you can see this already looks a lot better. How long it will take. Which
samples, if I set to 512, you can see down
here a loading bar, and then it will use 512 samples before it starts
smoothening our mesh. So if you wait until this is
done, you can see that then. It will start to look
a little bit smooth. What I tend to do
is I tend to go for like 25, six for now, and I like to set my denoise
strength over here to 0.9, because I never like to have insane amount of smoothening. The denoise basically, after
your loading bars done, it will remove the
noise, however, you don't want to go too
intense. Ambulent occlusion. I tend to set this up, but on a sphere you won't see much. Local reflections, I just
like to set this up and set the intensity to four
and shadow quality, I like to set this
to mega over here. I don't think, cascade
is not needed. So let's set this to the
absolute highest quality. Okay, so we now have set all of our render
settings over here. Now, what we're going to
do is we are going to render out a proper
proper image. We can go into our image over
here, and in the output, you can choose your image, and you can also
choose the name. So I will call this one
Concrete underscore. Well, let's just do concrete. And I like to set this
to a JPEG file and save. Next one, I'd like
to do is I like to go for quite a high resolution. So let's do 3840 by 3840. Remember, we need to keep
this like a square number. So 3840 by 3840 over here. JP, I like to set my samples often quite high to like 1024. And once again, my
denoise strength to 0.9. Now that this is done, the
last thing that you need to do is you need to choose which
camera you want to render. By default, it renders
the main camera. However, if we just go to
render cameras, art Nu, we want to select camera one and deselect or even remove
the main camera. At this point, our
scene is ready to go. We now have everything
set up for lighting. We have everything
set up to preview material and to
create our images. Last thing to finse
off is just go ahead and press
render image up here, and then it will
render our image, which will be left in here. Because we set our
settings quite high, it might take a second
to render out the image, although it's not too
loud or not too long. I do hope that, of course, you don't hear my computer
in the background, which starts, like, boost
up the fans at this point. But with this almost done, we can enjoy a Wi high
resolution image. And then we will go ahead
and end this chapter. Come on. Do I really still
need to pass it after waiting? Okay, I'm going to pass
the video until it's done. And literally like half a second after I passed the
video, it was done. Anyway, let me open up this
image, and there we go. So that's looking pretty
good, if I say so myself. So whenever you
look at this image, then you can really see the stuff that we might have missed. So if I can see here, the stuff that I feel like
we have missed is that the base noise is actually
too strong right now. So from a distance,
it looks fine, but I want to tone it
down a little bit. For the rest, all of
our other details are looking pretty good. And I think when we
have a base color, it will look even better and
our roughness, of course. So I'm just going to
go to my norm map, and I'm going to excet
this to like 0.07 for now, or maybe like 0.08
to tone it down. And that's all. Okay, let's
go ahead and save a scene, and in the next
chapter, we will go ahead and continue
with our base color.
51. 30 Creating Our Concrete Material Part2: Okay, so we are now going to get started with
our base color. So for our base scroller, what we will mostly be doing is, yeah, we will capture the base. Then we will add a few dirt
layers on top of that. I'm not sure if we should get this detail because
it feels so specific. So when we start repeating
this over and over again, this texture, it might
not look very good. But, yeah, we can
definitely get maybe, like, some more of like these
leaks and stuff like that. And, of course, we will also
have some dirt in between, like, all of our little dots
and that kind of stuff. So in general, we'll
see how far we get. Now, let's get started.
Let's move this over here. So for our base color, what I like to do often for concrete is I like to use something
called a gradient map. With a gradient
map, what you can do is you can basically map colors based upon the gray
scale of whatever you input. So if we go up in texture, and one of my favorite ones is the B&W spots to over here, because it looks really sharp, as you can see, we can plug this in and now
we can map the colors. Just to show you as an example, if we click on the
gradient editor, let's say that I
click once here, you can see that it
creates three points. Now, everything
that becomes black, I can, for example, make red, everything that is mid gray, I can make blue, and everything that is
white, I can make pink. So that's the general
concept behind it. Now, of course, we
won't be doing this, so we can just press clear. But what is really
nice is that we can actually pick our
gradient over here. And if I just go ahead and hopefully I can do this
on the same screen, and let's try to find a default. So I guess over here
is like a default. You can press Pig
gradient. That's too bad. I can't show you on my screen, but you can basically
click and drag, and then it will grab whatever we click and drag on
in terms of colors. So what I will do is
I will click and drag roughly in this area to
capture those colors. But I can show you because yeah. So what I'm going to do is I'm just going to quickly do this. And here you can see that, yes, it already gives us a base. I don't like it yet. So let's try to find a different area.
Maybe like over here. Let's try around this area. And I basically try
to capture a bunch of times until I get something that looks a little bit similar
to what I was hoping for, which I want quite a
few notes up here. So right now you can see
that we don't have too many. I want to go for,
like, quite a lot. So let me just try
and because that way, it becomes a little bit
more like a harsh noise. H, it's quite difficult to
get the stuff that I want. I will just let you know after
where I end up dragging. No, but we're getting closer. Just give me 1 second.
This always takes a while. But this is the
most important one because it's literally
like your base color. So you want to make sure to grab something that looks
visually interesting. Although, right now, I'm having quite a bit of trouble
getting exactly what I want. But, yeah, we definitely then
will need to rely on, like, a dirt layering on top in
order to get a better effect. Let's say, something like this. Yeah, let's go for
something like this. And what I basically
did is I went over here and did like
a lot of drawing? I guess what we can
do is we can also try over here a little bit more, just to be sure to just
grab a different image. But remember that we were
also going to go ahead and go for a little bit more of
like a whitish concrete. So that's something we
would want to keep in mind. Okay, so now we are getting a little bit closer to
what I was looking for. So just give me one more second. Honestly, sometimes I can do this for like ten, 20 minutes. But for now, I will save
you guys like the effort. Okay, let's do
something like this. I end up going to
this image over here, and I end up drawing it
roughly around this area. So, okay, we got this stuff. Let me just move my
reference back over here. And now we got, like, a pretty solid base
to get started with. Now, what I want to do with
this is I want to have, full control over the
color because, remember, we want to go for something
a little bit more whitish, like you can see over here. I do want to grab
this type of texture, but I just want to make it
a little bit more gray, blue, white. Kind of colour. So what I can do is I can
add something that is called a replace color
range over here. With this one, what you can
do is in your source color, you can grab the color
picker and just grab one of the most used colors
in your gradient map. Then in the target color, you can click and just
click on the source color. What that will do is it will just leave everything default. Set your source range up, and now if you go into
your target color, you can go in and
you can actually just if we go, for example, like blue and stuff like
that, we can go in and we can add some small changes. So let's just go ahead
and make a little bit more of a white or
concrete like that. Yeah, I do want to get, like, a little bit of blue. So maybe I can just, like, move my blue color over here, see, to, like, very carefully make it like
a tiny bit more blue. Let's do 166 over here in the B. So yeah, and just go for, like, a color that you like. So I'm quite happy
with this color. Now what I'm going to do is
I'm going to get started with my colors that are derived from the grunge
maps that we created here. And after that, we
will overlay colors. So let's start with
an easy one which is going to be like our
lines over here. What we can do is we
can actually go for something a little bit more
interesting for that one. Let's create a blend. And now we do need to have a color
to plug into the top. All school ways would be to press space and art
a uniform color, which is like a plain
color over here that you can make a
little bit brownish, and that way it
would create a dirt. However, this one most
likely doesn't look as nice. So instead, let's just go ahead and duplicate our
grading map over here. And let's capture it from, like, a really dirty part like
you can see over here. We can capture some
interesting looking dirt. We can hopefully then use. So if we just capture because
we need to do this anyway. So I'm just trying to perfect. That I really just
like we zigzagging, quite a lot on here to capture as many
points as possible. So now we instantly have,
interesting looking dirt. It's not like a plain color, but it looks just like
a little bit better. So, okay, the ones that we want. Sorry if I need to switch back and forth a lot, I
do want to show you. Let's get started with, like, so we have some waves, and then we have, these dots. And after that, it is
mostly going to be like just some Geno dirt. I can see that we also have
maybe some unique damages, but we can look
into that a little bit later when we polish things. For the waves, what you
could do is you could simply just drag this
in here and plug it in. And yes, I guess that does work. However, it will not
be as interesting. So instead, what
I like to do is I like to add something
called a shadows note. With this, and I will
show you a trick. So let's say that I want to grab this value over here and I
want to plug it in here. I can hold Shift, and
then I can switch it. I can also hold control, and then I can
duplicate this plug in. So with our shadows, what we can do is we can give it some downward facing shadows, maybe set these samples up a bit and give it quite
a low look like this. This will just give us a
little bit of a fading effect. Then if we press space in art invert gray scale just to make it white
and plug this in, you can see that this
already starts to look like a little
bit more interesting. It's also a bit softer and just in general, it
works a bit better. We can then use
our passe to maybe tone it down a bit because
I want this one to be very, very soft like this. I then can go ahead and
I can add another blend, plug in the same dirt. And this time, we
want to go for, like, our larger details that
we have over here. So just simply grab these, plug them in here, and
tone down the passe. This dirt over here, it's really sensitive in
your base color, so you don't want to
make it too strong. We plug in another
blend, and this time, I want to go for some of the more grainy detail
over here, see? And we can once again
tone down the opacty. So we can slowly start adding more and more dirt until we get something visually interesting
looking. Let's see. Okay. So at this point, what we can do is
we can start with some more overall
dirt and grunges. I can see over here that
I want to go for, like, something that is quite soft and then also something
that's quite strong. Do not make stuff like this because this is a
tile bomb material. We will repeat it. If we make really strong
stuff like this, we will be able to
see the same stuff over and over and over again, and it just doesn't look good. So you want to try and
keep everything as generic as possible so
that when you press space, you don't see, like too intense repeating like you
can see over here. Like it's not too
intense right now, especially not when
we add more dirt. So let's add a soft dirt, a harsher dirt, and
some like water leaks. For our soft dirt, we can plug in our blend, and we simply want to
go for a grunge map. Now, the one that I
often like to use is the grunge 013 over here. And then I like to send
my contrast all the way down and then play around
with my balance a bit. This one is quite cool
because it gives us this really soft undertone
as you can see over here. Is this looking the
way that I want? You can also try Grunge map 01, tone down the
contrast and balance. And then what you
can also do quite cool is that if you
don't like the patterns, you can play around
with your random seat to change the patterns. This one looks a bit better.
So let's use crunch map 01, and I just change my seat to one that has not as much white. I then can go ahead and I can play around with my
balance a bit more. See? And that way, we can create some quite interesting
looking crunches. So let's do this. And once again, go into
your opaste of your blend, tone it down. There we go, see. And then I like to
sometimes press space to just make sure
that it's not too intense. Okay, so maybe make it a
little bit more intense. It's already starting to
really look like concrete. That's really nice.
So we got this one. Now what I'm going to do is
I'm going to, let's see. It has some more, like, streaky details also that are
a little bit stronger. I happen to know that we have another grinch map that
we can use for that. So once again, we
plug in our dirt. If you want, you can
also, of course, change the colors
of your dirt and stuff like that to
give it more balance. But there is this one,
the Grunge map 02 often. And now let's leave
that one for last. The Grunge map 02, you can see that it has
some direction to it. You also have Grunge map 03 if you want to have
even more direction. What we can do is we
can grab crunch map 02, lower down the contrast
and balance to give it some more dire
directionality, and then we can add
a transform node. In your transfer node,
if you just press the 90 and doesn't really matter
which one over here, we can rotate this by 90
degrees and it will still be perfectly repeating and then
we can plug this one in. So here can see that
now we get stronger, and let's bring this one out
a little bit more to give it some stronger
streaking over here. Another thing that you can
try to do if you want, but I don't recommend
it too much is you can try to it's called shift. No, not shift. Control shift. Control shift to
extend these out. And then you can see that
the streaking becomes more. However, whenever you do this, you break tiling,
as you can see. A quick way to fix
this if it's not too important is to add a
make it photo gray scale. So if you just type in make, and that one will kind of
make it tilable again. And then you can just go ahead
and let's say that we set our H down because our H was
already maybe a little bit. And then play around
with your warping amount to make the warping
softer or stronger, play around with your mask
size and that kind of stuff. To basically make it blend a little bit better, and
then once that is done, here you can see that
now we have a little bit more of the stronger
streaky effects. Now, next one is
going to be some of not this rain but
some of these type of, like, leaks over here. And if we want, we can also add maybe some cracks later on, but that's something
that we'll have to have a look at in our polish. So first of all, I want to
really get like a base. So for our leaks, these stringy leaks
what we can do is just give me a second
because I'm just having like a think stringy leaks
that are warping around. That one is a bit more complicated if
we don't use a grunge. There's a few ways
that we can do this. I'm just thinking of,
like, the best way. So one of the things that we can do is we can see if we have one of
these grinches. Often, for the base color, gringes are often best. They are often working like the easiest to create
like some leaks. So yeah, I guess we can play around with
this leaks intensity. Leak scale. Yeah, I guess we can play
around with this one. Let's also just have a
look at this one, Leaks. These are quite new these notes, so I'm just playing around
with it because I don't know them yet quite perfectly. What I want to do is let's say that we grab this one, actually. Let's grab this one,
but I want to make my leaks a little
bit more intense, so I want to manipulate
everything a little bit more. So let's set our
length really high. Let's set our Christmas quite
high over here like this. And now what I'm going to do is I'm going to
add some blending. I'm really trying to keep this as simple as possible because, of course, it's a
beginning to toil. With substance, it's really easy to go way over the
top complicated, and I could literally spend like 20 notes just on
some perfect leaks. So to keep this simple, what I'm going to do is I'm
going to blend this together. Using a anostropic noise
that we've used before. However, for the
anostropic noise, just turn on rotate to rotate
it the other direction. Throw this in here and blend
this as like a multiply. So here what you can see is now it already starts
to streak out. What I'm going to
do is I'm going to set my wire mount a little bit lower or higher. Sorry, a little bit higher. And then what I'm going
to do is remember that slope log racecal
we got from here. Just copy it. Paste it in here. Plug in your endostropic noise in the gray
scale to give it some very quick variation
and babysitting intensity, a little bit one, five. There we go. A
little bit stronger. Okay, that's too
strong. Let's do 0.1. Okay, so that will already give us a little bit more of
these streaky leaks. And what we can also
do is you can also play around with your
levels if you want to make it more or less using a
hist gram scan. So a look. Okay, so now we have these
really tricky leaks over here. Now what I'm going to do is
I'm going to just press D to dock my histocum scan to keep
everything nice and clean. And now I will add some probably some direct multidirectional warp grayscale. And I want to basically give them a little bit of,
like, this warping. However, I have a feel that we need to have two
types of warping. So let's do two multidirectional
war gray scales, one big one, one small one. For the big one, what I like to do is I
like to see if I can reuse one of these notes
because the more notes you use, the slower your scene
will start to run. This is something I won't
go into right now because it's a little bit too complicated
for this kind of stuff. But it's something
that if you can, you would want to reuse notes. This one doesn't work. Let me
just try this Perlin noise, and else I will create a new
one because purlin noises are not that Strong. Yeah, this one will
probably work. So that will give us some
general warping over here. And now what I want
to do is I also want to like out
some micro warping, for which I like to
use, for example, like a Clouds two, plug this in here and set the mode to
get started to minimum. Let's see. Do I want to do like one direction or do
I want to go for, like, You can also play around with your angle to give it a bit of direction. Let's go for four directions. And now you can see
that over here. I'm just playing around
with my density bit more. There we go. So that gives us some more stronger
leaks like that. So let's see, is this
still clean enough? Or do we need to clean it up? Now, we should
have enough space. So let's plug this into the top, plug in our dirt. And now you can see
that we start to get some of these leaks in here. It is up to you
how much you want. Mostly, or what you
can do to increase it is to play around your
balance over here, see? And then we can
increase the amount. Or you can do that trick that I showed you before over here, where you grab a transform and then blend those two
transforms together. So now we get some
of these leaks, which are looking pretty good. Is going to tone
down my intensity a little bit over here. And yeah, I quite like this. I'm going to go ahead and
I'm going to right click Ara frame and call this
base color over here. Next, what I like to do
to keep things simple. So I do want to, like,
add a few small cracks. However, making these cracks from scratch that is
quite complicated. So instead, there
is this website. And it is called
substance Share. You can literally go to Google, type in substance Share and get the first image or the
first link over here. In here, you can
find a lot of stuff that other artists
have shared with you, everything from materials, but
also to interesting notes. So what I can do is I can go in here and I can
type in cracks, and hopefully it still exists the one that I wanted to use. So, oh, I'm afraid that
if it doesn't exist here, I will give it to you guys. Normally, it used to be in here, but, maybe if I type in crack. It used to be like a
generator that we can use. But to be very honest, I'm really disappointed
to see that it's not in here. The website is new. That's why it's not
in here anymore. In that case, what I will do is definitely have a
lookout substance source. It's still quite
good. In that case, what I'm going to do is
in our source files. Let's do in other. I will overhear. I will
place our rack generator. Give me 1 second. Here we go. And it is called the
Bruno crags generator. I assume it's made by
an artist named Bruno. You were able to
get it for free, but it looks like that I
can't find it anymore. Basically, if you just
drag in this note in here, you can see that it's a
note that's really handy to very quickly generate
some cracks. What we can do is
we can actually expand because we can
also have these normals. If we go into this node, it does always spread from the center, so it's not perfect. But what we can do is we can basically play around with
the length over here, which can give us an
interesting crack. Play around with
the edges fading, which will give us some fading. So it breaks up the cracks. The spreading over
here is quite good. So it basically removes some of the cracks so that
they are no longer attached. And then what I like
to do is I like to set my distance lower. Let's set my edge
fading to be actually, yeah, let's leave the edge
fading all the way to zero. Play around with your length
a little bit more to make it less. How you say it? Yeah, to make it feel
less stretchy, I guess. I'm just going to turn
off the were for now, and I'm just going
to go ahead and set my softness a little bit lower over here to make
the quacks really sharp. And then I like to set
my spreading also down. So over here now we get
some general quacks that we can base things off. Now, next, what
you can do is you can go up here into the were. And if you turn this on,
you can find the samples, which I like to set
all the way up. You can choose a
custom ware noise for which I like to use the
clouds, too, for example. Maybe a smaller one, smaller
clouds, too, over here. And then you can set
the wear intensity. And here you can
see that it will basically do a slope blur, the same one that
we used over here. It will just do a slope blur, and it will give us
some interesting wearing on our edges. Now that you have this
one, I'm still not happy with it because
it's too uniform. We have too many cracks
in too many places. So what I like to do is
I like to blend this. And because the
cracks are black, all I have to do
is I have to blend this using a uniform color. My uniform color, right now, you can see that it is orange. If I would plug this
in, we get an error. This is because all
of these notes, height map nodes and
grunges are grayscale. You can see it by the color. This is also why norm maps,
you can see that norm maps, they go from grayscale
to color because they are turned into
something that needs color. So what I'm going to do
is in my uniform color, I'm going to click
the grayscale button. And I'm going to set this
slide all the way to white to make it a simple
white uniform color. Now we are blending this
and you guessed it, we want to blend
this using a map. What I can do is I can grab maybe my grunge
map 001, actually. And if I add the
histrum scan to this, I can use this one because these grunge maps
are often quite heavy to render in this graph, and I can basically use this
to blend out my cracks. Doesn't seem to do
much. Let's try. Oh, yeah, okay,
so here. So let's push up our position.
There we go. So now we have a few cracks. I don't know if they
are too big yet. If they are, we can always tone down the
distance a little bit more until they're a little bit smaller.
Let's actually do that. Let's set the
distance to like 32. Play around with my RM scan
maybe a little bit more. And when you are happy with it, what you can do is you can add a normal note and
set this to open GL. And now we can see that
we have our cracks. What I'm going to do is I'm
just going to go back into my crack generator and set the softness down
to maybe like 0.2, or maybe like 0.1, to make
it like wy tin cracks. And then, of course,
in my norm map, I'm also going to make
these really soft cracks. So like 0.04,
something like that. We then just drag out our normal combine over here and add another normal
combine at high quality. Plug in your cracks. See? So now we also get some small
cracks here and there, which you add a
nice extra detail. I can then go in here and
remember how I said that I wanted to do the
base details before. So I'm just going
to go ahead and add a blend in between here. Drag in our dirt and
simply drag in our cracks. However, we need to invert them because we need everything that is white will become dirt. So invert gray
scale your cracks. Plug these in here. See? Now we also have control over
our cracks over here, which is starting to look
quite nice. Okay, Awesome. I think at this point, I have a pretty decent base color that I can use to start previewing and balancing
inside of Marmoset. However, before we do that, what I want to do is
I want to generate a base roughness because the base color and
the roughness, they really go hand in hand, so you often want to
generate them together. Generating a base
roughness when we have a pretty decent texture like this inside of designer
is not too difficult. What I like to do is I
like to add something that's called a gray
scale conversion. Roughness maps are grayscale because they don't need
to contain any color. What I like to do is I like to grab pretty much my base color. Let's grab let's see at which point that
I want to grab it Probably at this
point before we add the dots. And drag it in here. So this is going to be
like our base roughness. All we have to do
is we have to add something called a
histem range this time, not scan, but range. What this allows us to do is
it allows us to both soften, over here our texture, so we can make the roughness
less or more strong. But more importantly,
it allows us to also change the overall value. When something is white, your roughness, it
will look dull. When something is black, your roughness, it will look shiny. This concrete, it is quite flat. If we have a look over here
at the roughness response. It looks quite flat, so we don't want to
make it too sharp, but it still has a little
bit of shine to it. So what I'm going to do is
I'm going to set my range. Actually, I'm going to
leave my range around 0.5, and my position, I'm going to make it a
little bit whiter to maybe like 0.6,
something like that. Now what I'm going to do is I'm going to start
blending in my noises, which will all have
different ranges. So if we just like a bunch of blends by pressing
space multiple times, the first blend is going to be our let's basically
add a blend over here. And let's blend our large dots together with our small
dots using an art. So now you can see
it's almost the same as using a normal combine. I want to go ahead
and these two noises that we have blended together, plug them into my blend and set the blending
mode once again to art. Remember, white means dull. So these will now look
like a little bit duller. So play around with
your opacte like this. Next, what I like to do is, I like to go in here
and have a look, so I can see that
this one over here, track this one also
in here in our blend. Just drag it straight into your blend. Let's
set this to art. Let's make this also quite white to give it some dullness. Then what I like to do is
let's add another blend. I like to grab some
of my grunges. So we have this
grunch over here, which is like a very
soft overall grinch. Let's set this to
art. Here, see, so this will give us some
overall roughness variation. And then what I like to do is, I like to probably
skip the straight ones because else we have too
much and grab some leaks over here and set
these leaks also to art to give
them some streaks. There we go. So that's already
like a base roughness. We most likely need to make
quite a few changes to it, but it's like a solid base. Right, click the frame. Just make the frame a bit
bigger and call it roughness. I hope I'm not going too fast, just blending, but yeah, it's litty just blending these two together using
a blending mode. And these blending
modes you will be very familiar
with if you've ever used painter or Photoshop
or anything like that. Right, click and save My scene. And these two, we can leave
for now because they are mostly for when we
create our tiles. Awesome. All of these
textures have now exported, because everything is still
set to automatic export. We can go into Mamset. Don't
know why that's hidden. And then what we can
do is we can set our color back to white. Now, if we go to our folder, over here, textures,
concrete main. We can start by dragging
in these pieces. So base color and our
roughness over here. Great. So let's have a look. So this is what we
have right now. Okay, so it does look like
concrete, definitely. A few things that I
notice is, first of all, I want to set my lights a bit brighter at this
point over here. So now because now we can handle that brightness since
we have our concrete. So let's set my lights
a bit brighter. Boost up these lights also to give them a little bit more, like a stronger
rim. There we go. Okay. So that's looking pretty good, what
we have right now. Let's play out with
my sky a bit more. So that we have a solid base. That's basically what
I'm looking for. Let's do something like this, and then let's go into my
sky that set my brightness, a little bit stronger. There we go. And what you
can also do your Sky, you can also set the mode
from ambient to color, and then you can choose
your background color. So we can just go for, like, a really neutral background
color, something like this. Awesome. Okay. So having
this. Let's go ahead. And start balancing everything. So the first thing that I
notice is that I probably want to make my overall
concrete a little bit lighter. Let's go ahead and go
back into designer. Let's go all the way back
to our overall concrete and set the target color
a little bit whiter. Then we don't need
to run through this entire note and balance out our dirt based
upon our new brightness, because now, of course, the dirt will look a little bit darker, so I'm just going to go in
here and just in general, tone down the dirt,
a little bit more. This one I'm actually going to tone down a little bit more than here we go the previous. And then we have our
leaks, which we can keep a little bit
stronger over here. Okay, so that is that one. See? Looking a little bit whiter, that's
already looking good. Our leaks are a little
bit too strong, so let's just go ahead and tone those down a little bit more. And what I also saw
is that my roughness, it feels too plain right now. So what I'm going to do is I'm going to go in my HCRm scan over here and I'm going to set my position a little
bit darker, actually. And then we just can go
ahead and go in here and just make sure that
this looks fine. So let's go for a little bit more like a strong roughness. Now we can start to see a little bit of that shine
that we have over here. It is starting to
look pretty good, and this is why these lights are also really handy to use. However, I'm still not
completely happy with it. I think I'm going to
make it even darker, my base over here. But then what I
might do is I might make my base a
little bit darker. But then I want to art another
one of our dirt notes, which is this one over
here, the streaks. Let's go ahead and
add that one to basically balance things out
a bit more and bring in, like, a little bit
more dullness again. Okay, so that's starting
to look pretty good. So we got that one also done. I'm just going to
quickly go in my camera, and I'm going to go ahead
and go into curves, and I'm going to make my
dark curve over here. I don't want to
change it too much. I often want to try and keep it a little bit
in, like, a wave. Don't know if I can maybe, like, play around
with my contrast to, like, tone it down a bit. Just trying to be, like, really careful
because I don't want to ruin the lighting. And this one
basically gives you, like, your highlights,
as you can see. Okay. So let's do
something like that. Not too dark. We can still
play around with our sky. There we go to give
something interesting. Okay. So the next thing
that I would say is that those little dots over
here, they are too strong. I'm not sure. Oh, and
also our larger specks. They are also not strong
enough and they are too dark. I think they are
basically too small now. So what I'm going to do is in
my larger specks over here, tone down the intensity. And maybe what I want
to do is I want to, like, increase the size of them. So we have our spots over here. Let's go ahead and just for now bypass the transform that we
used to scale these down. And what I want to do is I
want to probably go into my flood fill or my
hiscumscnsi and, like, increase the amount
a little bit more. So we had that one,
and then there was like these I think
it's these ones, these dots over here
that are way too strong. Yeah, here, these ones. So let's go ahead and tone
that down like this. Go back. Okay, so that's already
looking better. So we got these bigger
chunks over here, which is looking good and
everything is a bit softer. Next, I would say that I don't
see my cracks really well. So I'm just going to go ahead
and this is basically it. It's just us. We now have laid down all
of our foundations. So now what we're going
to do is we are simply going to improve upon them. So let's set this to like 0.07, and then you can see that's
where we switch back. Here, now we can
start seeing a bit of those cracks, which
is quite nice. And maybe my base color, I can also enhance the
cracks a little bit more to bring them
out a little bit. Oh, sorry, that's
not the cracks. Do we not have the cracks
in our base color yet? Huh? I swear we did that.
I swear we did that. Oh, wait, yeah,
yeah, here we go. What already thinking like?
That looks quite strange. Okay, so this one? Okay, so it's starting to definitely
look like concrete already. Okay, so we got, like,
some sharpness going on. We got some cracks
going on, looking good. Let's go ahead and just play around a little bit
more with my lighting. To maybe make it
like a little bit from, like, a stronger angle, just to give a
little bit of, like, that typical artistic
lighting feel. Let's go for something like
that. That's probably good. Okay, so that is
looking pretty good. We got some overall
dirt going on. I feel like at this
point, what I want to do is I'm going
to save my scene, and I'm going to
render out an image so that we can look up close. Once you get Willy close to
finishing your material, what I recommend is like
render high quality images, which show you like
the true resolution. And once you've done that, you can keep zooming
in and then you can, just take off all the points
that you want to change. And yes, it does
mean that you need to work blind a little bit more. Because you won't be rendering an image out for
every single change, but it definitely gives you, like, a really good foundation. So let me just pass the video
until this one is done. Here we go. So
that has finished. So if we open it up, we
started with this one, and now we have got this. So that's already
quite a big change. Okay, let's zoom in
and have a good look. I really like the
sharpness, actually. Yeah, I like that. So we also
got some slashes over here, which is actually pretty good. These slashes, they come
from, like, our micronise. They are not like the cracks, which are also
looking quite good. But yeah, they come
from our micro noise. So in general, it has a, it has like a nice balance. I want to probably
make these dots over here a little bit
stronger in our normal map. And maybe a little bit less
strong in our base collar. I'm going to make my cracks
a tiny bit less strong, and I'm going to maybe make my noise over here a
tiny bit less sharper. So let's say our dots over here. Let's make them a
little bit less. Go into our dots.
This one up here. Let's set this to 0.16 to make
it a little bit stronger. It's going to our cracks, and that's set to 0.05 to make it a little
bit less strong. So we had those things done. Oh, yeah, our general noise I wanted to make that a
little bit less sharp, which is this one over here. So that's set the
sharpening down to, like, 0.1 maybe. Uh, let's see. Is there anything else that I want to do before I call this like a really good
looking concrete, especially if you
are a beginner. Like this is quite a salt
looking concrete for, like, the amount of work that we did because we didn't
do that much work. Maybe what I want to do
is I might want to see if I can make my leaks a
little bit smaller. So we have these
leaks over here. They are quite large right now. So I might want to simply go in, and I don't know if I want
to do that after my details. I probably do. I probably want to
start a transform after everything and then
set this to minus two. But it does create
quite a bit of tiling. However, in our leaks, we don't really
have any control. So we can try to do it here. So let's do a transform and
set the leaks to minus two. Which does create some tiling, but hopefully the tiling gets broken up by all of our
directional warping. I can still see the
tiling a little bit, but it's not as bad. Also, what you can do is you
can also play around with your random seat to try and find some leaks that are
less intense like this one. This one, the tiling looks less intense if you press space, see, compared to some
of the other ones. Okay, so let's see
what this looks. So, we have our leaks over here. Yeah, it looks a bit better now that it is minimized, I think. I don't know if
52. 31 Creating Our Concrete Material Part3: Okay. So now that we have our base concrete
over here done, what we're going to
do is we are going to go ahead and create
our concrete tiles. These are not going
to be too difficult. So what we want to do
is we want to try and capture these tiles that also have like this
little bit of, like, grout pushing out of it. And for rest we just
want to give it some damages and just
some overall variation. So the first thing
that we need to do is we need to
generate our tiles, and at this point,
we can also choose how do we want to
generate our tiles? I think we do want
to go for horizontal and we want to go for
quite long tiles. So if we go into our
patrons over here, for this, I probably like
to use a tile generator, which is a really useful
generator node that will allow us to place a
bunch of different shapes, including really large tiles. I like to set my patron
over here to square, which will make it
perfectly square. And there are a lot
of settings here, but you don't need to
worry about too much, scroll down to size and lower down your size so that we can actually see
what we're doing. Now if we scroll all the way up, we can set the X
and the Y around, and this is where
we will be able to basically set
our tile amount, so we can go for
something quite large. Maybe Let's do two by
five, something like that. The next thing that we
want to do is we want to, of course, improve the
space in between here. We can start by going
into our scale, pushing it out until it gets
to quite a decent point. So I don't know, this feels still a
little bit too much. Let's do 0.995 maybe. I want this to be
quite a thin line 993. Let's do 0.992 over here. Now, what you can see this often happens with these
type of tiles. It is able to do the
scale over here, but because we stretched it in an uneven number
like two by five, we are leaving a little
bit more space over here. We can simply fix this by
going into our inter ste. I hope I said it
correctly, and set this to like -0.05, for example. Okay, Thesho be way lower -0.01. I guess even lower,
-0.005. There we go. -0.004 Let's do -0.0 045. It's really sensitive,
but I'm trying to get quite an even number. Okay. Awesome. So, we now have
our base styles over here. Now what we can do
is we can give it some large scale variation
because these tiles, just like with models, they are never perfectly
square in real life. There's always, like
some variation going on. So what we can do is we
can just add a let's do, like, a multidirectional
war grayscale. Set the directions to one. And then what we can
do is we can grab this really large purlin
noise that we've used before. Let's go ahead and
set a angle to, like, a slightly angled version like 45 degrees or something
and then simply play around a little bit more
with your intensity to give some very slight
warping here and there. There we go. Okay, awesome. So now that we have this one, the next one that
we are going to do is we probably want to generate the grout that you can
find in between here. So because I want to
have the grout sticking out of my this and we do also
need to add some damage, but that comes a
little bit later. What I'm going to do is I'm going to go ahead
and I'm going to add a histogram range,
and I want to do this. So I'm going to set
my range all the way up and then I'm
going to set my position down to basically
make my tiles a little bit darker
because fill white, you cannot go beyond fill white. So because these ties
are already fill white, we would not be able to
stick anything out of it. However, if we make it
like grayish like this, then we are able to add some whitish details
in between here. Next, what we can do is
we can use a slope blur, not a slope blur grayscale, a non uniform blur
gray scale over here. And with this one, what I can do is the same technique
as I've used before, but this time we probably
want to invert it. You want to plug in this in a non uniform blur gray scale, the same notes, set the samples and blades
all the way up. But this time in your blur map, select that line and add
an invert grayscale to it and now play around
with your intensity. So what will happen now is
that we are able to add like this little a bit of
softening in between. So once we've done that, what we do want to do is we
want to mask it out. So if we blend this
using before we add our non uniform blood grayscale and set this blend
to be like subtract. So now you can see that now we get like these grout lines, and hopefully we can use these to create some
interesting effects. So what I want to do is I want to have my
hiscum range over here. I'm going to blend
it using this note. Now, I can try to
simply press art or maybe a Max Lighten.
Let's do an art. That might work, but we might have some problems with
these lines over here. If I add, for example, a norm map and I set my
direction to open Gel, this is what I mean, I might not always be
completely perfect. Let's have a look. If I go ahead and add a hist Cam scan to this to maybe push this out a
little bit more, let's try. Here we go. So we push this out. But not too far,
something like this. Yeah, that might cause for
an interesting grout line. So we might want to go
for something like that. So for now, this is
something we will need to see inside of Mum Setubg. So for now, what I can do is
I can leave it like this, and now we can go ahead and start working on
some other details. So we got our grout
line over here. Another thing that
I want to do is in my hcrm range over here, I want to add a
slope bl grayscale, and I want to start breaking
up my edges a little bit. We can start with the slope bl grayscale and set
the mode to minimum. Samples all the way up,
and have we already used a moisture noise by any
chance? Don't think so. In that case, I'm just going
to go to my noises and grab a moisture noise over here, which is a great one
for edge damages. And then if we go to our slope, we can lower our
intensity a little bit. 0.01 to give it some
overall small chips. And what we can do
is we can also add a multidirectional
warp gray scale, set the mode again to minimum. And this time, grab our
clouds, too, for example, set the directions to Here, you don't even have to set
the directions to one. If you just keep the
value quite low, it adds and damages. Maybe try average. No, average definitely
doesn't work. Let's try two. I just want to break up these lines a
little bit more like that. Okay. I'm going to add Hmm. I'm going to add another
multidirectional warp gray scale before a tile generator, and maybe we want to once again grab a Cloud two over here. Set the directions to one, and setting density lower. So I want to kind of, like, try and break up our original
lines a little bit more. I feel like that this cloud two is actually too
large, in this case. So what I can do is I
can add a transform in between over here, and I can press X two
to scale up my sorry, I meant that it was, like, too small to scale up my clouds. And then what I can do
is I can play around. Yeah, that looks a
little bit better. Now, this is no longer tilable. So what we need
to do is just add a make it tile photo gray scale, and the clouds to
it's very easy. So you don't really need
to change any settings. Just press D to dock
it, and there we go. Now we have some more
interesting looking damages. So we warp it, we warp it some more. We balance it out. We are two damage variations,
we blend it. And now the only thing is
that the grout over here, we might get some
problems with that. Or might not. It
kind of depends. So we now have a grout in here. The first thing I notice is that my slope blow gray
scale over here, I want to s is a little bit
lower. So let's do 0.05. I don't want to
have it as intense. And in general, I think
that's looking pretty good. So we already get like
something out of this. Yeah. I think that
can work pretty well. I'm just, like, having an
extra look around. Yeah, see? So yeah, we get, like, these
damages and stuff like that. So I'm going to keep it simple. I know that over here,
I can see that it's, like, peeling out and
that kind of stuff. However, this might be
a little bit overkill for what we are trying to do. So for now, let's
go ahead and art another frame and call
this tiles over here. So we now have a
norm map in here, which we can, of course, art. However, we are
going to do this a little bit different because we want to have both a plane
and a tiles concrete. I want to add something that is called a switch color over here. If it is false, we will have the plane,
and if it is true, we will have a let's do
this, a normal combine That combines our base normal
with our tiles over here. See? So now it looks like that, so that already starts
to look a lot better. We might need to work on the
grout a little bit more, but that will come when we
arrive inside of Momset. And now the cool thing is
that with this switch, we can turn this
on and off, see? Now, I will show
you later on how to use this even better, but for now, just
plug it in here. And what we also have is we have a height map and an
ambient occlusion. The height map can simply
be this map over here. And the ambient seclusion, if we type in ambient
occlusion and grab the RT AO, which stands for rate race AO, what we can do is
we get hold control and also plug in the height
in our ambient seclusion. This will generate a very
nice ambient eclusion for us and we can
play around with the max distance and with the height scale and
maybe even spread. Now, let's leave the
spread. Let's set the height scale to 0.01, two, something like that, to give it a little bit of AO. Now, having this done yeah, there's one more variation
that I might want to add, but I don't know if it
will be as visible. And that is that if we go to our let's go to our
Hcrum range over here. What you can do is you can
add a flood fill note, which we've used
before, and we cannot plug in this one
because this is not white and black, this
is gray and black. You want to plug in your
multidirectional wall, which is perfectly white and
black into your flood fill, so it's able to generate. And then you want to add
something that's called a flood fill to random Oh, no, sorry, flood fill
to gradient over here. The cool thing about
this is that you can turn on angle variation and you can generate different
gradients for every tile. Remember how I said that white means something sticks out. Black means that
something pushes in. What we can do with
this is if we just go ahead and give it a
quick blur behind it, Sorry, my doorbell rang, so that's always annoying
during the recording. Anyway, let's add a blur, high quality grayscale
to soften out those edges because
they are way too sharp right now so that
will not look good. Make it nice and soft. And then what we can do is
we can simply add a blend, throw on our blur,
high qualtic grayscale and set this to probably
like a multiply. And then if you just give
this like a very soft effect, what we can see is that we
will get a slight difference, which especially
in our height map, will give us a very slight
difference in, like, the angles of our
tiles over here. Now, you can also use something that is called a flood fill to random gray scale over here if you also want to control the depth of
your tiles because, of course, with these
random gray scales, we can control the
depth of our tiles. But for now, I want to keep
this, like, nice and simple. Do double check that everything is still working
the way that we wanted to. Looks like it does.
The cool thing is also that at one point, you can even try to, like, push out some of these details. I feel like this one is not it feels like it can be
whiter, to be honest. Let's try and play around
a little bit more with my Hitcumske until
it's just above it. Yeah, let's try
something like that. Okay, awesome. So we
have our embuticclusion. We have our height
map ready to go. We do not yet have anything
in our base color to really support our tiles.
But for now, that is fine. The only thing that
we would do is we would like art maybe like some small leaks
and just, like, add some dirt
around the corners, which is not too difficult.
So let's check this out. Let's go over here, and it will instantly have
updated with our tiles. Now, this is looking
pretty good. I would say that the grout
is too white over here. I'm not saying white.
I'm saying white. It's difficult with my accent. Yeah, so let's try and make
that a little bit less, but it's tricky because you can only make it so thin
before it starts breaking. So what I can do is I can
go ahead and set this to, like, zero point, I don't know, 993 or maybe like 994. And then over here, if I go set this to 0.004, let's do 0.004. Does that work? No. Three. Okay, and now
if I set this to 99, five, Okay, let's see
if this is still able. It's the slope blur.
That's the tricky one. Like, these stuff
we can do, but the multi directional or what is it? This one over here, the non uniform blur, that
is the tricky one. That one there comes a point where it's just
not able to anymore. We read the detail. So you can already see
it happening a tiny bit. So I might want to
go for like 0.4, maybe even 0.3 over here to
tone down those details. Now, let's do 0.4. And let's have a look. Okay, so, yeah, that's a
little bit better. So we have our grout
sitting over here. I'm just going to quickly go to my main camera and like zoom in. Okay, so if we would go ahead
and throw in most like dirt around these areas
and maybe make the grout a tiny bit darker,
should do the trick. Let's do that. So let's go
ahead and first of all, to make it a tiny bit
darker, super easy. We can probably do
the grout on top of everything else
that makes it easier. So in here, you can once again, what you can do is you can
add a switch color over here, and we will clean
this up later on. But what we can do
is if it is false, it will use our
default concrete, and then we can now go ahead
and up here, make the rest. So what we want to
do is we want to, and this is another cool trick. You can actually click and drag, and then it will
automatically show you your menu and you can, like, for example, press blend. It's another way that you
can place your notes. So we want to add a blend, and we want to let's go ahead and just add
something called an HL node, which is your hue
saturation and lightness. And if we just plug
in our blend and just set the lightness
a little bit down, honestly, this is
probably already enough. Maybe set the
saturation a bit down. This in the top and then
grab all the way over here our grout lines
and throw it in here. See, that might
already be enough, just like this really
tiny darkening over here. Next, what we're
going to do is we are going to work on our dirt. Now, there's a few ways
that we can do this. So one of the ways, so you have a long way and
a short way of doing it, although there are
multiple ways. One of them is there
is a note that Sliti called the dirt note. I don't know, or
did they remove it? I think because it
was so expensive, they might have actually
removed it. No problem. In that case, what I'm going
to do is I'm going to go for my second option, which is that though
I do want to hear, let's go in mass generators. Oh, no, no, it is in here.
It's just not able to read. So we have like a
du note over here in which you can plug in
like an ambient occlusion, curvature, all this stuff, and basically, it allows
you to generate on dirt. It's like the quickest way. So we can plug in our
ambient occlusion. In order to generate
a curvature, all you need to do is add a curvature node and
plug in your nom map. Although in this case, I would probably only want to plug in my norm for my tiles because I only want to generate
the dirt around my tiles. So you can plug in
this, then what you can see happening
over here is that it will try to apply the dirt around your tiles and
everything like that. You can also do a position map, and another word for position map is a
flat fill map, often. That one will also
often work over here, although in this case,
it doesn't do much. But yeah, basically, this note, it's quite a bit over the top, but you can use it to
generate some dirt. However, I'm going to show
you another technique. So another technique
for that technique, we need the tile generator. But the annoying
thing is that we have manipulated our tiles. So what I will most likely
need to do is I need to grab this one over here, this one, add a histogram scan. And the reason I want
to do a Hcraum scan is to push this back into white, like you can see
like that over here, so we push it back into white. And now what we want to
do is we basically need to create like a gradient mask. Unfortunately, this is the
one that we need to create. So normally, you can go in your tile generator, and
you could literally do it. It's, let's see, this this one. This is the one that we
want to create this shape. However, the annoying thing
is that we changed our tiles. So we cannot just grab a tile generator and
change it around again. A bit of like an old school
technique of doing it, although it is a
little bit more of a lengthy technique is that you grab your Hcram
scan like this. You throw on a flood fill and make sure that
it works, yes. And then what you don't
want to do is you want to do a flood fill to gradient. Now, as you can see over here, it's already giving
us one gradient, and all we have to do,
Wi is we just have to go ahead and copy this four
times for every angle. Like this. And then we go so
this one is zero degrees. This one, we can set the
degrees to like 90 degrees. This one we can set this to
-90 and this one to like 180. So we basically have
these four nodes now, and all we have to do now is we have to blend them together. So we plug in these two,
and we want to blend them. I always forget
which one multiply. I think it also multiply, yes. Yeah. So let's plug
it into multiply, Blend again and again. So both of these we can set to multiply And then we can go ahead and we can plug
in these notes over here. Now, this is what we have
right now this really dark. This is why I was not
sure about multiplier. I feel like there is another one that maybe Max Lighten
or Mint Lighten. Sorry, Min darken. Mint
Darken might actually be better because it's able to keep everything a
little bit better. Anyway, so we now got this, and then what you would do is you would probably leave
it off with just like a histogram scan just so that we have control over how strong we want this light to be. Now in here, there is a node, and the node is called
a ground dirt node. The cool thing
about this is that it requires a position map, but what we have
generated basically is a position map that goes
from black to white. If we plug this
into our position, this will happen because it will capture it
around the dark areas. We can basically play around with our dirt levels
and everything. And as you can see over here, can now control where that
we want to have some dirt, and we can have the
dirt really clearly coming from the edges. I honestly do wish
that they gave us control over which
crunch map to use. Unfortunately, they do
not do that in this case. There are multiple ways
that we can work with this. So this is just a
quick and easy way. So what I'm going to do is I'm going to boost
this quite high. And then what I will
do is I will blend this using some kind of
crunch map to break it up. Maybe not this one.
Sauce, is there maybe a cool crunch map that I
can use Moisture noise. Maybe the moisture noise we can use instead of
creating new one. And now what we can do is we
can set this to subtract. Although in this case, it doesn't look like
it's a good one, so let's just go ahead
and find the new one. Let's use Crunch Map 013, plug it in here, set it to subtract and play around
with your balance, see? And contrast so that we can now control where and how much
dirt we want to have. So yeah, it looks like
quite a big setup, but it's just like big because we need to do a lot of blending. So what we can do is we
can add a blend note. We can plug this into opacite mask over here and
then throw in our dirt. And now you can see
that now we are starting to get some
localized dirt. And we can, of course, also
just play around with, like, our levels and
stuff like that. To make it more or less. So we got those ones. Those
are looking pretty good. I would say that the last one that we could
maybe art is maybe we can add like some tiny leaks
that are coming from that are coming from
our stuff over here, just because those tiny leaks
yet, it just feels nice. Also, what I see over here
is that actually the dirt is a little bit more localized. So I might want to,
like, set my dirt height bigger and or sorry, no,
not my dirt heights, set my levels bigger and then play around
with my contrast. And then maybe, like, play
around a little bit more with my. There we go, see. So let's give it a little bit more dirt,
something like that. So for the leaks, this has been honestly has been a
while since I've done this. These type of localized leaks, we need a, and there are so many notes.
That's why it's hard. But we need a non
uniform blog race. And with this non
uniform block ray scale, we need to plug in a
map which is basically a broken up version of our
Grout, if that makes sense. So we have our Grout over here. If we blend our grout using
something to break it up, Um, let's just move this over
here to get started with. So we have a Grout, and we want to break it
up with something. I'm going to break it up with maybe like a Clouds
one over here. Let's Let's grab a clouds one, set the scale a bit lower and add a histogram scan to this. And let's add and press
subtract over here. So the goal is that
by breaking this up and maybe we set our
clouds even smaller, it will basically make our leaks a little
bit more localized. So we have this stuff over here. And now, the way that this
works is if you plug this in, I don't think I need to
do it in both of them. I think we want to have
this one at the No, wait. We want to have this
one at the bottom, and then at the top, oh, God, it's so much remembering. At the top, we want to grab. I don't know if it's
just our height or so basically the general
goal is that we can actually control the
angle of our blurring. So if we set the
intensity really high, no, this is not the one. I think I need to
switch it around. I think I need to plug
this one into the top. Have a look over here. And then maybe we need to
invert grayscale. That's the one because I
don't want to have the base. But honestly, I forgot
which one I need to invert. Just give me 1
second. I'll figure. And else I will pass the
video if this doesn't work. But it looks like this
one is starting to work. Now we have I don't
know if we want to have our asymmetry or our
anastropic noise over here. I think we want to have our
anastropic noise over here. And then we are able
to push this out. So let's set our asymmetry up
and our anastophic noise up and maybe set my blades
a little bit lower 2046. I'm surprised. So normally what would happen is that
we can see it really well, but I guess in this case, I might need to use my
hist cram scan to push up the white because
it feels like it's just losing out on all
of that whiteness. And as soon as it turned on my intensity, oh, there we go. It is starting to
work a little bit, but, yeah, it's not yet perfect. I want to go to Oops, 270 in my degrees to
go perfectly down. And now we can set our blades up to give it like these
smoother leaks over here. And you can play with
your intensity to Yeah, don't push it too
much because it's only so much it can push down. But the general idea was that we have this
stuff over here, so now we have some leaks. And then with these leaks done, I'm going to you can
now what's quite nice, you can control using
your Hcrum scan, more or less leaks. So with these leaks done, we would then blend these together using something
we have used before. And it's like those leaks
that we used to break up are larger leaks. This this one over here. Yeah, this one. We can use this one over
here and once again, we can set this to subtract to break up our
leaks a little bit. Now that that is done, let's go ahead and maybe
use a blur high sorry, not a blur high
quality greyscale, a slope blur gray scale
with like a clouds two. I think that might work. Let's
do clouds two over here, samples all the way up, mode to minimum. And move this down. Okay. And now let's go ahead and start already adding it so that we can see
the effects of it. So let's add another blend and plug in this into our paste and plug in our dirt in
the top. There we go. Season now we can see
already like some leaks, although it is not perfect yet. Mostly, what I find is that
it's just not strong enough. And, of course, you can
also use a grinch map to basically blend this in and
out and that kind of stuff. So I'm going to add a
Hcam scan behind it. Oh, we don't have a
lot of space left. And here you can see, so here
we have our actual leaks. So we can just play around
with the intensity. There we go to give it some
nice leaks that are coming from our concrete pieces. And then at this
point, you can do a switch color or you can plug it into your switch color
for your base color. I'm going to at this point, move these pieces
down over here. I will go ahead and right click and a frame and
call these outputs. I will go ahead and also go
to my roughness over here and create a switch gray
scale in this case. And if it is false, it will use the normal one. If it is true, it
will blend to blend. It will blend where are you? This one, it will blend
our dirt and our leaks together using a max
lighting over here. And this will be
our roughness mask, which we can set to
art to also map out the dirt on our roughness
here and plug this into True. Okay, cool. So we have
our roughness done. We have our base color done, and we have our norm map done, and of course, our height map, but those ones did
not need to do a lot. Now what we're going to do is these switches that
we have placed, what you can where are
you? There we are. What we can do is we can
actually almost like Unreal engine where we had
a material like instance, we can do the exact same thing inside of substance designer. So what we want to do
is we want to go down here and we want
to press expose. Now, when we press expose
and call this has tiles, for example, I can copy this over into my label and
into my description. And then what I can do is I
can press, Okay, over here. Now with this done, we need to go to
every switch and then go down here and
select the has tiles. This means that when we switch on the has tiles or turn it off, what will happen is that all of these switches will
instantly change. So if I go to my
norm map over here, the way that you can
control this is you can go to your concrete main, and you are able to create presets and that kind of stuff, but we are just going
to keep it easy. All we need to do
is in our Premo, we can turn it over
here, off and on, see? And it will just
instantly get rid of our tiles and all
that kind of stuff. That's why we use
those switches. So with it being turned on, we can go into our base
color and look at that. That honestly looks really
cool. I like the leaks. I'm glad that we
added the leaks, even though it was a little
bit messy to add it. I would say that the dirt on the edges can be a little
bit stronger, to be honest. So let's go ahead and
go in our ground dirt, maybe, like, set levels a
little bit stronger. Over here. What is interesting is that for some reason over
here on these sites, it's generating more dirt. I guess it has to do
with the hiscum scan. I don't know if I can do
anything with contrast to, like, balance that out. No, to be honest, I don't think, but it's not really
that big of a deal to have more dirt on the
corners over here. So we can go here. Okay, now it's a little bit too intense. So what I will do now
is I would just go in my opsteTne it down a little
bit to maybe like 0.8. And there we go.
Okay. Awesome. So I'm just going to go ahead
and I'm going to now assign my embitoclusion and my height map to Wi
finish this thing off. So first of all, embitlusion, we want to click down here
and click on occlusion. And then what we need to
do is we need to go ahead and let me just navigate to my textuus concrete main and dragon my ambient
occlusion over here. There we go. That's
already like some AO, which you'll mostly see
wherever there is shadow. I'm not going to
make it too intense, because often 100%
is too intense, so I'm going to set to 0.5. And now for our displacement what I like to do
if I really want to push it inside of marmoset is I like to have actual
geometry displacement. What we can do is we
can click over here on a sphere and click
on the parent, which is like the
little sphere with the icon and press subdivide. You can see your
pol can count here, and what you want
to do is you want to give a lot of polis. Let's go for like 6 million
or something like that. Then in our material, if
we go to displacement, we can go to actual
height displacement. And we can drag in our
height map. Over here. Now, what you can
see happening over here is that, of course, because our grout
is pushing out, our height map is a
little bit too strong. So what we can do is
we can toe this down. It's not as intense as I had
hoped for, to be honest. I think in this specific case, we can actually benefit from having our height
before the grout. I know that it might not
always make too much sense, but in this case, the norm map will take care of the rest. So let's go ahead and apply our height before our
grout, because this way, we can literally
push in over here, see, we can push out
our actual tiles. So what I'm going to do is I'm going to push out my tiles, and I'm going to probably maybe give one more subdivision because it looks a
little bit jagged. And it's just because
the cleaner your model, the more subdivisions
you need to really get it to look good. So now we are at 24 million
polis, which is quite high, but it does look a lot nicer
now. So we have this one. I'm going to tone down my
occlusion a little bit, and yeah, it is a bit difficult to
see my grout at this point. So just having a
think what I can do. I think the reason it's difficult
is because of our dirt. So we might want to
go back in here. And where we actually
made the grout darker, in this case, let's
actually make it lighter because the
dirt will kind of, like, overtake it a little bit. So let's see if I
make it lighter, yeah, I can see like a
tiny bit better now. But yeah, our dirt is
basically overtaking it. Now, one thing that
we can do is in our ground dirt over here. We can basically remove our grout from the
dirt a little bit. And the way that we
would do that is, let's go ahead and add a blend, and we would want to
grab our grout line. And we want to blend this
using something soft. And I remember that we have
our ground map 01 over here. And just set this
to, like, multiply. And then what we can do is
if we plug this into mask. Oh, sorry, invert your mask. If you invert your mask
and plug it into a mask, we can now control using your paste how much dirt that we want to have
on our grout lines. So let's start with something
like this. Let's see. Does that here, see? So now it starts to bring out a little bit more of that
grout that we had. Yeah, and that's already
looking a little bit better. So at this point, it's really
just like subtle changes, but I am quite happy with
my material right now. So what I will do
is I will go ahead and render out a nice image. While at this rendering, don't forget to save your
scene over here. Go ahead and create another
frame and call this one tile, unscored dirt to nicely
organize that one. And everything else seems
to be quite organized, so I'm quite happy with
what we have right now. I think we have done a
really solid material with not too many notes. Just like if I'm going to make a photo realistic
complicated material, my graph can be like two or
three times as big as this, just to give you a reference. Most of these notes over here,
they are not even special. These are all combined notes, so they don't do much. These are all normal
notes. They don't do much. These are all combined notes. So in general, I think we did
a really solid chapter on our substance designer
stuff. Are you done? No, so I will pass it on
until Mom said is done. Okay, so that is done, so let's go ahead and open
it up. And there we go. Looking really cool. I think my height is a little
bit too strong, but I can just push
that back a little bit. But just in general, here, we get the small damages
on our concrete, which is looking really nice. Yeah, just like in general, I think I quite like this. The tiniest bit of
detail that you might feel like is not very
nice is that over here, the noise is transitioning
from one side to another side. This is something so small. However, we will
have a bonus chapter where I will show you how we
can fix something like that. But for now, I'm not
going to really do that because it's such
a small, tiny detail. But yeah, I like the leaks. Everything is
looking pretty good. So let's go ahead and call this material done
at this point. And what we will do in
the next chapter is we will have one more
chapter in substance inner, where I will just show
you some useful notes and some useful techniques
and stuff like that. And once that is done,
we can go ahead and we can continue on by actually applying these materials
to our modular assets. So let's go ahead and
continue with this
53. 32 Bonus Useful Nodes And Techniques In Substance Designer: Okay. So in this
quick bonus chapter, I just wanted to go for, like, some random notes
and just run through some things that
we were not able to do for this
specific material. Now, one of them, we can
actually do for this material. So remember how I set if I
just bring up our image. And this is going to be
quite a relaxed chapter. So sorry, there's
not going to be like any organization,
it's a bonus chapter. But one of the things
that you can often find is that whenever
you have tiles, the details, they just continue on from one tile to another. However, this is
not how it would work in real life or
most of the time, unless it's a very
specific type of damage. In real life, what
would often happen is it would be completely
different details. I just want to show you an
easy way that you can do that. So all you have
to do is you just have to go ahead and
find the details. In this case, it's like
this concrete over here. And then what I want to do
is I want to go ahead and I want to add a let's see. We have a flood fill
over here, right? Do we change our mesh a lot after this flood fill? No,
we don't really change it. So what I'm going to do is
I'm going to add a flood fill to random gray scale and
plug in my flat fill. And this is the flood
fill for your tiles. Now what you want to do is
in your grunge concrete, you want to add a
directional warp. Now, the cool thing with your
directional warp is that if you plug in these grayscales, you can warp each
tile individually. Now, when you go ahead and
set like a random war bangle, and you set it's really,
really high to like 500, it will actually
completely change. As you can see over here, it
will no longer transition. It will just completely
change wherever all of our details are, which, in turn, if we would now go ahead
and go into Mm set, you can see, I don't know if
I can zoom in to show you. You can see that the details no longer properly transition. They are just like randomly
starting and stopping. So that's another way that
you can very quickly, add some additional
variation to your scene. Now, of course, in our case, because we have this detail, we would need to go ahead
and we would need to add a switch grayscale, set this gray scale
switch to has styles, and then if it is true and
if it is false like this, just so that we keep
everything in line. So that's just like a cool note that I
wanted to show you. Now, for the rest, what I want to do is I just want to go ahead and I just want to basically run
through the library and just show you
a few notes and, like, a few techniques
and stuff like that. So first of all,
for our patterns, what we did is we created our tiles which are
like, Willy Willy clean. But sometimes, if
you ever want to scatter around Wi's
specific patterns, there are a few different
notes that I really like. One of them is the tile sampler, and one of them is the
shape splatterer over here. With a tile sampler,
what you can do is it's very similar
to the tile generator, but it has a few extra features. You can go to your pattern and you can set whatever
pattern you want. Let's say that you want to
scatter around a lot of dots. And then what I recommend is
that you play around with your scale random to control
the scale of your dots. And, of course, just
like your scale if you want over here. And then if you go to
your position random, you can completely
randomize your position. And like this, it's in
also your rotation, but these are circles, so rotation doesn't do much. Now, the cool thing about
this is that you can even create your own noises
based upon this technique. Just like these
noises have a lot of scattering around, you can
do the same over here. Another thing is, if you want
to change the intensity, almost every single
node has this. You can always scroll down
and add a color random, and this will add
random luminosity, which as you know in a height map can change the
intensity of your mesh. So that's something that I
just wanted to show you. It also has a lot of inputs, and these inputs are very
similar with all of the nodes, as you can see, they often
look exactly the same. The only one that I really would want to show you
in this case is, let's say that we
grab a grunge map like this and throw
up the contrast, you can plug this into
your mask map input. And then in here, if
you scroll all the way down in your mask map threshold, if you push this up,
it will only show our shapes wherever we
have white in our mask. See? That's very useful if you want to do some
specific masking. The shape splatter is very
similar to this node. However, in this node, you can plug in much
more detail patterns. Now, as you can see, this node does not have any control
over picking a shape. This is because
you want to go to patterns, and then over here, there's a shape note
which allows you to basically plug in a
shape, as you can see. So we can plug in, once
again, our cylinder. But we can also plug in, like, way more
interesting stuff. Let's say we grab a
cylinder and then grab a multidirectional warp and throw in like a purlin noise
or something like that. Over here and set it
really really strong. So let's set this to like 100. You can see that now it's
like a freaky looking shape. You can plug this
into your pattern, and then in here, what you want to do is you want to,
first of all, scroll down. And in your height map, you want to turn off
the height scale out adjust because that will try to adjust your shape in a way that you
would not want it to adjust. Then you can go
ahead and you can control the amount over here, just like normal. And the scale. But the cool thing about
this one is that you can also plug in multiple
different patterns. I can go up here,
and I can say that I want to plug in three
different patterns. Let's say that I duplicate my slope gray scale and change
the patterns a little bit. I can even go in
and, for example, go from a para booilt to like
here to like a triangle, and then from a triangle, I can go to or pyramids, I can go to like
this one over here. I can plug in all of
these interesting shapes, simply plug them
into my patterns. And now I'm able to control
the amount of patterns. I can, of course, control
the general scaling of it. And you can also set the
scaling really large. Now, what I recommend is if you want to push the
scaling really high, scroll all the way down, I believe to masking. No, not masking. Let's
scroll all the way up. I'm not able to find it in here. Basically, what
you can do is you can select the blending mode, but for some reason, I'm not
able to find it in here. Let's try and play around
with our height scale, maybe. Yeah, let's try I
guess over here, we would use our height scale. And just like this, along with some rotation random and
some position random, you can create really
interesting looking shapes, which imagine that you are like, for example, creating,
I don't know, rocks or something like that. So you have these
really specific shapes, and then what you
would want to do is add like I don't know, like a multidirectional
warb gray scale that has, like, a clouds in it. I won't go too much in
detail. Don't worry. Well, let's say
that there's like a Clouds two and multi direction w
grayscale with clouds two. What it often does, especially
if you go for minimum, it breaks up your
shape quite a bit. And then if you then
throw on a non map, you can see that you
can instantly create this really specific and
interesting looking shape. And at this point, you
would just do whatever you want to, like improve it. Like here, I can see that this one doesn't work very well, so I can switch it
out, and there we go. So there's instant way to have an interesting
looking rock shape. Of course, I'm doing this
like really quickly, but you can go really refined
in this. So that's it. So the shape and
the tile generators are really useful in
this kind of stuff. You also have some
cool stuff where you can create some tree shapes, but I personally don't
seem to use it too often. And so I'm not going to
go over there too much. Now, in your adjustments
here we have just some general like
our replace colors. Honestly, I don't
think there's much in here that I often use. You have your inverts, you
have your high passes. So yeah, not too interesting. Blending, I don't need
to do much are blurs. So we already went over
the slope blur ra scale, non uniform blur ray scale. We went over the normal
blur rascale channels, we don't really do
anything effects. So we have our curvature
if you ever want to generate a curvature map just like we did
with our baking. The edge detect
notes is quite nice. So with the edge detect note, what you can do is it will try to detect the edges
of a specific shape. Let's say that I grab, for example, no, let's do this one. Let's say I grab some
crystals over here. It will try to be able to detect the lightest edges on
your edge detect note. And over here you
can see that that instantly allows
you to generate, for example, some
Wi I don't know, like some glass
or you can change the edge roundness
to basically very quickly generate some
interesting shapes or to just in general,
detect some edges. It will try to do
this for anything, even if I grab something
weird like this. It will always try
to detect the edges. It's not always able
to do it as well, but specifically for, like, really clean shapes, it does a great job into
detecting your edges. And now you can see, like
pebbles, for example. You can slowly turn these into, like, little pebbles
and that kind of stuff. So it is really useful
also if you want to generate some cracks
and that kind of stuff. So let's have a look. So
that was the edge detect. We already went over
the flood fill notes over here, pretty much. We went over the ambit
seclusion notes. We went over the
multidirectional nodes. Honestly, we have
covered quite a bit of stuff more than I expected. On normal map
notes, we just have our normal combine that's
the most useful one. You also have a
normal intensity. If you ever need to change the entire
intensity of your normal, you can add a normal
intensity node, which basically allows
you to using one slider, increase or decrease
the intensity of your normal to make it
more or less strong. Can be useful sometimes. Tiling. Okay, yeah, so
tiling is pretty cool. So we went over the make
it tile photo gray scale. However, you also have a
make a tile patch over here, and then you can, of course,
use it as a gray scale. What you can do
with this one is, let's say that we have a
shape like a grunge map, for example. We can
plug it in here. Then what it's able to do is it's able to tile
this crunch map, and while it is tiling it, it can blend it and rotate it. So in your octave, you can control how many times
you want to tile it. So let's say I set this
to two times over here. I can then throw
on some disorder to change the tiling amount. I can throw on size variation
and rotation variation. And using this along with some mask precision like
this and some mask warping, you can very quickly
almost create an entire new looking grunge
map that you can use. So this is used for quite
specific scenarios, but it is really handy to know. Lets see make it
tile patch node. Our transform notes, honestly, we don't have too much stuff to talk about that.
Material notes. I guess, it's a bit
difficult to show, but the water level or the height blend
note is quite nice. So let's try Water level because it's a little
bit easier to see. If I go ahead and go
for my water level and set my channels
just to be base color, what I can do is, let's say that you
have a node over here, so grab a cloud too. And sorry you can also use a gradient map to convert your note from
grayscale to color. And then in here, what it
allows you to do is it allows you to basically control
the water trying to, like, maybe if I need
to, there we go. So I need to also plug
this into our height map. But basically, it allows you to basically create a
mask based upon the water. Now, you don't have
to use this as water. If you click on the mask,
you can see that it can basically push out the
color for your water. So the same stuff can be done using the height
blend over here, and this one is a bit more used. So you can blend two
different heights. Let's say that I have my
bottom height to be my cloud, and let's say that I have a really fine height on the top. I'm able over here
to blend between these two heights based
upon the distance, and it also allows us to give or it also brings us like
a mask that we can use. So I just wanted
to show you that you are able to, like,
blend some stuff. This one is
specifically for water, but honestly, that's why
you never really use it. But it is great if you want to like blend two
grunges together, based upon, like
height maps like that. Honestly, I don't
use them too often, but I figured I should show you. Let's see for the rest. Most of this stuff is like
photogram try, so we don't really
need to work on it. Your mask generators,
I don't use a lot, you will get more familiar with these inside the
substance painter, but you are able to
generate dirt and dust and all kinds of
different paintwares and all kinds of
stuff using those. Weathering weathering
is kind of funny. What you're able to do is it's like I rarely use these notes, but you can basically,
like, drag in a note, plug in, like, your base color. And if you like, plug
in a bunch of stuff, so let's say that you like
plug in your base color, Oh, I don't know why it doesn't duplicate norm,
that's not my normal. Your normal sorry, this is
supposed to be base color. You can go in here and
you can set the channel, so I want only base
color, normal, like that. And then it will ask you for an ambient occlusion,
for example, and maybe it will also ask
you for like a curvature, which remember that we
created the curvature. Oh, no, wait, we
never used that one. So in here, once
you've done that, you can use the spreading to
basically spread the rust. It doesn't really work great for this kind of stuff,
to be honest. Maybe I guess if I instead
from my embit occlusion, use, like a noise, then
it might be a little bit easier. You see? You are basically
able to, like, apply a rust and do, like, a bunch of different
smoothing and that kind of stuff to quickly add
rust and everything. I personally don't really use it because
normally you would make like custom rust and
it would be very specific, but I just want to show you
that these nodes do exist. Honestly, at this
point, I'm pretty much done with showing
you everything. The last thing that
I would want to show you is if you go into
your concrete main, just like we have our has tiles over here set to true and false, you can also go to presets. And if you want, you
can say, has tiles. You can go ahead and
give the label and press new and then if you
type another label, so let's say no tiles, and in the no tiles,
you want to set this to falls and press new again. What happens now is
that you have presets. So now if I go ahead and look on my normal, thanks
to these presets, I can very quickly
switch between has tiles, and no tiles. Now, we only have one output, but you can imagine if you
have everything exposed, let's say that you
have exposures for the roughness amounts for the different colors
and that kind of stuff, this would be a big list. And that's why thanks
to the preset, you can very quickly generate everything from with one preset, you can have dirty
concrete, preset, clean concrete, preset,
damaged concrete, preset. And you can have all these
presets with all these values to very quickly generate
different types of materials. Now that this is done, we
are going to save a scene, and the last thing
that I want to do is I want to
export my textures. Now, we have already
exported one of them, but of course, we
have two textures. So let's go ahead and go
into our concrete main, and I'm going to make
another folic called tiles. Oops. Tiles over here. Now what I'm going
to do is I'm going to go ahead and I'm
going to make sure that, yes, the current one that we have does not have any tiles. I'm going to go to
Export Outputs bit web, turn off the automatic export
and export my textures. Now that this is
done, what I want to do is I want to go ahead
and go to my preset, go to has tyles right
click and Export again. But this time, we are
going to export this into our Tiles folder so we can press Select and then we
can export again. So now what we've done is we have simply exported one with the tiles and one
without the tiles. The naming is still the same. It doesn't really
matter too much inside of unreal engine. But if it is a big
problem for you, you can always while exporting, go over here and you can
even change the graph. So let's say, right now it
is called concrete main, but you can even just type in
concrete cin scored tiles, space, and then add identifier, and you can even
export it like this. However, that does mean
that now, of course, you would need to go back
in every time you want to export the other tile and you would need
to change the name. But you can see
over here now it is called concrete main tiles. So I'm not going to do that because it's just
a bit overkill. What I will do is I will go
ahead and I will remove this. Go to this drop down and grab graph again so that it
is called concrete main. And then over here, I want
to do underscore base color. Awesome. So that's it. We are going to save our scene. And in the next chapter,
what we will do is we will spend our time on applying our actual materials
that we have created to our modular assets. And once that is
done, we can move on to texturing our unique assets. So let's go ahead and continue with this in our next chapter.
54. 33 Cleaning Up And Uv Unwrapping Our Modular Pieces: Okay, so now that we have
our tilable materials done, what we're going to do is
we are going to prepare the models over here that
we have created in Z Brach. We just need to make them
like Snapable again. And after that is done, what we're going to
do is we are going to Unwrap all of our models. Now, for this, I'm going
to just do this in Maya. However, you can replicate the exact same
thing in BlendRmMx. So you don't really have
to worry about that. This is all quite
easy stuff that we're going to do.
Let's see what else. So another thing is that there are two ways
that we can UV unwrap, and I will show you the traditional way,
let me say it like that. However, in Unreal, there's
also a way that we can even have it so
that we don't even need any UV unwraps
inside of Unreal. So we will also actually
be using that way, but that's something that
we will go over later. So this one is mostly about
preparing our assets. And then I will show
you some examples on how to UV unwrap. However, our UV unwrapping
will be slightly different. The reason I want
to show you both is because there
is a shader thing. So we are going to have two UVs. One of them is going to be
like our unique, normal UV. In our case, we will
be using this one for, like, our baked norm maps
and stuff like that. However, there is
another type of UV, and it's called a WorldSpace UV. Basically, what you
can do with this is you can UV unwrap your models automatically inside
of the engine based upon the
position in the world. So what that UV will do is it will look
at the font, back, and all of the sides, and
then it will basically mesh everything
together to create a really clean
looking UV for us. And that is the one that we
actually will be using for these modular pieces just because it is easier
and is faster. Only thing is that
it's a little bit more expensive to render, but we aren't really worried
about that right now. So what I'm going
to do is I'm going to go ahead and first of all, we have our backup over here, and we need to
position these pieces back into our backup scene. So what I'm going to do
is I'm going to go ahead and let's go to added pivot. Let's turn on
snapping two points over here and let's snap
this one to the corner. And let's turn off added pivot. And now let's go ahead and
I should be able to just simply snap this one over here. And let's see. So
that is pretty close. This is what I mean
what we need to fix, where we just need
to scale this out so that it snaps
back to the grid. However, let's
just first of all, go ahead and go for
a vertical pillar. And it looks like over here, all I have to do is
if I move this up. Oh, it's all
snapping. Let's see. When I move this up,
it's about 1.25, which is an even number. Wow, that's actually
really impressive that I managed to do that by
hand and not by typing. So we got that one, and
then we have our Oh, yeah, our horizontal pillar,
which is still in the correct location.
Awesome. Okay. So our railing, basically all we need to do is remember
how we made a little cut. And what I do notice here is,
it doesn't matter too much, so technically, our railing was supposed to be like this, but it doesn't really matter. Anyway, we created a cut on
this railing in order to make it like a green cut in order to make the
edges really sharp. The reason we needed
this is because we needed to be able
to repeat this. What we want to do is we
now want to go ahead and want to go to our let's go to our side view over here or our front or top
view doesn't really matter. And then what I want to do
is I want to go up here, grab these pieces over here. And now, it might be nice to do a soft selection just to make it a
little bit softer. So let's go to soft selection over here. Click on Soft Select. And this will often
just like here, if we just make a
little bit bigger, it will avoid any
stretching looking stuff. We can then turn on snapping, and we should be able to simply
snap it back to our grid. So now it is perfectly
tillable again. Now, just to double check
our work, of course, because this is where
I'm a little bit worried about because
sometimes this goes wrong. Let's go ahead and hold
Shift and clone it, and then I want to go up here. And basically, what I want
to do is I want to go to these vertss on Y
frame over here. So I want to go to
these vertss then what you notice is that over here, not everything is
completely perfect. Now, this one over here is
actually really annoying. I don't know where I went
wrong with that one. The reason why this one is
annoying is because I'm not sure I can change it too
much without messing up UVs. But what I wanted to do is I want to set this to
snapping to points, and I want to basically set my ertzson the correct location, which often is just a tiny
change like this over here. That's normally what
it is. This one, however, I'm a little
bit worried about. So what we will do
is we will fix this. And if we find a problem in our normal map that
we baked a while ago, we just need to re bake it because that was an
oversight of me, not noticing that
one looks so bad. So for the rest, what we can do. Like this one, that's fine. Like, it's just a
really smart change. But over here, the reason
we want to do this is that whenever
we duplicate it, there are no holes
and everything is, like, perfectly, you
know, written off. Everything is perfectly tlable. So yeah, this one over
here, to shade smooth. I have a feeling that's going
to cause some problems, but let's only go
ahead and worry about that when the problems have
arrived. So that's it. So this one is now
properly table, and now what we can do is we can apply our UVNwraps for it. However, this one, I will use
the second technique about UVnwrapping I was talking
about inside of unreal. The only thing that I
will do is for our wall and for our floor over here. For those two pieces, I will
go ahead and I will show you the traditional way of UV
unwrapping modular assets. But yeah, that's about it. So this one is correctly
on the grid or not. Can I go to my side view? Oh, wait, that's my
top view, sorry. Side view? No, it is not
correctly on the grid. So what we need to do is I'm going to select the
base over here. In this case, I will skate it flat to make sure that
it is absolutely flat, turn on my soft volume, and then go ahead
and set this to grid points and move it down. Let's do the same over here. Make sure to not do the scaling. When you have so selectnon
else it will become a mess. So I'm going to scale
this absolutely flat. And the reason I'm doing this is just in case that when we did our optimizations that it might have accidentally wiggled
around some of the edges, and of course, we
don't want that. So we got this one
over here done. Now what I will do is I will
go ahead and let's just reset my pivot to place it in the center.
Actually, know what? No. Let's go ahead and move my pivot to the base over here. And then I'm just going to go ahead and I'm going
to hold Shift, and I'm going to clone this up. And turn on my edges and stuff, and let's have a look. Oh, wow. This one has quite a change. Yeah, it's one edge. One
edge has a bit of a change. Let's go ahead and
snap to points. Let's see. Let's
snap this one here. That should be
fine. This one over here should also be
fine. This one here. This one might cause
some problems. But it is like a straight line. So what I might
want to be able to do is I might want to be able to snap it to one sec. Let's slack this model
and press snapping. And then select this one. And because we are now
snapping to this model, what I'm hoping is that I can snap it to the line
over here like that. And now we can go
snapping back to points. Turn off that one.
Here we go, see? So by selecting this button, you can snap it to the object. Inside of threes Max, you can just snap the edges, and inside of Bendal you can
also just snap the edges. So this is just
like a Maya thing that we need to do it this way. But this is often
because these are perfectly straight lines,
snapping it like that. So I can just set this back to snapping it to
this model again. But yeah, snapping
it like this is often's turn off snapping
the points. There we go. A better solution than massively changing my position
of my vertices. This one over here is strange because I swear that
I scaled it flat. Yeah, that's something
that I do need to fix. Let's go ahead and go to our what is it sit
View over here. And just have a look around
in three D to make sure that I have everything
selected, you see? That's what I meant
with it accidentally juggling around our edges. So let's go ahead and
turn off my snapping. Let's go ahead and scale
this completely flat. And let's go to our side
view. And once again. In this case, we can
just, move it down because we don't need to use soft slack for
something this small. Okay. So we did that one. And now what we can
do is just very quickly grab this
one and once again, clone it and move it to the top. Okay, so let's have another
look. So we did that one. We did that one. I'm not a big
fan of the ones over here. I don't know where we
went wrong with this one. It must have just
been oversight. I think what happened
was that because we cut it quite low, I'm feeling since we
cut it quite low, what will most likely
have happened is that we cut it below that range that we set where our
symmetry no longer works. So that's most likely the case. I'm not incredibly happy
about this one over here. Let's go ahead and once
again, snap to surface. Select this one. Okay, so
that one works better now. And then we had this one over
here which I also wanted to snap to this surface. Let's turn on point snapping, turn off the traditional. So we got this one over here. Yeah, these ones are aligned. But of course, that's
the thing whenever you use automatic optimization, you can never count on
it being like, great. This one, if I move this also, it might be just on the
edge of being acceptable. But we will see over
here, over here, the longer the
space, the better it is because we are only relying on a normal
map in this case. And the normal map
on flat areas, it will not actually
cause that many problems. However, if we would
already have UV unwrapped our actual meshes using
tilable materials, then it would have become
a big problem and we would had to redo
our UV unwrapping. However, for now,
we can do this. I'm going to move this one here, this one here, this one
here, and this one here. And then what I need to
do is I just need to do a quick snapping based upon object. There we go. Snap this one to the point. That one's nice and easy. Snap this one. Okay, cool. So that is now done, and hopefully that
should do the trick. But we will notice soon enough. Luckily enough, this pillow, we are not repeating it up
and down too many times. Of course, we want to make
it properly, but, like, it's not the biggest deal if
it isn't absolutely perfect. And what you can also do
is just like your pipes, you can always try to create other models to basically hide and seams if you
have problems with that. This one I most likely need to use my back up for the snapping because we don't
have a grid point on this one for snapping, since it is in the center. So what I'm going to
do is I'm going to select my corners,
and this time, I learned from my
mistakes, so I will actually have a look around it to make sure all
of these are snapped. Okay. Then I'm just going to
deselect this one over here. Then what I will do is
I will scale it flat. And next, I'm going
to do soft selection. And for this one, I should
be able to, you know, if I just select this, I should be able to simply have
this selected and move it. Oh, God. That taxi
is not very handy. The reason it's not very
handy is because it's trying to snap the entire sub selection to this point,
which I don't want. So let's just do this over here. Yeah, so point
selection should work. Luckily, we have a point
in the center like that. And then another one, let's turn off my
backup for a moment. Let's go ahead and
go to my other view. Don't know why sub
selection still turned on. Over here, Yeah, okay. That's quite the
scale this flat. And then for this one, we need to turn on our backup again. Turn on our soft selection. So that's too bad. I
actually didn't know that that soft
selection doesn't work with our object snapping like
that. Never noticed that. I'm going to quickly press H to height the other backup models. There we go and snap it. Oops. Snap it over here. Okay,
that should do the trick. So we got that one done, so now we can turn off our backup. And now for this one, I guess because we
have an even number, we should be able
to still snap to the grid in order to move it. So let's go ahead and
hold Shift and snap. But our grid is too small. Our grid needs to be like 0.5. Let's go display grid settings. And let's do grid line
every 2.5 and press Apply. And let me just move
this over here. Let's try that again.
Really? No snapping. That is interesting. That makes me curious about, like, which one? Oh, wait. Let's go ahead and
create a cube. That makes me curious about
how long this one is. So 3 meters, 3 meters, four Okay, so
that's interesting. So, for some reason, we made but we are following the backup. So, honestly, I don't really want to change it since we are following the actual one that
we did inside of Unreal. So what might have happened is that the one
inside of Unreal, we might have done some kind of like scaling to it, I guess. So right now, it should still
be in normal increments. So 3.4. Okay, that is interesting. That is also a
little bit tricky. So what I want to
do, in that case, is I'm just going to,
actually, I think this is it. Yeah, here. See? So we
have a little bit of, interesting, I would
say dimensions. However, what we can
do is we can salvage this by moving it to
the grid if we want to. The only problem is
that if we do this now, Everything in
unreel will change. All of these pills that
we placed will change. So with that in mind, I will probably stick to
our blockout in this case, just because it's
not too important. And then what I will do
is I can go ahead and I can instead of doing snapping because I can
probably snap in reel, but it's easier to snap
in reel than here. What I will do is I will go ahead and see if I can place
this super, super closely. Let's edit my pivot and let's
snap my pivot to a point, which is let's do this one. Let's snap my pivot to
this point over here. Okay. And then
what I can do is I can select this one,
and I just want to, like, move this down because
I can see that there's, like, actually, like, quite a difference
between these two. Uh, you know what I will do is I'm just going to go
ahead and go in my original. I'm just gonna Sorry, not in my original
in my new version, move this edge down over here. And the reason I want
to move this edge over here down is so that I can
do better point snapping. So now I can just
press Add a pivot. And if I snap this pivot
to this point over here, turn off add a pivot, and
then snap this over here. Now I know that it
is roughly snapped. So this should do the trick. And now what we can
do is we can do the normal thing that
we've done before. We can go up here with
the point snapping and just snap these
to our points. I noticed that over here, we have a bit of a problem because this one
is too far away, and this one is also Oh, no, this one is
not too far away. But definitely like
this one over here. I don't know. It might
cause some problems. We will see. If it
does, we will fix it. If it doesn't, then happy days. This one, let's
move it over here. See, I guess this stuff
as a learning moment for myself is too
because I don't often need to do it this extensively since I have
other ways of doing it, but those ways are a little
bit more complicated. So I think a learning
moment for me is to do this before
I do the baking. Over here, we do have a problem. See? So over here we have
quite a drastic problem where it is no
longer matching up. What we can do is we
can place a cut here. I have a feeling this is the
one that we need to rebake because as soon as
we start placing cuts, our smoothening changes. So we will see,
as I said before, it is quite flexible using the norm maps the way
that we are using them. So you don't have to, like,
worry about it that much. But, yeah, this is
something that we do, of course, need to
really pay attention to. So I'm snapping that one,
turning on back to points. And this one it's
supposed to go like this, hopefully because I am moving
everything up a little bit, that should also not cause
any real visible problems. Okay, cool. So I think
that's one will work. So let's just go ahead
and leave it like it is right now and
we can save sin. So we have those done. Now what I wanted to
show you is I wanted to show you how to UV
unwrap modular assets. UV unwrapping modular assets. It is actually quite easy. However, there's a really important
thing that I've already spoken about when we first
created these assets, and that is to keep them square. If we do not keep them square, it will be hell to have
properly repeating UVNwps. Of course, if they are square on two lines like this,
then it is fine. Like, in case of this wall, we can go ahead and
we can properly UVNwp it on the horizontal line. But, for example, if
you have a floor, and this is like a longer piece, it has to be divided up by two, as you can see, we've
also done that. Wait, let me just set
this back to five. Here we go. So what
I mean is like this, we can UV nwrap Oh, to snapping. So like this, we can UVR map it because we can repeat
our texture twice. Like this, we can
no longer do that. The reason we can
do that is because this would be the
length of 2.5 textures. Now, you probably guess
that what will happen is our textures are perfectly
repeating around the corners. 2.5 is not a corner,
in this case. So what will happen
is that it will create a seam and we
do not want seams. So let's go ahead and get
started with our wall. So for our val, we
mostly are focusing on, like, the front. We
don't really care. I guess we can do the
back, but we don't really care about the
sights in this case. The reason that we
left it like this is simply because it will block
our lighting, which is good. So we want to go ahead
and go to our UVTalGit. And in this case,
what we do need is we do need to be able to
preview our texture. So we have our texture expert. So what you want to
do is right click, and I'm going to show
you the AGs by Maya because I want this to be
replicated in Max and blender. And you just want to
create a base material. So just go ahead and click create the Lambert
material in this case. This is just a Maya thing,
so remove your history. But if you are using
Max or blender, just create a basic
material and apply texture. If you don't know how
to do this, honestly, it's such a basic
thing that you can find it everywhere online
on how to do this. In our case, we go to color and click on
this little button, click on File and then what we want to do is
we want to, in this case, probably use our tiles, so we can go ahead
and we can just navigate to our
tiles base color, and open it. That's all
that we have to do. Then we need to
activate our texture, and in this case,
it's a bit difficult. Here it is. We want to go
ahead and click this button. Okay, so what you
might notice right now is that because
this is a box, it is fairly tilable already. Like the sites are tilable. However, we want to make this,
of course, proper tilable. So what we're going
to do is we are going to go ahead and we
are going to go to create. And in this case, we can probably just like a planar mapping because
it's a perfect square. So we do our planar
mapping and set our, um, Projection to zero
over here. Here, zero. I find a bit strange that my wit and my height
are different. I'll said this to four.
That might be no, because I remove mystry. So what I'm doing right
now is I'm just doing a plainer mapping
exactly on here. So if I just go ahead
and press Enter or W, it should have Excuse me. I don't know where
my projection is. That is really strange. Maybe it's a bug that it doesn't show up because it
definitely works in here. So we have a plane
and mapping now. The only thing
that's quite strange is that for some reason, my UV editor is bugged. Okay, I guess that's a good moment to show
you another way. Another way that you
can do this is you can just go ahead and
do, like a bass plane, and a best plane will also work because it's a perfect square, and we are mapping it
on a perfect square, so it should be
able to literally map it exactly over here. If you ever have any problems, like for example, let's say that this happens over
here for some reason. You can also use snapping,
so snapping to grid, for example, you can also use snapping inside
of the UV editor. So you can guess
that all we have to do is a best plane here and a best plane here like that. So that's why it is so handy for us to have
everything square. Now, for these models over here, it is up to you what
you want to do. So what I can do is I can go ahead and I can do
a normal based, normal based, normal based
and normal based over here. Oh, no, wait, these ones do not seem to work for some
reason on number base. This model is being
a bit strange. I don't know what's
going on, so I guess I will just
use a best plane because they also
keep stretching. Now, sometimes what might
happen is that our UV, if we go to UV sets, we just want to
make sure, map one, that's the UV set that you want to be on, which is
like your first UV. So that's really strange. Let's go ahead and
select these sites, move them around, but they
do not seem to be affected. Honestly, I don't
know what's going on. This is not normal.
I can tell you that. So anyway, let's just keep the UVN wrapping and we'll
see what is happening. So if you go to transform
and press nine oh, let's do this for
all selections. Press 90 degrees to move it, and then just move it
on top of each other. A bit like this. And
because these are tiles, let's just go ahead and
rotate them like this. And it's a little bit annoying that I cannot see
what I'm doing, but it's not really
needed in this case. But yeah, I definitely find
this really strange why it is not yeah. This is
really strange. I honestly don't know why it
is not updating over here. However, I do know from experience that what
we just did is fine. Like, it did update
the important parts. So what would happen now
is that if we repeat this, you can finally see the
power of the tilable stuff. Because we perfectly map this, if we repeat this and
turn off our grid, it just looks like a
really long whale, see? Because the texture is repeating over and
over and over again. So that's basically
it for this tilable. Now, I'm just going to save machine and I'm
going to restart Maya. Sometimes restarting
is the easiest way in order to fix weird problems. So let me just do that. Okay,
so I restarted my Maya. And it turns out, the problem
is actually quite strange. Basically, you have something
that's called UV sets. And if you go to UV sets, you saw me already
working on this. And normally it will
always read Map one. I guess because this model comes from unreal and we
only changed it. For some reason,
it's trying to read the second UV map in our
viewboard. It is an easy fix. It's just weird that it
happens because normally, it always reads the first one. I guess maybe in our material
something went wrong. Anyway, if you go to
your UV set editor, click on the Light
MPV and press delete. Now what you can see is
these are our actual UVs, and it is quite good that we double checked because
what I see over here is that I need to select
this one and I need to go to transform and I need to
rotate this like this. Yeah, so that the
leaks are going down. This one needs to be
rotated also. There we go. So very strange. First time happening
that that happens to me, but that's about it. So now we have our Paper Wow. Okay. Cool. So let's go
ahead and save Hasen. And, of course, this will not happen with your railings
and stuff like that. And the reason it will not
happen with those is because they use they are from Z brush. Sorry. So the last one
that we need to UV unwrap is our floor over here because we already UV unwrapped
our railings and stuff. So for our floor, what we're going to do is we
are going to right click. And this time, if you press
assign existing material, I should have really
named it. One sac. I always forget to do that. Let's call this WAL in
our attribute editor. And now if we go to our
floor, we can select it, right click Assign
existing material, WAL. Okay, so now, I know that
our floor is actually going to be like
the plain concrete and not the tiles, but
it doesn't matter. All I need to know is
that it is repeating. So what I can do is I can
go to my UV sets to get started and delete that old one. There we go, so
that we only have our Map one left over here. Now for this one, what
I'm going to do is we just need to
make sure that it is causing two parts over
here because it is a square. So what we can do is we can go ahead and we can
select this one, and let's do best plane, one, select this
one, best plane, two, and let's leave the
other pieces for later. So as you can see
over here, right now, it is trying to map this
within our one by one square. This is normally
what we would want. We normally would
want to map this within a one by one ratio. However, because
this mesh is so big, this is one of the
few times thanks to the ilable workflow that we can actually go
outside of these tiles. So we have this one
to get started, which is the most important one. Let's move this one to the side. And let's just go ahead
and go to our transforms, and let's rotate
this 90 degrees. Honestly, for this
one, it doesn't matter which direction, but let's set the direction
with the leaks going down. And then what you can do is you can click on your pivot over here on the corner to set your
pivot at the very bottom. And then if we turn on snapping, we can snap the
pivot in our corner. Now, we know that this
needs to be twice as big because we did like scaling. So what we can do is yeah, set the scale. It's
already set the two. We can just press this
little scale button and it will scale it by two. And now we can see
that everything is quite exact because we kept all of our values
really, really precise. Again, you can use
the grid snapping, and if you right
click and go to UV, you can use it to do really
specific UV snapping. Now, for this one, T I
want to rotate this. Also 90 degrees,
pivot to the bottom, move it on the
corner, and scale. There we go. And for these ones, all we need to do, Willie is
we just need to map them. It's honestly not even needed, but I like to At least have whatever I
have to have it mapped. It's just like a habit. It just makes everything
look a little bit nicer, especially for a tutorial and stuff like that. There we go. Okay, so that is
the super basics on UV unmapping a
modular asset like this. And, of course, when
we arrive in wheel, which we will do
in a few chapters, I will show you the magic that we are going to use
on our other assets. So that's it for this chapter. We have now UV
unwrapped I assets. The last thing that
we need to do is maybe just go ahead and right click and assign
our wall material. To these pieces also, I don't really care that
it is the wall material. All I care is that
we have one material assigned to all of our pieces, and then in un reel,
we will simply replace it with the correct
material like that. Okay. Awesome. Let's go
ahead and save a scene, and let's go ahead and continue
on to the next chapter. And in this chapter,
we will be Oh, we will be going into
Substance Painter. We will start by texturing
our pipes, finally. So, let's go ahead and continue with this in our next chapter.
55. 34 Introduction To Substance Painter: Okay, so let's go ahead and jump right in into
substance painter. So substance painter is a super
powerful software that we are going to use to
texture our pipes. What is really great about
the software is that we can actually texture
in three D. And, of course, it's very flexible, and if you have followed the
substance designer parts, you might actually
recognize a bunch of stuff from the designer
parts inside of painter. So what we're going
to do first is we are going to go ahead
and go over our UY. Once again, just like
some other softwares, before we can
really go over u y, we need to start up a
project because right now we cannot really click
or see anything. So over here we have
our top bar, of course, and most of the stuff
that you want to focus on is just a file where
you can get new files, open files, save them,
that kind of stuff. Of course, we have
some Add buttons. We have some mode
between the baking mode, and there's also a
rendering mode inside of painter which we will
not be using layouts, viewpods like most of the
stuff is quite basic. But as you can see, I
cannot really click anything because we need to go to file and we
need to go to new. Now in here, what
we can do is we can create a new project. So in here, you want
to get a template. These templates, you can
create your custom templates. Basically, the way that
you should see it is that these templates are
different texturing modes. There's a bunch of
templates over here, including some custom
ones that I created. But the one that we want to
use is the standard one, which is the PBR
metallic roughness. Because Unreal Engine uses the PBR metallic roughness
method for texturing. So that is the one that
we are going to use. I highly recommend
that you look more into the PBR
workflows over here. It is quite technical, but
it is quite good to know. However, you can also just go ahead and follow along with me. So then we need
to create a file. What we want to select for our file is we want to
select our pipes over here. Yes, so pipes, and we want to
select our pipes low poly. So that we can texture them. So we can go ahead
and select pipes low poly and press open. Now, in our document resolution, substance painter is super flexible with the
document resolution. We can set it to
four K. However, with one button press, we can always switch back and forth between whatever
resolution we want. Because substance painter also uses procedural techniques, what it allows us to
do is it allows us to scale up and down our
resolution quite easily, just because everything
is procedural and everything will
just recalculate. Actually in our nor map format, we want to go for OpenGL because that's the one
that we will be using. Remember I said this before. The only difference
between OpenGL and direct X is that the green channel of your
norm map is flipped. So you can just flip
it around if you want to choose different values. And next, what we can do is we can pretty much ignore all of this stuff. We
don't really need it. You can even do
outer unwrapping, but we want to go to
importing our baked maps, and in here, we can
import our baked maps. We press art, we can
go ahead and we can navigate to the ones that we
baked, so that's textures, pipes, bakes, and these
are the ones that we personally baked inside of MomsetT are the ones
that we will be using. We can go ahead
and open them up, and then all we need to
do is press Okay. Okay. And now it is load
in, as you can see, this is a normal viewpod ld middle mouse button to pen
round, left mouse button. Wait, let me just
move this rear. I left mouse button
to rotate round and l right mouse button to zoom in or you can use
your scroll wheel. So it is quite a
normal looking viewpod where we can really
nicely and close up, look at our meshes, and we can literally texture them live. I come from a time where we still had to texture
in Photoshop. So being able to
texture everything live while looking at a
tremol is just amazing. So what we're going to do
first before we go over our U Y is we want to go ahead and
change it a little bit. It's nice always to have
a big viewpod over here, and I like to have my
library down here, but I'm just going to
grab my texture set list, and I'm just going to drag
it up here like that. Okay. So we got that one, and let's make this
a little bit bigger, and now we can get started. So, I already went over
this viewpod up here. I guess we also went
over our viewport in here because it's just moving around. There
isn't much to it. So what else do we
have? We have over here to the side this is quite
familiar to Photoshop, and substance painter and designer are actually owned
by Adobe who make Photoshop. In here, we can choose
between our brush, which is the one
that we mostly be using an eraser to remove stuff. Projection, which allows us to project specific textures
or anything we want, although we won't be using
that one in this tutorial. Our polygon fill, which
allows us to select polygons, which we can use for masking. We will be using that and
some extra tools like smudging and cloning and
just some default tools. But the ones that you often
want to use are your brush, your polygon fill,
and your projection. Although we won't be
covering all of these tools because Subspri is also
quite a large software, it is something that you can
look into if you want to. Now, right next to
that is our library. Our library is similar to the library in
substance designer. Here you can find everything. You can find basic materials. You can find more
advanced materials. You can find generators
that allow you to add dirt and dust and etch scratches
and all that kind of stuff. So extra additional notes. You can find different
brushes in which you can actually use your same brushes
that you use in Photoshop. You can find Alphas, which are like black and
white maps over here. If you want to like ld
bolts or art shapes, there's so much stuff in
here, including crunches. You can find textures,
which also includes a bunch of grunges over
here that we can use. There is a lot of stuff in here, also norm map details, and in general,
it's something I'm not going to go over because
it takes a long time. Like, you just really have to look into everything over here. But that is our
library. So we will be navigating and
using this library while we are
texturing our pipes. Then up here, we have
something very similar to Z brush where you
can just control the size of your brush, the flow, the stroke,
all that kind of stuff. However, in case of
substance painter, you can also control
the size and everything here on the right,
which I prefer to do. So here you can also
control the size of your brush to make it
bigger or smaller, or you can simply right click
and once again do it also. There's so many ways to
control sizes stuff like that. Now, over here we have
some important noes nodes. What you can do over here is you can switch between tree D view, a two D view, which
shows you your texture, or you can even do a double view where you have two D and T D, which, oh, wait, it's
hidden for some reason. There we go. In which you have 2d3d like this so that
you can use both of them. We will mostly be working
or in the tree view. The two D view is mostly
if we have problems. Down here, we can switch between perspective
and autographic. We would never really use that. We can control the behavior of the camera. We would
never really use that. And then over here we
have some modes where we can switch between
the baking mode, which are already covered
in a bonus chapter. However, we actually
do want to open it up because there are
something that we want to do. Now, I'm not going to go
over this because as I said, I covered this in
the bonus chapter. All I want to do is I want
to send my outputs over here to four K. And I
want to use this button, which says use low poly
mesh is high polymsh. This means that we will
not actually enter a high polymesh into our stuff because then it
becomes more complicated, but it will just use the
mesh that we see to bake. This one only really works
for your ambient occlusion, your I guess, also your curvature,
position, and thickness. So why would we want to do this? We want to do this
because we have not yet generated a position map. Now, you can also generate a thickness map while you're
at it if you want to, but it's mostly about
the position map. It is quicker for me to generate the position
map inside of substance painter than in Mm set because a position
map needs to be 16 bits, and I never will like
needing to, like, switch out my bit rates
just for one texture. However, in here, I just
need to set my resolution, press U low poly messes hi poly, select my position, and I can
press Bake. And that's it. Then it is already done.
Our thickness map, I guess, takes a bit longer. So that's it. Now
what we can do is we can just press return
to our painting mode, and that's all we had to do. I will show you later on
where we can find this. There's also a rendering mode
where you can actually use ray to render quite high
quality renders over here. However, it's still
a bit limiting in terms of lighting setup, which is why I always prefer to use marmoset or I
use Unreal engine. In our case, we will be
using Unreal engine. So we are just going to
go ahead and go back to our painting mode
over here and we will not yet cover the ray mode. So we have arrived at our
most important windows. First of all, we have a
layers window in here. We will have
everything containing our textures, just
like a photo shop, all of our layers, all
of our generators, all of that stuff
that will create the texture will
be located here. What I can do is I
can actually start by deleting the default
layer over here, and then we can continue
on with the rest. Now we have also a
texture set list, and this one is basically the material that
we have over here. If you have multiple materials, you would be able
to see them here. Now, we are just going
to keep the name pipes. However, in here, if
you change the name, it will also change the name of the textures that we
would export later on. And then we have our texture set settings, which is
quite important. In our text set settings, we can change the
resolution of our document. For example, we can set
it to 2048 or 40 96. We can control which maps
that we want to texture. So right now we are
texturing a base color, height, roughness,
metallic, and normal. Please note, very important, your height map inside of Substance Painter is
also your normal map. I know that might seem strange, but remember if you follow
the designer tutorials, where we grab a height map
and we convert it to normal. The same works in
substance painter. Even though this
mesh does not have an actual height map
that displaces geometry, we still need the height map in order to create
norm map details. So keep that in mind.
Don't remove it. You can also press
this plus button to find more
channels if you ever need a missive or if you need opacity or
anything like that. Now down here, most of these things we can
just leave by default. It's just like some settings. And now we have arrived
at important one, and this is where we would
input our bake maps. As soon as we input them, they will be used on our mesh, and they will also be
used in any generators. These generators often use these maps in order
to generate effects, but we will go over that later. So you just want to click on Normap and select the normal. WorldSpace map is the
same as object space. So you select object
space, Ambit seclusion, Empeclusion, curvature,
and curvature. And we already have the
position and thickness applied. Now, as soon as I wiggle wrote my viewbard you can see that now our norm maps over here
have been dded now they look the same as that they
looked inside of MamaseTbag. Awesome. So we now have
that already ready to go. Now, down here we
have our properties, and in our properties,
they are the same as designer settings. If you would art something, you will get a bunch of
settings over here. Up here, we also have some
modes where you can choose between if you want to add
some filters or levels. This is all a little
bit more complicated. You can choose the art masks, which we will be using a lot. You can choose the
art layers and fill layers which we
will go over later on, and also on how to dd folders
and other kind of stuff. So this is something
that we really will be going over when we
actually start texturing. Now there's a few more windows, and these windows we will
already use right away. Here at the top, you have
your rando settings. You have your display settings, which allows us to control
the environment map. This is just like
Mama Set Tolbac. It uses environment maps. So what I always like to do is I like to click on
my environment map, and here you can see
that if I select different ones, the
environment changes. But the one that I want
to use is I want to use Studio Timoco which is
this one over here. So when you select that one,
that one is quite neutral. And then what I like to do is I like to go ahead and scroll down to my activate
post effects. And I like to activate my
tone mapping over here. So let's click it on.
Set the function over here to Sensitometric,
like this. It does make our window or
viewpot a little bit darker. So what I like to
do is I like to set my gamma a little bit higher. And my exposure a little bit higher until I can see
everything a bit better. But this one is a little bit closer to looking
like Unreel engine, because there's
always a differences. There are always differences in viewpots between
UnreelEngine, marmoset, and substance painter. You can't really
avoid it. You can never make it look
exactly the same. However, what we can do is
we can make it look similar, so that when we have our pipes and import them in
substance painter, we often need to do
very little changes to them in order to make
everything work properly. If you want, there's also other toe mapping
like vignetting. If you like to give your
scenes on vignetting, but honestly, I don't
really need it. I like to often turn on anti alysing over here just to make my mesh feel a
little bit softer. Now for the rest, we don't really need
to do much over here. You can also control your
environment exposure in here just like in painter
and that kind of stuff. And your environment rotation
can be controlled by holding Shift right mouse
button to rotate around, or you can just use your
environment rotation over here to rotate it around. That's all up to you.
Now that over here, you also have some
shader settings. However, we don't really
need these shader settings, right now, so I often
leave them to default. I guess this kind of
stuff like displacement and subsurface scattering
is not actually needed. But basically what you want
to make sure is that it is set to ASM, metal rough. The reason I'm not
worried about this is because when we
selected that preset, it will already set all
of this stuff for us. And for the rest, it just
has some history stuff and just like a log which
we both do not need to use. Okay, so that is the
general UY out of the way. In our next chapter, what
we will do is we will actually start by
texturing our pipes, which shouldn't take too long
for something like this. So let's go ahead and continue with this in our next chapter.
56. 35 Texturing Our Pipes: Okay, so let's go ahead and get started by texturing
our pipes over here. I feel like whenever we just jump right in and get started, it's often the easiest to understand rather than me trying to explain
to you with voice, especially because I am
fully aware that there are many people like me
whose first language is not English who
are watching this. So I want to try
and keep everything as much visual as possible. So we have our pipes, and
we have everything set up. Now, it works the
same way as designer, and the same way as modeling. We want to start large and
then go to smaller details. Starting large, the first
thing that we need to do is we need to start with, like, a base material, just like what our
pipes will be. Now for this, if we just
go ahead and open up a reference over here, and have a look at our pipes. Now, we want to go for, like, a little bit more older pipes. So we would, like, make
a balance between, yeah, something like this,
like this type of, like, a bit of rust here and there, a little bit of, like,
this old painted. However, I do want to make
them a little bit more shiny, just because in our
case, shiny looks nice. That's mostly it. So it's like a balance between these two
that I kind of want to get. I don't want to get, like, that really dull looking paint. But still want to get something. And let's go for, I guess, let's do a classic. Let's do red because red
often stands out a bit. But the nice thing
is it's posedural so we can always
change the color. Okay, so knowing that, we want to go ahead and go
for a base material. The nice thing is that
what you can do is you can go up here into
your smart materials, and here you often have
many different materials. So we are looking
for a painted metal. We can go here and here
you can see plastics, and here you can see
normal bare metals like steel and stuff like that. And here we can steel painted. So that's already getting
a little bit closer. Are not amazing, but they are
like a really solid base. So what I like to do is I
like to use them as a base, and then I basically throw
away half of the stuff. Let's use our steel, painted, scraped green over here and click and drag
this into our layers. Now, you can
instantly see that we already have some
sort of a texture. It's not great yet,
but it is something. So what we can do is this
one is placed in the folder. So if we open it up, personally, what I always like to do is
I like to go ahead and turn off everything
except for my base, because I like to
just go ahead and, like, work on my base
and then continue. So over here, what do
we have right now? We have a base fill layer,
which is one of these. It's just like a node that basically applies
a plain color, and then it uses a filter. Over here, it looks like
it uses a filter that adds like some scratches
in our roughness, which does most of the stuff. I'm not so sure if I like scratches so much
because it's like, how do these scratches
get on pipes? That's more what
I'm thinking about. Like, there needs to
be logical things. But basically, what
this fill layer does, and we will go over
this a little bit later on on how to actually use these customly is that basically we select our
roughness over here, and then we apply a grunge
map to our roughness, just like we would
do in substance ier. It's actually really
important if you watch the substance designer
chapters if you want to have a clear
understanding of this. So what we would do is because
I don't like scratches, is I go to my texture
step over here, and I scroll down and I
find some roughnesses. Some of these are actually
made by yours truly, because I worked
with Adobe on them. So what I can do over here is I can go ahead and I can see. Let's try, like, something a little bit grainy, a
little bit spotty. Let's see. What grunge
dirt, tin maybe? Let's drag it in
here. Yeah, and see, just like that, you can
very quickly change. You can also, do something
softer like that. So it is quite handy to
use maybe some leaks. It's a bit too strong. But in general, what you
can do is you can just play around with it and see
which one you want to use. I think I'm actually going to go for the very
first one we used. You also have control over
your balance over here, which can increase or decrease the amount
of your roughness. Next, what it adds is it
adds a default looking. It's basically a Filter, and this filter, what it does is it just like arts
and metal effects. You can find these
filters if you go down here to this one,
which is the filters. And basically what it
adds is like you have some metal effects
in these filters. The way that you
would art filters, just to very quickly show you, let's say that you
have a fill layer over here and you make the
roughness nice and shiny, you can go ahead. Let's make it a bit darker so that you can see it like this. You can see I can
very quickly change the color and I can very quickly change
my roughness amount. However, this roughness
is really perfect. So what you would
do is you would go down here or you can
right click and find it. You would go down
here, art a filter. Click on it, and then down here, you have some metal filters. So let's say we grab
the metal finish rough, and then you can see
that it will add these interesting details over here to our roughness
and our base color, which will instantly
make your metal feel more like, well, metal. So that is that one. Anyway,
let's continue on over here. Next, what we're going to do is we are going to
make our color. I want to go for red,
but I don't do this. Don't go perfect. Red, go for a little
bit more duller. You would be surprised how quickly something can
look realistic when it's just a little bit
more duller and worn out and a little bit
darker. Let's see. Like that. It will often fit way better into
your environment. However, in our case,
we do need to have a look around to make sure
that everything looks fine. I can see over here also that
I can clearly see my seam. Now, this seam isn't that big of a deal because we
have that little pipe thing. But here at the top, you
can also see our seam. The reason for this is
because most likely, our texture over here
is using our UVs. Now, when N uses our UVs, the seams are more noticeable. However, you can also use something called
triplanar projection. When you use
triplanar projection, it doesn't look at our UVs, as you can see, to apply a mesh, but it just looks at
projecting whatever we have, in this case, our
grunge texture from every single site over here
and softly blending them. This often allows you to, like, hide seams a
little bit better. Unfortunately, you cannot
do that with your metal rough over here. Oh,
no, we can do it. You can press triplanar
mapping over here, but it doesn't
always work as well. So we are just going
to leave that. Next, we can just go
ahead and continue on. So what do we have?
Surface details. Let's turn this on
and see what happens. It looks like that
these surface details are like a little bit of, like, a painted the
painted look effect. I honestly I quite like it. Let's go ahead and click on the mask in our surface details. And what we can see
over here is that it is using a mask editor. A mask editor, you
can find up here. It's like a smart mask. You can drag in
whatever you want, and it will basically
create a mask. If you Alt click on it, you can see what the
mask looks like. So right now the mask
looks like this. And if I would go ahead
and, for example, grab paint Alt and drag it on, you can see that
it would change. So based upon that, if you just go ahead
and go over here, you can control whatever you want with these
different masks. When you click on the mask, you can control a bunch of sliders. You can control
the global balance over here, which is quite good. But you can also control how much embiotclusion
gets affected. And this is why we
have our textures. So here we have our
emboclusion and our curvature. Honestly, most of these sliders, I don't want to get
too much into it because then it becomes
too complicated. But see like this, global balance allows you
to control the amount. Global contrast allows you
to control the contrast. These texture notes
over here allow you to control the breakup
between your textures, and you can find these
textures down here. So these are just
simple grunge maps. You can once again, same as
before, you can go in here. You can simply drag in
a different grunge map, and it will change the effect. But I actually like the one
that we have over here. So what I would do is
I would, for example, go to my actually,
you know what? I quite like what
we have right now. So we have this slight surface noise which
is looking nice. I can click on my
base layer over here, and then I can control
both the roughness, as you can see over here. You can also turn
off the roughness if you don't want to
control it like that. Let's give it a little bit of roughness and very important,
I can control my height. So remember when I said that
our height is our norm map. This is what I meant. As
soon as we add height, it will also be translated
into a norm map, but it is super sensitive. So what we want to do is we
want to set this maybe to -0.01 to give it just a nice soft effect
over here with our paint. So we can go to the
next one edge damages. I don't like it. I'm
going to go ahead and click on the edge damages because I don't
like how they look. I'm going to go up
here and I'm going to press remove layers. Next, we have our dirt. I
don't like the dirt also. So I'm going to go ahead
and remove the dirt. And next, there's,
like, a sharpened node, which you won't need too often, but it does apply, like a tiny bit of
sharpening to your mesh, which can sometimes look nice. So we now got this
stuff over here. Let's have a look at
this one because it's a bit easier to see all
of our materials moons. So, I would say that
we now have our base Painted color over here.
That's looking pretty good. So what else do we need to do? As you can see, is we want to go ahead and we want to
create some variation. What you can often
see, especially over here is that you have
some dirt and you have some overall color variation
and that kind of stuff. I want to go ahead
and start with some large variations like the dirt and the
color variation, and then move into some more
smaller ones like our rust. So what we can do
to add some dirt is let's go ahead and go up
here and add a folder. And call this
folder. Dirt. Now we are going to create some
custom dirt pieces. So what do we want to
have for these pipes? We want to have
some generic dirt. We want to have some dirt that changes the color of our paint, like fading out our
paint a little bit, and we want to have
some dust that is laying specifically
on top of our pipes. So let's go ahead and
continue with that one. The generic dust
one is quite easy. What you want to do is you want to go up here
and add a fill layer, and once again, a fill
layer is just like a flat. And I don't need a height map. I don't need a metallic map, and I don't need a norm map. All I need is a base
color and a roughness. We are going to set our base
color quite low because it is dirt and dirt is
often not very shiny. Sorry, our roughness, I
mean, in our base color, we are going to go for, like, a bit of, like, a brownish look. So you can just go ahead
and go in here and control, like, the brown looking dirt
that you have over here. Now what we are
going to call this is OCC underscore dirt. OCC stands for occlusion. We are going to use our
occlusion map to basically generate dirt in between all
of the cavities and stuff. Now, in order to use this and actually have
proper dirt on this, we need to add a mask. So we can go up here and we can add a black mask like that. Now that we have
added the black mask, you can see anything. Of course, if you want, you can literally
paint in the dirt. However, we are going
to use a generator. This generator, you can find by going up here to
our Smart masks, and in here, we want to use one that is salty dust occlusion. Oh, it's out saving. And speaking of outer saving, let's save our scene so that it works so that the outer
saves work properly. So let's go ahead and go saves Pipes score texture,
and let's press safe. Okay, so our dust
occlusion over here, we can click and simply drag it while we have
our mask selected. Now, what you can see
is that if we click on it and play around
to the dirt level, it will generate dirt based
upon where our occlusion is. It also allows us
to generate or use a contrast to make it
more or less strong. You can see that this
happens everywhere, and it will instantly make our pipes look a lot more dirty, which is fitting for
our environment because our environment is like oh, that's a bit interesting. That one I need to check out. But yeah, our
environment in general, it's like these
pipes are in, like, a concrete environment
that has overgrown nature, so it would look a
little bit dirty. So what you want to
do is you want to basically play around
with your levels. I'm not going to go
too intense with it. Maybe something like
this looks quite nice. You can try to use triplanar. Over here to make your dirt
a little bit more localized. And then for the rest, you can also use
your grunge amount to add more or less
grunge effects. These grunch effects, you can go up here and you can once
again enter a custom grunch. If you want your dirt to look different, you can, for example, grab a dirt crunch and uses and press use custom grunch and then
you can see that now, it uses a different type. However, I'm just going
to stick to this. Going to set my grunge
amount a little bit less. And the next thing
that I would want to do is I would probably go ahead and I
would go into my color, and I'm going to make this
color a little bit more like a grayish color because often brown really is
associated with actual dirt. Now, I have this strange
problem over here. I think this is like a small
problem in our AO map. So let's say that we
have this problem, we don't like it and we
want to twin get rid of it. What we can do is we can
go up here to our mask, and currently, because
we have a generator, we cannot actually
paint in our mask. However, if we go up here
and add a paint layer, we like a layer
where we can paint on top of it, like you
can see over here. Now, I'm quite curious. So this one actually
looks quite strong. So let's go ahead and go, press the button B over here. And what the B button does
is it will show our bakes. So in our bakes, I can
see that my ambient occlusion and I think
also my normal nut. Let's call pre. No,
my normal is fine. So it looks like that
my ambidclusion, for some reason, has
these white dots in it. That is really interesting. I can also see them a
little bit over here. Let's look at the other pipes
to see if that happens. Honestly, in this case, it's good that we have some problems because
when we have problems, we can go ahead and
we can fix them. So I don't see them
anywhere here, only over here, which
is quite strange. So let's say that, Okay, I
want to fix this problem. How can I fix this?
The easiest way to fix this is to simply jump into Photoshop and very quickly paint
out these arrows. So here we go inside
the Photoshop. I have my AO inserted. The techniques that I'm using, you can use in any
software like Gimp, or you can use the Niva
free software online. All I want to do is alt and
zoom in to like these arrows. And there's two ways
that you can fix it. You can use your
clone stamp tool. It allows you over here to hold Alt and then basically
stamp it out. However, what I often
like to do myself is, and I think this one is a bit
more specific to Photoshop, is I like to click and hold
and use my patch tool. With your patch tool, you
can select the error, and then you can basically
move your patch, and it will also balance
out your lighting. So it will make it
look like there was nothing there before. I honestly, I'm not completely sure why this is happening. This is the first that I see it. Maybe our cage was wrong, maybe we had like
a little error or something in our
hypol you never know, but what I'm going
to do is often it's just quicker
to fix it like this rather than try to mess around the substance painter and then
to simply update our mesh. Because here, all I
have to do is just drag around it and
change it like that. I can, of course,
also just like, do a big drag like this if I want to, if I want
to save some time. It's up to you. It's a
little bit less precise the bigger you drag
around your meshes, but often it does for an emboclusion because an
ambulation does not need much, it doesn't make a
big difference. So I can go up here and I
can just simply fix it. And I don't know,
I feel like often students and also in general, people, they feel like that switching back
and forth between different programs
to quickly fix something is like cheating
or something like that. And I find it quite strange because you should
have the mentality to use whatever program you can in order to create
the best possible art. Of course, AIs are a little
bit more of a moral question, but in these type of cases, I sometimes literally
I sometimes simply switch
between, for example, Tres Max and Maya, because there are
some features like the topology in Maya, which is better than Tres Max. And as long as I
know the software, I can just as well use it. So here we have fixed this and we can go ahead and press Save. And now it will save our
scene and all we have to do. Is we have to go
back into painter. We have to find our
ambient occlusion and we can find it in our
texts folder up here. And often what you want to do is this is based on alphabet. So we have our
pipes, so we need to go quite far down
in our alphabet. And here we can
find our pipes AO. Now, what I want to do is I
want to right click and press reload, but very important, in order to update
it, you need to go to your text settings and redragon
your ambient occlusion. And when you re drag
it in, it is fixed, because now those embit
clusion spots are no longer being taken into
account with our mask. So that's it. So we now have started adding
our first dirt. Now let's go ahead and
start by adding maybe, like, some dust, for example. Now, for my dust,
I like to right click and press
duplicate my layer. Call it dust. Oh. Dust. And I like to get rid of
my paint and my dirt. Dust itself, I like
to often make quite gray because dust is often
more gray than brown. And now you can choose
what you want to do. You can try to find a generator, but I often find that even though we
have dust generators, they look good to me, like they rarely do like the
typical dust from above. Even when I like play around
with my balance, see? They never seem to
be quite perfect. So instead, what I like to do is I like to simply
paint it by hand. I like to go to my brush, and I like to grab a
soft looking brush. So if we go up here, we
want to go for something. Normally, I use custom brushes, but for you guys, I will
use a default brush. So let's scroll
down and let's grab our fur soft white over here. You want to set the
size quite high. Or quite big. And then what you can do is you can just
click a few times. And here you can see that I'm
very softly already adding some dust to my model,
just like that. See? And that already starts
to look quite a bit better. So we can go ahead and
do the same over here. And I'm just basically
clicking a couple of times because I want to
not make it too intense. And if I click and hold, here it just becomes
way too intense. So I just click and drag. And it will also give
you different densities, which actually can look nice. Over here, and it's
up to you like how far you want
the fall off to be. So I'm just going to improve my fall off a little bit
more here and there. And just like that because it is called
substance painter. It's not called
substance generator or something like that. You can go ahead and you can
make it look quite nice. So we have those ones,
and for some reason, click one and then press F, and then you can zoom
in, same as Cebush. Over here, we don't
need to do much because there's a lot
of occlusion going on. But I want to go ahead
and use this one. And now, for this one, I
actually am aware that we are going to most likely
rotate this one sideways, but just in case we are not going to do that or use
it in different ways, I do not want to add dust there because I know that the
dust is very specific. Once you're happy
with your dust, what you can do if
you feel like, Oh, no, I need to have
more or less of it. No more. So if you feel like
I need to have less of it, you can always go ahead and go down here in our base color, and you can set the
opacity down a bit, and that will control the
amount of our base color. Please note that this controls the amount
of our base color. If we want to control the
amount of our roughness, we need to go from base
color to roughness up here, and now we can set the
intensity for roughness. But I'm just going to leave it, and I'm just going to tone down my base color a
little bit like this. Okay, awesome. So we got dust. Now what we want to
do is we want to add some color
variation to our paint. This one, I feel like
it's better if we add this inside of our
base painted color. So what I'm going to do is
I'm going to add a filler, only turn on the color,
and I'm going to show you another technique
of adding granges. So as you can see over here, it looks a little bit
like I don't know. It's quite generic, actually. So not so much fingerprints, just like a generic
looking breakup. So what I'm going to
do and I'm going to call this paint whitening. And then I want to go down here and add a
black master disk. But this time, we are not
going to add a generator. What we are going to add is we are going to
add a fill layer. So we can go up here to our little Magic
One tool artifact, and we want to add a fill. The reason we want art to fill is because adding a fill allows you to input a map, a texture. Whatever you want to input,
you can now input it. So you can imagine that what we can do is we can go to textures and grab something that looks interesting and that feels a
little bit similar to this. So let's go ahead
and have a look, and you can click and Hofer to make it look a
little bit bigger. So here we have some
more dust and stuff like that. Some slashes. So we want to go for
if you scroll down, often what you find here
is some more softer. Oh, hey, and I made these
ones. That's funny. Over here, you can often
find some more softer stuff. Let's try this one. The
grunge, wipe, smudgy heavy. Click and drag it in here.
And now this is what we get. Not very good, but if we go from UV projection to
triplanar projection, we can now press W E and R
to rotate and everything. And if we select R, we can scale this down a
little bit, like this. Next, what we can
do is we can go ahead and we can play
around to the balance to make it more or less and also play around
with your contrast. And the cool thing
is that fill layers, we can actually
change the opacity of all of our maps
at the same time. So if we would have a roughness and stuff,
in a fill layer, you can use your opacity on the fill layer itself, and
we can tone this down. And toning this down,
this is what we will get. See, we get a nice
soft paint variation. I'm not liking this grunge, so I'm just going to
go ahead and see. Just try, like a few of them. I do need something like
slightly stronger details. Maybe like this one over here. Oh, I don't like that one. I just need to find
the right one, so I like to often
just drag in a bunch, play around a bit
with, like, a balance until we get something we like. You can see over here that
the triplanar mapping is not always perfect because of it going because
we are using cylinders. However, you can definitely
see that it does on the seam. I definitely improves a lot where it can hide the
seam a little bit. So I don't like this
one. It's quite difficult to find one that
I like, to be honest. Let's see. We have some smudges. Maybe that one will work. If we go ahead and set the
tiling a bit higher. Yeah, some smudges might work. Let's grab grunge fingerprints
smeared over here, and let's set the
tiling to around four. So you can actually
control the amount of tiling next to, of
course, the scaling. So you can do the scaling, but you can also change the tiling. And let's play around with my contrast a bit more to
give it a bit more contrast. And we can also play around
with my balance a bit more. Quite like that. I
think that looks visually quite interesting. So next, we are just going to go down here and we're
going to tone it way down because we just
want this to be some very soft color changes. What we can do is we can
set our color to be a slightly bit red like this. And setting it slightly red, it will give it more like that grounded effect as
if that this used to be red paint and then started to change the color
around a little bit more, like you can see over here. Let's go in here and I'm going to set my contrast
down actually. And just in general, this is starting to look
quite interesting. I am going to make it
a bit bigger, I think. I think set the tiling to maybe like two or
something like that. And maybe let's just quickly
play out a bit more with, like, it's a bit more intense. Let's play out a
little bit more like our smuches because I do
feel like there's, like, some harsh cuts, and I'm not sure I really like those
harsh cuts that we have. So we have this one,
which fingerprints dirty. I don't know. I want to
get something like soft. So I guess I will stick with, like, my smudges over here. But yeah, I'm just
not convinced. I don't like these cuts
that we have over here. And I'm not sure I might
be able to boost this up, but no, it's not working. Let's try to blur
this a little bit. Be careful with blurring
because blurring can very quickly make
something look low resolution. So let's go ahead and
add a filter on top of our grange and select the
blur filter over here. And blur it? No,
doesn't look good. I just don't like this
one, to be honest. Let's just continue searching. I know this might
take like a second. I don't know why this
one is so difficult. Oh, I like this one. Okay, I guess it's not as
difficult as I thought. So let's go ahead and yeah,
let's do something like this. Let's see. One
tiling is too small, T. Let's set the tiling
to around three. Yeah, see, this feels a bit
better, and it's tone down. So you basically
just want to, play around with it until you get whatever you want to
capture. So here we go. So now we have our pipes which
are looking pretty good. Now, the last thing that
we would want to do is we would want to go ahead and
add some rust to this. So we can go ahead and we
have our pipe, space color. Let's add some rust. And for that one, I do normally
use my own custom rust, which is a lot better
than the default. But in this case, because
it's a editorial, let's go up here to
materials. Type in rust. And then we have the rust course and the rust fine over here. I'm probably going
to use rust fine, and I'm just going to
drag it here at the top. So create a folder. Let's call this
folder. Pipes. Color. The reason I want to call
the pipes color is because I want to probably
change the color for, like, our bolts and
stuff like that. So we have this rust
fine over here, and let's set the color to be like a little bit more of
like a duller rust color, something like
that, for example. And next, what we need
to do is we just need to add a generator that
will control our rust. You can go way more complicated
with this kind of stuff. But we are going to keep
it nice and simple. Let's start by setting
our UV projection to triplanar to basically hide our seams, as you can see, see? That hides our seams really
well, that kind of stuff. And next art our mask over here. And now, what we're going to do is we are going to probably add like a couple different masks to this to really get
the effect that we want. Let's go into Smart masks and
we want to get something. You do have actual rust here. You have like rust
and rust drips, but these often don't
look very good. Like, see, this one just
looks like spotty rust drips. That one looks quite nice, I guess, but I often use, like
a slightly different one. But I want to just get
something that has, like, some edge damage.
So let's go over here. We have edges, Uber, strong, dusty, maybe dusty. I want this to be quite a
fine rust. Let's go up here. Okay, so dusty isn't working. Let's go for, like, Uber. Okay, so edges, Uber does start to give me
an interesting effect. Let's go into my mask
editor over here. And now what I want to
do is I just want to, play around especially
with my balance and my contrast. Over here. Okay. So that is looking quite interesting,
what we have right now. What I'm going to do is I most likely want to create
a folder for my rust. The reason I want to do that is because if I place
this in a folder, I can more easily paint out the rust
where I don't want it. So we have a base
rust over here. What I like to do now
is I like to go ahead and add another generator, but this one is
slightly different. You want to go to art
effect and add a generator. This generator, it is some Wi specific generator notes like ambient cclusion and curvature. But there is one and I
don't know why it's in here that is called
dripping rust. This one, it is quite
interesting because you can set your drip intensity over here and you can give it like a really interesting control. We can set our drip smoothness to make it less or more smooth. So let's make it not too smooth. And what is quite cool is we can set our spreading
smoothness. And in this one, here, we can soften things out, and then we can also
play around, of course, with our overall
rust control and contrast to give it like some small yeah, some slight rust. I don't know if I can set my
dripping intensity to more. Yeah, I can set it to
like two by forcing it by painting it out like this. So let's say maybe
like 1.5 over here. And basically, the reason that I wanted to do this is
because I wanted to paint out my rust in certain areas just to not
make it too overwhelming. So what I'm going to do at
this point is I'm going to go ahead and I'm going to add a
paint layer on top of this. Go to my brushes
and grab something. Hmm. Artistic. This one, heavy might be a
little bit too strong. Yeah, he see paints
it out too strong. I want something that's a
little bit softer cement one. Yeah, let's do cement one and set the flow
a little bit higher. The flow is almost
like your robaste. And now what I want to do
is especially like to get started around our over here. Whoa, I don't know why the
rust is so strong there. But around our
seams is especially like an area where we want
to get rid of the rust. Over here, it looks
quite subtle. And just like around
these areas where we have our occlusion, I'm
inside my other. That's sometimes a bit annoying. Where we have our occlusion,
I want to sometimes, like, just basically paint out our rust a little
bit here and there. We will make the rust
stand out more later on. But for now, I just
basically want to go to, like, some of these
areas where it's like, really heavy rust and especially like over here
where we have our seam again, and I just want to reduce the amount of rust that we have. So I'm just going
to paint it away, and I keep pressing Shift right mouse button
to rotate my sky. And don't just,
like, paint a line. If you paint it away, softly fade it out on both
sides to make it feel more grounded
and less like it is less like the rust is just painted out
to hide something, but more like the rust has just not arrived in that area yet. So there we go. Yeah, it
is okay to have some rust. But remember, this
is a modular asset, so you don't want to
make the rust too intense in some of these areas. You want to make
it quite generic. We can also go up here. This
one actually quite like. Maybe like around here
around the seams, I might want to like,
because this rust, it does not abide by
triplanar mapping, so it just goes
straight through. So that is looking quite nice. I think we got some
interesting looking rust. Now what I feel like is that I feel like that we
have this rust. Everything below the rust
should be like peeling paint. It should be like no more paint. It should be like almost like
bare metal a little bit. So what I like to do is I want to introduce you
to anchor points. Anchor points are will Awesome. What you can do with anchor
points is you can go down here and art
an anchor point. This means that this mask that
we have created over here, it's almost like a
instance of the mask. We can use an anchor
point to reference this mask in other masks,
if that makes sense. Also, I do note that over
here, I want to, like, in my anchor point, I'm just
going to go ahead and I'm going to paint out on my seam. And the way that
I show this is by just holding Alt and
I click on my mask. I'm just going to paint this out a little bit more to make sure that my seam is hidden. Before we do this. So yeah, because the flow is too soft, I need to sometimes redo it. And I can press M,
or I can click once again to show this again. So, okay, anyway, this anchor point we'll be able
to reference a mass. So what we can do now
if we press M again, is we can go for example
in our SMAC materials, and we can grab something like
a steel rusted over here, which is like a really old looking steel as you
can see like this. Now what I can do is I can go ahead and turn off the rust. So let's just delete it. You can keep your edges and your
metal scratches if you want. Basically, the goal is to have
a wily bear looking metal that we will end
up using below it. We can have this metal
and we can, for example, set our base color like to
shine a little bit less. And having this bare metal, what we can do is we can go ahead and we can
add a mask over here, and we want to reference
our rust mask. Now, we have one
problem right now, and that is that our
rust is at the bottom. However, you cannot go you
cannot go from up to down. The way that substance
painter reads everything is from down to
up because it is procedural. For example, if I
go here and I add a fill layer and click
on my anchor points, I cannot see any anchor points. If I grab my bare metal and move it up, go to my fill layer. Now it's able to see that one anchor point
that we created. But we of course
now have a problem. The problem is that I
want to have my rust or this metal below my rust
and not overlaying my rust. So what I recommend
doing, in this case, what we can do is
we can simply go ahead and copy or sorry, move our bare metal down, and we can right
click and we can go ahead and we
can copy our mask. And what it should do right now is it should copy
all of these layers. If we go in our bare metal
and press paste into mask, it should apply all
of our mask layers. Now what I'm going to do
is I'm going to get rid of my textures over here so
that we have a blank map. And in here, I'm going
to add my fill layer and I'm going on here add
my rust fine like this. So what you can see
now is if I turn this on and off, can I do that? Yes, you can see that now we start to get this metal base, and below it, we start
to get the rust, which looks a little bit better. I'm not yet too happy
about just like the overall colors of my
metal, but it is a start. What I like to do
in this case is I like to go ahead and we have our fill layer in our rust. I like to go down here and
I like to add a levels. What I can do with
the levels is I can actually increase or
decrease the rust. So I can make my rust a bit
stronger simply by here, increasing or
decreasing the mask. That's literally all
that we are doing. We are just adding
more in a mask. So I can play around
with my levels to make my rust a little bit
stronger than my actual metal. And then what I like to do is in
57. 36 Importing Our Assets And Textures In Ue5: Okay. So what we're going to do now is we are going
to get started by finally importing all
of our meshes inside of Unreel engine and
setting everything up. So, let's get started by
importing our measures. Why not? That's probably the easiest one. Let's go over here to assets, and in our Assets folder, this is where we wanted
to import our measures. So if we just have a
look because we did not export our modular measures yet. Oh, let's get rid of
that advertisement. Exports to Unreel, but we did
export our pipes already. So what I can do is sorry, let me just get sac to move
this over to my other screen. All I want to do
is simply drag and drop in my pipes over here. Now, when you import
something in real, there's a few important settings that we need to keep in mind. One of them is we
need to go into advanced and turn
on combined meshes. If we do not do this,
every single separate mesh in the FBX will be
imported as a unique mesh. So instead of having
pipe straight, we would have like bolt one, bolt two, bolt three, et cetera, et cetera, et cetera. That one is quite important. If you ever want to use nanite, you can press Build Nanite, but we are not going to use
nanite for this tutorial. The reason we don't
use it is because nanite is a unreal
engine specific. However, I want to teach you the introduction
to environment art, which means that
you can also use these techniques for
any other engine, including custom engines that
are made in game studios. We want to go ahead and keep
the uniform scale to one, because as far as
I can remember, we set our scale the
same as our scale inside our engine over here,
but we can just check. We can simply press
Okay and import, and to double check, we can drag this in. And then I can see that it
looks like that our pipes, we made our pipes a little
bit too big, probably. This is just me forgetting that we probably did not really, focus on the scaling as much. Now, if you ever want to change your pipes after the fact, what you can do
is you can double click to open up
your pipe over here. And what I like to do is, I like to have a
double view here, and this is only
needed for this one. You want to scroll down
to import settings, transforms, and you can choose. Or you can scale your pipes
inside of threes Max, or you can go ahead and
go in here and set this, for example, to 0.8
and press reimport. And then it reimports and yeah, I think 0.8 is a
much better scale. I then just want to
go ahead and open up the other ones,
because, of course, if we do one, it would be nice if we also reimport the bend. And the T over here 0.8, and let's press re import, and that should do the
trick for these pieces. Okay, cool. Now what I'm going
to do is I'm just going to remove that one because I want to continue importing the rest. So let's go ahead and
open up Maya here we go. And, of course, you can
do the same with Blender or Tres Max because all we're going to do is we
are going to export. The reason I use Maya is
because I used Maya to snap and prepare my
UVs for my mesh. So what I can do is I can
go ahead and I can simply start in our two unreal
folder file export, set it over here, and we
want to export it as an FBX. Turn on triangulate, and
this one is going to be railing underscore 01, and then we can just export. Next one, this our
File export settings. Will underscore 01. There are also
plugins that you can use to export layers
individually. 1 second. Vertical pillar
on the scuzzier one. These plugins are handy to look into if you are exporting
a lot of meshes. I use mine in three years, Max. I don't really
have one for Maya, but just something
you should know. Horizontal Pillar 01 over here. And then finally,
we have a floor, file export selection,
floor underscore 01. Awesome. So those are
now all exported, so we can go into in real. We can go ahead and
we can select all of those FBXs that
we just exported. And this time, yeah, we just need to go ahead and
keep our uniform scale to one because I believe that these ones are imported
using our modular. So theoretically, Oh,
that doesn't look good. That's a really
weird Did I mess up my that's interesting.
Why did that mess up? Okay, so that messed up. So let's have a quick look back. Let's use our vertical
pillars like a base because we did export
everything from Maya. So I must have said, if we
go for our vertical pillar, let's scroll down, and we want to have a
look at our unit. So somewhere along the line, we must have messed up our unit. So right now our
units are set to automatic that should
normally work. Let's set our units in meters. And let's go ahead and
export that again. Go in here, right
click and re import. Wow, that's very strange. To be very honest, this has literally never
happened to me before. I don't know where
it went wrong. So I guess then
what we can do is I guess we just need to
change our units over here. So if it isn't meters, which is a little bit strange, but I guess what we can
do is we can set this to. And I know it says like kilometers or centimeters
or something like that. Let's go lower, I believe. We need to go. This often what it does is it just
scales everything up. And else we can also always do some scaling in here,
some custom scaling. So let's just go
ahead and reimport. Okay, so for some reason, in
centimeters, it does work. Yeah. Okay, so I guess
we had to set them to centimeters.
That is so strange. But that's how it goes.
Whenever I'm making a tutorial, that's when the random
problems happen. It always goes like that. Anyway, it doesn't
matter too much. It only took like
a minute to fix. So we can just go ahead and grab our wall vertical pillar
horizontal pillar and just like reexport them. See, yeah, that might sometimes
happen with the units. And I guess for, like,
an introduction course, it's good when we have mistakes because at least if
you have the mistakes, you are not left out with, like, not knowing what to do, because I can just go ahead and fix it. I just select the meshes, right click, and I press Rinpot. There we go. Now they are
all working totally fine, as you can see. Awesome. So our meshes are now imported. Now the next thing
that I'm going to do is I'm going to go ahead and I will start by
creating our basic material. So we want to now
have our meshes. Now we are going to
create a basic material. Now for this, we first
of all need to import some textures because we could
use those for materials. That's in our texture folder. Makes a folder called pipes. Another one called concrete. And in the concrete folder, I will make a folder
called tiles. Let's start with
our pipes because it's like the easiest one. And if we go ahead and just navigate to
our textis folder, and you want to grab
your base color, metallic normal roughness,
do not grab your height. Your height is like
a leftover that we are that we actually
do not need. When you import this stuff, there's a few things that
you need to remember, and this might be a
little bit confusing. If you are texturing inside
of substance painter, it exports your null
map as direct X, which means we do not
have to do anything. Our no map is already correct. However, if you would be
texturing in substance designer, you would need to do a setting which I will
show you in a bit. So if you're exporting
for subs painter, the only thing you will need
to do is you need to go to your roughness,
turn off SRGB. Go to your metallic,
turn off SRGB. The reason you want to do
that for these ones is because these are
grayscale maps. If we turn on SRGB, it will not properly
read in our material. Now, let's say that
we have our concrete. So over here, we
grab our concrete, and then we can go
ahead and navigate to concrete main and we can grab our base color,
normal roughness. I'm not going to grab my
ambient occlusion because this material has almost
no ambient occlusion. So I'm just going to
drag this in here. This one is open GL. As you can see you can see it because the norm
map is not flipped. Whenever you are exporting a norm map in OpenGL,
in this case, from substance designer
because we made it in OpenGL, you want to go down
here to Advanced in rtexture and you want to
turn on flip green channel. Remember how I've
been saying, like, multiple times that the
only difference is that the green channel is flipped
between direct X and OpenGL. So here you can see
the difference. See? So whenever the
green channels flip, it looks like
everything is opposite. So just flip the green channel, press Save. Open
up your roughness. And in this case, it looks
like that it already managed to see that roughness
does not have SRGB. Sometimes it's able to detect
this, sometimes it is not. I then go into my
tiles over here, Roughness, normal, base color. Honestly, I also
don't really need my embitcluson for
my tiles here. I use that one
more for marmoset. So we drag this in our tiles, flip green channel,
and double check our roughness that our
SRGB is done. Cool. Now, there's one
last thing that I want to go ahead and do, and that is I want
to go my textures, right click New folder. And add a folder called grunges. Now, the reason I want to
do this is I want to export a few grunges from
substance designer. The reason I like to
do this is because in our material, we
can add some, like, procedural looking dirt on top of everything else,
which might be nice. So if we just go in
substance designer, create a super quick, new substance graph and
just make it empty. And just call this like
grunges and press okay. This is going to be super quick. All you want to
do is you want to export a few grunges
that you like. In my case, the ones that I like is I like some grunge
leaks over here. Maybe I also would like to
do grunge map 013 over here. And let's see, something that might look interesting,
visually interesting. Whenever we export. And
let's do grunge map 01. However, I like to
change my random seat. Awesome. So we have
these crunches. Now if we press space and
add an output over here, what we can do is
in this output, we can go at and
call this crunch. Copy the identifier and paste
it also into your label. This just this
naming conventions. And then what we can do is
we can just go ahead and we can copy this one,
two, and three. So here we can go ahead
and call this grunge. This one we can call
grunge underscore 01, and also in the label score 01. And this one can be called
Grunge underscore 02, and in the labele underscore 02. This one is just the
identifier, which is your note. This one is the name that
your texture will use. So it's just like
a texture name. We then drag these in here. And all we need to do now is if we just go ahead
and textures, create a folder called grunges and we can just very
quickly export these. Normally, you do this
within 30 seconds or something when you
would not be dark. TGA, export, done. That's all. So now we have
these three grinches. I'm not even going
to save my scene because I know that
we don't need it. I'm just going to grab these
grunges and throw them in here so that we now have some grunges to, like,
play around with. Okay, we are now ready to start
by creating our material.
58. 37 Setting Up Our Materials In Ue5: Now that we have imported our textures and
all of our assets, what we're going to do is we are going to create our material. Now, we already went
ahead and we created like a plain master
material over here, which already showed
you, a little bit of the basics on just like
creating color and roughness. And it showed you the concept
of material instances. So we don't have to
go over that again, but what we're going to do
is create a new material and call this main
underscore master. Let's go ahead and
open up this material, and I'm going to keep
it nice and simple. What we want to do is we
want to go into our pipes, select all of our
pipes over here and click and drag
these textures in here. So now we have our textures that we can use in our material. So there's a few things
that we are going to go ahead and do if we
have these textures. The first thing
that we want to do is just like we can expose, if we go into our instance, we can expose our
color and roughness. We can also expose textures
so that we can replace them. You can do this by
right clicking, and then you could convert
this to perimeter. However, there are
two different things. I will start by creating
our material for our pipes, but we are also going to create a specific material
for tilable textures. So for now, just go ahead and press
convert the perimeter, but this is something that we would need to change
with the second one. We are going to for the pipes, make a very basic material. Call this base color. This one is metallic,
convert pemter metallic. This one is normal, convert
the pemeter normal, and this one is roughness. Convert perimeter. Roughness. Okay, cool. So we
got these done. Now there's a few things
that I want to do. So in our base color, I always like to add a multiply, and I always like to multiply my base color using
a constant t vector, which if you remember,
is a plain color. So for this plain color, I like to set this
plain color to white, completely white, right
click and convert Spemter and call
this color overlay. This allows us to
slightly change the color of whatever
we input in here. It's like a color overlay, almost like multiplying
a color on top. We drag this one
into the base color. Normal goes into normal. In our roughness, I
want to multiply. And I want to multiply my
roughness using a S click, so scale a perimeter and
call this roughness amount. Multiplying our
roughness by a value, which a default will be
one allows us to control the strength of our
roughness on top of our base roughness. Next, we have a metallic. We don't need to control the
strength of our metallic. However, I can imagine that not all the textures that we might ever
use have a metallic. I know that we only have one
pipes that has metallic, but let's imagine that you
have multiple textures, but not all of them
use a metallic map. What you can do is you
can add something called a static static switch
parameter over here, and call this has metallic. This is basically like a switch just like a substance Zina
turning it on and off. You can say if it is
true, input the map. If it is false, add
something called a constant, which is a plain value of zero, and then you can
send it to metal. So if it is true, it
will use the map. If it is false, it will just be zero, which means nothing. That's all. This material
is already done. As I said, it's a very basic material that we
are working with. And for the rest, we will
simply balance our texture inside of substance better. So we can go ahead
and we can save this. So yeah, parameters, parameters and multiplies
are your friend. So now we are going to go for a slightly more
complicated material. Also, I don't know
why my material is so weirdly, laggy in here. But let's go ahead
and save this. So we now have a main master. Now let's go ahead and
create another one. And what we can do for this one is we can
actually duplicate our main master and call this
main master underscore WS, which stands for world space. So this one is a little
bit more interesting. If we open it up, we want to go ahead and for world space, we don't need metallic because we don't have
any metallic texture, so we are just going
to delete that. When you delete metallic, it will become zero by default, but we want to keep the rest. Now, worldspace uses a
different setup of UVs, but it also uses a different
setup of textures. So what you want to do is, let's go ahead and let's use
our concrete in this case. Let's drag in our
concrete textures. You only have to do this
once, as I said before. When you convert
something to a parameter, you can just replace the
textures in your instance. The only reason I'm doing
this now is because I'm using new textures is just to
give you better visibility. So what you want to do is
in your texture disc case, because our UVs, we are
going to use a UV that cannot read a RGB
texture that is exposed. It needs to read almost like
a collapsed RGB texture. So you want to right click and
convert to texture object. Once you've done that, you
can see that everything is basically collapsed
into one texture, and now the node that we are
about to use can use it. If we right click and
now convert this to Pemter we can call
like a base color, and let's also delete
these other ones. So this texture, we need a node, and it might look
quite overwhelming, but it's actually quite easy. It is called a world
aligned texture over here. So you can almost see
like worldspace world aligned, triplanar. They are all the
same. Everyone just likes to use a different word. Now, it looks like a big note, but all you need
to do is you need to plug your texture
into the first one. And then you want to control the tiling into the second one. Now, what you can do with
your tiling is if you just go ahead and right click
and then in here, we can go ahead and we can add, oh, sorry, we don't
need to do that. Just as click and art
a scale parameter, and call this tiling. Now what we can do with
this tiling is we can go ahead and we want
to always go with quite a large value like 250 because it is tiling
across the entire world. Unlike the original tilings, which one and two
looks quite large. Over a large area like
the entire world, 250 is actually
probably quite good. So remember, we also have
some tiles on our walls, those tiles the
ones on our walls, we might want to end up using
our main master material, and I will show
you in like a bit. It just depends. It all
depends on what it looks like. So anyway, we have our
world align texture, and then you want to grab the
XYZ and plug that one into, in this case, our multiplier for our color overlay and
use it like normal. So we can go ahead
and right click, convert the texture object, convert the texture object. There is a bug, where if you convert it
to texture object, sometimes it changes
your output. So double check that
you have your textures. If for some reason,
the texture is different, you can
always go in here, click and drag and then
apply the correct texture. It's something that you will know what I'm talking
about if you see it. Our world line texture, we can copy and use it
also for roughness. However, a norm map
is a bit special. So we use this with
our roughness. A norm map needs something
called a world aligned normal, because normal maps use specific directions to
manipulate lighting. If we all of a sudden start changing our UVs
of our norm map, it can cause lighting errors. So just imagine Normp needs to use world aligned
normal, same tiling. And then over here,
what we can do is, I want to show you
another fun node. So this node is called the
what blend angle corrected. Normal. Oh, no, no,
sorry, that's not one. I completely forgot
what it's called. It's a normal strength note, but I honestly completely
forgot what I called it. Uh, give me 1 second. I remember it is called the
flatten normal over here. I don't know why I
forgot about that. So basically what
we can do is we can input our XYZ texture
into the normal and then add a scale
parameter and call this normal underscore strength. We might not need
this, but it is cool to just have
this additional map, and I think we need to set
a default to one over here. It's cool to just have
this additional map which can give us control over the
strength of our norm map. So we now have a
base texture done, and let's go ahead
and at this point, just try it out, and then we
can go ahead and improve it. That save sin over here.
And also save this one. Now if we go ahead and we
can go to our materials, what we can do is we have
our main mask rover. Oh, let's move this
out of the way. Right click, create
the material instance and call this pipes
underscore Rd, for example. Now we can open this
up, and in this case, we can just go ahead and turn on he metallic because
these are pipes. We want them to be metallic. But for the rest,
everything is fine. So we can save our
scene. And then what I like to do is I like to often have this one as like
a smaller separate window. Let me just move it outside. And now if I go into my assets, I can grab my pipes. I can grab my pipe
straight and my T. And then I can, of course, make these windows smaller to dragon drop or I can
simply go to materials, click on my pipes red, and then go over here and press
this little arrow button. And this arrow button, it
will apply our material. Now, you can save
everything here. Or what you can do
is you can go back to your scene and
just press Save A, and then it will automatically
save those pieces. And give the second because we are actually saving
quite a bit of data. Here we go. Okay, it's slower than expected.
There we go. Okay. Awesome. So what we can do now is we can go ahead and let's say that we drag in our pipes, and then we can have a look
at what we need to do. So we have our pipes over here, and like a few things that I already notice is that it
is too dark right now, and the roughness
response is not as nice. But I just want to go ahead and polish those
things later on. Let's say that I grabbed
this pipe, I duplicate it, and now with it
being duplicated, I can go ahead and just
drag in my tepose. I can set my snapping to, for example, ten, and I believe a snapping
of ten should work. No, this one needs like a
snapping of one, I believe. Oh, no, wait.
Actually, the T pose, the reason why it's not
snapping is because we did like a unique thing to it. So
let's leave that one. However, this one should snap and else I did
something wrong. So let's go ahead and snap
this one. Yeah, there we go. So this one does properly snap. Okay, so we have our
pipes now ready to go. Now, just to show you
some of the controls, if I want to, for example,
increase my roughness, I can set this to
like five to decrease and like zero to make
it much stronger. And now you can see that
we have some shine. So although I'm not happy
with the material response, I could go in my roughness
amount and set this to like 0.8 to start bringing out a little bit more
of that shine or 0.6, for example, like this, which will look quite nice. However, I tend to not often use this value
unless I'm in a rush, and the reason for that
is because I like to properly do it in my texture. When we do it in our texture, at least we know
that our model does not rely on a specific
material to work. So we got this stuff
over here ready to go. We can go ahead and
save scene again. And now what we can do is we can go ahead and start
with the second one. If we go to our main
master world space, we can create a
material instance and call this concrete underscore. Let's make this like a
plain one over here. So in the concrete plane,
if we just open this up, there's already a
few things that I know that I forgot to do, and that is that I
forgot to import my baked maps which
we need to apply. So let's go ahead and we
have over here concrete, and we can use this
one on our floor. Or no, wait, sorry, this one will not be
used on our floor. Yes, this one will only be
used on our floor. Sorry. So we can use this on
a floor over here. We can just drag it in here. Materials concrete plane because we are going to create
separate materials for every Bakes
map that we have. So here we have concrete
plane in our floor. And now the cool thing just to show you before we move on. If I drag on my floor,
you can see that the texture is wordspace
and when I move it, you can see that the texture
kind of moves with it. This is great. The
only thing limit to wordspace that
if you go sideways, the texture will be world space, so it will still be straight, so it does not follow your shape. However, for flat
shapes like this, we simply don't need to
do something like that. Now, all I would say with
this one is I would go in my tiling and let's
set it to 400. See to make it a
little bit larger. I think 400 looks fine. So we can go ahead
and save this. Now, what I'm going to
do is in my textures, create a new folder and call this normal base, for example. I then can go ahead
and I can go into my textures modular bags, and I can drag these three
bags that we created. Throw them in here and don't
forget to open them up. So it takes a while
for unreal to remember that you want to open it up as a
separate window. Sometimes it's still
thinks like you want to open it up as like a large
window or something like that. But anyway, flip the green
channels of your normals. And that is the second thing that we are now going to art. If I go ahead and
create a material, so just duplicate my
concrete plane and call this railing on the
score 01, for example. Now, I can go ahead and I
can open up my railing 01. Let's drag it in here. It's nicely rotate it
over here and open it up, select ailing 01 and apply it. And that's just press safe. So over here, you can
see that, of course, now none of our no map
details are actually in here, and this is because we have
not yet assigned a normal. However, we can see
that thanks to the UVs, everything is always
perfectly tilable. Even if I go ahead
and I use this, set my snapping to ten, and it should snap properly. There we go. You can
see that now everything stays perfectly tilable even at the transition piece,
which is over here. And that is the nice
thing about worldspace that you don't have to worry
about that kind of stuff. So for this one, what we want
to do is we want to open up our main master
worldspace and we want to drag in temporarily
like let's do the ailing one, ailing 01 and drag it in here. Let's actually move my
roughness down over here. Now, what you want to
do in your railing 01 is we do not want to use a world align normal because we created
a specific UV. If we would use world align
normal, it would not work. So all we are going to do
is we have this texture. We are going to right click and convert this to a parameter and call this unique
underscore normal. Then we are going to create a static switch perimeter over here and call this
has unique normal, which allows us to
turn it on and off. Because, for example,
for our floor and our wall, we don't
want to use this. Now what we are going
to do is if it is false, use this one. If it is true, we want
to use something called a normal blend angle
corrected normals, this one. And what this one
does is it's the same as the normal
combine in designer. You plug in one
normal in the base, and you plug in the
second normal and it will blend these
two normals together. We then plug this
into our has unique normal and set this to normal. So now what should happen is if I go ahead and save my scene, I can go to my hallway. I can press search on my
railing one and open it up. If I turn this on, what should happen is we should be able
to see our baked norm map. So we click it on.
And there we go. See? It is subtle, but it does art, especially in the lighting, that's where it comes together. In our lighting, it arts over here our baked normal
that we have created. Once we have proper lighting,
it will work even better. So we have that one. Awesome.
That's looking pretty good. Now there's one last
thing that I want to do and that I want to add
some overall variation. Sure, we are also going
to add details and stuff to create leaks
and that kind of stuff. But in this case, I
feel like that I want to use one of my grunge maps to add some special variation. I can go into my grunges
and I can drag one of these grunges into my
main master worldspace. This one can go up here. We can start by a static
switch parameter. And we can call this has grunge. If it is false, it
will use this one. However, if it is true, what will happen is
that this grunge map, if we just right click
convert the texture object, right click, convert the
premeter and call this grunge. We want to grab a
water line texture, so Control C Contrave, and we are going to create a
new scale premter that we'll call grunge tiling so that
we have more control. Sets to 200 and plug this in. So basically, what we're going
to do is we are going to blend this grunge using a color. Now, the way that we can do this is we have over here a multiply, and we can add something
called a larp. A larp, sorry. Yeah, technique it's
called a linear Come on. Where are you?
Linear Interpolate. I always forget how to wide it. So we just call it a erb, but it's called
linear Interpolate. You can see this a bit like a blend inside of
substance designer. See how much stuff comes back between
different softwares. So what we want to
do is we want to grab our XYZ texture for
a grange in the Alpha, and then we can blend
between two things. In the B, we are going
to use our texture. And now in our A, we can choose what we want
to blend this with, and we can choose
to blend it with a color or we can
choose to blend it with a different
looking concrete. Let's start with a color. Let's copy our color
overlay and call this grunge color and set this one to be a little
bit like a brownish color. To make it like grunge
and plug this into A. So now what will happen
is it will blend these to this color and our
material using a grunge map. Everywhere there is white, there will be this grunge color. Now we have one problem now, and that is that we have no
control over the strength. If I would go ahead and plug
this in here and press save, and then in my material,
I would turn this on. It would just give us this really strong looking
grunge everywhere. But I don't really want that.
I want to have control. So all we need to do after
is we just need to add a simple multiply like this, and then add another
scale parameter, which we'll call grunge strength
and set this one to one. So this scale parameter, what it allows us
to do is we are blending our map and
then we are controlling the strength by a
multiply because when something becomes white in a multiply, it will overt. Oh sorry, when
something becomes black in a multiply, it
will overide it. So now if we go into
our hallway hallway. Now if we go into
our main scene, we have our grind tiling
and our grind strength. First of all, for the
tiling, we can set this maybe bigger to like 400. And then our grind strength, we should be able to control it. If we set it lower,
it becomes darker, and if we set it higher, A, that's not yet
doing what I want. I want to invert it. Let's go ahead and
let's go in here. So we need to basically invert these controls
because right now, if we go lower, it
becomes darker. This sometimes happens
with our grinch. It's sometimes a bit
difficult to see. There's a multiplier, but there's also something
called power. And sometimes we might
want to use power. So first of all, let's go ahead and try to
use power that might look better over here because we
are controlling the grunch. Oh, wait. I'm sorry.
I am messing up. I need to, of course, do
this before I do my Alpha. That's why it's not
working. Let's go ahead and plug this into Alpha like this. So let me just remove this. So of course, because right now, I was changing the I was
changing the entire texture. However, I just want to
change the amount of rough, my grunge so that
when it becomes dark, it will just show less grunge. So let's try that
one. Try again. Grunge, if we go lower, it becomes more, if we go
higher, it becomes less. So now if I go ahead and
go in here and invert it and you can invert it by
adding something called a one minus node, and it's just like invert node. We can plug this into
our offer and pre save. And now, if we said it
lower, it becomes less. If we said it more,
it becomes darker. The only problem that we have is that it tends to blow
out, as you can see. So we get some subtle changes, and we probably want
to stop at around like 1.5 is probably the
area that we want to stop. Remember how I showed
you that power node. Sometimes the power
node works better. I don't use it often,
but just to show you, sometimes the power node does do a better job of,
like, capping things. And else I will show
you another technique. So let's just save
this. Here, so now we control the
power, here, see? And you can see that power often keeps everything in
line a little bit better. The only thing is that it
is now inverted again, so we need to, like, Well, we just need to play around
with how much we want. If you willy are set, to not having it inverted, you can just remove
this invert node. And now, it should give you ARC, better
strength controls. So let's use power in this case. Just to show you if you
wanted to cap your multiply, you can go to your ground
strength and you can set the maximum to be 1.5. And then what it
does is it never allows you to drag
this beyond 1.5. So that's something that
I do want to show you, but it's just not needed. Oh, sorry. In this case, I'm going to keep my
strength to zero. Delete my multiply.
So we have a grunch. We control the strength
of this crunch. We blend a color and our base
material using the crunch, and then we control if we want to have it turned on or off. That's pretty much
all that we need. So now we can very quickly and very easily
have some control. If you want to set
some base control, let's say that we want to set
our base control to be 0.1, you can always go into your grunge strength
and set to 0.1. This is nice because then
0.1 becomes the default, so we don't need to mess around. You can also go into your grunge and change the grunge type. So I can go in here and see, I can drag in
different grunges and they all have a different
looking effect. So if I have this one, I think maybe grunge map 01 over here. No,
actually, you know what? I actually like the
first one more. So let's go ahead
and do this one, and let's do 0.12. Awesome. Okay. This
one is now done. So now what we can do
is we can actually just grab this railing
one and we can press duplicate and call this vertical pillar
underscore 01, and we can duplicate
it again for the horizontal Pillar
underscore 01. These worldspace UVs, they are amazing for very plain
looking materials, and I will show you
why they might not be amazing for our wall tiles. But first of all,
what we are going to do is we have these
two materials. We can go into our normal bags, and this is our vertical pillar, so drag in the vertical pillar unique normal and
horizontal pillar into the horizontal pillar
unique normal. Okay, awesome. Now, in our assets,
if we go ahead and open up the vertical pillar, and we also want to open up the horizontal pillar over here, I'm going to make them
smaller because it's faster. Then what we can do
is in our materials, we have our horizontal
pillar, plug it in, press safe, and we have
our vertical pillar, plug it in and press safe. Okay, so now we have a
vertical pillar ready to go, and we have a horizontal pillar also ready to go over here. So that's looking pretty good. We now got a pillars. All of
the world space is working. We got some extra
additional dirt, as you can see over here
when I moved around. So that's all
looking quite nice. Now, the last one that we
have is we have our wall, and I wanted to show you if we get a problem
with this or not. Right now when we drag WAL, you can see that
WAL it's the tiles. They stop perfectly at the
bottom and at the top. However, you can imagine
when you don't have control over your UVs and let
me just create one. Let's do concrete plane. Did I set my Let's has crunch. My concrete plane.
What happened? To my texture objects. That is interesting. Sorry, I'm not sure where my base color. Oh, wait, I need to convert spremter Normal and right
click and my roughness. Now, what you can see over here what is happening was
what I was talking about that sometimes
it loses its texture. So you just need to go ahead, select your normal and just grab your normal over
here and just plug it in. Select your roughness and
plug in your roughness. There we go. And now we can
go ahead and save this. No and now, if we go to
our concrete plane again, sorry if I drag out
my windows built, you can see that now we can expose our normal
and our roughness. Okay, so we have
our concrete plane. What I'm going to do is I'm
going to call this one, duplicate concrete
underscore tiles, and open that one up also. In my concrete plane,
I just forgot to Oh, now the grunches is fine. So we have our concrete
tiles over here. What I'm going to do is I'm just going to go ahead
and I'm going to replace my base concrete for my tiles. So we
have base color. Normal and roughness. Now, if I would go ahead and
I would plug this on here just to show you because
I know that this will not work. I'm just
going to drag it in. What you can see over here
right now it looks fine. The reason it looks fine is because we are
at a right level. However, you can imagine
if I move this up, see? I no longer properly leaves the tiles at the
bottom and the top. So the tiles are
no longer, like, nicely organized like
we had over here. And that is the problem with worldspace when you
have something more specific and you don't want
to have the tiles cut off. So I personally, for this while, I don't want to have
the tiles cut off. I want to have them at,
like, a proper level. So what I need to
do is I need to go ahead and I want to use
my main master for this. Now, in my main master, I'm just going to
go ahead and go to my main wordspace
and I will go and copy the grunge system that we have over here
and throw this in here. Plug in your multiply
into the sorry, into both this one and
into the false one and throw this into your
base color. Here we go. So now we instantly have
our grunges also in here, and I believe that yeah, we don't need unique
normals for this, so that's all that
we have to do. We can go ahead and we
can save our scene. And because the grinch is
automatically set to falls, it will not mess anything up. Now, Colt, you can simply go to your concrete
tiles over here, and you can replace your master by scrolling down
in your parent. You can replace it to
main master like this. Then all that we need to
do is we just need to plug in our correct
tiles over here. And now you can see that now
everything is looking good. We have our tiles, we have everything ready to go. It is curious that I don't have my no map strength in here. Let's go ahead and grab our no map strength
also and paste in here. Although we never use no map strength for
uniquely baked normals, only use it for
tilable materials. But let's go ahead
and save this. And then is the default correct? I feel sometimes the
default needs to be inverted or zero. Yeah, so the default
needs to be zero. So let me just go ahead and
set this to zero over here. And also in the wordspace,
let's set this to zero, and then we can just
play around with it. There we go. Okay, so the default is now set to
zero so that you do trick. And now when we move our wall, you can see that
it stays the same. However, we still have
those grunge controls, see? Okay, awesome. So I would
say that at this point, our materials are ready to go. We might need to
do some balancing, but what we can do is
we can, first of all, place all of our measures. And then what we
can do is we can slightly balance
out our materials. So let's go ahead and continue with this
in our next chapter.
59. 38 Replacing Our Blockout Part1: Okay, so now that
all of our meshes are prepared and our
materials are set up, what we're going to do is we
are going to go ahead and already start implanting
our environment. So we are going to
start replacing our blockout with our
actual environment. And now it's mostly
just a hope that all of our how you say it, all of our pivot
points stay the same. So first of all, we can test
this one out over here. So if I would go
ahead and by the way, these are leftover materials
for when we import it. So you can just go ahead and Oh, looks like wall number one, I just need to replace that one, but then we can just
remove that stuff. Concrete tiles. I think that's the
one I want to use. There we go. Safe. And now we can go ahead
and get rid of all of these junk pieces like that. Okay, so wall number one, let's hope. That's not good. So it looks like that
for some reason, it messed up its rotation. That is really weird. So
let's have a try over here. So it looks like
that our wall number one is simply not working the
way that we expect it to. I can double check my rotation. I'm actually really
surprised by this, so I guess it's just
a rotation, right? Yeah, it looks like it
is just a rotation. In that case, I guess what
we can do is, let's see. So we need to rotate on
which axis on the Z axis, we need to rotate to 90 degrees. So what we can do is
we can go over here, transform rotation
and set this one to 90 and then press
re import and save. And now if I go ahead
and replace it now. Oh, and by the way, you will need to go
into your material, and you will need to
press this back button because we accidentally
replaced all of our materials. Okay, so that seems to fix it. So that's really curious
because, of course, when we inputed the wall, we did not change the rotation. So somewhere along the
line, it kind of broke. But the nice thing is
that for these pieces, we can multi select. So we can select all
of these pieces, drag in all of our walls, and replace it with concrete. So that is quite handy. Unfortunately, because
we do not actually have real names in our
blockout pieces, we are not able to just, like, select all of the walls in here, but it shouldn't
take too long to, like, replace this
kind of stuff. So what I will do is, I guess, maybe I will not
do all of this in real time because it
might take a second, but instead, I will just, like, test everything out, and then I will just start placing it. So the second one
that we are going to replace is we have over
here our verticalpllla. If I just go ahead and drag, that seems to work
also totally fine, we have a vertical pilla
over here. Same over here. One thing that you might
want to do with these vertical Sorry, I had a cough. With these vertical
pillars is right now, most likely the
rotation never changes. And because of that,
the damages that we have are always
exactly the same, see? So you might want to
just go ahead and simply add a quick rotation. Also, over here, I see. I'm not sure if this
is a lighting error or if this is a
normal map error, but it looks a little bit dark, so that is something that we might want to double
check in our material. If I just do that
concrete plane. Okay, so Okay, so I guess that's just
like a lighting thing. So that's something we
need to fix later on. So anyway, our vertical
pillars are also working. So let's just go
ahead and reset that. Let's try our floors. Try get in our floor piece. Floor pieces are also
completely working, so we can just replace those. That's also looking
great. And now I know that our railing pieces, we were going to replace anyway. So for these pieces,
what we would end up doing is we would end up, grabbing our railing and just do the normal stuff where we move it into
place like this. And at this point,
at that point, you want to go ahead and turn on snapping and want to start copying this railing
over and over again to replace all
of these railings. However, what I will
do is I will run a time lapse after we've also finished testing out
the horizontal pillars, and I will do all of this stuff. So we got this stuff,
which is great. We definitely need a lot of
details in order to basically break up all of these really similar looking concrete pieces. So our pipes we
are going to redo. And then over here we have
our horizontal pillars which seemed to have also the rotation problem.
Let me just check. This one was also a
horizontal pillar. Okay, so we need to rotate it probably the same 90 degrees. So if you just go
ahead and open this up, that's really interesting. I've never really
had that before. It's funny that it's a beginner course
and I've already had multiple things that I've
never, ever had before. So one thing I notice here
Hmm. That's interesting. It's like the scale.
See? The scaling of our horizontal pillar
has changed a bit. So I guess that was the
problem that we had before. However, it is quite strange why it would change like this. So what we can do in
order to fix this is we can quickly grab our
box just by finding it. X asset actions and export. And let's go to export from Unreal horizontal
Biller underscore ten. And let's go ahead
and export that. Now if we go into Maya let
me just drag it over here. We have a horizontal pillar. Save our seen before
we do anything, file import, and we want to
go ahead and import this, and then we are just going
to match it up again. I don't know exactly
what happened, but it's something
you get used to. Sometimes just happens that over time, a lot of stuff changes. So over here, I can
see the rotation changed and not so much the
position, just the length. But this length is correct. Remember? Well, you
guys this length is at least properly sitting
on the corners. So that was that confusion that I was talking about before. Got a whole J, and I'm
going to rotate this. Now for this length, we should be able to just simply scale it up without too much problems. We have this one, and
then what I'm going to do is because it needs
to snap to the grid, I can remove this one and I can simply go to my side view, and the scaling that we did, it will not be enough
scaling to really impact the k. So what
I'm going to do is, I'm just going to do soft
select, snap to grid. That's one. And for the rest, everything should still
be exactly the same. So we can also do Soft select
here, and there we go. And here, even in
our unique UVs, you can see that it doesn't
make a big difference. So let's go ahead and
export this again. This one is going to be
a horizontal pillar. Okay. Let's go in here, assets. Open up a horizontal pillar
and set this back to zero and then press
reimport. And there we go. So now, because we changed
it, that should do the trick. Perfect. So now they
do actually fit together properly,
as far as I can see. Yeah. Okay, great. So those are now also fitting together. So in the end, it still saves us a lot more
time doing it this way, compared to me basically redoing the entire environment and
replacing almost everything. So now that we know that
everything is working over here and we are
happy about that, what I'm going to do
is I'm going to kick in a time lapse in
next chapter where I will be replacing my new models with our original blockouts. So let's go ahead and continue with this in our next chapter.
60. 39 Replacing Our Blockout Part2 Timelapse: Mm B Do. D And I No.
61. 40 Creating Our Decals: Okay, so if you have
seen the last time naps, you can see now that we have
done most of our level art. There's still some balancing, like we want to change one of the pipe colors and
that kind of stuff. But just in general, we have most of our level
now ready to go. So what are we going to do now? We are going to do
something quite important, and that is, if we just bring
up our reference, we are going to start
working on some details. Right now because we are using the same concrete material
over and over and over again, what will happen is
that everything looks very similar, which makes sense. Now, of course, we are going
to later on break this up using lighting and using our foliage and
that kind of stuff. However, another
great way to very quickly break up flat
surfaces are decals. And decals are basically two D textures that
we project on top of our three D models in order
to create leaks in order to create everything for moss
and all that kind of stuff. So that's what we're
going to do now. Now, let's get started. What I want to do is I actually want to
go ahead and go to texts.com over here to
get some free decals. Texaco has a nice
decal layer over here. And here we can find
some classic leaks and some bottom calling
and that kind of stuff. So let's go ahead and
let's say that we start with some leaks because
they are the classic ones. Let's go for some dark leaks, and then what you can
do is you can go in here and you can find some really interesting
looking leaks. We want something that's
not too strong and intense, maybe something like this, although this one looks
a little bit soft. This looks quite much like
concrete or this one, maybe. This one over here
looks quite nice. So when you found a leaks
that you want to incorporate, oh, this one is also
actually really cool. Do this one, for
example. Then what you can do is you can go ahead
and you can download it. Now, you can get some
premium credits. I have some premium
credits right now, so I could download a big one, but you can also
get the free one. Decals don't need a
lot of resolution. In my case, what I
will do is I will go ahead and I will
just in this case, download a slightly
larger version. And now what I can do
is I can go to hotShop. And the Vote shop, I
want to create a new 2048 by 2048 file over here. And in this file, we can go ahead and we can
place our decal that we just downloaded just by simply dragging
and dropping it in. Now, these decals, they
have to be in the center. That's the only
thing. Like, there's different ways to make a decal. The way that we are going to use it is we are going to use the built in system
in UnwilEngine. This does mean that we
have quite a bit of, like, wasted space,
wasted empty space. But what we can do
is thanks to that, we do have a lot
more flexibility because we can do like projection painting and
everything like that. What I like to do is
I like to make my decal a little bit
smaller over here, and I can go ahead and
get rid of my background. So let's get rid of that. But now, one thing
I do like to do is, I like to get rid of these ends because the ends never
really look good. In Photoshop, if you have
this little icon over here, just right click and press rests layer so that we
are able to edit it. And then all that we need to
do is if we just go ahead and go for array tool and then just find a brush that looks a little
bit more interesting. I don't have a lot of brushes in Photoshop myself,
but let's say that, let's see what is there Yeah, just like some of these
just a random brush. And then what you can
do is you can, oh, I need to make this
a bit smaller. You can go ahead
and you can paint out the end a little
bit like this, almost to give it
like a fading effect. So just like carefully
paint it out. And that should often like
already do the trick. Now that we have this
over here, ready to go. So I'm not happy
what happens here, so let me just there we go. Now what we can do is
we can go ahead and we want to duplicate this layer because now that
we have our color, the next thing
that we want to do is we want to create a mask. Having our color is fine. However, we need the mask
in order to tell unreal where exactly the decal is located and do not try
and render everything. So this is really easy to do. You basically
duplicate your layer, then you click on
the layer below, and then you go down here
and you add a solid color, which is similar to a fill layer inside of substance painter. You make this black, and
now we basically have the black background
with our Digal on top. Once that's done,
you can right click on this, blending options. And then if you go
to color overlay, you can set this overlay
over here to white. Like that. Now one thing I do definitely note that over here, wait, do I have to smudge? Did I have to wong brush? I have a feeling I
had to wong brush, which caused some arrows.
That's interesting. Oh, wait, our strength
is too low. There we go. No, no, wait. I don't
know what's going. Why is it back to smudging? I guess the special effect brushes only
work with smudging. That's weird. This one also
does not seem to work. That is quite annoying. However, I guess another way that we can do this
is we can just, like, that's really weird. We can create a
layer set to black, and then anything that
we paint in here, it will just become
black, you can see, because this is
what we are about. We want to get rid
of these ends. I don't know if this one, here, these are all smudge brushes,
except for these ones. That's really interesting
that you cannot just control how you want to use your brushes. Weird. Okay. I will try and, like, make this look a little bit decent over here by
getting rid of it. And I should I have a bunch of brushes, but I don't
want to use them. I want to try and use
some default brushes, but I do have my own custom brushes that I actually created. Anyway, so we have this one. Now what we can do is
we can select our base, along with all of my layers, right click and merge them. So we now have our mask
and we have our decal. You want to go at the
select your mask, Control C, press A to select everything
and Control C to copy. Hide it, click on your base, go to channels, press the little plus button at
the bottom and Contrave. The goal is to end up with
a mask in your Alpha, but have the rest of your
decal here ready to go. Now at this point, we are
ready to go ahead and textures decals over here
to place it in here. So we can go file, and
I like to go ahead and I need to do save
as copy on my computer, and I'm going to go
ahead and save it. In this case, I will
save it as a PNG file. Oh, no, we don't even
need to do that. I forgot to do one thing.
I forgot to do one thing. What you want to do is
add a quick solid collar. Move it down so that
your decals on top. Double click on the salt
color and click on like a plain color in your decal so that you
have a background. This will avoid getting any type of white lines
behind your decal. So now we can go ahead and we
can do file, save as copy, and we can go ahead and
save it as a Tager file. Leaks underscore zero, one. And there we go. We
only need a base color. You can in decals use
roughness and you can use your height map and
all that kind of stuff. However, in this
case, we have got to go for the most basic decal. I actually have an
entire tutorial course just about decals
and how to also, customly create them
and everything. Anyway, in our textures, we can create a
folder called decals. And we can drag in this custom decal
that we have created. Cool. So now that
we've done that, all that we need
to do is we need to create a decal material, which is not going
to be too difficult. You want to go ahead and right
click create the material, decal Scot Master
and open it up. Let me just go
ahead and close all of these other things over here. Here we go. Next, what we want to do is
we want to just grab our decal and also throw it in here. Right click on it, convert
it to perimeter and call it decal underscore
base color like this. And now for our decal, we need to set a few settings
in our main note over here. So what you want to do
is you want to go ahead and can I make this a
bit bigger? There we go. We want to set our domain
to be a deferred decal. Our blending mode
needs to be masked? No way. Translucent. Needs to be translucent. And then we want to go ahead
and we want to scroll. Where are you? Where are you? Advanced. Okay, yeah, so here, advanced, we have
our DCA response. I guess we do need
to go for masked. No. Huh? Okay. It's a bit weird that
our decal response is currently not activated, even though we have
a DBA for decal. But basically, what we are doing is in the material domain. By telling it, it is a decal. I will behave different when
we drag in our material. I'm just having
like a close look. Yeah, I guess that's
fine. Normally, you can go in your deca response
and you can change it, but maybe they made
an update where they change the way
that you do that. Anyway, all you need
to do is throw in a base color and in
the A for Alpha, throw this one into your baste. Yeah. Okay, that
seems to work fine. Then what you can
also do is you can add a scale parameter, which you will go ahead and call roughness and set this
to look quite dull. So I'm going to go 0.85 and throw this into
our roughness. Finally, we can just
do a simple multiply. And if you want, you can
multiply your Alpha with a scale parameter called opacity and set the
default to one. And this way, we
can also control the opacity of our
decal a little bit. Super basic, as you can see, there isn't really much
that we have to do. We can go ahead and
just save a scene. And now if we go
in our materials, let's go and make a new material or new
folder called decals, and let's place the
material in here. So I'm just going to
go ahead and move that there just to avoid any clutter. I can right click and
create a material instance. Leaks underscore 01 over here. And now the way that
this one works, so we don't really need to
make any changes right now, but I will already open
it up just in case. And I will move this over
to my other screen for now. So whenever we have a decal, as long as we set our
material to be a decal, we can actually click and drag, and it will automatically dictate detect that
it is a decal. You can now rotate it,
and I'm just going to set my rotation is a bit
softer and no snapping. And you can go ahead and
you can see that here, we are able to rotate it, and the closer we move it to a wall, the stronger the
decal will become. Now, there's a few
small problems that we have with
this kind of stuff. It's great because we can
literally do projection. Although over here, the projection is a
little bit stretched. Now, there's a few
things that you can do. You can try to, like, rotate the projection to
make it less stretched. However, then over here, it will often still
show some stretching. Another thing that you can do is you can just
say like, Okay, I want to avoid using
this pillar also. Right now, because
it is projecting, it is trying to even project
on the ground over here. You can move this up to
avoid the ground projection. You can just scale your decal, although it is not quat. But what we want to do is we
want to scale it quite flat. When we scale the
decal quite flat, what we can do is we
are able to basically avoid pushing our decal
on our pillar, see? Because we are scaling
it flat so we are not using as much of
the space that we want. And then we just want to go
ahead and move this down until it is looking
pretty decent. So let's say that you
are happy with this, and you can see that it already
makes quite a big impact. What you can do now is you can go ahead and play
around with, for example, your opacity and set us to like 0.7 or something like that to
make it a little bit less. And at that point,
you can just go ahead and duplicate it
almost like a model, and you can nicely
place this over here. And then what you
can see is that it will already make a big impact. Also, you can just place
it in empty space. If there's nothing behind it, it won't do much, although I can see over here,
it's causing a problem. Or what you can do is you
can also overlap them, and often you won't
really notice too much when you're
overlapping them. So that's already
it for some leaks. Well, that's already
starting to look quite nice. Now what we can do is we can just go ahead and
we can keep doing this. So we can go in here. And we can go ahead
and let's say that now I want to have
some bottom stuff, something that's curling
up from the bottom, so we can go to
bottom over here, and let's have a look around. Yeah, maybe something
dirty like this. Let me just check if
there's anything, especially when we have
let's do this one. Especially when we
have, for example, like foliage and
stuff like that. It's great to go for, like, something a little bit greenish. However, we can, of course,
also change these colors. I can simply drag this in here. Make it a tiny bit
smaller so that I have control over
how to edit it. Turn off the old
one. Just, like, select something for, like, the background over here. And at this point, I will do this, like quite
quickly. So we have this one. I want to go ahead and I
want to um well, actually, in this case, because I
don't have good brushes, what I will do is I
will just go ahead and I will not actually
paint it out in here. I will just paint
it out in the mask. So we can go ahead and duplicate this place a bottom layer
below it and make it black. Top layer, right
click, blending mode, set the color to white, and then we can just go ahead
and add a layer on top. And in this layer, I'm just going to go ahead and
I'm going to paint in some black like over
here like that. And also, let's do the same
like that. There we go. We can go ahead and
merge these together. Merge layers, Contra A, Contra C, hide it, Contra V, and there we go. Now we have our second decal. File, Save a copy. And honestly, I'm not really
even saving my PSD file, although, well, I can
save my PSD file, I mean, so I can do like decals. But I'm not too worried about overwriting it because it's
so quickly to make them. And now I can save it again, but this time as a
target file and call this one bottom underscore
01, for example. We can go ahead and save this simply go into in real textures, decals, import our bottom 01. And then if we just go ahead and duplicate our leaks and call this bottom underscore
01, we can open it up. Grab bottom 01 over
here and save. And that is just a
matter. If you want, you can even go ahead and
duplicate these leaks, and then you can just go
ahead and in your material, replace it like this. And there we go. So now we already start to get some interesting looking leaks over here, sitting
at the bottom. And we can play around, of course, with our intensity. So if I have this, I
would say like 0.6 maybe. Yeah, something like 0.6. And what you can also
do, which I like to do is often if it
is on the bottom, is I like to place another one Let's
rotate this like this, to have it sitting is like
a corner piece over here. And then you can go ahead and
you can just both of them. And we are basically just using this one as like
a prototype, this area. So we can go ahead and then
later on, I will, of course, probably do like a
time laps where we will just place a bunch
of decos and stuff, but I think I do want to
create the decos in real time. There. So over here,
now we have a bottom. And if we just go
ahead, for example, go to our Sinn macar, you can already see
that this starts to look quite a bit
more interesting. I can also go and sometimes it's a bit difficult to actually see your leaks, but I can also go ahead
and duplicate this one. Rotate by 90 degrees. Rotate B and kind of, like, just carefully also move it over here to
give it a bit more. Let me just scale this down a bit because this
one is a little bit trickier in order to do
the projection without getting like these
messy looking lines. Yeah, there we go. So we can now also
look these lines to make them feel less cut off. Now, decals, they can be
quite expensive at times. So do not use them, to an insane level. Like, what I'm doing here is
already kind of pushing it, but they have gotten
cheaper over the years, of course, and that
kind of stuff. So we can go ahead and do this. And now, if we go back to
our camera, here we go see. So that's already starting
to look quite a bit better. Now having these decals, we can also go for, like, some overall looking decals. Let's say that we
want something like just some general dirt
and stuff on the floor. Now with this kind of stuff, you can try to find
a decal in here. However, that might
not always work. Like, there are some here. You can go to, like, stains, and like this one might work a little bit,
that kind of stuff. However, what I sometimes
like to do is I sometimes like to go ahead
and open up designer, and it looks like we still have our Grunge map scene open,
which is totally fine. And basically what
I like to do is in here, I like to
grab something. In this case, we can probably
use the grunge map 01, and I like to use my
brush pattern over here to basically get rid
of most of the details. Then I like to play around
with my contrast and balance, play around with my random seat, and then you can
see that we can get something that already starts to look quite a bit
more interesting. So let's say that we have
something like this over here. And now often I like to just
go ahead and for my color, I like to use a B&W spots. We can just repurpose
this scene over here. I like to use a B&W spots too. Art like a gradient
map over here. And then I often just grab
some dirt or something. I don't know if there's something
I can very quickly use. I can use this one.
I just want to get something that looks
like a bit brownish. So we go into our
gradient editor, pick gradient like
we've done before, and just give it
something like that. It doesn't have to
be special. So now, We have our base color and we
also already have our mask. Now, we could go in Photoshop
and put this all together, or what we can do is we can
use something called an RGB, if you just type in RG and it is called an
Alpha merge node. This notes allows us
to have a RGB map, along with an Alpha
map can I show you? There we go. To get
a decal like this, which is very quick for us to just quickly
make some changes. I can then go ahead
and I can add an output to this and call this Gang decal underscore
01, for example. Throw it into the
label, grunge decir 01. And all I need to do now is, well, this one I
can probably save. So let's go ahead and save saves decals underscore Granges. Let's do that and save. And now we can go in
here, file, export. Textures decals and
place it in here. And then that should be we don't need the
identifier in this case, because we don't need to
do underscore base color. Oh, no, sorry, we do
need the identifier. We need the graph. There we go. So just
do like identifier. Crunch decal 01 is what it will be called,
and we can export. It's that easy to very
quickly generate some decals. So we can just go ahead
and go back in here. I can did not export correctly. Give me 1 second.
Let's try it again. Export, export. Okay, now it exported correctly. You cannot see what's
on my on the screen, it was like a buck with
the file. So there we go. We have that one. Go
back in our materials, scrap Legs one, duplicate this. Crunch decal underscore 01, for example. Open it up. And we can just go ahead
and throw in our decal, and now it is as simple as
dragging it in over here, see? And now we instantly
have just like a dirty looking concrete decal. If you press G, you
can go into game mode, and I want to make
this a bit smaller, make this a lot
thinner so that it's only at the base over here. And actually, you know what I am going
to make it a bit bigger, but only on the X
and Y, like this. Okay. And just like that, what we can do is if we
move this one over here, duplicate it, rotate it a bit, duplicate it again,
rotate it a bit. And again, you can very quickly if we now
go to our cinemactor. See, we can very quickly make our ground also look a
little bit more dirty. And you can see how this can become more and
more interesting. I can go in here and
maybe I want to set my brush pattern
to be a little bit more intense over here and maybe play around
with my sat a bit more. I feel like this one might. Here, this might look
a little bit better. So let's go ahead
and export again. Go into unreel decals, click on it, right click
and press reimport. And then I want to probably go ahead and set my intensity, maybe to like one or
0.9 or something. 0.85 maybe. Yeah. See. That works. Okay. Awesome. So let's
go ahead and have a look. So we got those pieces. Let's see what feels like that we are still
missing in our scene. I guess what we can do is
we can add one more leaks, and we can also go ahead and add maybe you have some damage over here
and some patches. So often these kind of damages, they do not look very nice. The reason they don't
look very nice is because they have no normal
map or anything like that. So I would actually avoid them. Patched walls look a little
bit more interesting, so you can do, some
more bad stuff, but it is super specific. So I don't know if I want to personally spend a
lot of time on it. Like this one over here
looks quite interesting. I'm just thinking, where
would I be able to use? I guess I would
be able to use it on the large wall
pieces over here. What we can do is if we go
ahead and where are you? Here you are, let's
download this one. Drag it into VoteshopO here. I think by now you
get the workflow. You want to just go ahead and select something for
the background color, right click, duplicate
blending options. Color overehte. This time we don't really need to paint out any of the back. Then we can just
go ahead and set a solid color black behind it. Select them, merge
them, Contra A, Control C, select a map, Contra V. There we go. C, very quick and efficient. And of course, we can
also control the color, but we can even do it in unreal. So we can do Save as
copy to computer, TGA, and this one will
be damage underscore 01. And what I was talking about is that we can go
into our DGA Master. And over here, we
can do a multiply right click and
constant three vector, right click, convert
the perimeter, color overlay, same stuff as we've done
before multiple times now. Just give it the color
overlay in our multiply, and that way we also have
a little bit of control over the color of our
degl, which is nice. So we can save sin and now all we need to
do is we have our DCL, so let's just import
our damage 01. Materials, let's go ahead
and duplicate our leak 01, damage on score 01. I don't know why it's still
opening up in the top when we should be able
to see that I'm having these side panels. Here we go. And now what we can
do is we can go ahead and just have a look and let's say that I
have it over here. Not all details
will always work, so it's just up to you
to try and find out. So this one looks
pretty good if we just go ahead and go for
like 0.9 maybe. Yeah, this one is,
like, really intense, but it does look quite good. And let's make the scaling
a little bit less. Over here to avoid any
additional problems. Here, see? That does
definitely add something. Maybe I want to go ahead and
make my opacity a little bit lower like zero
point, actually, 0.7. And then if we go into my color, maybe make my color
a little bit darker. And maybe give it a tiniest bit of a yellow look over here. And now you can see
that now it feels a little bit better embedded into our concrete as if this is just something that
happens on my concrete. And then, of course,
you can make it feel more logical
by, for example, duplicating it and having
another one that's here, going by the site or that
kind of stuff like that. Maybe you have even another one. That goes like, I don't know. I'm just trying to find, like, different ways in how we
can make it look like that, maybe. There we go. Okay, cool. So we got
a decal like that. We got a floor decal. We got some leak decals. All I would say is maybe
have one more leak decal, decal, sorry, and then
we should be done. So let's go ahead and
go to our decals. Leaks. Let's go just
for some dark leaks. Nice thing about dark
leaks is we can just make them also look mossy
later on if we need it. And we went for, like,
something really leaky. So now let's go for something that's like a bit more softer. I think this is the one that on no wait we went for this one. But this one over here is
actually a little bit softer, so I quite like that. So let's use that
one.'s plug it in here. Here we go. Let's make it a little bit
smaller so that we can paint out some of the edges like that. Let's go ahead and set
the background color, something like that, and
right click duplicate layer. Once again, ad like a fill. Right, click blending
options. Color overlay. Okay. I can just go
ahead, right, click, merge layer, go
into my painting, and I'm just going to paint
out like some of the edges. This one is actually
quite intense, so just trying to, like, with my limited brushes, I'm trying to make it feel
like a little bit organic, but it's a bit difficult. Although you probably won't
really notice it too much. Anyway, contra A contra C, paste that in our Alpha
and save it as our Leaks underscore 02. I think that should be about it. Yeah, we spent
about half an hour on this stuff. 1 second. Let me just save my
PSD also. Here we go. And I think after half an hour, you should probably get
the concept by now. So let's just go ahead and
import our Likes 01 over here. Decals, duplicate Like 01, and let's do 02, third decals, drag it in here, save And then for this one, let's say that for this one, I want to go, maybe something. Oh, hey, I need to
fix that stuff also. For this one, let's say that I want to go ahead
and go over here. Oh, turn on snapping. Oh, it looks like we
need to rotate it 90 degrees or 180, I mean. And then what we can
do is we can scale it flat to give it less
of an interference and that kind of stuff. Here we go. And you'll see
these small details along with all of
our leaks that we are going to place and
all that kind of stuff. Together, it will really
bring everything together. So we have this one over here. Now, you can also try
to do your leaks. So if we go, for
example, leaks one. It's a bit more difficult, but you can go over here
to, like, your pillars. And for example, you
would place like one leak over here, then
you would duplicate it. Place another one over here, that kind of stuff you can also do in order to as you
can see over here, it will make everything look
a bit more interesting. So having this stuff done, now, because we are working on
really specific angles, I'm not going to go too
intense with my decals. I'm just going to place
them in the angles where I want my decals to be
and that kind of stuff. But yeah, in general, this will give us some quite nice results. For example, like over here, I could see with my camera, so I might like one
to grab a leaks one. And I drag this one because Leaks one is a
little bit bigger, so I can drag this one in here. Here you see? And then, at
least in the background, you can just see some leaks and that kind of stuff
playsls over here. So I'm going to personally
to save some time. I'm going to mostly design my decals. Okay,
that did not work. I'm going to mostly
place my decals in, like, my camera angles, which means that for now, guys we only have one
camera angle ready, but we will create some more
camera angles later on. What I will do is
I will go ahead and just only focus on
this one camera angle. So I'm just going to kick in a really quick
time maps where we will just go ahead and
play some details. And then in our next chapter, we are actually
going to get started with doing our foliage. And after our foliage is done, then we can get started
with our lighting and our polishing and
all that kind of stuff. So for now, let's go
ahead and just kick in a quick time laps
and then we can go ahead and get started
with our foliage. Do Do
62. 41 Introduction To Speedtree: Okay, so we have arrived
over here into Speed Tree. Speed tree is a very
powerful software. That's also not too expensive that we can use to create
almost any type of foliage. However, personally, we will be creating only some ivy,
as you can see over here. So I will go over on
how to create like two different types
of ivy pieces, and then for the rest, we will just go
ahead and leave it. As this is almost, like, considered
like an extra bonus. The reason I consider
this more like a bonus is because foliage, it's an entire new profession. It is quite difficult
to get white. So what I do recommend is that if you want
to go much more in depth and know how
to create tees and grass and all
that kind of foliage, we actually created an
entire tutorial course, which is called Easy
foliage for games on our profile, for
example, Station. And just by the fact that this
one is 11 plus hours long, should already tell
you that yeah, it takes a while to
get everything right. But over here, what we are
going to do is we are going to create the same type of IV
as you can see over here. So that is the general
plan for this. Now, if I go ahead and
I can close this one. So we will go over a quick
introduction into Spettr. Speedr is very easy to use. The only thing that
can be a little bit overwhelming are the
amount of settings. So over here, I
just load in, like, one of the trees that
comes with Spettr. There are a bunch of sample contents that you
can go ahead and preview. So if we just go ahead
and go over here. So over here, we have the
top where we can have a file stuff like saving, editing, exporting, all
that kind of stuff, and for the rest on Windows, and the rest you
don't really use. Then over here, you have
quite an important tab. This tab, it's almost like your how do they call it whenever you have a family,
like your family tree. That's kind of what
how it minds me. And basically, it is the
building notes for your tree, just like with many
other software, you go from big
to small in here. So what you can see is that
if I folks that bug on here, I can see that this is trunk. I click on here, I
can see that these are like the branches
and that kind of stuff. Now below it is your
most important tap, which is your settings. There are a lot of settings. It can be quite overwhelming. However, it just takes
time to get used to them. For the rest, it's not difficult to use them.
I just takes time. But in here, you
can do everything, let's say that I like here, I like limit the amount
of branches I want, more or less, that
kind of stuff. Here, I can change the count. I can change how they rotate. I can change a bunch of
stuff with this kind of But we will go ahead and go over that a little
bit in just a sack. Now, up here, we have some modes that are relating
to our viewpoint. Everything from, like, how
do we want to render it? Do we only want to render, like our embitoclusion
over here, or do we want to render
our entire mesh? You can hide some specific stuff like you can hide, for example, your leaves like this, or you can hide branches,
that kind of stuff. It has some forces. So inside of Spettr you can use
forces like magnet, directions, attractions, that kind of stuff to
manipulate your mesh. However, we will go over that
a little bit later also. You can also use
collision objects, which we will also
go over later. So you are able to
have, for example, Ivy grow on top
of actual meshes. That's what we will
be using it for. You can simulate wind. You can change the
light, although I believe you can also go up here and what was it? Hold control? Normally, you were able to change
the light here. But yeah, you can definitely,
change the light over here. All that kind of stuff with like the rendering and the wind. We don't really need it because we are just creating
some static ivy. Over here, you have some
mode between generator mode, which does some automatic
stuff, and basically, the way that you
should see it is right now we are in generator mode. And if I would go to
node mode over here, I don't think this
tree is set up, it allows us to do a little
bit more specific stuff. However, this one
is not really the best one for us to do that. And the reason for that
is because it's not built to be like a generator
type or a node type thing. And you can even draw trees
by hand, that kind of stuff. So edit notes and some
post effect notes, which just gives us some control over,
like, the collision. And it also allows
us to, for example, showcase how to rent or some embitoclusion, that
kind of stuff. Have a viewboard. Our viewboard
very easy to navigate, middle mouse button to pen, left mouse button to rotate, and scroll wheel to zoom
in. That's about it. That's all you really
need for this kind of stuff in order to
properly look around. We also have some of these
gizmos if we select something, and these gizmos, they basically allow you to rotate stuff. They allow you to scale stuff. They allow you to I guess
this one is also rotate. They are basically like some of the more default functions
that you can see over here in case
you don't want to go into your settings in
order to change these. So over here, you can use
the default functions to completely change the way that your tree looks
and that kind of. So they are quite handy. We will also be
using those cells. And then over here on the right, we have our materials in which we have, for
example, our barks. You can see if I
click over here, I can have leaves, and I can even
click and drag and change my leaves around, although I guess these are
the exact same leaves. You would think that
if I change them. Okay, so I guess they are
the exact same leaves. However, you can
also change all of these materials simply
by clicking on leaves. And then if you go
into material here, here, you can also find them. So I can also go over
here and spring. Like this. Of course, these branches are not
made for these leaves. So as soon as I change
them, for example, to spring and summer, they become really large. But just in general, it allows us to control
some materials. So let's say that just to
quickly show you the overview, I would create like a super basic tree just
without textures. Let's say that we go to file
and we create a new scene. Over here, you can
also create or grab some templates like some stumps, some vines, some plants, some palm trees,
that kind of stuff. But let's say that
we go for just a completely blank new
scene over here. The way that this works is that if you want
to create a tree, you want to go from
large to small. So over here, we have
the base of a tree. It's even says like this is the beginning of
your generation. You can right click on it, and then you can go
to art geometry, and you can find a bunch
of different stuff. Now, you can go ahead
and art a default trunk. Or what you can do over here is you have some trunks that are like they are like
presets almost. So I can go to trunks and
I can go, for example, to split, and here you can see
that I have a split trunk. Now, once that is
done, what I would do is I would go
into my settings, and I personally like to
use the button to quickly, scroll down all settings. But for you guys to make it a little bit more interesting, let's say that I click
on spline over here, and I just set like
the radius like this. Actually, this one this one might be a bit too complicated. So let me just add like old
trunk over here. There we go. So we can go to our spline
and I can, for example, set like my length over here. You can see the length based
upon the person down here, how big your mesh actually is. So we can do
something like that, and for the rest, yeah, there's, like, some
controls for gravity and all that kind of stuff.
Let's go to, like, shape. Oh, no, sorry not shape
skin. Let's go to skin. And here I can also control
the radius, which is, for example, the thickness of my trunk, that kind of stuff. And honestly, there is a bunch of stuff
that you can trol here, but I will go over that
more in, like, the next. So let's say that I have
a base trunk over here. I can now right
click art geometry, and let's say that
I go to branches, and I want to like some
big branches like that. So just like that,
you can see that we can very quickly
generate a tree. With these big branches,
if you go to generation, you can always control
like how many you want. So if you want a few or a lot, like this, you can go to
your spine over here. And now, something that's
quite cool is that you can actually go ahead and yes, you can control the
length over here. But there are two nodes that are often behind every single value. The first node is a graph. This graph goes by distance. So what the graph can do is it can make the ends over here. So this type a disne. It can make, for example,
the branches near the end. Smaller than the branches at the beginning, as
you can see over here. So the graph basically
looks at the distance of our tree and based upon
that, make some changes. The one next to that over
here, it's randomization. See? It allows us to basically
do some randomization and control how randomly the
scaling of our branches are. Now at this point, let's
say that I want to now go ahead our geometry branches, and I now want to
go ahead and go for some little
branches over here. So now you can see that we
have some little branches. And then what we would do is, let's say that we would right click jum tree branches, and now like a few twigs. And these twigs will
hold all of our leaves. So now you can see
that we already have quite an interesting tree. It's a really high poly tree, and there's much more
complicated versions that you can create that
are way lower pool. Also, what you can do is you can also go up here into segments, and in segments you
can actually control. The polygon count, and you can actually make it less heresy. You can see that the polygon
count up here goes down whenever I play around with my accuracy and that kind of stuff. So there is some also
control over jom try, which we will also be using. But let's say that DS,
we have this tree. We right click art
geometry, leaves. And then what we
can do is we can go ahead and I don't know, just like I don't know if
alternating is the best one. Oh, right click. Leaves maybe like
scattered over here. See? And then we have some scattered leaves,
which once again, you can play around
with the settings to increase or decrease the
number, that kind of stuff. Now, a cool thing
that you can do is you can actually go to
other projects like, for example, the
projects over here, and you can, for example,
go up here and press Copy. Now, when you copy
your material, you can just switch over to your own project. Go down here. Oh, it didn't work. Copy. Normally, you can just go ahead and go up here
and then paste it. Oh, wait, it's because
we need to press the plus minus sign and
create a new material. And now we can paste it in here. See? So what I can do is
I can then go ahead and, for example, drag this
material on here. And I guess I need
to go to my cutout and meshes because right now we don't actually have a mesh. If you go to your
cutout and meshes, what you want to do is
you want to press Edit on the first one. Sorry
for the quick cut. For some reason, I have a bug, where if I want to go
ahead and actually copy, a leaf over here and paste it in another one
and then try to, like, dt. It crashes speedry. I
don't really know why. That never really happened,
but it doesn't matter because this is
something that we will cover in the next chapter. So for now, let's just go
ahead and leave it at this. So we can very quickly
create a tree. And in the next chapter,
you will learn how to actually, apply textures. But in the next chapter,
we will go much more advanced because we are going to go ahead and create some ivy. So I would want
to probably leave the introduction to
this. We went over UI. We even created like
a quick little tree, although this is the
third time I created one. And I recommend having, like, a look at some of
the sample trees. And here you can
see that you can go much more complicated, where you can see
it created a tree, and then it like some small branches over here that do not
have any leaves. It created like even like little lumps that
you can see up here. To make your tree more
visually interesting. I created some small
branches over here. And if we don't go to the
bigger branches up here, we have some bigger branches and those created even
larger branches. And then over here, they are something that is like
an Alpha map in order to basically create
some fake branches to save polygon count. And then on top of that,
they added, in this case, like some different type of leaves and even more
leaves and more leaves. So you can see that
you can go quite complicated with this
and you can create a really cool looking tree. But in the end, once you
know what you're doing, it's not that much stuff
that's going on over here. So let's go ahead
and leave it here. In our next chapter,
what we will do is we will start
by creating ivy.
63. 42 Creating Our Ivy Part1: Okay, so what we're going
to do in this chapter is we are going to get
started by creating our ivy. Now, before we get started, there's two things that we need. One of them is like
some collision and one of them
is some textures. So for our collision, when
we want to create ivy, of course, we are going to
create quite specific ivy. Well, there is also going to be ivy that's just like
growing over here. However, what I will be doing
is for that kind of ivy, I will most likely
just do, like, a time naps on how to do that one because it's,
like, the most basic one. But we are going to
do two in real time. One of them is going
to, like, nicely grow down here from our railing, and it will grow
onto the ground, and maybe it can also grow
over here on, like, the side. And another one,
it will basically grow around our pillar. So I'd like to go ahead
and let's just oops. Let's just go ahead
and select these. Se, I don't want to select
these three like that. Let's have a look. I'm going to go ahead and do this in Maya. It's probably easier
if I do it in Maya. Here we go because
else we would need to, like, export it from here. Well, we would need to
combine our objects, then we would need
to export them, then we would need to clean them up in Maya,
that kind of stuff. Or what I can do is I can
simply go in here Maya, and I can grab my
railing is what I want, and I want to grab
my floor over here. And if I just go ahead and very quickly do like a contra D and throw this into a new layer, call this like
collision and safe, turn off my railing and floor so that all that we
have left is this. Now I can just go ahead and
I can move this one here. I can go ahead and hold
J to snap rotate this. And then I just want to
have a quick look to see if one of these is long
enough to be in between, in between two pillars, which it is. So that's totally fine. So all I need to do
is basically move this one over here and
let you do the trick. Something like this. And then it will also fit
inside of Vacine. So now you can just go ahead and you can export selection. And I have created a new folder in our export
folder called collision. And in here, I just want
to export it as an FBX. Call underscore 01. And for the pillar, the eric pillar over here, we don't really need
to do anything. The reason we don't
need to do anything is because we already
have the model. All we have to do
is import our FBX. So we have that one done. Now the second thing
that we need is we need some actual
textures for our IV, just to already collect it
so that we don't have to do that later. It's
going to textures. IV. And in here, what we are going to do
is we are going to use a website that
we've used before, which is called texas.com. We use it just recently
for our decals over here. But the nice thing is,
yes, they actually also have some
real treaty plans. But what we can do is we can
go ahead and we can go to our not treaty foliage
show, treaty scanned atlas. And if you just go ahead and
go in here, there's, like, a bunch of different
trees if you want to or a bunch of different
leaves if you also want to create
like different trees. But I'm just going to go
ahead and type in Ivy, and then I'm going to
probably grab the first one. And also, there's immediately, like some reference
that you can use on, like, roughly what Ivy looks like. So let's
grab the first one. And then what you can do is
you just need, like a 1024. So let's just go
ahead and grab like 1024 or you can even
get away with 512. That's no problem,
actually. And I'm going to have all of them over here. Well, I already did them before. So I'm just drag those into
the folder. Over here. And now we also have some
textures ready to go. Awesome. So let's go ahead
and get started with our IV. Now, once we created one, let's call it an IV generator. Once we created
one IV generator, we can actually reuse it over and over again,
which is quite nice. So inside of Speedr, the first thing
that we need to do is we need to import
our collision. We can do this simply
by going to file, and then we can go ahead and
go for import mesh, asset. And then what you want
to do is you want to navigate to your folder. Now, I don't really like
this type of navigation because I cannot
copy paste my link. So what I can do is I can press use Native dialog, and in here, I can simply copy paste my project folder
collision and open it up. Now that we have
this one over here, what we can do is we can go ahead and we can set this
as a collision object, which um if we go I think I import it into
Did I input it into the 11? No, no, import mesh, I said, so that should be fine. We need to go Oh, sorry, we need to go to forces because it's
technically a force. It's a collision, but
it's also a force. So if we go art force, geometry, and then grab call one, it's a little bit large. Yeah, it's a little bit large. So over here, we have
collision one, ready to go. If you want to see it better, you can go to your materials, press the plus minus sign
and art in new material. And I like to just
click on it and press rename and call it like gray. Press okay and you
should be able to just drag this on
here. There we go. Okay, so whenever
we have our force, sorry, I called it a collision. The reason I call it a
collision is because to me, it behaves like a collision. So when we go over here, what we can do is we have some settings as soon as
you click on it. Let's go to scale and
set our scale to 0.1. Over here to make it a
lot more manageable. And then you can also go
ahead and you can also press W to simply move it. And what I'm going to
do is I'm going to go ahead and just move
it nicely over here. And this grid over here, whenever we grow
ivy down from here, it should ignore the grid.
So that should be fine. I know that this still
looks like really massive with, like, this person. You can go smaller if you want, but scale doesn't really
matter too much inside of Speed tree because
we are going to manually scale everything
inside of Maya later on. So over here we have a force. Let's nicely placed
into the center. Now, what we need to
do is once again, we need to go from
large to small. So we need to start by
growing our ivy branches. And once we've done that, we
can grow our actual leaves. And then on top of
that, we do actually also have a trick that can turn our ivy branches from like a really high poly version to like something
much more lower poly. Or what you can do is
you can use nanite because in our
version of unreal, foliage works with nanite,
which is quite cool. But anyway, what we are going
to do is we have a tree. We want to right
click Add jump tree to select it and
add a simple trunk. Now, this one is kind of
funny because this trunk, we are actually not
going to use it the way that it's
intended to use. We want to go ahead and create a even cylinder out of this. So if we go to our skin and
then over here in the radius, we want to go to the second slider and we
want to move this up so that it no longer twice
like scale down the bottom. Then what we are
going to do is we're actually going to
select it and press W, and now we can move it
like a normal object, and we are going to simply
rotate it like this. Over here. And this one, it's almost like it's
a fake one, basically. So what we are going
to do is we do this, and this one will
later on be hidden. So it's mostly here just
to create some branches. That's what we
mostly use it for. So we have this one. Let's go ahead and
go to our spine, and at this point, we can go ahead and go back to generator. We have this one. I want to go ahead
and I want to make it a little bit
longer over here. And there we go. Okay,
so this is our base. The reason we need this base is because we are going to
generate some branches, and we simply for the branches, we need something to hold them. Then what we can
do is right click geometry, and let's see. We can maybe do some
branches over here or we can, let's see. If I do little branches up here, those are a little bit too. Yeah, it's easier if I just use like a template most
likely to save some time. Twigs. No. I guess we want to go for branches and
let's use little branches. Then what we want to do is we want to go ahead and we want to set the length is honestly. The length, I guess, is fine, but what I want to
do is I want to make the length quite even over here. You can go down here and
you can set like a default. So if I go for max over here, then it will set to default. And then if I could just
go into my variation, I rather have a variation in length like this
than something else. Next, what I want to do is
I want to go to my skin. I want to go to my radius and I want to move this
all the way down. This will basically close off
or almost all the way down. This will close off my branch, and then I can go
into my radius and I can make it a little
bit thinner over here. Okay, awesome. So we got
this stuff ready to go. We just need to
go into generate, and what you can
do and generate, you can control when
the first branches show up and when the last
branches get removed. So I'm going to go ahead and
set this to zero to 0.9. You can play around with it to see what it does, of course. And what I'm going to do is
I'm going to go ahead and set my angle over here. Let's see. We have a position.
Maybe in spine, spine and then start angle. I want semi angle to be almost like pointing
out like this, so that's a really
spiky looking thing. Now that this is done and
we have our base branches, what we're going to
do is we are going to activate our force. So if you go ahead
and go to forces, we can go over here and we can activate our
collision, like this. Now, what this will
do is it will try to attract our branches to our collision, as you
can see over here. And compare depending
on this value, it can attract it really
strongly or really softly. I want to attract
it quite strongly. But what I'm going to do then is I'm going to
select my branches. And basically, one of
these is like rotation. Sorry, I need to
go to node mode. One of them, it's like
controlling the rotation. So is it this this one over
here, the little circle. And what I want to
do is I want to basically move these
branches using the circle and move them a
little bit more into place. I'm not too happy what
happens here where it's not like extending out. So that's something I
might want to work on. You can go ahead and
you can literally, move even the branches all the way to the back, use the circle. And this is the
only type of, like, really manual stuff that
we will do, I guess, it's just needed to, like, because even these branches, they are almost
like fake branches. We also won't be
using these ones. They are just once again
needed to hold the real stuff. Which we are going to work
on. So you can go in here. You can also change
the rotation, and then what we're going to
do later on we are going to give some additional values. So I want to go here. And I was hoping, oh, wait, let's just do this. I was hoping that
it would, like, grow over the base over here. I know that that was, like,
a difficult thing to do, but I've done it
multiple times before, so we just need to, like,
play around with it. But I will show you some tricks. Let me just first finish off by nicely placing this stuff. And of course, the more places you place branches
in those locations, your branches will become, how you say it, there will be more ivy in those locations. So just keep that in mind wherever you place
your branches, later on we might even
want to remove some. So let's say that now we
have something like this. Now what I want to do
is I'm just going to go ahead and probably go
back into generator. And then I want to
go to my let's do spline and set the length
a little bit more. Let's going to our forces. And, yeah, I can definitely
see that over here. It's not detecting it. We can try to, like, move
our trunk, maybe that one. Because for some reason, it should normally what
it should do is it should actually detect that it
can go down over here. So let's just mess around with things a little bit until
we get the right shape. That's mostly it inside of
speed reaches messing out. Let's go into our skin. Is it skin? No, not our skin. Let's go into our It's because
I always use the l button. Let's go into our
spine over here. And down here, we
have some noises. We can use these noises to basically mess around
with our branches. You have a early noise. You early noise will
abide to your forces. Your late noise over here, it will not abide
to your forces, although, for some
reason, this case, it doesn't really do anything. Which is interesting. Over here, you have, like, your jink. This one is actually quite new. Let's lower that down. And
let's go back into my forces, and then over here.
Let's see. Does this? Yeah, yeah, I want to
move this a bit up. I sometimes just like to
play around with my sliders. But let's set the forces a
little bit lower over here. See when I set it lower, it is able to start
generating on these parts. So what I need to do is I need
to try and find a balance between the top bits over here, going down using my sliders. And then maybe what I want to
do is I want to maybe go to my spine and set my
length, a little bit more. And now I have this
one over here, that might actually
be a little bit too much tone it down a little bit. If I have this, if I now
go to my note network, I was hoping that I
can use the rotation to slightly manipulate how
I want my branches to go, but it's like super sensitive. And I guess I don't
know exactly why it is being such a pain in order to move these
branches over here. Normally, they
grow quite nicely. Let's see. Can I go
back into my forces and I don't think this will work, but let's say that
I move it out like this and then try to
move this one down. No, it just pushes it back in. Which is quite unfortunate. Like, it works a little
bit, but it's not amazing. Now, what will most
likely happen is that I only need it
to work a little bit because these are
like my base branches after these branches are done, then we will like our actual branches
are really small ones, and those will most definitely make everything look a lot bigger and
stuff like that. So I'm mostly just trying to get like exactly the balance
that I want to get. So let's do something like this. And yeah, I guess, then
it's just unfortunate that for these ones, you can just, like,
try to use all of your notes just to
see what they all do. So this is like the one
that mostly rotates. Oops. I don't know what
happened there. That's weird. But yeah, basically, what I'm just trying to do is
I'm just trying to, like, get this all to flow out. A little bit better over here. Now, a cool thing that we can try to do is we can also try to have another force attracting this force in order
to push them out. The way that you can
do this is if you go to your forces, you
can add the force. And let's say that we add, for example, like a
magnet over here. Now with this magnet, you
can see that because we have added with our
branches selected, it is already active. This magnet there we go. See, I will try to attract. And yeah, the rotation
doesn't really matter, but the branches will try to
get attracted by the magnet. So if we set our magnet to be, like, a little bit
out over here, and we go into our little
branches and into our forces, you can see that now these two forces are working together. First force is keeping our
branches to the ground. The second force
is using a magnet, but to move here. Only thing is, of course,
a magnet is one point. So if we make it too
sharp or too strong, all of these bunches
will go into one point. But honestly, I'm
quite happy with this. So we have these ones now too. I'm just going to save my seem because last time I crashed, so I should really
save my scene. And I'm going to go saves, create a new folder that
I will call foliage. And in here I will go IV, underscore zero, one, and
let's go ahead and save. Awesome. Okay, now we are going to get started
with our real branches. If we go ahead and right click geometry branches and go for, like, twigs over here, we have, like, all of these really small
branches that we can use. As is typical with Ivy, these punches, we want to
make them like a mass. So what we want to do is
we want to go to generate, and we want to, first of all, set our first to be like
all the way at the base, and then our last to be at one, which means that they will
go all the way to the end. Next, what we're going to
do is we are going to, like, go to our spine, and we are going to make the
length a bit more insane and also make the variation
a bit more insane. Then what we can do is
we can go ahead and we can go down here to our noise. Give it like a bunch of, like, early noise and also give it
like a bunch of late noise. So it looks like, really, really insane what we have right now. However, as soon as we throw on force and collision
and once again, set this collision
like quite high and move this down so that it
really sticks to the branches. What you can see over here
right now is that the branches become a little bit tone down. So I can see that I
do have too many. Let's go to our skin and tone down the thickness of
our branch a little bit. Actually, you know what I
want to set this thickness, I want to set to zero
because right now it's deciding the thickness based upon the thickness
of the parent. However, I want to have
an absolute thickness like this so that they
are all, similar. And then I just add some variation next to it over here to give it
like some variation. Next, this they are
way too straight. Let's just go ahead and go
into our segments over here. And I'm just going to
go ahead and give it, like, a bunch more segments. So because these ones over here, they do not really you don't really have to
care too much about, like, the jom dri count
for this kind of stuff. So we give it some
more segments. We then go ahead and go into our generator and maybe
set the frequency down a little bit to
make it less over here. And now you can see that we get that really typical messy
ivy looking type stuff. You can also go in here. You can also play out
with your rotation, your position, and
that kind of stuff. But I think all I want to do
is I want to go to my spine, and I want to mess around a
lot more with my early noise. And let's see what
does this one do? Well, just move it
up a little bit. It looks a bit
better when it's up. And you can also mess with your turbulence to
make it more or less. So I don't want to make
it too round and wavy, but I do want to mess
it up quite a bit. So we have something
like this over here. Now, when you would
be happy with this, you can actually click on Fox
Semper trunk and press H to hide it and click on your wigs and press H
to hide it, as well. So you can see that all
that we have left is like our ivy branches over here. And then I don't
know for these ones, I will probably not use them, so I'm probably
going to hide them. But then in our twigs over here, Well, we are going
to create a branch, but it's not going
to be this one. I'll go over that later. Right now, we're just
creating the structure. So we have this one. I'm just going to go
ahead and give them a bit more over here. Only thing I'm still not
happy is that it creates these really straight
lines over here, which is a little bit
strange that it does that. Let's go into our so
this is our spine. And let's go ahead
and yeah, our length. Let's play maybe with the
variation of our length a bit more. Okay. And let's see. Is
there anything else that I might want to
change over here. You can even control,
gravity and stuff like that. You know, if igac
does something. Sigac basically breaks up your mesh a little bit more
by making it even more messy. But let's say that we
have something like this. Let's say that something
like this might work. Okay. Cool. So we have this one. Now, what we're going to do is now we are going to
well, first of all, save our scene, and we are going to start by creating
our ivy leaves. So for this, if we
right click geometry, and then we probably want to go for leaves and go for like a scattered leaves
to get started with, as you can see over here. Now, these ivy leaves right now, they are not very good, so there's a bunch of stuff
that we need to do to them. However, it is a little bit difficult to
actually see what we are doing. Like, it does feel
like ivy already, but it's a bit difficult to see what we are doing
without textures. We would want to
go to our forces, and normally what I do is
I use a plane of force, but this one is in a corner. So, oh, hello. What happened? So let's go to forces. And here, we can push them down, but they are not being pushed down the way
that I exactly want them to. So that's something that we
definitely need to work on. Let's for now turn
over our forces, and let's start by
creating our material. So to create an IV material,
it's actually really easy. We just press Plus,
Add new material, rename and call this IV. Let's do leaves over here in case we also want to
create the bark material. And now with our ivy leaves, if we go down here
to our ivy leaves, first thing that we
need to do is turn on two sided. That's
quite a classic one. Next, we want to
drag in our ivy, and we want to drag in
our albedo into color. Remember, this is just
for previewing purposes. This is not the final look. Opacity, normal can
be into normal. And if you want the
roughness can be into gloss and translucency can
be into like subsurface. It's not really needed
these last two, but just in case
you want them to. Okay, so we now have
our ivy material. However, something quite
important is that we don't actually have the
shape of our ivy leaves. As you can see over
here, our ivy leaves, they are all on one texture, so we would not be able to
use them as they are now. And this is where I
crashed last time, so let me just go ahead
and file and save. Now, if I count, so let's say how many different
types of leaves I want. Let's do one, two,
three. Let's do four. If I want to capture four of these leaves because
the other four are the backs of the leaves, I can go up here and I can press art until I get four
different leaves. Now, hopefully I don't
crash this time. So what you want to do is you want to go ahead
and you want to press it. Ah, okay, I didn't
crash this time. Good. And when we press it, uh, am I gray cut out? One sec. Why am I
doing this in gray? I swear I had my ivy
leaves selected. Let's make sure to do
it on your ivy leaves. I don't know why I mean do it on gray, let's press Add it. There we go. So what
do we have now? There's two components to this. One of them is
this little button over here. This is
your pivot point. If you want to have ivy leaves, you want to always
your pivot point at the base of your leaves, and then you want to
change the angle over here to control in which direction
your leaf will be pointing. The second part is
your geometry node. You can go up here and you
can click these red points. To go around your IV leaf. Now, let's say that you need
another geometry point over here because you don't
have enough space, like over here, see. What you can do
is you can click, and then it will
create a new point. And over here, I can click
and create a new point. Remember, the more points,
the more geometry, we are using a lot of
leaves so we don't want to go too insane
with our geometry. Although we could use
nanite for this one, I can show you how to do that. But I also want to give you a balance between this
and traditional notes. So we now have our base leaf. There's one last thing
that I do like to do. I like to go to by tesselation and I give it like a tiny bit
of tesselation like this, which allows us to curl
our leaves around, and it allows us to add some
cool effect to our leaves. Once you're done,
you can go up here, and although speed tree
is made for, like, level of detail to LODs, we are just going
to use it for high, medium and low, we are just
going to drag it all in here. And now, if you just click
outside of the window, that one is done over here. Ivy leaves cut out. So we want to go ahead and do
that for all of them. We can go up here
to the second one, change the angle.
Go ahead and move. And the cool thing is
what you can also do is if you want to
remove a point, you can always go up here
and click Remove points. And then it allows you
to, click and drag to, for example, remove
a point like that. But in our case, often you just want to
add points because you don't need to
remove that many unless unless you
place like one. So we can go up here. Give us a little bit of
tesselation and press the little arrow
button to apply it. And that's basically
what we are going to do. So with the last two, so we have this one over here. Once again, just
set like the angle. It doesn't have to be perfect. Just set like roughly the
angle it is pointing. Make sure that your geometry encases the entire
leaf because else what will happen because
this geometry is also the UV automatically. So if we don't do this, it will show you like a cut off
leaf. So we can do this. Bit of tesselation.
Apply. And finally, I don't know why it
keeps resetting to gray. That's really annoying. Finally
the last one over here. Set the angle. And now what we can do is we
can move this nicely. Over here. Give it a bit of teslaation and
let's go ahead and apply it. Awesome. So we now have our
four leaves ready to go. Now I'm just going to go
ahead and save my seen again in case I lose my seen
because for some reason, it's a little bit buggy lately. But now I can go to
my materials up here, and I can go to my ivy leaves, and I can start by dragging and dropping this on our leaves, and it should, as you can see, replace the material
of our leaves. Right now it's only
using one leaf. So what you want to do is
you want to go into leaves. You want to go into skin, and then up here because
it's only using one leaf, you want to go ahead and
press this four times. What we can do with
this is we can set the mesh one to cut out one. This one can be ivy
leaves, cut out two. Ivy leaves, cut out three. Ivy leaves, cut out four. Now what it will do is it will randomly cycle between
our four leaves. And if you look really close, although it's a bit difficulty, it is actually doing that. So we have our ivy
leaves over here. Now, there's one last
thing that I want to do. These leaves, right now,
what will happen is, especially when we add a bunch of them, which
we are going to do. You see you add a bunch of them, it's like one big
clipping mesh mess. They are all just like sticking through each other, all
that kind of stuff. So what I like to do is
I like to first of all, give them, like, a little bit of curling and stuff like that. If you go to your skin, you can over hires, you
can play around, like some folding, and
I can have a look, and ivy is always folding. Well, most of the time
it's folding down. I don't really want
to look up like custom reference, to be honest. Oh, no, wait,
actually, I can look up custom reference
because we have our over here. So
let's have a look. So Ivy is often if we just zoom in and press the C to
zoom, it's folding up. So if we go ahead
and go up here, we want to go ahead and
fold this up a little bit, and then we can use
our curl to, like, push this down a little bit more and use our twist to give it like a little
bit of variation. You can also go over
here and your vertex and you can give it
some vertex noise, which was quite useful. Here let's add some more noise. This one is quite useful for
when we added our geometry. Now, without that
tesselation that we did, we would not have been
able to do this stuff. So having this now, if you
go up here to collision, you want to set this to
high quality collision. And when you do that, you
can see that they will no longer collide with
each other over here. Cluster plane
overlap prevention. Yeah, that should be fine. Okay. So now, of course, our amount of leaves have reduced by quite a large amount. So first of all, let's
go into our leaves, and let's start by making
them a little bit bigger. So we can go over here. You can change the
size scalar up here, or you can go to
skin, and in here, you can set the size of
your leaves. There we go. So we are going to make
them like a little bit larger. The leaves. And then the next thing
that we're going to do is we are going to
go to generate, and we are going
to set the number quite a bit higher over here, which will slowly start increasing the leaves
more and more. So there are different numbers, so we can use this
one or we can go for proportional to absolute,
I believe it is called. Yeah, absolute also
allows you to, like, increase the amount of
leaves quite a bit, quite fast over here. Now, we are going to
increase them more. However, what I want to
do now is I first of all, I want to focus on the fact that these leaves are not
looking very nice. I'm going to go to
my twigs over here, and I'm going to
go to my forces, and maybe I want to, like, set my collision force a
little bit lower to make them a little bit more
relaxed and pushed out. That is starting to work,
except I don't like that one, but tone this down a little
bit more. There we go, see. So basically what I'm
trying to do is I'm going to make my branches like a little bit more
relaxed so that they are going on top of each other, which will often create a
nice effect with our leaves. So the only thing
is that over here, this one, I don't like that, so I can just go to notes
and I can just like, rotate this one back like this. And yeah, that should do
the trick. Okay, cool. So our leaves, what
we're going to do is we basically need
to go ahead and we need to try to
mostly have them, pointing downwards or, like, well, I guess mostly pointing
towards the magnets. I don't know if we can use the
magnets we want over here. And then we want to have
them pointing down. I don't think I
like this magnet. Let's also play around with
collision to see if we can have them moving down
from our collision. So right now, I feel
like the collision, it pushes everything
like too far away. So this always takes a
little bit of up and down to basically get
it to look right. I'm going to like, your fault is often
quite a bit easier. I think what I will do is
I will go for a direction. So let's go to forces, art force and
direction over here, and this one is always trickier than just one that is hanging down because when
something is hanging down, you can use gravity. However, in here,
I don't think do I even have you can use
gravity on the branches. I don't think I have gravity on the actual leaves over here. But yeah, basically. So that
one is not always as nice. However, if we go over here, so we are pushing this down. The only problem is
that we are pushing it inside of our mesh. If I just press H,
Yeah, see here. So we are pushing
it down too much. Go to forces and click on collision to
basically unhide it. So let's go over
here and let's see. Another one that
we can try to use, which is a little bit
more localized and not affecting everything is
we can go to forces, art force, and we can use a
plane of force over here. And I believe that the plane of force If we go over here. Now, normally the planar force, it is the scale does
not really matter, but I'm just gonna
try it out anyway. So let's go ahead and
go into our leaves, click on planar and
see if that one here. See, that one does start to push our leaves a bilitt more. Only what I then have is that I have another these leaves. Maybe if I can like, did I
just duplicate it or not? I want to duplicate this, and the hope is that I
can use another plane of force down here to kind of
like push the leaves down. This one, it will require, like, a little bit of back and
forth, as I said before. So don't be too discouraged if it doesn't look
correct, by the way. Yeah, so they are kind of like fighting with each
other right now, which is not super
handy, to be honest. And we have a lot of leaves
that are sitting at the base. So I'm not sure if I
want to actually do this. This one I kind of like. So what I will do is I
will leave this one. I like, use it to kind
of, like, push it out. And what I can do is maybe to, like, push out my leaves. I can then go ahead
and use a direction. And at this point, I am kind of, like,
cheating a little bit, just trying to manipulate
my leaves more. But basically, I want
to try and use it direction to bring out
more of these leaves. But the problem is with
direction is that, yes, we are bringing
them out, however, they are getting
pointed down again. So I can try to work with my rotation over here
and that kind of stuff. And my, where are you
skin with my folding, I don't think this direction
is working, to be honest. So what I will do is I think
at this point because it does require quite a bit of,
like, going back and forth, it might be nice if I just simply pass the
video and I will, have a look and see which
settings we need for, like, the absolute best. And then once we
got those settings, we can, like, local align over here
is looking quite good. Once we got those
settings, I can show you them and we can run
through everything like that. So let's go ahead and continue on with this in next chapter.
64. 43 Creating Our Ivy Part2: Okay, so I went ahead and
I went over the settings. And actually, there weren't too many settings that I
had to change in the end. It was just like a little
bit of playing around. So the first thing that I
did is I just went into my twigs and like I increased
the count a little bit. So here you can see that you
can just increase the count, which will also just in general, increase the amount of branches and increase the amount of ivy. So, the more you have of these, the more ivy you
will end up having without the collisions going
a little bit too crazy. Let me just set
that back to around like 1.3, which
is what I wanted. Oh, I don't like that one. Let's try that. There we go. That looks better.
Okay. So the next thing that I did is I just
went into my leaves. And if we go into
our orientation, I ended up basically the biggest one is
the sky influence. So the sky influence
was quite low, which caused all of my
leaves to basically try and move up towards the sky. So what I did is I
set this one higher to make them move a
little bit downwards. And then I went into
my graph over here, and I made it so
the leaves that are moving more upwards are
the ones here at the base. The reason I did that is
because if I remove this, many of the leaves they
basically went into the ground. So by moving this
down a little bit, a little bit less of the
leaves are going into the ground so that we can see them still a
little bit more. The rest, I just, like, messed out a little bit with my fault, which can fold
things down a bit. And mostly like my align note, which can align things a bit. And that's about it.
Honestly, for the rest, all I really did was,
I went into collision. This actually quite an
important one. I almost forgot. I turned on magnet. That's
one. So I turn on magnet. It doesn't do much,
heres, but it does, kind of point our
leaves towards, like, the goal where
they are growing. So that's kind of
like my idea for it. Collision? Are you okay? I don't know why my
collisions try again. None, high quality. There we go. Okay, so sometimes it does that. Sometimes the collision
gets a bit confused. What I did was I went into my leaves and into my collision. And if you play around with your pivot threshold over here, what you can do is you can
allow more leaves to go in. It does mean that you get,
like, a little bit of cutting, like you can see over here. So use it with your own risk, however, it does allow
you to basically, increase the amount
of leaves that you want just by pushing it up
a little bit like this. So it kind of depends
what you want. If you see some really,
really obvious cutting through your leaves, like
you can see over here, what you can always
do is you can always go into substance painter
and you can remove them, or you can literally go in
here and I can literally grab my leaf and I can just move
it until the cutting is away, or I can literally just,
like, press the lead. So it is up to you. Of course, this method where we go in
here and actually do it, it would be something that you would only want
to do at the very, very end because else it as soon as you
change the setting, all of your work would be lost. So we got this one over here. Now, I do want to still
go into my orientation. Maybe play around a
little bit more with my folding, like that. And maybe let's also
play around a little bit more like my curling. I don't want to do too much
because I want to have them, pointing downwards
a little bit more. Maybe like play around
with my twisting a bit, like my vertex. There we go. I just
want to give it a little bit of difference. Now, another thing
is that right now, all of our leaves are like, pretty much the same scaling. Which I think we can all
agree is a little bit boring. So what I'm going to do is
I'm going to go into my skin, and then in my size, I'm going to click on variation, and I want to give it a little bit of variation over here. Just to make some leaves
bigger, some leaves smaller, which will just in general, give us a more
interesting variation. One thing to also
remember is that what we can do inside of a reel is we can move our
leaves a tiny bit up, which will reveal a bit more of the hidden leaves
that are below here. So that's another
thing that we can do. Or if you want to
do optimizations, you can literally
just like in Maya, you can click and drag and select all of the
faces below here, you can literally delete them. However, I'm not really going
to do that, to be honest. I don't really want to. So let's go turn on my force again, and that's looking pretty good. Yeah, I think, in general,
I quite like that. Maybe maybe want to get
like let's now leave it. I might want to later on
get a bit more leaves, but I think for now, this
is looking pretty good. So at this point, we
would save our scene. And now what we need to do is we need to do some multimization, because right now we have 42,000 triangles for this one
little bit over here. I want to have most
of my triangles. Oh, no, wait, we have
way more, actually. No, wait, no, we
don't have way more. Yeah, we have 42,000, and our leaf mesh
are around 13,000. So I want to my branches. They are like 26,000 triangles. I want to reduce
that quite a bit. Now, we can do this
simply by going into Maya we can create
almost like a custom branch. And this custom branch is
going to be like a plane. So what I want to do is I
want to go ahead and I want to shift right click
and you can do this, of course, in Blender,
Max, whatever you want. I'm going to set my
subdivisions to zero. And basically what
I want to do is I want to move this
upright over here. Make sure that it
is forward facing. So top so this is the front. So it's not forward
facing over here. Let's just go ahead and now it's forward facing
so that at the front, we can see the front. And what I'm going to do
is I'm going to just scale this in until it is quite thin. I can control the scale
a bit more later on, and I want to set my pivot
down here so that it is pretty much sitting
on the pivot over here. Next, what I need to do
is I need to give it some segments because else we are not able to
bend this around. So let's select the edges
and add like ten segments. Maybe a little bit
more, Let's do 15 segments over here.
And there we go. That is our branch. If you want, although we most likely won't
be doing too much with UVs, or well, we would give it
like a WorldSpace UVs. But if you want, you
can also go ahead and you can also UV unwrap it. There we go. Like that. So we now have our branch, so to speak, ready. We can go Export Selection. And if we go to Export, um is it okay for you
guys if I just place in the collision and
call it like branch instead of making an
entire new folder for one single FBX. There we go. So let's just
go ahead and do that. Now, if we go ahead and we go back inside of subsuspainer, what we're going to do is we are basically going to replace these branches over here
with our own custom branch. So first of all, let's go to file and import and mesh asset and select
our branch over here, and let's go import that one. So when we have a
branch over here, now you can just
select it down here. The first thing that I want
to do is I want to align it with this leaf because this
leaf basically shows us, I don't know why I can move it. This leaf shows us the
correct direction. So we want to set
the orient to y up left handed and
turn on flip normals, and that will basically
flip around our branch. It's often when you
export for Maya, these are the settings
that you want to use, and that's looking good. Okay, now, the next
thing that I'm going to do is I actually need
a branch material. So for this, it's up to
you what you can do. So I guess what we can do
is we can go textures Ivy. Let's make another
one called Bark. However, we will use a
different type of shader inside of Mm inside
of inheel engine, but we can still
go ahead and go in here and type in, like, bark. And we can just
grab like honestly, we just need
something basic like willow tree bark for okay, that's a bit too intense. Linden bark over
here. Let's do that. And just grab like It
doesn't really matter. Like a base color. Normal map and roughness map over here. Even the resolution doesn't matter too much
because we really don't need a lot of resolution
for such small branches. And then we can go
in here and quickly just drag in your base color, your normal and your
like roughness. Make it two sided.
I'm really sorry. This is the wrong one. I need
to create a new material. I'm going too fast, sorry. Bark try it again. B two sided. Color, normal. And gloss. And now we can go to
our cutout meshes, and we can select
our branch mesh. There we go. Okay. So our
material has now been set up. Now, for our branches, what we want to do is we want to click on our twigs over here, and we want to go
to our skin and what is a type this time
from polygons to spine only. I will not change anything. It will just turn it
into invisible splines. Then what we need to
do is if we right click and then we want
to go to art geometry, and we want to add
a mesh over here, and this mesh that we have, this will be turned because this mesh will
follow our splines. What we can do is because
it's like a thin strip, we can make this mesh
follow our entire splines. So if we go ahead and
go into material, And set the material to be
the bark material over here. You can see that over here, it is basically duplicating
these splines over and over and over again
around this shape. Now, I can see over here that, of course, it's way too thick. We should be able
to go in our mesh, and in here, we should
be able to change it. However, the scaling
is not always perfect. Let's try radial scale. There we go. Let's
make that quite a bit thinner like that. And then here maybe at the ends, I can go to our start. And if I go ahead and click on here and then move this down, that one doesn't always work. That's the annoying thing. I can go in my radio
scale, probably, though, move it up and
then scale it down. No. That's interesting. That that one doesn't
seem to work. It's not that big of a deal, but it would have been nice. But anyway, now what
you can see is that we have gone back to,
like, 7,000 triangles. So for these ends, I'm not sure if it's
really that big of a deal. I want to check my orientation. I feel like, but I'm not sure. Let's just many of these many of these options
over here, they do not work. And the reason they most likely do not work is because you want to go into the twigs in
order to change them. However, I want to
be very careful with changing twigs, of course. So if we go in our twigs, radius, push this down here. Does that seem to
change our mesh? Nah, it does not seem
to change our mesh. Though I don't think it
has an effect on it. However, it does seem to, like, mess up our jumtre. So that's why I want to, like,
undo that because I want to be super careful
about at this point, changing our one sec. It's not able to read
collision anymore. There we go. So I'm
not sure what to do, honestly, with,
like, these twigs. I've had this problem before. I was hoping it would
not be that big of a deal, and I
guess it is not. I guess you won't
really be able to notice it too much,
maybe on these ends. But on these ends, what
we can do is we can fix this inside of Maya
if we really have to. I honestly don't know if there is any type of settings that we
can use over here. Doing this, the settings
are very limited. Let me say like that.
We do have a length, I can see over here,
which is interesting. So maybe what we can do is
we can push our length down a bit and that we'll hide
these harsh corners. But I don't think the radio
scale will really do much. I can also go in my variation of my radio scale and maybe
give a little bit of tiny variation in
the twig thickness. Let's move this down. And honestly, I think something like that
is honestly fine. Like we are not looking at it in the
engine, this up close. So this is probably good
what we have right now. So what I want to do
is let's say that we are going to call
this first one done. We might need to add a bit
of variation here and there. Over here, I can see if
I just unhightT one. No, it's not this one. I guess if I go note, select this one,
et's move this here. Select this one. Move this here. There we go, because
I don't want to have them so
close to the end. Yeah, that should do the trick. So let's go back to generator. And I think we now have a pretty decent looking
IV to get started with. So we have IV. We are going to file and we
are going to save scene. And then what we can do is
so we are going to hide our large branches over
here because it will only export whatever we
have not hidden. So I'm also going
to hide over here my piece like that,
my collision. So once again, let's
save our scene. And now we are going
to export this, and once we've exported, we can go ahead and set
it up inside of Maya, although I think the only
thing we really need to I'm not sure if we need to change
anything inside of Maya. Often this default, the only annoying
thing is that the Pivot point needs
to be in center. However, this is something we can actually change
nowadays and real. So let's just actually try to export this to
Unreal right away, and it might actually
just work totally fine if you don't need
to make any changes. So let's go exports to
Unreal, and in here, I will go ahead and
I will go file, ta, export to game. No, that's not the one, or
is it? Yes, that is the one. Okay. Export the game. And we are going
to go to Un wel, and we will go ahead
and export this as an FBX file because I prefer
FBX and call it IV 01. You can go ahead and press Save. Okay. We can go ahead and go for a came preset
of Unreal engine. And yes, so the scaling is another thing that
we need to work on, but we can do most of
this inside of Unreal. So I'm going to only
export my highest LOD. I do not want to export my Atlas because we have an atlas
that we have fromtexdt com. I do not want to export variations or light
Mb UVs over here, and that should do the
trick Billboards is fine. These settings over here, it's a bit of, like,
back and forth. I need to have a quick look
and see how this one looks, depending on how we
want to flip our mesh. So at this point, what we can
do is we and press, okay. And it should export our mesh. Now, annoying thing is that
it will always try to export, along with, like, your
materials over here. But you don't really
want these materials. So what I want to do? A, where's my Ivy? I exported my
materials too unreal, but it did not Export
my IV for some reason. Export IV 01. Oh, no, wait. It is here. I guess my explorer
is a bit messed up. Maybe if I switch back
and forth Oh, yeah, yeah. Okay, so here it
is. That's weird. So I'm just going to
get rid of, like, these leftovers that it
automatically exports. I can never find the setting to, like, not export those. And then what we can do
is we can go ahead and we can just straightaway
try it out over here. It will probably not look
good the first time, but we are going to work on it. Let's go in assets.
And if you want, you can right click,
create a new folder called foliage over here. And what I'm going to do
is I'm going to go ahead and drag my Ivy 01 in here. Combine meshes,
scaling of one, yeah, that's fine, because
I don't know yet what I want to do with this. And now if I just drag it
in, we can see what happens. Okay, so first of all, I think the scaling
needs to be 0.1. So we can go ahead and
go down here into MyMsh. And of course, you can
also do this in real or re Maya or Max or
Blender. Doesn't matter. So, okay, so scaling
of 0.1 is still not good but we are getting there. What I want to do is I'm just
going to move this one down as if that it would be
into place like this, and then we are going to figure out the scaling
because we did not make the scaling specific to
our object, if you remember. So 0.3 maybe. And the nice thing is that
you only really need to or at least we can quite easily measure it because it just needs to
lay on the ground. So if I go 0.35 over here, I think 0.35 does the trick. See? Because it's like
sitting on the top, and it is still flowing
over like that. So that's looking
pretty decent to me. Maybe push it down
a little bit more. Yeah, that's looking
pretty decent to me. Throw on some, like, green decals along with this
and some other foliage, and it will look quite nice. So we got that one
done over here. I also want to double
check my materials, which are looking fine. And now at this point,
it is up to you if you want to change
your Pivot point. Our Pivot point is
looking quite good. But let's say that we want to
have a pivot point here at the top so that we can really
place it on the corners. We can go to our modeling tools, and then we can scroll down
to pivot and click on it. And then in here,
you can choose to or you can set is like center and stuff like
that or the top. But what I like to
do is I like to go ahead and just do some
manual placement, and I want to have it
like here at the top. And then move it
down a little bit. And this will probably
make my placement a little bit easier to do. So go ahead the Paz except. And then what you can
do is now we can, like, quite accurately go
up here and we can, like, control the
position like that. Okay. So, what else do we need? Quite obvious, we
need some materials. It's already looking cool. You can already see the effect of what we are
going to work with. So for our materials, we want to go ahead and let's
just go save our scene. Go to textures, go to
cater fold cold foliage. And in here, I will do iv, and I will go ahead and I
will do bark like that. And now I can just
go ahead and import those textures that
we have had before. So here we have our bark, which is these three. Double click on your normal and just flip the green channel. Double click on your
roughness, turn off SRGB. Next, we will have our IV. It's ivy let's drag in, like, everything from our Ivy. You can, of course, for example, throw the alpha
in the base color if you want to save
some texture space. But this chapter or this tutorial is not so
much about optimization, because I believe
that first of all, it's important that
you can, like, create something that looks pretty decent before you
really start worrying about, like, all the optimizations, unless you're making a game, but then you are in, like, a fast track lane if
you will need to do stuff. It's flip. Turn off SRGB. There we go. So we now have
those pieces also imported. Our bark, we can just go ahead and we can
grab a concrete plane, duplicate and call this bark. Because this one will
use world space. It's just the easiest way.
You can use vs if you want. But honestly, for this bar, it's often easier to just
grab these pieces over here. Turn off the has crunch. NoepstangFne, tiling,
probably fine. So there we have our bark. And now what we're going to
do is we are going to right click material,
foliage, foliage. Underscore master over here. And we are going to
go ahead and import that and now what we want to do is if
we just go to Ivy and just drag all of
these pieces in here, it's not too difficult to
do this kind of stuff. So what we need is, let's see, base color, roughness, normal. Okay? So we have these
notes over here. I am personally not going to
expose all of these values. The reason I'm not going to
do that is because I'm not planning on doing
anything outside of, like, this ivy
foliage over here. But you can, of course,
expose it if you want. If we go into our
foliage master, we want to go ahead and
we're going to go surface. We want to go for mask, and then we want to
go ahead and set our shading model to
two sided foliage. And turn on two sided. Next, what you can
do is you can do the typical multiply with a constant t vector
and right click convert to Brampton and
call this color Overlay. This one can often
come in handy, especially with
foliage to balance out the colors. So we
can do this one. We have a normal
to multiply Sorry, not constant scale peremter, call it roughness amount. So we already went
over all of this, set this to one, throw
this into our roughness. Here we have a
subsurface collar. That's what it's called in here. You can call it translucency. You can call it subsurfacecolar.
Doesn't really matter. What we want to do is we
want to multiply this using a constantr vector that we call sub color so that we have
more control over a color. And let's set this color
to be a little bit of a darker looking yellow tone. And then what we want to do
is we want to multiply this again using a scale pemter
called sub underscore amount. Which will control the amount, and I'm going to
leave it to zero for now and set this to
subsurface color. And then our mask can just be in the obste mask over here. See? And now we have our leaves
pretty much ready to go. So at this point, we can go ahead and we can save our scene. So it's a really basic material, just as some of the basic stuff. And we can go
materials, material. We instance, IV
underscore zero, one. Yeah, I guess we can just like very quickly base color in case I want to
do something else. I should do this
properly. Normal map. It's just that I want to, like, get to the lighting parts because those are
really exciting. Sub and mask. So what we're going to. So
yeah, we're doing this one, then I will show you how to do one that's like horizontal. That's like growing upwards. And after that, what I will do is I already have a
bunch of foliage, like ivy, and it's
because I used that ivy in our creating interior environments
for games over here. So it's a little
bit conflicting, like for me to redo all of that work again for just like some
background ivy because that's ivy that we
will use like here in the background so what I will most likely do is I will include a special
bonus chapter, which will use the video files from our interior IV over here. And then we will just go ahead and we
will use those pieces of IV just to show you how to generate those
different variations. It will save both of us
a little bit of time. So anyway, we have our IV
because we're still going, of course, through the
entire process over here. So let's not forget that.
And we can go to materials, and we have IV 01, and we have our bark. Safe. And if you press G. So this is
what we got right now. We have our IV, yes,
that's looking fine. Now, I want to go ahead
and go in my IV 01. And one thing that
you notice that the back looks very dark. This is because of our
subsurface colors. So if we go ahead and go
into our subsurface amount, it sets to like one,
you can see that now the backs start to be
a little bit brighter. And also, we need to
work on the lighting, but that also comes
a little bit later. Let's set this like
0.3 over here. Tio Petri feels quite nice. Now, another thing is that I am. So the reason the back is dark over here
is most likely just because of our lighting effects. Because it does show the back. Yeah, so that should be fine. So most of this is probably
just like our icing effects. You can also go into
your subsurface color and said it's like to be a bit lighter or like a bit more like a yellowish color if you want to control
that kind of stuff. I'm going to maybe set my
roughness to let's see. 00.2 maybe, 0.4. Yeah, I want to give
a little bit of, like, a roughness shine. And another thing that I'm
not too happy about is that and I'm not too worried about like this kind of stuff
because I can just, like, place more ivy
on the other side. But I'm not too happy about
the amount of leaves. To be honest, it feels
like not enough. I know that in real life,
often this is like, totally fine to have like
these little strings. But oh, wait, and
I need to go to my worldspace bark,
which is concrete. No, main master world space.
I need to go in here. I need to turn on two sided, because else I'm not able to see the other side of my bark. And give that
second because it's a large shader.
Okay, there we go. Now we are able to at least, see the bark from all sides. That already increases things. It starts to look a bit better. I feel like I need
more at least. Now, the nice thing about this is compared to doing it in Maya, is that I now can just quickly make changes and I don't
have to redo my leaves. The only thing that's
annoying is that our pivot point will change. Again. So you kind of, like, want to take a
bit of grave salt. What I do find
interesting is, like, it looks like so much
leaves over here. Oops. That's the long
one. But in here, I guess it's No, yeah, that is interesting. I'm going to make my
leaves a bit larger, but I am really
curious why in here, I feel like am I doing something wrong
or something like that? Because in here, Yeah, definitely looks like more. Let's just go ahead and
play around with it. Honestly, that's the only
thing I can really say. So I'm going to go ahead
and I'm going to increase my leaf size like that. Maybe I will also go
to my twigs and I will go to generate
and set the frequency, a little bit higher to
give it some more twigs. Here, so now we are
really increasing it. So if it's still complaining, then I would be surprised. Let's go at an export to game. IV 01, just replace it. Yeah, I'm not doing
anything here, right? Oh, wait, include variations. That's it. No, wait. No, that's not it. I'm worried. I will turn on
include variations. What I was wondering
is that it is talking about these variations which are in your
material setting, you can add slight color
variations to your material. And I figure that we don't need it because we don't
need an atlas. You would only get these variations if
you generate an atlas. However, they might call.
So let me just add one. They might call meshes,
also variations. They might call this
also variations, which I'm not completely sure, but we will know soon enough. Let me just close Maya because I keep accidentally
clicking on Maya. So we will know soon enough
if that is the case or not. In that case, it was just
me getting mistaken. Uh, I feel like that
was the case, yeah. At least it does
look better now. So we got this one over here. Now, what I will do is I will just go ahead and
I will for now, not yet change my UVs until I'm completely
happy with this iv. So I'm going to
place it into place. Because the nice thing is, even though you
placed it into place, you can still change your pivot. I don't mean UVs,
soy I mean pivot. Over here. And let's have
a look at my camera actor. Okay. With my camera
actor, I probably want to, let's say that I
duplicate another one, and I will probably generate
another variation soon. And the nice thing
is about variations. I will show you how to
do that after this. So let's say I have
this over here. And then, of course, right now, our lighting is not very good, but just in general, it is
starting to look quite nice. And our focus our cameras
way out of focus, but I want to go ahead and give you a dedicated chapter on creating camera angles
and stuff like that. So let's see what
we have right now. We have a subsurface color. I'm going to set
it a bit higher. Let's set this to
like 0.7 for now, and we might need to, like, balance it out a
little bit later on. I like my roughness. So this is looking quite good over here. Now, another thing that
you can do is you can go into your IV and in here, uh in your build settings, you want to turn on two sided
distant field generation. And the reason you
want to do that is because often what
this does is it improves the dark shadows that you get under your foliage. I do often forget to turn on this setting, and I believe
that's the only thing. So now if we just
press Apply changes. Okay, I guess, with Lumen,
it doesn't do much. Before Lumen, it
actually did do a lot, but it might still make
some small difference. So just turn it on,
just to be sure. Okay, awesome, to leave this chapter off because
we now have, like, our first foliage in here and it's already starting
to look quite interesting. So yeah, I quite like that. It's looking cool.
You can go ahead and set your screen percentage
like way higher to get, like, a higher resolution stuff. So what we're going to do
now? Gonna set this back. Is I'm going to show
you how to very, very quickly generate
some variations. Then what I will do is, once we have all of our
foliage ready to go, I will change the Pivot points and then we will call it done. If you ever want to
change your variations, you can go ahead and
save your scene. And then if you just do
a saves and call this, for example, IV 02. The awesome thing
about speed tree is that it has a actual
generation note. So what I can do is
I can, for example, go to my twigs, and
although for these ones, if I go ahead and hide
unhide this stuff, so for these ones over here, they are Yeah, yeah,
they are generated. So we did not place
them by hand. So what I can do is
I can grab these. I can go to the All button. And then if I scroll down over, where are you? Did I pass it? Random seats? Oh, yeah,
there we go. Random seats. Over here, what I can do is I can randomly change the seat, and I can that way,
change the generation. Now, definitely make sure
that you save your scene as like a separate one because you cannot get this back
after you've done this. So let's press generation. And now what I hope
is that it will still abide by the
position that we set, but I have a feeling that it might not completely do that. So here it did the generation. Yeah, I see. So let's undo that. And instead, let's try to generate you'll see, and
now I already lost it. So I'm just going to
close this and press no, and I'm going to click on it again because once you press it, you kind of, like,
lose that effect. So instead, what I
might want to try and do is generate my twigs, which are much more flexible. So let's press generate over
here and give the second, and then it will completely
change the seat. Okay, yeah, it doesn't do much. In that case, I will have to play around with this
one a little bit more. So what you can do here
is you can also generate, like, various things, so I can generate my spine
and my branches. So if I just go ahead and
generate my branches over here, I don't know if maybe it
doesn't count it as a branch. Yeah, it doesn't count
it as a branch as spine, maybe. There we go. Okay. So this one is
definitely like a spine. And then when we do spine, it will avoid generating
the back mostly. I say, I take it with a grain of salt. It
doesn't always work. So if you just
generate your spine, you can see that now we instantly
have another variation. And now if we go ahead and just hide our original one.
So we got this stuff. And let's say that I
don't like this one, I can still go in,
note, grab this one. And move it down and then
go back to generate. So let's say that
I have this one, I can now go ahead
and save my scene, and then I can
already export it, and it's really quick to just create a bunch
of variations. So once you have
a variation that like let's say that you have one variation crawling
up on a pillar, one variation crawling
up on a sorry, 1 second. I should I should think
about what I'm doing. Save. Okay. So yeah, you have one variation that
goes up on the pillar, one that goes up on the wall, one that comes down from a wall, and one that does this effect. Then you can already make more variations than you ever need to dress
up your scene. So we can now literally
just go in here. We can go exports to
Unreal on my other screen, IV 02, before I do that. What was the scaling that we
chose to go for 0.35, okay? So import, set the
scaling to 0.35. Import, and you can
simply open it up. And because it is a generation
from the previous one, everything will be
all very similar. So all we have to do
is build settings, turn on to match distance
field generation, go ahead and add IV one
and art bark, save scene. And now it is as simple as grabbing one of
our original IVs. Duplicating it. And, of course, you later want to
do this when you did your pivots and
stuff like that. And then you can just go ahead
and drag in another one. I do realize that when
we change our pivots, if the pivots are not in
the exact same location, you might need to, like, or you might get,
like, a small mismatch. So it's up to you what
you want to do with that, if you want to, like, keep
the pivot in this location. This location is not too bad, but there are if you ever have
ivy growing from the top, then it becomes a lot worse. But yeah, here you
can see that now we instantly have
more variations, and you can, of course, make
the variations more drastic. But this way, it doesn't
feel like we are just repeating the same stuff over
and over and over again. So what we will be doing
in the next chapter is we will go ahead and create
our last little ivy piece, which is one that
is going to crawl up of our pillar over here. And once we've done that,
we are pretty much done. There will be like a
bonus chapter where I will show you how to
generate some more IV. But what we're going to do
then is we are going to go ahead and focus on our lighting. And once we've done
our lighting focus, then we will have a proper
proper level chapter where it will be mostly like Yeah, it will mostly be
like a time naps, and it will just
be like me placing around Ivy and props
and that kind of stuff. But don't worry. I will guide
you through everything. So let's go ahead and continue with this
in our next chapter.
65. 44 2 Bonus Creating Our Additional Ivy: Oh. I I things like that. Things like things like that.
66. 44 Creating Our Ivy Part3: Okay, so now that we have
these two IV variations, what we're going to do is we are going to create a
variation that's like grows around our pillar
that you can see over here. So for this, what we're
going to do is let's grab, we can grab IV 02 as
like a placeholder, file and do a quick save
as, and call this IV. I'm just going to call it
IV 03, and press save. Awesome. Now, what do we need? If we just go ahead and open up our collision one over here, we are actually going
to import a new one. For now, I will leave
this one in here. However, let's go file
and import mesh asset. And now we go ahead and
go for the two unreal and just grab our vertical pillar
over here and open this up. Now what I can do is I
can go to forces, art, geometry, vertical pillar, set
the size to 0.1 over here. Places roughly in the center. Oh, it's floating, so I
need to move it down. I think I can just set this
to zero in our Z axis. Yeah, there we go.
Actually, you know what? I can set everything to zero, 00 if I really wanted to. There we go. Now, these pieces, we want to have them growing
up and around a hill. For this, as soon as we go ahead and turn off
our collision, what will happen
is that it will, of course, break a few pieces. I'm going to get started
by basically hiding my twigs and my leaves
over here and my meshes, so that we only have
this stuff left because else navigating our
scene will be very slow. At this point, we can go ahead
and just quickly forces. So collision is set
to around zero. Okay, so only these ones
are set to around 0.7. So if I go ahead and
now delete this. Now what you can
see is, of course, nothing is here anymore. I can quickly throw my gray
material on this force. And now what I'm going to do is I'm just going to
go ahead and I'm going to Sorry about
the quick cut. My speed re crashed. It's really buggy lately. I have a feeling the
reason why it might crash now is because even though
these pieces are hidden, they still take up,
like, some memory. So if I just delete this
connection, yes. Don't crash. So my goal is that if I
delete this connection, I can add it back later on, so I don't really need to
worry about it for now. Now, I don't know
why it's so slow. It never used to be this
slow, but there we go. Okay, so now we should be able to move this a little
bit more freely. What I'm going to do
is that we can go to my little pieces. We can go to our forces vertical
pillar and set this to, like, what did we do? You said like 0.8 and then move this around over
here to kind of, like, get something
more interesting. And now what we can do
is we can use our trunk. And basically, I want
to just go ahead and move my trunk Ah. Looks like I cannot rotate
my trunk like that. It's no problem if
I can't rotate it. I just need to, like,
make some changes. So what we're going to do is
we do need to go ahead and, like, move these
around the corners. So I will most likely
probably, like, do this, and then if we
go to our generator, it makes it a
little bit smaller. And then say that
we move it up here. Oops. Oh, you know what?
Actually, we can move it down. It might be actually
easier if we just move it down like this
and then have everything, growing from the bottom
compared to trying to, like, make everything work. Anyway, so we have
something like this. So the next thing that we need to do is because we
want to have them, growing quite high is to I have a bit of a brain freeze right
now for some reason. So if we go ahead and go
to our forces over here, we can make these forces quite
a bit stronger like this. Next, what I need to do is I'm just going to go
ahead and I'm going to individually move these up. Yeah, I want to move them up and then they will go around. And if I go them, Okay, so
let's just go ahead and do, manual positioning
because my goal is that if I just move
them also up around here, they hopefully position
a bit more interesting. And then for these
pieces, I need to move them closer and
that kind of stuff. Just trying to get it to go all the way
around our pillar. And then if we just
grow up our scale, that should already
get us quite far away. Wow, this one really doesn't
want to get positioned. There we go. Now it does. So we got that one Oh, let's undo that because
I kind of lost it. Let's do this one over RC. So it's starting to grow around. I'm not yet happy around
like this side over here. So maybe I can do something
like this where here see, where we try to, like, make
it grow around like that. And then mostly what we need
to do is we just need to, like, change a bunch of
values. That's honestly it. And then that should
get us quite far. See? Because we're just, like, moving it all the way around. And this one over here,
I'm just got to delete it. I don't delete it. Let's see. This one maybe move it up a bit. This one maybe also. Okay, let's say that something like
this looks pretty good. Let's go back to our generator. And now if we just go into our spine and then play
around with our length. And then if we go
back to our forces, and now we can really start
working on our forces and seeing how do they behave? Because they are
sticking quite far this time inside of
our mess, you can see, but that might not be too big of a deal when we actually add
our twigs on top of it. So I'm just basically
playing around with it. Now, another thing that
we want to do is we can actually control the
gravity on these forces. Which will automatically make
them grow up a little bit. So if we go to our spine
and over here, see, we can use our gravity to
force them basically to, like, grow up rather than down just by
setting it to minus, which can be quite useful
for these kind of pieces. So let's say something like that. Yeah, and I
quite like that. It's not like it's not as
dense all the way around, but rather, it has some really dense areas,
and then there's, like, some empty areas
like we can see over here. So that's looking pretty, that's looking pretty good
what we got right now. So at this point,
what I will do, and I'm a little bit scared
for how it will behave. So I'm going to
definitely save this. Replace the reason why I had to replace it is
because I crashed. And I'm going to click and
drag my twigs on top of this. Oh, hey, look. Looks like
they didn't do much. Then I'm going to
unhide my twigs, go to my forces. Throw on my vertical
pillar over here. And it's a little bit
difficult to see right now. I'm going to move I'm going to move basically
my slider so that it is a little bit more snug
around my vertical pillar. And then over here, we can see that now these are our branches. So based upon that, we can, like, maybe make them a little
bit stronger like that. It looks like a big
mess, but honestly, ivy looks always like a
big jumbled mess often. So that's looking pretty good. I'm going to go to my
larger branch over here. I'm just going to set the
length a little bit down. There we goes that it's
not as dense near the top. Let's hide my larger branches. And now let's go at an un hight, and here we have our leaves. Okay. So we got our leaves.
That's looking pretty good. I'm going to, first
of all, go to skin, and I'm going to lower down my variation amount over here, because that's a little bit
too intense for my taste. Okay. Now what I'm going
to do is with these ones, we might need to go
to our orientation. And let's see. So sky influence. Now, that one is
actually pretty good. But we can use folding and
everything to make them really pointing down and
same with like a line, we can use it to basically make everything kind of like
point down like that, which looks a little bit better. And for the rest, yeah, all of this folding over
here is already fine. Scaling. I like to
tie and keep all of the leaves roughly
the same scale just because it looks
a little bit better. So if I just have a look. Yeah, this is a good scale. So I probably want to keep my
scaling as it is right now. Let's go into a
collision, maybe set a pivot threshold a
little bit higher. And maybe let's go a
little bit higher, maybe. Let's going to our
leaf generation, and I guess, yeah, I guess we already are like the top of our leaf generation. So then I would just
go to my twigs, go to almost sounds
like I'm saying twigs. Go to my generation and just
boost these up a little bit. Yeah, I think that
looks quite cool. Maybe I'm going
to make my size a little bit smaller in
order to kind of like Force generating more
leaves, you see? So when I make it a
little bit smaller, it has a little bit more room for leaves in, like,
those empty areas. So let's say that I'm going to start with this, and
then we'll see how it goes. Nice thing is that
the pivot point is sexually already in
the right location. So I'm going to hide my trunk. And I'm going to also hide
my collision over here. And there we go. Now we have a nice ivy
pillar, pretty much. So let's go ahead and save
scene and export this one. And because we already have
everything set up inside of unreal, it will
be very quick, so it should still keep all of our original stuff in here. And because the
scaling and everything we did quite uniform, we can just go ahead and
go import IV 030.35. Let's go ahead and import it. And if we just go
ahead and open it up, Let's go in here. Materials, we have our bark
and we have our IV 01. Let's go in our
build settings turn on two side a distant
field generation, and let's go ahead
and save that. Awesome. So that's already it. As you can see that
went really quick. Once you actually
have your final base, it should go really quick. So now if we go
ahead and honestly, maybe we can even
literally duplicate our pillar and then
replace it with IV. See? And now I just want to double check that I
set everything to zero, zero, zero, but that's looking
really nice, honestly. So here we can go ahead and see. We have this one, and let's
say that now we want to, like, for this one, we can rotate it
because it's a pillar, so it should be exactly square still and moved over here
and then for our camera, it instantly looks
like we have you see, like we have different ivs
growing on everything. And then it's up to you to like decide which side looks best. Yeah, I think this side. Which one is it? I
think for this one, this side looks probably
the best over here, and I just need to move
it out a little bit more. And then maybe for this one, is it the same rotation, 170? No, this is not the same No, no. Oh, yes, yes. Yes, it is the same rotation. So this one I want to go at and rotate a little bit different just to give it the look as if these are
different types of Ivy. Awesome. Okay. And that's basically the
general idea of it. So now we can very quickly have some IV that we can
use for our assets. Okay. So I would say that now, I've pretty much shown
you, the same technique. There will be some bonus videos, which are just timelapses of me creating different
types of IV. Please note that
these time lapses, they are originally from a different tutorial course because it's just
like an extra bonus. And they are just generating some ivs that you can basically hang down over here on the flat walls
and stuff like that. So I will include those bonuses. However, there might be references in the bonus to,
like, a different course. But that shouldn't be a problem. It's literally just time
lapses of these speed reps. So to clean this
up, I'm going to go ahead and I'm going
to delete all of this leftover stuff.
And save sin. Also, in my folder, I'm
going to go ahead and I'm going to delete all of this leftover stuff
that we don't need that automatically gets
exported. There we go. Nice and clean. So what we will be doing in our next chapter is going
to be quite fun, and that is that we will be
working on our lighting. So we are going to get
started by just like already sort of finalizing
our base lighting. It will not be perfect yet, so it will be like our
first lighting pass. But after that, what we can
do is I can show you where you can find a bunch of
different resources for, like, free assets and free
trees and stuff like that. And then what we can do
is we can start using those to enhance our
scene a little bit. The lighting pass will also include a polishing pass
where we will do some stuff, like, for example, replacing the colors of some of our
pipes and stuff like that. So please keep that also
in mind that we will do those two things kind of
like in the same chapter. So let's go ahead and continue with that
in our next chapter.
67. 45 Doing Our First Lighting Pass Part1: In this chapter, what
we are going to do is we are going to
get started with our base lighting setup and
also doing a little bit of polishing already in our scene just to enhance things
a little bit more. So if we have a look at, like, our reference, now, of course, this AI
generated reference, so don't trust the
lighting too much. But one thing that I quite
like from this is that there's quite a strong
white lighting that almost cats like a little
bit of like a blowout in, like, the further distances. And for the rest, we have some quite soft bluish shadows also
coming through there. So yeah, over here, yeah, it has a little bit of yellow, but just in general, I quite
like a lighting like that. So what we're going
to do is we're going to try and capture
a little bit of, like, a base lighting like this. And then later on
when we actually have done all of our level art
and all that kind of stuff, then what we will do
is we will go ahead and redo or not redo, but improve our lighting. So, of course, right
now, we only have like a really small
scene over here. With not much going on in
the rest of the scene. So this is something that
we will work on in a bit. And what we might also do
is we might also already, play some more cameras for us. So what I'm going to do is I'm going to get
started by probably, like, organizing my
scene a little bit. So right now we have our
blockout, our lighting, and I want to go ahead and select all of this
stuff except for my ivy. So unselect my IV. It's a w annoying bug that
when you deselect something, it snaps back to the but base. Luckily, we only
have three of them. And I'm going to throw this into a folder called
decals over here. So we have our decals. We have our lighting. This
one over here. I want this one to
change the name from blockout to assets. Let's do structural,
for example. Over here, we have
a bunch of pipes, which are quite easy to select because we just need
to select them. Create a folder called pipes. So just organizing it like this, it will make your
life so much easier. Let's do one that's called foliage because we're going to have more foliage later on. And then over here, I'm just going to go ahead and
grab all of these. Like this and drag them
into my structure. Or what you can do is
you can right click, move to, and then you
can select structure. That's another way
that you can do it. See? So now our scene
is much cleaner, and I highly recommend that you work with
organized scenes. If you don't do that, it will just become
a pain later on. So we have our
lighting over here. Now, we already like
some base lighting. What I'm going to do
is I'm going to have probably like a
pretty fresh start. Let's go ahead and delete
my directional light. I'm going to for now, in my post effects, I'm going to just go
ahead and actually, yeah, we can leave the
default of our post effect. We didn't really do much yet. I'm going to delete my sky
atmosphere, my skylight. I don't need to delete my
skylight because it has default settings and my
volumetric clouds over here. Oops. I didn't
mean to move that. Now, it's talking about a skylight with
real time capture. Oh, yeah. Go in
your skylight and turn off real time capture
over here like that. Awesome. Okay. So what we're going to do now
is we are going to get started by setting
up our lighting. Now, you can do the real
time lighting that we just had that I showed you before
with the volumetric clouds. However, what I'm
going to is I'm going to use a bit more of
a traditional way, which gives me a little
bit more lighting control because I don't like the look
of the clouds and stuff, and I want to get a bit
of, like, a background. I'm going to use
something that's called an CR image for this to
have our base lighting. Let's go into textures. Right click and create a new
fool called HCRI over here. And then what we can do is we
can go ahead and we can go to a website which is
called polyhaven.com. On this website, you can
get free HRI images. So if we just go
ahead and open it up, now we want to try and find an interesting looking sky
that will work for us. So let's have a think about it. Our environment is in a slightly urban area
with some foliage, and we want it to be fairly clear day and not too many clouds
over here with our sky. So we can go ahead
and we can go, Okay, so this is outdoor. That's one thing. And
we can just scroll over here or you can find
something more specific. Personally, what I like to do is I like to just go ahead
and scroll down here. You will be able
to see your sky, so keep that in mind
that when you use a sky, that you might be able to
see part of the environment. Of course, we can
move it a little bit, but we actually it
might actually be nice to show a part of the
environment if it's not, like, too strange looking. For example, it would
be strange if we have this over here, and then all of a sudden we have our sky or we have our
environment sitting in, like, a snowfield or
something like that. So let's go for something like and maybe this one over
here might be interesting, but it doesn't have
a lot of foliage. So I'm just trying to find a visually interesting
looking sky, and I'm also looking at, like, the lighting response and what I might want to get from it. Let's try this one, for example. I'm just going to
middle click on it, and while it's doing that, I will get, like, a few more. So here we have an urban street, but this does not feel
like this one also feels like it fits a
little bit better. And also what we can also do
is we can also get, like, some of these like
more flatter skies. And we can also get some that are literally like just
skies, if you want. So if you want, you
can also go up. And here you have some
that are like ARC, that are really just like sky. So I can go, for
example, with this one, which has some interesting
looking clouds. Now, when you're happy with
the stuff that you found, what you want to do is you
want to four K is enough. Don't go higher. You want
to grab an EXR file. Don't grab the HCR file. The reason we want to use EXR is so that we can use
it in our material. And then you just
press Download. You can go here, EXR, download, EXR, download and EXR download. Once that is done, what we
can do is we can go ahead and simply drag
these into unreal. And the goal is that
you get a texture. Do not get a texture cube. If you grab an HDR, you get a texture cube, but that's not the
one that we want. We want to read this as a
texture, but don't worry. Even though it is a texture
when you open it up, it should still show the compression settings
as HDR over here, so they should still be fine. So we have that stuff done now. Now what we're going to
do is we are going to create a material for our sky. So what we want to do is we
want to go ahead and we want to not that one. We want to go create a new
material and call this sky, and let's open
this up over here. Now, this is actually going
to be a super easy material. All we need to do is we
need to grab an HCR image. So let's say the
abandoned parking lot to get started with over here. You can right click, convert the perimeter and call this sky. And then what you want to
do is you want to multiply this sky over here, using a scale parameter, which we'll call intensity. And this will control
our intensity, and I'm going to set
the default to one. And we want to plug this one. We want to plug it
into our emissive. So we want to go to our sky. Now, we need to
set some setting. So we want to set the
shading model to be unlit the reason we want to set our
shading model to unlit is because we are going to
throw this on a sphere, and we do not want
to have our sphere interacting with any type of lighting because this
is our light source. It would make sense to have our light source get
interacted by other lights. So we then can go ahead and
you saw me turn on two sided, and then we can plug this into our emissive color over here. And now you can see
that we now have like our sky mapped on our dome. We can go ahead and we can save our sin and now if we
go into our hallway, we want to go ahead and
if you don't have it, over here we have
engine content. If you don't have this,
you can go to settings, and over here, you can turn
on show engine content. And we want to grab a
default editor sphere. Editor sphere over here, and we want to drag
this in here like that. So with our editorsphere, I'm going to reset this to 000. You won't be able to
see it. If you want, you can go to unlit mode and
then you are able to see it, and we need to make
this very, very large. We need to make this
around 10,000 or larger so we can go press the little lock
button in our scale. We can go 10,000. If you make it smaller, your lighting will
not work because we basically need to make
the sphere so large, it's outside of the ratio
of all of our other lights, including our directional light. So let's drag this into
our editor sphere. And when you've done that, all you need to do now is we need to go to our content. No, editor. Why is there? Oh, yeah, it's because we can walk around. That's why we have that content. Concrete hallway,
walkway, sorry. And then we want to
go to our materials, and we want to grab our sky, create an instance, and
drag this onto our sky. So now you can see
that now we start to have a sky and I can
just open this up, and then we can control it. So having this one, you can see that now we
have a nice sky rout. And this can also
work when we have our cinema actor
that we can see it. Now, not much will
happen right now, and the reason not
much will happen is because we need to go ahead
and go to our skylight. And now that we have our sky, make sure that real time is turned off, it's set to movable. And then what we want
to do is we want to scroll down and we want
to press recapture. And now what that will do is our scene will be
captured from our sky. Now, I don't know
why it's so dark. Oh, oh, yeah, sorry. The reason it is so
dark is because we need to go in our sky, and we need to turn off. Let's go our sky at fenced and turn off lower
hemisphere is solid color. And now we probably
need to, like, redo that again, recapture. Is there something else? Maybe our exponential
height fork? Oh, okay, so it was our exponential height fork
that caused the problem. But still, in your sky turn off, lower hemisphere is what I just showed you.
Where are you? Lower hemisphere is solid
color because else it will think the base is
going to be black. So now that you have done this, we can go to our sky and
press recapture again. And now you can see
that we already like art some small values. So I'm not yet liking our sky, so also we can change the density a little bit
and stuff like that. However, what I feel right
now is that it feels like, it's really, I guess, because of the look, it feels like this is not a
very large looking sky. It feels like it's further away. So I'm not sure if this is
the right sky for us to use. You can, of course, also
in your dit sphere, try to go further, but most time after 10,000,
you won't see a difference. If I go, for example,
to 50,000, here see, there's no actual difference because we are already so far away in the distance over here. We can also, if we have a look at the sky,
just double check. Yeah, we are at
Vogue resolution, so we won't really want to go much higher than
that, to be honest. And what we can do is we can, of course, rotate our sky around. We can go ahead and
grab our atmosphere, and I believe we need to do
the no, not the X rotation. I think it's the Z
rotation over here. We can rotate our sky around. But honestly, I'm not really
liking what I see over here, which is that the sky
looks too blurry. So we can go capture
or grab, for example, another one over
here, as you can see, but I feel like we might need to end up with
a default sky. You can press
recapture on your sky. Or what you can do is you can
go to build, and in here, you can build
reflection captures, and that often also
recaptures your sky. So this one over here, it is starting to look
more interesting. We can go ahead and grab
this guy and maybe, let's say that we build
reflection captures. This one is a little
bit too blue. And then we have
our original sky, which I probably set
back to one over here, which shows like some clouds
build reflection captures. Okay, so that one, I feel
like the construction yard is probably nicest over here, I feel like that gives
us already, like, a quite solid base
to get started with. So yes, you can
control the intensity. You can say it's two,
for example, two, build reflection
captures and you can see that then it makes everything
a bit more intense. However, don't forget
that we still need to like a bunch of
other lights in here. So for now, I'm going
to leave this to one, and I'm going to build my
reflection captures like this. Now, for my sky, that is a tricky one
where right now, I'm not really sure I'm
liking the resolution, but I also don't think, yeah, we can go for eight
K if we really want to. That's probably the only thing that we might be able to do. And then for the rest,
we will just use trees and everything
to cover up the sky. So if we go for eight K
resolution, or if you want, you can even go for 16 K, but I think that Unreal
doesn't accept 16 K yet. So let's go ahead and for
this one, let's import it. And then over here we
have our eight K version. So if we just open up our sky, and navigate to it. We should see, well, a doubling resolution
over here, see? So now that already starts to look like a
little bit better. And then if we just
go ahead and find like rotation that's, like, a little bit further away, maybe we do like some trees because I don't really
want to get like these really close up buildings. So we can do, like,
some trees over here. Go to our sky, and let's
just press recapture. And there we go. Let's start
with something like this. Okay. So we got this stuff done. Now what I'm going to do is speaking about
reflection spheres, I want to go ahead
and just already add some of these in here. Yeah, this feels like
an area where you would have concrete structures. So our flection spheres. Although we don't have a lot
of reflections in our scene, which means we don't
have something super metallic, we
still want the artist. We want to go to visual effects and grab a sphere
reflection capture. If we press G to
go into game mode, what this will do is it will accurately capture
the reflections in our scene based upon the orange cylinder
that we have over here. I want to make my radius a bit smaller because I like to
have these overlapping. You often get better reflections if you have a few of them. So what I like to do
is, I like to have, let's say, like three over here, and then I'm going to also have them in this hallway and
also in this hallway. I can go ahead and
throw these into a folder called reflections. And that you'd
already do the trick. If I now go to my
camera angle over here, I can go to build build
reflection captures, and it does very little, but it does like some small
changes to our scene. Okay, the next one will
be some fog, probably. Let's go ahead and go
to our visual effects and throw on again, our exponential
height over here. Why now it is black,
and this is because of the fog in scattering
color over here. So what we want to do is we want to go ahead
and do two things. First of all, we probably need
to set my height fell off. A little bit lower over here. And I want to set my
scattering over here. You can see that you can set your scattering and
set it a little bit bluish to give it a little bit more like
a foggy background. And then there's two
things we want to do. First of all, scroll down and
go to our volumetric fog. What this allows us
to do is later on, it allows us to also create goat ways and stuff like that. Now, your fog actually
reacts to lighting, and right now we only
have a skylight. So we are going to balance a little bit between the
volumetric fog and our density, and then we will
add our skylight to basically improve things. First of all, in my
volumetric fork, I'm going to go and
make this probably a little bit orange like
that, just a tiny bit. Now, you can see much of your volumetric fork right
now, but that will come later. Then you also have your
density and your density, you can kind of control
how much you want. And once again, high fall off. To be honest, like, I wish I could set my fork
to be a little bit lower. Now, you can try to use
your fork cut off distance, and there should be a
value over here where it basically no longer
touches our sphere. So if I go ahead and
set this one to, I don't know, like 5,000. And then if I play around
with my fork that's the, you can see that
we get the fork. However, it will be
in our environment and not so much in
our sphere itself. And then you can control
the height fall off. I was going to go for, again, a little bit more bluish
looking for over here. Then if I go to my volumetric, we can go ahead and use
our extinction scale. You'll see to increase our
for a little bit more. Maybe we should actually make
this a little bit more like whitish. And now you
can see that here. It's subtle, but it
definitely adds something. And when we actually add
the rest of our lighting, it will actually make
a big difference. So we got our fork done, we got our skylights done, which if you want now, you can recapture and it will
react to the lighting. The next one that
I'm going to do is I'm probably going
to go ahead and give it an actual sun that
would be always nice to have. So first of all, let's
save sine over here. Give the second. I'm going to get rid of my four
K construction, since we have an
eight K version now. And I'm going to go lights, and I'm going to go
ahead and I'm going to start by adding a
directional light. Let's go ahead and go outside
to my camera and game mode. Okay, so yeah, this is now
in, like, a good location. So what I'm going to do is I'm going to press G to
go into my game mode, and now I have this skylight. I'm going to make
it movable, and now I'm going to go ahead and I'm just going to rotate it. What you can see over here is that it is starting to rotate. However, we need to set our
intensity quite a bit higher. We need to go for something
like 100 to get started with. And what I notice, few things let's go into I feel like
right now it is still I think it is how you say it. It's being blocked by my sky. That's what I mean.
So if I would turn off my atmosphere,
yeah, I see here. So it's being blocked by my
editor sphere over here. Which is interesting. I must have forgot the setting.
Give me 1 second. Say, right now, the reason that our editor
sphere over here, it's basically
blocking our sunlight. So what I want to do is I'm just going to go
ahead and I'm going to go into my modeling
tools up here. I can just press mesh duplicate. And call this atmosphere
underscore or sorry, INV as an invert. And then I can go ahead
and press accept. And now for this
additosphere, invert, what I can do is I can just
go ahead and go down to my normals up here and invert the normals
and press accept. That still does not work.
Do I have my lighten on? Yeah, I have my light
in. Normals. Oh, wait. These are the area
weight to normals. I don't need to
care about those. I need to instead go up
to my poly ddt tools. And if I select it then press flip over here. Don't
know if that worked. Uh, that's St.. One sec, let me just go
ahead and make this because it's really difficult
to, of course, see. So let's go into
our editor sphere, and let's set this to like
50 to make it smaller. Oh, of course. Go to your sky and turn
off two sided. Go ahead. Completely forgot
that we still had to turn on in our sky material. So probably at this point, yeah, so that's why the
normals didn't work. W it bad, that if I now go to normals and I invert
them, that easy? Now it works. Okay, so that was my mistake. I
forgot to turn it on. Anyway, now we can set
this back to 10,000. I was already thinking
like that strain. But yeah, you can also use
your edit stuff for this. And now, if we go
ahead and go up here, you can see that
now because we have inverted our sphere so that it doesn't show any
backfacesO skylight or direction light is
able to go through it. You can see that also
our volumetric Fog is already starting to do
some interesting stuff. So what we can do with this
is we can go ahead and grab our skylight and we
can go for like, let's start with 50. Now maybe 20. We can go for, like, a visually
interesting lighting. So I want to try and get
the lighting mostly to hit near the back and not
so much near the front. I also want to push
out the back later on. So let's here. Let's try to, like, rotate my
lighting around a bit. I can use my mode
over here to switch between our world and our
actual gizmo lighting. So let's say that we
get, I don't know. I'm just trying to find like an interesting lighting angle. I quite like having
this strong lighting on our pillows over here. And then maybe what we
need to do is, of course, when we get trees and stuff
like that inside of here, it will kind of, like,
block some of the lighting. So that's also quite good. So let's say we have
something like that. Yeah, let's go for
an intensity of two, three, ten, maybe eight. Let's try to get started
with an intensity of eight. And then what you want
to do is you want to press use temperature, and in here, we can actually control the temperature of our
light a little bit better. And we want to go
not for two orange because our scene is
already quite light. So what I'm going to do
is, let's say 5,700. Yeah, around 5,700
looks quite nice. Now, there's two more things
that you have over here. One of them is your indirect
lighting intensity. Boosting this up, it will basically bounce your
light around a lot more, which will make your dark
areas a little bit brighter. So if we go for one
the let's say two. Let's do 1.5 because
it's a sunny day. It will probably boost
up a lot of lighting. Your volumetric scattering
intensity, this one, if you set is higher, it will affect your have a sets to 15. It will affect your
volumetric fog that we have. So remember how
we made this one? See if I turn it
off, it won't work. So that is also
quite interesting. And I'm going to set my view distance actually a bit lower. Over here so that
we can still see, maybe some of the sky around. But yeah, so if we
go into our light, we can go ahead and set this maybe to like
I do want to give it like a bit of Gotray so
maybe set it to around two. And I'm not yet too
happy about the angle, but it is a start. Let's say like that. I'm also not too happy yet about the sky. I feel like I want to
go in my sky sphere, and maybe I want to set
my instance to be way stronger so that it
stands out more. If I set it to like ten
or something or five. Maybe like eight.
But then, of course, in our sky light, if we would go ahead
and recapture it now, it would just be blown up. So if we set it to eight, I want to set this one to 0.2. And let's try to
recapture again. I think I need to
go like 0.1 even, 0.1 to maybe make it
a little bit smaller, and then I can go ahead
and maybe set my sky sphere to like I'm just
balancing it out, basically. Let's say six, and
then recapture. Yeah, now we are getting somewhere that looks a
little bit more interesting. Okay, awesome. And
then, of course, we will have some tees
and stuff like that. So let's just have a quick
look what it looks like. So yeah, a little bit foggy. But for the rest, it's like a pretty solid
base inside of here. Now, what we're going
to do is we now have, our base light, so let's track
these into our lighting. Let's see. We have our
skylight, which is good. We have our reflection
captures, which is good. I guess what we can do now is we can go over to our post effects. So in our post effects, there's a few things that I just want to play around with. One of them is our bloom. And in our bloom,
what we can do is we can get a little bit
of that blowout. Yeah, over here, you know what? I might want to actually make
my concrete a little bit whiter and then make my
sun a little bit lighter. A quick thing is we can kind of do that using
a little bit of, I don't know, cheating, I
guess you could call it. You can go in your
concrete and open up concrete main and also open
up concrete tiles over here. And then you can make
very quick addits to this by scrolling down, and here you can
control the brightness and the saturation. So saturation, if we set this
to like 0.8, for example, to make it a little
bit whiter concrete, that's often just
a really quick way to play around with
things, see how it looks. So if I make this 0.8, and if I then go to my lighting again and
my direction light, I'm going to set my
temperature to maybe 5,400, 5,500 maybe over here. Now, you also can go in here and you can set the
source soft angle. And what this does is
it kind of softens out your shadows along with your
source angle here, you see? So I can set my source angle. And then my sauce soft
angle and then those, oh, this one doesn't
seem to do much. I guess then it's
just a sauce angle. It will soften out almost
it's a little bit faking, but it will soften out
our shadows a little bit, which in this case,
I quite like. I want to make my shadows
a little bit softer and not super sharp and
stuff like that. So maybe let's say
3.2 is probably fine. Okay? So we got that stuff done. Did I forget anything in here? Sometimes turning on
contract shadow length in Worldspace might give you if you make it a
little bit smaller, it might give you better
effects on your foliage. In this case, it
doesn't do too much, but that's something
we can work on. You see, you can
see the tiny bit. But I guess this is something
that for now, I will yeah, for now, I will turn it off, and it's something
that we will get back to in just a bit. So we were working on
our post process volume. In our post process
volume, in our bloom, we can use our
bloom to basically, push out that typical bloom
look that you have over here. And in our case, this feels like an environment where it
could work quite nicely. If we just push it out and play around with our threshold a bit to not have the glow. The threshold, what
it does is it will make sure that the glow
doesn't go everywhere. Here we go and give it
a little bit of bloom. Next, we have our
exposure settings. Now our exposure settings, remember how I said that we went ahead and
controlled this, but right now, if
we look over here, everything looks very dark, and this is because
we don't yet have our exposure settings
set correctly. What I want to do is I
basically want to set my exposure settings to a
mint and max brightness. If I set my max brightness
to around three, what should happen is
that if I go in here, maybe I need to go for like 15. Maybe set my mint
brightness to like 0.5 Here we go. If I set my
mint brightness to 0.5, you can see that this
corner already starts to look like a little bit
darker and if I now go in here and set my
max brightness, it's a balance that
we need to get. Let's set our max brightness to, like, I don't know, set mint brightness to 0.2, and our max brightness
to maybe like 0.5 I'm I'm doing it
the one way around. I need to go for, like, one in my mint brightness and my max
brightness to be like 0.5. So that when I go here,
see, I can control it. So let's do 0.6. So now, no matter where I look, my environment, it
will not be too dark. So if I go ahead and go in here, I feel like minimum brightness
is one, maximum bright. Oh, yeah, yeah, that
should be fine. And then I can
control also still my exposure compensation
to give it, like a little bit of
the softness effect. Just give me 1 second. I'm just like playing around
with the values a bit. 0.5. Yeah. Okay,
that should work. So now, whenever we go in the darker corners or
in the lighter corners, it will not blow
out our exposure. Now, having this one done, and I said this one to minus
one. Having this one done. One thing that really annoys me, which I'm going to
quickly turn off is that where's my camera? In my camera, right now, the focus is all off. So what I'm going to
do is I'm going to set my current temperature
over here to 22. And what it will
do is it will make sure that everything
is in focus. See? So that works a
little bit better already. And then we can
improve this later. So let's go ahead
and continue to our post pocess effects. Now, most of these effects we
don't really need to touch. A chromatic aberration. It gives you that
lens effect that you often see at the
outside of your lenses. So what you can do
is sometimes you give like a tiny
bit of an effect. You can set a super
load like 0.1. For the rest, we don't need
to work on dirt masks, we don't need to work
on local exposures. Image effects, if
you want to increase the vignetting amount, you
can do that over here. But honestly, we probably
can stick to 0.3 even. Depth or field is
something that we will work on with the camera, so
we don't need to touch it. Our color grading, there's one type of color grading
I want to do now, and the rest I will do
inside of Photoshop. And if you go to shadows
and click on Gamma, I like to always make my
shadows a little bit blue as if they reflect the light from our sky a little bit over here. So I often like to make
them a little bit more like a bluish a tone over here because it
gives us a nicer effect, something like
that, for example, you can also control
your shadows over here to make them
stronger or lighter, but we don't need
to control that because we are going to
do it all the Photoshop. We are going to use something
called a lute for that, which I will go over
in the next chapter. So for now, in our lumen, we have a global
ilumation lumen. If you want, you can always set your lighting quality
higher to even two, although it doesn't make
a big visual difference. What I do like to do
is this is new inside of inside of the latest unreagen 5.1 is in your
lumen reflections. Uh Was it reflections? Oh, I can't find it anymore. Advanced. Which version am I on? About 5.0 oh, I'm
not I'm still in, like, the older
version. I guess, Wow. I guess because it takes a really long time to create these tutorial courses, I guess what happened is
that I forgot to update. Anyway, in my lumar reflection,
I'm going to set tutto. And what I might decide to do is I might decide to update. The reason I want to update is also because the
foliage has improved, so that might actually improve that darkness that
we have over here. So that's just my fault.
So that's what you get when it takes months to
create a tutorial course. It takes so long that
the version switch. So for now, don't worry. There's almost no
difference between nlog in 5.0 0.3 and 5.1. At least no difference
that can break your scene. So what I would say is
that at this point, we have our post effects.
That's all looking fine. I'm going to set my lumen
reflections quality to maybe, like, one over here back. And for the rest, I
don't really need to touch any of these
other settings for now. So I can go ahead and
I can save my scene. And now, we have a base. It's not perfect yet. I
like this area over here. This stuff where we have
a little bit of light. So let's go ahead and
in our next chapter, I will have upgraded to 5.0 0.1, sorry, yeah, 5.0 0.1. And what we are
going to do then is we are going to do
some color grading. We are going to
do some balancing with our pipes and
just in general, like, add some more
visual interest. And after that, the first
lighting pass will be done. So let's go ahead and continue with this
in the next chapter.
68. 46 Doing Our First Lighting Pass Part2: Okay, so we are back. So right now, I have updated to my Unreal engine version
5.1, almost no difference. Like, it was super
easy to update. All I had to do is
it just gave me a message saying that do you want to turn on DirectX 12 or something like that?
And that's about it. So now that we have
done this, basically, the setting that I was
a bit confused about missing lastly, and also, you can see that our
foliage is a bit better because it's able
to render it better, is that if we go down, in your reflections and in
your lumar reflections, you now have an option for high quality translucent
reflections. This one is great
if you ever have any type of glass or
something like that. Now, we don't have anything, so there's no visual difference, but I wanted to show
you that because it's amazing quality for like glass
and those type of things. But for the rest, all I would
say is that Oh, this one, for some reason, is it just me or does
it feel like there's less foliage again?
Oh, no, wait. I think it's just
like Yeah, here, it's just like because of the meshes that were
not that were hidden. Okay, anyway, sorry about that. That's just me being distracted. Sometimes that
happens where here or see, I'm just missing, like, some of those pieces
and also what I wanted to do. So we are now also going to
go into polishing phase. So if you ever see something, just dive right in
and quickly fix it. Like, one thing that I
see is over here that the bark is way too
low boli so I can set the tiling to like 200
or maybe like 50, see? And that just very quickly
fixes that kind of stuff. I know it is not perfect, but honestly, for something that small, it's totally fine. So if we go ahead and now go over here and
let's have a look. So, for some reason, I feel like my lighting
is still not good, so I'm just going
to go ahead and set the Clot to be maybe, like, 5,100 to push
the color a bit. And now what we're
going to do is we will do a color grading pass, and then we will go ahead and
do a little bit of, like, a polishing pass and
also some other stuff. So for a color grading pass, what we want to do
is we want to take a high resolution
screenshot of our scene, which we can use in Photoshop, and then we can literally
using a system called a Lute, which stands for
color lookup table. We can use that system to basically transpose the colors that we create in Photoshop
onto our real time scene. I hope I say that correctly. So what I'm going to do is
I'm going to go down here and let's set my screen
percentage to 100, just to give it a
nice crisp look. And then what I'm going
to do is I'm going to go to my high resolution
screenshots down here, and we will go over
a little bit more on this later on where we actually
take our portfolio shots. Let's set a screenshot, multiply to two,
and press capture. As soon as press capture, it
will show you like a pop up, and I recommend just clicking on the pop up because it's easier. So we have this one
now ready to go. Now what we want to
do is we want to go ahead and open up Photoshop and import our image. Here we go. And then we want to input a PNG, which I have ordered for
you in texts and Lute. You can also find this PNG by going into Google and
typing in Unreal Engine, color lookup table or Lute. And this is basically data. This is a very
small little image which contains color data. Now, you can imagine that if we apply changes to
this color data, Unreal Engine is able to
read the difference between the default and this data and applies that to
our entire scene. So the way that I
tend to do this, which I fight like
is the quickest and easiest way for this stuff, is I like to, first of all, hold Control and
click on my data. And then I like to
create a solid color. The only reason I
do this is so that I can easily select my data later on because
what we are going to do is we are going to, well, first of all,
go image mode and set our image to 16 bits so that
we have the full range. And now having our layer and our color lookup table selected, we right clock and
press merge layer. Reason I want to
do is because now we can go to filter and we can go to Camera Raw
Filter over here. And this way we have, all of the controls that we
really want to right away. So I can go in here and I can
very easily, there we go. I can go in here and can very easily change, like,
a bunch of stuff. We can go, for
example, over here, let's say that we can control
our exposure and contrast. You only want to control effects or you
only want to apply effects that go over
your entire image. So those are exposures, highlights, stuff like that. Sharpening and
clarity and textures, those things don't do
anything because they simply they do not affect the entire image or the
colors of the image. So let's go ahead
and have a look. So first of all, we have
a temperature over here, which we can control
if we want to go for, like, lighter or less light. Honestly, I'm quite happy with the temperature
we have right now. So I'm going to go ahead
and I'm going to set my exposure just like a
tiny bit lower, maybe. And let's set my contrast
up a little bit. Let's make my highlights a
little bit stronger maybe. Or not. A tiny bit stronger and let's play
around with my shadows. I'm going to set my
shadows also, like, a little bit lighter over here. Next, we have the whites, which we can push down a tiny bit just to bring down those highlights
a little bit more. But honestly, it's mostly just me playing around the sliders. Our vibrants can be used to give us scene like
more or less color. You can literally even go
for grayscale if you want. Uh, I'm going to, so we have this strong contrast. I do want to capture that. Right now, everything
feels like too orange. So I definitely will
probably need to change the color of my
concrete to be more white. But I like the strong
contrast between, like, green and white. And right now it just all looks yellow, which
I don't like. But that's what
balancing is for. So what I can do for
now is I'm going to set my vibrance
a little bit lower. I'm going to set my
contrast a little bit back to default. I go to my curve, and
I want to go up here to the first line
and move this down, and then go to the last
line and move this up. This is a default wave curve
that you can often use control the base tone
mapping of your scene. Okay, let's do
something like that. We can also go ahead and go into our color mixer over here, and we can, for example, choose, make our greens more or less
yellow or or more green. So let's say that we make
our greens a bit more. We can say that we make our
blues a little bit stronger. Our aquas don't really do much. Our oranges. You see, we can make our tire
scene a bit more red. And that definitely shows
that our scene is too orange. I'm going to set my
reds a bit down. My yellows, I'm
going to tone down a little bit increase a
little bit more. Let's see. I feel like something
like this should be fine. For now, we still need to learn quite a bit of color
balancing on this later on. But I'm just having a t. Sorry I'm just
having a t right now. So, yeah, we got
these strong colors. Over here, this area over
here looks quite interesting. Okay, let's stick with this. So what you want to do is you want to go ahead
and press Okay. See? You can see that there
was like a small difference. Now, what I'm going
to do is I'm going to navigate to my Lot
folder over here. And first of all,
I will do a saves and I will save this as a PSD, Lut underscore zero,
one, and save. And then what I'm going
to do is I'm going to hold Control and click on my mask so that we
select our lookup table. And then I go to image, cop, file, save as copy, and then save it as a PNG. As Lute 01 and safe. And then what you can do is
you can undo it in order to go back to the
scene that was before. Now for the magic, if we go
ahead and if we go over here, in our scene, we can go
at a folder called Lut. And in this folder,
I will go ahead and drag in my Lut 01. And I can go ahead
and I can open it up, and there's something important, so we need to tell it
that it is lute and we can do this by going into
our texture group over here. Scroll down and find
the color lookup table. So if you apply that, now all that we need to do is we just need to navigate
to our lighting, which we have over here. So post effects we want to go to Misk and turn on the color grading lute
and the intensity. And then when you're
dragging your lute, you can see that now
the changes have applied that we had
added to our scene. So that's looking pretty good. You can also control,
how much so you here. You can see quite
a big difference in what we change to our scene. So this is like a pretty solid
base to get started with. I still feel like there's
some blurring going on, but I guess focus. Yeah, okay, I guess
that is fine. Disable, maybe.
Okay, fair enough. So I guess there's no
blurring going on. Maybe it's just the
resolution of my screen. So having that done, what we're going to do now is we want to do some small tweaks, which make our environment, a little bit more complete. I'm going to make
my concrete whiter. I'm going to add another
color variation for my pipes, which is going to be probably
like a bluish color. And then what we can do is play around a little bit
more with our lighting, and then I think we are
ready for the next chapter. So let's get started by first of all, going into
Subset painter. And then here we have
our pipes color. You can make this
really complicated, but let's just make this
quite easy where we have our base metal and
call this red. And then simply right
click and duplicate this and call this blue. Then temporarily turn off red, go in our color
and make this like a maybe a bit of a very dull looking
blue color like this. And you can also go
ahead and if you want, you can also control the rust. Let's say that I
literally just tone down my rust amount a
little bit over here. I can do this, file,
export my textures. In our pipes folder, just
make a folder called blue because we only really
need a base color for this. We don't need anything
else, so we can export it just export that stuff. And now if we go into our scene, we can go to our pipes. We can go ahead and
textures pipes blue. I'm just going to grab
this one pipes score. Blue underscore base color. Of course, I guess what is easier might be to simply create a folder called blue because
then you don't have to, like, every time you make
a change to your texture, you don't have to re
change the color again. But for now, let's
just start with something like this and
we'll see how it goes. So we have our pipes red and just duplicate this
and call this pipes. Blue. Open it up. Let's go ahead and
grab our texture. So pipes blue over here. And then it is as easy as
just dragging it on here, and now you can see, you see, that's already like
quite a difference. Yeah, that's looking
pretty good. So now it's just a matter of me selecting all of the pipes
that I want to make blue. Is going to be this one.
This one over here. And then I will also do one on the right side and
that should be it. So at these points,
it takes a second when you have a lot
of modular pieces. There we go. Let's
make these blue. Let's go back into
our camera actor, and let's see which
one I think it is more interesting if we make the one closest to the wild
blue over here. And you can see that we start to get some roughness
response, which is good, which comes from a lighting, but a yeah, we might make sure that you don't accidentally
move anything. We might do some balancing with that, but that
comes way later. Like the actual material balancing outside
of the big changes. Those come at the very end when we have most of our scene done, and then we make some really
small tweaks. There we go. So that already adds some
more visual interest. Now, the next thing
that I was going to do is I was going to
go to my concrete, and for this, I need
to open up designer. Here we go. And
I'm going to make my concrete much more white. I can always go in in my shader and I can always,
change the color there. But for now, I'm just going to go ahead and
I'm going to make this almost like completely
white like we get over here. That's actually. That's not that much
of a difference. Interesting. Then it might be my sky that's making
everything to orange, but we can have a look at that. So tiles export. And then I want to
go ahead and I want to go up here to heatles
and turn this off. And then once again, I want
to go ahead and for this one, I need to go graph. No, sorry. Sorry graph. I just
need to check. That's why it's annoying
that I changed the name. Concrete underscore main. So graph, concrete underscore
main underscore identifier. Concrete. Okay, yeah. And this one will be in,
like, our main folder. So let's go ahead
and export this. So yeah, it should not
have changed the name. That's my fault. But now, those are now all done, so I can just simply
go in my concrete. And because I really only
change my base color, I just need to reimport that one and also go into my
tiles, reimport that one. Okay. So we got that stuff done. Now, I do notice
that now I've done that our colors are a little
bit almost like to green. And this is most
likely from our lute. So you can try to use your lute to basically
tone it down a little bit. Or what you can do is you
can try to go into, like, global and in your gamma and
go the opposite of green. Se to make it a little
bit more reddish. However, I think I just want to tone down my
lute a little bit more to maybe like
0.6 over here. Okay, so we got that stuff done. You also have a scene
colour tint, by the way, if you want to change
the entire tint of your color to be a bit more bluish or
something like that. Okay, so that starts to look a little bit
more interesting. I'm not yet happy
about the rotation of my sky over
here, to be honest. Like it arts, some
visual interest, but it's just not enough. So I'm just trying to
play around with it. I'm not sure. I think when we actually have some
trees and stuff like that, it will be broken up more
and then we can have a better idea of
where we want to go. Because for now, I like having a little bit of the
lights sitting up here. But in general, I'm not
so sure I like the rest. Yeah. Okay, so for
now, let's do this. I changed it a tiny bit, and we can also go
in here and let's set our temperature to like 5,000 and then set our volumetric scattering
maybe to like four or three. And maybe set our intensity, which is this one over here. To like a little
bit less intense. Maybe like five. Yeah, something like five might work over here. Now, also a cool thing
that we can do to just, like, increase the lighting, and it's almost like fake
lighting is that over here, we have these you can almost
consider them like windows. So we can fake the
lighting a bit by adding some area
lights to these windows, which will add additional
shadows and reflections. Of course, outdoor scene, you
don't want to overdo this. This is mostly something that you would do in an indoor scene, but it can add some
visual interest. So what I would say
is we will just try. And if it doesn't look good, then we won't do
it if it does look good. Then we will do it. Because there's no shame in, like, faking things
a little bit. So I'm going to go
ahead and I'm going to have this skylight. I want to move my barn
door angle down a little bit to basically push
the light direction down. And then what I can do
is if I go ahead and go to my for screen, I can go in here
and first of all, let's set my temperature
to the same, which was like 5,300 or
something like that. I think. And then over here, here see, you can see that that adds
some extra highlights already. So if I set this to
around five, maybe, here see and add
some interesting shadows and all
that kind of stuff, so it definitely adds
some visual interest. I don't know if I
want to also give it some volumetric lighting, maybe set it to maybe like 2.5. And now that we've
done this one, I can go ahead and I can
duplicate this over here. Also over here, and this one, I need to change my
size a little bit. Same over here. So just change
your size a little bit. It's quite easy to do, using your sauce wit and height. So we got something like
that, and honestly, you can even push it more by
later on also having some of these lights here on the side to really push where the sun is coming from and
stuff like that. But just in general, if I
have this, I can show you. So before, after, it's
a little bit strong. So let's set this to like two And then let's try
again, before, after. Before, after. See? It just adds like that extra little bit.
And I quite like that. I'm going to set my
radius, which we have. Where are you? Here, my radius, I'm going to set to like 500. And your radius is basically the the blue spheres over here. So we want to set our
radius to a point where it is no longer
overlapping so much, 450 and make sure the
set is too movable. So let's do 450 something
like that over here. Okay, awesome. So we can go ahead and we
can save our scene. And now we have, like, a base lighting
ready to go. So what I recommend is
that at this point, we probably want to go
ahead and although I might want to maybe
change my well, no, I'm not going
to do that now. I'm going to do that later.
What we're going to do now is we are going
to get started. But in our next chapter, I will show you where you
can find free resources, additional models, trees,
that kind of stuff. And we can use those
along with some IV that I will also import to
do some level art and enhance our scene quite a bit more and just start make
everything to final because it's hard to do proper proper lighting when
something is not yet final. However, you can
already at this point, if you just right click
and play from here, Okay. That's interesting. Not sure what happened
there. You can check. If you just go down here and
turn on layer collision, you want to make sure that
you do have layer collision. I can see that my IV will
cause some problems. Just for now, I will
go over this later on, but in your IV, go to
collision and remove it. IV doesn't need collision. So you can go
collision, remove it, and then you can see
that it starts to get removed. There we go. So anyway, another thing is
that if for some reason, your player keeps falling
through the ground, this might be because we
have a really low ceiling. You can go down here and you
can go to basics and players start and dd this
players start over here. It says bad size.
Does that mean it doesn't give me enough space? No. I have had this before. It's really annoying, but often
it just means that, like, the collisions are too close, but not this time, I guess. I can just try and
press play again. Yeah. Okay, that's
strange. Interesting. I wanted to play the game
a little bit just to S, let's try to do like on
top. Play from here. Okay, I'm going to
investigate this. Maybe we broke something. I'm not completely sure because it just like
defaults as to zero, 00, which often means
that for some reason, it's not able to play
from this direction. But honestly, that's
not really a rush. So for now, let's save Acne
sorry for the waste of time. And let's go ahead and continue
on to the next chapter.
69. 47 Where To Find Free Resources And Doing Level Art: Okay, so we are starting
to get closer to the end. So it's starting to
look pretty cool. And what we need now
is we need resources. I've shown you all of
the tools that you need in order to create
everything in the environment. However, of course, creating environment takes
a very long time. And if I would need to
go ahead and create, like, every single
asset I wanted, for this one environment in this tutorial course, trust me, you would not want to pay for this course
because it would simply be too expensive in
order to make it worth it. So what we are going to
do is I'm going to show you where you can find a bunch of different free resources. They are really easy to use, and you can use these
resources in our case, to basically dress
our environment. Now, please note
that the resources that I am about to show you, they have copyright on them, which means that they
will not actually be included in the source
files of this tutorial. So there's a few
places where you can find a lot of
free resources. One of them, which is
quite an obvious one is to go to the marketplace in
your lounger over here. So if we go ahead
and go over here. So, Epi Games has a really
powerful marketplace. And in this marketplace, yes, you can find a lot
of paid resources, but we are, of course, I want
to show you the free ones. So what you can do is you
can go up here to free. And here you have a
lot of free stuff. You have free for
a month. In which you can find free assets
every single month. In this case, over
here, for example, it has incidentally
some tees for free. You can also go ahead and
go for permanently free, and then you permanently
free, you have stuff that will always be free, which is really cool because
it has, like, some cars. It has a lot of foliage
if you scroll down. And if we go over here, there's a bunch
of stuff in here, like some really large
environments also, fill foliage environments,
all that kind of stuff. Now, we don't need this much, but I'm just trying to
show you like here. See, all of this
extra foliage you can get all the way
for free over here. You can even get animals. You can get these props over here, which
we might actually, I might actually want to use
this one over here also, because these props
look quite cool. So the way that
that would work is, let's say that you have
this one and I want to use these props that I have over here in order to
dress my environment. I can just go ahead
and I can download it. You will probably because
I already own it, you will get something
called, I don't know. I will say like art to cart and then you don't have to pay anything
because it's free. And once you have downloaded, you can press art to project and you can choose your project. In this case, our
concrete hallway. We can simply press
art to project, and then what it will
do is it will start downloading your pack and
adding it to the project. So that is all
really, really good. Now, another one
is that we also. So here, let's see. So
I want also some trees. So I know that mega scans, which is what we will go
over a little bit later, they actually also
have some trees. So if I go ahead and go, uh, let's try mega scans. Maybe I can find it like this. I forgot the name of it. Well, what I can do is
I can also go ahead and go ahead and type in trees, and then I can go for
the relevancy and go Ti. I believe the here, there we go, Mega scans. So mega scans, Quicksa mega scans is owned by Unreal, which is real nice. And they over here,
they have brought out some really nice looking
trees which are way better than anything I could ever make. So you can choose. So we have over
here some European trees that are like this. However, I'm not sure
if I want to do Uh, these might be a
little bit too large. But we can also do if we
go back to Lowa high. These ones over here, they
are a little bit smaller. They are the Black addttwie. There we go. They're
also a bit longer. So let's say that we
will pick this one. So I quite like this one, so I'm going to use
this one for my trees. I can go ahead the
Press Art project, click on it, and then it will artists do
the project also. So that is one place that
you can find a lot of bags. I personally, if I
go to my library, you can see that I have already, quite a large collection. I'm not going to
use most of this because a lot of these
assets they are paid, but there's, like,
a lot of assets that you can find on the
store that you can use. Now, another thing
that we can do is if we go ahead and go
back into Unreal Engine, we can go ahead and
go up here and we can use the built in Quixle bridge. Quixaw Bridge, also
known as Mega Scans, is a very large library
of free assets. I don't know why it's
asking me to log in. Let me just log in. One sec. Here we go. I log
in. So Mega scans are also known as Quisaw Bridge. Is a very large library
of everything from scanned materials to
trey assets to plants. So it is actually
really, really powerful. Let's say that now
we have some trees. Let's say that maybe I want to have some grass
that I can, like, kind of push in between the foliage to make
everything feel bit denser. I can go to tree plants. I can click on grass. And over here, all
of this is for free, as long as you use it
inside of Unreal engine. So I can go in here and
I can say, like, Okay, I want some maybe once in a while I don't
know why it's so slow, probably because I'm downloading that tree pack over here, but come on, load. That's annoying.
There we go. So here you can see some wild crass, and all I have to do is
when I'm happy with it, I can press Download, although
I've already done that, and then you simply
press art and it will be automatically
added to your project. So if we go into
our three assets, we can also go in
here and let's say that let's have a look
around at, like, industrial. So let's see if there's
anything in here that we might want to use that
looks interesting. So let's see. Yeah, you can like some shelving maybe like some electrical boxes.
Those look quite cool. So let's say I want these, I can simply press Download. And you can also
choose your quality. I normally do medium quality, but you can all the way go up to Nanite if you want to
use Nanite quality, and I can go ahead
and press art. Let's say that I also like these barrels over
here. I like those. So I can download over
here, and I can press art. Now, here we have some palettes. Maybe I want to
go ahead and also grab like a quick palette. So I can download that one. Then I can push can have placed against the wall
or something like that. We have some barrels over here. However, there are
some other barrels that I might want to use. Over here, we have
some cool lamps. So these lights, we
can actually use them to maybe even improve
our lighting a little bit. So let's add some lights that
we can add on our pillars. And just like that, you can
find a lot of stuff in here. So if we just have
a look around, here we have some cool barrels. Let's say, here we have
a rusty metal barrel. So let's just go
ahead and download this one and this one, just so that we have
some variations, and then we can press art, select this one and press art. And all of this stuff
is automatically imported into unreal engine,
which is really nice. So let's have a
scroll around to see if there's anything else
that I might want to use. Here we have also
some modular pipes. Of course, we already
created our pipes, but in case you want to,
there are some pipes here. I don't know why it's still so slow because it's
still downloading. I think it's still like
downloading that back, so that's why it's a bit slow. But yeah, we have some
modular pipes here. There's just a lot of stuff. Now if you just go ahead
and go back to Trey assets. So that was industrial. We can also go over here,
we can Foale go to props. And in here, you can also
find a bunch of stuff like hardware, storage, boots, trash. Let's say we go to trash. And here we have
some trash bags, which might also be nice. And I can just go ahead and
I can add this one also. So just like that,
you can find, like, a bunch of assets that you
might want to use that you can add that will look
really interesting. Maybe like some plastic. Yeah, here, we can
use some tarp, for example, just to break up the even flooring
and that kind of stuff. So, in general,
really nice stuff. Now, I will go ahead and I
will leave the downloading. For now, I will add this
one as like the last one. So let's add this. And if I
would need anything else, I can always during
the time laps, go back in and, like,
find some stuff. So all of the stuff
has now been imported, as you can see over here,
we can save our scene. And we can use it right away because it has been
imported and set up. So I would literally
drag in my boxes. The only thing is that sometimes mega scan assets
look really dark. This is just something
that happens. They are not
completely PBR valid. So what I recommend doing is
if you have that problem, let's say that we have this
one and it looks too dark, just quickly go
into your diffuse and set the brightness
quite a bit brighter like this and maybe set
my saturation to like 0.8 to make it even
less, maybe 0.6. There we go to make it fit my environment a bit
better. And there we go. So just like that, we
have something like this, and you can go ahead
and you can go in and you can, for example, place a barrel next to it, and maybe have another
barrel sitting next to this, so you can really quickly
create a nice slice. Let's say that now you want
to also have a little light. I can place a light
nicely on here. Or my pillar, just like that. And if you want, you
can even give the light an actual light by going
down here to lights. And in this case, probably let's use a spot a point light. A point light is a little bit
more expensive to render, but it basically shoots out the light from
every single angle, which sometimes
for these type of light bulbs might be
easier if we just, like, kind of place
this one really close. Well, not that close, like this. And then we can go
ahead and we can set our radius down quite a bit and intensity
so down quite a bit, maybe like 0.3 or
something like that. What you can also
do with this light, which is quite cool is
that you can select the source length to make your
light a little bit longer. I don't know why I
can't see it right now. But normally, make
it a bit longer, but for some reason,
oh yeah, there we go. See? So you can make
your light a bit longer, and then you can set
your source radius to also make it a
little bit wider. So you can make this
feel a little bit more like the light that you want. And this is like a
really quick way to just art a quick light. And just like that, we
have a quick scene. So you can imagine that just
having all of these assets, we can very quickly create an
interesting looking scene. Here, we can play
something like this. And I'm just showing you
some samples of what I would be doing if I would
be doing my level art. I don't know if I will
use this area over here. I might create maybe like
a camera angle like this. But basically, that is it
for these type of pieces. You can just use
them like normal. And for the rest, I recommend
that you just, like, play around a little bit
more with your storytelling, which I will narrate the
level art to explain to you, like, a little bit
of the storytelling. But for the rest, it's just
like a little bit lengthy. So just like that, we also have some grass
that we have imported. Now, for this grass, there's two ways
that you can use it. You can, of course, go in here, drag and place the
grass like this. However, UnweelEngine also
has some painting features. Oops, I didn't mean
to remove that one. So what you can do is you can go down here to the foliage tab, and the cool thing is
that the grass will automatically be
added to our foliage. Only thing we need to do is
we need to select the grass, and I'm just going to select
like the bigger ones, right click and press Activate. And when you've done that,
you have a brush size, which if I set is a
bit smaller over here. And then as soon as you click, you can see that it will
basically paint grass. The reason I paint
grass here is because I have static meshes
turned off, turned on. If I turn this off, then it
would not paint it on there. So this is really
good. You can set your paint density over here to, like, have more or
less pieces of grass. And what you can also do is you can also scroll down here, and here you can
change the scaling. If I set my grass before 0.7, to one point let's say
1.2 in terms of scale. What you can see
is that the grass will have differences in scale. So are big, some are small. And that's what that
scaling over here does. Next, if I want my
grass to be like super, super dense, it
will be expensive. But let's say that
I want to do that, I can set my density per
kilometer to like 400. And now when I place grass, you can see that the grass gets placed really, really
close together. So if you ever need to do, like, a scene with W dense
grass, you can do this. Remember, that this, of course, is really expensive
if you do this in, like, really large areas. But if you do this
in small areas, let's say that over here, we like places a little bit, then it's often doable
to use it like this. And it looks really
nice, high quality. So for now, let's go
ahead and paint this out. So that's how we would go
ahead and go over foliage. You can drag in any static
mesh in the foliage, actually, and you
can use it to paint. So what I can do is I can
set it back to like 100. I can go up here, set my
paint density to like 0.3, and let's say that I set
my brush to like 30. So over here, what I can
do is I can, for example, paint in some of this
grass in between my ivy, and it might not make
a lot of sense that we have grass growing
on top of concrete. However, we can indicate
that the ivy that is like, growing thanks to the ivy
roots and stuff like that. But you can do stuff like this
to basically enhance your seen even more and give
it a little bit of, like, grass and other foliage. It just depends on how logical
you want your seed to be. But definitely like in
the corners, for example, we can go ahead and push in some grass and you can hold
shift to remove some grass. In these corners over here, which just in general, you know, I just make this a
little bit less, it does add some visual
interest to our scene. Now, I'm not yet
sure what I will do, so I am going to
remove this grass again because I don't want
to do this right now. I'm just showing you
the examples for it. So that's one way that
we can use our foliage. Now, at this point, we can save scene to save
everything that we have. And you probably also
guessed that over here, you see that we have
some new folders. We have the industrial prop
folders and the black adder, which is our trees. If we just go into our maps, we can click, for example,
on the Showcase map. And this way, we can
very quickly load in all of our props because every
time you have new props, as you can see over here,
it needs to load in. So it needs a second to load
in all of our textures. But as you can see,
although the style does not completely matches
what we want to do, in here, we now have this. And if you want, you
can even go ahead. And the cool thing
is that in real, you can literally
just copy and you can then go to another scene
and you can paste it. So let's say that I want to have all of these assets
over here like this. I can just press contro Z. I can then go back to my concrete
hallway over here, and I can go ahead
and I can press CtraV and then let's
see where it is. There it is like this. And now I can go in and let's say that I
want to, for example, rotate this one maybe, scale it a little
bit down because it's a bit big for what we want. But I can go in here, and that's why you can
save a little bit of time in your level
art instead of placing it yourself if
you use specs like this. So I can very easily do this, and then we can go ahead
and let's say that I also want to
reduplicate this part, I can reduplicate it over here. And you can, of course,
go ahead and just use this along with your mega
scan, sweetie assets. Here, let's say that we
have a whiting here. It is a little bit dark,
so that's something I will need to work
on with my lighting. If it is really dark,
what you can do is you can go down here and
turn off game settings, and turning off game settings will basically give you like, really plain looking lighting, which can be useful
if you just need to, like, quickly preview something. But in here, we can just go
ahead and we can once again, play around with these
assets and place them. You can also go, of course, select an asset and
go into the material. And if you just open
up the material, you can see that here. We have control over our colors. So let's say that I want
to make this a little bit of a less bluish color, something like that to make it fit a little bit better
with our environment. I can then turn on game settings
again, and there you go. That's already
looking quite cool. And our goal is that
from our camera angles, if we ever have a camera angle, it's mostly just these
assets that you see in the background that make your scene feel a little
bit more fulfilled. So we have that done also. The next one would be our tees, which is
actually a big one. So if we go ahead and open
up our tees over here, we need to open it up
so that we can load it. However, the tees
are quite expensive to render because they're
really, really high detail. So it does mean that I will probably pass my
video until it is done opening and rendering
everything. Here we go. So our scene is load in, and as you can see, we
get these really nice, really high quality tees and there's more than
enough for us to use. So now that we have loaded in, we can just go ahead
and go back to our original scene because
once it's loaded in once, it will stay loaded in.
It's like caching thing. And then we can go here.
And let's say that we want to play some trees
like in this area. So what I would do is I would
go ahead and, like, say, go to my black adder,
go to my geometry, and I want to just use
the PivaPainter probably. And in here, let's
just say like, Okay, I want to have,
like, one of these trees. Now, what you can
see right away, okay, this tree, we
might want to, like, scale them down because
they are quite large, and we don't want to
have them, clipping with most of our scene. But what we can see
right away is if we just are a little bit careful about the type of trees that we use that we don't use
like something too intense, when we go to our scene, you can see that now our shadows are starting to look much more interesting because
the trees are like blocking some of the
shadows, but not all of them. I even feel like at this point, I might want to go in
my directional light and set the source angle to be like a little bit sharp, see? Like this so that we get, like, a little bit more of
these interesting shadows from our trees. So that is mostly up to you, how many trees you
want to place, if you want to make
them big or small, that kind of stuff. I would also say that
it might be useful to place a tree here
for that stuff. It might be easier if we
just go ahead and, like, place another plane down
here so that we can, for example, have one tree
that's just going over it, and maybe like
another one and just like place a bunch
of trees here, which from a distance, you can see that now it looks
like we have some trees that are just standing
there in the background. I can go ahead and maybe,
like, place another one here. Another thing is that
these trees, once again, as like most other
mega scan stuff, they are quite dark. And what I tend to
do is I tend to just find the leaf material. I tend to, like,
go down here and find the albido,
open that one up. And then I just boost up the brightness to like
five or something like that over here to make
them quite a bit brighter. And that makes them also
fit a little bit better. So all of these things together, our ivy, our props, our tees, when all of
this comes together, we will get a really nice and visually interesting
looking scene. So at this point,
and, of course, yes, we also still need to,
like, make some ground, but don't worry, we will have
another polishing chapter, which will be like real time where we do really
small stuff like that. So at this point, what I want to do is we
have our camera over here. It is a pretty nice
looking camera. What I might want to do is I might want to go ahead and go in my camera and if we go back
to our focus settings, let's turn on manual focus. And what you can do
is you can actually set a focus distance. First of all, set our
temperature to 1.8, which will bring out the focus. And now we can choose where we want to
focus our settings. If you pack the picker icon, let's say that I want to focus
on this pillar over here. I can click on it, and
now you can see that it will shift the focus
to this pillar. So the focus is now
sitting in the font, which in this case,
I quite like. I think I want to have my focus. Of course, this is AI, and AI, the focus is, like,
all over the place. Well, you can't really see because it's too low resolution. But yeah, in general, if we
go for a focus like this, and then maybe set our
temperature a little bit lower or higher to
maybe like four. Okay, that's too
high. Let's 2.8. Let's do two. 2.2 maybe, something like this,
so that most of our focus is hitting the front. It's quite nice how we then
have, some of this lighting. And, of course, if we
would go ahead and set our screen percentage
even higher like this, it can give us a really
nice crisp look. So now that we have done this, what we're going to
do for the end of this chapter is we are going to place a few different
cameras around, and then we will have
a Ti laps chapter which has been narrated. And this T laps chapter will
basically just guide you through how I'm doing my level art because it's
just placing assets. It's a little bit
time consuming, but that's why we
do the time laps. So what I can do is I
can grab my camera and press contro D. And
then this camera, let's say that for this camera, I might want to go ahead and
do a really strong close up. Right now, our
focal length is 35. Let's say that we
set to like 50. Oh, sorry, I need to set my focal length here
in my lens settings. Set to like 50 by 50 over here. And like that, we
can get almost like a photography style,
cinematic style camera. I'm going to go
ahead and duplicate our very first camera again. And this time with this one, let's say that
maybe I want to go ahead and I often like to have, like, something blocking
the foreground, and then I have, like, the back. So let's say, I don't know. I want to see how it looks
a bit like some trees. Okay, so if we would use
some tweets like that, then it might look
nice if we have a camera kind of like
shifting like this. Yeah, let's do
something like that. And then what I
can do is I can go ahead and let's duplicate camera actor two so that we
have the Wi close up one. And let's say that I want to have another one,
which is, like, maybe like a cinematic style, something like this over here. Okay. Yeah, that
looks pretty cool. So I'm sure that we
can work with that. And I don't know, let's duplicate camera actor, one more time. And let's see. Is there anything else
that maybe maybe like a low angle or maybe like a like peaking angle
where it's like, kind of peeking
towards the stuff. Maybe something like this might work. Yeah, you know what? Something like this
might be interesting. If we go for, like, if we have some IV and some
details and everything. So the reason I want to
set my camera angles now is because in
order to save time, I'm going to only focus my
level art on my camera angles. So if I have no camera that
is looking into this corner, there's no point in
me spending a lot of time placing assets and
everything in that one corner. So that's pretty cool. So we now got a few nice camerngles. Let's just cycle through them. So this one, this is number two. We just want to
go ahead and keep setting the focus correctly. This one is number three,
and for number three, I want to set my focus maybe. Yeah, let's set my
focus to the front. Number four. Oh, wait,
sorry, I'm doing this one. Number two needs
to be focus here. I'm not selecting my
assets accidentally. Camera actor three,
I need to select Cat three. And let's see. So focus on the back
or focus on the front. Yeah, let's focus on the
front. Camera actor four. Let's focus. I quite like this
focus over here, actually. I don't know if I want to set
this. Yeah, you know what? I quite like the focus being
on the forward font assets. And number five, we want to go ahead to set
our focus over here, probably on this pillar
over here. Okay, cool. So now we have that stuff done. I would say that there
might be some more balancing where you would
probably pick your bark. And maybe also make this one a bit brighter sets like two. Over here and eight
K resolution, so that's quite high
resolution bag. But yeah, so in general, that is it for these
assets over here. You can also find a
lot of free content, assets, materials, everything
in various websites. One of them you already
know like texts.com. In here, you can
offer very cheaply or for completely for free, you can find everything
from Tree D foliage, just like you have a mega scans, but also you can find
actual Tree D scans. You can find TD objects, rocks, all that stuff, doors. So there's a lot
of stuff in here. Next to this, you also
have default marketplaces. Like, for example, you have
the flip normals marketplace, where you can also find
a lot of stuff by going, for example, to game
assets or TD models. And then in here, you
can also go ahead and I don't know why
it's Oh, there we go. You can go in here and you
can find or paid stuff, but you can still go to filters, and it get set the price. To be like $1, and then you can find all
of the free stuff in here, although there isn't
too much free stuff because, well, we are artists. Like, we still need
to pay our bills, so that's just how it is. Not everything can be
free, just like the Til. And you can also go over here to RStation and you can go to
the RStation Marketplace. And in here, you can also
click on game assets. And if you go, for
example, for free up here, you can also find a lot of free content on the
RStation marketplace. So there are many places where
you can find free content. There are some other places where you can also find
free content like Google. There's a place
called Turbosquid where you can find free content. On Gum Road, you can find free content. So just
have a look around. But of course, by far, the unreal marketplace and mega scans are the
easiest ones to use because they
literally just directly drop everything into
your scene over here. So knowing all of that, I don't think I've
forgotten anything. So what we will do is
in the next chapter, we will kick in the time laps. Where we will start
doing some level art. And by that point, I will also have some extra IV for you. And then we can go
ahead and we can start doing some level art in our scene to take
it more to final. And after that, it's mostly just going to be about polish, doing some optimization,
that kind of stuff, and just like finalizing
the entire tutorial course. So let's go ahead and continue with this
in our next chapter.
70. 48 Level Art Narrated Timelapse: Okay, so I have kicked
in the time labs. So this time laps,
we will just go over very quickly on how to do
some generic level art. And I always like to do
my level art in sections. So over here, the first thing that I'm going to do is decals. It's nice to always do
decals first because decals are something that's
sitting on top of the mesh. If you place props
in front of it and then and then you need
to place like a decal, you often get errors where the decal is projecting on the
prop and stuff like that. So as you can see, I will be switching
back and forth quite a bit between my
different cameras. This is because to save
time, as I said before, I'm only creating stuff that
my specific cameras can see. I'm not really designing the level beyond that
point just because it's not really useful in
this specific instance. So over here, I keep switching back and forth
between the cameras. Now, there is a way
that if you go up to Window, excuse me. If you go up to Window and then what you can do is
you can actually open up another viewpard and this
is a handy way if you, for example, want to keep one camera active
like another screen. However, in my case,
I don't know why. For some reason, I just
went ahead and not did that and mostly focused on just
using these one cameras. On the other hand,
doing it this way, it does mean that your computer runs a little bit
faster because, of course, if you
have two viewboards, then your computer will
slow down quite a bit. But yeah, over here, I'm
mostly just using my ivy. This ivy will all be included
also in the tutorialples. And I'm just using
it basically to get some of those really
big white chunks out, or yeah, big white chunks out by replacing them
with, like, some greenery. I don't want to go
too over the top with ivy just because I didn't really want this
to be like an over the top post apocalyptic
type environment. But I still wanted to just, like, have these nice greens. And over here, I'm also just like placing
them on the back because even though
with my camerangle you can see it like a tiny bit. For my camera angle,
the back, so I'm just like placing these in order
to add some visual interest. Sorry if I'm sometimes coughing. I still have a cold, and these type of videos, it's not easy to pass narration videos in the
software I'm using. But anyway, so over here, honestly, there isn't
too much you say. It's mostly just me placing a bunch of foliage based
upon my camera angles. And for the rest, I do try to give the foliage
a little bit of logic. So what you don't want
to do, well, okay, here I do it, but this is because it's outside
of the view. But often if your ivy
is inside of the view, you want to give it
some logic on how did the ivy get there?
How did it grow there? Like there has to be
a starting point. Of course, in this environment, it's quite easy because you can indicate that the
starting point is down below where the
rest of the trees are and that it then kind
of started to grow up. And then, of course,
in our case, we are pushing it, or we're making it grow as
if it is falling down. But those are just
small details, since we are trying to work with the limited amount of
assets that we have. Bea, try to have a little thing. Like, over here, this could easily be like the
thing like, Oh, the ivy is growing
up the pillar, and then it was growing
towards the sites and then it was starting
to fall down again. Like, you can have like small
little bits of logics like that in order to improve the
general feel of your scene. S over here, not much to say. Often, especially when I get quite far away
from the camera angle, I do stuff quite quickly just because
it's not that important. And over here I'm
just starting to switch between my camera angles. And the first one is already starting to
look quite interesting. So I'm now just going to
continue moving on my camera. And over here, I felt like there was just
too much concrete. If there are so much ivy around, it would make sense that we have a few more areas
where we have ivy. It doesn't have to be a lot, but we just need to get something. And then, of course, don't
forget that whenever you place it on the railing, it would be nice if you
just go ahead and place another one. In front
of it over here. And what I'm doing here
is I'm just, like, creating or grabbing some smaller ivy pieces
to almost, like, fade out the ivy to make it
feel like it doesn't just, like, go from a really
big ivy plant to nothing. And once again, here, I'm
just trying to give it some logics by how did
the ivy get there. And in this case, I'm just
using these pillars over here. And then I felt like there was a little bit too much concrete
still here in the back. So I just went ahead
and also placed some Ivy here, but
that's about it. So over here, what I'm doing is I'm
just re using some of the acids I already placed, as you can see, just
to save a bit of time, just because I wanted to get
a little bit of iv here. But this one I didn't want
the ivy to grow over the top. And the reason I didn't want
to do that is because else we have way too much
foliage in our main shot. So I just went ahead and, um, yeah, as you can see over here,
I'm doing the quarter. But then all I did is, like, one pillar, and that's about it. So I did not really push it over the top just because
it didn't feel right. Over here, I can push over top, although you probably
won't even see it, but you can see, like, a tiny bit at the top,
but that's about it. And once again, I'm
just keep looking at my viewpots and then
whenever I feel like, basically what I'm
trying to do is, especially in this environment, we have so much empty space. We have so much empty
concrete looking space. So what I'm trying to do is
I'm just trying to break up these spaces that look
very flat and empty, and I'm breaking them up using multiple ways like
Ivy is a big one, decals is a big
one, and later on, I'm also going to just
play some props just to, like, make everything feel
a little bit less generic. Because, of course, we only have one texture on all of our
concrete pieces, pretty much. Sure, we have the tiles
one, but it is so similar. So knowing that, we
really need decals and we really need additional assets in order to improve the stuff. Now, don't worry. I was not
deleting those IV assets. I was just hiding them
by pressing H because I just wanted to easily
select my decals, which I forgot to
place over here. Sometimes it's quite
annoying when you have a really low ceiling,
and of course, you can hide the ceiling
if you want, but for rest. And over here, I'm
just trying to, like, I was just playing around to see if it looks cool,
if I have, like, leaks on my floor,
but in the end, I end up not doing it just because it just
didn't feel right. Like, you were barely
able to see it, and if I made it so
that you can see it more visible, it just felt wong. It felt like just
this random line, and I didn't really like that. So I scrapped that idea, but I highly recommend
that you just, like, play around with things just to see what will look nicest. And then over here,
I was able to still see from my camera
angles this area. But because I did not want
to have, like, IV on it, I just used some very
simple leaks, see, to make it a little bit more
visible, just in the back. So don't just focus
on the front. Will you just look at
your entire scene and start thinking about all
the logics in the scene. A lot of level artists just
think about logically. How did the dirt get there? Is it normal for
dirt to be there? Is it normal for Ivy to be
there? All that kind of logic? And what you basically
would end up doing, sorry about the brightness. I don't know why I
kept it so bright. There you go. So what I
basically end up doing is you try to get as many of
these logics as possible. And if you are creating an
environment 100% yourself, so you're making everything, then you can go
much more in depth. However, if you
have limited assets in order to get those logics, there will come a
time where of course, you take favor into a visual
interest over logics. So maybe it isn't so
logical that there are a lot of barrels
around in this scene. However, it adds some additional visual
interest, which is quite nice. And that's more like
the thought behind it. That we have a foundation of
logic on how stuff grows, how stuff gets damaged, how stuff gets dirty
and stuff like that. And then we add our own
artistic skills to it to basically enhance
the general feel and look of our environment. So over here, not
too much interest. I just feel like that
over in these pieces, like, the concrete
was way too clean, especially for something
that's like on the top. And the way once
again, for logic, the way that you can
think of it here is that you have trees
growing on the top. And these trees, they
will, of course, have like leaves and dirt
and all of that stuff that will fall off the trees and also birds and
stuff like that. And then it makes sense
that there is, like, some leaky stuff
coming from the trees, and then it rains and that's
how the leaks get created. So you can go
actually if you want really in depth with
this kind of stuff. Now I'm placing my trees. I'm not so worried
about the backside, but what you will
notice is that I'm really specifically
focused on shadows. That's mostly what
these trees are for. They are not really
art greenery. They are more here to
improve my shadows. And that's what you
will see me doing here is like I just very
specifically, like, look around my
scene and just make sure that it captures some interesting
shadows here and there, which will just look nice if
I do something like that. And of course, I want to make
sure that the trees are not blocking the view
that I have created, like the different
camera angles. We have rest over here. What you can see
is that I'm just, like, trying to play
around with my trees. And then I'm just adding, like, some small trees, but they
won't really do anything. I'm just adding
them just for fun, just to kind of, like,
fill up the space. I'm also not going to
worry about the ground because you can never
even see that ground. So there's no use in me texturing the ground
and that kind of stuff. But, yeah, we are
slowly getting there. You can see that now our environment is
quite a bit darker. I am over here playing a
little bit with, like, my exposure just to, like,
boost it up a little bit. But don't worry. We will have another lighting pass in
real time after this. And in that lighting pass, we can go ahead
and we can, like, balance everything out
a little bit more. But, yeah, it is starting
to look pretty good. We got some ivy.
We got some trees, some foliage, some
decals, stuff like that. And I guess what we're going
to focus on next will, is going to be like
our specific assets. Those are the mega scan assets and like all of those assets that we downloaded
additionally for our scene. And yeah, those are going to be like the main focus after this. So right now, just save your
scene and start going into, for example, mega scans
and just have at around. Like, I feel like it's
like a big concrete area, so I can go a little bit more heavy almost like a
construction type thing. Now, I want to keep going
into my camera angles, especially my main angle. You just want to try and
create some visual interest. Now, I'm also trying to break
up the square shapes, but, of course, I have limited
supplies with this. So I'm trying to brak it up with things like palettes
and barrels just to, like, they are square,
of course, a palette, but I'm just trying
to, in general, break up the look of all of
the square concrete pieces. But I guess, in this case, this is just a
square environment. It just happens to be like that. Even in real life,
everything is just like square because square is a really easy thing to
create in real life. I quite like this one,
because it's like a different color and it really stands out and
has a little bit of, like, sunlight on it. And for the rest, don't
forget the small props. Those small props actually
are really nice details, having, like, a few little
lights and stuff like that. They just really
make your scene. Now, of course, I'm not doing that many small
assets because it's, like, a bare concrete structure. But some lights definitely make sense along with some
pipes and stuff like that. That will look quite nice. And for the rest over here, I'm just placing some random assets, just trying to visual interest. Like I felt like that over here, things were a little
bit too flat. So I'm just creating some, and it's also about silhouette. So when you look at your scene, if you place a lot of props, but the props do not
actually change anything, your scene is still
perfectly straight. I still has perfect pillars, then of course, it might
not be the best one. But if you have, for example, tap and everything that breaks
up your floor and you have barrels and angled pieces on your walls that kind of breaks up the flat look of your wall. That's often quite good to
have those kind of things. So here you can see that now, it's almost like things
are sticking out. It's almost like a
wave. At one point, we have, like, ivy sticking out. At another point, we have
some barrels sticking out. At another point, we have
some tarps sticking out, and it just breaks up that
really straight flat look. So unless, of course, you are going for the
straight flat look, but if you're not, then it is great to break
up your shape. And here you can see me
doing it once again. It's like a willy
straight corridor, so I'm once again
just playing around and I'm just breaking
up that flat shape. And then later on, I'm Oh, wait, not even
later on right now. I'm also going to grab some of these pieces
once again just to, like, break up the shape. So I'm moving this a bit here in the back because I don't want to show it too much, since it's not really
compared to mega scans. It's not really at the quality
level that I would want. But once again, here, I can just enhance it with some mega scans, throw in some barrels
and stuff like that, although you will barely
even be able to see these. But here, see, it just adds some additional visual
interests as if there is something there that
is not just concrete. And over here also
like a classic one, just angle stuff a little bit. And when you angle
stuff a little bit, it just instantly adds some
additional visual interest. And over here, I decided
to give it some ivy, but I decided to make
the ivy only strong on the back side because else I felt like I would need
to have ivy here. So having it on the
backside, it just looks a little bit better. Just by moving it down
and stuff like that. So I just like that. And for the rest, it is just me switching between the scenes and just really
having a look around. Like over here, I
decided to just, like, place a random pipe, just to once again, make the ceiling feel a
little bit less flat. And luckily we have
created these pipes, so we can just go ahead and
drag another one in here and just rotate it so
that the spikes are sitting inside of the wall. And then often you
won't even notice. So you can basically use this, and I'm like, moving
it down over here. And there you go. See? It just once again breaks up the wall. It adds some visual
interest, and overall, I'm just like
playing around with the position and the
colors that I wanted, and I end up just using
the position that I already liked beforehand. And now we are getting
pretty much soused up. So in the next chapters,
what we will do is we will go ahead and we will
polish this even further, but it will be in
real time, placing some more details
and stuff like that, and we will really work on our lighting and on
our composition. So let's go ahead
and continue with this in our next chapter.
71. 49 Polishing Our Environment: Okay, so this is what
we have right now. Things are starting
to look really solid if we go to our
different camera angles. If you've seen the last chapter, you can see that over here. Like, we got some really
interesting looking angles. We got a bunch of
foliage in there. We got some props in there,
and just in general, for the limited amount
of work that we did, but the amount of
stuff that we covered, this is actually
looking really good. So what we will do
now is we'll mostly just be doing some
balancing, basically. So first of all, what I want
to do is let's have a look, and I just want to most
just going back and forth, playing around with stuff,
that kind of stuff. Let's go into our exponential
height over here. And I just want to
go ahead and go to my volumetric for and maybe, like, play around a little bit more with, like, the colors. Here you can see that if we make the colors really strong, you can kind of,
like, see what kind of stuff we can get from this. So let's see. Let's go a little bit
more like maybe a little bit bluish or yeah, let's go a little bit more blue. Something like that
looks quite interesting. Let's have a look around
at our directional light. So intensity of five is fine. Only over here, it is
a little bit strong. Although now I look at it, it's probably not that bad. I'm also going to set my
screen percentage to, like, 120 or something so that I have, like, the highest resolution. This is especially needed
because I'm recording this at, like, a lower resolution. So, let's have a look. So overall, our sun yeah, it's like a white sun. It's not that special. Yeah, I kind of want the sun to be a little bit like this, like, slightly, slightly orange, but we already have
that over here. Let's try and play around
a little bit more. Out to save my
scene. There we go. Let's try to play around
a little bit more with my temperature, just
to see what it does. If we go between
white and yellow. If I see this, I would
go maybe like 5,100. So 5,100. Yeah, that
might be slightly better. Next, what I want to do is I want to see what
will happen if we grab one of these slides over
here and if we paste them, in this area over here
to kind of, like, push the lighting even more
from these directions. And what I can do with this light is I can
go ahead and I can, play around with my source width and with my source
height over here to, like, push this out a bit. And let's have a look around. So I probably want to
go ahead and probably, like, rotate it slightly down. And then if I go ahead and
go to my camera actor, let's set our radius, which is over here,
a little bit bigger. And then I can just press
affect world to see. Okay, so it's only as
some light over here, which I actually do not like. I don't know if when I set it's like a little bit brighter. Yeah, honestly, I don't like it. So I'm just gonna get rid of it. It's just something
I wanted to try, but I actually like having
some of this occlusion. Only thing that I don't
really understand is why my occlusion is, like, so incredibly dark. In these areas, as you can see, and I wonder why that would be if it's because of
some type of shadows. But if I have a look, let's see, my directional light over here, I did not change
anything, right? Yeah, the contact shadow length
I said a little bit here. So this shadow length, what you can do is you
can increase it a bit, the contact shadow
length to give your leaves a little
bit more shadows. But this stuff over here,
it's actually quite curious. I'm not completely sure
if I go ahead and, like, turn off the car shadows
just to see what happens. Yeah, so it definitely
comes from over here. Let's have a look around. So the only thing I could think of is
maybe that it was like my shadow buys, but that doesn't
seem to do anything. So to be very honest, I am not completely sure
what I want to do with that. If I maybe just want to play
around with my exposure. We might actually be simply
a little bit easier, but yeah, it's a
little bit cheating. It is quite strange that
it is in these corners. One thing is, yes, the exposure. So this is something that I
can already start working on. And if it is not enough, then I'm going to fake something a little bit with lighting. So if we go ahead and
go to our exposure and go into our shadows
over and our Gamma, I want to go ahead
and set my shadow Gamma a little bit up. I don't know if 1.1 is too much. Here, let's see one, 1.1. Let's do 1.05 over here. Now, the thing is that we have our exposure
here at the top, but this exposure over here, it does not actually remove
this stuff down here. The reason it would not
remove this because we already in quite a
light looking area. So that's why I'm quite curious about why it is still so
pitch black over here. So I don't know if
I need to go maybe like zero down here. And maybe like 0.5. Let's see. If I go over here,
set this to like 0.1, no, sets to 0.8. Yeah, I cannot push
it far enough down. It's a bit difficult to get
a good balance between this. So 0.2 by 1.5 or 0.5 Woops. Let's not do that. So
let's try 0.3 and 0.5. That's already getting
a little bit closer. But then, of course, I want to control a little bit like
the brightness of my scene. However, right now, if I would control the brightness
using my exposure, what will most likely
happen is that once again, I can set my exposure down here, a little bit down, but then it would also become
darker again here. So maybe the most I want to
set it down is like -0.4. And then if I go ahead
and for the rest, I'm just going to
carefully balance it out using my global
exposure over here, and we have our gamma,
and we have a contrast. And we can use these sliders
to basically push it down a tiny bit
more. Let's do 0.9. And, yeah, we can
do this on top of our lute. So here we have 0.9. I don't know if I want to
play around with my contrast. I think I'm quite
happy with that. And now, just in this case, in order because
we are working on, like, a small piece, what I'm going to do is I'm going to place a
light over here, and I'm just going to fake some of the lighting errors
that we seem to have. And the way that
we can easily fake this without a lot of expense. And, of course, if you have
a real time environment, you need to balance out
everything a lot more, but we are just working on
just a small environment. But basically, the way that
we can fake this is we can go ahead and turn off our
cast shadows on this. And then if we set the
value very low to like 0.5. And let's have a look around.
So we got this stuff. So 0.5, maybe like one. You see, we can play around. Now, you want to
be careful. You do want to kick your pins
on darkness because, else, it looks like
it's a shading error. So I'm just going to do
something like this. There we go. Just to bring out those lights a
little bit more. Maybe what I will
do is I will, like, rotate it down a bit
more to kind of try and avoid and play around
my barn door angle. And the reason I'm doing this is because I want to try and avoid lighting too much of my wall that we
have over here. But just in general, like, that should work quite well. We don't have the
most amazing shadows in this area right now. And you can kind
of, like, see if you can press H to height. I would say maybe make this like 0.5, and that's about it. I just want to have
this subtle change just for this one
shot over here. Now, having this, let's go
ahead and save our scene. And with all of
our new lighting, we can go ahead and
have, one more ty in our lighting angle. So let's turn off
our Snap rotate. And see if there's maybe
like a lighting angle that looks a little bit more
visually interesting. Maybe like going
down a little bit might look a bit more
interesting right now. Yeah, I definitely want to go
from, like, this direction. And also, let's play around
with, like, a rotation. Not sure I'm liking
the rotation much. Yeah, you know what? I
think we were quite close. I think I'm just going
to, like, move it down just a little bit to show, a little bit more of
the light in here. And another thing
that I like to do, which is quite nice to give
it a little bit more like that cinematic feel is you can go ahead and you can go
to your post process volume. And if you go ahead and
scroll down over here, all the way down to your
film grain down here. So these are new film
grain options in 5.1, and they actually give
you like a really nice, realistic looking film grain. So if I go ahead and
boost it up here, this already for this scene, this works really
well to just, like, boost up this film grain and
give it like a little bit. You can go else really
intense if you want. But just in general, I can even just like
the default settings, I can go for, like, I don't
know, maybe like 0.35 Ah. Yeah, that is quite nice. And then we can
maybe do like 0.3, and then you can have the film grain intensity in the shadows. You can make that one maybe
like a bit stronger, 1.5, which basically means that
wherever we have shadows, the film grain will be slightly
more intense, maybe 1.2. And then we can also have the film grain in the
highlights to be, like, more or less intense. So there's quite a bit of balancing that you
can do with this. But that's looking quite nice. So we are getting quite
close to something I want. Let's have a look. I'm going
to because I'm just, like, looking and jumping
back and forth, I'm going to go to
my camera actor for this one and set my amperature
a little bit lower. So let's set this
to, like, or higher, sorry, set it to three. Yeah, let's do let's
do 2.8 over here. Okay? So that's interesting. We have our pipes
going on over here. That's all, that's all,
quite visually interesting. I quite like that. Mm. Do
I need to do anything? Let's play around a
little bit more with my bloom if we go into our
post effects and said, Look, no bloom, more bloom. What was the original?
The original was 2.6. I might want to go
down to, like, two. Okay, so we got this
stuff. Yeah, our concrete. I quite like the color
of our concrete. It's in quite a good
location right now, and like, it feels a
little bit orange, but it is because of,
like, the sunlight. So now that I go
ahead and just like, let's have a look over here, this view over here, it kind of lost its
feeling, to be honest. However, the feeling over here might just be the contrast. Now, something cool
that you can do. Let's say that you have a camera and you
just want to, like, increase the contrast on
one camera to bring out, like, a specific effect. You can actually
grab the camera. You can scroll down over here to your post
process effects, and in here, you
are actually able to once again go to your Global. And for example,
click on contrast, and then it will
overwrite your contrast. So what I can do is I can click
on my contrast over here, set this through like 1.2 to
make it a bit more intense. And then I go to my saturation. And because the contrast
boost up the saturation, I want to set this down
to 0.85, for example. And now you can see that
even though we've done it here, the other cameras. They will not have this effect. That's 00.9 in my saturation. Here we go. But this, of course, like, it makes it
look quite nice. Then we have this one over here, and this one, I'm not sure. I feel like there is
something visually. There's something missing,
like some visual interest. Maybe it's because this is
like quite a flat wall. Maybe if I do something
like this where it's like showing a little
bit more of the back. And I feel like that
I want to go up here, and I don't like how
it is just clipping. So what I'm going to do, I'm just going to move
this forward a bit, no one will notice that
it's really moved forward. So we got that one. And
then we got this angle. So this is like, nice food. And now I'm really
just, like, fine tuning everything to get it at a at, like, a place that I like. I'm going to, for example, here, let's add some
additional lights. Turn on snap rotate. I'm going to add some
additional lights in here. And what I might also
do is I might also make these lights a little
bit lighter later on. Just want to check how that light looks if that
doesn't look strange. No, no, that looks fine. So we got this one. Okay. So we just get some lights, which will just like, add that extra little bit
of detail in these areas. Let's have a look around. Yeah, see, just the lights. Let's go into our
lights and just set the brightness to like two. There we go to make them like
a little bit more visible. Yeah. So it's like nice
and sunny out here. That's quite nice. I'm going to have I need to be
careful with this one, but I want to play around with
my ivy subsurface amount. If I set to 0.2, that looks better here,
how does it look? Yeah, here, see, 0.2 looks
better than 0.4, definitely. So let's do 0.2 with
my subsurface amount. And just like that, you
basically go back and forth and you just
keep balancing things out until you get
something like over here, I feel like there's
concrete over here. It feels a little bit
too I don't know, it just feels like there's
something missing. I end up also not
really using the grass. I'm not sure if I
want to use it. Sets like ten. Maybe you can, like, use it like here a little
bit. Let's have a look. But I feel like
because this is like a concrete structure that
is higher up, I don't know, it just feels like a
little bit strange to use grass because it wouldn't
technically grow here. Like, weeds would
maybe grow here. Let's try that. Let's go ahead and let's get rid of
all of our grass. So right click and just press, oh, sorry, las remove. Yes, I want to remove them. And let's go ahead
and save sine. Let's go into bridge. And let's see if we
can find some weeds. I know that we can because
I've used them before. But let's go tree plants, and then let's go weed. And then over here, we
have some curbside weeds. These ones might look
a little bit better. Okay, so we want to have
something like that, and then I want to
have something to make my concrete feel a
little bit better. So there's also decals over here inside of substance,
which is quite nice. So what we can do is
we can have a look in our decal tab and see if there's maybe something like concrete
with like a concrete. I would say that
these digas, like, they don't often
fit really well. But sometimes,
sometimes they do. So let's say that I will get a crack decal to
see how that looks. So let's add that.
And let's see, maybe I can also get
a damaged decal. Maybe this one over here, let's try that one out just
to see how that looks. But of course, because it's
not the same concrete, you often get problems with that because it just
doesn't feel the same. Now, the crack one should
be pretty fine, I guess. You can go ahead and make
it quite a bit smaller. So let's scale this down. Scale is in. It almost feels
stretched, to be honest. It feels like I should do this. And if we just have
this over here, and let's go ahead and go
into our decal and maybe make it brightness to and maybe set the
saturation to like 0.8. 0.6, maybe. Yeah, that starts to feel
a little bit better. And then I can go in my decal and if I just, have
a look around. Yeah, it does add some like a quack and if I go
my collar overlay, maybe, like, make it a bit darker, I guess, that sort of works. Yeah, okay. And then this one,
this one was just like a long shot where I was just curious what would
happen if I throw this on, like, a side over here. But I have a feeling that
will not look very good. I know. You never know. Maybe if I scale this and
go like, sideways. Oh, no, definitely not sideways. I was just curious if
I can maybe, like, make it feel like
it fits in here. So let's say we have
something like this and I go in my material, and for some reason, even though Mexican is
already really dark, they even make the
material darker. And what if I set like
my saturation to, like, excuse me, 0.8 or
something like that. Okay. And let's just have a look at it from
this camera angle. Oh, contra H. Honestly. Not too bad, to be fair. Like, I expected
it to look worse. So that might actually like that extra bit of
visual interest. I wouldn't do it too often,
but maybe for, like, this specific one because
it is kind of hidden. Yeah, yeah, I can see that. Let's go ahead and
go to bridge and see if there's maybe,
like, another one, like, a long one that we
might be able to use. Let's see. This,
like, a large one. Let's do this one because you never know, maybe
this will work. So let's add this one also. Over here. Let's open up this
and set this to, like, what did I say
the previous one? I set this to 0.8. So this one can also be 0.8, open up the material,
make the color white because I assume they are roughly the same
color balancing. And I was just curious if
I can maybe over here. Actually, you know what I'm
going to do is I'm going to duplicate this one because
it's already kind of scaled. Over here. Yeah, I was just curious if we
can maybe use this one. Looks like we need to rotate it and it looks like we need
to scale it quite a bit. This one definitely
doesn't fit as well. I am going to give
it another try. Let's say that I have this and I go look at it from a distance. Let's start with just making
the colors a bit duller. Let's do 0.6. Maybe make
it a little bit lighter, like two, no 1.5. Let's start with 1.5
because it's easier to throw it to make it
lower than the material. 0.6 is about fine. Now let's open up our material. Let's see if in here, I can make it blend a
little bit better. But this one is a
little bit tricky too. Let's try and use some opacity intensity over here and maybe set to like 0.7. I know that it doesn't
make too much sense to use our opacity on this
because it's like damage. But from a distance, it does
fit a little bit better. Our normal map has the
green channel flip, so that's also fine. Yeah. Okay, cool. That adds, like, some
visual interest. But anyway, so we had this
one. We had this one. We had this one, and over here now we have a little crack, and we were going to do
the weeds. That's it. So let's go ahead and
go to foliage and they should already
be added over here. I'm going to activate them. However, I'm going to set
them to be quite small. 0.6 by 0.9. I'm going to deactivate the grass bits because I
don't really like those. So that's right click
and deactivate them. Oh, because they
are deactivated, I cannot actually remove them. So let's just remove. Whenever you
deactivate something, you can also not, remove the painting of it.
So let's try this. And let's just see
if we can get some, here, seeing something
small like that. And maybe over here, wherever
we have the foliage, we can also go in and, like, Add a little bit of those weeds,
have a look around. So let's start with
this one over here. I would probably add some
in the corner over here. Maybe in the corner over here. See, are they not too small? Maybe select them and set
them from 0.7 to one. Okay, so we have a bit in the corner over here.
That makes sense. A little bit. Around here. I'm just trying to
find logical locations where weeds could have grown, and it's mostly like in,
like, the corners and like, dirty areas where
concrete comes together. Okay, so we have a little bit of weeds over
there. That's nice. I don't know if we
maybe want to, like, have some in between here. I can check to see
what it looks like. No, I don't like that. I feel like when it's in between here, it just looks a bit buggy. So let's just get rid of that. But I definitely like
this corner over here. It's pretty good one.
That's good one. Let's go. Oh, it's like a
tiny bit more over here. And once again, I'm literally
only doing this in, like, the locations where I
think I can see it and not any other
locations because then it would just take
too long for a tutil. Okay, so that's
looking quite nice. Let's go ahead and
go to the second camera doesn't need anything. Let's go ahead and go
to the third camera. Third camera can use
some weeds over here. I don't know why this
area is so dark. That's interesting. But
okay. So we have some here. Uh, I will probably also increase the brightness
of them in a bit. So that's fine. Let's
go ahead and go to our next camera, number four. Here, we have some weeds sitting over here,
and maybe have, also a few down there and
maybe also over here. Okay. Maybe a little bit around the pipe
and stuff like that. And just in general,
around these bits. Yeah, of course, you can
keep polishing and polishing and making it better and
better. That's all up to you. I won't push it,
like, too far because then I would spend hours
on something like that. But that's looking pretty good. And then the last one also
doesn't need anything. Okay, awesome. So we
got those pieces done. Now, if we just go
ahead and go to our curbside weeds over here. I want to grab the colors probably on the
way actually here, I can push up the
colors in our material. I honestly don't
understand why they would make the material
gray, there we go. Push up the colors
in our material. I would then go ahead
and I would just open up the base colors, and I'm going to
set my saturation a little bit down to 0.8, because I feel like
they're a little bit too green for this
specific environment. They are not supposed
to stand out. They're supposed to be like
this extra little detail, but that's quite nice. I like that. So we can go
ahead and we can save sin. Now, at this point, I'm not sure if there's anything else that we
really need to do. Like, we got our pipes. I don't know if our
pipes maybe need to look a little bit brighter. Let's have a look around, but we can just at this point, just go into our textures and our pipes and just
like, open up these. So let's have a look
around if we have this. Maybe make our blue pipes
like one point let's see, 1.5 is Yeah, I quite like it a bit
brighter. Let's do 1.4. And let's make our
red pipes, 1.5. No, let's do 1.2. And maybe set the saturation of our red pipes to be like 0.8. 0.9. Ah, 0.95. Let's just 0.95, and in our blue ones, let's go for a saturation
of like 1.5, 1.1. Maybe the brightness to 1.5. Yeah, I like it. So brightness
1.5, saturation 1.1. And that's looking
also pretty good. Awesome. Okay. So
we got that stuff also ready to go. So
that's quite nice. Now, at this point, we can
have once again another now we are already at a
high resolution over here. So the only thing that
I want to double check, and it's most likely just
like a resolution thing. So if I would take a
picture, I won't have this. But I want to double check if my focus is creating
some problem. So if I set the focus to
normal, And undo it again? No, no, my focus is not creating any problems.
Okay. Awesome. So, is there anything
else that we need to do? Let's have a look
around. Maybe make my palette a little
bit brighter. Oh, okay. This time, our
bedo tint is I, correct? So let's go ahead
and just open up the base color and make
my palette like 1.5. And then to balance it out, let's set the saturation to 0.8. Okay. Let's have
a look over here. Yeah, that's looking
pretty good. I don't know if I
maybe want to, like, place a palette like
somewhere over here. I don't know if that
will look good or not. Let's have a look around. Yeah, I quite like
that, having like sun. Well, actually, it kind of
hides what we did before. So I don't know if this is the right location,
maybe over here. And maybe move it a bit forward. Hmm. No, you know what?
I'm going to not do that. What I might do, however, is I might grab another one of these palettes and place them a little bit
further down over here. Yeah, see here. So
now at least we have some visual interest
in that area also. Yeah, the barrels and everything they are looking are quite nice. So that's all looking good. I think at this point that my polishing is
pretty much done. There might still be some things that I might change later on. But for now, this is
looking quite good. So what we're going to do
in our next chapter is we are just going to
quickly go over collisions, LODs and some debugged
modes just so that you can see everything and just anything that we
might have missed. And after that, we
are going to create some portfolio renders and
some portfolio videos. So that is going
to be quite cool. So let's go ahead
and save our scene and continue with this
in our next chapter.
72. 50 Optimizations: Okay. So in this chapter, what I want to do
is I want to have a quick talk about collisions, about level of detail, and just in general, some debug
modes that we might have. Now, over here, when we
would play our game, although I will need
to figure out why I can play it, it's
looking really good. What will happen is that if
we go ahead and go from IT, we have some debug modes, and one of the debug mode
is player collision. This player collision
basically shows you where the collision
is of our mesh. Now, luckily for us, our player collisions
are looking pretty good, as you can see
over here, because we have mostly square assets. Maybe our pipes are a
little bit strange. What I wanted to do is I want because I need to show
you how to do something, let's just do the
pipe over here. So right now, we have a pipe and what you can do is
you can go to show, and in here, you can show
our simple collision, which is our player collision. This is automatically generated whenever we import a mesh. If for some reason you
are not happy with this, there's a few things you can do. You can go to your
collision and you can press remove collision
to get rid of it. Now, in here, there's
a few things. You can try to basically
create simple collisions. I will first of all,
do the out generated. For example, what you can
do is you can go ahead and press Auto convex
collision over here. And what it will do is
it will try to generate a collision based upon
the shape of your model. So I can press apply, and here you can see that
it tried its best. And based on the hull counts, you can make it more
or less precise. Now, let's say that you
just want to go for, like, a super simple collision. We can go ahead and
remove this collision, and let's say that we just want to go for something simple. So let's grab a
capsule collision. Now with the capsule collision, you can actually
select it over here. And you can go ahead and you can scale it down
and you can move it. So this is a collision
that you can move. Now, this is like a cylinder. So it is a pretty good one
to have like as a capsule. Because technically,
with player collisions, we probably don't really need
a collision in the center. So I just want to show you
that over here and you can do the same with boxes
and that kind of stuff. You are able to basically place a collision
here, press safe. And now if we go in our hallway and show player collision, you can see that now the collision is looking
a lot cleaner. So I just wanted to
go ahead and show you that this is how you
can generate collisions. Now, you can also go
ahead and you can also use boxes or spheres
and anything like that. Now, another thing
that I wanted to show you is level of detail. So level of detail is
basically a feature inside of unreal engine five and four doesn't really
matter. Now, there's two ways. So you have Nanite and nanite is like a level of
detail on steroids. It's like a brand new system that you can use to improve
the level of detail. And you have the LOD
settings over here. So these two Nanite actually also affects
lighting a little bit. So what I wanted to do is I wanted to show you two things. Now, right now, ivy,
for example, foliage, often, I don't know, it does work with
Manite nowadays, as far as I can remember, but it did not used to. So what is level of detail? If you look over here
in your triangles, right now, we have
22,000 triangles. It's always rendering
all those triangles. What you can do is you can
go over here to LLD settings and you can set the
group and you can use a template, for
example, foliage. Then if you press
Okay, what it will do, Okay, maybe foliage
is not the right one. Let's do props. What it will do is it will generate level of
details for us. And what you can see now is that the further my
camera goes away, if you look at the
triangle account, the less triangles
my mesh becomes. Now it's 5,000, and if
I go even further away, like over how many do I have? Over here, 2000, see? Now, the reason why we can just lower this is because when
you are this far away, you cannot see all that detail. So in reality, even though we
go further and closer away, you can barely see
any difference. The only difference that
you see over here is that the branches over
here go away a little bit. So that's a
level of detail. It's great to use, but it
is an old school technique. However, I find it important
that you know what it is, because every other engine
still uses this technique. So you could, at
this point, like, for example, save your scene. Now, right now, there is another technique
and it's called Nanite. If I go ahead and go
up here and I go for my nanite visualization
and turn on triangles, what you will most likely see is that you see nothing
really happening. The reason nothing is happening is because we have nothing in our scene that
currently has nanite. So let's say that we grab our pipes and we
turn these into nanite. Using nanite is even easier inside of unreal
than setting up LLDs because all you have
to do is select your pipe and enable
Nanite support. And now what you
can do is you can simply press Apply changes. Now what it will do is it
will enable the Nani support, and as long as your
shaders do not have any type of weird
masking or effects, it should now work totally fine. Now if I go ahead and
go, can I do that here? Also, show? No, I can't. Now if I go ahead and
go to my hallway, now, my nanite visualization, if I said this to triangles, you can see that now because
we have a nanite mesh, this mesh is the only mesh
that is shown to have nanite. The cool thing
about that what you can see is that if we go close, we have all of our details. However, the further we go away, the more it automatically
starts optimizing. It's a bit difficult
to show you. But here, the bigger
the triangles become. And Nanite is a
very powerful way because you might have
already heard from it. You can have millions
of polygons using nanite and it would still
give you the correct effects. So you could even
make your measures way higher detail than this. However, in my case, I wanted to show you more
traditional techniques. So because nanite often also slightly affects
the lighting because lighting relies on
nanite in order to bounce off the shadows, what I like to do is, I
like to, for example, turn on Nanite on
most of my measures. So let's say that
we have our floor. Let's say that we
have our pillar. Okay? Unreal is really confused with where to place
all of these pieces. But we can just go ahead
and press Nanite support, and Nanite should still
work with world space. So let's double check.
Yeah, that's working. And it should also work
with, of course, unique UVs. Now, I have not tested
it out a lot yet, but Nanite should be
working nowadays also with foliage in Unreal 5.0 0.1. This was not the case in
Unreal agent 5.0 0.3, which was the previous
one that we had. So what we can do is we can
go ahead and test it out. Here, if we go now to our
Nanide visualization, see, that's already starting to look a lot better having
all of these assets. So let's try foliage, and we will see if
it works or not. Right now, this one has LODs
which is already optimized. But let's say that we want
to go ahead and turn on nanite and I believe
that we need to turn on preserve
area over here for when it is foliage. So if we go ahead and
press Apply changes, we will know soon
enough if it is causing an error because it
is masked or not. What you can see
over here is that it looks like that it
is causing an error, which I'm actually
quite surprised about. Oh, no, there we go. Okay,
so now it is switchback. So now we have Nanite again. So if I go ahead and this is why preserve area is important,
if I go ahead and save this, I want to make sure
that my mesh yeah, it looks like
nothing has changed. Also, I might want to
take an angle like this. I think this is like
a really cool angle. But let's just go ahead
and do that in a bit. So if I go to my
Nanide visualization, Okay, that is cool. So this is brand new.
So this is also for me, like, only the second
time that I'm seeing it. So knowing that, I should
be able to just go into my foliage and just grab all of my nanoit and
I will just grab the ones that I know that I use because
I didn't use all of these. Over here, this one, this one, this one,
this one, and this one. Let's just go ahead and apply
our nanite to this stuff. And slowly, we can see our entire environment
turning into nanite. We can also do it with
the mega scan trees. However, they use really
complicated shader, so I'm a little bit
worried using it on those. You can try it out, but I'm just going
to leave it like it. My scene is running
quite fast already, so it's not that big of a deal. So what I can do is I can
go ahead and press apply, and that's looking pretty good. Now I can also go
in, and I can also go to my mega scans,
Tweety assets. And let's say that
I want to turn all of my assets into Nanite. Of course, I could have used
imported Nanite assets, but I did not do that, so I need to do it now. Now, I could go into
every single folder, select the asset and change it, or I can go down here to my filter and turn
on static mesh. And what that will do
is it will show all of the static meshes in my
child folders over here. At this point, I can go
ahead and I can open up all of the stuff that I
want to turn into Nanite, which I used most of these These ones, I did not
use this one, this one, and this one, and I can
simply go ahead and apply the nanite and
that should be about it. Nant, of course, also optimizes your scene because with
the optimizations, it just makes your
scene run a lot faster. I don't know how
much of a difference it is compared to LODs, but I believe that it is
a better optimization than LODs right now. So if you are using
a real engine, you can just as well
turn everything to Nanite even if it is a traditional model. That's
also what they recommend. Even traditional models, they recommend to just
turn it all into Nanites. So there we go. So now you can see that now
scene is actually using a lot more nanite which
is looking pretty good. These ones over here,
these are like boxes. I can go in here and
also quickly apply. And there we go. Awesome.
Okay. And, of course, the rest is the sky and trees. Yeah, we have some
acids in the back, but honestly, it's
not really important. So as you can see,
not much has changed. However, we should have a pretty decent if I go back to
a normal resolution, which is like 70
and show my FBS. We are running at a nice,
like 40 FBS right now. Which is looking pretty good. Oh, that's interesting
that I have that error, the texture budget error. The streaming pool arrow,
you sometimes get that. I should not get that
because I have a 30 90. However, if you ever
get this, in my case, I probably just need
to restart the engine, and you want to get rid
of this arrow over here. What you can do is you can go R streaming pool size over here in the
bottom in the console, and you can set it to something
really high like 5,000, and that will get
rid of the error. Okay, so this is starting
to look pretty good. I do feel like I have very
little light over here, which I'm not
completely happy about. Maybe I can use one of these
lights to very quickly. So I copy this over here. And the next thing I
want to show you is I want to show you
some debug modes. So now we went over
collision and stuff. Just give me a second
to quickly give it a light to artificially
light this one pillar, just because it will look a little bit better if
it's not so dark. So let's set this to 0.2. And let's have a look at
our let's to 0.4, maybe. 5,100 to make it a
little bit orange. Yeah, Okay, that is already
a little bit better. I am going to probably
cast shadows in this one, just to kind of, like,
push it a little bit more. But that's looking
good. Okay, so we got those pieces done. By the way, does this
look better with shadows? Make a difference. So there are a few more
debug modes that you can use in order to see how
expensive your scene is. We are running at
40 FPS right now. However, that is
still quite low, in my case, for my computer. And the reason why
it is quite low is, of course, I'm recording
that kind of stuff. So I probably hit
the 60 without. But I can double check. If you go to IT, there's a
few modes that you can check. I recommend that you just
play around with it. There are also some
really nice notes like detail lighting and just like the lighting
mode over here. However, if you
just go ahead and so I play your collision,
that one is looking fine. We don't have collision on
our foliage, which is good. And then what we have
is over here we have our optimization viewpod and
we have lighting complexity. So with your
lighting complexity, what you can see over here
is that everything that is blue is very cheap to light and everything
that is white is very bad. Now, we want to go ahead
and stay around orange, and right now it looks like that we did a really good
job with our lighting. Now the reason why we have
some lighting complexity here is because if I
turn this one off, see? It's literally this one
light over here that is causing are seen to run
quite a bit more expensive, and it's because we have
multiple lights overlapping. Whenever you have multiple
lights overlapping, it makes things a bit slower. Now I can go ahead
and I can go to my camera, and I can go in here, and mostly you just want
to twin and set the radius lower and see if that works. So if I set the radius lower and I push this a little
bit closer over here, it could give me and intensities don't
really change much, so I can set the
intensity to like 0.7. But now just in general, if I now go back to my
lighting complexity, you can see that now
it starts to look a little bit better already. Most likely the reason why
it's because this light. We have two lights
that are overlapping on top of each other.
Now, it's not bad. I'm not saying that
it's, like, really bad that we are in the red
or something like that, because we are not
going for, like, a super optimized scene, but we can go ahead and we can play around also
with this stoplight. And see how much
of a difference. Yeah, I see here, it
makes too much of a difference, so I'm
not going to change it. So I'm actually happy
with what we got. So here you go with, like, lighting, in general, like here. We just have some areas
where we have some lights which are increasing
everything a little bit. Now, over here,
this one, this one, we could argue that it see, this one, yeah, I want
the shadows here. Let's have a look and
go like our camera. And this one, if I go ahead
and just press affect world, see it makes no
visual difference. So this one is one where
I could just remove it. And when I remove it, of course, the lighting becomes
a lot cheaper. So we only have in
our main areas, we have expensive lighting, and I guess over here
we also have one, but it's still quite cheap. But for the rest,
this is looking quite good and most
of it is blue. So this is a way that if your scene is
running really slow, have a look around
at your lights. Maybe you used way
too many lights. Turning off shadows also
optimizes lights a little bit. So here you can see
that if I turn this on, Okay, in this case, I don't have enough lights to show you. But yeah, turning off shadows
definitely optimize lights. If you are in the white, yes, then you are starting
to get trouble. Let's see. For the rest,
you have shader complexity. This is basically complexity
of our materials. We are in green because our
materials are super easy. You can see that these materials
are a lot more complex, and that's why they
are red over here. So, honestly, we don't
need to do anything there. You have some buffer
visualizations. If you only want to
see the base color of your environment like this, to make sure that, for example, the colors are looking good. You can do that. You can use buffer visualization to check
even, like, the roughness, as you can see over here, and all of these extra pieces, which can be really
useful ambitclusion, all of that stuff. Nanite we already went over Lumen I guess you can
just check out lumen. And this is lumen. It's like a really low poly
version of sin. I don't know why it's sinking
down the bottom here. But yeah, in general, there isn't much to see. It just looks really funny. And I would say that, yes, we also have shadow
maps over here, which just basically shows you, your shadows that we have used. But once again, those do
not really say much to me. Okay, awesome. So, we
now have this done. I was going to go ahead
and I was going to grab one of my cameras. Duplicated. And I
was going to add a camera actor number
which is like here at the maybe for this one, I want to go for, like,
25 by 25 millimeter. No, not 25. Maybe 30 by 30. Just because I kind of liked
having, like, a side view. Like this. Also, something
that's quite cool. It will not work because
well, it will work, but because we set our
environment to be very specific, you can actually set your
sense of height over here, which can allow you to go for, like, a more cinematic fuse. You can even do, like,
the Kill Bill type stuff. But yeah, like this,
you can go for, like, a much more cinematic now, I'm not going to
do that because I know that when I'm rendering my images for station and for the tutorial
and stuff like that, it will not make much sense, but you can definitely go in
here and you can definitely, set your sensor height. And here, that already
gives a much more, like, cinematic feel in case you want to do
something like that. Now, in our case, we will
stick to 1920 by 1018. Nice and boring, I know. But I like to go for
something like quite even, and this is what we made
this entire environment for. If I start making this one
with like a lower sensor, it still works,
but just it's not what I had intended.
Okay. Awesome. I would say that the
last thing that I will do is I will go ahead
and grab maybe, like, one of these pieces
and just throw in, like, a little bit
of foliage here. This is just for this camera, so I don't care that
it's sticking out. It's just that I have, like, a tiny bit of foliage over here. However, if you really
wanted to, you could, of course, just pick
something better than me. But, yeah, I think that
looks pretty good. Yeah. Awesome. Okay, so we
have this stuff also done. So in our next video,
we will finalize our environment by creating
our portfolio screenshots, and I will also show you
on how to create some flrous that you can use to
create a little bit of, like, cinematic style videos. So let's go ahead
and continue with our final chapter
in the next video.
73. 51 Creating Portfolio Screenshots And Videos: Okay, so welcome to our
very final chapter. Now, before we get
this chapter started, I just wanted to let you
know that the reason why my character was falling
through the ground a while back was
because accidentally, our editorsphere,
it has a collision. So you just want to open
up your editorsphere, go to collision and
remove any collision because else unreal
gets confused. And as soon as you do that, if you right click and
press play from here, you can now actually
play your level, see? And it all looks like really
nice and high quality. And we can just walk
over our foliage because our foliage doesn't
have any collision, and we can just
explore our level. Of course, this is
not the best level for a third person character because of all the pillars
and stuff like that. So you would need to
maybe work on that, but in general, it's
like a great level. So here we can see that
everything is just looking exactly the way
that we intended it to. And even when we walk around, we have multiple
angles that feel like a nice spot for your
shot and stuff like that. He over here, we didn't really pay too much attention
in this area, but that's no problem.
Okay, awesome. So having that done, what we are going to
do in this chapter is we are going to go
over on how to create some really high resolution
screenshots and on how to also create
some actual videos. Now, the high
resolution screenshots, we kind of already
went over that. It is not too difficult.
What you want to do is you want to go ahead and
go to your camera. At this point, we can
also turn off FPS. Now, often there
is currently unwel a bug data will become a memory leak as
soon as we do this. So you might need to restart
wheel after doing this. But make your
viewpod quite large. Go down here and set
your screen percentage to something quite decent like 150 and then go to your
high resolution screenshot. Now, in here, you
need to be careful. The higher you set this, the stronger your PC needs to
be to render out an image. You can see that as
soon as I press three, it will say large multiplies micas the graphic
driver to crash. They are not lying about this.
It will actually do that. Now, right now, I'm recording this footage in 2560 by 14 40, and I'm doubling my resolution, and this one is around 2000. So I will probably
get around like a four K or a five K
image out of this. Once you're happy
with your views and everything and
everything is ready to go, you just want to set your screen multiplier and you
want to press capture. Then what you want to
do is you want to go ahead and quickly go
to the next camera, give it a second to load in the lighting and capture again. And you just want to do this
for every single camera to quickly capture
some nice images. Number four, Number five. And then for the last one, just to make it easier for
us when you capture it, click on the link to
open up your folder. And now that that
is done, we can go ahead and we can close this. We can set this one back to, like, around 100 or 70. And I don't know. Do
I have a memory leak? Okay, it looks like this time, I did not get a memory leak. Definitely do not look
up here because I just, like, placed a random
piece of foliage. But anyway, now, if we
go into this folder, we can see that
now we have these really high resolution
screenshots. What's also cool here.
You can see like before, and now we have after. So we have these screenshots
which are currently, yeah around 4,000, 3,700. And you can see that we have
these nice screenshots. Now, at this point, when
you have these screenshots, it is no shame to go
into FEamplePhotoshop. Over here and to just
slightly enhance them. Often, what I like to do is, I like to go and throw on like
a quick camera raw filter. And because it's no problem to just balance it
out a little bit. For example, stuff
that I like to do is, I like to go to detail and maybe set on a little bit of
sharpening to my image, and maybe go to, basic and
set my texture a little bit higher and my clarity, just
to bring everything out. I can also go ahead
and, for example, tone down my contrast
a bit to make it more. I think I'm actually
quite happy. Like, you don't have to do many changes often on this stuff. Dehaze, not that
we really need it. So often, yeah,
you don't need to do many changes because we already did most of the
stuff that we wanted to do. You can play around a little
bit more with exposure, but I'm actually quite
happy where I am right now. So I'm just throwing
on some sharpening. Noise reduction would not
really work because it would actually get rid of the noise that we
tried to capture. So let's set my
sharpening to around 25. And then when you
are happy with it, yes, you can also do
some color mixer. So maybe you want to play around a little bit
more like the colors of your foliage by making it
greener or less green. Honestly, I'm happy with it. I'm honestly just happy
with what we got right now. So when you're okay with
it, you can press okay. And now you can see,
some slight differences. And normally, if you go to
the next one, go to filter, you should be able to press camera and should be
able to give you, like, the same settings
as that you used before. So you can simply
apply this over here, the subtle settings
to everything. See, just like Wi subtle, just some sharpening, like
we got over here like this. Then because these are like
PNGs, which are quite large, what I like to do is I
actually just go to file scripts and use an image
processor in which I can say, I want to save this as
JPAx all the open images, which are all the images that we have in the same location. And if you just press Run, it will go ahead
and it will save all these images for us
into a nice little folder. And if we open them up, here are our final environment images. You are looking quite cool. Awesome. So we got this
stuff done over here. Now, the next thing
that I want to show you is I want to show you that you can render out some videos. So if you want to, for example, have a video, what
you can do is, let's say that in
our scene over here, get rid of this filter. So in our scene, we
can, for example, right click and you want
to go to animation, and you want to grab a Oh, they changed the look of it. You want to grab
a sequence, sir, I guess it's no longer
animation cinematics. Okay, I guess they
moved it to cinematics. And you want to grab a
level sequence over here. And just call this
Cam underscore 01. Now when you open this up,
it will load in down here. And the way that this is
going to work is super easy. We can animate our camera, and then what we can do
is we can render out a video also within
the sequencer. If we grab, for example, our very first camera actor, which is the beginning
one and drag it in here, this is what we
will see right now. Now, what I can do is I can
hold Control and zoom out. And normally for a
slow moving camera, you want to move your
red bar to around 330. You also need to
move your camera so that it shows
all of the footage. Then once that is done, you basically grab your camera, which is this one over here, and you want to go to the
transform and you want to add a keyframe by pressing this little button in the
center of these two arrows. After that, you just simply
move your slider to the end. And then what you can do is you can go ahead and
you can move this, and I'm going to
not move too far, something like this over here. And once you are happy
with your position, you can move another
one, and it will smoothly move between
these positions. So what will happen is
if we go ahead and go to our camera actor and I press
G and press play down here, we'll get this nice
slowly moving camera that you can see over here. Now, sometimes what will happen is whenever we work
on these transforms, the camera might start slow. I might speed up and then
it might slow down again. You can go over here
to your curves, and this is basically
your animation curve where this stuff happens. The way that you can
keep your camera like an even length is to
select something. And then what you want to do
is you want to go ahead and select the first point
and just move it straight and select the second point and
also move it straight. Like this so that it
becomes a straight line, and then we can go
ahead and save. And now, it should
start and end at an even speed. She
can see over here. I feel like I might want to move my camera a
little bit further. But this is basically the
way that we can do this. And it's better to go
slower because you can always speed it up
than to go too fast. So let's say that
you have this image, although it does feel
like it starts off quite quickly. Yeah, it does feel. But the curves seem to Oh, God. I did not mean to
do that. The curves seem to be working
fine over here. You can click on Location
to double check. Yeah. So that's probably just like a weird effect or
something like that. Anyway, so when you
are happy with it, of course, save your sequencer. But now what you
want to do is you want to render out the video. This one is a little
bit annoying, so you can go up here and
render out the video. And the reason that
this one is annoying is because the video that it
renders out is always corrupt. I know, it's weird. It's
because it's an AVI video. So what I like to do is I
like to always render out this quite high to 60 FPS at a four K resolution because even though I'm
recording at, like, a smaller resolution, it's
better for me to scale it down than having than rendering at a low resolution because you just get better
quality like this. You then want to go ahead
and you can go down here in the output directory and search for the location you
want to save your video. And I'm just going
to call this Cam 01, and that will be the file name. Now for the rest, you can
keep everything else on. And then when you are happy,
you basically want to go ahead and press capture
movie and save your scene. While it is capturing
this movie, what I recommend is
that you go ahead and get a software that
is called hand brake. Hand break is a
compression software that will not only make our
file size smaller, but what is also nice is that it will fix that corruption
effect that we get, and we get a clean
dt and before file. You can see in real time that it is capturing our footage. I will pass the video
until this is done, and then I will show
you how that we can fix this kind of stuff. Okay, so that is done. We now have an AVI file. I can show you like most
time it is corrupt. Sometimes it works, but if
we just go ahead and open it, this is what I mean, see? It doesn't move, it
doesn't do anything. That's what I mean with
corrupt. It's just not able to play this
type of AVI file. However, what we can do is if you go ahead and
download handbrake, it's a really easy
software great. I'm even using it on my tutorial
files to compress them. We can drag in our
AVI file in here, and our goal is to simply
put out a pfour file. So we want to set the
format over here to p four. The dimensions can
stay the same. The video in your video tab, we can go ahead and for
an average bit rate of 6,000 or something like that, just to make it nice and high. And we don't have any audio
or anything like that. So everything can
often stay the same. It's just like the video that you want to make sure that the
bit rate is nice and high. You then choose where that
you want to place this, and I'm just going to place
this in the same folder, and then you can simply
press start and code. And now what it will do is
it will not only compress, but it will also fix
all of those problems. Now, fair to say that
it might not actually compress anything because
we set our quality so high, since I want to go
ahead and I want to capture, real world quality. But that's basically how
you would render this. So we can go ahead and you can
do this for other cameras. I will probably do
that in my own time. But in general, things are
starting to look really good. If you want to go
even higher quality, you can actually set
your screen percentage higher while you are
rendering this video. But let's just have a look. There we go. So
that one is done. So now we have a
nice MP four file, and if I open it up,
this is what you get. Now, sometimes what
I can see over here is I can see there's some little problems over
here that we get from, I think it is like alumin
or something like that. You'll see it takes
a while for it to lighten up and
that kind of stuff. And it is a little bit grainy. For those kind of things, what I recommend that you do is I recommend that you
for the darkening, you go to your Rando settings. And if you go into
thinking over here, it is in advanced. No. I think it's animation
and then advanced. You can say over here
the warm up frame count, and you can say that you
want to wait, for example, for 50 frames before
you start recording. When you wait for 50
frames, it will well, wait for 50 frames, and that gives the lighting a little bit of time to kick in. Now, at this point, for
the rest of the stuff, what I would say is
that specifically for when you're
rendering videos, it is often better to avoid
that greenness to go into your post effects and temporarily turn off
your grain that we have. So over here, it's set to three. If I set this quickly to
zero, going into my camera. So now we don't have
any of that grain. And then if I go over here
to my screen percentage and set it to, I know, like 200. Like set is really,
really sharp, like that because we don't really care about
frame rate at this point. Then what we can do is,
let me just delete the old one and try rendering
this out again over here. And also something that
sometimes works is when you are compressing,
lowering your resolution. So if I go ahead and
render this out again, Hmm, 50 frames that did not feel really long, but it looks fine. I don't see any color changes, which is a bit which is good. So I'm just going to go ahead
and pass the video again. Okay, so that rendering is done. If we just go ahead and
throw it back into handbrake and this time to maybe,
improve it a bit, let's go down here and let's
set the resolution back to 2560 by 14 40. Over here. Like this. So 2560 by 14 40, that should be it, I believe. Oh, no, sorry. I need
to do that here. Oh, God. What was this one? This one was Oh, no, no, wait. I did it good. Yeah, yeah.
I just didn't update. But yeah, so don't turn on automatic,
leave it like it is. So we got that one done, and our bit rate let's go
back to, like, I don't know. Let's go like 8,000,
nice and high. Higher bit rate means
often, higher quality. And let's go ahead and render
this out one more time. So save and start. And also something that would
be nice is that, of course, I do not go full
screen right away, but I actually make it the resolution size that
it's supposed to be. But yeah, in general,
not too difficult. And this way, you can run around like a couple really
nice looking images. Just going to go ahead
and set it back to 100 over here like this. And also, you can
also play around with your deep or field and
that kind of stuff. If you maybe want to make
your image a bit sharper, you can try to remove
your deep or field, and you can try to re art
those things back into, like, a video editor. I'm going to set my
video green back to 0.3 over here to bring
it back to normal. And I think it is done. Yeah, it is done. So now
if I go ahead and open up and make my size a little bit smaller
to like how it is supposed to be viewed over here. You can see that now, okay. I don't know why, but my player is a
little bit buggy, which is a bit weird,
but it will work. I just don't know why.
There we go. Now it works. So, as you can see, over here, we have a nice looking video with our environment
playing room. Awesome. So I think we
have arrived at the end. Now, I really hope that
you enjoyed this journey, and then I hope that you
learned a lot from it. This is one of my few
beginner courses where I really like try to
focus on beginner stuff. Of course, it is not so much
beginner as every software, but more beginner as like
the concept of vimdart. But we went over a lot of stuff. Just a quick recap, we went over our reference
searches and planning. We went over all of
our modeling tools in both Maya Max and Blender
on how to create blockouts, how to create modular models, how to create unique models, how to do high poly
to low poly modeling, how to sculpt inside of C brush. How to bake everything, how
to create tilable materials, how to create unique materials. We even did some rendering
inside of marmoset. And of course, we
did our entire setup inside of UnwelEngine. And as a bonus, we also went ahead and created some foliage, and we went over on where you can find some free resources, and we did some optimizations. Of course, we covered
a bunch more stuff, but that's like the main
stuff that we have covered. I think we end up with a
really nice result for a very technically
basic environment. Like the techniques
that we used, they are they are very powerful, but they are also,
not too complex. So I really like
what we end up with. I might need to do,
like, a tiny bit of polishing after this
course is done, just here and there, but it's nothing that we
would not have covered. So I will hope that you
enjoyed this toil course. I had a lot of fun making it, and thank you for watching
fast tracked oils.
 FastTrackTutorials, Premium 3D Art Education