Transcripts
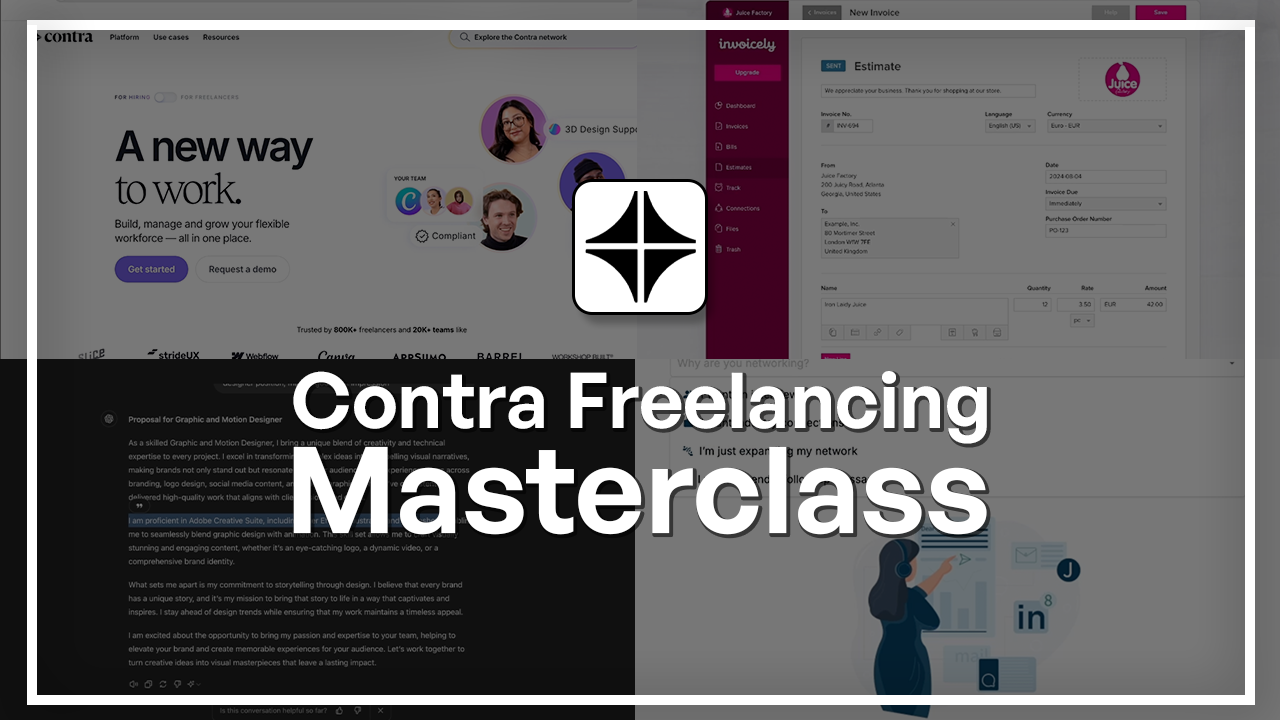
1. Welcome to the Contra Freelancing Masterclass: Welcome to the
Contra Master Class. Contra is a modern
freelancing platform, which is meant for
individual professionals who want to showcase
their portfolio, work more transparently, and connect directly with clients. In this class, you're
going to be setting up your Contra from
the ground up. Before we begin, let me
quickly introduce myself. I'm Jose Kachii a freelance graphic designer
and digital designer. I've worked with
many clients across the globe with independent
contracts, and over the years, I have learned firsthand how important it
is for you to best present yourself as a freelancer and know how to sell yourself. So this is especially important for platforms like Contra, because the way you show
yourself is the way you're going to be getting jobs
and getting those clients. This class, I'll be
sharing with you some practical steps based on real freelancing experience. We're going to start
with an overview of Contra in case you've
never heard of it before. Then we're going to see
how the platform works and how it's different from the
other freelancing platforms. By the end of the
class, we're going to be focusing on getting clients, how to set up your resume, how to use templates, how to show up more in
research results, and what you can do to get
closer to that first project. This class is designed
for complete beginners. You do not need to know
any freelancing principles or even how contra works. I'm going to be showing
everything to you step by step so that by the
end of this course, you'll be a lot
more confident in both areas. Let's begin.
2. Introduction: Hello, everyone, and welcome
to the Contra course. We're going to look over this amazing new platform
that allows you to flourish as a
freelancer by having everything available to
you on this one page. Not only can you have an account and declare your
skills, but over here, you get to create your
own separate portfolio, manage projects, send invoices,
and collect payments. There is obviously a lot
more to that as well, and we're going to
explore all of that in the next couple lessons. So let's get started first
by making an account.
3. Account and Overview: Welcome back. Now we're going to go over
to the front end. So on the left side menu, just head over down to
profile. Click at once. So in profile, this is what
the people are going to see. Obviously, they
can't edit stuff, but the first thing they'll
see is your picture, your name, get in touch, and they will also see
your recommendations. You set your rates right
here, your skills, badges, a little
bit about yourself, time zone, and links
to social media. On the right side, they
can see your work, which we'll see how we
can add them later. Can see your services, and they can see your
recommendations. Previous clients and all that, you can request a
recommendation, send it to their
email and announce that you have a new
contra profile, and their feedback would really help you
get more clients. Let's go over here, go to work. And this is your profile. Let's look at the portfolio, which is this icon right here. So if you click it once, it's going to be
about the same thing, but the templates that they have are
actually really cool. It closes for a second. So it just brings in your
information from your profile, has a nice animation. You work is listed this way, and they get to click on it to learn more about
your project. So this right now is
called a case study. I'll elaborate on that
in a different lesson. But essentially,
you have a case, which is this project, and you're basically going into every nitty gritty detail. To tell them how you did
the say logo, the website, any photos that can help
them visualize the process, that would all be here. So again, we have
the same things that we saw on the profile. You get to share this
with potential clients, so they get to click this and they will type in
what they need from you. They can also share
your profile, and it's a pretty
easy situation. No, I was only able to do
the stuff that we saw, but if I want to take
it a step further, I would have to
buy the Contra Pro that I mentioned earlier. These are the stuff
that you can do. You can change the font at
a logo and make it a custom domain because right
now it's going to be your username.contra.com. However, you saw that
even with a free version, I have a pretty
decent portfolio, and I don't really
the pro version. But you can, of course,
go for it if you want. Down here, we get
to edit the content and explore other
themes and templates. If you want to share
it with anyone, you just press this
copies the link, and you can just put
it on other platforms. Okay, the plus button is for
adding a work or service. So another one of these, if you just finish the project either on Contra or outside, you can put it right here. Now, for the projects
that you find on Contra, they're just going to be
added here are easier because all the information has been within your project
management tap. But if you've done
external projects, it's a pretty easy process. You just press on this, put in your title, skills, the tools you use,
clients, et cetera. And then they have
this new thing which imports
content in seconds. You click on that, you just
put in your project link. This could be a website, it could be a presentation
and other stuff. You can see that if
we go over here, doesn't accept stuff
from FEMA, Notion, Google Docs, and there
are some limitations. But again, if this doesn't work, you can just add it manually. All right. Let's go
back over here and take a look at the lead section. So first thing is discover. This is where you can
find other freelancers, look for them via
the program they used or their name
or the service. So let's search
Logo designer under skill. And there we go. I can see this is
also what people will see when they search
for something you have. So your rate, what you do, the three main things,
it could be more. This person has
13 more, 18 more. You could have less. The
tags that will show up here, your photo, this green
thing means your online, your rating, and
your latest project. We can also customize the
animations that people see. So it could be a photo, stop
motion, and other stuff. So over here, you can
just click on them. You can get in touch with them, look at the stuff they have, and it's pretty straightforward. You can also make a
hiring account if you want to hire and be a
freelancer at the same time. It's a pretty easy process. And if you just go over here, you can see that you can
easily switch between the two. So you can just do that here. The next thing is jobs, which is what freelancers
would have to do eventually. Over here, you have jobs and the jobs that
you've applied for. You can filter through
them, look for the roles, see if they're Contra jobs
or community created jobs. So there are other jobs listed
from different platforms, but that's if the creators
allowed them to be here. So if you're not interested
in things on Contra, you can also search for this or just search for all of them. So I'm going to go for
AL Jobs in finance, and I can find job like this. So this is the monthly
payment. It's still ongoing. The text, I can click
on it and I get more description and learn
more about the company itself. Now, when you apply,
if this pops up, this means that you're
applying for a contra job. But if it's another platform, you're going to be
directed to there. So that's the only difference. The good thing about applying
via Contra is that you get to link the projects you already have
on your portfolio, and that just saves
you the time of uploading your
portfolio separately, sending out links, explaining your work because
it's already there. And your profile is linked
when you apply on Contra. So first, it's essentially a
cover letter, calendar link. And then here, when
you click on it, it brings all the
projects that you currently have on
your portfolio. You would have to
choose the top three that match this job description, so you can't have all
of them on there. You just select them like that. You link them, and
then you submit. The person who gets
your application can click on your profile. Take a look at your
certifications, your education,
recommendations, et cetera. Now, let me show you
what the other type of jobs are going to look
like. So let's go over here. When you hit Apply,
it takes you to this company's preferred method. Now this is no problem,
but as I mentioned, you would have to add in all
this information yourself. On the top right,
we have Contra Pro. You can share your profile, copies the link.
There are messages. People want to contact
you for a project, a question, collaboration, all
of that will show up here. You have a notification center, and here I can see that I've been matched
with a few jobs. If you allow Contra, they will do the same for you based on the tags you put on your profile and how advanced you are in your
profile development. So you're going to
get these messages. You click over here, you
can mark them as red, and we also have
some new features. Now the last place is the
projects and payments. So let's go to
projects and invoices. Right now it's clear, but if you start a project or get
accepted for a project, you're going to show up
here as little boxes. You get to change your
status to maybe finished, pause, canceled, and
filter through them. Your clients will
be listed here, the companies they work for. And you can sort
them out as well. If you're not doing
it via Contra, you can put in an
external project. So start a project. You can send a proposal. So this is where you get to tell the potential client who may not be on Contra. If
they are, that's okay. What you hope to achieve
for them, your prices, the amount of time it's
going to take, your work, a contract for them to sign. And other stuff. So who are you working with? You put in your
client's email address, the name of your project. Next, we have payment detail, escrow payments,
invoice billing. This is with Contra
again, Project Scope, your deliverables, and you
can add them on like that. Can't show you the whole thing. I do have a sample project that I'm going to be proposing, and then we'll go
through that together. Let's go back over here and look for the last thing,
which is wallets. Basically, what you can do is add in your payout accounts. This could be an e wallet, your bank, paypal or whatever. You can make a keep
your payments here. I'm not sure for how long, but you essentially
have a wallet, and you manage your
payments this way. I did forget to show
you guys the invoice, so let's go back, go over here, and you can make invoices. Custom branding is
pro, but again, you can do perfectly fine
with the free version. First things first,
invoice number, your email to who you're
sending this to, the date. You can select
your project here. So you would have to add a
project there to be able to send an invoice the
items you made, how many the rate, can add more items, and you can even tax them according to whatever
country you're on. And lastly, we have a memo. Do you have any
notes or anything? You can add them here. You
preview it. Then you send it. And then all the
invoices that you make are going to
show up over here. So as you can see, it's really an all in one platform
for freelancers. And it makes everything
a lot easier. You don't have to go
over several platforms. Not even fiber or Upwork
have reached this level. So if you are starting out with freelancing or
you're struggling with it, I highly recommend
looking at this platform. And as we saw from the filters, it's in almost every category. So there was finance,
there was crypto, there was web design, copywriting, anything
you can think of. At that we've seen an
overview of everything. It's now time to start
building our profile. I'll see you guys in the next lesson where
we do just that.
4. Contra Tour: Welcome back. Now we're going to go over
to the front end. So on the left side menu, just head over down to
profile. Click at once. So in profile, this is what
the people are going to see. Obviously, they
can't edit stuff, but the first thing they'll
see is your picture, your name, get in touch, and they will also see
your recommendations. You set your rates right
here, your skills, badges, a little
bit about yourself, time zone, and links
to social media. On the right side, they
can see your work, which we'll see how we
can add them later. Can see your services, and they can see your
recommendations. Previous clients and all that, you can request a
recommendation, send it to their
email and announce that you have a new
contra profile, and their feedback would really help you
get more clients. Let's go over here, go to work. And this is your profile. Let's look at the portfolio, which is this icon right here. So if you click it once, it's going to be
about the same thing, but the templates that they have are
actually really cool. It closes for a second. So it just brings in your
information from your profile, has a nice animation. You work is listed this way, and they get to click on it to learn more about
your project. So this right now is
called a case study. I'll elaborate on that
in a different lesson. But essentially,
you have a case, which is this project, and you're basically going into every nitty gritty detail. To tell them how you did
the say logo, the website, any photos that can help
them visualize the process, that would all be here. So again, we have
the same things that we saw on the profile. You get to share this
with potential clients, so they get to click this and they will type in
what they need from you. They can also share
your profile, and it's a pretty
easy situation. No, I was only able to do
the stuff that we saw, but if I want to take
it a step further, I would have to
buy the Contra Pro that I mentioned earlier. These are the stuff
that you can do. You can change the font at
a logo and make it a custom domain because right
now it's going to be your username.contra.com. However, you saw that
even with a free version, I have a pretty
decent portfolio, and I don't really
the pro version. But you can, of course,
go for it if you want. Down here, we get
to edit the content and explore other
themes and templates. If you want to share
it with anyone, you just press this
copies the link, and you can just put
it on other platforms. Okay, the plus button is for
adding a work or service. So another one of these, if you just finish the project either on Contra or outside, you can put it right here. Now, for the projects
that you find on Contra, they're just going to be
added here are easier because all the information has been within your project
management tap. But if you've done
external projects, it's a pretty easy process. You just press on this, put in your title, skills, the tools you use,
clients, et cetera. And then they have
this new thing which imports
content in seconds. You click on that, you just
put in your project link. This could be a website, it could be a presentation
and other stuff. You can see that if
we go over here, doesn't accept stuff
from FEMA, Notion, Google Docs, and there
are some limitations. But again, if this doesn't work, you can just add it manually. All right. Let's go
back over here and take a look at the lead section. So first thing is discover. This is where you can
find other freelancers, look for them via
the program they used or their name
or the service. So let's search
Logo designer under skill. And there we go. I can see this is
also what people will see when they search
for something you have. So your rate, what you do, the three main things,
it could be more. This person has
13 more, 18 more. You could have less. The
tags that will show up here, your photo, this green
thing means your online, your rating, and
your latest project. We can also customize the
animations that people see. So it could be a photo, stop
motion, and other stuff. So over here, you can
just click on them. You can get in touch with them, look at the stuff they have, and it's pretty straightforward. You can also make a
hiring account if you want to hire and be a
freelancer at the same time. It's a pretty easy process. And if you just go over here, you can see that you can
easily switch between the two. So you can just do that here. The next thing is jobs, which is what freelancers
would have to do eventually. Over here, you have jobs and the jobs that
you've applied for. You can filter through
them, look for the roles, see if they're Contra jobs
or community created jobs. So there are other jobs listed
from different platforms, but that's if the creators
allowed them to be here. So if you're not interested
in things on Contra, you can also search for this or just search for all of them. So I'm going to go for
AL Jobs in finance, and I can find job like this. So this is the monthly
payment. It's still ongoing. The text, I can click
on it and I get more description and learn
more about the company itself. Now, when you apply,
if this pops up, this means that you're
applying for a contra job. But if it's another platform, you're going to be
directed to there. So that's the only difference. The good thing about applying
via Contra is that you get to link the projects you already have
on your portfolio, and that just saves
you the time of uploading your
portfolio separately, sending out links, explaining your work because
it's already there. And your profile is linked
when you apply on Contra. So first, it's essentially a
cover letter, calendar link. And then here, when
you click on it, it brings all the
projects that you currently have on
your portfolio. You would have to
choose the top three that match this job description, so you can't have all
of them on there. You just select them like that. You link them, and
then you submit. The person who gets
your application can click on your profile. Take a look at your
certifications, your education,
recommendations, et cetera. Now, let me show you
what the other type of jobs are going to look
like. So let's go over here. When you hit Apply,
it takes you to this company's preferred method. Now this is no problem,
but as I mentioned, you would have to add in all
this information yourself. On the top right,
we have Contra Pro. You can share your profile, copies the link.
There are messages. People want to contact
you for a project, a question, collaboration, all
of that will show up here. You have a notification center, and here I can see that I've been matched
with a few jobs. If you allow Contra, they will do the same for you based on the tags you put on your profile and how advanced you are in your
profile development. So you're going to
get these messages. You click over here, you
can mark them as red, and we also have
some new features. Now the last place is the
projects and payments. So let's go to
projects and invoices. Right now it's clear, but if you start a project or get
accepted for a project, you're going to show up
here as little boxes. You get to change your
status to maybe finished, pause, canceled, and
filter through them. Your clients will
be listed here, the companies they work for. And you can sort
them out as well. If you're not doing
it via Contra, you can put in an
external project. So start a project. You can send a proposal. So this is where you get to tell the potential client who may not be on Contra. If
they are, that's okay. What you hope to achieve
for them, your prices, the amount of time it's
going to take, your work, a contract for them to sign. And other stuff. So who are you working with? You put in your
client's email address, the name of your project. Next, we have payment detail, escrow payments,
invoice billing. This is with Contra
again, Project Scope, your deliverables, and you
can add them on like that. Can't show you the whole thing. I do have a sample project that I'm going to be proposing, and then we'll go
through that together. Let's go back over here and look for the last thing,
which is wallets. Basically, what you can do is add in your payout accounts. This could be an e wallet, your bank, paypal or whatever. You can make a keep
your payments here. I'm not sure for how long, but you essentially
have a wallet, and you manage your
payments this way. I did forget to show
you guys the invoice, so let's go back, go over here, and you can make invoices. Custom branding is
pro, but again, you can do perfectly fine
with the free version. First things first,
invoice number, your email to who you're
sending this to, the date. You can select
your project here. So you would have to add a
project there to be able to send an invoice the
items you made, how many the rate, can add more items, and you can even tax them according to whatever
country you're on. And lastly, we have a memo. Do you have any
notes or anything? You can add them here. You
preview it. Then you send it. And then all the
invoices that you make are going to
show up over here. So as you can see, it's really an all in one platform
for freelancers. And it makes everything
a lot easier. You don't have to go
over several platforms. Not even fiber or Upwork
have reached this level. So if you are starting out with freelancing or
you're struggling with it, I highly recommend
looking at this platform. And as we saw from the filters, it's in almost every category. So there was finance,
there was crypto, there was web design, copywriting, anything
you can think of. At that we've seen an
overview of everything. It's now time to start
building our profile. I'll see you guys in the next lesson where
we do just that.
5. Profile Building: General Information: So there are certain factors to consider when you're
filling in your profile. Remember, that's the
first thing people see, so we want to make sure that
it's rightfully optimized. It has the correct information
and the right information. So in this lesson,
we're going to focus on the left
side of the profile, which is your photo, your rate, your skills, a little
bit about you. And other stuff. In
the next lesson, we're going to go
over how we can fill in projects from
start to finish. So when you go over and hover onto any of these,
you can change them. The first thing is your photo. Be sure that you have a
professional headshot, and it's a photo of you alone. A lot of people have
photos where they're all the way in the back
and right off the bat, the client can't really connect with you through
the human interaction. So make sure it's
a headshot where your eyes are visible,
you're professional. And you can just take that photo anywhere.
That's the first thing. If you have a photo
where it's not of you or if it's a pattern, landscape, chances are that
the client will not find you that trustable when compared
to a photo of yourself. Next, we have this
button down here, we spoke about briefly, but it's basically
whether or not you're and I haven't come to
this platform in a while, so as you can see, it
named me as Unavailable. And if I want to get that back, I just have to
press this button. And now I'm available. If I'm not, I'll just go back in here and click
on Unavailable. The next thing is
your full name. Just type it there with
the pencil on the side. We have the get in touch button, which basically you're letting people contact you
with questions, with projects and
all that stuff. But if you don't want
them to contact you, you just turn that off, and I will also no longer
appear in Discover. So I'm not sure why
they have that option. You should definitely
have that turned on. Next is your recommendations, which we looked over here. But essentially, when
you click on them, you have the option to
ask for recommendation. So you type in your client's
first name, last name. If it's a company, you
just put one right here, person's email, someone
that you can contact. Can add their LinkedIn profile if you want to if you
have access to that. The company, it's optional, and you can also add
in your collaborator. So if you're just starting
out on this platform, I highly recommend going back
to your previous clients or collaborators and just ask
them to fill this up for you. It won't take that long, but it's going to help
you tremendously. Even if you have one
recommendations, you're already above the
people who don't have any, you will show up on the discovers or when someone searches for a
skill that you have. So it might seem a bit tedious, but it's actually
very important. Write a message. There's
one already there for you, but of course, you
can change this up. This will be telling us that
there's going to be a link. So once you have all this
and you fill this up, you simply request
recommendations. That person is going
to get an email and there's a link
for them to click on. Once they go in there,
they will get a box where they get to write about
their experience with you. And that is going to show up, as you can see,
right underneath. Let's talk about your rate. Depending on which
industry you're in, the starting rates will differ. And a lot of times you
can't have flat rates, and you got to
have hourly rates. So for those that don't know, flat rates are a certain
amount that you're going to take regardless of how many
hours you put into that work, whereas an hourly rate is for every hour that you
worked on that project, you will get X amount. So here I have 25 to 50/hour. This is industry standard for
graphic design, web design, and all that stuff,
but I believe I kept mine for graphic design. But if you're not sure of how to calculate your hourly rate, there is this tool, clockifidtM slash hourly rate Calculator. Basically choose your industry. Let's go for a gain
programmer, your location. Let's do United
States experience, say I'm one to three years. Now it's going to tell me
the average of 45/hour. This is based on my experience. If I say I'm an expert,
that's going to go up. And if I have no experience,
it's going to go down. And this is, of course,
different for every place. So former Soviet Union $21. If you don't trust this,
you can also just type in, How much should I charge for a senior or junior
game programmer in the United States
or in Canada? You're going to find tons of articles guiding you
through that process. Once you have that figured out, you simply go over here, type it in, or actually,
you would choose it here. You can also say, I
prefer not to say, but it's better to have
that upfront just so the client knows what
they're signing up for. So choose that, it's safe. Next, we have skills and tools. The first three are
what's going to pop up on the client view. So make sure you
choose those wisely. The top three that I went
with for the following, I'm sure that for a lot of you, there's more to it than
just three skills, but think about a very
specific thing that you want to focus on because the more
you concentrate on a niche, the more likely it is that
you're going to get clients. So instead of, say, being
a graphic designer, try being a startup
logo designer. So that's very specific. You're targeting a
certain audience, and people can find you
easier, and in a way, you're telling them
straight up with that title that you are experienced
in that startup field. So you can do that. Just delete it, put in. I'm going to put it in
Logo Designer for now, and that is more specific
than graphic design. After that, we have the tools. So type in the stuff
that you are familiar with or an expert in it's
safe, and there we go. The badges section
is basically things that you do and contra
rewards you for it. So we saw in the previous lesson someone had people's
choice or something. Those are stuff that
you're going to gain eventually the more you
are on this platform. But the first two things
that you should get after this lesson is
getting your payments active and verifying
your identity. If you don't have
these two badges, you can't even be trusted
because the client will eventually have to pay you and they don't even know if
you are who you say you are. So after this lesson, take the time, verify it. I believe with the
identity verification, it takes a few business days, but it's totally worth it, considering that you're going to actually show up on
your search results. Next is your about section. You can choose any tone of voice or any perspective
that you want, but try to sound friendly and approachable and not
so much like robot. Remember, this is not
exactly your resume. This is a profile
for people to come onto and trust you as
a fellow designer. Some people like to do this type of writing in third person. Some people like to bring
in a lot of numbers. Others like to just say
that they're passionate. Maybe they'll list a few of their hobbies and
all that stuff. But just take the time to
write a good about section. You can also use the help of ChatBT if you're not
sure how to get about it or view other profiles on Contra to see what's in demand. So we can actually do that. Let's go to Discover and type search for
someone in our field. So logo designer, let's
go for this person. And so they're having this
pitch that she's going to give them an increased
clarity and confidence in their brand and a
question near the end, which most likely the
answer will be yes. Let's look at some other stuff. So this person chose to
introduce themselves. So passion, confidence,
and something near the end to just pump them
up for a potential project. All right, this person is saying their title, a
different approach. But as you can see, there's
a ton of ways to do it. There isn't like
one standard here. But the main goal
is that you are a personality on this platform. So try to match that and keep it consistent across
all your designs, all your writings and
across your entire profile. Let's go back here.
Next is your location. You can type it in.
This actually helps, especially in regards
to time zone. Time zone and then the
languages that you speak, you can add as many as you
want and choose your fluency. Down here is the links
to your social media. You can put in your portfolio, another portfolio, if you
have it listed as a website. You have B hands,
LinkedIn, dribble, and all that stuff, you can add new links like a
YouTube channel, anything you want, and
people can further explore your creativity and just
be sure of their decision. That is the profile section. In the next lesson,
we're going to make a new project and see how we can make a great first
impression and basically convince the clients that
we are right for their job.
6. Projects: Alright, let's go ahead and
make our first project. This is an example of a project. The first thing people
will see is the title, the photo and a description. Down here, we have
tags regarding this project that you're
going to have to add. And if you just press
on the Plus button, you're going to be
brought onto this page. And the first thing we want
to do is to give a title, and that's going to
be about the company. So company name, and then you can put a dash and talk
about exactly what you did. So mine would be a
logo and brand design. Okay. The formatting
could be different. You could just mention what you did without the company title, especially if the
company did not give you permission to share
what you did for them. Make sure to clear that up
with them before you do this. Next, we're going to
add in the skills that are associated with
logo and brand design. So graphic design, brand design, visual design, and that's it. Now, the suggestions
are from our profile. Those are the things
that we kept in earlier. You can add in other stuff. So let's say start up. Brand design. There's going to be a
bunch of other options, but if you can't see them here, you can just create
one yourself. Add it in the design category,
and there we have it. You can still go
ahead and add more. With projects, there
isn't a limit, so you can just go ahead
and do as much as you want, but the ones you add
first are going to show up immediately on
the client side, so bear that in mind. Next we have the tools. What did you use to make
this project happen? Just add that in there. It's that framer in there, and I believe that is it. Add Photoshop as well. There we go. Lastly,
it's the client. It's going to look for
clients on Contra, but a lot of times you can't
have that possibility. If you just type them in, should be able to see them, but if not, you can just leave
it B, not have a client. But try so my client
is not Contra, and I can't add them here, but I did mention them above. Alright, now we're going to do something called a case study. So you're going to bring the client with you
from start to finish, how you went about this project, how you got started, if
there's any challenges, any sketches you want
to put in there, you can do that immediately. Now, I am going to try this because there's a
website for this project. So let's let's try it
and see what we get. Let's see if it can import it. Okay, so it's not
supported. That's fine. But let me see. The
supported versions. So if I go to Bhands and
grab one of my projects, copy that, paste it here. Let's see what that's
going to look like. So there we go. I brought
it in from Behance. The name of my project, it matches, didn't
change this that much, but it brought in my
image and those with it, and then there's a link
for the original project. All right, I'm just
going to hit Cancel, go back to profile. I think we have to start
again. There we go. Change the name. Get
rid of the pictures. Okay, let's just
do this ourself. I'm going to start in by adding the photos
relevant to this project. So let's click on Plus and get ourselves
an image. All right. Down here, I'm just
going to add in a text box so I can start talking about
what's going on here. And I'm just going to use chat GPT real quick just so we don't spend a lot of time from the lesson crafting
these things. So write a case study
for an app design, study process at Inter. Let's do the same thing. A Plant tracker app called antifi so Chat CHIPTs just going to give
you a nice outline. Of course, it's not going to be exact because the project
is different from this. But you can see how it's
giving you the basics, and I'm just going to
grab this real quick and pretend like we wrote it
together just to save time. So general overview of what this whole project
is. There's a text here. You can skip the first photo, and cool thing is that you
can keep adding stuff to it. Let's say I want a
divider, hit Enter. Add a divider, make sure
it's on a different line. Hit Enter again. Now I can separate everything. Let's add a heading
for project goals. And maybe we can do a little
bullet point, go back here. Let's go with project goals. The first one being built a minimal and modern logo
for the plantifi brand. Number two, design a
brand identity that fits well into the startup
and agritech industry. Third, let's do have
application mockups ready for developers for test application and
deliver final version. All right. So now, usually the client gives
you project goals. I just wrote these myself. But when you send a
contract to your client, and of course, prior
to that, a proposal, you are going to agree on
a mutual project goals, and you're going to get
deadlines for those. So most of the information
that you're going to add here can be found in that
initial proposal that you sent. So let's assume the stuff I'm writing is from
that proposal. Going to learn about writing
proposals in another lesson. So let's do project goals, and then I'm going to add in hit Enter twice
to get out of this. Let's add in another image for, like, the actual
logo. There we go. Now I'm going to just type
in about the process. I'm going to see if Jad JBT
wrote something about that. Okay. I didn't write about logo. I think I didn't
add that in there. But let's put in a logo has smooth edges and
follows leaf patterns. Across each letter, the
color is rich and when sood against a white background has high contrast
for visibility. For better visibility. Alright. Any other
stuff if you have a sketch of your logo designs, this would be a time to put it. Something inspired you. Put that in there.
If a client asks you to design a logo like
the Airbnb logo, that's something
that you do want to mention here because it shows that how you took a
very famous logo like that, changed it up a bit and
made an awesome logo yourself based off that style. So that's an achievement
right there, sketches. You can add those in there, too. Is there were multiple versions of a logo that you had to go
through with your client, that's something you would
want to put in here. A lot of people
choose not to put the challenges they
face in projects in their case studies
because they feel like it makes them look maybe
not as competent. But on the contrary, having a lot of challenges and showing how you go through them is a great way for the client to see you as a problem solver, and that's exactly why
they're on this platform. They have a problem,
which in this case, could be a lack of logo, and they want you to
solve it and seeing how you went after all
the challenges. You took all the feedbacks
and implemented them. That is a huge bonus. So at those over here, I saw that Chat GPT did write
some lessons learned, okay? I'm just going to copy
these two and put them in. Let's hit Enter get another
text block, paste that. If you dabble click,
you can change your style for the text.
Clean this up a bit. I'm going to put outcome after lessons
learned. There we go. Hit Enter again for
our other section. And I will add another
photo as the last thing. All right. So there
is our case study. There's also image captions. Let's type in finalized logo. Put in here buyers interface
within the application, and then home screen
for Growers interface. And then I would have to
define these two over here, so have application mockups
ready for developers. Define crowers and buyers when designing a. All right. So a bunch
of stuff like that. Let's hit the next button, which is the preview. Okay, so I'm just going
to delete visual design. It's kind of irrelevant. Preview. And now it's
going to bring me to this place where I get to decide how clients
see my project. So over here, you can see that
it added that first photo, but that's only because
we uploaded them to this project gallery. So if I just change
that to this, it's going to switch. You can also add a new photo if you don't
want any of that. Get something from Osplash, get something from templates,
connecting these two. This is not even
ready, but I'm just going to go with this one.
It looks pretty nice. And here is the
project description. So let's just head over
here to make things faster. Write a project description
for Decas study above. Let's do let's see what
the maximum is 160, write a 150 word
project description. There we go. Let's just copy
that, put that in there. I always want 60 characters. Let's do that. Again, 50 character limit.
Project description. There we go. Let's
put that in there, and then we can go
ahead and publish. And now I have my project. So all the skills, the tools I used, the exact
same order that we did. It's all over here, and if
the client likes it so far, they can immediately go and get in touch
with me. All right. Now, this is where the
recommendation part comes in. So you can see the
thing popped up above. Did you complete
this for our client? If so, you can request
recommendation. So the company Plantfy you
made this for their email, and you can just link that to the project to make a
stronger case, basically. Let's go to our profile, and there it is. There we go. We also have
the option to reorder. If you don't want this to be
the first thing people see, you can just click and track it. And move it around. Over here, you can edit or delete. So pretty straightforward,
and they rehab it. That's how you can make
a new project on Contra. Please do this with every
project you've done. Even if it's a passion project, it really helps showcase
your skills to clients, and it just takes a lot of time, but it's definitely worth it. Now that we have some projects, we're going to move
on to how we can add services with
those projects, and we're going
to take a look at that in the next lesson.
7. Services: Now, we're in the services
section, and over here, you're going to list
out the things that you want people to find you for. So I have some over here. We got web design. If you click on it,
I have the title, some of the work I've done, and I'm telling them what's
included about the service. Here are some examples
and recommendations. And then down here,
they get to contact you and also view your other
services if you've listed any. So let's close this and
create our new service. I'm going to make
one for logo design, just because we have
some here already. So click on that. And first, we're going to type
in what we're doing. So there's a logo
design right there. Next, we're going to
pitch our service. So let's go ahead and
write something like modern and minimal
logos for startups. And then the search tags. These are what the
people are going to search for in order
to find your service. So let's put Logo designer,
Adobe Creative Suite. Let's go down here and
be graphic designer, typographer and all that stuff. Next, we have the tools,
sketch, Figma Illustrator. I mean, we won't be
using Figma for that. Actually, I think
design was pretty good. And there we go. Next
we have industry. So see if they have
start ups here. Okay. Let's do local business, see what other business
stuff we have. Maybe we can go into the field we're looking
to design stuff for. So let's do agriculture, finance, a bunch of other stuff. Next is the deliverables. So what will you be giving them exactly at the
end of the project? It's to finalize logo. And here I'm going to explain
that in different formats, let's give them
PNG, JPEG, and SVG. The next thing, let's do
a brand Guide, a PDF, including the
different go styles, typography limits, and
let's see, color guide. Well, let's add a third
one for brand icons. And I think these
are pretty good. Let's just add something
extra logo motion. A ten second showcasing the new logo for your
social media page. So there are the deliverables. Once I'm done, I'm
going to hit next, and now we have
to add a summary. So let's go ahead and type in something like turn your ideas into professional and modern
logos for your business, the freedom, have the option to showcase your rebranding in a fun and engaging way through the provided
resources. All right. Next, we have
additional details. These are optional, but I do
recommend that you put them. Again, if you've used
fiber or Upwork, these will be rather
familiar to you. If you want to let the client
know your exact process, which you should going to add a plus and outline your process. First one, let's do sketch or actually Let's do an
idea call where we talk about the rebranding or
the look of the new logo. Secondly, let's do
initial sketches. Next, we can do logo drafts. Four, let's put in feedback
call and five final delivery. Something like this. Then
we have this thing for a Calendly link or
any other platform. But basically, if you are in the type of industry where
communication is important, which is most industries, you would want to make
an account on either Calendly or other spaces
and just put the link here. All right. Next, we're going
to go for the pricing. So fixed rate is a
certain price that the client is supposed
to pay to you regardless of how many
hours you spent on it. So fixed rate, then
we have ongoing rate, which you can do hourly
or per hour that you work on this per week that you
work on this. Per month. So if you want something like a salary and it's going to
be a really long project, you would want to go
for an ongoing rate. But usually with logos, you want to go with
something fixed because it's doesn't
take that long, and once a client's done with
it, they're done with it. But if it's something to make
a website and maintain it, then that's going
to be going on for as long as a client
needs that website. So that's when you
would go for ongoing. Next, we have a quick hire, which is an accelerated
version of this service. But when you turn this
on, it's going to disable this because it's going to be a really fast
project, like an emergency. So that's just going
to be your fixed rate. And I'm just going to
put it in a price right now, whatever you want. It does help to look at other profiles and
see what the standard is so you don't put
a price that's way too high or way too low. You can also check
out the calendars, the calculators
that we looked at a few lessons ago if you're
not sure what to put on here. Next, we have the duration. So let's go for two weeks. You can go for months as well. For days, let's go next. And you can highlight your
service with a photo. Okay, so I'm just
going to add one of the logo we made previously. So there we go. Is save so they can get an idea of what I'm going to
be providing for them. And let's publish. Alright, so this is
my service right now. This is what the client will see a nice photo descriptions about the service
recommendations, and, um additional information. If they go down here, there's also other stuff that we made. There is the contact for
pricing option as well, which I've said here. If your project is going to
take a long time and you're not exactly sure what the
client is looking for, like, it's something that you have to be in constant
communication about, then you would want to
put in a quote option. So after you've spoke to them, they've told you
exactly what you want, then you give them a price. So there's that option as well, and those are your services. Got some per hour, and these are starting at. So if you felt like project
took longer than intended, you can just change that. And that is how you can
make a service on Contra. It was pretty straightforward, and I do recommend
at least having the services that you've
listed over here. So, it makes sense. And there's a consistency amongst your all
throughout your profile. So now that we have
made our services, we kept in our project, it's now time to make a proposal and actually start
a project from scratch. We're gonna do that
in the next lesson, and I'll see you guys there.
8. Making Your First Project Part 1: Now that we have all aspects
of our profile ready, it's now time to actually
start a project and request to a client to
allow us to do their work. So what we're going
to do is head over to the menu on the left and go
into projects and invoices. Right now it's empty,
but we're going to make our first one right here. Alright, so there are four
steps to this, as you can see. What we're going to
do is have a client that is looking for
a sort of service. But first, let's go to Chat
GPT and get a fake brief that we can pretend
is our client and then use that brief
to fill in the proposal. So, write a fake
brief from a client. For a web design project. Alright, so Cha JPTs going to give us
everything that we need. And this just saves us
time for writing stuff. Of course, you can take time and write all of these yourself. But if you're not
sure where to begin, you can refer to something
like this to see exactly what the order is
and what the standard is. All right, so I have that ready. First thing, who are
we working with. The name of our client
is Urban Echo Living. Pasted of here. Hoops, actually, that'll be here through email. All right. So then it's going
to ask us to put in their full name because
they're not Contra. Once we're done with that, let's go for the payment details. We can do either invoice
or escrow payments. This just depends
on your project and the relationship you
have with that client. Basically, with
invoicing, you can either ask them to pay
every month or just pay once at the end of the project or pay them
they pay you upfront. With escrow payment,
they pay it upfront, but you don't get it until
you're done with the project. So the funds are held in escrow. Until project completion. If it's a new client, a lot of people rather do this just to make sure that
they end up paying you. But if it's a client
that you've worked with before or you
just trust them, invoice billing could
be a good option. So I'm just going
to go with this one just to show you, let's do both. So first, we have
fixed payments. This is a certain amount that you request once
from your client. It could be a fixed payment of 300 per month per year for
two months, up to you. But then we also
have hourly rates, which is basically per hour that you work
on that project. So it really depends
on your procedure. A lot of people rather
do hourly when they have big projects that they have to spend a lot
of time researching, brainstorming, prototyping,
and all that stuff. But some stuff like I've seen illustrations do this
a lot, Illustrators. They just take a fixed payment
at the end of the project, or if it's very long
with monthly intervals. So fixed payments, you get to decide the frequency weekly, bi weekly or monthly. Then you put in your amount. And then we have the start date. So when is this
project starting, you can click on this
to get the calendar, and then you can decide when the client will
get an invoice. So is it since we said weekly, Thursday's first
invoice is August 8, you can add an end date if
you know when this is ending. Say it's going to
be six weeks long, and it will just calculate
the end date there. But notice how it's not
letting me put that in there, and that's because if there's anything that
comes up mid project, your end date will be delayed. So until you declare that
the project is finished, the client will be
getting invoices. So we can't really put
an end date because we are not sure how long the
project is going to take, given that the client will
have unpredictable feedbacks. Then we have first
invoice payment. Do you want the full amount, or do you want to adjust it to maybe half the amount
and get the rest later? We have invoice due. Do they have to
pay it as soon as they get it within 15 days, 30 days, or you can customize it for however much you want. And that is the fixed payments. Now, hourly payments is
something different. You can again choose
the frequency and then put in a per hour rate. So I'm going to do 60/hour. And the estimated hours that I plan to work for this project, you can put it here,
the start date, and you can put in an end date. So with this one, because
you're getting paid hourly, if the client is like, Oh, I need this and that,
nothing really changes. There's just going
to be more hours. And you've already
said that over here. So let's say the project
ends October 30. Invoice do, let's
do upon receipt. Funds are not secure, paid instead once a freelancer submits hours for
work completed. Here you can see that
it is recommending an escrow payment
for new clients, but I just wanted
to show you what each of these look like. Let's try the
escrow payment now. The first thing
is the structure. Milestones are
basically the steps that you complete that you
would like to get paid for. If you don't have any
of those milestones, it's just a one time payment. Let's take a look at an example. With web design, there's
going to be milestones. There's the first prototyping, then there's a development, there's user testing, and then
there's the finalization. These four things, there's going to be more in
different cases. These are called milestones
and they take a while. So you would identify these
as the milestones and then ask for payment as
you go along these steps. So once you're done
with the prototyping, the client has to pay you X amount of your
undeclared full amount, and then you will only continue
if they pay that amount. They don't pay you, then
clearly there is a problem, and you obviously don't
want to spend time on something if you're not
going to be paid for it. In other cases, there is a
one time payment option. So say someone is asking you to draw a caricature of them. This is a one time drawing. Hopefully, so you would
just say that once I'm done with this
drawing, pay me $600. Milestones, you would
have to identify them. So let's go for let's see. Okay, so we were
doing a website. And say, these are
the milestones. So I'm simply going to copy them and then put
in design logo, topography and color palette. I say, this is it. And
then for this thing that I've done, I want $200. And the date in
which this will be completed is kind of like a deadline for this
particular step. That's going to be,
let's say, 8 August. The next step is the
enhanced user experience. Actually not sure if
these are these steps. Okay, so that's a step. Let's just do branding
and just put in prototype and for
this, I'm on 500. Let's put a random date. The initial look of the website. Let's add another one. SEO. So SEO improvements
and automation. Let's put $300 random
amounts for now. And finally, we do
final delivery. Alright, so right
now, I'm just putting really simple and
short descriptions, but in your case, you definitely want to
be more descriptive. You don't want to
have the client guessing anything because that could be a problem later on, where they will
tell you that, Oh, I'm not going to
pay you because I thought this meant that. So even if there's some obvious stuff that you
think the client would know, still put that in there, it's better to be safe than sorry. You're talking about
a logo, mention how many logo versions
you're going to get, typography, what styles, and
how will you be doing that? Color palette, how many
colors are in this palette, and what options
do the client get? With a prototype,
you can mention what they're going to get
in this draft website, so you can list down the pages. ChatPD did have them here. So let me just copy
that real quick. I'm basically
promising them this, and they should expect exactly this and
not anything extra. Let's put that there. 500 SEO. How are you going
to optimize it? If you're going to
be using plugins, third party stuff,
list them all here. Final delivery. What
are they getting exactly at the end of
this whole process? Just put that in there. I'm
just going to put $100 here. And then we have the
tax inclusive tax. You can put it here,
choose a tax here, put in ID and the rate. This is, of course, optional, but definitely look at the freelancing tax requirements in your country and
list them here, just so you don't get into
trouble with payments. Alright, I'm just
going to put that. Let's put a bunch
of numbers for now. 20% at next, and now we're going to describe the
overview of the project. So let's put this over here. This should be what
I think the overview of the project is based
on my understanding. I put it here, and then
the client reads it. If there's anything wrong, they should be telling
you that upon seeing it, and you really want to confirm that you got everything right. The signature that we're going
to get to in a bit is just going to confirm that they
agree with your understanding. So let's stop here for this
lesson just to keep it short. I'll see you guys in
the next part where we continue with our
project creation.
9. Making Your First Project Part 2: Welcome back. Let's
continue with the project. All right, once we're
done, select a contract. There's this standard
Contra service agreement. You can preview what
that looks like. And the cool thing is that it's going to input everything you've written so far into
this contract. So let's take a look here. So it's mentioning Contra, but here are the stuff that we wrote for the deliverables. There's a brand, SEO and stuff. The timeline, it listed
all the milestones, and the end date, there's the payment terms, it's describing everything, the taxes which you put
in there ownership stuff. These are just standard
freelancer stuff. However, you could
upload your own. So if you hit Cancel. Let's go back, actually. You hit that go contract. You can just upload a PDF. Maybe you have a
contract that fits your services or
your requirements. There's tons of them online. If you just search for developer freelancer
developer contracts or graphic design contracts. They're going to show up, put in your information, and
upload them here. Also put in additional terms to put terms or special scenarios. Let's say if there is no, your laptop crashed and
everything gets lost. You want to put a
term over there. If you're in a place that
has strict copyright laws, you want to indicate that here and anything else
that comes to mind, again, better safe than sorry. I'm just going to use a
standard contra agreement and a preview. So there's this option to sign on the behalf of a company. That's if you are a
agency or something, and it's not just you, but if you're just a
regular freelancer, this should be enough. I'm going to put in my name here and make sure
I check this box. And let's go to sign and
sent, and there we have it. So your proposal or projects will go under
review each time. It shouldn't take that long, but essentially they're looking to make sure that
everything is correct. You didn't miss any information, and everything is legit. So it sounds good. And once we have a project, say, it's been approved,
we have the activity, which is the steps
that are happening. So if the client signs it, there's going to be a circle
here that leave Sarah Green. Signed this contract. We can also see
that at this time, this project was created. Over here, we can see the
information we kept in, and there is a progress bar
for this whole project. It's great to keep
track of what's left. Next, we have the scope, which is the stuff
we wrote for it. So start date, end
date, the client, the total amount, the steps
that we put in there, and a project scope text. Then we have invoices, so we did indicate four
different milestones. So by the end of this project, there should be four
separate invoices. They will let you know
if it was paid or not. And you can make a
new invoice here. If there needs to
be something extra, your milestones will be
automatically invoice. But say the client asks for a whole new thing separate from the stuff you've
written before, you would just add
an invoice like so. Now, invoicing, since we're in here already, is
pretty straightforward. You put in a number,
make sure you start from something that you can keep
track of the issue date. Do received or if you want
to give them extra time. The project, you get to
choose it from here or just choose a new project,
the item that you did. So let's say, new page. Take it for $80. Just an example. Add
as many as you want. Add a text if you want to write
in some additional notes. So for the new landing
page, let's see. And then this is what
the preview looks like. If you want your logo there, you can upgrade your P. It's
going to show up right here. I'm not going to
send a new invoice, but you can see that our
project is ready to go. So I did another project just to show you that they
do refuse stuff. I made a project for myself, and it was a brand
design for this much. And you can see that
if they sense that your project is not legit like mine here, they
will reject it. If it was a problem, if you think they
made a mistake, you can just duplicate the proposal and
change something up. It will copy everything so you don't have to
start from scratch. And if they still refuse it, you can just contact
them over here. Alright, so say that
this is my project, and I'm just going
to go in there. It's evading Sarah's signature, but Sara is not real. So only once the client
signs this proposal, will you be able to
have an active project? So you can see the checklist
for pre launch and all that. You can download the contract
if you want to email it to them and just be more secure. Let's go back here. So
our project right now is not active. As you can see. But it's a really
fascinating way how they can allow you to manage
all your projects, all your clients in
a really simple way. This didn't take that much time. They already had a
bunch of templates, and I didn't have to
do that much stuff. And that concludes our
project or proposals. Once you get paid,
as we mentioned, it's going to go in your wallet. You can go over here,
and then you send the payout amount to an account
that you add over here. So they have the bank
account, debit card, PayPal, and USDC,
whichever you prefer. And everything is pretty
secure. All right. So we have our profile ready. We have a project ready. Now let's go and see how we can get more projects
with real clients. We're going to see
how we can write decent proposals for
a project that's already listed on Contra
by community members and even check out external links and try to get those
projects as well. So I'll see you guys
in the next lesson.
10. Getting Jobs: Now that our profile is ready, we can go ahead
and discover jobs and see what the lead
section has to offer. So we looked at
Discover already, but just a refresher, this is where you get to
see other freelancers, look at their rates,
what they do, and perhaps you can hire them, do a collaboration with them. And as you can see, there
are no paywalls or anything. You can just click
on any of them, get in touch with them, and this is letting us know
that they're rather active. These are the project
and the recommendations. So a profile like this is
what you want to strive for. We kind of have that going, but there was the
services that we made, and then there's the
different projects and recommendations. Over here, he has a nice
about his location, the languages he speaks, and another big thing that
I don't think I talked about is having social media or external links on your
profile just so that people have the option to research you further and see if
you're right for the job. So be sure to put
those there as well, and you can also open
them in a new tab. Now, over here, there's
a section where you can basically hire
freelancers for anything. You can look based
on people services. That was people previously, but now their services is coming up and you can see
they're different people. And they have that
quick hire option that we looked at previously. This means that they get to hire you with a flat rate and in
a shorter amount of time. So if you said that
you're going to design a website for
them for 100 an hour, there is a quick hire
option for them to hire you really quickly for,
let's say, $2,000. So you just put a
flat rate for them. But as you can see, not
every person has that, so it's an option that
you can look for. Services, you can look for the skill that
you're looking for. So let's go for
business consultant, and there is the tool option. You would want to
choose something in relation to business consultant, and they're just
going to pop up. Let's go for Microsoft Excel, one of the tools, and
this person shows up. They have a starting rate
because this is a service. If you want to see the per hour, that would be a people
search. So people search. Next, we also have a project. If you ever want to just
brainstorm and take a look at what other people
in your field are doing. You just go to projects and look for a skill
that you have. So let's go for brand designer. And I want to see
what people are doing with end design. There we go. We got some pretty
nice print work. I can look at this
for inspiration. Let's search for something. I'm going to clear everything. Go to projects, and
let's search for stamp. Design. And now I can get different things that I
can look for inspiration. So I'm just going
to go over here and look at this
person's process. Pretty nice. Here, they're sharing their work from Bhands. You can also just link it
down here if you prefer. So that is the Discover page. Pretty cool stuff
that you can do. Now, let's go to the jobs page and see how we can find jobs. So as mentioned previously, this is all jobs
and all categories, and these are the
jobs that you've applied for. So
let's close that. There's a filters option, and let's just go for
something in our field. So design all jobs, results. And I definitely want
the newest ones and not the old ones because I
want them to be available. So this one has been matched to me based on my
skills and experience. Contra does that for you. That's really helpful. So let's just go ahead and open this up and see
what we're working with. So they want brand
content stuff, telling us about the position, what I'll be doing and a little
bit about their company. There's also a linkedIn
that I could explore. As for the tags, make sure
they're related to what you do. So look at that. The language that you
should be speaking, sometimes they have
that available. And it's from June 20. It's a little late, so it's still open, though, so let's just try applying
and see what we can do. So if this is going to be a
graphic and motion designer, I want to go for something that includes motion
and some sort of, like, minimal graphic design. Now, what should you
put in this top bar? A lot of people
start by introducing themselves and saying that they're passionate about
something like that, but try to imagine yourself
as the hiring person, and that's not really helpful. They're going to get a
lot of these requests, and the first thing they want to understand from message is, what can you do that
the others can't do? So that's how I would start
a sentence over here. So if you have 20 years of
experience in graphic design, that's something you
want to put in there. If you've worked with Airbnb, you would put that in there.
Something impressive. If that is not the case for you, you can mention the amount
of programs, you know, so expert in ten plus programs. You can talk about timelines, anything that can impress them and set you apart
from everyone else. As always, we can
use the help of Chat GPT to write something
pretty decent for us. So let's go over there. For a graphic and motion
designer position include a good hookline
and keep it under 1,500. So I didn't quite
understand that. Let me go here, write a strong
proposal for a position, make a good first impression. And I'm just going to add
this so Cha GPT got us this bulky text of what we are doing and how
we're unique and stuff. But you can see that
in each paragraph, there's a way to open
this introduction. So you can go in, like, as a skilled graphic
and motion designer with 20 years of experience,
that's your hook line. You can mention the
stuff that you know, the programs and
the high number of programs that you know be
impressive to that client. You can talk about a
challenge that you've experienced in your previous
job and how you overcame it. That's another way to do it. You can also just write
something general, but those don't
usually set you apart. So choose the approach
that is most suitable for you and put them
into the request. So I'm just going to grab
something like that. Post it here. I have
my Calendly link and, of course, the linked project. Let's submit this application, and now this message was sent. This now goes into
the applied section, and they're going to
be in review until the other person will either
accept you or reject you. And those can sometimes take
a while because Contra, as I mentioned, is
a new platform. However, if you go
for the jobs that are not on Contra,
let's go over here. It does take a bit longer to apply to because there's
no automation going on, but you can see that
there are more recent. So let's go over here. I got a nice description, remote work from Europe and UK, but we're just going to look at what happens.
So let's it apply. It takes us to their page. It's no longer available. Let's try something else. Community created. Let me see if this
one is available. Alright, so we
have a Google Doc, pretty straightforward,
but you would have to put in this stuff yourself. So here, if it's asking
for a link to a portfolio, you can just share
your contra page. You just go over
here, share profile. I copies it, and then
you paste it like so. And then we have the references. You just go over here
to your profile. And copy these recommendations, and there we have it. So you can go both ways and just go for things
that suits you best. This is another Contra project. It's pretty recent. I would recommend just looking around. And if you're applied
to a bunch of, say, animator jobs and you're
not getting anything, it could be that
your profile does not have the suitable
information. So that's why it's important
to go to Discover, look for animators and see what they have
on your profile. If they put the way they showcase their work is
through the animation itself, the sketches, the challenges, then that approach is
obviously working. So look at how they are showcasing themselves
and expressing their creativity and try to replicate that in
your own style. So that's how you apply to job. It's rather simple. We had the Contra jobs
and off contra jobs. In the next lesson, we're
going to take a look at further templates and
contract styles for freelancers just
to set you up for a bigger business scale and allow you to do more
stuff outside of contra. I'll see you guys
in the next lesson.
11. Freelancing Templates: Being a freelancer can be a very exciting and
unpredictable journey. But one thing that
you need to bear in mind at all times is that you want to make sure you're consistent with the amount
of clients you get, with the amount of revenue
you get, and, of course, to have that creativity
always flowing. Now, what we're going to talk
about in this lesson will mostly cater to the freelancers
in the creative industry. So whether you are
a motion designer, web designer, graphic designer,
illustrator, et cetera. But some of it can
apply to, say, if you're a business consultant, finance manager, and
other positions. So Contra lets you do a lot
of things automatically. There's templates for contracts, there's templates for services. Your portfolio is
already made for you. May think that you
don't have to do much. But in order to take
this a step further, it's important to understand the whole concept of
being a freelancer. So you cannot rely on just one platform like this
to basically make a living. If this is a part time
situation for you, then Contra may be enough. But I'm going to be talking
about cases where you also have external clients
whether from word of mouth, your own personal website, a friend or something, you
want to make sure that you're able to not only document everything like
Contra does for you, but to make sure that there's evidence of
all the transactions, of all the agreements
and basically set yourself right for the job. Obviously, we cannot ask the external clients to come on contract before
working with you because they have to
make an account and that whole tedious process may just make them go
for something else. So in times like that, we want to have certain
templates ready to provide to them via email
and get the business going. Are standard templates
all over the Internet, but, of course, you can download and tweak them to
make it your own. And I do suggest doing that
just so it's more cater to your personal identity
because at the end of the day, you are freelancer and
that is a business. So you want to make sure
everything's cohesive. Everything is communicated well, and that starts with
a strong foundation for documentation. So HobSpot has a lot of
templates out there. Most of them are free, and
there is this one page that has 17 different
templates for freelancers. Now you can just choose
your agency over here and get the stuff that's
suitable for your need. Let's say, let's see. So you can go for Google Docs, just so you can edit them. There's mind maps, there's
a Business one pager, but there's a lot of
organization stuff that can help you communicate
how you're going to make your project
work to the client. So there's this decision tree. Say, you're proposing two different things
to your client, but they're not
quite understanding what the main difference is, you can break it down like this and basically document that you've told the client to different outcomes
depending on each decision, and this will just set you up in case something bad happens. We have job estimates, we have marketing proposals, and a lot of other stuff. There's also stuff for
invoicing that you can look if you want an invoice
separately out of Contra, there is another platform
that is fairly easy to use. So invoicla.com, it's
free up to three clients, but you get to just delete one at a new
one, and so on forth. The way it works is that you
make a template like this. You put in their address, your address, the
date, the currency. You list the items
below, total comes here. And then there's
usually a memo section down here where you get to put in your banking information for them to wre
that amount to you. Invoice is great because you can see all of the
invoices you've sent. You can label them as
paid, paused, canceled, and just see how
much you're making in a month in a
year or in a week. You can also upgrade, and it will let you
do more things. First things first,
is that it lets you customize the way your
invoices look with a logo. And there are other stuff such as unlimited clients,
tracking your work. And it's a really handy
platform for freelancers. So there are templates
for invoices, but I recommend using something like that just because
there's automation, and you get to keep all
of your invoices in one place and refer back
to them if you need to. Voice also does let
you email a copy of that invoice to the client
on the platform's behalf, so it looks more professional, but that sums up the
invoice section. Now, on Contra, you were able to make case studies free hand. You get to add a text
block, an image blog. But if you want to build
case studies on your own, you're going to need
a handy template. So there's stuff like this, but this depends
on your industry. If it's something design wise, you obviously want
to have a lot of pictures with the process that. But you could start
with something like this if it's in a
separate industry. A great place to have K studies outside of
Contra is Bhands, which great thing about
it is that you get to basically link
it to your Contra. So whoever goes on Bhands
for your Kase studies can come to Contra for
some other stuff, too. So I'm going to look for design. Just to show you
some case studies, let me take a look at
this one. There we go. So this is a great example. We have the name of the company, the client, a little
bit about them, the assignment that
they had to do. There's solution,
there's a team. You could also do this solo. And here are the pictures. So they have some
animations. Engaging. So package designs, mockups
and logos and a lot of stuff. So this is what you want
your case studies to look like both on Bhands
and on Contra. We also saw the other
day that someone linked their entire Bhands profile
on Contra as a project. So that's another good
thing that you can do. Basically, the way that
would work is that you go to your just import
content in seconds. So you copy your link and
then you paste it here. It's not going to let me do
it because I'm a viewer. And that's not my project. But if I do it with
one of photos, which is not a case study, it's going to have
a similar result. Copy that, import
content, paste. There we go. So it's
going to let me do that because it's my project. But if you do it with your own design stuff that
you've uploaded on Bhands, all of them are going
to show up here. You can title this project, my BhansPortfolio, and just
link these two platforms. Hans is another place where
you can also get clients. You can see there's
a jobs section. You have your own profile.
You have to share your work. But I would say that it's not as concentrated as Contra is. So Bhans is more on the community aspect where designers and
creatives can just, like, communicate with another, have sort of like a feed, where they see different
works to get inspired, something like a combination between Instagram and
Pinters basically. They recently added
a job section, but it's obviously not
as good as Contra. So hopefully it does improve. Alright, so that's
for case study. In terms of proposals, I would share templates, but the best thing is hat GPT, we used it in one
of the lessons, and you can tell it to give you a certain proposal within
a certain word limit. If there's a niche, you
can edit your response, and that's pretty
straightforward. By the end of this lesson, I do want you guys
to take the time to create certain things for
your freelancing business. The first one is a
contract for a design job. So I actually didn't how that. Let's go with freelancer
contract template. So there's tons of
stuff out there. It really depends on
which one you prefer. I see even wise has one. Download the one that
looks the best to you, make sure that you are able
to edit them because you're going to need to add new
pages and all of that. And over here, I
want you guys to say this is the
contract that we chose. I want you guys to put in your terms within
this template. If you do things a certain way, you have different
pricing methods, different compensations,
add those in there and have it ready
for a potential client. So define your address,
your full name, your company name, and have a template ready for each
service that you do. That would be a separate
contract for every service, so you can't really
use one for all of them because that would
be a lot of editing. So if you do multiple services, have multiple of these ready
and have them ready to sign. You can use Adobe
Acrobat for that. It's pretty easy to
change things around, and it does a great job for getting signatures
from that client. So you send it via an email. It sends it via an email and you'll get notified
once they signed it, and then you have proof that they've agreed
to your service. Having your freelancer contract your very own, one
for each service. That's the first thing
you should be doing. Secondly, is having case studies for the different works
that you've done. If you haven't done
any works before, it's a great idea
to go and look for fake clients just to have something to
showcase your skills. People are not going
to know that they're fake unless they ask you
and they look them up, which doesn't happen very often. But take the time to do that. If you have existing clients, be sure to make case studies
for them either through the free freestyling
method that we had previous lesson by
adding the blocks ourselves. You can go on the Discover page and look at how other
people are doing it, get inspired, put them
in the right order, generate a lot of mockups if you're working
with something in the creative industry and have case studies for all
of your best projects. If it's not a project
you're proud of, then it's better to
not put it on there. As we saw, you can
also put them on B hands and then just
link them to your Contra. Third thing you want to
do is to have a bunch of proposals ready to
send to the clients. So if you're looking
for jobs on Contra, there was that box where
you had to kind of sell yourself and convince
them to choose you. You can formulate a bunch
of engaging proposals, especially the first
sentence has to be engaging and have those
ready in a Google Doc or something where you
can just copy and paste it and then just personalize
it for that client. So three things. First was the
freelance contract. Second is case studies. Third is proposals. Sure you have all of that ready before you get into
any sort of job, just to save yourself
time and ensure that you're doing everything
in the right order.
12. Building a Good Resume: On some cases, we saw
that we were able to attach our resume in order
to get a job on Contra. So I'm going to
touch on that topic a bit and guide you through what makes a good resume and what
makes a redundant resume. So I'll be introducing you
to some tools that can make this whole
experience easier. If your jobs are not
found on contract, chances are that those
companies are probably using some bots to filter out the good resumes
and the bad ones. Now, these bots
are usually placed before a hiring manager
even sees your resume. So you want to
make sure you have the right things in there in order for it to get past
this first evaluation. So there's this platform
called Osulting AI. It's fairly new, but
they have a lot of stuff that you can use
to build your career. So there is resume AI. Cover letter AI and network AI. There's also job trackers
and other stuff, but these are the three that
would be relevant to Contra. The first one is a resume. So over here, you can
create a new resume or upload an old one just
to tweak it up a bit. And essentially,
it's going to take your old resume and
change the wording, contract it into
something that's easy to detect for the bots
that I mentioned. So I'm just going to
create a new resume, but you can just upload
it if you already have. When you scroll over, first, it has your information, which is from your user, we have education degree. But over here is where I
want to draw your attention. The AI comes into play when you want to put
in your bullet points. So the way this resume is
structured is that you have your company,
your job title, and 123 bullet points where it specifically states how
you made an impact. Instead of saying helped
team design website, it's going to be
talking about what were the results that
website of your input? Was it increase in
sales by X percent, X times more visitors, et cetera, et cetera. So if I just click
on one of this, it's going to open
this new place, and I'm just going
to put my role here. Let's say I was a web designer, and I just need to put
it in one sentence. So I built an ecommerce
website for a fashion company. Alright, let's generate. And it brought me
these bullet points. Now notice how what I
put in was very general. It could be applied to anyone. But over here, it's
bringing in numbers. So 40% increase
in site visitors, 20% increase in online sales. These are the type
of things that can set your resume apart. Now, you might be wondering
where you get these numbers. You just need to do some calculations in
order to get them. If it's about websites, there is the analytics
that you can look at compare the amount of visitors
before you contribute it, and then with the number
after you contribute. You can find the
difference between those two numbers and just
put that in your resume. Other industries have
their own methods, too, so there's always a way to get numbers showcase your impact. So let's say these
numbers are accurate. I could change them, of
course, I want to put them in. So let's add all three, and you can see that
I can edit them. So if it wasn't by 15, let's say's ten, I
could just change that. And with the free version, you have some
restrictions down here. You can see, these are
the stuff that I can do. But essentially, that's how
you fill in your resume. So with project experience, let me just close
this real quick. You can do the same thing with project leadership and
your own custom sections. This is a great place to either upgrade your resume
or build a new one. This company is always talking about how their
resume design and AI bot is based off hundreds of case studies and they're very
experienced in it. All right, so this
is how you can easily get a top notch resume. Some factors to keep in mind, if you have an old resume is that there are some things that you shouldn't put in there. Those are usually things
like a big headshot, some information
about your hobbies, the fact that you have
a driver's license. I've seen people put these As. Not that they're
completely irrelevant. They do talk about you, but for this particular case, the hiring manager
just wants to see what you are capable
of in a technical way. So if you are accountant, how good are you at that job? That's what they want
to see. So this resume right here is a great example. You can see that it just has the information about my
experience, education, and down here, there's
some additional stuff, but there's nothing
extra over here. Other thing that you
want to make sure you have in your resume 100% is a LinkedIn link. It may seem kind of pointless, but through your LinkedIn, people can see how engaged and passionate you
are about what you do. Do you have an active
voice in the community? How often do you share
stuff with other people? What are your accomplishments? Who do you follow? And what
groups are you a part of? These things may seem
irrelevant to the job title, but there has been a
lot of studies that LinkedIn is one of
the main things that people look for
when they're hiring. Just go ahead and make one,
put the link right here. Email is right over there. Then we have phone number
and your job title. So go ahead and make your
account in onsalting.com. AI and build yourself a resume. If you already have one, upload it and use
this AI feature to generate points.
Okay, let's go back. There are some other stuff
that we're going to look at. The second one is
cover letter AI. Now, with Contra, if you're
applying on the platform, they don't ask for
cover letters, but the external links might. So if you don't know
how to write one, just come over here and
create a new cover letter. So it's going to ask
you to upload a resume. But if I did, it's going
to automatic put in my resume experience
into a written format, and I could just
copy that and put it in my job application. There's also Chat
GPT, of course, but this is another way
that you can do it. If you want to use Chat GPT, a trick to do it is
to get a resume. I just went over here
to get a sample resume, and you basically grab you copy your experience,
basically your resume. Let's copy all of this and type in turn this resume
or turn the resume Bloom into a 500 word
cover letter for a interior Design job. Put a call in,
quote, paste, quote. So this is the resume, and you can see that it's bringing in exactly the
stuff that we pasted. So this was one of the experiences integrated
design solutions, solutions. There we go. That's one of the first
stuff that this resume had, and it made a full cover letter. Just copy this, put it
in the company name, address, your name, and
you are good to go. You can also use this as well. Third thing, which
is actually pretty cool is called Network AI. This is great for LinkedIn
where you want to meet your potential boss and network with the people
that are in your industry. So let's choose one
of the reasons. Let's say I want industry
connections, my target role. Let's pretend we're
the interior designer. All target company. Let's say I want
to work at Tesla, current job, let's just
say I'm a designer. Never going to generate. It's going to basically give
you a message where you can chat with other people as this is going to be your
connection request, basically. So let's say this is
what I want to do. You can also load more messages. You go to LinkedIn and
it's going to bring up a bunch of interior
designers. At Test lab. So they're not exactly interior designers,
but close enough. So I just have to
copy this message, try to connect with these people and get more connections, basically. So it's a
pretty cool thing. You can have a favorite spar if one message is working great, and it's automating everything. Just remember that you do have these restrictions,
but again, you can use chat GPT to help you out with
these type of messages. So write a connection, hold on. A LinkedIn. Connection request for
a developer at Amazon. See what happens.
So there we go. I'm impressed by who work
as a developer at Amazon. This is just my input. You would have to
put their job title, especially in this project. This is really important, eager to connect with
you and all that stuff. So you would go in
their LinkedIn, see what specific project they've worked with,
put that in there, and put in their full title, and you've got yourself a nice connection
request message. Can also use those type of messages when you're
on the Discover page, you're trying to connect
with different freelancers. You put in their job title, so product designer
and no code developer. Put that in ChaGPT, use that when you
want to get in touch. So you can use these
for multiple purposes. The fact that it's all run
by AI makes it a lot easier because coming up with
the right message can be a tedious task. So now that we saw what
ways we can use to get a decent resume cover letter
and networking tactics, I want you guys to take some time and build
those stuff yourself. If you have a resume,
tweak it using resume AI. If you don't have one,
make one from scratch. Try to connect with
at least 20 people on LinkedIn within that area that you're trying
to freelance in, either use the Network AI for the request message or Chat
GPT or just yourself and get those connections going because you never know if your
next client is going to be on LinkedIn or it's going to be on the Contra job page. Hope you guys enjoy this lesson. Now we're going to look
at one last thing, and that is your
online presence.
13. Online Presence: Welcome to the last lesson. We're going to be talking all about online presence today. Now, freelancing is
considered to be usually an online
business because you're connecting with clients
all over the world while you are just
somewhere on your computer. The thing that gets
you clients is how reliable you seem
on the Internet, because that is eventually
where people will find. Having a good contra page is, of course, of need, especially if you're going
to be applying to jobs. But like I said before, if you plan on doing
this full time and fully rely on freelancing
to pay the bills, you may want to
expand your business onto other platforms as well. I'm going to be talking about your online presence on
different social media platforms and how you can best
utilize those platforms to show yourself as a skilled
and trustable freelancer. So I'm going to show
you guys a case study. Basically, this person is very
famous in a design world, and her online presence is something that
aspiring designers or freelancers should take note of because not only is she
in a lot of places, showcasing her skills
in different ways, she's also educating designers
on how to get clients, how to do this design
task, and other stuff. This person is Abby Conic. Some of you may know her, but just from searching
her full name, notice what comes up first. So that is her personal website. Now, having a personal
website can be a bit costly. So if you can't invest
that much right now, just profiles on
platforms like Contra, B hands, and et cetera. So her website,
if we open it up, if you do choose to go on there, it's all about her,
and straight up, she tells you what
she can do for you. There's some testimonials
and all of that. She also sells some
stuff on her website. Now, there are
platforms that can build your portfolios in
a rather quick manner, such as Skillshare
and WIX basically no code website, web
development platforms. You can use those if you
want to invest in them. That is to showcase your
work, have contacts, and instead of people having to come to another platform to find and just type in your name
and get to your portfolio. She also has a YouTube
channel where she shares, basically tutorials or her
workflow on certain things. So I'm just going to show
you guys real quick. So she's a brand designer. If you go to her videos, she is sharing tips, her strategies, some stuff about logo design because
that's her niche, and there is plenty of
stuff to go around. Now, when you come across
someone like this, you will find them
trustworthy because they're open about
everything that they're and they're very
much active online. So anyone who looks her up can immediately
find her great work, trust her, and hire
her as a freelancer. Now, on Instagram, you usually share your
photos and whatnot, but it's actually a great place for freelancers to find clients. And with the recent
addition of reels, that work became
a lot more easy. So the way you want
to do it is make a professional
Instagram that's just catered towards your freelancing,
so nothing personal. And over here, you want
to share all your work, have the right hash
tags in the bottom, and it's a great thing to share the process of how you got
to that outcome as a real. So this is a real right now, so if you go over here, so the design process when
a concept gets rejected, it's a workflow video, maybe a sped up of her
designing this and printing it. If you show yourself
working on something, the struggles you
faced and all of that stuff that is adding
to your personal brand. Now, it does take time to
get as big as her pages, but it's something
that you should start considering if you want to do freelancing
full time. So have your portfolios
on different platforms, eventually your own website, and have a strong
social presence. You want to do longer videos, you can do YouTube as well. And since there's
YouTube shorts, what you post here can be
posted on YouTube as well. Facebook is another
great place to go to. There's a lot of communities
for freelancers on there, especially if you search
within your niche. Over there, you can
share your Contra page, your website, your Instagram, put in a contact info, and there is a lot of demand for freelancing service because
obviously it's going to cost less than them having
to go to a company. Next thing on your list should be having a strong
online presence. Go ahead and make your
professional accounts on these different platforms. If you don't want
to do all of them, make sure Instagram
is the minimum, and then you can decide whether or not you want
to have Facebook, YouTube, or Tik
Tok on there, too. Look for famous
freelancers in your field, see how they're doing it, just as we saw how this
person's doing it, get inspired and
try to replicate it with your own work
and your own style. And just by doing that, you are a step ahead in the
freelancing game.
14. Class Project: Build Your Contra Profile & First Project: Now it's time to work
on your class project. For this project, you're
going to be building and refining your profile and a
service that you have listed. That way, you're going
to be able to apply everything that you have
learned so far in the class. Your project submission
should include your profile header
and a short vo, the project or service
that you wish to offer, a description on how you plan to show that to the
client, and finally, any sort of resume or templates that you would like to attach to your submission. You're not ready to publish
that information publicly, screenshots or drafts
are completely fine. The goal of this project
is for you to build a clear and professional
freelancing presence on Contra. And once you're ready with
your drafts or full work, you can go ahead and upload them to the Class
Project Gallery. I'm going to be reviewing
that from time to time and provide you with
individual feedback, and that way you can
continue on learning and trying different
things for your future. And another plus is
that you can see how the other students
are doing in the class. This project is going to be the first step towards
your confident profile, so I wish you all good luck, and I can't wait to see
what you guys make.
15. Congratulations! What’s Next : You've now reached
the end of the class. Congratulations. You
know how Contra works, how to set up your profile, create new projects or services, how to best present yourself
to clients, and finally, how to have a strong presence on this freelancing platform. Contra becomes
especially powerful when you're treated
more than a job board. When you look at it as a place where you can
showcase your skills, build credibility, and build
long term relationships. Your next step is
to finalize and further refine your
profile and projects. You can refer back
to the older lesson, see what you would
want to change, and ask yourself
if what you see on the screen is what
best represents. If you haven't
already, make sure to upload your class project to
the class Project Gallery. I can't wait to see what
you guys create over there. Thank you so much for
learning with me, and I hope to see you guys
in our other classes.
 Skillademia Academy, Creative Skills for the Future