Transcripts
1. Introduction: Welcome to the complete
Webflow bootcamp. Have you ever wanted to build modern websites but
didn't know how to code? Do you want to convert
your web design to a fully responsive
website without code? Hi, I'm RH, I had said it
and I am a UI UX designer. I also teach UI UX design
and web development at the University of Economics and Human Sciences in Warsaw. In this course, I'm going to
show you how you can convert any design to a fully functional
web site without coding. Yes, you heard it right? Without writing a
single line of code. If you have no prior
development experience, don't worry, because this course covers everything
you need to know. First, we will dive into the basics of web design
and web development, and then we will
get into Webflow. Webflow is a powerful
tool that lets you build modern websites completely
visually with no code. It's been used by famous
companies like Dell, Upwork, Zendesk, and many more. We will go through web
flows, elements, styling, animations, interactions,
and so much more. Once you learn the
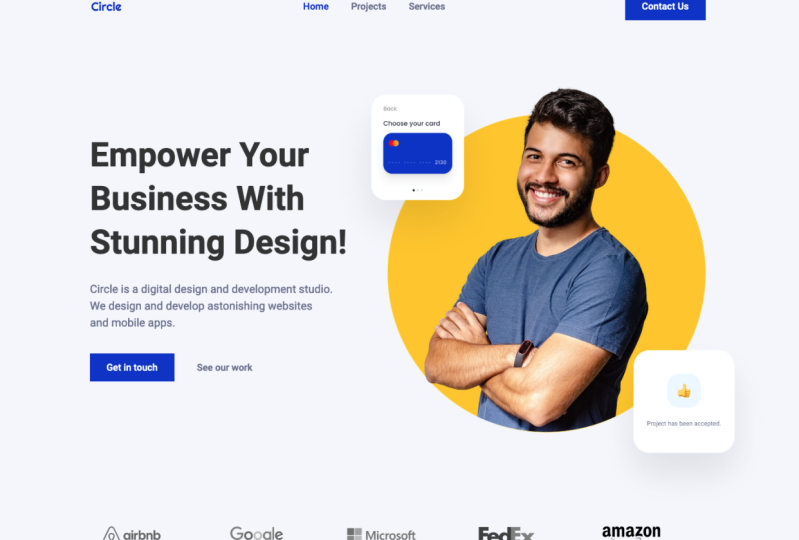
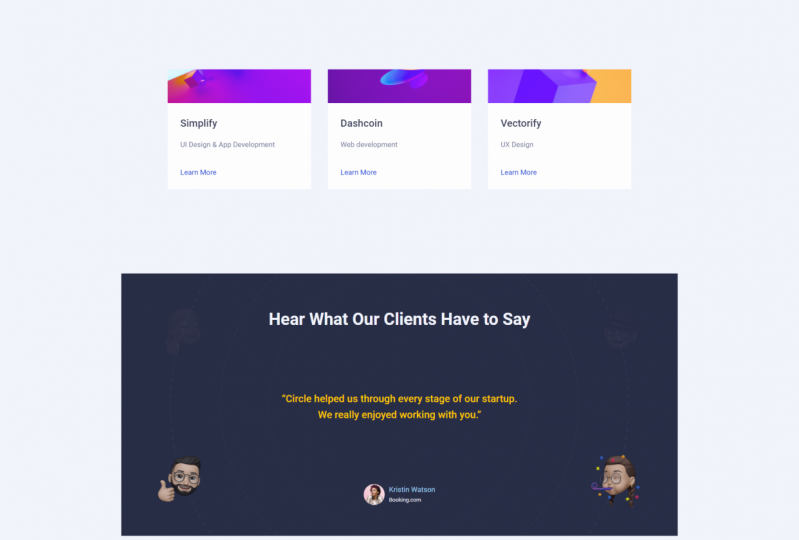
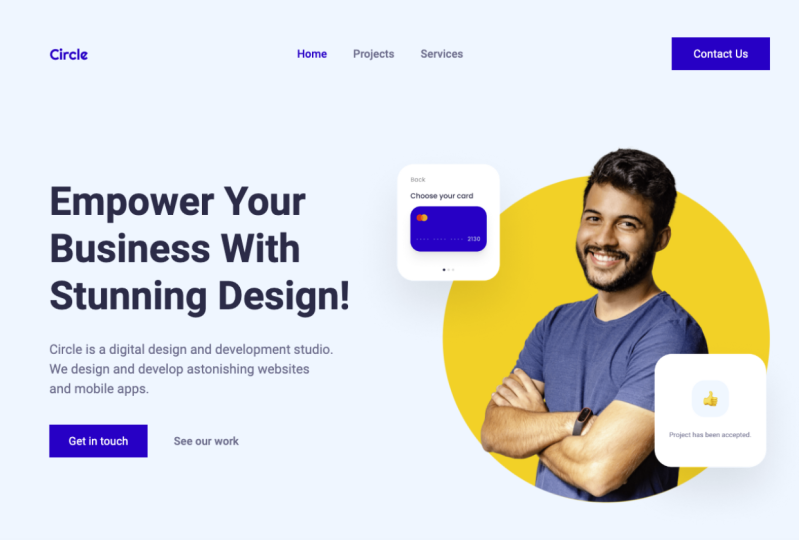
basics of Webflow, we will start building
a complete website for a design agency
from scratch, you will learn how to convert your Figma design
fully responsive website with complex animations and interactions that
worked best on any device, no matter if it's a mobile
tablet for computer. Next, I'll share
some advanced tips and tricks to help you level up your web design skills and become a world-class
web developer. In the last part of this course, I'll teach you how to run
your own web design business. As a freelancer, you will learn how to get your
very first client, how to price your work, how to prepare a great
proposals and so much more. This course is aimed
at people who are completely new to the
web development world. If you're a complete
beginner or a UI UX designer who wants to build amazing
websites without code. This course is for you. So if you are ready to become a no-code developer and builds stunning
websites in no time. I'll see you in class.
2. Introduction to Webflow: What is workflow? Well, workflow is a
modern and powerful tool that lets you build professional and
costume design websites visually with no code. Don't get me wrong. It's not another
template-based website builder like Wix and Squarespace that
limits your creativity to a great extent. In fact, it's an
incredibly powerful tool that lets you code visually. Yes, you heard me right? With Webflow, we can actually develop custom
websites visually. It doesn't come with
all the limitations of those template
based websites. When it comes to
web development, there is a wide variety of
ways to develop a website. We can build a website
by writing custom code, I mean HTML, CSS,
and JavaScript. We can use
template-based platforms like weeks, Squarespace
and WordPress. Or we can use Webflow. If you don't know how they
differ from each other, don't worry, let me
elaborate more on that. The first option requires
knowing how to code. You need to learn HTML, CSS, and JavaScript
to create a website. The second option
doesn't require coding, and it gives you some pre-built
templates to work with. This option is suitable
for anyone who wants to build a simple
website quickly. But the trade-off is the
limitation that it comes with. Last but not least, you can use Webflow to
actually develop a website from scratch without writing
a single line of code, and most importantly,
without any limitations. But how is that possible? Well, when you're using Webflow, you're actually coding a website from the ground
up, but visually. So that's why Webflow
allows you to build professional and
custom-made websites without any limitations.
3. Environment of Webflow: Hey, in this video
we're going to talk about the environment
of Webflow. I'm going to show
you how you can register and how you can login, which plan should you use, and also how the whole
interface looks. So without further ado,
let's get started. First of all, in order
to work with Webflow, you need to register, okay, if you hit the Get Started
button right at the top here, you can sign in with
your Gmail account or you can register
with your email. It's totally up to you. Once you've signed in, you will be redirected
to the dashboard. In order to use Webflow, you can use different options. You can use the free account or you can use one
of their plants. So what's the difference? Let me show you which plan you need in order to proceed
with this course. Basically, Webflow has site
plans and account plans. We're gonna dive into the
details later, but for now, you need to know that Webflow offers three different
account plans. The starter, which
is free, light, which is $16 per month, and Pro, which is $35 per month. For this course, you need
to use a free plan, okay, the starter plan, you can
create up to two projects. There are some limitations, but it's perfect for the
educational purposes. And in order for you to get
used to the tool and practice later on when you want to create projects
for your clients, you can upgrade to the
lite plan or the Pro plan. We're going to talk
about it later. But for now, just register
and use a free account. Once you are registered, you will be redirected
to this page. This is the dashboard. You can hit the
new project button and you will see this page. There are some free
templates that you can use and there are also
some paid templates. However, for this course, we're not gonna use any of
these templates because we're going to learn how to build
a website from scratch. So we always need to
create a blank side. You just need to
select this option, the first one here you can
specify your project's name. By default. It gives
you a default name. However, you can specify a precise name for
your project as well. Let's call it new. I'm going to hit Create Project. And there we go. Here is the designer. Actually, we can divide the whole interface into
different main parts. On the left side, you can see that
there is the toolbar, Okay, we have different options. Then we have the
navigator, okay? Right now the
navigator is selected. We have the Add option that includes some elements that
we will talk about later. We have symbols, we
have again navigator, I already showed you. We have pages. We have CMS collections, we have e-commerce, and
finally we have assets. And last but not least, we have settings at the top, we have different options. These are our breakpoints that we're going to
talk about later on. But as you can see, we have
desktop, we have tablets, we have mobile landscape, and we have mobile portrayed. So this basically determines
the dimension of our screen. On the right side here you can see we have
different options. We have the Publish button, which is so important. We have to share project button
and we have export code. And on the right side we
have the style panel, we have the settings, we have the Style Manager, and we have the
interactions tap. We're going to
talk about each of these tabs specifically
in detail later on. But for now, you
just need to know what the interface looks like. Right in the middle, we have the canvas. This is basically
where we design our website and
build our website. It's an empty canvas,
as you can see, since I selected this
body element here, you can see that the style
panel has some properties. Now, these are the CSS
properties that we can modify and use for our projects. Each project has a
project settings. So if you head over to
the top left corner, you can see this a
w or Webflow logo. If you hover over this logo, you will see this
hamburger menu button. If I click on that, we have three options. We have Dashboard. If you click on
that, you will be redirected to the dashboard. We have Project Settings
and we have editor. For now we're not
going to talk about Editor because we have a
specific video for that. But right now, I'm going to show you how the Project
Settings looks. If I click on that, we will be redirected to
the project settings. Here we have different options. We have general, we can
specify the project name. We have different options here that we're not going
to talk about now. We have hosting, we have editor, we have billing, SEO, forums, funds, backups,
integrations, and custom code. Once we start creating
our projects, I will show you how you can
use these options one by one. But for now, you just
need to know that the project settings
exist actually. And there are some options that you can get access to here. If I click on Designer, we will be redirected
to the designer tool, which is this
environment are right, that's all for this video. I'll see you in the next one.
4. Introduction to HTML & CSS: What happens when you
open up a webpage? When you visit a webpage, the browser actually
renders the code written by the programmer
and shows you the result. So for instance, if you go to your favorite website and
inspect the code yourself, you can see how that
website is built. You can also modify that website's content
to have some fun. But locally, because once
you refresh the page, all your hard work is gone. So you may ask, why are
we talking about this? Aren't we supposed to build
websites without coding? Yes, as I promised, we're not going to write
even a single line of code. But as a web designer
and web developer, it's crucial for you
to understand how a webpage is built
in a structured. When it comes to
web development, there are two main
components that each webpage comes
with, HTML and CSS. Html stands for Hypertext
Markup Language. And it's all about the contents of a webpage that basically tells the browser what
to show on the page, headings, images,
videos, buttons, etc. This is a simple HTML
code and as you can see, it includes some
elements like tidal, body, H1, and p. These
are called HTML tags. This is how a browser understands what it should
display to the user, but this page is boring. Don't you think so?
Well, we can style each of these tags to make the
contents look more interesting. Back in the day, whenever
we wanted to style our webpage is we needed to
style each tag one by one. And whenever we wanted to
modify our styles, guess what? We had to change each
inline style one by one. It's not very efficient. That's why we use CSS. Css stands for
Cascading Style Sheets. It allows us to create our styles once in
a separate file and reuse them again and again
and again in our HTML file. It takes all the information about color, positioning, size, alignment, topography,
and so much more, and it puts them into a
separate style sheet. Now whenever we want
to make changes, we do it once and the
change is applied to all those HTML tags
simultaneously. But how does Webflow work? Do you remember when I
said we are going to code, but visually, I
truly meant that. Let me show you how it works. Here is the designer and there
is nothing under Canvas. If you go to the Add section, we can find some elements. These are the exact
HTML elements, or let's say HTML tags
that we talked about. We have Section D, block, heading, paragraph,
and so much more. Here in the navigator, we have the body element. Do you remember the body
tag in the HTML file? This defines the main
content of the HTML file. Any HTML file has a body tag, and that's why when you
create a page on Webflow, you will always see the
body element there. By default, we can add other HTML tags inside
the body tag, e.g. if I go to the Add section, I can drag and drop
a heading element into my Canvas and
look what happens. The heading is inside
the body element. So instead of writing
a bunch of codes, we just drag and drop production ready code that we
can interact with. What about styling? Well, if I select
this heading and head over to the style panel
on the right side, I can easily modify the CSS properties of these particular
element just like that. And to prove that
you're actually coding the page from scratch, I can click on this
CSS Preview button at the bottom left to
preview my CSS code live. If I change the color
of this heading, you can see that a new
property has been added here. So now I hope you have a better understanding
of how a webpage works and most importantly,
how Webflow works.
5. Introduction to the Box Model: Here is a simple
webpage that has some HTML elements like
heading, paragraph, an image. The box model actually defines how the layout
works on the web. For instance, here, each of these HTML elements
is treated as a box. It's like a boundary
on each of them. All these boxes can
be positioned and aligned according to the CSS
properties we give them. But why does the
web work like this? Can we just create a webpage
like a PowerPoint slide? Well, we can, but the problem
is when you design a snide, it's not responsive and you design it for a
specific dimension, but it's not the
case for a webpage. When building a website, we always want to make
it responsive so that it could be displayed
perfectly on any device, no matter if it's a MacBook, iMac, iPhone, you get the idea. So using the box model and CSS, we can make
responsive web pages. And other important thing
about the box model is that we can put boxes
inside other biases. And this way, we can
decide whether they stack on top of each other
or next to each other. We can also align
them however we want. If we want to
modify the spacing, we can use margins and padding. Margin adds space
outside the bikes, while Padding adds
space inside the box. Let's take a look at
a real-world example. Here we have different cards and inside we have
different elements. In fact, they are all
considered as boxes that are positioned either next to each other or inside each other. We can modify the CSS
properties of each of these boxes to control the styling and layout
of every element. Let's take a look at
some famous websites. As you can see,
all these websites are built using the box model. And if you want to become a professional web
designer and developer, you need to understand how the box model works thoroughly.
6. Webflow Elements: As you remember, we talked about HTML elements or
let's say HTML tags. And in Webflow, you can find
them in the Add section. On the left side, if you
click on this plus icon, you can go to the Add section. And here we have
two different tabs, elements and layouts. The layouts tab actually
includes some pre-built layouts. You're not going to work with
these pre-built layouts in our projects since we are going
to create our own layout. But you just need to
know that they exist. If you go to the
Elements tab, however, you can find all
the HTML elements here we have different
sections like layout, basic topography, CMS, media,
forums, and components. We're going to
talk about each of these elements specifically
in the upcoming videos. But for now, I'm
going to show you how you can use these elements, how you can add these
elements to your Canvas? Well, in order to add an
element to your Canvas, you can simply drag and drop that particular element
here, just like that. And as you can see, now we
have the section element. We can see all our elements
right, in the Navigator. If you want to find
the navigator, you can click on this icon. So if I go to the Add and try to drag and drop
another element, e.g. a. Container. There we go. You can see that the
container has been added right below the section. You need to understand that in web design and web development, the hierarchy of
our layers matters. So e.g. here, when
we have a section, as you can see, this section
is placed right at the top. That's why when you take
a look at the canvas, you can see that the section has been placed above the container. If we want to put the
container above this section, I can simply drag it and drop it right above this
section. There we go. It's place has been changed. Each element has, it's a specific icon right
next to its name. So e.g. here, as you can see, the container has a unique icon and a section has
its own unique icon. It's a very good way to find out what kind of elements
you are using. As you remember, when we
talked about the box model, I mentioned that you can put
boxes inside other boxes. So let's take a
look at an example. If I select this container, I can drag it and drop it and
put it inside the section. There we go. Now, this container is nested inside this section. You can see it has
been indented. I can add another
element, e.g. a. Diblock inside my container. Here. There we go, and it has
been nested as well. So the container is now the parents of these
D-block element. And D-block is the child
of this container. The container is the
child of section, and the section is the
parent of the container. So I can easily
collapse and expand these elements if you have multiple sections and
multiple elements, just like this, and you want to collapse all at the same time. You can click on this
icon right at the top. And if I click on
it, once again, I can expand them all. You can expand the Navigator as well by clicking on this icon. And you can pin the navigator just like that in
the upcoming videos, we're going to dive
into Webflow elements. So see you then.
7. Div Block: What's a div block? Well, I do blog is the most
basic blocks on a web page. If you go to the Add section, you can see that we have
different sections here we have layout, basic
topography, etc. And under the basic section
we have different elements. And the first one is
called div block. If I try to drag and
drop it into my Canvas, you can see that the DFF block has been added to
my canvas here, and it takes up the whole
width of the canvas. A def block actually is sized based on that content inside. However, here, as you can see, it created a boundary
and it seems that there is a
some space inside. However, if I preview that, if I just click on this icon, you can see that
nothing is here. It's actually an empty box. It's a dynamic bikes
because when you add more and more
elements into it, it's size will be
changed accordingly. So let's give it a try. I'm going to go
ahead and try to add a heading into this diblock. Just like that. Now, I'm gonna go ahead and
add a paragraph. There we go. And let me go ahead
and add a button. Okay, cool. Now these three elements
are inside this div block. And as you can see, that def block size has
been changed accordingly. If I remove one of
these elements, you can see that the def
block size has been changed. Again, a def block
generally can be anything. It could be an image, it could be a line. But most of the time we use
a div block in order to align elements and group
elements together, e.g. here we group these
two elements together. And whenever we
want to modify e.g. the margin of this
particular div block, we can just head over
to this pasting section on the Stein panel here. E.g. I. Can set the top margin to 70. And there we go. Both these elements
have been moved because they are grouped
inside this div luck, although a def block takes up the whole width of the
canvas by default, we can also give it a
specific width and height. If you head over to
the Size section on the style panel here, you can specify a
particular width, e.g. 400 pixels. And there we go. We can modify the
height as well. You can set it to 300 pixels and the deep blacks
height has been modified. Now this div luck has a fixed width and height
depending on our needs, we can give our div blocks
specific width and height. As I mentioned before, a def block can be
anything e.g. an image. Let me go ahead
and drag and drop another div block here
right below this paragraph. And let's suppose we want
to add an image here, e.g. we want to make this
diblock an image. We can go to the side panel, we can scroll down. And if we go to the
background section here we have image and gradient. If I click on this
plus button from here, I can click on Choose image and I can get access to
all my assets, e.g. let's use this
image and for now, we're not going to talk
about all these settings, but let me change the
position to center and cover. There we go. As you can see, we
have this def block, but this def block actually
has an image bank around. If I want to make it bigger, I can set the size, e.g. the high to 400 pixels. Of course, we are
going to talk about all these properties actually, these are CSS properties
in the upcoming videos, but for now we just need to focus on the web flows elements. We need to understand how
they work and why do we need them in order to build a
professional and modern website.
8. Section: What's a section? In this video, we're going
to talk about sections. If we go to the
Add section here, under the layout, you can see that we have
different elements. We have Section container,
grid and columns. And here I'm gonna
go ahead and add a section into my Canvas. Let me drag and drop a section
here, and there we go. The section has been added. Well, a section
actually takes up the whole width of
the browser window, but wait, isn't it
like a div tag? Yes, it actually
acts as a def block. However, with one difference, the only difference between
a section and a diblock is actually the meaning
of the content that you put inside
these elements. When we use a section, the content inside should
be logically connected. E.g. when we design a website, we may have different sections. The hero section, the client section, the
testimonial section. And each section has
some content, e.g. a. Title, a subtitle, a button. When we group all
those contents, we put them inside a section, so we group them using a
section, not a diblock. For anything else, we can
use a div block, e.g. when we want to
align some elements, when we group some elements
in order to style them. So this is basically
the main difference between a DIF block
and a section. When you start
designing our projects, you will truly understand what's the difference between a
section and a diblock. But for now, let me
tell you that we use sections to structure
our websites. Basically, for any
website, for any project, what you need to do is add a section right after
the body element. So here we need to add a section and we can
add our content, our div blocks
inside this section. So let's give it a try. I'm going to take
this div block. And since this div blog
has a specific height, let me set it to auto. I'm going to set
the height to auto. And then I'm going to drag and drop it inside the section. And there we go As section is sized based on the
content inside. So to understand it better, I'm going to select
this section and I'm going to head over to
the style panel on the right side and let me
modify the background's color. Okay, I'm gonna go to Background and by default it's
set to transparent. I'm going to set it to
something else, e.g. this purple. And now you can see that
the height of this section is determined by
the content inside. So if I select this div, like this image and modify
its height to 200 pixels, you can see that the height of this section has been
modified as well. So you should always keep
in mind that the height of the section is determined
based on the content inside. As I mentioned before, a section by default takes up the whole width
of the canvas, or let's say the browser window. However, we can modify that. We can override these preferences
and these properties. If you head over to the
size here, let me show you, I can set the width
to 500 pixels, e.g. just like that. So you can easily override
all these properties. We will talk about these
properties later, but for now, you just need to know that we structure our websites
always like this. After section, we usually
put a container and then we will add our content
inside a container. We will talk about the container
in the upcoming video.
9. Container: What's the container? In this video, we're going
to talk about containers. If I go to the Add
section, as usual, I can head over to
the layout section. And from here right
next to the section, I can find container. As I mentioned in
the previous video, when we design a website, we try to structure our
website in a particular way. Actually, we try to keep
everything organized. That's why we have all these
different elements here. Basically sections and
containers are just div, blocks with some
predefined styles. E.g. a. Container has a specific width. If I try to drag and drop a container into my
Canvas. There we go. As you can see, it's just a simple div that
has a maximum width. It has a specific width
of 940 pixels by default. So if I want to keep
everything organized, I can take this def block. Okay, I'm going to set the
width to oto just like that. And as you can see,
this div block, since the width and
height are set to auto, takes the whole
width of the page. And if I want to keep everything neatly organized in the center, I can select this
div like and drag it and drop it
into my container. There we go. Now everything
is placed inside this container that
has a default width. Of course, you can
go ahead and modify its width if you want, e.g. for larger screens, you can head over to
the size property, to the size section here and set the maximum width to 1,100. Just like that, it's totally up to you how you
want to use them. You can decide not to
use a container and just use a div block and set a
specific width for that. That's totally fine. You just need to
know that these are just pre-built elements in order to make our
lives much easier. So I hope now you know, the real difference between a section container
and a diblock. They are basically all the same. They are variations of a div block with
predefined styles, as I mentioned in
the previous video, whenever we want to
design a website, whenever we want to
build a website, we first use a section, then we use a container and inside we will
put our elements. So this is the best way to organize and
structure a website. And if we need to
create more sections, we can simply drag and
drop more sections here. Or we can just simply copy and paste our sections like that.
10. Grid: What's agreed In this video, we're gonna talk
about CSS grids. If you head over
to the Add section under the layout category, you can see that we
have a grid element. It's actually a CSS grid. It's not an HTML tag
because basically we can turn any bikes into a grid. We will talk about it
in the upcoming videos. But for now, let's go
ahead and drag and drop this element
into our Canvas. There we go. Here. I have a section and
then I have a container. And inside this container, I'm going to drop my grid. As we can see, a grid
is nothing but a guide. Grids help us organize our
content in a dynamic way. So when we have multiple
images, for instance, that we want to organize
dynamically or even when we have some deep likes that we want to organize dynamically and neatly, we can use greets. You need to understand that
a grid serves as a guide. So it's like a placeholder
for our content. As you can see now we
are in the editing mode. So here by default we have
two columns and two rows. And if you take a look
at the right side, you can see that here we can modify the preferences
of our grid, e.g. we can modify the gutter amount, which is the spacing
between rows and columns. By default, it's set
to 16 by 16 pixels. You can set it to
whatever amount you want. You can also modify it here
manually, just like that. And if you want to add more columns and more
rows to your grid, you can simply click on this plus button right
here to add more columns. If you want to add more rows, you can click on this
plus button here. Alternatively, you can
hit this Plus button right in the settings to add
a new column and four rows, you can click on
this plus button. Once you've created your grid, you need to exit the edit mode. To do so, you can press Escape
on your keyboard or you can click on this blue Done
button at the bottom here. Alright, as you can see, I already created for
simple div blocks, and each of them
includes a heading, a paragraph, and a button. So what we're gonna
do is drag and drop these deep blacks into our grid. But first, let's see how
many div blocks we have. We have actually four
different IP blocks. Therefore, I'm going to
select my grid element here. Then I'm going to click on
this read or pinkish button. So since we have four
different div blocks, I'm going to remove some
of these columns and rows. Let's remove two of these columns and two
of these rows, okay? Now we have a two-by-two grid. We have two columns and
two rows. That's perfect. Now I'm going to adjust
the gap or the gutter. So let's set it to 20 for
both columns and rows. Great. I'm going to click on this
Done button, and that's all. Now what we need to do
is select our diblock, drag it, and drop it inside
the grid, just like that. One thing to mention
about grids is that when you add content
to your grid, the content will take the next available
cell within the grid. As you can see, the first
diblock took the first cell. And now if I select this, the Blog and drag and
drop it inside the grid, we can see that it took
the next available cell. Of course, if I modify their
order in the navigator, you can see that their place
changes just like that. Okay, Now let's
do the same thing for the remaining
two div blocks. I'm going to select them and
drag and drop them here. There we go. Let's do the same thing for
the last diblock. Are right, cool. Now our div likes
are inside our Grid. However, if I select my grid and if I go
to the Edit mode, you can see that these
cells are bigger and this def blacks don't take up the
whole width of each cell. That's because I gave these
deep blacks a fixed width. So if I select content
and modify the width from 400 to Auto,
see what happens. Now it takes up the whole
width of that cell, and that's exactly what we want. If you want to modify
the height of your grid, you can select your grid and set the height to four incense, 700 pixels, just like that, or I can set it to 500 pixels. Let me remove this
section for a second. One of the most
important things. About grids is that they
are way default responsive. So let's take a look. If I hit the Preview
button here and I tried to modify the
dimension of my screen. You can see that these
contents are dynamic. They are responsive by default
because we used a grid. That's why reads are so powerful in terms
of responsiveness. If I go to the
desktop base point and I want to add some padding, I can select the container. And then here I can
set some padding. Of course we will talk about
all these properties later. But I just want to show
you how the grids work actually in terms of
responsiveness. There we go. But what if I want to modify
the layout of this grid? That's so simple. I can select my grid. I can go to the Edit
mode. From here. I can modify the number
of rows and columns. Let's suppose I want to stack
these content vertically. So I just need to
have one column. I'm going to remove this
column and I'm going to add two more rows and hit done. And it's done. As you can see, now we have four different rows that are
placed on top of each other. The yard dynamic. So if I try to check
its responsiveness, you can see that they are
steel dynamic on all devices. But what if you
want to make one of these div blocks take
more than one cell, we can do so as well. Let's add one column and remove these additional two
rows just like that. And I'm going to remove
heading for this last block. And suppose that
you want to take heading three, this last blog, and you wanted to take
the last two cells, okay, to do so you can use this handle right at
the bottom corner. If I left-click on that and
drag and drop, there we go. Now it could easily spend the content to take
up more cells. And the good news is, it's still dynamic and
it's still a responsive. Let's take a look. Sometimes we might need to
place our content manually. As you remember,
I mentioned that when you add content
to your grid, it takes up the next
available cell by default. But what if I want to
place them manually? Well, we can do that. Let me undo the operation. So what if I want to place this last def block here
into this last cell? Well, we can do so first we need to select
this div block. And if we head over to the grid child settings
on the right side, you can see that by default, it's position is set to auto. If I set it to manual, now, I can just drag it
and drop it here. Now, we could easily position
our content Manually, are right, I hope now you have a better understanding
of grades. We're going to work with
grids at large when we start creating our projects. So see you then.
11. List: There are times that we want at least some elements
in our project. No matter if we have a list of images or at least of items, that list element
could be so helpful. So if you go to the Add section
under the basic category, you can find a list. If I drag and drop the
list into my container, you can see that by default
it has a three list items. And as you can see, this list
settings window pops up. We have two types of lists. We have the unordered list
and the ordered list. The difference is this. When you use an unordered
list, there is no number. If you set it to ordered, you can see we have numbers. Let me select this list and modify the color of this text. White that you could
see better, perfect. If I set it to an order, you can see that we have on the bullet points in
terms of styling, we have no bullets
at all and bullets. So let me double-click on the first list item
here to add something. Let's write elements. For the second one, I'm going to write
something else. Let's write web design. For the last one, I'm going
to write web development. Alright, great. So now we have three
different list items. And if I want to add
more lists items, I can simply copy
and paste it using Command C and Command V
or Control C and Control will be alternatively, you can go to the Add section. And under the basic category
you can see that we have a separate element
for the list item. You can drag and drop a list item only inside
a list, just like that. But can we actually
lists some images? Of course we can. Let me show you. I can go to the Assets
and I can drag and drop an image here. There we go. I'm going to decrease
its width to, let's say, 300 pixels. So no matter what kind
of elements you have, you can always list them. If you want to open up
the least settings, you can select
your list elements in the navigator and you can click on the Settings icon
right next to the list name. There we go. Alternatively, you can select your list elements and
you can head over to the elements settings right next to the style panel right here. And we have the least settings.
12. Link Block: What is a link black? Well, a link blog is a
clickable container, so any content that
you put inside the link black will
become clickable. It's very useful because sometimes we might
need to redirect users to another page or
another section of our website, or even to another website. And we can do so by
using a link blog. If you go to the Add
section under the basic, you can see that we
have this link block. Let me drag and drop a link plug right
into this container. And as you can see,
it's just a div blood. However, it's clickable and this link block
has some settings. So by default, you
can see the URL here. You can specify the
URL that you want to redirect the user to, e.g. here I can write google.com. I can go to the page when we create more pages for
our website, e.g. contact page,
registration page, etc. We can choose our
page here when we create different
sections in our website, we can use this
page, section, e.g. when we create a nav war, we may have some menus. And when the user clicks
on one of those menus, the user should be taken to a specific section
of our landing page. We can choose a section here. We will talk about
all these settings later when we actually
start using them, you can set an email address, the subject of that e-mail. You can set a phone number. And finally, you can even
choose an attachment. You need to remember
that you can use a link blog for anything. You can use it for cards, you can use it for a specific
element, an icon, anything. So let me go ahead
and add a heading inside here just to
show you how it works. And as you can see,
as soon as I add the heading here into
this link block, its style has been changed
because now it's a link. I can go ahead and manually
override these settings, e.g. under the typography
section on the side panel, I can set its
declaration to non, and let me modify its color
to white, just like that. And if I preview our project, now you can see that as soon as I hover over this heading, the cursor has been
changed to a pointer. Now, if you can't
see the pointer, probably it's because
of your browser. You can clear your
browser's cache, or you could try it out
on another browser. But a link block automatically changes your cursor
to a pointer. And if I click on that, nothing happens because we didn't specify a link for that. If I select this link block
and modify the URL, e.g. let's set it to google.com. Now, if I preview that
and if I click on it, I will be redirected to Google. So in a nutshell, a link block is a
clickable diblock. Well, there are times
that we want to convert our div blocks into a link blog. Instead of creating a link
blog from scratch, Of course, we can go ahead
and drag and drop a link blog here and add a div block inside and design
our cards and elements. But sometimes we might design our card or
our elements first, and then we might need to
convert it to a link blog. How can we do that? If we select our div block, e.g. here, this card, and if you right-click on its name
right on the canvas, we have many options. The second one says
Convert to link block. If I click on it, there we go. Now this tiling of
these elements, the child elements has been changed because now it's a link. Of course, I can go ahead
and override these settings, but I'm not going to do that because I just
want to show you how the link block works
if I preview my project, now you can see
that this card is clickable just like that. However, the other cards or not, because the other cars are
just simple div blocks.
13. Button: Almost all websites use buttons. Buttons are so important when
it comes to web design and web development because they
let users take actions. They are generally used
for our call to action. If you go to the Add section, we can see that we have the
button under the basic. Actually, a button is
nothing but a link block. It's just a clickable box
with a text block inside. If I drag and drop this
button into my card, you can see that it has
some default stylings and I can give it a
URL just like a link. Like we have all these settings that we already discussed. But for now, let's go
ahead and preview that. As you can see, the
cursor has been changed because it is indeed
a link block. We can modify all the properties of this Watson elements, e.g. we can modify its color
here in the style panel. If you double-click on that, you can modify the text. Let's write signing,
Just like that. But sometimes we might need to create a custom button, e.g. if we want to add an
icon to this button, we can't use the
button elements. We need to use a link block, and then we need to
add a text block inside and also an image. Okay, so this is
how you can create a custom button and we
will talk about it later. The button element
has different states. We will talk about
states in detail, but for now you just
need to know that each button has some states. It has none hover, pressed, focused and visited. So if you head over to
the selectors section, here is where we
specify our classes, our CSS classes that we
will talk about later. And if you click on
this down arrow, you can see all the
states of your button. If I go to the hover, I can modify the styling
simply, just like that. And now if I go to the
non-state and preview this button and I hover over. You can see that the hover
state has a different styling. When we dive into the
styling and CSS properties, we will talk about
all these details.
14. Typography: When it comes to web design
and web development, Typography plays
an important role. I can't imagine designing a website without
using text, can you? So in this video, we're going
to talk about typography. If you head over
to the Add section under the topography category, you can see that we have
six different elements. We have heading,
paragraph, text, link, text, block, block
code, and reach ticks. So let's dive into each of them. I'm going to start with heading. Well, heading is an HTML tag. It's used to create
titles and subtitles. We have six different
headings from H1 to H6. One important thing
about headings is that search engines and screen readers try to understand the content of our website
based on headings. So you need to make sure
to use them properly. Right now, here I have
two different cards, and right at the top
I have a heading. As you can see, it says H1. If I click on this
settings icon, I can choose the heading type. As you can see, we have
six different headings. H1 is the largest one, H6 is the smallest one. Well, H1 defines the
most important title or subtitle on your webpage, while HCX defines the
least important title or subtitle on your webpage. So you need to make
sure to use them wisely because
Google, for instance, checks your headings to analyze your content and
rank your website. When we start
building our project, we will talk about headings
a lot, but for now, you just need to know that we have six different headings. And H1 is the most
important one, and H6 is the least
important 11 thing to mention here is
that you should never, ever use headings just to make a text bigger or
bold. That's wrong. To do that, you can use CSS properties that we
will talk about later. Well, headings have
default stylings. They have default font
sizes, font weights, etc. But you can override the
default stylings later. Now let's move on to the next topography element,
which is paragraph. Paragraph, lets us create
multi sentence content. As you can see here, I have a paragraph and there are multiple lines of text here. I can double-click to easily
modify this paragraph. If I want to style a specific word or
multiple words here, I can select it just like this, and I can use the
inline styling here. E.g. I. Can make it bold. I can make it a link
just like that, or I can just select my
paragraph and clear formatting. We will talk about this
option wrap with span later. It's more advanced, so we're
going to leave it for now. Alright, now, let's move
on to the next element. As you can see here,
we have a text link. Well, a text link is just a text that is clickable
just like a button. You can use it for a text
button. Drag and drop. It takes link here and
I'm going to place it right next to this button. And as you can see,
this is just a link. It has all the
features of a link. As you can see, we
can specify a URL. We can just modify all
these preferences here. In fact, this Read
More button is a text link with some padding. So if you want to
create a custom button, you can simply use
a text link and then style it are right. Now let's move on to
the next element, which is textblock. Well, a textblock is used for anything that is not a heading, paragraph or a text link. Okay, so let me
go ahead and drag and drop this textbook here. There we go. As you can see, it's just a
container with a text inside. You can double-click on it to
modify the text, style it. And you can even turn it into
a text link just like that. Now, the texts inside
is a link element. It's used for something like a description or the
copyright disclaimer. We will talk about the use
cases of texts flux later. Alright, let's move on
to the next element, which is Blood code, will block code, lets
you create a code. So let me drag and drop
this block code here. And as you can see,
it's just a text block with some predefined styles. So if I double-click on that, I can simply modify the text. This is block code, okay? And it has this left
border by default, you can obviously modify
all the properties. We will talk about that. So if you want to use a
code in your project, you can use the blockquote
elements or alternatively, you can create it
manually, are right. Now let's move on to
the next element, which is rich texts. The rich text element
is so powerful. Why? Because it gathers all kinds
of elements together, e.g. here we have a rich takes. This rich takes can use many different elements,
like headings, paragraphs, images, videos,
links, you name it. Why do we need to use them? Well, it's useful
because it's easier to modify the contents
when we have a rich text. If I just double-click here, I can simply modify
this paragraph. I can just create
a new paragraph if I press Enter just like that, or I can just simply click
on this plus button and upload an image or a
video or custom code, or even at least. So let me go ahead
and upload an image. Here. There we go. Our image is ready. I can align it to the left. It's very easy to customize everything within the Rich Text. And most importantly, when you create a website for a client, it's very practical to
use a regex because the client is not a web
developer or a web designer, he or she needs to modify
the content easily. They can just simply head over to this reshaped and
just add images, videos, modify the
content style, the heading styles,
paragraph, and so on. We will talk about
the editor later on. But for now you just
need to know that rich text can group
all kinds of elements, images, videos, headings,
paragraphs, anything.
15. Image: Can you imagine design a
website without images? I can't. So in this video, we're going to
talk about images. I'm going to hit over
to the Add section. And from the media category, I'm going to drag this
image elements and drop it right inside
my container. In the navigator,
just like that, here is an image element and
it has different settings. We can use this image
element to upload popular file formats like PNG, JPG, SVG, and so on. Well, images are our assets. Therefore, in order to use an image in your project first, you need to upload them. The best practice
is to just upload all your assets in the
Assets panel first, when you start
creating your project, then start working on the
layout and the content. This way, you can
easily get access to your assets
whenever you want. Alternatively, you can just drag and
drop an image element. And from here you can hit this choose image and then
upload your image here. So for now, I'm going
to select this image. There we go. This image has some settings. As you can see, it's too big, so I'm going to change
it to this one. Alright, it's much better. As you can see. It has the
width and height set to auto. It means Webflow determines
the width and height here. There is the high DPI
checkbox as well. And when it's checked, the width of our image will
be divided by two in order to be displayed perfectly on
the retina displays. So e.g. here, since the width of
our image is 640 pixels, when I check that Webflow
sets it to a 320 pixels, this way we can make sure
that our image will be displayed amazingly
on different devices. It's optional to use high DPI, but most of the time,
if you check that, you can make sure
that everything looks great on all kinds of devices. You can specify the width and height of your
images right here, or you can style it in the style panel here
under the size section, we will talk about styling
later, but for now, you just need to know that it is possible to specify
the dimension of your images right here
in the image settings. You can also replace
your images. If you hit this replace image
and from the assets panel, you can choose different
images like that. One important thing
about images is that you can upload images up to 4 mb, anything larger than that, you cannot upload it. Why? Because it's not practical
to use images that are so large since they slow down
the web page load speed. So that's why you can
upload images up to 4 mb. There are some
advanced options here, like all texts and load. We're not going to touch upon them right now because these are advanced topics and we will talk about them later in this course, you can use an image
element for icons as well. Since an icon is an image, basically, you can just
go to your assets. And if you upload it an icon, you can simply drag and drop
it here, just like that. Or you could just drag and
drop an image elements and then choose your image
from the image settings. It's totally up to you.
16. Video: Sometimes we might need to
use a video in our project. In this case, we can
use a video elements. So if you go to the
media from here, you can drag and drop a video
element into your Canvas. I'm going to put it inside my container to keep
everything organized. And this video elements
works like a place holder. You can paste a video link from any third party source
like Vimeo or YouTube. It doesn't matter. So for now, I'm going to
paste a YouTube link. And as soon as I pasted, it, loads it here, and I can
simply preview my project. I can play this video easily. As you can see, we have all the options of the
YouTube video player, but we have another
element as well. Let me remove this
video element, then I'm going to drag and
drop this YouTube elements. So what's the difference? Well, with the video elements, you can use any link
from any platforms, but with the YouTube element, you can only use a YouTube link. So what's the main difference here with the YouTube element? We have more options
to work with. We have different settings, like start at, we can mute
the video by default. We can enable the auto play. We can modify the
player controls, whether we want to show the
player controls or not. We can also modify the
privacy settings as well. So this is basically the main difference between
these two elements. And just like any
other elements, you can modify all
the CSS properties of this video elements as well.
17. Lottie Animation: Have you ever wondered
how you can use an animation in your project? The answer is
lighting animation. If you head over to
the Media section here in the ad panel, you can see that
there is an element called launching animation. Let me drag and drop these
elements into my container. Well, latae is a file type
for animation and it's so powerful because it lets us
use high-quality animations. And most importantly, it lets us control different properties
of that animation. E.g. we can make it interactive. We can make it play in
reverse and other things. We will talk about latae
animations in detail later, but for now, let's
give it a try in the assets while I
have a JSON file, which is basically what we need if we want to use a
Latina animation, if I just click on this
replace latae sequence Martin, I can simply choose
this animation. And there we go. Now we have the animation, but let me preview that. If I click on this
preview animation, the animation plays 0-100%. How cool is that? I can check the loop option. Let's preview it. There we go. It plays again and
again and again. I can choose the play
in reverse option. Just like that.
18. Forms: If you're gonna be
live website that has a contact us page or even
a newsletter section. For sure, you need
to use forums. Well, a form can have different elements
like label, inputs, takes area, checkboxes, radio
buttons, form button, etc. If you head over to the forums
section on the ad panel, you can see that we
have different elements here we have formed
block that groups different form elements like
label, inputs, form button. We have label, which is
just a simple text block. We have input, It's a TextField. We have the text area for long sentences and long content. We have checkboxes, we have
radio buttons for selections. We have the select element. If you want to let the user select from
different options. We have recapture and we
have the form button. We also have the file
upload element here, but it's only
available when you add a site plan to your website. Alright, when we want
to create a form, first, we need a forum block. As I mentioned before, it gathers together all
these form elements, the necessary ones. So I'm going to drag
and drop it into my container on the canvas. There we go. As you can see, this form block already has some elements, like two labels to text
fields and one button. You can see the texts layers
because of its color. I'm gonna go ahead and modify the color in this tiling here. Right now it's better. So when you drag and drop
a form into your Canvas, the forum settings pops up. A foreign block, has
different properties, it has different states, and it has a form name. So here let me show you different
states of a form block. When we work with forums, we have the normal
success and error states. So what's the difference
between them? The normal state is the one
that you are looking at. It's just a normal for
the success state, actually shows a
message to the user. Once the form has been
submitted successfully, we can easily customize
each of these states. And the error stage shows an error to the user when
something goes wrong. For now, you can see the
texts because we already change the styling of
these texts layers. But if I select this text block, I can go ahead and modify
the color to black. Now you can see it
better when you want to design different
states of your form, you need to make sure to first select your foreign
block in the navigator, not the form elements. First select your form block and then you can
double-click somewhere. Or you can just select
your form luck and click on this settings
icon, just like that. Now let's talk about
the form name. Well, you might need to use different forms on your
website and it's important to name them properly because later when we receive
form submissions, we can easily
recognize that which information is associated
with which form. So I'm going to name
this form demo. Okay, I'm gonna go to normal. And these elements have some styling by default
that we can override. We're not going to talk
about styling now, but I'm going to show you
that this is a text field, and a TextField has some
properties as well. If I select the text field, if I double-click on it, you can see that the
input settings pops up. Each TextField has different
settings like name, placeholder, text type, and here we have the require
than autofocus options. You can easily name
these text fields, e.g. if this TextField is associated
with this name label, you can simply call it name. If it's going to be surname, you can simply name
it surname. Here. We have the placeholder as well. So if I want to present a placeholder right
on the text field, I can write it here. Let's write enter your surname. Just like that. We have the text type as well. By default, it's
set to plane and it means the texts
could be anything. We could set it to e-mail, we could set it to password, we can set it to
phone or number. Why does it matter? Because here for the
email text field that takes type is
already set to email. Why? Because when the user tries to fill in these texts fields, hit the submit button, then this TextField
checks whether there is a valid
email address or not. E.g. if we have
something like test at, it will give the user an error. There should be a
valid email address. It doesn't check whether
that e-mail address exists or not because
it's not possible, but it just checks the format
of that email address. The same thing happens with
password, phone, or number. Now let's talk about
these two options. We have the required option. If I check this checkbox, it means that the user has
to feel these TextField. If I uncheck that, it's an optional text field. If I check the autofocus, it means whenever
the page loads up, this text field is autofocus and the cursor
is already blinking. I'm going to set it to required, and I'm going to
uncheck the autofocus. And then let's select
this submit button. If I double-click on that, I can simply modify
these properties. There are two properties. When it comes to form buttons, button texts and waiting texts, I can set it to anything
like send for instance. Then the weighting text, this text appears when
the user clicks on this button and he or she is waiting for the form submission. So here let me modify
that to wait a moment. Not the best weighting
texts, by the way, alright, now let's give it a
try to try a forum. You can not just go to the preview mode because
it doesn't work like that. You need to first
publisher website. We didn't talk about
the publish option, but it's so simple. First, I'm going to click on this Publish button on
the top right corner. We don't need to
change anything. Just click on publish
to select the domains. Okay, Just like that, this is a unique domain created by Webflow
for our project. And then once this
button turns green, it means that our
website is published. And if I click on this button, this little icon right
next to this link, I can check my website. Okay, let me zoom in. So here is our form. Let me go ahead and
check the type of this text field
because I change it to number mistakenly
it should be playing since it's
just a surname. I'm going to publish
my website once again, and I'm going to
refresh this page. There we go. Now, this is a plain
text field here, let me write test. And for the email address
I'm going to write test at, this is not a right
e-mail address. This is not a correct format
for that e-mail address. If I hit the send button,
look what happens. Please enter a part
following at, okay, so this is what happens
when you choose the e-mail, takes fuel type, and then
let's write gmail.com. Now everything should
work perfectly. I'm going to hit
the send button. Wait a moment, and we will
get the success message. Of course, the
styling is not good because we already
changed the color. But you just got the idea. If something is wrong with
the Internet connection, we will get the error. So let me refresh the page
and I'm just going to disconnect my internet
connection for a second. Here. Let's write test2 and I'm goingtowriteanotheremailaddressheadlow@gmail.com. If I hit the send button,
look what happens. Oops, something went wrong
while submitting the form. So this is the
difference between different states of a four. Now let's see how we can get access to the form submissions. Well, we need to go to
the project settings. As I showed you before. If you head over to this W
icon on the top left corner, and if you hover over it, you will see this
hamburger menu icon. I'm going to click on that. And I'm gonna go to project
settings are right from here. I'm going to go to
the forums tab. And here we have different
settings of a form. We can specify the
form name here, we can send a form submissions to a specific e-mail address. We can write the subject line. We can specify an
e-mail address for replies and also
the email template. We will talk about
these options later. But for now, you just
need to know that if you scroll down here, you can find a form
submission data. And as you can see, we submitted one form. It says surname test, e-mail
addresstest@gmail.com. You can simply delete
this submission. You can download all the
submission data using this download CSV
button as a CSV file. And one thing you need
to keep in mind is that there is a limit for
receiving submissions. If you don't add hosting
to your project, you can get up to 50
submissions per month. We will dive into these
advanced settings of forms later when we start
creating our projects. But this is basically
all about forums. Let's go back to the designer. I'm going to hit the
designer button. I'm going to select my
form block just like that. And let me check out
other elements here. So here we have a
label input text area. We can simply drag and drop
any of these elements into our form black and all these elements have
their own properties. So let me go ahead and drag
and drop a checkbox here. Just like that, it has
different properties. We can drag and drop a
select element here. If I want to specify
the selection options, I can select this select field and go to the elements settings. From here, you can see
that we have the choices, we have select one, first choice, second
choice, third choice. We can simply modify them, but let's preview it. Okay, there we go. This is how it looks. The check bikes could be
checked and unchecked. The text area could be enlarged, and everything
works as expected.
19. Nav Bar: Most websites nowadays have
a navigation bar at the top. If you take a look at
some famous websites, you can see that they
use a navigation bar in order to show some many
options to the user, e.g. here we have the
navigation bar that has some menus like
NAC, iPad, iPhone. Or here we have the navigation
worked at has products, use cases, developers,
et cetera, and also a button. Most navigation bars have
some common elements, like a logo that is clickable. So this is a link blog. They have some menu options. They are also usually
linked blocks, and they have a button
on the right side. So we can create
navigation bar manually using a div block and a link
blogs and other elements. But there is a pre-built
elements in Webflow. So if I scroll down here, under the components,
there is the nav bar. If I drag and drop it into my body element here,
as you can see, this navbar has been added to my canvas and it
has some elements. Inside. There is a container, it's just a div block. We already talked about it. And inside there are
some other elements. There is a link blog
in which we will put our logo and then we
have the nav menus. This is another div plug
that holds all these links. And finally, there
is the Menu button, but we can't see any
menu button here. Just wait a second. Nav bar element is
dynamic and responsive. And if we go from the desktop breakpoint
to tablet break point, you can see what happens. All those menu links
are disappeared. And instead we have this
hamburger menu button. And this is associated with this Menu button
in the Navigator, which was not visible in
the desktop breakpoint. So the navbar is
already responsive. If I preview this project, this Menu button appears. There is no logo because
we didn't add one yet. So this is basically
how a navbar works. We can customize these links. If we double-click on
any of these links, we can modify the text. We can also select
this nav link element. And if I click on
this Settings icon, I can modify the URL. We can ask this to
take the user to a specific page or to a specific
section of our website. This is just a link blog, okay? Therefore, we have all the
properties of a link block. So a nav bar is
basically a diblock, which is responsive already, and it has some pre-built
elements that we can use. If you want to create a custom navbar,
that's totally fine. You can do that simply. But most of the time we will use the nav bar element
because it makes our life much easier
since it's already responsive and everything
is ready for us.
20. Lightbox: If you want your images
or your videos to be displayed in a full-screen
view on any device, you can use a light box. If you head over to
the components section on the ad panel, you can find a
lightbox components. I'm going to drag and drop
it into my container. There we go. This is a lightbox link and
in order to work with that, we need a thumbnail. So if I double-click on that, I can choose the
image inside because by default it has an image. And from my assets, I'm going to choose this
image and I'm going to decrease the width and
height to 300 pixels. And the height is going to be
400 pixels, just like that. Alright, so this is
a lightbox link. Let's preview and
see what happens. If I click on that. Nothing happens because in
order for a lightbox to work, we need to specify
a media for that. We need to go ahead and
select our light bikes link. And then we need to head over to the elements settings right
next to the side panel. And from here we can find
light bikes settings. And there is this media section. We can either choose and
an image or a video. Let's start with an image. I'm going to select an image, the same image from my assets. There we go. There is this caption here. We're not going to add a caption for now because
I'm going to show you the difference between
these two options. I'm going to save. Then let's preview it. There we go. If I click on my lightbox link, we can preview this image in a full screen view
on any device. It works perfectly on mobile and tablet or any
screens just like that. But what if I want to have
multiple lightbox links? Well, that's very simple. I can simply drag and
drop more light boxes. Or I can simply copy this light box and paste it
again and again and again. So let me remove this
new lightbox link. And I'm going to copy
this light box link, command C or control C and Command V or Control
V. Once again, to get three different
lightbox links, alright, by default, there
is no padding between them. I'm going to select this light
bugs link, the first one. And I'm going to go to
the spacing and just add some right padding, ten pixels. As you can see, immediately, a class has been created. We didn't talk
about classes yet, but for now we just need
this name lightbox link. Later we will dive into classes. I'm going to select
the second lightbox. And from here I'm
going to look for light bugs linked
class, just like that. And once I apply this class
to the second lightbox link, these elements can use
all this tilings that they already defined for
this particular class. Alright, cool. Now I'm going to
change the thumbnail of these two live vaccines. So let me double-click on it and replace the image to this one. And for the third one, I'm gonna do the same thing. There we go. Our Tom nails are ready. Now let's preview. The first one looks fine. The second one shows
the same image because we just
copied and pasted it, the third one the same. So what we need to do is we need to select our second
lightbox link, then head over to the
elements settings. And from here, we need
to remove that media and add another image that
corresponds to this thumbnail. Cool, I'm going to save
it for the third one. I'm going to do the same thing. I'm going to remove
this media and choose the proper
image and save. Now, it should work perfectly. So let's give it a try. I'm going to click
on the first image. The second one, and a third one. But here as you can see, there is no caption. So what happens if I add
a caption to our media? Let's go and check it out. I'm going to select the
first line box link. And from here I'm
going to click on this first image and
let's add a caption. This is a nice image. Cool. Save. Now let's see what
happens if I click on it. As you can see, a
caption has been added to the bottom
of this image. That's very handy. But what if I want to connect my light boxes together
so we can do that. That's very simple. First, we need to select this light bikes
link, the first one. And under the media
There is a checkbox that says link with
other light boxes. If I check this here, I can specify a group name. It's very important
because if you have multiple light
boxes on a page, this is how we can
connect them properly. So let's give it a name. I'm going to write main. I'm going to copy it. Let me select my
second lightbox link. And I'm going to
paste that name here. For the third one, I'm going to do the same thing. And now our lightbox
links are connected. Let's give it a try. I'm going to click on this
first link. And there we go. Now we have this kind
of slider interaction. I can click on this
right arrow button and I can simply move
through these items. That's very useful. E.g. if you want to create
an e-commerce website and you need to show different images of a
particular product. You can use a light box. So let's recap. In order to work with
light boxes, first, you need to drag and drop a lightbox link
into your Canvas. Second, you need to
choose your thumbnail, which is this image. And third, which
is so important, you need to add a media for that particular
light bikes link. If you want to connect
your lightbox links, you need to check this link with other light boxes and
specify a group name. Alright guys, I hope
you enjoyed this video. I'll see you in the next one.
21. Slider: If you want to create
an image gallery or a slideshow for your website, you can use the
slider component. From here. You can drag a slider and drop it inside
your container, or you can put it
wherever you want. I'm going to place it
inside the container and it takes up the full
width of my container. As you can see, this slider
has multiple elements. If I expand it, you can see that there are
four main components here. The mask, which
includes our slides, the left arrow link, right arrow link,
and the slide nav, which is this indicator
at the bottom. If you click on
these indicators, you can move between
your slides. And if you want to
add more slides, you need to select your slider and go to the slider settings. From here, you can get access
to the slider settings. We have many options to modify. We're going to go
through each of them. If you want to add more slides, you can hit this add slight
button just like that. If you want to move
through your slides, you have different ways. First, you can click
on these indicators. Second, you can use these arrows here in the slider settings. Third, if you know exactly
where you want to go, you can choose your
slide from here, e.g. slide three or slide five. Let me remove these
two slides for now, and I'm going to explain
different options here. A slider has
different properties. It has the animation property, the easing method,
and the duration. And also you have some
advanced settings here. So the animation lets you control the type of
transition that occurs. You can choose slide crossfade, fade-out in, fade
over and slide over. You can check them out and see which one suits your needs. The easing method is also related to the animation
and to the transition. And since it's a
more advanced topic, we're not going to
talk about it now, but later when we start
talking about interactions, we will talk about the
easing method a lot. Then we have the duration. This is the duration of our transition and the
unit is milliseconds. So here, if I specify 1,000, the animation
occurs in precisely 1 s. Here we have
different options as well. We have the infinite
repeat slides. We have disabled swipe gestures. By default, the slider
has the swipe gestures whenever the user interacts
with it on tablets or phones, you can disable this
option if you want. You have the autoplay
slides option. You have the height at each end. So what it does is this. If I check this option, it hides the left arrow for the first slide and the right
arrow for the last slide. So let's give it a try. Here. We don't have
the left arrow. Then if I go to the
third one here, we don't have the right arrow. So you can customize these
options however you want. Then we have this slide, nav. This is all about
these indicators. So I can check rounded or you can uncheck that
to get these squares. You can check number labels, we can check shadow,
invert colors. And also you can
specify the spacing in pixels like I can specify ten. And I'm going to
uncheck all of them, and I'm going to check rounded. Great, alright, now let's
add content to our slides. A slide can contain
any kind of container. You can add some
deep blacks to it. You can add background images, you can add an image to it
that's totally up to you. But for now, I'm going to
select this slide one. And I'm going to scroll down in the style panel and
from the backgrounds, I'm going to hit Image and
gradient and choose image. And from my assets, I'm going to choose
one of these images. Cool. And let's set the position to center
and it's going to cover just like that and do
not tie for the next one. I'm going to do the same thing. So let me choose my
image just like this. Let me change the
position and size. And last but not least, for the last slide, I'm going to choose
another image. This one, Let's change the
position to center and the size is going to be
cover and do not tie it. Okay, great. Alright, our slider is ready. However, I'm going to
modify its height. Okay? So I'm going to
select the slider, make sure to select your
slider element From the size, I can specify a
specific height, e.g. 500 pixels. It looks much better now. Now if I click on
these indicators, I can move between these images. So now I'm going to
select the slider. Then let's go to the
elements settings. From here, I'm going to
check autoplay slides. Here I can specify
the timer delay. By default, it's set
to 4,000 milliseconds. It means that
transition occurs in precisely 4 s. If
I preview it now, after 4 s, the
transition occurs, you can modify that. I'm going to set it to 1,000. There we go. It's too much. Maybe
I can set it to 2000. Now it's better. So as I mentioned before, a slide can contain anything. So here I can add some
other elements, e.g. a. Heading. Let's drag and drop a
heading inside this slide. And there we go. I can give it a title. Slide. One, I can modify
its CSS properties, everything for each slide, I can do the same thing. I can add a paragraph
as well here. Alright guys, that's all
for the slider components. I hope you enjoyed it and I'll
see you in the next video.
22. Tabs: Sometimes we might need to
have some tapped content, some interactive tabbed content. In that case, we can use the tabs element under
the component section, we have the tabs elements. One of the most
common use cases of tabs is the pricing section
of different websites. Here, as you can see, I prepared two
different deep blacks and inside there
are some other div, blocks with some elements. And what we're gonna do is put these pricing bike
says in two tabs, okay, the top row is
our monthly plan and the bottom row is
our yearly plan. So we're going to need
two different tabs. But first, let's go
ahead and drag and drop the tabs element
into my container. Just like that. And by default, as you can see, the tabs element as a
three different tabs. Basically the tabs element
has different components. The tabs menu, which are
these tabs at the top, and the taps content
inside the taps content, as you can see, it's a mask. This icon indicates
that it's a mask. Inside these taps contents, we have three different pain, so we have tab-pane, tab1, tab2, and tap three. So the contents of
our tab should be placed inside the tab pane. And whenever we want to
modify the tabs name, we need to work
with tabs, menus. Okay, So here, if I just
double-click on this text, I can modify that. So let's write monthly. And for the next one I'm
going to write a yearly. This third one is not necessary, so I can hit Delete or Backspace on my keyboard
to remove these tap link. Just like that. Now I have two different tabs, but what about the content? Well, first, I'm going to
select this div block, this top pricing box. I'm going to drag it and drop it inside the first tab pane, make sure that it's
nested correctly. Okay, take a look at your
navigator and make sure that this is nested
inside the tab pane, one, just like that. Now, this pricing box, okay, these boxes are part
of tab-pane one. Okay. We're gonna do the
same thing for these bottom or yearly plan. I'm going to drag
it and drop it. And I'm going to make
sure that it's nested inside tab pane to
just like that. But now it's invisible.
From now on. If I want to check
out my taps contents, I need to click on
these tab panes, e.g. I'm going to click
on tab-pane one. This is our monthly plan. And if I click on tab pane
to this is our yearly plan. By default, there
is no top margin, so I'm going to
select tabs Content, which is basically a
wrapper for our Paine's. And then I'm going to give
it some margin, okay, Some top margin,
maybe 30 pixels. Okay, so let's see
what happens now. I'm going to preview it. We are on yearly plan. I'm going to click on
monthly. There we go. Can you see this transition? So this is basically
how the tabs work. Of course, you can
style these tabs and we will talk
about stylings later. But for now you
just need to know how the tap element works. If you want to add more tabs, I can select my tabs
element in the navigator. And if I head over
to the tap Settings, I can click on this Add button just like that to add more tabs. As you can see, tap three
has been added here. And I can rearrange
my tabs like this. I can set the initial tab
that the user sees, e.g. it's going to be tapped one, I'm going to remove tab 34 now. You can rename the taps here, but just in terms
of organization. Okay, so if I rename it here, nothing changes on
the actual tab, on the actual link
because this is a text and you need to
modify that on the canvas. But if you want to
organize them properly, you can simply write one e.g. and for this to just like that, you can modify the
easing method. For now. You don't know what it is, but we will talk about it later. It's all about the
animation here. The fading is set
to 300 milliseconds and the fade-out is set
to 100 milliseconds. It's too fast. So to see the real
difference here, I'm going to set it to, the fading is going to be 500 milliseconds and
the fade-out is going to be 500 milliseconds as well. Now, let's preview it are right, the monthly plan is
already selected. I'm going to click on a yearly. And there we go. It's
much slower now. Alright, so let's recap. The tabs element has
two main components, tabs menu and taps content. The tabs menu includes all these tabs is tab
links at the top. And the taps content
includes our tab panes here. So whenever we want to modify
the content of our tabs, we should only head over
to the taps content. Select our tab pane. If you want to modify
the appearance of our tab links or even
the name, the text. We should always go to tabs
menu and choose our tab link. Alright, that's all
for this video. I hope you enjoyed it and
I'll see you in the next one.
23. Social Media: Adding social media buttons
to your website can help drive more traffic to
your social media accounts. To do that, you can
use the Facebook or the tweeter components. I'm going to start
with Facebook. Let me drag and drop
it into my container. And as you can see, by default, there is a like button. There is the default
like number and this sign-up to see what your
friends like sentence. And here you can specify
the Facebook account URL. It could be the clients
Facebook account or your own Facebook account. If you are building
your own website, you can modify the layout
here from standard to bikes to button. That's totally up to you. You can specify the
width and height here, and also you can modify
the language e.g. I. Can choose German,
I can change it to Spanish, just like that. But for now, let's
keep it English. If I preview that, if you click on that, you
will be taken to Facebook. But since we didn't
specify any account here, we will just go to facebook.com. But if you specify
an account here, the user can like that
particular account. But what about to either, let me remove this
Facebook component. I'm going to drag
and drop components, the tweeter components here. And let's see what we have here. We have different options, button types like
tweet or follow. If you want the user
to tweet something, you can choose the tweet. And here you can specify
the website's URL. Here you can specify
a tweet texts, like check it out. Okay? And then you
can decide whether the bubble should be shown
or not, just like that. And you can modify the layout here we have the
horizontal layout. You can change it to
vertical or the size. You can change it to large. I'm going to hide
the bubble for now. Now let's preview that. If I preview it and I click
on this, there we go. I can see this, check it out. Webflow.com. This is the URL that
we can specify when we are modifying the preferences
of that component. If I go to follow here, I can specify the
accounts username without the add sign because the add sign is already there, I can write my accounts username and immediately
the number of followers of that particular
account will be shown here. Okay, I'm going to
hide the bubble for now and let's make it larger. Now let's see what happens. If I click on it, I can decide whether I want to follow
this page or not. Since this is my own page, I'm not going to follow that. So let's move back. This is all about social
media components. I hope you enjoyed it,
and I'll see you then.
24. Search: If you want to add the
search functionality to your website, you can use the search element, actually this search component here under the
components section. This is a very
powerful component because you don't need to worry about indexing your pages and prepare your search results. What you need to do is just drag and drop
it into your Canvas. I'm going to put it
inside my section, as you can see here. Let me add a container here
that you could see it easily. I'm going to put it
inside my container. Alright, now it looks better. And also I am going
to modify the color of the search word to white. Alright, now it's quite visible. So this is just a text field, and if you double-click on it, you can find this
place holder property here that you can modify, you can enable or disable
the autofocus as well. That's totally up to you. One thing to mention
is that when you add a search element
to your Canvas, a new page, a new utility page, is created
automatically for you. So if you go to the pages here, you can see that
under utility pages, we have this new
search results page. If I click on that, there we go. You can see that we've got
some sample results here. Okay, So let me modify the
color of these texts as well, wide and this one
to white as well. Okay, Cool. So this is basically
what the user sees. You can easily style it, but you need to understand
that it doesn't work for all websites and all plants. Why? If you go to the settings
here and you go to search, you can see that it says, once you've set up CMS
or business hosting, web flow automatically
indexes the content of your Published site to create
an up-to-date search index. So without the CMS
or business hosting, you cannot use this search
functionality if you want to work on a client project and they need this search
functionality, you need to make sure to add either the CMS hosting or the business hosting
to your project. We will talk about
these plans later. But for now you
just need to know that this functionality exists. And if you need a search
bar, you can use that.
25. Symbol: As designers and developers, we always try not to
repeat ourselves. So we want to avoid
copying and pasting and redoing everything again
and again and again. To do so, we need to learn
how we can create an element once and reuse it multiple
times across our project. How can we do that? Well, we can use symbols. If I go to the Add section and I tried to drag and
drop a nav bar here. Just like that. I'm going to place it right
below my body are right here. We have a navigation bar. Let's suppose we want to
turn it into a symbol. How can we do that? We have different ways to do so. First, we can go to
the Symbols page here, and then we can hit the
Create new symbol button and we need to name our symbol. I'm going to name it
navbar and create single. As you can see, it turns green. A green boundary appears here, and it means that our symbol has been created successfully. But now we are inside
the master symbol. You can press Escape to
exit the master symbol, or you can click on this
green bag to instance Martin. So here we have a symbol. How can we reuse that? Well, let's go ahead
and create a new page. I'm going to go to pages. And from here I'm going to
click on create new page. Let's name it. I'm going to
name it contact and create. Alright, now we have
an empty canvas. I'm going to go to symbols. From here. We have our nav bar. If I drag and drop it
here, there we go. We've got our nav bar, but wait, can you just copy and paste it instead of creating symbols? Yes, we can, but it's
not an efficient way. Why? Because when you copy
and paste and elements, if you make any change to
one of those elements, that change is unique to that particular
element and it doesn't affect the duplicated elements. But when we use symbols, let me show you how it works. Let's suppose I want to change this contact is contact
takes to contact us instead. To do that first, you need to go to
the master symbol. If you double-click on
that, as you can see, now we are inside
the master symbol. And I can double-click
on this text. And I'm going to modify
that to Contact Us. Then I'm going to hit the
bag to Instance button here. Alright, now we change it
here in our contact page. If I go back to my homepage, you can see that the
change has been applied automatically to this
instance as well. So when you work with symbols, you make changes once and the
changes apply automatically to all instances of
that particular symbol. It's so powerful
because imagine you have 100 different
pages on your website. And if you want to just
manually go ahead and modify your navigation bar or any
other elements one by one. It's going to take so much time. And believe me, it's
a boring process. So if you can use symbols,
make sure to use it. It's usually useful for creating navigation
bars, footers. We will talk about the use
cases later, but for now, I'm going to show
you how you can use them and how you can
modify the content, how you can override
the content here. So, so far we've learned
how to create a symbol, how to reuse a symbol, how to edit a symbol. Now, we're going to
talk about overriding, how we can override the
contents of our symbols. Here I created a simple
card with some elements, a heading, an image, a paragraph, and a button. Okay, I'm going to
turn it into a symbol. The other way of creating a symbol is to just
right-click on your element. And from here, you can choose Create symbol,
just like that. Now we can name it, let's say card or
write our card. Symbol is ready. Now what I'm gonna do is
copy and paste it two times. So I'm gonna hit Command C
or Control C and Command V, or Control V two times. So these two new cards are
incenses of our card symbol. If I make any changes to
that first card, e.g. if I change the
size of this image, the changes apply immediately
to other cars as well. If I modify this heading to H2, you can see that the changes
apply to all the instances. But how can we
overwrite the contents of these two instances
since we have three different cars and
for sure we are not going to use the same
content for all cars. We need to learn how we
can override content. To do that first, you need to create some fields. Your symbols, I'm going
to double-click on this symbol to go to
the master symbol. And I will be able
to edit things. And then I'm going to select the element that we want
to create a field for. Okay, I'm going to
start with this image because this image
should be replaceable. I'm going to select that. And if I go to the
image settings here, at the top, I can see that
there is image settings here. And I have this pair pill button right on the top left corner. If I hover over that, you can see that it
turns to a plus button. I'm going to click on it
and then I'm going to hit new field just like that. And as you can see, it says, this new field
will automatically be linked to this
image override. And I'm going to name it
image, create and link. It says you've just created and linked and overwrite
fields are right, cool. Now I'm going to
select this heading, and from here I'm going to
click on this link to field, create new field, and let's call it title,
create and link. Great. I'm gonna do the same
thing for the paragraph. Let's create a new field. And here I'm going to write
description, create and link. And that's all. I'm not going to create
a field for the button, but if you want, you
can do that as well. So how does it work? First, let me exit
the masters symbol. I'm going to click
and drag to instance. And now if I select my second
card on the right side, you can see that we have
instance overwrites. We have the image, these are the fields
that we just created. We have the image, the title, and the description. Each field has a
default contents. Okay, so I'm going to replace this image simply with this. I'm going to modify the
text here to car two, and we can modify the paragraph
as well just like that. And then let me choose the third card and we're gonna do the same thing for this one. This one is going to be a three. And for this one
I'm going to remove the first sentence
just like that. So this is basically how you can override your symbols content. The last thing I'm
going to talk about is unlinking your symbols. How can you unlink symbol? There are times that you want to make some changes and you want these changes to be applied
to specific elements, okay, to do that first, select your symbol,
Right-click on it. And from here you can
find link instance. If you click on
Edit main symbol, you will be taken to
the master symbol and you will be able to edit it. But if you unlink
instance just like that, now, it's just a simple div. As you can see, it's
no longer a symbol. And you can recognize that
from the Navigator because here the icon of these
symbols is green. But this is just a
simple div block. Now, if I change the
dimension of this image, this change is unique to
this particular card, right guys, that's
all for this video. I hope you enjoyed it and
I'll see you in the next one.
26. Important Shortcuts: Hey, in this video
we're going to talk about web flows, shortcuts. When we work on a project, we may need to use some shortcuts to accelerate
our design process. And in this video, I'm
going to talk about the most important
ones because there are many different shortcuts
that you can use. But we're not going
to talk about all of them because most of the time we won't use
all those shortcuts. So if you head
over to the bottom left corner of Webflow here, you can see these question mark. If you click on it here
on the Hill panel, we have different options. The second option is
keyboard shortcuts. I'm going to click on it. And there it is. As I mentioned before, we may not need all of them, but some of them are
so important to know, like copy and paste, undo, redo, find, etc. So whenever you want
to copy something, you can use Command
C or Control C. If you're using Windows. If you want to cut something, you can use Command
X or Control X. And if you want
to pay something, you can use Command
V or Control V. Basically, if you
are a Mac user, you need to use command. If you are a Windows user, you need to use control. So here for instance, for duplicate, it says
Option plus drag. So if you hold the Option key on your keyboard and
you click and drag, you can duplicate an element on windows instead of option, you need to hold the Alt
key on your keyboard. And here as you
can see, for undo, use Command Z or Control Z. And for redo we use
Command Shift and z, the other important shortcuts or device views here
as you can see, if you want to go to
another breakpoint, e.g. if you want to go to
the tablet break point, you can hit number
two on your keyboard. If you wanna go to
mobile portrait, you can hit number for using
these shortcuts is optional, but believe me,
it's going to make your life much easier
if you learn them. The other important
shortcut that we use almost all the time is fine. There is a very good
feature called QuickFind. When you want to open it up, you can hit Command
E or Command K, or Control E or Control K. We've been talking
about QuickFind later. But for now, you just need to know how you can use
these shortcuts. So if you want to learn
more about these shortcuts, you can head over to
the panel and click on keyboard shortcuts
and just check them out. But for now, these are the most important shortcuts
that you need to know about. Alright guys, that's
all for this video. I hope you enjoyed it and
I'll see you in the next one.
27. Classes: Almost all modern websites nowadays are created
using classes. Why? Because classes let us store
our styling information and then reuse them again and again and again for as many
elements as we want. That's why classes are so
powerful and it's almost impossible to create a modern
webpage without classes. Let me show you how
it works when you add an element to your
Canvas, e.g. a. Diblock, just like this, you can head over to the style
panel on the right side. And at the top we have
the selectors section. Okay? Here is where we
will add a class, or let's say select a class. By default, our elements
don't have any class. If we want to modify the CSS
properties of our elements, we need to add a
specific class to that. If we don't, Webflow
automatically assigns a class to these
particular elements. Let's see how it works. First, I'm not going
to add any class here. I just want to modify
the background's color. And there we go. As soon as I changed one
of these properties, this div blood class has
been created automatically. If you want to rename our class, we can just left-click on
it and simply rename it. I'm going to call it. Okay? So this is basically how
you can create a class. The other way, which is
better, in my opinion, is to just create a class once you've added your
element to your Canvas, instead of modifying the
properties of your elements, first, add a class to it. This way you can make sure that your classes are organized. Because later on
we're going to reuse these classes and naming them
properly is so important. Now I'm going to select
this div block and there is no class here
because I just remove that. Let me show you how you
can remove a class. I'm going to write div to choose this class
that I created. To remove a class, you
can just click on this down arrow and just
hit Remove class. Alternatively, you can
click somewhere here. And as you can see, this
cursor is blinking if you hit the Delete or Backspace
key on your keyboard, this class will be removed. Alright, so now we don't have any class apply to this element. I'm going to click here and I can start creating a new class. So we need to name
our class here. I'm going to write new div
Enter, just like that. Our class has been created
and we didn't modify the properties of
these elements yet. So if I scroll down, you can see that there
are some properties and there are highlighted
with this amber color. It means that this
particular property is inherited from another class. If I click on that, you can see that value
comes from body all pages. We will talk about
these tags later. But for now you just
need to know that this amber color means that actually the property and styling is coming
from somewhere else. Of course, we can override that. Once you override that,
see what happens. It turns blue. It means that this property is now coming from this class. If I click on it,
you can see that we can reset this property and resetting will inherit the
value from body oh, pages. Okay, So now let's go ahead
and modify the background. I'm going to change it to white. Why do we need to use classes? Well, as I mentioned before, classes store information
about our styling. So now that we modify the background's color
and also the font, we can just reuse this class. How to reuse a class? First, let me go ahead and
add another block here, and I'm going to place
it right next to it. And now instead of
creating a new class, I can just apply
the new div class to this particular block. I'm going to write new. I can find it under the existing classes
here and there we go. One thing you need to
remember is that we are making changes to the style. We're not making changes
to the element itself. That's why we can apply
a class to any elements. We set the properties
for a specific class, and then we can apply
to any kind of element. So now I'm gonna go ahead and change the
background color. And let's see what happens. There we go. As you can see the
change applied to both these div blocks because both these elements are
using this new div class. But what if I want to have a unique class for the
second diblock to do so, we can duplicate a class. We can just click on this down arrow and I'm going to
hit Duplicate class. And let's write second
div, just like that. Now, there is no connection
between this div block and this block because
we just duplicated the class and there is no relationship between
these two classes. Decide to modify the color here. The background's
color, they change. I make here only applies to
this particular elements. But how can you rename a class? To rename a class, you can simply click on
it and just rename it. I'm going to change it to demo. Now our class has been renamed. So let me show you
another example. I'm going to go to
the Add section. And from here I'm going to
bring a button into my Canvas. Just like that. Let me put it inside
my container and I'm going to remove these
blocks. Alright, cool. So this button has no class. I'm going to add a class to it. I'm going to write
primary button. Cool. Now this
primary button has some default stylings because this is a pre-built elements. And I'm going to
override these elements. I'm going to start with
the spacing, okay, here we have
different properties and I can modify the padding. I'm going to hold down the
option key on my keyboard or Alt key and just
left-click and drag to modify the padding from both sides simultaneously,
just like that. And as you can see,
it turned blue. And it means that these
properties are coming from this class, this
particular class. Alright, now let's make
another change to this button. I'm going to modify its
color, something else. Okay, Cool. Now what I'm gonna do is
add another button here. There we go. And I'm going to apply the
same class to this new button. So let's look for
primary button. All the stylings have been applied to this new
button as well. But what if I want to create
variations for my button? Well, in this case, we can use something very
useful, a combo class. A combo class is a
type of class that is built upon your base class. Right now, we have created
the base class, okay? And if I want to
create a combo class, I can just click somewhere here. And as you can see, it
says new combo class. Why? Because we already have
the base class and we can create a combo class on
top of this base class. So let's write light. But nothing happened. Of course nothing
happens because we didn't change anything. Now that we created
this combo class, this element is inheriting the styling from two
different classes. It first inherits
all the properties from the primary button class, and then it inherits more properties from
the Light class. So first, all the properties of the primary button class will
be applied to this button. And then if we modify
something here, since we created a combo class, it overrides those properties
from the primary button. It's so powerful. Let's suppose I want to
create a light button here. I'm going to modify
the color too, white, and as you can
see, it turns blue. And I'm going to modify the typography color here
to black, just like that. So let me explain what happened. As you can see,
the spacing didn't change and we have
this amber color here. It means that these
properties are coming from our
primary button class. However, if we head over
to the background section, you can see that we
have this blue color and it means that this color, this particular property comes from the light combo class. But to understand it better, I'm going to select
the primary button. As you can see, there is
only one class applied. We don't have any combo class. And I'm going to modify
the padding 30-40, okay, just like that. And as you can see,
the change I made here automatically
applied to this button, although we had a combo class. Why? Because when we created
the combo class, we didn't touch the
spacing property. We only modify the
background's color. That's how combo classes work. They are built on top
of our base class. Apart from these two classes, the base class and
the combo class, we have another type of class which is called a global class. Let me show you how it works. I'm going to go ahead
and drag and drop a div blog here
into my container. There we go. This is
an empty div block. I'm gonna go ahead and
assign a class to it. So I'm going to create a new class and let's
call it shadow. I'm going to put it outside my container that you
could see it better. Okay, it's right
here at the top, and I gave it this shadow class. Now I'm gonna go to the Effects
section, and from here, I'm going to click on
this plus button to add some shadows to this
particular div block. As you can see, the shadow
has been added here. I'm going to modify
the properties, the blur amount and the size. And let me modify
the opacity as well. Okay, cool. Now we have a global class. What does it mean
whenever we want to apply some specific stylings, too many elements
on our webpage, we can use global classes, e.g. let's suppose we have different buttons and we
have different images. Let me go ahead
and drag and drop an image here that you
could see it better. I'm going to decrease
its width to 300 pixels are right, cool. So let's suppose we want to have a consistent drop shadow
for all our elements. In this case, I'm going to
select my primary button here, and I'm going to add
our global class to it. So let's look for shadow. As you can see, it says
global combo classes. There we go. The shadow
has been added here. Now I'm going to select
this primary button, and here I'm going
to write shadow. There we go. The shadow has been applied. And let's do the same
thing for this image. There is no class here. So first I'm going to
give it a class image, and then I'm going to add the shadow global class
to that, just like that. So as you can see, now, these three elements use
our shadow global class. But what if I want to modify the properties of this
shadow global class? I can select this div blank. This is a temporary elements. I can simply remove that
and nothing happens. But if I want to modify the properties of
this global class, I'm going to need to
select this diblock. And let's suppose
I want to change, let's say size, amount here. As you can see, the
changes applied to all those elements that are
using our global class. If you're familiar with different design software
like Figma or sketch, for sure you have
used styles in Figma. We can create color,
size, typography styles. This is the exact same concept. We create our styles
once and we apply them to multiple elements again
and again and again. And this way when we want
to make some changes, we can do it once. The changes apply immediately to all the elements that are using that specific class
are right guys, that's all for this video. I hope you enjoyed
it and I hope now you have a better
understanding of classes. We will use classes
almost all the time when we work
on our projects. So make sure to understand
the concept of classes properly since we are going to use them across our projects. I'll see you in the next video.
28. Display Settings: Any website you visit
nowadays is using one of the six display
settings here. If you head over to the layout
section on the right side, you can see that we have six
different displays settings. In this video, we're
going to talk about each of these display settings. What is the difference
between them, how you can use them, and when you should
use each of them, It's important to learn these
display settings is very, very well because if you don't, it's very hard for you to create different layouts
for your projects. So make sure to pay attention to the details because sometimes
the difference is subtle. However, in real-world projects, it makes a difference. Alright, so without further
ado, let's get started. First of all, I'm gonna
go ahead and add a heading into this container. I'm gonna go ahead and select this container and
remove this top padding. I don't need that. Now we have this heading. Let me give it a class. I'm going to write a one. Okay, then I'm
gonna go ahead and modify its color that
you could see it better. Alright? Any elements like heading,
paragraph, div, block, button, et cetera, use the block display
setting by default. So here we have six
different display settings. We have the block, we have the flex or flexbox, we have the grid, we have the inline-block, we have the inline, and finally we have none. As you can see by default, it has the block
display setting. What does it mean
when the display setting is set to block? It means that your
element takes up the whole width of its parent. So in this case, the parents of this
element is container. And as you can see, when I
select this h one elements, this boundary takes up the
whole width of this container. The width of this container
is set to 1,100 pixels. Therefore, this H1 element takes up 1,100 pixels here as well. And one more important thing is that if I add more
elements here, since this heading
is set to block, if I add more headings,
just like that, you can see that it takes the next available line it wants sits right next to this heading. This is how the block
element behaves. So let me give it the
H1 tag just like that. And if I copy and paste
it multiple times, you can see that each
of these elements takes up the whole
width of its parent, which is in this
case the container. That's why they cannot
sit next to each other. The next display setting
we're going to talk about is called flex or flexbox. It's one of the most
important display settings we can work with for
web development. So let me show you how it works. Unlike the block display setting that is applied to
the element itself, the flicks display setting is applied to the parents
of our elements. In this case is this
container, okay, so we don't select our
elements and change the display setting to Flexbox. Why? Because Flexbox is used for
aligning different elements, either horizontally
or vertically. So let me show you how it works. Let's suppose we have
multiple headings here. Just like that, we have
three different headings and the display setting of these
headings is set to block. So they take up the whole
width of this container. Then if I select this container, as you can see by default, the display setting
is set to block. If I change it to Flexbox, see what happens now. These elements are aligned
next to each other. And here under the layout, I have different
properties to work with. I have direction. By default, it's set to horizontal. I can set it to vertical
to stack them vertically. I can align the
elements to the center, both horizontally
and vertically. I can align these
elements however I want. But for now, you just need to
know that whenever we want to create a
one-dimensional layouts, we can use Flexbox, but what if I wanted to create
two-dimensional layout? In that case, we
need to use a grid. And you're right, we
already talked about grid. And if you remember, I told you that we can turn
any kind of box into a grid. And this is exactly
what I meant here. If I change the display setting from Flexbox to grid,
look what happens. Now. We have a two-by-two grid, and now I can modify my
grid however I want. Basically you can turn a
div block into a grid, a container into a grid
because you can change the display setting of
those elements easily. So if you have a container and you want to
turn it to a grid, you can simply change
the display setting here and then you
will get a grid. Alright, now let's talk about
the inline-block, okay, first, I'm going to set it
back to block display setting. If I want these headings
to sit next to each other, I can use the inline block. So let's turn it
to inline-block. And there we go. As you can see now these
elements sit next to each other and they don't take up the
whole width of their parents, which is this container. It's good for when you
want to create some tank, is that they need to
be placed next to each other or other
different use cases. But what about the inline? This one is called inline-block. We have the inline as well. If I turn it to inline, Let's see what happens. The main difference between the inline block
and inline is that the inline doesn't respect
the spacing property. So you cannot modify the
spacing properties here, but you can modify the
topography properties or let's say the
backgrounds property. Let's give it a try. Now that our display
setting is set to inline, I'm going to change
the background here to something else, just like that. And I can't modify the
padding or margin. But why should we ever use the inline display
setting when we can modify the
padding or margin? Well, let me show you a very
good use case for that. I'm going to remove
these headings. I'm gonna go to the Add section. And from here I'm
going to drag and drop a paragraph
into my container. Now, let me go ahead and change the color
of this paragraph. But first let me give it a tag. I'm going to call
it p for paragraph, and let me change it to white. By default, this paragraph is using the block display setting, and that's totally fine. First, let me modify the
width of this paragraph. I'm going to set it to 500
pixels, just like that. And let me increase the font
size a little bit cool. And also the line-height. I'm going to set it
to 150 per cent. We will talk about these
units later, but for now, I just want you to focus on
this paragraph right now. This paragraph has some styling. It uses the p class, and this class has some styling. What if I want to style a
specific word here differently? Well, in that case, I can select that particular
word, e.g. this one. And then from here I'm going
to click on this icon, this brush icon, and it
says Wrap with span. Let's see what it does. If I click on that, it
creates a tech span. And this takes
span by default is using the inline
display setting. We can modify the
padding or margin, even if we want to change
the size properties here, it doesn't affect this word. Let me prove it to you. I'm
going to write 500 here. As you can see, nothing
happens because the inline display
setting doesn't respect the size or
spacing properties. Alright, let me
reset that for now. Since we created this takes pan, I'm going to go ahead and call
it highlight. There we go. What I'm gonna do is change the background color of
this particular tech span. I'm going to head over to
the background section here. And let me change the
background color to something else like this. Let me make it lighter. Then. I'm going to modify the
topography property here. Just like that. As you can see, we could style this particular word
using a tech span, and this takes span is
using the inline display. So this is a very good use case of the inline display setting. And if we have
multiple paragraphs in our project like this, and we want to just
highlight another word. We can simply choose that word, rapid with a span. And from here, I'm
going to give it the same class that
we just created. Highlight. There we go. If I modify
the properties here, since it's just a
class that changes, apply immediately
to all the elements that are using these
particular class. So let me modify that. There we go. Alright, now let's move on to the last display
setting, which is none. None actually hides
the elements. Let me show you how it works. I'm gonna go ahead and
remove these paragraphs. And here inside this container, I'm going to add a div
block, just like this. And this div block is
going to have a class. I'm going to write new card, and then I'm going to change its background color to white. All right, Now I'm
gonna go ahead and add some more elements into
this particular div block. So let me start with
adding a heading, and then I'm going to
add a paragraph here. And finally, I'm going to
add a button just like that. Okay, Then let me select this new card blog and
modify its height, okay, by default,
it's set to auto. I'm going to change
it to 400 pixels. As I mentioned before, by
default the heading and paragraph or using the
block display setting. But what if we want to
hide an element here? Well, let's see what happens. If I click on this
non display setting. The last option. There we go. Now it's hidden. And if I turn it back, just like that, you can
see that now it's visible. But you may say, Can
we just decrease the opacity of this element? Let's see what's the difference between turning the opacity down and setting the
display setting to none. I'm going to select
this paragraph. And from the typography section, I'm going to decrease
the opacity of these elements
using this slider. There we go. It's not visible. However, it's still there. As you can see, it
takes up some space. And if I preview it, you can see that
something is there. And I can select this text, but it's not visible. So in this case, it's better to use a display. None. Okay, one thing to
mention is that when you use the display
non setting here, the elements still
shows up in your code. It just disappears on the page. And from the interface, it doesn't take up any space, but it's still
there in our code. So if you want to
remove something completely from your code, you need to remove that element. To do that, you can just hit the delete or backspace
button on your keyboard, or you can right-click on your element and
click on Delete. Alright guys, that's
all for this video. In the next video we're
going to talk about flexbox in detail.
So see you then.
29. Flexbox: In the previous video, we talked about all
the display settings that you can use
for your layouts. And in this video, we're
going to dive into the details of using Flexbox. As I mentioned before, flexbox is very useful for
one-dimensional layouts. And I'm going to show
you some useful examples that you could truly
understand how you can use different features and different properties
of a flex max. Here as you can see, I created some simple cards. If I go to this wrapper, I have three different cards. As you can see, each card
has one image, one heading, one textblock, nothing fancy, but their alignment is not
what I want. Actually. I want them to sit
next to each other. And for this, what
we can do is use a flexbox whenever you want
to align some elements, you need to make sure not to set the display setting of
those elements to Flexbox. That's wrong. Let me show you what happens
if I select this card, e.g. the first one, and I turn the
display setting to Flexbox. This is what happens and
it's not our intent. So you need to
always make sure to choose the parents
of those elements. In this case, the parents of these cards is this
wrapper, okay? I'm going to select the
wrapper which is the parent, and I'm going to turn it
into a flexbox. There we go. Now this cards sit next to each other and if I want them
to stack vertically, I can change the direction from horizontal to vertical,
just like that. For now, I'm going to
keep it horizontal. And let's talk about the
alignment and the justification. When I turn anything
to a flexbox, I can control the
alignment of its children. Right now. The children of
this Flexbox are these cards. So what I'm gonna do, I'm gonna show you how
the alignment works. If I change the alignment. Now you can see what's going on. Why? Because the height of this
wrapper is set to auto. Let me set a specific
height for this wrapper. I'm going to set
it to 500 pixels. And now as you can see, these cards are
stretched because the headline option
is set to stretch. But what if I want them to
be aligned to the center, both horizontally
and vertically? The justification
is set to center. If I change the line
option to center as well, this is what happens. And as you can see, these
first card is smaller. The reason is if I
click on this card, you can see that the
height is set to auto. And here on these two cards, we have four lines of texts. Here we have only
three lines of text. So if I just go ahead and
add some dummy words here, you can see that we will get
the same height here now. Alright, now let's talk
about the alignment. I can align it to the top, to the bottom, to the center. I can set it to stretch. I can change the
justification to the left, to the middle, to the right. And these two justifications
are so important. This one says space between, okay, so let's see what
happens if I click on that. It distributes and even
spacing between these cards. However, the first
card will stick to the left side
of the boundary, which is this wrapper. And the right card will stick to the right side of this boundary. But if I change the
justification to the last option space around, we can see that we have an
even spacing between cards for the first and last cards are not attached to the edges
of this wrapper. This is the main
difference between them. Most of the time we
use space between, it's much safer to
work with this option, but you just need to understand the difference between
these options. Alright, so far we
have been working with the parent elements, okay? But when we turn the parent
element to a flexbox, the child itself has
some properties as well. The child here is this card. Okay. I'm going to
select the card. And on the right side
you can see that we have the flex child and we have
different options here. We have sizing and then we
have alignment and order. If I click on this, you can see we will get
some options as well. So let's see what's going to happen if I change
the sizing option. We have three different
sizing options here. The first one says
shrink if needed, and by default it's
set to this option. And it means if we go to
other breakpoints, e.g. smaller devices like this, it shrinks since it's needed, since we don't have
that much space. But let's check out
the next option which says grow if possible. If I click on that,
as you can see, there is no space in
between and it fills up the whole space
within a wrapper. So this is the
difference between them. Then we have don't
shrink or grow. So now if I go to the
tablet break point, you can see that they
don't shrink and it's not good actually in
terms of responsiveness. And you can also use
the manual option, but I've never used that. And it's better
to avoid it since it's going to make your
life much complicated. So I'm going to change
it to shrink if needed. Now let's talk about
alignment and order. So here we have a line
and we have order. Sometimes we might need to
change the order of our cards. Of course we can do that within
the navigator like this, but we can also do that here using the flex child options. If I select this card, I add a combo class, e.g. let's call it summer. And I want it to always be the last card I can
set it to last. And there we go. They are placement
has been changed. I can change it to first and I can set it to don't change. Again, I can use the
customized order as well, but most of the time
we use first and last, just like that, Let's
talk about the alignment. So let's suppose I want to align these first card differently. I can do that. I can
select this card. Since a combo class has
been added to this child, I can change the
alignment to top, center, bottom, or again
stretch or baseline. I'm gonna go with oto. The auto takes the
alignment that we set to the parents
element here, stretch. But sometimes for some reasons, we might need to override
those preferences, those properties that we
set for the parent element. Alright, now let's take a
look at another example. Here at the bottom, I created some link blocks. These are some
simple link blocks and I created some tags here. As you can see, there is
a wrapper called tags, and all these tags are
inside these wrapper. If I select this
tag is rapper and I turn it into a flexbox,
look what happens. As you can see, nothing is organized and our
tags are destroyed. So how can we fix that? It's very simple. Can you see these
children option here which says don't
wrap by default, if I set it to wrap, it wraps all our children. These tags are the children
of this tags wrapper. And now I have access
to these advance a line option here I
can set it to a line. Roads start. Now, this tags wrapper wraps
all the children inside. If I go ahead and copy and paste these tags
again and again, you can see that they are
aligned perfectly as expected. So can you see how powerful
it is to work with Flexbox? So let's take a look at
the order once again. So here if I want this UI UX design tag to
always be our last element, I can give it a specific
combo class, e.g. I'm going to write UI UX, and then I'm going to
change the order to last, just like that. Are right guys. That's all for this video. I hope you enjoyed it. I'll see you in the next one.
30. Flexbox Challenge: Now that you've learned
how to work with Flexbox, it's starting to
challenge your skills. Workflow has created a
very cool Flexbox game in order for you to
practice what you learned. So if you go to
Flexbox game.com, you can preview this game and you can actually
play this game. You can do some exercises. There are 28 different
CSS Flexbox challenges that you can solve in order to see
whether you truly understand how the
Flexbox works or not, what I want you to do
is go ahead and solve these challenges one-by-one from level one all the
way through 28. As you move on from
level one to level 28, it gets harder and harder
to solve these challenges. But don't worry, I'm pretty
sure that you can solve them. And what matters is that
you try to solve them. It doesn't matter how much
time it takes to solve them. What matters is to try. In the next video, we will solve all these
challenges together. So see you in the next one.
31. Challenge Solution: Hey, I hope you
were able to solve all the 28 Flexbox challenges. But if you couldn't,
that's totally fine. Because together you and I
are going to walk you through all the 28 levels
and we're going to solve every
single one of them. Are you ready?
Let's get started. First of all, let's start
with the level one. Okay, So let's see
what we have here. It says move the
green circle into the outline using
flex layout setting. Alright, so first we need
to select the parent. Remember, always select
the parent first grade, it says select this
white bikes and then play with flex layout in
the right panel. Great. So here the only
thing we need to do is change the justify to right? That's all. Level one is fixed. Let's move on to the
next one, less than two. So here we have two circles
with two placeholders. It's simple as well. I'm going to select
the parent which is this playground and justify
to the center just like that. Let's move on to the next one. Here. We have 123 circles. As I can see, we
need to modify to justify to space
around just like that. Now let's move on to
the level for Cool. So here the only
thing you need to do is modify the
headline to bottom. Great, What about here? Well, we need to change
both the line and justify here to align this
circle to the center. So I'm going to change
the line and to justify number five is solved. Let's move on to
the next one here. First, I'm going to
align it, the center, and then I'm going to choose
space around this one. Cool. The next one here, we just need to
change the direction these circles should
stack vertically. I'm going to change
the direction to vertical and it's solved. Let's move on to
number eight here. Again, we need to change
the direction to vertical. Also, I'm going to
change the justify. And finally I'm going to
align it to the right, done the next one. Here we're going to use
the reverse option. We didn't talk about it before. But if you take a look
at the directions section right next
to these tabs, we have this icon, okay, there are two arrows, and this is the reverse option, and let's click on that. So let's move on
to the next one. So here first, I'm going to change the direction to vertical and then I'm going
to align it to the right side and bottom. But we have a problem here. We have number one, but number one should be
placed here at the bottom. Therefore, I'm going
to select the child, which is this circle. I'll make sure to select a child and I'm going
to modify the order. So here I'm going to change
the order to make last. And for this one,
the middle one, I'm going to change the
order to first done. Can you see how easy it is to work with Flexbox are right? What about this one? First, Let's make that
direction vertical. Then I'm going to change the
justify to space between. And finally, I'm going
to modify the order. So I'm going to first
select the circle, which is this child, and change the order to last. And this one, the
second one should be first, are right, great. Now let's see what we have here. As you can see here, we have 123 and the placeholders
are three-to-one. So we need to reverse
the layout first. Just like that, I'm going to click on this reverse button. And then I'm going to
align it to the bottom. And finally, I'm going to
use space between done. Let's move on to the next one. Cool. Let's see
what we have here. As you can see,
these circles are kinda shrinked and this
is not what we want. So what should we do? Do you remember the tag example
that I showed you before? We change the children to ramp. This is exactly what
we need to do here. So first select the
parent and change the children to wrap and done. We don't need to
touch anything else. Let's move on to level 14. Again here, you just need
to change the children to wrap and then we need to
modify the alignment. So first I'm going to align
it here to the center, and then I'm going to modify
the justify to center. Cool. Let's move on to level 15. Again, we need to change the
children to wrap and then I'm going to change the
outline here to space between. And finally, I'm going to change the justify to space between. Cool. Now let's move on
to the next one. Here. Again, we need to change
the children to wrap. And let's see what we have here. Alright, right at the top, we have green placeholders
than orange placeholders. And finally, the
purple placeholders. So let's see what
happens if I change the direction from
horizontal to vertical. There we go, We're almost there. Now, what I'm gonna do is
change the justify to center. And also I'm going to change
the outline here to center. Let's move on to the next one. Alright, let's see
what we have here. 1245 are placed properly. The only thing we
need to do is change the alignment of
these green circles. So I'm going to select this
circle and then I'm going to change the alignment
to button done. Now we are in level 18. So let's see what we have here. We can always take a look
at the hint as well. It says reverse layout on the flex container
and change alignment and two of the flakes children. So first I'm going to
select the container, which is this playground. And then I'm going
to reverse it. Now, let's select this
circle, this circle one, align it to the center, this circle three,
allowing it to the bottom. And finally, I'm going to
select again the parents and change the justify to space
between just like that. Now let's move on to the
next level, level 19. Alright, so first here, I'm gonna select this circle
and I'm going to change the sizing to grow if
possible, and it's done. Alright, Let's move
on to level 20. Number one is placed properly. Number 3.2 should be modified. Okay, so I'm going to select
number two and change the sizing to grow if
possible, and it's done. Let's move on to the next one. Level 21 are right here. Let's take a look at the hint. It says the green circle should have a width to 100 pixels. Yeah, that's right. So I'm going to select circle
one and I'm going to change the width from 100
pixels to 200 pixels. And I'm going to
select circle tool and change the sizing to
grow if possible. All right, Let's go
to level 22 here. Number one should be
here in the middle, and number three
should be placed here. So first, I'm going to select number three
and I'm going to change the order two
first, and it's done. Let's move on to
the next challenge. All right, let's see
what we have here. This number two should
be the last child. So I'm gonna change
the auditor to last number three should
be the first child. So I'm going to
change the order to fares and the rest is fine. I'm going to move on to
the next one, level 24. Okay, so let's see
what we have here. First, I'm going to
select the playground, which is the parents here. And I'm gonna I'm gonna change the children from
Don Trump to wrap. Nothing happens
yet. That's fine. Then this number
three should take up the whole width of
this container here. And as you can see
here, we have a hint. It says, guess what you need to do if you want to flex child to span across full width of
its parent container, right? Just set its width
to 100 per cent. And this is exactly
what we're gonna do. So I'm going to
select number three, and I'm going to change
the width to 100%. Nice. Then I'm going to change
the order to first. Now what I need to do is select the parents and change
the line option here. So I'm going to change
the deadline to align rows start, and it's done. Let's move on to the next one. There is no hint this
time, that's totally fine. Let's see what we have. Alright, so first, the
second circle should be placed here instead
of this green circle. Therefore, I'm going to
select this and I'm going to change its order to
first are right. Then as you can see, number one should take up the whole width of this
green placeholder. Therefore, I'm going to
change its width to 100%. And as you can see, since we didn't change
its children to wrap, everything is messed up here. So I'm going to change the
children to wrap our right. We're getting there and
let's see what we have. First, I'm going to select
this circle three and change the sizing to
grow if possible. Nice. And the only thing
left is the alignment. So I'm going to select
the parent and change the alignment here to space
between our right done, Let's move on to the next one. Okay, hint the
alliance setting on individual flakes
children will help you. Alright, cool. First, this circle
one should be last, since it's gonna be
placed at the bottom. So I'm going to change
its order to last. So the order is correct. Now, then I'm going to
select circle one and set its width to 100 per cent. Nice. Finally, I'm going to select the parent and
change it to wrap. I'm going to select circle one, this one, and change its
alignment to bottom. I'm going to select the
parents once again. And let's see how can we
align these two circles. If I change the
justify to the right? Number two, we'll
replace properly. And now I need to change the alignment of this
particular circle. Number three, I
need to select it, and let's change its
alignment to bottom. Nice, level 26 is done as well. Let's move on to level 27. Let's see what we have here. Alright, so number two should take up the whole width
of this placeholder. I'm going to select that and I'm going to change the width to 100% are right. Then as you know, we need to select the parent
and change it to wrap. Then let's select circle
too and make it first. What else do we have here? If I select circle one and
change the sizing to grow, if possible, it will grow, but the order is not correct. So what I'm gonna do is select the parent and reverse the
direction just like that. And I'm going to select
this circle five and set the sizing to
grow if possible. Finally, while it's selected, I'm going to align
it to the bottom. Done and last but
not least, level 28. Alright, now combine
all the things you learned today to solve this. So let's see how we
can solve this one. Interesting, isn't it? Alright, let's see
what we have here. We have 145. So I'm going to select the parent and
reverse the direction first, just like that,
since one is here, then I'm going to select the second circle
and make it first. Since we reverse that, the order doesn't
work as expected. So when I choose
fares, it means last. Now, if I choose
last, it means first. But for now let's choose first. I'm going to select this green
circle and make it last. Then while it's selected, I'm going to set its width to 100% and select the
parent and choose Wrap. Nice. I'm going to select this green circle and change
its alignment to bottom. I'm going to select this circle, this purple, and change
its order to last. Let's select one of these orange circles and
align them to the bottom. And finally, we need to select our second circle and change its sizing to grow if possible. And there we go. We've successfully solved all the 28 challenges
of CSS Flexbox. Let me tell you something. If you couldn't solve
some of these challenges, that's totally fine because
in real-world projects, we never use some
of these layouts. But it's good for
you to see what's possible and how you can
utilize the Flexbox. Are right guys. That's all for this video. I hope you enjoyed it. I'll see you in the next one.
32. Flexbox vs Grid: Now that you've learned
about flexbox and grid, it's time to compare them side-by-side to see which one you should use for
which purpose. Well, let me mention
that sometimes there is no right or wrong way when it comes to web development because you can achieve
something using grid and you may achieve the
same thing using a flexbox. So sometimes it all comes to our preferences and how we
want to structure our website. Therefore, I'm going to
show you some examples to understand the
difference better. First of all, you need
to know that when we have one-dimensional layouts, it's probably best
to use a Flexbox, but sometimes if you
want to make our design responsive and make
our life much easier, we can do the same
thing using a grid. So here I have a card
inside this section. I'm gonna go ahead and
add a container here. I'm going to drag and
drop a container. And then let me add the
class container to that. And finally, I'm
going to drag and drop this card
into my container. Nice. Now I'm going to copy
it and paste it three times. Okay? Alright, let me
select my section since I turned it
to a flexbox and now I'm going to select
my container and I'm going to change the display
setting to flex max. And here we have a
horizontal Flexbox. And as you can see,
everything looks great. I can change the
justification to space between two
space around left, middle, whatever I want. But now I'm using a
one-dimensional layout. If I have two
containers like this, now we have a
two-dimensional layout. It probably makes more
sense to use a grid. Now let's check this layout
on different breakpoints. I'm gonna go to tablets
and as you can see, it shrinks. Okay, nice. However, if you want to make
our design more responsive, it would make sense to
use a grid as well, even for one-dimensional layout, It's totally up to you. As I mentioned before, there is no right or wrong way. Sometimes we just
need to focus on our preferences and
focus on the fact that which way suits
our needs better. Now let me go ahead and
drag and drop a grid here. I'm going to put it
inside my section and let me drag these cards
inside this grid. Of course I could turn
this container to a grid, but I'm going to do this
manually, just like this. I'm going to remove
the container. And now we have this grid
which is inside our section. Oops, I'm going to copy
and paste this card. Once again, let me select this grid and I'm going
to add a class to it. I'm going to call it grid. Then let me add some margin from both sides are right, Cool. Just like a flexbox, we can control the child
of a grid as well. So here, if I select this child, this card, I can
modify the alignment. I can change the justify here, I can change the
order, and so on. So it comes to you to
decide whether you need to use a grid or Flexbox. Make sure to work with both
of them and check which one makes more sense
to use for your needs. Are right guys, that's
all for this video. I'll see you in the next one.
33. Spacing: Here I have a card, but it doesn't look good. Why? Because of
the spacing here, the content cannot breathe. Therefore, I need to modify the spacing between
these elements, as I mentioned before, when it comes to spacing, we have two main components. We have the margin
and the padding. The margin is the space
outside the element, and the padding is the
space inside an element. So let's take a look here. I'm going to select my card. If I want to add some breathing room for
these texts block here, I'm going to select
that and I can add left padding and right
padding just like that. Alternatively, what I can do is select the card and
add the padding. However, this padding applies to all the elements
inside this card, to all the children of
these card diblock. Let's give it a try. Just like that. And there we go. But this is not what I want. I'm going to undo the process and I'm going to
select the textblock, and I'm going to add 20 pixels and left and right padding. However, it's very tedious
and time-consuming to add the padding for
each side one by one. Therefore, I can hold
down the Option key on Mac and Alt key on Windows, and then click and drag to adjust the padding
for opposing sides. Just like that. If I want to change the padding
for all sides like top, bottom, left, and right. Instead of Option or Alt key, I need to hold down
the Shift key on my keyboard and then click
and drag, check it out. That saves a lot of time. But what about the margin? Let me set the top
padding here to zero. And I'm going to select
this heading this time. Instead of padding, I'm
going to change the margin, the bottom margin, as
I mentioned before, the margin is the space
outside of an element. Therefore, I'm going
to increase that by ten pixels and the top margin
by ten pixels as well. Alright, it looks
much better now. Alright, now this card
is inside a container. If I take it outside this
container for a second, you can see that it
touches the edges. If I want to align it to
the center of my section, let me remove this
container for a second. If I want to center it both
horizontally and vertically, I have some options. The first option
is that I can go ahead and set the
margin manually, just like this, which is nuts, a good option and you
shouldn't try that ever. The reason is when you
set the margin manually, it may look good on one device. However, if you go to
the iPad breakpoint, you can see that it's not
centered because it still has a 435 pixel margin. So you should never
do that, are right. I'm going to reset this margin. I'm going to click on that. And let's click on Reset. Alternatively, you can
hold down the Option or Alt key and then click
on that just like this. Alright, so how can I
align it to the center? I have different options. Whenever you have
an element that has a fixed width like this, when the width is defined here, as you can see here, the
width is 300 pixels. You can set the left and
right margin to auto. If I click on that, I can set the left
margin to auto. And then I'm going to set the right margin
to auto as well. There we go. Now it's centered perfectly. Let's give it a try. I'm
going to check if it's responsive and if
it works properly, I'm going to go to tablet. As you can see, it's
still in the middle. That's perfect. Alright,
this is one option. Okay, let me reset
these margins. You could just click on
this button right here. Now both left and right
margins are set to auto. However, keep in mind
that this way only works when you have
a defined width. If not, you can use another way, and that is flexbox. Alright, let me
reset this margins. Now I have this card
and I'm going to select the section and the display
setting is set to block. I'm going to set it to flex. I'm going to align it to the center and justify
it to the center. There we go. We've got the same thing, but this option works even if your element doesn't
have a defined width. Alright, now I'm going to
show you another example. First, I'm going to
select this card, and as you can see, it's display setting
is set to block. Okay, I'm going to change it to flicks for a second
and everything is disorganized
because the direction is set to horizontal. I'm going to change
it to vertical or right, we're good again. And now I'm going to change
the alignment to center. Let me select the image now. Let me change its
width to 200 pixels. It's high to 200 pixels as well. Sometimes we might need
to move this image up in order to have
an overlay image. Okay, to do that, we can use negative space. Let me show you how it works. I'm going to select this
image here in the margin. I'm going to give it
a negative margin. Okay, just like
that, There we go. Using negative margins
is totally fine. In fact, many popular
websites use them, are right guys, that's
all about spacing. I hope you enjoyed it. I'll see you in the next video.
34. Size: In web development, there are different size units
that we can use. In this video,
we're going to talk about every single one of them. So let's get started. First of all, I'm going
to go ahead and drag and drop an image
into my Canvas. Let me drop it inside
my section here. For images, you can specify the dimensions right here
in the image settings, but it's not a good way. Why? Let me show you here. I'm going to change the width to 400 pixels and the height
is going to be O2. Okay, for now, it looks fine. But if I go to the desktop break point and if I want to
make some changes, specifically for this dimension, the changes are applied to
the desktop version as well. Let me show you. I'm going to double-click on
it and I'm going to decrease the width here to 300 pixels. And if I go back to the desktop
breakpoint, There we go, our image is resized
and this is not good when we want to design
a responsive web pages. Therefore, it's
always good to use classes in order to
size your images. You should avoid sizing your images here as
much as you can. I'm going to set it to
auto. Alright, great. Now on the right side, you can see that in the side panel we have
the size section. As I mentioned before, these are all CSS properties and the size is also a CSS property. We have different
units to work with. The simplest one is pixel. Any elements dimensions by
default are set to auto, okay? As you can see, it says O2. O2 determines the dimensions of that element in respect to
the parent of that element. In this case, the parents of
this image is this section. Here, the width and
height are set to auto. So I'm going to select this
image and instead of O2, I'm gonna give it
a specific value, let's say 350 pixels. To write the unit, you can just simply write Px, or you could just click on this little Px here and you will see all the
available units. I'm going to select Px, let me make it larger. I'm going to set
it to 450 pixels. Now this image has
a specific width. We can set a specific
height for that as well. Let's set it to 350
pixels, just like that. But what about other units? We have percentage. I'm going to choose that, well, percentage is actually relative to the parent element as well. So for instance, if I want
this image to take up 30% of the available space
here in this section, which is the parent element, I can select it and
I can set it to 30% and keep in mind that the percentage actually take
some of the available space. So here for this section, right now I have a 40 pixel
left and right padding. Therefore, it takes up 30%
of the left space here. Let me select my image. I can simply set it to 50 per cent or whatever
amount I want. The same thing happens
to height if I move this image out
of my section here. And the parent of this
image now is the body. So it takes up 50 per cent
of the browser window. Let's check it out. If I preview that,
as you can see, it takes up 50 per cent
of my browser window. If I just modify the dimension, you can see that
it still takes up 50 per cent of the dimension. It's easy, isn't it? Alright, now, let's move
on to the next unit. The next unit is m. We're going to talk
about ems and rems, although they are
not that useful. Let's start with EMS. Actually, ems and rems are
relative to the font size. Here. The font size to 14 pixels and one m is equal to 14 pixels. So if I want to
set the width to, let's say 280 pixels, I can just multiply that
amount by this font size. So let's say 20. So 20 m equals to 180 pixels. So let's write 20
ams. There we go. If I just write 280 pixels, you can see that this
is the same thing. Let me prove that to you. There we go. Now I think changes because 280 pixels is equal to 20 ems. Let me write 20 EMS again. And now if I try to
increase the font size, this width changes
as well accordingly. So I'm going to hold down the option key on my
keyboard or Alt key if you're using Windows and just click and drag. There we go. I'm going to set the
font size to 30 and 1M now is equal to 30 pixels. Therefore, the width of this
image now is 600 pixels. You can use ems sometimes e.g. if you want to design
a card and you want all the elements to
respect the font size. But one of the
best use cases for using ems is in buttons. So I'm gonna go ahead and
drag and drop a button here. So this button, by default has a 15 pixel left
and right padding. Let's see what happens if I
change the font size first, let me give this button a class. I'm going to write new button. Alright, if I try to
increase the font size, Let's see what happens. Can you see that the
padding stays the same? We can just fix this problem. First, I'm going to set the
size to 16 pixels are right. Now here for the padding, I'm going to use
EMS for the top, bottom, left, and right padding. I'm going to select top padding. And here I'm going to write
one m for the bottom, the same thing, one
M or the left 1M. And for the right one
m. Alright, cool. Now we have a fully
responsive Martin, because these padding are now
relative to our font size, so they respect our font size. I'm gonna go ahead and
increase the font size. And as you can see, the padding scale as well. This is one of the most
popular use cases, but what about rems? Let me select this image. Well, rims actually
stands for root EMS, and it means that
it doesn't respect the topography size
that we set here. It only checks the font
size of the user's browser. By default, it's set to 16 pixels unless the
user changes that. If I set the width
to 20 RAM here, just like that, and I try
to increase the font size. Nothing happens because RAM doesn't respect the
font size here. Let's give it a
try. There we go. Nothing happens. However, if I go to my browser settings and I try
to increase the font size, this image will be larger. These are some advanced units that you might not
need to use them, but I just want you to
know that they exist. Now let's talk about CAH, let me go ahead and drag and drop a paragraph here that you could truly understand
what the CH means. I'm going to drag
and drop it right inside my section, right? And let me modify the
color here to white. Cool. As you can see, the
text width here is so long, therefore, it's very hard to
read this paragraph, and it's a good practice
to limit the number of characters in a paragraph. So how can we do that? We can either set a
specific width for that. We can use percentage
or we can use CH. I'm going to set it to CH. So what's a CH? Actually ten CH equals to ten zeros of that
particular font. What do I mean by that? Let me set this width to, let's say 50 CH. It means the width. This paragraph is now set to 50 zeros of this
particular font. Let me show you how it works. I'm going to write
something here. Let me make this font size larger and we're
gonna set it to 20. And let's write hello. And then I'm going to
change the width to ten. Ch. Ch doesn't mean
ten characters. This is a very common mistake
that most beginners make. This is not about characters. Let me prove that to you. Here. I'm going to write hello. Again, I'm going to write hello. And once again, let's
write hello only HE here. Let's count it. 1,234,567,891,011.12, it's 12 characters. But if I hit Enter and
I try to write zeros, we should be able to write precisely ten zeros,
123,456,789.10. The next zero goes
to the next line. So this is how the CH works. If I change the font
here to something else, you can see that the
width changes as well. Can you see that are right? Now, let's move on
to the next unit, which is we w and we h. Well, vw stands for viewport width and we H
stands for viewport height. So what do they mean? Well, I'm going to select
this image and I'm going to set the width to 50 V w. What does it mean? Viewport is actually the
size of our browser window. If I use the 13 inch screen, my viewport is a 13 inch. If I use a larger screen, my viewport will be larger. So if I set the width to 50 V W, it means that this
image should take up 50 per cent of the
viewport width. Let's give it a try. There we go. As you can see, it takes up 50 per cent
of the viewport width. We can do the same
thing for height. I can set the height to, let's say 50 V H. Let's give it a try. As you can see, it
takes up 50 per cent of my browser windows
height, just like that. Now, let's circle out minimum
width and minimum height. These are super, super powerful. Sometimes we don't
need to explicitly specify a specific
size for our elements. Instead, we can
use minimum width, minimum height, and maximum
width, and maximum height. Let me show you how it works. So I'm gonna go to
another example. Here I have a card. And if I select that,
you can see that the width and height
are set to auto. However, it doesn't look good. Why? Because it takes
up the whole width of the section, its
parent element. How can I fix that? Well, instead of setting a
specific width for that, I'm going to set a minimum width and a maximum width for that. Let's say we want
this image to have a minimum width of 350 pixels. Therefore, I'm going to set the minimum width to 350 pixels. Nothing changes because
this is minimum width. If we want to limit the maximum width of
this image or this card, Let's say I need to
modify the maximum width. So here the maximum width
is going to be 400 T cells. And there we go. Now this card is 400 pixels, but it can't be smaller
than 350 pixels. So let's give it a try. So if I preview that, you can see that it
can be smaller than 350 pixels because we set
a minimum width for that. If I make it smaller, e.g. the minimum width
is going to be, let's say, 250 pixels. Now, it can be smaller. Okay? Just like that, this
is minimum width. We can use minimum
height as well. It functions exactly the same. We can use that for
our hero section, e.g. for our sections, we can
set the minimum height to, let's say, 100 vh. And it means that it
takes up at least 100% of the viewport height and it doesn't mess up
with our content. As I mentioned, these
units are advanced and if you don't know how
they work completely, That's totally fine because
it takes time and practice to completely get
used to these units. Now let's move on to the next
topic which is overflow. So here in our card
I have a paragraph. Alright, I'm going to reset this minimum width
and minimum height. And here I'm going to
set a specific width, like 340 pixels. And the height instead of auto, I'm going to set it to, let's say 400 pixels. Okay, now, if I try to
add more sentences here, Let's see what happens. There we go. Now we
have the overflow. It happens sometimes,
and we can fix that. To fix that, we need to select the parents of these elements. The parents of this
next plug is this card. Make sure to select the parent. And if you head over
to the overflow here, we can set the
overflow to hidden. It kind of mask the
overflowing content. If I preview that, you can see that there is
no overflow happening. We have other options as well. We have scroll. If I select that, you can see that the user can scroll through the
content just like that, we have one more option
and that is auto. Auto means that the browser
first checks if there is so much content here that
doesn't fit into this card, it will show the scroll. But if I try to remove some
sentences here like this, it will not show this
cruel are right. Now we need to talk
about the last property of the size section,
which is fit. Let me drag and drop a
diblock here. There we go. I'm going to give it a class. Let's call it demo. And for this demo, I'm gonna go ahead and drag
and drop an image here. So let's suppose that we want this image to cover
this diblock. So first, I'm going
to select this image. I'm going to set the
width and height to 100%. It means that it takes
100% of its parent width, which is this
demoed if block and 100% of its parents height, which is exactly
this demo diblock. Then while this
image is selected, I'm going to change the
fit from field to cover. Now let's see what happens. If I select this demo diblock. I can give it a
specific width and height like 400 pixels. And you can see that the image covers this def block perfectly. If I modify the height, let's say to 500 pixels. There we go. It covers the image
and it doesn't change the aspect ratio of the image since we set the fit to cover. If I change it to, let's say, feel it will change
the aspect ratio. But since it's set to cover, it doesn't change the
aspect ratio our image. But what if you are not satisfied with the
positioning of this image? Well, there is an advanced
option right next to this fit. If you select your image, you can click on this three
dots icon and then you can position your image however
you want, are right guys. That's all for this video. I hope you enjoyed it. If you didn't understand some of those advanced units,
that's totally fine. You can always reach out
to me and then you will try to simplify
everything for you. But believe me, if you start practicing them in
real-world projects, for sure, you will get used to them as quickly as possible. See you then.
35. Position: Hey, in this video we're going
to talk about positioning. Basically we have six different
kinds of positioning. We have static,
we have relative, we have absolute, fixed, sticky, and finally
we have float. In this video, we're going to dive into each of
them and I'm going to show you how they
differ from each other and how you can
use them properly. Are you ready? Let's begin. I'm going to start with static. Any element by default
has a static position. What does that mean? It means that they are
part of the document flow, so they take up space
on our page and also they appear in the
order that they are stacked. So e.g. here I have a heading, its position is set to static. Then I have a paragraph,
again static. Then I have this image
wrapper, again, static. Then I have these images, these div blocks, they
are all set to static. Most of the time we use
the position static. And we change the
positioning using the display settings that
we talked about before. But sometimes for some
specific reasons, we might need to change
the positioning. So let's see how they
differ from each other. I'm going to select this image, the third one, this d block. And I'm going to
change its position from static to relative. Let's see what happens. Nothing, but it's
not true because now it's position is
relative to itself. Here, as you can see, it says relative to
and then it indicates that the position
of this disk block is relative to itself. What does it mean when we set the position of any
element to relative? We have two positions, the old position and
the new position. The new position
of this element is relative to the old
position of this element. It sounds complicated and
complex at first glance, but believe me, it's so simple. Let me show you here. Once I set this
position to relative, I have access to these
positioning settings. If I try to change its
position just like that. Now, this new position is relative to its
previous position. So we moved it by 92 pixels to the left from its
original position. And when we set the position
of an element to relative, it's still part of
the document flow, so it still takes up space. So this is basically how the
relative positioning works. One thing to mention
is that when we have different elements that we want to put on top
of each other, we can't do that using static. Let me show you what I mean. If I set it to static
and if I want these images to overlap each
other, I can do that. Of course, I can change
the padding and margin and I can give them some
negative margin and padding. However, that's not a good way. Why? Because when we change
the margin and padding, we are actually changing
the actual position of that element and we're
changing the document flow. This is not what we want. If you want these images to overlap each other for
a specific layout, we can set these
elements to relative. If I select this div block, the last one, and I set
its position to relative. It's relative to itself. And here we have a new property
which is called z-index. The z-index lets us control how our elements should
stack on top of each other. So if I want the second image to appear on top of this image, I can select it. I can set it to relative. And as soon as I
set it to relative, I can change its z-index. Let's set it to one. There we go. Now this image
has a higher z-index, therefore, it will be on
top of our previous image. If I select this image and I set its
position to relative, I can move it to the right
side just like that, and it's behind
our middle image. Why? Because our middle image, the second image, has
a higher z-index. If I want this first image to be on top of our middle image, I can set a higher z-index
for that e.g. two. There we go. If I want the third one to be
on top of all these images, I can set its the
index to three. If I move it around, you can clearly see that it's on top of the other two images. This is basically how the
relative positioning works. We create a new position
for our element, which is relative to
its old position. And we can also
control the z-index. Alright, now let's
set the position of these images back to
static for a second. Okay, So let's talk about the other positioning
option, which is absolute. If I set an element
to position absolute, Let's see what happens. As you can see, everything
is disorganized. I can get access to
these alignment options. And if I click on that e.g. top-left, you can
see that it will be positioned to the top left. And here it says that
it's relative to body. The position absolute
works like this. It always looks for the first parent element that has the positioning of relative. So here I have this
image wrapper and this image rapper has
a static positioning. Therefore, when I change
the position of this div, like this image to absolute, it's relative to body. Okay? So what if I want this image to be relative
to this image wrapper? Well, it's simple. I can select the image
wrapper and I can change its position to relative. There we go. Now this image is relative to the image wrapper
boundary, okay? Now it founds a
parent's elements, which is this image wrapper that has a relative positioning. You need to understand and learn these concepts very well because when it comes
to web development, these positioning options could
really help you to create some stunning layouts and some stunning web
pages are right. Now, I can select
this div blog and I can modify its position
however I want. And it's now relative
to its parent, which has the
relative positioning. So when can be used the
absolute positioning, e.g. let's suppose you want
to create a pop-up, a pop-up window,
which is so popular. Nowadays, most websites use a pop-up to let the user
register for something. So in that case, we can
use the position absolute. Of course we will talk about the position absolute and
different use cases later on. But for now, you just need
to understand how it works. And just like the relative, we can still work with
the Z index here. One thing to mention about
position absolute is that when you set an element
to position absolute, it's no longer part
of the document flow. What do I mean by that? It means that it
doesn't take space. So if I try to move it around, it doesn't take any space here. It's not like relative. This is the main
difference between position, absolute and relative. So you need to
keep that in mind. It doesn't take any space. Alright, let's set it to static. Now, I'm going to talk about the next positioning
option which is fixed. Let me show you another example. I'm going to go
ahead and drag and drop and navigation bar here. I'm going to put it right
below my body are right here. Then let's give it a class. I'm going to write nav. Cool. And also I'm going
to modify its height. Let's set its height to
something like 200 pixels. It's too much, maybe 150 pixels. All right, Cool. I said it's height to 150 pixels because I'm going to show you
something in a second. So let's preview our
project for a second. This navigation bar is part of the document flow and
it takes up space. If I scroll down, you can see that
everything works as expected and it disappears
as soon as I scroll down, what if I wanted to stick to
the top while I'm scrolling? Well, we can use
the fixed option. Okay. If I use position fixed, let's see what happens first. Everything will be disorganized because when we set
something to fixed, we need to specify
its alignment, okay? We need to define that it should be fixed at the top, e.g. and now it's fixed. However, this is not part of
the document flow anymore. How do I know that? Because now you can see that this container pushed
up a little bit. Why? Because there is
no navigation bar anymore taking up space. If I preview that, you can see that it sticks
to the top, just like that. However, we've got this problem. So to fix that, we can use another positioning. But before doing that, let me show you another
example of fixed positioning. If I select this image, this div blood and I set its
position to fixed, okay? I can change its alignment to bottom right corner and
it's relative to the body. Actually, it's relative
to the viewport. It's not relative to
its parents anymore. It's relative to
the browser window. So if I preview that, you can see that it's fixed
to the bottom right corner. And if I scroll down, it's still fix there because it's relative
to the viewport, to the browser window or right? And if I want to
change the dimension, let me show you how it works. Just like that. It's still there. Okay? Alright, let me set its
position back to static and I'm going to show you how we can fix the problem with
this navbar, okay? Because we don't want to mess
up with our document flow, we can use the Sticky option. If I select this navbar and
set its positioned to sticky, you can see that
it's still part of the document flow because this
container didn't push up. However, we can
specify that it should stick to the top if
it's set to auto, if all these edges are set
to auto, see what happens. It doesn't work. The thing with sticky
is that you need to define where this
element should stick to. So I'm going to set
the top here to zero. It means that it should stick to the top edge of our browser. And one thing to
mention is that sticky. Is also relative
to the viewport. It's not relative
to its parents. So now if I preview
that, there we go, it sticks to the top and
it's not messing with our document flow because it's still part of the document flow. We can use this position for our navigation bar
for the footer, we will talk about them. But I prepared another
example for you, which is so popular nowadays. Here I have a section and
inside I have a container, which is a flexbox. And inside this container I have two different div blocks, the content div block
on the left side, this newsletter div
block on the right side. Okay, nothing complicated. I'm going to select
this newsletter div, and I'm going to change
its position to sticky. Let's see what happens. First. I'm gonna go ahead and
remove this navbar. We don't need it anymore. Now, I'm going to preview that. As you can see,
nothing happens. Why? Because as you remember when we work with Sticky position, we need to specify where
it should stick to. So here I'm going to set the top to zero and let
me show you what happens. I'm going to preview that. If I scroll down as soon as it touches the top
edge of my browser, which is the top
of the viewport, you can see that it
starts sticking just like that until it reaches the
end of its parent element, which is the container. Alright, let me show
you once again. Since we set the top
position to zero, once it touches the top edge, it starts sticking until it reaches the end of
its parent element, which is in this case
the container, okay? Then it behaves normally,
as you can see. Now, we can even add
more spacing here, e.g. I'm going to set it to 100. And let's see what happens. Now when there is 100
pixels at the top, it starts sticking
just like that. How cool is that? You can see these kind of
behavior on many websites like Medium or other different
blogging websites. Now let's talk about
another option which is the last type of positioning
and it's called float. Well nowadays we don't use
float and clear that as much. However, for some use cases, it's still very practical
and we can use floats. So let me show you how it works. First of all, I'd
like to mention that float and clear don't work with Flexbox as
the child of a flexbox. So here I have a container
which is not a flexbox. The display setting
is set to block. And inside I have a
simple image div block. And then I have the paragraph. If I select this
image diblock and I change its position
to float, e.g. float left. You can see that the contents
wraps around this image. Now if I change
the flow to right, you can see that now the content is wrapping
from the left side, okay, just the opposite sign. But what is clear? Let's suppose we have this
image set to float left. And I'm going to
select this paragraph. And I wanted not to wrap
around this specific image. In this case, I can
set clear to left, right, or both sides. Most of the time
we use both sides. Since our image is
here on the left side, now only the left side works. If I set it to left, you can see that it's not
wrapping around it anymore. But if I set it to right, it doesn't work because
our element here, which is set to float, is not on the right side. If I set clear both, you can make sure that
it will be cleared. Our right guys, that's
all for this video. We talked about a lot of
different things and I hope you could understand different
kinds of positioning. If you do have any questions,
please let me know. Make sure to practice all of these positioning
options because we're going to work with
them in real-world projects. So I'll see you in
the next video.
36. Typography: Hey, in this video we're
going to talk about the typography section on the side panel, on
the right side. Here I have some texts elements. I have a heading and
also I have a paragraph. So let me select the heading
and I'm going to show you all the properties of the
topography panel here. First, we have the font. If you open it up, you have some default funds. If you want to add more
fonts, you can click on this, Add Fonts at the top, and you will be taken to
the project settings. And here under the fonts tab, you can add different
fonts, e.g. if you want to work
with Google Fonts, Roberto or other Google fonts, you can just add them here. Let me look for
Roboto for a second. Let me see if I can find
it right there we go. Here is Roboto. Then you can select variants
of that particular font. These are the weights
of your fonts, e.g. a. Regular 500, 700,
which is black. And if you want to upload
some custom fonts, you can upload them here
from your computer. And if you want to
use Adobe fonts, you can simply use this
section to connect your project to Adobe
fonts using an API. Okay, now let's talk about
the topography panel. So I'm going to
select this heading. And here we talked
about the font. Then we have weight, we have bold, different weights. Each font has different weights. Then we have size. This is our font size, and you can use different units like the size property here. You can use pixel percent, ems and rems, CH, viewport width and
viewport height. And finally we have
the line height, which is so important
when we have a paragraph. So here, if I select
this paragraph, I set the line height
to 150 per cent. So it's 150 per cent
of the font size. If I just reset this setting, you can see that this
paragraph is not that legible. Therefore, it's always
a good practice to increase your line-height, especially when you're working
with small font sizes. I'm going to set it to 150
per cent. There we go. Here we have color. You can change the
color of your font easily to watercolor you want. Here is the hue slider. Then we have the
transparency slider. This controls the amount of
your color if you want to, let's say decrease the opacity. You can just use this slider. Here we have the hex color code. You can just copy and paste the hex color code from any design software
you work with. No matter if it's Figma, Sketch, Adobe XD,
it doesn't matter. Then we have HSP, which stands for hue
saturation and brightness. We're not going to talk about
these specifications here. Then we have the
alpha or the opacity. If I use this slider and
I decrease the opacity, you can see that the
alpha amount changes. Here we have the
contrast ratio and it actually lets us know whether we have enough contrast between the background color and
the foreground color. And as you can see, it says AAA, and it means it's very legible. But if I try to use some
lighter colors like that, you can see first we have WA it's still fine,
it's still good. But if it says fail, it means that your texts may not be legible
to some pupil. It changes based on your font
size and different factors. So always make sure that your color passes the
contrast ratio test. Okay? All right, let me
undo the process. Alright, so what
do we have here? Here is where we can
create our swatches. Let's suppose we have
this color and we want to create a color is style or
let's say a color swatch. If you're familiar with Figma, you may know that we can
create colors styles, and this works like that. Here. We can just click on this plus button and it creates
a new swatch. And I can name it, e.g. I. Can say neutral
slash light create. And if I select
any other element here and I hit over
to the color section, you can see that
these swatch is here. And as you can see there
is this little arrow and it means this
is a global swatch. And I can use it for any
element just like that here. If I use this
neutral light swatch for this paragraph and I
use it here as well, e.g. let me change that. So if I change it here, if I click on this pin button and I tried to
change this color, you can see that the changes
apply immediately to all the elements that are
using this particular swatch. So you need to make sure to
keep your colors organized. Our right, Let's
undo the process. Let's move on to the next
property, which is a line. It's so simple, we have different alignments
options, left, center, right, and justify, just like Microsoft Word or
any design software. Okay, then we have
the style property. We can it tell us size
our texts like that. We can use some
declarations here, e.g. we can use this strikethrough. We can use underlying
or over line. If you want to create
some links, e.g. we can use this underline, then we have this
more type options. By default, it's not visible, but if you click on that, you can get access to
these advanced options, such as letter spacing, texts in dance columns, and these capitalize
and direction options. So let's go through
each of them. Using this field, we can control
the letter spacing, e.g. if I want to increase the
spacing between letters, I can set a higher
letter spacing here. I'm going to set it to 20 now. And as you can see now, the spacing between
letters as much higher. Let me decrease that. Actually, a good use case
for using letter spacing is when we have a word that
is completely capitalist. So if I select this
interior design and if I set the capitalist option
to all caps like that, sometimes if I work
with small font sizes, I need to increase the
letter spacing to improve legibility and
readability of my texts. So in this case, let me set it to five. Now, it looks much better. I can set it to three as well. So this is used basically
for this purpose. Now, let's move on to the next
one which is text indent. I'm going to select this
paragraph and let me specify an amount
like 20 pixels. It just in dense the text, just like Microsoft Word. And then we have columns. Actually, I've never used
that and I rarely see any website or any
designer uses this option, but it's good to
know that it exists. So if I specify three here, it takes our texts
and it divides it into three equal columns. If I hit Enter, there we go. Now we have three
different columns and we can just modify
the gap here, e.g. the styling, we can
add some dividers. As you can see, we can modify the thickness of that DY
there, just like that. And also we can modify the
color of that divider. Okay. But to be honest,
I've never used that and I doubt you
should use that too. Alright, let me
remove that for now. If you want to reset
any property here, you can hold down the
Option key or Alt key on your keyboard and
then just click on that once, just like that. Okay, Then we have the
capitalist options. We have all caps, as I showed you before. We have capitalize every
ward just like that. What do we have lowercase? Okay. I'm going to set it to none. Then we have the erection for most languages we use
left to right direction. But for some languages
like Arabic, you can use right to left
direction. We have breaking. There are some
options like this. It's not that useful. So we're not going to touch
upon all these options since most of the time we don't
use this breaking option, then we have text shadow. If I click on this plus button, I can add shadow to my text. Just like that, I highly recommend you
should avoid adding shadows to your texts because it decreases the legibility
of your texts. So I'm going to
remove this r, right? That's all about typography. But there is one more thing
I'm going to mention here. If I go ahead and drag and
drop a div block here, I'm going to give it a class. So let's write typography
here for this dip. Like I can set some specific properties
that its children can use. So if I change the font
to something else, Let's use this one for instance. And I increase the font size to, let's say, 40 pixels. Something dramatic. And also I changed
the color to red. You can see that nothing
happens here because there is no texts layer inside. However, if I go
ahead and drag and drop a heading
here, there we go. Now this heading is
getting the properties from the default properties
we said to its parent, which is this
topography diblock. Of course, we can override that. E.g. I. Can give a class to this
heading, like heading one, and just modify the color
to whatever we want and font size or any
other properties here. But you need to understand
that sometimes it makes much more sense to add the default properties to the parents of our
elements first. And then we can just simply
drag and drop those elements. And we don't need to modify
everything from scratch. E.g. you can select your section if your
section is going to have some specific fonts and let say some specific
font properties. You can just specify those
properties for the section. And then whatever you put
inside this section will inherit from the properties that you set for that section. So I personally, when I
want to start a project, I select my body and I
set the font here once. And then I don't need to change the font again and
again and again. Of course I can override
these properties, but it's going to save
me so much time if I can set some default
properties. Are right guys. That's all for this video. I hope you enjoyed it. I'll see you in the next one.
37. Backgrounds: Hey, in this video we're going
to talk about backgrounds. If you head over
to the style panel right under the
typography section, we have the background section. And it's very useful because we're going to use it
almost all the time. So here as you can see, I have two different
sections, one empty section. This is for the next
part of this video, but for the first part, we're going to work
with this section inside I have a
container as usual, and then I have a
heading and a paragraph. Let's suppose we want to add
a background to our section. I'm going to select my section. And I can go to the background, and I can click on
this plus button here. And now I can choose Image. I already showed
you this section, but we didn't actually dive
into all the details here. Okay, now I'm going to choose this image from my
assets. And there we go. By default, it's
always set to time. As you can see here, we have
the tie an option and we can just set it to none because
we don't want it to time. Then we have the
position options and all these options here. So let's start with the time. Here, we have different types. We have image, we
have linear gradient, we have radial gradient, and we have the color overlay. So let's first talk about image. Here. I can set the size, I can set a custom size if
the custom tab is selected, we rarely use this custom size here because we usually size our images using the size
property in the side panel. Then we have the cover, which is so useful almost all the time
we use this option. And we have the contain. The contain actually
scales down the image until it's contained in our
section or our container, or whatever element it's in, then I can modify the
position here to center. Now I'm going to set
it to cover for now. Alright, our background
image looks great. We can also set the
left and top position based on percentage. As you can see by default, it's set to 50 per cent. If I set it to top-left, you can see that left
and top are set to zero. If I want to manually
modify them, I can do that as well. I can set it to
48 per cent, e.g. or maybe, let's say 35 per cent. Nothing changes here because our image is too large actually. So let me modify the top
as well to 20 per cent. As you can see, it moves down. Alright, I'm going
to undo the process. If we want our image to tile, we can use the tile option and we can just set
a custom width. Let me set a custom width that
you can see how it works. I'm going to set the
width to 100 pixels. And as you can see, since the tile option
has been selected, our image is titled. I can set it to horizontally and also vertically tile are right. Now we're going to
set it to downtown, and let's set it to cover. We have the fixed option here. By default, all images
are set to not fixed. We're going to talk about
the difference between fixed and not fixed in a few seconds. But for now, let's move on to the next feature of this
image and gradients section. As you can see, our texts
layers are not reliable. Why? Because we don't have
enough contrast here. So what if I change
their color to white? Let's see if it
makes a difference. Of course, it makes a
difference, but still, since we have a small font size, sometimes it could be
hard to read this text. How can we fix that? Well, a very well-known solution is to just add an overlay. If I select this section here, and then I go to
the backgrounds. If I click on this
plus button here, I can set the time to
overlay like this, and it creates an
overlay, a dark overlay. And we can just
control the opacity of this overlay from
here, just like that. Now it's much more visible. But what about linear
and radial gradients? Let's talk about them as well. I'm going to start
with linear gradient. Well, as you know, a gradient is a smooth transition from
one color to another color. And by default, we have two different stops
or points here. We have the black
and white points. I'm going to select this point, and from this color, I'm going to change the
color to something else. Let me change it to e.g. this orange and the next one, I'm going to select
the next point. And I'm going to change
it to the Scholar. Alright? And then I can modify the
angle of this gradient. Here. As you can see, I can simply modify the
angle, the degree. But what about this
repeat option? If I check this checkbox? Well, nothing happens. That's because in order
for this option to work, we need some space
here in the slider. If I just take one of these points and move
it to the left side, you can see that now
we have more space. As you can see, it's repeats again
and again and again. Just like that. I can change the angle as well. Cool. Alright, let me just
uncheck this repeat option. We're not going to need that. We can also control the
opacity of these colors, e.g. to create a custom overlay, if I modify the alpha
amount here to 50 per cent, as you can see, now we
have a gradient overlay. I can do the same thing
for my orange color. 50 per cent. There we go. It looks great. But what about radial gradient? If I click on that and if I set the opacity to 100 per cent, again, you could simply
see the difference between a linear gradient
and a radial gradient. Alright? As you can see here, we have a focal point. We can change the
size here, e.g. this one, I can
set it, this one. I can change the size easily, and also I can change the
focal point like this. From which direction this
transition should start. Like that. Are right, nice. If you want to hide one of
these images or gradients, you can simply click on this
icon or you can just click on this remove
button if you want to reorder your elements here, you can simply hover over these vertical lines that is
next to this tiny thumbnail. Click and drag just like that. Alright, let me remove this
radial gradient for now. But sometimes we just need to have a solid background color. We can do that as well. We can always select an element no matter
if it's a diblock, a heading, a paragraph, any box can have a
background color. By default, it's
set to transparent. If I select it, I can
set it to white, e.g. but since we have an image here, you can see that I can change the background color to black
to whatever color I want. Okay, there is also
a good trick here. If you want to use
some famous colours, like white or black, you can simply write
its name here, e.g. I'm going to write white here. And there we go. I have a white background. If I change it to
black, it works. If I change it to
read, it works also. But most of the time we
usually manually set the background color or we copy and paste the
hex color code here. Okay, now I'm going to
talk about clipping. It works like masking
InDesign software. So let's suppose I want to add a gradient to this heading. Is it possible? No, except it is, if I go to color, I can set a gradient. However, there is
a good trick here. If I go to backgrounds here, I can create a
gradient here and I can change the time to linear. And from here, I'm going
to change the gradient to, let's say this color. Alright, right, let me
create a cool gradient. Are right, nice. Now I'm going to
change the angle. However, as you can see, this box doesn't feel this text. It doesn't cover its height. Therefore, I need to increase the height size to
something else. Let me increase it to
100 pixels for now. Alright, but does it look good? It's not exactly what I want. Well, wait a second. I'm gonna go to the backgrounds, and from here I'm
gonna go to Clipping. And by default it's set to none. If I change this to clip
background to text, there we go. Now we have the gradient
clipped inside our text. How cool is that? This is the exact same
method that's most popular websites use in order to
create such an effect, e.g. Apple uses this
technique as well. So I can simply
modify the gradients and the changes apply to
this text in real time. Let's see if it works. Yes, Dance. I'm going to change
the background color of this section to black that you could see the
effect much, much better. Alright, now let's talk
about the other feature. As you remember, I mentioned that there is another
section here. Let me change the
background color to white. And here inside this container, I'm going to drag
and drop a diblock. For this, the Blog. I'm going to create a class, let's call it Image fix. Then I'm going to
set its width to 100 per cent so that it takes up the whole
width of its parent, which is the container. And the height is going
to be 50 per cent. Like that. I'm going to go to backgrounds. And from here I'm going to
add an image or gradient. And I'm going to
choose an image here. There we go. And finally, I'm going to change the size to cover and
the position to center, and let's set the time to none. As you remember, I told you that we're going to talk
about the fixed option. So let's see by default
how it functions. If I preview this webpage, it works like that,
okay, as expected. But what if I want this
background to be fixed? And we create a
parallax effect here. In that case, I can
select this image and I can just go to the
image settings here. And instead of setting the
fixed option to not fixed, I'm going to choose fixed. Once again, I can reposition
it however I want, and then let's preview that. There we go. Can you see
how cool this effect this. So when we set the image to fix, it actually creates a new layer behind our browser window. And that new layer is our background image,
which is fixed. And we can simply scroll
through our page. We can do the same thing
with texts as well. Let me prove that to you. Let me remove this image
and I'm going to select this container and
add a heading here. Then I'm going to increase
the font size dramatically. Let's increase it to 80 pixels, or maybe 120 pixels that you could see
the effect clearly. Then I'm going to increase
the height to 100 pixels, or maybe even more,
maybe 140 pixels. I'm going to go to
Image and gradient, and let's add an image here. I'm going to choose,
let's say this one, and let's reposition that. Do not tile and cover. Alright, How can I do that? Well, first, I need to
set the image to fixed. And then I need to go to Clipping and I'm
going to change it to clip background to text. And let's see what happens. Can you see that?
Now we have that fixed backgrounds sitting
behind our text layer. It's very cool. You can create some cool
effects with this technique. Now I'm going to talk about
something very interesting. So far you learn that you can add a background image here. If you select your section, you can just add a
background image and everything looks perfect. But what if you want to actually add a video to your background? Is it possible? Of course it is. However, we can do it
in the backgrounds. We need to use a component which is called
background video. If I go to the Add section, now you scroll down, you can see that
under the components, I have the background
video component. Drag and drop it
and put it right above my first
section. There we go. This is just an element
like any other elements, and you can simply modify
everything you want. I can give it a specific
height, like 100 vh. And then I can use this Upload Video button
to upload a video. So let me go ahead and
quickly upload a video. You need to keep in mind that your video should
be less than 30 mb. And as you can see,
nothing happens. That's because the
background video components only works when you
preview your webpage. It doesn't work in the Designer. I'm going to preview
it and there it is. Can you see how cool it is? But wait, can we add some contents on top
of this background? Yes, We can. Just like any other elements, I can just select my
container here, e.g. and bring it and put it
inside this background video. But as you can see,
it's not centered. So I can select my
background video and I can change the display setting
from block to flex. Now, let's check it out. Can you see how
easy it is to work with these components
are right guys, that's all for this video. I hope you enjoyed it and I'll
see you in the next video.
38. Borders: In this video, we're going
to talk about borders. If you scroll down here
on the right side, you can see that we have
the borders section right? Under the backgrounds. We use borders
almost all the time. It has different
properties that we can customize and we're gonna
go through all of them. So let's get started
first things first, I'm going to show you
a very common example. I'm going to select this button. And as you can see, this button has just a background color. But what if I want
to make it rounded? Well, I can hit over to the
border section and I can modify the radius property
here to make it rounded. If I increase the corner
radius amount, there we go. We've got this cool
rounded button. But what if I want to modify the corner radius amount of
each corner independently? Well, we can do that as well. If I click on this option
that says individual corners, I can control the
corner radius amounts of each corner separately. One thing to mention
is that you can still use all the units we
talked about before, like pixel percentage, em, rem, CH, VW and we h. Okay? So here let's suppose I want to just make the two top
corner radius rounded. Therefore, I'm going to set the bottom corners
coordinate radius to zero. Let's see what happens. There we go. We've got this weird
looking button now, let me undo the process. Alright, so that's all
about corner radius amount. But what if you want to create an outline button instead
of a contained button? Right now we have
a contained button because it just has
a background color. It doesn't have any border. If I want to make an
outline button first, I can add a combo class
year because I use this button class somewhere else for this register button. And this is Learn More button. And I'm not going to change
the default properties. Therefore, I'm gonna go ahead
and give it a combo class. So let me write contact
us just like that. Then if I head over to the color, this
background scholar, I can write transparent and our button disappeared
except it didn't. It's still there. But we can see that
it's not visible because we just set the
background color to transparent. If I click on that,
you can see that the alpha amount is set to zero. That's why we can
see our elements. So the next thing I'm gonna
do is obviously change the color of my text
here to something else. I'm going to change it to black. All right, then I need
to add some borders. If you head over to the borders, here we have the border section
right under the radius. And we can decide whether
we want to create borders for all edges or
just for specific edges. If you want to create
borders for all four edges, you need to select
this middle one, the one that is in the center. And then you can
select your style. I'm going to select
Solid are right, we've got our border, but I'm going to
increase the width. Okay. I can go ahead and
manually increase it. E.g. I. Can set an amount here to three. But if you just want
to eyeball and you want to experiment with
different amounts, you can hold down the option key on your keyboard or Alt key, and then you can click and drag, increase and decrease the
width here, just like that. Alright, I think four
pixels looks great. Now we can modify the color of your border as well to
whatever color you want. And you can modify the style
of your borders like this. That's so simple, isn't it? But let's see what happens. If I want to just add borders
to some specific edges. I'm going to remove the style and then I'm going to select a specific h here, e.g. left. And then I'm going to
set the style to solid. And there we go. One thing
to mention is that when your element doesn't have a
specific width or height, when you add some
borders to that, its size will be changed. However, when you define a specific width and
height for your element, it doesn't matter if it's a button or a div
block or anything. The dimensions of your element, one change because
the border will be added from the inside,
not the outside. So let me show you
what I mean by that. I'm going to go ahead and select this image, this div block. And this block has
a specific width, not a specific height. And I'm going to go ahead
and add some borders here. I'm going to select the
middle one, the center, since I'm going to add
borders to all four edges. And let me select the
style solid or right. And then I'm going to
increase the width. Just like that. As you can see, the
actual dimension of this div block is not changing. And the reason is I have a specific width
defined already. But what happens
if we remove that? Okay, Let's see what happens. I'm going to set it to auto, and then I'm going to move
this image outside of this image wrapper for a second
to show you how it works. Then let me increase
and decrease the width. And as you can see now, the actual dimension
is changing. Why? Because there is no width
and height defined. If I set a specific
width here, e.g. 350 pixels, and I
adjust the width, we can see that the
border is added inside. Alright, let me
undo the process. Okay, cool. Let's suppose you want to
create a perfect circle, e.g. you want to create, let's say, a circular
profile page. In that case, you can
use radius as well. So here is our image. To create a perfect circle, you need to take some steps. First of all, you need
to select your image which is inside your diblock. And then you need to make
sure that its width and height are set to 100 per cent. So they take up the whole width
and height of its parent, which is this image diblock. While the image is
selected, not the diblock, head over to the fit and
change it from fail to cover. And now you can select your image div block
and go to the borders. And from here, I'm going to set the radius to 50 per cent. But nothing happens because we need to do two more things. Let me scroll up. As you can see, our div
block has a specific width. But in order to create
a perfect circle, our width and our height
should be the same. So I'm gonna go ahead and set
a specific height for that, which is equal to width. I'm going to write 350 pixels. Great. The last thing we need to do is change the overflow. So I'm gonna go to the
overflow and then I'm going to change it from
visible to hidden. And there we go. Here
is our perfect circle. But why does it
function like that? Do you remember when we
talked about overflow, when we created a
card and inside that card there was
a paragraph that was overlapping the card to
remember that this is exactly the same scenario
when it's set to Visible. Our circle has been created since we set the
radius to 50 per cent. But we can see that
because this image inside this div luck is
overlapping our shape, therefore we need to
set the overflow to hidden to create
these kind of mask. The last thing I'm going
to mention is that when you work with borders, you have control over properties of each
edge a specifically. So if you want to select the left edge and change
the color, you can do that. You can set another color for the top age that's
totally up to you. You are not limited in
any way, are right guys. That's all for this video. I hope you enjoyed it. I'll see you in the next one.
39. Effects: In this video,
we're going to talk about the effects section. If I just scroll down
here in the style panel, we can see that at the bottom we have the Effects section. There are so many
different options here, and we're going to talk
about each of them. So first, I'm gonna go ahead and select one of these images. Okay? Let me select this block. The image div blocks
the first one. And now I can actually modify
different options here. Let me start with opacity. The opacity is so
simple because it just lets us have transparency. If I decrease it, my element will be transparent. If I increase it, you can see that there
is no transparency. So when you have an element and your element has some children, you can simply select
your parent element. In this case, it's
this image live blog, and just adjust
the opacity here. Then we have box shadows. Well, as you can
guess from its name, it lets us add some shadows
to our box elements. So if I hit this plus button, I can add some shadows to
this particular element. And here we have
different properties. We have two different types of shadow, outside and inside. Well, if it's set to outside, the shadow will appear outside the boundary
of this element. If I just modify the distance,
you can see it better. But the insight type lets
us add inner shadows. I can modify the angle
here, just like that. I can control the degree or let's say the direction
of my shadow. I can modify the distance, how close these shadows
to the element. I can modify the Blair, so it determines how focused the shadows I
can change the size. It determines how much
it spreads like this, and the color actually lets us control the color of our shadow. I can set it to
whatever color I want. Most of the time
when we use shadows, we want to make sure to decrease the opacity to have
some soft shadows, okay, just like that. So this is all about shadows. One thing you should
remember is that you can actually add multiple
shadows to your elements. If I click on this plus button, once again, There we go, I could add another shadow. I can add even more shadows. I can move them around and
I can hide and unhide them, and I can remove them simply. Alright, now let's talk
about 2D and 3D transforms. Well, sometimes we might need to have some simple interactions, some 2D and 3D transformations. And in that case, we need to use this option. We can also use the
interactions which is more advanced and we will talk
about it later in detail. But for now, let me
show you how it works. While my element is selected, I can hit this plus
button and we have different types of
transformation. We have move, scale,
rotate, and skew. Let me start with move. Well, then move type lets us move our elements and
we can control the x, y, and z axis. Just like that. If I
change the type to scale, I can scale this
element like this. If I change it to rotate, I can rotate it like that
using different axes. There we go. And if I set it to skew, Let's see what happens. Depending on our needs. We may or may not use every
single one of these types, but it's good to know that they exist and the possibilities
are limitless here. Now I'm going to show
you something else. Let me remove this 2D
and 3D transforms. I'm going to just create a new transform layer and I'm going to move
it around, okay? But what if I want to move my element and scale
it at the same time? If I go to scale now
and I come back, you can see that
everything is lost here. All the modifications
that I did here are gone because we can't use all
the types at the same time. We need to actually
move our elements. Then we need to
create another layer. Just like that. Now, I
can scale it as well. So you need to keep this in mind when working with 2D
and 3D transforms. Then we have transitions. If I click on this plus button, you can see that we
have different types of transitions and we're not going to talk about transitions now because first, you need to learn about states, which is the topic
of our next lesson. In the next lesson, we will touch upon
transitions as well. Alright, let me
remove transitions. Now I'm going to
talk about filters. Why in this element is selected, I'm going to add a
filter to this element. And here we have
different filters. We have clearer. We can make this element blurry. Just like that. We have color adjustment
filters like brightness. You can control the
brightness of your element. You can modify the contrast, the hue, saturation, e.g. you can decrease or increase the saturation of your element. We have grayscale. If we want black
and white images or black and white elements, we can use this filter and
other effects are right. Now let's move on to the last property of the effects section,
which is cursor. Well, every element by default has a specific cursor, e.g. when I add a button,
let me show you. When I go ahead and
add a button here, and I preview that. If I hover over, you can see that the
cursor change to this pointer and it's expected
because this is clickable. And the same thing happens
if I add a link blog. So if I just go ahead and
add a link blog here, of course I need
to add something inside or let me just
change its color, background color to something
that you could see. And also I need to
specify the width and height because otherwise
It's invisible. So let me specify the width 50 pixels and the
height 100 pixels. And now let's check
it out again. We've got a pointer, e.g. the text has its own cursor. These cursors are
the default Cursors of our browser, okay? But sometimes for some
specific purposes, we might need to override
these properties. Okay? So e.g. if I want to change
the cursor of this button, I can select that. Here. If I open up
this drop menu, by default, it's set to auto. And most of the
time it's better to use the auto option because this way the browser determines which care
sir It should use. However, if you want
to intentionally override these preferences,
we can do that. So e.g. let me change
it to something else. I'm going to choose this graph
and let's see if it works. Yes, it does. So this is how the cursor works. Most of the time. We don't need to
change it unless we have to change it for
specific reasons. Are right, guys. That's all for this video. I hope you enjoyed it. I'll see you in the next video.
40. States: Hey, in this video, we're gonna talk about
states and transitions. Well, let's start with states. Every element we work with
has some default state, like none, hardware
pressed, forecast, etc. depending on the type
of elements are, states might change as well. So let me show you an example. If I select this button, button element and I head over
to the selectors section, you can see that there
is this down arrow icon. If I click on that, we will
get access to our states. We have non hover pressed
forecast visited. So if I select hover, I can go ahead and adjust the properties of
the hover state. So when the user hovers
over this element, the new properties will be
applied to this element. So let me go ahead and modify
the background's color. I'm going to change it
to something lighter are right now in order to see
whether it works or not, first, I need to go
back to the non-state. I'm going to go to non-state. And if I hover
over, there we go. As you can see, as
soon as I hover over this button, it's color changes. When I change the properties
of any of these states, this blue indicator appears
indicating that there are some properties that we modified for these
particular state. But what about pressed? Well, since I changed the
properties of harbor, depressed state will inherit from the properties of harbor. Let me prove that to you. If I select that, There we go. We've got our light blue now, however, we can
also modify that. I'm gonna go ahead and change this color to something darker. And now if I go to none, if I preview that, and now when I hover over, I will get the light blue. And if I press, you can see that we
will get the dark blue. So this is basically
all about states. But now I'm going to show
you another example. If I scroll down here, I have a TextField here. For TextField, we have
an additional state. If I select it, if I go
to open up my state, you can see we have this
placeholder as well. And if I go to place holder, I can customize
the appearance and styling this placeholder text. Enter your email, okay, because right now I can't
modify that in the non-state, but if I go to place holder, I can simply modify
its color, e.g. to read or to anything else. So let me reset that for
now and I'm going to show you another state
of this TextField. The text field also
has the focus state, and this state is very
useful for text inputs. Let me show you
how it works if I select it and if I go to, let's say box shadows, I'm going to add some
shadows to this state. Let me change the angle and
also the distance, the blur. I'm going to increase the blur. And I'm going to also increase
the size and finally, decrease the opacity are right. Now let's see what happens. I'm going to preview
it. Nothing happens. But as soon as I click here, you can see that the
focus state appears. We can use States
for almost anything, even for images, for div blocks, as you can see here, we have different states. They are so useful for
these subtle interactions. But if I hover over this button, you can see that we don't have
a smooth transition here. So how can we fix that? Well, we need to use the
transition section here, the one that we didn't talk
about in the previous lesson. But now I'm going to show you
how it works when we modify the properties of
different states or we add some effects
to our elements, we can animate those
changes using transitions. So right now we have three different states
for this button. None hover and press. And whenever we want
to add the transition, we need to go to the non-state. It's very important, otherwise
it's not going to work. So while we are in the
non-state, as you can see, nothing appears here indicating that we are in the non-state. I'm going to add a transition. And here I need to specify
the type of transition. So I changed the
background scholar. I'm gonna go ahead and
look for background color. As you can see, we can
animate all the properties, even margin and padding, flakes, topography,
borders, anything. I'm going to select
Background Color, and then we have the duration. By default it's set
to 200 milliseconds. And the easing method,
just like that, we will talk about the
easing editor and using methods later because it's
kinda advance for now. Later on, we will
dive into it for now. We're not going to
touch upon that. Let's see how it works. I'm going to preview
it, and there we go. Now we have this
smooth transition. And the transition
applies to all states. If I press, we have a
smooth transition as well. So let's go ahead and do the same thing for
our text input. I'm going to select
this text field and I'm going to make sure that
I'm in the non-state. And then let's go ahead
and add the transitions. From here. I'm going
to change the type from opacity to box-shadow. There we go. And I'm going to change
the duration this time to get a more
dramatic transition. Let's say I'm going
to increase it to 500 milliseconds
or half a second. Let's preview that. If I click here, there we go. Now it's forecast. And you need to understand that transitions work both ways. If I click somewhere else in order to go to the non-state, you can see that it will be
animated as well. Let's see. Did you see that? So this is basically how
transitions and states work. If you want to add some simple interactions to our elements, like what I just showed you, we can always use
transitions and also we can use 2D
and 3D transforms. But for more advanced
interactions, we are going to use the interactions panel and
we will talk about it later. But before we wrap
up this video, I'm going to show
you another example. I'm going to select this image, this image diblock, and let
me go to another state. I'm gonna go to hover. I'm going to add a
2D and 3D transform and let me scale it. I'm going to slightly scale it, and then I'm gonna
go back to none. And finally, let me
add a transition to it and I'm going to
animate transform. Let's preview that. There we go. Did you see that? But as you can see, it doesn't work
for other images. That's because for
these elements, I added a combo class. Okay, So this transition and all these interactions only work for these particular div block. If I want to apply to
all these div blocks, what I'm gonna do is
remove this combo class. So now if I go to hover, I add the scale transition. Since we already added
it, it's still there. So I'm going to go
ahead and modify that. Are right. Let me go to none. And I'm going to add the
transitions here to transform. And finally, let me add
my combo class again. Let's see if it works or not. I'm going to hover
over this element. It works, this element, it works, and this elements. So that's how states and
transitions work are right, everybody, I hope you
enjoyed this video. I'll see you in the next one.
41. Breakpoint Basics: When we want to design
a webpage responsively, we need to use breakpoints. Wants a break point? Well, a breakpoint
is nothing but a specific size that applies. Some style changes to
specific screen's width. You need to remember that we define our style
changes for different screen sizes only
based on the width of the browser or the width
of the device itself, no matter if it's an iPad, iPhone, or any other devices. So by default, Webflow has
four preset breakpoints. If you take a look
at the top bar here, you can see that we
have the desktop, which is our base point. Then we have the tablet, then we have more by landscape, and finally mobile portrait. One important principle
that you should learn about breakpoints
is this changes we make to our styles
will cascade down to smaller devices and cascade
up to larger devices. This is the main principle
of responsive web pages. So if you learn it correctly, you can create responsive
websites easily. Let's start with the
desktop break point. If I hover over this icon, I will get the information of
this particular breakpoint, and this is called
our base breakpoint. The next one is tablet. And as you can see, we
will get the pixel range. It says 991 pixels and down, then we have mobile landscape. It says 767 pixels and down. And finally we have
mobile portrait. If you want to add
larger breakpoints to your project,
you can do that. If you click on this
icon right here, you can start adding
larger breakpoints. However, keep in mind
that at the moment, once you add a large
breakpoint to your project, you can not remove that before
adding larger breakpoints. Let me show you how
breakpoints work. I'm going to start by
selecting this tidal. Okay? So this tidal looks great. The font size looks fine
on this screen's width, but what if I go to tablets? On tablet, it looks
great as well. What about mobile landscape? Well, here it looks fine, but I can make it
smaller as well. While this is selected, I'm going to head over to the typography section
here on the style panel. And I can override
these properties. As you can see, all these
properties have amber color. It means that the value comes
from our base breakpoint. As soon as I override this, you will see that it turns blue. So let me modify the
font size to 14 pixels. There we go. It turned blue. And now this specific property comes from this breakpoint. And all the changes I make in this particular breakpoint will cascade down to mobile portrait, but it doesn't affect
larger breakpoints here. So let me prove that to you. If I go to mobile
Porsche rate now, you can see that the font
size is set to 40 pixels and it comes from our mobile
landscape are right. However, if I go to tablet, can see that the font size
is a seal, 60 pixels. This is how breakpoints work, changes cascade
downwards and upwards. If you learn this
simple principle, You already know how to
design responsive web pages. 1 important thing about
breakpoints is that it only works when we modify the
styles on the side panel. If we try to modify e.g. the order of these
elements in the navigator, it will affect all other
breakpoints as well. So let me go to mobile portrait
and I'm going to change the order of these elements in the navigator, okay, like this. Now if I go to mobile landscape, the order has been
changed to tablet, the same, desktop
breakpoint, the same. So you need to keep in
mind that when we want to modify the order
of our elements, we need to do that
using Flexbox in the style panel and all
other properties here, you can use a grid as well, and you can modify the
children of your grid. You can modify the order
of your Flexbox children, as we discussed before, but you can change the
order of your elements in the navigator or
on the canvas here, because the changes are
applied to all breakpoints. So let's suppose I want to
change the color of this text. I can do that as well. However, if I change it here
on the base breakpoint, it will cascade down and up. Therefore it will affect all
other breakpoints as well. Let me scroll down
here and I'm going to change the color to
something else, e.g. something lighter. Let's see what happens on other devices. There we go. That changes applied
to this breakpoint, to this one and to this one. However, if I
override the color of this text here or on
any other breakpoints, let me show you
what happens if I override it here, e.g. to read. Okay. If I go to desktop
breakpoint and I try to change this
color to black, it doesn't affect the mobile porch rate
breakpoint anymore. Why? Because we've
already overwritten that property for that
particular breakpoint. There we go. It didn't change. So this is generally
how breakpoints work unless there is a
specific property set to that particular breakpoint, changes always cascade down. If I remove this styling here, if I hold down the Option key or Alt key on my keyboard
and I click here, click on this color text. Now this tiling comes from
the desktop break point. Let me go to desktop. I'm going to show you
other things as well. So let me go to tablet. And as you can see,
these images look great, although we have a
narrower screen size. But what if I go to
mobile landscape? Will they are to shrinked. So I'm going to change that. We can select our image wrapper, which is a flexbox. And we can modify the
properties of our flexbox. Instead of setting the
direction to horizontal, I'm going to change
it to vertical. Okay, great. Then I'm going to align
them to the center. Finally, I'm going to select the children of
this wrapper image. Here the width is set to 31% because it comes from
the desktop breakpoint. I'm going to change the
width to 100 per cent. And remember any changes
I make to this breakpoint will cascade down to
mobile portrayed as well. Now I'm going to add some
bottom margin to these images. I think maybe ten
pixels would be fine. And let's see what happens
if I go to mobile portrait. There we go. Now they look great. But if I go to
tablets, it's intact. If I go to desktop, can see we have steel,
the horizontal direction. And if I select one
of these children, the width is set to 30, 1%, and it didn't change. So using breakpoints, we
can create any kind of responsive pages easily
and conveniently. However, there are some
points that I should mention. Let's suppose I want to change this image on
another breakpoint. Let's see what
happens if I select this image and if I change
it to something else, e.g. this one, this change
applies to all breakpoints. If I go to desktop, there we go. That's how images work. We're not changing the style. If I use the background image
here in the style panel, we could set it for each
specific break-point, but with images,
it's not possible. You need to keep that in mind. One other important
point is that if you modify the
text somewhere, even on mobile and portrayed, it will affect all other
breakpoints because again, we are not changing
this tines if I just remove this design here, let's see what happens. There we go. It has been removed
from all breakpoints. So you need to be aware
of these limitations. But what if you want to
remove some elements? Well, let me show
you how it works. If I decide to remove
this paragraph here, and I select it, and I hit Delete, or I can right-click on
that and just delete it. It will be removed from
the document itself. So it will affect all
other breakpoints just like that because it doesn't
exist in our code anymore. However, let me
undo the operation. If I decide to remove this element from this
particular breakpoint, I can select it. I can head over to the
display settings here, and I can set the
display setting to None. And now it's hidden. It's hidden only on
mobile portrait. Why? Because we have modified
the CSS properties here. Let me go to desktop. Here, you can see that
it's still there. I'm gonna go to tablet and mobile landscape,
it's still there. So this is a good trick
for hiding elements. However, you need to
keep in mind that although you hit
the element here, It's still in your code, but it's not visible
because we just said it's displaced
setting to none. But it doesn't mean
that it doesn't exist. Alright, if I want to
reset any properties here, as I mentioned before, I'm gonna hold down Alt key or Option key on my keyboard and
I'm going to click on that. Alternatively, you can click on this blue label and you can
hit Reset just like that. But what about
larger breakpoints? Well, larger breakpoints
are optional. That's why they don't appear
at the top here by default. But sometimes it
makes sense to add larger breakpoints
and specify some, let's say specific styles
for those breakpoints. I'm going to show
you how it works. I'm going to add this 12,
80 pixels breakpoint. It says create this
breakpoint and up, you cannot remove
the breakpoint from the project once it's created
our right create one. Okay, I'm going to create
the next breakpoint as well. I'm going to create it. And finally the 1920
pixel breakpoint. Create, alright, cool. Now we have all the seven
available breakpoints. And just like smaller devices, changes we make to the
base breakpoint will cascade up to larger devices. So if I go to this break
point and if I decide to modify the maximum width
of my container here, as you can see, the maximum
width is set to 1,100. If I decide to increase it to, let's say 1,200, like that, this change applies to
all larger devices, but it doesn't cascade down. Let me show you if I go to
this 14, 40 pixel breakpoint. You can see the max
width is set to 1,200. If I go to 1920 pixel
breakpoint, there we go. Again, 1,200. For
this breakpoint, I can modify that. I can override this
property, e.g. to 1,700, it looks
much better now, however, this change doesn't apply to smaller breakpoints. Alright, that was a lot
to process. Let's recap. First, you need to understand the main principle of
responsiveness and breakpoints, also known as media queries, in order to make
responsive design, this principle
says that changes, we apply it to our
base breakpoint, will cascade down to smaller devices and will
cascade up to larger devices. So this is the main
thing you need to learn. Then you need to understand
that breakpoints only respond to style changes. So whatever you change on this tile panel on
the right side, we respect the breakpoints. But if you change something in the navigator or if you change the order of your elements in the navigator or on the Canvas, it will not affect
different breakpoints. The other point was
that if you replace your images using
an image element, it will affect all breakpoints. And last but not least, when you modify
your texts layers, if you change your texts, it will also affect all your
breakpoints are right guys, that's all about breakpoints
and responsiveness. Of course, we will talk
about responsiveness in detail once we start
creating our projects. I hope you enjoyed this video and I'll see you
in the next one.
42. Setting up Your Project: Hey, welcome back to another
section of this course. In this section,
we're going to start building our real-world
project together. I'm so excited. So first I'm going to show
you what we are going to build and then I'm going
to explain the process. And finally, we're going to set up our project in Webflow. So without further ado,
let's get started. This is the project
that we're going to build in this section. It's actually a website for a fictional design
agency called circle. So together, you
and I are going to build this website from scratch. You're not going to talk about
the user interface process because this is not the
main goal of this course. The main objective of this
course is to teach you how to convert a user interface design to fully functional website. Therefore, we're
not going to design this project from scratch. So I prepare the design
and I'm going to show you how you can get
access to this project. So first of all,
let me show you how the design looks
in this project. We are going to build
three different pages. The homepage, the project page, and the Contact Us page. We're gonna be able to static
pages and one dynamic page, of course, we will talk
about the difference between static pages
and dynamic pages. But for now, let me show
you how the homepage looks. I'm going to scroll
down just like that. As you can see, we have
different sections. We have testimonial section, we have services, we have
a call to action section. And finally, filter. I'm going to zoom out. I'm going to show you
other pages as well. So here we have
the project page. As you can see, there
are some information about the latest projects that this company has
recently done and also the other projects
section and again, the call to action. And finally, there is this Contact Us page that we
will need to build together. So these are the main pages
of this project homepage, or let's say the landing
page that showcases the recent projects of this
company called circle, this fictional
company, let's say, and also displays they
are services, e.g. here we have user
interface design, user experience design, application development, and a call to
action with a form. So first, we're going to build this design in sight Webflow, and then we're going
to make it responsive. And finally, we are
going to work with interactions and animations in order to make the
website look much better and improve
the user experience, you're going to
learn how to create advanced interactions
inside Webflow. And also you will learn how
to create advanced animation. So this is the main points
that I needed to mention here. As you can see, we have
a design system as well. Here we have the colors, styles, and the textiles
on the right side. I already prepared them. And I'm going to show you how you can get access
to this project. Now, the software I'm
using is called Figma. You may or may not be
familiar with that, but if you aren't, That's totally fine
because we're not going to work with Figma
in this project. We just need Figma to see how
this project is structured. And maybe we just need to check some properties like the
font size or the colors. Okay, so nothing complicated. If you haven't worked
with Figma before, don't worry, you won't
face any issues. Alright, first of all, I'm going to ask you
to go ahead and create a free Figma account if you
don't have any already. If you go to figma.com, you can click on
this sign-up button on the top right corner. And here you can enter
your email address and choose a password for your account and hit
the Create Account. Once you are logged in, you will see this
dashboard, okay. You may be inside a recent
tab or the Draft tab. That's totally fine. What you're gonna do is upload the project that
I prepared for you. Okay? So if you're inside
a draft or resent, you can just head over
to this new button on the right side and
you can click on that and you can hit
the Import button. I'm going to show
you here as well. I'm inside a team and I am
going to hit this new button. I'm going to click on import. And then I can import the
project from my computer. Alternatively, you
can just drag and drop the file that I
prepared for you here. So first, you need to download the Figma project that
I prepared for you from the resources section
or from the assets lecture, okay, once you
download the zip file, you need to unzip that. And once you unzip the file, you will get this a
Webflow project dot 50k file extension is dot fig, and you can just simply
drag and drop it inside your Figma
dashboard, just like that. Once it's imported, you can double-click on
it and it's done. You will get access
to the project with all the details you need. So this is basically what
you need to do inside Figma. Nothing more. First, create an account. Second, download
the Figma project that I prepared for you. In a third, import that
project to your Figma account. That's all. Alright, once you've
done these three steps, it's time to go ahead and set
up the project on Webflow. So I'm gonna go to my
web flows dashboard. And here I'm going to hit
this new project button, and then I'm going to
choose this blank site. Select here, Let's name it. Seroquel. You can name it
whatever you want. That doesn't matter. And let's hit the
Create Project button. Perfect. Now we are inside
the designer and we have an empty canvas
for this project. We need to work
with some assets. If I go to my Figma
project here, as you can see, we
have different images, we have different logos. Also, we have some images for our projects and these
emojis and also some icons. So we need to export
these assets and then import it to our
web flows project. But in order to save your time, I already exported them and I prepared an asset
folder for you. You can download it from the resources section or
from the assets lecture. Later on we will talk about how you should
export your images, how you should optimize your
images for web development. But for now, you just need to
get access to those assets. And you need to learn
how you can use those assets in order to
build a real-world project. We're not going to
dive into details about image optimization at
this stage of discourse, but later we will
talk about that. So let's go to Webflow. And then if I head over to
the asset section here, I can drop my files here. So once you download it, the Assets folder
and you unzip that, you can simply drag and
drop those files here, let me show you how it works. So inside the Assets folder, you have different folders
like hero section, logos, newsletter,
project section, Services section, and
testimonial section. We are going to open
up each of them and we're going to import
them one by one. Okay, I'm going to start with hero section. And there we go. I'm going to select
all of them and drag and drop them.
Just like that. I'm going to repeat
the same process for all those folders. And I'm going to fast
forward this process to save you some time
are right, It's done. All our images and icons have
been uploaded successfully. So what else do we need to do in order to set up our project? In this project, we're going
to use a specific fonts, okay, if I go to my
Figma as projects here, and if I select one of
these texts layers, I'm going to double-click and
this tidal, this heading. And I can show you what
funds are used for an ad. It's called roboto. This is a Google font
and it's free to use, and we're going to
need that as well. So as you remember, in order to work
with these fonts, we need to add the font
inside our project settings. So if I go to Webflow and if
I go to Project Settings, I can head over to the
fonts tab are right, and here I'm going to
choose font from least. I'm going to look for Roboto. There we go. I'm going to choose Roboto. And here I'm going to choose different variants of this font, different weights for this font, regular should be selected. I'm going to select 300,500.700. We're not going to need 900. It's gonna be too bold. So these are the necessary funds we're going to need for
these projects later on, if we need more variants, we can always come to this section and just
add more variance. I'm going to hit the Add
font button, and that's all. I'm going to head
over to the designer. Perfect. And we are ready to start building our project
because our assets are imported and our funds have been added to
this project as well. All right, guys, that's
all for this video, we successfully set up our
project and we're going to start building our
project in the next video. See you then.
43. Navigation Bar: Hey, in this video
we're going to start building our
navigation bar. So first let me head over
to my Figma project here. And as you can see
right at the top, we have a navigation bar that includes one logo on the left, then three different menus,
right in the middle. And finally, a Contact Us
button on the right side. So it should be placed
right at the top. As you can see,
this homepage has a background color
which is not White. So for this background, I used a color called
neutral light. If I go to my color
styles, as you can see, I have this neutral color and I used it for my background. And this is the
same color that we used for all different pages. Therefore, all of our pages in our project should have the
same background scholar. And in order to make
our lives much easier, we're going to create
some global swatches for our colors in order to reuse them again and
again and later. If you decide to
make some changes, you don't need to go
ahead and manually change the color of all your
elements one by one. You can just make the change. And the change
will be applied to all the elements using that
particular global swatch. We already talked
about global swatches, but we're going to now
create some for our project. Alright, so let's begin first, I'm going to head over to
my design system here. And I'm not going to create global swatches for
all these colors because some of these colors are not used in this project. I just created them to
have a good color scheme. And later if you need to add
some colors to your project, or you may need to
change some colors. You could just have some
predefined colors here, but we're not going
to use all of them. So if I go to Webflow, and here I'm going
to select body, and then I'm gonna
go to the selector. And here, if I just click once, you can see that we will get this HTML tag, which is pink. It says body all pages. These HTML tags are so
useful because we can define some default stylings
or different tags, e.g. body on pages or all ones, or all H 3s for our headings
or four paragraphs, we will talk about them
later, but for now, I'm going to select
body all pages. So once I select
this body all pages, I can define some default
styling for the body tag. So here I'm gonna go ahead
and change the color, and I'm going to
need a color code if I go to my Figma
project here, as you can see, I wrote
the color code here. You can just double-click on it and then you can
copy and paste it, command C or control C. Then you can head over
to your Web Flow. And here you can just paste
it command V or Control V. And if I hit Enter, there we go. The color has been changed. But as I mentioned before, I'm going to create
different swatches, different global swatches
for this project. So I'm going to hit
this Plus button, and here I'm going to
write neutral light, neutral forward slash light. Then I'm going to create it. Alright, cool. Now I'm going to
need more colors. So let's go ahead and
create all the swatches here that we're going to
need for this project. So I'm gonna go ahead and
copy this color code, the one right next to
this neutral light. I'm going to copy
it and I'm going to create a new swatch. Let me change the color
code to the new one. And I'm going to call it
neutral medium, just like that. And I'm going to create
the next swatch. So let's go to Figma
and I'm going to copy this dark color code. And let me create a swatch. And I'm going to change the
color code and let's call it neutral dark are right, we need three more colors. We need our primary color, which is this blue. I'm going to copy
the color code. And I'm going to
create a new swatch, paste it here and here. I'm going to call it
primary slash default. Are right, Create. Now I'm going to
go ahead and copy this color code for
this orange color. I'm going to copy it and
let's create a new swatch. Paste the color code here, and let's name it
secondary. Hit Create. And finally, I'm gonna go ahead
and copy this color code, this light blue color, and let me create a swatch. I'm going to paste it here, and let's call it neutral
light blue are right, grades are global,
swatches are ready, but make sure to use your neutral light
color for your body. All pages stack
right now we created these swatches inside
the typography section. That's why our background
didn't change. So that's totally fine
because we can use these swatches in the background Scholars
section as well. So if I head over to
the background scholar, I can select this color and I can change it
to neutral light. Now, my background's color
has been changed and I can reset this typography
color as well. I can hold down my
Option key or Alt key on my keyboard and I can
click on it. There we go. The topography is
columnar has been reset and we're good to go. So now that our background is ready and our
colors are radians, well, we can start creating
our navigation bar. So let's see what we have here. As you can see, I created different sections
inside this project. Let me show you how
it's structured. So right at the top
we have navbar. This is a section. And if I open it up inside, we have a container. And if I open it up inside, we have different elements. We have the menus, we have the button, and we have the logo. That's so simple. We have the hero section, the client section, and so on. All these sections
have a container, as you can see here, we have a container and inside we have
different elements. Inside this section we have a container and inside we
have different elements. And we're going to structure our project inside
Webflow in the same way. Alright, so now we're going to start creating our
navigation bar. In order to create
a navigation bar, we need to head over to
the add elements section. And I'm going to scroll down to find the navbar components. I'm going to drag
and drop it here. There we go. We have most of the elements we are going to need
for this project, but we need some
changes to make. So here inside this nav bar, as you can see, we have a
container like in our design. Here inside this nav bar, we have a container. But this container by default has a specific maximum width, and this is not the
maximum width we are going to use
in this project. By default, the maximum width of this container is
set to 940 pixels. But for this project, the maximum width
of our container is going to be 1,100 pixels. Why? Because if I head over to my design here, and if I e.g. select this recent
projects inside, if I select the container on the right side
in the Inspector, you can see that the
width as 1,100 pixels. That's why we need to
create our own container. And it's very easy. We just need a deep black with some specific size properties. Alright, so first, let's
create our own container. I'm gonna go to the Add section. I'm going to drag
and drop a div block here inside this nav bar. And let's give it a class. I'm going to call it container. We're going to use
this class for other containers as well. So here for the maximum width, I'm going to set it
to 1,100 pixels. And then we need to
center this container. Do you remember how
we could do that? Yes, you are right. We can just click
on this little icon here, and there we go. It's centered. So now we just created
a container that has a maximum width of 1,100 pixels. And it's centered because
we clicked on this button and it's left and right
margins are set to auto. That's why it's centered. We already discussed that. Alright, What else do
we need to do now? Because it's right now. Here we have two containers. If I open up this
main container, I can just drag all the
elements and drop them inside our new container because we don't need this
container anymore. Let me start with this
logo link, brand link. I'm going to drag it
and make sure that you drop it inside your
new container. It should be nested inside. Then I'm going to
select the nav menu. I'm going to do the same thing. And finally this Menu button, and let's put it here. Alright, cool. Now we can select
this container, the main container,
and remove that. Alright, our container is ready. And since this container is going to be used
for this navbar, I'm going to give
it a combo class. Why? Because later we're going to use this container class name for
other containers as well. So here I'm going to
create a new combo class, and I'm going to call it navbar. Now, let's set the
display setting to flexbox instead of
block, just like that. And here, as you can see inside, we have different elements. We have the brand link block, we have this Nav Menu diblock. And finally we have
this Menu button, which is not visible
because this Menu button appears when we go to tablet, as you can see here, or mobile. We already talked about that. So what do we need to do now? First, I'm going to
select this container and I'm going to change some
of its properties here. I'm going to start with a line. I'm going to align
it to the center. And also I'm going to change the justification to
space between why? Because if you go to our
design project here, you can see that our
logo and our button, or touching the edges
of this container. Okay, so that's why
I need to change the justification
of this container to space between,
if you remember, when we set it to space between our first element touches the left side of this container, and our last element touches the right side
of this container. That's exactly what we want, but here we need something else. We need a button as well. So let's create one. I'm gonna go ahead and
drag and drop it button. Inside this container. There we go. We've got our button and
their placement looks great because our button touches the right side of our container. Alright, now let's go ahead and select this brand link black. And I'm going to give
it a class name. So here I'm going to
call it nav bar logo. That's right, navbar
underscore, underscore. I'm going to use two
underscores and logo. There we go. You can name it
however you want. This is the way that I
structure my classes. I will talk about
class names later, what system you can
use for your projects. But it doesn't matter as
long as you know what you're doing and as long
as your names make sense, you can decide how you want
to name your elements. So here we have navbar logo, and then I'm going to head
over to the backgrounds here, and I'm going to
add an image here. Okay, Let's choose image
and from my assets, I'm going to look
for Seroquel SVG. This is the logo. Great. I'm going to select that. What else do I need to do? First? I'm going to set it to contain, then I'm going to change
its position to center. And finally, I'm going
to change the tile to don't tile just like that. But it looks too big, isn't it? So I'm gonna go ahead and
change its size property. Let's set the width to 60 pixels and the
height to pixels. You can adjust them
however you want. But based on my
design file here, if I select this logo, you can see that its width is roughly 60 pixels and its
height is set to 18 pixels. Alright, cool. Our logo looks great. Now we need to create
our nav menus. So here in our
design file we have home, projects and services. And the home, which is the selected page
or selected menu, should have the
primary color and the others should have
the neutral medium color, as you can see here. So let's go ahead and
create our menus. We have the home, we have
about I'm going to change the about two projects and
the contact to services. Okay, cool. What else do we need to do? As you can see, we are using a medium font here and
median wait for these menus, but here, this little light. So I'm going to
select one of them. It doesn't matter which one
I'm going to start put home. And I'm gonna give it a class. Why? Because we are going to reuse the styles that
we're going to set for this particular nav
link again and again. So it makes sense to
give it a class here. And I'm going to
write nav underscore, underscore link, just like that. Now I'm going to head over to the typography section here, and I'm going to change
the font to Roboto, the one that we added before, and the weight is set
to 400 or normal. I'm going to set it
to 500 or medium. And the font size is
going to be 17 pixels. As you can see here,
we have 17 points. Alright, let's set it to 17. Alright, what about the color? Let's set the color
to neutral medium. Nice, and we're almost done. Now that we apply these stylings
to this first nav link, we can select our second link. And here we're going to use the nav link class just like that for the
third one as well. All right, cool. But what about the
color of the first one? Should entity use
the primary color? Yes, it should. So
how can we do that? It's so simple. We need to create a combo class. So while this first
link is selected, I'm going to create
a new canvas class. And let's call it current. It means the current
page is selected. Then I'm going to change
its color to primary. Our menus are ready as well. Cool, but what
about this button? Well, we need to
modify this pattern. So I'm going to
select this pattern. I'm going to give it a class. I'm going to name
it primary button. Great, then I'm going to start
changing its properties. First, I'm going to change
the typography here, the font to Roboto, and the weight is going to
be 400 normal, that's fine. What about the size? It's going to be 17 pixels. If you go to the
design file here, if you select this font, you can see that it says 17. And I can change the fonts
way to medium as well. But let's see how it goes. Then I'm going to change its background color
to our primary color. And finally, let me modify
the text to contact us. Alright, cool. But what about the padding? Because here as you can see, we have more padding
around this text. I'm going to select this
Contact Us text here. I'm going to hold
down the Option key or Alt key on my keyboard, and then I can see the padding. Alright, our top and bottom
padding are 15 pixels, and our left and right
padding are set to 33 pixels. So let's go ahead and
select this button. And then here in this
pacing sanction, we're going to change the
padding, not the margin. Remember padding is
the space inside our elements and margin is the space outside our elements. So here I'm going to
modify the top and bottom padding to 15 pixels. I'm going to hold
down the Option key or Alt key on my keyboard and modifying the right and left
padding to around 30 pixels. It looks fine, right? It looks great. But what about this
background's color? If I select this nav bar, you can see that we have this light gray background color, which is not what we want. Because here we have a
transparent background. So wine, this
navbar is selected. I'm gonna give you the class
and I'm going to write navbar just like that. And finally, if I head over
to the background's color, here, I'm going to
write transparent. There we go, the
background is gone. Alright, but what
about the top margin? Here? As you can see, we have some top margin. If I select my
container and I hold down the Option key or
Alt key on my keyboard. I can see the top margin here. It says 70 pixels. So let's go ahead and
add some margins. To do that, I'm going to
select my container because our container here has
a 70 pixel top margin. And then if I head over
to the spacing section, I can just add some
top margin like this. I can set it to 70
pixels, just like that. And that's all our
navigation bar is ready. We are not going to talk
about responsiveness now. We will talk about it later, are right guys, that's
all for this video. I hope you enjoyed it and I will see you in the next video.
44. Hero Section: Hey, in this video, we're going to start creating
our hero section together. So as you can see in
this Figma project, our hero section
has a container. Just like all other sections. We always have a section and inside we will have a container. This is the best
structure that you can have for your
projects, uh, section, and then a container inside, and then you can have your
content inside this container. We have two other frames here. These are going to
be our div blocks. As you can see, they
look like boxes here. So here, inside
this container we will have two boxes
to div blocks. One is going to contain
our content, the left one. The second one is
going to contain our images inside the content, we will have a heading, we will have a text block, which is our description, and then two different buttons, a primary button,
just like the one that we created for our navbar. Then this is a text button. And finally for this
right container or let's say image the block, we will have two
different cards, card one, card two. And finally the hero image, which is this main image. So you may ask, why
can't we export these three different
elements as the one image? That's a great question. We could do that. It would be much simpler
if I would do that. However, when we start working with animations
and interactions, we're going to animate all these elements
together one by one. If I export them as
one single image, it would be impossible. Therefore, I exported
these elements separately, but we could have more
flexibility when it comes to interactions
and animations. Alright, so let's go to
our web flows project. And the first thing we need
to create is a section. So I'm gonna go to the Add section and
let me drag and drop a section here and place
it right below my nav bar. Just like that. I'm going to give it a
class called section. And this is the class
that we're going to use for all our sections. Therefore, it's very
important to specify the properties that are gonna be used globally for
all our sections, we're not going to modify
the sides properties here. However, I'm going to change
the padding of this section, the left and right padding. Why? Because all our
sessions are going to have some left and
right padding. If I hold down the Alt
key or Option key on my keyboard and just
click and drag. I can add a 30 pixel
left and right padding. We can see anything
happening here. But when we go to
other breakpoints, this padding that we
added here will prevent the content from going
outside the viewport. So this padding is
so important when we start talking
about responsiveness, you will see the impact of the
padding that I added here. Now, right? And one more thing I'm going
to mention here is that right now I'm working
with a large screen. That's why here. It says 1,600 pixels
and it says 100%. If you're working with
a smaller device, like a 13 inch laptop
or even larger laptops, chances are you won't see the
exact canvas as I see here, because of the available
pixels of your screen size. However, I'm going to show you a very good trick
if you're working, let's say with a small device
like a 13 inch laptop, you can just click here
and then you can scale your project down in order
to see what I see here. It's just for the
previewing purposes, so it doesn't affect your main project and the
size of your elements. However, if you want to see how your project looks
on larger devices, you can scale it down. For instance, you can
set the scale to 70%. Alright, cool. What else do we need to do? Welfare's? I'm going to go ahead
and add a combo class to this section because it's
going to be our hero section. I'm going to write hero. There we go. And then inside this section, I'm going to need a container. So if I just go ahead
and drag and drop a div block here and put
it inside this section, make sure that it's
nested inside. I can give it a class container. And there we go. We've got our 1,100
pixel maximum width that we set for the container
that we used for our navbar. One important thing I'm
going to mention here is that if you want to add
the elements much quicker, you can simply use
the Command key or Control key shortcuts
on your keyboard. And here using these QuickFind, you can look for any
elements you want. Let's say I'm going to
look for a diblock. I can write Div,
and there we go. If I press Enter, this def block will be added
in scientists container. Let me remove that. I'm going to remove
this container as well. And I'm going to show you
once again how it works. First, I'm going to
select my section because inside I'm going
to add a container. Then I'm gonna hit
Command key or Control K. And here, let's write the
block enter. This div. Luck has been added
to my section, and then I'm going to give
it a class container. And we are done. Alright, our container is ready, our section is ready. However, we don't
have enough spacing between our navigation
bar and this section. So let's go to our design file. And if I select this
hero section and I hold down the Option key
or Alt key on my keyboard. You can see that we have a 100 pixel top margin set
for this hero section. So I'm going to
select this section. And since we added
this hero combo class, when I add some margin to this, it will not affect the
properties of our section. It will just affect
the properties of this hero combo class. So I'm going to set the
top margin to 100 pixels. And there we go. It has been pushed down. So what do we need
inside this container? Well, this container should
have two other div blocks. So let's go ahead and
add to the blocks. I'm going to hit Command
K to use the Quick find, and I'm going to write div. There we go. There is a div block inside and I need one more div blocks. I'm going to select this
container again and hit Command K or control
K and write def. Alright, now I have two different IP blocks
inside this container. However, as you can see, each of these blocks takes up the whole width
of its parent, which is this container. It's not what we want. So I'm going to select the
container and then I'm going to change its display
setting to Flexbox. Why? Let's take a look at
our design file here. As you can see inside
this container, we have two div blocks. We've created them,
but they are sitting next to each other that's
on top of each other. So if you remember, when we have a
one-dimensional layout, we can use the flexbox to
align our div blocks easily. That's what I'm gonna do. I need to select the parent element and I'm going to change its display setting
from black Flexbox. All right, now we have a
horizontal direction, good, then the alignment is set
to stretch and I'm going to change the
justification to center. All right, cool. They look too small. That's totally fine because we're going to give
them some classes. Alright, but let's see
what we've done here. We've selected the
container and we've changed its display
setting to flex Mike's. However, there is
one mistake here. We didn't add a combo
class to this main class. And that's wrong. Why? Because later on, if you want
to use the same container and we don't want to use a
flexbox with these properties. We need to override these
properties using a combo class. So I intentionally did
this mistake to show you why it's important to
use combo classes. Now I'm going to
undo the operation Command Z or Control
Z again and again. And here we have our container. And now before changing its
display setting to flexbox, I'm going to give
it a combo class. I'm going to write hero. And then I'm going to change its display setting
to flake spikes. And I'm going to change its
justification to center. Now, everything looks great. I'm going to select
the first div black, and let's give it a class. I'm going to write
hero underscore, underscore contents
because this div block is going to contain
our contents. And for the second one, I'm going to select it and
let's give it a new class. I'm going to write hero
underscore, underscore image. Just like what we have
in our Figma project, we have content and image. So let's start with content. What do we need here? We need a tidal, a heading, then we have a description right under that
and two buttons. It contained button
and the text button. I'm going to start
with the heading. Let me go ahead and drag
and drop a heading here, just like that, make sure
that it's nested inside. And for this heading, I'm going to choose H1. It's very important
for the hero section. You need to always use the H1. It's important when it
comes to SEO optimization. We will talk about
these details later. But for now, you
just need to know that for your hero section, you should always,
always use H1, H2, or any other headings. Okay, cool. Now, for this heading, I'm going to give it a class. That's right, hero underscore, underscore heading our right. And we need to modify
its properties, like the topography properties, the color, the font size, etc. So did you notice that did you notice that
for each text layer, we're repeating
the same process. We are changing the
font to Roboto. Can we omit this step somehow? Yes, We Can. Do you remember when
I talked about body, all pages tag, we set the
background color there. We can also set the default
typography properties there, and then we can overwrite them if we need to modify something. Since I know that
for this project, I'm going to use only one font. Roberto, I can simply go ahead and select my
body element here. And then I'm gonna
go to the selector, and I'm going to
choose body pages. And if I head over
to the topography, you can see that the
font is set to Arial. So let me go ahead and
change it to Roboto. And as soon as I change
it here you can see that this headings font has
been changed as well. Why? Because
headings, paragraphs, and textbox by default look for their parents and their
parents right now as the body. So they inherit whatever
properties we set for the body. All pages tag unless
we overwrite them. Alright, we're not going to
change the font size because most of the time we need
to override the font size. And also I am going to
change its color to our, let's say neutral dark. Because for most of our texts, we need to use our
neutral dark color. So it's good to set the
typography default here as well. Alright, so now I can head over to my hero content div black. And I don't need to
change the fonts anymore. I can overwrite them
whenever I want. But if I click on
this font word here, you can see that the
value comes from body all pages because we set some
default properties there. Alright, so let's see what
font size do we need here. I'm gonna go to
my Figma project. I'm going to select
this text. It says H1. H1 is 60 points, okay? So I'm going to set it to 60
pixels here, just like that. And what about the line height? I usually set it to 130 or 150
per cent for this heading, since we have a large font size, I'm going to set it to
130%, just like that. Then I'm going to go ahead and copy this text from my design. If you just double-click
on these layers, you can select them and
copy it, paste it here. There we go. Alright, but as you can see, this hero content div blog
picks up too much space here. If I head over to my
design file and I select this contents bikes,
this content group. You can see that the width
is set to 530 pixels. Therefore, I'm
gonna go ahead and select this hero
contents div block, and I'm going to give
it a maximum width. It shouldn't be larger
than 530 pixels. So I'm going to set it to
530 pixels. And there we go. What else do we need? Right under this heading, we're going to need
a description. As you can see. I can drag and drop a
paragraph or a textblock. I'm gonna go with a text block. I'm going to drag
and drop it here. And this textbox,
as you can see, it's using the
default Roboto font that we set for our
body, all pages stack. So it's going to accelerate
our design process. What about the size? I'm going to change
its size to 20 pixels. If I go to my design file here, you can see it's using
body irregular and body irregular is 20
pixels are right. I'm going to set it to 20. Let me go ahead and copy
and paste this text here. Cool. But as you can see, the line height is not enough. I'm going to change the
height to 150 per cent since the font size is not
that large and it's two lying. If I head over to
my design project here and I select this text, you can see that its width
is set to 435 pixels. So I need to do the same thing
for this textbook as well. I'm going to set a maximum
width of 435 pixels, and now it looks great. And finally, I'm going
to change its color. For this text. I used neutral medium. I'm going to use the
same thing here. I'm going to use one
of the swatches here. Mutual medium. There we go. Alright, cool. What
else do we need? We need two buttons. So in order to organize
these two buttons, we need to create a div block. And inside that div block
we can put our buttons. So let me go ahead and select
this hero content if block, and I'm going to create a
new div block Command key or Control K. And
let me write div. There we go. Here is our div block
and I'm going to name it hero underscore,
underscore buttons. Okay, cool. And inside this, I'm gonna go
ahead and add two buttons. One contained button or this primary button
in one text button. So let me select
this primary button in the navigation bar. I'm going to hit
Command C or Control C. And I'm going to select these
hero buttons, div block. And I'm going to hit Command
V or Control V to paste it. Here. There we go. We've got our Contact Us button here and it says primary button. Cool. I'm going to go ahead and change this text
to get in touch. Let me write getting
touch, nice. And also I'm gonna
need a text button. So let me go ahead and
look for text link. I'm going to drag
and drop it here inside the hero buttons, the block, just like that. And by default, since
it's a text link, you can see that it has a
some styling and decoration. So we're going to
overwrite them. I'm going to give it a class. Let's write hero underscore,
underscore, text button. There we go. Let me scroll down here. The font looks fine. The weight is going
to be 500 or medium. The font size is going
to be 17 pixels. If I go to my design file here, It's using headline medium. And headline medium has
a 17 point font size. Are right, what about the color? The color is going
to be neutral, medium, and a declaration by
default is set to underline. I'm going to set it to none. And finally, let me change
this text to see our work. Alright, cool. So now I have two options. I can either select this
hero buttons diblock, and change the display
setting to Flexbox. Just align it and add some
margin to this button. Or I can just keep the block
display setting and just add some right margins to
this getting touch button. Since these two buttons are gonna be placed
next to each other, I don't need a flakes minds. I can just select
this button and add some margins so the left
side is almost ready. The only thing left
is add some spacing. So I'm going to select
this heading here. I'm going to hold down the
Option key or Alt key. And if I hover over
this description, you can see that I have a
30 pixel bottom margin. If I select this description
here, as you can see, I have a 40 pixel bottom margin, and for this button, I have afford the
pixel right margin. So let's go ahead and
change their margins. I'm going to select
this heading. If I click on that,
you can see that the value comes from
all H1 headings. We didn't talk about this tag, but it works like the
body all pages tag. I'm going to remove
the top margin. I'm going to set it to zero, and I'm going to modify the
bottom margin to 30 pixels. Now, let me select
this description. We didn't change the class name, so I'm going to
modify the class name here to hero description. Hero underscore,
underscore description. Alright, now I can add a 40 pixel bottom
padding just like that. And here I'm going to
select this button, but I can't modify
its margin right now. Why? Because right now I'm using the primary button class. If I add some margin here, it will affect the
Contact Us button in the nav bar as well. Let me show you. If I just add some
right margins. There we go. Can you see that? It's not what we want. So what should I do? Yes, you are right. I need a combo class here. I'm going to add a combo class, and I'm going to write hero. Now I can add a 40
pixel right margin without affecting the
Contact Us button are right. Now it's time to work on
the second div block, which is the hero
image, the black. As you can see here, we're going to need a
three different images. So let me select
this hero image and then I'm going to add a
three different images here. Let me hit Command
K and I'm going to look for image, Enter. I'm going to choose the image. And from here, I'm going
to look for hero image. There we go. Okay, it looks fine. Now I'm going to need two
more images for my cards. So let me select this
hero image diblock. I'm going to hit
Command key or Control K. And let me write image. Great, It's here. I'm going to choose card one. Let me look for card one. There we go. It's right here. It's too big. We're going to fix that and I'm going to need one
more card as well. Let me select this image and I'm going to give it a
class. That's right. Hero underscore,
underscore, card one. And I can simply scale
it down just like that. Or alternatively, I can
click on this settings here. I'm going to set
its width to 300, then maybe 80 or 375 pixels. It looks good. But why this box looks too big, but the element is not that big. It's because I used
some drop shadows for this card and
I exported that. That's why we have
this large boundary. Now I'm going to select
this hero image div block, once again, hit Command K or control K and look for image. There we go. And I'm
going to choose car to, from my assets. Here it is. Okay, I'm gonna give
it another class. Let's write hero underscore,
underscore card too. Now I'm going to scale
it down just like that. Let's give it a specific
width of 375 pixels. Alright, amazing. But can you see how they are
placed on top of each other? It's not what we want. How can we fix that? Well, do you remember
when we talked about different positioning
options like static, relative, absolute,
fixed, and sticky. I told you that if
we want to create some modern layouts,
we're going to need them. And this is exactly
what we're gonna do. We're gonna change
the position option in order to get what we want. So here, as you can see, these two cards are
kind of floating. Therefore, I'm going to set
their position to absolute. But as you remember, in order to set the position
to absolute, first, we need to set its parent
position to relative. So the parents is this
hero image div block, and I'm going to change
its position to relative. Alright, nothing happens. But if I select this here, acquired one and I change its position to
absolute, There we go. Now it's relative to
hero image diblock. I'm gonna do the same
thing for this card. I'm going to change its
position to absolute, nice. And now I can simply control
their position right here. So let's start with card one. I'm going to select card one, and it should be
placed around here. So I'm going to select top left, and then I'm going to modify the left margin just like this. I can set it to -19%. And for the top, I'm going
to set it to, let's say -2%. Okay, it looks great. What about this one? I'm going to select
Hero Card too. I'm going to change it to
position two, bottom right. And then let me move it
down just like this. Let's set the bottom
position to -22 per cent and I can modify the right or left margin here,
it doesn't matter. Let me show you. It's just like this. If I use the right one, I need negative values. If I use the left one, I will need positive
values like this. I prefer to use the right one. I'm going to put it
right around here. Alright, It looks good. Let's compare it
with our design. It looks fine. However, this content div block is not aligned with these, right div, like this
image div black. So how can I fix that? Well, I can select this hero content and I can
give it some top margins. Let me show you how it works. Just like that. If I move it down like this, I can set its top margin to
114 pixels. It looks fine. I think now they are
perfectly aligned, right guys, that's
all for this video. I hope you enjoyed it. If you have any questions, please let me know. See you in the next one.
45. Clients Section: Hey, in this video, we're going to start creating
this client section. As you can see in
the client section, we are going to have
different logos. Actually, we need to place
five different logos. By default, these logos
should be black and white, and when the user
hovers over them, they should turn colorful. So what do we need
for this section? As you can see here, we need another section
and inside we need to have a container that
includes our logos. Each logo should be
put inside a diblock. So let's get started. First of all, I'm going to go ahead and create a new section. Okay, I'm going to
select body and I'm going to hit Command
key or Control key. And let's look for
section. There we go. A new section has been added. Then as usual, we need to add the section class
to this section. Are right. Let me
look for section. Okay, Great. Are section is ready. Now inside this section, we need a container. So while this
section is selected, I'm gonna hit Command
key or Control K, and I'm gonna look
for the if block. Okay, there we go. And I'm going to give it the
container class. Fantastic. Our container is ready. Our section is ready as well. But this section doesn't
have any margin yet. So I'm gonna go ahead and
check its margin here. It needs to have a
130 pixel top margin. Therefore, here
for this section, I'm going to add a combo
class called logos. For our hero section. We added the hero combo
class for this section, I'm going to add logos. Then I'm going to add
130 pixels, top margin. There we go. Now we have enough space to work with are right inside
this container. We need to have
different div blocks. Actually, we need to have
five different div box. So how should we align
those div blocks? Well, we have two
options to choose from. Option one, we can turn
this container into a flexbox option to we
can turn it into a grid. Well, a flexbox
is a good option, but I'm gonna go with grid, although it's a
one-dimensional layout. Why am I going to choose grid? Because later on when it
comes to responsiveness, when we want to make
our webpage responsive, it would be much easier
to work with grid. I will prove that to you
in our future lessons. But for now, I'm going to select this container and I'm going to add a new div block inside. I'm not going to turn
this container to grid. I'm going to add a new div
block inside, just like that. And let's give it a class. I'm going to write greed,
underscore, underscore logos. And I'm going to
turn this def block to a grid just like that. So how many rows and how
many columns do we need? Well, basically we need only one row and five
different columns, as you can see here. So I'm going to remove the
second row here, alright? And I'm going to add
three more columns to get five columns in
total. Alright, cool. Our grid is ready. Now it's time to
add our logos here. As I mentioned before, each logo should be
put inside a div. So I'm going to select
this grid and I'm going to hit Command key or Control
key on my keyboard. And then let's add
a div block here. Now, our def block takes up
the first cell here, okay? And that's exactly what we want. And I'm going to call it client underscore,
underscore logo. Alright, cool. And finally, inside this, the Blog, I'm going
to add an image. So let's hit Command
key or Control K. And I'm gonna look for image. There we go. And let's
choose the logos here. By default, the
logos are colorful. That's totally fine because
later we're going to make them black and white
and make them interactive. But for now, I'm going to select the Airbnb logo here
or right, cool. And then I'm going to
select this diblock and I'm going to give it a
specific width and height. Okay? So here, if I select
this first logo, if I select this box here, you can see that the width is 150 pixels and the height is 96. So let's set its width to 150 pixels and it's
high to 96 are right. Then I'm going to turn this
div black to a flexbox. I'm going to align
it to the center and I'm going to justify it
to the center as well. Right? That's exactly
what we were looking for. Okay. What else
do we need to do? Our first logo is ready. I'm going to copy this div blog, hit Command C or Control C, and then hit Command
V or Control V four times to get
five different logos. Then I'm gonna go
ahead and modify the image of each logo here. So I'm going to select this one. I'm going to change
it to Google. I'm going to go ahead
and select this one. I'm going to change
it to Microsoft. I'm going to select the next one and let me change it to FedEx. And finally, I'm going to select this last image and let's
change it to Amazon. Fantastic, are right guys, that's all for this video. I hope you enjoyed it. I'll see you in the next video.
46. Projects Section: In this video, we're
going to create the recent projects
section together. As you can see, this section has a container that
contains this heading. And also this bottom section,
the project section. This project section, or
let's say projects rapper, has a three different projects, and each project has
different elements, like an image at the
top, a title, subtitle. And finally, this
Learn More link. I'm going to go
ahead and as usual, first create a section. So let me select my body
and hit Command key or Control K and look for
section. There we go. Our section has been added. Then I'm going to give
it the section class. So I'm going to write
section perfect. And finally, I'm gonna
give you the combo class, which is going to
be called projects. Fantastic. As you can see, since there is nothing inside this section, it doesn't take up any space here and
it's understandable. Now, widely section is selected. I'm gonna hit Command
key or Control key, and I'm going to
look for a diblock. Now at this block is
inside this section, and I'm going to give
it the container class. There we go. Now our container
is ready as well. And finally, I'm
going to give this section some top margins. So let me take a look
at my design here. If I select this
project section and if I hold down the Option key
or Alt key on my keyboard, you can see that it has
a 200 pixel top margin. So I'm gonna go
ahead and give it a 200 pixel top
margin here as well. Right? There we go. Now, what do we need
inside this container, we are going to
need a heading and then we need this
project's rapper. Okay, So first, let me
look for a heading. I'm gonna hit Command
key or Control K, and I'm going to write heading. Make sure to select
your container while you are looking
for your elements. Because these elements
will be nested inside the element that
is currently selected. So I am going to click
on this heading. There we go. Now this heading is
inside my container. And finally, I'm going
to change H1 to H2, H3. And this is not right
because basically it should be H2 and I will
explain it later. But I'm going to intentionally
make this mistake because later on when we will
talk about accessibility, I'm going to show
you why choosing the right heading matters. But for now, Let's keep it. H three are right, and I'm gonna give it a class. I'm going to write projects underscore
underscore heading. Then I'm going to modify some of its topography properties. I'm going to change its font
size from 24 pixels to 40. Finally, let me copy this
text and paste it over there. Great recent projects,
our heading is ready. So what else do we need now, right under this heading, we are going to have
the projects wrap her. Okay, so I'm going to select this container and I'm
going to hit Command key or Control K and look for
a diblock just like that. And I'm gonna give it a class. Let's call it Projects
underscore, underscore wrapper. Alright, and now
these two elements are placed inside
this container. However, this container has
a block display setting. I'm going to turn it to Flexbox, but before doing that, make sure to give
it a combo class. It's so important. Why? Because as I mentioned before, when you don't add a
combo class and you change the display setting or any of these properties here, you are making the
changes globally. So if I turn it to Flexbox, you can see that these
logos are messed up. If I change the
direction to vertical, everything looks messed up
and that's not what we want. So here I'm going to select the container and I'm going
to give it a combo class. I'm going to ride
projects are right now. I can change the display
setting to Flexbox and I'm going to change the direction from horizontal to vertical. Great. And let's change
the justification to space between as well. Right now when I choose
that nothing happens, but later on when we add
content to our projects wrapper and also add some
margins to this heading. We will see the difference. Alright, so I'm gonna
select these projects, wrap her, and I'm gonna
give it a top margin. So let me add 70
pixels top margin. If I take a look
at my design here, I have 70 pixels, top margin as well. Alright, so inside we're going to have three
different cards. Therefore, I'm going to
need a main diblock. That is our main card. And inside that, we're going
to need two more blocks, one for the top image and the second one for
the bottom content. Okay, So let's start with adding the main diblock wireless
projects wrapper is selected. I'm gonna hit Command
key or Control key, and I'm going to
look for the block. Now inside there is a diblock and I'm
gonna give it a class. Let's write project
card, just like that. And this project card takes up the whole width and whole
height of its parents, which is this project wrapper. And it's not what we want. We wanted to have a maximum width and
also a specific height. Okay, so if I go to
my design file here, and if I select this
project one, e.g. you can see that this card has a 340 pixel width and
a 444 pixel height. So I'm going to set
the maximum width to 340 pixels and the height to
444 pixels, just like that. All right, Our project
card is ready. We're not going to
duplicate it now because first we are
going to design it. Later, we will duplicate it. So what do we need
here inside that, we will need two
different div blocks, as I mentioned before, one for the image and the second
one for the content. So while it's selected, I'm gonna hit Command
key or Control K, and I'm gonna look
for a diblock. Okay? Our first div block is ready, and I'm going to
give it a class. So let's call it
project underscore, underscore image,
just like that. And inside we will need
to add an image element. So while this project image, the black is selected, I'm going to look for an
image component here. And let me look for
one of these images. Number one, from my
assets are right, cool. I'm going to select this
image in my design file. And as you can see, the
height is set to 240 pixels. Therefore, I'm going to go ahead and here I'm going to
give it a class first. Let's write project underscore, underscore card, underscore
image, just like that. And finally, I'm going to set
its height to 240 pixels. And let me modify the
feet from field to cover. This way, I can make
sure that it will cover the project image,
the black perfectly. And also I'm gonna
give it a 100% width. So I'm going to set
its width to 100%. This way, it will take up the
whole width of its parent, which is this project image
and also the project card. Alright, cool. The
first part is ready. Now while this project card, div black is selected, I'm going to add
another div block here. There we go. And I'm going to
give it a class. And let's name it Project
underscore, underscore content. First, I'm going
to make sure that this project content div block takes up the whole
available height here. As you can see, we
have some space, but this project
content div block is not covering all this space. Therefore, I'm going
to select that. And if I head over
to the side section, I can set its height to
100% just like that. But there is a problem. As you can see now it's
outside our project card. Why? Because this project card
has a specific height and the display setting
is set to luck. So in order to fix this problem, I'm going to select this project card and
I'm going to change its display setting
from block to Flexbox. And it's gonna be vertical
because we will have two different
children inside that should stack on top of
each other vertically. Okay, so now
everything looks good. We have the project content. We have the project
card image as well. If I go to my design file, you can see that this card
has a white background, but here we don't
have any background. So let me select my project card and then if
I head over to the color, I'm going to write white here. There we go. Now we've got the
white background. And inside this project content, we will need to have one title, one subtitle, and
one Learn More link. Okay, so how can
we structure that? Let me see. If I turn this project
content to a flexbox. And inside I put a div
block and a link blog. I could easily get
what I have here. How when I turn this project
content to a flexbox, I can change its
justification easily, then I can achieve this
exact same design. So let me show you how it works. Right now, this project content. As the block display
setting and there is nothing inside
while it's selected. I'm gonna hit Command
key or Control K. And I'm going to
add a div block here, and I'm going to
give it a class. So let's go ahead
and create a class. I'm going to write project
underscore, underscore text. And inside this div block, I'm going to have two
different texts blocks. I'm going to hit Command
K and I'm going to look for textblock. There we go. This is the first one. Let me give it a class. I'm going to run it
project underscore, underscore title,
and I'm going to modify its topography
properties. The font is gonna be Roboto. The weight is going
to be 500 or medium. The size is going to be 24
pixels, just like that, the line-height is gonna be 150 per cent and the
color looks fine. Now I'm gonna go ahead and
copy and paste this title. Let me choose that, copy it and paste it here. Simplifying, this is the
name of the project. These are fictional projects, by the way, are right, cool. So our title is ready. Now I'm going to
modify its spacing. I'm going to give
it some margins. I'm going to hold
down the Option key and Shift key on my keyboard. And let's add an equal
margin. All sides. I'm going to give it
a 30 pixel margin. Maybe I could decrease the
bottom margin to 20 pixels. Alright, now I'm going to copy this title Command
C or Control C, Command V or Control V. Then I'm going to add my
description or subtitle here. However, make sure to
duplicate your class first. It's so important
because we're going to modify its properties. Otherwise, we will change
the project title as well. So first, click on
this little arrow, duplicate this class, and change its name to project description. Just like this description. The first thing I'm gonna do
is remove the top margin. I don't need it. I'm going to
hold down the option key on my keyboard or Alt
key and click on it, then I'm going to decrease the
bottom margin to ten here. There we go. Now, I can go ahead and modify
the topography properties. So let's start with the weight. It's going to be normal. The size is going to be 17 peach cells and the
height looks fine. However, the color
should be changed to our mutual medium color. Now I can simply copy this
text and paste it here. There we go. Alright,
now I'm going to select this project texts
and I'm going to change its display setting to Flexbox and make sure to change
the direction to vertical. It looks much better
now and make sure that it's justified to the top. Now wine the project
content block is selected. I'm gonna hit Command key or
Control key on my keyboard. And let me look for a text link. We're going to
create a text link like what we did here
for this hero section. So first, as usual, we will give it a class. I'm going to write Link
button, just like that. Then I'm going to modify
its topography properties. The weight looks great. I'm going to modify
its size to 17 pixels. It's color is going to
be primary default. And finally, the declaration
should be set to none. And let me modify this
text to learn more. Learn more. Alright, let me give
it some margins here. I'm going to give it left, bottom and right margins. However, since this text link using the inline
display setting, I can't modify the
bottom margin. Therefore, I'm going to change its display setting to lock. Then I can give it
a 30 pixel left, bottom, and right margin. Just like that. There we go. Now what
else should we do? As we can see, they are
not aligned perfectly. So I'm going to select the
project content div black. And as you can see, the display
setting is set to block. I'm going to change
it to Flexbox and I'm going to change the
direction to vertical. Nice. And also I'm going to change the justify to space between. Now, it looks much better. Alright, cool. But what about other cards? Well, we're going to select this project card now and
we are going to copy it, hit Command C and
paste it two times, hit Command V or Control V. But right now, these cards are stacked on top of each
other vertically. This is not what we want. We want them to sit next to
each other horizontally. So how can we fix that? Well, we can select our projects wrapper
and we can change its display setting from block to Flexbox,
just like that. Then we can change the
justify to space between. There we go. We've got what we have here. Now, I'm going to go ahead
and modify the content. So I'm going to
select this image and I'm going to go and
replace the image, and I'm going to
choose the second one. For the third one, I'm going to repeat
the same process. I'm going to change
it to number three. And also I'm going to
change the name of these projects and also
their description. So let me quickly go ahead
and modify the titles. There we go. And now I'm going to modify
the description here. And for the third project here. Alright, we're almost done, but there is one more
thing we need to do. If I take a look at
this design file, we can see that the
spacing between these cars is less than
what we have here. As you can see, the gap
is much bigger here. Why is that? We already set a maximum
width for that and a height. That's the key we set the
maximum width, therefore, we need to select the
project card, one of them, it doesn't matter
because we didn't add any combo class here. I'm gonna select the
first one, for instance, let me just go ahead and
select the first one. And then in sizing,
as you can see, it says shrink if needed, I'm going to change it
to grow if possible. There we go, it's fixed. Now the spacing here is
equal to what we have here. We have an equal spacing
between them and the yard growing when
they have enough space. Alright, our recent
projects section is ready. However, I'm going to
show you another way of creating such a
layout using grids. Because if you use grid
instead of a flexbox, it would be much easier to
make your design responsive. The only thing I need to do is select these projects wrapper. And then instead of flexbox, I'm going to change it to grid. Right now. I have two rows and two columns. I'm going to remove
one of those rows. I'm going to add
one more column. There we go. And here I'm going
to modify the gap between our columns to 40 pixels
and hit Done, That's it. Now instead of using flexbox, we are using a grid and we've
got the exact same layout. However, in terms
of responsiveness, it will make our
life much easier. All right guys, that's
all for this video. Our recent projects
section is ready as well. I hope you enjoyed
it and I'll see you in the next
video. See you then.
47. Testimonial Section: All right, In this video, we're going to start creating this testimonial
section together. So let's see what we have here. As you can see, this
section should have a smaller width compared
to other sections. Here, our recent projects
section had 100% width. But here this section should
have a 1,320 pixel width. So we need to keep that in mind. Let's see what we have here. This section should have a neutral dark
backgrounds color. And also, as you can see, we have some orbits. So how am I going
to structure that? First, I'm going to
create a section with a maximum width
of 13, 20 pixels. Then I'm gonna give it
a background scholar, this neutral dark color. And finally, I'm going to add a background image
to add these orbits. Once our section is ready, we will add a container inside
and inside that container, we will add these texts layers. This title, this subtitle
or let's say description, and finally the client's
information here. Alright, so basically
these containers should be a flexbox with a
vertical direction. And for this section first, we're going to create a diblock with the Flexbox
display setting. And then inside we are going
to have two more blocks, one for these profile image and one for these two texts layers. The right, the black is
going to be a Flexbox. We'd vertical direction. And last but not least, we're going to place
these emojis right around this container and
we're going to set their position to absolute. Finally, we need to change the position of this
section to relative. Alright, It sounds simple. Let's get started. I'm gonna go to Webflow, and here I'm going
to select my body. I'm gonna hit Command key or
Control key on my keyboard. And let's look for section. Right. The section has been added. I'm going to give it the
section class as usual. And also I'm gonna
give it a combo class. Let's call it testimonial. There we go. As I mentioned before, this section should have
a specific maximum width, okay, and also a
specific height. So let's take a look at it. It's maximum width
should be 13, 20 pixels, and its height should
be 622 pixels. So let's go ahead and
specify those values. I'm going to set its
maximum width to 13, 20, and it's high to 622 pixels. There we go. Our section is ready, but it's not centered. So how can we address
this issue? You're right. I can head over to
the spacing section and I can click on this
little button here. Now the left and right
margins are set to auto, and it means our section
is centered, perfect. The last thing I'm
gonna do is at some top margins
to this section. So let's check our
design for a second. As I can see here, the top margin should
be 200 pixels. So I'm going to give it
a 200 pixel top margin. There we go. Alright, now it's
time to give this section a specific
backgrounds color. So I'm gonna go to the
background section. And using this color picker, I'm going to choose
neutral dark. And finally, I'm going to add an image to this background like this and choose the orbit from
my assets just like that, but it doesn't do good. That's because the size
is set to costume. I'm going to change
it to contain, and that's what
we're looking for. We don't need to modify
anything else. Okay? Our background is ready. Now inside, we're going
to create a container. So wildly section is selected. I'm gonna hit Command
key or Control K, and I'm going to look for
a diblock just like that. This diblock is now inside this section and I'm going to give it the container class. There we go. Nowadays,
container has a maximum width of 1,100 pixels, like all other containers
that we created before. Okay, Cool. So what do we need for
this container first, this container should take up the whole height
of this section. Therefore, I'm going to
give it a combo class. Let me write testimonial, and I'm going to set
its height to 100%. There we go. And inside I'm going
to add a heading. So while this
container is selected, I'm gonna hit Command
key or Control K. And let's look for heading. There we go. The heading has been added, and for this section, I'm going to choose h three. Alright, now let's give this
heading a specific class. I'm going to write
testimonial underscore, underscore heading. And then I'm going to modify
its topography properties. So first, let me go ahead
and modify its color. We're going to use
neutral light, this one. And also, I'm going to
modify its font size. 240 pixels. If I head over to my
design file here, if I select this, you can see that I'm
using H three and H NH3 is 40 points. Okay? So here we are going
to specify 40 pixels. I'm not going to touch
the line height. And then let me go
ahead and copy and paste this particular
texts from my design file. I'm going to copy it, Command C or Control
C and paste it here. Okay, great. Now I'm going to
need a textblock. So once again, select
the container, hit Command key or Control
K and look for textblock. Okay, there we go. And again, I'm gonna
give it a class. That's right. Testimonial, underscore,
underscore text. And finally, I'm going to change its color to this secondary. And also I'm going to
modify its size to 24 pixels and it's
line-height to 160%. I can also modify its weight. Let's take a look
at the weight here. Yes, it's going to be medium. So I'm gonna change
it to medium, and then I'm going to copy
and paste that text here. So let's copy it and
paste it right here. Our texts is ready as well. However, we have a problem here, as you can see, this
text is too long, but when I take a look
at my design file, you can see that I've got
two lines of text and the width is set to 596 pixels. So you know what we need to do, we need to change
its size property. If I set the maximum width
for these texts layer, the issue will be solved. I'm going to write 596 pixels. There we go. We've got two lines of text, and I'm going to align
it to the center. Nice, before we start creating
the last section here, the client section, I'm going to go ahead and select
this container. I'm going to change its display setting from black
to flex marks. As you can see by default, it's the erection is
set to horizontal. I'm going to change
it to vertical. And also I'm going to
align it to the center. And we will lay their modifying
the justified, but not. Now, what else do we need here? As I mentioned before
for that client section, we need a diblock. Wireless container is selected. I'm gonna hit Command
key or Control K. And let's look for the block. There we go. I'm going to give it a class. Let's write client, okay? This client diblock should
have two more div blocks. Okay, So while it's selected, let's look for a block now
and other diblock is inside. And I'm going to repeat
the same process to add another div block. Okay, we have two duplex now, but they are stacked
on top of each other and it's not what we want. Why? Because here they should be
placed next to each other. Therefore, I'm going
to select the parent, which is this client if block. And I'm going to
change its display setting from block to Flexbox. The direction is
set to horizontal. That's exactly what
we need, are right? I'm going to select
the left Div block. I'm gonna give it a class. Let's write client underscore,
underscore profile. For the right one. The next block, I'm going
to give it a class. And I'm going to write
client underscore, underscore info. Our div blocks are ready. Now we need to add content here. First, I'm going to select the client profile leave block, and I'm going to head over
to the background image. And let's add an image here. I'm going to choose
an image from the assets, the profile image. There we go, but we need
to modify its preferences. First, I'm going to change
its size to cover, Nice. I'm going to reposition
it to center. And also I am going to set
the title to Don tile. And finally, I need
to make it circular. So how can we do that? Well, it's so simple. I already showed you
before how we can create a circle and we're gonna
do the same thing here. First, we need to set a
specific width and height. The width and height
should be the same when we want
to create a circle. Therefore, I'm going to check
this width and height here. It's a 50 by 50 pixel image. I'm going to give it a 50
by 50 pixel dimensions. Now, the only thing we need to do is head over to the borders. I'm going to change the
radius to 50 per cent. And there it is,
we've got our circle. Okay, what else should we do? Now it's time to add the
client info content here. So for this div, we're going to need
to take slingers. As you can see, we
have a name and then the name of company
or the name of website. Here, wireless clients in
for the block is selected. I'm gonna hit Command
key or Control K, and I'm gonna look
for textblock. There we go. This is our first text block. I'm going to give it a class. Let me write client underscore, underscore info, underscore, underscore name, just like that. And then we're going to modify
some of its properties. So let's head over to
the typography section. And from here, I'm going to
modify its size to 17 pixels. If I take a look
at my design here, It's sizes 17 points, and then we need to modify
its color to primary hover. We didn't create a
global swatch for these primary harbor
color, but that's fine. I'm gonna do it right now. So let me go ahead and get
the color code from here. As you can see, the
color code is a 2D6, F9. I'm going to copy it and then I'm going to head
over to Webflow. And from the
typography color here, I'm going to create
a new swatch, and let's paste the
color code here. I'm going to name it primary,
forward slash hover. Okay, Nice. We've got a new global swatch. Now, let's copy and paste
the client's name here. I'm going to copy it and let's
paste it right over here. It looks fine. And finally we need
another text layer. So I'm going to select the
client info div block. And using the QuickFind, I'm going to look for another
text block just like that. Let's give it a class. I'm going to write
client underscore, underscore info, underscore,
underscore company. Okay. Then I'm going to modify
its topography properties. So first, let's start
with the font size. Its font size should
be 13 points. If I'm not mistaken. Let me check it out. We are using the
caption to textile. So here, caption to as a
13 points, that's fine. So I'm going to give
it 13 pixels here. And for its color, we are
going to use neutral light. Nice. So let me go ahead
and copy and paste the company's website,
which is booking.com. Okay. I'm going
to paste it right here and we're almost done. Now the only thing we need
to do is align our elements. So let's start with
the client info. If I select this
client info diblock and I head over to
the layout section, you can see that the display
setting is set to block and it's not what I
want because I want to change the alignment
a little bit. Therefore, I'm going to
change it to Flexbox and I'm going to change the
direction to vertical. And the last thing
I'm gonna do here is change the justification
to space around. There we go. So the last thing
we need to do is add some left margins here. Let me check my design file. If I select this
group and I hold down the Alt key or Option
key on my keyboard, you can see that the left
margin is set to ten pixels. Therefore, wine, these client
info block is selected. I'm going to give it a ten
pixel left margin are right. Now I'm going to select the
container and I'm going to change the justification
to space around. Now we've got what we have here. Let's take a look. We've got exactly what we
have in our design file. So what about them, emojis, as I told you before
inside this section, we're going to have four
different emojis as well. So I'm going to select this
section, not the container. I'm going to select
this section. And then I'm going to
look for a def block. And this block is now
inside this section. And let's give it a class. I'm going to write memos. And this memos you should have a specific width and height. So let's take a look at our
design file for a second. If I select this emoji, you can see that its
width and height are set to 150 pixels. So I'm going to set
its width and 2,100.50 and it's height to
150 pixels as well. But what about the image? Are we going to add an
image element here? No, we're going to use
the background image, but before adding the
background image, I'm going to give
it a combo class. Why? Because we're going to have
four different emojis. And since we are going to change the background image here, it's important to give this
emoji diblock a combo class. So for the first memo G, I'm gonna give it the one
combo class just like that. And then let's give it an image. I'm going to choose an image
from my assets, this one, and I'm going to change
its size to contain and let me reposition
that to center. And I'm going to set the
time to do not tire. It's right here. But how can we place
it right over there, as you can see in
our design, fine. They are placed right
next to the corners. So as I mentioned before, I'm going to select this
section and I'm going to change its position from
static to relative. Why? Because later I'm
going to change the position of deism
emojis to absolute, and that way I can reposition
them however I want. So if I select this emoji and if I change its position to, let's say absolute hear, nothing happened yet because I'm going to change its
position to top-left. Now, as you can see, since the position
of this memorial is relative to its section, as you can see here. I can simply modify
its position. So let me modify the
left and top position. I'm going to change
it to, let's say, 5%. And for the top, I'm
going to set it to 10%. Okay, now I'm going to need
to create the next memo g. So you can either copy and paste this memo G or you
can duplicate it. I'm going to right-click
on this memo, which is name, and I'm going
to click on Duplicate. It's been duplicated, but they are now on top of each other. So if I select the
duplicated layer, I can just reposition it. But before doing that, I'm gonna go ahead and duplicate this combo class just like that. And I'm going to give
it a new comp class. I'm going to write two because
this is our second memo, G. Now I'm going to reposition
it to bottom-left and I can modify its left and
bottom position here to 5%. And here I'm going to set it to ten per cent are right, cool. Now it's time to go
to the bank runs section and modify
the image itself. So I'm going to select
these mammography, and now we just need to
repeat the same process. So I'm going to duplicate
this memo GI, just like that. I'm going to select the
duplicated div block in the navigator, and I'm going to duplicate
its combo class. And let's change it
to three and let me reposition it to
top right corner. And also I'm going to change its emoji from the background
section to this one. And finally, I'm going to
change its position the right, I'm going to set it to
five per cent and the top, I'm going to set it
to ten per cent. Last but not least, I'm going to duplicate it. Once again. Let's select the duplicated
layer in the navigator and also duplicate It's combo class and I'm going to name it for, then I'm going to reposition
it to bottom right corner. And also I'm going
to change its image from the assets to this emoji. And finally, let me modify its right and
bottom positions to 5% and ten per
cent respectively. Just like that, are right guys, our testimonial section
is ready as well. Can you see how easy
it is to convert your Figma design to
functional websites. The only thing that matters
is that you understand the structures and
the CSS properties as long as you follow
the rules and you have a clear structure in your
mind, everything is easy. So let's recap. For this section. We created a section. We gave it a testimonial
combo class, and also we gave it a
200 pixel top margin according to our design file. Then we specify a maximum width and also a specific
height for that. And we gave it a background
color and a background image. Right after that, we
created a container and we gave it the container
and testimonial classes. And inside we've added
a heading, a textblock, and another div block that
includes two other blocks. And all these div legs
are flexed boxes. We change their
display setting to Flexbox in order to
control their direction. They are alignments and
their justification. Once the container section, once complete, we started
adding them emojis here. And in order to position
them correctly, we set the sections position to relative and we set them
emojis position to absolute. Alright guys, that's
all for this video. I hope you enjoyed it and
I'll see you in the next one.
48. Services Section: Hey, in this video
we're going to start building the
Services section together. So let's see how we
should structure it. As you can see here we
have another section. So first, we need to create a section and inside
we need a container. Just like what we did here for the recent projects section. We're gonna do the same
thing here as well. And inside this container, we're going to have
a heading for this, our services tidal and then we're going to have
the services wrapper. It's going to be a
grid or a flexbox. We're gonna go with greed. And inside this
services container or let's say services grid, we're going to have three
different div blocks. So here we have three
different cards, and each card should be
created using a div blog. So let's take this one, e.g. this is going to be a div block. And inside we're going to have this icon and
we're going to create this icon using diblock
and a div block inside. Once our top section is created, we will go ahead and
create the content section here we need a title
and the description. And finally, we need
this Learn More button. And last but not least, we will duplicate
our diblock two times to get three
different cards. Alright, it looks simple. So let's begin. First. I'm gonna go ahead and
select my body here. And then I'm gonna
hit Command key or Control K and look for
a section. There we go. And new section has
been added here, and I'm gonna give it a class. The section class are right. This section is
not going to have a specific width or height. However, I'm going to
give it a top margin. So let's take a look at
our design file here. As you can see,
we're going to need 200 pixels top margin. So I'm going to select this
section and I'm going to change its top margin
to 200 pixels. There we go. But
we can see it now because there is nothing
inside our section. Okay, so how can we fix that? First, I'm going to
select this section and I'm gonna hit Command
key or Control K. And I'm going to add a div
block because as you know, we're going to need a container. And as you can see now we've got our 200 pixels top margin. And while this div
block is selected, I'm gonna give it
the container class. Okay, there we go. So now we have the maximum
width of 1,100 pixels. That's exactly what we need. And for this container, I'm going to add a
combo class as well. I'm going to write services. And inside this container
we're going to have a heading and the
services wrapper. So while this
container is selected, hit Command key or Control
K. And look for heading. This heading has been added, and I'm going to
choose H three here. And let me go ahead
and give it a class. Since it's CSS
properties should be exactly the same as the
recent projects heading. Therefore, I'm going to set the projects heading for
this heading as well. So I'm going to select
it and let's try it. Projects heading. There we go. Then I'm going to change
its text to our services. Let me go ahead and copy it. Okay, Cool. Are heading is ready. What else do we need? We need the services wrapper. So while this
container is selected, I'm gonna hit Command
key or Control K. And let's look for diblock. Then this diblock needs
a class as usual. So since we are going to change the display setting
to grid later on, I'm going to name it
services underscore. Underscore grid. Okay. It's not a grid now, but later we will
change it to greet. This services grid needs
to have some top margins. Let me check it out here. If I select this
services wrapper and I hold down the Alt key or
Option key on my keyboard, you can see that
we're going to need 70 pixels, a top margin. So I'm going to select this services grid and I'm going to add
some margins to it. So let's set it to 70 pixels. Are right, cool. Now that's our services
greed def block is created. We need another div block inside for our service card,
okay, therefore, while this service
grid is selected, let's look for a div block, and this block is going
to have a new class. Let's name it service
underscore, underscore card. This card is going to have
a specific maximum width, but we're not going to specify a particular height for now, we're going to set
the height to auto. But if I select this
service one card here, you can see that the width
is set to 340 pixels. Therefore, we're going to set the maximum width to 340 pixels. Nice, and this card is white. So what should we do? Yes, you are right. We need to change the
background color here. So I'm going to hit over to the background section and
using these color picker, I'm going to change
its color to white. Okay. Cool. But it
looks too small. Yes, because we didn't set a specific height for net
and that's totally fine. As soon as we add more
elements to this diblock, its height will grow. So don't worry about it. Alright, who wants this
service card is selected. We're going to add
some elements to it. What do we need? We
need two div blocks. We need the service icon, the blog, and the service
content if block. So let's look for the block. And again, I'm going to select service card and look for
another div block, okay? Now we have two blocks that are placed on
top of each other. I'm going to give them a
class for the first block, for this top block, I'm going to name it service
underscore, underscore icon. For the bottom div block. I'm going to name it
service underscore, underscore content. The top div block is gonna
be used for our icon and the bottom diblock is going
to contain our content. So let's start with the icon. I'm going to select the
service icon, the block, and let's head over to
our design fine here. If I select this icon, you can see that we
have this circle and its width and height
are set to 80 pixels. Therefore, I'm going to
specify the width and height here to 80 pixels,
just like that. And then I'm going to modify
its backgrounds color. Here, we need to use
neutral light blue. So let's go ahead and modify the background's color
to neutral light blue, just like that, then we
need to make it circular. So I'm going to change the
radius to 50 per cent. And there we go, our
circle is ready. But what about the icon? Well, for the icon, we have two options. First, we can go ahead
and add an image here. Second, we can add another div block inside
this service icon, the block and put
our icon there. The second option is more
flexible in terms of alignment. But let's go ahead and
check out the first option. I'm going to add an image here using the bank runs
image section, and I'm going to choose
this first icon. Then I'm going to change
its position to center. And I am going to set
the time to downtime. There we go. Our icon is ready. Now we need to move
on to the next block. But before doing that, let's give this service
icon diblock some margins. I'm going to scroll up. I'm going to set its top
margin to 40 pixels. Let's take a look
at our design file. Yes, the top margin
is going to be 40 pixels and the left margin
is going to be 30 pixels. So I'm going to set
its top margin to 40 and it's left margin
to 30 pixels. But look, I couldn't get
the 40 pixel top margin. Why is that? That's because the
second div block, this service content
div block is taking up the
available space here. Therefore, this icon,
the service icon, can have that for the
pixel top margin, since we didn't give
a specific height to this service card. So that's totally fine. Now, let's move on to
the service content, and later on we will
get that top margin. So what do we need inside
this service content? Let's take a look
at our design file. Inside that service content div. We're going to have
another div block to put these texts layers in. And then we're going
to need a link, Martin, okay, it takes link. So let's go ahead and
create a div block. Wildly service
content is selected. I'm gonna hit Command
key or Control K and look for a
diblock. There we go. Inside this service contents, we have a new div block. This new div block is
going to need a class. So I'm gonna go to the selector and let's
add a new class. I'm going to write service
underscore, underscore text. And inside we need two
different texts blocks. So while it's selected, let's hit Command key or Control K and look
for textblock. There we go. This is
the first textblock. I'm going to need
another one as well. So once again, I'm going to
select service contents, hit Command key or Control K, and look for textblock. Okay, we've got two
texts plugs ear, but they don't have any classes. So I'm gonna select the first one and I'm
gonna give it a class. I can write service
underscore, underscore title. However, since this title and
the description is going to have the same styling as
we have here for this car, for this project card, I'm going to give it the
class that we created for this tidal and
for the description, it should be project
description. So let's go ahead and
select the first textblock and let's ride project title. Okay, there it is. And for the next one, I'm going to write project and
then look for description. Here it is, our right. Cool. Now I'm gonna go ahead and copy this text and
paste it here. And for the description as well, I'm going to copy it. And let's paste it right here, right below this service text, we're going to need
a link blog as well. However, as you can see, this project description is not inside our service
texts, the blog. I'm going to drag it and I'm
going to make sure that it's nested inside the
service diblock. Okay, now I'm going to select service content and I'm
gonna look for a text link. Okay, there we go. We've got our text link and
we don't need to create new properties for that because we have our
link button here. So I'm going to choose
that and I'm going to give it the
link button class. There we go. Can you see how beneficial it
is to use classes properly? And finally, I'm going to
change its text to learn more. Our right Cool. We're almost done. Now. We just need to change some
properties in order to make our card larger and
modifying the alignment. First, I'm going to select
this service content div blog. And as you can see, the display
setting is set to block. I'm gonna change
it to Flexbox and I'm going to change the
direction to vertical, and I'm going to change the justification
to space between. Then I'm going to select the
service card, the block. And I'm going to
repeat the same thing. I'm going to change
the display setting to Flexbox and I'm going to change the direction
to vertical. Okay, now we've got
our top margin. However, for this description we don't have any bottom margin. Therefore, I am going to select this project description and I'm going to give it
some bottom margin. Its bottom margin is
set to ten pixels. I'm going to give it a
40 pixel bottom margin. So let's modify that. Now it looks much better. As you can see, our
current looks exactly the same as what we have
here in our design file. And that's exactly what
we were looking for. What should we do now? Well, the hard part is done. Now we need to select
our service card. We need to duplicate it. So I'm going to
right-click here. And I'm going to hit
duplicate two times. I'm going to repeat
this process two times. And there we go. We've got
three different cards. However, they are stacked
on top of each other. And we have two options. We can either go with a
flexbox or with grid. Since I'm going to keep
our design consistent, I'm gonna go with
grid because for this section we use
a grid as well. Therefore, I'm going to select the services grid live black, and I'm going to
change its display setting to create nice, You know what we need to do? We need to remove one of these rows and we need to
add one more column here. And finally, I'm going
to change the gap from 16 pixels to 40 pixels,
just like that. Alright, cool. Our
cards are almost ready. The only thing I need to do is modify these icons
and the content. So let me go ahead and
quickly modify this icon. If I select this service
icon, the block, I can head over to the background section and
I can choose another image. But something happens as
soon as I change this image, since I didn't add a combo
class to this base class, if I change this icon, all these icons
will be affected. So let me show you what I mean. There we go. This is not what we want. Therefore, what I'm
gonna do is go ahead and add a combo class to this
service icon diblock. I'm going to write two. And for this one, I'm going to write 3.4, the first one,
That's right, one, although the first
one is not necessary, I'm gonna give you the
combo class that I could organize my elements easily. Alright, now I can
select this series icon. And then if I change its icon, the other icons
won't be affected. So I'm going to choose
the second one. Nice. For the third one, I'm going to do the same thing. And let's choose this one. Our right, our icons are ready. Now I am going to go ahead and change the title and
the description. So let me quickly copy and
paste these texts here. Are right guys, that's
all for this video are services section
is ready as well. I hope you enjoyed it and
I'll see you in the next one.
49. CTA Section: Hey, in this video, we're going to create
this CTA section. Ctas stands who are
called to action, and it usually grabs the user's e-mail address
or name and email address to send him or her hair
some files or let say, some news or any information that the
user is looking for. This call to action
section has a form. As you can see, this form has a text field and also
the subscribe button. So let's see how we
should structure that. First, we have a section, I need to modify its
name to CTA section. And this section, just like
our testimonial section, has a specific width. So it doesn't take up the whole width of
our view port window. Therefore, we're going
to set a specific width for that 13, 20 pixels. As you can see here, it
requires a background color. So we're going to use the secondary color for
the background here. And then once our
section is created, we need a container as usual. And finally, inside
this container, we're going to have one heading, one takes blog, and
also a form block. This form block is going to have a TextField wrapper
and a button. Okay, So nothing complicated. We just need to stick to the
rules and we just need to use flexbox in order to
align these elements. Are you ready? Let's begin. First. I'm gonna go ahead and
select my buddy here. And then I'm going
to look for section. Just like that. Let
me give it a class. I'm gonna give it the
section class here. And also I'm gonna give
you the combo class. Let's call it CTA. As you can see, we can see the section because there is
nothing inside our section. So first, I'm going to go ahead and give it a maximum width of 1,320 pixels and also a
specific height of 500 pixels. Okay? So if I take a
look at my design, you can see that its
height is 500 pixels. I could set it to auto as well, but I prefer to have a
specific height here. So now we need to
center our section. How can we do that? You're right. I can head over to the spacing
section and I can click on this button to center the element horizontally,
just like that. The next thing we need to do is change the background scholar. So if I head over to the background section and
I click on this color here, using this color picker, I can use one of my swatches. I'm going to use
the secondary or write our section is ready. Now inside, as usual, we're going to need a container. So wildly section is selected. I'm gonna hit Command
key or Control K. And let's look for a def block. This block doesn't
have any class. So let's go ahead and give
it the container class. Okay, Nice. Our container is ready as well. So what do we need in
scientists container? We're going to need a heading. It takes block and a form block. So first I'm going to give this container a combo class CTA, and then I'm gonna
hit Command key or Control K and look for heading. Let's change the heading
time to age three. And also I'm going
to give it a class. So here I'm going to
write CTA underscore, underscore heading, and let's modify some of its
topography properties. Alright, the weight
is going to be bold. However, the size is
going to be 40 pixels. The color is going to be
neutral dark as well. Now, I'm gonna go ahead
and copy this text from here and paste it
right over there. Okay, our heading is ready. Now we need a textblock. So let's select our container
using the QuickFind. I'm gonna go ahead and
look for a textblock, and I'm going to
give it a class. Let's write CTA underscore,
underscore, subtitle. And I'm going to modify some of its topography properties. So the only thing we
need to do here is change the size
here to 17 pixels. We don't need to
touch anything else. Alright, great. Now let me go ahead
and copy this text. Let us help you. Just like that. Our right, our texts
layers are ready. Now we need a form block. So let me select this container. You can either go
to the Add section and just drag and drop
a form block here, or wireless container
is selected, you can hit Command key
or Control K to open up the quick find and
look for a form luck, we've got our form blank. However, we have
two text fields. We have two text fields, labels, and also we
have a button here. But for this section we
just need one takes filled. We don't need any label and we need to modify the
button a little bit. So let's go ahead and select the field label from the
navigator and remove that, hit the backspace or delete
key on your keyboard. I'm going to remove the
text field as well. Now I'm going to remove
this field label. We don't need any field label. So right now I have one takes thrilled and one Submit button. First, I'm going to
select this form diblock. And as you can see, it's display
setting is set to block. I'm going to change
it to Flexbox. Now the direction is
set to horizontal. That's exactly what we need. So we've got the layout
we're looking for. However, if you take a
look at the design file, you can see that we have this placeholder text
and also this icon. So let's go ahead and modify
our TextField a little bit. This text field has a
specific width and height. The width is 393 pixels and
the height is 80 pixels. Therefore, I'm going to select this text field and I'm
going to change its width to a 393 pixels and its
height to ADP cells. But as you can see,
this text field by default has some bottom margins. I'm going to go ahead
and remove that. Let's set the bottom
margin to zero. Now, this text field is
aligned with this pattern. But what about the
placeholder text? Well, if you remember, if I double-click on
this text field here, I can specify the
placeholder text. So let me write,
enter your email. And the text type is going to be email and it's going
to be required. The name is going to
be e-mail as well. Alright, cool. But how can we add an icon here? Well, since we are using
a text field elements, we can just simply go
ahead and add an icon. Therefore, we need to be
creative and we need to use what we learned so far in order
to add an icon here. So what I propose is this. First, I'm gonna
go ahead and add some more left padding
to this text field. So I'm going to change
its padding to 70 pixels, and then I'm going
to modify its color. As you can see here, the color of this text
layer is neutral dark. So do you remember how we can
modify the CSS properties? This placeholder sex?
Yes, you're right. We need to select
our text field. And then if we head
over to the selector, we can go to the
place holder state. From here, I can just
adjust the color. As you can see, it says the
text color is set to neutral, dark already, but it's not. It's just an annoying bark. So if I just click
on it and I choose this color once
again, There we go. Now the color has been
applied properly. Alright, the color is fine now, but we need an icon. Therefore, I'm going
to create a div block, and I'm going to put
these texts field and a new div blank insight that in order to align
everything perfectly. So first, why in this
form is selected? I'm gonna hit Command
key or Control K. And let's look for a diblock. Then I'm going to
give it a class. Let's call it CTA, underscore, underscore, TextField,
underscore underscore wrapper. Then I'm going to drag this
text field and drop it inside this CTA takes field
wrapper that we just created. And I'm going to move
this wrapper up, just reorder rate
in the navigator. Now while these new div block, this wrapper is selected, I'm gonna go ahead and add a
new div block for our icon. So let's look for the if block. Great, and this diblock
is inside this wrapper. So let me select this def block and I'm gonna give
you the class. I'm going to write TextField
underscore, underscore icon. And this icon should have a
specific width and height. So if I go to my design file
and I select this icon, you can see that its
width and height are set to 30 pixels. So I'm going to give you the
specific width and height. I'm going to write 30 pixels. There we go. And as you know, we
need to head over to the background section and we
need to add our icon here. So let me look for
the mail icon. Alright, nice, or icon is here. Everything looks great
except its position. So how can we position
this icon right here? Well, do you remember
when we talked about the position
property here, I'm going to set the position of this block to apps to
do it just like that. And then I'm going to
select its parent, which is this CTA
TextField rapper. And I'm going to set its
position to relative. Okay? Now the position
of these TextField icon, the block is relative. Tweets parents, as
you can see here, we have CTA TextField wrapper and I can just reposition
it to top left. So I'm going to just increase the top position to around 30%. We just need to eyeball that. And then I'm going to modify the left position to around 8%. Okay, Nice. I can just
move it a little bit down. I can increase the top
margin to, let's say, 32%. Our rights, our TextField
is almost ready, but what about its color
right now by default, it's background's
color is white, but our text field is not white, are textfield is using
the neutral light color. So I'm going to select this
text field and I'm going to modify its color
to neutral light. And now we can move on to the
next part, which is button. It's gonna be so
simple because we already created our
primary button, if you remember, for the hero section and
for the navigation bar. So what I'm gonna do is select
this button right here, and I'm gonna give it a
class primary button. There we go. We've got our sales. The only thing we need to do is adjust its padding a little bit. Okay, so first, I'm going
to give it a combo class. This way I can make sure
that the changes I make here won't be applied
to other buttons here. And then I'm going to
adjust its padding. So let me scroll up. As you can see by default, it has a 30 pixel left
and right padding. Let's take a look
at our design file. If I select this
subscribe texts layer, you can see that
it's left and right padding are roughly 60 pixels. So I'm going to give it a six the pixel left and
right padding. If I hold down the Option key
or Alt key on my keyboard, I can just modify the left and right padding
simultaneously, just like that, the top and
bottom padding look fine. Now I need some left
margin as well. Here I'm going to need
a 20 pixel left margin. So wireless button is selected. I'm gonna give it a
20 pixel left margin. Alright, I'm going
to select this form. And as you can see, this form takes up the
whole width of its parent, which is this form block. First, I'm going to select
this form and I'm going to change the justification
to center. And then I'm going to
select this form block and I'm going to give it
a class form block. And let me change its
display setting to Flexbox. And I'm going to change
the justify to center. And now I'm going to
select my container. As you can see, the display
setting is set to block. I'm going to change
it to Flexbox and let me change the
direction to vertical. I'm going to change the
justification to center as well. But as you can see,
it doesn't take up the whole height
of this section. Why? Because its height
is set to auto. Therefore, its height is determined based on the
height of its children. They don't take up so
much space inside. So what I'm gonna do is select this container and set
its height to 100%. Now it takes up the whole
height of this section, and then I'm going to change the alignment to center as well. Alright, now I'm going
to select my heading. And this heading requires
some bottom margin. So let me go to
my InDesign file. If I select this heading, I can see that I need to get
20 pixels bottom margin. So while it's selected, I'm going to
override its margin, its bottom margin to 20 pixels. And also I'm going
to do the same thing for these foreign block. If I select this form block, we can see that I don't
have any top margin. I'm gonna go to my design file and I'm going to select
this text field. You can see that I need to
get a 50 pixel top margin. So I'm gonna give it 50
pixels here are right. Now let me change the
text of this button from Submit to subscribe. And there we go. Our CTA
section is ready as well. But now I'd like you to pay attention to
the other elements inside this form block because apart from this
TextField land button, we have two more blocks. We already talked about them
in our previous videos, but I just want to
mention them once again in case you forgot them. So here we have a
success message, the black that is not visible. The reason is by default, it's display setting
is set to none. We have this error
message as well. By default, it's
display setting is set to none and we
can't modify that. Why? Because once the user hits
this Subscribe button, he or she will get either a success message
or an error message. If everything goes well, there is no internet
connection problem. He or she will see
the success message. If not, they will see
the error message, but can be just change the
design of these messages. Of course we can,
well in that case, we need to select
our form block. Then if I click on the
Settings icon here, you can see it says Show
State, Normal success error. If I go to success here, I can start modifying
its appearance. If I go to error, I can change its
appearance as well. So for instance here, when I go to error, you can see that it's
alignment is wrong. So let's go ahead and fix that. While we are in the error state, I'm gonna go ahead and
select this form block. This form blog holds
this form, the block, the success message and the error message and
its layout direction. As you can see, it's set to horizontal when we are
in the normal state, it doesn't make any difference. But when we are in
the error state, it makes a difference. I'm going to change the
duration to vertical, and now it looks much better. So if I just go to
the normal state, it looks just fine. If I go to success,
it looks great. If I go to error, that's fine. Of course, you can go ahead
and modify the content here, but this is not our goal now, are right guys, that's
all for this video. I hope you enjoyed it. I'll see you in the next video.
50. Footer: All right, In this video, we're going to create this footer at the
bottom of our homepage. This filter is
going to be placed on all pages on our website. As you can see here
on the project page, we have the footer as well, on the contact page as well. So how are we going
to build that? Let's analyze it and see
how it's structured. As you can see, we have a
section that's going to take up the whole
width of our report. Okay? So as usual, we need
to create a section and then inside we're
going to need a container. There we go. And
inside this container, we will have two
different IP blocks. One for the content
on the left side that is going to contain the
logo and the address, and one for the links
on the right side. In fact, for the links, I think it would be
much better to create a grid because here we have
a two-dimensional layout. It would make much more
sense to create a grid for these links without further
ado, let's get started. First, I'm going to select my body and I'm going to hit
Command key or Control K. And let's look for section. Then. I'm going to give this section
a class as usual Section. Nice. And we can see anything because
there is nothing inside. Then why in this
section is selected? Let's look for a div block. I'm going to add a div inside. And let's give it
the container class, because it's going
to be our container. Alright, nice. Our
section is ready, or container inside is ready and wireless
container is selected. I'm gonna give it the
footer combo class as well. There we go. So as I mentioned
before, for this footer, we're going to create
one div black on the left side and one
grid on the right side. So in total, we're going to
create two div blog spheres. Wireless container is selected. Let's look for the block. Okay, I'm going to add
another div block, so make sure that your
container is selected. And then using the Quick find, you can add a div block. There we go. So now we
have two deep blacks. I'm going to select the top one and I'm going to
give you the class. Let's write filter, underscore,
underscore content. And I'm going to
select the second one. And I'm gonna give it a class. Let's write filter
underscore, underscore links. Okay, cool. Then I'm going
to select this container and I'm going to change
the display setting from black to flex Mike's. Why? Because I'm going to align these two deep
blacks horizontally. Vertically. Therefore, I'm
going to change it to Flexbox. There we go, that direction
is set to horizontal. And the only thing I need
to do here is change the justify to space
between just like that. Because we want
these deep blacks to touch the edges of
this container. Alright, let's take a
look at our design file. And if I select this group
here on the left side, you can see that this
content bikes, this, the block is going to have a specific width of 260 pixels. So what I'm gonna do is select this particular div
block footer content, and I'm going to give it a
maximum width of 260 pixels. And then inside I'm going to
add one more div blank for our logo and a one
textblock for the address. So while it's selected, let's hit Command key or Control K and look
for div block. And I'm going to give
this the blocker class. Let's write footer, underscore, underscore content,
underscore, underscore logo. And then if I head over to
the background section here, I can add an image. And from the assets, I'm going to choose this circle logo and I'm going to change the size to contain. Let me reposition that to
center and don't tie them. Let me take a look at my design. If I select this logo, it's width is roughly 100 pixels and its height is 30 pixels. So while this footer content
logo div black is selected, I'm going to set
a specific width, 100 pixels, and its height
is going to be 30 pixels. Alright, but what
about the address? I'm going to select this
footer content div. And I'm going to add a text
block here just like that. Then I'm going to need
to give it a class. So let's name it
footer, underscore, underscore content, underscore,
underscore address. And let's go ahead
and modify some of its topography properties
the way it looks fine. I'm going to change
the size to 17 pixels. Then I'm going to
change the color to neutral medium and the line
height to 150 per cent. And finally, I'm going to copy this address and let's
paste it right here. Let's see what we have here. If I select this footer content, you can see that the
display setting is set to block and it looks fine now, however, later when we want to make our website responsive. It would be problematic
because e.g. in mobile portrait or landscape, we might need to change the alignment of these
two elements here. Therefore, now I'm
going to change it to Flexbox and I'm going to change the direction
to vertical. And I'm going to
select this logo and we need to give it
some bottom margins. So let me select this logo here, and its bottom margin is
going to be 30 pixels. Therefore here, I'm
going to give it a 30 pixels bottom margin. Nice. Alright, our
footer content is ready now it's time to
move on to the next part, which is footer links. If I select this footer links and I hit Command
K or control K, I can look for text link. Then I can give it a class. So let's write footer,
underscore, underscore link. And I'm going to modify
its topography properties. First of all, let me
increase its font size to 17 pixels and its color is
going to be neutral medium. And finally, I'm going to
set the declaration to none. Okay, So this is basically
our styling here. Then I'm gonna go ahead
and copy this text here. The first one is going
to be team. Nice. Now I'm going to
duplicate it five times to get six
different links. So I can just copy it, Command C or Control
C and paste it five times using
Command V or Control V, just like that are right, I've got six
different links here. And now I'm just gonna
go ahead and copy and paste these
names one by one. Alright, are six
links are ready. But since the display setting of this footer links
is set to block, we can see that they
are sitting next to each other and this
is not what we want. As I mentioned before, we're going to
change it to a grid. Let's hit the grid. We're going to have three
columns and two rows. Therefore, I'm going to
add one more column here. Nice. Now I'm going to hit Done. Alright, our grid
is ready as well. However, as you can see, we don't have any bottom margin. And now our container is touching the bottom
edge of our screen. It's not what we want. So let's go ahead and select this container here
in our design file. And I'm going to check
the bottom margin. It's set to 100 pixels. So what should we do? If I go ahead and select
this container and try to add some bottom
margins, it doesn't work. Therefore, I'm going to select our section and I'm going to give it a bottom
padding instead. So here I'm going to set the bottom padding
to 100 pixels. And there we go. We've
got what we wanted. Oops, but look what happens. As you can see, as soon as I added some padding
to this section, the padding of this section
has been changed as well. So why is that? The reason is we didn't add a combo class
to this section. As you can see, we don't
have any combo class and that's bottom padding has
been added to all sections. All sections have this
extra bottom padding and it's not what we want. So how can we fix that? Well, I'm gonna hit
Command Z or Control Z to remove this padding wildly
section is selected, wine, our footer
section is selected. I'm going to give it a
combo class called footer. Now I can easily add that extra padding without
affecting other sections. So I'm going to set
it to 100 pixels. There we go. Now it looks amazing. All right guys, that's
all for this video. I hope you enjoyed it and
I'll see you in the next one.
51. CMS & Dynamic Content: Hey, in this video we're
going to talk him out. Cms and dynamic content. When it comes to
web development, we have two types of webpages. We have static and
dynamic pages. So what's the difference between static and
dynamic pages? Well, static means fixed
and dynamic means something that is more functional and changes based on
the user's action. So if you remember, I already told you that
we are going to create two static pages and one dynamic
page for these projects. So let me tell you
what it means. Here is our homepage and we created all the
elements in Webflow. But this is a static
page right now. Why? Because the
content of this page is not going to
change frequently. The image is going to be fixed. These logos are
going to be fixed. This testimonial is gonna
be fixed and so on. So that's why it's
a static page. But sometimes you might need to create some dynamic pages. Well, let me give
you a good example. Let's suppose you want to
create a block for a blog. You usually have
hundreds or thousands of different blog posts. Therefore, you need to
create dynamic pages. Well, dynamic pages
have dynamic content. It means we can create
the page you once, and then we can just modify the contents again
and again and again, depending on the user's actions. For our blog, we can create
a blog post page once with a specific layout and then just modify the contents again
and again and again. That's why we need to use a CMS. So in this project, we are going to create one
dynamic page for our projects. As you can see here
on our homepage, we have three
different projects, and it says recent projects. But what if this agency
creates more projects in the future and they
want to present them here. Should they contact you
as a web developer or web designer and ask you
to modify the content? Well, the answer is no, because this is not
an efficient way. In this case, you can
create a dynamic page, as you can see here, we have this project page and it displays the details
of each project. We have the subtitle, we have the title, we
have the completion date, we have some information
about the project, and then we have this
other projects section. So it would be very
hard to create some static pages if you want to change the content frequently. So when should you use a static page and when should
you use a dynamic page? Well, if you want to create just a landing page with
some informational contents, you can go with static
pages because they are much easier to create and
they are not time-consuming. However, if you or your client wants to modify the
content frequently, or let's say add some new
content to the website. It's better to create
dynamic pages. So here for this project, we're going to create
a dynamic page. As you can see here,
the project page. And these projects are going to be changed dynamically later. If the client wants to
add one more project, the project will
be automatically added to these recent
project section. And you don't need to
go ahead and manually create a separate
project page for that, because we create a
project page once and if the client
adds more content, the content of this page
will be changed accordingly. Alright, so what do we need in order to create dynamic pages? Well, to create dynamic pages, we need dynamic content and we need to store our
contents somber. So how can we do it at? Well, we can use workflows, CMS, Let me go to Workflow. And if I go to the
CMS section here, we can create a CMS collection. Well, what does CMS stand for? Cms stands for content
management system and it lets you
store some content. And then your website
can reference these contents again
and again and again. And once you make some
changes to these contents, all the dynamic pages will
be updated immediately. So it's so beneficial to use CMS collections if you want to update the
content frequently. So the first thing
we need to do is create a CMS collection. To do that, you need to click on this blue icon on the top
right corner. There we go. And here we can create
a new collection. At first glance, it
may seem complicated, but don't worry,
it's very simple. Right at the top, we have
some collection templates. We have blood pools, Arthur's categories,
projects, clients, etc. But we're going to create a collection from scratch
because I'm going to show you how you can create a
collection step-by-step. A collection lets us create
a structure for our content. Okay, So if we have
some projects, let's say here each
project has some content. We have an image,
we have this name, project name, we
have the subtitle. And then in the
project page here. We have the completion date and we have these information here. So these are gonna be
our collection fields. Each collection has some fields, but first, we need
a collection name. So let's call it projects
because we are going to create a collection
for our projects here. In Webflow automatically creates this collection URL for us. You don't need to worry
about that for now. We will talk about it later. As you can see, it
says Project page. Once you create a collection, Webflow automatically creates a separate page for
your collection, a page for our project here, okay, alright, let's head over
to the collection fields. And here is where we
need to add some fields. So what do we need
for our project? Well, obviously each
project has a name and remember that each
field has a specific type. As you can see here,
it says plain text. That's because we have a name. Then we have the slide. This is just the URL that's Webflow automatically
creates for us, so we don't need to change that. And then we can add
some custom fields. If I click on this
Add new field here. Here we have different types. We have plaintexts. And as soon as I hover
over these field types, you can see on the right side, we get some information. So you can go ahead
and read them one by one if you want to
learn more about them. But let me go ahead and
quickly explain them to you. Well, the plain text is just a simple texts for
basic texts content. We have reached texts. Well, the rich takes is
for long form content. Let's say you want to have
a paragraph than a heading, than a video or an image. In that case, you
can use a rich text. Then we have the image. Well, you can use
that for an image. Then we have multi image. If you have more images, you can use this multi image. Then we have video link, link, email, phone number, date, switch, color, option file and reference
and multi reference. These two last
options are advanced. We're not going to talk
about them now, but for now, we just need to go
ahead and create our custom fields using
these simple types. Okay, so we have the name here. What else do we need? Let me go ahead and check
out my design file here. Here we have an image, so obviously we need an image. So let's go ahead
and choose Image. Then we need a label. I'm going to write
project image. We can add a Help
takes here or not. If we add this Help takes later, if a collaborator wants
to modify the content, he or she will know what
this field is all about. But don't worry about it now, then we can check this checkbox. It says this field is required. And I'm going to check
that because we can create a project without
a project image. So I'm going to check it. Then save field. There we go. Our
project image is ready. So what would be the next field? Let me go ahead
and check it out. Here we have this subtitle and it's going to be
our project type. So if I go to the
project page here, you can see that's right. Under the project's name, we have the project type, UI design, an app development. Therefore, here I'm going to go ahead and add a new field. And this new field
is going to be option because I'm going
to create some options. And later when I want to
create some collection items, I can choose from those options. Let me show you how it works. This design agency has some
specific services, e.g. UI design, an app development, web development, user
experience design. So we already know
about the services. That's why we can create
some default options. And then when we want to
create some projects, or let's say some
collection items, we can just choose
from those options. Let me go ahead and
choose option here. Then I'm going to
give it a label. Let's write project type. And here, using
this green button, I can add some options. Alright, let me add
some options here. I'm going to write UI, design and app development. I'm going to press
Enter to save. Then I'm going to
create another option. Let's write web development. I'm going to press Enter. I'm going to add another option. That's right, user
experience design. Press Enter. The next one is going
to be UI design. And the next one is going
to be just app development. And the last one is going
to be UI UX design. Alright, our options are ready. This field is also required
because we can create a collection item without
choosing the project type. So it's going to be required. I'm going to hit Save Field. We need two more fields. We need the completion date, as you can see here, project page, we have
this completion date. So let me go ahead and
create a new field. And this time I'm going to
choose date and time, okay? I'm going to write
completion date, okay? And here we have two checkboxes. The first one says
Include time picker. I'm going to check
that as you can see, when I create these
fields on the right side, I can preview my custom fields. Here I have Project image, I have project type, and I have completion date, and it's going to be required, then I'm going to
hit Save Field. And last but not least, I'm going to create a field for the project detail here
for these paragraphs. So let me go ahead and
create a new field. This time I'm going to
choose a rich text. Why? Because later the
client can easily add some images or videos
without my help. So it's gonna be so useful, I'm going to choose rich text and let me call it
project details. Here we can specify some minimum character count
or maximum character count. It's optional. I'm
going to leave it. I'm going to check this
checkbox and hit Save Field. Our right, our fields are ready. We have the name,
we have the slag, these are the basic info, and then we have
some custom fields. We have projected image, project type, completion
date, project details. Once we added our fields
on the right side, we can preview our fields
here we have name slag, these are the basic information. Then we have custom
fields, project image, project type, we have completion date and
project details. So if everything looks fine, you can hit the Create
Collection button. And there we go. We've successfully created
our CMS collection. And on the left side you
can see it says projects, this is our CMS collection. If I click on this projects
on the right side, I can create some
collection items. This is how the CMS works. This is how we can create a
structure for our content. We create some collections
with some custom fields. Then we create some items for
that particular collection. And later, we can just use
these collections and items in our project and design
around our dynamic contents. Let's see. So here we have
different options. We can either add
some dummy items. If I click on add
five items, workflow, create some random items
with the random content. For me, it's a good option, especially if you
don't have the content or the content is not ready yet. However, since we
have the content, I'm going to go ahead and hit the New Project button here. Why it says new project? How does it know that
this is going to be a project because we named our collection
projects and Webflow automatically uses that name
and make it singular here. And it says New Project. If I create a new collection
and I call it members, here you will see new member. So I'm going to hit New Project. And there we go. We've got our fields here. First we need to specify the name I'm going to
write simplifying. This is our first
fictional project, and as you can see, this slide has been created automatically. Then here we need to
upload our project image. If I click on it, I can choose the image from my
computer or right, I'm going to choose
the first image. You have these images in the assets folder that
you downloaded before. Okay, now I am going to select the project type
using these options. As you can see, these are the options that we
already created. So I'm going to
choose UI, design, an app development, and then I'm going to need a completion date. So here using this date picker, I can just simply choose
my date and time. So let me go ahead and
choose a specific date. I'm going to choose June 1st and you need to
specify the time as well, but I'm going to leave it since it's gonna give me
a default time, it's not important, we're
not going to show that. But if you want to
display this time, you can specify it here as well. And then here I'm going to
just add some dummy text. Okay, So I already
prepared some texts. I'm just going to go ahead
and copy and paste it. You can also use this text
here from the design file. You can just copy and paste it. And here it says simplify
is blah, blah, blah. This way I can make sure that these paragraphs are
related to these project. Alright, now let me
hit the Create button. Our first collection
item is ready, and it says staged for Publish. It's not published yet because
we didn't use that before. But now I'm gonna go ahead and create five more
collection items. Okay, I'm going to create
five more projects. If you have so many different
projects to create, you can also use
the import option. If I click this
Import button here, I can drag and drop
a CSV file here. And then Webflow creates all the items for
me automatically, but I'm gonna go ahead and manually create those projects. So let me go ahead and
create this new project. I'm going to name it dash coin. And for the image, let
me choose the image from my project section folder, the second one, and then the project type is gonna
be web development. Now I'm going to specify the completion date
to something else. Let me choose June 17th. And here I'm going
to add the details. So let me just paste
the previous texts here and just change
the first word that we could recognize that this detail is related
to this project. So I'm going to copy
this dash coin name and I'm going to paste it here. Instead of simplifying. Alright, cool. Let me copy this project detail because we're going
to need that. I'm going to create it
and I'm going to repeat the same process
four more times. So you can skip this
part or you can just go ahead and create those
projects one by one with me. Okay, so let's name the
third project, Victoria phi. And then I'm going to need
an image, the third image. And the project type is going to be user experience design. The completion date is
gonna be something else. Let me choose June 23rd. Okay, Nice. And I'm going to need
project details. I'm going to paste the
previous project detail. And let me just change
the first word here, just like that. All right, Cool. Let me create that. I'm gonna go ahead and
create three more projects. This one is going
to be called Orbit, and the project image is
going to be the fourth one. The project type is going to be UI design and a completion date. Let me set it to something else, maybe July 1st, and I'm going
to need project details. So let me paste it here and I'm going to change the
first war to orbit. Nice. I'm going to create that. Then I'm going to create
two more projects. It's going to be called purify. Let me choose its image. It's gonna be the fifth image. The project type is going
to be UI UX design. And the completion date, I'm going to choose July 5th, and the details is
going to be the same. So let me change the
first war to purify. Nice, hit Create. And last but not least, I'm going to go ahead and
create that last project, which is going to be
called creep two pi. Let me choose the project image. It's gonna be the last image. The project type is gonna
be app development. The completion date is gonna be, let's say July 9th. And the details here, I'm going to modify the
first word to crypto Pi. Nice, our collection items are all ready and we can
start using them. So how can we use our collection
in our collection items? Well, we can use a
collection list and the collection page that's Webflow automatically
created for us. As soon as we created
this collection, Webflow created a specific
page for our project. If I go to the pages here, you can see that we have one static page which
is called Home. Then we have to utility pages. These are created by default. And if you head over to
the CMS collection pages, you can see that Webflow created this project
template for us. And if I click on that, nothing is there and it's fine because we
didn't design it. But what should we put here? Well, we need to design
our project page here. So since this project page is
going to be a dynamic page, we need to design it here
inside this projects template. And then the content
of this page gonna be changed for each
collection item. As you can see at the top, we have this item option. And if I click on that, you can see that we
have all our items, but this is going to be the
topic of our next lesson. For now, I'm going
to show you how you can use a collection list. Let me go to pages and I'm
going to go to the homepage. And if I scroll down here, as I mentioned before, this page is static and these contents are
static as well, but now it's time to replace
them with dynamic content. So how can we do that? As I mentioned before, we need a collection list. So let me open up this section here in the navigator
and then we have this container and
inside we have this project's wrapper
and projects heading. I'm going to go to
the Add section. And if I scroll down right
under the CMS section, we have this collection list. And if I drag and drop it
inside this section right here, we can see that we will get this collection list
rapper by default it has three different items and it says double-click to
connect to a collection. So now we need to connect
this collection list wrapper to the collection that we just created to the
projects collection. If you just double-click
on it here, you will get access to this collection list
settings and from source, you can choose projects. There we go. And as soon as I connected this collection lists
wrapper to my collection, you can see that the
number of items here increased and now we have
the name of our items, we have the name of
our projects here, crypto pipe, purify,
orbit vector, refined, dash coin,
and simplifying, it means that everything
works perfectly. But what should we do? Now? If I open up this collection list rapper in the navigator, you can see that we have
two different elements. We have the collection this, and we have the empty state. We don't need to talk
about the empty state. Now, what we need is just go ahead and open up
this collection list. And inside we have
this collection item. So our cards here should be placed inside this
collection item. Always your content should be placed inside the
collection item, Okay, Not the collection list. The collection list
is just this wrapper. So what should we do now? Well, it's very simple. I'm going to go ahead and select the first card,
this project card. I'm going to drag it in
the navigator and I am going to drop it inside
the collection item. It's very important. Pay attention to the
hierarchy of your elements. It should be nested inside the collection item,
just like that. And as soon as I dropped this item inside this
collection list, you can see that six
different project cards have been created
here. One, why? Because the collection
lists wrapper knows how many projects we have. So what about these
project cards? We don't need them. I'm going to select
this project card. I'm going to hit Backspace
or Delete to remove it. And I'm going to do the
same thing for this one. But what about these
projects, rapper, right now, these projects are stacked on top of each other vertically. The good news is
the collection list as also display setting. So if I go ahead and change the display setting
from blog to grid, we will get exactly
what we need. Let me go ahead and
give it a class first, I'm going to write collection
list. There we go. And I'm going to change the
display setting to grid. Now I have two
columns and two rows. I'm going to remove
one of these rows, and I'm going to add
one more column here. Okay, nice. Then I'm going to
change the gap to 40 pixels and I'm
going to hit Done. It doesn't look right
now, but bear with me. I'm going to show you
how we can fix that. First of all, the content of all these cars is the same
and we need to fix that. What should we do? Well, we need to connect
our elements like image, tidal project description and this link to the fields that we created for our collection. And it's very simple. If I
just click on this image here, and if I click on the
Settings icon here, it says gets image
from projects. And if I check this checkbox, then I can select a
field project image. It automatically prisons the
appropriate field to you. Since I selected an image here, it doesn't show me
all the fields. So we have only one image
field, project image. I'm going to select it. There we go. Now the images are different. What about the tidal? We're gonna do the
same thing here. I'm going to select the title. I'm going to click on the
Settings icon and let me check, get texts from projects
and from the strop menu, I'm going to choose
name just like that. Now we have crypto Pi
purify orbits, et cetera. Now, let me do the same thing for the project description. So once I select it, I'm going to hit
the settings icon and I'm going to check, get texts from projects. And here I'm going to
choose project type. Nice. And last but not least, I'm going to select
this link Martin, and I am going to check
git URL from projects. But wait, we didn't create
any URL for our projects. Yes, you are right. But Webflow the
data automatically. Do you remember when
we talked about slug, That's exactly the URL
we're looking for. So what should happen here? When the user clicks
on this link, the user should be redirected to this crypto Pi project page. Okay, therefore here I'm
gonna go to Collection page, and from here I'm going to
choose current project. That's what we need to do here. We can check this
checkbox open in new tab. I'm not gonna do that and there is nothing
else we need to do. Now, our cars are using
dynamic content and if we make changes to our
CMS collection items, the changes will be applied to all these cards automatically. That's amazing, but here we
have six different cards. We can filter our items. How? If I select my collection
list wrapper and if I go to the elements settings right
next to the style panel, we have different options
here we have filters, sort order, display limits. Alright, let's head over
to the display limits. And here I am going
to check limit items. And then here I can
specify the number of items that I'm
going to display here. So let's write three. Now we've got three items, but here we have crypto
pipe, purify orbits. But in our design we have simplified dash Queen
Victoria thigh. So now we can use the
sort order option. If I click on this plus button, I can source my projects
based on the completion date, based on the name, based on the created on date. This is a field that's Webflow automatically creates for us. I'm going to choose
completion date. And here I can
choose all less to newest and newest to oldest. I'm going to hit all lists
to newest and hit Save. There we go. Now we have simplified dash coin and vector phi, just like that. So now that you are ordered based on their completion date, what else should we do? Well, here this collection lists wrapper is outside
our container. That's why it's taking
up so much space. Therefore, I'm gonna
go ahead and just drag it and drop it inside
our container. And I'm going to remove the
projects wrapper that we created before, just like that. Now why this collection, this wrapper is selected? I'm gonna go ahead
and give it a class. Let's write collection,
least rapper. And I'm going to add
some top margins. Let's give it a 70 pixel top
margin and we're good to go. Can you see how
easy it is to use a CMS and collections
and collection lists. So from now on, these contents are dynamic. This webpage
references our content inside our collections
and collection items. So if I go to my
CMS and if I go to, let's say simplify here, and I decide to modify its
name to something else. Let's write simplify
plas and I save it. Now this change affects
this card here as well, but I need to preview that here. There we go. We've got our
new title or right guys, that was a lot to digest. So let's recap this lesson. First, we talked about the CMS. Cms is where you can
create some collections and let's say create some
structures for your content. To create a collection, you need to create some fields. We created some custom
fields like project image, project type, completion
date, and project details. Then we created
some project items. We added a collection list here, and we connected our collection, this wrapper to our
projects collection. Then we drag and drop our project card inside
this collection item. And finally, we selected all
our elements one by one, the image, the title, the description, and the link. And we connected them with the appropriate field here, e.g. for this image, we chose
project image for this title, we chose project
name, as you can see. And finally, we selected our
collection lists wrapper, and we went to the
elements settings. And from here, we
limited the number of items that we wanted to
display here to three. And also we use the sort
order option to display our content based on the completion date and
from oldest to newest. Just like that. Alright guys, that's
all for this video. I hope you enjoyed it. In the next video, we will start creating our project
page. So see you then.
52. Project Page - Part 1: Hey, in this video, we're going to start creating
our project page together. This page, as I
mentioned before, is gonna be a dynamic page. Therefore, its content is
going to be dynamic as well. So how can we work
with dynamic pages? Well, in the same
way that we work with static pages,
nothing changes. The only difference here is that this page is going
to be a template for our project page and
its content could be changed according to
our collections items. Alright, so first of all, I'm going to go to Webflow
and here is our homepage. If I go to these pages here under the CMS
collection pages, as you can see, these projects template had been created
by Webflow for us. Okay, So I'm going
to click on that. What do we need for this page? As you can see, we need
the nav bar at the top. At the bottom, we need the
CTA section and the footer. So we already created
these sections. Should we go ahead and
copy and paste them here? Well, we can do that, but it's not a good way. Do you remember when we
talked about symbols, I mentioned that
it could be very beneficial if you could create a symbol and reuse that symbol again and again
and again and later. If you want to make some
changes to your symbols, you make them once
and it will affect all the instances of that
particular symbol instantly. So this is exactly
what we're gonna do. Now. We're gonna go ahead and create
a symbol for our navbar, for our CTA section
and for our footer. So let me go to workflow. But before doing that, let me show you something. Can you see the background's
color is exactly the same as our backgrounds color here on
our homepage. Why is that? We didn't change the
background color of this projects template. Do you remember when we change the background
color of the body, all pages tag in our homepage. That's why here we also get
the background's color. In fact, if I create
even more pages, all those pages will have the
same backgrounds calendar, and that's exactly what we want. Of course, you can go ahead and override that if you want. But in this case,
it's totally fine. Now I'm going to go
to my homepage and from here I'm going to
select my navbar fairs. Okay, so do you remember how
we could create a symbol? Yes, you're right. We had two different options. We could either
right-click on it and hit Create Symbol button here. Or we could go to the
symbols right here and just hit Create New
Symbol button right here. I'm going to hit this button and I'm going to name it nav bar. There we go. Our
symbol is ready. Now we're inside
the master symbol. I'm going to click on
this back to instance. Let me head over to
the CTA section. I'm going to select
this section as well. I'm gonna do the same thing. Let me create a symbol
and I'm going to name it CTA section. Our right, our CTAs section's
symbol is ready as well. Finally, I'm going to select my footer and let me do
the same thing here. I'm going to create a
symbol and let me name it. Filter are right,
we successfully created three different symbols, but now it's time to go
ahead and reuse them. So let me go to pages and I'm gonna go to projects
template here. And then I'm going to go
to the Symbol section. And from here, I can simply drag and drop them into my Canvas. There is an alternative as well. You can also use the Quick find in order to
find your symbols. Let me show you how if
I select this body and if I hit Command key or
Control key on my keyboard, I can look for footer, and as you can see here, it found our footer symbol. If I look for navbar, there we go, navbar symbol. I can just click on that. And there it is. Our
nav bar is here. But what about other sections? Well, we're gonna do the
same thing here. This time. I'm going to show
you how you can drag and drop them into your canvas. So I'm gonna go to
the Symbol section. And from here I'm
going to drag and drop the CTA section
into my Canvas and put it right below the nav bar. There we go. Our CTA section
is ready as well. And last but not least, let me go ahead and drag
and drop this footer. I'm going to put it right
below my CTA section. Our right our navbar is ready, our CTA section is ready, and also the footer has
been added successfully. So the first part of this
page has been created. As you can see here, we had the Navbar, the CTA section, and the footer. But now it's time
to go ahead and create this project section. But we're gonna do that
in our next lesson. Alright guys, that's
all for this video. I hope you enjoyed it. I'll see you in the next one.
53. Project Page - Part 2: Our right. In this video, we're going to continue working on
our project page. Now it's time to go ahead and create this project section. So let's analyze
this section and see how we can structure
it on Webflow. So here we need to
create a section and inside we need to
create a container. And inside that container
we need to have a heading, this project type,
this completion date, and the projects image, and finally the details. And as you can see here, this project's image
has some drop shadows, but it's not a
simple drop shadow. If I zoom in, you can see that this drop shadow has
different colors. I didn't use a simple
dark drop shadow because in real world we don't get dark shadows for
colorful images and objects. Therefore, it would
be more realistic to have the colors of our object, or in this case, our image for our
drop shadow as well. So how did I do that? Well, it was so simple. I just duplicated
this image and I put that duplicated layer
behind our main image, and then I added this
layer blur effect to it. Okay, let me show
you how it looks. If I just decrease
this player to zero. You can see that this is
exactly the same image here, but if I increase
the blur amount, it will be blurry. And if we'd look
like a drop shadow. And finally, I
decrease the opacity of this duplicated
layer to 50 per cent. So we're going to use
the same technique in Webflow as well. For these paragraphs,
we're going to use a rich text because
we want our client, we want the design
agency to be able to add some rich media like images, videos, and easily modify
the details of each project. Okay, so here we have this heading and in order
to create this section, the project type and
this completion date, we are going to
create a div black, and we're going to put them
inside that div block. And finally we will turn that they've blank to a flex max. Why? Because we want
them to touch the edges of this boundary are
right, it looks easy. So let's go ahead and create it. First of all, I'm going to
go ahead and select my body. I'm going to hit Command K or control K. And let's look for a section or write
this section has been added here right
below my filter. So in the navigator I'm
going to drag it and drop it right above the
CTA section right here. And this section is going
to have a class as usual. I'm going to give
it a section class. There we go. And also I am going to
give it a combo class. So let's ride project. Okay, cool. Now this section
requires a container. So while it's selected, I'm gonna hit Command
key or Control K. And let's look
for a div block, and I'm going to give
it the container class. There we go. Our container
is ready as well. So what do we need
inside this container? Yes, you're right,
we need a heading. So why this container
is selected? Let's hit Command key or
Control K and look for heading. It's gonna be H1, and I'm
going to give it a class. Let's write Project page title, page underscore,
underscore title. There we go. And I'm not going to
change this title because later on we will connect all these elements to our collections fields because we're going to work
with dynamic content. So what else do we need here
right below this heading, we need to create
this project type and also this completion date. But let's analyze this
section. The completion date. Since the completion
date should be dynamic. Here I'm going to create
two different texts blocks. One for this
completed on section, and the other one
for the date itself. Later when we connect our
elements to our fields, we will just connect
the right takes blood to the
completion date field. So let me go ahead and
create a div block. I'm going to select
this container and I'm going to hit
Command K or control K. Let's look for a div blog. There we go, and I'm
going to give it a class, let's ride project type
wrapper, just like that. And inside I'm going to
place a text block here. So while it's selected, I'm going to look
for it takes block. There we go. And this takes block is going
to have a class as well. So let's write Project page
underscore, underscore type. And I'm going to modify
its topography properties. I'm going to go to
my design file. I'm going to select
this project type. And as you can see, I'm using muddy medium and body medium. Its font size is 24 points, and it's also medium. Therefore here I'm going to
change the size to 24 pixels. And also its weight is
going to be 500 or medium, and its color is going
to be neutral medium. Just like that. I'm not going to modify its text are right, cool. But what about the completion
date section right here? So as I mentioned, I'm going to create a div block. So I'm going to select
this project type wrapper, and then I'm going to
add a div black here inside this div block is
going to have a class, let's ride project underscore,
underscore completion. There we go. And inside this div, we're going to place
two text blocks. So while it's selected, hit Command key or Control
K and look for textblock. This is our first text block. I'm going to just copy it
Command C or Control C and paste it to get
my second text block. Now each of these texts
blogs should have a class. I'm going to select
the first one and I'm gonna give it a class. So let's write
project underscore. Underscore, completed
just like that. And the second one
is going to be project underscore
underscore date. Now, let's go ahead and
modify its CSS properties. So I'm going to select the first one this project completed, and let me go ahead and
modify its font size to 20 pixels and also its
color to neutral dark. And what about the second one? The second one, which
is this project date, is gonna be 20 pixels as well, but its color is going to be
neutral medium are right, nice, but it doesn't look good. Why? Because we didn't turn this project completion
diblock to a flexbox. So I'm going to select
this project completion, the black in my navigator. And then I'm going to
change the display setting to flake spikes. Now the direction is horizontal and they are
sitting next to each other. It's exactly what I want. Now I'm going to select the
first text and I'm going to change its takes
to completed on. And to see how it will look, I'm going to change
this text as well, although this one is going
to have dynamic content, but just to see
how it will look, I'm going to write June 22, comma 2021. Okay, Nice. So here we need some
margins between them. So I'm going to select this
completed on textblock, and I'm going to give it a
five pixel right margin, just like that. Now it looks much better. But as you can see,
these two elements, this project page type and also this div blocks are sitting
on top of each other. That's not what we want. So I'm going to select this project type
wrapper and I'm going to turn it into a flexbox, are right, the direction
is going to be horizontal. However, I'm going to change the justification to
space between why? Because we want them to touch
the edges of this boundary. I'm going to set it to
space between Nice, our layout is almost ready. Alright, let me head
over to my design file. If I select this
project type and if I hold down the Alt key or
Option key on my keyboard, I can see that it has
a 20 pixel top margin. So while this div
black is selected, this project type wrapper, I'm going to give it a
20 pixel top margin. It looks much better now. Alright, now let's move
on to the next part, which is this image. Here. While this container
is selected, the navigator, I'm going
to select this container. I'm gonna hit Command key or
Control K. And let's create a new div block
because we're going to create a wrapper
for our image. So here I'm going to
write the if block, and this block is
going to have a class. So let me write
project underscore, underscore, image, underscore,
underscore wrapper. And in science,
we're going to place one image while it's selected, I'm gonna hit Command
key or Control K. And let's look for
the image elements. Here. There we go. And I'm going to give
this image a class. So let's create a class here. I'm gonna write Project
page underscore, underscore image. In this image should take up the whole width of its parent, which is this new div block that we created,
this image wrapper. So what should I do? Yes, you are right. I'm gonna go ahead and
change the width to 100%. There we go. Now it takes up the whole
width of its parent, but its height has been
increased as well. So how can I fix that? Let me go to my design file. And if I select this image here, if I double-click on it, you can see that it has a
specific height, 444 pixels. Therefore, I'm going
to set the height here to 444 pixels. However, as you can see, our image doesn't take
up the whole width now, doesn't cover this area. Therefore, I'm gonna
go ahead and change the fit from field to cover. Now, I'm going to
double-click on it and let's choose an image
from the assets for now, I'm going to choose
the first one. It covers the whole wrapper. Our image is ready, but what about the drop shadow? As I mentioned before, I'm going to duplicate this
image and I'm going to put it behind this main image. And then I'm going to
add some filters to it. I'm going to right-click
on this blue part here, and then I'm going to
choose Duplicate, right? As you can see now we have two identical images
with the same class. It's very important to modify the class of this
duplicated layer. Why? Because we want to
modify its CSS properties. So I'm going to select
this duplicated layer, and I'm going to go
ahead and click on this little arrow and let
me duplicate this class and I'm going to
rename it to project page image underscore,
underscore effect. There we go. Now it has a new
class and we can easily go ahead and modify
its CSS properties. So how can we put this image
behind our main image? We can go ahead and modify its position here
while it's selected. I'm going to change its position
from static to absolute. And as you can see,
it's kinda messed up. It's not what we want. Why does it happen? That's because its new
position is relative to body. If you remember, when we've worked with position absolute, I mentioned that it's
always looks for a parent element that has
the position relative. So if I go ahead and change the position of
this project image, wrap her to relative
from static, and then I select this image, this duplicated image, I can simply set it's
position to top-left. And now this image is on
top of our main image. How can we put it
behind our main image? Well, we can use the Z index. Here. I'm going to set the
Z index to minus one. And this way I can
make sure that this duplicated layer with this project page image
effect class is behind my main image because I
gave it a negative Z index. Now we need to go ahead and
add some effects to it. So if I head over to
the Effects section, I can go to filters. And if I hit this plus button, I can add the blur filter to it. And let's set the radius
to around 40 pixels. Just like that. As you can see, we've
got our drop shadow, and also I'm going to increase the intensity of my colors. So I'm going to add
a new filter here. So let's go ahead and add
the saturation filter. And I'm going to set its
amount to 200 per cent. Now as you can see,
the intensity of my colors has been increased. However, this drop shadow is too bright and it doesn't
look realistic. So I'm gonna go
ahead and decrease its opacity to 40%. There we go. Now it looks much better, but I'm gonna do one more thing. If I select this drop shadow, I can simply move it
a little bit down. So I'm going to add the 2D
and 3D transforms here. And I'm going to
move it a little bit down using the y-axis. So let me move it
down by 14 pixels, just like that, it
looks much better now. All right, Our project image
wrapper is ready as well. Now, it's time to
go ahead and add our rich texts here
right below this image. So I'm going to
select the container and then I'm going to give it a combo class and
we're going to write project just like that. And finally, I'm going to
modify its display setting because I want all
of these elements to stack on top of
each other vertically. And later when we want to
make our design responsive, it would be so beneficial. So I'm going to change
its display setting to Flexbox and I am going to change the direction
to vertical. Now wireless container
is selected. I'm going to hit Command
key or Control K. And let me add a rich
text here. There we go. Our reach takes has
been added here, and I'm gonna give it a class. Let's write project
underscore, underscore detail. Okay, So let me head
over to my design file. I'm going to select this paragraph and I'm going to
check out its top margin. As you can see, I need
a 70 pixel top margin. So while it's selected here, I'm going to give it a
70 pixel top margin. We're not going to modify
the content here for now. Alright, now let's go ahead and modify the spacing
between these elements. If I go to my design fine. And if I select
this project type, you can see that it's bottom
margin is set to 80 pixels. So I can head over
to my project here, I can select this
project type wrapper and I'm going to give it
an 80 pixel bottom margin. Everything is ready and we can move on to the next section. So let me head over
to my design file, right under that, we need to have these other
projects section. It looks exactly the same as
this recent project section. I think it would be wise to
just copy and pasted here. So let me go to Workflow. I'm going to go to my homepage. And from here I'm
going to select this section, recent
project section. I'm going to copy it, hit Command C or Control C. Then I'm gonna go
to pages and I'm going to go to projects
template page. And let me select the body and hit Command V or Control V. Just like that, this section has been added right
below my footer. So I'm just going to
reposition it inside my navigator and
I'm gonna put it below my project section. Alright, first things first, I'm gonna go ahead and duplicate these projects combo class, and I am going to change it to other projects to keep
everything organized. Then I'm going to change
this name here from recent projects to
other projects. And finally, I'm going
to modify its top margin because right now it's
too much, it's 200. If I head over to my design
file, if I select it, you can see that it's top
margin is set to 70 pixels. So I'm going to
set it to 70 here. If I select this section, you can see we have too much
margin here at the top. So I'm going to select
this section and I'm going to override
its default margin. If I click on it, you can see that it says value comes from section. It's fine. But since we added this
new combo class project, we can simply overwrite it without affecting
either sections. So I'm going to set
it to 70 pixels. Are right guys, the layout of
our project page is ready, and now it's time to connect all our elements to
our collections, items and collections fields, but we are gonna do that
in our next lesson. I hope you enjoyed this video and I'll see you
in the next one.
54. Project Page - Part 3: Hey, welcome back. In this video we're
going to connect all our elements to
the fields of our CMS. Are you ready? Let's begin. First of all, I'm going
to select this heading. This heading should display
the project's name. So if I click on
this settings icon, I can check this checkbox. It says get texts from projects. This is the collection
that we created before. Then I'm going to
select the field. I'm going to select
name, plain text. This is our project name. There we go. It has been changed
to simplify plus, if you remember, we modified it. But why simplify plus y nuts, another project
that's because if you head over to the top bar here, you can see that we have this
item and it says simplify plus this projects template
has different items, the items that we
create at the projects. And if I go to crypto pi, you can see that this title
is changed automatically. If I go to orbit, There we go. So that's the beauty
of using Webflow CMS. I'm going to go to
simplify plus four now. Then I'm going to select
the project type. Let me click on
the Settings icon. I'm going to check this checkbox and let me choose the field. This one is going
to be project type. There we go, UI design,
an app development. And then I'm going to select this project date and I'm going
to click on the settings. Let me check this
checkbox and I'm going to choose the relevant field. It's going to be
completion date. There we go. It has been changed
to June 1, 2021. Here we can modify
the format as well. So if you want to show
it differently, e.g. if you wanted to include
the time as well, you can simply
modify the format. We have many different
formats here, so that's totally up to you, but it looks good to me are
right now it's time to go ahead and select our image,
project page, image. And I'm going to hit
this settings icon and let me check
this gets imaged from projects and I am going to choose project image are right, great, but what
about the shadow? Well, since we duplicated this
image for our drop-shadow, we just need to
select it and we just need to simply
connected to our field, just like our main image. I'm going to check this
check marks and I'm going to select the project image
from the field drop menu, just like that are
right now it's time to select our project
detail, this rich text. And I'm gonna go ahead
and check this checkbox and let me select the
field project details. There we go. It has been changed to
the projects detail that it's associated
with our right, our elements are connected and now I can go ahead
and check it out. So if I change the
item here at the top from simplify plus to purify. There we go. The Tidal has been changed, the project type
has been changed, the date has been changed, the image and the
project detail. And take a look at this, the drop shadow changes
as well because it's also using a
dynamic content. I'm going to go to another item. I'm gonna go to dash coin. There we go. It looks amazing, doesn't it? Alright, we're almost done, but there is one more thing
we need to take care of, and that is the other
project section. If I go to simplify
plus and I scroll down, you can see that
in other projects, we will see the simplified
plus project as well. It doesn't make sense
because we should exclude the project that the user
is currently viewing. We should just display
other projects here. If I head over to my
design file here, as you can see here,
we have simplified. We don't have the
simplifying project in the other projects. So how can we do that? Well, that's very simple. I'm going to select this
collection, this wrapper. And if I head over to
the elements settings, here we have this filters option and I'm going to hit
this Plus button. And here we have two
different fields. Here we have name,
project, project, image. You can just add
different filters, but I'm going to choose project. And then here we have another drop menu which
says ears or is not. And then here it says
current project. This project is the
current project. It means that we will
get the project that the user is currently
viewing here as well. But this is not what we want. So I'm going to change is not. And then I'm going to hit save. And there we go. The simplify plus project
has been removed here. And here as you can
see, we have dash coin. If I go to the dash
coin project page here, we don't have any
dash coin project and that's exactly
what we needed. One more thing I'd like to mention here is that if I go to the homepage and if I head
over to the recent projects, I'm gonna go ahead and select this collection, this wrapper. And under the sort order we
selected oldest to newest. And it doesn't make sense. Why? Because here we have
the recent projects. Therefore, the completion
date should be sorted from newest to oldest. But why did we choose
oldest to newest? That's because when we
created these projects, we randomly chose the
project's completion dates. And since I want it to get the exact same design
that I have here, simplified dash coin
and victory phi. I change this sort order from newest to oldest,
oldest to newest. But in real-world project, when you have the
recent projects, you need to sort it
from newest to oldest. So whenever the
agency or the client adds a new project to
the collections items, it will be added here. So keep that in mind. Now, I'm gonna go ahead
and check everything out and see if everything
works perfectly. If I preview my project, here I have different projects. I'm going to click on
this Learn More button. There we go. Maybe it'll be redirected
to the project page and it says simplify plus
I can scroll down. I have other projects as well. I can click on Dashed coin. I will be redirected to
the Dash coins page. Perfect. I'm gonna go back
to the homepage now and let's try it out once again, I'm going to select
vectorially fine, and everything looks great. The only thing we need to
do here is just change the color of this
rich media texts because we forgot to do that. And if I go ahead and check
out my design file here, we can see that it doesn't
use our dark color. So I'm gonna go ahead and
select this project detail. And I'm going to
change its styling. Let me go to the typography
section and I'm going to modify its color
to neutral medium. Now it looks much better. Are right guys, that's
all for this video. I hope you enjoyed it and
I'll see you in the next one.
55. Contact Page: Hey, in this video
we're going to create the Contact
Us page together. This is going to
be a static page. Therefore, we're not
going to work with our CMS and any dynamic content. So we just need to create
this form and that's all. Let me go ahead and analyze all the elements on this page. At the top, we need to have
the navigation bar as usual. Then we need to have
this Contact Us section and finally the future. So for the nav bar
and the footer, we can use our symbols. And then we need to create
this Contact Us section. And inside we need to put
a container as usual. And then we need to have a
heading and a form block. This form block is going to
have different text fields, like full name, email, phone. And here, instead of
using a TextField, we're going to use a text area. Why? Because the user's message might be learned and therefore
it takes will, would be too small for
collecting that data. And finally, we will have
this large submit button. Nothing complicated. So let's get started. First of all, I'm going
to go to Webflow and I'm gonna go ahead and
create a new static page. If I go to pages, I can hit this create new page button and then
I'm going to call it contact us and hit the Create
button, just like that. Alright, now it's time to add our navbar and our footer here. So I'm gonna go to the
Symbol section and I'm going to drag and drop
our navbar right at the top. And then let me drag and
drop our footer right below that in-between we're
going to create a section. So I'm going to select my body and let's hit Command
key or Control K. And let me create a section. Then I'm going to give it
a class, Section class. And finally, I'm
going to move it up and put it between
these two symbols. And inside, we're going
to need a container. So first, I'm going to give
this section a combo class. I'm going to call it contact. And then while it's selected, let's see the Command key or Control K and look
for a div block. And then I'm gonna
give this the block, the container class,
and we're good to go. So inside this container, we're going to need a heading. So while it's selected, let's use the Quick find. And I am going to write heading, and it's going to be H1. Then let's give it a class. I'm going to write
contact underscore, underscore heading. Finally, we need to modify some of its topography properties. I'm going to start
with its font size. It's 38 pixels. I'm going to write
60 pixels because we used 60 pixels for our
H1 headings before. And then I'm going to change
its color to neutral dark. Let me modify its
line-height as well. I'm going to change it to
100 and maybe ten per cent. And finally, we're gonna give
it some pattern margins. Okay, I'm gonna go to my design
file and if I select it, I can see that it has an
AD pixel bottom margin. So first, while it's selected, I'm going to remove its
default top margin. I'm going to set it to zero. Then I'm going to change its default bottom margin
to 80 pixels are right. What else do I need? Right below that, I'm going
to need a form block. So I'm going to
select this container and I'm going to hit
Command key or Control K. And let's look for a form block. There it is, are
formed block is ready. Now inside this form
block, as usual, we have two different
text fields and two labels and one Martin, and we're going to modify that. I'm gonna go ahead and remove one of these text
fields and one of these labels until I get only one takes fail
than one label. Okay? I'm going to start by
creating the name text field. I'm gonna go to my design file. And here, if I select
this full name, you can see that it's using the neutral medium
color and it's using the body
regular text style. And it's fun size is 20
pixels or 20 points. I'm going to hit over
to Webflow and I'm going to give it a
class That's right, contact underscore,
underscore title. Then I'm going to modify some of its topography properties. So let's start with its weight. It's going to be normal and its size is going
to be 20 pixels. And finally, the color
is going to be neutral. Medium are right, cool. So our label is ready. Now I'm going to go ahead
and copy the text here, full name with this asterisk because this field is
going to be required. There we go, our label is ready, I'm going to select it. Let me give it some
more button margins. If I select this label here, and I checked the bottom margin, if I hold down the option key
on my keyboard or Alt key, you can see that it has a
ten big cell bottom margin. So I'm going to increase
its bottom margin here as well to ten pixels. But what about the TextField? So I'm going to select this text field and I'm
gonna give you the class because I'm going
to change its styling. Let's write contact underscore, underscore Form, underscore,
underscore, TextField. Just like that. Then I'm going to change
its width to 100 per cent, that it always takes up
100% of its parent width. And also I am going
to change its height. Let me go ahead and check the height data used
for this text field. As you can see, its height
is set to 70 pixels. So I'm going to set its height
here to 70 pixels as well. And then I'm gonna go ahead and modify its background color. So let me go to my design file. And here, as you can see, I'm using this color
code with a 10% opacity. So I'm going to copy
this hex color code. It's 6708d. Then I'm going to paste it here in this background's
color field. It's too dark. Finally, I'm going to
decrease its opacity. It's all fair, amount to ten
per cent, and there it is. But as you can see, it
kinda has a border. If I select it, you can see that there
is no border here. That's because takes wheels
by default have borders. So how can we fix that? We can simply change the
style of this border here to solid and
turn it back to none. But what about the
placeholder text? Well, if you remember, if you just double-click
on your TextField here, you can enter your
placeholder text. I'm going to write enter
your full name. There we go. The text type is going to
be playing because it's just the name and surname and
it's going to be required. So I'm going to check
this Required checkbox. Alright, cool. But what about
the placeholders styling? Well, I'm gonna go to the place holder
state just like that, and I'm going to
modify its color. So let's see what we have here. If I select this text, it's using neutral medium. So let me go ahead and change its color to neutral medium. And I'm going to increase its font size to 17
pixels are right, cool, our TextField is ready. Now I'm gonna go
ahead and create other text fields like
e-mail and phone. Okay, so first I'm going
to select this form, the block, and I'm going
to give it a class. So let's try it. Contact underscore, underscore, underscore,
underscore wrapper. And then while it's selected, I'm going to create
a new div block. So let's hit Command
key or Control K. I'm going to look
for a div block. And this block is going to hold this text field and this label. So I'm going to drag this
label inside this the block. And I'm going to
drag this text field inside this div block as well, make sure that they are
nested inside properly. Then I'm going to select
this new div block and I'm going to
give it a class. Let's try it. Contact underscore, underscore,
TextField are right, and I'm gonna put it
above my Submit button. Our first text field is
ready. All right, cool. Now I'm going to select this contact text field div black, and I'm going to duplicate
it two times r, right? Just like that. And then I'm going to modify the label of the
second one to e-mail. As you can see here, we have
email and it's not required, so we don't need that asterisk. And the next one is
going to be fun. And also we need to change
the placeholder here. So I'm going to double-click
on it and I'm going to change the placeholder
to something else. Let's write, enter
your email address. And I'm going to change
the text type to email and it's not
gonna be required here. Let's change the name
of this input to email. Let's double-click
on this text field. And I'm going to
change the placeholder to enter your phone number. And also I'm going to change
the text type from plane to phone and it's not going
to be required as well. Let's change the
name here to phone. Alright, cool. Our text fields are ready. Now we need one more
field and we're going to use a text
area for that. So let me go ahead and select
one of these div blocks, this contact text field. I'm going to duplicate
it once again. There it is. Here is the one
that I just duplicate it. I'm going to modify the label to message with an asterisk. However, this text field is
too small for our message. If I take a look at the design, you can see here we have a
text area, not a TextField. Therefore, I am going to
remove this TextField, hit Backspace or Delete
on your keyboard. And I'm going to select this
contact TextField div block, which is the parent
element here. And let's hit Command key or Control K and look
for text area. There it is, since
I'm going to use the same styling that are
used for other text fields. I'm just going to
use the same class that are used for
these text fields. Okay? So it's contact
form text field. Let me give it the same class. Contact for TextField. Let me double-click
on this text area. I'm going to change
its name to message. And the placeholder is
going to be, right, your message here and some dots, and it's going to be required. Now it's time to modify
our submit button. Let me head over back
to my design file. As you can see, the submit
button is going to have the same styling that we
use for our primary button, the Contact Us, and also
this getting touch button, its height is going
to be AD pixels. So let's go ahead and
select the Spartan. I'm gonna give it a class. It's going to be primary button, and then I'm going to
give it a combo class. Let's try contact and
the texts looks great. Now we need to modify
the layout of this form. So here as you can see, this full name text
field takes up the whole width of its
parents or container. And here on the second line
we have two text fields. And finally, this message
is going to take up the whole width of its
parent elements are right. And this button is
going to take up the whole width of its
container as well. So how can we
create this layout? Well, we can do
that using Flexbox, but it would be much easier if we could create
it using a grid, because later on, we want to
make our website responsive. It's gonna be much
easier to modify our grid rather than a flexbox. So I'm gonna go ahead
and create a wrapper. I'm going to select
this form block and I'm going to
give it a class. Let's write contact
underscore, underscore form. So what we need to do
is just go ahead and select this Contact Form
Wrapper that we created before. And then I'm going to change its display setting
from black to grid. There we go. For this grid, I'm going to need six columns and six rows. Okay, so let me go ahead and add four more columns using this plus button
and for more rows. And also I'm going to change
the gap to 40 pixels. And here as well, there we go, but they
don't look good. That's totally fine. I'm going to hit Done. And if I select this block, and if I hover over this little circle
and I click and drag, I can take up all these
six cells just like that. Then I'm gonna do the same thing for the email text field. I'm going to select it and I'm going to click on this circle and just drag to
take up three cells. Let's do the same thing
for the phone text field. It's going to take up
the next three cells. The message text
field is going to take up so many different cells. Actually it's going to take
up three rows entirely. And then I'm going to
select this primary button and it's going to take
up all these six cells. So far, so good. Let me preview my project. As you can see, it looks fine. However, this takes area looks
like a simple textfield. It's not what we want. So let's go ahead and fix that. If I select this text area, you can see that its height
is set to 70 pixels. Why? Because we gave it this
contact form TextField. Now I'm going to go ahead
and give it a combo class. That's right message. So I'm going to overwrite
this default height amount to 200 pixels are right
now it looks much better in preview that nice. But what about our button? I'm going to select it and I'm going to give it a
specific height. It's going to be a two
pixels, just like that. Now, let's preview our project. Okay, it looks nice
as you can see, as soon as I preview my project, this button moved
up a little bit. That's because we use this text area and
it's totally fine. It's not going to break
our website since this text area doesn't fill up the whole height
of its container, which is this contact
text field div block. This button moves up a
little bit, are right. Now I'm going to select
this heading and I'm going to change
it to Contact Us. Now let's preview our project. So here we have the navbar, we have the Contact Us, the for the submit button and the footer at the
bottom are right, everything looks fine
except one thing, that padding of these
placeholder text. So let's go ahead and
quickly fix that. If I go to my design file here, you can see that this
takes, has more padding. It has a 22 pixels top and
a 20 pixel left padding. In fact, I'm going to change the padding of all
these text fields. Because if you take a
look at the design here, you can see that all
these text fields have different padding. As you can see, 22 pixels
top and 20 pixels left. So what should I do? Instead of changing the padding here for this
message combo class, I'm going to select my
contact form text field. This is our main base TextField. And I'm going to change
the padding here. And the change I
make here will be applied to this message as well. Okay, so let me select
this text field and I'm going to change its top
padding to 20 pixels. It's bottom padding
to 20 as well, and it's left padding to 20. Now it looks much better, doesn't it? Are right guys. That's all for this video. I hope you enjoyed it and
I'll see you in the next one.
56. Introduction to Responsiveness: Hey, now that we build
our website successfully, it's time to make our
website responsive. We already talked about the basics of
breakpoints and now it's time to apply all
the things you've learned before to our project. When it comes to responsiveness, we can choose two
different ways. We can go ahead and make our website responsive
section by section. Or we could make our website responsive
breakpoints by breakpoint and both
ways are correct. That's a matter of preference. That's up to you which
one you need to choose. So let me show you how it works. I'm going to start
with the first way, which is section by section. It means I need to go
ahead and make this navbar responsive in all
breakpoints in tablet, mobile landscape,
and mobile portrait. However, in the second
way, which is breakpoint. By breakpoint, we need to go to the tablet breakpoint
and when to modify all the sections
here until we are satisfied with the results of these particular breakpoint. And then we will move on
to the next breakpoint. This is exactly what
we're gonna do. So first, we will go to the tablet break point and we will modify all
the elements here. Then we will go to
mobile landscape. And finally, we will go to
more wild portrait are right, but you are free
to choose between those ways. Are right guys. That's all for this video. And we will start making our website responsive
in the next video. See you then.
57. Responsiveness Tablet: Our right. In this video, we're going to start making
our website responsive. As I mentioned before, we will go breakpoint by
breakpoint on all pages. Okay, we're gonna start with
tablet right now on desktop, everything looks fine, but if I go to the tablet break point, everything is messed up here. But don't worry, we're
going to fix that. We're going to start
with the navigation bar. As you can see here at the top, this navigation bar
has some problems. The way these elements are
aligned is wrong because on tablet we don't need to get this Contact Us button anymore. We need to hide that. And also this
hamburger menu button should we place on
the right side? Here we have this
additional margin, this additional top margin. So let's go ahead and fix that. First of all, I'm going
to double-click on it because in order to
change this symbol, we need to go into
the master single. Alright, so let's start
by hiding this button. I'm going to select it. And if you remember, when
you want to hide an element, you can head over to
the layout display setting and you can change it
to display setting to none. There we go. It's hidden now, but here this logo is touching
the edge of our viewport, which is not exactly
what we want. So I'm going to select
this container, the container
inside our nav bar. And as you can see, the
padding is set to zero. I'm gonna go ahead and hold
down the option key on my keyboard or Alt key and click and drag and add 30 pixels left and right padding
simultaneously. Now it looks much better. But what about this top margin? As you can see here, we have 70 pixels top margin, and I'm going to select it, and then I'm going
to set it to zero. There we go. Because on tablet we don't need that
additional margin. Remember the changes I make here will affect breakpoints as well. So later when we move on to mobile landscape and
mobile portrait, it would be much easier
to change the layout for those breakpoints are rights since we are satisfied
with the result, we can click on this
back to Instance button and we can move
on to the next section, which is our hero section. Our hero section is
completely disorganized here. Why? Because if you remember,
for this container, we set the direction of the
flux spikes to horizontal. That made sense for the
desktop break point, but for the tablets and
smaller breakpoints, it would make much more sense to change the direction
to vertical. I'm going to select
this container here. And I'm going to
modify the direction to vertical are right, it already looks
much better now. Then I'm going to align
everything to the center here. Alright, cool. Now it's time to select our heading and then
I'm going to change its topography alignment
from left to center. I'm going to align all these
texts layers to the center. I'm going to select
this hero description and I'm going to do
the same thing here, but their alignment
doesn't look good. Why? Because if I select this hero content div blog
and I scroll up, I can open up this
alignments and order here. And here I can modify the
alignments of the flux child. In this case, this hero
content div block is the flux child of this container because our container
is a Flexbox, this hero content is its child. So I'm going to change
its alignment to center. And then I'm going to change the maximum width of
this hero content. Right now, the maximum
width of this hero content div block is
set to 530 pixels. That's fine. However, since we
changed the direction of our Flexbox from
horizontal to vertical, it would make much more sense to increase the
maximum width here, since we are aligning
everything vertically now, I am going to change the
maximum width from 530 pixels. 700 pixels are right, Nice. And then I'm going to select
this hero description. And I'm going to
do the same thing for this text block as well. I'm going to increase its
maximum width to 600 pixels, but it's not aligned
to the center. So how can I fix that? Well, I can simply select
this hero content of luck and I can change its
display setting to Flexbox, and then I can change its
direction to vertical. And finally, align
everything to the center, just like that are
right So far so good. Now it's time to go to our
hero buttons live life, as you can see are getting touch button disappeared.
Why is that? That's because when
we change the display setting of our button
in the navigation bar, we forgot to add a combo class. Let me show you if I go to nav bar and if I select
this primary button, you can see that this
button has only one class. This is the primary button
base class and are getting touch button here has also
this primary button class. Let me go to this div
black. There we go. If I select it in the navigator, you can see that the base
class is primary button, and here we have a combo class. Therefore, I have two
ways to fix this. I can either
override the display setting here or I can go ahead and add a combo class
to the button in our navbar, I think it would
be much easier to override the display
setting to black here. Since we have this
hero combo class, I'm going to set it to
black, and there it is. It appears again, but these buttons should sit
next to each other, okay. They shouldn't snack
on top of each other. I'm going to select this
hero buttons diblock, and then I'm going to change
its display setting to Flexbox and the direction
is set to horizontal. All right, Nice. Our buttons look great as well. Here as you can see, we have so much top margins and
that's not what we want. So if I select
this hero content, you can see that
by default it has a 114 pixel top margin. This is the margin that we set
in the desktop breakpoint. I'm going to overwrite
that to zero now, but still we have so
much empty space here. So I'm going to
select my section. And here the top margin
is set to 100 pixels. I'm going to change it to 50. Now everything looks great. But what about the
image section? As you can see this image, it looks so big. So let's go ahead and fix that. So let me select this
hero image, the block, and I'm going to go inside and let me choose this main image. And as you can see, we
didn't give it any class. So I'm gonna go ahead
and give it a class. Now, let's write
hero underscore, underscore image,
underscore, underscore main. And I can double-click on it. And as you can see, the
width is set to auto. I'm gonna decrease
it to something around 500 and maybe 60 or
70 pixels are right, nice. You can try different
numbers here. If you don't have
a specific number, see whether it
looks fine or not. Now it looks much better. These cards are too big as well. So I'm going to select
this Hero Card one, and I'm going to scale it down a little bit just like that. So here the width is 328 pixels. For this one, I'm going
to set it to 328 as well. Okay, Nice. But as you can see here, we don't have enough
space between our buttons and our images. Well, I'm going to select this hero image and I'm going
to give it some top margin. So let me increase
the top margin to around for the pixels are right. Our hero section
looks great now. Now we can move on
to the next section. So if I select this grid, you can see that on tablet
we don't have so much space. Therefore, we can remove one of these logos when we go to the tablet or
smaller breakpoints, how can we do that? That's so simple. I can simply select this
Amazon diblock, the last logo. And I'm going to give
it a combo class because we're going to change its display setting to none and we're not going to
affect other logos. So let's write Amazon here. And then I'm going to
change its display setting from flex to none. There we go, disappeared, but here we have so much space. So wouldn't it be
better if we could have two lines of logo
instead of one line? I think so. I'm going
to edit this grid. If I select this grid logos, and if I click on this
pink button here, I can simply add
one more row and I can remove some
of these columns. Okay? So let me
remove these columns. And now I have a
two-by-two grid. Then I'm going to
change the gap here for the column to 40
pixels are right. Let me hit done. They look fine but they are not centered, as you can see here. They are aligned to the
left side of their cells. So how can we fix that? While this greed
logos is selected, I can change its
alignment to center. Here, center as well. Nowadays, look amazing. Alright, our clients
section is ready as well. Now we can move on
to the next section. Okay, so here we have the
recent project section, and I think we don't need
to modify anything here. Let me change the dimension of the screen to see whether we need to
change anything or not. If I grab this handle here
on the right side and I drag in terms of
fluidity, they look fine. But here we have a problem. As you can see, these
Learn More button, move down a little bit. And that's because this
project description has some bottom margins. I'm going to select it
and I'm going to decrease this margin from
40% to maybe ten. And now it looks much
better. There we go. Okay, now we can go
to the other section, which is the
testimonial section. So what should we do here? Well first, we need to
decrease its top margin. So I'm going to select
this section and I'm going to decrease
its top margin from 200 pixels to 100 pixels because it's too
much now are right, it looks much better
than I'm going to select this testimonial heading. And I'm going to set
the maximum width for that to have a two
line texts here. I'm going to write 400 pixels. There we go. Then I'm going to modify it, takes alignments here
to center and let me increase the line
height to 150 per cent. And the next thing
we need to fix here is our orbits background. As you can see, our
orbit has been repeated. So I'm going to select
my section and I'm going to head over to
the backgrounds here. And if I click on
this orbit image from here you can see that the position is set to top-left and the tile option is enabled. So I am going to set the
tile to downtime and then I'm going to
reposition it to center. And finally, I'm going to change its size to cover
instead of contain. Now it looks great. Alright, the next thing
I'm going to modify here is the size
of these emojis. If I select them here, you can see that its width
and height are set to 150 pixels since we have
less space on a tablet, I'm gonna go ahead and decrease
it to 130 by 130 pixels. Since these emojis have
their own combo classes, the changes I make
to this first memo G don't apply to
other emojis here. So we can either go ahead and modify the size of each memo G, or I could just undo
this operation, it Command Z or Control Z. I
can remove this combo class. It has been moved down,
that's totally fine. Then I can decrease
its width and height, 130 by 130 pixels. And again, I'm going to
add its combo class to it. One. There we go. Alright, our testimonial
section is done as well. Now, let's move on to
the Services section. I think everything
looks fine here, but there is a problem. If I just decrease
this dimension, you can see that this Learn
More button move down and it's not aligned with other learn more buttons.
That's the problem. So how can we fix that? I'm going to select this project description and I'm going to increase its bottom
margin from ten to, let's say, 50 pixels, right? And then I'm going to select the service content div block. It's the block that contains the service text
and this button, as you can see here. And I'm going to set a
specific high to that, okay, right now
it's set to auto. I'm going to set it to
100% that it takes up the whole available height
of my card. Just like that. Now, it's fixed. Alright, let me check it. Once again. Everything looks perfect now. Okay, cool. Now let's move on to the next
section, which is our CTA. As you can see, our button
disappeared here again, this is the same problem that we had with this button here, with this get in touch button. So we need to just override
its display setting to block. So I'm going to double-click
on the CTA section. And if I go to the
container and I look for my button inside
the form here, I can select it and I can
overwrite it to block, and there is nothing
else we need to do. Everything looks great,
but what about the footer? So let me check. The footer looks nice as well. The only thing I'm
gonna do is decrease its top margin because here
we have too much space, so I'm going to
double-click on it. And here, as you can see, it has a 200 pixel top margin, so I can decrease
it to 100 pixels. Now, it looks much better. I'm gonna do the same
thing for the CTA section. If I double-click on it, you can see it's top
margin is set to 200. I'm going to set it to 100 here to have a
consistent spacing. What about this? Our services here, the
same thing here as well. However here I don't
have any combo class, so I'm going to add
a combo class here. I'm going to write our services. Then I'm going to
decrease its top margin. 200-100 pixels are right, it looks much better now. But here as you can see, we still have the problem with this Learn More button here. If I select this
project description, you can see that it's
bottom margin is set to 50. It's too much. So I'm going
to decrease it to ten pixels. And now the problem is solved. The last thing I'm gonna do
here is select this section, this recent projects section, and I'm going to decrease its
top margin, 200-100 pixels. And now everything looks great. So let's go ahead and
check everything out. Our navbar looks fine. I'm going to check its fluidity. Our hero section looks fine. I'm going to scroll down our
logo section looks fine. The recent projects, the
testimonial section. Then we have our services, the CTA section, and our footer. Everything looks great, right. Our homepage is done, but what about other pages? Now it's time to
go ahead and make our other pages
responsive as well, like contact us and
the project page. So let me go to the pages. And from here I'm gonna go
to the Contact Us page. And as you can see, it
already looks good. Why is that? That's because we
use a grid here. When you use grids instead of Flexbox is it's
responsive by default. As you can see, it's fluid
and everything looks great, so we don't need to change
the layout entirely. The only thing we
need to do here is to select your
button and just override that display setting from none to block,
just like that. And now you can see that
it looks great, nice. If I preview that. One more thing I noticed
here is this top margin. We have so much space
here at the top. So I'm gonna go ahead
and quickly fix that. If I select this section, you can see that it has
a 200 pixel top margin. So I'm gonna decrease
it to 100 pixels. And there we go. Our Contact Us page is
responsive as well. Now let's go ahead and
check our project page. If I go to the CMS
collection page and if I go to the
project page here, I can check whether
everything looks fine or not. Alright, let me decrease the
dimension so far, so good. We don't need to
modify the top part. What about here? Well, I think we can increase the font size of
this reach takes, but not only for the tablet, we can increase it for
the desktop as well. So I'm gonna go to the desktop
breakpoint for a second. And while it's selected, I'm going to increase
it to 20 pixels. And then I'm going to increase the line height to 150 per cent. Okay, it looks much better before gut to
increase it before, and now it's fixed. Let me see if I need to
change anything else here. It looks fine. What about these
other projects card? Let me see. No, they look great. What about the CTA section? It looks great as well. The footer looks fine as well. So I don't need to
modify anything else. That's the beauty of creating
websites with Webflow, most things are
responsive by default, so we don't need to make so many different
changes are right guys, that's all for the
tablet breakpoint. We successfully
modified our Homepage, Contact Us page and
the project page. Now it's time to move on
to the mobile landscape. And this is the task
for our next lesson. So see you in the next video.
58. Responsiveness Mobile Landscape: Hey, now it's time
to go ahead and work on the mobile landscape
breakpoint. Are you ready? So let's begin. I'm going to go to the
mobile landscape here, and let's see if we need
to make some changes here. So this heading
looks a little bit large or the mobile
landscape dimension. Therefore, I'm
going to select it and I'm going to
decrease its font size from 60 pixels to 40
pixels are right. I'm gonna do the same thing
to this here, a description. So I'm going to select it. And as you can see, it's size is set to 20 pixels. I'm going to set
it to 17 pixels. We don't need to
modify our buttons. This section looks fine as well. However, for the mobile landscape
and more wide portrait, I think it makes much
more sense to hide these two small cards because on mobile screens we don't
have so much space. Therefore, we don't need
to make our design noisy. So I'm going to select
this hero acquired one. I'm going to go ahead
and set its display setting to none here as well. For this hero car
too. There we go. And do your hidden on mobile landscape and
on mobile portrait. Because as you remember, changes we make to our
breakpoints will cascade down. Alright, let's move on
to the next section. Our hero section looks fine. I'm going to scroll down. What about the client's section? It looks fine as well. However, here we
have so much space, so I'm going to select
this client section here, and then I'm going to
set its top margin to zero instead of 130
pixels, just like that. Now, it looks much better because when it comes
to mobile interaction, we don't want the
user to scroll so much in order to be able
to consume the content. Therefore, if we can, we should decrease the
margins between our sections. What about recent
projects section? Here we have a problem. As you can see, these cards are outside our screen. There we go. So how can we fix that? Well, the best solution is to just select this
collection list. If you remember, we
use the grid format. I'm going to modify this grid. Here we have one row
and three columns. I'm going to click
on this pink button, and I'm going to
remove two columns and add two rows to
stack them vertically. So let me go ahead and
remove two columns here, and add two rows. There we go. But here we have a problem. As you can see, this card doesn't take up the whole
width of its parent. So how can we fix that? If I go ahead and select
my div block here, this project card div block, you can see we set a
maximum width for that. Okay? So I'm gonna change
this maximum width from 340 pixels to 100 per cent to take up the whole width
of its parent element. There we go. Now it takes up the whole
width of its cell in our grid, and the problem is solved. Now, let me check it out. There we go. Everything looks fluid. It looks amazing. What about the next section? Wow, here everything
is disorganized. So let's go ahead and fix that. First, I'm going to select this heading and I'm
going to decrease its font size from 40
pixels to 30 pixels. And also I'm going to increase
its maximum width from 400 pixels to 500
pixels, just like that. Then I'm going to select
our container here. And if I scroll up, you can see that
the justification is set to space around. I'm going to change
it to center. Let me select this
testimonial texts and decrease its font
size to 17 pixels. It's too large for
our mobile screen, and I'm going to give
it some bottom margins. Let's add 30 pixels of
bottom margin here. I'm going to select
my heading here, and I'm going to increase
its bottom margin to 30 pixels to have a consistent spacing
for all our elements. Now everything looks good, as you can see in
terms of fluidity. It looks fine. So we're good to go. Let's move on to
the next section. Here we have the
same problem that we had for this recent
project section. So the solution is the same. I'm going to go ahead and
select this services grid, and then I'm going to
change it this grid. I'm going to remove two columns. And then I'm going to
add two rows here. Then I'm going to select
this service card and change its maximum width from 340
pixels to 100 per cent, that it takes up the whole
width of its parent element. Everything looks fine
except this icon. So let's select it. As you can see, this
is a flex child, and if we head over to the
sizing here on the right side, you can see it's set
to shrink if needed. We have two other options. We have grow if possible, and we have don't
shrink or grow. I'm going to set it to
don't shrink or grow. And there we go, it
looks fine now, however, since it has a combo class, the change only apply to
this particular div block. So I'm going to
reset this property, hold down the Option
key or Alt key on your keyboard
and click on it. Then I'm going to remove
this combo class, this one combo class, okay? Now I'm going to change the sizing to don't
shrink or grow. And finally, I'm going to add the first combo class to it. Now everything looks fine. Let me check it out. But here we have
another problem. As you can see, this
project description doesn't have enough
bottom margin. So while we are in the mobile
landscape break point, I'm going to select this project description
and I'm going to increase it from ten
pixels to 40 pixels. Now it looks much better. Can you see how easy it is to make your website responsive? You just need to modify the stylings on different
breakpoints are right. This section looks fine as well. What about the CTA section? This section requires
some modifications, so let's go ahead and
make some changes. First of all, I'm
going to select this heading and I'm going to decrease its font size from
40 pixels to 30 pixels. This subtitle looks fine, and here our form has a
horizontal direction. I'm going to change
it to vertical, but this button doesn't take up the whole width of its parent. Well, let me select this
Subscribe button here, and I'm going to set
its width to 100%. And I'm going to remove
this left margin here from 20 pixels to zero. Nice. And also I'm going to set
a specific height to that. So let me write 80 pixels. The only thing left is to
add some top margins here. So I'm gonna give it a 20 pixels top margin,
just like that. Now let me go back
to my instance. Here it is. It looks amazing, doesn't it? Alright, the last
thing we need to change here is our footer. As you can see, this kind of
layout doesn't look good for our mobile landscape and
mobile portrayed Definitely. So what should we do here? We have a horizontal direction. So I'm going to double-click on this footer and I'm going
to select my container. And then I'm going to modify the direction from
horizontal to vertical. And also I'm going to change
the alignment to center. Then I'm going to select this
footer content if block, align everything to the center. And also I'm going to
select this address and change its topography
alignment to the center. Finally, I'm going to select this filter content if block, and I'm going to add some
bottom margins here. Let's add a 30
pixel bottom margin here are right, it
looks fantastic. Our homepage looks fine. Now let's go ahead and
modify other pages. I'm going to go to
my contact us page. Let's see how it looks here or right here we have a problem. First, I'm going to
select this heading and I'm going to decrease
its font size 60-40. And then we need to modify
the layout of our four. I'm going to select this
Contact Form Wrapper degree that we created. And if I click on
this pink button, you can see that we have
six columns and six rows. And in my opinion, it's
not a good grade for this mobile landscape and
even for mobile portrait, instead of having
these two text fields, the e-mail and the
phone text fields sitting next to each other. I'm going to make all
these text fields stack on top of each other. So let me go ahead and remove
three columns from here. Just like that. And I'm going to remove
one row as well. Nothing changed. That's right, because
we need to go ahead and manually select our
diblock, the first one. And as you can see, this div
block takes up six columns. That's not what we want. I'm going to click on this
little circle and drag it to the left side until
it takes up three cells. Cool, I'm gonna do
the same thing for this message block as well. This is our last block. Let's go ahead and make it
take up only three cells. Okay, it looks nice, but what about this pattern? I'm going to select it and I'm going to do
the same thing here. There it is. Now our layout
looks much better. Let's preview it. Here is our form. It looks great in terms of
fluidity and responsiveness. And have you noticed
that our footer has been changed on
this page as well, since we are using symbols. When we make our symbols
responsive on one page, it will change on
other pages as well. Now let's move on to
the project page. I'm gonna go ahead
and let me select this projects template
are right, Cool. Let's see what we have here. As I can see, the
heading looks fine. The project page
type looks fine. Our right. So first of all, I'm going to select this
project type wrapper and I'm going to change
its direction to vertical. Nice. And then let me select this project page
type text block and let's add some
bottom margins to it. I'm going to add
ten pixels here. It looks nice. What else do we need to do here? As you can see here, the top margin of this
image is too much. If I select this
project type wrapper, we can see that it has an
80 pixel bottom margin. So I'm gonna go ahead and
decrease it to 40 pixels. Now it looks much better. I'm going to scroll down. And here as you can see, we have too much space as well. So let's select this
rich texts here. And then I'm going to
decrease its top margin from 70 pig cells to 20 pixels. And also, I'm gonna
go ahead and decrease its font size from 20
pixels to 17 pixels, because right now we
are on mobile screens. I'm going to scroll down. I'm going to select these
other projects heading, and I'm going to decrease
its font size to 30 pixels. And here, as you can see, we have too much space. So let me select my
collection, this wrapper. And I am going to
decrease its top margin from 70 pixels to a 30 pixels. I'm going to scroll down. Everything looks fine. Here, everything
looks fine as well. Now let me check the
fluidity of my elements. Nice. Everything is responsive. But about here, great. I think if I select this project page type and
I add more button margins, it would be much better. I'm going to set the bottom
margin to 20 pixels. It looks much better now, here we don't have
consistent spacing. So I'm going to select
this project type wrapper. I added, afford the pixel
bottom margin here. And for this rich text, I added a 20 pixels top margin. I'm going to increase
this top margin to 40 pixels to have a
consistent spacing. Now it looks great. All right guys, that's
all for this video, we successfully modify
the CSS properties of our elements on the mobile landscape
breakpoint and we check the fluidity of
all our elements. I hope you enjoyed this video and I'll see you
in the next one.
59. Responsiveness Mobile Portrait: Hey, welcome back. In this video, we're
gonna go ahead and make our website responsive on the more wild
portrait breakpoint. So if you're ready,
let's get started. I'm gonna go to the more
wine portrayed breakpoint. And let's see what we have here. I'm going to check the fluidity. Most are elements look fine
because we already made some changes on the mobile
landscape breakpoint. So we don't need to make
so many changes here. The first thing I notice here is the font size of this heading
for mobile portrayed. It looks too big. I'm going to select
it and I'm going to decrease the font
size to a 30 pixels. The font size of this hero
description looks fine. I'm not going to change and add. What about these buttons? They look fine, but let's see, if I make this screen
smaller, how they look. As you can see, they will be shrinked and that's
not what I want. So I'm going to select
this block arrow buttons. And let me scroll up the direction of this
Flexbox is horizontal. I'm going to change
it to vertical. And then I'm going to select this getting touch
button and let me remove its right margin. I'm going to set
it to zero, nice. And finally, I'm going to add
some bottom margins to it. So let's set its bottom
margin to 20 pixels. Now if I check the
fluidity of my elements, you can see that they are
not shrinked anymore. Nice, the image looks fine. We already removed those cards. Logos look fine as well. However, since here we have
less space to work with. I think we can go
ahead and modify the left and right
padding of our sections. What do you think? I think it's a good idea? I'm going to select
this section. And as you can see, the left and right padding are set to 30. I'm gonna decrease
it to 20 pixels. But since I'm going
to apply this change to all sections, first, I'm going to remove the hero combo class because I need to make this change to my base
class, this section class. I'm going to remove
this hero combo class. And then I'm going to hold down the Option
key or Alt key on my keyboard and decrease
the padding to 20 pixels. And again, I'm going to add
the hero combo class to it. Nice. Now, as you can see, the left and right padding of all sections have been modified. If I select these
clients section, there we go, the padding
has been changed. If I select this recent
projects section, there it is, and now
they look much better. The recent projects
section look fine. I'm going to scroll down here. I think we need
to remove some of these emojis because this
section is too noisy. So how can I remove
these emojis? I can just simply hit
Backspace or Delete because in that case it will be removed from all breakpoints. Therefore, I'm going to set
its display setting to none. I'm going to select this one and I'm going to
do the same thing. And then I'm going to select these tomb emojis and let's
change their position here. Let's set it to top-left. And for this one I'm going
to set it to top right. And let's move them
down a little bit. So maybe I could change. It's a tough position
a little bit. I'm going to set it to five
per cent for both of them. Are right. It looks nice. What about the font size here? The font size looks
fine. In my opinion. We don't need to modify that, but here we have too much space. So maybe I can select this section and I can
decrease its height from 622 pixels to maybe 550 P cells. Now it looks much better, in my opinion, are right, the last thing I'm gonna do is change the size
of these memo. Geez, I'm going to
select this memo G, and I am going to
decrease its width and height to 100 pixels. I'm going to do the
same thing here. Since they have
some combo classes, they look much better now. Now that I made them smaller, I'm going to change
their position again. Let me move it to the left
side by five per cent. I'm going to move
this memo due to the right side by five per cent. Amazing. Let me check the fluidity
of my elements. Nice. Everything looks responsive
and looks great. Alright, let's move on
to the next section, which is our services. These cards look great. We don't need to
make any changes. I'm going to go to
the next section, which is the CTA section. So first I'm going
to select these CTA heading and I'm going to align it to the center in
the typography section, probably I can increase
the line height as well to 150 per cent. What about this for? Well, I can select
this form block and its width is set to auto. I can set it to 90 per cent. And I'm going to
select this text field inside this CTA
TextField rapper. And I'm going to change
its width to 100 per cent. So now it takes a
100 per cent of its parent with nothing more
and nothing else is needed. Actually, it looks quite good. And a footer looks fine as well. So our homepage is ready. Let's check it out once again. If I try to make this
dimension even smaller, they will be outside
our viewport. Well, we can fix that. We can just select this grid logos and
then modify the grid. We could simply
add two more rows and just remove one
of these columns. Just like that. Now we want face
this issue anymore. Our right, our homepage
looks amazing. Now let's go ahead and
check out other pages. I'm going to go to the
Contact Us page here. Everything looks fine. I'm just going to preview
it and let me see if it works well in
terms of fluidity, it looks very good. That's because we
used grid or button. Looks fine as well. What about our project page? Let me go to the
project page here and let me check if it
works perfectly as well. Are right, everything
looks fine. As you can see, I
need to increase the line height of this
project page type. So I'm going to select
it and I'm going to increase the line
height to 150 per cent. Now it looks much better. And let's check other
elements are right. The font size looks fine. The other project section
looks fine as well. I'm going to scroll down the CTA section looks
fine since it's a symbol. But here in the CTA section, we have one issue and
that is the padding. The padding here
is not consistent. So for other sections we used a 20 pixel left
and right padding. But for these CTA, I'm going to select
this section. As you can see, we have the 20 pixel left
and right padding. So let's see how
we can fix that. If I select this form block, we already set the width to 90%. I think we can set it to 100 per cent to fix this problem. Let's see if we will face any issues in terms of fluidity. So I'm gonna go back
to my instance, and here I'm going
to preview it. Right. Now. It looks fine, just like that. It looks much better now, are right guys now we have
a fully responsive website. Did you see how easy
it is to work with breakpoints and CSS properties? If you stick to the rules and
basics, everything is easy. So I'm gonna go ahead
and check all pages. Now. I'm gonna go
to the homepage. I'm going to preview it. The desktop looks fine. Everything looks great
here on all devices. Let me move on to
other sections here. Logos. Nice. What about recent projects? It looks great on
all breakpoints. What about testimonial? Great. And our services, let me check it out. Oops, here we have a
problem with the icons. So let me go ahead and fix that. I'm going to select
this service icon and I'm going to change their sizing to don't
shrink or grow. I'm gonna do the same
thing for all of them. Nice, and let's check it
out once again. Cool. What about the CTA section? It looks amazing and the
footer looks great as well. Now let's go to the Contact Us page and
I'm going to preview it. The desktop version looks fine. The tablet looks fine as well. My way landscape looks
amazing and mobile portraits. But if we go to
the project page, Let's check it out. I'm going to preview it. It looks fine here
on the desktop. I'm gonna go to
tablets. There we go. I'm going to scroll down. Everything. Looks fine. Let me go to mobile landscape. All sections look great
and more buy-in portraits. Nice. One thing I noticed
here is when we are on the desktop breakpoint and when I make the screen smaller, just like that, you
can see at some point this Contact Us button touches
the edges of our viewport. It's not what we want, so we need to fix that. How can we fix that? Well, let me go ahead
and go to my navbar. And if I select this
navbar in the navigator, you can see that
there is no padding. So while I'm on the
desktop breakpoint, I'm going to add a 30 pixel
left and right padding here. So let me hold down the Option key or Alt
key on my keyboard and add some left and right
padding to my navbar. But here we have
another problem, this container, some
padding as well. So I'm gonna go ahead
and remove the padding here from 30 pixels to zero. And also the right padding
is going to be zero as well. Now let's see if it works. I'm going to make it smaller. And there we go. On desktop, it looks
great now because we have this additional padding on
the right and left side. But what if I go to tablet? Let's see what happens here. We have this additional padding and we need to go
ahead and modify that. So while I'm on the
tablet break point, I'm going to select the nav bar, and I'm going to reset this 30 pixel left
and right padding. I'm going to set it to zero. And here I'm going to
set it to zero as well. Nice, and let's see
what happens now. There we go. It looks fine. If
I go to tablet, it looks fine if I go
to mobile landscape, everything is fine and mobile
porch rate are right guys, our website is now
fully responsive. I hope you enjoyed it and I'll
see you in the next video.
60. Animations & Interactions - Part 1: Any modern website nowadays, users animations and
interactions in order to improve the usability
and user experience, and eventually it can
improve the conversion rate. So let's take a look at
Apple's website as an example, if I scroll down here, you can see that these
elements fade-in. I'm going to scroll down. You can see that we have
this kind of interaction. This text block is animated. I'm going to scroll down here. When I scroll, you can see
that these textblock scales now as I scroll down
these elements, this image and this
textblock fading. So these are the kinds
of animation that make a difference when it
comes to web development, building a responsive
website is one thing, but making it look more
interesting is another thing. By adding interactions and
animations to our website, we can improve the
user experience and our users will enjoy
interacting with our product. So let me show you how
interactions work on Webflow. When it comes to interactions, we have two main
components to work with, the trigger and the animation. So what's the trigger? A trigger is something that
triggers the animation. In simple words, when
something happens, another thing should happen. So e.g. if a button is
clicked, it should grow. If the user hovers over something and other
objects should move. In general, we have
two kinds of triggers. We have the element trickier, and we have the page trigger. Let me show you how it works. If I head over to the
interactions panel on the right side here, as you can see there is
this thunderbolt icon. I'm going to click on that. Here is where we can
create a trigger. As I mentioned before, we have the element trickier and we have the page trigger. Well, what's the
difference between the elementary year
and the page trigger? We use the element trigger. When the trigger is
an element, e.g. a. Button, an image, a text
block heading, anything. We can select our elements and then we can create
these elements trigger, and when the user interacts
with that element, it triggers our animation. But what about page trigger? Well, the page trigger triggers our animation when our page
state is changed, e.g. if I click on this plus icon, you can see we have
mouse move in, viewport, wild pages scrolling,
page, load, page scrolled. In this case, we don't
need to click on something or interact with any element. The trigger is our page itself, so we can specify when the
page is loaded completely. Then play this
particular animation. Let me show you
some examples here. As you can see here, I
have some simple elements. I have a circle, I have
a square root here. I'm going to preview this
and I'm going to show you some examples of the
element trigger. Here. This circle
is our trigger. I already created an
interaction for that. And when I click on it,
something should happen. You need to keep in
mind that the trigger shouldn't always animate itself. So if I click on this circle, the animation shouldn't
necessarily occur on this object. I can set a trigger
on this object, and I can make other
elements animate, like in this case, if I
click on this circle, this square should move to the right side. Let me show you. There we go. So in this case, this circle is our trigger. And once it's triggered,
this square moves. But what if I want to
animate the trigger itself? We can do that as well. E.g. we can set an
element trickier. And we can say, if the user
hovers over these elements, these elements
should change, e.g. it should grow, it should move, it should fade out
anything you can imagine, if I hover over
this orange circle, we get this bounce animation. So in this case, the trigger itself is animated. I'm going to show
you another example. If I click on this square
on the right side, it will animate as well. Just like that. Let's recap. In order to understand
how the animation work, you need to understand how
the interaction works. So in general, we have
two main components. We have the trigger
and the animation. If our trigger is triggered, then the animation should occur. So let me show you how I
created these animations. I'm gonna go to my designer. If I go to the interactions
here, as you can see, I don't have any trigger, so I'm gonna go ahead
and select this circle. And once I select it, you can see that the
element tree here that I already created is there. I'm going to remove
that for a second because I'm going to show
you how I created it. If I click on this icon, I can remove that. Now I don't have any
element trigger. So since this circle is
going to be our trigger, I'm going to select it, and then I'm going to hit
this plus button here. And here, I can choose
from different options. Let's see what we have. We have mouse-click tap, we have mouse hover, we have mouse move over element. We have scroll into view, and we have wild
scrolling in view. We have other options that
are not available now, e.g. nav bar opens only
works for navbars or drop-down opens only works
for drop-down menus. But in this case, we're
going to use mouse click. When the user clicks
on the circle, the animation should play. I'm going to choose
mouse-click tap. There we go. And here is where we
can specify our action. So it says on first
click, on second click, it means I can specify
one animation for the first clique and specify another animation for
the second click. For this example, we
only want one animation. So I'm gonna go to
unfairness clique. If I open up this drop menu, I can select an action. I can either create a
custom animation by using these stars and
animation option, or I can use quick effects, e.g. fade, slide, flip,
grow, grow, big, etc. We're going to talk about it. But for now, I'm
going to show you how you can create a
custom animation. So I'm going to click
on Start Animation. And here is the animation
that we already created. I can either choose this animation or I can
create a new animation. So I'm gonna go ahead and
remove this for a second. So here we don't
have any animations, and I'm going to create
a new animation here, and I need to name that. Let's write move square. Why did I name it like this? Because this trigger is going
to make this square move. I'm going to press Enter. Now, I need to
create some actions. Here is our timeline. If I click on this plus button, I can choose between
different options. Move, scale, rotate, skew, opacity filter, BG color, border color, text color, etc. These are the properties
that I can animate. But first, let's see how we
should animate our elements. This circle is our trigger, and so far we
created our trigger. Now we want to
animate this square. Therefore, once we
are in the timeline, you need to select the element
that you want to animate. In this case, it's r-squared. I'm going to select it. And once it's selected, I'm going to click
on this plus button. And since I'm going to move it, I just want to
change its location. I'm going to select Move. We created a point or
let's say a keyframe. Here I've got a
warning and it says this move action doesn't
have a value applied. That's fine because we didn't modify anything here
in the timeline. Here we have the
time and we have the starting point
and the end point. So far we created
the first keyframe. Now I'm going to go to
the end point and I'm going to click to create
another keyframe. It's going to be moved. We've got this warning as well because we didn't
change anything. So let's see what we wanna do when the user clicks
on this circle, this square should move
to the right side. Therefore, we created
our first keyframe here, and we don't need to modify its position because
the animation should start from here and then it should move
to the right side. So I'm going to select this second keyframe that we created. And then if I scroll down here, you can see that I
have this Move option. We have many properties here that we're
going to talk about. But now let's modify
the move properties. I can change the
x, y, and z axis. I'm going to change the x axis. So let's use this slider. I'm going to move
it by 100 pixels. That's right, 100 pixels, nice. Now I'm going to hit Save and our animation
has been created, as you can see, it
says move square. And if you want to make any
changes to your animation, you can just click
on it and you will go inside your timeline. You can select these keyframes and you can make any
changes you want. But for now, it looks fine. Let me preview that. And now this circle
is our trigger. I'm going to click on it. There we go. This
square has been moved. So this is generally
how the interaction and animations work on Webflow, you can simply create
complex animations visually without
writing a single line of code that's so powerful. I'm going to show
you another example. Let's suppose this circle
is going to be the trigger, but it's going to
animate itself. So I'm going to show
you how it's possible. If the user clicks on
it, it's going to move. So the element
trigger is created, as you can see, we
already created that. I'm going to click on it. And inside, I don't
want to use this move Square animation
because I'm going to animate this circle itself. I'm going to create another
time the animation here, and I'm going to
write move circle. Then let's create an action
and I'm going to choose move. I'm going to create
another keyframe here. And let's choose Move. And here I'm going to move it to the right side again.
Let me save it. And here makes sure to choose
the Move circle animation, not the move square. I can click on Preview
to preview that. And also I can go here. And if I click on it, now this circle is
animated, not the square. So you need to understand
the difference between a trigger
and the animation. You should always create a
trigger and then you need to decide which elements
should be animated. And remember, when you
create a tree here, you are not limited to
animate only one element. You can animate
multiple elements. Let me show you how it works. Let's suppose when I
click on this circle, I want these two squares and how can you do
that? It's so simple. First, I'm gonna go ahead
and create a trigger. The trigger is created already. I'm gonna go to the
Animation section on first click here. I'm going to choose Move square because we're going to
move this square here. And if I go inside, I created two keyframes here. But for these square, if I go ahead and
select square root two, and I create another
keyframe here, and I say move, then I can move it to
the right side as well. Let's move it by 100
pixels, just like that. And let me save it. Now, if I click on this circle, these two squares should
move simultaneously. Let's see what happens. But did you see what happened? First the square moved and
then this square moved. Why can't we just move
them at the same time? We can, if I head
over to my timeline, if I select this move
Square animation here, as you can see, these square two elements has a
separate keyframe. If I want these two elements
to animate at the same time, I need to select this square
root two and I need to drag it and group it with my first
square, just like that. Now at the animation
occurs at the same time, I'm going to hit save. And let's see what happens. There we go. But they are too slow. Can I modify their speed? Of course you can. Let's go to our timeline. And here, if I select
my two squares, I can hold down the Shift key on my keyboard and click
on them one way, one. Here in the timing, I have different options. I have the delay option, I have easing and duration. The duration is set
to half a second. I'm going to decrease it to 0.2. And if I save now I'm
going to preview it, It's much quicker now, our rights so far
you learned how the interactions and
animations work in Webflow. In the next video, we're
going to start creating some animations for
our circle project. And we will talk about the page trigger and some
advanced animations. So see you in the next video.
61. Animations & Interactions - Part 2: Hey, welcome back.
In this video, we're going to start creating some interactions and
animations for our website. Are you ready? Let's begin. So first things first, we're going to think
about the kinds of animation we're going to create. So what do we need here? Let's preview this website. As you can see,
all these elements load at the same
time and it's fine, but we can make it better. So what I wanna
do here is that I want all of these elements to fading one-by-one
once the page is loaded. So first this navbar should
fading, then this heading, then the description,
these buttons, the main image and these cards. We can also move these elements slightly to create a
more advanced animation. Alright, so what should we do for these kind of animation? We don't need an
element trigger. As I mentioned in
the previous video, an element trigger is required
when we need the user to interact with something first and then the animation
should play. But in this case, there is
no interactions involved. So when the page loads, these elements
should be animated. I'm going to go ahead and
create a page trigger. How can I do that? Let me go to the
interactions here. And this time, instead of
creating this element trigger, I'm going to create
a page trigger. So let me click on this plus button and which
option should be used? Mouse moving,
viewport, wild pages, scrolling, page,
load, page scroll. We need to use a page load
and you can read what kind of interaction we can
achieve using this trigger. It says animate when the page
starts or finishes loading. That's exactly what we want. I'm going to click on page load. Great. Here we have two
different sections. When page starts loading, when page finishes loading, I'm going to use when
page finishes loading. Why? Because I want all
the content of the website to load before
playing the animation, these images should
be loaded and also these texts,
blocks and buttons. So I'm gonna go with when page finishes loading and I'm
going to create an action. So here I'm going to
start an animation. It's going to be a
custom animation. And then I'm going to click on this plus button. There we go. Let's name this animation, hero animation, because it's
related to the hero section. I'm going to press Enter. Nice. So now it's time to go ahead
and create our actions. What should we achieve here, as I mentioned before, I want all of these
elements to fade in. Some of them should be scaled, some of them should
be moved as well. But let's go one by one. If I want them to fade in first, I need to set their
opacity to zero. Why? Because right now their
opacity is set to 100 per cent and there is no way I can
achieve that animation. So I have two options. I can either go ahead and select all these elements here,
e.g. this heading. And I can go to the style panel, decrease the opacity
to zero per cent here. Or I can do the exact same thing here in the
Interactions section. Why go to page load? I'm going to click
on Hero animation. Here I can create an action e.g. opacity, and I can turn its
opacity to zero per cent. But let's start
with the nav bar. So I'm going to
select this nav bar and I'm going to
create an action here. But in order to create
an action for a symbol, first you need to
double-click on it. Now this navbar is selected the master symbol and I
can create an action. Then I'm going to
choose Opacity. And let's turn its opacity from 100 per cent to zero per cent. Okay, nice. It disappeared and it's
exactly what we want. This is what we call
the initial state. Here. If you head over
to the timing section, you can see we have this switch that says Set as initial state. If I hover over
these question mark, it says setting initial state applies styles to the
element before page load. It's useful for hiding elements
before animating them. Interview. That's exactly
what we need to do. So since I set its
opacity to zero per cent and it's going to
be our initial state. I'm going to enable this switch. What else should we do? I'm going to select all of
these elements one by one. I'm going to decrease their opacity to zero
per cent as well. So let's select this
heading and then I'm gonna go to my animation
here once again, and I'm going to create
a new action opacity. Let's set its opacity
to zero per cent. And remember to enable this switch just like that
set as initial state, as you can see now, these are grouped
because this top group holds all the actions with
the initial state on. Okay, now I'm going to
select this description. I'm going to do the same thing, opacity, and I'm going to
turn its opacity to 0%. And I'm going to set it
as the initial state. I'm gonna do the same thing
for these buttons one by one. I'm going to select
this primary button, and let's create opacity. I'm going to decrease its
opacity to zero per cent. It's going to be
an initial state. Let's do it for this
text button as well. I'm going to select Opacity. Let's decrease it
to zero per cent. And it's going to be
the initial state. Next, let's select
this image and let's decrease its opacity to
zero per cent as well. It's going to be
the initial state. And finally, we need to select these two cards and
do the same thing. So let's choose Opacity, decrease its opacity, and finally enable the
initial state. And last but not least, I'm going to select
this card and I'm going to do the
same thing here. Let's decrease its opacity
and enable the initial state. But wait a second, why all these elements disappeared
except our navbar? Well, that's because our
navbar is a symbol in reality, if I preview my project now, you can see that it disappeared. But since it's a symbol, we will see that. That's the reason. But don't worry, it
works perfectly. Alright, we created
our initial states. We set the opacity of all our
elements to zero per cent. Now it's time to create the next keyframe in
order to fade them in. So we need to increase the
opacity to 100 per cent. To do that, I'm going
to select my nav bar. Once again, double-click on it, and I'm going to
click on this end here to create a new keyframe. Let's choose Opacity. And this time it's opacity
should be set to 100 per cent. So make sure that it's
set to 100 per cent. We're not going to modify the duration and
delay right now, but in a few minutes we're
going to modify them. So for now, we just need to turn all the opacities
back to 100%. Now I'm going to select
my heading here. I can choose it
in the navigator. And then let's go to
my animation and let's create a new keyframe
here, opacity. And I'm going to set
the opacity to 100%. I'm gonna do the same thing
for all our elements here. Let's choose the description. I'm going to create a
new keyframe opacity. And then I'm going to
set the opacity to 100%. I'm going to choose the
buttons one by one. Let's repeat the same process and increase the
opacity to 100%. I'm not going to fast forward this process because
I want you to get used to the process of creating
interactions are right. I'm going to select
the Next button here. Let's create a new
keyframe opacity. And I'm going to set
the opacity to 100%. Now let's select the main image. Let's create a new
keyframe opacity, and turn its opacity to 100%. And finally, we are going
to select our cards one-by-one opacity and
set its opacity to 100%. And last but not least, we need to select our last card, create a new keyframe
here, opacity, and set its opacity to
100 per cent. Nice. Now let's hit save and
preview our project. There we go. All of these elements
fading one by one. Let me preview that once again. That's exactly what you want. It can you see how
easy it is to create animations in Webflow
without coding. That's amazing. But wait, can we even make it better by adding more animations
to our elements? Yes, we can. And this is exactly
what we're gonna do. Now that's our fading animation
is successfully created. I'm going to go ahead and add some other actions
to these elements. For instance, I'm going to make this heading and this
description moved down slightly. And also, I'm gonna make these two cards scale
up a little bit. And finally, I'm going to make this hero image move up as well. So let's start with
this heading first. I'm gonna go to my animation. I'm gonna go to
here I animation, and then I'm going to
select my heading. One thing to mention here
is that I don't want this heading to move down from its original position,
which is here. I want to move it
up slightly and set the initial state
for that and turn it back to its
original position. So that's what we're gonna do. I'm gonna select
this heading and I'm going to create an action Move. It has been created inside
the initial state group, and that's exactly what I want. If you create it somewhere else, you can simply enable
this switch set as initial state and
it will be grouped with other initial
state elements. Then I'm going to move
it up by 20 pixels. So I'm going to write -20. We can see that, but
it moved slightly. Then I'm gonna do the same thing for the hero description. So let me select it. I'm going to create
a new action here. Move and let me move
it by 20 pixels -20. Now I'm going to
select my main image, but this image shouldn't
move from top to bottom. It should move from
bottom to top. So I'm going to
create a move action. But this time I'm going to
set the y to 20 pixels, not -20 to move it down. And remember, these are
all our initial states. Finally, as I mentioned before, I'm going to scale my cars, those two little
cards up slightly. So first I'm going to
select this Hero Card one, and I'm going to scale it
down as the initial state. So let me create an action here. I'm going to choose scale, and I'm going to set the x to 0.8 and the y-axis will
be changed as well. Since these are linked, then I'm going to
select Hero Card to, let's create the
same action scale. And I'm going to
modify its X to 0.8. Hit Enter, but this
one is not grouped with other initial
state actions. I can either drag and drop
it inside this group, or I can simply enable this
switch set as initial state. Now it's grouped with other initial state actions
here are right, Nice. Now we need to go ahead and turn them back to their
original position. But how should we do that
here we have many keyframes. Should we create a keyframe
here after the last keyframe? Know why? Because if we do that, first, all those elements will fade in and then they start
moving and scaling. That's not what we want. We want them to move and fading simultaneously
for the cards, we want them to scale and
fading at the same time. So I'm gonna go ahead and
select this hero heading. I'm going to create
a new action here, and it's going to be moved. We created a new keyframe here. Then I'm going to change
its y here to zero. This way, we turn it back
to its original position. Finally, I'm going
to drag it and put it on top of the
opacity keyframe. This way, we can group
them and the opacity and move actions occur
at the same time, just like that, as you can
see now they are grouped. I'm going to do the same
thing for the description. So let's select it. I'm going to create
a new action move. Then I'm going to set
the wine to zero. Let me group them together. I'm going to drag it and
drop it on top of that. Let's do the same thing
for the hero main. I'm going to select
it and I'm going to create a new action move. And I'm going to set
its wine to zero. And let's group it with
the opacity keyframe. And finally, I'm going to
select this Hero Card one. I'm going to create
a new action. It's going to be
scale because we are going to scale
it up this time. And I'm going to set
the x and y to one. Okay, let's group it with the Hero Card, one
opacity keyframe. And then I'm gonna do the same
thing for the second card. So let me create this scale action
and I'm going to set the x and y, y21. Nice. And finally, let's group them together are right,
it was a lot. So now let's save our animation. And I'm going to go
ahead and preview that. How cool is that? Let me preview it once again. So first the nav we're
phasing than these elements. They move and they
scale at the same time. But here we have a problem. As you can see, the duration of this animation is too much. So we're going to need
to go ahead and modify the duration of these keyframes. First, I'm gonna go to
hero animation here. So I'm going to
select this opacity. I'm going to decrease the duration from
half a second to 0.3. We need to repeat
this same process for the move action as well. I'm going to decrease it to 0.3. And then let's do the same
thing for other elements. I'm gonna go ahead and select this hero description opacity. It's going to be 0.3. Then I'm going to
select the move. It's going to be 0.3 as well. Let's do the same thing for
this primary button, 0.3. Here, 0.3, I'm going to
fast forward this process. I'm gonna go ahead and select all of these
elements one by one, and decrease the duration
to 0.3 are right, Done. Now, let me save this animation. Let's preview it once again. Cool. As you can see, it's
much quicker now. Let's preview it again. Beautiful. I hope you like it, but I'm going to show
you one more thing. Do you remember when we talked about animations
and interactions, I told you about
the easing method. I said that we
will talk about it later and this is exactly
what we're gonna do. If I go to the
interaction section and if I choose this animation, I'm going to select e.g. one of these actions. Let's select this
hero heading move. And if I head over
to the timing, you can see that we
have this easing tab and we have presets or costume. By default, all actions have
the linear non using method, and it means the animation
plays in a linear way. But if I open up this drop menu, you can see that we have many
different using methods. We have easy ease in, ease out, ease in out. So what's the difference
between them? I'm going to show you a very
cool website created by Mr. Christopher travelers
that illustrates the difference between
all easing methods. It's very cool. It's called easing
that Webflow dot io. So you can go ahead
and check it out. The difference between
these easing methods is usually the speed. So here when we have this 0x01, the animation starts slowly
and it finishes faster. On the other hand, if
we choose, Ease out, the animation starts quickly
and then it slows down. So here you can compare
all these options. You can see which one
suits your needs. Alright, let's move
back to Webflow in order to make our
animations look better. I'm gonna go ahead and set all these animations
to easing out. So let's go ahead and
do it one by one. We can change the initial states here and we don't need to. As you can see, it's
disabled because there is no animations playing
in the initial states. I'm going to select this navbar
opacity and I'm going to change it's easing
method to easing out. And I'm gonna do it for
all these elements. Let me fast forward this process to save you some time are rife, it's done and now
I'm going to save the animation and let me
go ahead and preview it. There we go. It looks much better. All right guys, I hope
you liked this video. We successfully created
some animations for our hero section. In the next video, we're going to continue creating some interactions for other
sections of this website. So see you then.
62. Animations & Interactions - Part 3: Hey, in this video, we're going to go ahead
and add animations to other sections
of our website. For instance, as
you can see here, these logos are black and white and we're gonna
make them interactive. So when the user hovers
over each of these logos, they should become colorful. Here, for instance, we
have this drop shadow. So when the user
hovers over this card, this drop shadows should appear and otherwise it
should disappear. But what about the
testimonial section? So here when the section
comes into the viewport, we want to start animating these emojis and these
middle elements one by one, we just want them to fade in. Let me scroll down. What about this section? Well, what are we gonna
do for these cards? For this card, when the
user hovers over it, It's backgrounds
color is going to be changed to our primary color, and then the color of these texts layers should
be changed as well. So let's go ahead and start working on our
clients section here. Okay, I'm gonna go to Webflow, and I'm gonna go to
the logo section here. Our logos are
colorful by default. How can we make them
black and white? Do you remember when we
talked about the filters? That's exactly what
we're going to use. I'm going to select
this image here. Let me go to the Styles panel. And as you can
see, we didn't add any class to these logos. So while this image is selected, I'm gonna go ahead and
add a class to it. That's right, logo. Now I'm going to
add this class to every single one of these logos. So let me go ahead and quickly
add this class to them. Just like that. I'm going to add it to all
logos are right at me. Select this one as well. And I'm going to add it here. And finally, I'm going to select the Amazon logo and
let me add it here. Perfect. Now, while one of
these logos is selected, I'm going to scroll down and I'm gonna go to
the Effects section. And from here, I'm gonna go
ahead and create a filter. So if I click on this
plus button or default, the filter is Blair, I'm not going to
use a blur filter. I'm going to change the
filter to gray scale. And as you can see, the amount
is set to 100 per cent. That's totally fine. Now what should we do? If I go to the hover state here, I can select this
gray scale filter and I can decrease this
amount to zero per cent. Okay, Just like that. Now let me go to the non-state. Let's preview it. There we go. It works
perfectly for all logos, but here we don't have a smooth transition
between these two states. So let's go ahead and
add a transition, but make sure that you
are in the non-state, not the hover state. Otherwise, it's
not going to work. Okay? Always add your transitions
to the non-state. So I'm going to add
a transition here. I'm going to change
the type to filter and the easing method is
gonna be ears, that's fine. Then the duration is gonna
be 200 milliseconds. Let's preview to once again. Now it looks much
better, doesn't it? What else should we do? Well here, when I
preview this project, you can see that our hero
section is animated. But what about this section? What I wanna do is add an element trigger to the
container of these logos. And once it scrolls
into the viewport, this container should fading. So let me show you what I mean. I'm going to select
the container here and then I'm gonna
give you the combo class. Okay, so let's write logos. Now, let me go to
the interactions. And from here I'm going to
add an element tree here. And here, as you can see, we have scroll into view. That's what we need. Then it says, When
scroll into view, when scroll out of you, we're going to need
the first option when scrolled into you. And then I'm going to use these quick Effect
Fade just like that. And here we have
fade-in, fade-out. We can modify the
delay or the offset. So it's going to be fading. Let me preview that. There we go. It's too quick. So I'm going to add
some delay here. Let's add a
400-millisecond delay. I'm going to preview it. Nice. Let me preview the project. Alright, we can see the
effect now because I'm using a large screen and as soon
as this page is loaded, this section is
inside my viewports. But if I use a smaller screen, it will come into view
when I start scrolling. For instance, if I go to the tablet break
point here and I just preview the
project once again, you can see that our hero
sections elements are animated. I'm going to scroll down. And as soon as this section scrolls into the
view, it fades in. Let me show it once again. Our right, I'm going
to scroll down. There we go. It fades in. That's
exactly what I needed. And keep in mind
that when we add the animation to the
desktop breakpoint, the animation will be
added to all breakpoints. So if I go to mobile
portraits and I preview it, everything works as expected. Okay, great. Now we can move on
to the next section. And that is recent projects. So I'm gonna do the same thing
here for this container. I'm going to select
this container and I'm going to add an
element trigger here, scroll into view, and I'm
going to add an action here, fading and a
400-millisecond delay. Just like that. Cool, since these containers
have some combo classes, the interaction will be added to that particular container. But if I add the interaction
to the container, to the base class, it will be added to
all the elements using this container base class. So keep that in mind. Let's go ahead and preview it. I'm going to scroll down. There we go. Let's check it out once again. I'm going to scroll down. It fades in. Great. So as I mentioned, when the user hovers
over these cards, a soft drop shadow
should appear as well. So how can we achieve
this interaction? It's so simple, we
already talked about it. So first, I'm gonna go ahead and select this project card. Let me see. You can find it in
the navigator easily. And then I'm going to go to
the hover state from here. And finally, I'm
going to go ahead and add some shadows to it. Alright, now let's modify the properties of
these box-shadow. I'm going to change
the angle to 180. I'm going to change the blur to 50 pixels and the
distance to 25 pixels. And finally, I'm going
to change the color from black to neutral medium. And let me decrease the opacity 100-10% to get this
soft drop shadow. Alright, it looks great. Now let's move back to our non-state and
let's preview it. There we go. It works perfectly. Can you see that? But we don't have a
smooth transition here. So let me go ahead
and add a transition. Make sure that you
are in the non-state. I'm going to scroll down and why this project
card is selected. I'm going to add a transition. And the type is going
to be box-shadow and the duration is going
to be 200 milliseconds. I'm not going to change
the easing method. Let's preview it once again. There we go. Now looks much better. Okay, cool. Now we can move on
to the next section, which is the
testimonial section. So what should we do here? Well, first, I'm going to select this section and I'm going to add an element trigger to it. Okay, so let me go
to the interactions. And from here I'm going to
add an element trigger. And we're going to use scroll into view because we
want the elements to fade in once the section
scrolls into the view. So that's why we are
using scroll into view. And then I'm going to create
a custom animation here, because we're going to animate
these elements one by one. So I'm going to use
start an animation and let me hit this plus button
to go to our timeline. There we go. Here. Let's write testimonial. You can name it whatever
you want, Enter. And then I'm going to
select one of our memo, Gs. And let's create an action here. It's gonna be opacity because we are going to
make them fading. And as usual, first, we need to create
the initial state. Therefore, I am going to
decrease the opacity to zero per cent and I'm going to set it as the initial state. And then I'm going to
create a new keyframe here. I'm going to use opacity and let me increase the opacity to 100%. Let me play the animation. Alright, nice, but there
is a problem here. As you can see, this
animation only works for this first memo G. Should we go ahead and select these
memo G is one by one. Of course not because there
is an alternative to it. Since we have the memo
G base class here, we can simply hit
over to this section, which is called class, and then we can remove
this one combo class here. I just want to write my emoji. I'm going to choose my emoji and make sure that this
option is selected. Only children with this class, I'm going to select
the initial state. And now if I play it, now the animation
works for all emojis. Why? Because now this animation
works for this class, the emoji class with
all its children. That's exactly what we wanted, but what about other elements? Well, we're gonna go
ahead and select them one by one and we are
going to animate them. So let's start
with this heading. I'm going to select it. I'm going to create
an action opacity, and I'm going to set
its opacity to 0%. And let's set it as
the initial state. It will be grouped with
our memo G initial state. And I'm going to create
a new keyframe here. I'm going to choose Opacity. Let's turn its opacity to 100%. Nice. Now, we're gonna go ahead and select this testimonial text. Let's create an action for it. Opacity. I'm going to
set the opacity to 0%. Let's set it as
the initial state, and let's create a
new keyframe here and choose opacity and
turn it back to 100%. And finally, I'm going to
select these client diblock, create a new action opacity. Let's turn its opacity
to zero per cent, set it as the initial state, and create a new
keyframe opacity and turn it back to
100%, just like that. Now let me save this animation and I'm gonna go
ahead and preview it. Let's see what we
are going to get. I'm going to scroll
down and as soon as the testimonial section
scrolls into the viewport, the animation plays, but these memorial is
faded in so quickly. So let's go ahead and fix that. I'm going to go to the
testimonial animation here on the right side. And I'm going to select
this memo G opacity here, and I'm going to add
some delay to it. Okay? So let's add a one-second
delay and let's preview it. I'm going to save it. And let's see if it
works properly or not. I'm going to scroll down. Nice, but 1 s looks too much. So I'm going to decrease
C2 maybe half a second. Let me select this memo
G opacity and just decrease the delay
to 0.5 and save it. Let's preview it once again. I'm going to scroll down. There we go. Fantastic. Let's check it out on
other breakpoints as well. I'm gonna go ahead
and preview it. Let me scroll down. Pretty good. It looks great, doesn't it are right now let's move on
to the Services section. So here, as I mentioned before, we are going to modify
the background's color, the color of these texts blocks, and also this link button. So can we just select this
service card and go to the hover state and modifying
our backgrounds color, just like what we did for
these recent projects section. Unfortunately not why? The reason is for these cards, we just modified one property. So we went to the
hover state and we added the drop
shadow to discard. However, here, when the
user hovers over this card, we want to modify
multiple elements. That's why it's not
possible to animate all those elements
here in the effects. Therefore, we're going to
need to go ahead and create an interaction in the
Interactions section. So what should we do? First, I'm going to
select this service card, made sure that this service
card div block is selected, as you can see inside
our services grid. And then I'm gonna go ahead and create an elementary year. And this time I'm going
to choose mouse hover, not mouse-click, not scroll
into view, mouse hover. I'm going to select it. And here we have on
hover, on hover out. Therefore, we are going to create two different
animations here. Why? Because first, we want
to animate all of these elements once the user
hovers over this current. And then we want to turn
all those elements to their original colors
when the user hovers out. So first, let's go
ahead and create a custom animation
here on hover, I'm going to create an animation and let's call it card hover. There we go. So what should we do? Do we need to create
an initial state? No, because we don't
need any initial state. The initial state is
what we have here. We just need to change
the background scholar, and the color of these elements. So widely service
card is selected. I'm going to create an
action because I want to modify the background
color of the steel block. And here under the style, I'm going to choose BG
color, bank runs color. There we go. And here I can choose a new
bank runs color for it. Let me choose primary
default, nice. And then I'm going
to modify the easing from linear to easing out. The next thing we need to modify is the color of
this project title. So I'm going to select it. I'm going to create
a new action, and it's going to be
text color this time. Let me go ahead and
change the color of this text to white,
just like that. And then I'm going to select
this project description. And let's add a new
action here, text color. And I'm going to choose white. And then I'm going to decrease the opacity from 100% to 60%, just like that, to have a
good visual hierarchy here. And finally, I'm going
to select this link, Martin, and I am going
to create a new action. And it's going to be
text color again, but this time it's gonna be our secondary
color, this orange. Nice. Let me play this animation and see if everything
works perfectly well. There is a problem. These animations
should be grouped. We want them to play at
the same time right now. They play one-by-one. That's not what we want. So I'm going to select
these texts color, and I'm going to
drag it and drop it on top of our first action, which is this service card. I'm going to do
the same thing for these two elements as well. Just drag it and drop it. And now that you're grouped, so the animation occurs
at the same time, let me play it once again. Fantastic. All right, Cool. Let me save the
animation and see if it works perfectly.
I'm going to save it. I'm going to preview it, and I'm going to
hover over it. Cool. It looks great. But does it work for all
cards? No, it doesn't. What should we do? Should we go ahead and animate
these cards one by one? Of course not because it's not an efficient way since
we are using classes, we don't need to do that. So what should we do? Well, I'm going to
select these card hover. And as you can see here, if I select this service car, the first keyframe here
in the effects section, it says interaction
trigger and it says You are now only affecting
the trigger elements. I'm going to open up
the stroke menu and I'm going to change it to class. And then I'm going to
open up this drop menu. And I'm going to change it to only children with this class. Now let me save it. And now here, as you can see
under the trigger settings, we have two different options. We have elements, we have class. By default, the element
is selected and it says trigger only on
the selected elements. This is not what we want. We want this animation to
work for all these cars. So I'm going to change it
from element to class. And the class is going
to be service card. As you can see here, all these cards have the
same class service card. And now if I preview it and
if I hover over these cards, you can see that the animation
works for all of them. But what if I hover
out, they don't change. That's because we didn't create
the hover out animation. So let me go ahead
and create one. What should we do? Well, here, as you can see, we have on hover out, we're going to create a new
action, start an animation. This time, instead of creating
a new custom animation, I'm going to show you a
quick way to do that, since we just want to turn the colors back to
their original colors, I'm gonna go ahead and hover
over these card hover. And here as you can see, we have two icons. If I click on these dots icon, I can duplicate this animation
and I have card hover two. Then I'm going to rename it. So I'm going to click
on these dots icon and let me rename it to
card, hover out. Okay, now I'm going to
select it, click on it. And here I'm going to select
all of these elements, and I'm going to change their color back to
their origin on colors. Alright, wireless service
card is selected. I'm gonna go ahead and
change the color to white. Nice. Now I'm going to select
the project title and I'm going to change its
color to neutral dark. Now I'm going to select
project description and I'm going to change its
color to neutral medium. And finally, I'm going to
select this link button and I'm going to change its color
to primary default. Just like that, I'm
going to hit Save. And now if I preview my project and if I
hover over these cards, you can see that this
animation works both ways. Just like that. Can you see how easy it
is to create interactions and animations on
Webflow are right guys, that's all for this video. I hope you enjoyed it and I'll
see you in the next video.
63. Accessibility: Hey, in this video
we're gonna talk about accessibility as a web
designer and web developer, we always need to make sure that our website is
accessible to everyone. No matter if someone is blind
or has visual impairments, he or she should be able to use our website conveniently
and easily. But how can we make our
website more accessible? Well, in this video, you're going to learn
some important points about accessibility. And you will learn some
techniques to make your design more
accessible. Are you ready? Let's begin. When you design your website, you need to make
sure that you check the contrast ratio
of your colors. Because some people
have visual impairments and they may not process
the colors the way we do. Therefore, it's important to make sure that our colors have enough contrast and they pass
the contrast ratio test. We usually check the
contrast ratio of our colors when we are
designing the user interface. But as a web developer, it's worth to check the
contrast ratio of your colors when the development of your
project is done as well. So how can you do that? We already talked about it, but I'm going to mention
it once again quickly. Here. If I select this
text, this heading, and if I head over to
the typography section, I'm going to click on color. Here we have this section
that says contrast ratio, and there is a
question mark here. If I click on it, you
can see it says contrast ratio impacts your
site's accessibility. Sufficient contrast
ratio depends on foreground and
background colors, font size and font weight. That's absolutely true. So basically what we
are interested in is the color of our foreground and the color of our background. So in this case, the color of this text
is our foreground color, and this light blue color
is our background color. And here as you can see, we've got the triple a grade, and it means we have the
highest contrast ratio, which is amazing. So always aim for the AAA, but sometimes you may get
the double a as well. That's acceptable as well. Let me show you an example. If I try to modify this
color, there we go. Now I have the WA,
it's still readable, but the contrast ratio is not
that much as you can see. It's four to one. So I'm going to undo the
process Command Z or Control Z. So when you finished the
development of your project, you need to go ahead and check
all your colors one-by-one and see if you pass the
contrast ratio test, okay, if you see
this triple a or WA, it means you're good to go. So you need to go ahead and
check your colors one-by-one. So I'm going to
scroll down here. Let me select this,
Learn More button. And if I head over to the color, you can see that I've
got triple a as well. What about here? For sure it's AAA. There we go, because we
already checked that color. What about this
project description? It looks good. We've got
WA it's still acceptable. So basically you
need to go ahead and check all your
elements one way one, here we have AAA. What about this one? We have AAA as well. So this is the first
thing you need to check in terms
of accessibility. Now let's move on
to the next point. I'm going to scroll up. In almost all projects, we will use images. We may use decorative images or some meaningful images, e.g. here in this recent
projects section, you can see that we have the project image
and these cards, I'm going to scroll down here. We have some decorative damages. These are decorative images. I'm going to scroll down. These icons are
also declarative. What do I mean by decorated? Well, when something doesn't
add value to our website, and it doesn't help
the search engine to understand the structure
of your website. It means it's declarative. So I'm going to
scroll down here. We don't have any other images. If I go to My
Projects page here, this image is not
declarative because this is one of our
projects images. But how can we make the
search engines understand the structure of our website and the meaning behind our images. Well, we can use something
called alt text. Let me go to my homepage. And here I'm going to select this card if I click
on the Settings icon, as you can see here
we have the alt text. Alt is the short
form of alternative. So it's an alternative
text for each image, we can specify an alt text, but why do we need to do that? Well, there are many
different reasons to specify an alt text
for your images. Number one, search
engines could easily understand the meaning
behind your images, and therefore, they can
rank your website higher. This way you can
improve your SEO. The second reason
is that sometimes our images may not be
loaded completely. In that case, the
browser will show the alt text or alternative
texts to the user. And the last reason is that all texts or alternative
texts could be helpful for people with visual impairments who
use screen readers. People with visual impairments
usually use screen readers in order to read the
content of a webpage. When our images don't
have any alt text, the screen reader simply
reads its name, e.g. if I go to my assets, I'm going to scroll down. It says card one. It's not descriptive, so
the user may be confused. If I scroll up here, you can see that
these projects images don't have descriptive names. Here we have 123456. So we should add all takes to our images in order
to help a user with visual impairments to understand the meaning
behind your image. But how can we add all
text to our images? Well, there are many
ways to do that. The first and simplest way
is to go to the Assets. And then if you hover
over one of your images, you can click on
the Settings icon. And then here you can
write your alt text. And here we have a hint. It says write a
description of this image. All text is used by
screen readers and, or if an image doesn't load. Here we have two different tabs. We have descriptive,
we have decorative. So when our image is decorative, we can simply set it to
decorative just like that. And here it says,
decorative images don't convey meaning and don't
require all texts. That's right. Therefore, we don't need to add all text to our
decorative images, but if our image has a meaning, we need to write a
description for that. So we need to
select Descriptive. And here we need to
write something. This image is not declarative. If I go to the
testimonial section, this is our client's image. So here we can simply write the image of Christine
Watson are right Done. And from now on,
whenever you use this image on your website, it will have this all texts. But there is something you
need to keep in mind when you add an image using the
background section, they don't have any alt text. So here, this icon doesn't
have any alt texts. But if you want to use this icon somewhere else using
an image element, as you can see here, you can go to your assets
and you can simply click on the Settings icon and set
its alt text too decorative. Just like that, I'm going to do the same thing for these
two icons as well. Decorative and decorated. As a general rule, our icons are always decorated. Alright, let me scroll
up a little bit. But what about these
images that are dynamic? As you remember, this
image comes from our CMS. So it doesn't come from
our assets here when we created our collection
inside our CMS here. And when we created our
collections, items, e.g. simplify plus, we
uploaded this image from our computer and here we
can specify any alt text. So what should we do? Well, to fix this issue, you can simply go to your
projects collection here. Then if you click on
this settings icon here, you can create a
new custom field. I'm going to add a field here. And it's going to be plain text. And the label is
going to be ALT text. Okay. Just like that, it's not
going to be required. So I'm not going to check
this Required checkbox. I'm going to hit Save
Field and save collection. Now, if I go to this
simplify plus project first, let me go ahead and change
its name to simplify. And if I scroll down here, we have this new alt-text field and we can simply
describe this image. For now, I'm just going to
write something as an example, the image of Simplify project, not the best alt
texts by the way, I'm going to save it. And now let me head
over to my design here. If I select this image and if I click on the Settings icon here, as we remember, we connected this element to
our project image. And here I can simply get the all takes from my collections. If I check this checkbox, I can choose all texts, plain text, and it's done. Now, each of these images
will have its own alt texts. Of course, if you already
set the alt texts for them, we can do the same thing
for the projects page. If I go to the
projects template, I'm going to select
this image and I'm going to click on
the Settings icon. I am going to get
the all texts from projects and let me
choose the field, all text just like that. Alright, that's all
about all texts. But there is one more
thing about accessibility, and that is your
headings hierarchy. As I mentioned before, our headings should
have a clear structure. If I go to my homepage and if I head over
to the hero section, I can see that these Tidal
has the H one HTML tag. If I click on the Settings icon, you can see we have H1 to H6, but how should you choose
your heading type? Well, let me tell you one rule. One is reserved for the most important
words on your page. It's usually the first few words that the user sees on your page. In this case, it's our
hero section title. And remember, you
should always use the H1 heading type
once on every page. You shouldn't use
it multiple times. But why does it matter? Because search engines could easily understand
the structure of your website when you set
the heading types properly. If you remember, when we were designing this recent
projects section, I said that they intentionally
set it's heading type two, h three, and it's not right. Why? Because you shouldn't skip a heading type when you're
designing a webpage. So when you use a one, then the second most
important texts on your webpage should
have the H2 tag. In this case, I set it to age three to explain you
the difference here. If I skip a heading type,
the search engines, like Google can't understand the structure of your
website properly, and therefore, they won't give a higher rank
to your website. So I'm gonna go ahead
and quickly fix that. But before doing that, I'm going to show you a
very helpful feature, the audit section. If you head over to
the bottom-left corner here you can see we
have different options. We have this Help button. We have video tutorials, we have QuickFind, and then
we have the R, that section. If I click on it here, you can find a missing
alt text images and skipped a heading level. And as you can see, it says, audits check the current
page for opportunities to improve your site's
performance and usability. I'm going to dismiss it. And here, if I click on
this missing alt texts 13, you can see that it shows us all the images that
don't have an alt text. It even shows us the
projects collection here and all the items inside that
don't have an alt texts. We already specified
the alt texts for this Simplify project,
but take a look. Other projects don't
have an alt text. So we have two options here. We can either ignore this, e.g. if discard one doesn't
need an alt texts, we can simply click on this
bell icon to ignore it. Or if you want to simply go ahead and add an alt
texts our image, we can just click on
this right arrow button. It says Take me to the fix. If I click on it, we will be
taken to the asset section and we can specify a
descriptive alt texts here. But what about the
other section? As you can see here, we have this skipped
a heading level. If I open it up here it
says ordered headings help visitors understand
the page structure and improve page navigation. And it says Projects heading h3. So something is wrong with
these projects heading. This is exactly what we are
going to go ahead and fix. So I can either ignore it or I can say take me to the fix. So if I click on
this right arrow, I can change the heading
type on the right side here. I'm going to change
it to age two, and now we have a
correct structure. I'm going to scroll down. Let me select this
heading as well. It's gonna be h two as well. So I'm going to set it to H2. Nice. Let me scroll down. Alright, everything looks fine. Now let me go to the audit. There we go. That's warning is
gone because now our website has a
clear structure in terms of heading Types. So I can simply go to other
pages, e.g. Contact Us. And here this
Contact Us title as the most important
title on this page. Therefore, we use
the H1 heading type. So if I go to audit, it says no issues
found. That's great. Now, let me go to another page, our projects template
here I'm going to add it. It says skipped a heading
level, again, project heading. So this project's name
has the H1 heading time. We don't have any
other heading here, except here, it's
going to be H2. So I'm going to change
it to H2 just like that. And now if I added it, there we go, That
warning is gone. Alright guys, that's all
about accessibility. When you build a website, make sure to make it
accessible to everyone. It's very important
because that's what makes you a great web designer
and web developer. I hope you enjoyed this video. I'll see you in the next one.
64. Project Settings: Hey, in this video we're going to talk about the
project setting. We already talked
about it before. But in this video,
I'm gonna show you some other features of
the project setting. So as you remember, in order to go to the
project settings, you need to head over to the top left corner and you need to click on this W icon here. And then from here you can
go to your project settings. And here we have
different options. We have general hosting,
editor, et cetera. We're not going to dive into
all of them because e.g. we have a dedicated video about SEO and also hosting plans. I'm going to walk you through the most important
tabs and fields here. On the General tab, we have this name, this is our project name. As you can see here
we have a hint. It says this is the project's
title within Webflow, then we have the SOP domain. This is a staging domain that
workflow provides us with. It's totally free and you can publish your website
on this domain. At the moment, this project
is not published yet, you can go ahead
and modify that. And if that sub-domain
is available, you can use that domain. Here we can select a
folder and it says projects can be moved into
and out of folders here, we don't need to move our
project to any folder. Then we have these icons here. You can upload a favicon. A favicon is this little icon that you can see on
each browsers tab. It should be a 32
by 32 pixel icon. You can see all the supported
formats here, PNG or JPEG. You can also upload a web clip. This is just an icon
that shows up when your website link is saved
to an iPhone home screen. These are optional,
but make sure to upload a favicon always
for your website. Then we have the
localization here. You can choose the time
zone from this list. Then you can specify
a language code. It says set your science
language Go to allow browsers, translation apps, other tools to perform
language sensitive tasks. It's optional as well. You can get access
to the least of language codes if you
click on this link. But for English
you can write EN, for instance, then we
have website password. Some of these options are
locked for the free plan. So if you want to use them, you need to go ahead and
upgrade your account or you need to add a hosting
plan to your project. We will talk about the account
plans and hosting plans. But for now you
just need to know that some features are only available in pro plans or for projects with
a hosting plan. For instance, if you want
to showcase your project, you need to have a paid plan. One more important thing
is the Webflow branding. It says to hide
Webflow branding from the public site at hosting or upgrade your account to prove. So what's the Webflow branding? Let me go to the designer
for a second and I'm going to show you
what it is exactly. If you publish your website, if you click on this
Publish button, this is our staging domain
that I just showed you. If you click on publish
to select the domains, you can publish your website, and now it's published. And if I click on this
little icon, there we go. Here is our project. You can see that on the
bottom right corner there is this made
in Webflow badge and it will appear on
your websites if you are using the free staging domain. And if your website is
published on this domain, if you go ahead and add a
hosting plan to your project, you can simply disable that. Alright, let me go back
to the project settings. Let's see if we
have anything else. Here we have the
overview of our project, the total asset size
last published, last updated, the number
of pages form submissions. These are statistics. Here we have the site activity. I'm going to scroll up. If you go to hosting, you can add a hosting
to your project. We will talk about it later. Then we have the editor here. You can add collaborators
to your projects so someone else can edit the
contents of your project, but it's only available. If you have the CMS or
business site plan, then we have a feeling we're
not going to talk about it now because we have a
dedicated video for that. Then we have SEO, the same case. We're going to talk
about it later. Then we have forums. We went through all
these fields before. We have fonts here you can
add your custom fonts. We already talked about it
and then we have backups. This tab is so useful, you need to know that Webflow
backs up your project when you press Command Shift S or
Control Shift S on Windows. So why does it matter? Because sometimes you might
change something and you want to revert back to the previous
version of your project. In this case, you can simply
hit over to the backups and you can find the
appropriate version here, e.g. this one says two days ago, automatic backup three
pages, 102 styles, etc. You can also preview this version and then
you can restore it. But keep in mind. If you want to restore
some old backups, you need a hosting plan or
a paid account so that you can restore these
recent backups easily. Then we have integrations. So on this tab, you can actually
connect your project with third party services, e.g. Google Analytics, Google Maps, Facebook Pixel, and also you
can generate an API token. We will talk about the
integrations in a separate video, but for now you just
need to know that it exist in the project settings. Finally, we have custom code, which is also available
for paid plans. Using this section, you can add some custom code to your
website if you need to. But most of the time, for most websites, you don't
need to add any custom code. But if you need to extend web
flows, native capabilities, you can simply
upgrade your plan and take advantage of
these useful features. Alright, what do we have
here in the toolbar? Here we have some icons. The first one is
the transfer icon. If I click on that, it says to a user, to a team using this button, you can transfer your project to another web flows account. But to do that, again, you need to upgrade your
plan to a paid account. You can also transfer
your project to a team if you head
over to this tab, it's a useful option
if you want to transfer the client's project to their own account
and you don't want to host their project
on your own account. We will talk about the
benefits of this option later. The next option here is delete. If you want to
delete your project, you need to simply
enter these red code here and then delete
your project forever. Remember, once you
delete your project, it's deleted permanently and you can reverse this operation. Make sure to think twice before you delete your project forever, then we have the
duplicate option. Sometimes you might
need to duplicate a project for a specific reason. No matter if you just want
to archive the project or you just want to make some changes to the
duplicated version. You can simply click on
this duplicate button. And here you can simply
duplicate your project. And the last option
here is Unpublish. If you click on it, your website will be unpublished and you need
to publish it again. Here we have other
options as well. We have shared. Sometimes you might need to share
your project with other designers or let's say other collaborators
or even the client. If you click on this
Share button here, you can simply turn this
switch on and then Webflow generates a unique shared
link for your project. If you just copy
this link and share it with your client
or anyone else, he or she can easily get
access to the project, but we'd read only access. What does it mean? It means that they can make
some changes on the website, but those changes
won't be saved. That's why it's
called read-only. So you can be 100% sure that they can't break your
website are right. I'm going to turn it off and
then we have the designer. If you click on it, you will
be taken to the designer. Then we have editor. It says publish your project in order to access the editor. We will talk about the
editor in the next video. All right guys, that's all
for the project settings. There are many things that
we didn't talk about, like the SEO section or editor, but we will definitely
dive into them. I hope you enjoyed this video and I'll see you
in the next one.
65. Editor: Hey, in this video we're going to talk about the
web flows editor. But before that, we're gonna
go ahead and check our links because we're going to publish our website when we were
building this project, we created some links, but they are empty links. There is no URL, so we didn't create a
destination for those links. Let's go ahead and quickly fix. Now, I'm going to start
with the navigation bar. If you click on this logo link, it doesn't take us anywhere. Let me show you if I preview it and if I click on
it, nothing happens. That's because there is no
destination for listening. I'm going to double-click
on this navbar, and I'm going to select
this navbar logo link. And then on the right side
you can see that we have the brand settings and here
we have different options. What we are interested
in is the type and URL. So what kind of behavior
are we looking for? We want to achieve this when the user clicks on this logo, it should take the
user to the homepage. So I'm going to select type. By default, it's set
to external URL. I'm going to change it to page. And then from this
page drop menu we have created to static pages
home and contact us. So I'm going to choose
Homepage just like that. Then we can specify
whether it should open it in the same tab or in a new tab. I'm going to set
it to this step. Now let's go ahead
and check it out. If I click on it, there we go. That's exactly what we want. So what about other links here? I'm going to double-click on it. I'm going to select
this home link. I'm going to change the type to page and the page
is gonna be home. What about projects and
services and contact us? Let me first select this Contact Us and then I'm going to change
the type to page. It's going to take the user
to the Contact Us page. But what about
projects and services? Well, as you remember, we created the project section and the Services section
on our homepage. So when the user clicks
on these projects link, the user should be taken to that particular section
of our homepage. How is that possible? It's very simple. First, let me go back to my instance and I'm
going to scroll down. Let me go to the
recent project section and I'm going to
select this section. Then if you head over to the elements settings
on the right side, here we have this field ID. I'm going to specify an ID
for this particular section. It should be a unique ID. Remember that I'm
going to write, projects are right, cool, but what about services? I'm going to scroll down. I'm gonna do the same thing
for these services section. And here I'm going
to write services. Nice. We're almost there. I'm going to scroll up and I'm going to double-click
on my nav bar. And if I select these projects
link on the right side, if I open up this
type drop-down menu, we have different
options apart from external URL and page
that we use before. We have phone, email
section and fine, I'm going to choose
section and then we have this new
section drop menu. And if I open it up here, we have different sections. These two are for our forums. I'm going to select projects. This is the section
that we just created. Now let's see what
happens if I go back to my instance and if I
preview this project, I'm going to click on projects. And there we go. We are taken to the
project section. You can find this
kind of behavior on many different
websites nowadays. Let's go ahead and do the
same thing for the services. So let me select this type. I'm going to choose section
and let me select services. Alright, we're done
except we aren't. Let me go back to the instance. I'm going to preview it. I'm going to click on services. There we go. It looks fine. However,
we have a problem. If I go to another page, e.g. our Contact Us page. Let me show you what happens. I'm going to preview it and
if I click on projects, as you can see, nothing
happens because we don't have the
project section here. The same thing happens if
I click on this services. So how can we fix that? Let me show you how. I'm gonna go back
to my homepage. And I'm going to
double-click on this navbar and let me select these
projects link here. The type is set to section. I'm going to turn it
back to external URL. And here I'm going to
remove this hashtag sign and we can simply write a back
tick and a forward slash. And then I'm going to
add a hashtag sign. And finally, we need to
specify our sections ID. So let me ride projects. I'm gonna do the same
thing for these services. So let me select this link. I'm going to change its
type to external URL. And I'm going to write
back tick forward slash a hashtag
sign and services. This way we are using
an anchor link. So this forward means to go
to our homepage and then this hashtag services means to go to these
particular section. Alright, now let's go
ahead and see if it works. But in order to check it out, you need to first publish your website because
it doesn't work. If we simply go ahead
and preview it. So I'm going to publish it. I'm going to select
this staging domain, and let's hit this published
to select a domains. Nice. And then if
I open it up here, I can click on projects. And I will be taken
to this section. If I click on services, I will be taken to this section. But the cool part is that if
I go to the Contact Us, e.g. if I click on projects, we will be taken back
to our homepage, right, to these
projects section. That's so useful, isn't it? All right, now
let's go ahead and select this getting
touch button. I'm going to click on
the Settings icon. And then here I'm going to
go to the page section. Let me choose Contact Us. What about CR work? I'm going to select it and I'm going to choose section here, page section, and let
me choose projects. Let me scroll down here. These layer and more
buttons have dynamic URLs, so we don't need to modify them. What about these? And
learn more buttons? We didn't create a page for
our services because this is a fictional project
and we don't need to create some simple pages
again and again and again. So far you learned how to create a modern page with
complex interactions. So if you want, you can
go ahead and create a page for these services, but it's not necessary
for this course. I'm going to scroll down here. We have different links as well. We didn't create any
page for them as well. It's totally fine because I just wanted to show you how you can create a footer
with different links. You can always go
ahead and create some other pages and set a
destination for these links. Now, let's move on
to our main topic, which is the editor. When you develop a website, your client doesn't
know how to work with their workflows designer
and they shouldn't. Why? Because it's too complex
for them to learn all the things that you've
learned in this course. And it's totally understandable. So should they always contact you if they want to
modify something, modifying the contents
of their website. Of course not. They can use
the editor if you head over to this W icon on
the top left corner, and if you click on it, you can find the editor. I'm going to click on it and we will be taken to the editor. Here is the editor. As you can see, we have
this toolbar at the bottom. We have pages,
collections, settings. Then we have two buttons, back to live site and Publish. So how can the clients go ahead and modify
the contents here? It's so simple. Let's suppose that you want
to modify the heading. They can just hover
over this heading. They can click on it and then they can start modifying it. Let's suppose I want to change this stunning work with amazing, just like that. It's so simple. They don't need to
go to the designer and modify everything. They can also
insert a link here. They can wrap it with span, all sorts of things, but they can't modify the
layout of the website. It's very important. They can change your
display setting, the CSS properties, and
those kinds of things. Let's suppose they
want to change this, get in touch button. They can hover over it. And if they click on
the Settings icon here, they can edit the text. They can edit the link as well. I'm going to click
on edit text here. I'm going to change it to get
us started, for instance. Just like that. I'm going to undo it. What, what about images? Well, changing images
as easy as well. They can hover over an image
and if they click on it, they can select a new
image from their computer. I'm going to scroll down. They can even modify the content from their
collections list. So let me click on
this Learn More button and now we are on
the project page. Do you remember when we
talked about the rich text, the one that we used
here for the details. When we use a rich text, the client can simply
modify that here. They can edit it,
they can format it, they can make it bold. They can add links. They can even add images
and videos to this section. ****, if I just click here, I can click on this plus button. There we go. I can choose an image, a video. It can even embed code. It's only available for a
paid site or paid account. They can add a bullet
point list, etc. So that's why using
a rich text is so beneficial when you're designing
a website for a client, because they don't
need to know how to modify the paragraphs,
the headings, etc. They can even add a
heading here if they want. But what about dynamic content? So I'm going to go to homepage. And here in this
toolbar at the bottom, if I click on pages, I can see all the pages. I can see a static
pages, project pages. I can modify the settings
of these pages 1 by one. But what if I want to add even more projects
to my website? It's so simple. I can hit over to
the collections. I can go to the
Projects collection and all my projects are here. I can simply select one of
them if I want to modify them. Here are all the fields
that we created before, like the image project type completion date
project details, even the alt-text. If I want to create
a new project, I can hit this green button and I can create a project and the client can simply manage his or her website
without your help. Of course, if you want to modify the layout or do some
complex modifications, they can reach out to you. Otherwise, they can
simply modify contents, add new content without
contacting you. And finally, once the
changes are done, they can hit this Publish button to publish all the changes. As you can see here, it says
two unpublished changes. If I click on it, you can preview the changes you made and you can hit publish, publish to changes, and now
those changes are live. Alright, so this is
all about the editor. It's a very useful
tool for modifying the contents and
adding new content, especially for your clients. Because now you are a
professional Webflow user and you don't need
to use the editor, but your client isn't. Therefore, he or she
needs to use the editor in order to add content
or modify contents. Are right guys, that's
all for this video. I hope you enjoyed it and I'll
see you in the next video.
66. Publish Your Website: Hey, now that our
website is ready, it's time to publish
our website. But before that,
you might need to connect your custom
domain to your projects. I already showed you
that if you head over to this Publish
section here, if I click on this
Publish button, you can see that Webflow creates a staging domain
for your project. It's totally free and
you can go ahead and modify this URL in
the project settings. However, if you're building
a project for a client, you don't want to use
the staging domain because it doesn't
look professional. Therefore, you need to connect the custom domain
to your project. How can you do that? Well, you can simply click
on this button here, or you can directly go to the Project Settings and
go to the hosting tab. I'm going to click on it
and I will be taken to the hosting tab of
the project settings. Here is where we can add a
site plan for our project. All projects on
your starter plan, complete free staging, as you can see it's indicated here. And if you want to connect the custom domain to your project, you need to upgrade
to a paid site plans. So you need to add
a site plan here, you can choose between
different options, like basic CMS business. We will talk about the
differences later, but the process looks like this. First, you will go ahead
and add a hosting plan, a site plan to your project, then the custom domain
option will be available. So if you have a domain already, you can simply write
it down here and then you need to go ahead
and update your DNS. We're not going to dive into the technical matters
now because connecting a custom domain to your project depends
on your DNS provider. If you bought your domain
from Google domain, your DNS provider
is Google domain, and each provider has
its own setup process. Therefore, it's
not possible to go ahead and explain the process of connecting custom domain
from all domain providers. And this setup process
might change frequently. So the best way to learn
about it is to just head over to these custom domain section and you click on this, learn how to set up
custom domain hosting. If you click on it, you will
be taken to another page. And here there is a very good
video that you can watch explaining how you can connect a custom domain to your project. You can also go ahead and read this article because Webflow updates these
articles frequently if they decide to
change something. It's a simple process. However, since the process looks different for each provider, we are not going to dive
into the technical issues, but the process is so easy
and it's not time consuming. Once you've connected
your custom domain, you can go ahead and publish your website on
your custom domain. How can you do that? It's so simple. You can simply hit over
to these Publish button. You can click on it. And then here, apart from
these staging domain, you can choose your
custom domain and hit Publish to
select the domains. Remember, you can always on
publisher website as well. You can also go to
the designer and you can click on this Publish
button in the toolbar, and you can choose your
custom domain here as well, and then hit the Publish button. Right now, our staging
domain is selected. Let's publish our
project for a second, and now it's
published and you can open it up if you click
on this little icon, whenever you make
changes to your website, you need to make sure to
go ahead and publish it. Otherwise, that change is private and no one can see that. So make sure to publish your website once you
make some changes. And if you want to
Unpublish your website, you can simply click on
this unpublished button, and it will be unpublished. If you want to modify
this staging URL, as I mentioned before, you can head over to
the project settings. And then under the
General tab here you have sub-domain and you can just
modify this sub-domain. Let me change it
to something else. Circle design, dot
Webflow does IO. I'm going to save
changes and then I'm going to publish it now. And right now, our
website is published on this staging domain and no
one else can use this URL. This is a unique URL
for our project. I'm going to open it up. There we go. The URL
has been changed. In the future videos, we will talk about
different hosting plans, whether you should host
on Webflow or not. So if you don't know
which plan is suitable for you or your
clients, don't worry. We will get into it. Are right guys. That's all for this video. I hope you enjoyed it and
I see you in the next one.
67. Webflow Plans: Are right now, that's
our website is ready, it's time to talk about
Webflow, those plans. Webflow has different plans. It has account plans
and site plans. So in this video, we're going to talk about different plans. You are going to learn what's the difference between them, and you can decide which
plan suits your needs. So if you're ready, let's begin. If you go to webflow.com
slash pricing, you can open up this
page and here is all the information you
need about different plans. If I scroll down, you can see that workflow
has two types of plans, site plans and account plans. So what's the difference
between them? Well, whenever you
want to connect your custom domain
to your project, you need to add a site
plan to your project. Right now we are using
the staging plan. All projects by default
have the staging plan. But if you want to get
access to more features and connect your custom
domain to your project, you need to add a site plan. This is basically
a hosting plan. So if I click on this
site plan section, I will be taken to this section. Let's see what we have. As you can see, we have
four different options. We have basic CMS,
business and enterprise. So let's start with basic. You can see the cost here. It's the monthly cost. It says best for a simple
site that doesn't need a CMS. So basically these plan
doesn't support CMS. So if you want to
publish a website that only has static pages, this plan works best for you. You can see all the
available features here. You can create up to 100
different static pages. You can get up to
25,000 monthly visits. You will get 100
form submissions per month and other
different features. Then we have CMS, which is good for websites
that need to have dynamic pages and work with CMS. Again, you can create up
to 100s static pages. You can get up to
100,000 monthly visits. Using this plan, you can create up to 2000 collection
items in our project, the collection items where
the projects that we created for our
projects collection, if you remember, we created different projects like
simplify, crypto Pi, etc. Here the number of forms
submissions is much higher. You can go ahead and read
all these information. We're not going to
dive into them. I'm not going to read
them one by one, but you need to understand
that if you want to connect a custom domain
to your project, you need to add a site
plan to your project. Remember, site plans will
be added to projects, not to your account because
we have account plans as well and we're going to talk
about it in a few minutes. But the next thing
I'm going to mention here is the e-commerce plans. These site plans are
good for personal sites, blogs, and business websites. If you want to create an e-commerce website
using Webflow, you need to add an e-commerce
plan to your project. Here we have standard
plus an advanced. You can go ahead and
read the information here and learn more about
different plants here. I'm gonna go back to site plans. And now I'm going to talk about Account Plans when you
work with Webflow, most features are free to use, but there are features
that are paid as well. These are some additional
features that you may need to use in order to
create amazing projects. So now I'm going to click
on this account plans. And there we go. Here we have individual
plans and team plans. If you're a freelancer
and you work alone, you don't need to
get a team plan. But if you want to
collaborate with other developers and
other designers, you may need to go ahead
and get a team plan. But let's talk about
individual plans. When you create an account
on Webflow, by default, the starter plan will be
assigned to your account. So here as you can see, it says, everything you need
to get started building with Webflow
and it's free forever. You can create up to two
projects using the starter plan. If I click on this, you
can see projects are on hosted sites you
build in Webflow. So if you create two
projects and if you add a site plan to
those projects, you can still create two more projects using
the starter plan. Here it says you
can publish them to a Webflow dot io
sub domain to share as prototypes or add a site plan to go live
on a custom domain, then you have client billing. We will talk about this
option later and staging. It says free. If I click on it, we will
see the information here. It says up to two static
pages and 50 CMS items. So it means you can create more than two static pages
and more than 50 CMS items. Remember, you can create
more dynamic pages, but you can create more
than two static pages. In our project, we had
only two static pages, our homepage and our
Contact Us page. Let me go ahead
and show you if I go to the pages panel here you can see under
static pages we have home and contact us. And if I try to add
a new page here, it doesn't allow me to do that. Let me show you. It says you've
created all the pages allowed by your free
plan to add more, upgrade your site plan. This is the limitation when
it comes to Starter plan. You can transfer your project, you can export
your code as well. One of the great features of Webflow is that you can
export your project. If I click on this code export, it says Export clean and
semantic HTML and CSS files to hand off to your dev team. Sometimes you might need to host your project somewhere else, not using workflows
hosting in that case, you can head over to
the toolbar here. And right at the top, you can see this
export code option using the starter plan. It's not possible to
export your code. As you can see, it shows
the HTML preview here. It's not all the code
of your website. If you go to CSS, you
can see your code as well, JavaScript and assets. And if you have a paid account, you can simply export
your project and hosted somewhere else or make any
modifications you want. That's totally up to you. This is something to consider. Then you don't have
any project transfers using a starter. Let me show you you can
transfer projects to Teams or anyone with a Webflow account and you can use white labeling. It says add your own logo to the CMS and client
billing payment forums and remove Webflow branding from form emails
and staging sites. You don't have side password
protection as well. So if you want to work as
a freelancer and you get more and more projects
as a web developer, Probably you can go with a
light plan that allows you to have ten on hosted projects
within hence staging, hosting and also
project transfers. But still you don t have
the white labeling option. If you have many clients and
many projects to work on, you can go and get
a pro account. Using the pro account, you are free to use
all these features. One more thing I'm going
to mention about free plan and paid plans is that
using the free plan, you can add custom
code to your project. So if I go to this
circle project, if I just head over
to static pages here, and if I click on
the Settings icon, I'm going to scroll down
here at the bottom you can see we have this
option custom code. However, it's not available. If you want to add some advanced custom code
to your project, you can simply upgrade
to a paid plan and then this option
will be available. You can also add a hosting
plan to your project. And again, this option will
be available if I go to the project settings and if
I go to the custom code tab, you can see that this option is not available here as well. Again, we need a paid
site plan or we need to upgrade our account plan to add custom code to our website. We will talk about custom
code in our future lessons. But for now you just
need to know that using the free Starter plan, you can't use custom code and
it's totally fine because the starter plan is useful
for people who are learning. So if you just want
to experiment with different options and
learn how Webflow works, this is the best
plan you can use. There is no trial period and
no credit card is required. But if you get clients and
you work on paid projects, you can definitely upgrade
to paid plans in order to use those additional options
are right, so let's recap. Remember, when we talk
about plans on Webflow, we have two types of plans, site plans and Account Plans. If you upgrade your
account plans, new features will
be available for all your projects
within your account. But if you add a site
plan to a project, only that project will be able to use these
additional features. Keep in mind that if
you want to connect the custom domain
to your project, you need to add a site
plan to your project, are right, but how can we add
a site plan to our project? It's so simple. If you head over to the project
settings of your project, you can see that we
have this hosting tab. Under this hosting tab, we have different
site plans. Here. As you can see, we
have basic CMS, business and enterprise,
and you can see all the available
options for each plan. You can simply add one of
these plants to your account. Make sure to check the billing
type here because you have the annual or monthly billing
options are right guys. That's all for this video. I hope you enjoyed it and
I'll see you in the next one.
68. Intro to SEO: Hey, now that the
development process is over, it's time to talk about SEO. As a web developer, you need to understand
that your work doesn't finish when the development
process is finished. Once you develop the website, you need to optimize
your project to rank higher on Google and
other search engines. But how can you do that? Well, this is the
topic of this video. Once SEO, SEO stands for
search engine optimization. So let me show you an example. Whenever you go to
Google and you look for something
That's right Apple, when the rank of this
website is high, it will appear higher in the search engine and
on the first page. Because if your
website doesn't appear on the first three pages, it means that your
website is not optimized and chances
are the visitors can find your website because
most people don't go to the fourth or fifth page. So we need to optimize
our website in order to rank higher
on search engines. We already talked about
some points before, such as headings, hierarchy, what we're gonna do
even more things. So once you develop
your project first, you need to go ahead and check out your headings hierarchy, like what we did before, to make sure that you
don't use more than 1h1 on each page and you don't skip any heading time
across your page, then you need to make sure that your images have all texts. And finally, what you can do is just go ahead to
the Pages panel. And if you go to the
page settings here, you can see that we have
some settings here, right at the top we have
the page name, okay? This is only for internal use in order to organize
all our pages here. But for external use, we need to head over
to the SEO Settings. Let's see what we have here. It says specify this page's
title and description. We can see how they look in search engine results pages
in the preview below. Here, what we can do is enter a title tag and a
meta-description. This is basically
what will appear on Google search result pages and also on other search
engines results. So here for the title, I'm going to write Seroquel, which is the name of
this fictional agency, a vertical line. And then I can write the main services that
this company offers. Let's write design and development
agency just like that. But what about meta-description? Well, here you need
to explain what this company does briefly. So I'm going to write, we help startups to
bring their ideas to live by designing stunning interfaces
and user experiences. Just like that, you can see
the search results preview. And it says this preview uses the typical character limits for Google search result pages on desktop search engines
do experiments with their character limits and may decide to show
different content. That's 100 per cent, right? I'm going to scroll down here. We have open graphs settings. So the info we add here shows
up when our users share our content on their social
media accounts like Facebook, Twitter, LinkedIn,
Pinterest, etc. So if I scroll down here
for Open Graph tidal, I'm going to check this same
as SEO title tag checkbox. And for opening
graph description, I'm going to check
this checkbox as well. Here we have Open
Graph image URL. Make sure to add an
image URL here, e.g. you can go to your assets first, let me save this page and then
I'm going to go to Assets. Let me choose one
of these images. For instance, I'm going
to choose this one. And if I click on this
settings icon here, I can get the link
of this image. If I click on it, I can copy it. Then let me go to Pages home. And if I paste it right
here, There we go. This image will appear
when the user shares or content on their
social media accounts. The image, the title,
and the description. Alright, so far, so good. Now let me save it. Now we need to go ahead and
optimize our other pages, like the contact us. So if I go to the Contact Us page settings
here for the title tag, I'm going to write contact us a vertical line, circle agency. And for the meta-description,
let me write, if you want to get a
code for your project, don't hesitate to get
in touch with us. All right, let me check it out. If you want to get a
code for your project, don't hesitate to get in
touch with us. That's great. I'm going to scroll down here. We have the Open Graph
settings as well. And we're going to just check these checkboxes to get the
same title and description. And for the image, I'm going
to paste the same link here. Nice, let me save it done. Now we need to go to our
projects template page. If I go to the
settings here we have again title meta-description
and all those fields. With one exception, this
page is a dynamic page, therefore its content
constantly changes. So how can we add the title and Meta description
for each project? Well, it's so simple as you can see here we have
this field option. Therefore, we can feel
these text fields dynamically with
dynamic content. That's so cool. So let's suppose first here we want to add
the project name. If I click on this Add Field, I can choose the proper field. It's going to be name. There we go. You can preview
the search results here. This is the name of
our project space, a vertical line space. Then I'm going to add
the type of project. I'm going to add a new field. It's going to be project type. Here we have UI design,
an app development. All these information
are coming from our CMS. And then a vertical line here I'm going to
write Seroquel agency. Okay, But what about
the Meta description? So let's write, check out the, and now I'm going to add a
field project type project we have done for the
project name company. So let's preview it. Check out the UI design and app development project we have done for the
simplifying company. That's great as an IT. And since we are using fields, if I use these arrows, I can easily preview the search results of
other projects as well. Let's check it out. I'm going to click
on this right arrow. And as you can see, the
content changes here. That's very nice, isn't it? I'm going to scroll down and here for the open graph title, I'm going to check
these checkboxes. And for the image, I'm going to choose
the project image from this drop-down menu, and the image will be
changed dynamically as well. So if the user shares the
link of these projects, simplify, the thumbnail
will be this image, but for other projects, the thumbnail will be different, just like that and the image matches the content
here are right, cool. Now let me save it. So what else can we do in terms of search
engine optimization? Well, there are many things
we can do and we're going to cover the most important
ones in the upcoming videos. I hope you enjoyed this video and I'll see you
in the next one.
69. Site Verification & Google Analytics: Hey, welcome back. So far you learned what
SEO is and how we can optimize your web
pages in order to rank higher on different
search engines. But in this lesson, we're going to talk about site verification and
Google Analytics. When a new website is published, Google usually tries to
index it automatically, but sometimes it
takes so long for Google to go ahead and
check out our website, check different pages,
and rank our website. Therefore, we can go
ahead and introduce our website to Google manually. So how can we do that? To do so, we need to work
with two different platforms. If you go ahead and look
for Google Search Console, and here you can find
Google Search Console. I'm going to open it up. Here is the platform. It says Search Console tools and reports help you
measure your site, search traffic and performance fixed issues and make your site shine in
Google search results. That's exactly what we need. The other platform
we are going to work with is called Google Analytics. But first we're gonna
go ahead and verify our website using
Google Search Console. How can we do that? Well, it's so simple. First of all, make sure to go ahead and create a free account. And then if I go to
the project settings, and if I go to the SEO tab here, I can scroll down. Here it says Google
site verification, and here there is a link. You can also click on this
link to go to this website. That's totally up to you. Since I'm already logged in, I'm going to click on it. There we go. If you already verified
some website before, you might see this page, but if you haven't verified
any website before, you might see a dialogue. Okay, so if you're seeing
a diet unlike don't worry, I'm gonna go ahead and
show you what to do. But in case you have already
verified some websites, you need to head
over and click on this link and you need
to add a property here. Just add property. Then here we have two options. We have domain, we
have URL prefix. I'm going to select
the right option here. And here is where you need
to pace your website's URL. So if I go to my website, I can go ahead and
publish my website. I'm going to publish to
the selected domains, and here is our domain, okay? In your case, it's
definitely different because this URL is
unique to each project. So you need to open it up. Here. You need to copy this URL. Remember, copy this
URL completely including HTTP or HTTPS. So I'm going to copy it. I'm going to go ahead and go to the Google Search Console. Let me go ahead and create a property and let me
paste it right here. Hit Continue. There we go. And here there
are many different ways to verify the ownership
of this website. But let me show you
the simplest one. I'm gonna go to HTML tag here. And here as you can see, we have this tag click on this Copy button and paste
it on a text editor. There we go. Let me increase the
font size are right. Once you paste that here, you need to grab this content
code, just like that. Make sure to grab only the text between
these quotation marks. I'm going to copy it. And then if I go to
my project settings, I can paste it here. This is our Google
site verification ID. Then hit Save Changes. Nice, but here is
the important part. Once you save the changes, you need to go ahead and publish
your website once again, otherwise, it won't work. Don't forget this step. Okay, I'm gonna publish
to select the domains. Nice. Now let's go to
the Google Console, and here I'm going to
hit this Verify button. There we go. Ownership verified. Now I can hit done, nice, but since I have
different projects, I need to go ahead and choose
this particular URL here. If you have only this project, you don't need to
worry about it. And here on this search bar, I'm going to go ahead and paste the URL of our website,
which is this one. I'm going to copy it, paste it here, enter right here. It says URL is not on Google, but that's totally fine. It says this page is
not in the index, but not because of an error. That's fine because it
takes some time to work. However, we can go ahead and click on this request indexing. It says testing if live
URL can be indexed, it takes a minute or two
submitting your request. And there we go,
indexing requests that I'm going to click on. Got it. But how can we make sure
that everything went well? Well, we can go ahead
and click on this Test. Live URL are right, as you can see, it says URL
is available to Google. Url can be indexed. And also we can click on
this View test that page. And on the right side we
can see our website's code. We can go to screenshot. As you can see, there is a
screenshot of our website. More Info. Okay, Perfect. Now our website is verified. The next step is creating an
account on Google Analytics. So if you just go ahead and search google
Analytics and Google, you can create an account, it's totally free using
your Gmail account. And then once you are logged in, you will see
something like this. So what should you do here? You need to go to the admin here at the bottom of this page. And here we have different
options, account and property. You need to create
a new property are right here it says create a Google Analytics for
property to measure your web or app
data property name. I'm going to write
Seroquel design agency. And here reporting time zone, it doesn't matter for now, the currency doesn't matter. You can go ahead and
modify them if you wish. Hit Next. Here you need
to choose an industry. I'm going to choose computer and electronics, business size, small, and you can
just check some of these checkboxes for our
example, they don't matter. I'm going to click on
the Create button. Perfect. Now we need to
choose a platform, web, Android app and iOS app. I'm gonna go with web
because this is our website. And here we need to
pace our website's URL. We have the HTTPS here. So I'm gonna go ahead and copy only this part of the
URL and paste it here. And the stream name is gonna be just write something
like circle, agency and create
stream are right, it has been created. What do we need here is
this measurements ID. If you click on this Copy
button, you can copy it. And if you head over to
the project settings, you can go to the
integration step. Our right hand here we have Google Universal
Analytics tracking ID. You need to paste the
measurement ID that you copied here are right, Nice. Make sure that this
switch is enabled. Use global site tag and
hit Save Changes. Nice. And then remember to
publish your website once again, published
successfully. And now we can actually measure the performance of our website. Google Analytics helps you to understand a user's behavior, what they like, where they are, how they interact with your
website, and so much more. So it's essential for any website to integrate
with Google Analytics. So if I go to the reports here, I can see some statistics here. I can go to the
real-time. There we go. I can go to different sections, such as demographics, e.g. demographics overview. For now, since we don't
have any viewers, we won't get any data. But once we publish our website and we
drive traffic to it, you can head over to the
report section and you will see all kinds of
statistics and data. Right now I'm going to mention something important when you connect a custom domain to your website and you publish it, you need to head over to
the SEO section here, and you need to make
sure to disable Webflow SOP domain indexing. It's very important if
you don't disable it, Google and other search engines might rank your website
lower because there is a duplicated version of your website published
on a sub-domain. So always make sure to disable Webflow sub-domain
indexing just like that, and save changes and
publish your website. It's very, very important. All right guys, that's
all for this video. I hope you enjoyed it and I'll
see you in the next video.
70. Image Optimization & Lazy Load: Hey, welcome back. In this video we're
going to talk about image optimization
when you want to start building your
project and Webflow, the first thing
you need to do is prepare your assets, right? You need to export your assets
from your design software. No matter if it's Figma, Adobe XD sketch or
whatever software you use, and then you need to import
your assets to Webflow. In this video, I'm
gonna show you what's the proper
way of exporting your assets and how you
need to optimize them in order to improve the
usability of your website, and also in order to improve the ranking of your
website search engines. So if you're ready, let's begin. I'm going to go to
my design file. Here it's Figma. And here as you can see, we have different images that
we used in our project. Are you already exported them, but I'm going to
show you how you need to do them properly. So let's suppose I want
to export this card. First, I'm going to select it. And then if I head over to the inspector on the right side, I can just go to the export section and I can
click on this plus button. Here, I can specify
some preferences. First, I'm going to specify
the format by default, it's set to PNG. You can choose JPG, SVG, and PDF depending on the
software you're using, these formats may change, but most design software
support PNG, JPEG, and SVG. So what's the difference
between these formats? Well, let's start
with JPEG or JPEG. Jpeg is one of the
most popular formats that you can use
for your images. It has a very good
level of compression. Therefore, your image sizes will be smaller if you use JPEG, however, the trade-off
is you don't get transparent background
when you use JPEG. So in this case, since we
have rounded corners here and we need to get transparent backgrounds
for these cards. We can use JPEG, instead. We need to use PNG. Png is another popular
format that you can use for your images and it lets
you export your assets. We transparent backgrounds. Therefore, we can create some overlaying graphics
and it's so useful. But what about SVG? Svg is a vector file format. So if you create a
simple shape, e.g. if you create a circle,
let me show you. Just like that. You can export it
using the SVG format. So what's the difference
when you use the SVG format? This file will be
scalable without losing quality because
it's a vector file. But when we export an image, it will be a raster file, and when we scale it, it will lose quality. So whenever it's possible to
export your files using SVG, make sure to do that. However, it's only
possible for vector files. For instance, when you create a logo and your logo
is a vector file, make sure to export
it using SVG. But for these images, it's not possible to use SVG because these are
not vector files, these are raster files. So I'm going to
remove this circle. So SVG format provides you
with small file sizes, then J peg provides you with the smallest file
size, and finally PNG. So when you don't need to
get transparent backgrounds, you can simply use JPEG. But if you need
transparent backgrounds, you need to go with PNG. But why are we talking about it? Does it really matter
which format we use? Yes, it does. Why? Because your file size has
a direct relationship, your page load speed, and when you have a
low page load speed, Google will rank
your website lower. It's not what we want. So that's why we
need to optimize our assets in order to load our pages faster and in order to improve the usability
of our website. So let me show you how you
need to export your images. Let's suppose you want
to export discard first, you need to select it. Then you will head over
to the export section. And here you will specify PNG because you're going to need
transparent backgrounds. Here we can specify whether
we want this element to be exported at one x
to x, et cetera. What does it mean when
it's set to one x? It means you will get
the exact dimension that you have here. As you can see, its
width is set to 190 pixels and its height
is set to 216 pixels. It's fine. However, nowadays, more and more people are
using retina displays. Those screens
display twice pixel. So instead of exporting
our assets at one x, we can set it to two x. And now when we exported, the width of our file will be 380 pixels and the height
will be 432 pixels. So if a user has a white screen, it doesn't lose quality. This is the reason that you
should export at two x. But if your image
is too big already, you don't need to export
it at two x, e.g. if the width is set
to 2000 pixels, you don't need to
export it at two x. And remember when you use an
image element on Webflow, Webflow automatically
creates variations of your image for
different screen sizes. So it basically automatically
optimizes your images. But what about other images? Let's suppose you want to export this project image, okay? First you need to select it. Again. You can export it at two x. Or you can change the
image format to JPEG since we don't need transparent
background and so on. So let me export it at two x. There we go. Well, most design
software don't let you compress your images so they are not good with image
optimization. Let me show you what I mean. I'm gonna go ahead
and open up one of these images here in
the assets file, e.g. the first one, if I
check its file size, you can see that it's 600 kb. What do we can compress
it even more in order to increase
our page load speed. But how there are
different ways you can use Adobe Photoshop and you can
use the Save for Web option. However, there is a
better alternative. There is a website
called tiny PNG. If you go to tiny png.com, you can simply drag and
drop your images with the PNG or JPEG format
and it compresses your images for you
without losing quality. That's amazing. Let me show you how it works. I'm going to go ahead and drop one of my images here, e.g. this one, there we go. It's already finished. As you can see, the
original file size was 600 kb and the compressed
version is 146 kb. It's awesome. We decrease
its file size by 76%. Alright, I'm going
to download it. There we go. This
is our new image, although we compress it, it still has a high-quality. So you need to always
go ahead and compress your images before importing
them into Webflow. Alright, that's all about
image optimization. Now I'm going to talk
about lazy load. When I was explaining
different features or Webflow, I told you that we will
talk about lazy load later and that's exactly
what I'm gonna do now. So whenever you use
an image elements, if you go to the
Add panel and if you drag and drop
an image element, let me show you
what happens here. We have different settings. If you remember, we have the alt texts and here
we have the load option. Since 2020, all images by
default are set to lazy load. But what does it mean? Let me remove this
image elements. I'm going to select
this hero image. And if I click on
the Settings icon, I can see the load
option as well. If I open up this drop menu, you can see we have
three different options. We have lazy, eager, and auto. What do they mean when
it said too lazy, the browser will load this
image once it comes into view. So e.g. if I scroll down here, we have different
images and these images won't be loaded until
they come into view. So when we scroll
down right here, the browser will
load these images. This way. We can make sure that
our webpage loads very fast and it's
very good for SEO. But we can override
this setting as well. I can select this image, I can go to the image
settings and from here I can set it too eager
loads with page. So if I select this option
when the page loads, this image will be
loaded as well. Therefore, it's
more time consuming for the browser to
load our web page. You can also set it to auto, and it will behave based on
the browsers preferences. My suggestion is that you
should always set it too lazy. As I mentioned
before, by default, all your images
are set too lazy. But I'm going to
mention one more thing. This option only works
for your image elements. So if you just create a div black and if you use
the background image, it doesn't work for that. You need to keep that in mind. Our right guys. That's all for this video. I hope you enjoyed it and
I'll see you in the next one.
71. Custom Attributes: Hey, in this video
we're going to talk about custom attributes, one or custom attributes. Well, according to Webflow, you can use custom attributes to define characteristics
of HTML elements. Does it make sense
if it doesn't, let me show you how it works. For each HTML element, we can specify some custom
attributes to modify their behaviors or add some
custom characteristics. So e.g. here, if I select any
HTML elements like heading, and if I head over to the elements settings
on the right side, you can see here we have the
custom attributes section. And using this plus button, you can create a
custom attribute. Any attribute has a
name and a value. Sometimes they are quite useful, but most of the time
you won't need them. So let me show you how it works. If I preview my project and if I hover over these get
in touch button, you can see that nothing
appears and it's fine. But sometimes we
might need to get a tool tip indicating
what it actually does. E.g. when the user
hovers over this button, the tooltip should display
a word or a sentence like click me or contact
us anything this way, search engines can
also understand what this button does
or what a link does. So let me show you how it works. First, I'm going to
select this Martin. And if I head over to the
custom attributes section, I can create a new
custom attribute. And here for name, I'm going to write tidal. And for the value, I'm going to Right Click Me, Save, and we're done. Now, let's publish our website. I'm going to open it up. Now if I hover over this button, I should see a tool tip
that says click me. Let's see what happens. There we go. Can you see that tiny Tooltip? That's exactly what
we were looking for. But let me show you
another example. If I go to the Contact Us page and here in the full
name text field, I'm going to write something
random just like that. And as you can see,
checks the spelling. Can you see this red line
under this weird name? My browser is actually checking the spelling
of this name. It's not what we want for
the full length TextField. So how can we disable it? We can use a custom attribute. So let me head over
to the pages panel. If I go to the
Contact Us page here, I can select this text field. And if I go to the custom
attributes on the right side, I can create a new attribute. And here I'm going to write spell check without any space. And for the value, I'm going to write false. Should the browser
check the spelling, know that's why we set the
value to false and save it. Then publish your website. I'm going to go to
the Contact Us page, make sure to refresh your page. And now if I write
something weird, my browser doesn't
check the spelling. So that's one of the
most popular use cases of custom attributes. In fact, there are many different HTML
attributes that you can use and you can get
the full list here. If you go to W3 schools.com, you can find the HTML
attributes reference here. There is a list of
all attributes, but most of the time
we don't use them. But if you wish, you can
go ahead and take a look. Alright guys, that's
all for this video. I hope you enjoyed it and
I'll see you in the next one.
72. How to create a pop up?: Nowadays more and more
websites are using pop-ups to ask the users
to do something, e.g. registering for the
newsletter or entering their email addresses
or submitting a form. So in this video, I'm going to show you how you can create a pop-up easily
and conveniently. Are you ready?
Let's get started. In order to create
a pop-up, first, you need to understand the
structure of a pop up. A pop-up actually interrupts the user's interaction
with your website. So it actually blocks
the website usage until the user take
some actions, e.g. filling a form or
submitting a form. How can we create
such an interaction? Welfare's, we need a diblock. So let me hit Command
key or Control key. I'm going to write the block. There we go. I'm going to put this the
black right below my body. It doesn't matter where it is. But in order to organize
everything properly, I'm going to put it at
the top of my Navigator. Now let me give it a class. I'm going to write
pop-up wrapper. This pop-up rappers
should be fixed no matter if the user
scrolls through the page. So let's go ahead and
change its position from static to position
fixed, just like that. Then I'm going to set
its position to fool, as you can see, takes up the whole width and
height of our viewport. Here it says relative to body. Then I'm going to scroll down and let me give it
a background color. I'm going to give it a
black background Scholar, and I'm going to decrease its opacity to create
this overlay effect. Alright, I'm gonna decrease
it to 70 per cent. Nice. As you can see, this
pop-up wrapper now is a bomb for some
of our elements, but still there
are some elements that are above these
pop-up wrapper, although it's placed on top of our navigator, if you remember, I told you that
it doesn't matter where our element is
in the Navigator, we can always put our
elements on top of that. If we modify the Z index here, I'm going to set
the Z index 29999. And this way I can make sure that this pop-up wrapper will always be on top of all
elements, just like that. Now as you can see, all the other elements are
behind this pop-up wrapper. Alright, cool. And if I scroll down, you can see that it's fixed. The first part is done. Now inside this wrapper, I'm going to create
a new div block. And that block can
contain anything. It can contain a form block
or a text, anything you want. But in this example, I'm going to create a form blank why this wrapper is selected. I'm gonna hit Command
key or Control K. Let's look for a diblock. There we go. And here I'm
going to give it a class. This time, I'm going to write pop-up underscore,
underscore model. And here I'm going to specify
the width and height. It's going to be 500
pixels by 300 pixels. And let me go ahead and give it a white background Scholar. Alright, now it's positioned
on the top left corner, but we want to center it. How can we do that? It's so simple. First we need to select
our pop-up wrapper. Then we need to just change the display setting to Flexbox. As you know, we need to
modify the alignment to center and the justification
to center as well. So in this pop-up modal, we're going to
have a form block. So while it's selected, I'm gonna hit Command
key or Control K. And let's look for a
form block. There we go. The form block has been added. And here I'm going to give
this form block a class. Let's write pop-up
underscore, underscore form. Okay, Let's set
the width to 100%, and I'm going to set
the maximum width of 400 pixels for that, but it's not centered. So I'm going to select this
pop-up modal and I'm going to change its display
setting to Flexbox. And let me change
the alignment to center, just like that. Alright, here is
our simple form. We're not going to change
the styling because I just want to show you how you
can create a pop-up. Alright, once the
pop-up shows up, they users should be able
to close it as well. So we're going to
need a close button. I'm gonna go ahead
and add a text link here inside our pop-up wrapper. Make sure that it's nested inside our pop-up
wrapper. There it is. I'm gonna give you the class. Let's write pop-up. Underscore, underscore, close. I'm going to change its color
to white that we could see that let me modify the
decoration to none. And here I'm going
to write close, but its position is wrong. Go, I'm going to place it
on the top right corner. So while it's selected, I'm going to change its
position to absolute. Nice. And then let me
position the two top right. There it is. Using these amounts here, I'm going to set its right
position to maybe 8%. It's tough position to
eight per cent as well. Our right, our pop-up is ready, but how can we actually
use it right now, if I preview it? You can see that I cannot
interact with the website. And if I click on
the Close button, nothing happens because we didn't create any interactions. So now it's time to go ahead
and create our interaction. But first, I'm going to
select this pop-up wrapper, and then I'm going to
change its display setting from flake spikes to none because I'm going
to hide it for now. Okay, now we're
going to need to go ahead and create interaction. But what kind of
three years should be created if I go to
the interaction, as you remember, we can create the elementary gear
or the page trigger. It's totally up to you. You can create an
elementary year, e.g. if the user clicks on a button, that pop-up should show up or even you can create
a page trigger. So e.g. when everything is
loaded after three or 4 s, the pop-up should be displayed. First, I'm gonna go ahead
and create a page trigger. We already created the page load and we use this hero animation. We can use this one or you can
use another page to rigor. I'm going to use
page load again. And here when page
starts loading, great, start an animation and I'm going to create
a new animation. So let's call it pop up or pen. Nice. And here we need to
create some actions. First, wine, this pop-up
wrapper is selected. Go ahead and create an action. The first action is
gonna be opacity. By default, it's opacity should
be set to zero per cent. And we are going to enable the initial state
just like that. Then I'm going to create a new keyframe and I'm
going to choose Opacity. Let's turn its opacity
back to 100 per cent. And in-between, I'm going
to create another action, but this time I'm going
to choose Hide Show. If you remember, we said it's
displayed setting to none. Now we need to change it back
to Flexbox just like that. Let me break it down for you. First, we set its opacity to zero per cent by default
because when the page loads, we shouldn't see
it and it's also hidden so we can
interact with the page. We will change its display
setting to flex max. So now it blocks our
websites use edge, and then we will increase
its opacity to 100 per cent. However, there is one problem if I save it and if I preview it, you can see that when the page loads that pop-up
shows up as well, That's not what I want. I want all of these
elements load first. And after 3 s, this pop-up should sharp. So let me go ahead and
modify the delay here. I'm going to select pop-up
wrapper hide, show, and I'm going to increase
the delay two or 3 s, just like that. Let me save it. Now. Let me preview it again. Are right, everything
loads. There we go. So first everything loaded and then this pop-up showed up. That's exactly what we want it. Alright, but how can
we close this popup? It's so simple. We need to go ahead and create a new trigger. So if I just close
this page load here, we can go ahead and select our pop-up close link
that we created. And then we can create
an element triggered. This time, I'm going
to choose a mouse click or tap on first click, I'm going to create
a custom animation. We're going to create
a new animation, and I'm going to call
it pop up close. What should we do here?
We need to do two things. First, we need to
decrease the opacity of our pop-up wrapper
to zero per cent, and then we need to set its
display setting to none. Why should we do that? Because if we just
decrease the opacity from 100 per cent
to zero per cent, we will hide it, but it's still there. It's still blocking
our websites usage. We need to set its
display setting to none that the user could
interact with our website. It's very important. Make sure not to forget that I'm going to
select pop-up wrapper. I'm going to create a
new action opacity, and let's change its
opacity to zero per cent. Let's create a new
keyframe, hide, show, and I'm going to set its display setting to none and save. Let me go ahead
and preview that. There we go. Everything loads. Nice. This is our pop-up. I can scroll down. It's still there. And if I click on
close, There we go. It's closed. And I can again interact with
my elements are right guys. That's how you can create
a pop-up inside Webflow. I hope you enjoyed it and
I'll see you in the next one.
73. Custom Code & Integration: Hey, welcome back. In this video we're
going to talk about custom code and third
party integration. I know that I told you
that we're not going to code and that's 100% true. But sometimes if you want to add some functionalities
to your project that Webflow doesn't offer. You can integrate some
third-party services into your Webflow project by just copying and pasting some code. You don't need to know
how to write code, you just need to know
how to use that. As I mentioned before, the custom code feature is
only available for paid plans. So if you're using
the free plan, unfortunately, you
cannot use that. However, I wanted
to show you how it works in case you want to upgrade your plan in the future. So if you're ready, let's begin. First of all, here we
have this empty canvas. This is a new project. And if I want to use
some custom code, I have different options. If we want to add the custom
code to the whole project, to all pages, to
the whole website. I can head over to the
project settings and I can go to the custom
code tab here. And I have head code
and I have footer code. But if I want to add
some custom code to a specific page of my project, I can do that right
in the designer. Let me show you how. So here is our empty canvas. I'm going to go to the Add
panel and I'm going to scroll down here
under the components, you can see that I
have this Embed. It's not available
for free plan. Therefore, if you
want to use that, you need to upgrade your plan. So I'm going to drag and
drop it here. There we go. Now we have this HTML
embed components. Here we can paste
in our custom code. It works like any
other elements. You just need to pay some
custom code here and save and close and make sure
to publish your project. So let me show you how it works. Let's suppose you want
to create a survey or a form that gets the user's information
for a specific reason. So you can use a service
called type form. It's a very popular service. Let me show you how it works. Here is they're landing page. It actually allows you to create some surveys or forums
easily and conveniently. And you can modify the design
of your form, the settings, everything you can
possibly imagine, and it has a free plan as well, so you can use it for free. So first you need to
go ahead and sign up, create a free account. Then you can simply
create a form. We are not going to dive into
the details because it's so simple to create a tie forum. I just want to show
you how you can embed this form
into your project. So here is the form
that I created before. Let me show you if I
go to my dashboard, I have this RSVP. I can click on it. I can
modify the questions. I can modify the choices
or answers here, and then I can publish it. Once it's published,
I can head over to the Share tab at the top here, I can head over to the embed
in a web page section. You can choose whatever
option you want. If you need a pop-over, you can use this option. If you need the slide tab, you can use this option. I'm going to use the standard. And here I'm gonna get
the code just like that. I'm going to copy the code. And if I head over to
my Webflow project and I paste it here, you can see that the
code is in one line. Therefore, if you
want to check it out, you can simply scroll
horizontally just like that. Now I'm going to save and
close and make sure to publish your website because
it doesn't work if you just preview
your website here, okay, so you need to publish it. Then you need to open it up. And let's see what we have. There we go. Here is our type for imbedded here
into our project. So if I just write our
ash and then lastName, Ok, here Let's
writetest@gmail.com. And then I can choose from
one of these options. Let's write UK. And then I'm going to choose
one of these options, e.g. Figma and submit. There we go. Done your information
was sent perfectly. And if I head over to the
type form website here, if I go to the Results
tab right here, I can see the form
that they just sent. If I go to the responses, here it is, I can simply
see all the answers here. It's a very useful service
that you can integrate to your Webflow project
and you can use it for your future clients
projects as well. So can you see how simple it
is to just copy and paste some custom code and improve the usability
of your website. Now let me show you
another example. Let's suppose your
client wants you to create a booking
system for him or her. How can you do that? Well, you can use
another service. There are actually many services out there that you can use. However, I'm going to show you a very popular service
called Calendly. If you just go ahead and create an account
on their website, here is they're landing page. You can use it for free as well. I'm going to just go ahead
and show you how it works. So first you need to just
create an event by default, you will have this demo event. You can also go ahead and create your own events or a
one-off meeting here. Once your meeting is created, you need to click on
this Share button. And then you need to go to
the Add to website tab. And here I'm going to
use embed in line. Just like that, continue and
here we will get the code. You can modify the
design simply here, you can just modify
the settings as well. Then if you just copy the
code and head over to your Webflow project and
you just paste it here. I'm going to remove the previous custom
code that we added. I'm going to paste it here. Save code, publish, and we
are done. Let me open it up. Here it is. Our booking system
is ready for us and our users can simply
book a meeting with us. Let me choose a date, e.g. this one, then the time. Confirm here I'm going to just write our ash andtest@gmail.com. And finally, I'm going
to write a message. We are talking
about custom code. Then I'm going to
schedule the event. And there it is, the confirmation you
are scheduled with our ash and here is
the information. And if you go to Calendly and here under the
Scheduled Events tab, you can find all the upcoming
events here just like this. If you want to modify
or rescheduled event, you can simply do that. You can just cancel
the event as well. Here is the message. There are tons of options
you can use here, alright, if you want to get a list
of all the services that you can integrate into
your Webflow project. You can head over to
this URL university, that webflow.com
slash integrations. And then here there is a list of all the services that you can integrate into your
Webflow project. Just like that, we
have Shopify, Zap. Zap here is so useful as well. If you want to just connect different services and integrate
them with your project, you can use the app here, definitely check that out. You can use other
services as well. You can eat this next button
to see, are there services? There are many different
services you can use and they are so handy. So that's why I
wanted to show you how you can use custom
code in your project, because you can simply just
copy and paste one line of code and easily add an advanced functionality
to your website. Alright, the last example I
want to show you is this. There is a very cool website
called CodePen, CodePen.io. And if you go ahead and
create a free account here, you can just use
some cool effects. There are many different
effects here that you can use. As you can see, for each effect, you will have the HTML
code on the left side, the CSS here, right at the
middle, and the JavaScript. Okay, so let me show you
how you can use that. Here is the fact that I
chose, as you can see, it's so cool, but
how can I use that? It's so simple. First, you need to grab the
HTML code on the left side. I'm going to copy it. And if I head over to
my custom code here, I'm going to paste
it right here. So I'm going to remove the previous custom
code that V paste it. And I'm going to paste it
right here, save and close. The first step is done, but we're not done yet. Why? Because this effect
requires the CSS or styling and also it
uses the JavaScript. We need to add the CSS and the script into
our page as well. How can we do that? If you go to your
page settings here, and if you scroll down here, we have the head
and the body tag. We need to paste the CSS
code here in the head tag, and we need to paste the JavaScript code
here in the body tag. So let me go ahead and
copy the CSS code. And I'm going to
paste it right here. But as you can see,
workflow doesn't recognize this CSS code. Why? Because everything is white. So first, I'm going to remove these additional lines
of code at the top. We don't need that. We
need to have the body in order to make Webflow understand that
this is a CSS code, we need to use the style tag. Why? Because CSS is
actually for styling. So I'm going to create this title tag just like
that. And there we go. Now we've got all these colors. And it means that Webflow understands that
this is a CSS code. But once you create
the style tag, you need to go ahead
and close that. So it's so simple. You just need to write a forward slash and
just write style. There we go. The
first part is done. Now we need to go ahead and
copy our JavaScript code. Alright, now I'm
going to copy it. Let me go to Webflow. And here right in the body tag, I'm going to pay what again, Webflow doesn't
recognize that as a JavaScript code because
everything is white. So first, I'm going to go ahead and remove these
comments at the top. As you can see, this is a
comment that's not a code. I'm going to remove that. And here we need to
create another tag. What kind of tag? Since this is a
Java Script code, we need to create a script tag. So let's write script. Whoops, script. There we go. Now we've got all these colors. I'm going to go ahead
and close this tag, a forward slash script
R, right, cool. Now let me save it. And if I publish my project, and if I open it
up, There it is. Here is our cool effect. It's amazing, isn't it? But how can we
change these words? It's so simple. You need to head over to your page settings here. If I scroll down right in the JavaScript code here
we have this text cons, and we have all the words, and each word is between
two quotation mark. You can simply go
ahead and modify it. I'm going to just modify
one of these words, e.g. why is this so
satisfying to design? Okay, I'm going to save it
and I'm going to publish it. Remember to publish your
website whenever you are using custom code and
let me open it up. Why is this so
satisfying to design? There it is. How cool is that? Alright guys, can you
see how simple it is to use custom
code in Webflow? I hope you enjoyed
this video and make sure to go
ahead and check out the Webflow integrations
list because there are many different
services that you can integrate into your
Webflow projects. I just copying and pasting some custom code are right guys. I hope you enjoyed this video and I'll see you
in the next one.
74. Lottie Animation: Hey, in this video, I'm going to show
you how you can use Lottie animations
in your projects. If you open up our
Seroquel project that we created together, you can head over to the
Contact Us page here. As you remember, our form
had three different states. It had the normal state,
success and error. So if I just select
this contact form in the navigator and I go to
the success state here. You can see that we have this simple message
with a gray background. It's fine, but we can
make it look even better by adding a Latina
animation here, e.g. we can add a conformation
animation here. How can we do that?
First, I'm going to select this success
message div blank here. Then I'm going to head over
to the bank runs image. And I'm going to make it
transparent because we don't need to get any
background color. Just like that. I'm going to decrease
the opacity to 0%. Alright, cool. Now I'm going to add a Lottie
element to this diblock. So while this div
black is selected, I'm going to head
over to the panel. And from here, I'm
going to drag and drop this lovely animation and put it right above my text
block. There we go. Here is our Latino
animation element, but we don't have any
loyalty animation file. Where can we get one? Well, you can go to a
website called Lottie files.com and it's the
official website of Lottie. There are great resources
you can find here, but what we need is just go
ahead to the Discover menu. And from here, I'm gonna
go to free animations. And here you can explore many different free animations created by different
contributors here. As you can see if I scroll down, there are many cool
animations here, and you can simply
use them for free. You can go to other
pages as well. And depending on your needs, you can choose between them. So what do we need actually? Well, we're looking for a
confirmation animation. So using this search
bar at the top, I'm going to look
for confirmation. Are right, hit Enter, and let's see what we get. And as you can see here, we have tons of different options. Let me see. I'm going to choose this one, the third one, you can
choose whatever you want. I'm gonna go with this one. And now I can simply click
on this Download button. And I need to download
the latae JSON file. To download the file, you need
to create a free account. So make sure to go ahead, sign up first, are right now I'm going to hit
over to Webflow. And I'm gonna go to Assets, and I'm going to
drag and drop my lithified into my assets. Okay? Okay, there it is. And then I'm going to select this lovely animation elements. If I double-click on it, I can replace this
lovely sequence. I'm going to choose
this JSON file and I can preview
this animation. Alright, cool. However, it's too big. So while it's selected, I'm gonna go ahead
and give it a class. Let me write latae animation. Then I'm going to give you
the specific maximum width. Let's write 100 pixels. That's fine, but
it's not centered. So I'm going to click on
this little button in the spacing section to set the left and right
margin to auto. And then I'm going to give
it some bottom margin. Let's add a 20 pixel
bottom margin here. I think it would
be enough. Nice. Let me preview it. Are right, it looks good. However, we need to go ahead
and publish our website and actually test it on
our published websites. So I'm going to publish it. And if I opened it up here, I'm going to fill this form. Let's write RH. And here I'm
goingtowritetest@gmail.com. And then let's write a message, hello and submit our right, we will see this image but
the animation doesn't play. So what's wrong? How can we fix that? Well, to fix this issue, we need to use the Webflow
Interactions section. Why? Because we need to
create an element trigger, to trigger this animation. Let me head over to the
interactions panel. And from here I'm going to
create an element trigger. And our element is gonna be our submit button,
this primary button. So please select it
from the navigator and create an element
trigger, mouse-click, tap. Then I'm going to create
a new action here. It's going to be a
custom animation. Here I'm going to create
a new animation and let's write latae animation. Okay, nice. So what should we do here? Now we need to select our
lighting animation element, and then we need to
create an action. Here, as you can see under
the integration style, we have Lottie, I'm
going to choose loyalty. There we go. If I scroll down here under the latae section, you can see that they
can control the frames. I'm going to set it to zero per cent because this
is our start point. I'm going to create
a new action latae, and then let's turn
it to 100 per cent. If I preview it, it looks fine, but
it plays so fast, so I'm going to change
its duration to 2 s. Let me preview it. It's much nicer, Isn't it? So let me save and we're done. So now I'm going to
publish my website here. And then I'm gonna go ahead and refresh this Contact Us page. Let me fill this form again. I'm going to write our ash. And here let's
trytest@gmail.com. And for the message,
Let's write hello. I'm going to hit
the Submit button. There we go. Our Latino animation
plays perfectly. So this is basically how you can add custom animation
to your website. And if you want to create
your own animation, and if you're familiar with the software, Adobe
After Effects, you can easily download the naughty plugins and then you can create
your animation in Adobe After Effects and export your latae JSON file and
import it in Webflow. It's very simple. And this way you can create some custom animations
for your project. You can also ask and motion graphic designer to
do that for you. Alright guys, that's
all for this video. I hope you enjoyed it and
I'll see you in the next one.
75. Naming Convention: Hey, in this video
we're going to talk about naming convention. Well, when you build a website, you use many different
CSS classes, just like what we did
in our own project, the circle agency project. And as you create more
and more classes, it gets harder and harder to maintain and organize
all the classes, combo classes, global
classes, everything. So in this video, I'm
going to introduce you to a very popular naming convention that you can use
in your projects. It's called bam. Bam stands for block
elements and modifier. Does it sound complicated? Don't worry, I'm going to
break it down for you. So first, I'm gonna go ahead
and create an elements. I'm going to just drag and
drop this navbar element here. And this navbar doesn't
have any class. So let's suppose we want
to create a class year. How should we named it? Basically, it's
totally up to you. You can use your own
naming convention as long as you can keep your classes organized and you understand what you're
doing, it's totally fine. But if you're
working with a team of developers and designers, it would be better to use a naming convention
system That's all other developers understand. So how does the system work? Well, as I mentioned before, it stands for block,
element and Modifier. So what does block refer to? Block is our main element. For instance, here in this case, this navbar is our block, therefore, we're going to
just name it nav bar. Okay? So we created our base class. Then if I extend it
in the Navigator, we have a container here. This container is
going to be named container because this
is another block. This is a main block. And then inside
we're going to have different elements
like this brand link. We have this Nav Menu and these nav links and also this Menu button
which is hidden. So let's suppose we want
to name this brand link. How can we do that? First, we need to
write our blockName. What's our main block? It's navbar, rewrite navbar. And then we use two
underscores just like that. And then you need to write
the name of element. Here it's going to be
logo, just like that. Now we have our black name
and our element here. Okay, But what
about the modifier? Well, the modifier refers
to our combo classes. So for instance, if I
just go ahead and select this nav link and I
just give it a class. Let's write nav menu. Underscore, underscore nav link. Okay, so here we have our block and then we
have our elements, and this link has
some properties. But let's suppose
we want to override these properties
using a combo class. Then we can go ahead and
create a combo class. And this combo class is
going to be our modifier. Let's suppose we want
to change the color of these home link, e.g. to read. In this case, I can create a new combo class and you can
write something like this. You can write dot
is dash, dash, red. Okay? Then you can go ahead and modify the color right in the
typography section to read. And here this dot is dash ash, red is our modifier. You can name it
however you want, but this is how
the system works. If I want to create
a new modifier, I can remove this class
and then I can write that is dash, dash green. For instance. Let me go ahead and modify
this color to green. Something like this. And now I can simply switch
between these modifiers. It says is green is read. The whole point of using this naming convention
system is that you can simply understand what
each class does, e.g. here, you can immediately
understand that it's, a modifier, is green, is red. You can create different
modifiers like is big, is large, and e.g. if I choose navbar logo here, you will immediately
see the blockName, which is navbar, and
then the element logo. And you can simply
organize all your elements within the navigator when you
use this naming convention. But again, it's totally up to you how you name your classes, as long as you keep them
organized and understandable, you are free to use any naming convention
system you want. But remember, you may
work on a small project and you may use your own
naming convention system. And it works perfectly. However, if we apply the same naming convention
to a large-scale project, you may face difficulties
because if you create hundreds of different pages and
hundreds of different classes, it could be a challenge to
organize and understand all the combo classes
and classes you create. So in that case, you can use
the BAM naming convention. Are right guys. I hope you found
this video helpful. I see you in the next video.
76. Introduction to the Freelance World: Building a successful
web design business is a challenging task that requires a
tremendous amount of energy and many skills. So far, you'll
learn how to build a modern and fully
responsive website with complex interactions
and animations. I'm so proud of you, but you still don't know about the business side of the
freelancers journey. So in the upcoming videos, I'm going to walk you through
the freelancing process. As a web designer
and web developer, we will talk about
acquiring clients, preparing proposals,
pricing your work, and so much more. If you want to
know how to create a successful web design
business for yourself, make sure to check out
the upcoming videos.
77. How to get clients?: No matter how good
your design is, if you can sell your services, I'm afraid to say
you will be out of this business
sooner or later, but we are not going
to let that happen. So let's assume you have
no prior web design and web development experience and you want to start from scratch. What do we need to do to
get your very first client? That's a simple question, but the answer is
not that simple. Why? Because there is a set
of things you need to do to get your first client. To get a client first, you should understand
how clients think, what matters to them and
what they want to achieve. A client always
needs to trust you first before signing
the contract with you. So how can you gain
the client's trust? Well, you need to
show them that you're capable of doing what
you're offering, how, by presenting
your portfolio. But wait, you didn't
have any clients. What should you show them? The answer is, you need to
create some sample projects. To do so, you can look for
some local businesses around you and see if their websites
require some improvements. You can redesign their websites and build them in
Webflow quickly. Remember, it
shouldn't be perfect. Then you can reach out to them and show them what you've done. You can simply say, Hey, I'm a web designer and I thought maybe your website
needs to be updated. Here is the before and
after of your website, and I would be glad to
offer my services to you. This is the easiest way to get started and get
your first client. Additionally, you
can post your sample works on social
media like LinkedIn, instagram, Facebook, et cetera. This Way, more and
more potential clients will see your work and
they may reach out to you. You can also post your sample projects on
Behance and dribble. These platforms are
a great place to show off your design and
web development skills. The next thing you
need to do is create an account on a
freelance marketplace. There are many marketplaces that help you get clients
conveniently, like fiber, freelancer,
Upwork, et cetera. I suggest freelancer.com, but
you can be on any of them. Create your profile and add
your sample works to it. In the beginning,
it's harder to get clients because you
didn't get any reviews. But once you complete a few projects and
get good reviews, it becomes much easier
to acquire new clients. I'd like you to know
that freelancing is all about connections
and relationships. So if you type two
different clients, but they didn't give you
the project, that's fine. It's part of the process. They may reach out to
you after one year or so and give you
another project. So it's so important to create
great relationships with everyone because who knows they may be your future clients.
78. Sending a proposal: Once you find your
potential client, they will ask you to
send them a proposal. And it's one of the most
important stages of freelancing. If you do it right, you will dramatically increase the chance of
getting the project. Many beginners struggle with this stage because they
prefer to spend time on designing and
building a project rather than preparing
a great proposal. But let me remind you something. If you can't get the client, there is no project to do. So it's worth focusing more
on this stage as well. Now let's talk about
the proposal itself. How should it be structured? What information
should be included? When it comes to
preparing proposals, there is no right or wrong way. You can choose between
different styles, different layouts, and so on. Here is how I structure
my proposals. Each proposal should have
seven main elements. Number one, introduction. This section is mainly
written based on the previous conversations
you had with the client. You can include the client's
name, the project's title, the name of your
point of contract, your name and title, and finally, the
submission date. Here is an example of
a good introduction. Number two, problem overview. Once you introduce
yourself to the client, the next important section that follows is the problem overview. In this section,
you should clearly define the problem
and the client should understand that there
is an issue with their website that has a negative impact
on their business, the client should also understand that you have a
profound understanding of their problems and
you can clarify your responsibilities and
the project scope here. Remember, the main goal
of a project proposal is to make your client believe
you can solve their problems. So always focus on the
client's needs and issues. Here is an example of
a problem overview. Number three, solution overview. After defining the
company's problems by conducting different
pieces of research, it's time to convince
them that you can solve the problems by providing
a detailed solution. In this section, you should
explain how they can benefit from using your
services to solve the problems. And most importantly, what you're gonna do to
solve their problems. As you can see here, we have a very good solution. Overview, number
four, deliverables. This section should clearly
define what you will deliver as part of the
project and most importantly, what you will not deliver. You may think it's strange to exclude once we do nuts deliver, but believe me, when you work
with inexperienced clients, sometimes they expect you
to prepare their content, logo, images, and even optimizes their website
for search engines. It's your responsibility
to clarify what is and is not part
of the project scope. Number five, process overview. After defining the
problems, solutions, and deliverables, you should explain what your
process looks like. This section can outline
different steps of your process, like the initial meetings, preparing the assets,
designing a wireframe, etc. You can also indicate
how long each step takes and what you expect from the
client during this process. Number six, the cast. Now it's time to outline
the cost of your services. If you don't know
your clients budget, make sure to ask them before
preparing the proposal. Because otherwise,
you might ask for a very high price
or a meagre price. Remember, it's
totally fine to ask the client about their
budget in advance. So don't be afraid
of doing that. If you don't know how to
price your work, don't worry. In the following lesson, we will talk about it deeply. Number seven, CTA
or call to action. In this section,
you should prompt the client to proceed
to the next step, accepting the proposal
and signing the contract. If you send your proposal
as a PDF or Word file, you can ask them to send you an email and let you know
about their decision. I don't really recommend
this way. Why? Because of many reasons such
as PDFs or not responsive. Therefore, if the client wants
to read it on their phone, it would be problematic. The second reason
is PDF's wants let the client accept
the project and sign the contract immediately. So instead, you can use an online proposal
tool that lets you design and prepare the proposal professionally and conveniently. This way, we can send the proposal as a webpage
that is responsive, password protected,
and editable. In addition, your client
can simply click on the Accept Martin and
immediately signed the contract. How convenient is that? I personally use this website to prepare this
proposal for free. There are many tools
like this that you can use for this purpose are right, that's all about
proposal preparation. I hope you liked this video
and I'll see you then.
79. Pricing Your Work: Pricing plays an important
role in any kind of business. And you, as a freelancer, should know how to price your work to succeed
in this business. Many of you expect me to give you a magical number right now. But there is no magical number
when it comes to pricing. There is no standard
formula that gives you the exact price point you should choose for your services. So how can you decide how much you should
charge your clients? Especially when
you're just starting. Well, there are many factors
that you should take into consideration when
it comes to pricing. First, let's talk about
the pricing models. There are generally
three pricing models that you can choose from. Hourly rate, flat rate,
and recurring rate. Let's start with
the hourly rate. If you charged $60 an
hour and the project takes 60 h, you charge $3,600. This model is pretty
straightforward because the client can easily understand how
much time each step takes. But there is a downside to that. You need to keep track of the hours you spend
on the project. Because sometimes the
client might change the project scope and it may take much longer to deliver it. Now let's talk about flat rate. It's an effective way of
charging your client. Why? Because you set the
expectations once and you charge a fixed
price for that project. Let's suppose you
charge for $1,000 for a project that takes
you 6 h to build. It's a 66 dollar hourly rate. But here's the point. When you choose
this pricing model. You need to keep in mind that
you still need to charge a fixed price no matter how long it takes to
complete the project. So if it takes you
80 h instead of 60, it's a 50 dollar hourly rate. On the other hand,
if you manage to complete the project in 50 h, it's an 80 dollar hourly rate. The last pricing model
is the recurring rate. It works like this. You charge the client a fixed amount for a period of time, let's say $600 monthly
for 12 months. It has some advantages
and disadvantages. When you charge the
clients monthly, they don't need to pay
the whole price upfront. Additionally, you
may provide them with a recurring
support service, but here's the catch. When you choose to
charge the clients over a long period of time, you need to clearly define what you are going to
provide them with. Because otherwise, they
may expect you to do lots of work since you're charging
them over and over again, if you're looking for a
steady source of income, it would be a good
choice for you. But I personally don't use this revenue
model because there are so many different variables
that are hard to manage. Now let's talk about
the price itself. The price you set for your work depends on the
value you provide. Remember, there is a correlation
between price and value, and you should always
price your work based on the value you provide
to the client's business. There is always a
market value for everything from gold to
real estate to cars. But you need to understand that you define your own value. If you price your work very low, you automatically
diminish your own value. On the other hand, if
you price your work, you're very unreasonably high. You will be out of this
business because you can hardly find someone who
agrees on your value. But anyway, that's the
decision that you should make and you should
set your own value. Of course, when you value
your work very high, you should deliver a
top-notch project as well. Sometimes a client
approaches you and asks you to do
something for free. And they say that you
can add this project to your portfolio and it's good
for your future career. Let me tell you something. Never, ever do a project
for free because your work has value and no one should
undervalue your work. So even when you're
just starting out, don't do free projects. You can start with a
lower price point, but not totally free. If you go to different
freelance websites, you can easily find the
average price point for the services you offer and
set prices accordingly. You can also adjust them
based on your experience and the value you provide when you set your numbers, stick to them. If a client says, I found someone else that does the same thing for
a lower price, you could politely reply. I understand, But based on the value I provide to
you and your business, I think my price is reasonable. So which pricing model
do I suggest you use? I personally prefer the
flat rate revenue model. Why? Because as you become more
and more confidence and you gain experience in web
design and web development, you can complete the
projects faster. Therefore, it would be more
beneficial to you to use the flat rate revenue
model because you don't charge
per hour this way, your hourly rate will increase as you manage to complete
projects faster. Remember, when you
complete a project faster, it doesn't mean you should
undervalue your work. The reason you're able to
complete projects faster is the fact that you are more experienced and
you practice more. Let me give you an example. Let's suppose a web developer
can develop a website and 60 h and his or her
hourly rate is $50. We call him or her developer one another developer
can develop the same website in 30 h and he or she charges $100 per hour. We call him or her developer to which one is more
beneficial to the client? Yes, you are right. Developer to because
he or she charges the same amount of money
as the developer one does, but delivers the
project much faster. The second developer
could charge even more like $200 per hour and still be beneficial to the clients
because he or she delivers the project faster
than the first developer. Remember, you can modify your price points
whenever you want. So for instance,
if you have done some projects and feel you didn't charge the
clients enough, you can increase your prices
for your future projects. There is no limit
in this regard, but always keep track of your price points and
the changes you make in order to come up with
the best price for your services in the
future, are right guys. That's all about revenue
models and pricing. I hope you enjoyed it and I'll
see you in the next video.
80. Meeting Your Client: Many inexperienced designers and developers think
that we meet with clients because
they want to ask us some questions about
us and how we work. But this is not all. The reason we meet with clients is to
exchange information. They ask questions
and we ask questions. We want to truly understand
how their business works to be able to
solve the problem. So always prepared
some questions Before going to meeting. These questions may vary depending on the
type of project, but the main point is just took familiarize yourself
with their business. Some clients may ask you about your process and
it's totally fine. You can explain to them what the whole process looks like. Some of them may want you to
develop a WordPress website, maybe because they heard
it's good or they are just familiar with the
WordPress interface. Two scenarios could happen. First, you may think
that according to their budget and
also their needs, it would be better for them
to have a WordPress website. And it's your responsibility
to guide them and say, you need to look for a WordPress developer to
help you build this project. You can also introduce
them to someone if you know a good
WordPress developer, because we don't want to
get a client at any cost. We want them to be happy once
the project is completed. The second scenario is that you think that you're wrong and it would be much better
for them to have a custom workflow website. In this case, you
need to convince them why Webflow is more
suitable for their needs. You can mention
the features that workflow has and
how convenient it is to work with the Webflow
editor and many other things. So you should actually educate your clients because
they may have never heard a Webflow before and they just heard
about WordPress. In the upcoming video, we will talk about selling
Webflow to your clients. So see you then.
81. Webflow Pitch: Our right. So you have a meeting
with a client and you want to
sell them Webflow, how to do that? First of all, you need to
ask them a few questions to see if Webflow is the best
choice for them or not. Because as I mentioned before, it's not right to push them
to use something which is not good for them just because we want to
get the project. So what should you ask them? You can ask them the
following questions. What do you expect
from your website? What features should it have? You need a CMS. What about security? Does it matter to you? How often do you need to
update your website's content? Do we care about speed
and scalability? These questions will help
you truly understand their needs and focus on the
things that matter to them. For instance, if they
care about speed, you can talk about that. You can let them know that
Webflow is powered by AWS, which stands for
Amazon Web Services, which makes their
website load very fast. In fact, AWS is one of the most secure and fast hosting
options available, trusted by big companies. They care about CMS. You can explain how
easy it is to work with Webflow CMS, what
about scalability? You can tell them
they don't need to worry about anything, no matter how much traffic
they drive to their website. Workflow can handle that easily. If they already worked
with WordPress, you can ask them
what they like and dislike about it and
just focus on that. Now let's talk about
the differences between Webflow and WordPress. They are like Mac
OS and Windows, each has its own advantages
and disadvantages. And you need to choose
between them based on your needs and preferences. Workflow is a
relatively new tool, but WordPress is
well-known and very old. That's why most clients may
be familiar with WordPress, but it doesn't necessarily mean that it's good for
them to use it. Workflow uses the
latest technologies to build a clean and
modern websites. On the other hand, WordPress uses all technologies like PHP. Webflow doesn't
require any plug-ins to create custom webpages, but WordPress relies on many different plugins
for almost everything. That's why Webflow generates a much cleaner code
compared to WordPress. Workflows features are paid
and it's not open source, but WordPress is totally free and you just need
to pay for hosting. Webflow gives you
complete design freedom, whereas WordPress is
restricted by templates. So these were the most
important differences between Webflow and WordPress. Now I'm going to show
you a very cool way of presenting Webflow
to your clients. Webflow has created an
innovative way to let us easily convince our clients
and friends to use Webflow. If you go to webflow.com
slash peach, you can enter your name
and e-mail address and start creating a
customized presentation. You can write your
client's name here, upload a screenshot of
their current website, and then you can go through the slides and
customize some of them. E.g. here, I can
choose an option from this drop menu and the image
will be added accordingly. You can also disable optional
slides just like that. And finally, you can
create a message for your client and hit the
save and send button. In a few minutes, you will receive your custom presentation is linked to your e-mail and you can share it with your client. How cool is that? Our right guys, that's
all for this video. I hope you enjoyed it and I'll
see you in the next video.
82. Webflow Hosting: Hey, in this video
we're going to talk about Webflow hosting plans. I often get asked why
Webflow hosting is so expensive compared to other hosting options
like Bluehost, Host, Gator, et cetera. When you build your
website using Webflow, you're not obliged to
use their hosting. If you have a paid account, you can simply export your project and
hosted somewhere else, either for free or
for a low price. So why would you ever
use Webflow hosting when you export the project
and hosted somewhere else, you can no longer
use the CMS feature. It means your dynamic
pages won't work. Let's say the project doesn't have any dynamic pages and it only has some informational
static pages. You host your project somewhere else and everything works fine. After a while, the
client wants to add something or modify
something on the website, then they should
hire a developer to go and change their
websites code, which is so time consuming
and frustrating. And they should repeat this
process again and again. Each time the developer
may charge him something between $100 and $300
to make those changes. So if they want to change their website's content
at least once a month, they should pay anything between $1,200.30, $600 per year. Now let's compare it
to Webflow hosting. For most clients, the CMS
plan works best and it cost $16 a month,
charged annually. That's $192 per year for a hosting plan that comes
with lots of features. First, they can edit their website using
workflows editor, and they don't have to
rely on anyone else. Second, they can use
all the features or Webflow like CMS,
editor, designer, etc. Third, workflow automatically
creates backups for them. Additionally, Webflow
hosting offers CDN, which stands for content
delivery network that ensures faster page loads by delivering content from the servers
closest to the user. It also comes with a free SSL which makes
their website secure, gains Google's trust and
eventually improves their SEO. So in my opinion, workflow hosting
is totally worth it based on the
value it provides. Are right guys, that's all
about Webflow hosting. I hope you liked this video and I'll see you
in the next one.
83. How to Deliver the Project to the Client?: Hey, in this video, I'm gonna be talking
about project hand-off. When it's time to deliver
the project to the client, you can choose one of
the following options. Number one, host the project on your Webflow account and add the hosting cost to
your invoice number to create a workflow
accounts for the client, transfer the project
to their account, and add a hosting
plan to the project. So what's the difference
between them? Which one should you choose and which one do I
personally choose? Well, the first option
works like this. You add a hosting plan to the
project and you publish it. You are done except you aren't. Because now every time the client wants to
modify something, they should reach out to
you and you should do it either for free or
as a paid service. When you choose this way, you can use the Webflow
billing option. What is it and how does it work? Let's suppose you choose
the CMS plan and it cost $192 per year, but you can charge
your clients more for hosting using the
billing option, you can set your hosting
price and Webflow issues an invoice for
them on your behalf. Let's say you charge $250
per year for hosting. Web flow receives this
money and sends you the additional $58 you charge. So this way, you can earn
some additional money. Now let's talk about
the second option. It's pretty straightforward. You transfer the project to
the client's account and add a hosting plan to the
project on their account. This way, they can easily modify their website's content
and they shouldn't rely on you or any
other designer. But keep in mind that once you transfer the project
to their account, you can get access to it
in your account so you can duplicate it before you transfer the project
for your reference, I personally prefer the
second way because first, I wouldn't say I like to
charge a client for hosting. Second, I don't want to be responsible for the
maintenance of their website. And third, I don't
need to manage the payments and yearly billing. Once you publish the project, it's time for your
training session. You can have a 30 minute meeting with a client and explain how Webflow works
and how they can use the editor to modify the
contents by themselves. I personally asked them not
to make any changes using the designer because
they may mess up with something and
break the whole website. Always ask them to use
the editor instead. If they want to add
some collection items, they can do it in the editor to, since you should repeat
this step for each project, I suggest you record
a training video, explain everything once, and
send it to all your clients. If your clients need more help, you can set up a meeting
and give them a hand.
84. What to do Next?: Hey everyone, welcome to the
last video of this course. Congratulations on finishing
the course successfully. It was a long journey for both
of us and I'd like you to know that I'm so proud of you
that you've come this far. Now you're officially
a web developer and you're going to
build amazing projects. I hope you enjoyed
this course and I would appreciate it
if you could leave an honest review of
the course so that I could make it better
and better for you. If you would like
to get notified of course updates and
my new courses, you can follow me on Skillshare
if you want to learn more about UI UX design and level
up your design skills. I have good news for you. I have a YouTube
channel where I put tons of free stuff that you
might find interesting. So make sure to subscribe to my channel to not miss
my upcoming tutorials. If you want to learn
more about UI UX design, you can check out my UI UX
design course on Skillshare. It was an honor to be your instructor and I
wish you all the best. See you and bye-bye.
 Arash Ahadzadeh, UI/UX Designer | University Lecturer