Transcripts
1. Welcome: Well, hi, everyone. My
name is Carrie Sanders, and I'm an artist, a teacher, and a creative here
in Northern Utah, coming from my new studio that's not even
fully unpacked yet. But I was so excited to launch this class for you today. I just had to get it out. I am fortunate enough that this new studio is up
on the second floor, and I get to look
out this huge window all day at these beautiful
birds and tree tops. And it was such an inspiration. I had to do a class on birds. I've been wanting
to for a long time. I hope you'll join me today as we learn how to do some inking. We'll do some
washing and glazing, some splattering, some
highlighting, some shading. We'll be doing three
different types of leaves and berries. We'll be doing all kinds of
fun things in this class. And the beautiful thing is, I have started doing these
videos in real time, no speeding up because
you're in the driver's seat. Did you know that you
can speed up the videos, you can slow them down. You can stop them
and start them. The controls are in the bottom left hand corner of
the main screen. So we want this to be
the best experience and the most comfortable for you and you get to control that. Over the years, I have
taught many, many students. I've been teaching since
I was 19 years old, and I've been fortunate
enough to have been picked up by
a big box store, and we did a painting
book that went out across the nation along
with some can packets. I've also won awards for
my art over the years. And I only share this
to let you know that I just have such a love of art. And my greatest
joy is instilling the enthusiasm and the
joy in my students and in other people because
there's nothing better than blossoming and enjoying
your own creativity and finding out what that is. I hope that you
will join me today. If you would like to see what other classes I have to offer, all you need to do is type my name in the search bar above Carrie Sanders and all
the classes that I have here on Skillshare will populate for you
to take a look at. I'd sure love to have you
join me for more classes. Also, if you could take a
moment to just follow me, click that follow button, then you would get
a little notice whenever a new class comes out, you'd be the first one to know that it's there and
available for you. I'd sure love to be a
part of your art, Journy. Thank you for joining
me, and I'll see you in the next video where
we get started.
2. Project: Okay. All right, my fellow
artists and friends. You class project today is to complete all three of
these beautiful birds. And you can do that by following
my step by step videos. You can start them, stop them, rewatch them, fast forward, whatever you need to
do, you're in control. All you need to do is look for the control buttons on the left bottom corner
of the screen, and you can take it at a pace that is
comfortable for you, so you have a good experience. Once you have
finished your birds, if you could take
a moment to snap a picture and upload that
in our class gallery, you can look for this button
and you upload it easily, then that will allow
us to make comments, and we can like your piece
to the little hearts. First of all, we get to see
what each other is doing. You know, it's kind of
like baking a cake, where we all have
the same recipe and they all turn out a
little bit differently. And that's the beauty
of art being an artist. We're all unique,
we're all individual, and I can't wait to see
what you've accomplished. So please take a moment
to upload that piece, and that allows you and I to
communicate for me as well. And you can ask me questions, and I will be able to share my thoughts on your
piece. And don't worry. There's no judgment here, nothing but love,
nothing but love. So I look forward to seeing your pieces and thanks
again for joining us today.
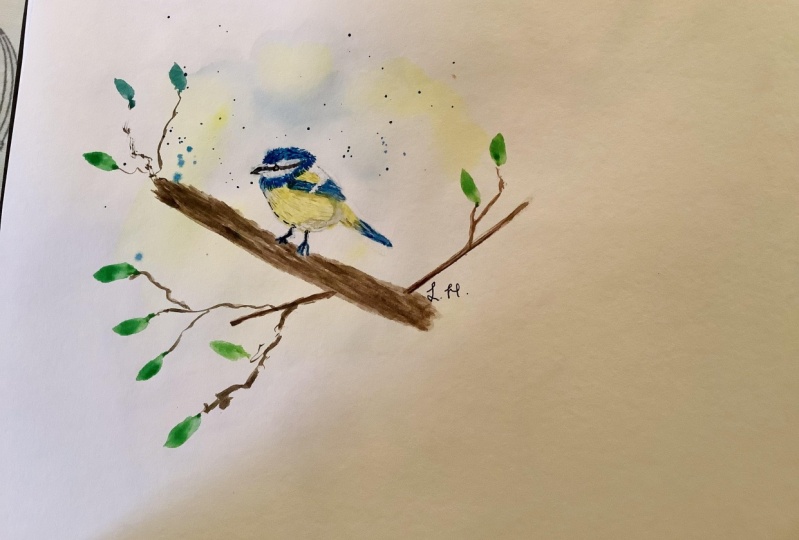
3. Bird 1 Supplies & Pattern Application: Let's do a quick review
of our supplies today, and then we're going to dive
right into our first bird. And when I first did
this, and as you know, I do these several times
before I teach a class, I didn't do any inking, and it looks just fine
without the inking. So if you choose not to
do that, that's great. I always give you
different ideas to be creative with your pieces. But I'm going to in this class, do some inking with this, but we will start by
just painting it in. So I wanted to show that
to you without the ink. And also, I'm going to provide for you a PDF
that has the pattern. It's a very simple
pattern because we'll do some free handing with all of the greenery and
the tree around it. So this is the pattern
that you'll just print out if you choose to use that. And then you will trace that onto a piece of
tracing paper and you'll need some
graphite paper so that we can trace that onto
your watercolor paper. Now, I'm going to challenge
you guys here because it's so easy to just go ahead and sketch
on your own bird. All you need to do is sketch a circle for the head
and then do an oblong for the body and add on two little triangles
and a tail so easy, and it's a great way to increase the strength of both
your creativity, but also your
ability to draw and sketch because when you're
out with your sketchbook, you're going to
want to be able to draw that bird in the tree. So I challenge you
to go ahead and just sketch your
own bird on there. But you will need
some tracing paper if you choose to just print
it out, and that's fine too. Today, I'm going to be using arches 140 pound water color. This is a cold pressed paper. It's got a little
bit of tooth to it, a little bit of a rough edge, and you can use whatever
paper you want, but I always encourage 140 pound or better because it's going to interact well
with your brushes, your water, your paint, it absorbs and contracts and does what it's
supposed to do. Now, I'm using
100% cotton today. We do not need to
use 100% cotton. That's purely my
preference for today. And I've taped my piece down on just an old wooden palette, actually, just to give it some strength so that it
doesn't buckle as I paint. And then we're going to
need my favorite tool ever is always our handy
dandy tissue, we'll be using a lot of that. As far as brushes go
today, very minimal. We're going to want
some type of a flat or I'm going to be
using an angular brush. Then you're going to need
a mid sized round brush, I would say an eight or ten, and maybe even a
mop, so a small mop. And then you're going to
want a variety of rounds. Of course, I'll always be using my number four round,
my favorite brush ever. It's very versatile. And then you're going
to need something to do a lot of little
fine line feathers. So you're going to need a
liner brush of some sort. I'll be using both
of these for sure. This is a one ought,
and then this is a very tiny five ought. And then for inking today, I'll be adding just some
really fine gentle lines. I'll be using my finest pen. It's a MGU J. It is waterproof. So if I choose to
watercolor on top of it, it's not going to bleed
or ruin my paper. I can do it before or after. And I'm going to be using
two jars of water today, both for dirty water
and clean water because we're going to
be using a lot of white. And then, of course, you're going to need some shop towels. And let's go over our palette. This is for our first
bird that we'll be doing is called
the blue tip bird. And we'll be using
let me come over here so you can
actually see the paint. We'll be using the emerald blue, Prussian blue, indigo blue, and pins gray, lemon yellow, cad yellow medium,
and yellow ochre. Now, guys, all of that is just
for this cute little bird, and I don't want you to
panic and feel like you have to go buy a bunch of
paints because you don't. Just if you have something
that is similar to these, or if you don't want to
use these darker ones, you can use black and add a
little bit of blue to it. So be creative with your
palette so that you don't feel like you have to go out and spend a lot of money on pins. And then for our tree branch, I'll be using burnt umber, raw umber, and
quinac burnt sienna. If you just have a cad
red light, that's fine. So a couple of browns and a little bit of red to
make it more interesting. And then for our leaves, I'll be using undersea green
leaf green and light green. Again, if you just
have a variety of greens in your palette,
that will be great. And we'll be using lots
of white for this piece. You can use white wash. I'm going to be using the
bleak proof white because it goes on stronger
and more opaque, and it will save us
some time and give us the strength that we want for
some real light feathers. And then this, you'll just see me use this. I've
shown it before. I just use it to set my
brushes on as I'm painting, and so you don't have
to have that obviously, but I'll get questions if I
don't explain what that is. And something, of
course, to keep your paints nice and
wet as we go along. So gather your supplies, and let's get started painting.
4. Bird 1 Base in Bird: Perfect. Okay. I'm so excited to get started
on this piece with you. I'm going to start with you can see this is a well loved brush. A number six round. I'm picking up some
clean clean water. We're going to start with
a wet on wet technique, which is where you just
add water onto your piece. Now remember, paint flows
where the water goes. Only put this water on
the breast of our bird, and this is why I went ahead and applied the full pattern
so that you can see on camera where I am applying the water and I'm going to go up around this leg. There we go. Great. We want to just go
ahead and get that paper. We don't want it soggy, but we do want it nice and wet. Great. Now I'm going to pick up some of this lemon yellow, one of my favorite
colors is pretty. We're going to take this
down to a 90 95% water, 5% paint by just putting
more water on our brush and work it on our palette until we have just the tiniest
amount of paint. Then you can just touch
it and let it blend. The reason we're being
careful is if you look at the reference photos
that I'm providing for you, we're going to have
blue up against it and you don't want to end up
with a green bird, right? So we want some
distinctive colors. Now, I think we can go ahead and strengthen
that a little bit. Let's pick up some more of
the stronger yellow here. And I'm just dabbing it in. It's wet, so I'm just dabbing
it in on that outer edge. It's a soft difference, but it's a difference. And now while it's still wet, let's pick up some of
our cad yellow medium. This is going to
be about a 90 ten. And up here towards This is going to be
more of a shadowed area underneath that wing, so we're going to have
a darker yellow, right? Let's just dab some in. Bring it up under his
little tail down here. And it's looking beautiful. I'm also going to bring
this yellow medium. Right underneath this neck. Because it's going to meet
up against the blue there. Now, let the water do its thing. That's the beauty of
wet on wet technique. Is the water does
the work for you. While that is working, let's add in a little
bit of our lemon yellow, and this is more of a 90 ten. Now, can be a bit stronger. I'm not. I'm doing wet on dry. Just floating in a little
color right there. And a little bit right
here underneath this tail. But I'm not touching
that cad yellow medium. I don't want the two
to blend together. Great. Okay. Let's add maybe just a touch of
this cad yellow medium. 90 ten mixture. Just going
to touch a little here. Let that flow out by itself. You see how it's growing.
That's what we want it to do a natural. Okay, wonderful. And let's go and add a bit
while those are drying. Let's go ahead and add a little
bit of our emerald blue. This is going to be a 90 ten. Moral blue goes on so light. Remember that watercolor dries
one value lighter. Anyway. Don't be afraid to
really put it on there. This is maybe more
of an 80 20 mix. Notice I'm avoiding
a smooth top. These are little fuzzy feathers, and I'm going to play
with them some more, but we want to start right from the beginning with
a textured edge. This dabbing a little Nice. Okay. And we can go ahead and add a little
bit of the same blue. So what we're
basically doing, guys, is kind of basing in
some of our colors, and then we'll build on them. We're going to do. That little ring
around his neck. A stronger now. Okay. Now, I think we can go
ahead and just as long as you're comfortable
going between these two yellows, we
don't want them to mix. We don't want any
green feathers. I'm just going to
bring it down to this is a white
stripe of feathers. I'm just going to bring
it down that far. And then I'm going to bring
it down again underneath. And one more time on
the bottom of his tail. Beautiful. It's going to
add a little more depth. Oh, we're off to a great start. Okay, let's go ahead
and let that dry. I'm switching to my
number four round and I'm picking up more of
this emerald blue. About 80 20 mix, and I'm going to go ah and
wash in his feet and legs. Okay. Great. I'm going to pick up a little bit
of this bird number. And I'm just carefully now, I'm just going to
use a little stroke that's just kind of an
up and down like this, almost like we're scribbling. But from here on, it's going to be a lot
of little feathers. And these kind of lead
from the beak to the eye and the back of the eye
all the way to that blue. Now, if you don't want
to use a number four, use a smaller brush,
that's totally fine. I'm spanning them
out a little bit. And then I'm going to pick
up my smaller hounds. This is the five out and come
back to this burnt umber. And I'm going to do
a circle this eye. The outside edge of
this eye is brown. So if it's easier to just I'm having trouble seeing
it from this angle. Sorry, guys. Oh, dear. How about I put some glasses on. Oh. There's an eye there. Okay. It's so fun to get older. It's okay to just
fill in the eye like that bond Because we're going to come in with black
and do the people of the eye. The important thing is around the people of the eye is brown. So that's what you want
your burn number for. We just have to be
adaptable, right? No matter what our age
of capability is, so.
5. Bird 1 Layering Feathers: All right. I've switched to
my double out line of brush, which is quite small. I'm picking up some
of this emerald blue. And I'm probably using
an 80 20 mixture, and we're just going to
add a little indicator of some feathers now that just kind of poke out technical term. On this outer edge. Don't worry
about doing it everywhere because we're going to be putting some other colors
on top of this head first. We'll take this opportunity
now to just add a few pure blue mb. Okay. And I do want to have some all the way around
this band around his neck. I start by pulling some out. Just gently. Come out here. With these little liner brushes, you have to load
them frequently. We don't hold much paint. You may have noticed. Okay. So I pulled some down
into the yellow, and now I'm going
to pull some up. Even though we're still going to come in with some other colors. We just want to start making it look the way we want
it to look in the end. There. Beautiful.
Okay. I'm going to add a few here too. Go ahead. Now, these can be a
little bit longer. Now we start his
beautiful wings. Let's go ahead and
pull some down. Kind of start in the middle just to get a feel for things. Okay. And one more spot.
Start in the middle. Okay. Great. Now, let's just add a little more
depth here and there. I'm going to keep
adding to these feet. Normally, I don't add
to the feet of birds, and you'll see that a lot
as you're painting birds. But these are. I don't know if you looked
at our reference photo. But they're blue
and they're almost translucent in places they were so interesting that we just have to add some
more color to them. That's all I is to
do it. All right. Let's rinse that out.
We're going to switch colors now. All right. While our blues are drying, let's come over for cade medium. Now we're going to go
with an 80 20 on this, just if you look at
the reference photo, you can't possibly
put every feather. Nor would you want to
unless you're really going for the realistic type painting. Notice I'm curving them
in a little bit here. So follow the contour
of your piece. I'm going to keep them
a little bit lighter in that highlighted
area of his breast. Beautiful. Okay, let's see the same thing up
here on his wing. Minus. Great. Now let's pick up a
little bit of yellow ocher. This is going to be
our darkest yellow. You can feel the pigment. It's a little. We're
going to thin it down. Take it to an 80 20. And I'm going to
start up here in the darker areas.
See the darkness. And definitely some up here. Good. Okay.
6. Bird 1 Background and Shading : Let's let our yellows dry and we can pick up
some prussian blue, to take it to a 90 ten. Now, I don't know
if you notice this. But as I pull away through
the paint, watch my fingers. I'm rolling it and lifting brings me to
a really fine tip. Now, let's start at the
top and work our way down and going to start with some
really fine feathers here. This we're going to be short and more concentrated
on the forehead. So be sure you're looking
at the reference photo. Unless you're doing
something more whimsical, we do whatever you want,
and that's okay, too. I thought about making some
of these whimsical bird. Maybe we'll do a lesson
on whimsical birds. Further I go back. The
lighter my lines are, the more thin they are out because I'll probably
come back in with some blue and a
little bit of white. But for now, we're just adding
another layer. Same here. This is actually under here. But we don't want to cover up all those pretty
feathers that we did. Adding another layer. Notice about this area here. These are curved out a
little bit this direction. Here's about where
I start turning, and I'm going to start curving those out the other direction. You can see that some
out into the air. Oh, so pretty. I up into that
brown a little bit. I remember these areas, we're going to come
in with white. We're going to do that last. While we have our pression blue, I'm going to come back
to my number four round. Let's do the bottom
side of the beak. I'm going to bring this
to it. I'm rolling this. I'm going to bring this up
to as fine a point as I can. I'm just going to
do the bottom half start with a really
light fine line. Then I'll just slowly
build up out there. And then I'm actually
going to make this kind fuzzy feathery. All right. Back. You are long strokes. And I've probably
gone to a nine ten, maybe even a 9055. Now, on these feathers, these are more smooth. I'm not going to have them go out onto the white background. A little bit more. Yeah, right up against the body. A little lines, just
giving it some texture. Awesome. All right.
While that's drying. Let's pick up that
trusty old number six, six, eight, ten,
whatever you have, and I'm going to come
into this lemon yellow. I just have a lot of water on my brush and whatever's
left on my palette. I'm just going to out here
from wherever it's yellow. I didn't do it from the
blue area. Pull out. Maybe a little bit over here. I'm going to go
right over the wood. That's okay. I need a
little more Malmo stronger. And I'm making it I'm using my clean water section
over here, my dirty water. Whenever I work with
yellow and white, I make sure I have clean water. Okay. So now I'm just adding it's a little here and there. Okay. And let's print
out really good. And then up here at the top, I'm picking up some
of this emerald. I can't use that
anymore. It's dirty, so I'm going to start a section. But again, quite watered down. I don't want to lose my cute
feathers there. Cheerful. This is just water on my brush. And now going down. There we go. Nice. Just kind of jig it out a little bit wherever you want it. Now remember, we're
going to come in with some leaves and a branch. So leave some white spots. Water on my brush
fair bringing it out. I like to have that
uneven edge of fun. All right. And let's
pick up some world. And let's do some splatter. But I am going to
cover up the bird. I like the splatter
to go in where it's wet because then it lends out. Then I also have
it where it's dry. I also like to come in
while it's still wet on my paper and make sure I
have a clean spot of tissue. Don't use where it's dirty, but just touch it here and there and you can see
it makes it fade. I want some faded, I want some. I want that spread out and I want some that don't have
a nice mixture there. Now let's rinse out
really well and do the same thing
with our yellow. I'm going to pick
up some the arrow. Make sure you rinse
out your brush really good or you're going to
be splattering green. Which I guess for
this wouldn't be so bad since we're in the trees. And I'm going to
protect my herd. Yes. Oh, I want
some right there. There we go. Good. And
maybe a little up there. But I might bring
just a little bit of blue down here
because I didn't. Yeah. I like that better. Okay. Let's let that dry. Okay. Everything should
be totally dry now. And let's go ahead and pick up our number four and some of this panes gray and water
it down quite a bit. This is probably a 9055 mixture. We're going to drop
in a little bit of shadow underneath this
tail and under the wing. Now we can't overwork
this or we'll lose our feathers a
little water there. Soften that edge with water. You see that? I'm going to bring it up underneath this wing here. That shading. Blend it down
with water on my brush. Beautiful. I that some shape. Great. And let's put a little bit of
contour around his leg now. That up here. The one is belly. Nice. All right. I think oh, let's put a
little bit on this feet. You know it this feet. Right up here at the
top here and there. Great. All right. And
let's add just a tiny bit. Notice I'm rolling my finger
in this to a nice spine tip. I'm just going to add a little
emphasis here on the beak. I left a little
bit of edge that's white and a little edge
on the top that's white, which is actually light
gray, right? It's not white. Okay.
7. Bird 1 Highlighting Feathers: Now, let's go ahead and pick up a little bit of
this indigo blue. And probably a 90 ten mixture. It's my number four round. Just going to add
a little emphasis here where we want a little bit darker at
the top of that wing. And a little bit here. And I'm carefully going to
bring down some streaks. I say streaks, but
it's actually, you know, his feathers,
the edge of his feathers. I'm just going to bring
down an indicator. And you'll have to
decide on your bird. How many you want, how
dark you want them. When I was looking at
reference photos, obviously, there's generalities, but each one is quite
individual, just like we are. So you decide what you want
your bird to look like. Use your creativity and create
the bird that you like. And it'll be great. Okay. Now, same up on top. Let's be really careful up here, but it should be pretty dark right at the
forehead line there. Come down where some
of the white will be. I'm using my number four
for added emphasis, a little bit thicker line. Yes. And then I'm going
to do the same thing around where it comes
out from the eye. We are going to do some
inking there to bring in the black to be so fun. I can't wait. But I wanted to bring in some of
this indigo blue. And it seems to be quite
dark right here underneath is white. Okay, good. It sticking with
the indigo blue. A 90 ten mixture here. I'm going to add in just a
few more distinct feathers. Still leaving it quite
light on the top there. And gosh, I think I about
done with this color. It's going to have a
little more darkness. And probably a little bit more
on the bottom of his feet. Just on the very bottom. And just kind of let that work, work up to with the Prussian
blow. That's on there. Water on the brush. Great. Okeydokey. We are ready for White. Okay. Let's make sure we
have very clean brush. And I'm going to pull out. Now, if yours thickens up like this, it
comes much thinner. It's more like an ink
like consistency, but for some reason,
this one came thick. Water will thin it
down just mine. Well, it's going to be so fun. All right, so we're
going to start. Good. This dries on your
brush pretty fast, too. So you'll see me dipping it into water frequently so that I'm starting with a clean brush doesn't have to
be totally clean, but you want to make
sure that you have some fun white feathers showing in that
blue that we added. We're just slowly
building, slow and go. There we go. You can
see how that gray makes your white stand out
more. All right. I'm just going to bring a bed here or there into that brown. I'm not going to worry
about the eye right now. There for the
nostril. Then here's the fun to bring out a
bunch. It's cute neck. Slowly bring it up to the eye. I'm going to leave some
of that gray showing. It makes your white. Here. All right. And then this outside piece, these are going to be
a little bit longer. Go into the blue a little
bit here and there. You don't have you don't
want just a straight line, so make it look a
little more natural. To the yellow. Great. What are you doing? Oh, Kito k. So just a few here. Oh. Awesome. Okay. And
then a few highlights. On our beloved legs and feet that we've been
so much love and into. Awesome. It's always good to step back and take
a look at your piece, and that's what I was
just about to say, but you can see the
importance of it. Sorry, I'm there we go. I will highlight. There we go. All right. Let's let this dry and step back six feet and take a good look, see if there's anything that
we missed or want to add to. Okay. I'm going to stick with the white for a
minute here and I'm going to add some white
fuzzy feathers, so to speak. Just on this outer edge,
just a little bit light. We are going to come
in and ink this area, but I think it'll still add some good highlighting
around this leg, this is the one that
goes up into the body. The other one we
can't see obviously because it's on the
other side of the body. There we go, just a
little bit there. I wanted to not happy
with this wing, so I'm just going to
that down a little bit. Here we go. There,
I like that better. And I wanted to add a few here. And then just a few that
would catch the light, a few feathers that would
catch the light on his breast. And If you look at the picture, he has some darkness
underneath his feathers, like almost a blue tone. And we can add a few
under tone feathers. If you would like,
or if you're like, No, I like it the way it is. Then leave it the way
it is. That's fine too. I think I'm going to add just a few that are in the blue tone. So I'm just going to
pick up a little bit of this indigo blue and probably a 95% water.
Super super thin. Sticking with my double lot touch it and get
some of that water. And I'm just especially
down here in the shadow. I add just a few feathers. And probably around the leg. And I think in the picture,
you can almost I mean, definitely, but kind of almost see just around around
the top of that leg. I'm going to leave the
breast nice and light. I like that. But just can't bring this, Dad. That's a little dark,
but's a little dark. Just touch it and away it goes. Okay, I feel good about that. How about you guys?
You feel good?
8. Bird 1 Branch & Leaves: All right. I am using my
angular brush, my angle flat. It's a number six. So
just kind a medium size. I'm going to pick up
a little bit of um, burnt umber and
probably a 90 ten. I'm going to keep
it pretty washy. And going to put
some water on it. I want it fairly wet so that I can float in
some other colors. It's just water on my brush. Careful not to go over those cute feet that we
spent so much time on. Now, while that's still wet. Let's pick up some
of this raw umber. It's fairly strong
color, quite dark. 90 ten mixture. I'm just using the flat
side net of my brush now, and I'm just going to
touch it here and there. Because it's wet,
it's going to do its thing and blend for us. But we just want it
to look lumpy bumpy, especially next to the feet, there's going to be shadowed. I bring out a little branch. And probably went over here. I'm up on the chiseled edge. I do that. And I'm just going to use the
tip of my brush now. A little more umber right
there where they meet. Good. Now I'm going
to use a sage. I'm thinking of just on
the tip of that brush, some of this pinocridin pretty, but I just want I'm going right on that raw number
here and there. Just to give it a
little more depth and color. A little pop of red. But you can see if you if
you just touch it with the tip instead of stroking it I mean you can
stroke it if you want a smooth. That's fine. But I want to look
rough and like bark is. Okay. Nice. Okay? Now, let's come over and to use number one, a rush picking up
that bird number. And this is going
to be I don't know, probably an 80 20, a
little bit thicker. Now, with branches, guys, the secret is to just in jerk your hand a little
bit. Does that make sense? Let's You try to
do it too smooth, it doesn't look as natural. We are going to want to
just pull off from the tip. Then we're just
going to pull out. That's what I mean by flick it. Jerk your hand
around a little bit. Okay. And we just want a few branches
that we can go ahead and put leaves on. And go up. Pick up a little more paint. Again, we're doing this
with our bird number. You could do it with your
raw number if you want. No, I don't want to get
in the way of this bird. I'm going to bring
my branch down. And I think I'll
leave it at that. All right. So sticking
with the number one. Let's pick up some
of this raw number. And let's just touch a
little bit here and there. Just to make it look
a little more rough. And again, I'm not doing
any definite strokes. I'm just kind of
indicating a curvature. A All right. Great. Sometimes there's a little
lumpy bumpy technical term. When a branch kind of goes off. So kind of play with it
and make it your own. Great. There could be some
horizontal lines, too. Okay. Good. All right. Let's let that dry and we'll
come in and do our leaves. When I stood back and
looked at it closely, I realized that I'm
not super happy with these prussian blue
feathers right here, so I'm just going to put
a couple more in there. There. That's all. I just didn't want
to surprise you. We are going to use our round. I'm coming back to my
handy dandy number six, and I'm going to pick up some undersea green put
some water in there. It's going to be a 90 ten. I'm also going to pick up
the other greens as well. This is the leaf green, going to have a little well of color, ready to go because we're
going to do some of each. We're going to blend
some together. Just have it ready to
go on your palette, whatever greens you chose to go with some of this
beautiful light green. Good. Now, the stroke that
we're going to use for this guys is the tear drop
stroke or the petal stroke. Just to make sure that we're
on the same page here. You just load up and you're going to touch
press and lift. You're going to touch,
press and lift. But I'm going to make it curved and jaggedy
more like that. I want you to practice
this a couple of times if you want to do it like me and you can
curve it every which way, make them big or small, but
that's my number six round. Touch press and lift. Okay. I'm going to start at the top in order to
not smear them on my piece. I've learned that the
hard way over the years. I'm going to start up here, just to get a feel for things, one that's pretty straight. Touch and press, wiggle
wiggle wiggle. There we go. What do over here that's
drop touch and press. I want to make it a little bit. There we go. Great. All right.
Now, I'm going to pick up. I leave green. I do. Well, have fun with these guys. It's fun to do. There's
no right or wrong. Now, that one, I don't
like the shapes, so I'm just going
to pull it down a little bit. That's okay. I'm going to blend
those two together to bring in even a third color. And you decide how
many you want. I'm going to keep it very sparse because I want the
focus to be on the bird and the beautiful background
that we've already given it. I'm going to move down
to the next section. I'm going to pick up a
bit more leaf green now. Here we go. You know, light one. Light. So the light green, to me, is more of an indicator
of a new leaf, smaller leaf, or where the
sun is shining through it. So fun. Are you having fun? I'm having so much fun. Beautiful. All right. Now I have four going
all the same way. So step back, look at
what you're doing, and make sure it's
the way you want it. I'm going to pick
up some darker now, and I need to put some
going the other direction. I mean, I guess
the wind could be blowing that way and
it would be all right, but it looks funny to me, so I'm going to turn my
paper a little bit. Give me a better perspective. And Okay. That's all I needed was those
two going other direction. I think I have the same
issue right here, so. Okay. Hey, how do you do? Now, I've
got this branch coming out. I could put a leaf right there, but I feel like it would
detract from the bird. I'm not going to step back, assess your pe, see if there's anywhere else
that you want to add. Then if you want, you can do I still have some
paint on my brush. I'm just going to throw
in a touch green. I'm just going to pick
up some water and just lightly touch the green
that's here, and leave it. Not going to go bananas over it. Okay. And I didn't really
want to go into my leaf, so I'm going
to pick that up. Anything you don't want,
just touch it with a tissue. End and end the tissue,
my favorite tool. It comes to the rescue,
doesn't it? I can. I'm going to touch those
splatters that are wet right there. Yeah, I like that. And maybe a couple up here. Just play with your piece.
Make it the way you want it.
9. Bird 1 Ink & Sign : All right. We are
almost done guys. I am pulling out my Muji. It is a fine tip pen, and it's just a
ballpoint pen guys. But the important thing
is it's waterproof, in case I want to come back in, I can go ahead and do
that without worrying about my bleeding or
ruining anything. I'm going to use a light touch. I'm not going to add
a lot of inking. Just a little indicator,
as you can see here, what I found when
I've done it with and without the inking,
I just like inking. To me, it's fun and
it adds definition, and I just like it better when there's just a little bit of inking
on these birds, so that's what I'm
choosing to do. It's perfectly fine to not
in if you don't want to. Don't. It's okay. But I just
like that little indication. Now, for the eye, we're going to outline
the eye completely, but we're not going to
color it in completely. So go slow slow and go on this. We want a nice round circle. A nice round circle, and
then we're going to leave a circle of brown and
black pupil in it. Start I start with a
small circle like that, and then I just go a little bit bigger until I get to
the size that I like. Now, if you choose not to in, you need to do this with paint. You need to have a
pupil with paint. Okay. There you go. Then I am going to add a
little bit of black lines on top of this burnt
umber from the eyes out. Making sure that
some of that burnt umber still shows through. Just like that.
That looks great. Then we're going to
come in and we'll add the white highlight and it's
going to look so great. All right. Now, I
am going to add just a little
indicator of feathers. And it's a mixture
of dots and little zzags We just don't
want to smooth edge. Okay. Now, where the
legs are, same thing. Just a little indicator. Right. All right. Everything is dry. When we stood back
this last time, the only thing that I felt
like I needed to do was come in and just strengthen my blue and my yellow in
those three areas. I just washed in a
little bit more color. And now that it's, we are
ready to sign our name. Always your art, guys. Always be of what you do. Please understand how
talented you are. And I'm so proud of you for taking this class and
finishing this piece. You have a unique gift. I hope you understand
that. Look in the mirror and tell yourself
how wonderful you are because very few people
can pick up a pen and a paintbrush and create something
beautiful like this. And I'm just so happy that you've spent this time
with me. Thank you so much. You're very valuable to me, and I do appreciate you
spending your time in my class. Let's go ahead and sign our
name and claim our artwork. And I hope I'll see you in
the next video where we will continue on our journey with some beautiful birds.
And thanks again. M.
10. Bird 2 Palette: All right. My fellow artists. We have finished our first bird. We're onto our second one. This is called the orange
bellied flower pecker. It's a beautiful beautiful bird. I couldn't resist because
of the bright colors. So we are going to go
ahead and dive right in. I'm not going to go in
depth on any of this because I did it in
the previous bird. So refer back to
that video if you need to refresh or if you
didn't paint that bird, and you're just starting
with this one and you need some instructions on
applying the pattern. It's in the other video. I
have just printed out the PDF. I provided the pattern for you. Again, I do encourage you to just sketch it
on because it's such a simple sketch and
it's a good practice. Just apply your pattern
to your tracing paper, and then you can apply it
to your watercolor paper, which is what I'm
going to do next. Always I recommend 140
pound watercolor paper. Today, I'm using 100% cotton
paper. We don't have to. I just choose two
today for this piece. Let's go over the palette really quickly so that you
have the right colors. Very similar to our first bird, the blue ti bird, and just
a couple of differences. So let me pull this over so
we can see the palette here. We'll be using emerald blue, Prussian blue, indigo blue, lemon yellow, cad yellow light. Oh, sorry, cad yellow medium, orange, and cad red light. Those are all for the bird. And then we're going to use the burnt umber raw umber and
buff for the tree branch. And then for our leaves, we'll be using undersea green leaf green, and light green. I made those distinctions for you on what
they're being used for so that it makes it easier for you to
substitute if you need to. You don't have to use those same browns for your tree branch, use a different brown or the
same greens for your leaves. Use a different green if you have something
different at home. I want you to be able to adapt
and use what you have at home without feeling
like you have to go to the store just to paint
this project with me. I'm going to be using
bled proof white today. On this piece, you could
probably use white guash. There's not a ton of white, and I just usually prefer bled proof white
because it's more opaque. You get a stronger white.
It's not a see through. And so to me it's a better
outcome for a lot of pieces, particularly feathers
when we're doing some white feathers over this dark prussian blue.
But you don't have to. You can try your
white guash and see how a good result you receive with that if you're
happy with those results. So All right, gather
your supplies, guys. And let's go ahead and
get started one that's beautiful orange
bellied flower packer.
11. Bird 2 Wash in Bird and Branch: Okay. All right. I'm going to start out with my well loved number six round, and I'm just going to pick up some clean water and
wash in my belly, the belly of the bird. I'm just trying to be careful not to go up into
the blue section. We're going to start with
our yellows oranges reds. We want to get that paper wet, so we're going to do our
wet on wet technique. I'm not going to go
down into the leg. So I'm going around
that as well. To be a little
careful here going between the long legs there. Loops, I went up too far there. There we go. Great. All right. Once your area is nice and wet, I'm going to stick
with this brush. I'm going to start with
some lemon yellow. And this will probably be a
90 ten mixture, 90% water, 10% paint, and I'll just start with yellow
down here on the end, and just slightly touch that in. And you can see it
immediately starts to spread. It's the beauty of wet on wet. The water does the work
for you. So great. I'm a little on the little belly down here between
those two legs. Just carefully and a little bit on the other side of this leg. Here we go. Hey, let's pick up just a touch
of this orange. What that spread out
just a little bit. That's looking good. Clean
water on my brush and I'm just going to gently feather this down as
if they were feathers. I like that. Now
I'm going to pick up a little bit
of our red light. And I'm going to keep this
up higher on the breast. And that's going to travel. Isn't it beautiful already? These birds have been so fun. First of all, I had a great
time just searching for them. I just typed in colorful birds, and Oh, boy, there were a lot. But then I wanted to find
some that were here in the United States
and something that we could actually see when
we looked at our windows. And as you know, I paint each of these before
I get ready for a lesson. I painted it three or
four times to make sure it's the way I want it
before I present it to you, and it's just been
so delightful. All right. We're going
to let that keep spreading and doing its thing. And in the meantime, let's
move up here to our blue area. We can go ahead and
got some water here. I'm going to try not
to touch our orange. Just to leave a little
gap. It's okay. We'll fill it in later. I'm avoiding the
beak for now too. It's not the end of the world if somebody gets on
the beat though. Okay. Great. Now, let's pick up some
of our emerald blue. I love this color so
much. It's a purply blue. Let's go ahead and touch
that in and get it going. We're going to put an awful
lot on top of this, guys. This is just our base in I'm just going
above that yellow. I don't really want to
have green feathers. Don't worry about
the perfect shape of the eye at this point. I go to be fat brush. It's okay. Great. All right. Let's let that dry for a minute. Actually, before
your blue dries, let's go ahead and pick up a little bit of
our prussian blue. This is a strongly
pigmented color, so we're just going
to do a 90 ten. But I'm going to just
drop in a little bit here and there. Not everywhere. But definitely around the beach here and around the eye a bit. This area, we're going
to come in with white, just looking at the
photo of the bird, others are going to come up here a little bit
more right there. Good. Mine is still
a little bit wet. If yours is as well, let's
just keep moving along. Let's pick up some buff with our angular brush or
if you're using a flat or even if you're using
around, that's funny too. And let's just go ahead
and kind of rough this in. Yeah. Okay. Well, that's still
wet. Let's pick up a little bit of our umber. Man, let's just touch
it here and there. Those two blend. Leaving some of the buffing Los a
rough right now. That's okay. We're
just adding layers. And now let's pick up a
little of this raw umber. Same thing. I have
nothing to mention here. Okay, let's let that branch. The bird's looking
pretty good now.
12. Bird 2 Feather Details: Switching to my
number four round. And I'm picking up
some cad yellow media. Just going to start to indicate
some of these feathers, so on top of that lemon yellow. Come on. So they're barely visible
on the breast of the bird, but it adds another layer
gives it more dimension, and it blends all
our values together. We're going to go ahead
and add some of these. Nice. All right. Now, let's pick up some orange. Back to that 80 20 ratio. Well, it's beautiful. And these can be a little bit longer. These are breast
feathers that are going down towards
his tail feathers. Notice I'm rolling
the brush and paint, lifting to a fine tip. That's great. Now, I'm going to mix a little
yellow, a little orange. Just to get a medium
value of these two and throw in a few. Yep. Just to blend. That's nice. All right. And now you know what's next? What's the red. A few, not very many red can
take over really fast. Just a few For. All right. Let's come
up to our blue now. And we're going to take
some of this pression blue back to that
90 ten mixture. And let's just emphasize
too much water. Here we go. Under the around
the Up around the eyes. All right, that's looking good. Now, this is where the
head meets the body. And there's not a super huge
distinction in our photo, but we know it's there, right? So we can go ahead and just add a little bit of these
dark feathers here. I think we can switch to
our number one liner. Number one liner. Let's pull down more of
these cute little feathers. We're going to have the
push out a little bit from his neck out into the air. And some of these
that are coming down. Keep these kind of far
apart from each other. Because we want to come
in with some white. All right. Here we go. It's going to
emphasize a little bit where that head
connects with the body. Yes, you see that? And a bit more here. Okay. And, we can put a few. I'm sorry. My hand
is in the camera. Let me turn the board. Maybe you can see it better this way. Just going to pull a few. Can you see how
gentle those are? Let's take some
of our raw umber. And we're going to pick up a
little bit of this indigo. Look. But it's going to be a brownish gray brownish bluish gray, dark we can go ahead and
need water on my brush. Put in the legs. These won't be anything
like the last bird, the blue tip bird where those beautiful legs where
that light blue color. These are just going to
be dark and nondescript. Okay. And let's go ahead
and use this indigo. Let's start with a 90
ten. Put the beak in. The beak is quite
dark. We're going to put some pression
blue in here. Let's just indigo. Maybe we'll just put the
indigo on the bottom for now. That's pretty dark. At least
mine went in pretty dark. Now I'm going to pick
up some pressure. I'm going to leave a
little white stripe. See if you can do that. If not, we can put white in there. Afterwards, we can do a
white stripe with our brush. But if you can, leave
a little white stripe. I'm just touching a little
prussian blue on the indigo. Yeah, I'm making my
stripe a little thinner. Good.
13. Bird 2 Branch & Bird Details: Now, while the bird is drying, you can either just stop
right now and let it dry or we can keep
going on the branch. So I vote we keep going. Thanks for your vote. Let's
pick up some raw umber. And if you want, you can mix it a little bit with
that bird umber. I just to soften tab, go in points of interest. We still want to leave
some of that buff showing. Now we're going to
come in and put in some branches so that we
can some beautiful leaves. Let's start making this look
dimensional and interesting. D. Okay. All right. Let's switch brushes. Let's come back to
our number one while we have some of this number out. 90 ten mixture. We're not going to get
too carried away with branches because of the type
of leaves I want to add. But let's add some right here. Come out. And here, Okay, let's put a few C here. I'm going to leave
it at that for now. Okay. I'm going to take a
little bit of this buff. We're still letting
our bird dry. Let's take a little buff
while we have our number one, and let's just add a bit
of interest on the feet. And a little bit more on our
branches here and there. Okay. Let's pick up a little bit of lemon yellow. I'm going to pick
this up like a 50 50. Strong lemons here. Because we want to do some
feathers that come up here and if they
still don't show, we can do white and then lemon yellow on
top of the white. Can add a couple up here. That's pretty subtle. Let's see how it does.
Off the top here. Great. Then let's glaze. Glazing is just floating a
little bit of the color, one color on top of
another after it's dry. So this is all dry, and I just want
to glaze a bit of cad yellow medium over
a portion of this. Just lightly. If you press too, you're just going to
blend them instead of laying color on top of color. We just want a
light yellow sheen. That looks great. All right. I'm picking up clean water. I'm sticking with my number six, and I'm going to come in with just the smallest amount of orange and just kind
of urge it out a little. Be careful around
your tree branch. A little more color. You can add a little yellow if you want. I pick up a little
bit of this blue. Sorry, emerald blue. Same thing. Who. I sure you're dipping into your clean
water for this, guys? Nice. I might want to add
tiniest amount of prussian iniest to give
it a little more punch. Now I've got clean
water on my brush. I'm just softening. I'm going to take down
that edge a little bit with my tissue,
up and down motion. Great. How do you
do? That was fun. I'm tempted. I'm going to do it. Just to do a tiny bit
of lemon yellow here. Pure yellow, no orange. Clean water, and I'm
going to carefully. I don't want it to go
into my tree bridge. There we go. Okay. All right. I'm liking that. Now, do you feel
like splattering? This is a good time
to do that background if you feel like splattering. I'm sure I heard a yes because you know how much
we love to splatter. All right. I'm going to
stick with my number six. I am going to cover
up the bird a bit. And I didn't get
too carried away, as you can tell.
Softening it already. I go to be really soft. I'm going to switch
to my number four. I was a very thrilled with that. All right. Let's try again. When the bird Yep. I like that better. It's going to soften a few here and there. I've got all these leaves
that are going to come in. Great. Okay. And then I'm
going to pick up some orange yellowy,
mixed together. I want to strong one way or
the other. That looks good. Same thing, cover the bird. All right. I'm
liking that. And I'm going to soften a
few here and there, where some of our
leaves are going to go. Good. Great. All right. Let's pick up some of our to go and just darken
this up a little bit more. Should be almost black underneath the bottom
side of that beak. And then we're just
going to touch here and there on his back. I feel like this
bird went so fast.
14. Bird 2 White Feathers and Details: Good bye. Before I can use
my black marker on the eye. I need to get rid of
the splattered dot when you know it went
right on the eye. But we are going to put a
white rim around the black, it'd be much easier to get rid of that
splatter dot right now. While that's drying, let's
move over to our leaves. Coming back to my trustee. Actually, I'm going to come
back to angular brush, or you can use a flat. We're going to pick up
some of our greens now. I'm going to start
with undersea green. Now, these leaves straight
up and down, chiseled edge. Press wiggle wiggle,
straight up and down, and that's where it
would hook to the tree. So we're going to do this
in all different colors. And we'll just kind
of start up here. Chiseled edge, press
wiggle wiggle Cisled edge. And that's really
all there is to it. If you don't have a nice
chiseled edge. Put it in after. So I'm just going to do here
and there with this color and then I'll add
different colors. M. Depending on how
much water you add, is how strong they
are on your paper. You probably understand
that by now. Okay. I'm going to
pick up some of our medium green, which
is the leaf green. So I'm making some really
big and some small, different colors. Just
kind of play with it. Mix them together. Let's bring in some of the light green. How are you doing? Now, they don't
all have to be at the tip of a branch like that. You can put some in that
are just kind of there. Just depends on
how many you want. Maybe I'm done. Yeah, it feels pretty good. All right. And it's okay to
take a little bit of green and drop it in here and
there on your branch. Maybe there's a
bit of moss on it or it's a green tinged
to pull it together. All right. If our bird is dry, we can go ahead and add
some king and some white. Let's go ahead and take our
pen and add in the eye. Now, we want to sketch book. We want to keep a white
rim around the eye. So don't fill in
the whole thing. And if you do
accidentally, that's okay. We'll come in and add
some white afterward. But if you look at
the photo reference, there's a white,
which is pretty cool. I'd like to start kind of in
the middle and build out. Now, of course, you could
do this with a paintbrush. That's getting there.
That is getting there. Yeah, that's feeling
pretty good. Now, I'm actually going to go
over that with the indigo. Just to fill in any spots
that might be showing. And in case it's shiny,
want to go down. Nice. All right. Let's let that dry and we'll
put white on top of it. But in the meantime, we can
keep going with some white. It's time to add
our white feathers. So let's grab our I'm going
to be using this five out our wonderful
white ink. All right. Who's with me? Here we go. Do some white feathers. Let's start under his neck. That down a little bit.
Rolling nice fine point. And paint is a 90 mixture. Just going on top of that blue. Now, in the photo, this
whitish grayish bluish goes all the way up to
the bottom of the beak. Which is going to look awesome on top of the prussian
blue we put in there. Remember, if you want your
highlights to stand out, you put something
dark underneath them. Oh, gorgeous. Beautiful. All right. Let's wrap that
around a little bit. Sorry, I'm trying to
keep my hand out of. You guys can't see me, but I am frequently looking at
the reference photo. Try and keep in the right direction these
feathers are going. Okay.
15. Bird 2 Inking and Sign: Okay. I'm going to come in
with lemon yellow. Sticking with my five
out those tiny feathers. A an 80 20 mix. And I'm just going to come
right on top of this white. That will help us with
yellow instead of green. I like that. All right. Okay. If you want, you can put a little bit of
the yellow that it shows on the back. We are about done. All right. Let's step back, six feet and assess our piece. See if there's anything
that you want to add. Anything you want
to emphasize or we do a bit of inking. All right. I think we are ready to ink as long as you have
completely dried, you've fixed anything
that you wanted to fix, and we can go ahead
and get started. I'm just going to
be super ginger, meaning I'm not
going to do much. Same as the last bird. This is a little indicator. Just a little broken line. No. Sorry, I'm going to
turn this a little bit. You can see how very
little inking I'm doing, but it does make a
difference if you want the look of ink and Wah. Although we did a lot more than wash. We fly painted
this cute bird. Great. Okay. You'll just have to decide where
you want to stop. You can see, I'm not really putting lines around
the feathers. I'm just putting a little
can be a little shadow, a dot of a shadow. Great. And then for the legs. So I did see one more
thing that I wanted to do. I've picked up some
undersea green 90 ten mixture and
my number four, and I'm just going to splatter a little bit in the
area of the leaves. Let me. I'm going to soften
these just a bit down here. Here and there. I'll
keep some strong. I keep some soft. There we go. And I'm going to cover
up my bird here. I like that. You need a more like there. Good. I like that better. You know me in my splattering. I just feel like that
green ties it all in. All right. I'm going
to let this dry, and then we're going
to sign our name. What a fun piece this beautiful orange
bellied flower pecker is, and I'm so happy that you spent the time to
take this class with me. Thank you so much.
I'm so proud of you for finishing
this art piece, and I hope that you learned something and enjoy
the experience. And it's time for us to
claim our art piece. Always claim your artwork. Always sign your name. Let's
do it together. Here we go. You have a special talent. I hope that you understand that. Look at yourself in the mirror
and say, I am talented, I am an artist because you have a skill that
most people don't have, and I'm just so
thrilled that you are taking the time to work on that and enjoy that and thrive within the art world
on your art journey, and thank you for letting
me be a part of that. I'll see you in the next video, and we will be doing
a beautiful BlueJ. Okay.
16. Bird 3 Palette: All right, welcome back, guys. We are onto our third bird. This is a cute blue jay that
we're going to be doing. We'll be doing a little bit
different one than this one. As you know, I paint,
you know, three, four, five versions before I decide on what I really like
before I teach it. But we are going to be doing
this style of the Blue Jay. So go ahead and you can download the PDF that's found on the main page of
Skill Share for you. I've provided that for you
and you can either free hand this onto your
watercolor paper or you can put it onto some
tracing paper and then take that pattern and apply it onto your watercolor paper
using some graphite paper, and I show you how to do
that in bird number one. So if you need
reference on that, just go back to bird number one. I'll show you exactly
how to do that. Today, for all of the birds, I have been using arches. It's a 140 pound
watercolor paper, and this one is 100% cotton. You don't have to use this. You don't have to have 100%
cotton for this project. I just felt like using a
little nicer paper for these because they're such
beautiful birds and I wanted the best outcome
that I could get. Always use 140 pound water paper for your projects if you can. That will give you
the best outcome for the work that
you put into it. I want you to have a
really beautiful outcome. And then the rest
of our supplies remain the same as
far as, you know, our hand dandy tissue and have some clean water and
dirty water jar. Our brushes will remain the
same as the other two birds. You're going to need
an angular brush or a flat brush for the branch, and a couple of
medium sized rounds, which will be used for
background and some washes. And then you're going to need
a variety of liner brushes. And also, I love to use my handy dandy number
four. It's my favorite. This is a number one. This is a double out, and this is a five out, and we'll be using
those for those fine lines a little feathers. And for our inking,
I'll be using my Muji. It's MU J. It's a waterproof pen. Tried and true. I've
used it 1 million times. I absolutely love it. And you can use any waterproof pen that you're
comfortable with. Just make sure you test it
out first and make sure that it doesn't bleed or
run into your watercolor. Here are the paints that
we're going to be using. It's a small palette
compared to our other birds. We're going to use emerald blue, prussian blue, indigo blue. And that's it with some white.
That's it for the bird. And for our tree branch, we'll use buff, burnt
umber and raw umber. And you're welcome to
substitute those for other colors that
you would like to do your branch with or
that you have at home. And then for our berries, I'm going to be using
quinocridin burnt sienna, and you can use C red light or Indian red or whatever red that you have at home that you'd like to do
your berries with. That's just fine.
He's what you've got. And I'm going to be applying the berries
today using Q tips. That will be in a
fun different thing. If you don't have Q tips or
don't want to use those. You can absolutely use your number four or one
of your other rounds. Then for the white, I'm going to be using the
bleedproof white, and you can use white guash. You won't have quite
as opaque coverage as you do with your Blee proof hite this is why I'm going
to go with this one. Go ahead and gather all of your supplies and
apply your pattern, and I'll see you
in the next video. We'll start painting together.
17. Bird 3 Washing in Bird and Branch: All right. Hopefully, you've
applied your pattern, we're ready to get started. I'm starting with my number six round and I'm going to pick up some of our indigo
blue to super light. This is probably a 95% water. This is going to be our
underlayer beneath the white. We're going to go ahead
and just wash this in on the belly. We really want our white
feathers to pop out. So remember that if you
want white to pop out, then you need to put something darker underneath it
because you can't make white whitr Let's go ahead
and just wash that in. And we'll go ahead
and put a little bit strike up a little bit more
and come up to the head on. Great. All right. Now, let's wash in some of
our emerald blue. Now with this emerald blue,
we're going to wash it in, but we're going to come back with the same color
on top of it. Just be a little bit cautious. You just don't want it
too dark right now. Otherwise, you won't see
it when we come back. Actually, just go ahead and
feel that whole area in. Same hothead Right. B on the tail. I'm picking up I have a
little white stripes. I'm a little bit right there. We're not going to be quite as crazy as we were
on our first bird. That blue tip bird has
beautiful blue legs, but we are going to
start with the base of this emerald blue for this one. Good. Come in ever so
lightly, 95% water, 5% Prussian blue and same thing. We're just washing
in a base coat of everything we're going to
use on this blue J. No. Great. All right. While that's drying, let's go ahead and pick up
some but with our angle brush. We're just going to
lay something in. Starting on that
chislled edge down here, so it's sin and then I press
and it gets thicker and. And then we'll come
in and we'll add some branches to
attach our berries to. But this gets us going No. No. Good. Well, that's still wet. Let's just pick up a
little bit of our umber. Umber. Is a little
bit here and there. It will look a little
bit funny right now, but that's okay. Nice. Mam. Let's pick up a little bit of our raw umber or your darkest brown,
whatever you're using. And let's remember we want to keep some of this buff showing. I'm kind of just going on top of areas of the brut number. Great. And I think we
can leave that for now. We'll come back and
do more with it, but we'll keep moving. So let's come back to our indigo to our Emerald blue and picking up my
number four round. I'm going to make a nice
little well of color here. That helps us maintain a consistent color when
we put it on our paper, if you have a little well mixed. This is probably an
80 20 mix, 80% water, and I'm just going to come
in and start feathers here. Nice. And same here, if you look at the
reference photo, this is actually a fairly smooth area right
here on the back. I'm going to bring
some down here. Hey. Good job, guys.
18. Bird 3 Start to Lay in Feathers: Picking up my number four. And while the bird is drying, let's just come back
into our branch, and I'm just going to well, that had too much water on it. I'm just going to emphasize
a few spots here and there and making sure that we leave some
of that buff showing Go Go. Okay. I'm going to pick
up some of the raw umber. Back to 19010. It comes on, but I'm just going to
touch it where it's wet. And add some added
darkness here and there, where it connects here. O. Great. Well, let's add a little bit. Notice I made some
that are horizontal, but on the vertical ones, I'm making them curved. So those marked curved lines and make it look
ground, obviously. Good. Let's go ahead
while we still have these colors out on our
palette that are wet. I'm switching to my one
out, number one liner. I'm just using a mixture, whatever's on my palette here. A mixture of the two browns, if you didn't do the
other birds with me, when you're doing branch lines, the trick to success is
to wiggle your brush, make them jerky for most trees, obviously, not for every
tree, but for most trees. So we're going to use
a 90 ten ratio here, and we're not going to
get too carried away. We're going to add
quite a few berries. And I'm going to keep the
branches fairly close. Instead of branching
out too far, I'm going to keep
them pretty close to the main trunk because it will help us when
we put our berries on. So you kind of have to
picture in your mind the way you're going to paint this
and think ahead a bit. That's part of why
I always paint these four or five
times before I get ready for a class
just to make sure you get the kinks worked out of
the system, so to speak. And as you get more
and more experience, you'll just know naturally what to expect,
how to anticipate. Great. I think that's probably close to
all I'm going to do. Maybe one more up here. All right. And then
I'm just going to just picture clumps of
berries around there. We don't want to distract
or detract from our blue J, but I think these
complimentary colors of the red against the blue
is going to look fabulous. So we're going to let that. Then we can come in with
some of our prussian blue. I'm actually going to
stick with my number one. I'm going to mix up some
prussian blue and use a 9055. We have a good base. Now we need to start layering in some deeper colors so that
we know where we're going. I always keep my tissue handy. Two or three squares kind of folded over, kind of helps me. So if you look at
our reference photo and I always keep
the photo on screen, as you can see of the finished
piece because I think it helps you see the end
result, where we're going. We're going to start
not super dark. Okay, that's not going
to be the end result. You don't want to go all the
way dark right off the bat? We want to build up to
it so it looks like it has dimension and
depth and texture. I also want to point out I'm doing some lower
down and higher up. So if you didn't do our
other birds with us, we need to knit those
feathers together, and we don't want
just a straight line. And bringing them
out into the white. We are going to punch in a bit of background
there, but that's okay. We'll go right over it. Now, as we bring this pression down, there is going to
be a ring of white. So make sure you leave room for it. In fact, I'm
going to come down. Just to remind myself.
Here we do that. It's like, Okay, I need
something to remind myself. I'm putting this pression blue. I'm leaving a ring
of white here. I'll just come up and
meet it How's that? Oh, he's looking so
pretty already, isn't he? I don't know why I
call all these birds. Maybe they're a sheet. I don't know. I guess most
colorful animals and birds, the male is the pretty
one. All right. Now, same thing
with the wing here, I'm just going to
add layer here. Just to start laying
in the ground work. M. Trying to get all my
stripes in line here. And then these, we can finally
do some longer feathers. Watch your contours,
as we do here, they're going to flip up as
we do here, they come down. And they might look kind
of sparse right now. Remember, we're just laying them in just trying to get the layout of the bird
and kind stay on track. And then we're going to these are actually going to come down a little further, I guess. Okay. And this will be the
underside of his tail. And then there will
be a white strip. And then a dark
area. Great. Okay.
19. Bird 3 Laying in more feathers: We need to come in here with
some emerald right here. Let's pick up our number
four and some emerald. Let's put some on
this under belly. Just because we're
going to be putting Prussian blue on top of it. If you put Prussian
blue right on top of this indigo right
here that's so light, it's going to look funny. Let's just soften it a little. That be better. And we have this let's just
pick up a little bit of this pression and start working
on the legs a little bit. Right here, there's a
shadow a little triangle. A. I'm just going to wash in
at the top of this leg. Because I'm going to put
some light over that. I'm picking up my
five out 80 20 mix. And I'm just going to start laying in a
few more feathers. All right. Let me the brush
back here you can see better. I'm going to have
this white and here. But I'm going to bring
this up a little bit, so it blends in when
we pull that white. Mm hm. You have to load these
little brushes frequently. They don't hold a lot
of water and paint. Great. All right. And then
same thing here on the side. This is going to blend in with the whites that
we're gonna put in. Okay, and all we did was wash this shadow in. Now we can go ahead and layer. We're going to come in with
Prussian blue here as well, but let's start with
a little layering. H. Make sure you're putting this
leg comes from the body. It's the forward leg. I'm pulling out and it's
coming from the body. This leg is on the
other side of the bird, so the body is forward. So these feathers here are just the bottom side
of the feathers, you know. We'll try to keep proper
perspective there. All right. Let's come up to the beak
and add a little bit of this pression blue and start
to get some formation there. I'm sticking with my little five out because the beak is small, and I want to try and make the bottom side darker
than the top side. I'm going to build up to it. Okay. I don't know about you, but I was
holding my breath there. Breathe. Breathe.
Okay. I'm going to come back in and it's wet, so I can just touch it with
some darker fresh and blue, and it will automatically
cover that area. Remember, paint flows
where the water goes. It's nice. It does
the work for us. We do it once and it
does the rest there. That's getting nice and
dark. I'm actually going to pick up some of
this indigo blue, which has a lot of gray
blue and touch it again. Or. Might have to let
it dry and come in.
20. Bird 3 White and Dark Feathers : I think we should
go ahead and lay in some of our
white feathers now. It's going to take
several layers, but it will help us keep perspective on
where we're at now. You probably could put this on a piece of watercolor papers or definitely on your palette. But because I'm going to be
dipping in so frequently, I'd just like to keep it
and so I put it in my lid. I probably just put a little
bit of water in here, just dipping from my brush, going to be more like 10% water. And 90% paint. Anyway, let's go ahead
and start with some of our feathers just at
the top on his face, his neck and keep some
space between them. Let's just go in gently, knowing that we're going
to do several layers. Slow and go is what I say. It's easier to add more in than it is to try to lift
out after you put it in. We're going to put a
little bit around the eye. Now, we don't want it to
look like eye lashes, so they don't have to
be the same length and they can be going a
little bit Kitty Wumpus. It's fine. And he's got a
little bit above his beat here. Great. I remember this just
our first little layer. All right. Let's
put some in here. You look, notice some
come all the way up here. So stay down lower. We don't want to have a stripe. I want to look natural. Now, on his belly, we can go ahead
and make feathers. And I'm going to
need more water. Just make sure you're following
the contour of the bird. When you're doing
that next row down, the secret to making it so it doesn't look like a stripe is to have some start way up here
and some start down lower, you know, just to,
like I said before, kind of mesh those together. Again, this is just
our first layer, so be too worried. And bringing those
into that blue. And here. All right. Let's do
the top of his legs. Uh All right. I'm just going to put a bit. We are going to come in.
I have a fat leg there. I just noticed, so I'm going
to actually that down a bit. Then I'm going to
that. All right. We are going to come
in with a couple more layers on our legs. But you can go ahead and start adding a little bit of
highlight here and there. K. Let's go ahead
and rinse that out, and let's come in
with our number four. We're going to stick
with our white. Just wanted a
thicker tip so that we can do these bigger
white feathers. They might need a
couple of coats because we're going over blue, they just come down here. And we'll come put a line of
Prussian blue between them. So pretty. All right. Let's stick with our number four and let's pick up a little
bit of Prussian blue, quite watered down and just float a little over the
top portion of the beak. Pick up a little indigo. And I'm still going to
leave the eye alone. We're going to ink that eye in. You can paint it if you want. But if you plan on
inking it at all, just leave it alone
for a minute. Let's pick up some darker
pression blue now. And I'm going to come
in with some feathers. Sorry, if my hands
locking the camera, but darken some of these
feathers above the nose. Be. I'm sure I
meant to say beak. You add that stripe across
in front and behind the eye. And then there's a bit of a almost if you look at
the reference photo. It's a little bit of
feathering the darker blue around the best touch. And let's deepen. Is that outer edge. It's getting pretty. Now again, I'm going to drop down
just like we did before. I'm dropping down to the bottom. And I'm reminding myself that I don't want to do
all of the blue. Just the bottom outer edge. It almost gives us three
shades of blue here. And we may even come in with a little indigo at the
end if it needs it. Okay. I pull this
out a little bit. You guys can't see my face, but I keep looking at
the reference photo. Now, if you're doing
a whimsical bird, you don't really have to. It's not that I'm going for
a total realistic look here, but fairly accurate, I guess
would be what I'm doing. Okay. I think it's time to
work on this section here. I'm going to start at the
bottom and work my way up and I'm just going to add some shading with
the dark repression. Between the feathers. And under. It's going to look
really dark for a minute. Don't panic. It's
going to be fine. All right. Breathe.
Breathe. Now, let's just pull this
down a little bit. Okay. We're going to come in
with white one more time, so it's really crisp
white like the photo is. I love that so much. Okay. And then above it. I'm just feathering it, but
I rounded the bottom edge. And I guess here's where
you just need to decide how close to the bird
you want to be actually. You don't have to
do this. I didn't do it actually in a
couple of my versions.
21. Bird 3 Background and Berries: Sticking with my white
and my number one liner. I'm going to go ahead
and add some of these feathers on the back now. So there's just a couple
of spots that are picking up light or maybe they're
white feathers, I'm not sure. And some white feathers in there. All right. I have just
a few little white. Here. That's good. Hey,
how do you do, guys? That pretty good. All right. We are going to put in a
little bit of background, and I've got my blues here. They've mixed together
a little bit. I'm just going to
use a lot of water and pull some up maybe
here from the back. Remember this is going
to dry one shade lighter and you decide
where you want it to go. But use clean water. Don't
use your dirty water. Remember, we're going to have a whole bunch of berries here. And it's okay to have it
going under your berries, but just keep it in mind. Okay. I'm almost done here. Pull in a little darker. With the head. Yep. I like that. That's fun. All right. And I don't think I'm
going to splatter. I know. Don't fall off your chair. Don't
fall off your chair. But it's because
we're going to add so many berries that it's
going to be very busy. So I'm going to stop. I'm going to show
great self restraint. Okay. All right. I have prepared a well
here and it's not a 90, it's actually on
the thicker side, so I would say more of a 70 30, 70% water, 30%
quinocridin burnt sienna. And the reason I've made it
a little more thicker is because in using the Q tips,
let me pull some over. They go on pretty
diluted and that's okay, but I do want them to show up. So that's where I'm
going to start. I can always add more
water if I want to, but you want to have a good well prepared because a lot of it's going to get
absorbed onto your Q tip and you don't want to have
to stop and prepare more. Okay. Here we go. If you
haven't done this before, when you first load your tip, I'm pressing down in order
to have a flat bottom. Let's just pest it out here. That's going to give you a
nice round circle. All right. And you can press it and
have a small circle, you can press it hard,
have a large circle. Just have fun with it. Do all different sizes,
bunch them together. You have on top of each other, have some on top of the branch. I'm going to leave that for now? Can I always come
back and Ed More. Oh, looks so good. See how the red just works
so well with that blue. So pretty. And it's okay to have a few that
they appear to be floating. That's all right. Okay. I hope you're having
as much fun as I am. This is almost as
good as splattering, guys. This is awesome. I'm coming up here
to kind of give me a guide on where to stop, and then I'll kind of
fill in a little bit. That's feeling pretty good. I didn't get any that we're
too close to the body. I don't want to take
away from our bird. I'm feeling pretty
good about that. I think I'm going
to couple down. So your eye is drawn. Yeah. I like that.
How did you guys do? I like that. That was so fun. I don't want to stop. All right, and we're going to come
back and we'll put a white highlight on our berries and in we'll be finished.
22. Bird 3 Inking and Sign: All right. I'm going to move back to the
side a little bit. We're going to pull out our pen. And finally, we can
put in the eye. You've been so patient. But let's go ahead
and start by making a round circle and
just filling that in. And I am going to go over
the top of that with some paint to fill in any
little blank spots now. With the black, we're
just going to go over these blue feathers that are on either
side of the eye. You add some black lines
deep in those a little bit. And we can start to enhance
the outline of the bird. I'm certainly not going
to do every detail. So if you get the other
birds with me and I hope you did,
then you'll know. We're just going to do an
indicator of feathers and we use the black t to
enhance and add depth a little bit here. Oh. Always broken
lines. Curve lines. In situations like this, I just do a little line between the paint
lines. Some of them. I don't do a zigzag,
in other words. Your eye and your brain
will do the work. It's so interesting to me. I'm actually a certified
forensic artist. I used to do work for
the police department. And your brain is amazing, what it will fill in,
what it remembers. And it makes our job
as artists much more interesting and
easy in some ways. Okay. Now, Okay. That's probably all I'm going
to do on the a little bit. Hey, I think that's
about finished? Okay. Let's pull out our we finish off the eye and
highlight a few berries, and we will be ready
to sign our name. Actually, before we can
put the white that eye in, we pick up some of this indigo and just go over the pupil. We don't want any pen marks to show you want any white showing? All right. While that's drying, let's go ahead and put some
highlights on our berries. We're going to use
the same brush, five t and our white. All we're going
to do is just put a little highlight
on some of them. Just a little. Not on all of them,
but here and there. Over here. I like these floating
berries. That's fun. If there's a certain bird
that you would like to paint, let me know in the comments
section in the discussion or post a pick of your bird
and put a comment there, and we can communicate together. I'd love to do some more birds. This has been a
really fun project. Okay. Let's let those dry for just a moment so we
don't smear because we need to come back in and add the high light to the eye
and then we'll be finished. Hey, back to our five
out and our white, and we're going to just do a really light outline of white. It's a broken line.
It's not a solid line. That. Beautiful. And
then pick up some more and go ahead and put a highlighted dot.
Just a little one. Just like that. There's
we finally have an eye. Yes. All right. So let's go ahead. This is our final chance to step back and take a
look and see if there's anything else that you feel
like you would like to add or if you would like
to change anything, and if not, I'm going
to remove the tape, and we'll go ahead
and sign our name. Okay, guys, I think
we're ready to claim our artwork by
signing our name. Please always take the
time to sign your name and be really proud of what
you have accomplished. I am so proud of you and I'm so grateful that you took the time to take
this class with me. I hope that you will Take
a look in the mirror and tell yourself just how talented and wonderful you are. You have an ability and a skill here that most
people don't have, and it's really wonderful that
you are taking the time to pursue what you love to do and try to do it a little bit better each time
that you practice. Let's go ahead and sign our name together and
claim our artwork. All right. I'll see
you in the next video.
23. Congratulations: Wow. Well, congratulations. You have finished you have done it and accomplished
all three birds. I hope you did all three birds. And if you could
take just a moment to snap a pick of one, two, or all three of your birds and upload those into
our class gallery, I would be so excited to see
what you have accomplished. Also, if you felt
like this class was beneficial and you learned something and had a good
time along the way. Then if you would like to
share this with someone, all you need to do is look for this button and send that to your friend and both
you and your friend will benefit financially
from skill share, which is a pretty cool thing. And if you would like to
take more classes from me, ma'am, I'd love to
have you join me. All you need to do is type my name in on the
top search bar, Carrie Sanders, and
all the classes that I teach here on Skillshare
will populate for you. I hope you'll join me again
and until the next time. Take care, everybody.
 Kerrie Sanders, Artist, Teacher, Creator.