Transcripts
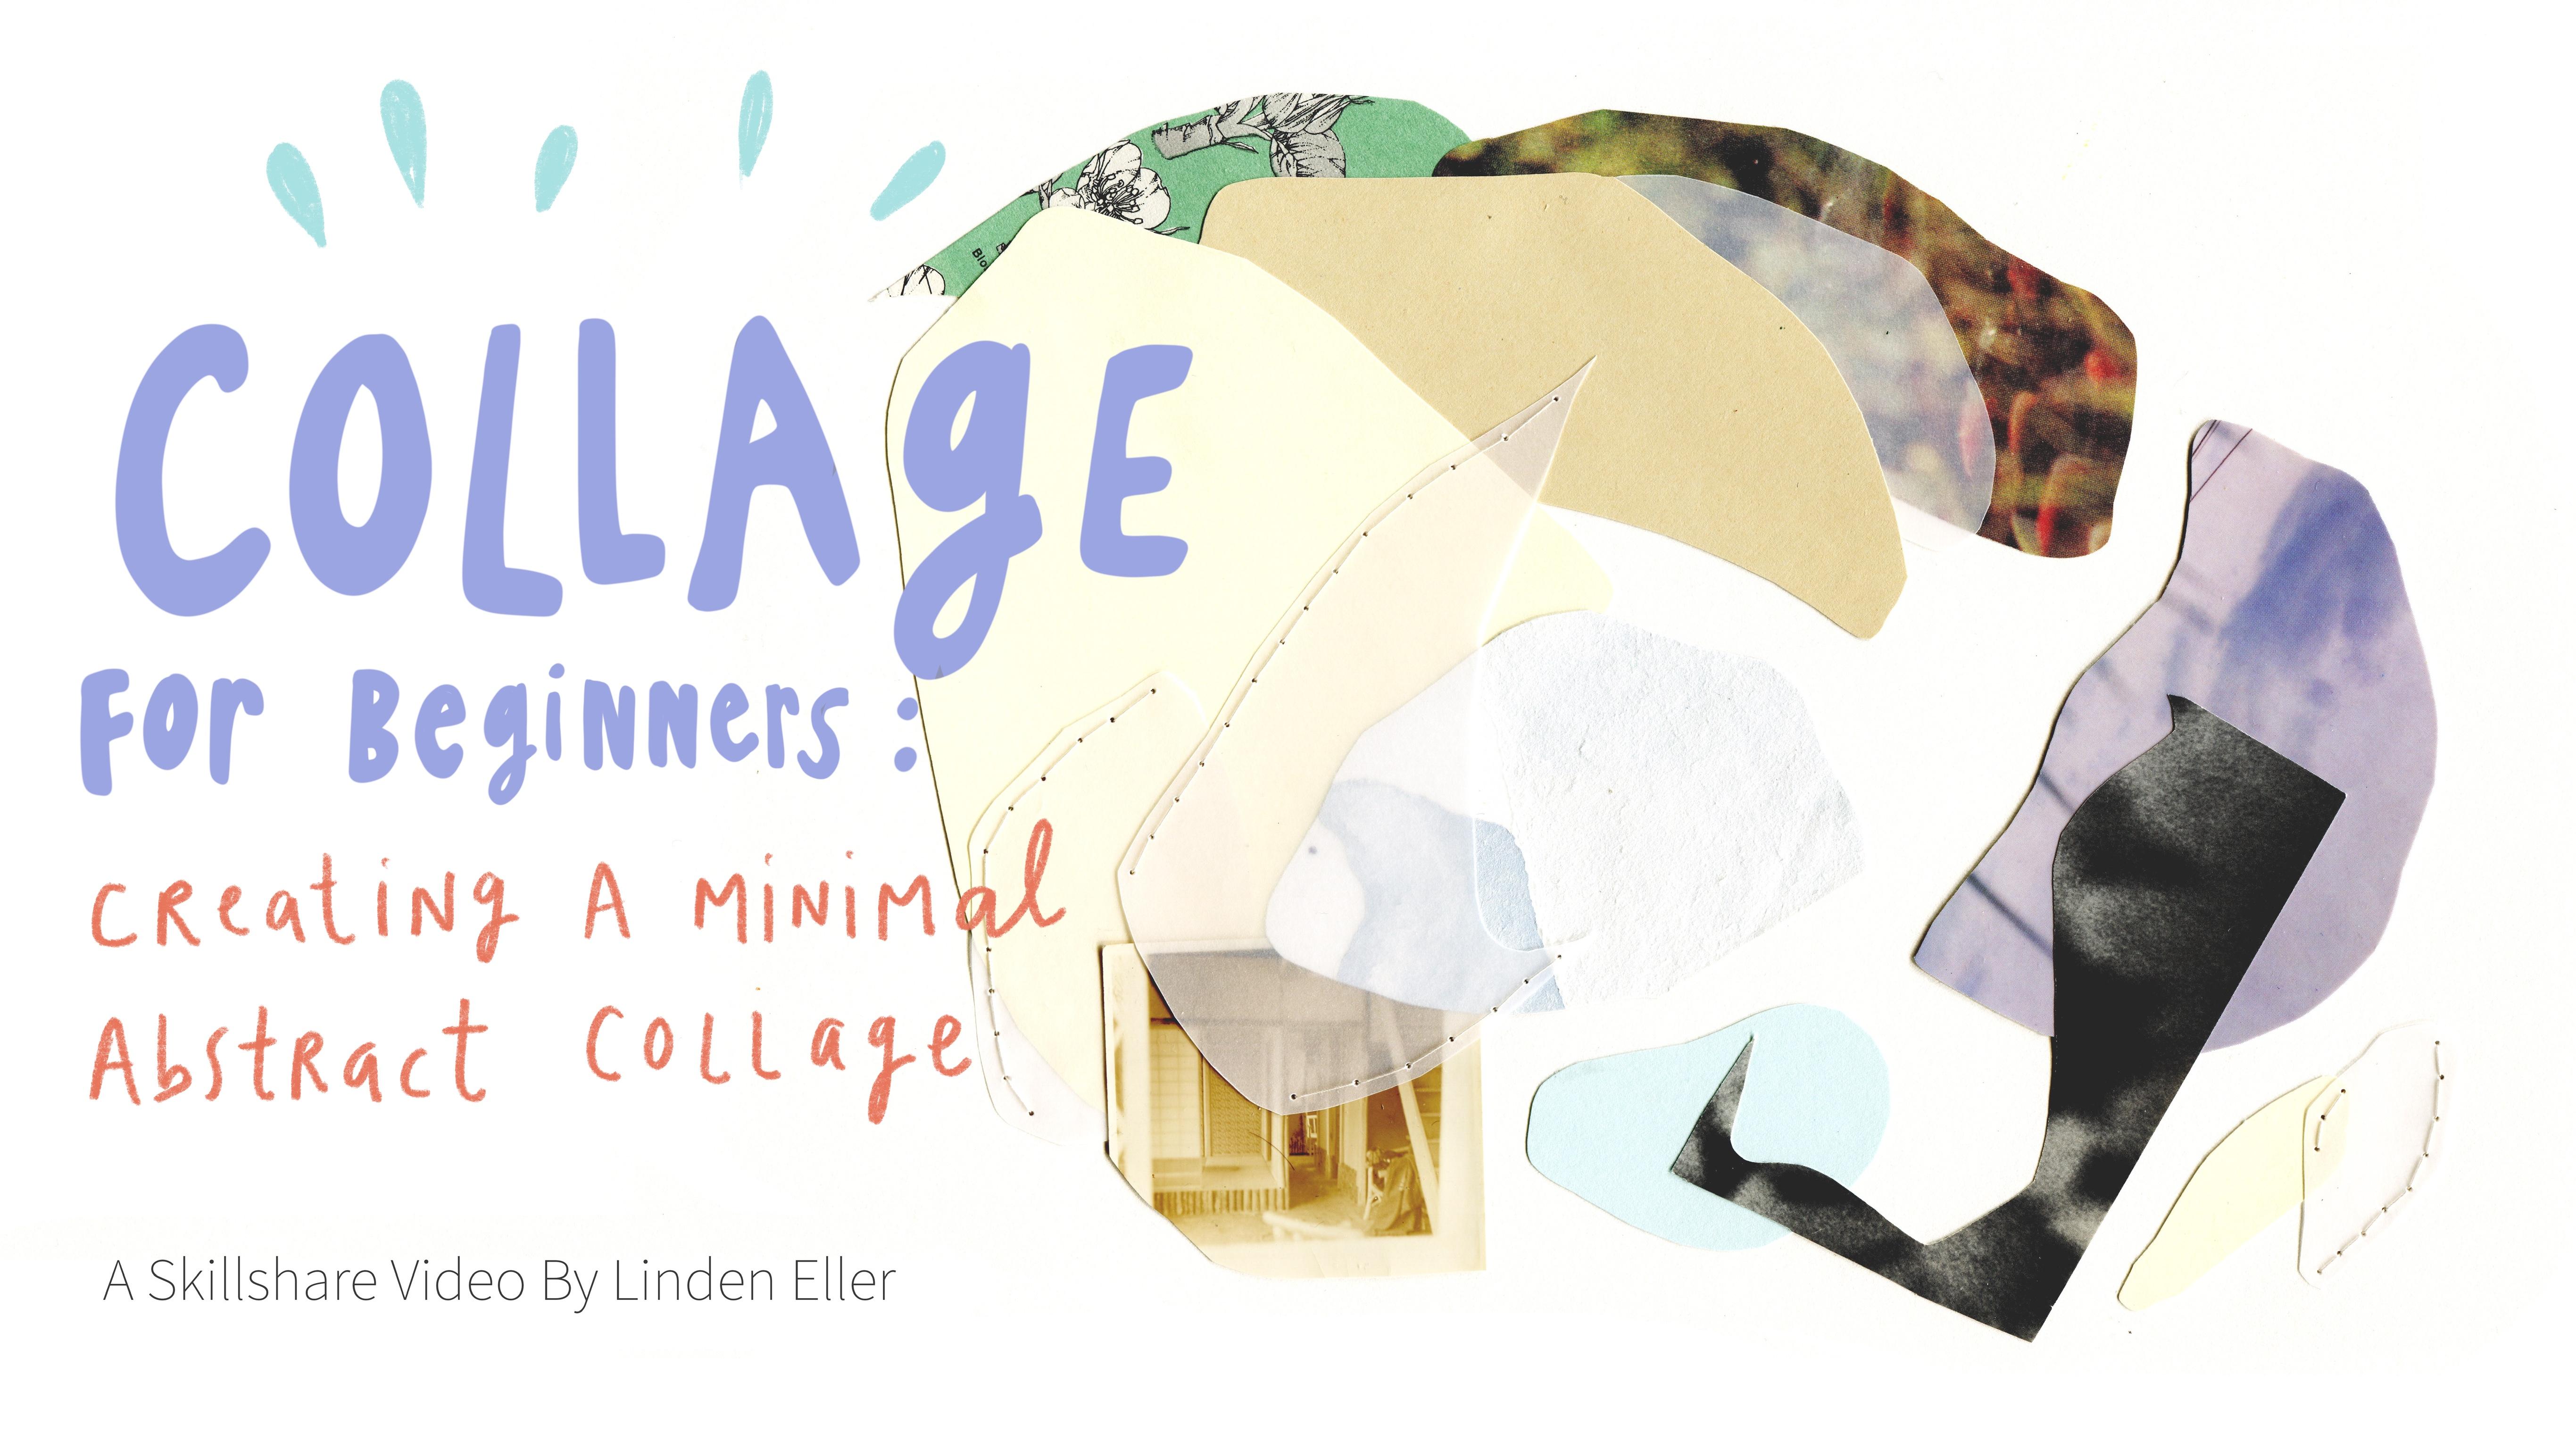
1. 1 - Introduction: I'm Linden Eller, and I'm a mixed media artist from the United States, even though I have always included collage elements in my work, I began focusing dominantly on collage during my season of 5.5 years of long term travel, mainly because collage allowed me to continue making work but with minimal supplies and space. It's a really beautiful genre because it's largely dependent on your own unique materials that you find and discover. So in this course I'm going to walk you through my whole process, including how to find, cut and arrange your fragments as well as my own personal tips. So in the end you will have your own finished, minimal abstract clutch. That's a good start.
2. 2 - Preparing Your Materials: preparing your materials. Most important are your collage fragments so you can gather together some old books that you can cut some images out of. These are some books of old paintings, even like to use just the backgrounds because they look like brush strokes. And I really like the addition of that texture and my collage ins. You can also include old magazines. So some old national Geographics Well, this is a very, very old collection of black and white photographs. Really, like Teoh and I always keep a bin of scraps from previous collages that I've used. So sometimes when I'm cutting something out, I put the remainder of the peace in this been, and I always keep it on my desk. So if I'm making something small or if I need something quickly but can usually find something that I want to use in here so you can see a lot of these fragments have little shapes that I've cut out to use for other projects. And I really love repurpose ing these leftover pieces. And I think the holes in the shapes that are left behind in each piece become really interesting and the randomness of how they end up. It is something that I really like to incorporate. So that's another idea that you can use is to keep a collection of pieces in a big box at your studio desk for quick access and leftover pieces that become really interesting pieces on their own. Next, you will need scissors. So these little scissors are Martha Stewart. You can get the minute in craft store, and I have actually had this little pair of scissors for eight years. I took them with me all over my travels, and I still have the same pair. They are great because you can pack them up in a little kit to take with you, and they're just really good for getting some detailed shapes when you're cutting your fragments. So it might be attempting to use bigger scissors like these, but you really don't have as much control, um, the's big blades. Then you do with a smaller pair, so I definitely recommend getting a small pair of scissors to do your work. It's also good to have a pencil and an eraser on hand, because we will be using these to help us when we are gluing are pieces down. Also very important glue, so I don't really have a favorite brand of glue or glue stick. I intend to have a lot of different kinds around at once, but just make sure that they're strong and acid free. Now. If you want Teoh, so your collage going to need some thread and a needle, any color of thread that you would like you can choose. I tend to mainly use white and neutral tone threads because I don't like the stitching to pull away. Focus from the fragments, but you are welcome to use any color of thread you would like. When it comes to paper, there are a few different kinds of paper you can use. I do prefer the Strathmore paper, Siri's, and I switch between using Bristol Bristol paper, which is nice and strong and smooth. Sometimes I also use watercolor paper. Even though I'm not using watercolor paint. I'm just collage E, but sometimes I really like to have the texture, cold press texture of the paper, and probably most commonly, I used the mixed media paper, and if I'm doing a final peace, I dio prefer to use the 400 Siri's, which is the best Siris of the straw. More paper. So it's always the brown color paper. The yellow is more of a medium Siri's. It's 300 so it's one quality step below the brown 400 Siri's. So this'll is probably my preferred paper, the straw more 400 Siri's mixed media. Whatever paper you do use, just try and make sure that it's acid free and heavyweight. Now, if you like to incorporate vellum or transparency, this'd is very common in my work. One of my signature parts of my work is all the transparency that I use, and typically you need to order this online. It's very hard to find heavy vellum in craft stores are in art stores. You can't use the very thin vellum, but it will just be a little bit more fragile, and it might tear more easily when you're stitching it or it hearing it. I also like to have plain paper, in addition to all of my patterned paper or paper that has imagery on it. Like photographs or things from magazines I always like to incorporate plane shapes is well , I tend to find that if it's too heavy and imagery. It gets a little overwhelming, especially since we're trying to create a more minimal collage. So I just would recommend for this project to try and have some plain colors of paper available. If you also want to incorporate other materials, lying fabric or lace or felt for different textures, you can also gather some of those things for your Kalash. Those are also optional, so now we have all of our materials and we are ready to begin our kalash.
3. 3 - Selecting a Trigger Piece: selecting a trigger piece. So I always like to start my collages by searching for a trigger piece and a trigger piece for me is anything that really excites me or feels inspiring or an image or a scrap that I feel really connected to. And I want to highlight in a collage, something I want people Teoh, Pay close attention, Teoh. I want them to also discover how special it is or how I think it is. So this is the power you have as a collage artist. You get to choose what materials you think are special and why people should pay attention to them. So we're going to start by searching through all of our materials and looking for a trigger piece. That first piece that you kind of want to be the focus of your CA watch as you're searching for your trigger piece, you can also put aside a few additional pieces that you really like and connect to as well . Maybe just put them to the side, and you can choose through them. After you've been going through your materials, you can pick out your favorite, or you can also maybe incorporate the extra pieces into the finished collage afterwards. Okay, so I have chosen this small photograph as my trigger piece kids of a room in Japan and I did actually bring it back with me from Japan. So this is going to be my trigger piece. I really like this. And I want people to pay attention to how special I think this piece is, So that's going to be my trigger piece.
4. 4 - Exploring Shapes: exploring shapes. So this is my trigger scrap. I'm going to set it aside for now. So I want you to gather some plain paper or some images, maybe from one of your magazines or books, and we're going to explore ideas of shapes, ideas of colors and of texture before we start searching for the remainder of our materials . So every artist has their own language, and this is a part of the process to figure out what your language is when working with collage. So a part of that has to do with shapes. How do you cut your materials out? I tend to cut out my materials, repetitive Lee and a very similar shape. So, for example, if I were to cut out the sky here, I would tend to repeat to the same process and the same shape which usually starts with kind of an arch, something a little curvy, and I would come down and curve back around to kind of create this organic long shape. So typically, my shapes tend to be very soft. We'll do another one here so you can see how repetitive I m in my shape cutting, so I don't plan cutting of my shapes. There's no planning. There's no sketching. There's no decision making. I really just go and start cutting. And whatever shape comes out of me is the shape that comes out. Sometimes they'll still edit it if there's a side that I don't like, or that looks awkward, but most the time. My shapes tend to look like this. Very organic, very soft. You can see a lot of a lot of my shapes that are already cut out from this pile. They're all kind of long and soft and blobby like little blobs. So this is my language, a kind of shape pattern that I usually use in my work. Now that might look different for you, so you have to figure out what your shape languages. Maybe it's something that's more sharp. Maybe it's something that's more rectangular or more more angular in general that it has more sharp edges so much do you decide to cut them out as rectangles or as ovals or more as the individual shape of an item. So, for example, cutting out the shape of a person's face exactly as the outline or cutting out a horse exactly the outline of the horse, or do you want to include some of the background? Do you want to cut off half of a person's face? Do you want to include the whole thing? Do you want to just include the mouth? There's so many ways that you can edit your material based on the shape that you choose to cut it. So I want you to take some time and explore cutting things out in different ways and seeing what excites you the most are seeing what the track see the most and see what comes natural to you. See what you like. Maybe cut out a few different kinds, put them together and see which you feel more connected Teoh, or which feels more natural for you to cut out. So here are some examples of shapes that are different from mine, so you can see these are more sharps with angles. There's still little odd right these air, more odd shapes there, not a definite recognisable shape, but they're similar to each other and hear these air all kind of similar, and that there there long okay, they're kind of long shaped, skinny shapes. And then you can do a more basic oval or circle shape. I want you to choose one kind of shape that you're going to cut most of your materials out into for this collage. But I am going to let you choose one or two materials where you don't cut them out into that shape. And this is gonna provide some contrast for our collage. So I I'm gonna let you make an exception to your shape. Rule your shape language with just one or two fragments. You can maybe cut out an alternative way. But for now, just explore cutting out different shapes and choose one shape pattern that you want to use in your collage. Uh, so much.
5. 5 - Choosing Colors: choosing colors. Color palettes are very mysterious. They are also connected. Teoh each individual's language and definitely are something you have to explore as you're discovering that. So I would like you to choose a palette for your collage. And I think sometimes the easiest way to do this is to think of a place or a landscape and imagine the colors in that landscape or place. So if you think of a desert, it has very pale kind of peaches and pale blues and pale sage greens. And so you can kind of facilitate your collage around a desert palette. Or you can consider an Arctic pallet that's gonna be a lot of whites and grays and blues, for example. So if you bring your trigger scrap back and I can use the colors here to decide what I want my palate to be in my piece. So this is a pretty neutral toned photograph, so it gives me a lot of options of what colors I also want to include or explore. So, just like shapes, you have Teoh observe what you are more drawn to as an individual. So personally, most of my work tends to be pale, although I am getting better at using brighter colors. But traditionally my work uses a lot of subdued materials. Start just placing things together with your trigger scrap just for the palate. You don't necessarily have to use thes exact materials, but just to get a sense of what you want your palate to be, go ahead, search through your books, search through your plane colors and try and put together a pallet. That's it's not too broad. OK, we don't want it to be every color of the rainbow that's included. We do want to be selective with our colors, so try and choose a palette. Okay, a tone of maybe two or three. Hughes and the rest are variations of those hues.
6. 6 - Considering Texture: considering texture, so texture can mean a lot of things in collage. Texture can mean the actual physical texture of your materials. So this is a really photograph. It kind of has a shiny, glossy finish, which you may or may not want to include. But then it got stuck to another photograph and as a result, has this soft kind of caught me paper texture, which is kind of translucent. You can see a little bit of the other photograph onto it. So I really like finding accidents like this in my materials so I would actually normally cut out with glossy part and just keep the nice white part. This'll texture. So again you can see my shape, pattern shape. Language is consistent with my other shapes. You can also use fabric or lace or felt, and these will actually glue really well to deeper. You don't need to worry. The lace and the fabric and the felt all respond really well to a lucid to adhere to your paper. I also use sometimes natural elements in my work, like a pressed delete or flower. Those are very, very delicate, though, so be careful if that's what you want to select, so texture can mean the actual texture of the material itself, or it can mean the texture in the material. So if it's a photograph of a painting, for example, it's it's still it doesn't have actual paint texture, but it looks like it has paint texture okay, or if it's a photograph of a pattern of something, that pattern is gonna have a really different feeling to it, to then a real photograph. So I always like to have a variety in the textures of my materials. When I'm choosing. I don't want them all to be photographs. I don't want them all to be felt. I don't want them all to be soft. I like Teoh. See if I can include a variety of different textures. So consider that as you're selecting your final materials for your watch,
7. 7 - Discovering Your Fragments: discovering your fragments. Okay, so now it's time to use your trigger peace, and I want you to look through your books in your magazines and your stacks of whatever you have that you are thinking about using in your collage, and I want you to consider all of the things that we just did exercises in. Remember your shape pattern. Remember your color palettes and remember to consider texture, variety of texture when you're selecting pieces. So those are the three things you want to hold in your mind as you start looking through all of your materials and choosing what ones you want to be in your final collage. So think about your trigger peace and think about what is what is the trigger piece about? Is that a flower? Is it a room? Is that a person's face? And what would you like to communicate that's associated with that trigger piece? Maybe nothing that's okay, too. Maybe you just want to have plain colors and textures around your trigger piece. But go ahead and start exploring your materials. Find other things that excite you. Some gonna make a nice pile here of all of my chosen materials. I found that are possibilities of what I want to include in my collage. So this is my possibility Pile and keep going. This is going to take some time. So again you can cut out your shape or if you'd like. Sometimes I get a little lazy and a little sloppy, and I just want to rip out pieces and make a pile and then cut them into their shapes later . So you can also do that, right? Yeah. So one thing I would encourage you to try to do if you have people's faces I tend to not like to show their whole face really directly. That's just my personal personal tip personal style. I like to create a sense of mystery. So I try and cut it out in a way that maybe doesn't show their whole faces but maybe just shows a part of them. You can also do this when you are arranging your fragments and a composition, you can choose to hide pieces behind others to also create a sense of mystery. So this is just something to consider as you're cutting your pieces into shapes, and even as you're selecting your pieces, try to remember an element of mystery. Don't give too much away with your fragments. If you want to keep them whole and be a little bit more bold in your selection, you're welcome to do so. This is just how I like to think about cutting out pieces. And he also really like to choose fragments like this that kind of have a blurry element in front of something. So I really like choosing those blurry edges of photograph. Maybe a plant or something is coming in the front or on the side of the photograph. These are pieces that I really like to choose in my collages, So don't forget to look to the sides and the edges of your materials. So, for example, I'm I'm not interested in the dog at all. I'm more interested in this nice blue and the kind of grass tones coming up, So that's actually the piece I'm going to select instead of the dog. So again, I'm making my pile of materials that I really like and that I'm considering using for my final collage. But I don't need to decide yet and just making my possibility pile. Don't forget Toe also have a selection of plain colors so you can do a little checklist for yourself. Before we start our composition, make sure that you have a variety of sizes of materials. You have some that are nice and big, and you have some that are medium. You also have some that are nascent small. You can even have some that are very, very, very tiny. Now I do want to give you one exception to the shape rule. So even though I want you to choose one or two kinds of shapes and on Lee, cut your materials out into those one or two shapes. I want to give you one or two exceptions, so maybe you have one or two fragments that you want to make a shape that's very, very different from your other shapes. OK, but maybe just one or two fragments to be very, very different from the others, and this will actually provide a lot of contrast. So, for example, if I wanted to leave this photograph in a square and make my more organic shapes around it or overlapping it, that's going to create contrast that's going to make this piece stand out or For example, if you want to have a more triangular piece or angular piece, maybe one or two, it's okay to have, for contrast, a nice, sharp edge. But for the most part, trying. Stick to your one shape and next we will start working on our composition, all right.
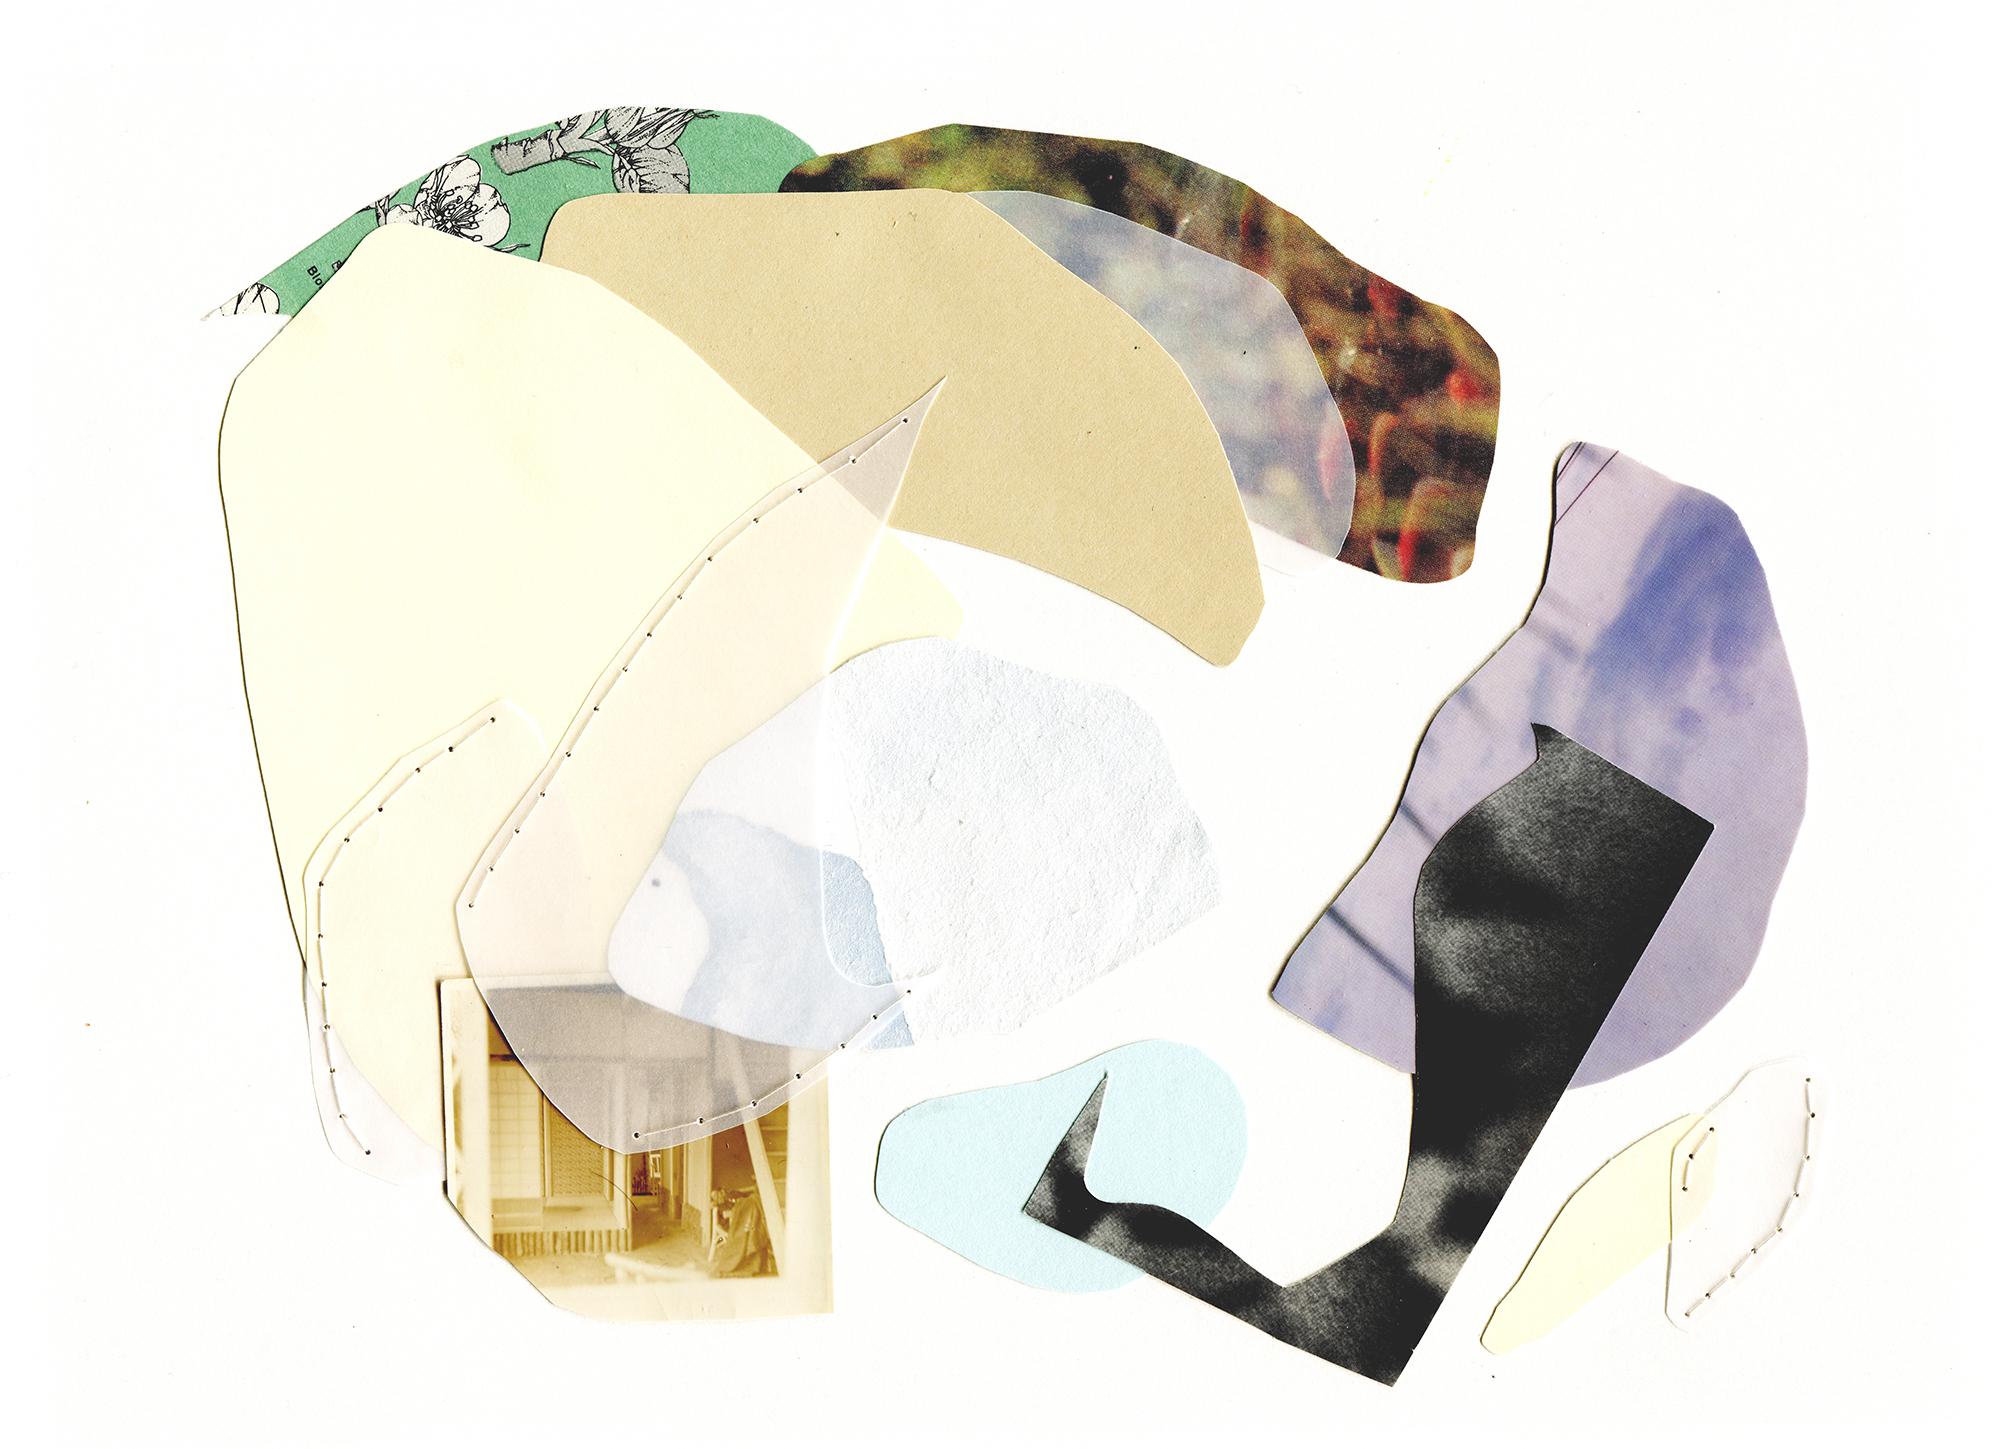
8. 8 - Arranging a Composition: arranging a composition. Composition is one of the hardest things to learn and teach a lot of my composition. Decisions come from intuition and not any sort of formula or anything that I learned in art school, although there are a lot of composition theories that you can practice like the rule of thirds or the triangle composition, and I'll let you explore those through Google. But there are methods of composition that you can further study. OK, so you should have a big stack of materials that you have collected gathered, and hopefully you've already cut most of them into shapes. You're using your shape pattern that you've chosen. Hopefully, those materials are within your color palette that you've chosen, and hopefully there are a variety of textures and a variety of sizes of materials. Here's my trigger piece. I'm going to remove all of my fragments off of my paper. I want my paper nice and clear. Go ahead and remove all the other fragments from your environment, so it's nice and clean. Here is my trigger. So now I start to add piece by piece into my collage, deciding where I want to overlap. What important pieces I really want to show and what pieces I'm okay with covering up so you can see my color palette is nice and pale, subdued. Desert E and now you get to play. Now it's all about play, play, play, play, pick things up, switch things out, try a lot of different options. Another thing to consider when you are building your composition is the negative space. So I tend to create a kind of cluster shape in the middle of my paper, and I make sure that I have some interesting negative space in between my pieces, so I usually don't create a shape that's all touching like this in the center. I try and have some space, some negative space in between my materials to kind of create this movement in and around the collage. You are welcome to actually touch the edge of your collage. I typically do not touch the edges. Sometimes I dio, but typically I kind of like keeping this negative space around the edge. Since we are making a minimal collage, we don't want to add too many fragments, so one mistake that's really easy to make is to add too many pieces Okay, minimal means less. So I know it's hard when you have so many pieces that you like, really want to try and squeeze them all in. But if this is going to be minimal, we have to restrict ourselves from that tendency. So less is more maybe even take away a few pieces when you think that you're finished. So typically your focal peace, which should be your trigger piece. You don't really want that in the center. Okay, so try putting it off to one side. A lot of times you have the triangle composition came where your interesting pieces air kind of in this triangle. That's just a suggestion. A lot of times how I work with a composition is I start with my trigger piece and then I start adding things and I kind of Onley move forward if I like the composition as it is by itself. So I kind of make sure that the composition is evolving in a strong way each step of the way. And if one piece isn't working, maybe I have one piece and I really, really like it, and I really want to make it work, and I move it around to a bunch of different areas, and it just roots, not working. It's not looking balanced. It's not fitting with the other pieces or it's to darker. It's to lighter. It's too much too similar to something else. There are a lot of different reasons that can affect composition. Take it out, take it out. Put it aside. Maybe you can bring it back during a different step during a different, um, draft of your composition. Maybe if you add a few more pieces later down the road, you can tuck that piece back in and a new place, and it will feel more like it belongs. So I do have a large degree of play. But I am also carefully observing my composition as it changes and as it involves, another tip when you're creating a composition is to repeat some of the same fragment in two different places. So a lot of times I try to not have every single fragment completely unique. I like to repeat maybe one or two off the plane colors, or even take a fragment and cut it into two or three pieces and place them in different parts of the collage. So this repetition will move the I to connect those pieces that are the same. So in this case, I have this big piece in this really small piece that are the same color that will also help you create a visually strong collage. Now you can alter your shapes as you form your composition. Maybe one piece is a little too big. You want to trim it down. Maybe one piece just isn't working in that specific way or shape. You need to maybe cut off aside so you can alter the shapes as you arrange your composition . I'm really tempted to kind of alter my trigger piece and maybe cut off the bottom of my photograph, so it's a little bit softer. So I've still kept this sharp corner in this sharp corner, and you can see this piece is my exception to my shape, my normal soft organic shapes. It kind of has this hard rectangle corner, so I have that peace in this piece for contrast. For my shapes, I have a big piece here and a really tiny piece here. This is a little bit smaller, and then I have a few medium sized pieces. So I have a nice variety of sizes, and I also have a lot of different textures. So this is a very soft touch. Ter. This is kind of a blurry photograph. Texture. This is a little bit glossy, and then I have some plain pieces as well. I also have some illustrative elements here and some photographic elements, So I have, you know, an interesting collection of pieces that are are different from each other. I don't have too many photographic images, which might be a little bit overwhelming for a minimal collage, and I have a nice balance of plain pieces for the eyes. Teoh rest on its Not too busy. It's not too overwhelming. I have some nice negative space that's working its way through the middle off the collage. A little nice pocket here. I like to think of them as negative space rivers. So if you don't have those in all your pieces, air kind of piled together in the middle. Try and space them out, so there's some interesting negative space again. Composition is so hard to teach. A lot of it is how it feels. Sometimes the composition just feels not finished to me or feels unbalanced. It's a lot of feeling in there. But I trust you and you think you can do it. It takes a lot of practice, Good luck.
9. 9 - Adding Transparency: adding transparency, so this part is optional. But in my work, I use a lot of transparency, and I think it adds a lot of mystery to your piece. And it's a great opportunity to just practice trying to use the material and get a feeling for what it's like to work with fell. Um, so if you have your vellum available, go ahead and bring it out. And I want you to cut some vellum shapes in the same shape pattern that you've been using for your other fragments in your collage and start placing them on top and do some playing , pausing where you see something interesting happening with the transparency. And I like to have a variety of sizes of my transparency as well. Maybe two or three pieces and I like toe have ones that are a little bit bigger and ones that are a little bit smaller, so you have to decide what you want to cover up. So normally I like to add mystery to any piece that's really recognizable. I tend to find it's maybe a little bit too strong if this whole photograph is visible, so I'm going to cover it up with some transparency, even if it's just a small one there, and I might cover up a little bit of my illustrations at the top, because those also seem a little bit strong. But again, you have to reconsider your composition. So now we have a new challenge, adding the transparency. Maybe the composition felt finished before and now adding these new layers of vellum. Now maybe your composition is thrown off again. Okay, so again, we have to consider the negative space. Maybe that were changing as we add on our vellum pieces. So play move things around, maybe overlap two of your vellum pieces. This usually creates an interesting composition because you have to vellum pieces that are kind of close together. Another option is to hide your vellum pieces behind other pieces so they don't have to be on top. You can also hide them behind. Sometimes it takes me along time to decide on a composition, so don't don't be scared. Guys take us long as you need, so there's a lot to explore here just again, the same as the composition arranging. It's a lot of playing, so play shift cut some pieces out. Move them around. And when you are happy with their effect and what they are hiding and what they're revealing, then we are ready to it Here and glue are pieces down.
10. 10 - Adhering (and optional Stitching): adhering and optional stitching. So now it's time to get here. You've worked really hard figuring out your materials, figuring out your shapes and your colors and you textures and different sizes and your composition. And now it's perfect. And you wish that they all could just magically glue themselves exactly where they are but almost ever happens. And so we have to carefully create some little reminders of where the pieces live on your paper in order to glue them down. So I will teach you my method of how I like to it. Here, my pieces, you will need a pencil, and later you will need an eraser to erase those pencil marks that we're going to make. Now, if you're working on a really big piece, this is gonna be really hard, because it's gonna be too many materials for you to remember where each of them goes. Since for this collage were working on a nine by 12 paper, you probably won't have that many materials, and all the shapes will be different enough that you will be able to match them back to their shape at the end. So it's kind of like a puzzle we create these little outlines, and then we find the shape that matches the outline and we glue them back on piece by piece . So take your pencil. We're gonna start with the very top piece. Usually, this is the transparency, peace, and depending on your material, you don't want to write on a photograph. It's gonna be really hard to erase, but something like paper that will erase no problem so very, very lightly. I'm going to make a little hint to myself of where that point to goes. And I can also do one here on my paper, Maybe a little lying here. Okay, so just some little marks and another hint as you can make a line going in the opposite direction so you know exactly where to line it up. So once you have your little puzzle marks in place, you can take it off and make a little stack to the side, and I like to keep them in order as I go. So the next piece I'm gonna stuck on top of this. And so then I just moved backwards when I'm finished. So next piece on top, I'm going to do all my transparency. Vellum pieces first make a small outline on the top and bottom is enough. A little hint line, and then I can remove it and put it on top on my pile over here. So I think my other two Transparency czar hidden behind. So I'm just gonna find the next piece on top, and I have a few that are on top. I'm just gonna work my away over Here's this piece. Make a little Hinch line. So I know which end goes where. Put it on top of my pile, make a little corner line. This is much easier if you have rectangular pieces because you can just do a little corner marks and hopefully just with these marks, I should be able to fit it back in. I'm not gonna put marks up here because this is a photograph paper and it will make an indent if I use my pencil on top of it. So I'm just going to trust that that I can put it back using the lines on the bottom. Okay, so next is here. It's now with this one. This is self contained. Yes. There's no more pieces that are touching it or that are beneath it. So I'm just gonna leave that on my paper. I don't really need to take it off or move it. I'm just gonna leave it right there. Same with this blue piece. Okay? I don't need to move it. So I'm just gonna keep it there. This one, however, there are a lot of pieces beneath it still, so I do need to pick it up, so just draw a few lines. You don't need to do a whole outline. You can, but this is just more erasing for you when we're finished. Another hint is to try and place your pieces in the pile in the direction they fit on your kalash. So try not to turn them as you put them in your pile. It will be easier to remember how they are placed when you're putting the puzzle back together. If you keep them in their same position. Okay. So now you've reached this point where you just have maybe a few that are remaining that aren't touching any other pieces so they can stay in their spots there little puzzle slots . Now it's time to get your glue and pick each piece up, Flip it over. Make sure you get a lot of glue on the edges. You wanna have it all over naturally. But the edges are very important as well as those little ends, and you're gonna fit it back in its little puzzle piece. So find how it fits within your lines that you drew and give it a nice solid press. Make sure it's really down nicely. Now, this piece, this is a transparency. Now we can't glue the transparency pieces because they will wrinkle from the moisture. So my little hint is to use washi tape. So I take a little bit of washi tape and I place it where it's supposed to be in its puzzle piece, and I put a little piece of tape down. Now, the reason I did not put the tape here is washi tape is normally very easy to remove without tearing any paper. Except if you have this very thin magazine paper. Okay, it does tend to stick or rip on this magazine paper. So whenever possible, I try and put the washi tape on the actual paper that your collage ing onto it will be able to remove very, very easily without ripping anything, so it could be a little confusing. You have all of these lines and you're thinking, How do I remember? What if I can't remember how to put the puzzle back together? Well, it's happened to me before, and I will give you a cheat. Take a picture so I always take a picture of my collage when it's totally finished in the composition that I want. Teoh have it in before I start adding my pencil marks and taking off all the layers I like . Teoh, take a picture of it first. So if I happen to forget where a piece goes or which direction it was facing, I can reference my picture and it can help me get back on track. So the only thing that you need to be careful of is when you are putting your transparencies on the top, sometimes they will overlap with some of your pencil lines below them. So I always make sure that you erase all your pencil lines before you start so weak. All right, so now it's time to go and erase all of those pencil lives. Be very, very careful when you're erasing, so you don't accidentally touch or move your fragments, even though they are glued down, they can still by accident, get pushed back or crinkled with your racer. So just take some extra precautions while you're erasing your pencil wings. Okay, don't forget any lines that you may have added on top of other pieces. Now, if you'd like to stitch. So this is if you're using the transparency pieces, the vellum. Now you can use glue on very small pieces of vellum. They will be okay. They shouldn't transform too much or wrinkle too much. But if you use a big piece of vellum, especially depending on the heaviness of the vellum, the thinner it is, the more it's going to wrinkle. The thicker, heavier vellum will not wrinkle as much, but the glue, because it's wet, will change the consistency of the vellum. It's going to cause it to, so this is where the stitching comes in. So get out your needle and thread. I like to cut a nice, long piece, maybe two feet two or three feet, but you don't want to make it too long because it will tend to get a little nodded as you sow, so I like to keep it long enough so I'm not re cutting and re tying to many knots. But short enough that I'm not getting frustrated when my thread gets tangled because it's too long. Make a nice not on one end. And go ahead, ex thread your needle on the other end. Make sure that that not is maybe 34 or five times nodded. It will come through the paper if it's not big enough. Another thing you can do with your paper once you start sewing. I like to start on one side and then work my way over. So I'm actually going to start over here. And once I choose where I want to start, where I'm gonna put my first hole, I'm going toe poke it in to make sure that it's poking down towards the back and I can find it on the back. Bring it through. And if you're worried about your not coming through the hole, you can put a piece of tape Washington or Scotch tape. Teoh. Make sure that it doesn't do okay, so you have to decide where you want to stitch ahead of time Because you're going, Teoh, punch your holes ahead of time. So I've decided that I'm gonna do a nice stitching line here. That may be a little bit up here to hold it in place on the other side. I am not going to go all the way around. I tend to think this stitching style is a little overwhelming. It's a little too much teaching. I'm trying to keep my stitching to a minimum, but I still want to keep my vellum pieces on my paper. I want to make sure that they're strongly attached. So I don't want to go over my washi tape, so I'm gonna take that off. I don't need it anymore, because my my vellum is attached already. And I'm gonna go ahead and punch my lying all the way. We're Benaissa. So by punching all of the hole's down, this creates that nice, smooth texture. Otherwise, that paper would create those bumps. And we don't want those bumps on the front of our collage. We want to keep those paper bumps on the back. You are welcome to explore again. Figure out her own language with stitching. You can stitch around the outside, you can stitch in kind of a wild, erratic pattern. You can stitch onto the other pieces, or you can Onley stitch on the ends of the vellum pieces. There's so many ways you could do it. Here's a little trick. If your thread ever gets really wrapped up in itself twisted like this sometimes I like Teoh thing. Let it dangle. And what kind of spin itself out that helps it from getting knotted up as your son. Okay, so when you are finished sewing, turn your piece over. Make a nice Not again. You can use a piece of washi tape to seal it. Now you are finished with your abstract, minimal lache.
11. 11 Final Thoughts and Tips: final thoughts and tips. Hey, you're finished. I hope that you have learned a few things and maybe laughed once or twice at yourself or at me, and that you've enjoyed this process of creating a collage together. I hope that you are able, Teoh. Use some of these techniques and harvest them and apply them. Teoh your own work, whether you're making collage or you're making paintings or you're making mixed media work collages, a very unique medium, and it takes some time and repetition to familiarize yourself with the materials and the techniques. But hopefully this is a way to get you started and feeling creative and energized to make more. So thanks again by
 Linden Eller, Contemporary Mixed Media