Transcripts
1. Introduction : [MUSIC] Hi, I'm Rebecca. I'm an art tutor from the UK and I'm back with my
second Skillshare class, which is called
Collage a Collection. In this class, you
will learn how to create a collage collection, which is the collection
of elements that have a cohesive theme
and color scheme. It could be a
collection of anything. You will decide on
the subject matter. I will take you through
my process from the initial design right through to the
final digitization. I have always loved paper cut collage ever since I
discovered it at our college. I've been teaching up
now for nearly 10 years, and one thing I really
love about this is that I've got to try
all the materials. In this class, I'm really
going to encourage you to explore
different materials and mix them together to create some beautiful textured
papers for collage. [MUSIC] A collage collection is a really good piece for your portfolio because
it's just so versatile. It could be made into a pattern that you
could put on products, you could create
spot illustrations from the individual elements, and the list is endless. This course really
is for everyone, whether you're a
complete beginner or a more experienced
illustrator or artist. Collage is fun, accessible, and it's really going to
spark your creativity. [MUSIC]
2. Class Project : [MUSIC] Hi and welcome to class. Our class project is to create a paper cut collage collection. I'm going to be showing
you all the things that I did right from the
initial beginning where I was inspired by the objects
to the final digitization. I would really like to share
with you my experience, my tips, my advice. But of course I would like you to take on the project as your own and to be inspired by
your own ideas and interests. By the end of the
project you will have completed a paper cut
collage of a collection and you'll also
perhaps have gone further and manipulated
the elements in the collection and created perhaps something
that is digital. I think that you're going to
learn a lot along the way. We're going to be thinking
about composition design, how to put elements together so that they work in a pleasing way thinking about how
to make it look cohesive in terms
of color and shape, and you're also going
to be exploring how to make these textured
papers for collage. That will involve looking at materials, mixing materials, and really experimenting
and having fun with all the art
materials you have. Of course you're
going to learn how to create a paper cut collage. I can't wait to get started
and I can't wait to see the final projects
in the project gallery, so please do share. Lastly you will consider the
topic of your collection. You will look for inspiration
and give us some objects. You will then draw the
objects so that you can consider which ones might
be in the collection. Once you have your drawings, these form the basis
of the tracings which you can then use
to cut out your papers. You will create a range of
textured papers by exploring materials that you can use
to create your elements. [MUSIC] Once you have your papers ready
you can then cut, glue, and arrange
your final collage. [MUSIC] Digitize your
collage if you wish so that you can
manipulate it further. I can't wait to see
what you come up with. Please do share your projects
in the project gallery. It really inspires everybody
to see what you've done. If you do have any questions, please do reach
out along the way. Let's get started. [MUSIC]
3. Materials : [MUSIC] I have listed all the materials in
the resources section, but let's have a look
at what we need. Paper. Any paper
will do for collage but the thinner paper is better because it's
easier to cut. I like to use a range of different colored papers because it gives different effects. But mostly, I've just used
white printer copy paper. You will need a pencil, pen, rubber, and tracing paper
for drawing and tracing. Glue. I have used a
latex craft PVA glue. It's really good
because it dries fast, which means I can
move the components around without fear of
them falling apart. It's also drawing clear so it doesn't leave those
yellow marks, and it's also very strong. A small pair of scissors is absolutely ideal
for this project. You could also use a scalpel
and a cutting board. To create my textured papers I have used a whole
range of materials. You can get experimental here. But just to give you some ideas, I have used acrylics,
watercolor, ink, pastel, color pencil, and I've also used some mark-making tools to create some marks and some lines with the paint and the ink book. For the digitization
aspect of this class, you'll need a scanner to scan in your work and digitize
it or you could take a photograph on your
smartphone and you will need an app such as Photoshop to
edit your paper cut collage. We're ready to move on. See you in the next video. [MUSIC]
4. What is a Collection?: [MUSIC] Collections are
absolutely everywhere. If you look around, you can usually find some
popular themes, such as flowers,
teapots, bakery items. Now if you would like
to create a piece for your portfolio that is a
little bit more commercial. Then perhaps you'd like to research some of
those popular trends. However, I would
really just encourage you to pick objects that
you're interested in. To start my process, I simply just looked
around my own home. I was looking for
objects where I was attracted to
something about them, whether it was their color, their shape, their texture, and things that I could imagine
I would enjoy collaging. [MUSIC] You could choose anything for your
own collection. I started by creating
a mind map of objects that I might
like to draw on collage. I then came up with a shortlist. I have created a list of ideas
in the resources section. [MUSIC] To gather inspiration, I looked and gathered
some real-life objects. I looked at leaves, shells, art materials, cosmetics, sewing materials,
and fruit and vegetables. Now, of course, you
could use some imagery. You don't have to go out
and find real objects. But I always like to look at
the real thing if I can so, for me, I physically go and collect those items and
gather them together. Now that we have gathered
ideas for our collection, perhaps you've
decided on a theme. We're now going
to start creating the design so I'll see
you in the next video. [MUSIC]
5. Creating the Design: [MUSIC] Now that I've collected my
collection of items, which in my case is leaves, I'm going to start drawing them. I'm going to draw
as many as I can so probably about 10
different types of leaf that I've collected. But in the actual collection, I may have as few as maybe five so I'm going to
be able to really examine them by drawing them
and decide which ones to keep in the collection and which ones maybe
not to have there. Drawing is a really good start because you get to
really observe. The other thing about
the drawing is that I like to use my
drawings to then collage from because it has my hand in it if
you like my look. Whereas, if I just
took an image and I traced it and
collaged from that, then it's less of my own. But there's nothing wrong if you do want to do it that way. But I would encourage you to draw because it's just
going to get you really looking at the items
and exploring what it is about them that
interests you. Now that I've created lots
of drawings of leaves, I've got a variety and a
choice for my collection. I aim for at least five
different elements for my collection but
I probably drew at least eight different
types of leaf. I drew the leaves at
the size I was happy with so that I could collage them and I didn't want a really fiddly small
drawing because I knew that would be
really hard to collage. If you would like to
use my leaf drawings, you'll find those in
the resources section. I chose leaves for my collection because I was inspired
by the coming of spring here in the
UK but it's also because I like the
shape of leaves and I also like the color of leaves so I'm going to keep
my color scheme quite true to the
real-life greens that I see in my collection. It's really important to have a cohesive color theme so that the objects look like
they belong together so I would recommend choosing
a limited palette. If I was experimenting
with the colors, then I would perhaps
just put some colors next to each other and see
how they work together. We have created some
drawings and hopefully, you've got at least
five different elements of different size and texture. Now we're ready to
move on so I'll see you in the next video. [MUSIC]
6. Creating The Papers : [MUSIC] Now we've reached the part of the course
which is really fun and that is creating our papers. I've got all my materials out here and I'm just going to be experimenting and mixing
them and just seeing what textures marks I can make to create some
interesting papers. I've got a variety and a choice. Let's have a look at some of the ways that I made my papers. [MUSIC] As you can see, I've had a lot of fun
making my papers, and I've used all
my materials and ended up with a range
of colors and textures and a wide range of
choice so that I can choose which ones work for my elements and
which ones don't. You could use the color and texture of the
objects themselves, such as these vegetables here have lovely
color and texture. [MUSIC] Now that we have created our papers and
hopefully you've created some really lovely
textures and you've got this big range of
papers to choose from. We can now move on and start
cutting out our elements. I'll see you in the next video. [MUSIC]
7. Cutting : [MUSIC] We have now reached
the part of the course where we're going to
cut out our elements. I have one big tip for
you and that is get a good cutting tool or tools. By that I mean get the
scissors for the job. If it's a really fiddly area, you really don't want
to be struggling with a larger pair of scissors. Just scaling them down
to an embroidery sizes, which is this one here, from this one is going to
make a massive difference to how easy the fiddly
areas are to cut out. If you're struggling,
scale down your scissor. You also might consider using a scalpel and a cutting
board. Let's get cutting. [MUSIC] I gathered my papers and selected the ones I wish
to use for my collection. I also cut them down
into manageable sizes. I used my drawings
to make tracings. From these tracings, I can now cut out
from the papers. The idea of the tracing
is that it's transparent, so you can see
through to the paper and see what you're cutting
out at the same time. Once I had produced
lots of tracings, it was then just
process of going through and cutting from
the papers I had selected. [MUSIC] Do make sure that
you have your tracings at the correct size that
you want to cut out your papers because if
the tracing is too small, then that means that it's
going to be quite fiddly. [MUSIC] Now, you can see that I have cut out my entire collection. It is unstuck, but I
have spent some time arranging them into where
I want to stick them. We have now cut out
our elements so we're ready to move
on to some gluing. Let's move on to the next video. See you there. [MUSIC]
8. Gluing and Arranging : [MUSIC] All the
elements cut out now, so we just have to
glue them together. Now just a little tip here. I have glued my elements together so that they
are independent of one another and I can
move them around at the end so that
I can decide on this composition and see which shapes and colors look
better next to each other. Now, if I had stuck them down onto a board or paper as I went, then I wouldn't
have that option. So just something
to think about. Now, I want them
independently because I'm actually going to scan
them into my computer. But even if you were working on a physical paper cut collage, I would still be advising you
to stick them independently because you've just got
the option of moving them around at the end and seeing
how they all look together. Let's get on with this gluing. A few tips for gluing. Using a brush and a liquid
glue is really important because it gives you that precision on
where the glue goes. Also make sure that each part is stuck completely before
you move it around, and I'd also suggest having a gluing area to
keep things neat. I found I had a
problem with the paper sticking to the board
which I didn't want. Just be aware of this because you can be sticking
your elements together and then realize that it's actually stuck down
to the gluing board. Just check that it's
not being stuck down, and if it is then you
can gently prise it carefully off the board
with some tweezers. [MUSIC] Here we have it, my completed glued collection. Now I can move
around each element and decide how I
want it to look, and get an idea of
the composition. [MUSIC] We have now
glued together all of our elements and we're
ready to start digitizing them and manipulating
them in Photoshop. If you're not interested
in this part of the class, then you can physically
move around your elements, decide on a pleasing composition and stick them physically down to a piece of board or
card and the job's done. However, if you'd like to move on with me to the next session, we'll go through the
digitization process. I'll see you there. [MUSIC]
9. Digitization: [MUSIC] We have reached the last stage of our class
and that is digitization. You can do so much with your
artwork once it's digitized. I really wanted
to show you this, but it isn't a session
about Photoshop, so please don't expect a lot of detail and a
step-by-step tutorial. However, what it is, is a chance to show you my complete process
from the drawing to the digitization and what I do to finish off my
paper cut collage. I'm just going to give you a quick overview of
the things that I did. Let's have a look
at what I do with my college once I digitize it. I scanned my elements and
used the blue background because it's easier to remove
than a white background, which the scanner will
create automatically. I scan my elements
into the scanner at a very high
resolution, 600 DPI. This isn't completely necessary, but I just like to do it
because it's a way to ensure the quality
if I scale it up, print it off, and really I can
do what I like at 600 DPI. There are a few things I can do immediately on my
scanner software, such as increase the contrast, if needed, cropping the image. It's always good to do them at the earliest stage if you can. I'm now opening up my scan in
the Photoshop application, where I remove the
blue background by using the Magic 1
selection tool. Because I wish to move around each element separately to work out the best composition, that means I need to separate each element and put
it on its own layer. Therefore, I select
each element and cut it out using
the selection tool, and then paste it
into a new layer. The way I do this is by using the Lasso tool and then
adding a new layer, pasting it into a new layer, and repeating the process
for each element. Once I have each
element on a new layer, I clean up the edges by
creating a black background. This is really so that
I can see everything. The black really
shows up everything. I just go around and
either use the eraser to erase some of the
smudges and marks. I use the Lasso
tool to go around the edges and just create
a slightly clean edge. I'm selecting the areas I don't want and then
deleting them. Once I have each element on
its own layer and cleaned up, I can now move them
around independently. Really, I can do quite
a few things now. I can size them, rotate them, duplicate them,
change the colors of each individual
element, and so on. Once I'm happy with
the composition, I can merge the layers, so I'm dealing with
just one layer with all the elements now on it. This way, it's just
easier to deal with and I can change
the background much more easily this way by creating a new layer and just trying
out different colors. Once I'm happy with
my arrangement, I save my document as a JPEG, but I also keep the
Photoshop version, so I can go back to
it and change things. I duplicated my first document
by creating another layer. I then created a pattern or a slightly bigger
document because I've duplicated the elements. This was the file that I use
to create these mockups. I hope that you have been
inspired now that you've seen all the possibilities
of the things you can do once you digitize
your artwork. We have now completed
the process from drawing to digitization. Well done and hopefully you're really pleased with
what you've created. I can't wait to see it
in the project gallery. I'll see you in the next video. [MUSIC]
10. Congratulations: [MUSIC] You have created your
collage collection. Well done. If you got this far, you should have learned
a lot in the process such as how to use materials, how to mix materials, how to create some
fantastic textures, and how to create a pleasing composition
and color scheme. I hope that you have ended up with a piece of
work that looks unique to you and your
preferences and style. I can't wait to see
these projects, so please do post them
in the project gallery. Please feel free to
follow me so that you can be alerted of any
new Skillshare classes. If you enjoyed this class, you may well enjoy
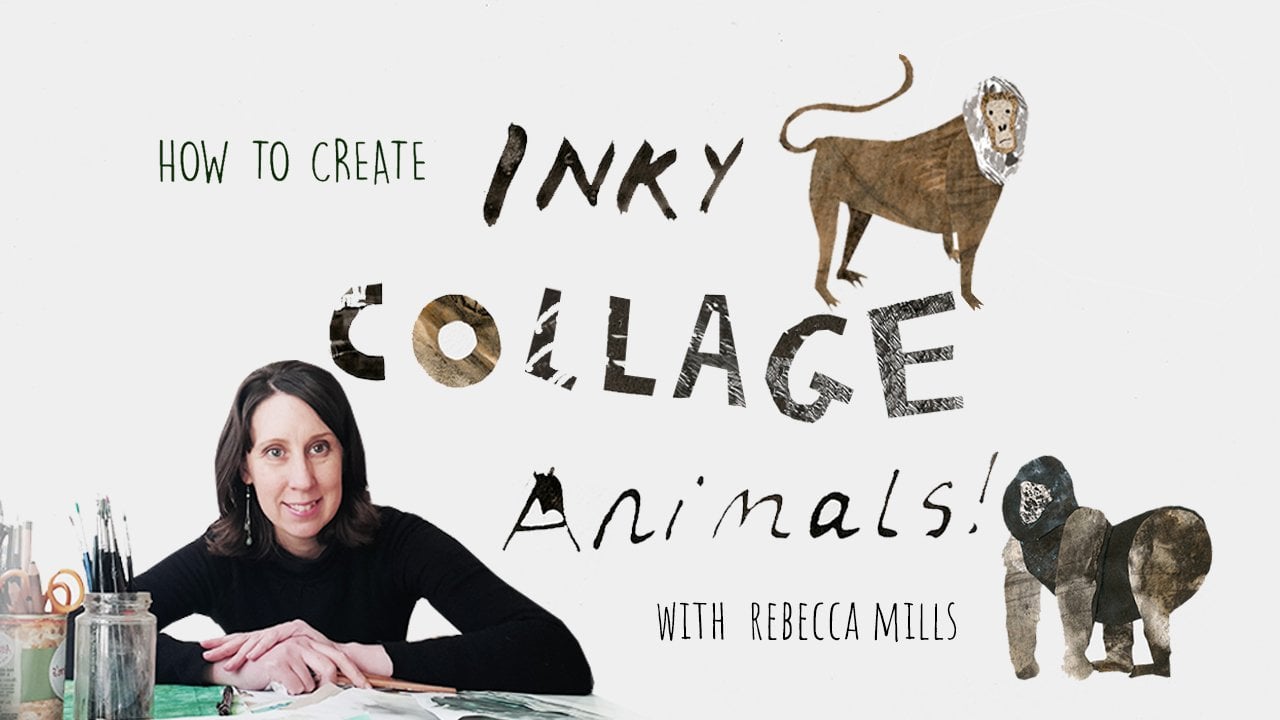
my other class, which is called how to
create inky collage animals. Thank you for joining me. [MUSIC]
 Rebecca J., Educator/Artist