Transcripts
1. Welcome to the Claude AI Fundamentals Course!: Welcome to Cloud AI
beginner Workflows course. If you have already
used Cloud for asking questions or
generating content, it's now time to realize what
truly makes it powerful, and that is with building
workflows that save you time and become more useful
every time you use them. My name is Hosakihui and I've
spent years working with AI tools to improve productivity, automate
repetitive task. Build systems that are efficient for both personal and
professional use. Throughout this class,
I will show you how to use Cloud as more
than just a chat bot. By turning it into an
intelligent workspace, you can use clod to help
organize your information, help you with some tasks that
you don't know how to do. Or help you with the
repetitive ones. By turning it into an
intelligent workspace, you can use it to
streamline your daily task, help you with organizing
your information, and help you figure things out that you don't
know how to do. We're first going to begin by
understanding how Claude is different from all
the other tools out there and what
makes it unique. Then we're going to jump into the cloud projects
and how you can keep the context for one task in one space and build upon
it for long term work. Next, we're going to
dive into skills, which is one of Claude's
most powerful features. Going to learn how to build reusable instructions
and workflows that will save you time and help you get more streamlined
outcome for your needs. From there, we're going to
learn about connectors, which is how Claude is going
to use external tools and their information to give you a more streamlined
and professional work finally, you will learn
how to put all of these features into
one business flow. You may learn about
all these tools. They're great, but at
the end of the day, you want to see how it
applies to your needs. So we're going to see how we get to use each one efficiently, which one you should use
from planning to execution. We're going to see how we get to connect all these points so that you get to continue using this
after the course is done. By the end of this class, you will learn how to utilize each of these features and use Cloud in a way that is
consistent, efficient, and quick. Let's go ahead and jump
straight into clot.
2. Introduction & What You'll Build: Hello, and welcome to this
clot beginner course. By the end of the course, you're not only going to be
using clod occasionally, but using it daily to improve your task and even help you
get things done faster. By default, most
people only get to use about 10% of clot's
capabilities. But the goal of this lesson is to close that gap and make you feel confident
with all the stuff that's available
right on the screen. So we're going to start
from the beginning. Is AI? What is Claude? How does it all
work and what you could do to better
improve your experience. Then we're going to dive into the different tools that
Claude has and finally close it with a project
where we get to apply our theory and
actually get something done. This course is good for
freelancers, founders, students or people who just need a little bit of help with
the stuff that they are juggling will not be mentioning
or going over any of the coding capabilities
that Cloud has just because that's
a whole different realm, but I'm going to focus more on the other tools that don't
get as much attention. You also want to set up your expectations before
starting this course. Now, Cloud is a tool,
not really magic. You still need a lot of human judgment to
get a good result. So what Cloud can do is
actually take your concept, whatever you feed into it, use its strong
reasoning and learning capabilities to generate
outputs for you. But you as a human need to
still review that content, make sure it's correct, it's accurate, and it's
exactly what you need. So don't just assume that you're going to press a
button and something magically perfectly comes out by the end because whatever you
decide to do with Cloud, there's going to be
a lot of back and forth when it comes to
finalizing that product. As you move on with the course, I do encourage you guys
to have Claude open. You can follow along on
the screen activity that I'll be doing or just do something straight
after a lesson. But I encourage you guys
to apply what you see onto your own account and see
what Claude does for you. So that way, you're able to see Claude as a capable partner. You know, it's a new partner. It comes in. It doesn't
know much about you. You need to give it direction,
context, background, and that way, it's
going to learn all your patterns,
learn all the facts. Get better at giving
you what you need. At first, when you tell it
to make a presentation, it's going to make
something very generic. But once you feed into it
your brand's identity, the brand mission, the tone, the language, the audience, it's going to tailor
that presentation into something that's
actually of use for you. Now I hope you have an idea of what this course
is going to be. Just to recap, I'm
going to be going over all the
fundamentals and basics before we actually dive into the tools and apply our
knowledge into a project. I will not be going over the coding capabilities
of Claude because I do want to shed some light on the tools that are not
getting enough attention. Now that we have that idea, let's actually learn what
makes Claude different. There's so many AIs out there. What makes this one stand out?
3. What Makes Claude Different?: Now you may have heard
of Claude either on the news in passing or you've never heard
about it at all. Claude is made by enthropic. They are mission focused on
safe and genuinely useful AI. It's not just about pressing one button and getting
something in return, but something that
spends time learning your patterns and giving
you useful outputs. It is known to be a
little bit more careful, more wise, and a little bit more refined when it
comes to its responses. It will leave you
with the feeling of confidence rather
than confusion, and these are just
some things that the company is known
for amongst its users. There are three areas where
Claude really stands out. The first one is writing and editing large bodies of text. So it picks up on the
tone of your company. As I said earlier, it picks up on the language
that you're using, what method you used
in that paragraph, how to improve it, how to
make it shorter or longer, in a more efficient way. Second place is its reasoning around really complex problems. So if you give it
a document where it's completely messed
up, nothing makes sense, Claude is really good at
working around that and giving you something that is more organized and makes more sense. Thirdly, speaking of files, it's really good with handling
any sort of document. You could feed it a PDF, a link, a screenshot, an image, and it's going to thoroughly
look at that document and integrate that knowledge into whatever prompt
you're writing. So it actively engages with that content and stores
that in its memory. And the memory is something
I'm going to be talking a lot more about in
the further lessons. But let's just say
that once you upload a PDF onto your cloud chat bot, it's going to be
basically sprayed over all your future conversations
unless you stop. Every AI chatbot has models. So these are different
versions that the AI tool interacts
with you as a user. So Cloud has a family of
models and not just one thing. You can think of these models as basically categories where each one is
good for one thing, and then within
those categories, there's different
versions of that model. So we have high Qs,
Sonnets, and OPS. So what are these exactly and how are they different
from one another? First one high Q, it's used
for really quick task. You know, maybe
you're asking Claude about the best
restaurant in the area. That does not use
a lot of power. It just does something quick. It gives you a quick response. You can talk back
with it, but it doesn't need that much details, that much reasoning,
that much thinking. It does a simple search for you, based on maybe user reviews, based on available sites, and gives you a quick output. The second one Sonnets. This is basically used
for everyday task. It's basically people's
default model because it uses just enough reasoning for something to be
outputted quickly, but it does not take
forever and it's not really used for
more complex reasoning. This could be maybe
writing an email, writing a file, getting an improvement on
that file, et cetera. The last model is
the heavy duty one that's used for more
complex situations, such as the example
where you have a really big confusing problem and you don't know
how to approach it. You feed that into Cloud
and then you go back and forth with it to come up
with a genuine solution. That third model, Opus uses
the most amount of context. It uses a lot of credits. It takes a little bit longer, and basically Cloud gives
you all three models, this whole family so that you
can either choose from them or have it assigned to your
conversation automatically. Right now, these three things, you don't need to memorize them. When you're starting
out your chat, you could just work with
whatever is default. Right now, you can see
that I'm set on SontFive Hi. But if I go over here, we can see the high Queues, we can see the Opus, and there's actually a new one called fable. So this is still not
fully integrated. I think they recently
released this. But the three main ones that I just talked about,
they're right here. If you go over here,
we have more models, but you could just stick to
the ones that are right here. Now, as you can see from the main screen that
we're looking at, Claude is a lot more
than just a chat bot. A lot of things on the sidebar, things that you may not have
seen on Chat GPT, Gemini. We have projects,
artifacts, scheduled, and even a customized
feature where we get to make our own tool to better
aid us in that project. We have a chatbot right here. This is your classic
chatbot, cows, things that are
going to help you work on whatever it
is that you're doing. And then we have
the coding feature. So right off the bat, it's a lot more than
just a chatbot. And looking over here, you can see that there's
different tabs for writing, learning, coding, live
stuff, and Claude's choices. There's also some
suggestions down here, and we even have a design tab that I'll be showing you
further in the lesson. Now, the biggest mistake
that you can make with Claude is just staying
within the chat bot, you know, just going back and
forth, talking about things not really utilizing all the different tools
that are right here. Now, I know it may seem intimidating when you
first look at it. You may think water artifacts. Why should I even waste
my time with them? What if it ruins my project? But that's the whole
purpose of this course. We're going to be tackling
things that are unfamiliar to you and help you feel more comfortable in this
new workspace. Now, I do want to remind you if you do not
know this already, this tool, like all the other
AI tools, is not perfect. So when it comes to
real world facts, when it comes to, you know, news, research information, it still has the ability
to make mistakes. And that's why it's
so important for you as a human user to have your judgment and make sure that all the information that's coming out of here is accurate. So it may include a detail
about something political, but it may be completely wrong. You as a user. You need
to be careful about that when you're going
to be publishing this information anywhere. So take all of the knowledge
that Claude gives you, most importantly, when it has to do research with
a grain of salt. Now, unless it's something that does not require any research, such as rewriting a document
with a different tone, then you don't really
need to worry about it. The concern comes when
it has to do research. It has to fetch
links from online, look at the market prices
or something like that. That's where you need to
double check that information. And another thing,
Claude will not remember all the details across the chats unless you
turn on that feature. So we're going to go
over that later as well, but just know that
it's not automatic. It will not remember every single detail about
you unless you wanted to. Alright, so now we
know what Cloud is, what makes it stand out? Let's actually go ahead and
look at how we can make an account and how we can
choose the correct plan.
4. Creating Your Account & Choosing the Right Plan: So now that we know what Cloud
is and how it all works, let's actually see
how we could get the program and how we can start by setting up our account. So just head over to cloud.ai. It's right here in the URL, and you're going to
be seeing this page that you have to
put in your email. You could use your Google, your outlook, or
whatever you prefer. And then you're
going to be asked to verify that email and
that's all there is to it. To be brought to the main page, and that's going to
be the same thing that we saw in the
previous lesson. So I'm just going
to put in my email, and as you can see down here, you can download the
application for your computer. That's what I've been
using so far and what I will be using basically
the rest of the course. But you can also use Cloud
in the browser itself. So I'm just going to log in real quick and then I'll be
back so we can continue. Okay, so I just signed
in, and as you can see, it's not different
from the application, the desktop app at all. This is basically
the same features, and we have everything
we need right here. If you wanted to change things or view things
about your account, you just simply click right here and you get to head
over to settings. Here you can see your
general information, your account, billing, usage, and all the other
things that you need. And then you could just
use this as you go on. Now, if you use the same email for the browser and
the desktop app, everything's going to be synced. So you could use the browser
for a different device, but have the application
on your main device. You, you don't have to
copy everything over. Now let's talk about the
pricing and the plans. When you first sign in, for the first time, you're
going to have the free plan. That's basically going to let
you use the chat feature, but there's going to
be some limitations regarding the models, the responses, and
you may get to use some of the good models for
a short period of time. Also some limits with
attachments, and overall, if you want to use Cloud
for something more detail, you would want to upgrade
into a different plan. But the free plan is perfectly fine if you're just
testing things out and you just want to see how it responds to very
simple requests. So let's head over
to our account and then go to subscriptions. So I am currently on the P plan. It's $20 a month billed monthly, and then 17 if you pay yearly. So you can see that we
get all the free things. The additions are clot code. We have cowork available. We have the design tab. We have higher usage limits, and then we get the
different models, as well as the ability for clot to carry memory
over to other chats. You're using the free plan, Claude will not remember every detail if you jump
from one chat to another. But if you have this either P
or max, whichever you want, you can organize the chats for different parts
of your needs, but Cloud is going to know every information
that you fed into it. For example, it's going
to know your job, but you could have
different chats regarding different
projects within your job. Can also get clawed for
teams and enterprise. That's a different payment plan. But if you need, you can always come over
here, see what's available, or just chat with one of their buying agents to see
which plan is right for you. Which one did you buy? Should you stay
on the free plan, the Pro plan, or the Max? That really comes down
to how often you plan on using this tool and how much
you will be using from it. So if you want to use it for just very simple chats
across your mobile, your computer, you could
stick with the free version. But just know that
after a certain time, you're going to get
either no responses or very weak responses
because the models are going to be downgraded
if you step out of that li. The Pro plan is where
everyone usually ends up, and then maybe they
choose to upgrade to MAX. But P lets you use all
of the available tools, the cow, the design, and it also uses
a lot of models. Now, the Max is going
to be a higher level if you constantly need clot
to help you with your coding. Really big projects, maybe
one for, like, a campaign, and you constantly need
Clot to be careful, very detailed, and help you throughout this
bigger process, you could upgrade to MAX. But for the purposes
of this course, I think you should start with
P. And after the course, if you feel like you need more, then you can upgrade to MAX. And the good thing
is that you can always cancel your
subscriptions. So if you paid for
multiple months, but you changed your mind, you can always
cancel it with Clot. So you have your plan right now. I highly recommend
you guys at least get the pro for this course just so that you're able
to follow along with all the tools that we're
going to be using. If you stick to
the free version, you will not see a
lot of these options, a lot of the outputs that
we'll be going over. So it's only $20. I hope you guys are able to. So just go ahead and
make that purchase, upgrade your account
to the P plan, and we can continue learning
more about Claude. Mm
5. Navigating the Claude Interface : So now let's take a
look at the interface. I'm going to jump back to the desktop application
and just see where everything lies and how you can get started with
some simple task. So on the left side, you can think of this
as the homebase. This is where most of the tools are kind of combined together, and you can get started with the type of task
that you want to do. So the first thing is the
bar, you can collapse it. You can search through
your different chats, your different projects,
and look for things. You can start a new
chat right here or with Command N. When
you click on that, you're going to get
your classic chat bot. You can write a simple prompt, attach things, either files
or photos or a project. I will be talking
about projects later. But as you can see,
it's a lot more than all the other chatbots
have to offer. We have something called
skills, connectors, plugins, and there's
also a research feature. By default, it's on the websearch meaning
that it's going to look at very accessible
links on the Internet. So maybe Wikipedia, Yelp, Instagram, that sort of places. You can have certain tags
be attached to your prompt. So if you do write, it's
going to focus more on tone, language, the
quality of writing. And here are also some templates
for you to get started. And as I hover over these, you can see that if I
click on one of these, it's going to write me
one of the prompts, and I'm telling it
exactly what to give me, and it's also going to ask
me one or two key questions. Now, this is
something I have not seen in the other
chat bots where it kind of quizzes you to get a better idea about
what you want. So this is a very interesting
thing that Claude does. It kind of has a quick aop quiz, in a sense, before it actually
gives you the output. That's something
that it made for me right here in my prompt. I asked for a case study, but it's going to ask
me to basically choose the correct answer
or the answer that I want before it even gives
me any sort of output. What are the case studies for? Let's say marketing. Do I have any source material?
Let's say I don't. Once it has these answers, it's going to combine
your prompt and these answers together to
give you something decent. Right now, interestingly, it's going to ask
more questions. So it's not giving
us random outputs, random paragraph, just for the sake of
giving us a result. It's actually taking its time. So say just a few random things. It's going to think, and
I'm using Sonnet right now. So that's the
everyday level model. It's going to work through this. It may take longer
because I'm not on high Q, the faster one, but this is just an example of a chat that is tailored
towards writing specifically. Now let's go back to New chat. The chat that I just exited
is actually right over here. So while this is
doing its thinking, I can go ahead and do another chat. I could
do a learn one. So maybe I'm a teacher. I want reflection exercises. I could make some with
Claude, right over here. We can also do some
coding if you want, and then Claude's choice. So these are like,
some different things that you could do
randomly with Claude. It's pretty fun. So
that's for attachments. These are for different
types of chats. Here is the model button
where you get to choose your model and basically tailor the response type to your need. We also have a voice feature, so you get to talk directly into the microphone and then get
a result based on that. And then we can do a voice mode, which is just no typing at all. So if you're on your
phone and you just want to talk to Cloud, you can use the voice
mode. That's the chat. This is the project. This is where you make your new project, edit them, delete
them, search for them. These are the artifacts. So these are products that you get to build
based on an idea. This is, again, all the
editing, building, deleting. And then we have
a customized tab. So this is where you
get to integrate different tools that you
have outside of Cloud, bring it into Cloud and get kind of like an
agent, in a sense. You can add plugins, connect apps, and
create new skills. Skills is something
I'll talk about later. But this all goes to show how much more professional
and handy Cloud can be. So these are all the chats here. This is the design
that I told you. You get to build
visuals with Claude. These are some examples. This is your
account, billing and all that stuff. This is chat. If you go to cow,
it's going to remove that chat option and you get to work with all
the other tools. You can make automated task, you can make agents, projects, and even scheduled task. So maybe if today's Tuesday, you can make a task so that
it sends out an email every Friday to X YNZ. So
that's an example. And then we have
the coding section. This is again for the artifacts. If you want to make
products out of an idea, you have sessions,
you have messages, and there's basically a chat bot down there where you get to see a task that you
want coded or just go back and forth with
Claude to brainstorm. And you can see that we have the models down here as well. We can do attachments, do either local or
connect your Github, if you want, and do a
bunch of other things. Now, as I said, this
whole coding section is an entirely different story, so I'm going to steer
clear of this for this course and just show you
guys the chat and the cow. On the top right,
we go back to chat. This is the incogNohat, so it's not going to save
anything you say here. And be careful with this
because if you want clot to remember certain
things for memory, you do not want to
be in that page. And that's pretty
much the interface. So right now it's just a bunch of tools that you may
or may not know about. We're going to dive
deeper into them. But right now, at least you
know where everything is and where you can access
certain parts of Clot.
6. Understanding Tokens, Context Windows & Projects: So you may have come across tokens or credits
when you used clot. And if you're on a free
plan where there is less usage for you
to reach the bar, you may have seen a red error saying that your
credits are going to reset at a certain
time or that you can no longer chat
in that session. So when we're looking
at the app right now, the only clue about
how much usage we have is when you choose
a certain model. So right now, I'm on SontFive. You can see that
I have two times more usage until this date. But other than that, there's
no progress bar over here, and the only way for you to see how much more you have left your plan is to go down to your name settings and
then go into usage. So this is settings right now. If you go right below
billing, you'll see this. Click on it once,
and you can see what your current session
is looking like. Now, I'm on the P plan
as we established. But if I use maybe the more advanced models such as Fable which is the newest
model or the Opus one, this bar is going to fill
up a lot more quickly. So what is the
purpose of this tab? It basically tells you
how much more you can use Cloud with the most
precise capability. And the more complex model
you use, for example, Opus or the newly
released fable, the quicker this bar
is going to fill up. But if you use IQ for
really quick stuff, it will take a while
for this to fill up. Now what happens when
you've reached the end? There are certain things
that can happen one you will just not be able to
chat in that session, or if you are able to,
it's very limited. So maybe you will be
limited to, like, more basic models
rather than the advanced one so
that's one downside. Another one is that you're just not able to
use it completely. And if you are on the free plan, you fill up your usage
a lot more quick. So that's something
to bear in mind, but we're on P, and we're not
going to have that problem. So current session, whatever
you're currently on, starts when a message is sent, and whenever you
send something that is larger than a
message, for example, a document, a photo, it's going to take
up more of this bar. Now you have the models here. As we saw, there's
different models. They all reset around this time. So you can kind of come back here and see how
much usage you have just so that you are sure you're getting the
best out of Cloud. Now, fable, as I mentioned, is something newly released. Currently, they're doing
promotions where if you have the P plan or something high you get to use
it within your plan, and it uses 50% of
your daily usage. So that's why there's
two separate ones. This is all the other models, and this is Fable alone. Now, fable is above Opus, so it does take a while
for it to process your prompt and you really want to use it for something
more complex. Another thing you could do
is to turn this button on, which means that whatever
you're using that's above your limit will
be charged separately. So you're no longer being
charged for a monthly thing, but also for these
additional credits. That's what this is for. Can turn it on if you need it, but if you're doing something
basic within Cloud, you do not need to turn this on. Now, we're seeing a
few keywords here. We're seeing credits. You may have heard of tokens, and I'm just going to go
over what those exactly mean and why it's relevant
to you as a Cloud user. So tokens are small chunks of texts that Cloud is going to process when you're putting in your so depending on
how big your prompt is, your token size will
increase as well. And just for
reference, 100 tokens is about 75 English words. This is not something
you need to memorize, but if you ever heard tokens, that is what it refers to. It's just about how Cloud reads your prompt,
your English prompt, or any other language
prompt and then processes that for that action. Now, there's also something very important in Cloud and
all the other chatbots, and that is Context window. So if you were to
put something very generic within a tool like clot, it will give you
something generic. If you were to give it more
context in your prompt, it will actually look at those and include them
into that solution. Now we're going to learn
more about prompting and giving context constraints
in further lessons, but just know that
context windows are very important
because it does relate to how much processing
time Cloud will need to give you
that response to your this is also important if you use one session
more than necessary. So say you had a session, so just for reference, this is a session right now. If I were to go in this session and use it
for years, at some point, the stuff that I've said
earlier in the beginning of this session is going
to fall out of context, meaning that Cloud's memory
per session is not infinite, and this also changes depending on the
plan that you have. So you want to make sure
that you're storing only the most important
and necessary information in memory so that Claude can use the context in your
session to respond. Don't want to remember every single detail as
you're using that session. If you want to work on different things that
do need that memory, that context, for example, if you are having a session
about your educational path, there's going to be a lot
of details personal to you, like the degree you
want to follow, the end goal that
you want to have, the university you've applied
to all these information, there's a lot of information
cannot kind of have that box of information
mixed up with your work box. So for your work, you
may be working on different projects about
certain campaigns, and there's a lot
of information that you may want Claude to remember. Good thing about
this specific tool, Claude is that it has
something called project, meaning that instead
of having one session named to do list and have every single thing
in your life in it, you can separate
those into projects. One project for your education, one for your work, one
for your daily life. Now, projects are right
over here, and this way, you're able to have one
dedicated space for one purpose, and you're able to have that
context window constraint. To what is needed
and it does not mix with anything else that
you're using clot for. Here are some examples, study project, career
project, research project. In the end, you as the person, you have certain demographics, you are using it for all
these different purposes. Clot is going to
know you as much as you let and it's going to use as much as
information needed to focus on these different areas. And it will not
mix the following. Wess if I had all three
topics in one session, the overlap can
happen a lot quicker. Now, we're going to see this in action in further lessons. So if it sounds confusing right now, don't worry about it. So just to wrap this
lesson up tokens, you can think of
them as your units, contacts windows as the
capacity for that session, and projects as a way to have different rooms with their own capacities
for certain things, avoiding overlap between memory and the details that you
want to keep separate. Now that we know a little
bit about, you know, how this whole AI thing works, what our tokens, where our
money is going, actually, we can now move on to
the next lesson where we learn a little bit
more about prompting and how you can best save those tokens by writing
prompts in the smarter way. Mm
7. Writing Better Prompts: So you have probably
heard about prompts, especially in this day and age. So prompts, you can think of
them as an instruction that you give an AI tool
to either do for you, give you tips on, or anything
else that you need AI for. So a very simple
instruction could be, Hey, could you write me a short
story about rabbits? That is a that is
an instruction. Now, an instruction
could be very specific, could be very generic, but that does fully change
the way you get that outcome. So if I ask for a short
story about rabbits, I'm going to get I could get any rabbit. It
could be anywhere. It's something out of my control because I
did not talk about it. I did not say a blue rabbit. I didn't say an elderly rabbit. So just like how you would be careful with certain
instructions, you would do the
same with prompts. Now, we are here
on the homepage, and I just clicked
on a new task. See that there's cow
and then there's chat. I'm going to switch
to chat right now because we're just going to see how prompting works in general. So you want to give an
instruction, as I said before. Let's do a very simple one. Write me a caption. So it's not even a
really long sentence. I'm going to click Inter
and let's see what we get. So this is the general
format of a prompt. Do this for me. Now, you can see that immediately Claude is going
to ask for more context. This is automatic. I did not really say
anything prompt, but a little quiz pops up, and I need to now use Claude's little test to make
my prompt more detailed. So let's say it's for food
and it's going to be funny. So we get the Q&A. Now without me having to
say that in my prompt, it is writing me some funny
food related captions. So we get seven options, and then it's
asking me if I want to refine any of these options. So I could say,
refine number six. Again, another instruction
that I'm giving Claude, and I'm just following up
whatever it's asking me. So it took number six, and it made them more refined. And I could ask for
a certain tone. So that's pretty much what
a prompt is, but of course, you can make it a
lot more detailed in order to get that
final result quicker. So if I were to jump
from here to here, I would need to write
something a little different. So write me a caption. And then we said we want it
to be funny slash witty. So we put that right here, caption about what's
the caption for food, and we can add the refine
element with a refined pike. So I kind of combined all
of Claude's responses, and now I'm going to click Sent. I'm using the
default model here, Sonnet five, but you can switch to anything
else. So there we go. Now, instead of Claude having to ask me for clarification, I just went from one prompt to, let's say, the best
caption for my post. You can be even
more detailed here. So we're just going
to take this. You can use the copy
button up here or edit this to change
the original prompt. If you click on
the Retry button, it's going to look
at that prompt again and give you another
set of response. So I'm just going
to copy this here, paste it in the bar, and we're going to maybe say something more
about the food, maybe about a certain location and see what Claude is
going to do with that. So write me a funny
caption about pizza. With a refined take,
period, let's say, look into the current best
pizza spots in New York. So that's something that Claude
needs to do research on. I did not really give
it much information. I'm just asking for
something very detailed. So immediately, you can see that it's doing a little research. From those information online, it found, you know, some information it could use. So here are the restaurants, the pizza spots, and
it's listing them down. And then it's asking me
if I want to take one of these to further
refine my caption. So we pizza caption, a couple more options
that we could use. So let's, you know, make
this even more detailed. Let's edit our top prompt. So look into instead of this, we're just going to put
that spot that we need. It's safe, and as you can see, got rid of that
previous response, and it's going to give
us something else. Searching the web thinking at the same time because
we are using Sonnet, and here are some new captions. You can go even
further than this, maybe write this caption for an audience of mostly
teenagers or mostly kids. You can keep adding
onto this instruction. And I want you guys
to think about this as a little brief that
you're giving Claude. Now, a brief may come
with some images as well. So you may want Claude
to write you a caption based on a photo that you took while you were
walking in New York, and that's another
thing that it can do. So if you wanted
to add a picture, you click on the Plus, add files or photos
if there's, like, a that you already have and you want it
to be more refined, more detailed, you can add
it right here as well. But right now, I just
want you guys to know what a prompt is and how you could add on to a prompt to get quick and more
relevant responses. So we went from this
a very generic thing. It could be about anything into this prompt where I'm asking
about pizza in Brooklyn, and I'm asking for
something that is funny with a refined take. So go ahead and practice
with prompting, start with something very basic and see how
you could build up to a more detailed prompt that give you exactly
what you need. The next lesson, we're
going to continue with the prompting basics and
learn about giving context.
8. Giving Claude Context: Mm hmm When you're talking to a friend about an important project or
an important incident, you give a lot of context. That way, your friend can
better understand what you went through and better help you
or offer you some advice. And that's the exact same logic you need to have with Claude. We talked about giving
generic prompts and how the result is going
to be generic, as well. But in this lesson and
the following after, we're going to focus
on how we can build stronger prompts and what your
goal should be every time. So I'm back in that same session from the previous lesson, and I was basically
talking about a caption for a pizza
place in Brooklyn. So what we're going
to do is take a simple sentence like this and turn it into a
multi part prompt. You don't have to do this for every single prompt in cloud, but if you're actually
looking for a result that you want to use for your work
or something more detailed, you may want to consider
this technique. So let's set a goal
for our lesson. I want to do, let's say, a LinkedIn post
about my experience and my knowledge about local
pizza shops in Brooklyn. Instead of being like, what are some good stores or
pizza places in Brooklyn, I could turn this into
a multi part prompt. But first, I'm going to type
this in so you can compare the result we get from this versus the result we
would get later on. I'm just going to hit sent, and this is where it's going
to do a little research, give you some results
based on the location. And then afterwards, once
it finishes searching, we can do write me
a LinkedIn post about what makes a good
pizza spot in Brooklyn. So here it just gave me
a visual display because I didn't say how lot
should output this. Did I want a bullet list? Did I want a paragraph, one sentence, one word. But essentially, I just
asked this question, and it did give me some highly rated pizza spots in Brooklyn. And when you scroll down, there's a few bullet points with some keyterms and it's
asking me a follow up. But now I'm going to
ask for an output, but I'm not going
to say what tone, what sort of length, and let's just put that
in, see what we get. Here the sentence that
I put in the prompt, it is lacking what's
called context. So any sort of
background information that I would need
to give Claude, give me exactly
the result I need. Here's a LinkedIn
post. It's not bad. It's very clearly AI, if
you know what I mean, I just has bullet points, things that people already know. Maybe important tips that are available on other
Google search results. But there is no
context in there. I didn't say, Hey, I'm a food influencer, maybe I'm a food
critic or my audience, what sort of tone
clot needs to use. That's what we're going to do. So I'm going to have this as our first point of reference. You know, it's not a
bad LinkedIn post, but it could obviously
be a lot better. So we're going to do
something like this. So let's do, like, task. This is what Claude is
meant to do. On text. This is Things About Me. Audience. Who is this post for? Output, and I'll do one
more here for research. So these are five things
that I'm going to include in my prompt
for this specific task. Now, if you're doing
something else like building a landing page or
being like an app, that's going to be different. First thing we're going
to start with is task. First, we're going to
assign a task to Claude, and I want you guys to
turn away from the generic write me or me very
basic command and instead do something like a world famous food
critic in Brooklyn. Write weekly LinkedIn, write weekly LinkedIn posts about
best pizza spots in town, can the time include the local
experience and highlights. Simple stores,
something like that. So now it's no longer
clawed but a food critic. One that is based in Brooklyn. The task is you're going
to write Din posts. The task. So it's
not going to write blog it's not going
to do captions. I'm asking for one type
of text. For context. Let's say I am a
food influencer, and I like to write a lot. A new local spots I find in Brooklyn need content
that is interesting. Fun to read, but also
very informative. I need to post or I pose
twice a week on Linktn. N a lot of engagements. My audience consists of
other food influencers. Calls for actually, let's say, tourists visiting Brooklyn for the first time. All right. So that's what it is. If you have an age
range, gender, anything that's relevant to what you need, you
can put it here. I'm going to put that because
tourists could be kids, adults, but mostly people who would even have
access to LinkedIn. Research, pull data from this
month Data from this month, look at Jing spots
on Google Maps. You could also do Yelp
or wherever you are. By that, the places still open. And offer at least some
vegetarian options, but this needs to be say a 500 word post with
points for an easy read. Mojis to grab attention. A fun but pure tone
and have a call to action at the end of the post for Dance to
follow me for more content. And we're gonna do one post. We're gonna do I three. We're going to write
three Linked in posts to choose from. They include a different angle. Or age of the posts. So this already is very different from
where we started from. I'm now going to submit this. I'm going to use Sonnet five. You could use a different
model if you prefer. You can just use Sonnet so
that you're having some tweet, not something too quick, not something too out. And we're just gonna hit Send. It's going to think,
it's going to research. It's going to apply our
command to the final product. We can see that it's
reason things right now, and we're going to dig deeper into researching in
a further lesson. But we're just going to
see what we would get from something that has
a lot more contacts. Finish the three different
type of articles. I have them right
here for, like, a quick of them, and then the file itself
is right here on it. If you can't see
this, just click on it once and it will
open it right here. See option one,
hidden gem angle. So that's one angle
I could take Craft. So if I want to look into
the historical context of the area and then for
trending or big name places, listing me the
different pizza spots, what's unique about them and how it relates
to this angle. Click over here, we have
our options written out. So this is my title. Mojis I did use bullet points, and it included the vegetarian that I had. So
that's option one. Um, option two is right here. Again, same thing. Vegetarian,
emojis, bullet points. And that is consistent
across all three particles. It's just a starting point. Just by putting in a little bit more time
for your prompts, you can get results like this. Now, we are going to talk
more about refining. You know, you get
this, but maybe it has something you don't need or
something you want changed. That's going to be
something we will focus on in a further lesson. But Jaire we started
from, you know, apps visual, this
very plain post, and something a lot more unique. Li the next lesson
and see how we can add constraints
to our prompts.
9. Using Constraints & Refinement : Alright, so we stopped here
in the previous lesson. We got a bunch of
LinkedIn posts, and we just want to refine this. So let's say I read through this and I want to leave
out some details. And that's something
you could do within the same session and even
edit the same document. So before I go out from here, when you have a
document, you can view it like this. You
can see the code. Say you want to put this on a website or just take
a look at it like this. But you can save this as
a Microsoft document, printed as a PDF or publish the artifact through
one of your connectors. So say you connected
LinkedIn to Cloud, it's going to upload it
for you automatically, but that is something
we'll get into later. You can refresh this. So say I made some changes, but I'm not seeing it here. That's what this is
for. You can expand this to a full screen and
just close it like this. Now, this file will be
saved in your clot, so don't worry if you
don't see it on the side, you just click on it
once and it comes back. So let's talk about
some constraints. Traints are things you want
Claude to steer clear from. So that could be
certain neighborhoods in Brooklyn that I
want to leave out. I don't want Claude to
focus on that at all. It could be certain menu items that I don't want
Claude to talk about. It could be not including
vegan pizza spots, those sort of
things that I don't want are going to
be my constraints. The same thing as
a negative prompt, basically things you do not
want Claude to even consider. What we're going to do is
work with the same article, and I could see that
it's looking at certain neighborhoods and it's
giving me different dates. Let us think of some
constraints here for our case. I could have Claude not mention a certain
neighborhood. As this one. And given that it gave
me a bunch of dates, I could have it leave
out restaurants that were opened recently,
so we could do that. So it's even asking me
a follow up question, but I could instead do
just add constraints. So work on the same document, but implement the following. In the updated version. So you could do bullet points
here just to shift eight for the little asterix and
it becomes a bullet point. Do not include let me see, implement the following
constraints, actually. So do not include
spots in Bushwick. Do not include spots
that were recently. So maybe nothing past 2010. Do not include the word. Let's even try a word here. I'm going to see what's
being mentioned a lot. So let's say I changed my mind about the
vegetarian thing, do not include the
vegetarian options. So three constraints,
same document. Let's send that and
see what happens. So, again, it's looking at the different pizza
spots at the same time. So it has, like, ten results that
it's looking at, and now it's basically
running the command, and it's working
on that document. Alright, so now it gave
me a different article. So we have three
different spots, and I can see the dates. They are indeed before 2010, and no vegetarian mentions. Comparing it with
the stuff above, we can see or actually, that's the different
pizza spots. So now we have different dates. It's giving, like, a
historical context. The address is not Bushwick, and I don't see that vegetarian
section in the post. Still have the emojis. We still have the three
options that I asked for, and it's looking pretty good. Now, it did give us
a different link. So when I press on this, this
is the document we have, but it's the same thing
as the document above. So it did edit the original. You could leave that
out, so you have two types of
documents to look at, but I just wanted it
to edit the original. And there are 500 words, and now we're just going
to add more constraints. So let's do another one. Edit the same document, but remove all Imogs and
reduce the length to, let's say, 350 words, only keep option three. Now we're going to take
that bigger document, shrink it down into
one option, one post. So it's going to finalize it. I didn't ask it to
do more research, so hence not seeing the
results like we did earlier. So we got the same document, and there is no emojis. There is no option
one, two, three, and it's about 3:20 words. Even though I asked for
350, it's around 320. You can see Claude kind of has its own reasoning over here. Say, this is my maximum, I could mention it there, but
320 works for me as well. Has the hashtags. You can ask it to add hashtags,
remove them completely, research what hashtags
actually work in this case, and replace it in there. But I'm just going to
keep what's here already. So that's just one example. Instead of asking Claude to
write you a LinkedIn post, you can have it do research,
have a different tone, have a different format, an output, and even
a different role. So if I did not tell Claude to pretend to
be a food critic, we may have gotten
a different result. Maybe the tone and
the description of the pizzas were
not that engaging. The way a food influencer talks or reads is very different
from a regular person. You know, maybe they care
a lot about ingredients, about the historical context of the restaurant and other things. So this formula that
we had earlier, you could use this for
your next prompt and just see what sort of different
results you're going to get. So practice with this, you know, you can target Instagram
captions next, try something you're really passionate about and you know a lot about and see how Claude can help become
your assistant.
10. Prompting Best Practices & Common Mistakes: Now that we have a
better idea about how to prompt Claude and how the
general application works, let's talk about some tips to
improve your experience and some mistakes that you might make and how
you can avoid them. So first, let's talk about some beginner mistakes and how you can avoid them
as you move forward. The first mistake that
a lot of beginners use is treating Claude
like a Google search. So find me the best restaurants. How do I become famous? How do I become? The questions
will give you a response, but you're not really using Cloud for its actual
capabilities. So instead of just asking very generic questions or
giving very generic task, try to add a lot of contexts and break down your prompt
into something like this. It may seem like a lot and may
be useless to some of you, but this actually
saves memory and also provides you more
space in that session. So you're not wasting a
lot of the capacity in this session with random
prompts that didn't even give you what you
were looking and you can just skip all that that
we did in the beginning, get started with a
template like this and save yourself memory
tokens and just time. So that's the first mistake. The second mistake is not verifying what
Claude gives you. Now, a lot of people
that use AI assume that because it's trained on the Internet and all the
resources out there, then it must have a good understanding of
what is factual. And what is true. But
you as the user need to verify every
single information that comes out of Cloud, especially when it has to do
with the research aspect, when it has to do with
political events, you know, stock prices, that sort of stuff,
because Claude, like any AI out there
can make mistakes. So in this example, you know, I asked about good pizza
spots in Brooklyn. But what I can do
with this document is ask Claude to
verify it again. Now, this may seem redundant, but it actually helps
Clause to go back to what it gathered and see
if it made any mistakes. So can you verify the
information in the document? You know, I don't
want to have to copy each of these guys. Double check myself
that if it's open, if it serves the pizza
that I'm looking for, I can just have
Klatt do it for me. Now, a lot of times,
it really depends on what you asked
in your prompt. Klatt does a good
job of, you know, processing the information in a better way and
making sure that it's not missing
out any information or presenting you with
false information. But since we're dealing
with pizza here, I did ask it to verify
this information, and it's actually telling me where it got the
information from. Now, if I'm the user and I say that Wikipedia is
not to be trusted, I can now tell Claude to
remove whatever you grabbed from Wikipedia outside
of this document. So confirmed accurate,
and it's even flagging some things that it doesn't have enough
information in. So now we can adjust our document or just keep
going with what we had here. But again, this is
about pizza and food, but if you're doing
something with, you know, market research, if you're
talking about, like, a different culture, you want to ask a very simple follow up. Can you verify this information? Times you may see
Claude being like, oops, I missed out
this information. Thanks for catching that. And it will redo that research for you. So mistake number two, assuming Claude is perfect, it can know everything and give you the precise
information. That is not correct. The third mistake is trusting Claude too much with your
personal information. Now, Claude does do a lot
about information security, but just as a good
practice with any AI tool, Cloud included, do not
provide any sort of personal information that
can be used against you. Now, it's not like Cloud
is going to, you know, write you an email
and blackmail you, but say there is a data breach at some point, hopefully not, at least you were
safe and you didn't provide them with
your home address, your financial information, personal information about
your family, and those stuff. Now, I'm not saying don't say anything about
yourself because the whole point
of giving context is to provide some
information about you, but you have to know
the difference between safe information
and unsafe ones. So safe information
could be your name. Job you work at currently,
the area that you're in, your academic or career
ambitions, what you like, your hobbies, these
sort of stuff, that can be considered
public information. So make sure you
are aware of that. If you're uploading a document that includes your
personal information, make sure you're blocking
those out or taking a screenshot that does not include those
vulnerable information. Sake number four, which is something we're
going to get into in a further lesson is not taking advantage of the
memory that Claude has. Now, a lot of
beginners will assume that every session
sort of resets, go put in all the context again, and they keep repeating
it over and over. So say my context is that, I'm an artist and I like
to work with oil pastels. I want to work in New York, and I keep copy pasting
that in every session because I'm assuming Claude is not going to memorize that. But if you put it in once, you can lock that
in Claude's memory. And then if you make
another session, Claude is going to remember
those details about. There is a better way
of utilizing memory and basically allocating a space
within Cloud for one task, and that is the project section. We're going to get
into this later, but a lot of beginners leave out the project capability
and they don't realize that Claude is
saving everything in memory, and that is going to be
universal within your account. Next time you want to talk
about your art aspirations, you don't need to reintroduce
yourself, your dreams, your goals because Claude has
already saved that for you. Now, let's jump into
some tips that you can practice moving
forward after this course, during the course so that you
have a better experience. While we are on the
subject of memory, if you want Claude to remove something from its memory
after you're done using it, you can mention it directly. So let's do a little
exercise together. I have my session open. I'm now going to say something
for it to save in memory. Save this in memory. I like oil pastels. So it's going to do a little
bit of processing here. So you can see that
I got this error. So this is actually
something you need to turn on
before you proceed. And this is something a lot
of beginners miss out on. So simply go to
your name down here settings or just do
memory in the search bar. And simply turn this on. Allow Clot to search for relevant details
in the past chats. So you just turn this
on and that's it. Now, another cool thing is
that if you were used to using HGPT for the entire time and you just discovered clot, you can kind of export that information from
HGPT import it into clot. You don't need to redo
all your prompting and all your projects in
this new language model. So that's this
option right here. If you do start Import, you're going to copy
this prompt into whatever tool you were
using beforehand. So hat GBT Gemini, copy it, and then you
paste it in that model. It's going to basically give out everything it
knows about you, and you're just going to
copy the result from there, put it here, and that's
going to be added to memory. So you don't have to
start over every time you are moving from
one tool to cloud. So now, whatever I say will
be remembered across chat. Similarly, if you said something that you don't want claw
to remember anymore, you can have it remove
that detail from memory. So all you have to say is, say I said something,
it would be like, remove that detail from memory or maybe put the
detail in quotation, and it's going to remove
it from the chats memory. So that's a tip that you
can use if by accident you said something or something you don't want
Clate to remember. The next tip is to actually have Claude help you figure out
what it is that you need. So say I'm an art student and I want to write a
little personal blog, but I'm not sure what
sort of content I need in order to go viral or in order
to get a lot of audience. So say something like this, I am an art student
who wants to start a new personal blog
and wants to go viral. That's something I want to do. My goal is that ask me
questions that would help you generate the
right content for me. So I'm having Claude do a little pop quiz with me so
that it can better help me. So there's a little pop quiz. What kind of art
do I want to make? I'll say traditional. I'll do
essays, and maybe polished. So I answered these according to what I know about myself, and now it's going to apply
those into its strategy. So now I have something a
little bit more polished. I don't have to
think about writing a prompt because this
combines with this, and it basically sets clot
in the right direction. Tip number three is having clot two multiple outputs or
receive multiple inputs. Now, you may have
seen that you can easily add files or photos. But if you don't know how to do a very good prompt or basically articulate
what you're looking for, you can upload
multiple pictures, your reference pictures or
multiple reference files, and have Cloud look at those. For example, if I want to design a new menu
for my restaurant, but I don't exactly know how to articulate the
vision that I have, I could upload some of my
favorite restaurants menus and have Claude pull out the keywords that will
really help me or, like, how I should like word my menu items,
something like. Or it could be something
within your sphere. Say you were walking
around the neighborhood. You took some pictures of
certain architecture you like. You upload those into Cloud, have it pull out some keywords
that you guys can further discuss so that you can do a better job on your
future project. So basically the whole
idea of using the inputs as much as you we did this already in our
previous lesson, but you can also multiply
your outputs so that you're not limited to
one result and one file. You can have Claude
basically process something and output
something for Instagram, LinkedIn or Tik Tok, and maybe within those
different tools, you can get different
variations. The variations for Instagram, three for Tik Tok,
three for LinkedIn. That will basically
save you time. You don't have to go back
and forth with Cloud. I will do it once
and you can spend more time thinking about
which one you like. The final tip that you can utilize is using the
voice feature right here. Think about it as being on
the phone with a friend. Sometimes you just want
to bounce some ideas. You don't want to type forever. Kind of turn this on
and it's perfect on the mobile because it becomes
like a telephone call, you're just talking
to Claude, like, Hey, I got this idea about an ice cream store. I
don't know where to begin. Claude is going to talk to you, like a little friend, ask you questions, what
are your inspirations? And you would
basically save time from typing, pulling in links, and just basically use what's in your mind and try to articulate
it via a phone call. The good thing is that even though you're using
the voice mode, it's going to be transcribed
within the session. So you can always come back to it and see what you
guys talked about, build upon it the next
day with a new idea that you have or something you
want to further refine. So those were some
tips and mistakes that you could keep in mind moving
forward with the course, and I hope you guys were able to identify how those are helpful
for you at this stage. Moving forward,
we're going to dive deeper into some of the
tools that Claude has, and you're going to see more of what I just said in practice. Let's actually move into one of the really cool capabilities that Claude has, and
that is research.
11. Research Faster with Claude: Now, let's dive into the research feature
that Claude has. Now, research is going to be a little bit more advanced
than what we've been doing so far because
it's going to look more carefully
at the sources it's using and give you a lot more details compared to what we've
been doing in the chat. So to enable
research in the app, you just have to go to the plus and go all the
way down to research. So you can see that we were on web search this whole time. Research is going to
be slightly different. We're going to see
this little bar. It's a little icon
next to our chat, and that's a good indicator that you're in the right place. I'm going to leave the model as it is, feel
free to change it. But we're basically
going to have Claude research good venue for a birthday party that I'm
planning for a 12-year-old. So we're going to do
a very simple prompt. I'm going to say,
give it some context. I have a birthday coming up for, let's say, my 12-year-old. And I'm going to turn
this on, actually, just to make sure it's not
picking up anything about me, but sort of starting
from scratch. So with the Incognito mode, it's not going to look
at the other sessions that we did in the
previous lessons. It's only going to
use the context that I'm giving it right now. So I have a birthday coming
up for my 12-year-old. I'll say Son and I need to find a venue that is kid friendly
and offers catering. So that's something I need. So this is not going to be enough because we didn't really give context about what
Claude needs to research. So we need to give it,
like, a certain area, a certain platform
to search for maybe finding out what 12 year olds like, you know,
that sort of thing. So, oops, let me actually
turn on research here. So I'm going to give
it some rules first. The formatting isn't
really as important, but when you make your
prompt clean like this, it's easier for it
to be understood, and I'm also doing
it like this so you guys can easily
follow along. Rules should be outdoors should be suitable
for large crowds. We could say food
options need to be ins gluten free and
offer lots of veggies. Just making up rules here. I think I'll leave it like that. Look into Brooklyn. I'm just gonna use Brooklyn
again and find me places online that I can call
and make arrangements. My budget is, I guess I'll just put $10,000
just randomly. I want to host this birthday
during the weekends. So research about the places, list them and tell me their price and
their pros and cons. And then in the end,
I could be, like, asking more questions that can better help me plan
for this birthday. Say this is something
I've never done before. Claude may think
that I'm missing out on drinks or an element
that I have not mentioned. Maybe all I'm thinking about
is just affordability, catering, it being outdoors, but Claude may suggest that I also look into photographers, clowns, that sort of stuff. So you can have this line so that it helps you out
with the planning. I'm just going to send this, make sure research is turned on. Once I'm done, I'm
just going to hit Send and let Claude
do its thing. You can see that it's going
to get more details from me. I invited that, but sometimes if you don't give enough
context in your prompt, Claude will automatically
ask that from you. So how many guests
am I expecting? Let's say, around
50 outdoor venue, we could do a garden
how far ahead, maybe within two weeks. So more details, it's
going to dive in and research to get us those venues. 28 sources and counting. It's also telling us
how long how much time has elapsed since I've
given it these answers. Now, I had to go in
incognitomo just so that you guys can see Clock
can pick up the context, but say you were doing
this for an actual event, I recommend that you do it
in a session and not in this form of chat just because you can
always go back to it, build upon your prompts. Maybe you discovered something
about one of the guests. Say someone said that an you can add that
detail to that chat, get updated response, a different catering option,
and that sort of thing. So just bear in mind what
this does to your sessions. It's only about it
remembering these details. So when I exit here, it's not really
going to remember this birthday party planning
because I asked it to. When you click on
this bar right here, we can see that it has
been 2 minutes so far, 162 sources and counting. But when you click on
this, you get into this side panel where you get more details
about the process. So it created a research plan, and now it's gathering
the sources. It's getting multiple sources
from different websites, and now it's looking more into the 41 sources that are probably
more relevant to my ask. We're just going to
let it do its thing. If you ask for a more
simpler research, it will take less time, but I wanted my command
to be very specific, just so we can see how
detailed clot can be together. So it finished. It took about
6 minutes and 17 seconds. Again, if you have
a simple research, it will take less, but for something more complex,
it will take more. So I'm just going
to close this and show you the process it did. It looked over 239 sources. It took this many minutes, and it's just telling me that, you know, a report
of what it did. And then it gives me a document. Once you click on the document, you get a nice header, and then it's telling me the
different places it found, how much they need,
pros and cons, key findings, different details
on each of those spots. I have two, three, four, five, six, six places
to choose from. Recommended caterers for gluten free and vegetable forward. We've got four of
those and what's unique about them,
so zero waste. Then it's giving me
an action so today I should call this park and
ask about certain things. Next day, I could
make some inquiries about picnic house and
a bunch of other stuff. There's also some do
not do like this guy, and some things I should bear
in mind for my birthday. So pricing and
then a little risk about the timing of this.
I have this document. Again, I could go here
and be like, fix this, look into this place, maybe add another
allergy in there. So maybe half of my guests
are allergic to strawberries, making sure that this
goes in my plan, and when I'm looking
for caterers, I inform them that there's
also that allergy. So you can copy this, or you
could download it as a PDF, as a markdown or publish it. Web. So if I want to share
this with other people who want to help with the planning of this
birthday party, I can. And if we have a
team within Cloud, say that we're all on one plan, if I click on this option, they will all get a
copy of this document. Now, the research feature can be used for a lot of
different things. This was just one application, but say you want something
for business related works. For example, your team is thinking of coming
up with a new drink. You can use Clot to research
what's popular right now, what is everyone's
favorite flavor? What is the market like? And because you're on
the research mode, you can see that it does
take a lot more time. It is more detailed, and it does give
you a better result compared to the web search. So these are straight
out of credible sources. That's something
that the research will make sure happens. So if you click on
this, you can see all the different
sources it went to. And as you can see,
they are quite relevant to birthday
parties in New York. So I could see all of these
guys, different results. I could click on each one if
I wanted to read it myself. So I'll just click
on one real quick, and I could learn
more about this place that I so now if I click on X, you can see that my
conversation was not saved in the different sessions because I went on
incognita mode. But if you want to do it here, all you do is press
on this research, ask the same question, but
it's going to be saved here, and it may use the context that you've given in
these other places. That's how you can
research with Claude. It's really cool, and there's a lot more that
you could do with it. So go ahead and research about
something you want to do. It could be like
the stock prices. If you're into sports, what is the next event? What are the prices like
and that sort of stuff? So, give it a try, see
what you can find out and how relevant the sources
were to your question. Mm
12. Summarizing Documents: Sometimes you are given
a big document that has so much text in there and you don't have enough
time to read it. With Claude, you can easily summarize documents, websites, and it will make you a nice polished summary of it using bullet points,
bulleted text, and any other details that
could help you either better understand a document or
take actions based off that. So for this lesson, we're going to be using a sample document that is available for you
guys to download. And we're just going to add it to our chat bar right here. So here I have a PDF. It's about ten pages
long, lots of text, and it's basically
a meeting note and different agendas
within the document. So I don't want to spend the
time reading all of this. I'm going to use clot
to summarize it for me. So you could either stay in
the chat or do the co work if you wanted to do certain things
after the summarization. Example of this
application is saying, asking Claude to summarize
this document and then maybe email it to certain
people right afterwards. So we're going to give
some permissions for this, and then it will
do it on its own, sort of like an agent. But I'm going to stay within
the chat just because we're getting started with
this whole capability. And we're going to
see how it works. So we're going to
give this command, summarize this document for me, and bold the important parts, the agendas using bullet points. Then list me actions I should take for the meeting or goals. Point out some follow up questions I could
ask from my team. And let's pretend that this was a meeting note sent to me, say I was sick that day
and I wasn't there. So I'm going to give
it that context. I was not at the meeting,
summarize this document. We're going to hit sent
and let's see what we get. So this was a sample document, as I said, and you can see how quickly Claude
picks that up. So it's a sample placeholder
document, no unique content. So that's something
we already knew, but it did still
do what we asked. So it did a summary, logistics,
attendee experience, and then it gave us
some action items that I could do if the document
had actual owners, so it doesn't specify
it here or deadlines. So if we had actual
people, it will tell you, reach out to Peter about X, follow up with Jenny on
Y, that sort of stuff. But it also did the follow
up questions that I asked. So these are things
that I need to ask my teammates just to catch up since I couldn't
attend the meeting. Now, you could do documents. You could do multiple
documents or even do websites. So I'm just going to grab a Wikipedia page
and paste it right here so I could have Cloud summarize it for me instead of me reading the whole thing. But we're going to go
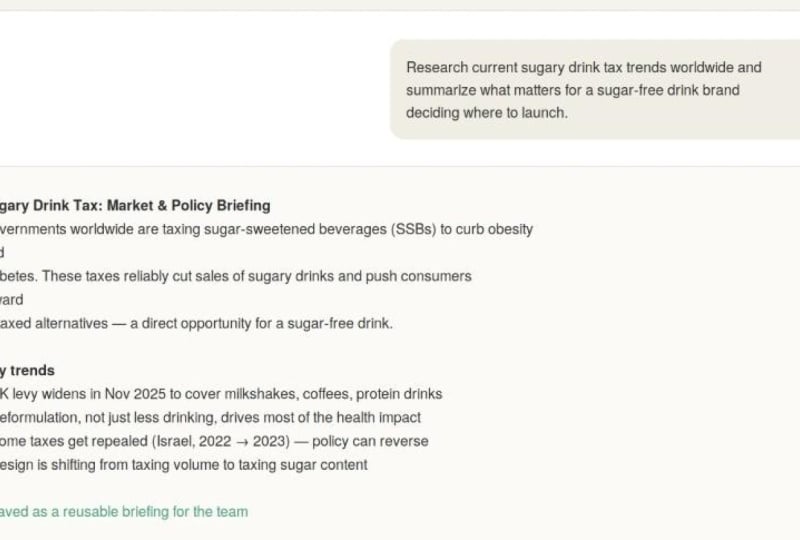
over this Wikipedia page, sugary drink tax. Say our team is looking into designing something that
has to do with this topic, and our boot has given
us this document, this website to look at and
form it into a document. So I'm just going
to copy the URL, go back to Cloud, and then
give it the instruction. Read this website and summarize the important details
inside a PDF file, highlights latest trends,
affected countries, important numbers and
action items for my team. So here's the website. I'll put it in parentheses, and then I'll give it
some more context. So my team and I are looking to develop a sugar free drink. Help me make a document to
present at our next meeting. So this is our prompt, very simple, very
straightforward. You can do multiple
links, a link, and a document, and then
have Claude do it for you. So this will be like
your summary session. So here's my PDF. It's
going to build it. And if you want, you could have the same prompt done
with the research. So say I only have access to
one website that I found, but I do want other information to be incorporated
into this PDF. So I could tell
Claude that this is the website I have and for it to research on the Internet and
find other websites, extract the important
information, and put it in the same document. That way, I don't have to
look for other websites, copy their URL as well, and give it a longer prompt. So we can see that it's building the document as we speak,
and now it's ready. So I did some summary
of the document itself, and here's something I could
present in our next meeting. Make it a full screen here. So we got a nice
little abstract, latest trends,
affected countries. We do have some
formatting issues, but I could have it to redo it. But we're getting
all the countries, important numbers, action
items and other stuff. So I could be like maybe
separate the tables into an Excel file and keep
the other text in the PDF. It's going to look at skills. We're going to get
into skills later. But basically, those are special instructions
that I would have given Claude as the user to
do Excels a certain way. So if I have a specific format, if my company has one header that needs to be
in every single, you know, Excel sheet,
Claude is going to just check that real quick. But I didn't do anything
with the skill, so don't worry about that. So now it's done the split. We can see that we have
a PDF and an Excel file. So the PDF, only the text, which is perfectly fine, but we just remove those tables and put them in an Excel file, which should be a lot better for formatting and the
columns in rows. So now I could present
both to my team and have a good meeting using
Claude as my assistant. So you could use this for summarizing, building documents, combining documents,
splitting them, and doing so many other stuff. Try this with a document
that I have for you guys. I'm going to leave these two in the resource
pack as well. So you guys can take it, try to combine them,
separate them, maybe take this one Excel file, break it into two or three, have the research feature, add more information to it, and just experiment
with what you could do with the cloud chat and
the Cloud research. Now let's move on
to our next lesson where we're going to talk
about brainstorming. So when we have
nothing in our hand and we're just tossing
around some ideas.
13. Brainstorming Ideas & Solving Problems : In the previous
lesson, we looked at how to extract information from a website and then output that into two different formats. So we're going to continue
working on this specific file, sugary drink tax briefing. And what we're going to do is use Cloud information
now that it has context about our needs to just brainstorm some ideas
for the new project. So as we said in the
previous lesson, let's say, the company is looking to
design a new a sugary drink, and this was part
of the research. So now that I have the
research component done, I could look into, you know what flavor the
drink should be, what are the trends
and all that stuff. And essentially, I will be
brainstorming with Claude. So I'm going to be
within the same chat. Ideally, you would want
to do this in a project, but we're going to get into
projects in a further lesson. So we're just going to
keep this in the chat. So this is where we left off. But now I need to give a
little bit more context about the project itself and basically tell Claude that I
want to brainstorm with it. Maybe I could have it
interview me again, ask me some questions, and then that could
help me get closer to that drink idea that me and
my team want to execute. So let's start with a
very simple prompt. My team and I are looking to
develop a new sugary drink, and we want it to be trendy, fruity and fun in
terms of design. So ask me some questions
that can help me or help us brainstorm ideas
about the new drink. Very simple. If you want, you could mention other stuff. I will mention a budget. We have a budget of around, I'll do ten K again. We want to do a
form of AB testing. With two different flavors and figure out the best selling one. Again, Son at five, I did not change the model. Let's hit Inter and see how Claude is going to
help us brainstorm. So I have five questions
that I need to answer. The first one, what flavor
direction feels most trendy, food you fun for your
target drinkers right now? So I didn't mention
my target drinkers, but maybe I'm aiming
for teenagers. I'm aiming for every age. I'm aiming for children. That's going to greatly affect, you know, that
flavor of the drink. Ocation is also important. So let's see if Claude is
going to ask us about that. But for now, I'm going
to go with tropical, and you can choose more
than one answer here or even type something
that's not over here. I'm going to go to the
next one. There we go. It's asking us about the age. So I'll say maybe health
conscious, the base. You could say carbonated soda because we chose sugary drinks. The important thing to
measure for the AB test. I think I'll just say taste preference and the
packaging appeal. Last question, how do we
want to run this test? So we could do a pop
up just for fun. And now that it has my answers, it's going to help
tailor my ideas, put them down in one session. And later on, we're
going to see how we could build
visuals with Claude. It can give you flow charts, SVGs, landing pages, and
so many other stuff. So this is only the beginning. Alright, so we have an answer. We got two concepts. It even gave us a name. On food Guava. And then it's giving me some packaging directions because I said the taste and the packaging needs to
appeal to the audience. So it took that information, and it's giving me some
ideas around here. And then here are some
budget breakdowns. I didn't really ask for it, but Claude is going to pick
up the fact that this is a team project and I need
to bear these in mind. And it's also telling
me how to run DAB test. Lastly, we have some additional questions that I could answer. I'm going to ignore
the questions, but just come up with
a random question that I will have during
this brainstorming session. So what should I call the drink? I want it to be fun
and easy to remember, but not pure English. So we get some ideas here, and I'm just brainstorming. Giving different languages,
invented blended stuff. This is more of what
I was going for. And then I could build
up on this idea. So talk to me more about blended names and how I could incorporate this
into my packaging. It's telling me a
little bit about how the names work to begin with. It's giving me more names
that I could think about, maybe share with my teammates and how we could carry
this into the packaging. So these are a lot of ideas
that I could now explore. Say I want to share all of
this with my teammates, but I don't want to have
to relay the message myself or write
everything up, as well. So summarize these ideas into a visual presentation that I can share with my
teammates or with my team. Let's give it one lead. I'll choose one of these
guys to begin with. We can go for this
guy. I like the best. So notice how in this lesson
and the previous lesson, it's talking about
a certain skill. We're going to get into
skills later, but as I said, those are really handy
when you're working with certain templates that
you have to adhere to. Say everything that
you publish for your company needs to have a certain letterhead,
a certain tone. Those are things that you
get to save in clot skills so that every time you ask for a presentation or an Excel file, it applies those rules
to every single file. So you don't have to
make edits later. But again, we're going to
dive into that later on. So now it's building
the JavaScript file and you can see this
happening live, and now it's going to convert it into that visual presentation. Again, you could
make this a simple written PDF file
or an Excel sheet, whatever format you prefer. As long as you
mention what it is, Claude will execute it for you. So we got three slides. I didn't say how many slides, but you could also specify that. Alright, so now we
got six slides. It's going to open
up a side panel, and it's a PowerPoint
presentation. So there we go. Got a nice color. Going on where the
name comes from, meeting the flavors and the test plan and open
questions for the team. So this is one way
that you could take all your brainstorming session and produce something out of it so that you could
share it with yourself or anyone else working
on the same project. And notice how this
thing just popped up. This can be connected to external platforms
or your local drive. So Cloote could make
this save it in a folder within your computer or send
it automatically via email, upload it automatically
to your Google Drive, and that is done via connectors. Another thing that we're going to learn more about
in a further lesson. So now we have our brainstorming
session. It's complete. I have an idea. Let's go
ahead and see how we could plan with Claude
so that we could actually take action
from this idea.
14. Planning Projects and Tasks: So this is where we left off. We made this presentation out of a very simple
brainstorming session that we had with Claude. Now I'm just going to close this off and give a little bit of basically more context about the timeline I
have for this project, some restraints that I have, and have Claude give me, like, a checklist that I
need to do in order to be able to execute
this new drink launch. So I have three
months, let's say, to finalize the packaging and
flavors for this new drink. Ask me more questions. That will help us build an action plan so that
I have the drink ready. Very simple prompt. Let's see what sort of
questions it's going to ask just so that it could
build upon its own context. So clarifying questions.
We got three more. Where am I in the
flavor formulation? I think I'll say number three, who will handle the production? Let's say we already
have someone and then what happens after
the AB testing? I guess we'll do
pitch to investor. And then this will be my goal, but we need a checklist as
to what I should be doing. Say, I'm missing out
some important details, and then we got three
more questions. So this just
prompted on its own. I didn't say asking
more questions, so I'll say dedicated team. Where do we stand on
this? So it handled. For the pitch, I think we'll
do like three to six months. And it's just going to
process what we give it, ask more questions if it needs, and actually give
us a good plan. So month one, week one to two, we got these things that we
need to do second month, third month, and
it's even telling us a few points that we need
to consider moving forward. And it's going to ask me
if we want to output this. So I'll just have it do both. Here are the two files. We got the document and
then the Excel file. And as you can see, it's
formatted really well. We get checkboxes, too. The same information about the action items per
week and per month is written out and also the points that it
wanted us to watch out for. And then we can see
the launch timeline. Click on that. And this
is what it looks like. I'm going to extend it here. And it's looking pretty good. So it's color coded, and it's nicely formatted. I could download this, bring it into Excel, or have Cloud do
additional changes right inside this chat. You just hit X right
here to collapse that. And you can do multiple outputs. This could also be
a landing page if you want to advertise the
drink before it's out. Cloud can do that for you. It uses the code capability. You can also get that done with the live artifacts feature, which we're going to look
at in a further lesson. So this way, you can
come up with a project, make a good plan for it, get some research involved, and finally get these
actionable items that you could share with the team
or focus on by yourself. So now you can try this with
anything else that you want. It's pretty easy,
pretty straightforward. And now you have the tools to start something
from one idea, one concept, build upon it with the research feature and
the following output. Let's go ahead and dive
deeper into these tools, which are the core
features of Cloud.
15. Working with Projects : In this lesson and the
ones following this, we're going to look at
the core features of cloud in a more basic way
just to get you guys started. So as you can see
on the sidebar, we have a bunch of
things that are not as common in the other
large language models. May have wondered what they are. They look very different
when you click on them. And we're just going to do a quick dive into each
one because as I said, there's so much more you
could do with Claude, but it helps to get a very
basic understanding first, do a few experiments,
get a hang of it, and then go onto the
more advanced things. So first, let's get
started with projects. If you click on it, it's right underneath it's going
to look very simple, but essentially
projects allow you to have a dedicated room
for one specific thing. So you can think of projects as something more
elevated than the chats. Now, in the chats, they're going to Claude is going to remember the things
that you tell it. Context is still in there. It collects the
information you provide, it gives you outputs, and all of those things. But projects allow you to have more focus and more details
involved in that need. And they're really helpful
for long term things. For example, you can see a few things down
here, study projects. You just started a semester. You feel like you're
going to struggle with physics, for example, you can start a
study project where it's going to be with
you the entire semester. It's going to learn
your learning style, what you struggle with. You can always come back to it every single day,
ask it questions, have it generate you quizzes
and stuff like that, and that is a long term thing. So it's always going to
be available for you. The same thing could
apply for your career, say you're looking for a new
job and you want Claude to be an assistant that will
help you tailor your resume, write your cover letters, and maybe write emails,
prepare for interviews. This again is a long term thing. So you want to leave zero
rooms for hallucinations. You can also do the same
thing for research. If you go on this
example project, there's a chat bot just
like the chats here, but there's a different
box for context. This is where I said it's going to basically use
a lot more detail for the outputs
because it's first going to study whatever
you put in here. Say you made a study project. Going to put in your textbook, your instruction notes,
maybe the syllabus, stuff like that, and
Claude is always going to refer to this box before
it gives you an answer. So this way, it's not going to randomly pull information from Wikipedia when it's
trying to help you prepare for your
next physics exam. So it has this box over here, and there's also
a cowork feature. Now, cowork is going to be
something more actionable. Clot is not going to
just give you an answer, like the chat, it's
going to do things. For example, this, of course, depends on the permissions
you give clot. For example, with cowork, it could read your slack, find one message, print
it out for you here. It can send emails. It could look into
your Google Drive, extract all the pictures. I could look into your
downloads folder, stored everything from, let's say, the amount of time you've used it, and so on forth. So it it has the ability
to interact with the things outside of clot as long as you
give it permission. So whether it's one
task or multiple tasks, you can decide on which
one you want to use. But we're just going to
focus on the project here. So let's go ahead and
make a new project. We're going to give this a name. So let's give this a project. I'm going to do
something for studying, just so it's versatile. We'll do, like, Irish
literature, too. Let's say, that's the
name of my course, and then some goals. What do I want to achieve
with this long term project? We could say, get better at understanding historical
contexts, unique terms. Character analyzing
and other stuff. So we gave it the goals that we're trying to achieve
with this project. And then there is an
ad folder feature. This is something that you
get to use if you want to upload a folder from
your computer onto clot. Say if you're doing a project about basically sorting out meeting notes and
making agendas, if you have a folder
full of meeting notes, this is where you could upload. I'm going to leave this out and basically upload
two separate files. So create the project, and now we get that chatbot instructions and the contacts. So for the contacts, I have two PDFs. You guys can
download it as well. But these are things that
are related to my course, and say, my instructor
gave these two files to. Just hit the plus,
upload them here. So it could be from your device. You can add text content. So if there's any
important detail that your professor mentions in the class at the beginning, you can put it right here. If it's a file, you
get to upload it, and you just have both options. There's also GitHub as well. So I uploaded those
two for my context. Again, you could do
textbook as well, but I have one about James Joyce and one about the troubles. And these are just
Wikipedia page. Are free to use for everyone. Next, we have instructions. So add instructions to
tailor the responses. This is if you wanted to
output in a certain way. For example, if you want, you could say that whenever you're trying to
analyze a character, make sure you use one or
two quotes from the stories or make sure that you're using quotations from the sources,
that sort of stuff. But something unique
to your needs, you can put it right over here. So maybe you can do this
since we're doing literature. Analyze the short story and provide two
quotes, direct quotes. Every time you are asked
about a character. So that's one instruction.
You could do multiple. Let's save this.
And this is unique. I could always go back
to this, by the way. And you can always
add more context. Now we can either use a
chat feature or the cowork. If you go to cowork, you have two options, and these are the
permissions that I was talking about earlier. So for example, if
you enabled Claude to build something with coding
and save it onto your Github, it's going to ask
you for permission. So build this file
question mark, and then you could
approve it or you could have it not
ask you at all. I recommend having this on because sometimes
it may want to do things that you didn't think about and you want to make sure that you're
aware of that. Posting things on your slack. You want to know
what's going to be on there if it's
going to be from you. So make sure this is on this. We again have the same models. You have the voice
mode, and of course, you could add things
to the chatbot. So we have the skills. This is something
I'll tell you later. The connectors are
also for later, but we're just going to
focus on this for now. So I'm just going to grab a short Irish story
to bring into here, say that is my homework. And we're going to
have Claude help us navigate through
this difficult story. Given that it has context
about James Joyce, the author and the troubles, just so that it knows a little
bit about Irish history, it's going to be able
to better help us. So I'm just going
to grab that story. So I just downloaded Ulysses. This is also available
for you guys. So that's my story. We could add it to the context as well. If this is going to
be a long term file. Say you're going to spend
the entire semester for this, you can
put it in here. But if it's one homework, you could put it in the chat. So let's say summarize each of the characters
within the story. Very simple prompt. Let's send. And while this is happening, we have some new
things on the side. So we have progress. So if there's a
task that is going to basically happen
in the background, it's going to show up here. If you're saving anything onto a local drive or onto
a cloud location, you will see them here as well. And these are just the contacts. So we have the
project right here. So now, because I asked it to
analyze all the characters, we have a folder that
contains this text file. So this was a PDF. But it was like pictures of the pages because
it's an old story. So first, it extracted the text. And because I gave it
the instruction earlier to pull quotes every time
I ask about characters, you can see that it's
exactly doing that. So now it has the solid quotes. It's basically running through everything it's doing for you, and it's creating the files. You can see the
amount of characters, and I could do follow up
stuff here, make edits. But notice how on the left side, we've been doing chats
this whole time. This guy is different, so it's a different
type of session. The file is complete. Here is the character summaries, and there's the two
quotes that I asked for. These were my instructions. It's giving me a little
bit about each one. I get to scroll down
and maybe use this for my study sessions
or for my essays. So again, you can
make changes here. The files are saved. I could be like turn this into a pop quiz to prepare
me for an exam. So turn this file into a pop
quiz for me to study with. So it's going to basically
use this space to make everything needed for me to get better with my study. Here are the questions. So we have part one, part two, and there's, like, the
answer keys underneath. So that's an additional
file that's saved. If I close this sky, we now have three files in my
working folder. So that's pretty much a
general idea of the project. This was one application, but you can imagine that
you could use this for any other long term
goal that you have. It's really helpful. It's
saved for you right here. You can always come back to it and build multiple projects. Now, something that
goes hand in hand with projects are the artifacts. Is right underneath here, and we're going to take a look at that in the next lesson.
16. Creating Interactive Artifacts : The artifacts are products
that you can build with clot, and they go hand in
hand with projects. So this could be an
interactive quiz, it could be a landing page. It could be a simple calculator, things that you get to
make in a few seconds with clot and save it for whatever
reason that you have. So it's right
underneath project, and when you first open it, it should be empty if you
haven't used artifacts before. On the right side, we get to
filter a type of artifact. So we have chat cow which
is what we looked at in a previous lesson and code
that I'm going to leave out, as I mentioned, because there's so much
you could do here. You want to build
a new artifact, you just go over here.
There's two ways. You have the chat
one for one task and the cowork for multiple
task and multiple outputs. I'm going to start
with the chat one. We kind of looked at a cowork example in
the previous lesson. So now, immediately, it's
going to ask for a category. So what is the product
that I'm going to build? So I'm going to do a
productivity tool. Let's click on that. And it's going to ask
me some questions so that it could better
build this product. So kind of tool, let's say, time management. Main problem help me with
everyday health, I guess. I must have feature, positive and motivational
quotes like that, and I'll do, like, bullet points so that it's nice and organized. Use Shift and Inter to basically format this
because if you hit Enter, it just sends the prompt. So that's two. I'm doing
Shift eight for the asterix, and now we get three
bullet points. So right now it gave
us a little brief. This is the name of my tool. These are the sections,
the check ins. And then we have
the quotes here, rotating positive quotations
and a progress snapshot. Now, it's going to ask me to double check this if I
want to make any changes, I could do it here or else
it could build it for me. So say this is perfect, I'm just going to say build it. So now, because we
are in artifacts, it's going to build
something for us that's available in
the clot application, we're on the desktop again. But you get to maybe upload
this onto Google Drive, share it with your
slack members, and basically decide
where this product goes, but I'm going to keep it
within the application for now because the connectors is going to be something for
a further lesson. So here's my product. It's done. You can see that I took a while, but we have today's focus. We got a timer feature, and I'm just going to
make this full screen. We get a nice color scheme, and we got our
motivational quotes that I get to refresh
for something new. That's an example
of an artifact. This is an HDML. You can download this, host this somewhere else if you prefer, but you can see the preview or the code and do
with that as you will. You can download
it or publish it, as I said, and make changes
if you want via chat. So you can be changed
the color scheme, use these two colors that I like or something
of that sort. Very straightforward.
Artifacts are great when you combine it with other
features within Claude. But as a general idea, this is how you work
with it. On its own. It's really fun to explore with. And as you saw, there's
different categories. But in the next lesson, we're
going to look at something that's more visual and used
for more visual applications. And that's the design
feature down here. It's fairly new so
make sure you're updated to the latest version so that you could follow along.
17. Introduction to Claude Design: Claude recently added
their design feature, which allows you to turn
ideas into visuals, whether that's a poster, a logo, or any other sort of format, and it's done right
within the application. So say you brainstormed
an idea, you know, you came up with a
logo idea or, like, a new business to start, you now don't have to leave
Cloud for Visual aid, but do it all within
this tab right here. You click on it once,
you're going to be brought into this window, and it's pretty similar to a
lot of the other platforms. They've now added a chat
bot that outputs visuals. If you've used Canva before, this may seem familiar, but there's a big
difference with Cloud and those platforms. With Cloud, you
can do prototypes, slides, documents, wire
framing, and even animation. And you could do reference
files as always, get different design systems, can use templates as we saw, and you can even program
something like within a code. For example, you use clot code to build a landing page
for your new business. You can now turn that code into an actual prototype
inside. Let's get started. We're going to do a
very general briefing of this because as I said, every feature within Cloud has so much
capabilities for you, but it's good to just get a basic understanding first before you experiment further. As you can see, it's Beta, so by the time you guys see this course or a couple
of months later, this may completely change. But essentially, we have this
chat bot where we get to speak to Claude to build
whatever we're trying to build. You can see some suggestions. We have wireframes
for landing pages, we got briefing documents
and all that stuff. First thing is the plus icon, which allows you to
attach reference files. You can attach folders. This could be from your local
drive or something else you downloaded from
your work computer and then reference
another project. We went over projects already, but say I wanted to turn my Irish literature project
into something live, I get to connect it right
here. And then we have code. If you are using Cloud for
code, Github, local code, which is within your computer, you have these two
options. We have designs. If you've used FIGMA before, then this should be
pretty useful for you. If you haven't used FIGMa, it's basically a design platform where you get to
build wireframes, mobile user interfaces, web, and so many other stuff. Whatever you design
there, the full package, you get to download it from FIGMaimport it right
here so that you have basically more control over how your
prototype comes out. Design systems,
so you can set up the system so that it
maintains your branding. For example, if
you're designing for your company with a design
system that you set up here, it will keep the logo, the colors of your company, typography, tone, and
so many other stuff. And then we have skills, which we'll get into in the next lesson and then connectors, which is also the lesson after. These are references,
different types of references. Design System which
is looked at it, if you did end up making one, so if I just click on it, it will show up over there. You can either create
one from scratch or you could have Cloud
code do it for you. If I click on that, I get
to put in my company name. If you're doing
this for yourself, you can put your own name. You can put a link from
Github, code from computer, Figma file, and add all the design assets
that we talked about. You can also put in some notes regarding the tone,
the audience, and then you can
put in like b to further specify what you
plan to use this design for. And then whatever you save
is going to show up here, a drop down menu, very handy. Templates. These are things
that you make yourself. So if you just go down here, when you make one from the projects, they're
going to show up here. You get to reuse templates, but right now we don't
have anything here. There's a search bar as well. Your design systems
are also going to be lined up here and your
projects as well. Once you have that, you can
add in some code as well. Again, I'm leaving
the code part out. The models are right over here, and then you have
the Send button. So here are some templates that you get to use to get started. We have prototype, slides, document, wireframe,
and animation. Let's get started with
the slides because we did use Claude to make some study guide for us
for that literature class. So now you can see
my template has slide it's going to maintain
Power Point formatting, the rules that are associated
with that in terms of the number of characters
per slide and other stuff. You can add in a project, and I could let's actually do prototype just because
we did slides already. So let's say design a one page landing page for
a new skincare product. Very simple. Of course, the more details
you put in here, the more it's going
to be tailored. You can mention typography. You can mention the style, the audience, and
many other stuff. So now we have this
engine running, and you can see that I'm getting all these questions
that I now need to answer to better help Claude
continue with this design. So it's not going to
just take something from you and give you a
bunch of random designs. It's making sure that it's
relevant to your actual need. So here's a chat bot. You can see it got named
after what I asked. And we could hide this sidebar. You can go back to the chats and now Claude has
some questions. So whatever follow up you have, you would
put it down here. Let's actually look at what sort of questions they are asking us. So product name,
online description. Let's call it I don't
know, beauty Smart, Beauty smart, the
best moisturizer in the world or something. So Beauty Smart, the best
moisturizer in the world with, let's say, special serum. Overall aesthetic wipe. We want maybe warm natural. I'll do just that one. You can also do decide for me. So Claude is going to
look at what you gave it here and make
a decision there. I'll do like this
guy, any colors. I'll leave this empty. We'll do elegance. What sections do we want? This one, ingredient breakdown. Something to buy,
imagery approach. I'll do decide for me. How many design directions
would you like to see? So how many versions of this
design? I'll do one for now. So I didn't give it a
lot of information. This is great if you're
just experimenting. But obviously, if you
have an actual project, you will have a lot to say in these areas. Continue
once you're done. We now fed it these answers. It's thinking, designing, and we get to see this
happen live for us. There's our logo. Got a button. Got the fonts that we asked for, the color is exactly
what we chose. And now it's generating, I believe, a picture or it's a placeholder.
We'll find out. Got some random ingredients. I didn't say what
the ingredients are, but they seem pretty
relevant for a moisturizer. We even got a random pricing. There is the ritual, the frequently asked
questions that I asked for, and we even have a fotter. So right now, it's doing
some final touches. And there we go. So this
is the final product, which is looking pretty good. We have actual questions
and answers here. Pretty cool, working buttons. So ingredients,
pricing, FAQ, shop now. They all work. That's our logo, and I could just go
in there and be like, change all the green to yellow, you know, make all the
adjustments that I need. What you get to do with this design right now is share it. So you get to share
it to your workspace, keep it private for yourself, copy the link,
implement it with code so that you get to host it
on whatever server you want. Make it a PDF. If you're
proposing a design to your team, you get to do a PDF here, make it into an HTML file. Power Point, and there's
even more formats down here. You can also present this. So new window in this
window full screen. Make some edits down here. So if you go to simple, you can add a text if you want, like I could just do so fun. And I have all these options. We could add in some
code as well if needed. And make some tweaks that we
don't know how to implement, but we have an idea of. So I don't know, make
this more kid friendly. That would be a tweak.
Claude is going to read your prompt and
make that adjustment. You can annotate
this. So if I was the next person getting
this design, say, my co worker did this, I could now edit this annotate this and leave my comments. So let's say too small,
that's a comment. I could make the change. As you saw, there is let me make another one send to Claude. So Claude is going to make it bigger because
I said too small, and it's all going
to be listed here. And then there's zoom
levels you could do. There's also drawing,
which is pretty cool, so I could do
something like that. Like, no need. You know, that's just an example. Leave a comet and do a
bunch of other things. So, look, I could send
this and now it's going to Claude is going to look at my critique and
redesign the section. So, as you can see,
it's getting rid of all the circles because
I said no need. So you can either
leave a comment for whoever that's going
to make the changes, or you could have Claude make the changes. That's
pretty much it. So now you could refresh for another version.
Make a new page. If you want multiple
pages for this design, you can just make
it all over here. Now, I could go
back to the design, just click on that little logo, and now it's saved here. So I could always go back there, make changes, and
go about my life. Let's try the wire framing as well because
documents slides, animations, they're
very straightforward. I'll just use one of
the template here. So build the user process. For a skincare shop. It's actually user
journey with wireframe. It's hit Send. I'm not
referencing anything else. This is just pure basically
starting from scratch. Again, we have a little pop
quiz that we got to do. So what is this journey for? We'll say website. Where should we begin? Onboarding. So when they're
making the account, what's the vibe of the prant? Why is this unique? I'll leave this empty. Familiar stuff. One direction, and I'll
just do structure only. Actually decide for me. So this is another
design output. It's going to think,
start designing. We get to see this
live on the screen. The options are still the same
thing as the previous one, so it's only a matter
of the format and template Claude is using
to implement that prompt. So, there we go. So this is onboarding. There's a little sketch for us. We can see the journey that
the user would have to take, and it's looking pretty
good. There it is. Let's try to make
this full screen, and I now have these different wireframes
that I get to work with. So it was done in a
matter of seconds. You can hit Escape to go back and the logo to go back
to the main screen. So that's how Cloud
design works. Again, this is a new feature, so it's only going
to get better, but feel free to experiment with the different types of
templates and see what you can make either using real projects or some random ideas that
you want to explore. Now, let's go ahead and move on to our next lessons where we're going to talk about
skills and connectors.
18. Skills: Skills and connectors can really help boost your workflow
because it allows Cloud to integrate and interact with other applications
that you use daily. So this could be Gmail, drive, slack, or
any other platform. Cloud can use the cowork feature to either help you
generate emails, look for a certain file
within your folders. Maybe highlight certain
things you forgot to do from your slack and do a
lot of other things. So in this lesson, we're
going to set it up, and there's so much
you could set up here, but I'm going to go with Gmail because I'm pretty sure
everyone has access to that, but you're going to see very soon that there's so many
other things you can connect to Claude and so many other skills you
could tell Claude to save. To access that, we
just have to go down to customize
right over here, and there is Skills
connectors, plugins. So plugins are straightforward. I'm sure you guys know
how to use plugins. You could just browse
some right here from Enthropic or partners. And, you know, for example, based on the design
experience we just had, if I connect FIGMA, I can bring in my
FIGMA files directly into Cloud without having
to leave the application. So that's an example. But we're going to focus on skills and connectors
in this lesson. So here are some
enthropic templates that you can get started with, and they're very
straightforward. You can see a lot of
people rely on these. These are the
amount of downloads that are currently available. I'm going to go with
a very simple one, which is learn when
hit plus right here. And now that is
added to my skills. But what you could do is make
your own skills as well. So I'm going to go x
right here. Go to skills. There is AD, and there's a
learn that we just added. So if you go to AD, you
can create with Claude, write the instruction yourself or upload like a text file. First of all, what is a skill? A skill is a set of
unique instruction that Cloud will execute every time
there is a need for that. For example, if I give
Cloud Excel skill, it's basically going to apply those instructions
that I'm going to write here every time there is a need to
make an Excel file. So we saw this in the
previous lesson where I made a bunch of data
tables out of nowhere, and we saw that it was
searching for skill. So if I give a instruction
right here that every data table
has to be blue it's going to apply that every
time I ask for a table. So it's very straightforward. We're going to
actually experiment with it in this lesson. And the first thing you
need to do is make a skill. We're going to look at the
learned skill afterwards, but let's see how this works. So let's give this a name. We can say Excel
format, space format. Description how the
Excel files should look, and then the instruction. So every file needs to only use the color
blue for the tables, and all the text
needs to be folded. Say, those are the design
branding for my company. Everything needs to
be blue and bolded. You can also add, like,
a hex code here if it's a specific type of color
you want to implement it. So this is very simple. We're going to hit Create, and now it has been created. So we now have Learn
and Excel format. So first, let's try
the learn feature. That's something by enthropic. It's a something used a lot
for educational purposes, for personal growth, for work, and basically any situation where you need to learn
something effectively. So I'm going to go to this guy, the one with the
Irish literature that we made the project, and I'm going to use
the learn skills Learn. That's how I'm going
to call this skill. Let's say, each character within Ulysses and
the main conflict. So very simple prompt. We're going to see
how it works here. So this is going to first
clarify my question. So have I read some of the
novel, and, like, basically, Claude is asking me how much
I need to learn for this? So say I am starting
from scratch. We now see that the skills
integrated here are learned because I just called it C.
Before I name characters, does modeled on the Odyssey
mean anything to you already. I need to respond to this. I don't know anything, let's
say, starting from scratch. But it's very interesting
how Claude will make sure that it's doing
the right thing for you. It will not just generate
something random, which a lot of the other
language models tend to do. But now I'm starting
something from scratch. I'm using the learn feature, which integrates
visual aid as well. So we can see the skeleton
for the characters, and then we have like
these characters, and this is going to
help me learn it. I could ask more, dive
deeper into this character, give me a summary of the
conflict, that sort of thing. But that's how the
learning works. If you go on it, click on it, you get to see the
scale dot D. So it gets triggered when you have
a explicit learning request. It does not get triggered for coding, writing,
calculation, personal troubleshooting, and there's also
a learning mode. And you can just
read this if you want to know more
about how this works. And because it's learning, it has a warm direct tone, which is really helpful if you are struggling with
something big here. All right so that was
the anthropic skill. Very straightforward. Again, there's tons out there. You could just add them
to your application. But now I'm going to
do the Excel example. So I think it was here. Okay. So slash Excel Format. We do the Excel file for the
launch timeline document. So it gave it to me already, but I want it to be reformatted. And I just don't want
to say every time, make sure it's blue,
make sure it's bolded. So now it's checking the skill, and now it's checking
the document, and it's going to do its you can see how helpful this is if your company has a header that always needs
to be implemented. This is how you make
sure that you're saving time with Claude
since Claude would be doing, like, the writing and
the research part. You don't need to
go into every file and re edit it so
that it has the logo. It has the colors
and other things. So this is a really
cool feature, and there is my document. It's now blue, no longer green, and everything is bolded. So if I could show you
guys the original, I think it red it, replaced it, but you could ask for it to
save the original as well. But as you can see, I didn't
say blue or anything. I just called this skill that I made within a
couple of seconds. So that's how skills work.
It's really helpful. Feel free to experiment with it and add as many
skills as you want. So if you go right here, you can add them this way, as well. So I could do two at a time, three at a time, or
even none at a time. It really depends on
what you need this for. Now, let's go ahead and see what connectors are because those
are also very helpful.
19. Connectors and Tasks: So going back to customize, you can just go down
here to Connectors, and these are the permissions
that you're going to give for Clade to interact with
the other applications. So I just kept in Gmail. So let's see how we
can even do that. Just go over to Ad browse and then look for the
application that you need. So I did Gmail, and
it's already connected, but let me show you something
that's not connected. You're going to click
on the Connect button. It's going to bring you to a
browser where you sign in, you give it permissions, and then it'll bring you
back to this application. I can't show you that bar because you're just signing into your Google account or whatever email that you
used for this application, giving it some permissions. So that's what I did with Gmail. And down here, it tells you what clot could be
used with this app. Drafting replies,
summarizing threats, and searching your inbox. Let's go ahead and close
this since now I know that the status is
active for Gmail. If you click on Gmail, you get to work with
the permissions again. This could either
be done through Cloud or through
your Google account, but these are the stuff
that I let Cloud do, things that need approval. So I highly recommend
if you're using a very sensitive
email to come in here and make sure that Cloud is not doing anything on its own, or if it wants to do something, it needs approval
from you first. You are not going
in here blindly, and then you wake up
one day to see Claude has written like 50
emails to your coworkers. Alright, so let's hit X, and we're just going to
go to one of these guys. I think this was the
one with packaging. So this is the chat from a few lessons ago with the drink that we're
going to work on. While I'm here, actually, notice how after we
talked about the slide, the slide that we made
for our new drink, it prompted clot design, so that's how you get
to connect the two, but we're not going to
go to that right now. So let's go to the
productivity tools chat because GMAil does
link into this field, and we're just going to go to the plus connectors and make sure that
Gmail is turned on. So we could look through my emails and highlight any
thread about productivity. So now you can see that
it's looking through my Gmail because I
gave it permission, and I'm just asking it
to search my inbox. So I got an email from Gemini once, Slido Slido grammarly. So now I could have
it maybe draft me a response to something
or draft me a new email. So draft me a new
email for my friend asking whether she wants
to work project together. Show me the draft
and send it to. So I'm just putting
in a random email. We can put the actual email, and then you can hit SNT
specify the project here, but I'm just doing
something random. So it could be related to the stuff you were
mentioning here, but you could really use
Claude to either do responses, draft new emails, draft new initiatives,
that sort of stuff. So subject want to
work on this together. Hey, and all that stuff, let me know if you're up for it. And it did not send it it wants me to confirm
it, which is good. So I could now copy this, send it myself, open
it in the mail app, open it in a Gmail app, ask for some tweaks, and then have it send
it on my behalf. So you can see how helpful
this is going to be, especially with a
cowork feature where we can have Claude
do multiple things. So we could talk about a project and ask
Claude to search for, like, a special email in our inbox regarding
this project. Email seven people
with their task, maybe draft a new presentation for us to show and
do multiple things. The skills and connectors really come in handy here
because you get to keep your standard
or your company standard in whatever work
that you're doing here. The last thing that
I'm going to show you real quick is the schedule tab, and these are
scheduled tasks that will happen with one routine. It could be daily briefing. It could be weekly reports. Maybe every week you could
have Cloud run through your inbox and look
for any unread emails. So that sort of stuff, you get to define the
new task right here, set up manually, weekly checks. So search inbox for
unread messages. And I'll just put
this down here. You can save this to a project. I'll just leave
it out like this. Make sure it's manual so that
whatever cloud wants to do, it asks for your
permission first. And you could have the
frequencies set here, so weekly. And then you set a
time, you hit Save. So it's very straightforward. Everything you make is
going to be listed here. And another important thing
is that you could have this happen only
when you are awake, meaning that the
application is turned on, and it's not going
to do anything when you're not
on your computer. So that's something
you could do. There's next ran names. If you have multiple
things lined up here, you know, it's pretty fun. If you're the team lead or
the manager or the CEO, this can be very
helpful for you. And connecting that with
the skills and connectors, you can see just how much
you can get out of Cloud. So now we know about all the
core features within Cloud, what you can do,
what it's good for. But now we're going
to apply this to a project that we're going
to do together from scratch. So that's going to
be the focus for the next couple of lessons
before the end of the course, just so you guys are
able to apply what you've learned onto
something and see what else you could do
with this amazing tool. Oh
20. Planning the Study Guide: So let's work on our project
where we're going to be solving a problem that
occurs in our lives. This could be something small, such as finding restaurants every time our friends
want to hang out, or it could be a bigger thing. So what we're gonna do
in the first lesson, and it should always be
the first thing you do is plan as to how Claude is going
to help with that problem. This project, we're
going to be building a workflow that we get to
reuse as many times as needed, and that is going to solve
a problem in our lives. So you can all think of
something big or something small that you're dealing
with right now and that Claude
could help you with. It's usually something regarding productivity or communication,
that sort of thing. And I want you guys to first
think about that problem. For my case, it's going to be something regarding studying. So I'm going to be building a quiz workflow so that Claude could design a quiz for me every time I struggle
with a new lesson. So this is a long term and if you have the
mobile app on Claude, you can use the same workflow
on your mobile as well. So the first thing you
need to do is plan, and that's the focus
for this lesson. Number one, what is the problem that you're
going to solve? Number two, how is the
solution going to be? Now, if you have no idea
how to solve that problem, you can just use
a general chat to tell Claude I have this problem at work, at school, wherever. And how can you help me? So I'm going to basically pretend that I don't
know how to solve my studying problem so that we get to see it from
scratch together. This is the planning
phase for a workflow. It's very important. A lot of time it's overlooked. People think that Claude
will figure it out for them. But the problem with that is that you're wasting your usage, and you're also
wasting your time. So first, let's begin with
a new chat right over here, and we're going to have a
conversation with Claude. So I'm starting a new semester, and I'm worried about
one of the classes. Say, it is it is linear algebra, and I want to build a workflow with Claude
that will help me understand the
equations and then be able to solve some
questions through quizzes. Ask me questions that
would help you build this for me and help me
learn and improve long term. So right now, we're
going to switch to cow because I'm asking
for multiple things. First, I wanted to basically summarize my lesson
then build me quizzes, tell me the correct answers, and maybe something else that
clade things would help. So this is my prompt. I could make a
project right here, so that's really helpful. But first, I want to
start by getting an idea, so I'm not going to
do anything else. Let's actually keep this on
chat just from the scratch. Click Sents going to
ask me the questions. So I've never taken linear
algebra. Let's pretend. How do I learn best? You know, we could
do one of these, or you could say, I have no
idea. You can even skip. So say I like to see examples. How do I want to use
this day to day, let's say, before each class. So these are my preferences. Claude is going to process them, and we're going to come
up with a plan together. So now it is suggesting
these things, preview of the topic. So if I put in the syllabus,
it's going to know. Worked example, I try
a few things mini quiz and a quiz log to see how well I'm doing or
how bad I'm doing. And then we got a bunch
of other questions. So do I have the
syllabus or textbook? Let's say, I have a textbook. Track your progress, yes. And then it's going to
ask me even more thing. I'll tell you, like, the title. And now, so far, we have what we need.
This is the plan. Refer to your problem, see
if this is going to help. Do you have any additions
you want to make? And basically, we're
going to bring this plan to life using all
the features we have learned. So this is part one
of the project. Make sure you have something
you're happy with. If you want, you could write
it down on a piece of paper, draw a diagram. Whatever
helps with you. For example, if your
problem is something work related and someone needs to
input during the process, that's something you need
to tell Claude, as well. For example, if you
make a presentation, your manager needs to approve it first, and
then you need to, you know, fine tune it, then present it to the
investors, something like that. So that's something Claude
needs to see in the equation. So make sure you have
something like this, and we can move on with the actual research aspect or the setting up
of this workflow.
21. Researching and Organizing Information: Once we have our plan, we know exactly what
Cloud could help us with. We're going to make
a new project. So this is as we saw a space
dedicated for this problem, and we could integrate multiple
things inside of here. So I'll go with
another study project, and I'll call this linear
algebra. Create the project. And this is where you get to add reference materials because
I said I have a textbook, I could upload it right here. So I just uploaded my textbook. You can see that it tells
us about the capacity. We have used 27% because
there's a lot in a textbook. You can even see 73,000 lines. You can add anything
else if there's a syllabus that
your professor gave you or any other
additional material that's going to help Claude, upload it there,
and then continue. So now we have a context
tab, the instruction, which it pre wrote, but could alter this as well. We got all these stuff, and then we could start
with in this stage, if you're working with
a problem where there needs to be a lot of
research involved, you would do the research now. So what is the best way
to learn linear algebra? You would have Claude
look into that and provide you with some examples. So I'm going to go
back to chat for now, where you're going
to do research. What is the best way to
learn linear algebra? Let's say, college. So this
is the research portion. If you're doing work
related things, this would be different for you. And now it's going to give us some things that it researched. Alright, so now we have
all of these things. If you disagree or you want to alter something, you
can do it right now. But say this is perfect for me, and now I just need to
begin the study part. So we're going to go
back to the project. Just click on linear
algebra right here. And what I'm going to do
is set up some skills, basically, instructions that I need Claude to do
at certain points. Just going to head over
to customize real quick, go to skills, and
I'll do a new one for linear algebra
or just linear. Use bold font for equations, and italic font
for explanations. This is my unique Oops. I'll have to put this down here. So I'll call this
equation formatting. This is an example of a skill. We would add it right here, and now it is saved. You can add multiple ones
as well or browse for more. I'll add this one for later web artifact Builder
because I did ask for quizzes. Hence why I want to do
something with artifacts. You can add anything
else that you want. Let's see what else?
I think that's it. I made one and I chose one. Those are now saved
in my skills. Alright. So whenever
I want a skill, they are there for me to use. And now I could begin by
learning a certain lesson. So what I'm going to do is just generate a fake
document in this chat. Let's say that's my lesson. So build a PDF for Lesson one. And then we're going
to download it, bring it into our project. But if you already
have a document, you don't need to do this part. So you can see that
because I asked for some problems,
example problems, it also provided me the
short quiz that I asked for, but this is not currently
in the project, so this is something external. Here's our document for
vectors. Looks pretty good. We have, nice tables, and we have a little
quiz section. I'm just going to download this. I'm going to pretend
like this is something that I get later
just to show you, like, a long term
application here. So now let's go back
to our project. So whenever you see this, it indicates that
you're in a project. I'm just going to go
into my instruction and make sure that
it's something for me. So there's a lot of things
that I didn't really ask for, study flashcards and all that. So what I'm going
to do is delete this completely so we
could work on it together. So based on what I saw
from the research portion, I found out that it's helpful
to do some work problems, get explanations,
maybe some quizzes, and a bunch of other things. We're going to do is tell Claude who to be for us
to solve that problem. So pretend or act
as maybe a tutor, helping the student with their understanding
of course materials. You will do the following. So one, if document is provided, do a quick summary
and present it to the student two always ask if they would want to
do a practice problem. The include real
world application for each document provided, since those will be
like the lessons. And I guess that's it for now, and then we'll do one for tone. Then four, if
student seems lost, present them with
questions that would help you understand where they
are in the learning process. These are the unique
instructions for my problem. You could add in more or
add in something less. You can also specify the way Claude interacts with
you in this project. So keep things professional, maybe be very strict, you know, whatever
works for that problem, and just save the instruction. Oh, and I forgot one thing. The quiz part, let's
say, prompted. So generate an interactive
quiz with a live artifact. So save the instructions. And now I could begin using
this for my first lesson, maybe move throughout my
semester, come back to this, ask you a question, and
it will always relay and reflect on my textbook and anything else that
I've provided here, as well as the instructions. So now we've researched
and we've built this project that is
relevant to the problem. So make sure you
have an instruction. You have at least one document uploaded for your contacts, and everything is set up. So you know exactly what you need to do that's going
to help solve that we're going to move
on to actually testing this and seeing how we could use it
in the long term.
22. Creating and Testing: So let's go to cowork and I'm going to upload my
first document, say, I went to class, and I saw that, you know, I'm really
lost with that lesson. So what I'm going to do is add that lesson that we made
with one of the chats. So lesson one factors, and we're going to be like
we had this lesson today. I am so confused.
Just like that. And we're going to do
slash. That's for the quiz. But let's do linear
and just hit sent. So it's going to use the
skill that I just applied. It's going to read the document. We can see the uploads here. Basically, all the
equations are in bold and all the explanations
are in italics. So that's the skill that
we introduced here. It's being applied. So want
to see a practice problem. That's something we kept
in the instruction. I could say yes or
no. I'll say for now. Let's see how it's going
to work on this without any integration of
design or artifact. So now I have to,
like, solve this, and I could upload my
answer right here. So this is like a
little tutoring space that I have now built. So what I'm going to
do now is if I want, I could add a connector here, let's say Simoab or a platform that's helpful
for linear algebra. But instead, what I want
to do is make me a pop quiz with live artifacts
and cloud design. So now it's actually going to visualize it and not
just give me these, but I made sure that this
is only done when prompted. So it's not going to
automatically use a lot of my credits to build these
visual interactive features, but more so when I ask of it. So now five questions
and check the answer. Let's say I have no idea
what the answers are, and I got a zero out of five. So I could go back in here, be like change my questions,
give me something else. So now I could use this feature to check for understanding. The only difference is that all these questions come
straight out of my textbook. It uses that standard. Again, if you did syllabuses
and that sort of stuff, it's going to be
even more detailed, and now it has my first lesson. So I could come back every
time I need a little tutoring, upload a lesson here, ask for an interactive quiz
or no quiz at all. It's completely up to me because of the instruction
that I provided. So here's another set of quizzes, questions
that I get to do. Now, what you can do is do something that
prompts clot design. So the little feature
that we looked at. So we could be like summarize Lesson one and make
a presentation. S, that's my unique
learning style. It's going to run my
skills if I had any. So I have one for PowerPoint. I think this is with Claude. It's going to add the task. We have different things in
progress. You can see that. So now we have multiple
folders running. We have three Python scripts, three progresses, and it's, like, a bunch of images
that are being formed. I believe that's
going to be like the diagrams used for learning. And of course, we have
our context thing. These are all going to be saved, and as long as you sign into mobile with
the same account, you're going to see
this there as well. So this is going to
take a little while, although I have song here, so it's not going
to be that long. But another feature you
could integrate here for this problem is
the schedule tab. So let's have that run. You can see there's,
like, a flickering light. We could build a new
task set up manually, and I'll be like weekly quiz. So check my linear algebra. Understanding. So
let's say use let's actually use the
linear algebra tab right here, manual, frequency. I said weekly, so weekly. So use project
context to generate a five question quiz based on student progress
and weak spots. We could save this. You
can choose a model. I think I'll keep SO at five and I'll have this be manual. Then we're going to do
send the quiz via email. To the student. So hit safe, and this is going to happen every Monday
at nine in the morning. We could even run it now. If you do in progress, closes. It started. Let's view. At project, there is our task. It's looking at all the things, and it found the lesson
that we uploaded, doing a little script. And because this is weekly, it goes hand in hand with the project workflow that
I'm building right now so that every week you
could check in with me and see how well I'm doing. So, now this is doing its thing. We're going to go back
to the previous chat, and now we have a little
project presentation. There it is. You
can see the visuals are really good and relevant. The design is clean, and I could take this
a step further, open it in Cloud design or
make some changes here. So, you know, we're
getting all sorts of outputs with our tutor here. I think our task is done. So allow for all scheduled runs, create a new draft email. I'll allow it for now.
I I go to my email, I just hit it over there. Let's do Allow connectors, the Gmail that we
connected previously. Now it just made a draft. So I'm just going to check
that real quick because I didn't say who to
sender email was. Let's open up our email, and there it is draft, weekly linear algebra quiz. So here's the answer keys, here's all the questions, and this will be done
weekly unless I stop it. So that's a really cool
addition you get to do. It goes hand in
hand with this guy. And I'll just change
the name here as my like linear algebra
tutor. There we go. I could come back to this
every time I have a problem, test this three weeks later, four weeks later, and have this do everything in the background while I progress
with my learning. So this was an example
of a full project. We integrated the clot
chat, the Cloud cowork, schedule task, skills,
connectors, and even design. We use a bunch of the core
features within clot, and we're able to build this very easy
workflow where all I have to do is upload
my next lesson. Have Claude look at it,
build a presentation, do a little quiz, and help me better
understand my lessons. So you just upload it here. If you have a screenshot
of your own work, you know, anything you
can upload it right here. And as always, you can change your instruction in
the main project. So say your professor asks you to do another thing that
you've not done before, you would specify it here, upload additional
material for reference, and basically work
with Claude as your assistant and have it build amazing workflows
like this one. I hope you guys were able
to either follow along with this example or build one
for your own problem. And we're also able
to test it with different things and alter
the instructions if needed. As you saw, it's very
straightforward. Claude does a lot of the
reasoning on its own. We just need to
give it some hints. And anytime you're stuck as to what to write
for your prompt, you can have it
ask you questions. So that's a really helpful
feature that Claude does. It does like a little
pop quiz for you guys, and it builds the prompt itself. So go ahead and try this for your next problems and see what sort of workflows
you can build.
23. Class Project: Create Your AI Workflow: Now it's time to build your
own AI powered workflow. For the class
project, you're going to be using Claude to build an AI powered workflow that solves one
problem in your life. This could be personal, educational, business
or your work. Start by identifying the task that you need the workflow for. Then you're going
to use what we have learned so far to
build that workflow. Create a clot project so that you can organize
this whole ordeal, then give clot some instructions via the skills, and if needed, connect external connectors
so that your work becomes more efficient and it is tailored to what you need. Once your workflow is complete, you can go ahead and test it, refine it, and then see
how well it executes. Most important thing
here is that clot needs to be consistent
for that task. So try it more than once and
note of any inconsistencies, anything you left out, and what you can do to
make it better. Once you're done,
you can go ahead and take a screenshot
of your project, the skills, the
connectors you use, and a drawing of the workflow
that you came up with. This could be a
diagram, a chart, text, anything you feel
comfortable with to explain what you
did with Cloud. The engineer and designer
of this workflow, you also need to state
the problem you initially wanted to solve and how
your workflow solves it. And the goal here isn't to just copy the workflow that
we've done in the class. I want you guys to be unique
as each of us has one need. We have different
jobs, different tracks that we're on currently, and I want to see you guys fully explore this
in your own way. So good luck, and
I'm excited to see what you guys come up
with with the project.
24. Congratulations! What’s Next?: Congratulations on
completing the course. You now know how to organize
skills with projects, build skills with Claude, and use the connectors feature. Remember that the best
workflows evolve over time. So come back to that project, see what needs changing, and if your needs
are now different. The good thing about
project is that it's going to remember
your instructions, and you can always come back
and edit them if needed. If you haven't already, make sure to upload your
class project screenshot and information to the gallery. I would love to see
what you guys came up with and how
you use the tools. Thank you for joining
me for this class, and I hope to see you
guys in our next.
 Skillademia Academy, Creative Skills for the Future