Transcripts
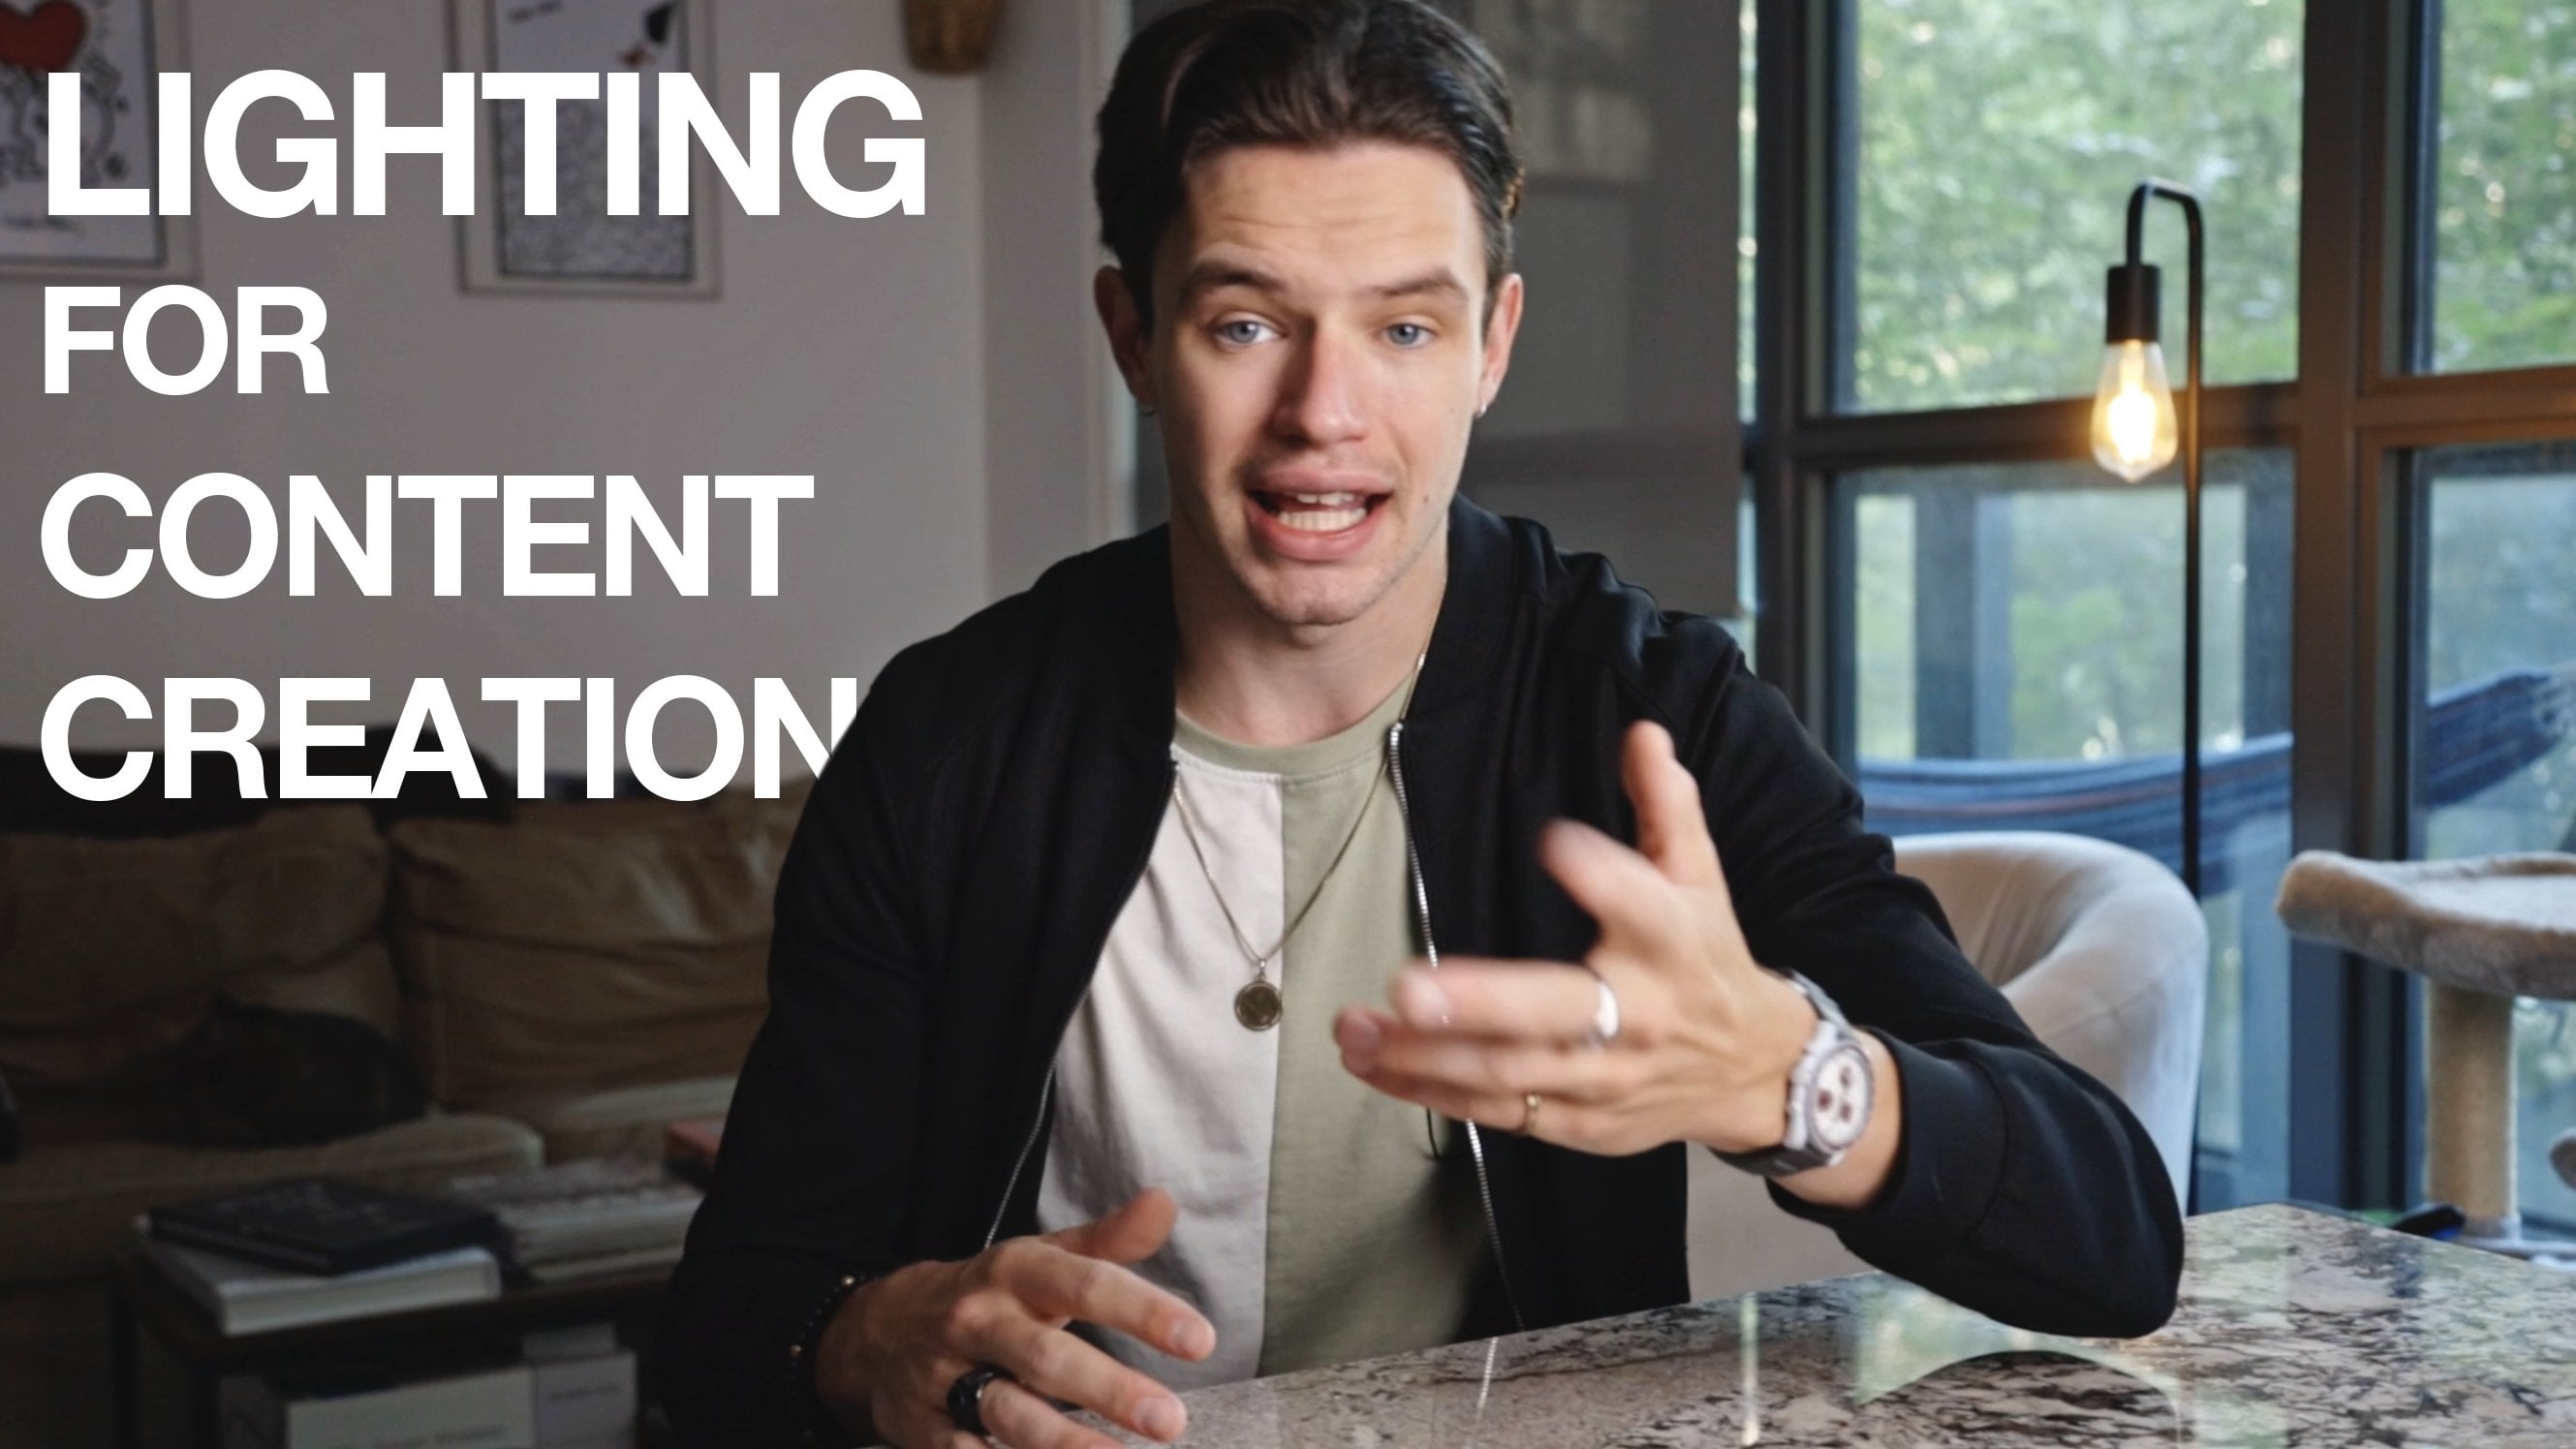
1. Introduction: Movies, cinema, visual storytelling. It's an art. But how can you make your own stuff look that good? What makes it cinematic? Hello and welcome. Firstly, I would like to thank you for taking an interest in this course. My name is Fynn Badgley, and in addition to being a commercial fashion portrait photographer, I have also had the pleasure of working on some of the biggest productions to come out of North America. Now, while I wasn't operating at the highest of roles, I was still able to take in and absorb what it takes to make a project of this scale. I am taking those tools and techniques, and bringing those to you today so that way you can start honing your cinematography and create some amazing stories. This is the type of course that I wish I had the access to when I was going to film school, as it would greatly expedite the process and be able to allow me to take all the tools and techniques that are out there and start creating some amazing cinematic stories, no matter the budget. Whether you're using an iPhone, a cinema camera, a DSLR, or anything in between, you can use the fundamentals broken down through this course to create some cinematic and visually compelling stories. For the duration of this course, to make it easy and accessible, we will be shooting on a mirrorless camera, and that is just so it can be applicable to a wider range of viewers and it is less constricted on what camera you have. We're going to cover a lot of different topics, including how to use camera movement and lighting techniques to really craft your frame and create a visually compelling story. I'm going to show you techniques used on industry sets, as well as budget friendly options that are alternatives if you don't have a multi-million dollar budget. It doesn't matter if you're creating for YouTube or for the big screen. Now, with all that said, let's get rolling.
2. Project Brief: Now, right off the bat, I do want to break down what you will come away with at the end of this, this isn't just going to be learning techniques and tips. This is going to be putting them in practice in creating your own see. There are no limits to what you can create using the tools and techniques that I am going to share with you today. But to fully demonstrate everything, this is being recorded during the COVID-19 pandemic. With that spirit, we are going to film a COVID-inspired short film. This is going to be somewhere blurring the lines between short film and documentary so that it can be applicable with what is going on today. But there will be some added dramatization and the techniques we'll be sure to spice it up and give it more of a narrative feel. Now, that said, you don't need to use the same theme for your film that I am using. You can do whatever your heart desires and go with your gut and shoot whatever makes you feel excited. There's no idea too small nor too big. A good reminder is sometimes simple is always best. Now, with that said, we will carry on into the rest of the course.
3. What is Cinematography: You see a lot of people these days talking about certain things looking cinematic. But what exactly does that mean? Simply explained, cinematography is using camera and lighting techniques to visually communicate a story. Now, making something look cinematic has a lot of different uses these days, especially if you're looking at cinematic B-roll on YouTube versus a Hollywood blockbuster movie. Sure, both of them may look cinematic, but what does that actually mean? Essentially, it is using cinematography, camera, and lighting techniques to draw the viewer in to what is happening. Now, this can be slow-mo footage of coffee being made, or it can be film, very true to life in a fast paced, quiet cut environment, and anything in between. The possibilities are endless and with the skills that you'll come away with at the end of this course, you will be able to make almost anything look cinematic.
4. Rules & Best Practices: Now if you're fairly new to video filmmaking and cinematography, you may not know all of the rules and settings to apply to your work and that is why I'm going to break those down right now. Unlike photography where you want your shutter speed to be equal to whatever your focal length is, video and cinema are a little different. Basically the rule of thumb is you want your shutter speed or shutter angle if you're on a cinema camera, basically they are the same thing, only one is a fraction and one is an angle with a degree number. Basically you want your shutter speed to be double whatever your frame rate is. In North America, most movies are shot at 24 frames per second or 23.98 frames per second, including the drop frame there if you want to be specific. Now this is because it is supposed to be natural for what our eyes see and that little bit of blur that you get in there looks very natural. Because it's been used for so long, it is the gold standard and is what looks very cinematic. Now if you are in the UK, this is 25 frames per second. Now with the shutter speed rule, then in North America, your shutter speed would want to be 148th of a second if you can. If you're on a camera that does not allow for that, 150th will do just fine. If you're doing the standard video or broadcast frame rate of 30 frames per second, you would have a shutter speed of 160th, as that is double your frame rate. Then when you go into higher frame rates, like 60p, 120, 240p, etc. You need to keep raising your shutter speed to be double whatever that frame rate is. Because of this, the higher frame rate you go, the more light you need because increasingly your shutter speed is being increased and therefore less light is being let into your sensor. Now for you cinema camera users, you want your shutter angle to be at 180 degrees, and this is the same thing as having the double your frame rate idea. Now while this is the gold standard and the way to make everything look as natural and organic as possible, there are situations in which you may want to adjust that for different reasons. If you are in an environment that has fluorescent tubes or has some less expensive LED lighting, you might encounter some flicker problems, and this is where you would want to adjust your shutter speed so that way you can get rid of that flicker. If you're adjusting your shutter angle, you might want to try 144 degrees or going higher to something like 200 degrees, 196 degrees, anything like that. You can adjust your shutter speed or shutter angle until you get rid of that flicker. You can monitor that as you go to make sure it's not coming in at all. Another reason why you may want to change up your shutter speed or angle is as a stylistic choice if you're trying to make it feel more dreamy. Or even if you're trying to film like an intoxicated vibe, you would lower your shutter speed to be closer to your frame rate and then you would get this really distorted, wappy effect and everything would be very blurry. While in most cases this isn't what you want. If you're going to sell that intoxicated effect, this is a way to do that. Conversely, really fast, fast cut fight scenes are often shot with a higher shutter angle or higher shutter speed. This is to have all of that come across a little sharper and a little stiffer that way you can really feel that action. Now this obviously isn't what you want for most filmmaking as it can feel a little jittery. But if you're doing a fast-paced fight sequence, sometimes that is the look that you're going for it. Then aperture, it's pretty much the same. You're dealing with f-stops on a photography lens and T-stops on a cinema lens. Basically, for all intents and purposes, they are the same thing. They're just the amount of light being let into the camera via the hole in the lens. Now ISO, ASA, EI, whichever you call it, these all work in primarily the same way. However, some cinema cameras do have a native ISO or a dual native ISO in which it is best to shoot at, so that way you have less grain in your final product. That's why it's always worth it to research your cameras, see what the native ISO is and try to stick to that as best you can because it is usually going to give you the best results. Now another rule to live by is the 180 degree rule. This is also called the axis. Basically what this means is if you're having two people talking to each other, say I am talking to this camera here while this camera is on my left side, but this camera is the other person that I'm talking to. I can have the camera anywhere between me and where this is placed, except act as if this camera is the character I'm talking to. This camera here can be placed anywhere from here all the way to my shoulder here. Now if it goes on this side, it does what we call breaking the axis. Basically you draw a line between your characters and you stay on one side of that. This is primarily using two characters or one character and one important object. But when you get into using a lot of characters in a scene, it starts to decrease that dynamic quite a bit. It is more so for one-on-one conversations and that sort of thing. You want to stay on that side of the axis because when you break it, suddenly everything is flipped, and when it's edited, if I'm here talking this way and then the camera is on the other side of the axis, suddenly I'm going to look like I'm here talking this way, even though I'm in the same direction. Now there are times when you can break this, but do so sparingly and do so as a stylistic choice to convey something in your story. This is when we want to make sure it's motivated by what's happening in the story. Ways to do this are you can actually show the crossover, which I have done in some of my projects you seen done in the past, and that is to show a shift in the dynamic. Say if there is a boss talking to one of their employees and suddenly their employee has the power in that situation, you can cross the access to exemplify that shift in power. But if you don't show the move, the only way in which you want to do this is when you're using it for stylistic choice, like they did in the movie Psycho. This is a way to show insanity talking to yourself and that sort of thing. This is also being done in The Lord of the Rings when you see Gollum talking to Smeagol. It's really just him talking to himself, but they act as if that axis is broken to show that. These are ways that you can exemplify that insanity if that's something that you're going for. But as a good rule of thumb, it's always wise to stay on one side of the 180 degree rule as that way it won't jar your audience because when that axis is broken, your audience might not realize it, but something will feel very off and they'll be taken out of the story and then they'll all wonder what's going on and then they just get confused and that's not what we want. These are a lot of the rules that you want to stick by, as well as some instances in which you can break them, but do so cautiously.
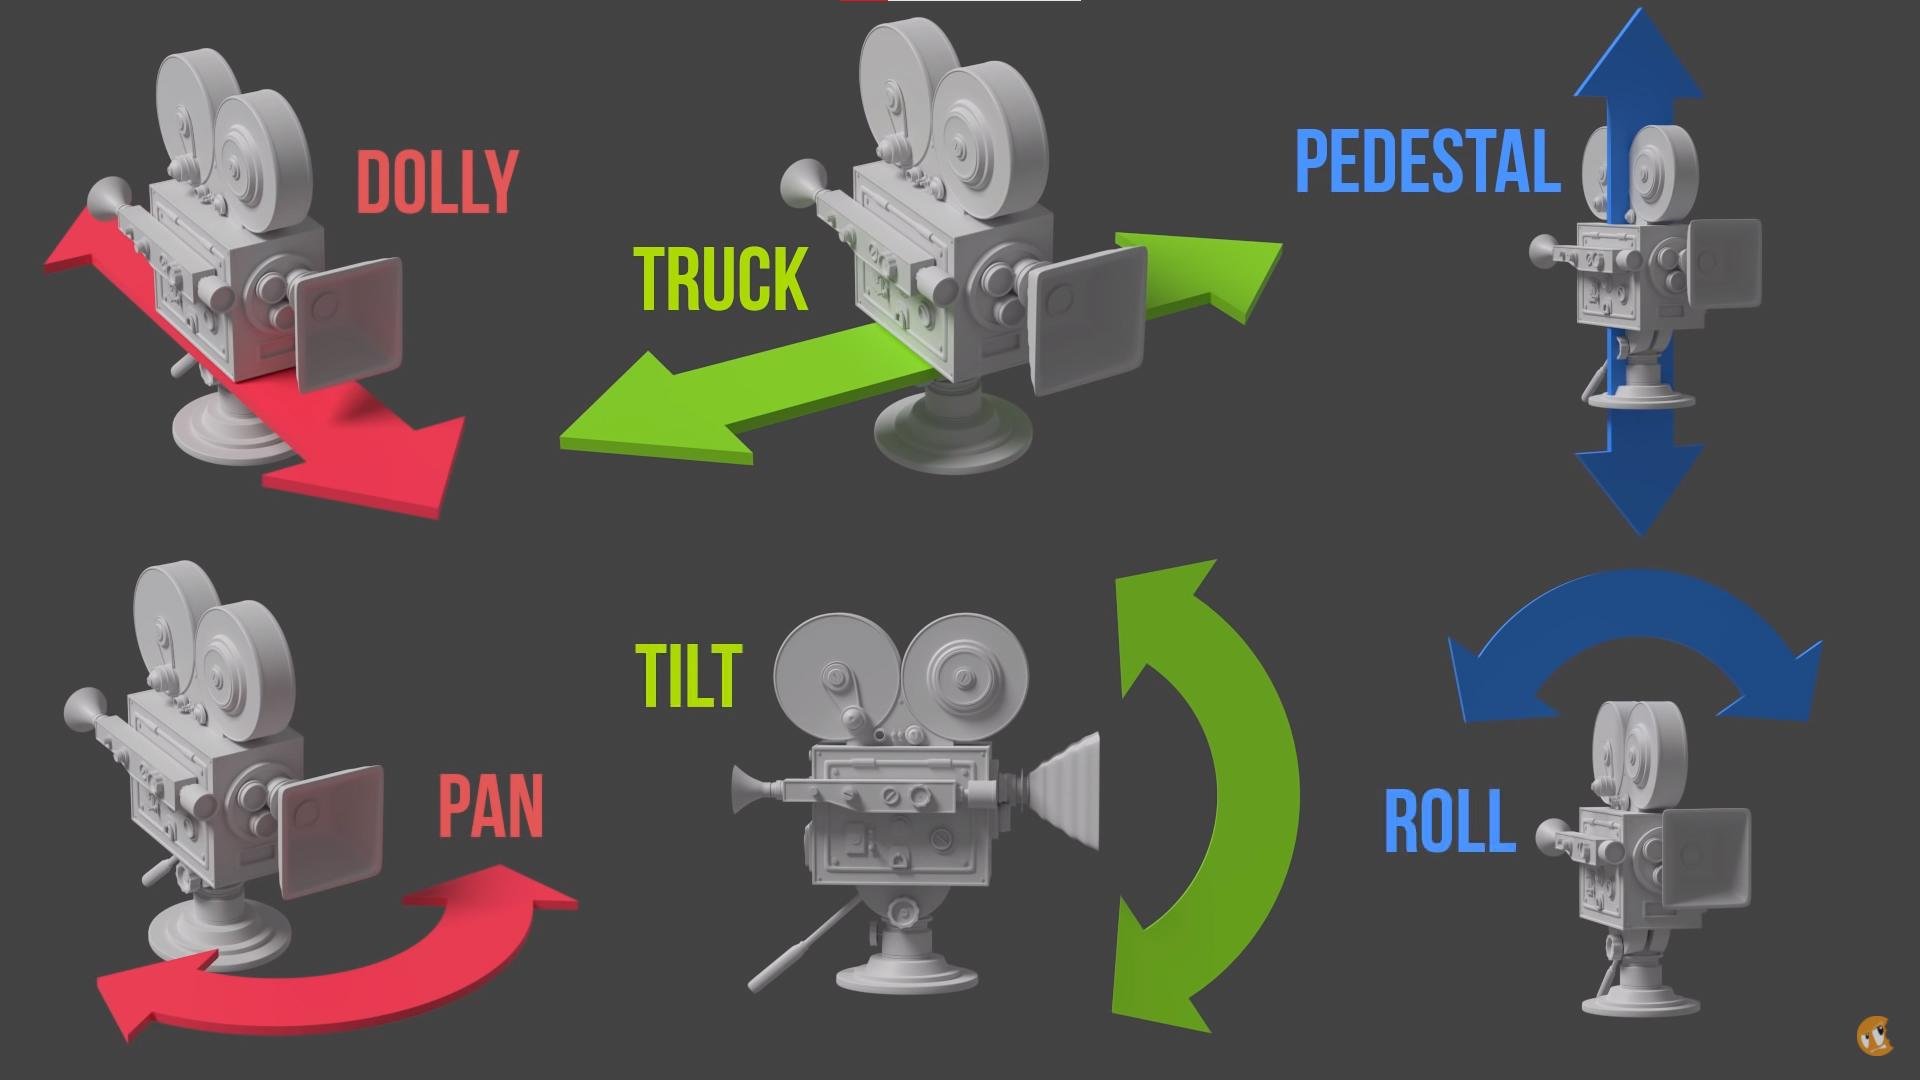
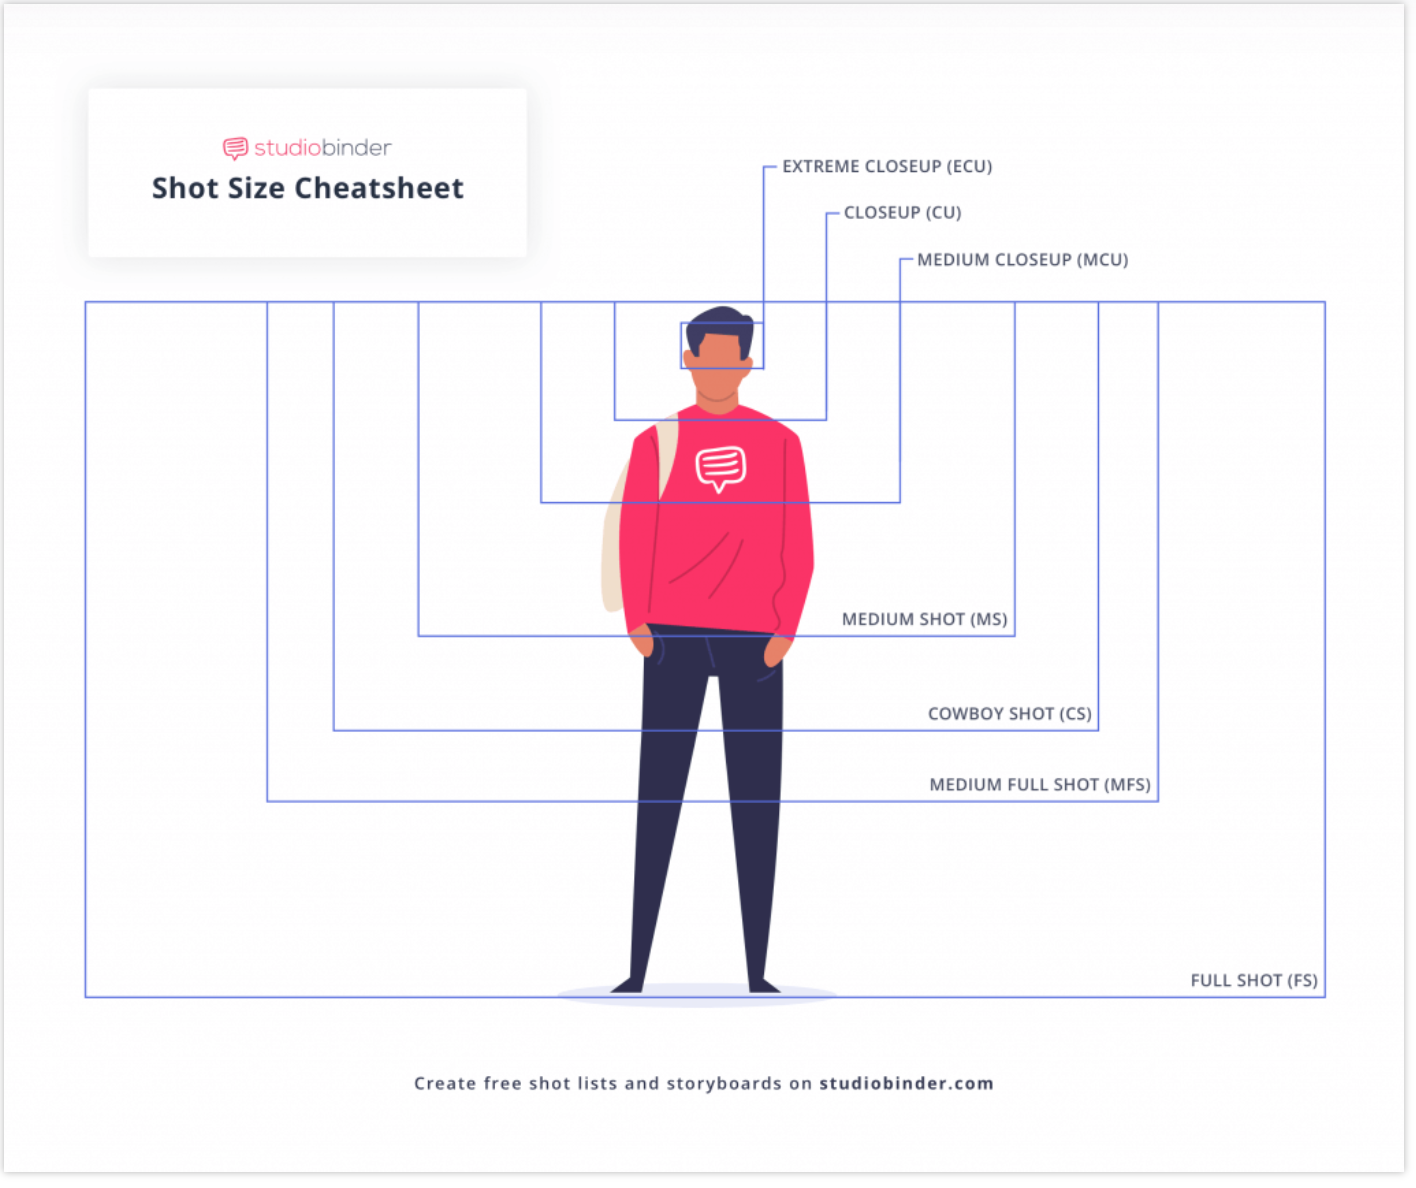
5. Shot types and Camera Movement: Now, going ahead, as you are planning your scene, you're going to want to plan the different shots that you're going to use as it will save you time and a lot of headaches when you're actually out on set filming. With that, first, we'll break down actually what the types of shots are, and then from there we can actually build a shot list, so that way we can have figured out what we want in there. In terms of explaining camera movement and shot types, it can be broken down into two categories, and that is what the actual framing is, and then what the actual camera is doing. As far as what the actual camera is doing, a lot of times you'll hear about panning shots, but people will sometimes use that for a variety of terms, and fret not, we're going to break down each one individually. That way, you know what each shot is, and you can have the best picture of it going into your shoot. A panning shot, very simply explained, is a horizontal rotation. That's when you just pan around and show the scene as it is. This is a very simple but effective shot. If you had somebody walking by, you can be on a tripod or sticks, as we sometime call them, they mean the same thing, just on a nice fluid head panning so that way you keep them in the frame. I'll have a graphic here and I'll also have it down in the course materials down below so that way you guys can download all of this and have it for your reference. I did not make these. These are compiled together for your education, and I will also list the sources to which they come from. With that said, if you are painting horizontally, you can also tilt vertically, which is that same movement, where you're locked off and it's just a camera rotating around a center point, except instead, now it's going up and down versus side to side. From there, we have what we call a dolly movement, and this is where the camera itself is pushing in or pulling out. If you are going towards scene scene or away from it, we would call that a dolly forward or dolly back. This might get confusing when you also consider a Zoom. The Zoom is still moving forward or back, but it is the lens itself zooming in or out, which changes the field of view, depending on the focal lengths that you are going between. Whereas a dolly shot, you're on one fixed focal length the entire time, and most cases, unless you also incorporate a zoom in there, which is a more complicated move that people do to give that distortion or sudden realization, if you're dollying forward and zooming out at the same time, it gives a parallax effect, is what we call it, so that way it gives that sense of distortion and that real heavy sense that you can feel through the screen. That is a more complicated move as it is combining a couple different types in there, and with that, we will stay mainly to just using one camera movement at a time when we can. We have a dolly forward and the dolly back. What if we're moving side to side on a dolly, or on a slider, or anything like that, where the camera is moving instead of front-to-back but horizontally? This could be if somebody is running and you're running beside them, say on a gimbal or steady cam, keeping them in the frame. That is what we would call a truck shot, as you're following them horizontally. If the camera is moving up with the subject, then that is what we call a pedestal shot, as you are going up. A more complicated version of this is if you are moving up and down, but also add some side-to-side movement in there, and that is where you get into something like a jib movement or a crane movement. These are coined by the actual equipment that you use to use them. If you're on a jib arm or if you're on a crane, you would have this big sweeping motion, and that's where you get those types of shots. You don't have to have a jib or a crane to do movements like this. You can actually get away with it on something like a gimbal, which I personally will be doing for this short film. So that is something that you can watch for as I break down how I do that. But moving ahead, now we will talk about the actual framing and the shot type. Probably everyone has seen the shot, it is the establisher, it is a very wide shot getting in the whole surrounding and giving you context as to: this is the location, this is the environment, this is the time of day, this is the setting and everything that's going on. Sometimes you'll have a character walk into frame, but not always. Also, the establishing shot is usually used as an opening shot for a film or a scene, but it does not always have to be that way. You can get more creative with it if you so choose. Now, moving ahead, we talk about the long shot. This is a full body shot, fully framing your subject as they're doing whatever action they are. This is good for setting up a scene coming off of the establisher, anything like that. It's also good for what we call a master shot. Your master shot is basically what will save you should any files get corrupted or anything happen. Where certain shots are unusable, you will rely primarily on the master, and even though it won't give you as much to cut with in the edit, it still allows you to have the context of the story in there, which is always the most important part, is showing the story. If you don't have that, then everything else falls apart. Story always comes first. After we have the long shot, then we start coming in for a closer shots. This is when we get what we can call a medium long shot, which is more of a three-quarter body. There is also a term known as the cowboy, and this is where you're going just about from the waist up, and then from there you go into the medium shot, which is a little higher up on your character. This could almost be classed as a medium shot, what I have right now. From there, you can go into a medium close-up, which I will punch in a little bit on myself and this angle to show you what that looks like. Then from there, we go into a regular close up, which is what I have on my B camera here. If I look over here, this is what we would call a close up. I can go in a little further if I want to, to make that more dramatic, but it's anywhere from here to the full head in the frame. From there, we get even further in, and that is what we call the extreme close-up. This is if I just had the camera just on my eyes, or anything that is supposed to accentuate any features. This is really good for showing intense emotions and really drawing you into what your characters are feeling. From there, it also depends on where you have your camera pointed. You can be over a character's shoulder, looking at another character as they're having a conversation. That is what we call the over the shoulder shot or OTS, if we're trying to break it down on a call sheet or something like that. From there, you have a two shot, which is where you have two characters in the frame, and then you will also have a low angle and high angle, and these basically refer to looking down or looking up from a higher or lower perspective, either to give your character more power or take some away. If your character is feeling powerless, you would go from a down shot. A down shot is where you're up higher looking down, and that is to diminish them and visually communicate that they are feeling small. It's like we're looking down at them as the audience. An up-shot, on the other hand, this is where you really want to communicate that sense of power, so you have the camera lower and look up at your subject, really get that sense of authority. Then from there, another type of shot is the good old point of view or a POV shot, and that is where the character whose point of view it is actually isn't in the frame itself, and the camera is acting as their eyes. This is another shot that we will play around with in the film that I'm going to be creating, so definitely stay tuned for that. So these are the different types of shots and camera movements that you can use to your advantage. You can combine some of them or you can stick with the fundamentals especially. Like I mentioned before, simple is always better.
6. Motivated Camera: Now that we know what shot types that there are and camera movements we can use, we're going to talk about when and why you would want to use certain ones so that way we know how to use them. Then from there, we will start crafting and creating shot list to shoot our film. Now this is one we want to start to talk about, motivated camera movement. What exactly does that mean? Basically, it means that your camera movement is motivated, is related to what is going on screen. If somebody is walking by and you're panning with them, you're panning to show them walking by. Then if you let them walk out a frame, that conveys they're going to somewhere else. Other good example of this is if it is a very emotional scene and there's a lot more tension and drama picking up as the scene builds, you might have a slow dolly in or a slow push in so that way, it slowly brings more attention to your character therefore emphasizes drama, which would be in a motivating factor for that camera movement. Another good example of this is using something like a reveal shot. This is where you would have the camera focused on something. It could be out-of-focus or it could be focused on something very clear. Then that camera movement moves to reveal the character. Actually, we had an example of this on-set here, where you can see for the opening shot of my film, I wanted to reveal the character coming out. I start on a neutral background and this is just part of a building. This technique is something that I've seen used on some of the biggest sets that I've worked on and it works very well to have a character enter. For this, we used a jib shot and this was just done on a gimbal. We started up and slowly came down. As I came down, I gave the actor a queue. That way then you want knew come through and enter the scene at the perfect moment. Then the scene continued from there, where that shot then turned into what we call a tracking shot and that is where I follow them on the gimbal. Now a time where this wouldn't work so much as if we were in the middle of the scene and they were walking down the street and we went to reveal them, but we already know they're already walking down the street. This introduces them coming in. It's a good factor for that if there's a location change or if there's a move or change in pace, anything like that. This can work well to reveal that. I have used this shot a couple times in the film, as you will see, but I chose when to use it very carefully as the setting starts to change and the mood does as well. It gives you that break to visually communicate that. Now this is something also to keep in mind, is as you're filming, you will develop a cinematic language. That is the types of shots and the movements that the film naturally has. For this, I wanted it to have a fairly frantic and very anxiety inducing nature in the beginning. Then at the end, I wanted it to have more of a soft, secure and warm feeling. I use my camera movements to allude to that. When we are filming out on the street where we wanted that frantic nature, I used a lot of gimbal and handheld movements and had a bit of camera shake in there. Now camera shake isn't always something that we want. But if it is motivated by the scene, if it is used to elicit that frantic nature, then it makes sense. Now, this isn't saying to go and shoot everything handheld. In fact, I would advise against it unless it is for a stylistic purpose to add to that scene. In this case, all of these movements are very calculated and used to draw the viewer in and really give that feeling of anxiety and distress. Now, there are times where this can be overdone. If you have the camera shaking everywhere and you can't tell what's going on in the frame. Then it can become overwhelming for the viewer and you almost feel a little C6. Definitely use a technique like this very carefully and sparingly. Now that said, when I wanted to give more of that grounded feeling I was on a tripod or on a slider for the majority of all of those shots and that is just to give that stable feeling as motivated by the story. Our story in this case is our character is out on the streets and it's getting very nervous and overwhelmed because of the amount of people out, some of them not wearing masks and that sort of thing, and getting too close and they are very overwhelmed by it. I know a lot of people who are struggling with similar themes to this so it is something that is very relatable and I was able to convey it by using these frantic, handheld and gimbal techniques. Now, with that said, when that character comes home from outside, they take a deep breath and are able to start to relax. That is when the camera becomes more stable as it visually communicates that more stable feeling. Now, had I kept that same handheld motion going when our character enters their home, we wouldn't get the sense that it's now relaxing for that character. We'd still get that same tension and then the audience would have no relief and then they would be left holding all this tension at the end of the film with nowhere to go. That is not really what I wanted to communicate with this shot, which is why I was able to craft my camera techniques to allow for that release of the tension that I've previously built up in the beginning of the film. Now, while I like a lot of movement in my films, that is my personal style. If you like things being more locked off on a tripod and more static shots, that is entirely okay. Art is subjective and my way to do things is by no means your way to do things or the only way to do things. With that, you can use different techniques, such as getting a lot of different angles and slowly coming in more on the character to increase drama. This increase in drama through the character's emotions motivates that camera to be moved closer. Additionally, something you want to avoid and it's easy to fall into a trap of when you're using a gimbal is just moving around your character with no real sense of direction. What you want to do is let your character direct the movement of your camera. Let's not get confused, you're still in control of the camera. However, that character's movements, they're blocking, as we call it, which is moving through the scene. Allow that to dictate where your camera is going to be pointed. Very simple, steady cam moves are just following somebody where they come into their house, go over to the kitchen and come to the couch. These moves are very simple. But because they're simple, they are very effective and don't bring the viewer out of the experience. What we want to do is bring the viewer in and have them not notice the moves as much. This is something that we just want it to flow naturally and feel organic. I know gimbals can be very exciting if you are using one, I would just like to offer a word of caution to make sure that your camera movements are motivated by what's happening in your scene. By all means, if it is an intense fight scene, you can get a little more crazy with your movements. That way it emphasizes the energy and the drama that is going on in that sequence. But if you were having just a more relaxed, somebody comes in and it's happening conversation with their friend, you don't need to be spinning around them or moving in and out all the time if the contents of the scene does not call for that. Look at your story, look at how your characters are going to be moving, and then build your camera movement off of that so it feels natural, organic, and works within the scene. We can see how we can really visually communicate how the story is moving, just with our camera movements alone. But there are more things that you can do to communicate these things in your story. One of those is lighting, which is now what we will move over to.
7. Motivated Lighting: We talked about motivated camera movement and now we're going to talk about motivated lighting. Yes, just like how camera movements can be motivated by what's happening in your scene, your lighting is also motivated by what is going on and has to make sense in the same way. Now, that's not to say don't get creative with your lighting, there are definitely ways to play with it. But this gives you a good starting point to then build off of in whatever scene you're in. An example of this is when we were out onset shooting the entrance point of our character coming into their apartment. The way the light was naturally in the space, it didn't make sense for them to have a light on already as it was daylight outside so that way they enter the apartment and it is dark. Now that said there is a decent amount of window light coming in, but it is just backlighting them. While personally, I love backlighting a subject, it leaves the face fairly dark. A way that we used to fix this was putting a small light tube just in the corner to add a bit of fill to the one side of our character's face and that way they're not completely in shadow. Now that said we're still shooting into the shadow side of their face to create that drama that we want for the scene. Now their face is a little more illuminated, but it still doesn't break the fact that they are being lit by a window. It just looks like it's wrapping around. Whereas if we had the light on the camera side and we're completely lighting that side of their face, then it would look like there's another light on in the apartment. Then it brings the viewer out of it a little bit thinking, okay, there's already a light on, is somebody already home? Do they live with somebody? If they live with somebody, then that might be a good thing to do but in this case, we're having them live alone and we're having the lights off when they come in. So, it wouldn't make sense to have that on otherwise, because it will draw the viewer out of that situation. In being a fairly dramatic and not the lightest subject here, we want to keep a bit of a moodier aesthetic to this and this is one way that we did that. If we were shooting something like a comedy, for example, the overall light levels would be a lot lighter and the apartment itself would be brighter. This would be something where we would very heavily light the scene but this particular film did not call for it so that is why we did not do that. This is important to keep in mind with knowing what your genre is and then conversely, what you want the audience to feel. Now as we start to enter the apartment, all my lights are slowly getting warmer and warmer and that is to elicit a warm and cozy feeling to the viewer. Everything outside we shot so it would be a little cool in terms of color temperature, and that is to elicit a cold and uncomfortable sensation within our viewer. Then when we come in, that warmth is then to allow that viewer to feel more at home just as our character is feeling more at home. But, it still needs to make sense with how the scene is shot, so using our knowledge of lighting, the sun is roughly about 55,000 Kelvin on the color temperature scale. Now, to make things feel warmer, if I had that light tube on their face at something like 3,000 Kelvin, like a tungsten bulb. Well, that wouldn't really give the feeling we're going for and will break the viewer out of it because then it's no longer imitating the window light. It's now giving this weird tungsten fill on their face, which then can take our viewer out of that for a moment. You may think, okay, the viewer won't pick up on that and you might be right, but it will feel off. Our eyes are trained to know what feels right and if we have that set so it doesn't make sense with the scene, our viewer will interpret it as feeling off and then it won't sell the feeling that we're going for. Then it may leave our viewer feeling a little dissatisfied and not really sure what was going on. It's these little subtle tweaks that really can make or break your film and that is why you always want to work off of the light that is in the space. That way you can craft a film that makes sense and is effective, especially for your viewer. Now, another technique that we used, when they enter the apartment, we have them light a candle. In lighting the candle there are a couple of ways that we can have that light come on to them because the candle itself for our scene is lit, is not going to give them enough light on the front of them that we need. So for this film we actually used that same light tube in the entry sequence. We used that just off to the side, filling in their face nicely with a practical light in the background. A practical light is any light that is on set that is in your frame. It's part of the set dressing, if you will. This is a lamp. If you had a bunch of light tubes in a music video, those would be considered practicals where you see them glowing in different things, turning on and off in the shot. If it is in the shot, it is considered a practical. Unless of course you accidentally catch a light in the shot, in which case that shouldn't be there. Now, that said, our light tube actually has a setting on it to give a candle flicker, which is what we put there. Now, I did have this dialed down all the way down to one percent. As our overall scene, it was fairly dark and we're going off the light that we had in there. Our lighting setup for this was R1 practical, giving a bit of a back light on our subject. Then I did have a light panel bouncing off into the corner of the wall and the ceiling acting as what we call a co-light, almost like a big umbrella to bounce outwards. Now, this wasn't bright nor harsh enough to look like the light was actually coming from anywhere specifically. It just worked to bring up the overall ambiance so that way nothing falls into complete darkness. This is how we can build a lighting scheme to add more depth into a frame, which is what we'll also talk about a little bit later. With that flicker, if we had it too bright, it would look unnatural for the way our scene is lit. It wouldn't look like it was a candle, it would look like it is a roaring fire right in front of their face. While that might be what you want, if you have somebody staring into a fire, this it's just a small candlelight, so we did have it on a lower power. Now, there is a way that you can actually recreate this flicker without using something like this light tube. This is a very inexpensive and easy way to do this on a budget. All you have to do is simply take a household lamp. Now, I would recommend something with a tungsten color balance, so it is warmer like your average regular household light bulb. Now, with that, you want to take a 5-in-1 reflector and then put it to the gold side. Additionally, you could get some gold foil paper, something like that as well, would work just fine. But, the larger the surface can sometimes be better, especially if you're shooting something with more than one person. While it is a small light source that we're imitating, we can make it a little more flattering by increasing the size of that light source. As long as we position it contextually with where that candle or that flame is, it will make sense for this scene and won't bring the viewer out at all. With that said, you will point your lamp into the reflector and then you would jiggle that reflector back and forth and then create that light on your subject. This is a very good DIY trick that I've seen used on different sets, especially before the age of these light tubes and this is a very budget friendly way. You can get away with just that. All of the techniques that I am sharing with you here, you can use with your own household lights. The light tube that I used to fill in the front of Abby's face, if you just had a white piece of paper and a flashlight, you could shine that through and give a little bit of fill there. Now I say white piece of paper because flashlights might be a little too bright for the scene that we're creating depending on how powerful your flashlight is. Myself, I like using ones with a bit of umph to them so that is why that piece of paper would cut that light enough and make that source larger thus making it more flattering and soften that light that we put on their face. Another way to do this if that piece of paper is too strong, is to take something like a shower curtain or some tissue paper and put that farther away from that flashlight, that lamp that you are using, and then create a nice soft light source out of this. This is how you make something like a DIY diffuser for your light. There are also diffusion gel that you can get, but this is a cheap and DIY-friendly way to do so. Don't think you need expensive lights to have a motivated lighting scheme that makes sense for your setup, use what you have and get creative DIY things if you have to. You can definitely do this on any budget. To give you an idea of this motivated lighting and how to do it on a budget. I was actually able to light a night driving scene where we had the car stationary but made it look like it was moving at night. We did that with a couple of simple tools. We had a couple of bright lamps, some that we bounced off of sources and others that we used to have as streetlights going by. Then we had a flashlight on a swivel to work as a car driving past to imitate those headlights. Then for our key light, we had one of those lamps just bounced into a reflective surface. Then from there just to create a little ambient, we did have a small light in the car itself just to give that overall ambiance in there. Then for the lights passing by, we used a projector projected through a shower curtain to get the effect that you will see here on the screen to show you how we did that. We did have a bit of our crew for that as they were all moving lights individually but this example is to show you how you can really create a motivated lighting scheme, no matter your budget.
8. Adding Depth to Your Frame: Now, we're going to talk about adding depth into your frame and when to do so as well as how to do so. There are a couple of ways that you can add depth to a frame. There are a couple of instances in which you would want to, if you're shooting in a dark environment and you have a black wall, it might just show up as a black hole that there is no information there. A way to add depth is to add some set of dressing in there. If you add a lamp or if you add some plants or anything like that. Another way to do so is by adding a small light. This is why I like having those small little aperture light panels around. That way I can take them in different spots to add a little bit of visual interest. If I have a big black hole in my frame, this will bring that up. So it's not just a big spot of nothingness, which is typically what we don't want in a frame. Now, that said, there is something used on a lot of large budget productions that adds a lot of depth and mood to your shot. It raises the overall ambience and just helps to create the overall feeling and vibe. Now, this is actually a staple and done in a lot of different productions, especially ones that I've worked on. That is the use of haze or a smoke machine. Now, there are different ways you can do this. When you do it indoors, it's always best to be cautious and have some ventilation around as it can be easy to overdo. While we do use safe smoke and haze, it can also be harmful to the lungs if you have too much in it because you're not breathing in enough oxygen, so definitely be careful when you do use it. Another option is something called atmosphere aerosol. It is just a small can of that haze that is very safe to use and you just spray it in the air and it creates this nice hazy environment. Actually, in this film, when we are interior, when we're doing the inside bits, I am using this atmosphere aerosol to add to the overall look. These are just some tips of how you can really craft your frame and build it up to be the best thing possible.
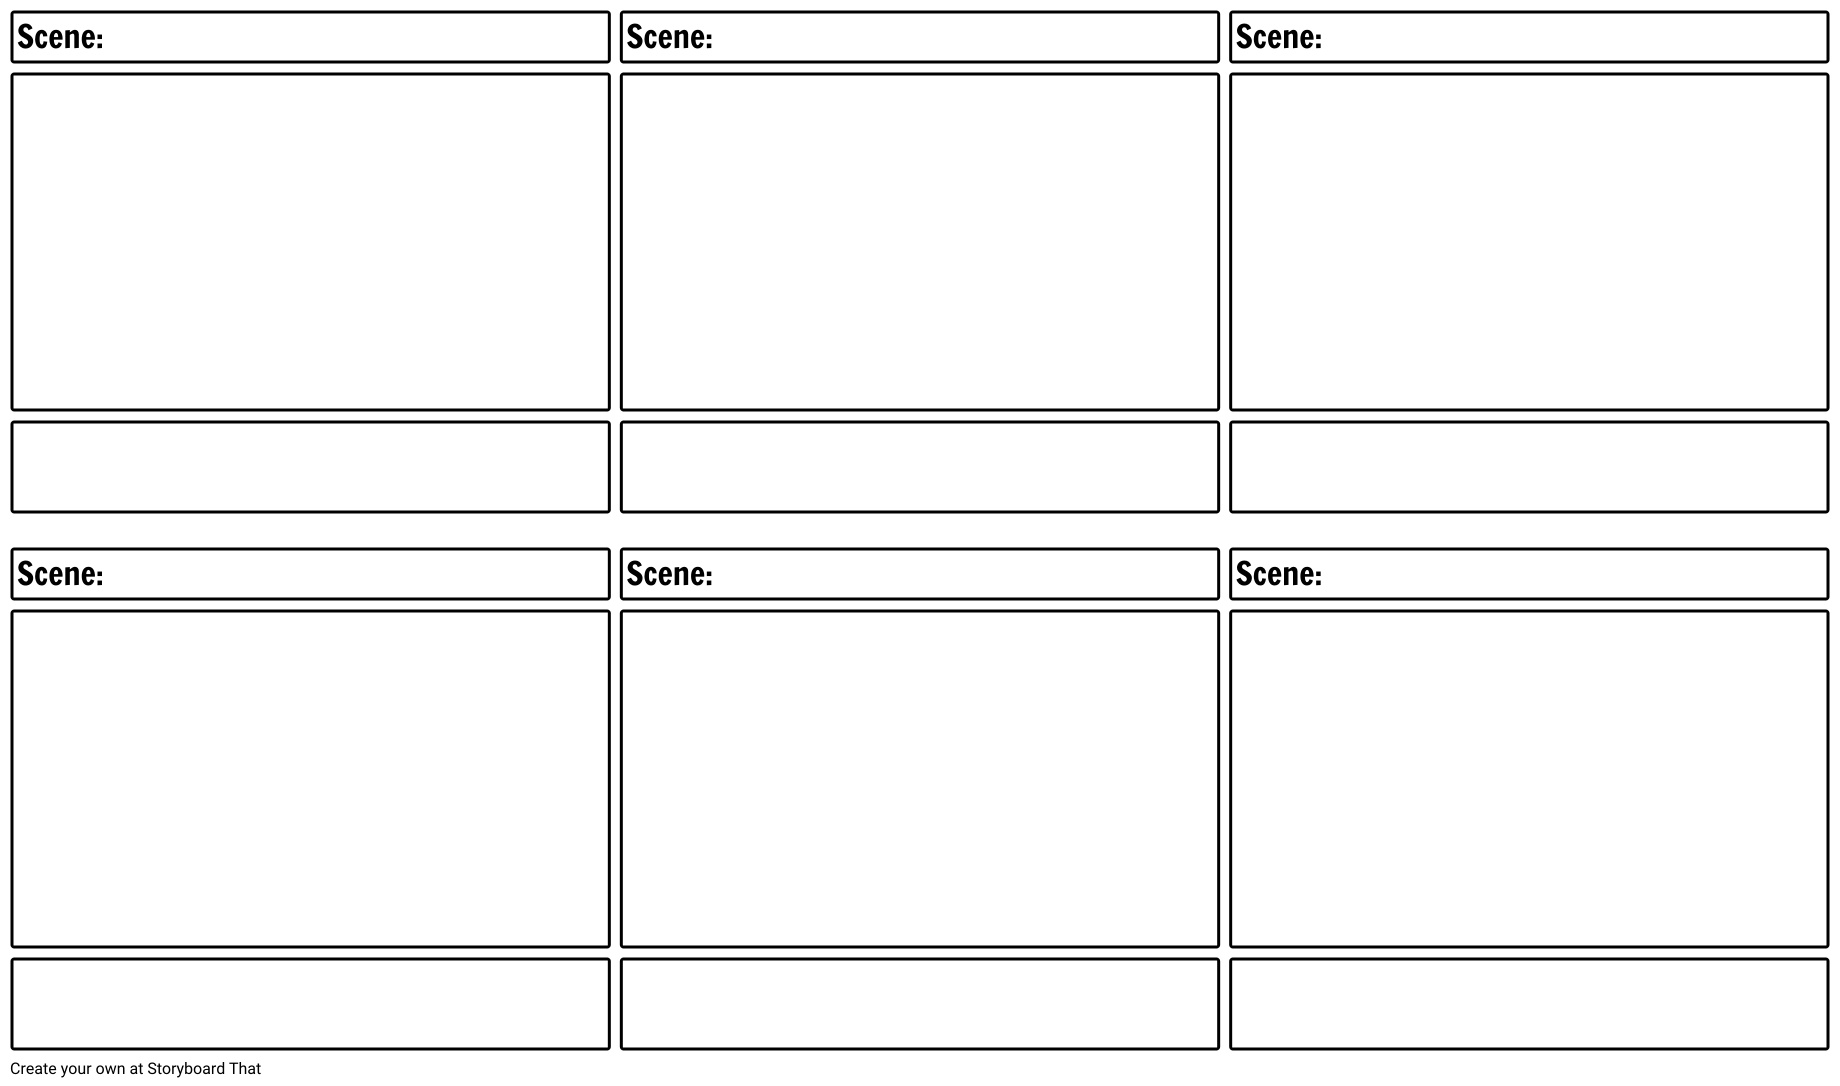
9. Crafting a Shotlist: Now, it's time to actually build out our shotlist and plan how the shoot will go when we're on set. Now, there are two ways you can organize this in terms of either chronologically by the scene, or then you can also reorganize it as in accordance of what you're going to shoot when. If you have multiple scenes that take place in the same location, it is sometimes beneficial to shoot everything in that location before you move to another location and need to get anything else rather than going back and forth. For the film that I am creating, I only plan on having about three different locations taking place across 2-3 different scenes, and for that, I'm going to plan on shooting it chronologically, although that is oftentimes what we will not do, especially if it is a larger project. We'll shoot all the scenes in one location and then move to the next location, shoot everything there, and so on, and so forth. When I've been on large productions, this is the way we almost always do it. But again, this is just in terms of building in the shotlist. When you actually go to shoot it, you're going to do whatever makes sense for there. Now, there are a bunch of shotlist templates out there that you can find, there are some great resources, but for the purposes of this and original content and everything, I made my own spreadsheet and I will be including this in the course notes below so that way if you want to, you can go through and fill this in as you need to, and that way you're already familiar with it. That said, I will also attach a couple of links for different shotlist templates that you can find as well through those other sources. I've used many before, and just based this one off of what I needed to have for this shot, and based on what I've learned from those templates in the past. You can see here, off the bat, we do have a fairly simple shotlist template. This is just something very basic that I wanted to throw together so that way I can show you how I build a shotlist, and then that way you can know what I look for when I'm building this and what I plan for. We do want to have our cast member in there and the character for the purposes of this, they don't actually have a name, so we're just going to call them Sam. I have a 1 beside Sam, as that is our first cast member. If we had somebody who was a supporting actor, we would put them down as number 2, and basically go down the list like that. Shotlistsing call sheets usually number cast depending on who is the main character, and then who is of most importance beyond that. I've seen the numbers go all the way up into the hundreds, especially when you're getting different cast members in just for a day or two at a time, and then bring them back a couple of episodes later just for another day or two. Now, with that said, we just have our one character in this, keeping it simple. That is Sam, and we can just leave number 1 for the rest of those. We have our first scene here, and the different shots that we are going to be getting. Then from here, we're going to list a rough description of what we expect the shot to be. Our first shot, I would like it to be a reveal jib shot. The action for this is our character walking into frame so we'll say, Sam walks into frame revealed by camera. Framing, we're going to be about a medium long shot, so we can put ML for that. Usually, especially in these types of things, you will want to try to use as many acronyms as possible. This is where you get into the ECU, if you're doing an extreme close up. Basically, you take the first letter of each different shot, combine them together, and you have your acronym. Now, the movement, we're going to do a jib movement for this so that's all we have to say. Our angle is pretty eye level. We do start up high, and then we start looking down on the character a little bit. I'll put a Slight Down. Now, you could just write, down, but I'm just writing this so I have it when we actually go out and shoot. Then from there, to keep in the very intense emotion, we basically want to be tied in with the character's emotion and not really have too much room to broaden from there. So I'm actually going to be staying pretty tight for the majority of this shot. For this, I'm actually writing down that we're doing a jib into a tracking shot, and that is just to convey that the jib movement doesn't end. The shot does not end when the character walks into frame, and the jib movement ends. From there, we follow the character as they continue to walk down the street. Then from there, our second shot will be a tracking Sam walking distressed because of people. That is just a very simple way to explain that Sam is being distressed because of so many people being out so this is going to be a tracking shot following them as they're walking around, looking around, and that thing. This, I'm going to want it to be a close-up, so I'll mark that as CU. This is going to be a tracking shot. This will probably be on a gimbal as we are shooting this on mirror-less cameras to give you the best idea of a budget friendly option. You don't need an expensive cinema camera to create some cinematic visuals. You can execute this on your phone, DSLR, any camera you have will do just fine as the fundamentals are the same no matter your equipment. From that, we're pretty much going to be eye level, I think, and that way we can just stay with the character and there's not going to be too much funny business going on. Then we will have a reverse tracking shot. Now for this, Sam is going to be distressed and looking over their shoulder, and we want to indicate that here. For this, we're going to have a close-up that is also an over the shoulder. What this means is I'm going to be tracking behind them on the gimbal, and then we'll see the back of their head, an over the shoulder type of thing. Here's the camera, here's their head. We're following together, and then every so often they will look back, and I will catch that in the close-up. This is just something to have more variety and gives us more to play around with when we get into the edit, and that way I have different cut points and it will work out very well. This is also going to be a tracking movement. Again, we will be pretty much at eye level for this. Then we will add another shot again with Sam. This time we are going to have them just stopping for a moment looking very distressed, and then we will go from seeing them to seeing a bunch of people hanging out across the street, and then back to a close-up of their face. We'll have two shots to cover all of that, we'll add another one here. We'll have Sam stops, distressed looking at crowds. Then this is also going to be a close-up. For this we'll have a slight dolly forward so that way we can increase the drama there. Now this is just the way that I like to do this, again, you don't need to use these specific terms and everything that I'm using if it works for you, it works for you, this is just a good starting point. Now we will have Sam looking at the crowds, except this shot is going to be a long shot on the crowds, so we'll do long shot over the shoulder looking from that character's perspective. We see over their shoulder at the crowds of people, so that way it gives context as to what they're looking at. This is going to, for the most part, just be handheld, we'll get a little bit of shakiness in there so it keeps that frantic movement going. Again, we're going to be at eye level here. Then from that, I want one shot of them sanitizing their hands. Sam enters sanitizes and walks away. This is going to be a more so of a medium shot, maybe medium close-up, so I'll put MCU there. This we'll call it a Steadicam shot as we are on the gimbal. You can put gimbal Steadicam, anything like that, will explain it pretty well. This is going to have a slight down as we're looking at them sanitizing their hands and walking away. Now, one extra shot that I want to have in the scene is what we will call insert of people walking by. This is something you might call B-roll. B-roll is more so for when you're doing a documentary style and you have somebody talking over something and then the footage playing. This is more of an insert where we are intent on putting that specific thing in here so we're just inserting that shot. A lot of times this is extreme close-ups, but in this case, it's just little pieces to cut back and forth from. For this, it'll probably be a medium shot there. Then this will all be handheld to really capture that nature. I'm not even actually going to be using the gimbal for this, I want it to be a POV style shot of them looking around as people go by, so I want it to be a little shakier, the angle as a POV. It's right from their perspective. That will pretty much wrap up this scene and we will continue on with the rest of the shortlist where we continue the shot number, but the scene number just gets bumped up there. The next scene is just going to be them coming away and beginning to enter their living space. We'll just have walking down alley. The walking down alley is going to start as a long shot and then it's going to move to a medium shot there. We'll indicate that that's going to be one long shot. That shot will be a jib and a dolly backwards. We start reveal them coming out around the corner and then dolly back a bit with them. With that, this is going to be more so at an eye level angle still. Then from there we'll have a insert of them unlocking the door. That is just going to be roughly a medium close-up there. This is going to be on a Steadicam and this is also going to be a down shot. You'll notice a lot of this so far, it's either been eye level or looking down. That is, as we talked about with motivated camera movement, this is to make them look smaller and feel smaller as currently that is how that character is feeling. This is one way that you can use to exemplify that. Then we move along to our last scene here, scene number 3. I think we're going to have a couple different shots here, I'm guessing around five. We'll add those in. Our first shot of this scene is going to, have them enter the apartment and take off their mask. That we are going to be on a slider and have a dolly back forward. We're going to start off at a medium close-up and move out to a medium long shot. This is going to be a dolly back. The reason we're dollying back is to decrease tension. Now they're taking a big deep breath, letting it out so we're pulling back to decrease that tension that has been built up. With that, our camera angle is now going to start to change a little bit where we'll actually have a slight up shot looking at them. Now they are more in control and they have a little more power, whereas before they felt a little powerless. From there, they will enter living space, drop coat, and pick up candle. With that, we're going to start off at about a long shot, we'll see their full body walking in. Then from there as they sit down, we'll pull back and end at around a medium close-up. This is going to be a, another dolly backwards. Again, we're alleviating a lot of tension here. We'll have another slight up angle just so that way, again, they are the source of power here. Now the power has shifted from feeling powerless to them having more control. Our next shot is going to be an insert of them putting down their jacket. Putting jacket on chair. With that, I would say around a close-up shot here, and this is actually going to be a truck shot following them sideways as they come in, and this is going to be pretty eye level unto where it's actually being put down. Now we'll have an insert of them, of Sam lighting the candle. This is going to be another close-up, and this is going also to be a truck shot, we're going to follow around as they move there. Maybe we'll have a bit of adjustment to follow, but I think it should be pretty good. Again, this is going to be pretty much eye level. Our last shot here is going to be Sam exhaling, feeling relieved. This is going to start at a medium close-up and go right into a close-up, this is a dolly forward. What we really want to do here is push in and slowly start increasing the importance in the character, we're starting to feel for them a lot and that emotion is building and then they just take one big exhale, and that will conclude our film. I'm going to have another slight up, and then we're good to go, that is our shortlist here. I will be putting this template down in the course notes so that way you have access to it. I will also show what I wrote out for this, so that way you can reference back to that. Briefly we'll talk about storyboarding and how you can do that, and then from there, we will actually go to building the scene itself.
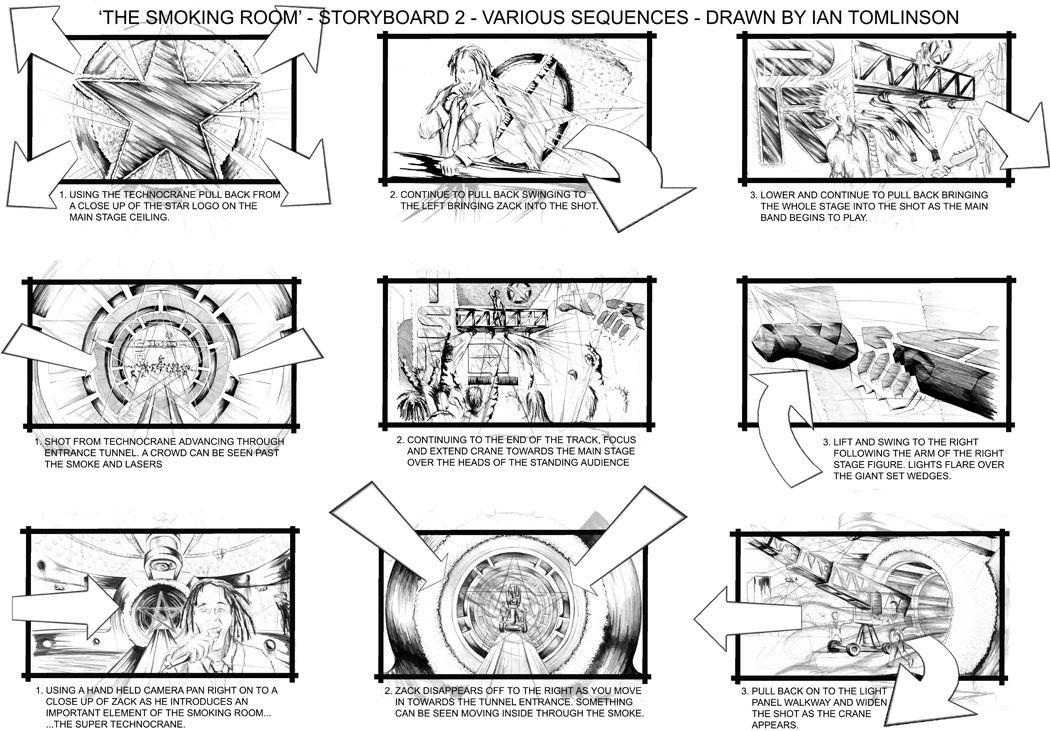
10. Storyboarding: Now, we're going to talk about storyboarding. The way that I'm going to storyboard this is just in Procreate here on my iPad and I have a storyboard template from storyboard that again, these different resources I will list down in the course notes below. For this, I'm also going to show you the different ways that you can identify what the camera movement is. Now, I may not be a professional illustrator and neither do you have to be, you just need to be able to communicate what the shot will look like. Right off the bat, we are going to draw a couple of symbols for you so that way, you can see how to tell what different shots are. If we want to tilt up, we're going to have an arrow with a little squiggly guy coming off of it. If we want to tilt down, we will do the same with an arrow there and you will put these at each different point in your frame. Again, I will actually be including all these different symbols as well just so that way you have that as a reference while you're storyboarding, if you choose to do so. Now, we did have a couple of dolly forwards and dolly backs in our shot. With that. We will have one big arrow showing the perspective there, coming in and if we were to be dollying back, we would have one big arrow coming back like so. Then as far as if we are zooming in, that's when you see these little arrows on the corners here, and that's how you know that you're going to be zooming in. If you're doing a zoom out, the arrows are pointing in the other direction. This is a good way to tell between a dolly forward, dolly back and zoom in and zoom out as one is pointing to the arrow forward and the others are the corners going in. In the effort of keeping this concise, I will just draw one scene to give you an idea. For this, we are going to do the one of when our character enters the apartment here. Based on where this is, we already know what it looks like. So it gives us a good point to draw it from. We're going to be shooting into a bit of a corner, so we'll keep that in mind as we're drawing. We'll have everything just on a bit of an angle there, as that is just something important to keep in mind when you're building your frame here. We'll have some coats hung up on a coat rack here. That's what that guy is there and then here, we have our window and then we have all these slots from the window there and there are some light pouring in. Now, we will have our main character, Sam, here, who will be wearing a face mask. We'll draw that on and then we'll just draw that around their face. I believe they are wearing a hat for this scene so we'll draw that hat on there. Have their eyes looking out and then here is them taking a big deep breath in. Again, you can see you don't need to be the best artist to do this, you just need to have an idea of what's going on in your frame. Then from here, we are going to give our arrow pointing backwards so that way we can show that it is a dolly back shot there. Now that said, I am not a huge storyboard person, but if this tool works for you, then by all means, use it to the best of your abilities and I will leave these resources down in the course notes down below and I hope you find them to be very useful. Now, with that said, let's actually go out and shoot our scene.
11. On-Set Exterior: Now that we've talked through the fundamentals, the rules, when to break them, and we have prepped our shoot, now it's actually time to go out and do it. When we were shooting the exterior bits, you will see, because this was more of a running gun setup, I did not want to need to worry about setting up multiple cameras as it was mainly me and the actor, so I have a GoPro strapped here me, so that way you guys can see the process of how this is all going. What I'll do, is I'll talk Avi, the actor for this through the setup, through the scene, and then we will shoot it a couple of different times, maybe with some adjustments as we go. That way we have a couple of different options for the edit. You'll see based on the shortlist that I created, we tried a couple different Gibb shots in a couple of different locations. It seems this one worked the best. We had a couple of people walking by, which worked well for the overall shot that we were going for. You can see by directing Avi, they were able to really exemplify that panicked and overwhelmed feeling very well and it translates very well on camera. Then it is these techniques that we went over that allow me to translate it even better when we go into the close-ups here, those was tracking shots and how they're looking over their shoulder, and how that translates very well. Now you may realize there's not a whole lot of people around and that's okay, we can do something called cheating. Cheating is basically when you use what is setup and you modify it a little bit so it makes sense and it works for the story, and it works better for how it will actually present on screen. From here I had a bunch of handheld shots walking through the street. This is just getting people walking by. That way, it does look very frantic as they are turning, I will cut in somebody walking by. That way it adds to that overall chaotic feeling of everything. Now, for the over the shoulder shots, the tracking shots, the jib shots, etc, of this is done on a gimbal and that is to have a bit of smooth motion, but I am moving it around a little bit more than I regularly would, just to give a bit of that frantic nature and that handheld style in there. Because when I cut to their POVs where I'm doing that handheld work, it'll make sense with how it is still fairly shaky. That's really when we get inside their head and that's one we see that point of view of them looking at people going by. Then we cut to them looking by and it's a little more stable, but that's okay because their point of view through their eyes, everything's very shaky and very overwhelming. Cutting between all of that will create a very nice sequence that really exemplifies what this scene is about. Then here, we have the close-ups where they're just looking off and you can see I'm moving in and out a little bit and they're giving me different emotions. Looking around, it's working very well. Then I come around to the over the shoulder shots of them where you can see we're focusing on the people across the street crowded around, and then we can cut between that and those close-ups. That way you get that emotion out of there. Then we also have the sanitizing shot here. What we did for this, is we wanted to have them stop to take a break, put some hand sanitizer on, put it back in your pocket, walkaway, rubbing their hands. Then as mentioned previously, we have one more reveal shot which is cutting to when they are starting to come out of that overwhelming environment. This is as they start to make the transition into their home. That's why this review was used. Otherwise, if this were just a continuation of the same thing, there would be no point in using such a reveal shot, but this is revealing them walking away from that environment, which in my opinion is very effective. You can see in the way that they are directed in the body language that they have, they're starting to become a little calmer as they exit through the shot there. This is something I always like to have them do is completely enter and completely exit. That way I have these cut points that I can cut on the action and then cut to my next piece. Now from there we had our down shot looking at them, unlocking the door, which was a very simple insert. Again, I'm just on the gimbal up on the stairs. There are a couple of stairs just out of frame. They walk into frame, unlock the door, and it works very well. Now something to note for all of these exterior bits, I am using a neutral density filter. Because we're on a mirrorless camera with some photography lenses, I am using a thread on variable ND filter, so that way I can keep that doubled frame right there and still have a fairly shallow depth of field. If I had too much in focus, not enough of the focus would be just on our character here, which would break that isolated feeling. Because everything else is very blown out of focus, that's how you still get that character feeling isolated and alone and overwhelmed. That's why I put this on here. That way I could have my settings where I need them to be and the image would be darker. If you're not familiar with what a neutral density filter is, it is basically like sunglasses, but for your camera. You put that on and it darkens the image down by an amount of stops. That way, you can open up your aperture, you can fix your shutter speeds so it's at the same rate as what you need it to be. Otherwise, my aperture would have been down quite a bit or I would have had to increase my shatter speed, which neither of those would have worked for this scene. That is why I used that tool to my advantage.
12. On-Set Interior: Here we are in the interior section of this. Basically, what we're doing is continuing from their travels outside as they enter through here and it's going to be more of a calm feeling. You'll also notice as we move through the scene, as we're getting in here, we're becoming progressively warmer to show that they're getting more comfy, winding down a little bit as well. Now, you'll notice in this scene that we have a lot of light coming through the back here, and this is where a main source of light will be coming from. Now, since they are just coming home in this scene to have that light be motivated, we don't really want to have a large light filling in the majority of their face, as that will not really work with the vibe that we're going for. Pretty much we're going to be shooting into the shadow side of their face, so maybe add a little bit of a light just on the camera right side or the left side of their face. With that, we just have a small tube light tucked back in here. These things are very easy to just tuck in a corner and add that little bit of light. We are no longer on a gimbal, we're no longer doing any handheld movement as the character is becoming more grounded and more stable, therefore we want our camera setup to reflect that. For the majority of everything we'll be shooting in here, we're going to either be locked off on a tripod or on a slider. Abby, what I'm going to have you do is actually probably start outside and then just make your way in, and we'll shoot that a couple of times and see how we can adjust the frame. I will turn on this guy just to add that little bit of fill: so sparking. These are some of the things that you need to keep in mind when you're shooting out on location. If this were a big budget production, we would actually have an assistant director with me and then an assistant director outside to tell them when action is called and that way they can follow their queue and come in. But since we are just doing a very small setup here, I am just going to call action for Abby, they will hear me through the window and then they will come in. On larger budget sets, what we'll usually do is we'll mark the actors during blocking, but here since we're doing a fairly simple setup, I will just mark Abby before we go to shoot, and that way they know where they're going to be and I can frame up for their face as well, so that way we can hit it every time. I'm probably even going to switch to manual focus just to get that locked in, and that way there's not going to be any hiccups when we go to shoot. The way that we mark the actor is just with a little t-mark there pretty much covering both of their feet, so that way they know exactly where to stand. Now, something I noticed in this frame that I might want to change a bit: there is a decent amount of depth, but I think we can craft it a little bit better, and that is when you bring in something like a smoke machine, haze, or in this case something like this. This is called atmospheric aerosol and this is just a canned version of a smoke machine or anything like that. It's a very safe way to have a little bit of atmosphere in your frame and then you can get some light rays, and overall, it brings up the ambiance a little bit and makes things look a little moodier and dramatic. This is currently without any of the haze, and then I'll just do [inaudible]. You can see the immediate difference that that made. I kind of did a little spin around when I came in to lock the door. Was that okay? Yeah, I actually liked that, it worked well. I'm going to have you now do that one more time. I just wanted to double check on that. Thank you. It's always good to clarify and keep an open line of communication, so that way everybody knows what's going on and knows how the shot's going to be planned and how it's going to work. I'm framed up, all right, and action. Fantastic, let the cut there. Sometimes, I always like to offer the actor the chance to review playback as well just in case they want to see how they're doing. I'm okay. We are getting those nice little bits of light rays. I don't think it's too much, and I think it works for it. Sometimes you just want to keep an eye on your background to see how it's looking there. I may actually, just for the sake of this, put a coat over here just so that way it makes it all uniform and blend in a little bit. Then I think we'll take that one more time, and I think that'll be the one. This is just something that you want to keep in mind, especially as you're crafting your frame. We want to make sure there's nothing too distracting in the background, and if there is anything going on there, that it works for the shot and that it makes sense, and then you can adjust it to work for what you're looking for. Action. With the camera movement there, you can see how it does decrease tension and allows to pull back, especially as they're going to walk out of frame. I start really close on their face as it is that intense emotional reaction. They take a deep sigh and then I reflect that by pulling back with the camera. Now we're going to continue the scene into the main area, and then we'll show you the techniques from there. What we're going to do here, they're going to walk in, drop their jacket, and then they're going to light a candle and pick up the book. Now, at the beginning of this scene, it is going to be fairly dark. The idea here is they live alone, so they're entering an apartment and naturally, it's going to be quite dark when they enter. We exemplify that with them entering the apartment when it still was fairly dim, so that way we could expose for outside and inside as well. But it works that we have it a little darker and then they enter, they get comfortable, and everything lifts up a bit, it becomes a more warm and inviting environment. We'll have it a little brighter with an overall greater ambiance. Then it will be a nice, warm, final book and of the scene. When they enter, we're going to have them turn on a little lamp here for two things. One, just to show them brightening up the space a bit, but also, it does brighten up our scene so we can see what they are doing. I'm thinking as far as the motivated camera movement that we will keep this pull out movement as the tension continuously decreases. That's what we're trying to do here is the beginning of the film is very tense and very shaky, but now it's more stable. Tension is decreasing and we want to show that within our camera movement. Now, we pretty much have our frame figured out here, for the overall ambient when it was just the lamp that was being turned on, I thought it was just a little dim, so we do have a light panel bouncing off into the ceiling, creating a little bit of a nice soft bounce coming in, and I've that turned down quite a bit from when we actually shoot and that is just to give a nice soft fill. It would be the same kind of thing if you had a little bit of light coming in from outside and it's just to add a little bit of the light level. There create a little bit of overall ambiance and add a little more depth in the frame, and then when that practical is turned on, it's going to act as a nice backlight. Then, they will come down to the table here, sit down and light a candle before reading their book. Now, here I have a little light tube that we used to add a bit of fill to their face when we shot the doorway scene. This is going to act as our motivated lighting for the candle here. In motivated lighting with the tube here, what we're going to do is make it act as if it is the candle light itself. You can see when you turn it on sparking, that it does have that nice flicker there. Actually, what we can do now since we've adjusted the position in this way, we actually don't need the light here. It would serve as better to be off on the other side, so that way we get a nice light coming on on the front of Abby's face, and then that way, it doesn't act as this front light that we have currently. I'll switch the position in this around and show you what that looks like. You can see based on where the light is positioned, it actually works a lot better. We still managed to shoot a little bit into that shadow side of Abby's face, which always makes the drama look more intense, and adds to the shot quite a bit. We are having the light similar in position to where that candle is, so that way, for one we have a position, so you're not completely lighting up the candle itself. We still get the light from that, but we are still up lighting Abby just a little bit since that is the position that the candle is actually at, which is why it makes sense to apply in that way. Usually, we don't want to apply anybody because it makes things look a little spooky and unnatural. But for this, it makes sense. But also this is a large enough light source, that it isn't completely up-lighting them, so it doesn't give us that uneasy sense, that we would otherwise have. This way it's a nice, flattering light. We have that practical in the background and we're getting just enough ambience from our light panel their to craft a beautiful shot. Now, I think what we'll do here is add a little bit of haze just to make everything look a little more pleasing and then we'll be good to get the shot. Since I'm manually focusing the shot, something that focus pullers do that I've worked with is they mark off the distance of where that's going to be. Now, we aren't wirelessly pulling focus. I'm just doing it right on the lens, so I'll put a couple of marks down to make sure that I'm able to keep them in focus. Now, also we did change our lens since it is quite a bit darker in here as compared to outside, so that way, this lens has a lower F-stop so we can open it all the way up. Then that way, we are able to capture the nice ambiance that we have crafted going on in the scene here. We'll start with that light on and the camera is rolling, and action. Beautiful, and that just gives us a nice little cut point there, change up the action a little bit, and the camera movement is motivated by them coming down and sitting down, so it's not like I'm doing any unnecessary camera movement, which it would be very easy to do. I'm actually going to start on the candle itself. We're getting a nice little light coming back off of our practical light there, so there is a bit of ambiance going on and then, when they light the candle, I'll turn on our light here and then, will be good to go. I may actually raise this guy a little bit and spin it around, just so that's bouncing off and coming onto their face quite nicely. Even though we're not actually getting their face in the shot, it's just going to come across their body quite well. I'm going to be adjusting my frame a little bit, so doing a motion like this to follow their hand as they grab the candle there. Camera is rolling and action. You'll notice I'm actually starting my camera movement just before I tell them action, so that way it's not action and there's a jump. It's nice start moving action and then everything flows well rather than having that little bit of jumpiness in there. Action. Perfect, and that is it, cut. We did it. With that, that concludes our shooting of the scene, so now we're going to put it together. We're going to edit the entire thing, and then I'm going to talk you through how the edit came together and the different things that we talked about and how it translates to on screen. Thank you for watching up until this point. We'll see you on the other side of this.
13. Viewing Our Film: Here we have our final edited scene pieces altogether. If you would like to see how to edit something like this I can definitely also make a full editing course. But to keep this focused on cinematography I just want to show you the final product and how we worked with it there. A new study by the CDC is raising the alarm on the coronavirus variants spreading across the country. They can't keep up. There's a big backlog of cases so people- Super spreading events and epidemic surges. This virus has the potential to make many of us sick with fever, coughing, or even resulting in death. It is now evolving in a way that could make existing vaccines less effect. COVID-19. I know- You can see on the audio side, I did add in some different news reports talking about the virus and that sort of thing, just to add to that overall chaotic nature. You can see I'm cutting back and forth fairly quickly here, so that way it keeps that chaotic feeling going, getting that really chaotic mood. You can see I did add in a couple of shots such as people walking by coughing, etc, just to add to that overall chaotic feeling of everything. You can see how those POV shots and those close-ups cut together work really nicely when you're going between the two. They really add to that frantic nature. Then here we have them stop, sanitize their hands. Then we cut to them looking away. This is okay to do, because it's just all about that feeling that they're having. Sometimes you'd want to play that whole shadow. But here we cut back to it. Then, there you go. It could even be something where they're looking off as they're doing it but it gets the picture. Then here's that reveal shot, where you can see the camera moves and they start coming in. This is that type of thing where I start to move and then I call action to them, so that way the movement is already going and then by the time they come into frame I've already been moving, but I didn't catch too much of an empty frame before they came in, and that's how a nice reveal shot works. Then you can see they start coming closer to the camera and completely walk out of frame. There I did cut on the action so that way they walk out of frame and then they walk right to the door. Here we have that nice down shot. Then again, cutting on the action and we have this nice shot here based on that motivated lighting. Without that light tube we would just have this side of the face completely in darkness, but with just having that little bit extra it gives a nice catch light in the eyes there which is very nice. You see that life in a person's eyes. If you don't have that, sometimes a person will look dead or lifeless and that's not what we want here. That does just work, it almost just looks like that window light itself which is exactly what we want here. You can see how it translated nicely from what we storyboarded to the actual shot here. You can see pulling out as they exhale, they walk out a frame, then we have them turning on the practical light lighting up the scene there. We have a bit of that overall ambiance from that light panel that in there cutting to our truck shot. Then we keep that shot moving, stalling backwards. Then as they are lighting the candle, I turn on that light tube and we get that nice, beautiful flicker there and it works brilliantly. Here's our final shot coming in. They inhale, look up, exhale, and there we go. It's a beautifully bookended shot. You can see them just taking a load off. They just going to go into their book, enjoy their candle, and try to forget about the stress of the day. There we have it.
14. Conclusion: If you've been following along up until the end of this course, you've now the fundamentals of how to create a beautiful cinematic film. Whether it's a documentary, a wedding film, or even a feature, whether you're shooting it on an iPhone, a mirrorless camera, or $100,000 cinema camera setup, these fundamentals work all across no matter your budget, no matter your camera. With that said, thank you so much for watching this course. I hope you gained a lot of value out of it. If you did, be sure to follow on on Skillshare as I will be uploading more courses covering photography, videography, cinematography, and everything creative. As well, I also do have a YouTube channel where I will be uploading different projects that I've worked on, different tutorials and everything like that. That is a little more bite size and easier to consume. With that, thank you very much for watching up until the end of this course and I look forward to seeing the films that you create down below.
15. The Final Film: A new study by the CDC is raising the alarm on the coronavirus variants spreading across the country. They can't keep up. There's a big backlog of cases. Super spreading events and epidemic surges. This virus has the potential to make many of us sick with fever, coughing, or even resulting in death. It's now evolving in a way that could make existing vaccines less effective. COVID-19. I've never had a patient so close to death in my career. Wash your hands frequently for at least 20 seconds. According to CDC's COVID-19 case tracker, there are now more than one million confirmed cases of the virus in this country. Because it takes several days to show symptoms and most people won't even know they have it yet. There are higher grade masks that can filter better. We have to test, we have to trace, we have to isolate; the fundamentals of epidemic control. Growing anxiety this morning about the COVID-19 trend. Focus on protecting the people who are getting sick from this. The fast spreading COVID-19 variant. The number of cases per capita also calls for concern.
 Fynn Badgley, Fashion & Portrait Photographer