Transcripts
1. Introduction: One of my favorite parts
of filmmaking is logging. I've been doing it
for over ten years, and during this time, not only my style has evolved, but the entire logging
era has changed. What used to be a
simple handheld videos has turned into
something much deeper. Blogging isn't
just about picking up a camera and pressing record. There's a system behind it. Every shot you choose, everything you say
on the camera, and how you edit it together can either make
or break your flogs. And I'm here to help
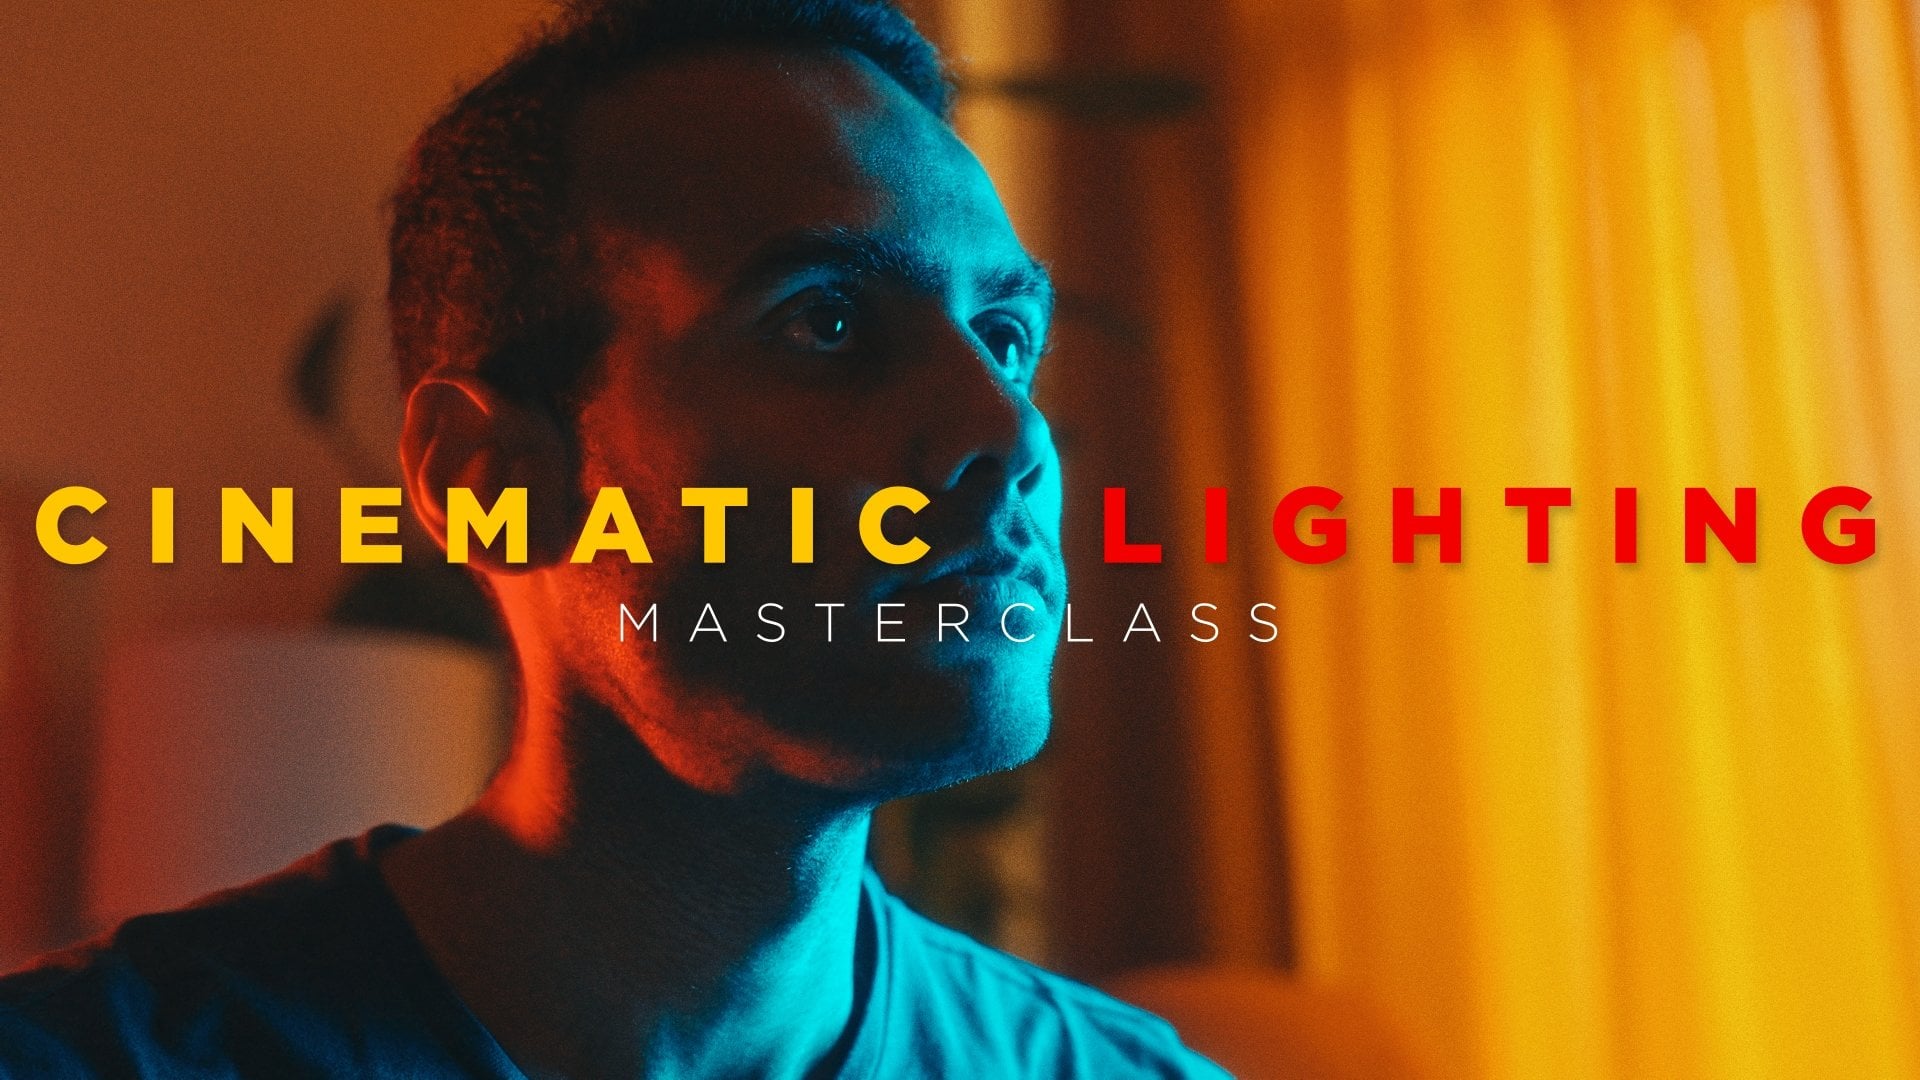
you master that system. Welcome to the cinematic
logging master class. In this class, I'm going
to be teaching you how to make logs from scratch, from pre planning and structure to talking confidently
on camera, to filming professional
cinematic shots and editing your blogs in a way that would make people keep watching. Yes, we're going to be
covering everything. And by the end of this class, you would have a clear
repeatable structure to film cinematic blogs. So if you want to take your
blogging to the next level, then let's get started.
2. Why you should vlog: The first question, what
might come in your mind while making content is why vlogging? When I started videography
back in 2025, sorry, back in 2015, there was not a lot of
quality content online. There were not a lot of
beautiful drone shots, beautiful transitions, you know, those crazy Woche
effects and all that. So during that time, just making a video without
someone talking or without a personal
touch was good enough because people didn't see all
those crazy shots before. But now I feel that people
have seen everything. People have seen the
beautiful four K, 120 frames per second, beautiful eight K extreme
slow motion shots. They have seen the
most beautiful drawn shots from
around the world. Now what I think is
working on YouTube, Instagram TikTok everywhere is the personal touch what
we bring to our audience. And that's why I
think vlogging is the best tool to connect
to your audience, to deliver what you want to say. And one of the
reasons vlogging or talking from the camera
has helped me personally, it has taught me how
to convey a message to my audience or if I'm
talking to a client or if I'm talking to a partner or if I'm talking to a
group of people. How can I efficiently
convey what is going in my mind without
just blabbering around? I remember when I started
making courses like this, I would have to
take so many takes because I wanted to
say a few things, but everything was just
going all over the place. And by just talking
to the camera, making a lot and making
tons of travel vlog, I have learned how
to talk to a camera, how to talk to anyone, how to just say some things really concise and
really accurate. So the person in front of me, it's really easy for
them to understand. It's really easy for
them to consume. Of course, a vlog format
is applicable to YouTube, but it's also applicable
to Instagram, Tik Tok, YouTube shot. You can implement those skills in short form videos as well. So yes, that's why
I think vlogging nowadays is just extremely,
extremely important.
3. Best Vlogging Gear: And the next question what
everybody has who is new to vlogging is what kind of logging gear they
should be using? I would tell you all
the gears available in the market and what
are the pros and cons. The first one and my
favorite logging tool is this your smartphone. If you have a decent
smartphone, iPhone, Android, whatever, First thing, it is always available
in your pocket, so you never miss a moment. Second thing, if you're
a beginner taking out a big camera with a
big mic on top of it, that might attract a lot
of attention when you are, of course, filming in a crowd. So that time just sneaking out your smartphone and talking to the camera or taking the shot, it's way, way easier. And the third thing, they
are super easy to use. You just press record and
just talk to the camera. Of course, in all
the smartphones to get the most
beautiful video output, you need to know about the video settings
of that smartphone. In general, if you just
want to film a normal vlog, just press record on your smartphone and
you're good to go. But if you want to master
vlogging or if you want to master videography
with your smartphone, especially if you
have an iPhone, recently, I made an iPhone
filmmaking master class that actually helps beginners take professional
videos from their iPhone. It does not have to
be the latest iPhone. You can just film from
your iPhone 13, 14, 15, whatever and make
professional videos from just your phone. You don't need to buy
a professional camera, what I'm using right now. So yes, iPhone, in my opinion, they are the perfect tool for someone who's
getting into flogging. The second type of logging camera could be
an action camera, it could be GoPro
instead of 360 as. But yes, action cameras
can be good for vlogging. But the thing is that
the video quality, it's not that good. So you see, you can see
this little blur behind me, which kind of gives a bit
more cinematic effect, that is not really
achievable with a little GP or some
other action camera. But the pro side of
an action camera is they're even smaller
than any smartphone. So yeah, it's super easy to
just take them out and vlog. And the view and the angle in
which they show the video, it's super wide, so
you never miss a shot. So you just have to log in front of you and
you never miss a shot. But quality wise,
even the latest ones, I'm still not really convinced
by the video quality. If you have an action camera, it's really nice to start with
that, practice with them. But yeah, if you're serious about making a nice
and cinematic vlog, I would avoid buying
an action camera. If you already have
it, it's fine. I also have Insta 360. I rarely use it. When, it was 360 camera. I used it a lot, but now
when I match the videos with my drone shots or with the videos with my
professional camera, there is just so much
difference in the quality that I just prefer not to I film it because I don't
want to miss the shot, but most of the time,
I just don't use that. Oh, yeah. Action cameras are
good if you already have it. It's good to practice,
but you don't have to buy a new action camera unless you are into adventure
sports or water sports. Then it's really handy
because then you can just take it anywhere.
It's super rugged. But if you just
want to blog, like, normally, don't invest
in an action camera. Third type of cameras are
point and shoot cameras. When I started
vlogging, I bought a point and shoot
camera from Cannon. It is perfect because
they are still small. The video quality, it's amazing. You see the blur
in the background. The name really suggests
point and shoot, so you really just have to
point to yourself and shoot. And most of those point
or shoot cameras, you can flip the screen, so it's really perfect
for vlogging. Like, to be honest,
if I didn't have these professional cameras
the mirrorless cameras, I would really use
the action camera because a lot of times we
are making hiking videos or traveling videos
and I have to carry this big camera with a
big lens and big mic. It's a lot of hassle. In the end, the video
quality is good. But the difference between
the video quality from a point and shoot these days
and a mirrorless camera, it's not that much. So you can still get
away with making really beautiful
cinematic videos from a point and shoot cameras. And pointy shoot cameras they
are not just for vlogging. You can also make
courses like this. You can also make
talking headshots like this if you are
interviewing someone or if you are
making some sort of professional videos,
it's really handy. It's really worth to
look into them and just see if that
fits your goals. And the last type of cameras, what are available
in the market for vlogging are the
Mirror Lewis cameras, what I'm filming on. I actually have love and hate relationship
with these cameras. Because they are just
super big and they just make my life so much difficult because
with every shot, I have to worry about
the correct videos. I can't film in auto settings,
but with every shot, I have to worry about
correct video settings, changing the batteries,
changing the lens. They are super heavy. It always comes in a
way when I'm hiking, when I have clipped it here. So it's just bulky and not really practical
for making travel vlog. But when I come
home and when I'm editing on my computer and
I see the video quality, then I'm like, I'm glad I
took my mirrorless camera, because the video quality
is just unmatched. And the reason why I have mirrorless cameras is
because I'm a videographer, professional
videographer, as well. So I cannot go to
my clients with a tiny action camera or a
tiny point and shoot camera. I go to my clients with my mirrorless camera,
and of course, we film quite
professional video, so that is a requirement
for my work. And I don't want to buy any other action camera or
any other point stute camera. So that's why I use
my mirrorless camera as well for travel vlogging, and video quality wise, it is just so good. You need to, of course,
learn how to get the best video output from the mirrorless
camera you have. But once you nail it, it's just it's
crazy good quality. And the good part about
making YouTube vlog is that if you make a quality
YouTube vlog or like, really cinematic YouTube vlog, a lot of times, people who are your target audience
are watching your videos, and a lot of times, if you're serious about being a
professional videographer, you can get clients from that. I moved to Netherlands
back in 2020, and my first client, she got really impressed by my storytelling skills and
my videography skills, just by watching
my YouTube video. So yeah. That's how I got my
first client in Netherlands, and after that, it has been a
really good journey for me. If you put extremely professional
cinematic videos on YouTube, just even for your vlog, you never know who you
would be impressing and who could be your ideal
client or ideal customer. I have two cameras. The Sony a seven has three.
That's quite expensive. But I have another camera
which I usually take for my travels is Sony A 74. It is under $2,000
right now because A 75, the new model has come,
and it is perfect. It's just the photos are good. The video quality is just
it's like top of the game. So, yeah, that's what I use, and I have some
couple of lenses. Lenses are a bit expensive
as well, so, yeah. But the video quality, as I said, it's just unmashed. And few more vlogging gears. What you might not
forget is a good tripod. Usually for vlogging, people always have these small
tripod, you know, the Gila tripod or some
other kind of tripod, which are really tiny. They are good for
vlogging, you know, when you are doing the
talking handheld shot, but it's not really handy. To film yourself. For example, when
we go traveling or when we are hiking or
when we make any video, I take the peak
design tripod because sometimes I want to take shots while standing on an eye level, whereas if you have
a small tiny tripod, you can always have those
shots from the ground level, or you need to find things
to put your camera on. And a lot of times there is
a risk of camera falling. But if you have a proper tripod, which can go to your eye level, then you have the ability
to take low angle shot, high angle shot,
whatever shot you want, and you can put the
tripod anywhere you want. Only demerit is the tripods
are a little bit big. It's not really handy
to go in the cities. But when I'm vlogging, you know, just the handheld shot, I am not really using
any sort of tripod. And I will show you later how to vlog nicely with
a smartphone and how to log with a
mirrorless camera so that it looks much nicer, how to hold the camera and, you know, all those
kind of things. So don't worry about
that. But yeah, a good tripod is really handy. You can invest in a small one. It's good if you're filming at home or if you are
filming in a city where where you are
not really looking to leave your camera on a
tripod somewhere and walk away. But if you're making
adventure films or if you are, you know, working as a professional
videographer or looking into going
in that direction, then I would recommend to
invest in a good tripod. Those were few gears or few filmmaking
gears what you need to be using to make a vlog.
4. Audio: Next, let's talk about audio, which is the most important
thing in a video. This I realized a
lot of years later. So here's the deal. Even
if you film a video from your smartphone or from a
really bad action camera, let's say, if your
audio is good, the video is still watchable. But if I film a video from
my mirrorless camera, and if I didn't connect an external mic,
it's super windy. The audio is really bad. People cannot watch the video because there is no audio or
even if there is an audio, it's just not good enough. Let's talk about some of
the mic system or some of the audio system that is available in the market and what I would
recommend to you. The first one or first type
of mics which is available in the market are the point and
shoot or the shotgun mic. So you just put it on the camera and it would record the audio. Are really, really good as compared to the audio
of your camera. And a good external
audio is required, even if you're filming
with a smartphone, an action camera,
point and shoot. All those cameras they claim
Mc system has improved, but still it's not as good as adding even the
cheapest mic on a camera. Some of the mics, I think
when I started videography, I used this road video micropro. I'll put the picture here. It is perfect, the video quality. The audio quality
is just perfect. The second type of mic
is this kind of mic, the wireless mic system. So the mic system, what I'm
using is this DJI mic too. Is a little bit expensive, but this kind of system is available in budget
options as well. Even DJI has this DGI, something Mini, which is a
smaller version of that. The audio quality is
still pretty good. And the good part
about these things are you can just clip it here or you can also add
an external lav mic. So this is called the receiver. No, this, this is
called the receiver. So this sits in your pocket, and then you have
this tiny mic here. We usually use these
kind of mics when we are filming in any sort of
cities because in cities, there's just so much
chaos going on. And a lot of times
if my subject, if me or if my wife, we are a bit further
away from the camera, it's really difficult to
listen to that person. And that's why if
you have these mics attached to yourself, then you can listen to the audio of the person the whole time, and that is the most
important part. You want to capture
the raw emotion, the raw reactions
of your subject. That's when these kind of
mics, they come in handy. So yeah, I would link
down this mic as well, but there are so
many other options. So that's why it's
really important to take that extra step and invest
in a good audio system. Like, even till date, I watch some YouTubers who
film from their action camera, but they have this external
mic attached to them. So sometimes I even forget that the entire vlog was shot
in an action camera. Because the audio
is just connecting. I'm so focused on listening
to that person that I even forget about the
quality of the video. So yes, audio is the king, and the first thing
what you should be doing after buying the camera or having the camera
what you have is to invest in a
good audio system.
5. Theme Of The Vlog: Now let's talk about
what makes a great vlog. What separates beginners
to professional bloggers. The answer is theme of the vlog. So you see, when I
started vlogging, yeah, back in 2015, it's almost
embarrassing to watch them now. When I started, what I would do is I would just film whatever is going on without
thinking about what is the theme of the video. You might see all the
professional bloggers. They have certain
topic of that video, and the video starts with the
introduction of the topic. And then throughout the video, the subject or the
vlog is showing his or her journey
within that theme, what they decided
for the video to be. When we started making travel
videos back in the day, we would just film
our day without even thinking, why are
we filming this? What is like, what are we trying to convey
to the audience? But now when we film any travel video,
there's always a theme. Sometimes a theme theme
could be traveling here on a budget or sometimes
a theme would be hiking this beautiful hot
in the middle of Nowhere. Then we can talk about the hot, then we can talk
about our experience in this remote area. So there is a topic
in the video. So that is really important. And especially if you're
not filming a travel video, then it's even more important to have a topic because
travel video, of course, the whole place is
a kind of a topic, but if you're filming
from your home or if you're filming
your daily life, there should be a
topic in that video. Otherwise, there is no point
in filming just randomly what is going on because the
audience would get confused, first of all, the audience
wouldn't even click because there is nothing intriguing them to
click in that video. And even if they did
2 minutes later, they would feel that, Oh, the video is
not going anywhere, so they would just
watch another video. So that's why having a
theme is really important. And if you have
decided the theme, then that also helps you to
decide the pacing of a video. Let me give you an example of
another travel video niche. So sometimes, if we are filming a nature
video or sometimes the video theme is that we found the beauty in the
quietest place somewhere, then the pacing of
the video would be, of course, a bit slow, of course, a bit peaceful. But sometimes I
remember we had we filmed some video in
Japan in a big city. I think it was Tokyo. So we filmed that
video in a big city. So the theme was that exploring the craziest
neighborhood in Tokyo. So there the pacing of the video was
completely different. There the songs that I
used was high energy. The cuts were quick cuts
because I wanted to show that intense city
vibe in that video. As whereas if I film
a nature video, the vibe and the pacing of the video is
completely different. So that's why if
you have a theme, according to that, you can
make some shots of the video. According to that,
you can do the cuts. According to that, you
can choose the music. According to that, you can
talk in the video as well, especially in the nature videos. A lot of times, if we
don't talk too much, I do a lot of voiceover
in that video because that just goes with the
nice and peaceful vibe. Whereas in the city video, we don't do a lot of voiceover. We film or we talk a lot because we want
to show our reaction of this crazy thing what
we are witnessing in the city or some craziness
going on in the street. So yeah, that's why theme
is really important. And once you have the
theme of the video or a topic, then you
can go from there. Filming just random things in your life, it's
not going to work. You can do it for practicing, but it's not going to work. Determine a theme of the video. The video should have a message.
6. Hook of the vlog: Now let's talk about something
which is, in my opinion, and you might have
heard it 1,000 times is really important is
the hook of a video. And of course, the
hook of a video, you also determine if you have a meaningful topic or
meaningful theme of the video. According to that, you can
make a hook. What is a hook? So the hook is first five to 10 seconds
in a YouTube video. That would kind of
hook the audience and kind of convince them
to watch the entire ten, 20, 30 minutes of video. Are different kind of
hooks what people use. I have seen some of the Mr. Beast videos and the
hooks. They are good. Of course, the videos are
getting a lot of views, but in my opinion,
it's just so chaotic. Like one year ago, just screaming in front
of the camera would work. But now, for me,
especially for me, it's just so chaotic and having so many crazy cuts and so much chaos already in the
beginning of the video, People think that that would attract so many people to watch, but in my opinion,
is just a chaos. What I think a good
hook can be is that. It starts with, like, especially in my videos, it's the topic of the videos
we're exploring somewhere. So our videos, it
starts with sometimes if we have a really
nice reaction throughout the video,
it starts with that. So that already has a human in front with a real reaction, so that connects the audience in a quick second because
the audience feel that, oh, there is actually another
human behind the scene. So it's nice to watch that. And then I start with
this beautiful montage or beautiful B rolls or
the most beautiful shots, which are coming later
throughout the video. So if someone has clicked
on a travel blog, they know exactly what
they have signed up for. They know exactly what all places we are going
to be taking them. So that's one hook that we start with some of
our nice reaction. Then we show some drone shots, some beautiful
shots of the place. And a lot of times we make sure that we are
filming us a lot, so we can use those
clips in the intro. Because, as I told before, people have seen the most beautiful shots
around the world, the most beautiful drawn shots. But people haven't seen you in those places or your reaction
or what you're saying. So those things are also really important in the
hook, I believe. I have seen some of
the YouTube birds. They just have this one shot
in the beginning for ten, 15 seconds, and then
they're doing a voiceover. That's a hook. And the
shot is so perfect and the voiceover is so intriguing to the audience that
they keep watching. So hooks, there is no
definition of hook. A lot of times like last year, this trend started that steal these ten hooks to
get so many views, steal this is just
like in the end, all the videos,
they look the same. Everybody if everybody's talking the exact same thing in
the first 5 seconds. So that's why it's
really important to determine your style of hooks, but a hook should tell the audience exactly what is coming in
throughout the video. For example, when the
intro of this class, I started with some nice shots, some nice cinematic
shots because the theme of this class is
how to film cinematic vlog, like how to film
high quality vlog. And I wanted to show to
the audience that I am a videographer and I'm filming some high quality videos
with a nice voiceover. So they have come
to a right place. You are not just watching any other class where
the instructor, they don't even know how
to make beautiful shots. I'm not pointing. I'm
just giving an example. So does that make sense? So that's why it's
really important to be really mindful
about the hook. You should put the
best of the video, just squeeze everything
and put that in the front, and what not to do in the hook. Do not put any boring
clip in the hook. Like, for us, we don't really
plan the entire videos, especially with travel videos, but we really plan the
intro of the video. That would the intro be that I'm talking in
front of the camera? Or would the intro be that we are at some
beautiful place and there's a drone shot or
would the intro be a voiceover or would the
intro be some reaction of us? So we make sure to
give those reactions. We make sure to film those
intros at a particular place. So, yes, it's really important to be thinking about the
intro and pre planning the intro because doesn't matter how beautiful or how much work you have put
in the entire video. If you are not putting the
work in to film the intro to film the hook of
your YouTube video or to film the
hook of your vlog, then it's just a waste. Then the entire
video is a waste. So yes, hook is really,
really important.
7. Pre-planning: Now let's talk
about pre planning. Filming any vlog, this is a mistake what I did
back in the day. I wouldn't do any research. I wouldn't plan how
the video would be, and I would just go
as the day goes. That's how I film my
videos back in the day. They didn't work, and
now when I look back, I realize that, Oh, this is the exact reason
why it didn't work. Pre planning is the
most important part. Especially if you are
making a travel video. Pre planning is important
because you need to know what you're going to film, when you're going to film. And, of course, whatever
you're filming, you need to know a little
bit about that place so that you can talk to the
people about that place. Same with if you're
filming in your house. You need to plan of course, you need to plan the hook of how you're going to do
the hook of the video, so you need to film that or lot place or lot a location to film the
hook of the video. Intro, but you need to also plan what are the things what you're going to
talk to the audience. And in what settings, would it be talking
head shots like this, like camera on a tripod or
would it be a handheld shot? If I'm talking to the camera, I want to put some B roll
on top of the videos. So what kind of B roll
would be appropriate? So I should film that as well. So all these things, it's easy when you're
making travel videos, but if you are just talking normal or making
just a normal video. Then it's really
important to write some bullet points about what the vlog is about so
that you don't get, you know, distracted
from the main topic. Like, a lot of times, if I have to film somewhere outdoors, I go on Google Maps. I check out the street view that how is that place looking? Are there a lot of cars or
is it next to the street or is it next to a beach or
how is that place looking? You know, is it
good enough to be vlogging or is it good to just make some shots and
do a voice over later? Is it good to fly
the drone there or is it restricted
or is it worth it? Or I would check some
stock footage online that is there stock footage from that place for the drone? If it's there, then I
wouldn't take my drone. All these things I would
only know if I preplan. So that's why for
filming of log, pre planning is
really important. First and the most important
thing you should be pre planning is how the
intro of the video would be. Have to film the intro
already in the beginning, but at least know when, where and what you would be filming that goes in
the intro of the video, especially with us when we
are filming the travel vlog, we kind of script
down the intro. It's like a 32nd intro, and we make sure
that we are saying that orli or delivering
that dialogue at the most typical location of that place or the most unique
location of that place. So yeah, those things we already think about
in the pre planning. What we do is that
we kind of divide the videos in different different chapters if
I'm filming something. So the first chapter, we're
going to be filming there. Second chapter, we're
going to be filming the third chapter, we're
going to be filming there. And then in all those chapters, it's also really important
to tell to write down what are the kind of semi
topics in those chapters. So I had a video which did extremely good was My
Life in the Netherlands. The intro, I wanted
to start with some cinematic shots
with a nice voice over. So then I had that. I
already filmed that. I already filmed the voice over. I knew this is how
the intro would be. And then a few other chapters. I knew that what are
topics I have to talk. I have to talk about
how the people are, how the food is, how
it is living here, what are the pros and cons. So for each chapter,
I already thought some different different
locations where I would be filming that in different
different scenarios. For example, when
I wanted to talk about my learning Dutch
language experience. So then I actually
went to a shop somewhere and I talked
to that person in Dutch. So all these things, I
already planned it before. It was not just that it just
happened all of a sudden. It was all preplanned. So those things you have to
plan that for every chapter, when are you going to film?
What are you going to film? So then it makes your
life really easy. I kind of watch other
YouTubers as well, or I kind of watch photos
from the locations as well. And then I kind of note it
down according to everything what I see that wattle shots I need to be taking
at that place. So I had this kind of little
short list of few shots. So that is also
really important. So, yes, I think pre planning is really important if
you're filming a vlog because those are the
little little things that separates a beginner
and a professional. And that also just
makes your life so much easier because if
you're, of course, not filming a travel
view if you're just filming a general vlog, then at least if you have all different different chapters or different topics,
you want to talk. And then if you talk
or film all of them, you can just cross, you can just check them that I did this,
I did this, I did this. So it also makes sure for you in the end that you
have filmed everything. You have the talking
part of everything. You have the B rolls
of everything. You have some nice, beautiful
shots of everything. So it's just I think
it's a lifesaver. So you should really do some pre planning before
filming any vlog.
8. How to film yourself: Here in this section,
I'm going to be teaching you how to hold the camera while logging if
you're making handheld video. I know it might sound
really weird that why am I teaching how to
even hold the camera, but trust me, it is
really important. So first and the most common
mistake what people do while logging is what I've also seen people doing
back in the day when I started was they would
hold the camera like this, they would grab it like this. And if I have to log, then they are logging like this. So if you're logging like
this, what happens is that? The more you move, your hands
would be shaking a lot, and that creates a lot
of shake in the camera. So even if I do a
little bit of movement, you can see a bit of
shake in the camera. So because I'm holding
at the camera body, what I can do right now is that if I hold the camera here, then the camera has a bit of a suspension because my arms are acting as a
suspension kind of thing. So what happens is that if
I hold a camera like this, then there is a bit
of room that even if I move the camera or even
if there is a movement, a lot of shock this angle or this kind of setup that absorbs, rather than if I
just hold it here, then the movement then the camera sensor is placed
exactly near my arms. So even a little bit of movement would obviously move
the camera sensor, and that of course, results
in a super shaky video. What I usually do is that I
just hold the lens like this, and then because I'm
holding it here, the bounce or whatever the movement is if I'm
walking and talking, that kind of gets a bit
less, if that makes sense. So that's why I would
really recommend not to hold the
camera like this, hold a camera like this
when you're logging. And what you would also
notice is that I'm kind of keeping the camera a little bit further
away from me, so it's not that close. I'm keeping it a little
bit further away from me. Of course, puts a bit of
pressure on my shoulders. But that's the part of the game. What people also used to do is that they would put a
tripod here or, you know, those small gorilla tripod, and that would make it look like the camera is placed on tripod. Because if I keep the
camera like this, then you can really
see my hands. And that is not
really a pleasant so that's why I keep it a
little bit close to me. So then it actually
looks like the camera is on those, those
small tripods. And that's why I don't use a tripod because
with this technique, I can get the exact same effect
of me having a tripod on. And a lot of YouTubers,
they don't do it. Like, it was really common when logging started to use
those little tripods. But I see so many YouTubers, they just don't do
it because it's just so bulky and eventually, if I have to use a big tripod, I would just use a
brig tripod from the beginning because
from this setup, I can really just switch or put the camera
on a big tripod. So it's, yeah, super handy. So, yes, the first tip, don't hold a camera here. Hold it like so. And the second tip is that use a wide angle lens.
Let me show you. So this lens what you're
seeing right now, this one, it is at 16 millimeter because
it's a wide angle lens. And when I started logging
with the professional camera, then I had the lens,
which was 24 millimeters. So if I put to 24 millimeter, then you can see that people don't really see a lot of me. It's just, like,
really until here. So, which I don't really like, it's not really personal
and it's not really giving too much story about the surroundings and also
just about my body language. But if I have a wide angle lens, which is 16 millimeter, then you see a bit more of me, you see a bit more
of my surroundings. So that also really helps using a wide angle lens with logging. A wide angle lens could be
anywhere from 12 millimeter, 14 millimeter, 16
millimeter max 24. If you go a bit more than 24, then the whole footage
would look like this. Let me show you. You can push the logging to 24 and it
would look like this. But if I move it to 28, then so you can really see that I'm really
super close to the camera, and that's not really and that's not really
a pleasant look. So that's why it's
really important that the lenses which you
use for blogging, their focal length
should be 24 or less. And another tip while
filming a video. Of course, I told you
about the handheld shots, but I also really love shots like this where I have
put the camera on a tripod because now
I'm not stressing about framing myself and
keeping the camera this steady, keeping the camera you know, stationary so that there's
not much movement. And after a point, if you're using a
big mid less camera, your shoulder starts to hurt, and then you're
kind of in a rush to turn off the recording. But if I have a camera on
a tripod setup like this, in my opinion, I'm
a bit more calm, I'm a bit more relaxed. And yeah, I really like this
look because it's a bit more stable and also what I love This is a technique what I have learned from
some other YouTubers, as well as that. Remember when I
started this video, I don't think you
really noticed it, but what I did was I kind of walked to the
camera like this, and that kind of looks
or that kind of gives an impression that I'm inviting
the audience in my life. I'm inviting or I'm kind of getting a bit more
closer to the audience, whereas if the shot
just started like this of me talking here,
here's the first example. Welcome to a day in Life
of content creator, where I'll show you
everything what I do since morning
until I go to bed. Here's the first example, let
me show you the second one. Welcome to a daily life
of content creator. Where I'll show you
everything what I do from morning to evening. So
you see the difference. Like in the first shot, I was just standing here and the shot started with,
like, just like this. But in the second shot, I
actually walked in towards you. And that just in my opinion, it feels a bit more inviting. It feels a bit more a bit
different, a bit dynamic. And I've seen a lot of
YouTuber using this technique, and, of course, I
learned from them. And yeah, it just gives a really good effect
in my opinion. So I would really recommend that if you are starting a vlog or if you are going to a new location and if you're introducing a new
chapter in the vlog, instead of just holding
the camera and talking, maybe try this and see how you, how you feel about
the whole video. Now a quick tip of how to
film with a smartphone. So remember, I told you that you should be using
24 millimeter lens, and you shouldn't be using the little tripod with the camera because
with the camera, it's easy to hold, you know, the lens and then keep
your hand like this. So it really looks like
this is the tripod. But with smartphone,
it's that kind of gives sometimes that
effect, but not every time. So I hope, yes, so I'm
recording now and I'm recording with the main
lens of my iPhone, 16 P. But with phones,
for some reason, I prefer to use those tripods rather than
just this handheld shot. And I also feel that
a 24 millimeter is a little bit zoomed in. So what I would be doing
is, let me show you. So now what I'm
going to be doing is I'm going to be switching the lens to the wide
angle lens of the iPhone, which is, I think,
14 or 12 millimeter, I would put the right
description here. And then I have this
magnetic cara holder, iPhone camera holder
from Ulan zi. It's a really good, really good tripod. I use
it all the time. We actually take
it on our holiday just to film reels
or just to film, you know, those static
shots for reels. So which is really handy,
and it has a McSaf. So if you have an iPhone,
McSafe rewards really well. But if you have a Samsung
or some other phone, then really look into a good camera holder or
a good phone holder. And then we have this
little tiny tripod from lanzi which, in my opinion, is really good. It just takes really less space, and you can bend these
legs and put it anywhere. So if you are if you don't want to invest
in a big tripod, I think this is the way to go if you're filming
from your smartphone. I wish my life was
so simple and I was just using a smartphone to
film travel blogs. But, yeah. So what I usually would do is that if I'm
filming like this, I would turn the legs a little bit towards me so that
it's easy to hold. And also have switched
to the wide angle lens. So these wide angle lens option is in any good smartphone, so you shouldn't be missing out. And then I would press record. So if I'm pressing record, now it would be framing me
really good as compared to the 24 millimeter lens because now we are in
the wide angle lens, and this is a really
nice blogging shot, in my opinion, because
you see a lot of me, and then you also see
a lot of background. Behind me. And if I
walk with this setup, then my hand and then
my hand and the tripod, they kind of erase all the jerks and all the load or with all the
movement coming in, and that kind of stabilizes
the video a lot. So that's why it's really
important that with the iPhone, not I always see a lot of
people holding like this, and they kind of
are at an angle. So if I take out this, I always see a lot of people holding like
this at an angle. That looks really weird because
then you see your arms, and that is just so immature or so non professional or so non professional
way of blogging. So even if you're filming
with a wide angle and without a tripod,
film like this. So that would give that
effect that your camera is on a that you're holding a tripod. And that also kind of
eliminates a bit of shake. But with iPhones or
any other smartphone, I would really recommend using
these because right now, as I said again,
with the camera, my hands are really close to the sensor of the smartphone. So any little movement in my hand or in my body
would be transferred directly to the sensor and
one more tip of how to hold the camera if you are
filming from an action camera. So as I told before that
the action cameras, I'm not really a big fan of their quality when
it comes to logging. But let me just show you how it looks when I'm filming
from my Insta 360. But we're going to be filming
with a wide angle lens, not a 360 lens, but
with a wide angle ns. So a lot of times what I've
also seen people doing is that they would be filming
from this angle. You see? So now, what you see
is just my face. And if I was filming outdoors,
you would see the sky. It is really
important. It doesn't matter what camera
you're filming from. It is really important
that you are filming at an eye
level. Not too high. I also see a lot of
people like taking selfies or just talking to the camera like
this. Don't do that. Please don't do that.
What do you need to do? Keep the camera at an eye level. And because the lenses
of these action cameras, they are super wide, so then
you just cover everything. So that wouldn't be a problem.
9. Why B-Rolls are important: Now let's talk about why you
should be filming B roll. So what are B roll?
Beer rolls are videos. They come on top of everything
what you're talking about. Not always, but those videos, they come on top of what
you're talking about. Sometimes those B
roll are also really handy to put in the introduction
video, put in the hook. Sometimes those B roll are
also really important. When you are moving from
one chapter to another, or when you are moving
from one scene to another, then you can put some B roll, and those B roll, they are
called transition clips. Oh, pateai really you can
just get in Thailand. Outside of Thailand,
ptais are garbage. Garbage. But the PataiPlace
is not super close by to us. So we're gonna go there, not with the train,
not with the taxi. But Sabra, how do you feel? And why I think Bros are really important is that I live by one rule when it comes
to making videos is show your audience
rather than telling them. So you see what I'm
doing here as well, everything what am I telling, if I have a video of that, I put that video on top
of my talking headshot. So that gives you
more information. So, of course, you have the
audio information as well. If you have a visual information
of whatever I'm talking, then you tend to understand or you tend to grasp everything, what is going on in
the video a bit more. So that's why it's really
important to film some roll, especially, yeah, in travel
videos when we are traveling, when we talk about
some craziness, what we saw or when we talk about some beauty or some place, then I actually put the shots so that matches really good
with what we are talking. And it's not even that early. It's 930, and it's just quiet. And in front of me, I see
all the bridges all empty. And with some ducks
coming this way, it's really, really magical. Yesterday, it was a
crazy circus here, and now we are all by ourselves. And don't forget to look at all the beautiful houses here. Really every house is just straight from the fairy
tale, for example, there. It's not really on
the main street. You would almost not notice
it, but it's like this. So I'm kind of showing to the audience rather
than telling them. And that's why I think B roll
are really handy as well. And it's also really
important in travel vlogs is to film yourself,
not just talking, but as a third person, because a lot of times when
you're talking to the camera, people just see this
medium shot of you. So they don't really grasp the full information
about who you are, how you look, how you like
who you are in general. But if they see you
from a third person on a tripod shot, you
are doing something, then they get more information
about you and then they feel more attached to you because that's how
we see normal people. We see our friends or our family when we
are talking to them, like the medium shot, but sometimes we also
see them far away. So you know, we see them in
all different scenarios, and that also keep makes the
video a bit more interesting because then you are
not just showing yourself from one
shot, one boring shot. Then you have different
shots as well. Then people see
your body language, people see what you are
doing in that environment. So those things are
really important. And they are also
included in B roll. So that's why it's
really important that when you're
filming any videos, it's not just a talking head shot throughout
the entire video. You also show or film what you're doing
throughout the video. So that gives a bit of
variety to the audience. And a lot of times B roll, they also help you
hide the mistakes. What I'm also doing
here is that if I fumble or if I do some
mistakes in this video, of course, I cut out the
mistakes, what I've done. If I cut that out, then
there is a choppy effect, then you can see the cut. But if I put a B roll
on top of the cut, then people don't
really see the cut. And that I do a lot of times in travel videos because here, it's a really
controlled environment. I know exactly what to talk. Sometimes in travel videos, some things go
wrong or sometimes you said something which you wanted to say it better and you wanted to cut out
the middle I cut it out, but then I put some videos
of what I was saying. So in the end, the audience wouldn't
even realize that there was a cut because I put some B rolls on top
of what am I talking? So that makes the entire
video really smooth. So yes, B rolls can
also save your life sometimes if you did some mistake while
talking to the camera.
10. Framing and Composition: And now let's learn about how to film some
cinematic B roles. Before me teaching you
how to hold the camera, how to film at different angles, I want to show you
a list of chapters. And in those chapters, I've discussed how to frame a subject to give
different emotions, how to frame yourself
in the frame to make the video look
a bit more cinematic. So yes, let's start
the following chapters where we would be
learning framing and composition because that is one of the basics
of videography. Once you learn that, then making any shot cinematic is
super easy after that.
11. The rule of thirds: Now it's time to learn
framing and composition. Because if you learn this, the framing and composition of a subject of an environment
of a landscape, that would turn your
videography or that would take your videography
to the next level. The first rule of framing and composition is a rule of third, and this is how it looks. A rule of third is a rule in
filmmaking or photography where we divide the frame
into nine equal parts. And what we do is we place
the subject either here, here, here, or here. And if you place the things or the subject or the most important thing
along these lines, then the video looks more
cinematic, you can say. Sometimes if you put
the same subject in the center of the frame, it just feels like the
framing is a bit incomplete. But if you place the subject on one third of the
frame on either side, that just tells
the complete story that where the subject is going. And there's also one more thing
really important is that, for example, if you
are framing a human. So if I am here on
the rule of though, and if I am looking that side, so of course, I'm following
the rule of third. But then my audience, they don't know what am
I looking at, you know, the frame looks a bit more incomplete because here
there is a lot of emptiness, a lot of concentration is here, but then as soon as
I'm looking here, the frame stops at this point. But if I place myself here, and then if I'm looking there
or if I'm looking here, then that gives the audience a bit more idea of
what is going on. Where am I looking? Now, if you go in any movies or if
you go in any documentaries, you would see that every time
when there is an interview and when the subject is sort
of talking to the camera, they are at an angle, and
if I'm at this angle, then I would be placed here. If I'm at this angle, then I would be placed here. And that also I do
in a lot of my shots if the subject or if me
or whoever I'm filming, whatever side they're facing I leave a lot of room
on the other side. That also gives the subject
a bit of room to breathe. Because if I just put
myself this side, then it just looks a
bit more incomplete. A lot of times in films, they use this kind
of framing as well, whereas the subject
is looking this side and you are sort of
closing the frame here, and that creates a bit of drama. That creates a bit of
curiosity in the movies. But I'm assuming that you
are beginner and I don't that you are making any sort of dramatic movie already
a Hollywood production. So I would say just stick
to the rule of thirds where you place the subject year and they're facing
kind of this way. But if you want to
introduce drama in the scene, then
you know what to do. And one more thing really
important with the rule of Thirds is when you're filming
a landscape video is this. If you are placing
the horizon in the middle of the
frame, it looks okay. But if you place the horizon on the top line or on
the bottom line, then that gives a bit
more information to the audience about where the subject should
be focusing on. And one more thing where you
can follow rule of thirds is talking when you're
filming a talking headshot. For example, in this shot, I am placing myself here. I'm not placing myself
here in the center. I'm just checking
at this screen. So I'm not placing myself
here in the center because that leaves a lot
of room over my head. I am placing myself here. So my eye is almost on the top
line of the rule of third. So then there is a bit
of balance in the image. Ideally, I should be a
little bit higher or I can bring this frame
a little bit low. Yes. So ideally,
I should be here. So that makes the whole
framing a bit more proportionate because now you can also see my body language, but there's also not
much room over my head, not much empty
space over my head. So this is also when rule
of Threats are applicable. And rule of Thirds are also applicable when you're
filming a vertical video. So when you're
filming a subject, a lot of times I personally
I put myself or put my face in the center because I know that I want to put
some text over my head, you know, when I'm making a
Instagram real or TikTok. But if I don't have to leave any room for
the text over my head, then of course, I
place my eyes on the top line of the framing. I would never place
myself at the bottom of the screen because then there's a lot of empty space on the top. So that's when rule of 30 is applicable when you're
filming a vertical video.
12. Leading lines: Now let's talk about diagonal
lines or leading lines. So a diagonal line or leading
lines, they look like this. So what happens here is that if you really look
at the image carefully, you would see a line crossing from one side of the
frame to another, and that is that kind of
looks like a diagonal. And what that does is that, that kind of directs
viewers to the subject. If you see this frame,
you can see that the lines all the lines are
leading towards the subject. And sometimes it doesn't
even have to be human. It can also be a subject or it can also just be
a point of interest. Sometimes if there is
something, for example, if there is a temple or there is a monastery off the
end of the road, then the road can act
as a leading line, which is leading towards
the end point of interest. They don't always
have to be straight. They can also be curved. They can also be spiral. I know it can be a
bit overwhelming. But I would say you learned
about the rule of third. Then I would say just go out
or go in your backyard or go in a park and just film
yourself or film other things. And just teach yourself
rule of third. Just practice on rule of third. And once you master that once you kind of have
that muscle memory, then practice leading lines, then practice the
following steps. Yeah, because I am
telling you, of course, all the rules and all the
framing compositions at once. But for you, I understand
that it's a new thing. It can be a lot of
information at once. So yeah, just practice
one thing at a time, and once you master that, then
you move to the next one. So now we move to the
next framing tip.
13. Centre framing: Now let's talk about
center framing. That's kind of
almost exactly what am I doing in this frame. So a lot of times, as I told
previously, that, yeah, you always have to follow
the rule of third, but a lot of times center
framing can be useful. And those times are when the
subject is in the center and either side of the subject is a bit more balanced
or it is mirrored. For example, if you
see this scene, the subject is in the
center and the things on the left side of the
subject is almost the exact same as the things
on the right hand side. Here, rule of third
wouldn't be applicable. You can also do center
framing for buildings or landscape or even a human. And why I centered
frame myself in this framing is
because there is, you know, the screen
of the computer here and there is a lamp here. So if I would have
moved this side, the whole scene here would
look a bit more empty. And if I would have moved this side following
the rule of third, then this would be a
bit of empty space. So now that if I
am in the center, I am kind of
balancing the scene. I'm also not making one side
of the frame too messy, and I'm also not leaving another side of the
frame too empty. So these things you have to
also keep in mind is that, am I going to follow
rule of third here or am I going to
do center framing? So how you can determine what framing to do is that
just film yourself at different different framing options and go in
the computer or go in your laptop and just
tech which looks aesthetic. There is no hard and fast
rule that you really have to follow this rule by
heart. That's not true. Filmmaking rules, they are good, but a lot of top filmmakers, a lot of top directors, they are always
breaking the rule. And some of the shots,
what they take is just it just so new because they are not
following any rules. So these rules are good to remember or good to know about, and then you break it.
14. Out of focus shot: Now let's talk about
out of focus shots. So it would look
like you are out of focus and the
background is in focus. And when do we use
those kind of shots? Those kind of shots are used when the emphasis is
not on the subject, it is mostly on the background. Or, for example, if I am
looking at certain direction, then if I'm in focus, then the audience, they don't really know
what am I looking at. So that time it's good to sort of blur the
subject and then show the background or show
where the subject is looking at to convey the
story to the audience. So that's when you should be using the out of focus shots. A lot of times they use
that in the movies. A lot of times, yeah, they
use that in documentaries. So yeah, now when you go and watch a movie or ethlic
series or any sort of series, then you would know
that, Oh, actually, I know what kind of
rule or what kind of framing methodology
they're using. So now that we learned
out of focus framing, let's move on to the next one.
15. Top down shot: Top down shots. Top down shots are one of my favorite shots. They take a bit of effort, but the end results
is just so good. The top down shot, of
course, they look like this. This can be a drone shot
or it can be a shot from a camera or from
your smartphone. And why the top down
shot is important is it just shows the
audience the subject or the environment from a really unique angle
because how I look at you or how I look
at things around me is just with the
eye level shot. I never look things
with the top down shot. So that's when if you show the audience the top down shot, then the audience can
go wow that, Oh, wow, this scene actually looks
like this from way above. And one way I achieve the
top down shot is, of course, with the drone,
but I also achieve top down shot with another
equipment called a C stand. So a C stand, it
looks like this. Then you have to
set it up. You put a sandbag so that the camera
is not going to fall. And then you either clamp
your camera on the top or you can clamp your
iPhone because then it's a bit less risky because iPhones are really light and they can be
attached anywhere. So a lot of times I take
top down shots mostly with my iPhone because if I put my whole camera set
up on a C stand, it can break or it's
just really heavy. And I just love it. And sometimes I follow
the rule of third on the top down shot or sometimes I just follow
the center framing. It really depends on
what is around me. So yeah, that was top down shot. And now let's move
on to the next one.
16. Patters and repetitions: Patterns and repetitions. This is not a tip of how to frame a subject or
how to frame a thing. It's just a general tip that
whenever you're filming a city scape or a landscape or whenever
you're filming yourself, always look for those
patterns in the image and then take a shot according
to that pattern. And that would look
really nice because we have patterns like
every day around us, but we don't really realize it. But if you have an eye to sort of find out that pattern in a normal day to
day life shots, and then capture
that, that would really make the
audience go, Wow.
17. Low angle shot: So now that we have learned
how to frame a subject, now let's talk about
where should you place a smartphone or a camera to convey different
emotions to the audience. So this shot is an
eye level shot. So this shot wouldn't really
generate a weird emotion in the audience because this is how we see things
throughout the day, and this shot just
looks quite average. But if you put the camera or
if you put the smartphone a little bit lower and film
the subject from that angle, then the subject is, of course, at a higher angle. So that time the subject
looks a bit more dominant. You would see these shots in
a lot of superhero movies. So yeah, if you want to convey the emotion
to your audience, in your movies or in your videos that the subject is a bit
more dominant in the scene, then you can use this low angle
shot where you're placing the camera at a low
angle and the camera is facing up at the subject.
18. High angle shot: And now let's talk about
the high angle shot. So in the high angle shot,
that's completely opposite. So here, the camera
is way above, and it is filming the
subject from above. So now the subject
is at a lower level. So here the subject looks
a little bit powerless. The subject almost
looks like he or she is trapped in a frame. So yeah, when you want to convey a message
through your videos, that subject is a
bit more powerless, then you can use a
high angle shot.
19. Point of view shot: And the last shot
in this section is the POV shot or the
point of view shot. So here you show the audience what you are seeing
as a subject. So how you can achieve
this shot is really easy. You can just place the
camera or a smartphone here, and then whatever you are doing at whatever angle,
you just film that. So if I'm just moving
my arms and if I'm doing with my arms,
you show to the audience. A lot of times people have this scopomunt attached to
the chest or to the head and that shows a
really nice POV shot. I also take a lot of over the shoulder shot
for my subjects, and that also is a
POV shot because so that time the subject
is kind of allowing the audience into
his or her lives to show them how the life
looks through their eyes. So that's why I think POV
shots are they're really unique and they also
are really beautiful.
20. Cinematic B-Rolls cheat code: Now that you have learned
Fram composition, I'm going to show you some of the cheat tricks that you can use to make any
shot cinematic. And, of course, we're
going to be following the same rules that we learned
in the previous chapter. So the first trick of
making a shot cinematic is put something in front of the foreground.
Let me show you. We have a coffee mug here. Okay? So what I'm going to do, I'm just going to change
the angle of the camera. So, yes, we have a
coffee mug here. So what I'm gonna do,
there can be one shot. You know, I would show you the
wrong way of doing things. Let me show you. So one way to film this coffee
mug is just like this. It looks nice. Even
if I put it as, like, a rule of thirds video,
it would look like this. But if I want to
make this coffee mug look a bit more cinematic, I would use these plants in the foreground.
So let me show you. So I would already
start recording. So you see now the plants
are in the foreground. I'm just going to
zoom in a little bit. And now I would focus
on the coffee mug. So you see, now it looks way, way better than how it
was looking before. I can also bring it like this. So it is on the rule of third. And you see with one click, we can make it look so nice. And of course, I'm zooming in
with the lens all the way. And now let me show
you another example. I actually plan to film
this class outdoors, but now there is a
snowstorm outside, but I'll show you
something really cool, which you can do from
inside your house. And these things
it's applicable to any scenario because there's keeping things in the
foreground of the lens, I do it all the time
while filming be rolls. But let me show you
something cool. So here, what I
want to do is that, of course, I have to
film the outdoors. So I'm not going to film
like just like this. It looks fine, but if I
zoom out a little bit, if I bring these doors
in the foreground, then the video looks a
little bit more cinematic, and that also gives a
bit of perspective to the audience that how they
are viewing this thing, this view is through the doors, through the eyes of myself, and the subject here is inside the house to see
how nice it looks, even if I film here, the door handles, it looks
absolutely beautiful. Let me show you another example. So you see this
chill chair here. So if I have to film
it, if I just film like this, it looks okay. It looks okay, the chair. But what can I do is that I can see that I can put
something in the foreground. So I would go just a little
bit back or maybe here, and then you see how nice
it looks with the leaves. And to make it even
more cinematic, now I can add some movement. So I would just move
from left to right. I can see that this
chair is in the way. But if I zoom in a
little bit, like so. So now that the couch
is in the frame, now I'm just panning. So here, if I show
you the close up, I'm not panning the
camera like this. I'm just moving my
whole body like so. So it almost looks
like the camera is on a slider and it's
revealing the couch. And here we can do the exact
same thing with the coffee. So if I just zoom in in
the coffee right now. So if you would see
me from the back, then you would see that I'm
just sliding a little bit. So I'll just focus on the coffee and here the movement starts. Uh, so you see how nice it looks if I add
a little bit of movement. And these kind of movements
you can do in any shot. So remember, I talked about the diagonal shot where you see the diagonal
lines on the side. You can also just walk in by keeping the
diagonal lines locked. And that also gives a really nice perspective
to the audience. So he has camera movements, like learning the framing
and composition is the beginning step for
making cinematic videos. And once you implement
really slight, really slow movement
in those shots, the entire shot,
it just looks so, so beautiful and so cinematic. And one more tip, what I want to give you is that there is one shot where I am
here in this frame. So you see I'm here and
it's not that zoom, then it's not that wide. This shot looks okay. But say if I zoom in, yeah, and if I go a
little bit further, what do you think
about this shot? Let me give you an example
with this camera, okay? So I'll just make it wide. So say I'm filming this
camera like this, right? Here, I'm at 24 millimeters
and it's not super wide, but wide enough shot, right? And the camera is of
this size in the shot. What I do if I go back and
then I zoom in in the frame. What do you think
about this shot? So this is called adding a
compression in the shot. What happens is that when we are filming at a
wide angle lens, there is a bit of fish eye. So if I keep my face like this, there is a bit of
fish eye effect and that doesn't really
look very cinematic. But if I wanted to keep
the same size of my face, what I can do, I can zoom
in, and I can be here. So now if you see my face, the fish eye effect is gone, and it also looks
like the background has come a bit more closer, and it's also giving
a bit more blur. And that is really cinematic as compared to the usual
wide fish eye effect. And why is it happening
is that if you zoom in with any lens
towards the subject, then the Zoomed in part adds
a compression in the shot. What compression means is that
the background appears to be closer to the subject
than how it was, and it also adds a bit of blur. And that blur and the closing and the
closeness to the subject, that makes the shot
bit more cinematic than just having
a wide angle lens and being close to the subject. So remember, next time if we have to take close
up of our subject, don't go close to the subject, go back zoom in
and then film it. So that would give you
super cinematic videos. I remember when I
started videography, I had this GoPro with
GoPros, you cannot zoom in. And then I would take this
close up shot of some things, and it would just
not feel right. And that would make
me so frustrated that why all these creators
am I watching online, why their videos are so good in the same scenario and why my videos are not
looking that cinematic. And that was exactly what I
learned throughout the years. So it's a great great tip to
make your videos cinematic. And another tip to make any
shot cinematic is this. So you see this shot o like a nice shot would
be something like this, which I would really like would be a little bit zoomed in. So you see this shot. I really love it because there's a bit
of blur in the background, and there's a bit of depth. You see where I'm standing
where the background is. But what beginners creators they do is that the
beginner creators, they would be
filming videos like this where they are
super close to the wall. Like, it just looks so
close, there's no depth, and it just doesn't look as professional as how the
previous shot looked. So that's why it is
really important. So I'll just move it here. Then I'll zoom in a little bit. So that's why it's
really important that when you're filming yourself or if you're filming a subject, don't keep the subject super
close to the background because then you don't have the separation between the
subject and the background. The subject doesn't pops out. But if you move the subject
a little bit close to the camera and increase the distance between the
subject and the background, then there's a bit of separation between the subject
and the background, and that kind of pops out
the subject a little bit more and the further
the background goes, the more blurrier the background is and the more
cinematic it looks. So this is also a
really interesting tip what many bigger
nurses don't know. Stay away from the background, keep the background as far as possible while filming anything. Like, every time I'm
filming my reels, TikToks, just talking head shots
for these online classes, I make sure that I'm further
away from the background. Also when I'm filming a you
also when I'm filming locks, I really make sure what's
in the background, how the background is looking. Even if it's blur, how is
it fitting with the frame? And if you don't see the blurry background or the
cinematic background, then I kind of move myself
away from the background, or I move my subject away
from the background. And remember when
I told you about the movements in the shots, it's really important to have the similar movements
in the B rolls. For example, if I move
my camera from, say, right to left like
this in this shot, and next shot I
took up the coffee and if I move from
left to right, it just looks really off. So if you're moving
from right to left, in the next shot also
move from right to left. If I'm doing a push in shot where I'm kind of
walking in the frame, like so that I can
also put a drone shot, which also has this
push in effect. So that gives a really
smooth transition between one frame to another. So yes, another tip, keep the movements
if you're adding movements in your
shots. Very similar. Otherwise, it's just disrupting
the pattern and it just doesn't really look that it's flowing in one flow
with the music. Those were the few tips of
how to film cinematic videos. And let's move to
the next chapter.
21. How to talk to a camera: Now let's talk about how
to talk to a camera. I'm laughing because I remember when I
started making videos, and if I watch that now, it's just so cringe. And I'm sure that if I watch
this clip three years later, I would say the same
thing is just so cringe. But, yeah, that's the
journey we all go through. And talking to a camera
has not been has not come easy for me because first thing English is not my
first language. Second thing, I'm an introvert. So especially talking in public, like, it still kind
of gets me sometimes. But when I'm in the flow, then I'm in the flow,
then I just don't care. But anyways, talking
to the camera, one thing what really
helped me to talk to a camera was Think of a
camera as your friend. A lot of times what we do is that we are talking
to our subscribers, you know, because
there's a group of people watching this video. So we say, Okay, guys, we're
going to be doing this. What do you guys
think? So that's what we do a lot of times. But all those subscribers, they're not watching
your videos together. They are watching
in their phone, in the television in the
computer in their home. So they are watching it alone. So make the video as if you're
showing it to one person. Same in this class. I am talking to you who's watching from who's
watching from their home. Treat the camera as
one single person. That person could be a friend, that person could be anyone and treat as if it's a real person. So I'm kind of treating this camera as one
of my student who has no clue what to or even
me who has ten years back, who has no clue how to vlog, no clue where to start, and no clue about what
I'm going to say. So that's when the
real connection comes. So treat the camera
as one single person. It is really nice to
be practicing this, this one single person
thing when you're alone. So when I started
vlogging, that time, I thought I'm talking to
the camera really good. But what I would be doing is every evening I would come
to my dorm in my university, and then I would just talk to the point and shoot what
I had back in the day. And I would just talk
about how my day went. So those practices that help me to kind of summarize
what is going in my head and put them out in the easiest possible
way to my audience. Of course, I would fumble a lot and it would take
a lot of retakes, but those videos
were just for me. Were not for anyone. So those practices, it helped me a lot. So I think this is what you
can do as well every day, maybe for the next two
weeks or one week, that every evening
just sit in front of a camera and talk about
how you de went and really try to watch the video and then just see that what
could have been better? How could I have
talked or or how could my body language improve while talking to the camera? Because a lot of times what
beginners do is that they would only talk to a camera when they have to
film something. And that is a mistake because then it would be a nightmare
for you to edit the videos. I remember when I made my first
class first online class, it was a nightmare for
me to edit because I would just do so many
mistakes and so many cuts, and sometimes the cuts
would be so awkward. So like, just doing
so much practice, it just makes it so much easier, especially just the talking. Forget about public, just
the talking to the camera, one on one, practice a lot because you don't have to post it online. You don't
have to share with any. Just pick up your
smartphone and talk every day for five to 10 minutes and just see in two weeks you
would be improving so much. It's just crazy. The next one is
filming in public. As I told before,
it still gets me, but what helps me to
be filming in public without thinking that what people think around me
is that I am working. This is my job. And why
should I let someone else control how good or bad should I do I should
do at my job or not? So that mindset kind
of quickly changed me. And I also thought that
I'm not going to see this person 5 minutes later. So if they are making fun of
it, most of the time not. Most of the time, people
are just curious. And now, like this day and age, this is the best day and
age for vlogging because when I started,
nobody was vlogging. Like you would only see
Casey Nystat or Ben Brown. They were the only vlog, and at that time I would
get really crazy looks. But nowadays, there are so many people vlogging
that it's not even awkward. So yes, if like, a lot of times, people don't mean something bad when you have logging
or they're not kind of making fun of you, a lot of times, yeah, and
even if they do, who cares? If someone is making fun
of a person who goes out of their comfort zone and
who's filming in a public, like how insecure that other person is to be
making fun of you. Think about that. This one
quote, I also read it, you might have
listened as well that the only person who
would be making fun of you is a person who has never even tried
what you're doing. For example, if some
other big YouTube or if they watch my videos, they would never make fun of me. To be filming in public because they know how exactly it feels, how exactly someone
goes through, you know, that fear, that
anxiety of filming in public. The only people who
would make fun of you are the people who
have never even tried. I remember when I
started vlogging, like, the closest people, my family, my friends, they would
all make fun of it. Would all make fun of how
I'm talking to the camera, how my accent is
not same as them. A lot of things
were made fun of. And that time this
quote came in my head. I heard it somewhere. That when you are
at the beginning, people make fun of you, and when you are successful, then the same people come
and ask you how you did it. Some other things you need to be keeping in mind while talking to the camera is remove
that energy drop. So you might you might have seen a lot of YouTubers just screaming in
front of the camera. I don't like that, but I
like some sort of energy, even with this course. I've been talking to you for
the last two or 3 hours, but I take a break
every few minutes, every 15 to 20 minutes
just to recharge so that I come up with the same energy to
teach you this class. And that same thing
happens with vlogging. You have to keep your
energy a little bit high. You have to be excited about what message you're going to
be showing to the audience. And you can overdo a little bit, but in camera, when you watch
it, it looks really normal. So even if you
overdo it right now, a lot of times
people like what I said that you should
talk to your friend, but I'm not going to
be talking to a friend with this much energy or
with this much excitement. My body language would be a little bit calm, a
little bit laid back. But in the camera, it looks
I don't know the signs. For some reason, it looks
a little bit boring. So you have to kind of
exaggerate your excitement, exaggerate your energy, and that looks completely
normal in the video. This I have learned
by just watching myself and filming
a lot of times. Oh, yes. Like, for example, if I'm going to be
talking to you as if I'm talking to a friend,
it would be like this. So this is how I'm going
to be talking to you. And the next thing and the next thing what
we're going to be discussing is how to talk to a camera. You
shouldn't be do this. You shouldn't be doing
this. You shouldn't feel awkward in talking
till you see how my energy drops and how my
body is just a bit tired. So really avoid that because
to make a really good video, your energy should be
a little bit higher because the person
who's watching at home, they don't care
what you have been through or they don't care for how many hours
you are talking. They care about they have they might be seeing
you for the first time, and this is your chance
to impress them, to subscribe to you or
to follow you, wherever. But so yeah, keep your
energy a little bit high, and if you feel that it's
going down a little bit, take a breath, be a bit more
mindful about your energy, about your energy level and
see how you are talking. Here is another tip which I
recent which I've been using, which I'm a bit more
mindful, let's say, for about the last
couple of years is avoid using filler words. For example, a lot of times when we are talking
to the camera, when we are kind of
thinking what to talk, then we use a lot
of filler words like like, like, you see? Or a lot of times I
used to say, you know, like, this is, for example, talking to a camera is
so difficult, you know? Like, you know, is
not really important. And also with YouTube videos, like I was always doing, Alright guys, so today, we're
going to be doing this. When you're talking to someone, you never say, Alright, guys, we are going to be doing
this. We never say that. We only would be
saying that when we want to grab the
attention of entire group, but that's not the
case with vlogging. So a lot of times we
say these filler words. We also say, and I was like,
maybe I should do that. And then she told you this. And then I was like, maybe I should go somewhere
and eat an ice cream. So you see, I was like,
that's a lot of filler word. That's a lot, there's
a lot of things What you shouldn't be saying, and you are just
saying because you are thinking what to say next. Instead of that, you see
what I just did there. Instead of that, and
then I had a pause. You can think while making a
pause. That's really normal. And that also gives some time to your audience to digest
what you just said. And that also just keeps the entire talking
process a bit more calm. So when I started I said so. You see what you see I'm working on I'm
working on as well, and I see a lot of big YouTubers or people who are
just good at talking. They don't use a lot
of filler words, and their tone, how they talk to the camera kind of
varies a lot of times. If you don't know exactly
what to talk about, maybe just pause for a bit and then really think
what you have to say. And whatever you have to
say, try to keep it short. Lot of times we try to
over explain to people, and then we are kind of saying the exact same thing
over and over again. Say one specific sentence, pause, then say another
specific sentence and end that sentence. What happens also with
talking to the camera is that even before
finishing one sentence, we are already thinking about what would be
the next sentence. And then we don't let this
sentence to be finished, and we are already starting
with the second one. And sometimes if you did a mistake in between
those two sentences, then it's really difficult to cut because there's no
end of that sentence, and then the whole
sentence structure would look a little bit weird. Trust me, if you just speak one sentence at a time
in front of the camera, and even if you take a pause, it's so easy to
cut out the pause. And if you have any filler word, it's insanely
difficult to take out that filler word because even
if you take out the audio, you can see in the camera
that I was going to say something. Does
that make sense? So, yes, avoid filler woods. It just doesn't put too much emphasis on
what you're talking. And one more
important thing while talking to the
camera is maintain a consistent eye contact when I started or
when any beginners, if they start talking
to the camera, the only place where they would look is at the viewfinder. So you see this is me looking at the flip screen of my camera so you see
how weird it looks. Teeth look into that
black hole, the lens. That's where you
should be looking because if you're looking
at the viewfinder, there is no way to fix
it, at least for now. There are some AI apps that can change your
eyeballs to the camera, but if you don't want to use it, if we have to have we have to
keep this practice that I'm talking I'm looking right
into the eyes of my audience. And of course, you don't have to keep looking all the time. Same as if I'm
talking to a friend. I'm not looking into their
eyes the whole time. My eyes are going here. If I'm thinking about something, sometimes my eyes are
going at my phone. You know, so keep it natural, but be mindful that
look in the lens. Don't look at the screen,
don't look at anywhere else. When I'm talking, I'm
looking into your eyes. Especially with
making these courses, I really feel that
I'm talking to you. So yeah, it just comes quite natural to
me after so many years. But, yeah, if you
already maintain this practice in a year or two, you don't even have
to think about it. And don't shut off the camera instantly once you
have finished the sentence. What happens is that when
we are filming in a crowd, when we are filming in public? Like, our urge to shut
down the camera is so so much that as soon as even before
finishing the sentence, I can already see I
have also done it. I can already see that
the whole camera moves, and it's kind of
shutting it down. What I do now is that once
I finish my sentence, I keep looking at the
camera for maybe 1 second. And that 1 second gives
a really nice cut. So you see, when I said cut, then I'm looking at the camera. I'm not looking at my notes or I'm not looking
anywhere else. I'm maintaining the eye
contact because it's really easy when you're cutting the
video after that sentence, it's really easy to cut. I would give an example from
my me filming the courses. So back in the day, I
would have my laptop. I still have my notes with
all the bullet points. But say, for example, if I have the notes with
all the bullet points, and if I'm talking to you
that how to talk to a camera, and let's move to
the next topic. So you see what I just
did? As soon as I said, let's move to the next
top pick at the pi, I'm already looking
down at my notes. Instead of that, what
I would be doing is, let's move to the next topic. And then I would pause, look into the camera, and then I would look into my notes. Oh, next topic, no, we have covered all
the bullet points of how to be confident
on the camera. So this is really important. And these are small,
small things I don't really see
anyone talking about. And these are the things I have learned from my experience. So, yes, those were a few things that I have learned
over the years to be able to talk in front of the camera like I'm
doing right now.
22. Editing tips: Here in this section,
I'm going to be teaching how to make
an effective log. So it is not an
editing master class. I have released previously some classes when it
comes to editing, when it comes to storytelling, when it comes to editing
specifically for YouTube. So I would highly recommend you to check out those classes. Some of those classes are a complete master class
for Adventure Resolve, which is the most
popular class of mine. And there's also
storytelling for YouTube. There is also editing
specifically for YouTube. There are some classes
where I really teach how to edit faster when it comes to
editing YouTube videos, how to have a really good
workflow that would help you to edit specifically
YouTube, YouTube logs. So go check out those classes as well
after watching this. But here are some of the
tips I'm going to give you that would help you to make an effective bit more cinematic, a bit more professional
looking log. And in the DemiurRsol
master class, I've also taught students how to color grade and make a simple looking
footage cinematic. So really go check that out because color grading
can either make or break a vlog when it comes
to making it cinematic. So here I'm going to be
giving you some tips, and I would be showing you
some of my previous logs. And yeah, so let's
start the chapter. So the first and the most
important thing is the intro. So you should also
be knowing how to edit the intro because
according to the editing, you can go backwards and
then plan all the shots. So I'll show you a really
cool video what we had. We made a video with
our camper van. So we were building
our own camper van, and we made a really nice intro. So I'm going to be
showing you that intro. And then we will talk
about what we saw. After many years of dreaming,
it's finally happening. We are building a
very own camper. This dream began seven years ago when we traveled
across New Zealand. We slept in just a car. It was super simple, but
it was the best trip ever. That trip started Mira
her dream of building her own camper and my
love for making videos. A few years ago,
we tried to start with a small van
and a rooftop ten, but we faced some,
let's say, problems. Wasn't the right time for us. Now we saved enough money
and bought a renal traffic. Over the next few months,
we are going to turn this car into a five
star hotel on wheels. Or let's say we'll
give it our best try. Stay tuned as we turn
this vision into reality. And moreover, learn
from our mistakes. Welcome to our
future camper van. I will show you rounds. So here, what is
happening is there is a really high tempo music
because I wanted the log to be of a bit more high
tempo, a bit more energetic. So I'm doing a voiceover. But in between that voiceover, we are also saying something
in front of the camera. And that makes the whole
log a bit more personal. And when I'm doing
the voiceover, of course, I'm showing
some previous videos, but I also show some
beautiful B roles that we took, you know, that we made time specifically to make those be rolls because we knew that we're going to be putting that in the
intro of the video. So as I discussed before, that filming an intro is,
of course, important, but also just be a
bit more mindful that how you would be editing the intro because
according to that, you can go back and
film everything, do the voice over,
do the dialogues, do these one liners. Yes, intro, how you
should be editing, it really depends
on the type of log. I'll show you another intro. So this was a bit more
energetic kind of video, but there is a bit
more cinematic kind of video, what I
want to show you. And how do you edit
this specific intro, I have shown in my
DaventiRsolve, 20 master class. So go check that out after
watching this class. I love this intro, by the way. There's an island just off
the coast of the Netherlands, a place shaped by wind, sea, and silence, where the sky stretches endlessly and the
land moves to its own rhythm. So call it peaceful,
others magical, but everyone agrees
it's different, unlike anywhere else
in the country. They say you don't just
visit Teso. You feel it. So you see here, what I
did was in the beginning, there were two, three shots, a bit more cinematic shots. And then there was also a really dramatic music
in the beginning. There's no high energy, nothing. And there's also a lot of
sounds from the videos, what I have used in
the editing here, because a lot of times what people do is that when
they are using a ro, they don't put the
audio of those videos, but putting the sounds like
the audio of the video clip, that's really impactful when
it comes to making videos. So what I did here was I
started the video with two, three shots in the
beginning no voiceover yet. I just wanted the audience
to be in that field that, Oh, it's a cinematic, a
bit more dramatic intro. And then I started
the voiceover. But this time my voiceover was very different
as compared to the camper build voiceover
because in the camper build, I wanted to be a
bit more casual, a bit more energetic,
a bit more happy. But here, I wanted to have
a bit more cinematic, a bit more serious, a
little bit of deeper voice. So that's how I did the
voice over for this intro. And then I'm putting a lot of cinematic clips from
throughout the log, and I also use some
stock footage. So this is a stock footage. We don't have this
where we visited, but it matches the
whole vibe, so yes. So, yes, the reason why I'm telling you about the
stock footage, you're like, do not restrict yourself to
the footage what you have, but also go online and
check for stock footage. So I have this subscription from a website called Motion Array. And you can download
tons of stock footage from that website and also a
lot of music, sound effect. That's really cool. So go check that out as
well, Motion Array. But yeah, this is
another form of intro. So you see already in the intro, I'm setting up the tone
for the entire blog. The first one, we wanted to show it a bit more funny,
a bit more casual. But this is a bit
more cinematic. I've also done a bit more
heavy color grading, a bit more cinematic
color grading. I've taught that in my
Dijor master class. So yes, how you edit the intro really defines how the
whole log would be, because in the intro, you can already deliver that
feel to the audience, so they kind of know
what's coming next. So that was the intro. And now, a lot of times when
we started blogging, what we would do is
that we would say, Okay, so now let's
start the video. After the intro. But here, let's show the
camper video again. Or, let's just play
the Tessl video. And I will show you
how quickly or how smoothly we switched from intro to the main
video to Chapter one. They say you don't just
visit Tessle. You feel it. So, the sun is in my eyes, my hair goes everywhere, and apparently, we're
going to find a bird. I cannot leave or pronounce, but Teso let's go. Now it's time for some picnic. You see, in all the
shots, I'm using those I'm using the framing
and composition row. You see here the diagonal lines. And in this shot, you kind of see the
rule of thirds. So that's why it's also really
important to learn that. But let's come back
to the editing. So you see how
smoothly I went from the intro to the main video. That's also really important because already people
are hooked while watching the intro and how
smoothly you go from intro to the main chapter that would help the retention because what's happening now is that people are really
hooked with the intro. And even before they realize it, the video has started, and that's how a YouTube
video should be. It's not a movie that
you have this intro and then slowly everything
started because of it, because when it
comes to YouTube, people have the
option to click away. So that's why it's also
really important to edit as if you quickly switch between the intro to
the main chapter. Let me show you the
camper built videos. Or let's say we'll
give it our best try. Stay tuned as we
turn this vision into reality and moreover, learn from our mistakes. Welcome to our
future camper fan. I will show you rounds. See, just when we did the clap, the first chapter
started where we are giving the tour
of the camper. And if we play this
chapter you rouse. From here, you will step inside into our grant living room. So the idea is that
here comes a couch. And that couch, you can
make flat into a bed. The Grant kitchen with
Cooking Island will be here. So, of course, So you see when she said the couch you
can make flat into the bed. I'm showing the
video. I'm showing the video of the couch
turned into a bed. So that's also really
important is that every time that throughout
the whole video, whenever you are
saying something, and if you have a video to explain a bit more better
what you are saying, put that roll on top. That's really, really handy. So we talked about the intro. We talked about how to smoothly move in the intro
to the main video. Now, something I see all the
beginners doing a mistake, what I see everybody
doing is that they use the same music
throughout the whole video. What music usually
does is that it is giving or it is generating
an emotion in the audience. And if you have the
similar emotion throughout the
entire video, like, people would like to feel that emotion in the beginning,
but for 10 minutes, 15 minutes is the same emotion, then it kind of gets boring. So that's why I recommend. And if you watch any video from a big YouTube or even a small YouTube,
if it's doing good, if it's looking really
cinematic and professional, that's because they are changing the music in each act or in each chapter because what then happens is that
people have some emotion. Then in the next chapter, they
have a different emotion. Then in the next chapter,
they have different emotions, so they barely have
time to get bored. Let us show you
in the camper uh, this will all come
out and we will put a bets on top
of this camper fan. I cannot really imagine it now, but in a few weeks, we are able to sleep
on top of here. So you can see that in the
intro we had energetic music, but now I'm playing a bit
more funny kind of music. No, but in a few weeks, we are able to sleep
on top of here. In the last month, we
have built every weekend, and there are many more
weekends to come because this is a list of all
the tasks we have to do. So you see, there
was a funny music, but then the energetic
music started because here I'm showing the passage of time. So you can
check this out. Yeah, because this is a list of all the tasks we have to do. First things first, taking out the dividing wall in the st. It was not difficult,
but for some reason, Lia thought that the whole
van would break down. Oh. Oh. Second mission. Giving our future Hotel on to
also see when she screamed. I turned off the
music. So that's also really important when it comes to any sort of reels
or TikTok or YouTube video, taking out the dividing
wall in the west. It was not difficult,
but for some reason, Nia thought that the whole
van would break down. Oh. Second mission. When
something really funny happens or when something really significant happens, you turn off the music, and it's just the voice of the
subject and the audience. So that emphasizes the audience that where they should focus on. That also gives a little bit
of breakthrough that, Oh, something crazy or something
significant happened. So you have to really
focus on that. So yes, another tip, if the music is playing and if something funny or something, you know, something
different happens, pause the music for a bit. And another tip when making
a cinematic blog is that sometimes when I
do the first cut, I leave the videos
as long as possible, and then I would watch that
video for after two, 3 hours. And then I would feel
that some shots, even if they are crazy,
pretty really beautiful, they are not really making
any sense or they are not really adding to the story. So then I was shot
in those clips. So that's a really good tip is that if you edit something, watch it over and over
again after a few hours. And then you would
realize that, Oh, this section is a bit
too long and it's a bit more boring because the story is not really
going anywhere. So of course, I'm teaching
how to film cinematic blogs, how to put beautiful
shots in a YouTube video. But if you put the beautiful
shots for too long, then the audience, they get bored and the story
is not moving. So there's no point of
you going out there and taking all these beautiful
shots, color grading them. And in the end,
nobody's watching. So that's also really
important is that cut the video as
short as possible. But then also at some places, keep some breathing space. A lot of times,
especially with Mr. Beast and other people who are making these fast cut videos, it's almost too overwhelming
to watch if I just want to chill on my couch in the evening and watch something easy. Watch something which
is easily consumed. So yes, you have to
keep a balance between the fast cuts and a
slow paced video. It's really about how
the story is moving. That's how you should
be making the cut because I see a lot
of TiktGuru saying that each clip should be for no more than 1 second for
no more than 2 seconds. And that can be
applicable to some video, but it's not applicable
to all the videos. So you have to find
a balance of in which act I'm making a bit more fast pace
and in which act, I am going a bit more slow. Because when you see
the camper video, we got our fan bag from
the Camper Builder, and I will show you what
the Camper Builder did. We didn't do this. I wish
we were able to do this, but we cannot. So
we got the couch. We got the couch, but
can convert into a bed. And I want to show
you something else. So in this part, the video
is a little bit slower because here we are showing
the audience our camper van. Here we are giving the
actual tour of what happened after the
transformation. So here I wanted to
be a bit more calm. The whole hot should
be a bit more calm. There shouldn't be so many cuts. There is just a raw vlog
of someone talking. Of course, I'm
cutting in between some errors or some dead space because that's not really
adding to the story. But I am also keeping the
video a bit more calm. There's no music.
There's just one on one between the subject
and the audience. Those were the few
tips of how to make a cinematic vlog when it comes to you know, editing of log. But I would highly
recommend to check out my previous classes
because in those classes, I'm really teaching
how to color grade, how to do certain cuts in the
software in the ni resolve, how to tell a better story
when it comes to editing. Because if I start
telling that here, this class would be
five, 6 hours long. So really check
those out because now you have knowledge of
everything about logging, everything, everything
about the short list, everything about
how to film videos. But with editing,
if you really need an in depth knowledge
of editing, then really check out
my previous classes because they are pretty good.
23. Thank you: This brings us to the end
of this master class. I hope you enjoyed this class, and I've also given the project of this class in the
project section. So really do participate in that because I
would love to see your work that's also really good for you because everything
what you have learned, if you don't practice,
you're going to forget it in a
couple of days. So it's really important to practice on everything
what I've told, all the shots what I've
taught you how to take that and implement those
shots in your logs. And I would be really
happy to check those out. And if you have any
other question, leave them down in
the discussion panel or reach out to me
on my social media. So I'll see you in
the next cross.
 Adi Singh, Videographer and Youtuber