Transcripts
1. Introduction: Oh. In a world where everybody wants
the cinematic look, only a few understand
where it truly begins. So here's some tips but
here's the problem. We chose expensive gear, fancy cameras, fast lenses. Only to end up frustrated. But what if the secret
wasn't in the camera? What if it's been in
front of you all along? Yes, lighting, the invisible art that separates the ordinary
from the unforgettable. I'm Adi, a videographer who spent years
decoding the mystery. Through failures, frustrations, and hundreds of tutorials, I think I cracked the code. And now I'm handing it to you. No expensive setups,
no Hollywood budget, two lights, and a whole
lot of creativity. If you are ready to turn your
videos into pure cinema, this class is where it begins. This is the cinematic
lighting master class.
2. Class Structure: And before we dive
in, let me give you a quick overview
of what I've covered in this class and how I've structured
this entire class. In the first few sections, I'll start with the basics. I'll teach you what all different types of lights
are there in the market. What is the role of all
those lights and which light would be good for you if you're a beginner and what
lights I'm using. So I'll give you introduction of all the lighting because
I can understand that if you want to look online to buy a light
for your videography, there are tons of options, and it is just so hard to know which one would be good for
the purpose, what you serve. And once we have covered
all different types of lighting in the market, then we would move on to the
fundamentals of lighting. For example, we would be
learning about the key light, which is the main
light, we would be learning about back light. We would be learning
about the ambient light, for example, the
lamps, what I'm using. And we would also be
learning what are the main roles and
how we can manipulate the settings of the light or how we can manipulate
the position of these lights to create different look
or different feel. We would be learning
how a light can shape the subject and
shape the surrounding, how a light can convey certain
feelings to your audience. And once we have learned
all the basics and fundamentals, then
the fun begins. I'll demonstrate how to light various scenarios and
more importantly, show you how to achieve completely different looks
in the same frame by simply adjusting lights at different angle and simply adjusting the camera
at different angle. So I'll show you the
behind the scenes of a lot of different scenes, what I recreated from movies, and then I'll show you
my thought process of why I position the light a certain way because that's what
I was missing, as well when I started my journey that I would
see the final shot. I would see all the fancy
lights what people are using, but I wouldn't see
how they're using, where they have
placed the light, where they have
placed the camera. And that's exactly what I'm going to show you in this class. So now let's get started.
3. What is a Studio Light: In this section, we're
going to be learning about different types of lights which are available
in the market. And the first light and the most commonly
used lights are the studio lights
with a soft box. The studio lights comprises
of three components. First, the main light, second, is the soft box which is
attached in front of the light. And the third is a reliable
and sturdy tripod. I use studio lights
all the time. That's what I'm using to
light up this shot, as well. But with a twist that
we can cover later, since I started my journey, I bought these
cheap Amazon lights they serve the purpose
for that time, but a few months later, I ended up buying a proper studio light. And I use that studio light
for next four to five years, and recently I've upgraded
to another studio light, which I'm going to
tell you later, and that has changed the game. So if you are serious about filmmaking or
content creation, it is really important
to invest already in a good studio light
because once you buy that light it's gonna
last you for years. But yeah, we're going
to also be covering some different kinds of
other lights as well, so you can see which
one is best for you. But some of the pros
of studio lights are they are portable, they are handy, and they can help you create
any look you want. They are super versatile
and they're super common, and it is also really
easy to buy a lot of accessories for these lights. But some of the dimits are these lights, they can be bulky. The lights itself
wouldn't be bulky, but the soft box, which comes in front of the light,
that can be bulky. And if you have a small space, that can be a bit of problem. So a lot of times when I started I was living in a
small apartment. I had a really tiny room, and I would really struggle with how to keep the light
at a certain position and a certain angle to get the best look
because it was just so bulky and the soft box in
front of it was also so bulky. So you have to
keep that in mind. But other than
that, these lights are the best investment
ever for anyone. And you can use these lights
to lit up interview shots. You can also if it's a
good and powerful light, you can also use these
lights outdoors, which I'm going to
show you later.
4. My Favourite Studio Lights: And now your question would be, which light I'm using? So I'm using a light
from a brand called Sun Crafter and why I
chose this light is set. It is a key light, which is extremely,
extremely powerful. Like, right now, I'm running this light at about two or 3%. And if I put it 200%, the whole footage
would be overexposed. But that's not the main
reason why I got this light. I got this light because this
light is also an RGB light, so I can change the color of these lights to any
color what I want. So that's why I think
this light is really handy because I use it
for interview shots, talking it shots like this, but then I also use
the same light for creating any
cinematic environment or creating any dramatic look. So that's why I've
invested in this light. It's a pretty good light
for the price range. So that's the light
what I'm using.
5. Should you get an LED Light?: And the second
kind of lights are LED lights or LED strips. You might have seen those
lights in movies or you might have also
seen your favorite creators using those lights. They are pretty good.
They are also cheap, and you can also
change the intensity of lights in LED lights. But the problem is the
quality of the light coming out from the LED lights
is not that good, and sometimes they're
also not that strong. But for some of you beginners, I think an LED light can also be a game changer because
it's a small strip. The soft box which
comes in front of that strip is also really tiny. So if you are living in a
compact space and if you just want to light up your scene just for a talking
head shot like this, then I think LED light can
be a good option for you. You don't need to go for
a big and bulky soft box with a studio light. But the thing is that
the high end model of those LED lights
can be expensive. And the cheaper ones, they are pretty good for
the time being. But after a point, the
performance reduces or they just die out if
you buy from Amazon. Yeah, I really do your
research on the LED light. But if you're really
serious about filmmaking, I would still recommend to get a big and nice studio light. Or what you can also do is use an LED light as a
secondary light. So, of course, you can
get a big key light, and you can also
buy an LED light which would act as
a secondary light, you know, to act
as a fill light or a back light, what
I'm using here. But I'm not using LED light. I'm using something
else, which comes next.
6. Why Tube Lights Are The Best: Stick lights or tube lights. I have a tiny stick light also from the brand
called Sun Crafter. It is called TL 30. And stick lights are, I think, one of my favorite
lighting equipment because they are just so small, so tiny, you can just
fit them anywhere. And if it's a good
quality stick light, you can create any
mood from that light. So the stick light, what I'm using is, you know, lighting up here,
lighting me up. So you can also control that
stick light with your phone. So you see, this is what
that light is doing, the tube light is doing,
which is at a higher angle. Which is acting as a backlight, but we're going to learn
about backlight later. So don't worry about it. So some of the pros of stick lights, they are highly portable. They are not that expensive. I think the one what I
have is just 100 bucks, and it is pretty damn good. And the good part about
these stick lights are you can also operate
them with the battery. So you don't need
to put a cable. So that's why that gives you flexibility to put it anywhere. I have used this light
as an ambient light, which I'll show you in
the upcoming sections. In the upcoming sections, I have combined
the key light and the studio light to create some really, really cool looks. I'm really excited to
share that section to you. But let's learn the basic
first. That's really important. Some of the things what you
should keep in mind while buying a stick light is that that is just a secondary light. That is just supporting
your scene along with the big light because a lot of times, if you have the light this interview shot like this, just one tube light or
stick light is not enough. And also, because
they are in a tube, the light spread can be a lot. So if I just want
to point it myself, that wouldn't be possible
with a tube light because the light would just spread everywhere in the room. So that's why I'm using a
little grid in front of my tube light so that the
light spread is not that much. So those things you have
to keep in mind is that the tube light cannot
be your primary light.
7. Practical Or Ambient Lights: And the next one's
practical lights. So practical lights
are the lamps, what I'm using in the back,
the lamp which is here. So yeah, if I just
turn that off, I can show you how boring
the scene would be. So if I just turn them off, this is how it looks, and if I just turn them
on, this is how. So I'm using I use
practical lights in a lot of my shots because
that just looks cozy. That also gives some
depth in the video. But it's also really
important to buy, you know, the Phillips Hugh
kind of practical lights. You would also find a lot of cheaper options for
these practical lights. So if you have a table lamp, you can make it cozy by adding more warmth by changing
the color of the light, and you can also make it
more blue or some other crazy color if you want to
go for a creative look. That's why it's also
really important that if you want to film in
a studio like this, you know, or if you
want to film in your home office or if you
want to film in your home, really make sure to get those good RGB light
because these lights, what I have, they are not RGB, so it can be really white or
it can also be really warm. So now I've set it
up to 3,300 kelvins, both the lights, so they are
giving this warm feelings. So that's why it's
not just about buying the most expensive light. It's also really
important to focus on the ambient light
because that is what is giving the
look to your scene.
8. Why Use A Softbox: And now let's talk
about soft boxes. Remember I told
you that I'm using this key light as a studio
light with a soft box. Of course, when you go
to search for lights, there would be thousands of
options for a studio light, but there would also
be thousands of options for a soft box. So a soft box is an equipment which comes
in front of the light. This is how my image would look. Without a soft box, you can see it is super harsh. So that's a light
which is directly coming from my studio light. But if I put soft
box on the top, then that makes the image
a little bit softer, a little bit smoother,
and that looks a bit more neutral,
a bit more cozy. So that's why a soft box
is used on a studio light. But with soft box,
you should buy. So I'm using a soft box, which is a parabolic soft box. So it is circular. It has this bigger depth. So the bigger the depth is, the softer your image would be. And the bigger the soft boxes, the softer your image would be because these parabolic soft box, they come in
different sizes. They are 60
centimeters diameter, 90 centimeters, 120, 180. But the problem is, the bigger the bigger
softbox you have, the more space it needs. So since the last four years, I'm using this
parabolic soft box, which is 90 centimeters, and I think that is good enough. Cannot imagine 120
centimeter diameter soft box here because that would
just take so much space. Parabolic soft boxes are the most common soft boxes used by creators or also
used in films.
9. Rectangular Softbox: There are some other
soft boxes as well. For example, a
rectangular soft box. So what a rectangular
soft box does is that it kind of helps you
to not spill the light. So there are some
of the soft boxes, which is 30 centimeter by
120 or 30 centimeter by 90. So what they would do is
that they would narrow down the space of
the light spilling. The leaner the soft box, the leaner the
rectangular soft box, the less light it
would spill all over. And the bigger the soft box, the more light it
would spill over. The soft ox what I'm using is, of course, 90 centimeters. It is spilling a lot of light. So this is how the image
looks originally when I film, and this is how it
looks, you know, when I did the color grading
and color correction. So that's why
rectangular soft boxes are used to minimize
the light spill.
10. Strip Or LED Softboxes: And now we have the
strip soft boxes. So strip soft boxes are
used with the LED lights. They are really thin and
they are super portable. But then the light which comes out of that
is not that smooth because the depth of the
soft box is not that big. So yeah, you have to be mindful while choosing
the soft box. If you're a beginner and
if you're serious about content creation or if you're serious about
learning filmmaking, I would just go
for a big soft box and 90 centimeters, I would say. It's a good starting
point to learn, and it gives you just
so much possibility. I just have one soft box, and we would be recreating
a lot of crazy scenes with just one soft box even without soft box, don't
worry about that. This class is all about learning cinematic lighting
with minimal care. So now that we have discussed the commonly used soft boxes, there are also
different types of soft boxes which are
used in the industry, such as a Chinese lamp. There are some big diffusers which are used on a movie set. Aria, I am assuming that
you are just a beginner. You are a creator like myself. And first of all, like, we don't have the space to
store 200 meter soft box. So yeah, that's why
I didn't discuss those soft boxes with you because I don't want
to waste your time. So now let's move on
to the next section.
11. What Is A Key Light: Yes. Once we have learned about the type of
lights and the equipments, now it's time to light them
up and learn about them. So the first type of
light is the key light. So the key light is the
light which is coming here, what I'm using to
light up myself. And the key light is a
main light in the scene. The key light kind of
defines the entire scene. A key light can also
be placed here. A key light can also
be placed behind me. A key light can also
be placed outside the window acting as a
sunlight or a moonlight. We're going to talk
about those later. But yeah, a key light is the
main light in the scene that determines where the audience
should be focusing on. And how the key light
is, for example, if the key light is soft or
if the key light is hard, that determines how the
audience would feel.
12. Different Key Light Placements: Once we have learned
what is a key light, now let's talk about
different types of key lights placement
in an interview shot. Because once you
learn how to light up a subject in a talking
head shot like this, then you can
understand the basics, and then you can start
creating whatever you want. So the first placement
of a key light, the most usual placement
of a key light, while lighting up a subject while doing an
interview or, you know, just while lighting
up a subject in general is placing the
key light at 45 degrees. This is how the subject
looks when I placed just one single key
light at 45 degrees. It gives a well defined look. It is perfect for interviews, and it also provides dimension to the face of the subject. You can see that one
side of the face of the subject is a bit lit up, and the other side is
a little bit dark. So that creates a bit of depth, that gives a bit of
shape to the face because if I put the key light right in
front of the camera, and then the key light is
facing head on on the subject, this is how the image looks. So if you see if I compare
the angle at 45 degrees, and if I compare the
angle at zero degrees, there is just so
much difference. If you want to create
more drama in the scene, bring the key light
to 90 degrees. So what happens in this
shot is that one side of my face is lit up and the other side is
completely in shadows. And that creates a bit
of drama in the scene. And a lot of movies, a lot of TV shows, they use this technique where they place the key
light at 90 degrees. You can also use this
look for an interview if you want the interview to
look a bit more dramatic. So yeah, I'm just
giving you the tools, and then you can just
create how you want, what you want, depending on what kind of feel
you are going for.
13. What Is A Rembrandt Light: And the next one is
Rembrandt light. So remember, in the
first scenario, I told that put the key
light at 45 degrees. What remembrant
lighting does is that, you bring the light a
little bit higher and then tilt the light
at about 45 degrees. So now what's happening is
that the light is way above the subject's head and it is casting a shadow
on the other side. And if you can see the
face on the other side, it creates a triangle, and that gives a really
cool dimension to a face. That is called
Rembrandt lighting. And why it is called
Rembrandt lighting, as most of you know, Rembrandt was a well
renowned artist, a well renowned painter. In most of his painting, he would paint the portraits
of people like that. On one side of their faces, they would be a bit
of trangle that gave such a beautiful depth to the face as compared
to if you just keep the light head
on to the subject. So, yeah, that's Rembrandt
lighting for you.
14. Butterfly Lighting Technique: And the next one is
butterfly lighting or paramount lighting. Here we place the key light
in front of the subject, but we bring the key
light a little bit high, and it is pointing
down on the subject. Now what happens is
that the top part, the forehead, the hairs,
they are a bit lit up, but the bottom part of
the subject creates a soft shadow under
the nose and the chin. You can use this
lighting technique when you want a symmetrical
look on the face, when you want a symmetrical
look in the environment. At 45 degrees, you don't see the entire face of the
subject, but in some scenes, you want to show the entire
face of the subject, but you want it to
look still nice, then you can use the
butterfly technique.
15. Do's And Dont's Of Lighting: Those were a few lighting
techniques with the key light, and few things what you
should be keeping in mind when lighting a subject
with the key light is at, make sure that the subject, they don't have raccoon eyes. And what I mean by
racoon eyes is this. So now you can see that there's a lot of shadows under the eyes. So you always have to make
sure that you're placing the light at a good
enough position and placing the subject at a good enough position
that there is not so much darkness
under the eyes. And the next step is if you want to light up a subject
in a neutral scene, then try to make the
light a little bit soft. Sometimes, from your soft box, if the light is not that soft, then bring the light a little bit far away from the subject. The further you
bring, of course, the intensity of the
light would reduce, but the softness would increase. So really, when you're
filming yourself, like how I'm filming, you just do a 1 minute
shot, you know, when you're filming
for the first time, then look in the computer that is the light looking
really harsh or not. If it's looking harsh, and even if you brought
the light further back, it's still looking harsh,
then what you should be doing is hang a diffuser in
front of the light. And that's exactly what I'm
doing here in this room. This is how this scene would
look without a diffuser. Or you know what?
Let's just talk about this entire setup
later. Don't worry.
16. What Is A Fill Light: And now let's talk about the
second type of light source, which is the fill light. A fill light is a
secondary light source in a lighting setup and is primarily used to reduce the contrast or
soften the shadows. In this scene, you
can see that this is the video this is how the image looks without the fill light, and this is how the image
looks with the field light. And, of course, a fill
light wouldn't be as strong as the key light.
17. Different Fill Light Placements: And now let's learn about
the placement of flight. So usually fill light
is also at 45 degrees, but on the other side
when you are lighting up a subject for an
interview in normal cases. But what you can also
do is that you can also move the fill
light to 90 degrees, and that would also give a different dimension
to the face. And sometimes what you
can also do is bring the fill light at about 45 degrees but
behind the subject. And that time, the fill
light becomes a backlight, but we're going to
learn about back light in the upcoming section. But yeah, let's talk a bit
more about fill light. The fill lights are not only just lights,
what you can use. You can also use a reflector
which can act as a fill. When I speak of reflector, what I mean is this. So you see this white how do
you say? It's a white cloth. And what this white
thing is doing right now is this is giving
me a positive fill. So this reflector, it is
acting as a positive fill, which means that the
sunlight is this blinding, which is coming on my face. That is the key light, but since I don't have a fill light, I can use this as a reflector. And what's really cool
about this reflector is it has different
different sites. So this is how my
face looks when the white side is lighting up
my face as a negative fill. So let me show you the
other sides as well. And I'll show you how
the gold inside looks. So you can see the
difference that now my fill light is a little
bit warm because now, of course, the sunlight is being reflected from this
golden reflector. So this reflector,
what I'm showing you, I think you can buy
it for super cheap. It's just a piece of plastic, so you don't really need
to have an expensive one. And I just got it from Amazon. The reflector, what I'm using is 60 centimeters by
120 centimeters. So it is pretty big, and it does a great job with all
my filming needs. So yeah, let's talk
about negative fill and show you how that looks. So you can see this reflector is quite big and it
comes with a packet. So the first side is, of course, the white side. The second side is
the golden side, and we have more sides. So that is hidden
somewhere inside here. There is a hidden thing, which is a diffuser
that I would be using in some future scenes, and I can also show you now, but let's show you the
other sides as well. Now you can just flip it around and I can put the
diffuser back again. And now, if I put
the black side on, so now let's see how that looks. Now the right side of my
face is completely dark. One side of my face is, of course, lit up by the key light, which is the sunlight
because I've put a black reflector here that
is absorbing all the lights. And this kind of light absorber, the black light absorber, it is called negative f, and we would be using this
in the future scenarios as well where I would be showing you some
real life examples. But now let's show you how
can we diffuse the sunlight? So let's take the reflector out. So here we're just
going to take it out. And it works, and I'm hoping
that it shouldn't fall. And now what this
is doing is this is giving me a super soft light. So this is really acting
as a studio light. So if I just turn
a little bit more towards the light as if the
light is at 45 degrees, you can see how nice my face
looks with the sunlight, but we're using this
cheap diffuser. So fill Light is, of course, adding a positive fill, you know, reducing the contrast. But if you want to
increase the contrast, then you can use
a negative fill, which simply means just
blocking the light on one side and
you can do that is by bringing a black cloth on the other side on the opposite
side of the key light. Fill lights can also
be ambient lights. For example, if you
are lighting up a scene from one side and if
you don't have a fill light, then you can use a lamp
on the other side, and that would act
as a fill light. So fill light, yeah,
does not has to be an expensive studio
light or does not has to be a
film making light. It can also be just light
which is just lying in your
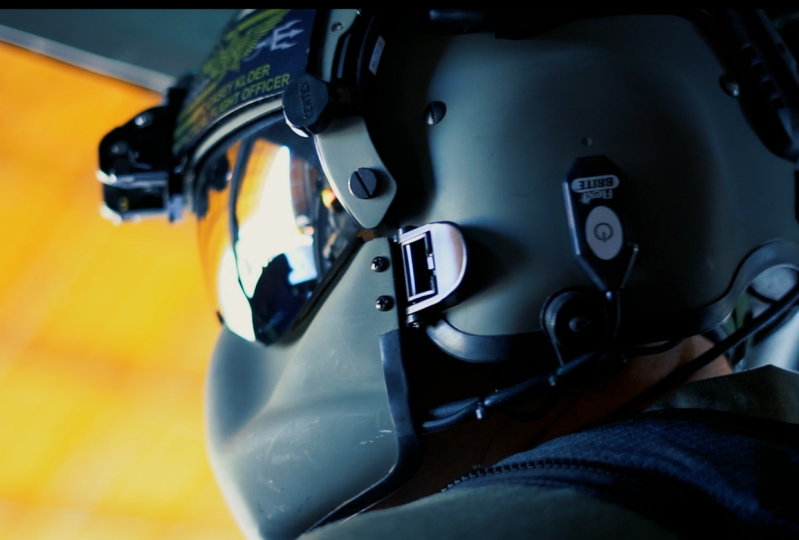
18. Why Use A Back Light: Now let's talk about backlight.
What is a backlight? Back light is placed behind the subject often
at a high angle, pointing towards the back of
their heads or shoulders. For example, in this case, you can see that how the scene
looks without a backlight. And now, when I
turn the backlight, the shape of the subject
completely changes. The primary function
of a backlight is not to light up a subject, but to give a different
dimension to a subject by, you know, adding back light. And most of the times
backlight is also used so that you can separate the
subject from the background. So the viewers can
see the depth, the distance between the
background and the subject. In this case, I'm also
using a back light, which is lighting
myself from there. So if I turn that off,
this is how I look. And if I turn that on, you see, it gives that extra dimension. It's lighting me up on
the edges of my body. And yeah, so that's
what back light does.
19. Different Backlight Placements: And where you would be
placing the back light. So the classic back
light placement is on top of the subject. So here you place the back light behind the
subject, but at an angle. So it is lighting the
subject from the top, and it is lighting the
head of the subject. And that, of course, separates the subject from the background. But in a lot of
cases, a back light can be used on the
side of the subject, like how I'm using now. So it is kind of
complementing the key light. So the key light is lighting
me up from this side. And to avoid a lot of shadows, I've used the backlight. But if you want to go
for more dramatic shot, you can keep the backlight
on this side of the subject. So one side of the
subject is lit up and the other side
is completely dark. I absolutely love using
back lights, and, yeah, you can do a lot of
creative shots as well with the backlight when
you introduce colors. So that's why the sun Crafter TL 30 I'm using as a
back light is an RGB, so you can use any
color you want. If I do crazy blue or red, that gives a bit more drama to the subject's face and
to the entire scene. And sometimes you can light up an entire scene with
just a backlight. So you turn off the key light,
turn off the fill light, and just leave the backlight on, and that is called a
silhouette effect. In that effect, just the back light is
lighting the subject, and that gives a bit of drama. So here you can kind of
see the subject's face, but not entirely, so
that creates a bit of curiosity that creates a
bit of drama in the scene. And of course, with
the backlight, you can use a harsh backlight
to create a bit more drama, and you can also use
a soft back light, which is what I'm using now. So it's there but
for normal people, they cannot really
tell that it's there. Yeah, that's the
difference between using a hard back light and
a soft back light. And one important
tip while using a backlight is avoid
light spilling. You see, in this case, the light is spilling and it
is going everywhere, and it's also coming on
the lens of the camera, and then you can actually see that there is
a light placed. Whole point of setting up
light in a scene is that the audience shouldn't
know that it's a light. It should just come to them
a bit more obvious that, ah, oh, there is a window. So of course, there
would be a light coming from there
or there is a lamp. So that's why the light is
lighting up the subject here. And sometimes backlight can also be achieved by using
practical lights. For example, how we discussed
that in field light, the field lights can be
achieved as a practical light. Blight can also be achieved
as a practical light.
20. How To Use Practical Lights: And next one is ambient light. So yeah, as you can see,
there are table lamps here. So yeah, along with
the key light, the fill light and
the backlight, I think ambient light, it also just acts and gives a bit more
dimension to the scene. So yeah, if you have
some table lamps, really use them in the shot. And in the upcoming section, I'm going to also be showing you how to use a mixture
of ambient light, a key light, and a back light to create some dramatic shots. So don't worry about
that, but yeah, ambient lights are also really important to be
used in any scene, whether it's an interview, a
drama scene or any kind of.
21. My Interview Lighting Breakdown: And now let's talk about how
did I light up the scene. So, of course, I'm using a
key light but with a twist. So this key light
has a soft box, a 90 centimeter soft
box in front of it, but it also has a grid. So a honeycomb grid
looks like this. And what that grid
does is that it kind of helps to not spill the light. So, for example, if you
see these two cases, the first one was without
the honeycomb grid. And the second one is
with the honeycomb grid, and you can see the
difference between the spilling of the light. Once I put everything, the light on my face was
still a little bit harsh, and I didn't have enough room to place my light
further away from me. So what I did was I hung a bed
sheet in front of my face. So this is how the light
looked without the bed sheet. So you can see this is how I
look without the bedsheet. So, of course, I can reduce the intensity of
the light, as well. I can reduce it like so, but I still feel that it's a little bit harsh on the face. The shadows are a
little bit harsh, and this is a normal
interview shot, so I didn't want to go
for that harsh look. So that's why I just hung a bedsheet in front
of the light, and then it gives a
much softer look. But what happens is that as
soon as you put the bedsheet, the intensity of
the light reduces because it is filtering
out a lot of light. So then I would just
increase the intensity of the light until the exposure
looks good in the video. So yeah, that was my key light, and it is placed at 45 degrees and a little bit
higher than my face, and it is just
pointing towards me. So that's the key light. And now I'm not
using a fill light. I'm only using my
monitor as a fill light. So my monitor is
just placed here, if I just turn that off, this is how the scene looks. It is not really doing too much, but it has a subtle look. And if I turn this on, and I've just left a white
background on the desktop, so it is giving
some sort of light, really subtle light,
but not that much. And then, of course,
the next light, what I'm using is the backlight. And I'm using why I've placed the back
light there is that that light is also kind of depicting the light
coming out of that lamp. So that's also really
important while lighting up a scene is that you should only place the light in the positions where there is already an ambient
light placed. For example, if I turned
off both the lights, then the back light
wouldn't really make sense. Let me just turn that off. So if I turned off those lights, then the backlight is
not really making sense. Like, we don't know where
that light is coming from. But if I turn on the
lamp on the corner, then the people might think that the lamp is emitting
that light on my face. I'm just using the
combination of these two studio lights
to light up this scene, and the back light is also at 45 degrees and a
little bit higher. And then next is
two ambient light. So I just have those lamps at really low intensity
so that they are not too distracting
because here, you should be focusing on
me, not the background. So that's what you should
also keep in mind is that the key light
should be the strongest. The back light should be not
that strong as key light. That's why I recommended you to use Phillips Hue lights or some other lights
because you can change the intensity because
with the normal lights, you cannot change the intensity, and they would be so bright. And then to complement that, you have to increase the
brightness of the key light. And the more you
increase the brightness, the harsh the more harsh the
face looks of the subject. So yeah, this is
how the scene is. And trust me, it took a lot of trial and error to set up this shot because we just
moved to this new house, and then I have this new studio, and I tried a lot of
different types of settings, a lot of different
types of light setting, a lot of different
types of camera placement, the
background placement. And then in the end, I came
up to this conclusion that I would be using this setting
to teach this course. So there is also a thing
that if you're a beginner, and, of course, you
bought the lights, you took the course,
you learned everything. Things also might not
work in the first group, but you have to keep trying, maybe come back to
the lessons what I've taught and really see where
I've placed the light, why I have placed the light, and then try it for yourself. And then just do a lot
of times just practice. And the more you practice,
then once you have the setup, at least the talking setup, then next time if
you have to film, you don't have to spend
hours to film the setup. Like, trust me, I've spent the past couple of days
just trying to figure out what would be the main talking head shot
setting for this class. And once I have
this setting now, I would be using this in
the future classes as well. But I would also try
some other settings because it's also
really just nice to challenge yourself and just give different dimensions
to the student. And yeah, just lead by example that if I can do it,
you can do it, too. So yeah, learning the
basics is one thing, but then just trying
it out and figuring out for yourself is there
you would learn the most.
22. What Is A Color Theory: Color Theory for
cinematic lighting. So some of you might
have heard about this. Most of you not. But
what is a color theory? Color theory is an art
and science of using different kinds of colors to create the look what you want. For example, the most
common colors patterns are teal and orange. You would see in a lot of movies and why
people choose teal and orange is because if you
see the color theory graph, teal is on one side and orange is on
completely other side. And those are called contrasting colors because they both have completely different
look and once combined, they give a really nice
look in the image. And I have used a lot of these kind of colors in
the upcoming section. And now you would know that
why I've used those colors because they just make the
image look more dramatic, make the image
look more vibrant. The warm colors such as
yellow, red or orange, when mixed with green, blue or purple would give you
really cool look. And now that you were listening
color theory from me, if you go back and check most
of the movies or TV series, they use color theories because a lot of times you would see
that there was a yellow, and in the background,
there is a blue light or there is a cyan
light somewhere. And you can choose what
kind of look what you want. For example, if you
want a cool look, if you want a cold image, then your primary
colors would be the cool colors such as
blue, green, or purple. And then the supporting colors
would be the warm colors, such as yellow, red or orange. But if you want to go
for a warmer look, then the primary colors
would be the warm colors, and then the secondary colors
would be the cool colors. And that's what I've used in
the upcoming scenes as well, that if you see this scene, this was the cozy look where the warm colors are
the dominant colors, and there is a little bit of blue color in the background. But I completely changed this entire scene to
a cold scene by using the cool colors as
the primary color and then the warm color
as the secondary color. So you can use the color wheels to light up the scene in
a few different ways. The first way is
complimentary color wheels, what I've told you already. But what you can also use is something called
analogous colors, which are the colors
next to each other. For example, if you see this
scene from the movie Dune, this scene has yellow,
orange and red. It doesn't have any other
complimenting colors. And they give a
certain look as well. So that kind of
lighting technique is called analogous
lighting technique. And there's another
way you can light up a scene is by triad colors. In this scene, you can use three different
complimentary colors. For example, red,
blue, and yellow. So obviously, out of all the three colors you
can choose which can be the dominant ones and which two are not so dominant
in the scene. So yeah, that's why color theory is really important to
learn for beginners and once you learn it
and once you start implementing the color
theory in your scene, that would completely
change the game. And that's why I would recommend
RGB lights as well for your key light and the
supporting light because yeah, interview shots is one thing, but if you want to go
for a creative look, you can do that if you
have an RGB light. And that's why I'm using the
Suncrafter because yeah, the combination of these two
lights are just so good. So yeah, if you are interested in checking out these lights, you can check out my
Amazon Link down below. Of course, if you buy the
light from that link, that would support me as well.
23. Real World Examples: Now that we have learned
about all the basics and all the theory of
cinematic lighting, now it is the fun part. So I'm gonna be going through
different different scenes, and I'm going to be teaching you exactly how I lit up this scene. And what was my thought process? What was my thought process
of placing the camera, of placing the light, of reducing the light in
some places. So let's go.
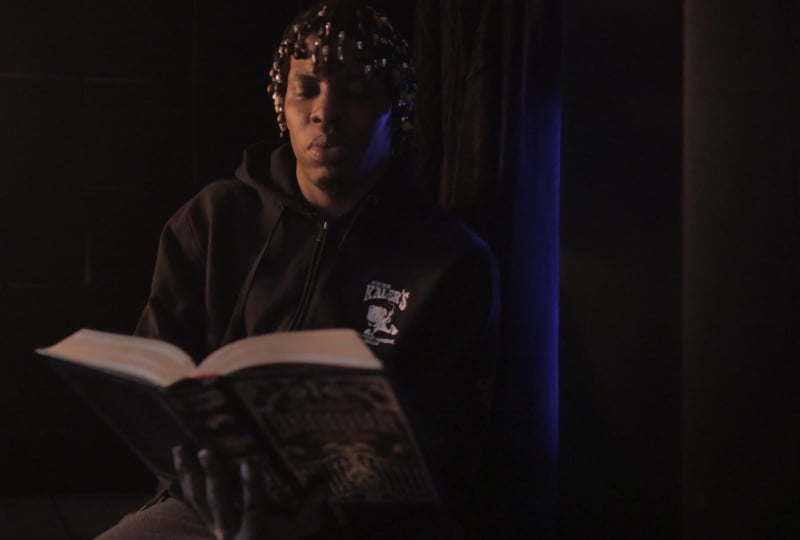
24. How To Create A Cozy Scene: In this scene, I'm going for a cozy look in my home studio, and we have one key light, and I'm keeping the camera
straight on my face. And the chair is
tilted at about, I think, 45 degrees. So yeah, so camera is not, like, straight on on my face. And of course, now
we're going to go to film the first scene. We have a problem. The problem
is that here I'm trying to depict in the scene
that the light is being produced from
the ambient lamp, but the lamp is already too much lit with my main key light. So what I would be doing is I would just tilt the direction of the soft box so
that the light from the soft box is not on the
lamp, it's just on me. And that's when the grid is also really handy because the grid is really helping
me to not spill the light on the plant and
on the walls behind me. I would also try to bring
the soft box a little bit back because I felt that the light was
a little bit harsh. So I brought the soft box back, changed the angle, and this
is how the shot looks. It's a decent shot, but I also feel that my
face looks a little bit too warm because now
what's happening is that the light is
falling on my face, but it's also falling
on the curtains, and then the light is
being reflected from the curtains on my face
on the right hand side. Yeah, that is not really a
pleasing look, in my opinion. So what I did was, I also turned off
the ambient light, and then I opened the curtain. Once I open the curtain,
the glasses outside, they are acting as a black wall because it is still
early morning, so there so there's
no sun at all. And here what I would do, I would take the
similar shot again, and now I would have more
shadows on one side of my face, and it should be looking a
little bit more pleasing. But of course, now we
want to experiment a little bit more because
with one light, the scene looks pretty decent, but we want to experiment
with more light. So what I would be
doing is I would be using a fill light. So here what's going
to happen is I would be changing the color of
the fill light to, like, a moonlight, bluish
light what I would be doing is I would be placing
this fill light outside. Once I place the
fill light outside, I'm also making sure that
fill light is behind me, so it is kind of
acting as a backlight, so it's not straight
on on my face. So there would be a
subtle bluish look because of dislike placement, and it would look like I have a moon light on my
face on one side. So this is what the scene looks, and here we just
use one key light, which was lighting one side
of my face and one backlight, which is, of course, also
acting as a fill light, and it is giving that
moonlight effect. So what do you think?
And of course, I also change different
camera positions. So some shots were medium wide, some shots were close up, and then I'm also showing
the book what I'm reading. So that's also really
important that if you are filming any sequence, make sure to take wide, close up and medium shot. And yeah, that would give
you a full sequence and, of course, give more
information to the audience.
25. How To Recreate Moon Ligh: In the last scene, we made
the setup a bit more cozy. But in this scene, we want
to keep it a bit more cool. We want to show the
night light a bit more. So to achieve that, what I did was I put the key light outside, and to make it less harsh, I, of course, hung my bedsheet
on top of the key light. And because of that, it gives a really nice and soft look on the room on the walls of the room on the
furniture, on the chair. And once I sit there,
then it almost looks like there's a
moonlight falling on my face. And to compliment the moonlight, to make the scene a
bit more vibrant, I'm using my lamp which kind of gives a
warm and cozy look. And in my opinion, the light of the lamp
was not that powerful. So what I did was I placed another my small tube
light behind the lamp. So in reality, there are two lamps which is
giving the warm light, which is the table lamp
and my tube light. But of course, you don't see
the tube light in the image. So people the
audience would think that the entire warm light
is coming from the lamp. That's why it's also
really important to be a bit more mindful about the
placement of the lights. It almost should look like
there was no lights at all. The scene is lit up by quite obvious things like the
table lamps, like the moon, because if the audience would figure out that you have
placed the lights here, you have placed lights there,
you know, studio lights, then the whole scene looks
a bit more artificial. So, yeah, that's how
we achieved this look, again, with two studio
lights, of course, I took shots at different
angles, you know, at different focal
length just to give more information
to the audience. So yeah, what do you think?
26. Filming Indoors Using Sunlight: And here are some more
examples of daylight shots. So what I did in this scene
was I am just lying down on the ground and the sunlight
is falling on one side. That is making my face look
dark on the other side, and that creates a bit
of drama in the scene. I placed the camera
on a C stand, and here I'm just
sitting on the chair and the sunlight is falling
on one side of my face. So kind of you can
see the shadows. You can see my body half lit up. And I also took some more
shots at different angles, and in all the angles, you can see that the sunlight is falling on one side of my face, giving that cinematic look. Just make sure if you're
filming under any light, the light should be at an angle.
27. Filming Outdoors In Direct Sunlight: And here we are
filming when the sun is lighting one side of my face. This shot can be a
little bit dramatic, you know, if you want to
use it for that purpose. And yeah, the sun is pointing
on my face as a hard light, and that can serve one purpose, but we can experiment
with something different. So let's try that. Now what I've done is that I've put a white bedsheet in between
myself and the sun, and that gives me a really
nice and soft look on my face. In the previous shot, you saw that there was a lot of harsh light and that
can serve one purpose, that can give more
dramatic look. But this shot, it can
give a bit more softer, a bit more neutral look. And here what I can
also do is I can just use the sun
as a mbrant light. So now the sun is at 45 degrees, and it's also I
think at an angle, it's not super on my head. It's at 45 degrees, I would say, and it's pointing down and the light is pointing
down towards me, and that gives a bit
of drama on my face, that gives a bit of
contrast on my face. One side of my face has
a little bit of shadow, and another side is
a bit more bright. But now, what are we going to do is we're
going to be using this reflector to see how it affects the
light on my face. So this would be the black side. So if I put the black side here, now you can see that there's a lot more darks on the
left side of my face. And if I just flip it to white, so now the shadows on my face
would be a little bit less. So I'm just holding it
on with my hands here. And if I take it out, so this
is without the reflector. So you can see that
there is a subtle change in the face of the subject. So, yeah, we are doing
everything for free. There's no light used,
and still you can get professional look on
the subject's face.
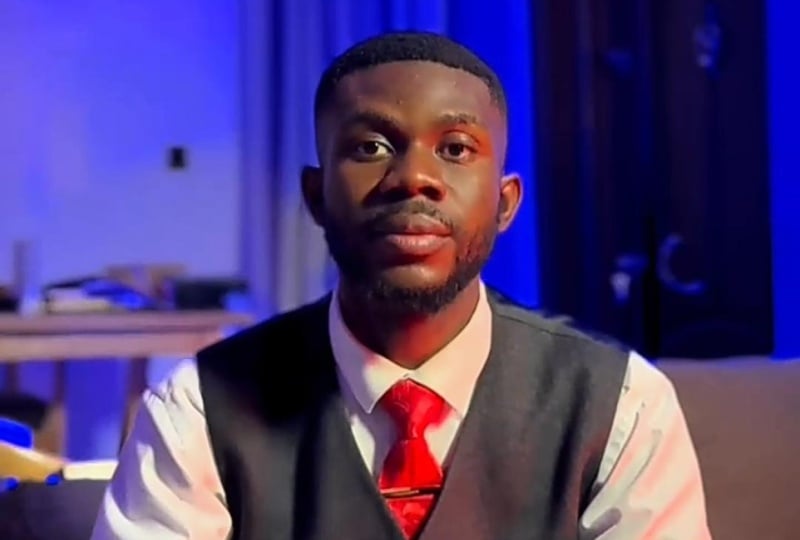
28. Studio Taking Head Lighting: So this would be a talking
shot in my studio, and I'm just trying to figure out what kind of light
position is good. And in the first setting, I'm keeping the light on my left, and the sunlight is falling
on my face from the right. And of course, I
put the light at 45 degrees angle from
the camera. Is a shot. It looks a little bit
decent, but, of course, here, people can tell that
I've put a light on my right. And it looks a bit unnatural because the sunlight is
falling from one side. So, of course, the side where
the sunlight is falling, that side should be brightest. So what I did was to
make it feel right. I put the key light
in the direction where the sunlight
was actually falling, and I have put the
camera right in front of my face because it is
a talking head shot. And this is how it looks once
I place the key light on the same side where
the ambient light is. This is what I meant in the previous section was this is what is called motivated light. So that your audience
would feel that the light is coming from
a natural light source, whereas it is actually coming from from an artificial
light source. So yeah, this is
how the shot looks. And if I turn off the key light, then you can see how dark
it is because, of course, the sunlight is actually
lighting up the background, not the subject,
which is myself. And the key light is, of course, helping me to light
up the subject. But if I make the shot
in a wide angle lens, then I can see that one side of my face is completely dark. And if I don't want it to be too dark, then
what I would do, I would just put a fill
light on the other side so that it is giving just a
little bit of fill on my face so that there are
not much shadows on one side of my face
because I'm not really going for a
dramatic look now. So yeah, what do you think?
29. Faking A Sunlight Indoors: So this is one of my
favorite scenes so far. So I have made an entire
video of coffee making ASMR. And, of course, the
light what you see in this video is all fake. So how I've created this
light is with my Suncrafter, the main studio light,
and I've put a barn door in front of the light so that the light is not going to spill. And I'm not using
any reflectors or any diffusers in the front because the sunlight is
usually quite harsh. It cast quite strong shadow. So that's yeah, that was
the look I was going for. And this is how it looks in the kitchen where I
would be filming. But I thought it looks
a little bit fake. I brought the light to an angle
where the sun usually is. This is how it looks
with the light, and this is how it looks
without the light, and it looks amazing. And of course, I am
placing the camera at different different angle
and making some shots, which would fulfill
the sequence. And one thing what you would notice is that whatever
shot I'm taking, the light is on almost
opposite side of the camera. So I'm so my camera is
never next to the light. My camera is never
parallel to the light. Always at an angle, mostly
it is opposite to the light, and that also gives a really
nice and dramatic effect. And because the light
sometimes was too harsh, so that was casting
a lot of shadows. So for that, I have
used the reflector, and that is lifting up
the shadows a little bit. So yeah, this was the shot, and of course, I have changed
a lot of different angles. I have filmed close
ups, wide angle shots, mostly close ups, and I'm also making sure that I'm
recording the audio. So yeah, and this was the final shot where
I'm just coming, and yeah, you can
also see here that the light is the sunlight is just lighting one
side of my face. And that gives a
nice cinematic vibe. So yeah, what do you
think of this sequence? So you see with one light, you can make the
light as a moonlight, you can make the
light as a sunlight. So that's really cool part about having an RGB light. So
yeah, what do you think?
30. Filming In Bedroom - Part 1: So this is another
very interesting scene what you can create
in your bedroom. So here, of course,
the first step was to close the blind. So this shot was taken
during the daytime. That's why I've eliminated
any outdoor light. So yeah, that would give
a nightlight feeling. And then I have put my studio light without any
attachment in the front. And then I have, of course, hanged my good old bedsheet. That bedsheet is giving
me that soft, creamy blue light that would look to the audience that the moonlight
is coming from outside. And to complement
the blue moonlight, I have placed a warm table
lamp next to the bed. And because the light from this warm table lamp
was not enough, what I've done is
that I have put my tube light behind
the table lamp. So to the audience, they, of course, wouldn't
see the tube light, and they would think
the entire warm light is from the table lamps. And one more thing which
is really important, what I've done in this
scene is that I've placed some dark towels next to my
face on the left hand side. The reason for that is
that I was afraid that the moonlight would
fall on the wardrobes, the white wardrobes, and then they would reflect
back on my face. So I didn't want
the blue light on my face where it's not needed. So that's why I put
this dark towels, and I also took some shots at
different different angles. So yeah, this is it. So let
me know what do you think?
31. Filming In Bedroom - Part 2: Mm hmm. Now what I wanted to do was I wanted to create
a sunlight look, a harsh sunlight look. So for this, what I did was I put an attachment in
front of the light. This is just the blinds
from my bathroom, and it was quite small, so I just took it
out just to have some texture on the
bed on my face. So it kind of looks like the sunlight is coming
from the window, and the window had these blinds. And that is also helping me to eliminate the direct
light falling on my face, which might look a
little bit harsh. So after adjusting the
light and the blinds, this is what my shot looks like. And in this scene, I'm
just using one light. There's no complimentary light because it just
wouldn't make sense.
32. Faking A Moon Light: This is a very
interesting scene that I've lit up with just
one studio light and a couple of ambient lights. So of course, as you can see, the studio light is placed outside, which is my main light, the TL 300 C, and I've changed the color of
the light to bluish light, which kind of replicates
as a moonlight. And to make the
moonlight a bit softer, I placed a diffuser
in the front. That gives me a really
nice and soft blue light which falls on the
walls of the room, and it looks like a moonlight. And the light which complements the moonlight is my table lamp. It's a mushroom lamp which
is just on my table. So yeah, that gives a
complimentary color. So that gives an
orange or warm color, and the blue light
gives a cool color. That's why this image looks
a bit more cinematic. And then I'm also
taking some close ups and some lights coming
out of my keyboard. And this is a very
special shot as well. Here you can see
that the moonlight is falling on my
face as a backlight. Is really subtle, so it kind
of looks like a moonlight. And to compliment that, I have kept the lamp in the frame, which is, of course, behind me. So yeah, that also gives a
really nice cinematic vibe. This is how I've
achieved this look, and, yeah, we just used one studio
light to lit up the shot. And if I turned off everything, then this is how the shot looks. And this was when the
moonlight was on, and this was when I turned on the table lamp.
What do you think?
33. Single Light Dramatic Scene: Here in this scene, what I wanted to do was
I wanted to light up the scene with just
one studio light. And I have achieved that with the sun crafter a three red C, and it's just a studio light, and it is of the same
warmth temperature as the light behind it. So there is a lamp ambient lamp, and that is almost the same temperature as
this studio light. And here I'm just sitting on a little stool in front
of the camera, a bit more close to the camera,
then I realized that the shot was
a little bit dark. So then what I did was I have these cheap reflectors
from Amazon. And what I did now was that I have put the silver reflector, and that is reflecting the
light on the dark side, that is lifting the
shadows a bit more up on the dark side because I thought that it was a little bit dark. And if I put the black side of the reflector,
then of course, you can see that
there's so much shadows on one side of my face. The reason why I have placed the light at this
angle is that because the audience might feel that
the light from the big lamp, the light from the
big studio light is coming from the lamp. So of course, it is
a bit intentional. You can see the background
lit up with the lamp, and you can also see
that I've turned on the screens of my
monitor and my laptop. So that is giving a little bit of depth on one side of my face, that is, of course, of a completely different
color, which is blue. So that is also
complimentary color. You see, you can lit up a
scene with just one light and some ambient light and
make it super cinematic. So yeah, let me know
what do you think.
34. Dramatic Lighting - Part 1: This is also a
very special scene what I have filmed in my
bathroom, with both the lights. So here, the primary light is the light which is just
hanging up here on a C stand. And I have kept the light to
a bit of warm temperature, and it is lighting me up as how a light on top of the
basin would light up. But yeah, the light on top of the basin was really
harsh and of really bad color temperature.
So that's why I've chosen the TL 30,
the tube light. And what I've also
done is that because the walls of the bathroom
is made up of glasses, I have put a red light outside my room,
outside the bathroom. And that is lighting the walls, and that is lighting a
bit of a background. That is giving a bit of
texture to the image. You can see that there
are some red lines, and that is kind
of complementing the warm greenish light. In most of the scenes
we had used the main light, the big light
as a primary light, but in this scene,
it is the other way. That's what I was saying, as well in the beginning
that tube lights are really special lights
because they can just fit it anywhere. They
can hang anywhere. So yeah, they can be
placed anywhere, and yeah, they are used in
a lot of movies, a lot of commercials,
a lot of music videos. So yeah, what do you
think about this scene?
35. Dramatic Lighting - Part 2: I mean, this scene,
what am I doing is let me change to my favorite colors, which is the teal
and not the reds, but a little bit lighter
red, something like that. This is my favorite
color combination because, yeah, I just love it. So here you can see
what is happening is that I'm using
complimentary colors. So I put the key light
next to the curtain, so it almost looks
like the light is coming from
outside, but it's not. I've put the key light here. And because the sun crafted
lights are RGB lights, I'm just changing the color. I'm changing the
saturation as well. Right now it is not at full red. It is a little bit
less intense red. But the blues here,
the back light here that is full
on with intensity. And with the backlight, I'm
using the small tube light, but to make the back light
a little bit softer, I'm using a little diffuser
in front of the back light. So yeah, I think that's
also really handy as well. And yeah, this is how
this scene looks, and you can see that
I am like this in the frame and I'm
lighting myself from one side from the opposite
side of the camera. So I am sitting here. For example, if I'm
sitting straight, the camera is at 45
degrees to my left. And, sorry, the key light is
at 45 degrees to my left, and the camera is at 45 degrees on the other
side to my right. And the back light is
at 45 degrees, as well. So from all these examples, I think you can really
figure out that the camera, the back light, the main
light, the key light, all sort of lights, they are
never in the same plane. For example, the camera is never parallel or never next
to the key light. The camera is never
next to the backlight. So this you have to really keep in mind it is such
a simple thing, but we often forget it, and then we realize that the whole footage is not
really looking cinematic. And you can see that just by changing different
different colors, we can achieve such a nice look. And because the curtains, what I have, it is not
super opaque curtain. It is not a curtain which can
eliminate all the lights, so you can still
see a little bit of outside light you can still see the lights
coming from outside, so that also gives a bit more
depth in the background. And this is also one of my favorite color combination you can see in a lot of movies. But I think the greens
are a bit too intense. So yeah, I'm just going to
reduce the intensity of the green, something like this. Or maybe and also
intensity of the reds. Something like that. The
curtains is also acting. It's also giving a bit
of mood to the scene. It kind of looks
like, it is a room. It's not just black walls, because I really
like I don't like it when there is an interview
shot or a shot in a movie or a lot of creators
they do that they like the background is everything is dark so
you don't really see. You don't have enough context of where the action
is taking place. And that's why it's
really important to keep an eye on
the background as well that Mac that
the background shouldn't be super
dark all the time. So yeah, this is how we
have achieved this shot. And of course, I'm using a
soft box and a grid on top because I didn't
want the light to be spilling on these walls. I want the light to
be just on my face. So, yeah, I think I think this look is really
cool. What do you think?
36. Thanks For Watching: Yes, that brings us to
the end of this class. And for the project
of this class, I want you to recreate at least three scenes of
what I've taught here. So, of course, you can use the sun crafter lights,
what I'm using, or you can also buy some cheap Amazon
lights to start with. That's what I did
eight years ago. But if you're really
serious, I would just go and invest in a good
and nice light. Yeah, the amount of
learning what you get from buying a professional
light is way, way more than buying a cheap light in the beginning and
then you have to buy the expensive ones or the
proper studio lights anyways. Really try to recreate
the three scenes. And if you are
struggling to recreate, then just comment
below in the class, and I would be
happy to help you. Just give me a screenshot and
tell me in the description that what is going on and
what problems you are facing. So yeah, that was the
end of this class. And to get more information about the project of this class, just go check out
the description. And yes, I hope
you've got a lot of value from the cinematic
lighting master class, and I'll see you
in the next one.
 Adi Singh, Videographer and Youtuber