Transcripts
1. Introduction: it stayed from CG Short Cuts Welcome to our course. I'm a freelance three D in motion graphics artist based in London, where I've been working in teaching in the industry for over 10 years. In this course, I'll show you how to create this looping photo real three D animation in Cinema four D, which I'm calling the Jelly Bean Factory. Thats kind of animation is super popular on Instagram and other social media at the moment , so it's going to be great for your online portfolio. By the end of this course, you'll level up your cinema 40 skills and be able to create your very own looping three D animation, or you need is Mexican Cinema 40 and Adobe after a fix. Don't worry if you don't have them, because you can download a free demo to start learning straight away. We'll also cover everything step by step so you can easily follow along, including modeling Cameron Scene set up looping animation with effective dynamics, lighting, texture, ring, rendering, basic compositing and uploading to instagram. There's also a bonus lesson on rendering with obtained for all you hard, calmer graph is out there, plus you also get access to my project falls so you can break them down and see exactly how it was done. That's it for now. Let's get started.
2. Welcome to the Course: Welcome to looping animation for Instagram and gift by C G Short Cuts is a few quick tips to help you get the most out of this course. So when you get started, you'll probably see something like this. It may or may not be this course, but the supplies for any courses on skill ship. The first thing you might want to do if you haven't already, is click the follow button here so you'll be notified every time we release a new CD Shortcuts Course. And you'll also get updates if we change anything or add to any of the courses. So the player window is pretty self explanatory. Israel The lessons. If you want to play one, you just need to click on one and it will play in this window. This is the play button. You can also scroll through nice and easy, and you can even come down here and add a note, which looks like this so you can type in a note for everyone to read publicly, or you can just make notes for yourself. Let's close that off and we'll take a look at the about section here. He is a well the information about the course again. It's not necessarily this course, but this is pretty standard throughout Scotia. And then we've got the reviews tab so you can write me a review in here. Hopefully, a good one. Next is community, and this one's a pretty important one. This is where you can have a conversation with myself for other students in the course. You can also ask any questions you might have here, and when you've completed the course, you can share your project here. It would be great to see what you create, so please do remember to shift. That's come up to the next tab, the Your Project tab. Here's where you'll find all the details of the course project, and you can also access the course resources down here. And these will change depending on the course you're looking at, and we've been another option here to upload your project. And then in our final tab, you'll be able to see all of the projects that have been uploaded. Although currently in this course, we don't have any yet, but unless you're looking at a brand new course, I'm sure they will be some projects in here, and that's pretty much it for the skill share interface. Each of our courses also comes with an exclusive Facebook group to make asking questions and sharing work a little bit easier. Sir. Let's take a quick look at that now. So to start with, you just need to find the Facebook group. For your course. You'll be able to find a link in the resources pdf document that comes with this course. We'll also put it on the screen down here. So when you follow that link, you'll come to a page that looks pretty similar to this. And in order to join, you just have to hit this joint group button. You'll get a pop up asking you a couple of questions, and if you just go through an answer, these and hit submit. We should be able to confirm that you are a student and you will be accepted into the group very shortly. Now, Facebook groups are pretty similar to the normal Facebook groups Out there. You'll be able to ask questions shut directly to the instructor and engage in conversations with other students. You can also upload your files and you're at work in one nice, easy place. We check the Facebook groups extremely often, so if you want a fast answer, this is definitely the place to go. Finally, for extra tutorials and resources, head to CG shortcuts dot com, and you'll find loads of stuff to help you out with your C G and motion graphics. That's it, for now, let's start the course.
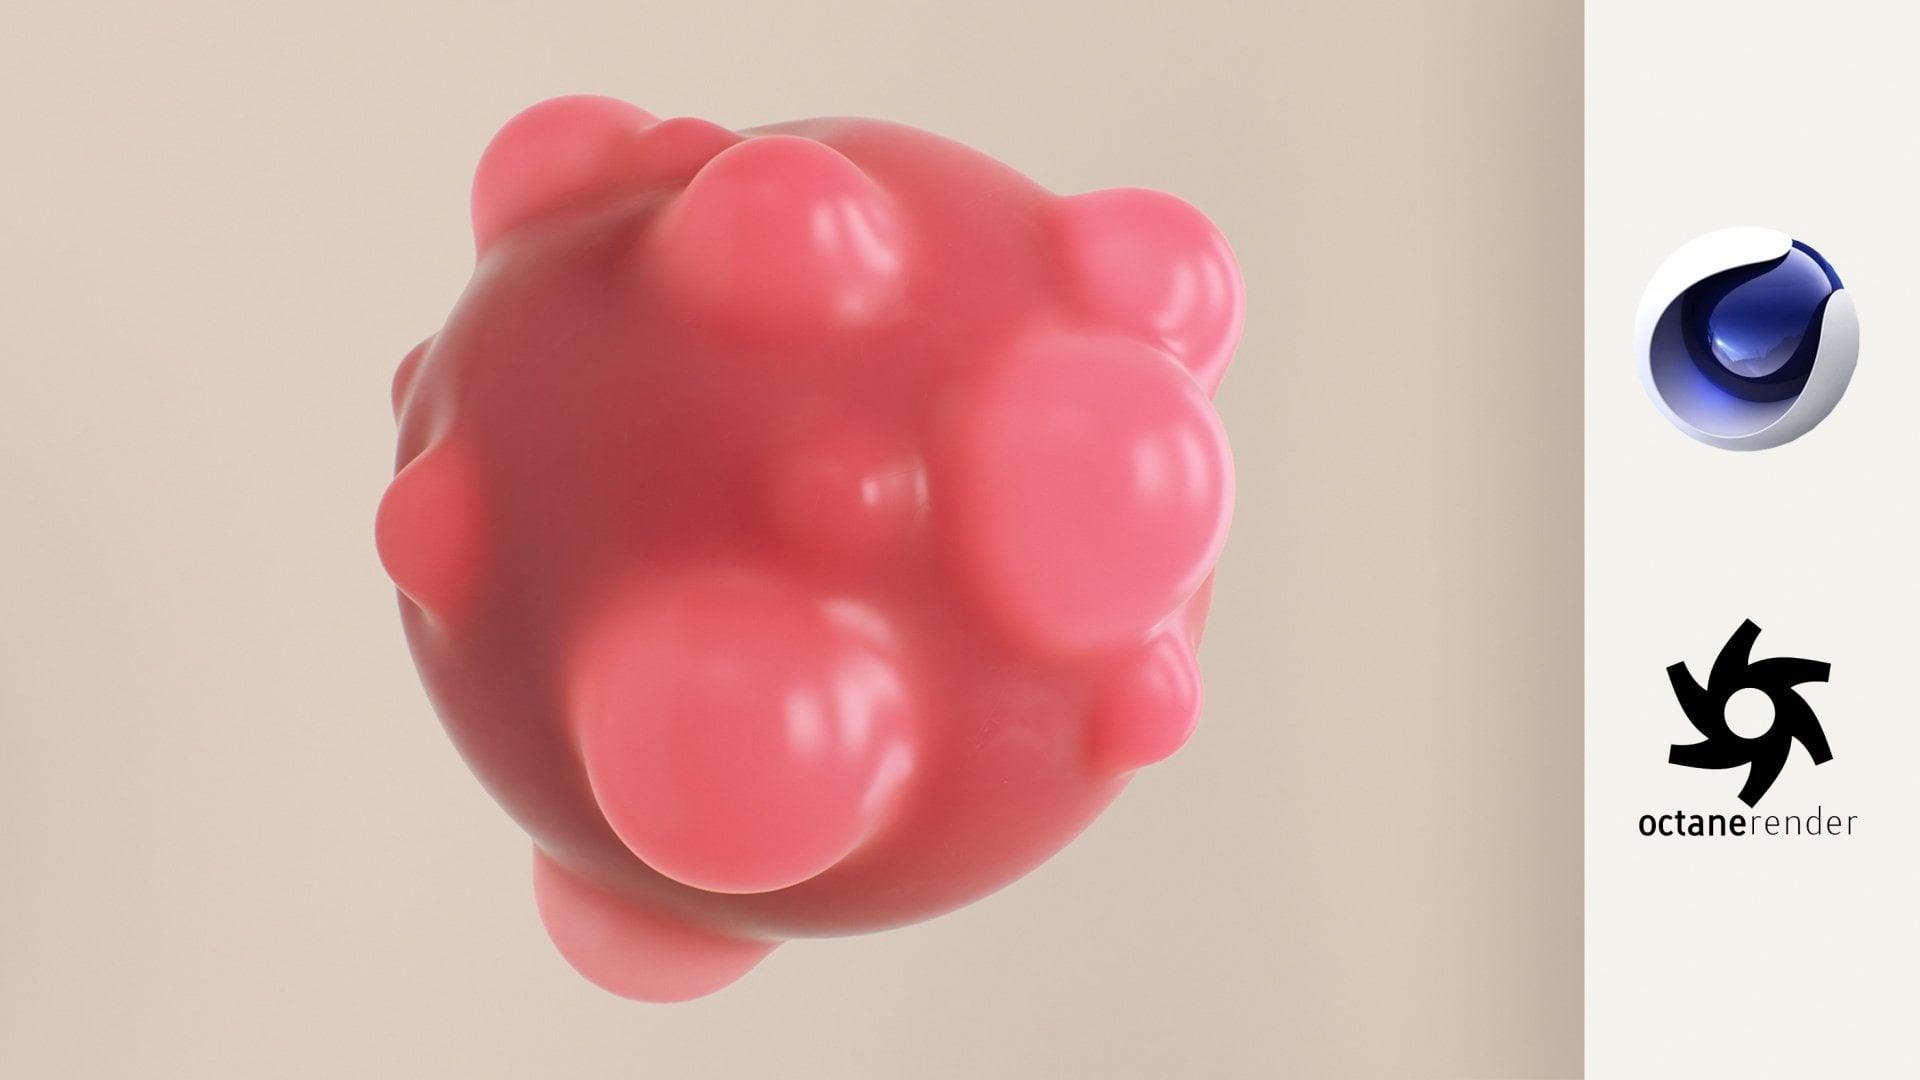
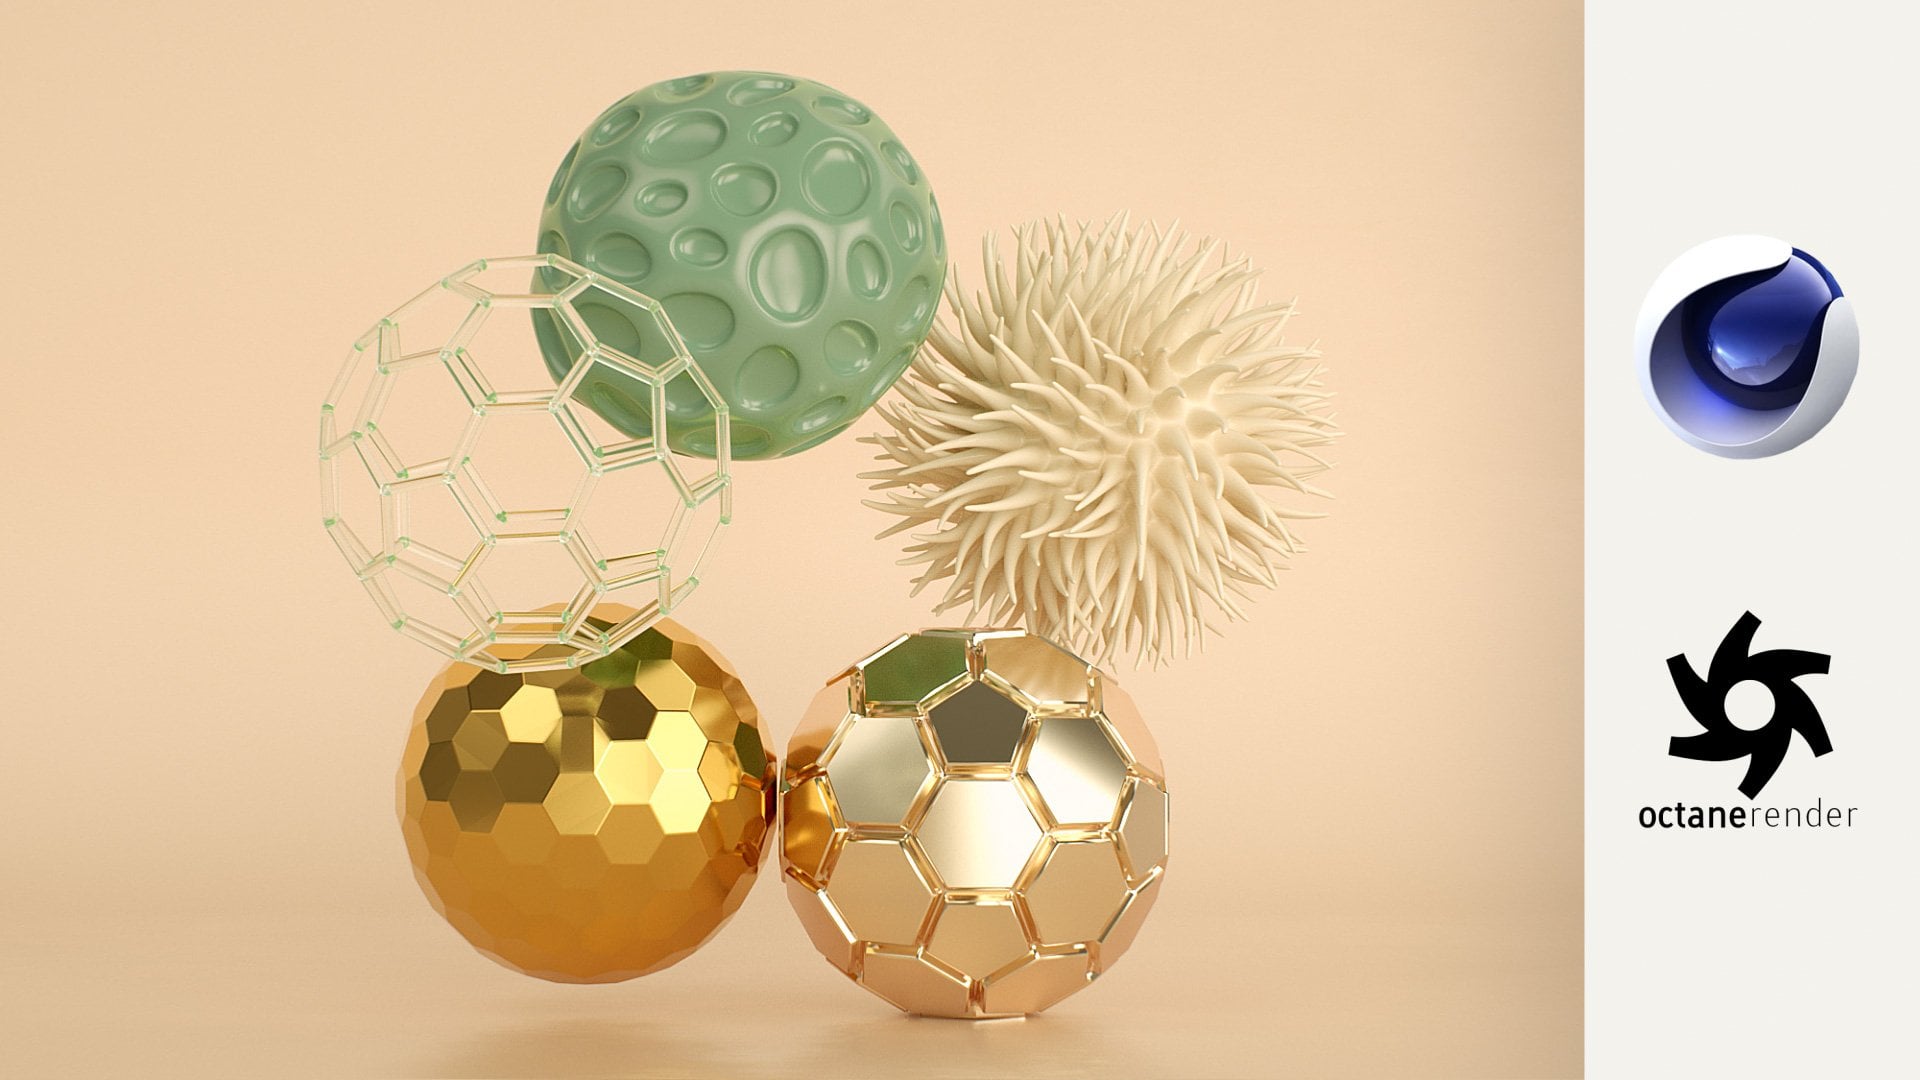
3. Modeling the Jar: Okay, here we are in cinema 40. If you need to download a demo version of any of the software we're using, you can find links in the about section of this course. All right, let's get started. We're going to kick things off by modeling out Jelly bean jar. When we start, Cinema four D will automatically be in our perspective, you and you can see up here. That's what it's telling us and were able to navigate around here in three D space by holding the key and dragging the mouse. It's probably gonna be easiest to model this from the front view, though, So if we click with our middle mouse button, it'll bring up about four viewing windows. So we've got our top, our rights and our front view, which is the one we want. And if we middle mass click again, we'll go into that view. Okay? It's always a good idea to work from reference when you're modeling in three D. So let's bring in a photo of a job that we like so we can make this look as realistic as possible. To do that for we need to do is come up here toe options and down here to configure. Then over here, in our view, port attributes will click on the back tab and you can see here there's a space for whatever image you want to bring in as reference. I have supplied one for you, but feel free to use whatever image you like, and it doesn't even have to be a job. Be as creative as you want when you've picked one out or you have to do is drag the image into here, and it should pop up in the background of your view port just like that. Let's zoom out a bit with the mouse wheel. Now. The next thing we want to do is trace around this job so we can define the shape of our model. So let's come up here to our pen tool and zoom into the top corner of our jar, and we can start tracing around this edge. Let's click here to make a point, and if we move down here, we're not getting a very straight line. We want to keep. This is accurate as possible, so we might have to turn on snapping. Let's come over here this is our snapping control. We'll come up and enable snap and we also want to come down here and turn on work. Plain snap. We also want to snap to the grid. So let's turn on grid point snap as well. All right, now we should be good to go. If we come back up here, you'll see that clicking will snap to these little points, making our life a lot easier. So let's just get through this quick one there, one over here, straight down to here. We'll just do this fairly roughly. For now. We're going to come in and smoothies out later. So if we zoom out and down here, we'll put one there and we want to get back to this middle line here to finish it off. We only want to do half of the shape I'll share your way very shortly. To finalize that line or we have to do is change. The tool will come up to move and we'll go back to object mode. It can be a little hard to see this plan that we've just created. But if we get back upto options and down to configure again, we can adjust that background image. If we come down here to transparency, you could see that set to zero. But if we bring that up to something like 82% it's gonna make out sliding a bit easier to see. Okay, let's frame that up of it. Now you can see our corners, a rub it to shop at the moment. We want to smooth those out of it. That's pretty easy to do that's Come over here and grab our points tool and we'll zoom in over here and grab this point. Then we'll right click and come down to where it says Champa. Now if we click and drag anywhere in the view port here, you'll see that point we selected becomes nice and smooth. Now it's just a matter of doing the same thing to all the other points that we want smoothed out a little tip to make selecting points of it. Easier is coming up here to the rectangle selection tool, and if you click and drag, you can grab these points nice and easy. So same deal with this one right click. Come down to Champa, click and drag and smooth it out. You can even do multiple points at the same time. Let's grab a rectangle select tool again and we'll grab birth of these points this time, right? Click shampoo and click and drag something like that. Okay, just one more point to Dio. Let's zoom up and come down to the bottom. We just have to get this guy same deal rectangle select right click shampoo And we don't have to follow this too closely. Maybe something like that for now. Okay, now that we've got a shape finalized here now we can do the fun bit. Let's middle mouse button click and go back. To our perspective view, you can see this blind we just created in three D view looking good. If we have a look at this from the top, basically, we just need a way to extrude this in a 360 degrees fashion to create our Josh shape. Luckily, there's a tool for that. Let's just get this into position. And if we come up here and click and hold this button the tool where after is called Lave, let's click that and bring it into our scene and you can see it over here above our spine for this to effect house plying. However, we need our spine to become a child off the lave. When we do that by simply grabbing it and dragging it here and now we're starting to get something that looks a bit more like a jar. Let's come up here and click on our lave and have a look at some of these options. Forget to the object tab. The angle basically controls the extrusion here. And if we change this value, you'll get a better idea of what's actually going on. The line we drew is basically being revolved around and 360 degrees. You can do a lot of cool murder of things with this, so you might want to come back to it sometime. Well, let's just reset this to 360 degrees for now. Okay, Before we go too far with this, we want to make sure our jar is the right size. It's a good idea, especially working with dynamics as we will be to keep all your models that real world dimensions. One of the quickest ways to measure your model is to just come up here and bring in a cube . We can't see it because it's actually coming inside out jar, so we'll grab the move tall and the model tool, and we'll just drag this cube out here. We can see how big our jars by comparing it to the Cube. If we grab our cube and have a look down under the object tab, you can see it's 200 centimeters squared, which is a pretty big cube. But in relation to our jar. It's pretty tiny, which means our job is enormous. So let's make our cube the same dimensions as we want our job, how Cube is going to be about 18 centimeters high. So let's put that in in the UAE access. So now it's 18 centimeters tall, and if we switch views this time to the right view and zoom in here, you can see how that compares to our jar. Now all we need to do is scale. L jar down to match L Cube. So let's click on the lave and we'll go over to our scale, too, and just drag that down and zoom in a bit and make that match pretty closely. And if we go back to our perspective. You it looks pretty tiny and now seen now. But if we zoom in, that is what 18 centimeters looks like. Okay, now that we've got that sorted out, we can delete that cube. Just grab that and hit, delete, and let's have a closer look at our new geometry. If we want to see the polygons that make up our model, we can come up here to display and turn on shaded lines, and there's all the faces that are making up our job. We want to keep the amount of faces down pretty low, so everything runs nice and smoothly. The more polygon do you have, the slower the renda and the slower it is to work with. This is looking pretty good to me. Let's figure out a way to make this nice and thick like glass should be. One way to do that is to come up to the simulate tab, and under cloth will bring in a cloth surface, just like before. We have to apply it by grabbing our job and putting it under the cloth surface. Just like that, you can see here we've got another subdivision, but it doesn't seem to have gotten any thicker. Let's click on a cloth surface and come down and see what's going on under the object tab. You can see here the thickness is set to zero. If we just put this up to, say, one centimeter there we Oh, it's much thicker now, but maybe too thick. We want it to be about the thickness of glass, so I think we should just bring this down 2.4 and give that a go. So the thickness has been applied inside our original shape. But you could come down here and put in a negative number to get this to extreme outward. I think that's probably a good option for this job. Cool. So the next thing we have to fix is the top of the job Appear. It's looking a bit too sharp to do that. We're gonna add a subdivision surface. Let's just zoom out a bit. You can find that up here and there he is. This time, when we apply this, I'm gonna show you a little trick that's going to save you loads a time in the long run. First, we need to make sure whatever object you want to apply this to is selected in our case, the cloth surface, which it is now. We'll come back over here and before we click this, we want to hold the old button, and that way it's automatically applied. You can see how hierarchy over there with subdivision surface at the top. So it's affecting all of this stuff. And if we take a look at our model, you can see it's nice and smooth now. And if we come to display and turn those lines off, you can get a better idea of this looking good. We're almost there now. Let's put those lines back on. There is quite a bit of geometry now. As you can see, we'll be doing dynamic simulations on this later, so too much geometry is going to give us a hard time. For now, let's just come over to the subdivision surface and bring the subdivision editor down toe one. That's definitely helped. Another thing we can do to make this really lightweight is to go back to our lave and here where it says subdivision, Let's bring that right down to 12 Now we've got a lot less faces in there, but because of the subdivision surface, we're still looking pretty smooth. We could do a quick check and come back to display. Turn the lines off, and that's pretty much the modeling complete for this one. We'll just do a little bit of housekeeping before we move on to the next lesson. You've probably noticed that we've modeled this directly in the center of vaccine. And if we switch views and go to the right view, you can see this line here in the center is where our floor should go. And right now Al Jazeera is going through the floor. You can probably see that a bit better if we go back to our perspective, you and bring in a plane and you can see the floor is cutting straight through out Joe. So let's just go back to our right view. We'll make sure we've got a subdivision. Surface selected will grab the move to, and it's just a case of zooming in and moving this. So it's just touching the floor, and that's looking pretty good. Let's go back to our perspective. You check everything nice, we'll go up and get rid of that plane for now and one final thing. We just want to make sure we stay organized. So over here we're grabbing no, which is basically like a group or an empty shape, and we'll gravel of this and pop it in there, then will collapse that up and double click on the name. And let's rename this to job, and that brings us to the end of this lesson. So how did Ugo? I'd love to see your first attempt at modelling. And don't forget you don't have to model a job. Here's a couple of other objects I've made with the same technique, so be as creative as you wanna be. And don't forget to post a screenshot for everyone to see catch you in the next lesson.
4. Modeling the Jelly Bean: Okay, here we are. Back with our job. Before we start modeling the jelly bean, let's go and hide this. You can do that by coming up here and holding the old button. Just double click these stoplights. They'll go green and then they'll go red. Red means off and there we go. OK, so we're gonna cheat a little bit to model the jelly bean. We want to start with a primitive shape that looks a bit jelly bean ish to begin with. So let's go up here and see what we can find. Alright, Cubes, spheres. Probably not gonna work for us. Let's try the captial as usual, it's coming in a bit too big, but a handy little tip if you want to frame everything up in the scene, is just hit. Hey, cian the keyboard. Okay, so I'll capture is basically what a jelly bean would look like if it was flattened out. So that's probably not a bad place to start from. It's always nice to see our polygons one way modeling, so let's come up to display and turn them on here. We always want to keep the polygon count down as low as we can get away with. As you can see here, there's quite a lot and we probably don't need this many. So let's go and have a look at our object settings and see what we can do. So here's all the properties of our capsule that we can play with. You can see changing the radius is gonna make it wider, and changing the height is obviously gonna make it taller or shorter. And then you've got segments. This is what's going to allow us to change the polygon count for our object. If we change the height segments, you get more polygons going up and down. Let's undo that. And if we change the cap segments, you'll get more polygons in the two caps so the spherical bids at the top and bottom. And then there's rotation segments, which controls the amount of polygons going around our object just like that. So the key is to bring a polygon count down as low as we can without losing the overall shape of the object. So for our jelly bean, I think we could probably get away with something like 12 segments. That looks pretty good to me, right now we need to do is figure out a way to bend this over so it looks more like a jelly bean shape. Lucky for us there. Is it a former that does exactly that. And it's called the Bender. Former Let's click up here and there he is. Let's bring that in. Okay, let's zoom out of it. This big blue box is out a former, and if we want to apply it to our capsule, we need to come up here and make it a child, so we'll just drag that right there. And if we come down to the object properties of Al Bender former and we play around with something like the strength, you can see that spending nicely now. And actually, I'll show you a better, quicker way to apply to formers. Let's under that, and we'll go and delete that. Bender, former, this time without capture selected, will come back to out of former and before we click it, we want to hold the shift key, and that's gonna automatically make it a child and therefore automatically start affecting it. And it's also going to wrap itself to the exact size of the parent object in this case out capsule, which is going to make her life a lot easier. And now if we go and change that strength, it should been exactly the way we wanted Teoh. Let's put in a value of 100 take a look at this from the side. It's a bit of a weird shape. Jelly bean. At the moment, it looks like how Bend a former is also stretching it a bit in the Y axis. But there's a little check box down here that's gonna fix that for us. Let's turn on keep y axis length, and that's looking a bit more jelly bean for their. If we look a bit closer, it looks like our Ben could be a little bit smoother. We're getting some slightly pointy areas here. We could try scaling the D former box to see if that helps. Let's come over here and play around with some of these size settings. So this is scaling in the X axis, and this is scaling in the Y axis, and this is the set access. So I think the Y axis is going to be the one we want to change. Also If you do mess up the sizes, you can always reset by just coming down here and hitting fit to parent, and that'll just reset it. Okay, lets fix these pointy bits. We'll come back to the second value here. That's the Y axis, and let's try bringing this down instead. That's looking better, much more jelly bean looking Now we might be able to see this a bit better if we come up to display and turn the shading back on. And if you find this to former box a bit distracting, we can hide that by coming up here and clicking twice on this top stoplight until it turns red just like that. Or if we turn that back on again. Another way to do this is to come over to filter and find the D former in the list here and uncheck that and that'll hide it as well. Okay, let's take a good look at our jelly bean. Now might be a good time to add a subdivision surface and smooth this out just a little bit more, so let's go up and grab our capture and then back over here. This is the same one that were used for the jar in the previous tutorial. Don't forget to hold out when you bring this in, so it's automatically applied. And I think we're just about done without Jelly Bean. Just a little bit of housekeeping before we move on to the next tutorial. It's a little bit messy back up here, so let's tidy this up a bit, just like last time. We're gonna add a null in here. There he is. So we'll grab, allow jelly bean bits and pieces and put it into their, and we'll just rename that No to being okay, Let's close that up. It's looking nice and tidy. Now, just one more thing to do. We need to make sure our jelly bean is the right size compared to our job. So let's turn our job back on again, and you can't see it because it's so tiny compared to a giant jelly bean. If we move it out, you can see there it is. We went out Jelly Bean fitting nicely into our job. So let's under that and we'll grab out Bean and the scale tool, and then we'll switch over to our front view. You can see things a bit easier this way. The job we can see here isn't our three d model. It's the reference image still in there from our previous lesson. But we can easily get rid of that if we come up two options and antic and figure to the back tab and we'll just uncheck show picture. And if we zoom in, you can see a tiny little jar over there. So clicking out here without scale tool, let's just bring that down and down a bit more something like that. And if we move him out here and get back to our perspective, you we now have our job and jelly bean muddled up and ready to go, and that brings us to the end of this lesson. Don't forget you don't have to use jelly beans. It's some other tasty options you could try otherwise, be as creative as you wanna be. I'm looking forward to seeing a screenshot of what you come up with catcher In the next lesson,
5. Modeling the Platform: all right, we're back without jelly bean and now Jelly bean jar. The next step is building a platform for these guys to sit on. This should be a nice, easy tutorial in the end of El Modeling section. To start with will come up here and we'll bring in a cube as usual. It's coming away too big. Zoom out a bit and scale this down. Let's try 20 centimeters here, and we'll just grab these handles and scale them down a bit. And we'll hit hates again to frame everything up. That's looking pretty close. Let's manually stick in some numbers here, maybe one centimeter high, and we want it square. So 20 centimeters in the said OK, we don't want any of the edges to be perfectly shop like this, so we want to add a little bit of bevel. If we come over here, we'll just turn on the Philip check box and you can see that surrounded off those edges nicely. Maybe a bit too much. Let's come back here and change the Radius 2.1, and we'll just bring those subdivisions down to one and believe it or not, that's it for modeling. the platform. We just have to make sure that sitting in the right place, let's go and have a look in our right view so you can see it's going through the floor at the moment and for our job, assume in. Just grab that guy and said it right on the floor there. Let's grab about being as well and just move it up here of it. And the John is to be sitting on top of the platform. We're having some issues there because we've still got this snapping on. So let's go and turn that off. Just stop you. Let's try that again. That's a bit easier. That looks close enough. Let's get back to our perspective. You and one last thing will tidy this up, bringing another. No, we'll drag. OK, been there and let's rename this platform. Okay, that brings us to the end of the modeling section.
6. Camera and Scene Setup: okay before we start playing around with the camera, it's probably a good idea to set up our seen first that we can do that by coming up to this menu here and bringing up the render settings. We'll have a closer look at some of this stuff later on in the rendering lesson. But for now, we're mainly concerned about this section. We already know our final output is going to be for Instagram, so we want to keep this square. Ph. D is still a good resolution to be working at. So that's 1920 by 10 80. So in this case, so we just want 10 80 by 10 80 to keep it nice and square. So let's put 10 80 in the width box here, and if we move this, you can see it updating in the background there. Let's change height to 10 80 as well, and now you can see a vague outline of our square shape. Basically, everything within this area is going to render in our final output. We can also make that a bit easier to see if we come down to mode and down to view settings in the view tab here, you can actually make this bit darker. This is actually called the tinted border, and we can turn that on and off. And if we bring up the opacity, it's gonna make it a lot darker. I usually have this on about 90% and I find it makes framing things up a little bit easier . Okay, let's have a look at some of these other options for video. We want the resolution to be 72 dp I So that's all cool for personal projects. I always use 24 frames per second for a few reasons. Firstly, it's been the standard for film pretty much forever. Secondly, it looks nice and smooth, and thirdly, and probably most importantly, it's a lot quicker. Surrender. The less number of frames, the faster the render. So let's switch 30 frames for 24 frames. OK, that's it for our render settings. For now, let's close this window. Now we have to make sure our scene is playing back at 24 frames a second to match our output settings. If we hit control de on the keyboard, that'll bring up our project settings, and you can see FPs here Let's change that to 24. Okay, we're almost ready to bring in a camera, but first we want to check out Time line are seen as 72 frames long at the moment, which gives us about three seconds at 24 frames a second. We want our looping animation to be nice and snappy, so we'll bring this down to 60 frames, which is about 2.5 seconds. Okay, let's bring in a camera. You can find them up here under the camera icon, as you'd expect. Let's grab that guy. So when the camera comes into the scene, it defaults to being off. What we're seeing here is the normal perspective. You and if we turn the camera on by clicking this button, it looks exactly the same because it automatically adopts the settings off the prospective you. But we want to come down here and start customizing this his way. Your photography skills. They're going to come into play. If you're not too familiar with cameras and lenses, there's definitely some great courses on skill show you could check out, but for now, we'll just go through some basics when you're working with cameras and three D. Do you really want to work just as you'd work in real life? So the focal length or the kind of lens you're going to use is very important. Let's go through some of these so you can see what I mean. So this drop down boxes, some of the more common lenses you'd find in the real world. They ranged from super wide to super telephoto or super zoomed in. Let's start with the 15 millimetre, which is a super wide angle lens. You can see how that's affected our job. Everything's looking really distorted now, but we're getting a lot more of the scene in our frame because it's so wide. But if we switch over to something like the classic 36 mil, it zooms in a bit, and we're getting a lot less distortion. Let's try one of my favorites, the 50 mil. I use this one quite often because it's more similar to what the human eye actually sees, and it's pretty popular all around lens in photography. Finally, let's try. One of the telephoto lenses will go with the 300 millimeter straightaway. We resumed way in there. Let's hit the hay chickie and frame up a bit. You can see this lens gives us very little distortion. So in real life, these kind of lenses a pretty handy in fashion shoots because they make the models look beautiful and less distorted. This is probably the closest lens to what we want today, but we're actually going to use a kind of camera that isn't actually found in real life. We're going to get a bit creative here and use an isometric projection camera, and that's the kind of look you find in engineering drawings or technical drawings. And I think it'll look quite cool for our jellybean factory. But please feel free to use whatever lends you like. So if we come over to this projection type here, we can change this from prospective to isometric, and again we're zoomed way far out. So that's hit hates to frame up, And we could just move that around and get it into a decent position, something like that. And if we turn that camera off and compared to our perspective, you and if you have a look at some of the angles here and we'll turn it back on, I think We're getting a pretty interesting look. So let's leave our camera there for now and I'll see you in the next lesson where we'll be starting the animation.
7. Animation with Effectors: okay, Before we start animating, we want to figure out a way to duplicate this job and the platform all along this access to form kind of a conveyor belt. So let's start by grouping both of those objects. Let's come up here and grab another. No, and we'll go on, grab our platform and our job and drag those into Oh, no, let's rename. L know we'll call this segment because that will be one segment of our conveyor belt. No, we don't need our being financed. So let's hide. That would just double click those stoplights until they get red. And now we can figure out a way to start cloning this. Let's make sure we've got it selected, and we could probably even collapse that. Then, if we go over here to the McGrath menu, let's come down and grab a cloner. And if we hold the boat key when we click this, it should automatically apply itself and you can see up here. That's work nicely. We can't see any of the clones yet, but if we zoom out, you'll see we've got three here in the Y direction, which is not quite what we want But if we go over here to the object tab, we can see the slide in next account of just how many cleanse their up. And the values down here represent the amount of space between each clue. So right now we've got 50 centimeters between each clone going in the Y direction, and the more we bring this down, the closer they'll get well. We don't want our clones going up in the air. We actually want them going along those it access. So let's put a zero in the wife and we'll bring out said Value up to something like 25. We probably don't need so many clones either, So let's bring that down to six, and maybe we'll bring them a little bit closer. Let's say 22 centimeters now we want to offset this cloner. So we've got clones on either side of our Centrepoint, so we'll go over to the Transform tab and we can just offset that in the set Access. Let's make it negative 44 centimeters, and if we zoom in, we've got a jar in the middle and a couple of jobs either side, so let's turn our camera back on and see what this looks like. Okay, I convey about. It's starting to look pretty good. We could actually animate by key framing this offset, but I think we're gonna have more control if we use an effect. Er, let's just offset that by one more segment and make that negative 66 that will just move their clones. One segment that way now, to apply and affected to our cloner, we need to make sure our cloner is selected first, and then we'll come back up to the McGruff menu and under effect, er, we want to grab the plane effective, and it looks like it's made everything in a scene disappear. So let's turn that camera off and see what's going on. If we zoom back of it, we can see our conveyor belt is up in the sky again. Now let's figure out why that's happening. Grab our plane that will go down to the parameters tab, and you can see by default. It's put 100 centimeters in the Y axis, which made everything go up with. So let's bring that back down to zero again. We want to be animating in the set excess so down here something like this. Let's put that back down to zero and set a key frame. You can do that by clicking this little circle here, and you can see our key frame appear on the timeline. Here it frame zero. If we dragged us along to frame 16 we want to set another key frame. So back up. Two hours, ed coordinates. Let's make that 22 centimeters and said Another key frame. So now if we hit this button and go back to the start of our timeline and hit play, we've made an animation. Actually, we should probably go back to our Kim review and see how this looks. Let's go on, rewind and play. And if we let this play for you can see it's looping. It's basically displaying that same animation every 60 frames, but our animation looks a bit linear. It's just start and stop doesn't feel very natural. But the good thing is because we're using an effect, Er, we can apply another effect, er, to make this look a lot more interesting, it's Pozo animation female and grab our cloner again. Then back to the monograph menu under effect er this time we're going to bring in a delay effect, er, and if we go and play this now, you might notice our animation has become a little bit smoother. And if we go to the attributes of that delay effect er under effect, er, you'll see that it's applying a blending effect to our key frames, just smoothing them out of it. But what's really cool is if we play with the murdered here. If we change this from Blend to Spring, for example, and let that play back, you can see a slight bounce in that animation, which I think makes it look a lot more interesting. And, of course, we can play with the strength of this. If we bring this up, you can see that bounces a bit more obvious. We can also make it lower to make it less bouncy. We're gonna leave it at 50% for our Jelly bean factory, and that pretty much brings us to the end of the animation. Listen, just a little bit of housekeeping before we move on, let's pause that and we'll go on, grab out DeLay and plain effective. We want a group. These so a quick, easy way to add a no instead of bringing one in manually is to just press out G. And that'll put them straight in their own group. Let's rename that to Effect is, and we could probably rename L. Kelowna. Let's call that conveyor will collapse that. So it's nice and tidy, and at this point, we want to make sure we don't accidentally move our camera so we can grab that and come up to tags. Cinema 40 tags will add a protection tag, which is gonna look a with the coordinates and stop you accidentally moving it. And that's it for this lesson. I will see you in the next one. We will be looking at dynamics.
8. Dynamics: okay. And this? Listen, we're going to try to figure out a way to make out jellybeans rain down into our job. Now we could hand animate that, but it would take forever, and it would be extremely difficult. So what we're gonna do instead is use dynamics. So the first thing we should do is probably turnout being back on. So let's go click here and there he is. And we don't really need everything else for now. So let's hide that stuff or just Ochlik. The stoplights are now conveyor a couple of times until they get red. Now we could probably put out being in the center of the world. So let's grab him and come down to the coordinates here and just zero these out There he goes. Then we'll come up here and turnout camera off so we can get nice and close to this. We could press the hate key again to frame everything up in the scene. But another option we haven't mentioned yet is just pressing the F key. And that'll frame just what selected. So let's hit if and there we go. OK, so we want a low Polly version of there being that we can use in our dynamic simulation. Lo Polly geometry is going to simulate way faster, so you always want to keep the polygon count down. So that's going open up this being hierarchy and have a look. How original capture was very low, Polly, before we added the subdivision surface. So let's grab that. And we basically want a bacon that Bender former. So we're left with a single piece of geometry. So that's right. Click on our capsule and come all the way down to current state toe object, and you can see that's generated exactly what we want. Just a single low rez piece of geometry. Let's pull that out of L hierarchy and will collapse. So old high res Jelly Bean and let's rename this new one bean as well, and we'll turn off the old 10 click here twice, all right, if we come back up to display and turn our lines on, you can see that are being is just a low polly piece of geometry, which is going to be nice and easy to work with in our simulation. Let's turn those lines back off again for now, so The next step is figuring out a way to make hundreds of these beans rain from the sky, and the way we're going to do it is with a particle emitter. So let's go up to simulate and particles and here's our meta bring one of those in, and if we zoom out, you can see we've got this big giant admitted here. And if we hit play, you'll see it's emitting a whole bunch of particles for us. Let's stop that female. We need to figure out a way to replace each one of these particles without jelly bean. But first we've got our mid A pointed the wrong way. Let's grab our potato and angle it so it's pointing down. Then we'll grab our move to and just bring this up a little bit. Now if we get back to the start and hit, play our particles of shooting down. So how do we get jelly beans on each one of these particles? It's actually super easy for just grab our bean. We can make it a child off the emitter, and if we hit play nothing yet. But if we click on our mirror and under the particle tab. Well, we need to do is turn on, render instances and show objects. And if we zoom in, you can see we've got lots of little jelly bean particles. Now let's play that and have a look. Cool. We've got some nice jelly bean rain going on. OK, so that's one way of setting this up. We'll need to tweak this a little bit to make it interact with our job. We want our particle emitted to work with the murderer off clone object, and I'll show you how to do that. First, let's grab out Bean and dragged that out of our middle. Then we'll go back to our Margraff menu and bring in another Kloner, and we'll start by renaming that to beans because there's going to be a lot of them. Then we'll make out being a child of our beans if that's not too confusing, and now we'll go and take a good look at the object tab in our cloner object. So by default, the mode is set to linear, which is why all our beans, they're going straight up and you can see just like in the last lesson. If we adjust the Y axis value. It'll bring them closer together. Let's just zoom in a little bit so you can see that. Let's take a look at some of these other modes. We'll start with radio, just like the name implies. This is duplicating our clones in a radial shape or circular shape, and if we bring that count up a bit more, this might be easier to see. We could make a ring of jelly beans if we wanted to. We don't Let's have a look at the next option. The next mode is Grid Array, which just allows you to control the clones in the X y and Zed access. So you could kind of make a cube of clones. We're not gonna go too deep into this guy, but feel free to have a play around with it. We've also got the Honey Comb array in newer versions of Cinema four D, which can give you some pretty interesting results. But the mode we want today is actually the object mode. When you bring it in, it actually makes everything disappear. But that's only because we need to tell it which object to use. We're going to use our particle emitter. So let's grab that and dragon into here, okay? Before we see if that worked, we want to make sure we turn on render instances here. This is going to replace all their particles with instances instead of the actual geometry , which should really speed things up for us. And it's gonna be pretty important when we go to texture this later on. Okay, let's hit, play and zoom in a little bit. You can see all their tiny little jelly beans on each one of these particles. Again, we've basically got the same set up as we had before, but doing it this way is going to give us a lot more control. So we need to make this look less like rain and more like a stream of jelly beans coming out of some kind of jelly bean making machine. So let's grab that Amita and down under the omitted tab, we've got out X and Y dimensions of our mid off. Well, we need to do is bring those down. Let's say four centimeters and we'll move this down a little bit closer to the center and frame that up. And if we hit play. We've got a nice stream of jelly beans shooting out a bit too fast, though, so let's go back to our particle tab. And down here you can see the speed is set to 150 centimeters per second, which is a little bit too fast for us. Let's bring that down to 50 centimeters and play that back. That's looking pretty good, although although jelly beans look executive same and they're coming out at the same angle here, which doesn't look too realistic, it'd be nice to add a little bit of variation to that. One way you can do that is to just come back to our particle tab and under rotation. Let's just bring that up to something like 1 32 and if we play that back, it's looking a bit better. But as with before, I think we can get a bit more control. If we use McGrath here, we can control the rotation along with a lot of other things. If we bring in a monograph random effect, er, so let's under that change we made to the rotation and we'll grab our beans, Kelowna and back to the monograph menu effective, and we'll grab a random effective and that's a bit too random. We've got jellybeans everywhere. Let's see what's going on in out parameter tab. You can see position is on by default, and we've got some pretty high values in here. Let's turn that off and we'll turn on the rotation would just put some values in here something like 90 degrees for all of them, and you can see that affecting those beings. Now let's hit play and we're back to where we were earlier, and you'll see very shortly why we set it up this way instead. But first, let's clean everything up a bit. We'll rename all random effect er to beans rotation, and we'll drag it down here with the rest of our effective. So everything's nice and tidy. Okay, Before we add our dynamics, we need something for our jelly beans to interact with. So for now, let's put in a floor, and we'll do that by just adding a plane. We always want to keep our partly guns down, so we'll bring the width and height segments down toe one, and the plane's probably a bit too big for our scene, so we can bring that down to 40 centimeters each side. Okay, now we're finally ready to do some dynamic simulations. Let's go and grab our beans, cloner. Then we'll click on tags simulation tags, and we'll add a rigid body tag. Then we need to tell the system to interact without floor. So let's grab our plane and go to tags again simulation tags. And this time we'll use a collider body. So hopefully we'll get some dynamic jelly beans falling from the sky and colliding without floor. Let's see what happens. It looked good for a second, but then things got weird. I think it's treating all about jelly beans. As one big object, we want the simulation to look at it as individual beings. So let's go and grab our rigid body tag on our beans. And under the collision tab, where it says individual elements. We want to switch that from off to top level, and if we play that back, that's looking a bit better, bouncing around a bit crazy. But we can fix that. Let's pause that for now. And if we control D on your keyboard and bring up our project settings, we can go over to the dynamics tab and finally over to the expert tab. We can bring the steps per frame and the maximum silver iterations per step up and give us a more accurate simulation. Let's just bring them both up to 30 for now, and we'll play that back. It's definitely looking better, but it's still a little crazy because we're working with pretty tiny objects. The scene scale can sometimes be an issue, so I find if we just bring this scale number down a bit, say to one, it should give us a better result. Let's give it ago, OK, I think that's looking a bit more natural. Cool. Let's pause that for now and take a closer look at our simulation. If we go over to the visualization, tab will have a better idea of what's actually going on here. Let's enable that, and we'll zoom in here. You can see all these little yellow and green shapes within our jelly beans at the moment. That's how jelly beans are being interpreted by the simulation. These shapes were all a bit smaller than our jelly beans, so it's not very accurate. If we go back to our rigid body tag. You can see why this is if we come down here and take a look at the shape it's set to automatic. So it's giving us the fastest approximation overall mesh. But if we change this to moving mesh, you'll see nothing happens at first. But if we go back to the start and hit play and we'll pause that our simulation is calculating that mesh a lot closer to our original mesh. So we should get even more accurate collisions. Hopefully, that's making sense. Let's rewind that, and we can disable our visualization. Let's frame this up and have one more look. We're definitely getting there. The next step is to have these beings fall down into our job. So let's grab out conveyor clones and holding control will just drag it up to make a duplicate. And we'll rename that conveyor dynamics. Then we can just unhygienic at, and our beans will only interact with our job so we don't need that platform. So let's go up here and unfold these grab our platform and delete that we've got another copy, another conveyor. So it's not a problem. We just need the objects that were going to use in our dynamics for now. If we open up our job, we also don't need the submarines and surface. So let's turn that off by unthinking that we also don't need the cloth surface because we just want the interior of our job because that's the surface our jelly beans will interact with. So let's switch that off as well. So if we have a look over here, we've got a nice, slow Polly version of our job for our simulation. And if we turn our lines on again, you can see that even clearer. We'll switch those off again for now. Okay, so our job is gonna be a collider body just like our floor was. So the good news is we could just grab the tag on our plane and dragged that straight onto our lave so it should start affecting your job straight away. We don't need that plane anymore, So let's delete that before we hit play. We need to move our middle out of our job so it looks like a jelly beans that coming from somewhere up above. So let's grab that guy and we'll move him up there. Actually, it's probably easier if we just type in a coordinate in the Y axis. Let's push it up to about 40 centimeters. We don't want that to be seen in the camera view, so it's probably high enough up there. All right, I think we're ready to hit play. Let's go back to the start and see what happens. Okay, it doesn't look like a jelly beans. Want to go in the jar? It looks like they're hitting an invisible force field or something up here, So let's see what's going on there. But first owner, just the animation, just a little bit. So Joe has enough time to collect the beans, and then the animation happens. So let's go back to our effective and find the plane effect. ER will come down to the timeline here, and if we hold shift off here and drag across weaken, select all those key frames that would just click on this great bar here and we can drag them across. Let's move it over. So the first key frame is on frame 33 we'll play that back. So now there's a bit of time for the jar to collect those jellybeans before it moves along in the conveyor belt. So now let's see what's blocking these beans from going in the jar. Let's hit control D and turn our visualization back on so we can see what the problem is. Remember, you have to rewind to refresh this. And if we hit play, you can see these beans are colliding with this green cylinder inside of Al Jarrah. Our simulation has automatically tried to guess the shape of the job. So it's gone with this cylinder to make things around nice and fast, just like last time. We want to come back to our tag and change the shape from automatic to moving mesh. And if we play that now, collision mesh matches our actual geometry a lot closer. You'll notice it's running a little bit slower, but our jelly beans are actually going inside the jar. This time, a faster option can sometimes be changing the moving mesh to static mish. If we play that back, it's a little bit faster. Okay, let's turn our visualization off and what we work on this It might be easier if we can see throughout Joe an easy way to do that It's just making you material by double clicking down here. Then we'll double click on new material will turn off the reflect its general and turn on the transparency. You can see it's gone transparent in our preview window here. Let's close our material editor and we'll grab this material and drag it over here onto our lave. And now we can see through our job. If we hit play, we can see what our jelly beans are doing inside there. I think this is running a bit too slow for us. Let's see if we can optimize this a bit. Let's stop it there and go back to our rigid body tag on our beans. Cloner. Let's try changing our beans from moving mesh to convex hull and see if we can get away with that. The simulation won't be quite as accurate, but I think it's gonna be a lot faster. Let's see what happens. Okay, it's looking a lot faster. I think we could probably get away with that. Let's stop that hit control de again and have a look at our visualization. Let's click enable again. The convicts Whole shape is similar to our jelly bean shape, but it's not exact. But from the speed of the animation and the position of the camera, I don't think anyone's going to notice. I think for the pretty dramatic speed increase, it's probably worth it. Sometimes you got to be willing to compromise when it comes to dynamics. Okay, let's switch that off again. We need a lot more of these beans to be admitted so it can feel the job nice and quick. So let's go and turn our camera on again so we can see how this is gonna look in a final render. Now let's go and grab our mid up and down here under the particle tap, we can emit a lot more jelly beans. If we change the birth rate, let's change these both to 400. So we've got more particles in the editor and the renderers. We also don't want to jelly beans to keep being admitted. So if we come down to stop a mission and change this to 20 now, jelly beans will stop a meeting on the 20th frame. All right, let's give that again. Don't put a bit of a jelly bean explosion there. I think I jellybeans, air coming out of it, too slow and they're exploding off each other. But that's easy to fix, or we need to do is come back to our middle and we'll crank up our speed from 50 to 200 and we'll try that nice. We're definitely getting closer. The first thing we need to fix is this big gap between our jelly beans and the edge of the jar, and then we need to have a look at some of these rogue jelly beans. This should be easy to sort out. Let's go and grab that dynamics tag on our job. And under the collision tab back down nearer shape, you'll see a size increment menu. And if we turn that on, the margin is automatically said at one centimeter, which is actually the distance between our Joe and our jelly beans. So if we go and change that to something like 10.1 and hit play problem one solved, you can see those jellybeans, it coming right up to the edge of the Joe Now, now, let's see what we can do with these runaway jelly beans. Let's go back to the start of a timeline and will come up and turn that camera off. Let's zoom out a little bit. Basically, we need to guide these jelly beans into the job. We more or less need to create a funnel that's going to stop the jelly beans bouncing all over the place. So the easiest way to create a quick funnel is to come up here and we'll grab a cylinder. As usual. It's come in huge, so let's go down here and change the radius from 50 centimeters to four centimeters and we'll bring the height down to 14 centimeters. And we'll just reposition this up between our Miller and our job, and we'll come back to display and turn our lines on. You consume but loads Apollo guns in here, which we don't really need. So let's bring the rotation segments down to eight. That's looking nice and simple, and we'll switch over to the Caps tab and we'll turn those off. And now we have a little cylindrical funnel, so hopefully our jelly beans can drop straight through there into our job. We need to tell our simulation that are funnel is a collider object as well, so we can actually grab the tag that's on our job and holding control. Drag it onto our cylinder and our shape has already set aesthetic mish, so we shouldn't have any issues here. Those jellybeans should pass straight through. Let's give it a try, Okay, that's looking good to me. Let's have a look through a camera. Let's rename all cylinder to guide and hide it by double clicking here, and we'll come down here and go back to the start of our timeline, and we might just go up to display and turn those lines off again. Now let's hit play and see what we've got. Okay, I think our dynamic simulation is pretty much finished. Let's stop that and bring back the rest of our scenes so we can see how this is playing out . We'll start by bringing back our high res convey about Let's come over here and old quick, those stoplights Now we might just apply that same transparent material to this so we can see through it. Let's open up our conveyor hierarchy until we can see the job. Then we'll go and grab that material and holding control or drag it down here. Okay, let's watch this through one more time. Okay? It's looking pretty good, but it's not quite looping yet. The beans are disappearing at the end of the animation. So how do we fix that? First thing we need to do is double out time line length. So it was 60 frames. Let's make it 120 you'll see why very shortly. Let's stretch this out so we can see all the frames. Now I'll go and grab out playing defector, which is driving our animation, and we can see our key frames down here on the timeline. This first ones at the 33rd frame, we're going to double our animation up, so if we go ahead 60 frames, that puts us at the 93rd frame. We want to come back up here, and we'll just disabled our delay, effective for now and back in our plane. Effect up under the parameter tab will set another key frame in the Zet access here so it stays at 22 centimeters. And if we look back to where a second key frame was, it's a frame 49 which is 16 frames ahead of our first frame. So 93 plus 16 is 109. So we want our next key frame on frame one or nine. So we need to double up this value from 22 centimeters to 44 centimeters, and we'll add another key frame. Okay, lets reward and quickly get back up here and switch out DeLay, effect ER on And now for hit play. Jelly beans won't vanish. They'll continue off screen, and we're finally almost there. The next step is the key to the looping animation. I'll try to go nice and slow because it's a little bit tricky. Let's stop this and we'll go on. Grab out Conveyor and I'll conveyor dynamics. We need to catch these guys to disk before we go any further. So we'll come up to tags and we'll go down to McGrath tags and we'll grab a monograph cash , and that should apply to both of them because we've got them both selected. Now we just need to come down here and hit and just say yes to this window that pops up, and then it's going to start the McGrath cash, which could take a while so well to speed this up. Okay, so we can tell they've been cached because these two icons of green now because they were McGrath caches we can turn a monograph effect is off because they've already been cashed in the animation and we don't want them applying themselves again on top of the cash. Now, good way to make sure our cash worked is if we grab allowed dynamics tags and just disable them for now because they'll slow everything down. And when we play that back, you can see our Planet Victor in a delay, effective, have been baked into the animation. And we've still got that bouncy effect. Okay, let's stop that and re enable our dynamics tags. We need to catch these guys, too, but we do that a little bit different. You can see within the tags. They actually have a cash tab. If we click that, we can just come down to Baykal and it's gonna do its thing. It's gonna get through all those tags and baked them out again. That could take a while. So go grab a cup of coffee. All just speeded up now so we can get to the end of this lesson. Okay, well done. Let's just make sure we've got all those tags selected, and if we come back to the dynamics tab, we can disable them again. And if we hit play where in business? Just one more thing to do. We don't need to see our conveyor dynamics anymore. So let's hold altar and double click the stoplights. And let's collapse some of these to make things a bit Tidier. We'll grab our beans, and we also need to give this a McGruff cash. So tags, McGrath tags and more graft cash. Let's hit bake on that one. It was nice and quick, and playing that still looks pretty good to me or we need to do is duplicate our simulation and offset it so it looks like it loops. And now Margraff Cash is gonna let us do exactly that. Let's stop that there and we'll come and grab Our beans will hold control and drag it up here so it duplicates. We'll rename our duplicate will be nice and creative and call this beans copy. And here comes the tricky bit. If we grab the monograph cache of our duplicate, you'll see down here there's a tab labeled playback. If we click that we have an option down here to offset Loop is 60 frames long suffering. Put negative, 60 in here, it'll go back 60 frames and if we come back to our timeline and make it 60 frames long again and now hit play, we finally have our looping animation, and that brings us to the end of this lesson.
9. Lighting: Okay, so the secret to good CD lighting is really just to copy the techniques of professional lighting artists in the real world, the kind of lighting that we're going for a now seen. It's similar to what you'd find in studio lighting in the real world. So basically, this is the kind of scene that we want to replicate for our lighting set up. And we'll start with this curved wall here, which is usually called a cycle or a cyclorama. And sometimes it's called an infinity war. It's used to create that infinite background look where you can't see the floor or any of the corners. We probably won't use it for that because we won't actually see much of it from our camera angle. But I like to use one anyway, because it makes the light bounce around quite nicely. So let's make one. We'll start by turning off that camera and zooming out of it. We want to build a wall just here. I think so. We get some nice light bouncing behind our jars. Okay, let's switch views. I think it's gonna be easy to create this in the right view and we'll zoom out a bit. Then we'll come up here and grab our pen to this guy right here, and we can start drawing out our war. Before we do. We'll go over and turn the snapping on. Just click on this. Enable snap and we're at it. We'll make sure work plain snap and grid point snap are on a swell. All right now we can start drawing our points. We'll put one here, one down here and one over here passed a large ours. And if we switch back to the perspective, you you can see our line in here. Let's change tools so it finishes that line for us, and we now have our basic wall shape. Now we just need to give it some thickness. We'll make sure we've got a new spine selected and will come up to here and bring in and extrude. Remember to hold old when you bring it in so it's automatically applied and you can see it doing something there. But it seems to be extruding that way, and not this way. That's an easy fix. Under the object tab, you can see it's extruding in the Zet access. Let's delete that we actually want the X axis. So let's bring that up and we'll move this into the center, and that's looking a bit more war like, I think the back wall here is probably a little bit short. But if we grab our spine and our point to, we can grab this point and just move it up and that'll make that wall bit higher force. Okay, let's organize this a little bit. Will come up here and bring in another No, and we'll drag on you, extrude into their and rename it to backdrop. And now we need to make a new backdrop curved. One way to do that is to come up to our performers menu and bring in a eval D former to make it afecta El Wall. We need to drag it into a hierarchy right here. Nothing happens at first, but if we come down to options menu here, we can configure the way this Bev ALS. Let's switch on use angle first, and we'll change the angle threshold to 45 degrees and will come down to the subdivision put in 60 here. We want it to be nice and smooth, and here's the most important part. We need to bring this off, set up something like 65 centimeters should do us for now and you can see we've got a nice curve now, which would be perfect for bouncing light around the scene. Let's turn our camera back on and we'll do a test. Renda. This button right here is the render view, so there's a few things we want to fix before we carry on lighting. The first thing you probably noticed is all of our jobs have disappeared. That's because we made that transparent material while we're working on our seen. So to start with, we'll come down here and we'll just delete that. So it's no longer applied to any of those objects. And if we hit render again, we've got our jobs back, and the next issue is that we can see our funnel guide here. That's easy to fix. Would just find it over here, and we'll double click the stoplights until we hide it. Now, if we do another Riendeau, things are looking as they should, although you're probably wondering, we don't have any lights in here. So where is this light coming from? That sliding out scene. We can actually find the answer to that in our render settings. So let's go up in click right here, OK? We went over some of this stuff in a previous lesson, but the power interested in right now is this bitch right here, Birendra. Right now it's set to stand it. But if we click, this will get a list of all the different render is the standard and physical renders are the main ones in cinema 40 and we've got the software and hardware which is usually used for previewing and cinema. Four days New GP render the pro render. And then we've got my favorite renderers obtain, which is also GPU. It's 1/3 party render us so it doesn't come with Cinema 40 and we'll be looking at that in the bonus lesson. But for now, let's just leave this that standard. We can access some of the options for this render. Oh, right here under the option step. Now we'll cover more of this stuff in the rendering lesson. But for now, I just wanted to show you this. If you look down here, it says default light and that's checked on. So that's a basic default light set up that Cinema 40 has to begin with, which is all well and good. But I think the best way to light is from the ground up. So from Doc, where we can build our lights up one by one. So let's switch that off and move this out of the way. If we do another Renda, as you'd expect, we get darkness. Okay, so in real life, like tends to bounce off objects and in some cases goes through objects. So if we want realistic lighting, we need to set up are seen in a way that's physically accurate, and we can get pretty close to realistic lighting with global illumination. So let's come down to effect and we can activate that here. Now, if we were to hit Riendeau, we're still going to get darkness which were not seen ready together. But we still don't have any lights in there yet, So we're gonna be lighting, are seen with the sky object, and you can find that up here and there it is. Now, this should affect out seeing straight away. So let's do another Rendah and we'll close this window now so we can see this. We're getting some nice soft light throughout our scene now. And if you look closely, you can see we've got these little shadows around things Now. Now we can see areas where the light is coming in and bouncing around. You can think of this as a big sphere around everything which is emitting light everywhere into our scene. And we can customize the color of this light. Nice and easy for we need to do is come back down here and double click to making your material. Then we'll drag that material up onto our sky. And if we hit Brenda, you'll notice that its a lot brighter because it's adopted that light grey over material. And we can control this now directly in our material. So if we open that up and come up to color, there's that light gray color that's illuminating are seen Now we would have changed that to something like a nice red and hit. OK, close that up and make another render. You can see we've got a nice soft red light now, and if you're really fancy, you could even use an image to drive the lighting in your scene. I've actually got a colorful little PNG image off the screen here, and if I grab it and drag it down here, it'll automatically create a material for us. And if we click on that and then come over here under where it says texture, we can see a preview of that image, and this works with most image formats, so you don't have to use a PNG. But if we grab our new material and drag that over the old one and hit render now image file is giving us a nice rainbow colored lighting set up so you can get some pretty interesting results with this technique. Now there's actually a specific kind of file format that's designed exactly for this purpose, and it's called a hey HDR or high dynamic range image. And it looks something like this. Now I'm not gonna go too deep into the science behind this kind of image, but basically there's a higher range of information stored in each one of these images, which means you can get more control out of them when you're lighting you've seen. Now you can actually get some amazing Freeh hdr I maps on deviant art. This artist, by the name of Zaid B. Y. G. Has some really nice studio. H. Diaz that he's giving away for free, so to light are seen will be using one of those. So I put a link in the lesson description so you can use one of those as well if you want, But there's literally thousands of them for free online. So feel free to have a look around. The HDR map I'll be using is this one right here and you can see it's basically just a still spherical image off a light studio set up. So let's go over here and click Download, and I'll show you how to use it in our scene. Okay, just a quick note on keeping your projects organized. You want to keep all the image files you using your seen in a folder called Tex, which is short for texture, and make sure that's placed in the root directory with your project file. This is gonna make your life a lot easier, especially if you're gonna share the file or open it on another computer. Okay, let's light this thing. I'll go off screen and grab a new HDR map and drag that over into the material section here so it creates a material forest like last time. Then we'll drag that up here to replace the material in our sky, and we can see a preview of our image down here in the texture slut. And if we click that there's a bigger preview up here and you can see I went with Studio 10 . Hey, HDR So let's give the surrender. And I think our lighting is starting to look pretty good. It might be a tad too dark or weaken. Brighten it up in the exposure sitting down here in our HDR. Let's just bring that value upto one and re Renda. And now we're ready to start texting, so I'll see you in the next lesson.
10. Texturing: Okay, now we're up to my favorite part, that texture ring, and we're going to kick things off by giving our job a nice glass material. But first, let's come down here and get rid of these materials that we don't need any more. We could just grab them and hit delete. But if we had loads of these that we wanted to get rid off, a nice little trick is to just come up to function and remove unused materials. And now we're just left with that HDR map we brought in in the last lesson. So it's renamed that we might as well call it HDR, and we'll double click this empty space next to it to make a new material, and we'll open that up and see if we can turn it into glass. The default material is kind of a matte gray, and it just consists of color and reflected values, but we actually don't need either of those two make glass, so let's turn them both off. We can control of hourglass settings in the Transparency Channel, so let's turn that on. So the most important setting here to make realistic glass is this one right here. The refraction. This refers to the index of refraction, which is a real world property of different refractive materials. You can actually google the index of refraction or I O. R and get different scientifically accurate values for all kinds of materials. But I know for a fact that the index of glass is about 1.52 So let's put that in here and already you can see something that looks like glass up here in our preview window. Well, we're here. We'll bring our absorption distance down a bit too much are seen scale a little bit more now. Jar is pretty tiny, so let's bring this down to about three centimeters. This is just how far light is able to penetrate the glass before it's absorbed into the material. We don't need to get to scientific when we're creating materials, but it's always a good idea. To start is close to physically accurate as we can, and then we can get is creative as we want to be to get the look we're after. Okay, let's close this and we need to apply on material to our job. So that's open up our conveyor here, you can see there's an old missing material on here, and that was the transparent one that we had on there originally. So let's grab our new glass material and plunk that on the old one. Now we could do a Renda. You're probably noticed. The more materials we apply, the slower AL renders it going to bay. It's usually a matter of playing around with the render setting, so you can get the right compromise between quality and speed. As you can see, it's already quite a lot slower than our previous render, so we'll just let this finish and then we'll see if we can optimize our seen a bit. Okay, so on your material is definitely starting to look like glass. But before we go any further, let's come back up to a render settings and see what we can do to speed this up while we're text oring. I think our global illumination settings of the main culprit here, so let's make sure we've got that selected and you can see up here. Cinema 40 has some handy presets for dealing with just this kind of thing. We're on the default settings now, but if we click this. We've got a bunch of preset preview mode that'll help us render much faster at slightly lower quality settings as well. Some higher quality final render presets, which will obviously render a little bit slower. The one we're going to use is called the Interior Preview. So let's grab that and we'll close our render settings and we'll go up and do another end up. Okay, that was much faster. This is really gonna make our life much easier while we work on the materials. Another thing we can do to speed up the workflow is to work with a smaller preview window. We can actually easily resize our view port here If we grab this, drag it over here or we could even come down here and move this up. Anything we can do to shrink l preview window is gonna make a renders faster because overall will be less pixels to calculate. So I'll show you exactly how I like to set up my interface when im text during a scene. Let's come up here to panel and then down here to New View panel. Then if we click this little box here, we can drag that over to where we want to place this. Let's move it over here until we see that highlighted strip. Then if we let go, it should snap into that section. Then we could just drag this up until birth of those windows. Look, square, something like that. Now, if we hit render, whatever view we have selected is going to be the render window. You can see this window rendered now because it's selected. But if we click here and do another render, it will happen in this window. And it's happening nice and fast for us now. So let's use this view as our render view and this one for everything else. So in this window will come up to cameras and make sure it's set to perspective. Now we can move around and do whatever we need to do without affecting l render camera. Okay, lets grab this view and do another render, and hopefully we can get back to text oring. First, we need to fix this issue. It looks like a jar is intersecting our platform here, so let's quickly switch over to our front view and zoom in here and you can see It's only just intersecting over here, So let's go and grab our platform and we just want to bring it down just a tad. But first, let's turn off L snapping. So we confined to name this a bit easier, and we'll grab that platform and just bring it down ever so slightly. And actually, before we do that, we also want to grab our backdrop and we'll move those together. So platform is just touching the bottom of the Joe. Something like that. Now we'll switch back to our camera view, do another window and see if that fixed it alright. It's looking pretty good to me. So now we could move on to text during the backdrop. Let's come down here and double click again to making new material. We should probably rename hourglass material while we're here and let's call anyone floor. Okay, let's drag him onto our backdrop and we'll come and open that up. Let's move this out of the way of our interview. And just to be different, we're going to give our floor a spotty pattern and will do most of our work for that down here in the Color channel. So we'll start by coming over here to the texture input, and we'll click on this little arrow here where we've got all sorts of options for driving out textures. The one we want for our pattern, though, is the Grady int. And here's where Grady, It looks like at the moment, let's click up here on this button so we can customize this now. We've got a lot of options here to find two now Grady in. Right now it's a straight linear ingredient from black to white. We want to turn this into a dark spot on a white background, so will come down to our type menu here and change this to two D circular. Feel free to play around with some of these other modes, but this is the best one for making spots. Okay, let's click that, and instantly we get kind of a fuzzy spot here, so we're on the right track. We want a spot to be a great color rather than the black. So let's click this little doohickey here and we'll come down here and bring out value slider into the gray and actually will make it 50% gray. That will hit OK, and now it looks a bit more like a smudge. So to sharpen this up, we need to grab these little notches here. We'll move that guy over here and we'll bring the white one up a bit closer as well, until it's almost touching the other one. And if you have a look at our preview, it's now a grey dot, and we could get a better look at that. If we right click and dio open window, let's scale this window up and there's a dot and it's looking nice and sharp. That should do nicely. Okay, let's close this up and we'll go into another Rendah. We don't see any dots yet. Let's see if we can figure out what's going on. Let's move our material editor up here, so it's not in the way, and we'll take a look at our texture tag. Now we've got some texture placement settings down here, but I prefer to use the more interactive tools when moving out textures around. If we come up here and turnout texture mode on, we'll get this grid. But in order to move in scale out textures, we need to also turn this on its the enable access tool. But before we'll be able to do this, we need to change our projection mapping. So down here you can see it's currently set to U V W mapping. We want to go too deep into UV mapping in this course. The projection type that we want in this case is flat, and you can see as soon as we apply that we've got a different result up here. It's actually projecting our spot in this direction, which is why everything looks stretched that way. So if we come up here and grab our rotate tool and just rotate that 90 degrees that way we can now see our spot and it's now being projected from top to bottom. But we don't want one giant spot here. We want lots of little spots. So if we come up and grab the scale tool and scale this down, we'll start getting a lot more spots. And when we're happy with that, let's give it a render. And that's how flow sorted out. The next thing we wanted texture is the platform. So will come down here and make another material. Let's rename it straight away to platform, and we'll drag it over to our platform. Then over here in our color channel, we want to click on this color, and this time we have an RGB value that we want to use. So let's click on this icon, and we'll enter some values here to give us that purple color that you see in our final render. So we'll put in 1 55 in our or red 56 in G, which is green. And finally 1 44 in B, which is the blue. And here's on you, purple color. Let's hit OK and you can see that's been updated. So let's do another end up. Okay, I'm liking the color, but it's looking a little bit flat. Let's see what we can do in the reflect its channel to make this look a bit more interesting. Let's open this up a bit. They will start by changing the type from Blinn to Fung, which gives us a nice looking speculate highlight. Now, to make this look a bit more interesting, we want to use an image file to drive our roughness, so let's pop this open and I'll duck off screen and grab an image file, which you can find included with the project files, and we'll drag it onto here. So the name of that images dirt map, tiff, but again, feel free to use whatever image you want. It's basically just a bit of dirty grunge texture, which is just gonna break up the speculum highlights and make things look a little bit more natural. We want to make our material a bit reflective as well. So let's take our reflections strength up to 60%. And you can see that update in that preview here. But we don't want the whole surface of our model to look super reflective. A lot of the time in real life reflections can't be seen head on. They have a bit of a fall off. So we'll try to emulate that here by opening this up and selecting Fresno from the texture menu. So now you can see those reflections air only appearing around the edge of every object, and that's going to make it look a lot more realistic. Okay, time for another render to see how this is gonna look on our platform. Okay, I think the reflection is probably a little bit too strong. Let's go back to our reflection strength, and we'll bring this down to 20%. And hopefully, if we render that again, it should be perfect. All right, that's looking a lot better. Adding images to your materials is a great way to make things look more realistic. All right, now all we have to do is texture out jellybeans. Let's make one more material and we'll rename. It means let's move this up so we can get to L Play button and we'll go forward to a frame where we can see more about jelly beans. Frame 19 Looks good. Let's go on a play. Our new material to, well, beans we wanted on both of our beans cloners so we can grab this one and hold control and drag it onto the other one. Right? Let's go and have a look at our color channel. We'll click up here and let's just pick a nice red. For now, something like that will do. Let's give it a rendah again. These are looking a little bit dull. Let's go down here and put some work into the reflect INTs. Let's change our type again to phone and we'll sharpen up our speculum highlights. Let's bring that reference down that 40 and the strength up to 15. And actually, I'm not really digging that speculum highlight. Let's bring the specs strength down to zero. And you can already get a rough idea of how this is gonna look in the view port here. But let's give it a render. Anyway, the render speed might dropped quite dramatically here. There's a lot of jelly beans in our scene. In each one has a reflective surface, so it's gonna take a while. I've spent this render up for the lesson, but it actually took a lot longer than this. So don't worry if yours is going a lot slower. Okay, this is looking pretty good. So the next step is to make all these jellybeans a random, different color. So back over in our color channel, we're gonna add a new texture. Shader. This time we're gonna come way down to the Margraff tab and we're gonna grab a multi Shater , which by default, has made our jelly beans white. Let's go back over here and see what options we've got to play within a multi shader basically this list down here will be all the different colors that we want to use for our jelly beans. So that's click here and add a color. And if we click this preview, we can choose a color I'd recommend finding a color palette you'd like to use. Then you can use the eyedropper to sample each color I with a few colors off to the side here so I'll just sample that, and our first color is this blue one. Now we can go and click this error to go back a level where we're building out color layers , and it's just a matter of repeating the process until you have all the colors you want for your jelly beans. So the next color will sample is this purple color, and we'll go back again and keep adding to this list so you can put in whatever colors you want. I'm going to speed this section up because it's going to be extremely boring to watch when you need to add another layer. Just click this button and you're good to go. I'm gonna had quite a few of these, but we'll be back in a second when we filled up the list. Okay, that was quick. I ended up going with 12 different colors. You can see them all here. So once you've chosen your colors, we're ready for the next step So we can see in the view port how jelly beans is still the first color in our list here, which is the blue. But if we come over here to mode and change it from color brightness to average color, it randomly goes yellow, which is a bit weird. And if we were to render this, it still wouldn't work. We still have one more thing to do because we used a McGrath shader. We need to use a monograph defector. So let's come up to our Margraff menu and we'll grab a random effect. Er, because we want random color that's come down to the parameter tap of every random effective they will turn position off. We actually want color information so you can see the color tab here. Let's change the mode to on, and now we just have to apply it. Let's grab our being cloners, and what we have to do is drag out new random effect er into the effect is Tab, and we'll put that in first in the list. So it's calculated first, so we don't get confused. Let's rename and you random effect up to color. And if we've done that right now, jelly beans will be all the colors from their list. Let's give it a try. I'll speed this render up as well, because I think it's gonna take a while. And that's it for texture. In your saying, those jellybeans are looking good. Let's move on to the next lesson where we'll take a look at rendering.
11. Rendering: okay, Before we render this, we should probably finalize out Camera position. How Jelly Bean Jar doesn't quite look like it's in the middle there. So let's come over to our camera and we don't need this protection tag anymore. So let's grab that and hit delete. Then we'll click on our camera and come down to the coordinates tab. And let's just bring this down a bit in the Y axis That looks a bit better, but I'm not too sure if it's exactly in the middle there. But I'll show you a little trick you can use to make this a bit more exact if we come over here to mode and down to view settings under the View tab, we've got some options down here for the title Safe Minds already switched on. But if yours isn't, you can just click it on here, and we can adjust the size of it over here so we can actually use this as a guide. When we're working on our camera composition, let's duplicate this window and bring it over here. Now we can access this stuff while we're playing with that camera. So back over here, we'll just tweet this until looks right in the centre about title safe. Something like that, we could probably come a little bit closer as well. That looks good to me, so it looks pretty scented vertically. Let's check. The sides will come back down to our title safe and bring that in a bit, and that looks pretty perfect to me. So we can turn that off for now and we'll close this window and we'll hit play to make sure our animation is looking good. Still, I'm pretty happy with that. So let's go and finalize our render settings. We'll go up and click this guy and we'll move this window out of the way. Then we might do another quick Riendeau to see how this is looking. Okay, you've probably noticed the edges are looking a little bit jagged. E here. It's not so bad on the platform, but all the smoother objects aren't looking so great. And that's to do with the anti A leasing this guy right here. Let's click on that, and you can see up here our anti A leasing is currently set to geometry, which is kind of a low resolution setting to speed up the render, but we're almost ready to do a final render, so we want to start bringing up the quality. Now let's change this to best, and we'll leave these settings as they are for now. So if we were to do another render, it would probably take a lot longer now. But the good news is we have an option to just render a part of the image just to check it . If we come up here to this menu, there's an option right here called Render Region and that's gonna let us draw a little box over the area. We want to render and hopefully save us a lot of time because it won't need to calculate the entire image. And you can see all those edges are looking a lot smoother now. Okay, we're almost ready to render. Let's take a quick look at our output settings. We settle this stuff earlier, so that's all looking good. The only thing we need to change is this bit down here. It's currently set to only render frame for We want it to render all the frames, so let's just change this and that's that sorted. Let's go over to the save tab. And here's where we can set the image format and the output location. So you just click this button here and said a folder location. I'm just calling my and jellybean factory. Then down here you can pick whatever image format you like. I'd recommend open E x R, which is pretty much the industry standard. I think 32 bit might be a bit overkill here, so let's just bring that down to 16 bit. And that will give us a nice, high resolution image sequence to play with in compositing. So there's one last quality setting we probably want to adjust before we send off our final render. If we go back to the Global Illumination menu, we've still got the preview preset selected here. So let's change that to something like interior High. And now we're finally ready to render. Let's come up here and we'll choose render to picture viewer. And now it's just a matter of waiting for royal frames to Renda. Now, this would be completely dependent on the computer that you're using and how powerful it is . If you find it surrendering way too slow, you can always go back to the global illumination settings and change one of those presets , so we'll see you in the next lesson where we'll be looking at compositing.
12. Compositing: Okay, here we are in after effects. The first thing we want to do is import the sequence we just rented out. So will come up to file import and we'll click on file. Then we'll never get to the photo. We save these in, we'll click on any of the frames or describe the 1st 1 here and after. Effects is usually smart enough to know this is an image sequence, so it should automatically take this box. If not, just make sure it is checked and we'll hit Import. Okay, so here's our imported image sequence. If you remember back when we animated this, we chose 24 frames per second. So we just have to make sure AFTEREFFECTS knows to treat it at 24 frames per second. And we can check this by just having a look up here, and it looks like everything's right for us. It says 24 frames per second right here. But it might say something different for you, maybe 25 or 30 frames, but it's quite easy to fix this. If that's the case, we just need to right click out image sequence and go to interpret footage. Main And here's where we can change our frame rate. Just make sure you're says 24 here and you're good to go. Let's hit. Okay, so now we want to make a new composition with our image sequence in it. So we'll grab the image sequence and just drag it down here onto this icon, and that's automatically created a new composition for us at the exact length and frame rate. All of our image sequence and you can double check that up here. Okay. To keep everything at the highest possible quality. We also need to check out bit depth if you remember from the last listen, we rented 16 bit. Exe are files. So we also want to be working in 16 bit to take advantage of that extra information. And you can check that just down here you can see ours is already set to 16 bit. If yours isn't, just click here and this window pop up and you can change your bit depth right here. So we'll leave that on 16 and hit. OK, and now we want to have a quick check of all of our frames so we'll do a ram preview and you can do that by hitting the zero ke from the keyboard and that we just played throughout sequence and cash it to memory. So the animation is looking pretty good to me, but I might just tweak some of the colors before we do our final output. Let's grab our sequence and come to layer new adjustment layer, and if we apply any effects to our adjustment layer, it'll affect everything below it. Let's hit the enter key and rename this to color. Correct, as will be adding some color fix. Then we'll come over to our fix and presets panel and to jump to. In effect, we can just start typing it in here. The one we're after is called Lumet Tree Color, and there it is. Let's double click that to apply to our selected lay up. We're going to add a lot to our image, which is a little bit like an instagram filter. So let's come up here to a new effect and open this up. You can see we've got a whole bunch of standard image correction tools here, but the part where after right now is this section here, the input Lut. There's quite a lot of free and paid lots available online or be using the M 31 rec 709 lot , and I've supplied a link to that. It's available free online so you can go ahead and get that yourself. Otherwise, feel free to use whatever look you want, so just click here and browse to the location. You've saved your Lut. Here's what the M 31 lot looks like when it's applied, and if it's a bit too intense for your liking, we can bring that effect down by changing the transparency on our adjustment layer. If we grab that and hit T on the keyboard, that will bring up our capacity, and we could just bring that down to say 50%. And if we talk about this little eye icon on and off, you can see it before and after. I'm liking how that's looking. We might just bring up the contrast just a tad, maybe up to 40 which is pretty subtle, but I think that works. Let's do another ram preview and see how this looks cool. I think we're almost there. I might just add a tiny bit, too. The saturation and then I think we're good to go. So let's just bring this up to 110 okay? I think I'm pretty happy with that. But feel free to play around with the settings into you. Get the right look for your animation. One thing we need to keep in mind before we send this to Instagram is that the first frame will become the thumbnail. So, ideally, we want that first frame to be the most interesting looking frame. And if we get back to the start, you'll see our first frame is probably not the most interesting one. I think I prefer to see more jelly beans than an empty job, so we just need to adjust. How are looping? Animation starts. So let's get back to our project panel, and we want to put our animation into a new composition. So if we grab, it will just drag it back down here onto our composition button, and that should happen automatically for us. Let's hit the enter key on a new one, and we'll rename that. Let's just call it Shelley being final, and I'll show you a little trick to change our looping animation Let's come down here and find an interesting looking frame. I think framed twenties, looking pretty good. We basically want to spit this layer in half on the timeline and put the beginning at the end and the end at the beginning. I'm sure it'll make more sense when we do it. So what we hear on Frame 20 Let's press control shift D on the keyboard, and you can see that layer has now been split in half with the beginning of the animation here, and the end of the animation here will then go back to the beginning. And with this top players selected will hit the open bracket key, which put the in point of that layer at the current time in this case, the beginning of our animation. And then we'll move ahead to the end of our timeline and select the other layer and will hit the close bracket this time, and that'll move this layer to the end. Now, if we play that back, we'll still get our looping animation. But the beginning of a lute will now be on frame 20 which is a much more interesting looking frame and a better looking thumbnail. Okay, Now we're ready to render this and get it up onto Instagram. Let's hit control old em on the keyboard and send this to Adobe Media Encoder. Okay, so this is all pretty standard stuff. We just need to set an output location and a file type. I would suggest using the H 264 Codec and media encoder has some great presets. But when I like to use is the match source high betrayed and all we need to do is hit this button and that'll go through all the frames and render at an MP four file. In the next lesson, we'll look at converting it into a gift and posting it on instagram.
13. Upload to Instagram: Okay, so the easiest way to convert your videos to gifts and to get them onto Instagram, I've found, is with Giffey. You can sign up for free at giffey dot com, and when you do, you'll get a page like this. This is the C G shortcuts Giffey page, and you can see I've already got some animated GIFs on here. These are from some of our free tutorials. You can find out more about those on your website, but for now we want to be clicking on the upload button. You're then get a window like this pop up and it's just a matter of grabbing our rendered video and dragging it into here. And you even get this cool little interactive hand thing. Then you get a little video preview here. You can feel in this stuff here if you like, but we won't worry about it. For now. We'll hit. Upload to Giffey. It'll start processing that, and it's pretty much a simple is that So When that's done, you can actually come up here and click on the media button, and that you can access a few different formats that it's created for you. This button here will download a social media optimized gift, which looks like this so you can post that wherever you like. But technically, Instagram doesn't support animated GIFs, so we're actually going to upload our looping animation directly from Giffey on our mirrorball device. So make sure you've got Giffey and Instagram installed on your smartphone and log in to your accounts, and I'll see you there in just a second. Okay, so we've got our Giffey and Instagram maps ready to go on our smartphone. Let's open Giffey first. So then we'll come down and click this icon to bring up our account page. So here's SED shortcuts Page and our new animation will click on that guy. And then if we click here, we'll get some more sharing options and there's an instagram button. Let's click that, and we wanted to appear in our feed and not our stories. So let's click there. We don't need to crop it, so let's skip that. You can add another color filter if you wanted to, but we did ours and after effects. So let's skip that, then. This is probably the most important section. We basically just need to put in a bit of a caption and add a bunch of relevant hashtags to make it easier for people to find out post. So let's just put in something like this, and a couple of hashtags were just put in these ones. For now, you probably want to use up to about 30 of these, and then we'll just hit share. So congratulations, you finished the animation and shared it for the world to see.
14. BONUS: Octane Setup: Okay, Here's where he left off from our texting in the cinema. 40 Standard renderers. So let's start tweaking the set up so we can render with octane. The first thing we need to do is change the render. So back in Orender settings will switch it over from standard to the octane render. Then we'll close. That female, then will come up to our obtained plug in menu, and we'll grab the live you a window. Let's move him here and we'll grab this button and drag this over here and will undock our old window by clicking here and undock, and we'll just close that up. Now we need to add and obtain camera tag to our camera. So with that, selected will come up to tags C 40 octane tags and grab the obtained camera tag. Now let's fire this up in the live you and see how this looks in obtain. OK, we've got some work to do. Some of the materials air translated pretty well, but some not so well. Let's pause there live, you're for now. I think we should probably start with fixing our lighting, So go on, grab our sky and delete that because Octane has its own version of that, we need to replace that with that obtained HDR environment, and you can find that over here in the octane objects tab. There it is. Then you can see down here there's a place for us to add HDR image, so we'll click that and you can see it's empty at the moment, so I'll just go off screen and bring it into here. There it is. It's the exact same one that we use before, and let's resend the scene to the live viewer, and now we need to figure out what's going on here. It looks like everything's being chopped in half if we take a look at our camera. The reason for this is that Octane actually doesn't support the isometric camera yet. They might do in future versions of the plug in, but for now we're gonna have to find a work around rather than trying to fix our old camera . I think it's a better option if we just start fresh and bring in a new obtained camera. So let's do that. We'll come back up here to objects and octane camera, Then we'll switch it on and come back down here and delete out old camera, and then we'll have a look at some of the settings in our new one to make this work in octane. We want to change our projection to parallel instead of isometric, which is going to look a bit weird at first. So we'll need to put in some exact settings to make this work. First. Let's change our zoom to 30 which pretty much brings us back to what we had before. So everything still mean cropped here. Then we need to go to the coordinates tab and we'll put 20 centimeters in the X axis, 30 in the UAE and 20 in the said. And we're getting closer. So now we need to put 135 degrees in the heading negative 35 in the pitch and zero in the bank. Then, over in the object tab, we can control how zoomed in or out. We are with the focus distance, so we'll just get that where we want it. Maybe we'll try something like 16 50 centimeters. Okay, that'll do. For now, let's start fixing these materials. We'll stop by getting rid of that old hey HDR material, Then we need to convert old cinema 40 materials into octane materials. But before we do that, it's probably a good idea to pores our live viewer. If you go and change anything too dramatically while it's running, sometimes it crashes, so we'll switch it off just in case. Now we'll grab all of these and come back up here to materials and down to convert materials. And as you can see, it's replaced all the old cinema 40 materials with new octane materials, and they look pretty similar. So we'll get rid of the old ones that have been left behind by clicking on function. Remove unused materials. So now if we turn our live you back on, it's not gonna look too much different. So it might be time to start playing with their octane render settings, and we confined those right here. Stockton has a few different ways of rendering are seen by default. We're using the direct lighting method, which is the fastest one, and if you change the G I'm owed to diffuse, you can get some pretty nice results. But if you want things to look a bit more realistic. I'd recommend using path tracing, which is going to be a little bit slower. But at the end of the day, the octane render is so much faster than the standard renderers, so it probably shouldn't matter too much in this simple scene. So the main sitting that's going to affect our render times is this one right here, the max samples. At the moment, it's probably set way too high. Let's bring it down to something a bit more reasonable, like 800 another sitting. That's gonna impact. Render time is the diffuse and speculative depth, which basically means the amount of times light is able to bounce around in the scene when picking your value here, I like to just bring both of these sliders right down to zero and then gradually build them up until it stops. Having an effect somewhere around eight should be fine for this one. Then we'll do the same again for the speculum slider, and you can see how glass is looking better and better as we go along. I think 12 is about the level we need for enough light to be going through here. We can also clamp our G I to keep things running nice and fast. I usually just bring the setting down to about one, and that's it for the render settings. For now, let's close that up. You've probably noticed their glasses looking more like chrome at the moment, so let's see if we can fix that. If we go on, open up our jar and take a look at our costs surface. We're getting a bit of an issue here because we use the negative value down here in our thickness, which is basically reversed. The normals on our object, which makes octane think it's inside out, and it has a bit of trouble rendering that you'll see if we get rid of that negative value . It starts to look a lot more like glass for doing this will change the shape of our job. So we just need to compensate for that. So what pulls out live, you're for now, and over here will switch to our right view. And if we zoom in a bit, how thicknesses going in would now instead of outward. So we're left with a bit of a gap around our jar, so let's just come over here and duplicate our entire jar hierarchy. So in the subdivision surface will hold control and dragged it up here. Then without copy, will grab its cost surface and put it back. How it was so negative. 0.4. So now we have a guide to work with. We can then grab our original spine and go over two point mode will make sure enable access is off in this case. Then we'll zoom out of it. We'll grab a rectangular selection tool, and it might be easy to select these points in a different view. Let's try the front view. Well, frame this up and we'll select all of these points and we'll just drag them out until they met, Shot Duplicate something like that. Then we'll come down here and do the same for the bottom points. Let's grab all of those and move them down so they're touching the platform. Okay, now, let's respect to our perspective, you and we'll go and delete the duplicate job we made. And if we turn our live you back on, you could see how jar is back to its original shape. Okay, I think I seems a little bit dark now. so we'll come up to our octane sky and click on its environment tag. Then if we come down here under the main tab, we can bring up the power to make this a bit brighter. Let's try three. Okay, Looking good. If you want to hide these details down here, you just need to click anywhere in this window. Okay? I think our platform is looking a little bit dull here. We might as well make a fresh material for that so I can show you how to do it in octane. So we'll come up to materials and add and you octane, glossy material. Let's click the old one and we'll come over here and lock it into place because we want to sample this color. If we double click out new one, it'll bring up the material editor. But Octane has an awesome feature called the node editor. So I click on that and this is how we build materials in octane. So he is a glossy octane material we created. So the first thing we want to do is bring out purple color back into this Shada. So we'll go over here and grab an RGB spectrum, and we'll drag it directly onto our diffuse general and you can see that links it up. Then we'll click the color and grab the color picker, and they will just sample this color that we've locked in here. And you can see that update in the thumbnail here so they will go and grab our material and drag it on 12 platform in place of the old material. And because they're live, you is still on. That's updated straight away. You can see that's looking nice and glossy now, so we want to do the same thing we did in the original material and had some roughness into the reflections. So I'll go over here and grab our dirt map texture again, and we'll just plunk that over here. Then, if we click this little dot and drag it into the roughness channel, it'll link up. And if we look in our live view, you can see that's broken up those reflections of it now. So let's close that will delete the old one and will rename the new one to platform one thing you'll notice with octane materials. The thumbnails don't always refresh, so here it still looks white, but our material is definitely the purple. Okay, all we need to do now is fixed. These jelly beans, thankfully making random colors in octane Schrader's is much easier to do than in the standard SHADER. We'll start by getting rid of our previous set up. Let's open up our effective and weaken delete this color random effect. Er, we can collapse this back up. Then we'll go back over here and bring in another octane, glossy material. As this material was applied to a few objects in a scene, a little trick is to grab it and we'll right click and select texture tags, objects that'll grab all of the instances of that texture tag. And actually, we should probably unlock out attribute panel and try that again. Select texture, tags and affray drag on your material onto the material slot that will replace all of those instances without new material. And if it doesn't look like a live view has updated, we could just hit this button again. Okay, By default, they've gone white, but we'll fix that. Let's get rid of old beans material first, and we'll rename out new material and we'll go back to our obtain node editor and just get this into position. And all we need to do is bring in a random color node, and we'll just drag that straight onto the diffuse channel. And if we have a look at that, it's already looking a bit random. Well, they're right now. It's just random shades of gray. There might even be 50 shades of grey anyway, let's add some color to this. We need to put a note between the random color Erno Diffuse channel to give it some color information. So the one we want is down here. It's the Grady int node. Let's drag that right on the line here, and it'll automatically link itself up, which is nice. Well, just tidy this up a bit and take a look at our Grady a node. So jelly beans seem to range and value between black and white, and you can see that's reflected down here without radiant. So if we were to change one of these colors, let's click on the black one, and we'll make it a nice bright green. You can see we've now got a range between green and white, so all we have to do is put a bunch of different colors on this, Grady it. But we're gonna take a little shortcut here if we pop this open and move this up a bit. We've got a few extra settings here, frog. Radiant. But if you look down here, we can actually import presets. And cinema 40 includes a whole bunch of these, and the one I think is best for our jelly beans. Is this one right here? The full colors. So let's bring that one in, and you can see the more lined up on our Grady It now. And if we have a looking at live viewer job done, we've now got out randomly colored jelly beans and that's it for text during an octane. There's just a few more little things we want to check before we start rendering. We can close this window. Now if we come up here and hit the lock resolution button, this little lock icon it'll render at our final output dimensions. This is a nice way of checking. Everything looks good before our final output, and I think everything is looking pretty good. The one thing you do notice that full resolution is that the jelly beans aren't quite a smooth as they could be. We made them pretty low resolution. So up close, some of the edges look a bit sharp. So rather than adding a subdivision surface, which could actually slow things down a bit, we can actually use an octane tag to do the same thing. So with one of our being selected will come up to tags, obtain tags and grab an octane object tag. Then, with it selected will come down here to the subdivision group, and all we have to do is raise. This number will put a one in there, so it's subdivided once. Then what has come back up here and grab that tag and duplicate it to the other beans? And now they're all looking pretty smooth. If you want to render a particular area only like we did back in the standard renderers octane actually has the same feature. It's just this button here, and we'll drag out a window here over the beans, and I'm pretty happy with that. Okay, let's turn both of those off, and we'll do the same thing to smooth out jar. It's already got a subdivision surface on. So let's just switch that off and will duplicate our object tag onto the cloth surface. And just to be sure these are super smooth in the final Render, I might grab them all, and we'll just bring that subdivision level up to two. Let's restart the live. You're just in case it hasn't updated. Okay, I think we're ready to render. Let's stop that and we'll come back up here and open our render settings. Okay, All of these settings we had previously a fine, and it's set to render out all the frames, which is good. Let's take a look at the save menu and again, all of these settings of fine I think all we need to do is check out octane render settings . So we'll go back up here and click this. We might just bring out samples up a little bit for our final Renda. I think it 1000 should be fine. Everything else looks pretty good to me. We'll close this and we're ready to render to the picture viewer, and that's it for rendering an obtain
15. Thanks for Watching!: Thanks for watching. Don't forget to post your final project on the project page. And if you share your creations on social media, you can tag me at C G Short cuts. It would be amazing if you could leave me a review. And if you need help with anything or have an idea for a future course, please get in touch. You can find us at all of these places. I'll catch you next time.
16. Troubleshooting: so I thought I'd make a quick video showing how to fix some of the issues that students are having. Firstly, some people having issues with the color of the beans if they hit render we're not seeing the multi color shader happening. That's an easy fix. The other issue is the slipping off the beans. As you can see in the corner here. If we just pours on another frame, you can see Oops here you can see them popping out of the jar here and again. That is another easy fix. Okay, let's sort the color of these beans out first. If we pulls this and maybe get to a frame where we can see a lot of beans, that frame will do nicely. You can see the real green right now, and that's because we've cashed before we sorted out our random color so it's actually cashed the green being data and not the multi color shader. So you'll probably find if you just delete that McGrath cash, you'll instantly get all of your random colors back. And if we hit Rendah that's working nicely. Now we will need to get back a few steps and re cash these beans because if we try to make that same fix on our duplicate cash, it will fix the colors, but it will no longer be cashed and offset. But I'll take you through the steps again while we fix the other problem here. Let's delete our duplicate beans. We're going to recreate that soon, But let's take a look at our slipping problem down here. This is because of one of our effective the plane effect. Er, if we right click on that guy and come down to show f curves, you can see our key frames here are smoothed out. We need these to be linear, sir. If we hit control A to select all the points we could hit this button here to make them linear. And now they're nice and sharp, and this is going to stop the beans from sliding out of the job when we animate. So we'll close that. And now we need to make sure all the other caches air gone because we're going to re cash everything so that you don't have a look over here and see if we can find some more cash is if we open all this up. You can see what these McGrath cash is here. Let's delete those. And if you remember, these were cashing the animation that our effect is were creating. So we need to turn those back on so we can re cash them. Let's just see what's happening now. You can see the animation is still playing really quick. So something still cached. What we're seeing here is actually the dynamics caches. So we need to gravel of those guys that should be three of them. Then with them all selected will go to the cash tab and hit clear. All cash is now if we play it back, the bean should still be admitted, but they shouldn't collide with anything. OK, so we're back at the point before we've done any cashing. And also, if you remember, we originally had 120 frames in here. We want to cash 120 frames so we can do the offset later back to 60 frames. So let's just put 120 back in here and we can move this over here, so we've got all of our frames back, so let's start cashing. We're going to be cashing. The effect is first, so we'll grab our to conveyor cloners here and we'll go to tags and we'll grab a monograph cash tag, and that should apply it to both of them. Now all we need to do is go to the build tab and hit make, and it will make them both. Now, if we hit play how conveyor animation is cached, which means our effect is have been cashed into the animation, including L corrected plane effective so we no longer need them. Let's switch them off. And now that we've done these tumor graph caches, we need to re cash the dynamic simulation so we'll grab all three of those. Then under the dynamics tab will enable them all. And then we'll go to the cash tab and hit make. Or now that could take a while because it's calculating the dynamics so we'll fast forward this. Okay, now that we've got our dynamics cashed on our beans, we need to bring in a murder graft, cash So same deal again had a monograph cash tag and will come down to bake and bake. There is 120 frames, and now that our dynamics is baked into this McGrath cash as well as our correct color data . We don't need them enabled anymore. So with all three selected will just disable them by clicking here again. And now if we hit play, everything's working as it should, and you'll notice we're not getting any more slipping down here. Now all we need to do is come back to our beans, hold control and drag it up here to make a duplicate. And if you'll remember, we just need to do that offset. So will come down to play back, and we'll offset that negative 60 frames and we'll change our timeline back to 60 frames. And if we hit play, we've got out looping animation. And if we stop that and do a rendah, all of our beans are the color they should be, so hopefully that helps you out. I'm looking forward to seeing your final renders, and we've got a brand new course coming very soon. Catch you next time
 Dave Bergin, CG Artist - CG Shortcuts