Transcripts
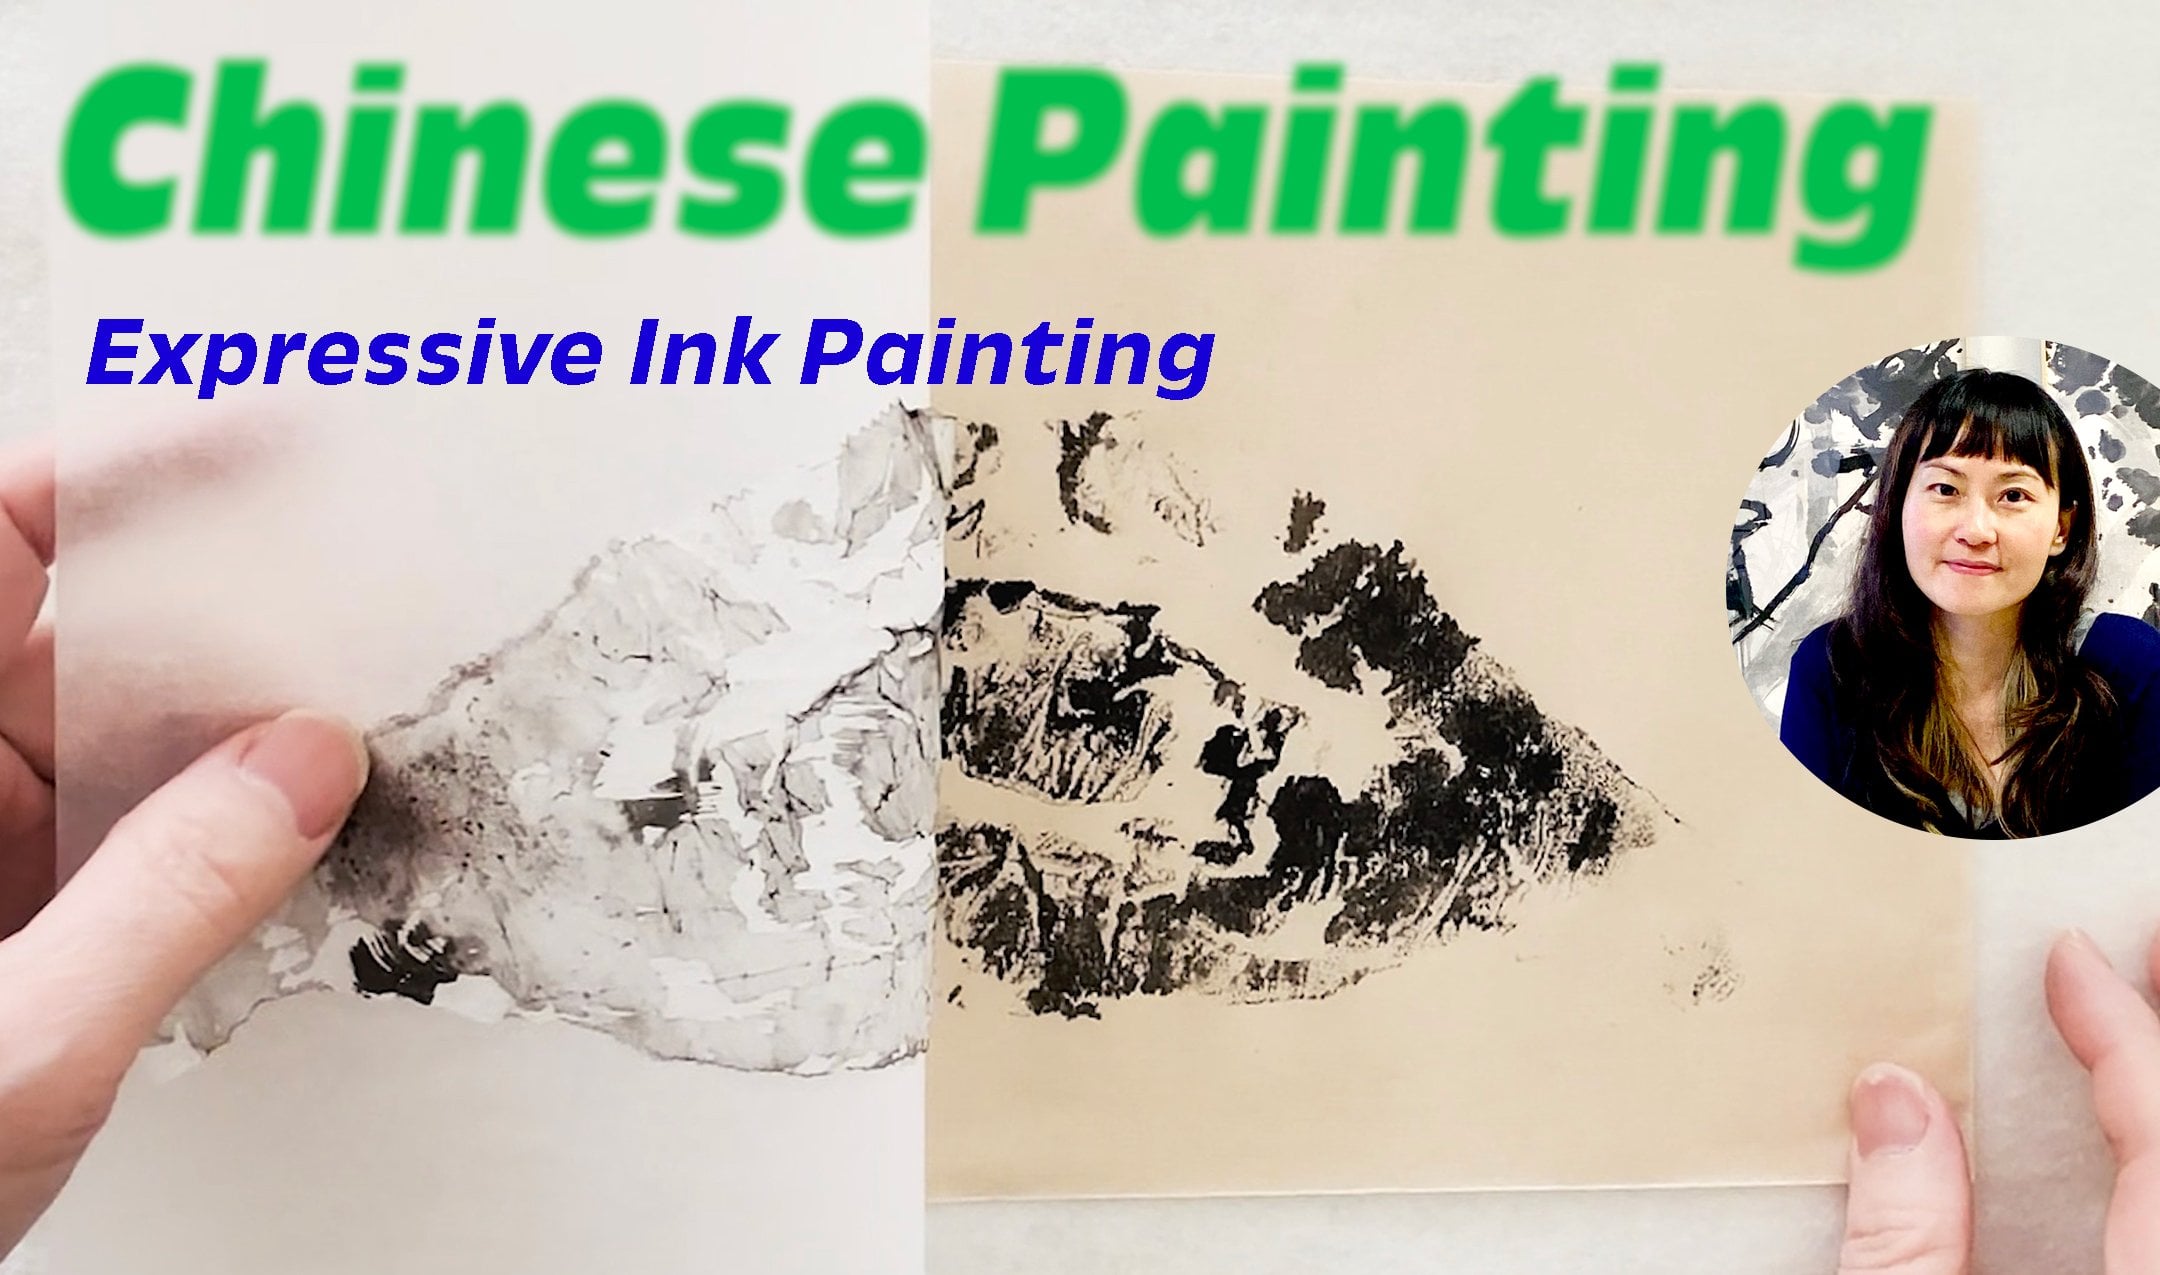
1. Introduction: Welcome to Chrysanthemum
painting in Chinese brushwork. In this course, we will explore not only the beauty
of the chrysanthemum, but also the quiet
strength and grace it symbolizes in traditional
Chinese culture. We'll begin with a close look
at the materials and tools, the foundation of your
painting practice. I'll introduce you to the specific brushes we use
in Chinese brush painting. You'll learn the best ways to prepare your ink and colors, how to control the
moisture in your brush, and how to create smoother
and more expressive strokes. These techniques are subtle, but they can transform
the way your brush moves and how your
painting comes alive. Think of this as learning the secret language
of your tools. Once you understand it, everything becomes more
fluid and enjoyable. Next, we'll begin painting. We'll start with the petals and buds of the chrysanthemum, learning how to use
the tip and body of the brush to create
gentle flowing strokes. I'll show you how to
build the structure of each flower from small buds to full blossoms
and how to bring out the natural rhythm
and form of the petals. Then we'll move to the leaves where you'll learn
two classic methods. You'll see how to create depth, flow, and harmony using
only ink and water. In the coloring section, we'll explore how to work with Chinese mineral
pigments and colored ink to build tones and contrast. Later in the course, we'll
shift to composition. Finally, you'll learn how to complete your own
chrysanthemum painting. This course is suitable for beginners and intermediate
learners alike. Let's begin this beautiful
painting journey together.
2. Material Setup: Painting the chrysanthemum
material set up paper. In this lesson, we're using
half ripe Chinese paper. This semi absorbent paper
is an excellent choice for beginners as it offers high
quality control over detail, soft ink flow, and
smooth tonal variations. Brushes. There are three types
of brush hairs, gold hair. Mixed hair, Wolf hair. In this course, we
will use wolf hair and gold hair brushes
in medium size and mixed hair brushes in
small and medium sizes. To prepare a new brush, soak it in water for
two to 3 minutes. The brush hairs will soften, making it ready for painting. When holding the brush. There are two traditional
techniques to consider. Begin by measuring the brush
position with your fingers. Hold it firmly with two fingers, adjusting as needed for
balance and comfort. You may hold the brush using
two different methods. Option one, option two, For this course, we're using either Chinese or
Japanese painting ink. We're using Chinese
ink painting. This has a distinct vibrant hue, perfect for creating a
recognizable effect. Before we begin, place
a layer of wool or felt fabric beneath your paper to help with absorption
and stability. Prepare two plates, ensure you have an adequate amount
of water prepared. Add a few drops of ink, and then clean and moisten your brush thoroughly
when taking ink. Use just the tip, allowing the ink to
absorb evenly into the brush hairs until you're ready with a dark
rich ink color. Now, try drawing a few lines
to test the ink color. As you practice, take more ink whenever the
brush starts to dry, repeating the same steps
to get comfortable. It's time to practice the movement of your
hand and brush strokes. Position the brush at
a 90 degree angle for fine control and try holding it at 45 degrees for
a different effect. Draw lines and experiment with various shapes to become more
familiar with the angles. For thin controlled lines, keep the brush at
a 90 degree angle, while 45 degrees is ideal for creating more
fluid curved lines. Lay the brush down for
thicker lines and shapes. Create unique lines and shapes, letting your
creativity guide you. For smaller details, rest
your hand on the table. But for longer lines
and larger objects, lift your hand to gain
freedom of movement. Try drawing
continuous long lines with your hand slightly
lifted off the table. Well done. You are now ready to move on
to the next class. Let's continue building your
brush technique and mastery.
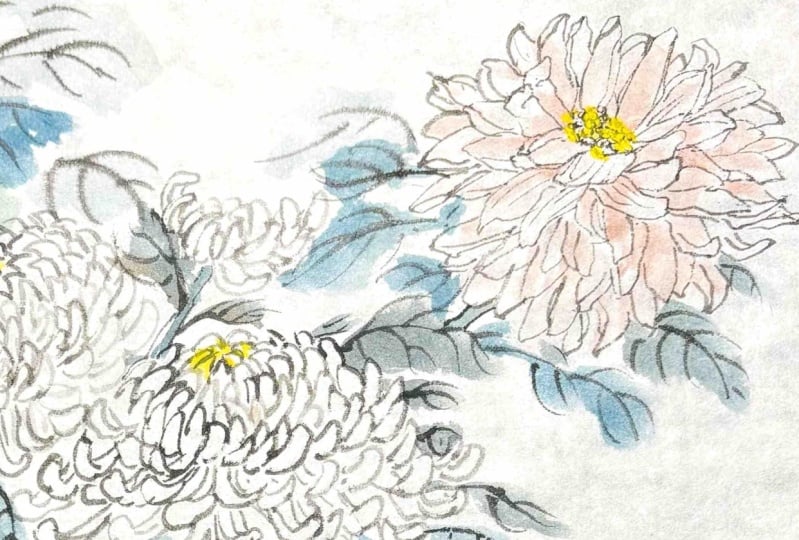
3. Introduction to Chrysanthemum Petals: Chrysanthemum
painting techniques. Let's begin with the petals. Preparation. We'll be using one small brush and
one medium brush. Start by dipping your brush in clean water to rinse
and moisten it. The brush should be evenly
wet but not dripping. Then dip the tip into your ink and mix it in a clean dish
to create a lighter shade. This diluted ink will give your petals a more delicate
layered appearance. Demonstration one. You can find a reference sample
in the course notes. Please download it from our
course page for guidance. Let's begin with small
chrysanthemum buds. Load the tip of the
brush with ink and gently press it onto the
paper to draw the petals. Use light, fine lines to shape
the bud with a soft touch. Try to vary the direction
and size slightly. This gives a sense
of life and rhythm. Drawing two to three
small buds within your composition helps create contrast and visual balance. Now, move on to the full bloom. Start at the center of
the flower painting about ten to 15
short curved petals that radiate outward in a
roughly symmetrical shape. Hold your brush vertically
for precision and vary the brush pressure slightly to create more expressive lines. As you work your way out, gradually lengthen
the petals and allow the form to
open up naturally. Focus on the balance between
fullness and airiness. Observe how the petals fan
outward and overlap slightly. This demonstration
also highlights basic brush handling and the fundamental structure
of the chrysanthemum. Uh take your time to observe the flow and allow the petals to develop
gently across the page. Artists and poets
throughout Chinese history have celebrated
the chrysanthemum for these very qualities. It embodies the spirit of those who remain
true to themselves, even in difficult times. When we paint this flower, we're not only capturing
its outer form, we are expressing
an inner attitude. I Chinese painting, the chrysanthemum is
more than just a flower. It is a symbol of quiet, strength, elegance,
and perseverance. Blooming in late autumn, when most flowers
have already faded, the chrysanthemum stands
resilient against the cold. This seasonal timing has long made it a metaphor
for integrity, endurance, and inter calm. Demonstration two. In this
second demonstration, we'll revisit the
same structure but take a more refined,
detailed approach. The goal here is to deepen your understanding of form,
flow, and composition. Begin again from the
center, but this time, pay closer attention to how each petal
curves and overlaps. Slightly vary the angles and lengths of the
central petals. A little irregularity creates a more natural dynamic effect. Aim for about ten to 15
petals in the center, radiating outward in
a circular rhythm. For the outer petals, lengthen your strokes and experiment with the brush angle. Gently twist your wrist as you paint to add
curvature and energy. Adjust the pressure
to create variety. A firm press will
give a bold stroke, while a light touch will
create a soft taper. Focus on the structure and
spacing between petals. Leave intentional gaps
between layers to suggest depth and to let
the composition breathe. It's petals, soft
yet structured, call for brush strokes that
are both light and steady. The painter must be
focused but not rigid, expressive, but not careless. Each petal we paint is
an act of mindfulness, a reflection of balance
between emotion and technique. Through the chrysanthemum, we learn to paint not
only what we see, but what we feel,
grace under pressure, beauty in simplicity, and
strength in stillness. This interplay of fullness and emptiness is a key principle
in Chinese painting. Once the bloom is complete, enrich the composition by
adding smaller buds or partially opened flowers to create contrast in
size and rhythm. These elements not only
add visual interest, but also help guide the viewer's
eye through the artwork. Before finishing, take a moment to observe the overall balance. Refine any irregular shapes
with a smaller brush, and reinforce certain strokes to bring clarity and
focus where needed. This demonstration
encourages you to go beyond technique to
observe closely, revise mindfully, and express the gentle elegance of the chrysanthemum through
intentional brushwork. Each stroke is an opportunity to express not just
the shape of a petal, but the feeling behind it. With continued practice,
your hand will grow more confident and your eye more sensitive to the rhythm
of ink and paper. In the next lesson,
we will explore how to complete a full
chrysanthemum composition, including leaves, stems, and layout to bring harmony
and depth to your artwork.
4. Painting Chrysanthemum Leaves: Chrysanthemum painting
techniques. In this lesson, we'll explore two methods for painting
chrysanthemum leaves, each offering a slightly
different approach to texture and form. Method one, line
first, color later. In this method, we
begin by drawing the leaf textures with fine
lines before applying color. Start by using a small
brush with a fine tip, dip it into medium or light ink, then gently draw the
central vein of each leaf. This main line suggests the direction in which
the leaf is growing. From there, add the
smaller side veins, curving them outward from the center like the
bones of a fan. Let your lines be
fluid and natural. Taper them sharply at the ends to create a sense
of energy and life. These lines are not
only decorative, but help shape the
identity of the leaf. This approach emphasizes
structure and clarity and is especially useful for practicing control
and precision. To create variety and movement, draw three to four
leaves in a group, vary the direction of each
leaf, some facing upward, others bending down or tilting sideways to suggest
organic growth. This variation prevents
the composition from becoming stiff
or repetitive. Once the line
drawing is complete, switch to a medium brush
to add color and form. Start by loading your brush
with a diluted ink tone. A soft gray or light ink wash
works well for the base. Fully load the brush
with both water and ink so the strokes
flow smoothly. Paint each leaf using one
to two brush strokes. Press the body of the brush onto the paper to form the
broad part of the leaf, then lift gradually to
taper off the stroke. This single movement captures
the fullness and gesture of the leaf in a minimal
yet expressive way. To create tonal
variation and depth, dip the tip of your brush into a darker ink before
applying the stroke. This gives the leaf
a natural gradient, darker at the base or edges, lighter toward the
center or tip. You may also layer strokes. Apply a second pass of ink while the first layer is still damp
to blend the tone softly, or wait until it dries to
add contrast and dimension. Yes. Method two. Shape first, texture later. In this second method, we begin with the shape
of the leaves first, allowing the overall composition
and brush movement to guide the form naturally before
adding internal details. Start with a medium brush
loaded with a diluted ink tone. The amount of water
in the brush will determine the softness and
transparency of your stroke. The wetter it is, the more delicate and fluid
the leaf will appear. With each stroke, focus on expressing the gesture and
personality of the leaf, rather than outlining
it rigidly. Use one or two confident
strokes to form each leaf. You can press the belly of the brush onto the
paper and then left slightly or twist gently to shape the
curves and tips. Allow each leaf to be
slightly different. So long and narrow, others rounder or curved. To reflect the natural variation found in chrysanthemum leaves, compose the leaves
in small groups, placing them around the flower to complement the
floral structure. Be mindful of the flow between the leaves
and the open space, keeping a sense of rhythm and
breath in the composition. You can further refine
the layering effect by adding darker ink along certain edges or
tips of the leaves, especially where you want to suggest shadows or
overlapping forms. Adding these tonal accents gives the leaf volume and helps anchor it within the
overall composition. After you've completed
the leaf shapes, allow the ink to dry halfway. Not fully dry but
in a semi dry state where the surface is still
absorbent but no longer wet. This is the ideal moment
to add texture and detail. Switch to a small
brush with a fine tip. Dip it into slightly darker ink and begin drawing the veins. Start with the central vein. Then add branching side veins, following the direction and curve of the leaf,
you painted earlier. Painting on a semi
dry surface causes the ink to softly merge
with the base layer, creating a subtle
embedded effect. This adds depth and softness, avoiding harsh lines and making the texture feel
integrated with the form. As you work, pay attention to the balance between loose
washes and structured lines. This contrast creates
a dynamic harmony that gives the
painting its vitality. This method encourages a freer, more intuitive
approach to brush work while still maintaining a
sense of structure and detail. This method invites
spontaneity and observation, teaching us how to respond to the movement of ink and
the energy of the brush. It's not only about technique, but also about sensitivity. Learning to let the painting unfold naturally one
stroke at a time. Each method offers
a different way to express the character
of chrysanthemum leaves. The first emphasizes
control and detail, while the second invites a
freer, more spontaneous flow. Try practicing both
approaches and notice how they affect the mood and
rhythm of your painting. In the next lesson,
we'll begin combining flowers and leaves into
a complete composition.
5. Colouring Leaves and Petals: Chrysanthemum
painting techniques, coloring leaves and petals. In this demonstration, we'll
focus on adding color to the leaves and petals using both ink and traditional
Chinese painting colors. We'll begin with the
leaves using method two, painting the shape first,
then adding the vein lines, and then proceed to
color the petals. Part one, coloring the leaves. Start by using a
medium sized brush. Load it with a good amount
of water and diluted ink. Gently press the brush onto the paper to form the
shape of the leaves. Let your strokes flow naturally, creating a soft gradient
with each leaf. Darker at the base or tip and lighter
where the ink fades. Vary your pressure
and brush angle to give the leaves
movement and character. Plan your composition carefully. Group the leaves in
relation to each flower. Some should be close
together to create density, while others are more spaced out to give a sense of airiness. This variety in spacing enhances the rhythm and balance
of the painting. Once the base layer of
ink has dried slightly, you can deepen the
tones by layering another round of diluted
ink on select leaves. This builds contrast and gives a sense of volume
to the clusters. Now switch to a smaller
brush with a fine tip. Dip it in a darker ink tone, and draw the central
veins of each leaf. Then add side veins that
branch out naturally. Keep the line soft and fluid, allowing them to blend subtly
into the underlying wash. Lastly, paint the
stem of the flour. Avoid using harsh thick lines. Instead, allow for variation in tone by using a mix
of diluted ink. Let the brush glide with a
slight wavering motion to reflect the natural
organic texture of the chrysanthemum stem. Part two, coloring the petals. Now we'll move on to color the petals using traditional Chinese
painting color paste. This type of color
is easy to prepare. First, clean your brush
thoroughly to remove any ink. Moisten the brush, then dip
it into your chosen colour. Mix the color well on a dish or palette so that the brush
is fully saturated. Using one brush
stroke per petal, paint each petal carefully. Focus on the rhythm and
repetition of the strokes. This meditative movement brings harmony to the
overall flower form. If your brush becomes dry, or the color fades, dip back into the
paint and continue. To enhance the realism
and depth of your petals, consider layering multiple
shades of the same color. For example, start with a light pink or
yellow as the base. And once it's semi dry, add a slightly deeper tone at the base or tip of the petal. This technique known
as shading with color, take on tar, adds volume and a three dimensional
field to each petal. Be careful not to
overwork the area, allow the water and pigment
to blend naturally. You can also introduce
subtle color shifts within the same petal by mixing a
tiny bit of a second color, such as adding a
touch of orange to pink to create a warmer
tone and gentle contrast. This approach gives the flower a more lifelike and
elegant appearance. You may switch to a
contrasting color for some of the petals to create visual
interest and variety. Simply mix it with
water until you reach a smooth,
even consistency. This is especially effective
when showing depth layers, or different stages of blooming. Part three, enhancing
the leaves with color. Since we already painted
the leaves with ink, we'll now add a
subtle green layer to enhance their tonal richness. Dilute your green colour with water to create a
transparent wash. Load your medium
brush and gently paint over the ink toned leaves. Use one or two brush
strokes per leaf. The green will merge naturally
with the ink underneath, creating a layered
gradient effect. This subtle color overlay gives the leaves a more vivid
lifelike quality. To add more dimension
and vitality, consider layering a second tone over the initial greenwash, such as a hint of blue or yellow depending on the
mood you wish to create. For example, adding
a touch of indigo or bluish green to the base of some leaves can
create a cooler, more tranquil atmosphere while a light yellow green wash
adds warmth and freshness. Always dilute the
color sufficiently and test it on scrap
paper before applying. Use gentle sweeping
strokes that follow the natural direction of the leaf to blend
the tones smoothly. This layered technique gives your foliage richness and a
sense of natural variation, enhancing the overall
harmony of the painting. Final touches. After the
ink and color have dried, you may notice some areas appear lighter or
lose intensity. Now is the time to refine
your work with retouches. Using darker ink or a stronger
tone of your chosen color, reinforce certain areas, such
as the base of the petals, the depth of overlapping
leaves, or the stem. This will help guide
the viewer's eye and create focal points
in your composition. The chrysanthemum, with its graceful leaves
and layered petals, offers the perfect
subject to explore the beauty of
expressive brushwork and subtle color blending.
6. Composing the Chrysanthemums: Painting your own chrysanthemum, composing and outlining
the chrysanthemums. In this lesson, we will begin designing and painting your own chrysanthemum
composition. I will demonstrate how
to sketch and outline the flowers on paper
before applying any color. We'll be working with a group
composition that includes five fully bloomed chrysanthemums
and two smaller buds. You will learn how to plan
the arrangement thoughtfully, paying attention to the balance, rhythm, and spacing
between each flower. Consider how each bloom
relates to the others in terms of size,
height, and placement. Some can appear
higher, some lower, some closer together, while
others leave more open space. This variation in
spacing brings movement and harmony to the
overall composition. As you outline each flower, focus on the flow and
direction of the petals. Pay attention to how
the petals are layered. So overlapping, some
opening outward, vary the density of the petals to create contrast and interest. Petals at the center may be
tighter and more compact, while outer petals can be
more open and spread apart. This part of the process
emphasizes outlining the shape and structure of the chrysanthemums
with fine brush work. These outlines will
serve as a foundation for the coloring and
shading in the next step. The following video is primarily a visual demonstration with
less verbal instruction. Please take your time to
observe the brush techniques, spacing choices and
compositional flow. You're encouraged to
pause and replay as needed while sketching
your own arrangement. Yes. Yes. Once your outlines are complete, take a moment to step back and view your
composition as a whole. Ask yourself, does the
piece feel balanced? Is there a natural
rhythm across the page? These small decisions will guide the energy of your
painting and allow the chrysanthemums to express both their grace and strength. In the next lesson, we'll
move into the coloring stage. You'll learn how to bring your
outlined chrysanthemums to life using traditional Chinese pigments
and ink techniques, adding tone, depth, and
vitality to your work. Stay with me as we explore this next exciting step
in the painting journey.
7. Colouring and Values of Chrysanthemums: Painting your own chrysanthemum,
coloring and values. In this final lesson, we will bring your
chrysanthemum composition to life through color. You'll learn how to apply
color to the petals, leaves and stems, building depth and harmony with thoughtful
layering and brushwork. As you watch the demonstration, observe how the colors
are applied gradually, how the brush moves
to create softness. How one color blends into another and how contrast
is used to highlight form. Pay close attention to how different tones
are mixed and layered, especially in the leaves where color shifts
from light to dark, create a sense of
depth and vitality. We will use two to three
color tones for the petals, allowing subtle variations and blending to reflect the
natural beauty of the flower. For the leaves we'll work with a green gradient created by mixing three ink
and color tones. This layering adds
visual interest and dimension to your painting. Remember that color in Chinese painting is
not only decorative, it conveys emotion,
atmosphere, and balance. Each brush stroke is a decision, and each shade contributes to the overall harmony
of your composition. Take your time and enjoy this meditative process of bringing your chrysanthemum
to full bloom. Once you've finished
your painting, take a moment to reflect
on your journey from brush technique to composition,
structure to expression. With each stroke, you've
brought your chrysanthemum to life with grace,
patience and intention. Thank you for
joining this course. I hope this experience has
deepened your appreciation for Chinese painting and the poetic spirit of
the chrysanthemum. Keep practicing, keep observing, and let your brush
continue to grow with you.
 Oi Ling Atelier, Chinese Painting, Calligraphy teacher