Transcripts
1. Intro & Welcome!: Looking to create a character
for your personal projects, then you're in the right place. We're going to develop a
character together from scratch and you'll see the entire
process video after video. At the end of this
course, you'll have a complete character that you can confidently use
on all of your projects. Hi, I'm Patrici Caldera
from Don Corgi, an art teacher with a love for drawing and keeping
things simple in art. I've taught thousands of
people around the world, and I'm here to teach
you the secrets to create characters for
your own projects. We'll start by creating a moodboard to get the
creative choice flowing, and I'll even give you a
helpful template for that. Then we'll brainstorm
your character, doodle to life and keep on refining your design
video after video. You'll see your character grow and evolve through each step with short bite sized lessons so you won't feel overwhelmed. We'll also be coloring and creating a character
sheet for your character, so you can use it over and
over again on your projects. Finally, you'll get tips
and tricks throughout the course so you can maximize
your creative potential. Are you ready to start creating? I will see you in
the next video.
2. Inspiration Overload And Assignment!: Hello, and welcome
to the course. In this video, I just
want to give you a small assignment before we start creating our character. The assignment is
for you to create a simple mood board with the
things you like and enjoy. The goal here is for you to think about what inspires you. It can be anything really, images of food, places, patterns, shows, movies, books, quotes, drinks, or flowers. Anything counts because this is a mood board about
and for yourself. This mood board will help
you focus on the themes you enjoy as you create your
character in this course. Not only that, but it will be a handy reference whenever
you create something new. If you're having difficulty in finding inspiration
for your next project, you can always look back to this moodboard and inspiration
might spart again. This moodboard can have as
many images as you want. I leave a simple template, so all you have to do
is add images to it. You can even do a
printed version of your moodboard if that's
something you enjoy. I also want to show
you my mood board so you can see a quick example. As you can see, I have here a
lot of themes such as food, objects, stars, movies,
books, and many others. It really doesn't
matter what it is, as long as it's
something you enjoy. This is it for the
first assignments. Have fun creating
your mood board. Don't forget to
download the template, and I'll see you
in the next video.
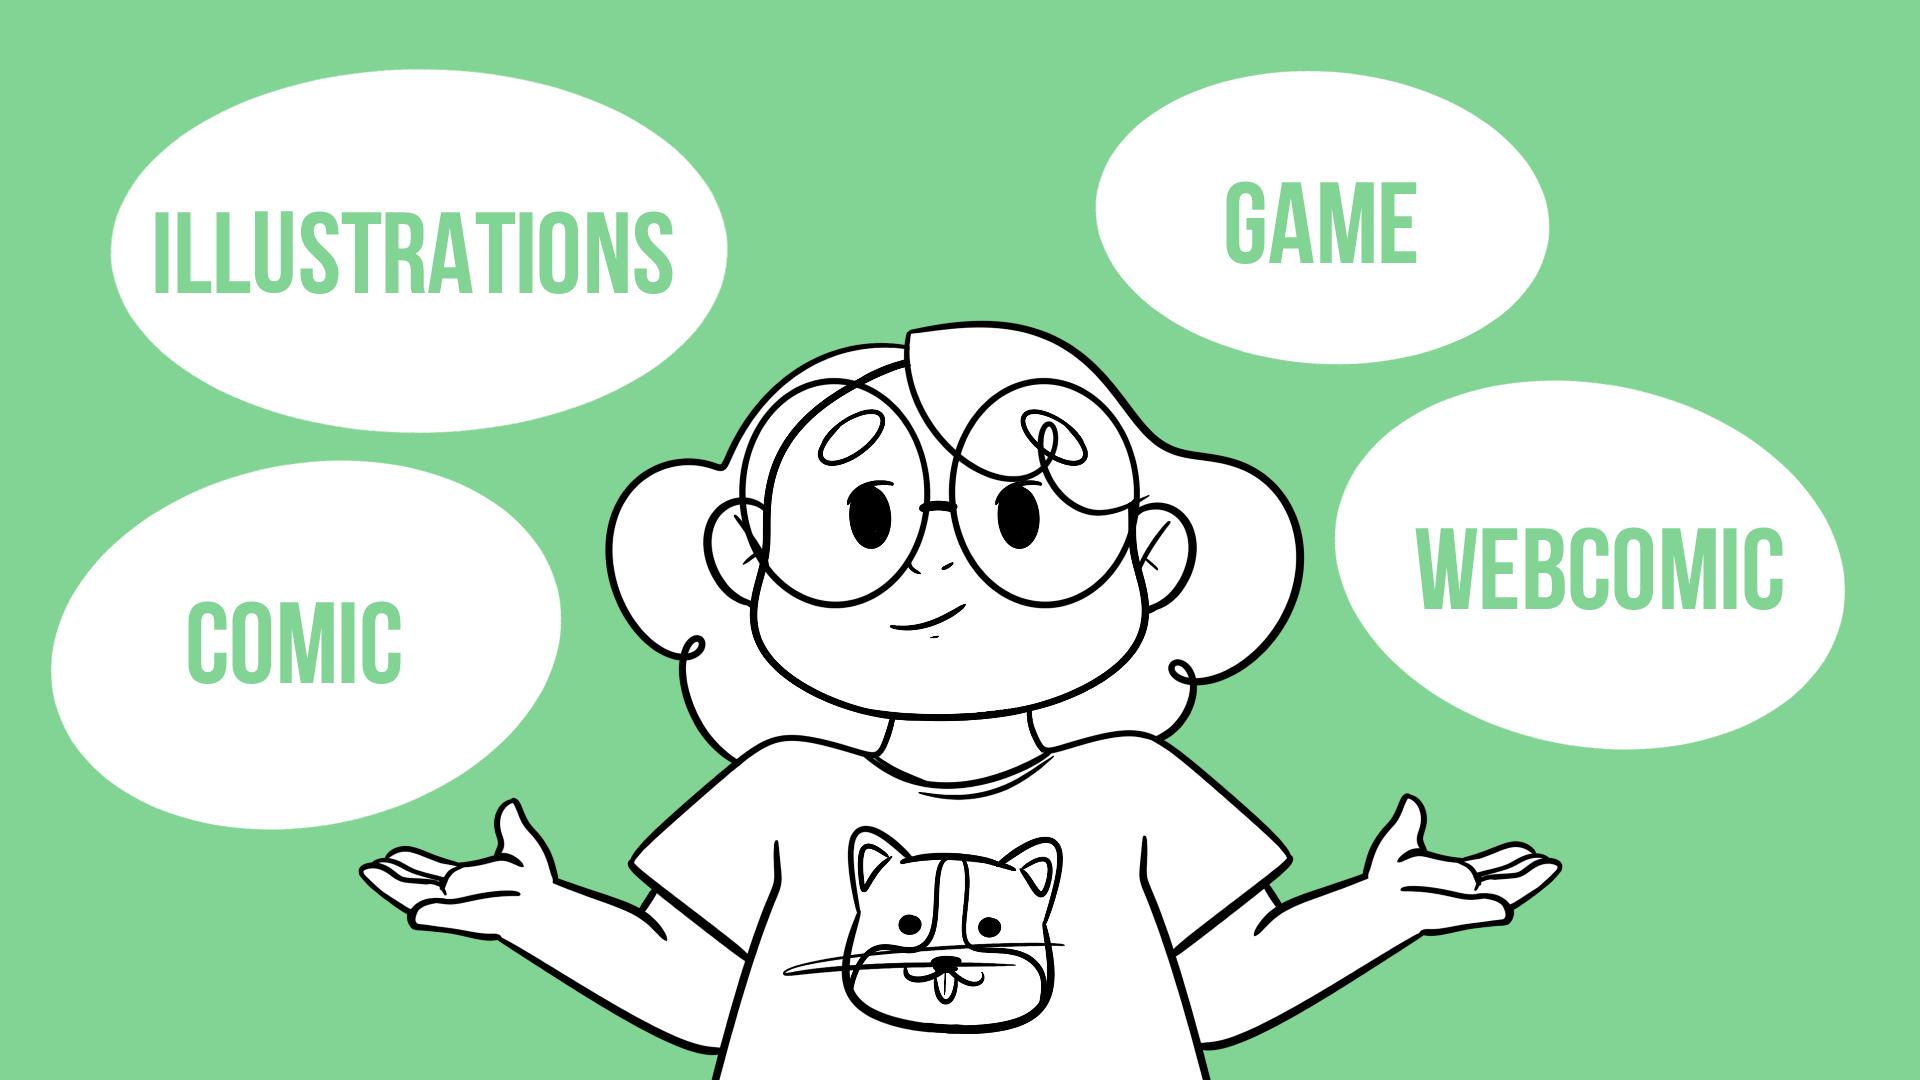
3. THE Reason To Create A New Character: Hi, and welcome back. There are many reasons
why you may want to create a character
or even several. Maybe you have a
story in mind and want to draw your own
comic or web comic. You're interested in creating your own character and use it in a series of illustrations. It can also be for a game. Another option is that you want to create
your own avatar, profile picture or a V tuber. This can be based on
your own looks or not. For example, I like to draw
my own avatar in our courses, videos, and social media
posts and profile pic. It doesn't really look like me, but it does have some personal
details like the glasses. Finally, you can also
be interested in drawing a character
just for the fun of it. Maybe there's no specific
use for them right now, but it's a fun project
you want to tackle. This might be the most
important reason. Creating good and interesting
characters is important, especially if you're
creating a story with them. However, having fun
with the process of creating a
character is a must. But you and other
people will be able to see the love you pour
into your own characters, and that only happens if
it's something you enjoy. Also, it's important to note that even if you're creating and deciding on a design character right now, it's never final. Today, you might
decide on a look, but you can also
change it at any time. It can be for personal reasons, or because the story you're
creating asks for a change. But in the end, it's
always up to you, so don't be afraid to change your character as
needed. All right. This is it for now. Feel
free to take some time and think what you'd want to use your character in
and afterwards, follow me to the next video, where we'll start
brainstorming our character.
4. Let's Brainstorm Your New Character!: Hello and welcome back. Before drawing anything, let's first brainstorm
or character. Grab your mood board to have
a reference and inspiration. Then either grab a piece of paper or sketchbook and the pen. If you prefer to
do this digitally, just open a Notepad file or even a new document
on Google Docs. Another option is to open your favorite drawing software and do the brainstorming
over there. Now, the first thing you
want to write right now is what kind of character
are you creating? Is it a main
character of a story? Is it a secondary character, an avatar or profile picture or an original character
for illustration work? This will help ground us into focusing what we'll
use our character for. Depending on this,
the complexity of your character will change. For example, if you
want to create a comic, then your character should
be as simple as possible. Otherwise, it might be hard
to draw them so frequently. Either it takes too
much time or you'll forget about certain details
about them along the way. If you're drawing
your own avatar, you'll want something that
grabs people's attention. It's complexity might be up to you as long as the
drawing is readable. Making up your mind
about what you're using your character for
is a very important step. Next, you'll write down important keywords of
what you want to draw. These keywords can
be about anything, can be the gender,
age, style, colors, outfits, hairstyles,
accessories, personality, likes and dislikes,
hobbies, and so on. You can even do more than
one brainstorming list and then try to combine the lists and see what
comes out of that. Another option if you don't really know where to
start and what to write down is to use a random
character generator and see if you find anything interesting in those prompts. I'll leave you a link for our own character prompt generator that you can use for
free whenever you need. This is it for now. Follow me to the next video
where you can see a demo of my brainstorming for the character we
create in this class.
5. DEMO Brainstorming A New Character: Hello and welcome back. We talked about brainstorming
and how you can do it by using your mood board to help you create a character, and now we're going to make
our own brainstorming. I'm going to be making my
avatar, my profile picture, the image I usually use
for our courses, posts, and so on, I rarely have my character drawn
with a full body. That's what I'm going to do. What did you talk
about before is first, we need to think about what we'll be using our
character for. In this case, I want to
use it as an avatar. I'm going to try and connect
several words to this idea. This can be about anything,
it can be their style, who the character
is, it can be names, it can be an age, whatever you
want. For example, for me. I'm going to say I
want it to be cute. I want to be a full
body character. It's not just a face or
the head or half body. I want a full body. Go with the cute idea, I want it to be a chevy
style, cute and small. I want my character to
wear comfortable clothes, so we don't get lost in the kind outfits my
character could use. This is an idea.
You can think about the outfit your character could wear, it could be a dress. Maybe it's some historical outfit or fantasy
specific to a profession, for example, I want them to be simple and basic few details. Since we're doing this
related to our brand, I might want something with a orgy or something
that relates to a org. The glasses. We're going to maintain the glasses
there, a main feature. I want to keep the
same color scheme with the green and I wanted
to have runder shapes. To focus on the round shapes. This is an example of the
brainstorming you can do. For example, in my case here, I'm just updating the character
I already have my avatar, and for that reason, it's more of a
personal drawing and I already have a visual
idea of my characters. What I'm doing here is I'm adding keywords of
what I want them, of the update I want for them. I already know more or
less how they look like, and I want to
remember or to focus on the main points on the main ideas of how my
character can look like. There's no wrong keywords
for you to add here. Just add things that you like and that you think would
fit your character. Just have fun. Take your
time and when you're ready, follow me to the next video.
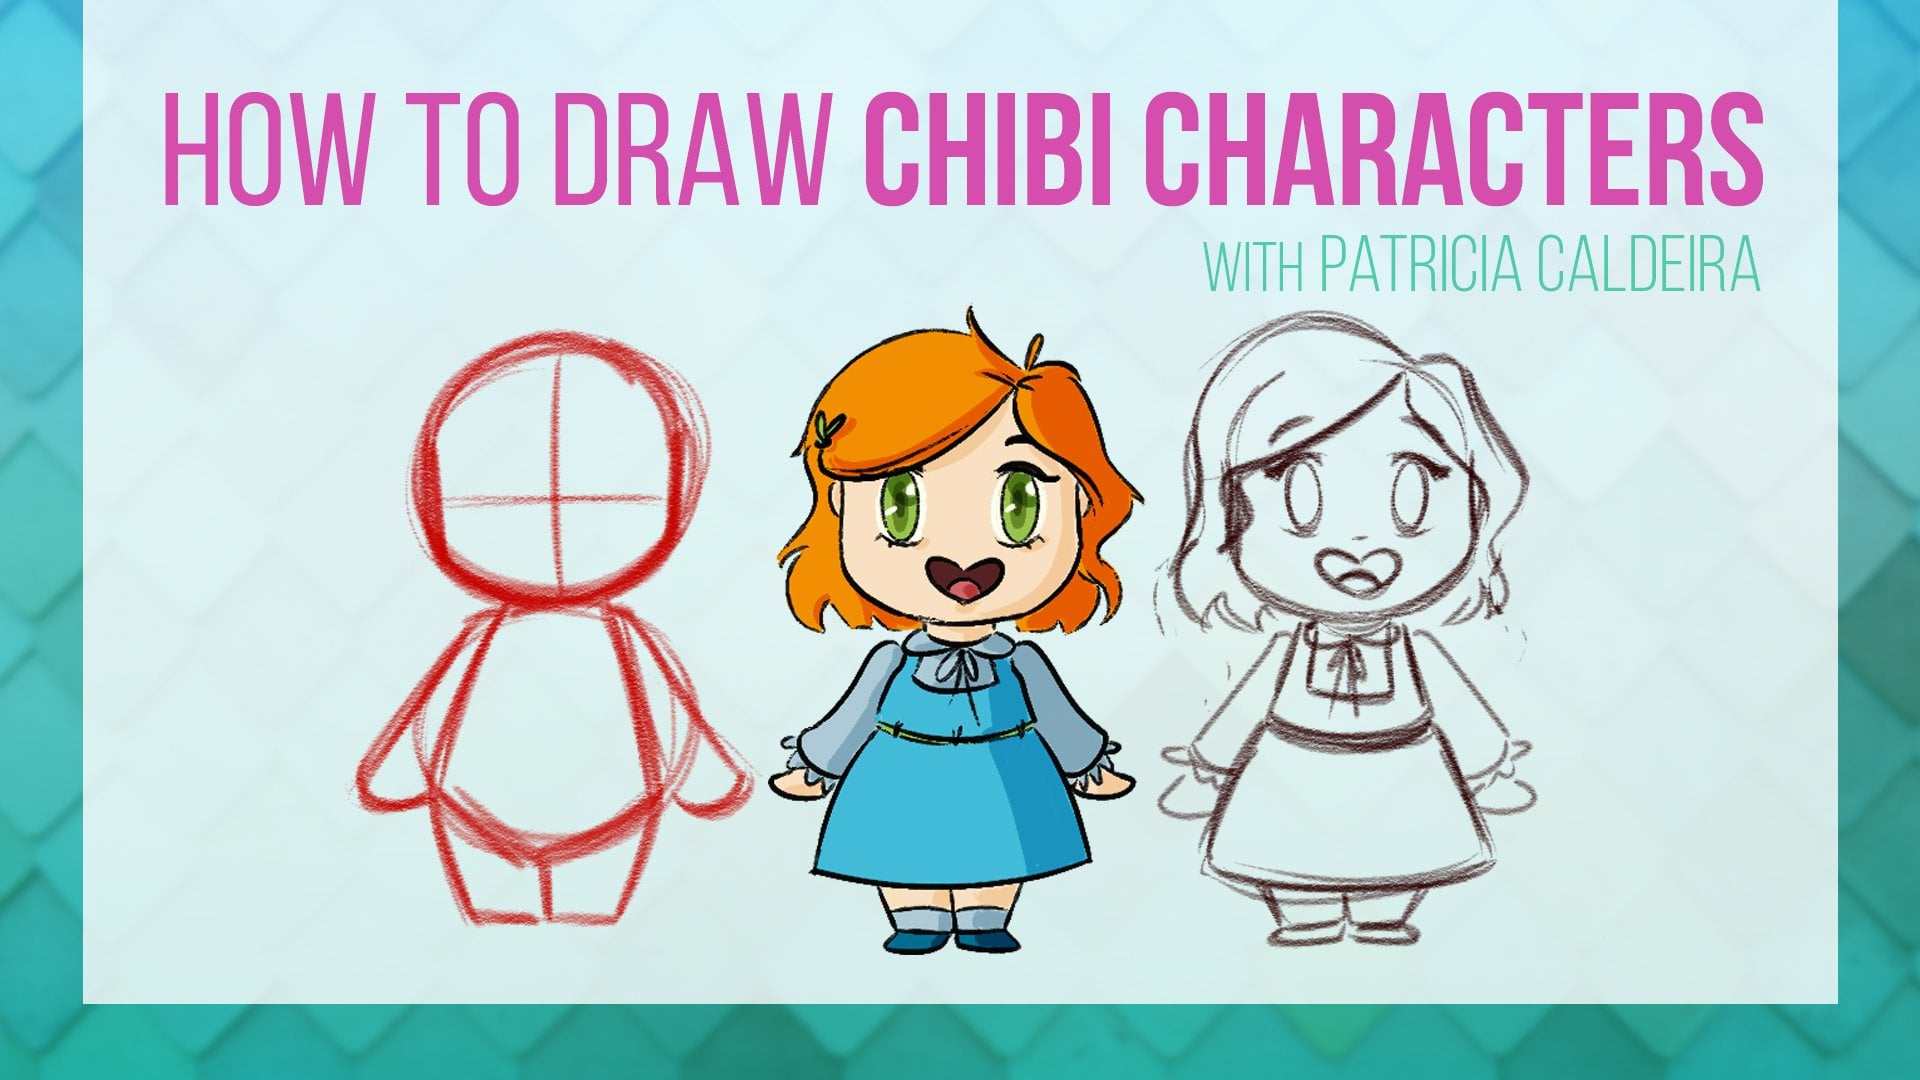
6. Doodling A Character To Life: Hello and welcome back. Now that we have an idea of
who or what our character is, we can start sketching them. The keywords we wrote before are very important
because they'll help shape our character in our mind as we think about them, who they are and
how they're like. We start creating a
visual idea of them. This is why I always
recommend everyone to first write a bit about their character
before drawing them. Sometimes we know we want
to draw a character, but can barely see them in our head since we don't
even know them yet. Once we start deciding
certain aspects about them, it's easier to
visualize them as well. What we'll be doing
right now is open up a new file on your
preferred drawing software, or if you prefer open your sketchbook and
grab a pencil or pen. This is going to be a
very experimental phase. Don't take too long
on each sketch. Just make quick and
simple doodles, trying different things and
styles for your character. If you're doing this
on your sketchbook, I even recommend using a pen. This way, you don't
fall into temptation of your raising and
fixing any mistakes. It's okay if these doodles
aren't anatomically correct, you'll be able to
fix that later. For now, all you have to do is gather some ideas into paper. Try to have several of them, fill up an entire
page, for example. Or if that feels too
overwhelming for you right now, do at least three
different versions of what your character
could look like. You can also mix and match different sketches
and see what happens. It's good to let
yourself experiment as much as you can in this
phase because generally, our first idea will really be the best we can come up with. Don't worry if these sketches
are in pretty or organized. What's important is that
you understand them and getting a good idea of what you want your
character to look like. Feel free to even
add some notes about your sketches or certain aspects of it that you find interesting. Alright, now that
you know what to do, follow me to the next video where I'll be sketching
my character.
7. DEMO Doodling Our New Character!: All right. Hello
and welcome back. It's time to start doodling
our character, right? We've talked about it for quite a bit before in
the previous video. So now it's time to put into
action what we just learned. So I have here the
brainstorming we did before. I'm using just a normal sketch
brush, nothing to fancy. You can use whatever
medium you prefer. And now I'm going to
make a few sketches. Based on the
brainstorming I just did. First thing that I remember
is the round shapes. Let's start doing that.
Let's focus on that. Just doing some shapes around
body, maybe a rounder. Now I'm going to keep the
idea of the T shirt here, for example, and the Shiv style. I'm making a very
small sketch here, not really on purpose. Again, you don't need to make a whole lot
of sketches here. You can just make three
sketches of a character. Don't forget the glasses. As you can see, I'm keeping
things very simple. I'm not focusing
on details here. Here we can have some
pants and simple fee. Now for the hair for now, let's keep it the same style. This is one idea, and we could have perhaps
a org to our shirt here. Once catches sun, this is it, I don't need to add
anything else to it. Let's see what else we can do. Let's again,
different shape while still trying to keep
a certain roundness. There we go. Again, glasses, big glasses, like a big sweater. Pig sleeves and then just
tiny hands appearing. I'm liking this.
This is a nice idea. Maybe this is a
bit less rounder, but we can round things up a bit more round corners to
them, something like this. For example, it's an
idea. Two ideas down. Let's grab here the simple
basic clothes and maybe do something a bit more in
the sports clothing style. Try different shapes here, but keep the roundness. As you can see, I'm being
very messy with my sketches, and that's perfectly fine to do. We're just exploring ideas. We don't want to get too
attached to these drawings. We don't know what might change, and it doesn't matter if they
are super beautiful or not. A T shirt. Let's
keep the T shirt. I like the t shirt idea. Then maybe some sweat pants. This is also nd. This one
looks a bit more comfy. This is more in that well, comfortable and cozy here
and here it's comfortable but a bit more in the
sporty area, you know, Let's perhaps do one
more sketch using this outfit and something closer to this
body type perhaps. I'm going to keep
this drawing here. I'm going to actually duplicate it because I like
these shapes right here. I think these are good shapes. Let's do the drawing. Our eyes, the big glasses, pop up the hair. Don't forget the arms. Also, don't worry too
much about the pose. A simple standing pose is good for now
because you can see everything about the character unless you have something
specific to show. But I mean, you can see
all the limbs, the head. A simple standing
pose is good enough for your sketches for
your simple sketches. Draw maybe a longer t shirt. Mix and matching all of
them here, and the shoes. This is an idea. We could
change the hair here. Maybe instead of
having it loose, I was thinking of having
a small ponytail, something I use quite a lot. Something like this, perhaps, maybe less waves in the hair. Bit of Isabel from animal
crossing hairstyle here, if you know about it,
and our Kogi again, I think we need
to keep our Kogi. This is my idea.
I like this one. I really like this. I
like both of these. Let me just try and do this one using this hairstyle
and this type of body. The eyes and the
glasses mandatory. Our small ponytail.
Yes, I love it. Big sleeves, the long sleeves,
tiny hands appearing. Okay, this is an idea, the orgy to a big
sweater here as well. But this is an idea. I
like this body shape. Here are my doodles. I have five sketches. The new ideas. The first three were new
ideas that we were exploring. The bottom two, we
mixed and matched all three of them with a different body shape
that I really liked. The most important thing is
that you take your time. There's no one here rushing
you and for you to have fun. This is a very fun phase. There just coming out
with different ideas, there is no wrong ideas. It doesn't matter if the
ideas are silly or not, just draw them because
as you draw them, new ideas start coming up. Just have some fun,
sketch your characters, think about different ideas, mix and match them together, take your time and
whenever you're ready. Follow me to the next video.
8. Deciding On A Design: Hello and welcome back. I hope you had fun with
your sketches because now it's time to choose one
final design and work on it. I know that it can
be hard to pick only one design and forget
about all the others. Sometimes we like
more than one design and cannot choose just one. So one thing you
can do is narrow it down to maybe two
or three choices. Then pick the things you like about each of those designs. Now, create a new final sketch that gathers all those
things that you picked. Just remember to
keep your design simple while still
keeping it interesting. Sometimes by adding
too many details, our character loses their
personality and focus. Not only that, but if you'll be drawing your
character many times, it can become quite
difficult to remember everything as well as keeping
each drawing consistent. If you're an artist that focused on details and complexity, and it's something you
consider strength, then experiment with that. On the other hand, if
you're not as experienced or even prefer to be more
minimalist with your art, then go easy on details for now. In the end, it's all up to you. You can even add more or change details on your
character later on. You can also ask your friends, family or art community to
help you pick a design. Sometimes a new and
fresh perspective from someone else can help you see
some things you've missed. Now, once you choose
a final design, it's time to refine the sketch. When drawing a character, I like to go through
three different steps. The loose sketch, just like
we did, a detailed sketch, which is where I'll refine
the sketch so the design is clearer and add anything
I think is missing. Finally, clean liner. That's exactly what we'll
do in the next video. Join me there and
draw along with me.
9. DEMO Choosing And Drawing The Final Character Design: All right. Hello,
and welcome back. As we mentioned in
the previous video, now it's time to
choose a design and then refine it until we
have a final drawing. First things first,
let's pick a design. I have here all the sketches we did in the previous videos. These last two are my favorites. I like the body shapes. They are round but
not too exaggerated. I really like the
shapes we have here, the hairstyle and everything, all about choosing the
outfit that I want to use. I really like this one. Although I think it might be a bit too different from
what we have right now, and I just want to update
it and not go overboard, not only that, but I
think that this is a bit, maybe it looks a bit
too much like pajamas. I'm not sure I want that. I think we're going
to go with this one, keeping the t shirt,
some simple pants, shoes, and that's it. We keep a very simple design, so it's easier to draw. This one is also a bit
more difficult to draw. I'm going to go over here. Select this one. I'm going
to copy and then paste it. Now I can hide this and this. We don't need
brainstorming anymore, and let's make it a bit bigger. Something like this. Now
what I'm going to do, lower the opacity of my drawing, create a new layer on top, grab my pencil brush, and a darker red. This is my preferred
color for the sketch so you can choose whatever
feels comfortable to you. Now what I'm going to
do is refine my sketch. As you can see, this is
a very loose sketch. There is almost no detail. There's half of the
face is not drawn here. What I'm going to do is
make a more detailed sketch with every detail I
want in my design. The lines don't
need to be perfect. Just go over your lines, pay attention to the shapes
you want for your character. All right. The face I have
here a previous drawing. Let's try to keep it
relatively close to it. Again, it doesn't need
to be perfect right now, very centered right
now, but that's fine. Let's just draw very quickly, our orgy print on the T shirt. So see, we have a
bit more detail now. We know where everything
goes with this sketch. I think this looks nice. So now that I have
my final sketch, it's time to go and
draw my final lines. So again, I'm going to lower
the opacity of my sketch. Then I'm going to create a
new vector layer on top. The reason I use
vector layers is because that way as I
move my lines around, if I scale up or down my lines, they won't lose any quality. It's a bit more comfortable
to use but totally optional. Now I'm going to start
drawing my line. This is the final step. The design is decided. Now, this part, again,
just take your time. You don't need to
rush this drawing. Repeat your lines as
many times as you need. It's perfectly fine. Just go over your
previous lines, your sketch lines until
you're happy with them. As you can see, I will be repeating my lines a lot
until I'm happy with them. It's perfectly fine
if you do the same. Another thing I'm going
to do here is I want my character to be
very symmetrical. I'm going to be
drawing one side, then copy it and paste it, mirror it, and then place
it on the other side. Just to make things a bit
quicker for you as well. But if you are practicing drawing your lines and
drawing the line art, I do recommend for
you to just take your time and draw all your lines because this
is a good practice for you. So this is it. We started with
a very, very loose sketch, and then we added a more
detailed sketch with some more details so you can see better what you're doing with
your character's design. And finally, when everything
has been decided, we went ahead and drew the
final lineup just clean line, so your character is
ready for coloring. So that's what we're going to talk about in the next video. So I will see you right there.
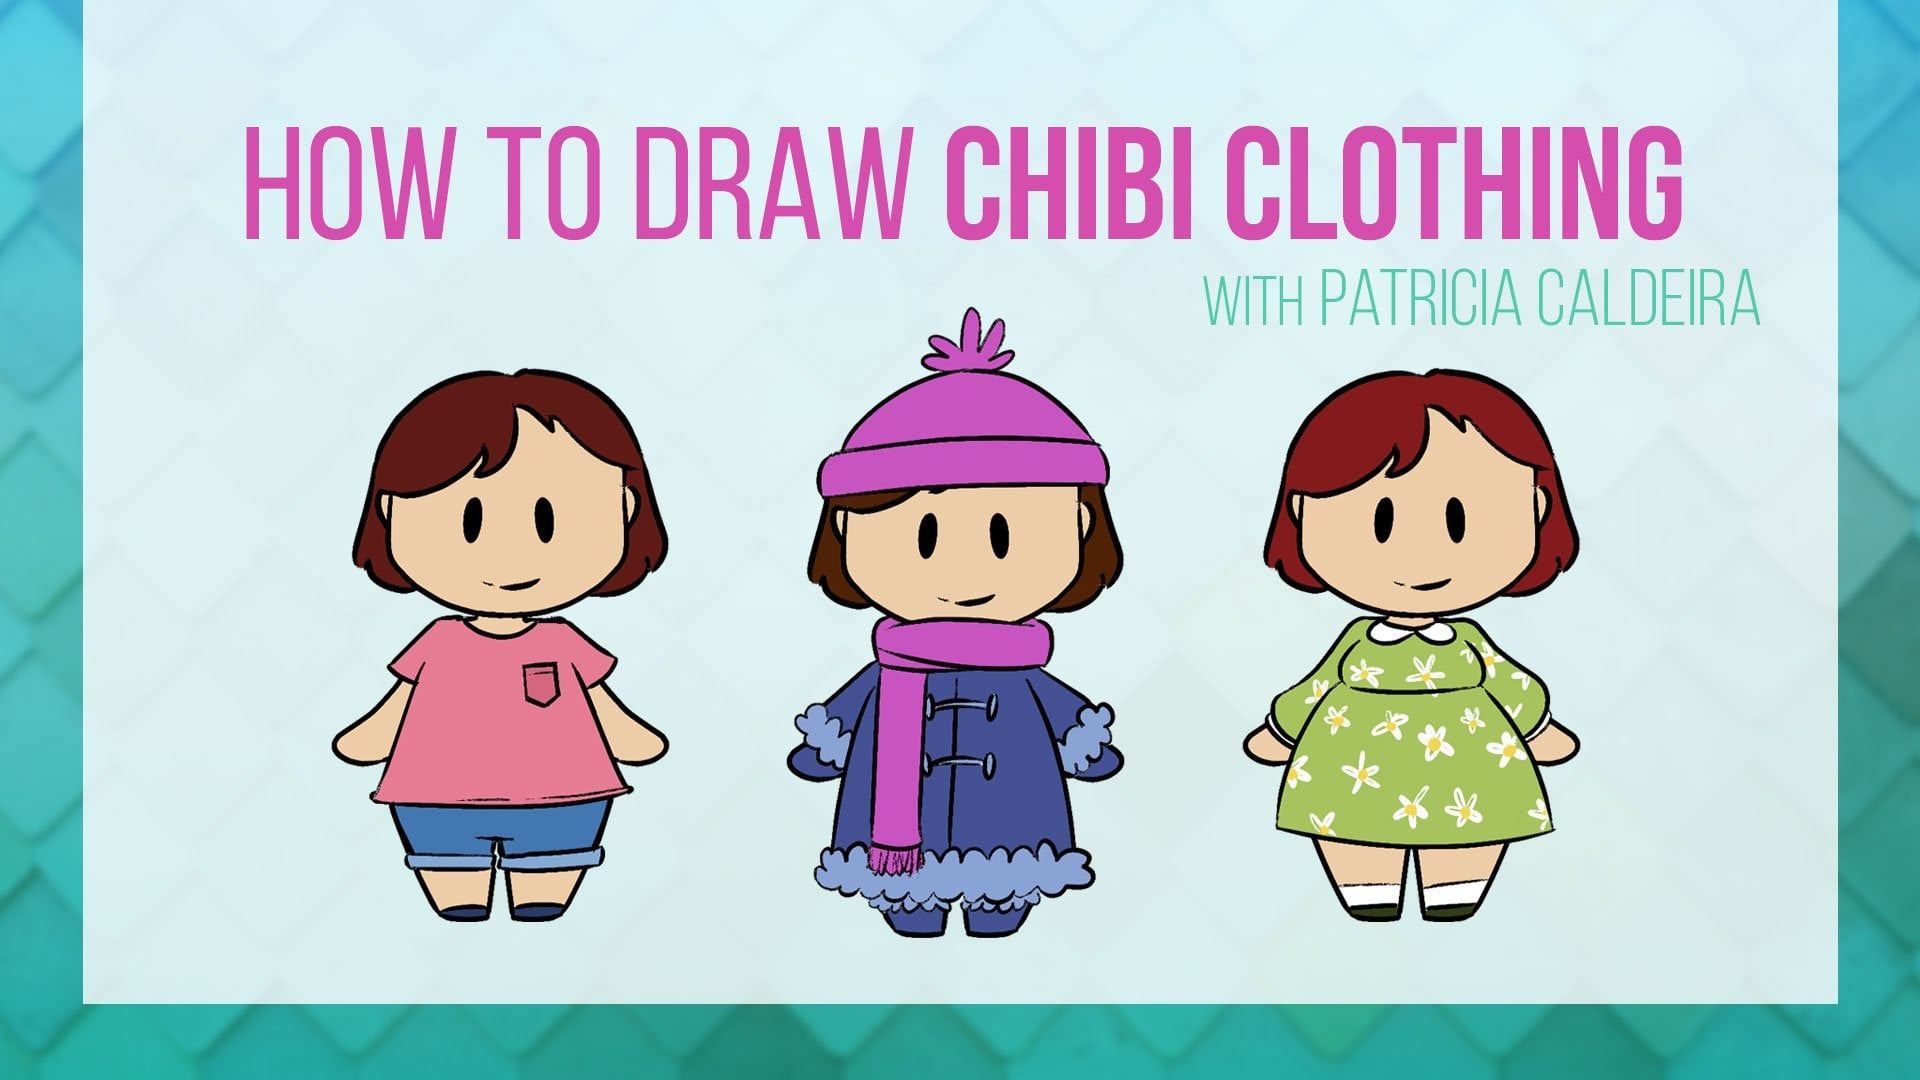
10. A Splash Of Color For Your Character: High end welcome back. A big part of our
character is finished. We have a design
and a full drawing, but we're still missing colors. This is something
you might already thought about during the
brainstorming phase. But even if you
didn't, don't worry. We're going to work
on colors now. First things first, where
to find color palettes. If you'd like to have some
control over the colors, I recommend going
to palaton.com. Here you can move
around the color wheel, play with different
color harmonies, as well as the saturation
and value of your colors. As you move things around, Palatin will generate different color palettes
that you can use. Do color is quite
similar with a lot of customization while
generating palettes for you. Another website you
can use is pigment. Here you don't have
as much control. However, you can still customize a few things over
the color palettes that are generated for you. You can customize both
the saturation and value. You can also select specific
colors for your palettes. One thing I like
about this website is that the color palettes
are quite limited. Sometimes having a wide range
of colors to use can be quite overwhelming and even more difficult to use them
in a balanced way. Fewer colors are
easier to juggle, especially if you're not
an experienced artist. Finally, if you're
a fan of using completely random
color palettes, then both coolers or color hands are good
websites for that. In coolers, you can choose
how many colors you want the palette to have and then
generate a few palettes. If you like one color in a
palette but want to see more, you can lock that color
and generate again. It's also possible
to move colors around and choose different
shades of the same color. Generate as many
palettes as you want, and then squenshot the one you like and paste it
in your canvas. As for color hunt, here you can choose from several
different palettes. You can just look for random
ones or pick a theme. When you click one
color palettes, it will show you the
codes for each color, as well as several
other examples that are in the same theme. Once you find the
color you like, you can download the image and then open it in your canvas. Take your time seeing
different color palettes that could fit your character. You can even pick different
color palettes and test them. Some might fit
better than others, or just like with the sketches, you can mix and match different color palettes until
you find the perfect one. Just don't forget to
keep things simple. To many colors and your character might be
a bit difficult to read. Also, if you're using
this character as a profile picture or
avatar for your brand, be sure that the colors
are in line with it. If your brand is all
about pastel colors, then use those colors
for your characters. If you already have a logo
or something similar, you can use those colors. Unless you want to drastically
change your brand, try to follow similar colors. Another thing to
remember is that again, chances are you're going to be drawing this
character a lot. Keep things simple
and easy to remember. Take your time and have fun picking different color
palettes you like. When you have a few
viable options, follow me to the next video, where we'll be coloring
our character.
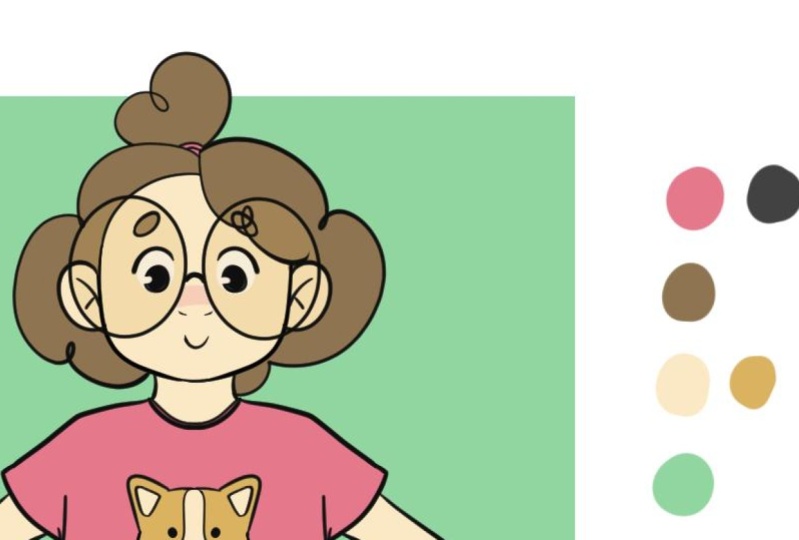
11. DEMO Coloring Your Character: All right. Hello
and welcome back. Our character, the lines of our character are all finished. Now we're going to go
for the final phase of creating a character, which is adding some colors. In the previous video, I showed you some places you can go to search for color schemes that you can use for
your characters. You can also just choose
the colors you want. You may already have a color
scheme such as in my case, already had a character and I'm making an updated version. And so what I'm going to do is I'm going to create
here a new layer. I've merged everything
into one layer, my lines layer, and now I'm going to create
a new layer first. I'm going to grab my brush here, make it a little bit bigger, and now I'm going to grab
the colors I already have. Now, I don't have
all the colors here. I have the skin, the hair color, shirt color, and I don't have, for example, any color for
the pants or the shoes. Same thing for the Kary. First, I'm going to
solve the pants problem. Since I wanted to pie
very simple and neutral, I'm going to go
with a dark gray. Something like
this, I'm going to not so dark,
something like this, so I'm going to make it
close to the pink since I know this is a color for
the clothes for the orgy, I probably going to use the skin color and maybe
something a bit more orange. This can change. For now, this is what I have
all very solid. I'm also going to grab here this color in case I want to
use it for something else. For now, this is a very
simple color scheme. Let's see if this
all works together. What I'm going to
do is I'm going to create another layer
and this one is going to be for my
colors and it's going to be beneath my lines layer. Then I'm going to
grab my bucket, and I'm going to make
sure that I have the option for other
layers enabled. So what this is going to do
is that I'm going to pick a color and then fill
it inside these lines, and the pink bucket
will have into account the previous layer. So my lines layer. This is a very quick
way for you to add colors to your drawings, and I'm going to
add here the pink. I'm going to do the same here with the tongue
of my doggie. I might also add it
here for the hair band. I'm not going to worry too
much about details yet. I'm just going to
fill all the colors and then I'm going to
fill in the spaces. Next, the leggings or the pants. Paint paint pocket. There we go. Hair. This coloring method, you can do this with
other drawing software. Many drawing software
nowadays have this option. You can paint inside your lines without
using the same layer. It's something worth exploring. Even Procreate has
the same option. For that, you just have to mark the lines
layer as reference, and then fill your colors
in a layer below it. It's very easy. You can also use the selection tool and select
the you want to paint, for example, and then use
your pain pocket and feel it. Whatever you're more comfortable with as long as it works, it's perfectly fine to use. Now, let's fill in
here the skin color. Same thing here on nor doggy. Here the ears with the
pink as well maybe. I think so. This is better. This is a bit more balanced. As for the shoes, I think I'm going to go with
the pink as well. I think that's nice.
I'm going to add a little blush on the
nose with the pink. I'm going to add a
new layer for that. If I want to change it, I can easily do that. Let's add some opacity here
maybe. Let's try again. More that feels a bit too much. Now, let's fill in the gaps. I'm going to lower my
brush a little bit, and now I'm going
to find the places where the paint pocket
missed. For example here. Normally, it's just
tiny bits and you can also control these gaps, but I like to go by hand and
feel whatever is missing. Just go over all
your drawing and be sure everything is properly
filled with color. If you want to, of
course, if you prefer to have a bit of a messier
style, that's fine as well. Now, let's fill in here
the white for the eyes. I think I want a bit of
color from my glasses, you know, I don't need the highlights of
the glass itself. I don't think I want to
add that kind of detail, but I do want to have a color difference between
my glasses and the face. Let's I'm going to try and pick the brown, the hair color. This might be a bit too dark. Let's try this one.
Yes, the orange, I think the orange
works much better. Now, let's lower the
opacity a bit more even. Let's see 25%. I
think I like that. That's a bit of a
difference color there but not too much. Basically, my
character is finished. Let me just try here because I'm not sure I like the
shoes with the pink. We might want to gray. I
think this works best. Otherwise, I feel
it's too much pink. Just explore your options. Really don't need to
rush this process. Try several things because sometimes we think the
first option is the best, and then we try different
things and figure out it actually there are other
better options to use. My character is
basically colored. Just to make things
a bit more fun, I'm going to add
just a little bit of a shape here using the green. Something very simple,
just a little shape. There we go. So I can
use my green here. You don't need to add
any kind of background. We are just focusing on the character right now,
focus on the character. Also, I'm not going to be doing shadows or highlights here because that's something that changes with the
drawings you're making. Depending on the lightning, the mood you're going for, depending on many things, both the shadows and the
highlights will change. That's more to add atmosphere. And mood to a drawing. What we're doing here is
just creating the character. We don't need the shadows. Don't worry about
it right now unless you want to practice
those, of course. But for now, just keep it
with the solid colors. Our catch is going to be used
in many different things, keep it simple, adding some
colors, and that's it. Have fun. Take your time, and I will see you
in the next video.
12. Creating A Character Sheet: Hello and welcome back. Our character is finished. Now, so you don't forget
anything about them. It's time to create
a character sheet. A character sheet is
a very important step on creating any character. Here we're going
to keep everything about how you should
draw your character, and this will be
very useful for you, but also for anybody else
you might work with in the future and that might need your character's
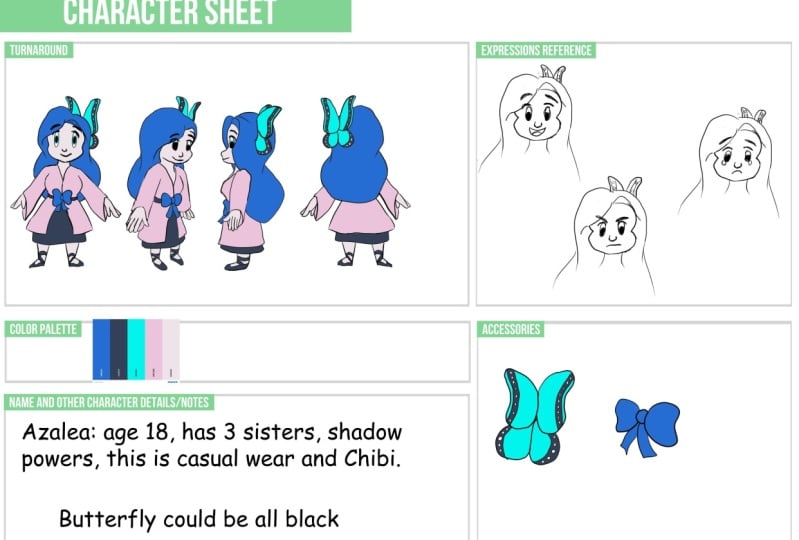
visual information. In this file, we'll add a full turnaround of the character in the
simple standing pose. The color palette used along with the codes
of each color, detailed drawings
of any accessory your character uses
plus respective colors. Their name and other details
you might find important, such as any traits
important to their story, age, height, birth
marks, and so on. And finally, portrait
references of the main expressions your
character might portray, such as happiness,
sadness, anger, and so on. This feels quite complex, but you don't need to
do everything at once. It would also be a
good practice on drawing your character in
different perspectives. If drawing and adding everything at once feels too
much right now, go one part at a time. Today, draw the front view, tomorrow, the side view, and so on, add things little by little until your character
sheet is complete. There's no timer, so
go at your own pace. It's also important to remember that things might
change in the future. Be sure to keep the actual
file instead of just an image. Whenever anything
changes, you can edit your character sheet
with new information. Now, that's enough talk, follow me to the next
video where I'll show you my process of creating a character sheet for
my new character. I'll also leave you a
template so you can download it and use it
for your character. See you in the next video.
13. DEMO Filling In Our Character Sheet Basics: All right. Hello
and welcome back. This is our final step of
creating our character, which is creating
the character sheet. And we're going to draw a full turnaround expressions
or a few expressions. We don't need to draw a whole
collection of expressions, just a few of them,
so you know how your character would
react to certain things. The color palette, so we
never forget about it, and there's always a place
to go grab the colors. Name and other details you might want to remember
about your character. And finally, accessories
if they do have one. So we're going to start
with the easiest part. I have here my character sheet. Now, first, I'm going to
go and grab my character, the front view of my character. I'm going to copy this and
then paste and move it here. I already have one part of my
turnaround, the front view. I'm going to leave it
like this for now. I'm also going to create
here a folder or a group. So I don't have too
many layers laying around and I end up a
bit confused about them, and now we're going to
fill the color palettes. So for that, I'm going
to go over here. I didn't bring the
background I did previously because that's not
an important part of my character right now. That was just to have a
little something there. All you want is our
character right now. Color pallet. Let me just
zoom in a little bit. I'm going to grab some
colors and create a square. You can make a square a circle, wherever you prefer as long as it's organized
as you like. Let's duplicate the square,
bring it to the side, the next color, feel it, and now we repeat this process until we
have all the colors done. I'm going to go and look for
each of this color code. One way of doing that is
by picking the color and then double click this square here where the
color is selected, and now we can go over here
to x and copy this code. It is copied. Now I'm going to use the text tool.
Bring it here. And paste the cold. We can even keep it with
the color might as well, or maybe not because we have a few light colors over there and then we can't read the
code. But there we go. Here's one of them. Now, let's
bring it here the layer, duplicate this layer and
bring it to the side. Now we're going to
grab our next code. There we go, double quick here. Copy the code. And paste
it over here. There we go. One part of our character
sheet is ready. We already have
our color palette ready to use as reference. Now let's just very quickly
add a few notes here. A new layer, I'm going
to write it by hand. I don't have a lot
of notes here. I'm just going to say that
this is the Dg avatar, used for posts, videos, and other heiferns material and tutorials and
well, for glasses. Something I also want to
remember in the future is that the glasses use the hair
color at 25% opacity. The same goes for the
blush shirt color at 25%. Opacity. This is it. These are all the
notes I want to keep. So I don't forget about this, what color goes for the
glasses and for the blush and the opacity I use for them and what I'm going to be
using this character for. You might want to
have other details such as my character
has three scores, one here, another one there
and another over there. Or they have freckles. They like to wear a backpack. The backpack has this
and that accessory, those kinds of things
that you don't want to forget
about your charter. With that done, let's go for other more complex parts
of our charter sheet, such as drawing the accessories. I don't have a lot
of accessories here besides, for example, the hair band, It's very small, but we don't want to forget
about it and our Kogi. So for the Kogi, I'm going to keep things simple and I'm going
to go over here. And copy the lines. And I'm going to bring it here
and make it a bit bigger. I'm just going to add
the colors very quickly. Okay. There we go, and now the hair band. For the hair band, something
very simple as well. Now another smaller circle. We can merge these
layers together, fill it with the pink there go. These are my accessories. Now all we are missing is our turnaround and
expressions reference, that's going to take a bit
longer. But that's fine. Again, we don't need to
do everything at once. If you want, you can pause, you can do something else, and then go back to the video
and draw along with me, or you can watch
the whole video and then do your character
sheet at your own pace. Do one thing one day, another or the other,
and so on and so on. Next, we're going to
work on our turnaround.
14. DEMO Creating Our Character Turnaround 3/4 View: Okay, so we've done the
easiest part right off screen. I just typed here my notes with a better phone since my
writing is not the best, so you can just see things and read things
a bit more clearly. I also added here just
a small description to the accessories. But that was it.
That's a bit more organized and it's
clear to read. And now it's time to
start our turnaround. So one of the poses
is already done. The front view, I'm
not going to be drawing a full
completed turnaround. For example, you can
have a front view, then a three quarter
view, turn to the left. Turn to the right, then
a three quarter view, but from the back, the back view and the side view, since I'm going to use this
for just illustration. I don't need to be
so detailed right. I don't need all the angles. But if you're using
this for animation, for example, it should be
as complete as possible. But it's totally up to you. So I'm going to start with
the most challenging pose, which is or angle, which is a three quarter view. It's always a bit
more challenging since we are making a mix
of two different poses. It's something between the
front and the side view. It's always a bit
more challenging. Let's take that one
out of the way. First thing I'm going to do
is draw some guidelines. You're going to need this when drawing a turnaround
of your character. You're sure you're drawing everything in its proper place. Create a few lines
and distribute them along places that are important. For example, one at the
top of your character, another one at the bottom. For example, one here between the small ponytail and the hair, the
rest of the hair. Another one here for where
the sin touches the neck, another for the shoulders. These guidelines are
going to be used for all the different
pulses of our turnaround. You don't need to be creating guidelines every time you're doing a new pulse because the guidelines are
always the same. It's very important
to get these rights. Also, how many guidelines you
have is totally up to you. For example, if you feel you're getting a bit
lost in your drawing, draw as many guidelines
as you need. It doesn't really matter. As long as you do not
get confused with them, ten, 20, I don't
know, you name it. Whatever is the most
comfortable to you. As you can see, I'm drawing quite a lot here
because I want to be sure that I'm going to have everything
in its proper place. I forgot one here
for the ye line, and I should have something
for the glasses as well. So as you can see, I have
a lot of lines here. Now we can lower the
opacity a bit just so it's not as intrusive in my drawing. And now we are ready to draw the character in
the three quarter view. So I'm going to create
a new layer on top. I'm going to keep my
pencil and the red. So I'm going to start just like before with a sketch
then add more details. And then finally,
I'm going to add the final line art,
and the color. It's the same process as we did for drawing the front view. First of all, I want
to go over here and remind myself of the
shapes I did before. I'm going to have
to adapt my shapes, but overall, they're the same. We want to keep the same shapes. Just away from me to
warm up a little bit and remind myself of the
shapes we use so far. I have here my shapes. Let me just add
some opacity here. And now I'm ready to start
drawing some shapes, but this time in the
three quarter view. Starting with the
head, don't worry too much about the first sketch. I'm going to make my
three quarter view turn a bit to the right ye line, and here we're going
to have a near. Then we have our
neck, the chest area. When drawing in a
three quarter view, one thing I'd like
to do is add a bit of dimensionality to my shape. Instead of drawing to
the shape like this, I'm going to add a bit
more three D to it, so I have a bit more
depth in my shapes, and I can understand
better my character. Always keep the main pose
right by your side so you can see where everything is and if it's
in its right places. There we go, torso is done. Now here this goes up to here, and it's a round shape again. Keeping here my guidelines. I know where the center here is, and now the legs,
they go up to here. I forgot this guideline
here where the legs go Sis here a little
bit because I went too far down with
my shape there. I think this is mostly
it as far as shapes go. The arms go this
way. There we go. The three quarter view can be a bit more complicated to draw. But it's also good
to take it out of the way. From the get go. You're drawing in a more
of an angular perspective. It's not straightforward like the front and the side view are. The side view can be
also a bit complicated, but at least you're only drawing one side of your
character, right? My mind shapes are then. We're going to add
some details, right? So we have here around here. I'm always looking at my first reference
to the front view. So I'm sure I'm
doing things with the right shapes in
the right places. Can't forget about
the doggie here, so the eyes around here. Now, of course, you won't be able to draw your character
exactly the same. That's okay. That comes with
time and sooner or later, you'll be able to do that. Don't worry too much about
that if it doesn't look exactly the same. You
have time for that. Now let's go and
throw our linear, lower the opacity of my sketch, a new layer on top, grabbing my brush,
my preferred brush. Grabbing the. Now, once again, drawing the final lines. Again, take your time to
not rush the process. It's fine if you're repeating your lines many
times, it's natural. Repeat your lines as many times as you need until
you are happy with them. There's no one rushing you. If you need to do more sketches, then do more sketches before
going the final lines. There's no rule that you have to do this in
one way or another. If the way I'm doing this
does not work for you, then you can draw
something else. Drawing is not an exact size. Don't be afraid of exploring different methods and
different processes. And there we go. As you can see, it's not 100% exactly the same as my first
drawing, but it's all there. Now I can go in and color it. I'm going to create a new
layer below my lines, use my paint bucket
and color pick the colors and fill the gt. Just like we did previously. We are done with the
most complicated view, the three quarter view, next, it's time to draw the side view.
15. DEMO Drawing The Side And Back View: Okay. So one more view done. The three quarter view, the
most difficult view is done. If it's not perfect, don't worry, you
can repeat later. Just make sure it's good enough for now and then
you can practice again or if you prefer just
practice that view a few times until you are
happy with the results. The side view can be
a bit simpler since we're only drawing one
side of our character. Again, if your character has
some asymmetrical details, be sure to draw the side view from the
right and from the left. So you have everything you need, every detail in your turnaround. Since my character
is very symmetrical, then I'm going to
keep it very simple and just draw one side view. Once again, we start
with a circle. My character has a
very round head. So even from a side view, I'm going to draw a circle and now an ellipse for
the side of the face. Okay. Just to make
things a bit more interesting and it's not
just a circle right there. Here we have our ear. Now we know the neck is here and now we do the
torso shape adapting my shapes a little
bit again since we are seeing the body from
a different perspective. I think these are good shapes. Now, add some opacity, a new layer on top for
my detailed sketch. Now we're going to add a few more details and clean
our sketch a little bit. The eye is around
here in this line, the glasses right here. Now let's draw one
side of the hair. We don't need the other
side in this case, drawing the t shirt now. You can't really see a lot of corgi here. I think that's good. Let's hide the other layer, create a new layer on top, and draw the final lines. Now all we have to do is
go over all our lines, our previous lines for
a cleaner drawing. Again, I might be rushing
this part a bit just so you don't get bored watching me draw
lines over and over, so I'm not being
as perfectionist. However, when it's your
turn, take your time. Okay? There's no one
rushing you again. Just have fun with
the whole process. Okay. This is my
character from the side. Now I have to do is very quickly add some color
to my character. Hide this layer, a new
layer below, and now, let's pick our paint packet, and let's start
adding our color. This is the quickest part. Now remember that
doing the turnaround is very hard, not a simple task. There are many steps
in this phase. Again, you can do it
little by little, as I said before, and If you finish it, you can come back later and
do it again. Try it again. After a few times of drawing your character of
practicing them, you might then learn something
more about your character, and next time you do
their character sheets, things might be easier. And now we're going for the
quickest view of the mole, which is the back view. If you do not have a
lot of things happening there is very quick
because basically, we're going to draw
the same shapes, the same drawing as when
drawing the front view, but this time with
almost no details. What I'm going to do
here is actually copy my front view and bring it here and now I'm
going to move it. Now, as you can see, I don't
have a lot of space here, so I'm going to have to resize
my drawings a little bit. Now, let's first
hide here our color, going to go to my lines. Again, draw your character all over for some more practice, or if not, you can just tweak
it like I'm doing here. But I do recommend you to take the chance and practice
drawing your character. We don't need a
face here, right? Here changes, the curvature
of the shirt also changes. We don't need our argiprint because it's on the other side, and I think this
is mostly for now. So now I'm just going
to fix my drawing. Othing like this. I also want here for this area of the
hair to be connected. If you have any kind
of detail on the back, don't forget about them. I like to draw very
simple characters, so I don't have that many
details to focus on. Fix here the T shirt. We also need to fix
the hands here. Okay. There's not a lot
happening here on the back. We fixed everything
that needed fixing. We don't need this
layer over here. Now, I'm just going
to fix the color. Again, no shadows or highlights, we don't need those right now, and this is it. Our turnaround is finished. Feel free to do other versions of the three quarter
view and the side view. You can also do the three
quarter view from the back. It all depends on
how much detail your character has
just take a few hours, even days to draw your
character in different views, and then you can come back
to the video or just watch the whole thing and then
later do your assignments. It's totally up to you.
16. DEMO Adding Expressions To Our Character: With that done, the
only thing we're missing is our
expression reference. For the expression reference, you don't need to do a whole
lot of expressions here. You can just use the
main ones, for example. I think I'm going to do
something like happy, angry and said, as
simple as possible. You can do more expressions. It really depends on what you're going to
use your character. If you're using for a comic, maybe you'll want more examples. But this is so you can have
a quick reference of how your character looks like portraying different
expressions. Having the most basic ones
like said angry and happy is a good reference because then many other expressions are
mostly a variation of this. You can use this
as a reference and then mix and match them
for other expressions. Very quickly here,
draw the bit shapes, Let's start with happy. So happy expression, very happy. The eyes are closed. Everything in the face lights up and goes away from the face. When you're happy, everything
goes away from the face. The head can even be a bit
more elongated if you want. I like to close
the eyes when I'm drawing very happy expressions. If you're drawing a happy
expression with the eyes open, remember to make them bigger. Maybe even a detail or two
here just for the fun. One quick sketch
of one expression. Now I'm going to duplicate this being here and the drawing. Now, erase what we don't want. Let's try a angry expression. Now, now we're going
to draw angry. Now, for an angry expression,
it's the opposite. We want the face closes up. Everything goes to the
center of the face. Eyebrows going down and
tilted to the center. Cause mouth like this. Again, we can make a
small detail over here. When drawing negative
emotions, most of the time, everything goes to the
center of the face and when it's positive
emotions, it's the opposite. Everything goes outwards. This is a good way of memorizing how to draw
certain expressions. Now one more for the
said expression. Again, our features go to
the center of the face. Eyebrows going this way. She You can even have a
small tear falling down. The eyebrows here
are also tilted, but going the opposite way. I'm going to merge all
these layers together, lower the opacity, too much. Now I'm going to draw the
final lines for my expression. First, I'm going
to draw the head, so I can use it for
my other drawings. Now I'm going to
make a new layer on top and rode the
actual face this way I have the heads in a separate layer and can duplicate it for
my other drawings. Now, we're just going to go over our lines and rode the app
expression, very simple. Our first expression is done. They, very cute. I like it. Let's duplicate the
head and move to the next one to the angry face. I don't often draw angry faces, but I think they're
really fun to draw, especially when you
exaggerate them. And that's key in
drawing expressions. Don't be afraid to
exaggerate things. It makes the whole
drawing more fun and intensifies the motion
you're trying to draw. If you want your
character to have a very strong emotion and to be very expressive about
what they're feeling, then don't be afraid
of using exaggeration. If some features of the face
go outside the face itself, outside the head, then do
that. It's fine. It's fun. It's really fun to do that,
exaggerate your expressions. Let's duplicate our
head again and move it here for our said expression. She looks so sad right now. Eyebrows that are tilted in a different direction than the
previous one. There we go. Let's duplicate this. D, move it to the other side. I don't think I've ever drawn
my character looking sad. This is the first
drawing the highlights. There we go. She looks so sad. And there we go. Our expressions, I think
are very happy with them. Three expressions, if you want, you can do more or you can just keep just the more
basic expressions. As I said, you can then mix and match them because most of the expressions you can draw are based on the most
basic emotions, sadness, being angry
and happiness. There we go, we
managed to do this. It is very challenging.
There's a lot to do. But again, take your time, do one thing one day, another thing to the
other, if needed, take a rest for a few
days, come back to it. Maybe you're not completely
happy about it. That's fine. Take a break and when
you come back to it, maybe you feel a little
bit better and you've got a few new ideas that can
help you fix your drawings. Just have fun. Take your time
and whenever you're ready, follow me to the next video.
17. Tips: Your Character Will Change!: Hi, and welcome back. Our character is officially done along with every
information you need. You can now use
your character for any personal project
you have in mind, be it for a comic, a game, for your illustrations
or to use as an avatar, you have everything
you need to draw them, including a very handy
and helpful reference, so you don't forget
anything about them. I've mentioned this a few
times throughout this class, but I feel it's something
very important to talk about. Your character will change. As time goes by, your tastes and
preferences change. Your drawing ability and
style will also change. This is natural to happen. We're always improving
and learning new things. As we do, some things about our characters
will also change. You start to realize better ways to improve your
character, for example. Maybe at first, you thought
the design was simple enough. But as you draw your
character more often, you realize you can make it even simpler and
more interesting. If you're using your
character for a story, it's also natural that
they might change, and those changes need to be applied to their
design as well. Not only that, but chances are you'll never draw your
character the same every time. Especially at the
beginning. It's normal. Keep on practicing until
you find the right pace. Let yourself and your character
adapt to the changes. If you're struggling
with something in their design, then change it. It's your character, and you'll know best what
to do with them. Don't be afraid or stressed
out about those changes. Just have fun, change
whatever needs to be changed, update your character sheet, and if needed, Do it
again in the future. Reason repeat until you're
happy with the result. This is it for this video. I hope you're happy
with your character. Follow me to the next
video so we can talk about your next and
final assignments. I will see you there.
18. Assignment Time: Post Your Character: Hello and welcome back artist. We went through everything
you need to know and do to create a character for
your own personal projects. First, we started by creating a mood board with the things you like so you can use as inspiration to brainstorm
your character. Then we went through
every step of drawing our character. Sketching choosing a design and refine it, choosing a color palette, and coloring our cart. Once everything was done, we created a reference
sheet of your character, so we always have
every information needed when drawing them. If you created your
character along with me, now's the time to post your
completed character sheet. If not, you can also just share a quick doodle of your character along with the
brainstorming you did. The most important thing is
that you start your cart. I'm looking forward to
seeing your art and characters have fun
with your drawings, and I will see you
in the next video.
19. Conclusion Before You Go!: Congratulations. You've
finished the course. You've done an amazing job
following through the videos, and you should already have a new character ready
for your projects. If you haven't finished
your character yet, that's fine as well. Take your time and have fun
with the whole process. If you can take the time
to leave a honest review, I really appreciate it. It lets me keep on
creating and updating new courses for you
and reach more people. Don't forget to share and
send me your characters. I can't wait to see them. All right. That's about it. Thank you for watching and
as always keep on drawing.
 Patricia Caldeira, Illustrator | Digital Artist | Designer