Transcripts
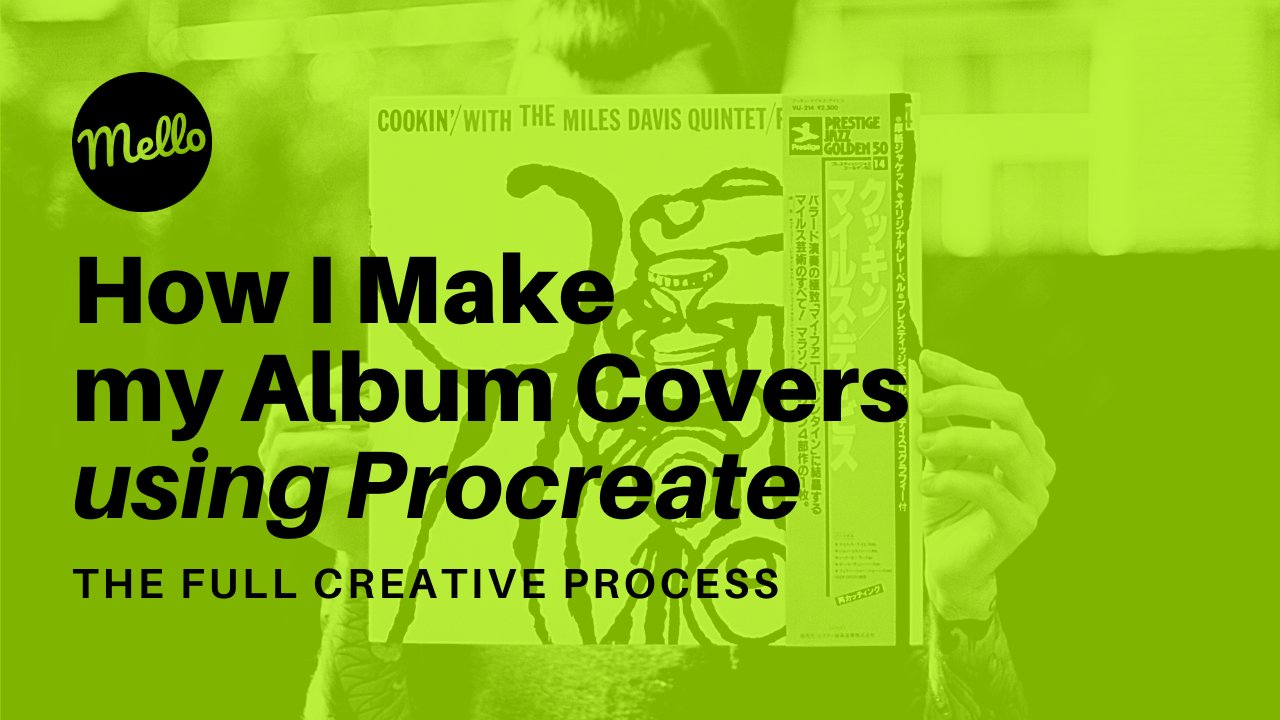
1. What you will learn: From Stick-man figure to Character Design: Hello, guys. And welcome to this course. I'm Georgia. And today I'm gonna teach you how to draw fantastic amazing cartoon characters using procreate. So this course is for complete Begin nous, you have your new iPod. You have your new a propensity by you don't know how to draw with this course. I promise. You start from Stick Member Cento An amazing cartoon character drawing. I decided to do this court's because at the start, I was exactly in your position. I just pulled my ipod, bro. My apple pencil. I was super excited, and I just went in both different courses about to use procreate out. The problem was there. While I was learning how to use this up, I realized that I didn't have any drawing skills, so I didn't know actually out to use the up. I knew any feature off the APA, but at the end of the day, I couldn't draw anything. So these courses for you, you have everything you know how to use the help? Probably. But even if you don't know, I'm gonna give you the Batic skills to use the up appropriate up. But also, you're gonna stuff from drawing like literally a stick Men person if you are that everyone can draw a sick member. So you start from that you're gonna finish to draw are complete character figure After you learned how to use the up and out to draw, you can actually monetize your skill. Okay, guys, I want to tell you a little bit. All the courts is structured. You're gonna be learning from the start. In the end, in a practical way, I've developed my personal method, my creative process, that if we're gonna go aspects like I lights, shadows coloring in King, sketching the whole creative process, I also wanted to include in the course a bonus section. This section is for actually, people like me at the start, because sometimes I used to be stuck. I didn't have any ideas. So you gonna learn throughout the whole course out to create from zero, Actually, from your fantasy from your from your creation, you start from zero. You create a new character. But what if sometimes you have no other ideas? So what you can do, you can get any picture from the Internet or picture of yourself of one of your friends and you could trace the speak shop and turn it into a character. So this is a really, really good courts. Ah, 100% practical it for 100% beginners, people that stuff from now. Like you. OK, guys. So I think that giving you old information. If you have any questions, please feel free to message me. But I read all the description off the course because they might be something more. And I can't wait to see you in the courts because And I promise, I know that this is gonna help you so much and I can't wait to see you in the course You
2. Procreate Workspace: All right, guys, welcome to this course. Um, let's die clean straight away into the appropriate up once Ray into the program up. The first thing we have to do is to create a new campus by pressing on the plus bottle on the right top corner here, and then our new panel will come out. And from these we have, like a series off recess already done by procreate that you can use if you need a specific size or otherwise, you can create a custom size That's the button at the bottom. If you know a specific citing, do you have to create in particular about say that these courses for beginners we're gonna be focusing on the first precept, which is screen size? The screen size is actually the size off the iPod, so it's a big size that it's enough for everything that we have to do in the course. So we're gonna be selecting the Screen Sides campus and he we are. This is the actual workspace off the upper. You can see at the top of the partner off all the options that you have on the left. You have the gallery. If you wanna go back at the gallery before then you have the options and then on the right . Instead, you have all the tools the unit to use, you know, to create amazing our works. You have the brush, er this mark tools. They were not going to be used for this course. Then you have the robber. Then you have the layer partner and Eddie. And the circle that you see is the color panel on the left. Here in the center there is another panel which is really, really useful. And we gonna be using all the time because you can see these two sliders than a square in the middle and then two arrows at the bottom. There, two arrows at the bottom are I think that you already understand what what they are. And it's the undue if you make a mistake. So we probably I use these all the time. Everyone, user, and there's the redo bottle. If you wanna redo what you just cancel, then a dissenter. These questions, I was saying, is the color picker to a really useful tool they were gonna be talk about after in depth simply And there's this light on Topper isn't just the size off the Russia off the rubber and the slider at the bottom is to adjust. Instead, the opacity off Russia, all the robber. Okay, the first thing we're gonna look hat is the brush it It's the icon on the right corner here , the ice off the brushes off course. So once you press the brush, I don't When we come out with all the different brushes available appropriate. But don't worry, we're not gonna be covering all the brushes here we're gonna be using. Just to brush is the 1st 1 is in the sketching folder. You can see here inside this catching core folder you have all this catching pencils we're gonna be using concentrating on the non reader pencil. But we're gonna be talking about this just after than the second folder is the inking one where you have all the inking bands in the inking folder. We're gonna be using the technical plan, which is this one. I don't understand why it's still in Italian. I'm sorry, but it should be in English. The technical panel, which is not what I finish it to stop in a d hand with the point until this after to Russia that we're gonna be using then the next planet is the Margot is this one. But I would just keep because we're not gonna be using. And then there's the rubber panel, which is pretty much similar to the brush panel. You have the same pretty much brushes, but we're not gonna be using any off thes except for this one, which is called modeling. We used just this one as a robber. The next panel is the layer panel. This is actually advantage off doing digital illustration compared toa pencil and paper in real life, because he makes everything easier, it's the advantage off the technology. You can pretty much divided her artwork into layers. So they after in the future, you can modify single things instead off relating everything and then re doing everything so delays. It's really, really important for you. Then the next panel is the Koloa panel. These, of course, I don't need to explain anything more because young, unless you want to do black and white drawings, the core upon its fundamental toe, understand it's really easy is divided into four categories. You have the disc which is the color wheels. You can choose any call you wants from the wheel you want from the world, and that's the classic. You can choose any car by selecting different brightness, saturation or use. They are all the same colors off course, but you can use different tools. You know, the toe shoes, the car that you want and then you have the bullets were already done presets from procreate, which is which are the last three. And then you can create your own watches, migrating your own palettes. Another important tool, as I say, is the color picker, which is the panel on the left center side. Off the artwork, which is the square in the left side, off the space, work off the upper. So, as I said before, once you select is square on the left side, which is the color picker these lands will up here so you can drug on top of the color they you want. For example, let's choose thes light brown. Once you leave the pen from the screen, the color is picked. You can see here on the top right corner. Okay. You can eventually decide to save by clicking one of the empty spaces off the Pollitz. Another important thing, toe no appropriate is out toe import or export your artwork. Import is fundamental if you decide to create sort off caricatures. Or maybe you want to get ideas from our previous fatherly you already have, or yourself. Or maybe you have a father from Guly. The you don't loaded that You wanna create a lot of work based on the photos, or you wanna be importing this photo in the numbers. And then, for example, you can trace the photo so you can copy the image to import a photo you select on the left top corner next to the gallery. These two option then you go on heart, which is the plus in the first option, and you insert a photo once it should've photo, you can select the photo, for example. Take my photo here. So I actually imported my photo. Then I can use in trace, you know, to replicate this photo in a cartoon character style. Okay, this photo will appear in the layers panel. As we said before you have inserted image, you can drug and draw bottom if you want to. If you wanted to be like a D end off every layers and then at the top issue wanted toe appear at the top. When you're finished, you want to export your artwork. You have to go again on the tool bottom on instead, off pressing the art. Tony, you have to press the share, but you decide now if you want, export the image in different type of extensions. So once you want export to your artwork because you're finishing, you think it's ready again. Nothing helps to are you press again the tool bottom, and then you go on share, and then you select the image extension that you want to be exporting. For example, the most common that I always do is J. Peg. Obviously, once you export, it gives you all the different option consent. On that drop on a message and email, you can save the image on your library
3. Brush options: All right, now we're gonna be covering the brushes Options. This is what we saw in the previous lecture. But now we're gonna go in more in debt. So let's like the brushes, Bonham, and let's focus on the first brush they will need, which is not a brush, which is technically a pencil. The pensive we need is the narrator Pencil, if you click again on the panel is gonna open up the option off the actual pencil once again, we're not gonna be focusing on every options, but just on one. They were really, really need because it's something that we take advantage off again. The technology that help us doing a great job even though we don't know how to draw professionally. Maybe we don't have a steady hand. Or maybe we don't know how to draw Kurds. There are little bit wobbly. And these magic option we help you guys to draw Kurds there are perfect. The optional I'm talking about is you can see at the bottom of this panel. Okay, so you select the night of the pencil, then click again. You go into the option planet off the actual fancy. Then you see at the bottom. You have seven different panel stroke shape grain than M expensive general and sorts. You go on the 1st 1 which is stroke in the option I'm talking about. It's called Streamline. You can see it's the second off. This basing at the moment is known. You don't have any streamline on you. Increase the streamline t look 100%. But before we're gonna be trying to streamline zero, not let you see the difference. For example, Now I have the neither pencil with streamline at zero. So I'm no using this Streamline, as you can see. Okay, it's not a lot wobbly because I'm used to Sorry, but you can probably see that it's not perfect. Okay, maybe I'll try and draw a circle. You can see. Okay, it's a little bit like no, perfect. Now let's try with the option off the streamline at 100% so you can see straightaway. The difference. You can see the line is a lot a lot smoother than before. Once again, let's try. Can you see the after I draw being like modified by the option. So these are pew draw like straight lines. I'm gonna follow the line that I did before. I hope you guys can see the difference. Even though I was going like fuss. You can see here, for example, in this bit that I was quite wobbly at once I put up the streamline. I was going really, really smooth. Even here you can see the difference out. These is wobbly and this is not so. The streamline option is the option. They actually make the difference. In order to create smooth lines like this, you can see this character. You can see all the lines off his face that really, really clean and neat so that you can make you look professional. Another important option that it's not anymore. In the panel, off the pencil is the size and the opacity off the pencil. You can find these, as we say in the previous lecture here on the left, you can see this lighter off decides here on your left, he can increase from 1% to 100% the size of the brushes. You can do the same with this lighter at the bottom. For the opacity can you can decrease from 100% toe, 1% capacity off the brush. So let's try now have opacity on 100% in size, 100%. This is the stroke off my pencil. I want to remind you that I have the streamline on. But if I pull the streamline zero, you can see a little bit of a difference in terms off the clean off the line. But if I put down the size off the brushy comptel now, how small it is the size off the brush so you can increase and decrease decides this and you can do with the positive. So I put the stroke 100% size. But your capacity, for example, 24% you can see the compared to 100% you have, like, lower capacity. So these are the three main option that we're gonna be using once again, streamline option, which is here, and the size which is on your left. And the capacity, which is again only left at the bottom. These are the three main optionally we're gonna be covering
4. How to use the Rubber: so another important thing they were gonna use an important tool. It's off course amazing and fundamental rubber that it saves our lies when we make mistakes . Rubber they were gonna use is just one. So it's so simple. You go on the calligraphy panel here and it's the 1st 1 It's called Monoline. Now you click again on the monoline so you can go into the option. And this is just gonna give you is that if you see the stream like option is on, you have to take it off because you don't wanna use the stream like options for the robber . Okay, because the streamline option doesn't give you a lot of freedom when you go faster with your hand. So it's really good when you draw because it makes you draw like, steady and clean in perfect lines. But when he wants to cancel something with the rabbi, you wanna be able to go fast with your hand and this is not possible when you have the stream my own. I show you an example right now. So we put the streamline on 100% in the maximum with the rubber and let's try to dilate a little bit of this green. So I'm gonna go faster with my hand. I think you can see the movement. Can you see that? I can. Actually, I'm going so fast and I can almost touch the bottom and the top of this caper, but it doesn't cancel till there because the streamline is on. Okay, but if it goes low, I can. OK, but these uncomfortable when you have, like, a pencil. So what you want to do is to take the streamline off and be able to be free to move your end as fast as you can. So you can see I'm doing the same movement before. But now I'm actually relating everything as my hand goes on. So it's actually option. We want to keep for the robber. So remember, just pulled the streamline off when you used the robber. Another important thing for the Robert is to know is the opacity. So I want to give you an example. It happened. It happened a lot of time. When you will be inking with the technical pen, probably. Maybe you do circle. Let me reduce the sighs when you do a circle, for example, you do like a line like this you can see like even from quite far away, that you have these little line here. OK? Do you want to late Because you wanted to look perfect? Not so. How do you delay this with this all mess off? Picks a Use the rubber off course. But you can use the rubber in the maximum picture because you can make some mistakes improbably cancer A little bit off other lines. OK, so what you do is actually put the robber at the minimum size. You decrease the capacity here down to quite like 25% for example. And when you do, you goes low here, you can see it's completely different away delay, It's k you do up and down, up. And now here you can see that it seems like he didn't actually overcome the sitcom with the line. Okay, so eat, canceling a natural way. Okay, so this is a good way to use the capacity for the rubber
5. Layers: another fundamental part of this course. I want you guys to understand the importance off the layers. Okay? Because it's on Friday. You have tow use in your advantage, Aaliyah, devise your whole heart work from this catch toe winning for a photo. The coloring. Okay, You divided I work in today. It's because you want to be able to have the freedom toe modify the are worker without delay. Ting everything so you probably have in general what we do. It's like you have a newcomers here. The first layer is gonna be the sketching. So your name is a sketching layer. Okay, Because it's the 1st 1 you drove with your principal, you sketch. And then when the whole artwork it's done, then you add on top of this layer another one they're gonna rename as the inking in keys like outlining with the markka with the pen on top off the inking. Actually, not on top, because you do it in between sketching and thinking, you create a new layer. The your name is colorings. Okay? Because you're gonna be coloring like behind the ink impanel. Okay, so the thinking is the last layer where you you see the outline of black of Line. Okay, underneath us the color. Okay. You're gonna be having all these layer organized all the time. And another lady, you're gonna hard this. Of course, if you will add a photo you wanna sketch, for example, you want a copy s So you're gonna go on the two option at instead of photo A, you select the photo, the import. You can see that the photo is important in this case in this catching panel, which is my mistake, but doesn't matter. Let's pretend that it's running this photo layer. The new art, a new layer on top, which is gold. Get Shing. Okay, so I want to add another thing to say which is really important for the layers. You have all the layers here in order them, you can see a letter and okay, if you click on this letter, it will appear another option panel. You have the warrior just about this option at the moment, which is called capacity so you can decrease or increase the opacity off the layer, which is really important. One with sketching, for example. You want to sketch on top of this photo So let's select a pencil. So we went out copy my face, for example. It's gonna be like, Yes, you can do it, but it's a little bit uncomfortable because you don't actually see. For example, my T shirt is black. The pencil is black. Here, you don't actually see the line. Okay, so to make it easier, you go on the letter and off the photo layer, you're gonna decrease the opacity until you see enough the outline off the photo. But at the same time, then you move onto the sketching layer where you're gonna be sketching on top of my head. But can you tell that now you can see much better the line off defenses so you can follow a little bit better on do a little bit roughly just to show you the option? Okay. So you can you canoe quite everything. The mouth, nose. This is what you can do. Then after when you finish, eventually you go on the layup in again. You go on the photo, Leia and next to the end as thes tick a box if you antique. So you're not gonna be seeing the layer selected. Okay, this is really good because you're gonna be a d end. You're gonna be having, like, few layers they, you know, antique. So you will not keep the layer stealing the document. Because maybe you have to use after maybe you for go like, OK, I want a hard another thing. Maybe the beer, my head Let me see. Delayed again. They are going to sketching panel and then I want to add my my beer because maybe I forgot . So you want to keep the layer here. But if you don't need it Because, of course, you don't need the father the background that you antique and just end results. For example, after you sketched, you don't need any more. You're fully I saw you on select the for the layer you anti that you want to be thinking. So you move into thinking you're gonna do the same thing with sketching layer so you don't want the pensive to be so black that maybe doesn't make you see the inking pen. Okay, so you reduced capacity off this catching layer. So you go back on the thinking So you do the same process that you did before you select the in compound the technical plan. And now you're ready. Okay, to think so you zoom a little bit, you remember to put the streamline it 100% and then you stop. All right, drawing. All right, you can see house moots. It is with a stream like option. Okay, this is just quick example. I'm being a little bit with my lines. I'm not cleaning the lines properly. For example, here you can see the here. This is not clean, but you refine after we do, after the example of refining explained everything. But this is just to make you understand. Like all the different process you're gonna I this catching layer and now you have the inking finished design.
6. Theory Techniques: Okay, so now let's timing into the rial course, teaching you out toe draw character design in Khartoum style. So the first thing is like the anatomy of the face. It's a technique. You actually divide the head in four squares. So it gives you the perspective, you can actually move the ads off your character, and it looks in perspective. It looks like he is actually moving like three d. So it's really important you're in this technique. The first thing you do. Let's keep it simple. Okay, let's get the pencil. Okay. You draw a circle. I'm gonna give you another tip right now because we need if you want to draw Seiko Upper Circle, you know, if we do, this is not perfect. But I want dropper for sequel because that's what we need you to the sea. Because good as he can. And then he stay still with your pen. You can see that he create perfect leaps in this way. Why you keep the pen on top off the screen. So all the panel screen you top with your other end with your finger, OK? You can see when atop it becomes a perfect circle then I leave. The finger becomes on in leaps again in a top again, it becomes a circle. Can you see it? The difference. OK, so these are face these enough of a big size. So once we have our face, then let's pretend that we want to make something easier to stop. So let me move. Let me move this face here Me to pluck a Let me duplicate these. Okay. Okay. So we have this to circle, which have to example faces one the 1st 1 which is a face that looks straight Get the simplest hever. So you divide the face here like this and like this. Okay, you need these in the sketching face because you need to know where the nose, when the years and when the eyes are, you eventually create our new layer on talk. So you don't wanna disturb this. And maybe you do what we learned on the previous lecture. They would increase the capacity off thes layer. So you just see a little bit. Okay? Which is enough for us, then on the late on talk, we're gonna draw, uh, nose your nose. It's here, in between here and here. in this line here has to be your nose. So what we do is pretty much in the centre than us. You can create any type of nose for example, these one and your eyes as to beat you with the line are can you see? Okay, let's just pretend little b you here's has to be here. Okay? The intersection between the centre lightly horizontal line and the circle controlled years here. Okay, the other one here. Okay, than the mouth. The mouth is in these line. Okay, you can have the chain. Here it is. You have the proportion now, so when we increase the capacity, you can see a little bit better. So what you do now when you go back on the other lady? Yeah. Now you can dilate here can late this without touching anything you've been drawing on top . That's did beauty off. Creating a layer. That's the magic. So these were You have now in my look a little bit weird because we're not putting enough effort at the moment. But if we are some hair, it's gonna look a lot better. So let's add some hair here just to make it look a little bit better. That's prudently. Looks like Elvis Presley. Okay, As you can see, it's like it's really, really important. This is actually the process, like you don't need to be, like, amazing and drawing general me. It doesn't have any rule the style and it looks like it doesn't have any sense right now because the whole part off doing his character desire, it's all about refining. So you have to verify with your rubber now it makes the difference. That's why it seems like you don't know to draw. You don't know the drill because, you know, spend and maybe you don't know, you know, spend time like refining your artwork. Now, if I get my robber and I start refining, this is gonna looks much different and this is just the sketching parts gained. Then once you've done, you're gonna be thinking with streamline on. I don't even have the streamline on as you remember guys, you know, So all my lines are wobbly. Okay, I know it's clean as they should be looking Here, Here, you can see this makes the different. You are well done. Drawing in a mature drawing, okay? Already looks different. sound than you have to lay. For example, here you can see that it's coming up good now already, it's really better competitive before is you have to late because you don't need even see this part of the head. You sketch a lot. You get the idea, the brief idea. Then you said the lady. You just the let you use a lot The robber. That's what I said. This style, it's writes really important to know how to use the robber properly. So that's what you gonna do. Like a lot. That's what you do. So here is already much better than before. When you clean every angle, it's gonna look so much better. So these were We have now. It's coming up, like or in different competitive before. Okay, so already have, like, now line on something our character. So what you can do now? Also, it's like maybe you want to do a different shape for the head. You can change again. So that's what's really important to refine and used the robot. Can you see here, for example? Maybe I change my mind. I don't want any more like around sheen around hat to now want some female pointy in the chine. So that's what I'm doing. Like I played it. This is the front side. Like you can create everything that you want. It doesn't have any rule. You have toe ask someone, watch YouTube, video on, like our Canada. What Sheen are gonna do. They know you just invent. That's the beauty off this style. This character on the left is looking straight. So let's do another character here that they will look in this direction, for example. Okay, so what I do, it's like I get the center point off the nose. So it mentioned the You see someone looking in this direction, Where would the center point off the nose be here? Okay, so once you have the center point that it's here. So we do. You start from the center, you have the full points. You stuff from EU duties doesn't have to be perfect. Okay? And that's what you do, Ego. Across the line. This is the point that we acknowledge as the nose. Pretty much that is looking there. Once you have this new layer again. Okay, This is what we do. We put the eyes here, another knows we invent. Okay, Maybe do a little bit smaller. Like when they like this. Look, look, Cuba have more, not a machine. So you can sister away how the proportions help making a good job goo character design. So this is the face that I have. So no, the lusting remain are the years Do you condemn from here? One They're the one. You put a here, for example. Maybe. OK, so this is one of our like that it's just so small And then when it will likely be bigger under Styx on a delaying or refined. And this is once again, like all trying Hera like you don't like in this whether you try something else years A fantasy. That's the beauty of this off this type. But you can see straightaway. This guy is actually looking there. So once again, we need to pull some hair. Maybe we do the same here. Well, wanted to be like curly hair. Okay, You just you just invent what we want. Okay? Then you refined when you re funding makes the difference. I'm telling you like it just makes the defense. So now this is what you have here now you're gonna delay everything. Okay? This is what we got. You know, this guy that is looking not anymore straight. So this is the end resolved. So another thing that I want to say in this style, it makes a little bit off. The different makes a little bit more particular. If we have the ads that it's quite big and we then draw the body that it's a little bit smaller. I didn't dive into the body yet. But for example, let's pretend that this is the stick men body. Then after we're gonna make you a little bit more complex, obviously you can see the difference in terms off proportion. The ad is really big compared to the body. Actually, not that big because it could have been done, like even more be compared to the body. But this is Dickie. If you make the bodies more compared to the air that makes everything much better, looks more like a cartoon. And that's the beauty off the style you can do actually where you want. Let's do like, let's write even smaller, for example. Yeah, okay. These it's even better. I know that you can see like I had that. It's really defined in a body that is like a stick, but it's gonna look much better than once we create the body. So this is what this is. The all important technique the U F to learn and practice and practice and practice. But it's actually easy. You can do once you already understand what to do. A lot of this fantasy of to use in drawing this thing so you can create, like eyebrows in this way, like I just did who can create eyebrows like, for example, like peace. Okay, and he already looks eerie. Looks different you just invented. Maybe if you wanted to have I don't know glasses. For example. Let's put these different eyebrow so you guys see the difference, so you probably that's what you do. Okay, so every little particular you want to change it makes the correct Akira or maybe smile. Maybe CIA's said it, depending on what you want to do. This is, like quite proud is looking at the Ardizzone. It seems like 100 dozen character, and maybe you want to add some glasses once again, you old, then you press you have like this We're glasses, but this is nothing compared to endure. So this is just the sketching we don't even have the streamline on. We didn't stacks thinking we didn't start coloring, So the end result is gonna look much, much better.
7. Facial Parts: now, guys, Another thing that I want to say. I'm gonna give you different types off eyes, noses, mouths Here's Sheen's hair or heads in jab. But I don't wanna waste too much time on this because I really believe that it has to come up from your fantasy. Nobody. If you just copy me. The real exercise here is that you invent you have your own. So I was little bit reluctant to give you a different option. Because what happened to me that I was like, OK, I'm gonna just copy what this guy showed me. Because he looks good. I'm gonna do the same. And then I wouldn't even than anything new and after, why would get bored. So in order to prevent this to happen, I want you guys to invent something. You. But I'm gonna still give you, like, one example or which part. So let's more eyes. You can do eyes in this way and said it before Let me a little bit of streamline because I don't like the way they can't otherwise Okay, you can do eyes like this. Okay, Then he can show different motions. For example, if you do the same. But like this, it seems like he's suspicious or quite hungry. Then you can do these. So, like, much happier. For example, when you can do eyes classical like Japanese Meghna eyes and you can do different highbrows . For example, these wanted have to take off my streamline issue. So look already is a little bit. If you're highbrows like these are like a lot in simple one like this. If it's like suspicious, for example. Okay, you can dio like this one. You can block here the calling side. Okay, get a different type of noses. For example, these one You can do these one into this one. You can do even smaller. Big, uh, you have a lot of types of nosy you can do. Then he condo's oh, mouths. I like to monthly really, really simple, like just stray line. Or if they're happier just like this, they've been no happy like this. So you can create like, for example, this one which is quite common Math The screaming weaken do like these one. You can do the opposite. Okay, then you have Here's I used the same He has all the time I used this one with X or I use like square. Here's with the sort of reverse g the opposite. Oh, you can do like I don't know, like Square Square. Here's with like this you can do anything like triangle. Here's I don't know, Jeremy, depending Where you doing? Like that's actually the video off this style. You condole whatever you want on normal skin, do it sheen she needs. It's really simply of the math here and you hard like a little chin. But the chain can be like just presented. This is the face. You have the chin here and then you have the mouth here in the nose. So the sheen king also, for example, go outside just to give a little bit of perspective a little bit outside the face. We can modify sties relate more with the chain, for example. Just Ukrainian characters like the really fun. If you have kids, they will love this. If you're a parent, listen to this course like they will love this. They will. They will want you toe print correctly. You do like have a little daughter and she lost his characters. So you create everything that you want with this and this is your chin and goes outside. They had just to give a little bit of perspective. Then another thing is there I really like this type of her. Okay. And this one you can do curling as I did before you can do while No bold are really, really sure. So you give a little bit of shape here. Do you know you keep a little bit of shape then? Another thing that we want to do. It's the shape of the head it doesn't have toe necessary. Be just a sickle. But it's really important we start from a sequin than you. You shape the had because he gives you the perspective with the technique that I told you before. So you start with a circle, and then what you do is the U shape your head and then you refine. That's the key. Remember, you shape you sketch, you refine your head. So that's why you do what you want to do. You can create the different types. For example, you can even do like that's where head That's so funny. Like, for example, like, look at this. This is Old square. Yeah, he s here. That's what you can do. For example, it is. You're already ever a new character. This is, like, endless. He can do what you want exactly.
8. Sketching: Now we're gonna actually start drawing these particular character that we started before they like. And you're gonna follow me in the entire process. From this point that we saw before, till the end. Did the color finish one? So we are in the sketching face with no streamline. And now we're gonna move into the body Very fine. A little bit off the body. But what I want to do is to delay everything. No, everything in just the body so that I can start again. So you already have. The ed is so you learned the technique. How you can do the ed. Now we do the body, but it's really simple. The way you start, you have to think of Finnish body. Just think of a stick, man. OK, so we do its neck really seem I'm gonna do a little bit bigger just for the purpose of the video castle. I'm gonna get take a little bit more space. So you start from the neck, which is a straight line. Then you remember you have the shoulders. Okay, then from these, you're gonna starts with the arms. Okay? Just pretend that the arms like this need to the body hip, and we start with the legs. Okay, easy. And then the foot forgetful. You don't know the ends. This is where you literally have. It's so so simple. Anyone can do this there from here. We're gonna start. We're gonna add another layer because we don't want to touch the stick, man, because it's up reference point. So what we do? We have the new layer as a Zeeland before. We don't want the stick man toe stand out that much. We just want like, it is a guideline. So we decrease the opacity down here. 10 15% whatever you may like, And then you move into the top layer with this catching. So now it's trying toe. Invent something. You're gonna start toe draw. You have the guy line of the stick men. So you want to follow these a little bit so you can be more precise, you know? I mean, it's just a waste of time. If you're not, then you have to delay everything instead back again. So that's why you actually do so. It doesn't take long to be a little bit more precise. A. You save a lot more time. So what you do is this'll you have the more precise you can. You can be the better, because otherwise you save a little bit more time after into the shoes and then you the arms you can walk from here. Do you know what I mean? From here? You can do it. But from here we start toe a few details like I wanna do the deal's off the tee shirt, for example, like the same issue coal. And that's that's why easy I'm gonna like this because I don't need Okay, we're gonna details here. Okay? Gonna another details for the T shirt. Okay. Maybe I don't like the way presents presents here, so I read too. Dese line. So that's why what will you do? It just refinery for everything that you had few details here, For example, You wanna, for example, I don't like this because it's not well done. Kind is a little bit better here. You may want a hard like, for example, belt Okay. Makes everything much better. So you are details. It seems like character design. You don't do anything, just stick figure, but these are really easy to do. These are real easy. Ik endure a makes the difference in the end for the whole character. So, for example, you are deter for the pants. He had the pockets here. You can add a little bit some fields and other tips that I can give you when you hard this stuff, for example, these details she can go a little bit more further. So you don't followed these line and these are tipped. The A suggest you to follow, because makes everything look better. Okay, you can tell the difference between this and this one. So you're gonna start doing all these little touch ups that they change their whole drawing ? That's what you gonna do. And another thing that you do here, for example, you a little bit fucked up. That's what you're doing, the new clean. It's a limited refining and cleaning. And you cannot, for example, these in a situation. You clean lines here like when the you can do a little bit of muscle. If you want. I look good. He cannot, uh, Hubble. It's nice to do like this. So you give a little bit of personality to the character. But as you can see the main point here. It's to asses. Many details issue can because of some off all these little details altogether. Make the amazing character design. There's nothing more. It's all the some off little, little, little easy details toe add one on top of the other. So the more Tito you do, the better is gonna come up. So I think this is quite good as a result that I wanted to achieve. And now I think we can move forward. But before I want to dilate. So you go back on, lay off the stick, man. Because now you want to lay the stick man because you don't want it anymore because it create confusion doesn't look good. So you delay this stick men that waas behind. This is a quite good resold. The week achieved Okay, I'm quite happy with this. And we can move forward into the next lecture
9. Inking: Okay, now that we've finished how sketching we go into our thinking face okay, in these face, we're gonna be, like drawing on top of the lines and withdrew in this catching face So really, really easy. But in this way, we're gonna make our character looking much, much better because the lines will be smooth because we will have the streamlined option on the actual pen. You look much better so it would make a difference. Let's start wih art. The second layer on top, which we call obviously thinking is lay at the bottom were name and we call catching. So, as we say previously, this catching layers we're gonna reduce the capacity because we don't want to see it. The match awas Get confused with the thinking. Wouldn't see the lines Then we move into the inking layers and we change brush. We were into the pencil. So we go from sketching to thinking and we select the technical pen here. We see if this size it's good. So we do some try A In this case, this pen is sort of interactive. Respond toe the pressure. So the more you press, the more increasing size the less You press the thing that gets the line. So we have to consider this thing. And with some try and thinking, if this is too thick, I think that this is to think, because if you could see the the stroke, this sickness, he are it's not gonna look good. So you want a line that he looks much smaller than these, But you want to try and do size 10? This is a quite good result. Okay, in size. Bye. Happy with size standing, I'm gonna move forward with this and check if with streamline on the maximum, and I'm gonna move forward. As you can see, even though I didn't add seven details in the sketching face like I'm gonna do now, for example, this socks here really rough I don't like in this way. So yeah, I had the detail and making look like the going behind. So it's three d, it looks much better. Makes a difference. This is another detail you can adjust in the Incan face, the shoes you want to be a little bit more precise. So the more you go further with the process, from sketching to to thinking you were not get better and better. We'd be more precise because the everyone the end result to be to look good. So, as you can see, are really like, specifically fall. Oh, every line, Mike, if I think that this has to go, this is the color be down more, darlin here I'd wear. So these were a little bit of experiences. You can do this as well, but it's actually quite easy. You It's common sense if you think that something like, for example, these lines off the knee I wouldn't do in this way, even though I drew in the sketch in facing this way. But now that I have the streamline on and I can do a better job, I prefer to do a better job. Of course. For example, here defense. I'm gonna do better around it instead of being straight. And I had a little girl personality, no falling, actually a stray stray line. Is he getting all this? I What I always do is to move the campus like a rotating campus so much because, of course, like I know that it's digital, but it's like you drawing in real life. I have a pen in my hand, even though it's digital, it's not really about, of course, being like you have to follow you the natural pace of your of your hands. So you wanna be comfortable? Of course, if I have to draw at the opposite like this, these shape won't look that good. But if I do in this way because it falls the national direction of my hand, that's much better, - because all he I give you an example on how we could start using the opacity for the Rybar in this case are no. If you can see I don't like this line the intersection between this and these, it's not clean, if you can see. So in order to clean these I can't use the robber with 100% off opacity because it will delay a little bit too much, he would see. So what you do, you decrease the opacity, he said. The lady, the actual pixels. Lowell is lonely. That's what you do. You don't see that. It's better, so this looks quite good to me and I can move forward. So at the moment, this is where we did, and I'm so happy with the result came up really good, even better than the sketching. So it's an improving every time we move forwards and improving. If I would like to spend more time, I would change few tings. Probably. Maybe this part of the body, like it would like to make this more muscly. I would change a little bit off the arms here. I would do differently, but it's fine you can do. If you can see this thing that you want to change. You can do it easily. But for now, for the end of the course, we're happy with these results so we can move forward in King the face he I used the the two off the edit shape, so I draw like a line that's a B wobbly when I stay, stay with the pencil like he e draws like, uh, more precise Cool. - Okay . Trying to do everything much better than the sketching because one singing disease, the goals to get the character better embedded to every face. Yeah, I know that I used, like, the cold drop to, but I'm gonna explain to you guys off does. I don't need to say you know these words, even with straight lines. For example, I drew like a lie that he might not be dust rate. If you're old, depend in these lines day straight. He can do what you want with this so makes thes look much better. I once again it is the same with surgical, I thought should the other finger and it makes the Sitko perfect in the eyes. I don't know. She can tell these two dots. So the line when over the sicko Issa said before now we have to clean with robber We decrease the capacity down to 20 around We stopped doing this put up again a little bit. Okay, much better. And I think we're done quite happy with the results. Let's hide the sketching. So I go to the layer panel and I antique He had sketching panel my antique You can see that I don't have any more in the background. So now I see the end result of what I did. Now I think that we can move forward and I'm gonna explain to you guys to feature the you must know which are the reference layer in the alpha lock
10. Reference layer: Okay, so another We finished the inking face. We should go into the coloring first step face. I want to explain to you guys the reference layer. In this case, it's really useful. So we're gonna use a layer is a reference point for another layer. For example, Now we have the sketching layer and the inking layer we don't need anymore. That's catching layer. So that's why it's either we're gonna create a new layer blow the inking layer which we're gonna call color. OK, but in order to call in these layer, we have toe refer and tell these lay at the whatever I call here Yes, to be refer to the above layer this one to color instead of just doing for example, in this way, in order to call the whole face by you drop color usually sicko in the right off corner, which is the color you take this color you drag on top of this face and a new liver. But in this case you can see the color the whole campus. You don't want this. You want to select the layoff, the inking. So where you have the drawing get the color then you drop it on top of the face, you can see that it's coloring everything, but because there's a But that's why we're using now They're reference layer, that if I'm going to start calling on the inking layer like thes Okay, then what happened after East, I wanna add or change something. I will dilate the thinking of line as well as the color. So I want to keep the color on a different layer separated to the inking layer because it gives me a lot of opportunity toe modify after, if I want to change something. OK, so I was like the inking layer as the reference point, and I tell them that this is the reference layer. So everything I do in any other layer is going to refer to these layer. Now I can select my lay on the cold layer and I can use thes and drop a here and even door you can see that's what he created. He created just the color. So now I can choose in which on and off the color, or maybe just change color without affecting the thinking lady. Or maybe I want to dilate something just on the color, and that's what I'm doing. I don't touch anything off the inking layer. This is really, really important to work in this way because it makes everything clean up. Once we understood these reference layer, we can move on into the first flat color step.
11. Coloring: Okay, Now, this is the fun part. Really? Like coloring can start calling without shadows or highlights. So what we're gonna do is just we just pick up like all of that we think can refer to the reality soft pink as the face brown or blond hair, colorful Fisher. And for the shoes. Except so now I'm gonna start with the face in the body. So I'm gonna get a pink. Just this one you can see here. Okay. I want to choose this one. Let's select my color layer with the reference layer as the inking, and I'm gonna drop all the beats that I have to color with these Pacific color. So anything you think used to be these colors the skin, you're gonna drop the color on it. So with the neck, arms, legs. And I think we have done that. This is the skin we've done, but its flood. I don't have any shadows, any highlights. So this is the first step. Now I'm gonna choose from my palate, for example, colorful the hair a brown on and drop it here. Can you see that he's starting toe. Take four. Any shape. No, I don't think we're gonna call it anything else as brown I forgot these. I use the color picker and I drug the color pick up in the color. Once in this case, is the skin. Then I drug the skin on top of this little thing that I forgot, and I'm done now I want to choose a color for the shirts, the T shirt, and I can choose, for example, these blue okay for the neck and details on and choose a little bit darker blue here because I wanted to be different. Of course. You know, for the inside. Okay. No, for the pants I can use. For example, like Gray I don't like, See, these are the kree. Let's choose this one. Maybe I'm not satisfied with this, To be honest, like I would do the opposite. Go back. I don't do undo everything and And I would do like this blue for the pants, which I think it's better. Looks like call natural car for jeans. Okay, so I want to stay. You decide When this happened, for example, that I got the color and dropped here, and I was like, Why did call everything outside? Because there's the threshold. So if you can see I take the car, you can see on top. You see this blue line where is really in color dropped racial 90%. So if you put it down, Okay, so if you put 100% is God dropped the color on anything because it's 100% so it doesn't actually see these. The outline, the borders, he doesn't see it. So you drop the girl on anything. But if you put downs, reason is gonna drop tickle just under thing that you want until it doesn't actually get not even to the border If you put a 0% so you have to put 1/2 until you start seeing that it goes outside. So this is fine. This epidemic os probably somewhere in the border, there's a little gap. It doesn't seem like a gap. This one, Okay, these one doesn't seem like a like a gap back having attritional really high, like in 1995%. The common says the Okay, this one, it's not enough for me. Toe stop the color here and 90%. So I will drop the call even outside this one So let's call everything. And once again I want to do the details with a darker blue like this one. The's once and for the T shirt. I'm gonna use the that gray, even light a gray may be in the dark gray for the details and you may know, like these colors, but it's fine once again, it's the beauty of this style that you can do what you want their normals, the belt, you know, are brown, for example you know, doesn't. Doesn't look so they're old. But that's okay. We don't care that much. Do like Dr Brown. You can spend a little bit more tiling. Finally, the cause that you like you like more than these. And now gonna possum to this socks. You know what? Another. The Sox are weird. I don't know. No. Even this weird green. You know what? I'm gonna do the belt the same color. Just because I like the issues are weird color. When I choose up a peak of aware, call this orange. Now, for example, I have these orange off the shoes and I want to do the bottom of the shoes the same color, but a little be docker, but I don't ever hear in this watch is so I want to create from these color that I have selected gonna go down and I select Okay, the classic tub and I'm gonna decrease He, uh, this light off the brightness so it becomes dark. You can see here on top, but you have the previous color compared next student new color you choose so you can see the difference. That is quite enough for me and others. Okay, Okay. This green, it doesn't look good, but we make it. Were there regardless matches like we're blue for the tissue. Maybe I'm gonna go when I do the same and choose a doctor brew for the details here. So this is another way you creates Call off about once again you can use because they you want as long as he easier fantasy. You can spend time as much as you want. I want to change this green in tow something else, okay? And this shoes, we're gonna do a like, like sort off white. But it's no white. We know that it's no right. One thing that I do for the glasses is that I pick up from the court. Pekar, The skin color, which is behind the glasses, lands because I would not like a show that these are sort of reflection. There's a glass. Okay. Pick up from the color picker. The skin color, which is behind the glasses, lands so from this color under the same, do it like a lighter. Okay, so I'm the increased brightness and reduce this saturation so that in this way becomes louder. I'm gonna drop this color here. Okay, let's move ahead. Because this is fine for me. And let's move on. I'm gonna explain to you guys another feature which is really important that I mentioned before, which is called the Alfa locked. Now we need so much.
12. Alpha lock: So the UPFA lock Let's go to the layer panel and I don't need any more the inking layers to be the reference layer. So I'm gonna click again on the layer and these menu comes up and I'm gonna insulate antique the reference. So this is no anymore my reference layer and what I'm gonna do is there. I want the car layer to be alpha locked. I'm gonna give an example, which is better. So I'm gonna get these black, for example, and I start growing here. He can see you can draw anything here because I already previously color draw something so this blue. But when I go outside, it doesn't go. So this is the Alfa lock. You can actually do the shadows in this way without going outside your enough to worry about being precise. So this helps a lot. So why you have to do is to at this face once you call everything flat gave the first powering, you have to select a layer and doing alpha lock. You can tell by the square that you have behind the delay. Yeah, so you can see the little miniature where you have the square behind. This means that you have a background so you can't call outside where you color. Okay?
13. Shadows: Okay, so we understood our flock works. Now we're gonna move on to something that's gonna make your drawing your character look much, much better, which is the shadows. Before we move on, I want to say a little bit off theory. It's really simple you decide before and where the source of light come from. So let's just pretend now that the source of light comes from here. Okay, so you know that if the light come from this part from this side, you're gonna have to shadow on things that opposite all of here. So the shadow are gonna be in this way. There are no that much that I can explain in these. You just go. It doesn't actually have to be the perfect to be honest, like as long as you follow these primary ruler, They You know that the light come from this side that you know that the shot are gonna be all on the other side. Everything. It's fine, like he doesn't have to be extremely perfect. It's finals in this way. So let's start with the shadow. They should actually a darker color off any of the color they were in this drawing, For example, I have this being color for the skin. We have toe pick up a darker grade off these think the same. We've to do for the brown for the blue, so on so forth instead doing with the color picker Get the pink and change the brightness of the Spink choosing Dhaka collar. It's so much easier if we do some females, which is we create a new layer. There's gonna be above the color layer and of course, but always underneath inking layer which is the 1st 1 has to be on top of everything. So just underneath the inking layer and above the Kolia, we're gonna have our shadow. Okay, here comes the tricky beat. Do you remember the end on the layers panel here? Now you can see that I've already selected a different letter here, which is the blank anymore. Instead, off selecting the normal blinding mode. So the opacity we select overlay which is under the panel. Off contrast, you can see here the bottom you have dark in Leiden Contrast difference in color. So we select the panel contras and then we select overlay as a blend mode. So this layer off the shell layer is gonna be set up with the overlay blending mode, OK, and I'm gonna tell you why. Then you select the color, which is black simple. You don't have to pick up any different core. You don't have toe make up your mind deciding that the darkest call off the gray, the darkest called the being the darkest called the blue. No, you just use the block. And when you do is because there's the overlay blend mode is gonna automatically use a darker color off anything you go on with the brush so you actually don't need to change. Color is gonna do it naturally so we can move on and start with the shadowing. So we decided the light source comes from the left top corner. Now we're gonna concentrate or shadowing the right bottom corner off any part of his face on any part of this body. Let's start for, for example, with his hair and I'm going to do for every curl a little bit of a shadow for the here. Okay, Now I'm gonna add a little bit also on his face and to make it look more like three dimension I'm gonna go Even It's like the eyebrows a little bit detached from his face. This looks cool as a cartoon. Okay, it's starting to look. I love bed up now. These are little little touch ups, Little shadows. Now we're gonna do the bigger one chop, obviously, on the ease Chine We could start from here now because I have to paint everything with the brush. I'm gonna increase the size of the brush. But remember, you have to remember the your own size 10%. So when you come back, you remember they have to put your brush back to 10%. So for the moment, because I have a big area to cover. I was gonna take me a water wise. So what I do now? I put the brush back to 10% to the wrecking cover all the little chops here. And by doing this big shadow, I'm gonna How actually this is gonna outline a lot more. The character is starting to look more Rio, but there are a lot of other shadows to do. This is actually the by where you lose a little bit of time. What do also there and classes and also the nose. She's really important to do hopes under the math a little bit. And the little chin here. Also, this here is that a little touch shops do You couldn't do okay, I think for the shadowing, Unless you know more things that I think I we like, for example, in our eyebrows are thes ones. Ah, these once. You know, if you don't really see it that much because off there's not too much of a defense between the two colors. The old dark when I fix a little bit here on is her now on these hair? I would like to add some details that I didn't do before when we were on the face off, Qingqing. But this is once again the beauty of everything. Because you can always modify. I'm gonna because E is curly. Hey, I'm gonna hard some Kurds. So what I'm gonna do now, I switch from Shelia to inking layer once again, select black car, which is a really selective again. My technique pen and what I'm gonna do now are some girls. And also I usually do these here, which makes you look a lot better. And also odd this line. Okay, this line underneath his eyes. So let's do more curls here and there. Okay, I think I think it's sent off from aerial. Probably late. Some of them, maybe that too many. Okay, this is fine. And also for the shelling, I think with done, there's no much to do. Maybe I'm gonna some shadow on few off these girls that have just did just to give a little bit of personality like this, because the more you are these details and the more the character start to look professional like this, we're done with this shattering off the face. Let's move on to the body. So off course the neck is gonna be under the shade because it's got out quite big head. So I'm gonna do a sort of like the shape of his head like this just to make it look more riel. So this bit is gonna be all under the shadow, increased the size of the brush once again, just do all And can you see the difference between picking up all different colors and we just in this way with the overlay Brandman method? It's so easy, I would have done like different call just to do this bit instead. Now I'm able to paint the singular shadow, the single shadow just going over different colors at once. Here we go. Okay, so we have the Shadow correspondent toe he's head, which he makes making look, riel. Now we have to have some shadows here, off course, because this is the inside. Then we have to out some more shadow here. Like for his harm. This is really fun for me. I find that really relaxing as well. And, uh, some shadow here also needs how Bo and it's hard. Teal is hand. Then of course, you can change. He's not definite, because maybe your allies are These shadow doesn't look that good here. I have to add something more. Have to make a bigger or have to make it small. Our have to change something. This is the way you have tow draw use to proceed here, for example, if he does, it's a bit a little bit of shadow that also think that he, uh so shades? No, we're not saw on his hand. I usually do in his hand. I usually do these, like seeing that you have to think and connect all the shadow together. If you have the shadow here on his body, then you have to keep doing until you go down. Because that's the best thing to do. Because it has to be connected. The shadow are all connected. So that's what we're gonna do. Now we do all this part, the shadow, but not here. I don't like this look. Okay, so for the leg, I'm gonna put the brush 10% for the like, I'm gonna hard these type of shadow. Okay? Also here, as I told you, you can choose the shell where it goes pretty much the rule. It's this you just have to follow. Where is the source of light? And then you go. He can do, like, much better work than me. If you spend more time or Sonny's shoes, you see our Eichel next, all the shadows. Like if in his leg on the skin. The shadow finished in this point. Okay. I'm gonna connect in its socks, starting from the same point in the same for the shoes. This is really important now for the other leg. Another something like this on the inside. Obviously, okay inside here. Once again, we did the same shadow here for his leg. Hold down here. You have to continually increase a decrease the size of the brush. Because when you have bigger parts toe to paint that to do it quickly it's better than you . Increase the size of the brush that what else we do. Me. There are dual these little lines, like, for example, just underneath the belt. And I'm gonna do, well, thes once just to make it look Rio. Okay, I think that I cover all the shadows that I had to do. This is a quite good result for for the shadow. And for the next lecture, we're gonna be covering the highlights.
14. Highlights: highlights Now, like for the shadow, we are the new layer on top or blow the shadow layer. It doesn't make any difference. We're gonna call it. Obviously I lie. It's okay. Now we have to change once again the blending morning. So we click on the letter hand because we have to change from normal, which is which to the tub contrast here. And instead of doing overlay like for the shadows, we do soft light. So we have highlights blend mode, soft light and instead, off having the black color, we're gonna pick up the white color. This time it's gonna work the same way as the shadow. And that's what we're gonna do You can paint over is gonna give you back a lighter version off the cold the you have So these are you gonna do the alights in a simpler way? Let's start from the hair once again I'm gonna start toe, give a little bit of i lights to the curls Here It's what we can do Just be to give again some personality Okay? And now we are ill eyes. He, uh straight on top of it is a hair. Okay, so let's do some of this. So as you guys know, the light source comes from from thes direction from these way. So, of course, we're gonna do all these sides really bright. So we're gonna do a lot off highlights coming from this direction. OK? No, we're gonna hot even these little details here. I like to do when he's here. And when. I had some highlights here as well. And I want a heart, some highlights also here. I want to make these huts finish a little bit here. Instead of going further, I'm gonna hunt highlights here really quickly. Here we go with the hair. No, a little bit Here. I'm gonna do little be here and also on north, you know, had some highlights on the mounds, the chine. So I hide it. We're gonna have a little bit of highlights here just to shore much source of lights coming from that side. I think that for the face we are fine so we can move on to the body. Obviously gonna add these biggest source of light coming from here. I don't mind that he creates like a Turk color here from the intersection off the shadow in the I'll lights the range of the shadows. Allah in highlights are not just to like what we're doing now that a lot so shades. So it's actually quite okay for duties. Hello, Once again, in his harm, it's held bowl. He, uh, a little bit with a little bit here as well. Honesty shirt going down all the way to his pants. All right, speak. But it's almost done. We do these okay and also on his shoes. And I think we we are done with the islands was quite easy. Let's move on into the next lecture, which is hugging a little bit wide details I'm gonna show you right now in a second.
15. White touch ups: Okay, so we're almost idea. And there were courts in these lecture. We're gonna be adding another layer toe our artwork, which is the actual wide details layer little tart shops. They makes the difference. So we're going to create a new layer this time, these layer, we're gonna put it on top of everything. So we select the first layer they were gonna press at the plus button when rename these layer as the white. All right, now we're gonna select obviously the white color. If you didn't have selected this same brush, the technical pen, they were going to start adding the white. So, for example, you add a little bit here, but they have to be just a little bit. Not a lot. You don't like the islets in the shadow. We just have to be just the timing beat like this. I don't have to be. It doesn't have to be too much. So whatever you have on the highlight, there's a little bit of this white. This is like the peak off the light, for example, here and off course, we're gonna do it on these eyebrows in this way. He's one as well. When I finish this, girls and we're gonna do is well on these eyes like this. So it looks like more alive. We do it on these glasses. We do us sort of like light reflects on the glasses. This make everything look more realistic. And also we do here. We also do it on his nose, the point of his north mouth and the chine. We're pretty OK for his face. Now we move onto his body, we're gonna do it here on his shoulder and he's hard Help Bo. We do it here. Stich er a little bit on the Spence and on his shoes here as well Sucks on the other leg. It sucks. Here he we are. I think that this is the actual hand result off our character. I wouldn't have anything else for this course. I think this is the my good hand result. Consider that we come from a stick meme person. So I'm really, really happy or what came out and I'm so satisfied. This is the hand off the course. We're not gonna be doing anything. Helps to d corrected. This is the end results apart from one little team that I want a hard right now, which is the very hand we're gonna add. A new layer. The bottom they were going to rename ISS shadow to okay. And disease will pick up the black color. This is the shadow that this is no required. But if you guys like you condone well, once again, you hold on and then you drop the color black disease? No, actually the best. So that's why we're gonna go on the layer. We hit the letter hand and we reduced capacity until we find something that we like. But we have to go on shadow and late all the shadow, the come out from before. All right, you hear Perfect. He's in what we're gonna do. And we do the same for the highlights so that everything looks clean here. Uh, this is clean. Perfect. So we added the last touch up, which is the shadow on the floor. Make it look three D. This is the hand result. Now let's move onto the burning section and I'll see you in a big
16. Bonus How to Trace an existing photo: Okay, guys. So now in these bottles lecture, I'm gonna show you what to do if you don't have any ideas for creating from zero from your fantasy character, so you can actually copy from any image. This is a really interesting idea because, you know, also be using these idea when you're on have any actually ideas for what to do. But you're gonna do this. If you want a trace, for example, on existing photo off you off. Anybody else that you want to do? So, for example, let's imports. As I say, you press the tool, button you out instead of photo. Let's say, for example, this picture you want to trace this one. So you under this layer, you gonna decrease the opacity. You select the sketching pencil, the narrator pencil, you gonna start on a new layer here, you're going to stop tracing, like roughly. So what I do normally is there. I don't trace perfectly everything. I just take on idea of what it is, the character I want to do. So I seek until, like I do the basic shape of the face and then the neck and I try to style eyes these onto something that can be then personalized, for example, in this way. And I could probably move on to the full body, something like this, or even better. Like we do, like, sort off pants there. Shoes. Would you be harm here? So I'm in off proportions? No, we have our nose. We can even change the shape, but we can keep it the same as well. So what we do here, it's We try and and do similar off course I'm sketching. This has to be modified all like it doesn't necessarily have to be exactly this way. So now I'm gonna take off my actual photo and concentrate on these to make you understand that this is the basic. It's now without repeating all the process that we did before when I move forward a little bit. But I'm not gonna finish it all. For example, Now I'm starting to refine everything, so that's what I do. Usually I don't like the mouth. For example, I'm gonna do it again after when I think about after and they're not cancer. Also the the eyes because I'd like to make it smaller. This makes more sense for me when I'm, for example, like to do like a little mouth like this, Like toe emphasize the Chine in this way makes it look better for our purpose. It doesn't have to look, really the less real the better. So that's what we're gonna do. We're not refined. All the heads shaped the lay all the lines that we don't need. Now, for example, I don't like piece shape off east hair, just to it straight that I think it looks better. For example, instead of doing the G the reverse for is here. I'm gonna do the X okay for his eyebrows. Happy? Oh, for his hybrids monger. And do it again. Just like more. Okay, starting to look the way I want. Maybe I'm gonna move the mouth a little bit down. That would be done and into some trials. Okay, Deasy's better. I'm gonna probably try and delight piece in the just one lie straight from the nose is starting to look a lot a lot better. So this is like our really good result from an actual picture turning into a collector design. So from here, you can use a little bit more fantasy. For example, or other decency. If you can do, like small the neck. No, I don't like it all. That was better like before. So this can stay in this way. We probably can do like a really big neck. Maybe from starting from here. Oh, this is better. We are and can move. I have to the body. I still don't like the mouth and a water cannon. The serious face. No happy as before. But we understood we could actually, like, grow beer, the beard in this way and not a little bit for the neck. In this way, it's gonna look quite cool. If we had the beard once, it's colored and we can move Rooney's arms and trying to a bet out, for example, like this toe are a little bit off personality again, refine, trying not to leave. This is the same process that we did before, but now studying from an actual photo. So that's a good starting point, because it's really fun. When you take a photo for reasonable a friend and you turn it into like connected cut tour , for example, I can do that Bense a lot different. This is I don't like was just the outline, and I can do something like this. Really small B. Oh, good. Okay, starting to come out, Probably. I would probably do this. Delight is harm. I would do it again. Like his showing off his muscle like these. Let's see what's coming up here. Okay. For example, something like these name. We're all have toe refined, every little detail to make it come up interesting and professional looking, and then you're just a little bit even the proportion if you think that they know looking good. But I didn't like the portion of the harm. Now, of course, the end is gonna take a lot of time because you have to think off out. This position is done here again. Jeans like this will delay the shoes, You know better. Perfect. Okay, you're not bill ankles And that the shoes okay emphasized issues as well, for example. And now I want to tell you another treat. For example, I want this used to look the same. So instead of spending time, toe, draw and redraw the shoes until they look the same, there's our feature. They want you guys to know you press this Botton next to the actions here. You have adjustment, and then you have this sort Of s okay. Is he used to draw like a mosque. So you see, like this beat of your artwork, then you select down here. Duplicates. Okay, Now you have, ah, duplicate off this bit off our work, and then you slate the arrow next to this s okay. And now you can with the arrow, you can move your selection, which is a duplicate. Okay, no press. The are a gay. You un select everything. And when he duplicates, actually create a new layer. Now, why you want to Do you want to blend this layer with the layer of the actual driver you were using before? Because you wanted to be one layer. Okay. To blend them together, you pinch the two layers with your finger. You blended together like this, you pincher, and it all comes up. Do one layer. Okay, so another. The shoes looks the same. Exactly. So you can maintain this in style and you don't have to draw again until you find the perfect match. You can move ahead. Okay? This is what we created so far. I don't think I'm gonna move for, apart from adding like fuel dots for the beard. So I want you guys do is go more to start from these picture here right now to replicate this one. But I want you guys to finish, so you have to go ahead and do the thinking, do the coloring into the highlights shadowing in the wide details that chops a D hand. And I'm like to have a feedback from you and send me your actually artwork because I'm so curious to see I was gonna end up looking. I'm not gonna finish it because I don't want to influence you because sometimes you can and are coping. And I want you to do this because the whole purpose of this course is just to develop your authenticity, you have to copy less as possible. So as you can see, it's endless. You condone what you want. You can actually copy and trace an actual photo. You can trace the actual photocopy and then modify as you wish, any little with detail they want. You can create from actual from zero, a new character. So I want you guys to D's for or Mark get this picture in the screenshot on. I'm gonna leave. Pdf file the JFX file attached to the core so you can don't loader you import instead of photo. When she below that you select this imaginary the letter from the courts and you put it on a new layer like this one. Then you're going to reduce the apostle T and you're gonna use a You can reduce your party . You're gonna use it toe, Traci, and they will not continue inking a coloring and see what it comes up.
 Giorgio Mellini, Graphic Designer | Illustrator