Transcripts
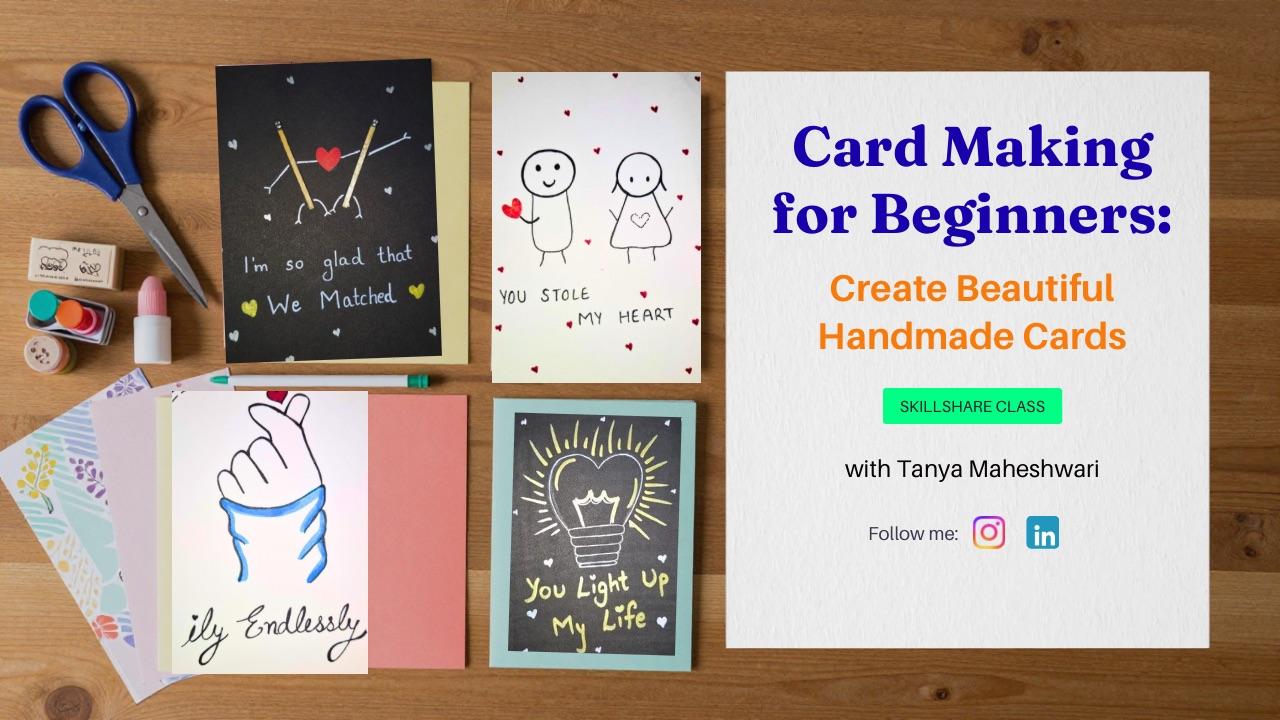
1. Introduction: Have you ever wanted to create handmade cards that
make someone smile? A card made with love is
more than just paper. It is a memory your loved ones
can cherish for lifetime. Hi, everyone. I am Kanamri. Professionally, I'm an astronomy
educator, and by heart, I am an artist and a crafter who just loves creating cute
and meaningful things. I welcome you all to
my card making for Bginers beautiful handmade
greeting cards class. I believe that anyone
can make beautiful cards with just a few simple supplies
and a little creativity. In this beginner friendly class, I'll guide you step by step through creating beautiful
handmade greeting cards. You will learn simple
card making techniques, tips for neat finishing, and how to add creative details that make every
card feel special. By the end of this class, you will have your own
handmade greeting cards. Let's move on to the next class in which you will get to know about all the material you are going to need
for this class. And yes, let's create
something beautiful together. So see you in the
next video. Bye bye.
2. Material Required: Hi, everyone. Welcome to this video in which
I'm going to tell you what material we are going
to require for this class. First of all, you will be
needing some multicolor sheets. Here I have taken white and black color as the
base of the card will be of this color and red color for small templates like
herds and other things. You can also go with
some other colors. Then you will require brush pen, or you can use any other colors like you can use watercolor, pencil color, poster
color, totally up to you. Other than these two things, you will require
white and black pen, as we are going to take white and black color as
the base of the cards. So white for the black sheet and black pen for
the white sheet. You will also be
needing pencil eraser for basic drawings that we are going to
make in our cards, scissor for cutting purpose, and obviously favical
when we are going to cut. We will be needing it to paste those small things on
our card template. Other than these
basic requirements, you will be needing
some more material. For example, we will be
needing matchsticks, bindages for the decoration
purpose in our card, and some cute ideas, which you will get to
see in upcoming videos. So see you in the
next video. Bye bye.
3. Card Borders: Hello, all. Welcome back to
the next video of this class in which we are going to prepare
the border of our cards. So for that, I have
taken this fine liner and decided to go
ahead with dash line. But it is totally up to you, you can go ahead with
the simple line also, or there are some more
other types of line. For example, you
can go ahead with zigzag line, hills typeline, clouds, maybe loops, or you can even draw waves or
maybe castle typ eline. So it is totally up to you, I'll add these type
of lines picture in the resource section
so that you can modify it according
to your likings. But I found these dash
lines more cute, and yes, it's all about making
our cards cute so that whenever you are presenting it to your partner or your friend, that person has a smile, automatically smile on the face. That's the only purpose of these kind of handmade
gifts, right? So in this way, just keep
drawing it completely. And once you are done with it, go ahead with another
basis for the black one, you will use the white pen
so that it gets highlighted because obviously you cannot use black pen on the black part, black page or black base, right? So take white Pen, just like here, I am
demonstrating you. And then once it is done, your card with the
border is ready. Now, all the basic
parts are done. Now let us move on to the specific card templates
in the next video. Bye bye.
4. Base Card: Hello, everyone. Welcome back to the next video of the class in which we will learn how to prepare the
base of the card. Instead of going to
the calculative part, here I'm going to tell
you the simple steps. If it is a four size sheet, just take it and fold it
into half like I am folding. Prepare nice and
firm crease so that it will be easy for you to
divide it into half sheets. If you have taken AF size sheet, then also you just
have to fold it. Like, it depends on you on
how big you want your cards. But I feel cute cards
needs to be small, cute, cute like this. But you can go
according to yourself. So here I have prepared
a nice and firm crease, and now I'm going to cut it. So it is totally up to you. You can take scissor to
cut it or you can use paper cutter and then just
fold the sheet and divide it. I will mention the
final dimension of the card also in the video. But if you are someone
who doesn't have much stationary but still want to surprise your friend or partner, then you can go
with this way also. So as I have used
A four size sheet, so after dividing it, now I
have two A five si sheet. Now, again, fold those sheets
or the parts into half, just like we divided the A 41, make super nice and firm
crease so that it will be easy for you to cut
properly like this. Yes. And then cut this
into two halves again, like I have told you earlier that you can use paper cutter, here I'm demonstrating it with the help of paper cutter, yes, it was smooth and way easier to cut it with the paper cutter
as compared to the scissor. So if you have it, then use
that or if you don't have it, then you can buy
the paper cutter or you can also use
scissor to divide it. The final size of
the card is ready. I have mentioned the
final dimension also, this is the final length in
the breadth of this card, but I'm not going to use
it with such sharp edges. So now let us make the round and smooth corner
of our card base. So here, what you
have to do just take the pencil and draw small
arcs on all the corners. Or you can directly cut
it with the scissor also, but I found that it
will be easy this way. Otherwise, it is possible that you mess up with
the round corners. So all you have to prepare
just one sheet like this, and then you can use that
sheet as the template or as the stencil for preparing more such bases in order to have equal size
of your cards. Once you are done
with the drawing fat, cut the corners with the
help of the scissor. And if you are finding it
difficult or quite tricky that you are not able to prepare
same and equal corners, then what you can do, just
prepare the one side, one corner, and then use it as the template
for other bases. In this way, you will find
it way easier than T is. Now, all the corners
are equal with round and smooth cut
with the same size. So this is the way you can prepare the base
of the template. Like, you can also
use it directly. But here I prefer to
use this way with round and smooth corners to
make my cards more cute. Now prepare all the
base cards like this, and then I'll save
in the next video.
5. You Stole My Heart Card: Hi, everyone. Welcome to
the first card class of this card series in which we will learn to start
drawing our first card. So here I have taken
this white sheet, but it is totally optional. You can go ahead with
the black sheet also. So let's start drawing
illustration for our first card. And for that, you first
have to draw two circles. These two circles will represent the head of our
illustration of two person. So here you can notice
that I'm drawing it with a very light hind so that even if there
is need to erase it, it will not ruin your sheet. So once both the
circles are ready, now it's time to
draw the body of these two circular part as the
body of two person, right? So here, I have drawn
a figure like this, not completely cylindrical and not completely rectangular. Now, from the bottom part, draw two slant lines moving
away from each other, which represents the legs. Now let's draw the body of
another person illustration. And since it is going to
represent the female partner. So here, instead of kind
of rectangular shape, I'm drawing a kind
of trapezium shape. To draw legs, draw two
slightly wavy lines, just like here you can see. Now draw two arc lines, one on each side to represent
the hair of the girl. Yeah. Now another arc line from the first illustration
to represent the hand of the boy and two slant lines one on each side for representing
the hands of the girl. Now for the facial expression
of first illustration, draw two circles for eyes and
one arc line for the smile. Yes, just like this. Now for the girl illustration, draw eyes in kind of a ver shape like the
girl is looking down. So here through
this illustration, I want to show that boy has
stolen the hurt of the girl. So for that, here I have drawn a dotted line hurt to
represent that it is missing. Now let's draw hurt
here to represent that the hurt of the girl is with the boy and
it is in his hand. So here I have just drawn the basic outline of
all the illustration. Now that illustration is ready, it is time to add the message. So your message is also going to be related to
illustration only. And since here, we have represented that the boy
has stolen the hurt. So our message is
also going to have those kind of words related
to our illustration. So here I'm writing the message. You stole my heart. And I have written everything or each letter in capital,
but it's up to you. You can write down the message in your running
handwriting also. So up to you, you can customize
it according to yourself. And once you are done with
the illustration part to you are satisfied that
ES is looking good enough, take your black fine liner or just a normal black gelpin or maybe a sketch pen up to you, whatever you have, right, and start outlining everything
that you have made so far. Like, whatever you have
drawn, outline it, each and everything, whether
it is the body part, the hands, facial
expression, everything. So this outlining part for
the illustration is same, so I'm going to skip some part. And once you will be done with the outlining of
the illustration, it will look like this. After that, start outlining
the message also, but here you have option. You can outline the message
with some color pen also. Like, it's totally optional as per your choice and
your partner's liking, if you like to make the
card more colorful, then use color pens. Now it's time to
add color in the hot that we have drawn
in the hand of the boy, or you can paste the hot cutting just like
here, I have decided. So instead of going
ahead with coloring, I have decided to cut a small herd piece and we
paste it there near the nt. So take an adhesive and
apply a small amount of it on the t cutout
that we have prepared. So here you need to be careful, as you need to ensure that not a very high amount of
avicol or adhesive is applied. Otherwise, what will
happen the moment you will go to paste the t on the sheet, the pevicol or the
adhesive will come out, which will definitely ruin
the sheet or your card. So make sure you apply a very appropriate amount of adhesive and paste
it on the card, just like here you can see. So you can see that it
is looking very cute, very beautiful that the boy
has stolen the heart of the girl because I am making it for boy
point of view, right? But if you are
making it for girl, so you can reverse it, that the girl has
stolen the art. Now for the final touch up, I'm just going to
draw very small, small herts all around the
illustration in the message. As it will represent a lot of love and also a
lovey dovey wipes. So I'm just drawing small, small herds all over my card, near the illustration, near
the message, everywhere. And you can always modify this instead of going
ahead with the hertz. You can draw small, small stars or maybe
small flowers, or maybe you can use different colors to draw these small hertz
all over the card. So it's up to you
how you want to give that card your personal
touch. Think about it. Think about your partner
for whom you are making it, and give that personal
touch to your card. You are always welcome to
customize the drawings. These are just for
your reference. You want to copy the same
one, that is also fine, but you can always
show your creativity. And in fact, you can add
more colors by adding colors in your illustrations.
So it's up to you. And once you will be done, just erase the
extra pencil part, and with this, you can see
your card will look like this. Now let's move on to the next
class with another card. By
6. You Light Up My Life: Hello, everyone. Welcome back to the next video in which we are going to
use this black sheet. Since it is black, I want
to draw something glowy. Any idea what are
we going to do? Okay. Let's start and then
you will get to know. Basically start with
drawing with pencil and draw two slant lines
which are not parallel. Then join these two slant lines from the top as well
as from the bottom, and you will get a
trapezium shape, right? Now in this trapezium shape, draw four to five lines, five lines as in
horizontal lines, just like here I am drawing. Any idea now, what are we doing? Let me tell you. We are
trying to draw a bulb, glowy glowy, but
not a simple bulb. The upper part, we are going
to draw like a heart shape. Because obviously I
want to represent the love and if I'm
talking about love, so hurt is very
mandatory thing, right? Okay. So the upper part
of the world here, I have drawn it in the shape of the hurt,
but if you want, you can draw it normal bulb also to represent that the
moment you entered my life, it became glowy or you
brought light in my life. Now for the filament part, here we are going to draw
it in the form of crown, like you are the king of my
life or you are my queen, whatever, for whosoever
you are drawing, like this, your l is ready. After that, now, since it is on black China and
I want a gluey thing. First of all, we will outline this l shape with the white 11 thing
that you need to take care while using
white pen is that you do not use the
white pen again and again at the same point because then it will not
work and time to time, you have to clean the point of the white pen so that it runs
smoothly on your design. Or you can also use
silver colored brush pen, golden color brush pen. It is totally up to you. You have so many
options available depending on the art supplies
that is available to you. You can also go ahead
with glitter pen or you can go ahead with
neon colored brush pen. So yes, again, it is
totally up to you as you are making these cards
to represent your love. It is not necessary that this
card needs to be perfect. You are making these cards. This is already
representing a love. A lot of love, gratitude, thankfulness that you
came into my life, towards your partner,
towards your friend, for whomsoever you
are making it. And once it is outlined completely, it
will look like this. Yes, it is not a very
perfect heart shaped bul, but yes, it is
looking very nice. Now take silver colore brushpin or golden colour brushpin. Here I have taken
golden colour brushpin and I'm going to draw small lines around
the bul to show that bul is on and
it is glowing. So just like this
sometimes small lines, some big lines or alternatively, you can draw big
and small lines. Just draw these lines
around the upper part of the bull to show it's
gluing. That's it. You can even go ahead with the silver, golden
silver, golden. But I think choosing one
color is more classic. So go ahead with
it and it is done. Now comes the filament part. Here I am highlighting
this filament also with the
golden color rsfin. But if you want to
leave it, you can. It is totally up to you. Then some details inside the bulb are gain to
show that it is glowing. Now, if I will leave it, then how will we know? These are some basic details that make our artwork beautiful. Once the bulb is done, now it's time to
write the quotation. Like our message, whatever
you want to write here. Here I am writing, you light up my life, or you light up my world.
So it's up to you. Whatever message
you want to write, you want to write
it with golden pen, write it, or you want to
write it with glitter pen, silver pen to just distinguish the colors between the
bulb and the message, you can go ahead with anything. Totally up to you. These cards are the personalized cards. I'm just showing
you a basic design. You are totally free to
experiment with the design. You are totally free to modify it and bring something
new. So it's up to you. Here, after writing my message, I'm drawing a small het also because I told
you earlier also, if I'm talking about love, how can I leave the t? Herd is everywhere. And with this tiny herd our
second card is also done. See you in the next video.
7. One in a Melon Card: Hi, everyone. Welcome back to the third card of
our Card series, and this time, we are
going to make it on the white sheet as we
decided to go alternately. Earlier, the second
card was on Blackshet, now it is for white sheet. Here we are going to
draw a slice of melon. A slice of melon, not the half one, not the crescent shape one, but the triangular one. It is going to be
triangular and for that, draw a triangle on the sheet, but make sure the
corners are blunt. We don't want sharp
ends because again, it is love, and I feel there
is no need of any sharpness. Cute drowness is the
important thing. Blunt ins are fine. No sharp things I want. Here we have drawn
a triangular one, and after making the
bottom part also, we have drawn cute eyes and
a small smile in the melon. Any idea why are we
making the malon? Okay, we will get to know about it later on when we will
be adding the message. Once you are done with the
drawing part with the pencil, go ahead with the outlining. And here I am going to
use black one, Black Pen, black pine liner that is
easily available to you. Outline it carefully with the black pen or with
black pin liner. You can even go ahead
with black glitter Pen. Outline all the parts carefully. After completing this upper one, move on to the bottom part, which is representing
the peel of the melon, the green part of the
melon that we see from the top right without
cutting it. Yeah, that part. After that, outline the eyes
of the melon that we have drawn here I have used this
ovular shape for the eyes, but you can go ahead
with another shape also, like a small thin lines also. There are many options
to draw lines. You can check it on Google also. But I find these kind
of eyes more cute. Right? So once it is done, we did not draw the legs in the hens with the pencil
as this is very easy. Here you can see for the legs, I have simply drawn the
L and for the hens, draw a slant line in
the V shape at the end. Yeah, like this. Do repeat the same for the next end also, draw a slant line and at
the end a V letter. Yes. And with this, this melon
drawing or outline is ready. Now it's time to add
color in our drawing. But before that, first check the ink or the outlining
that we have done is completely dry and then erase the pencil part because
once you will color it, it will not be possible for
you to erase the pencil. So first clean the
drawing with the eraser, remove the extra pencil part, and then take the green
color because we are first starting with the peel
part of the watermelon. So here you have to take
light green color to fill the bottom part or the
peel part of the watermelon, and we will use the dark
green color to show the stripes on the
peel of the melon, but we will do it later. Once this get dry completely because I don't
want to smudge the colors. So once the screen part
is done, take red color. It can be brush pen or it can be your pencil colors, crayons, whatever art supply you
have taken as I have already informed
you in the material that we are going to require. So first of all, take
the red color pen or red color simply and
outline the shape, outline this strangular part because I don't want
to spell colors. Once the outline is done, you can see it is looking
good like this also. So it's up to you, you can
leave it with the outline only or you completely fill
it with the red color. Here I'm going ahead with the complete red color slice because then only it will
look more waterblontype. I want to add colors
in my drawing. I just love colors. Okay, um so here we have outlined and now
I'm just adding color, but make sure while
you are adding color, be very careful near the eyes. You don't want red eyes. And here, obviously,
we don't have eyes, hands, or legs in a watermelon. This is just the way that I have personified my
melon because yes, you will get to
know about it when I will add the
message in the card. Once you are done with
the coloring part, you can see it is ready. Now wait for some time to get this red color that you
have done to get dry completely if you have used watercolor or
brushwin then start throwing small black
colored dots in it to represent the
seeds in a watermelon. Yes. You can see I'm just
throwing small black dots. But if you want, you can draw a drop shape to
represent the seeds. But then you need to be
very careful because this is already a small drawing and in that adding a small drop, you need to be
careful in that case. So if you are beginner as my classes are
beginner friendly, you can go ahead
with the small dots. And once it is done, remember I told you that we
will add green color stripes, so now it is that time. Here I'm just adding wavy lines
in the peel of the melon. Just like this. This knot
needs to be perfect, small baby lines. That's it. Yes. Now it's time
to add message. Any idea what are
we going to write? Okay. Here we are writing. You are one in a melon. Melon representing
something like million. You are one in 1 million, you are one in 1 million. So basically here with the
melon instead of million, I have tried to add a
little bit cute humor. But if you want, you can simply
write R one in 1 million, or you can even add
any other message related to this only because
we have drawn melon here, so your message should
be related to that only. Here I have chosen this are anna melon instead of you
are one in 1 million. After writing the message part, it's time to draw small things around the
figure in the message. And yes, those small things are one and only hert.
So it's up to you. You can do it with the fine
liner or you can again use black Bushpin because I feel
with the black brush pen, it will be more easy to draw small hertz because then
just one and two stroke, one for the side and
second for another side. Two strokes are enough to
draw small hertz like this. It is so easy. And why am I drawing these
small small herbs? Like, these are very small, even smaller than
the first cart also. So these small herds
are also relating with the seeds of the melon
because our theme is melon. So everything also related
to melon and obviously love. So yes, Mall herds
around the watermelon, around the message
that you have written, just to add some cute
elements in our card. But yes, it is up to you
if you are feeling no, it is looking a lot on a card. So you can skip
this t part also. So it is totally up to you and I have always said
that my designs, my drawings are customizable. You are welcome to
modify these designs. After all, you are making these
cards for your loved one, feel free to modify them. You don't want these
small hearts, up to you. You want to add color
in these small hearts, use multicolors. Totally your choice. Once it is done, it
will look like this. And yes, it is looking
very cute to me, with the message, you are
one in a melon or million. See you in the next video with
the fourth card. Bye bye.
8. Perfect Match: Hi, everyone. Welcome to the
new class of This course in which we are going to make our fourth card of
this Card series. So here in this one, instead of just drawing, we are going to use
these two match sticks. Yeah, you heard it, right. We are going to use matchsticks this time to make our card, and you will be
amazed to know that just these two
matchsticks are going to make this card,
very cute one. So what you have to do just
grab your matchsticks, take a small square
red color piece, just like here you can see, and you will be needing casar. You will be needing
favico for this one. So first of all, let us paste these two match
sticks on this sheet. And for that, take
favicol and apply a very thin line of glue or favicol on one side
of the matchstick. If you will apply glue or
favicol in very high amount, then what will happen. The moment you will put it
on your sheet to paste it, the glue or the
favicol will come out, which will definitely
ruin the sheet. So apply a very thin
line of favicol or very less amount
of cevicle so that it doesn't ruin your
sheet and paste both the match sticks
in a kind of V shape. By kind of V shape, I mean that put the Aztic in such a way that if
we extend them, they meet at one point, but you are not supposed to make a complete V with a pointed end, like here, you can see
in the screen, right? Okay, now let's move
on to the next part. So for this one, take a red square piece that
I have told you earlier, fold it into half, and
cut out a hot shape. Or you can directly draw it on the sheet of paper
and then cut the shape. So it's totally up to you. You can go ahead with any kind of method, directly draw it, and then cut or just
take a square piece, fold it, and then
cut the heart shape. It's up to you. So once
the heart is ready, put it on the sheet
between the two mastic and finalize the position where
we are going to paste it. So let me clarify here, these two match sticks are
going to act as two person. Once the location is finalized, take small amount of favicle on the heart and paste
it on the sheet, just like here you can
see in the screen. Press it gently to ensure it sticks properly at the
right position only. All right, everyone. Now
it's time of detailing. Grab your white pen
and start drawing a slant line towards
the downward direction, just like here you can see. At the end of this, draw a
small V shape like this. This slant line and V shape is basically representing
the hand of that person. Similarly, draw the
slant line from the same mastic representing
that it is holding the rt. Just like that, draw
another slant line for another matchstick
representing the same thing that both, the mat stick persons
are holding the hood. To complete the picture, draw one more slant line from the second matti in
upward direction. Like both the people are very
happy and dancing in love. Just like that, complete the hand figures of
these two mastic person. Now it's time to add facial expression of
these two mastic person. For that, on this black
part of the matchstick, draw two small dots
for the eyes and a small arc for the face,
smiley face, actually. And you can actually notice that those simple looking mastis
are now looking very cute. To complete this, draw the
feet of our mastic persons. For that, just draw
small curves like figures and a small V at the
end of these figure lines. Repeat the same for
another matchstick and in that way,
your mastic figures, the one male and another female
person will be complete, just like here you can
see in the picture. Now it's time to add
other details. All right. Now it's time to add a cute and lovely message
for your partner, since the main component of
our design is the matchstick. I'm going to write
the message in which the word matchstick or
match is going to be there. Here I'm writing. I'm so glad that we matched. Yes, you can see that I have
used the term match here. You can always
customize the message as per your bond and the
design of your card. If you are feeling
that you are not that creative writer to
customize your own message, then there are lots of AIs are present these days
where you can just put the keywords and they will customize the message for
you as per your thoughts, as per your feelings. Feel free to use the same
message in your card or use the customized one
that you must have designed yourself
or took help of AI. Now to give the final
look to this card, I'm going to draw small silver colour herds
with the help of, of course, silver brush pen
and two herds of golden color around this
match to one at each side, just like here you can
see in the screen. So it's up to you. Here I'm adding small hertz because it's full of
love ie, you know. But you can also add small, small stars or just tiny drops
or dots totally up to you. Or even if you want to
leave it as it is, you can. But to me, it was looking
a little bit empty. So here I'm adding small hertz. And as I said earlier, two golden herds, one on
each side of we matched. Rest, you can draw white or silver colored
hertz all over, and with that, it will be done. Our fourth design with matchstick as a main
component is done, and yes, it is looking cute. See you in the next class,
9. King/Queen of My Heart: Hi, everyone. Welcome
back to the new class of discourse in which we are going to prepare our fifth
card on white ase. For which you are just
going to need basic supply, like the black fine liner, red sketch pen or maybe the
brush pen, pencil eraser. Just that's it. And with these things, we are all good to
go for our design. So this is going to be
a very simple design, as we are going to make this card in the
deck of card style. So since I'm making this
card for male partner, I'm going to make this card
as the king of heart Card. So you have to write K on
both the alternate corners, just like you have
seen in the card. So here on the top left side, I have written K. Now
just reverse the card and write the K again on the top left side
after reversing it. Yes, please take
note of this that I have just written the
K and then reverse it, and then again on
the top left side, I have written the K letter. And as you all know that
in a deck of a card, we have four types of card club, spade, diamond, hurt, right? So since it is all about love, I am going to make it as the
king of So just below the K, draw a small and you have
to do it on the boat side. And also, if you are making
it for your female partner, then instead of K, you just draw or you just make
it as a queen of her. Once you are done
with the pencil part, start outlining it with the pen. Or if you are
comfortable enough, then you just directly draw the heart with the
pen or the marker, whichever you are using. It is not necessary that
you draw everything or you write everything with the pencil first and then outline it. It's about your compatibility. If you are confident
enough, do it directly. I don't have any problem. It is just that this
class is for all level. I am first drawing everything or writing everything with the
pencil and then outlining. Once you are done with the
basic designing of the card, now it's time to write
down the message, the cute message or the message of your hurt for your person. Since I'm making it again
for my male partner, here I have written that you
are the king of my hurt. So the beauty of these kind
of handmade card is that your message always has the
word related to your design, whether it is related to the machti card in which
we use the term match. Or here also, in this message, you can notice that I
have used the term king. I have used the term het. And similarly, if you are
making it for female person, then you can use the term
queen in place of king, as then you will be representing
the queen of het card. After writing the message, you can again draw heart just
adjacent to the word heart. Or, in fact, you can write
the message more creatively. Like instead of writing you directly draw a
little bit big hurt. Once you have finalized the
message, the words, pogion, everything, it's time to add colors or
outlining the message. For that, first, erase the extra pencil near the t
or where you have outlined already and then
fill red color in the heart shapes that
you have drawn, right? Once you are done with
the coloring part, it's time to outline the letters of the
message you have written. Here to outline,
I'm using, again, my black fine liner, but yes, it's up to you. You can use some colored pen
or colored sketch pen also. So once you are done
with the outlining part, wait for some time to get
the ink dry completely. And then erase your extra
pencil with the help of eraser. But yes, you need to ensure that the ink has
dried up completely. Otherwise, it will
ruin your card. And with this easiest, but the beautiful card is ready. Now let's see you
in the next class with the six card. Bye bye.
10. You Complete Me: Hi, everyone. Welcome
back to the new class in which we are going to
make our sixth card, and for this, I have
taken this black vase. Now, if I talk about the
main component of this card, it is the art. Yes. That signifies the love
that represents love, right? So for that, all you are going to need is a red color sheet. So here, I have taken
this A four size sheet, and out of this, I'm cutting
a small square piece. Now if I talk about the
size of the square piece, then it totally worries as it depends on the size
of your base card. So let's say, let me
give you an example. If the length of your base card is around
eight or ten centimeter, then the square piece should at least up to the half
size of your base card. So if the length of
the base card is ten centimeter or 12 centimeter, then length of the side of
the square piece should be at least five centimeter
or six centimeter. Once you are done with
the square piece, just fold it into half. And yes, it is not
completely square. It is here rectangular. But it's totally up to you. You can cut a square piece also. Totally up to you. Here I have cut it without
the measurement. Just a random one because
out of this card, I am going to cut hertshape. So here I'm going to draw two herds because
I need two herds, but in different manner. One will be the hollow one and another will
be complete herd. So first, I have
drawn a small herd, and outside of that herd, I am drawing a bigger herd just like here you can
see in the screen. Once it is ready, start cutting the heart shape with the help of the scissor. So I'm first cutting this
bigger one here you can see. And once the bigger one is done, cut the inside or the
smaller hert also. So in that way, you
will get two hertsO the hollow hert and another
one, the complete het. And yes, please cut
these herds carefully as we are going to need both of these herds
for our design. So once you are done
here like this, you will get two herds. Open both of these
herd shape like this, the one complete one, and another the hollow one. So here, basically,
the idea is to represent that completes me. So place the hollow
heart above on the top left side and the complete heart on
the bottom right side, just like here you can
see in the screen. Once you are done with
the positioning part, take favicol and apply a very
small amount of favicol on the art and then paste it on the sheet where we have
positioned it earlier. Press it gently to ensure
it is pasted properly. After that, take
the smaller hert or the complete one, basically, and then apply favicol in the center of the t just
like here you can see. So there is a reason
why I have not applied favicol on the
complete herd on this one. So first, paste it on the
sheet and press it gently. After that, pull
the top right end lip side of the herd
just like here, I'm doing it with my ne
so that we can give it a little bit pop up look now it's time to add
details in this card. And for that, here I'm drawing a loop pathway to join both of these hearts with
the help of the pencil. Once the basic outline
of the loop is done, take your white pen and start drawing it with the help
of the dotted lines. So here you can see I'm
not completely drawing it. I am using the dotted lines or dashers to make the path
or to complete this loop. And then here near
the hollow herd, draw an arrow shape like
this to basically represent the complete hert is going to complete the how one, right? Yeah, the idea is kind
of like that only. Now it's time to
add the message in this card as we
are making cards, which has some cute, cute message related to the
main component of that card. So here, I'm simply writing in all the block letters
that you complete me. Or you can always customize your messages as
per your choice, as for your liking, as you are making this
card for your loved one. Use AI, use your creativity. Whatever you want to do, just create your own
message or just write down the feeling that you
had while making this card. So it's up to you or just copy the simple one that
I have written here. You complete me. And with this, our sixth
card is also ready. So you can see with simple
elements and a cute message, we can create lots of
creative and lovely cards. So see you in the
next video. Bye bye.
11. Endless Love: Hi, everyone. Welcome back
to the new card class of this card series in which we are going to prepare
our seventh card. So in this card, we
are going to draw, and we are simply going to
draw this hand gesture. Yes, the hand that is representing kind of Korean
heart, if I'm not wrong. So let us start drawing. And yes, again,
use pencil first, and then if the
shape is finalized, then only outline
it with the help of the fine liner or maybe
a bold marker up to you. So here I have first drawn the arc line facing
upward direction. And then from both
ends of the arc line, I'm drawing some wavy lines
to represent the sleeves of the cloth above the wrist
and forearm of that person. Now, let's draw the
fingers of the hunt. And to draw them, I'm going to use
some straight lines, some curve lines
because the fingers are folded when we
are making that hurt. So one by one, just like here, I'm drawing the fingers, copy the same precisor and draw the fingers of the
hand for your card. So here I have made
these three fingers. Now it's time to draw the
index finger and the thumb. So here you can see I am
drawing the index finger a little bit longer as compared to the rest
of the three fingers. It is because when you make
that same ing gesture, you will notice
that index finger is not completely folded, just like here you
can see, right? So once you are done with the index finger from
this particular point, yes, here, draw the thumb. And if you need any reference, just make the same
gesture with your hands and notice where your
thumb is actually present. Once it is done in between the index
finger and the thumb, draw a small herd, just like here you can
see in the picture. Below this drawing, simply write your message in
your running handwriting. So here I'm writing, I love you endlessly,
but not complete. I love you. Here, for I
love you, I'm using ILY. So here I have written ILY
endlessly instead of writing, I love you endlessly,
but it's up to you. If you want to write it
that way, you can write. Once everything is done, you are satisfied
with your drawing and position of your
words of the message, then it's time to
outline everything. So let us first outline our hand gesture drawing with
the help of the fine liner. So again, I'm using
the black pen or black fine liner to
outline this hand gesture, but it's up to you
if you want to use black sketch pen or maybe a
colored sketch pen, you can. But here I'm just outlining
it with the black one, and after that, I'll
add some colors to it. Not completely, small
amount of color. But again, yes, it is optional. If you want to leave
it as it is you want, you can leave it just the
outlining part, no color. And if you want to fill
it color completely, then also, you can do it. So up to you as for
your choice, basically. Similarly, outline the message that we have written
below the drawing. And here, again, I'm using my black pine liner
only to outline it. But here, again, you
can give colours to it, like you can write ALB with
the help of red colour, and then endlessly maybe with the help of your or your
partner's favorite color. So up to you and as
per your feelings or, you know, that bond that you are sharing
with your partner. So modify the design,
customize the card. Again and again, I'm telling
you the same thing that customize your card
according to your likings, according to your partner
choices, and so on. Once you are done with
the outlining part, wait for some time to get
the ink dry completely. And then erase the
extra pencil part before adding colors
to your drawing. But you need to ensure that the ink has dried up completely, otherwise it will smerge
and it will ruin your card. So wait for some time. Ensure that the ink has dried up completely and then
start using the eraser. Now let's add color
to this drawing. So since blue is my
favorite color here, I'm going to draw the sleeves of the cloth with the
help of blue colour. But yes, I'm not going
to completely fill it. I'm going to add just outline of this blue colour around the black outline
that we have made. Once done with the sleeves part, take red or maybe pink color
to fill color in the heart. And here I am not
going to add colour in the fingers because the sleeve and the heart is
enough for our design. And with this, the seventh card of this card series
is also complete. Now let us move on
to the next class, see you in the next
video, bye bye.
12. Music to My Ears: Hi, everyone. Welcome back to the last card of
this card series. And in this one, we are going to make a musical note design. Yes, you heard it right. So you all have seen musical
notes like design, right? So for that, what you have to do draw two circles
on the sheet, just like here you can see. And the circle is of around two centimeter diameter or maybe three
centimeter diameter, depending on the size
of your card sake. And yes, you can draw these
circles free handedly. So once you are done with the circles for
our musical note, we are going to start
from the left circle, draw two parallel slant lines tilted towards the left side. Now extend these
two parallel lines to the right side circle. And for that, first
draw a parallel line to the horizontal line
of the card and then vertical line to
join the right circle. Similarly repeat the
same with another line. And in this way, you will get a kind of
musical node structure. Now to give some cute
look to our card. Here I'm adding the eyes and the smile in
both the circles, just like here you can see. I guess now you can
understand that basically these two circles are representing
two people in love. So here we are
drawing their hands joined like they are in love, and they are holding
each other hand. And here, don't forget to draw the other hands of
these two persons. So here we have used just curve lines to represent the hands
of these two people. Now let's draw the feet or
legs of these two persons. So here I have drawn
two vertical lines, one straight and one
a little bit folded, and a small dot at the end of those two lines to represent
the legs of the body. So repeat the same procedure
with the right circle also. Like, first, we have drawn just a straight leg and another
one a little bit tilted or curved to basically represent that these two people
are dancing in love. At the bottom, near the feet, draw a kind of dotted line elliptical shape to represent the ground
or the base, basically. And after that, write the message that you want
to add in this card. So as the main
component of this card or the main design of this
card is related to music. And to be very exact, it is musical note. So the message is also going to have some keyword
related to music only. So here I'm writing you
are music to my ears. Or you can write You
are music to my life, you are music to my heart. You can customize it always. Once you are satisfied
with your design, the words of the message, the position of each word, everything, start outlining it. So here, instead of
using white pen, I'm using this silver brush pen, a little thick one, basically. So it's up to you if you want to go ahead
with the white pen, only you can use it. But since I wanted to
give it a bold effect, here I'm using this brush
pen of silver colour. Outline everything, whether it is the
musical note design, your message or the base
design that we have made to represent the ground
or the surface, everything. But while doing so, please be very careful
and ensure that you do not smuch the
ink that you have used. Otherwise, it will
ruin your card. So be very, very careful
while outlining. Ensure the ink has dried up, then only move ahead or start
outlining the other part. So once you will
outline everything, it will look like this. And here you can notice that
for the musical note design, I have used the rush pen, but for the message, I have used a simple white pen. Now let's add some lovey
dovey es to our card. And for that, here I'm
drawing some small, small hertz with the
golden brush pen. Along with these small hertz, I am also going to draw small musical notes to
give it more musical yes. So here we are drawing
some small hertz, along with some small, small musical notes,
like single one, the double one, just like here
you can see in the screen. But yes, you can always modify the design
as per your choice. And then once the ink
has dried up completely, erase the extra pencil
card using your eraser. And that's it. Arcade is ready. So with this card
series ends here. Now, let's meet you in the
next video in which we will be discussing your
project work. Bye bye.
13. Project Work: Hi, everyone. Now it's
your turn to get creative. Using everything you
have learned so far, design and make your
own greeting cards. You can customize it
however you like. Choose your favorite colors, drawings, decorations
and messages. Try to include
things they like to make the card even more
special and meaningful. Remember, there is no
single right design. Let your creativity
shine and make a card that truly reflects your
ideas and imagination. And yes, if you enjoyed this
class and found it helpful, please take a moment to review
and share your feedback. Your feedback means a lot to me. It helps me improve our
session and motivates me to create more exciting and engaging learning
experience for you. Happy creating and I can wait to see your
wonderful cards. So once your cards are ready, do not forget to share
the pictures with me. You just have to go to
the project section and upload all the beautiful
pictures of your lovely cards. Thank you so much for
joining my class. Bye bye.
 Tanya Maheshwari, Artist and Crafter