Transcripts
1. DL Intro: Hi, I'm Vanessa S and
welcome to my course. In this course,
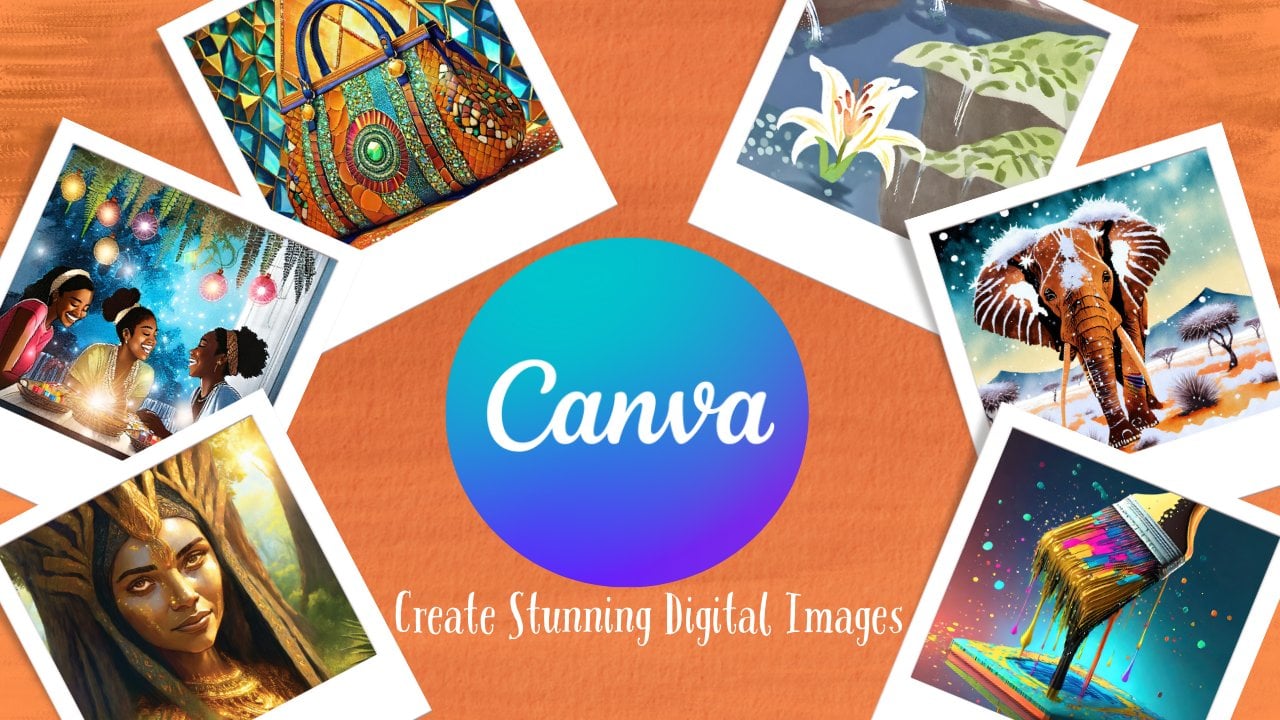
I'm going to show you how to create beautiful, robust digital images using Canva's dream lab application. But then we're going to take
those images and create print media such as greeting cards and
invitations and posters, things that you can
print and use for different events and activities. At the end of the course, there's going to be
a class project. I'll speak more about
that in the last lesson. We're going to start
with learning how to navigate Canvas dream lab
platform, the workspace itself. Then we're going to
look at prompts and how to use prompts to create the type of images that we want to use for
our print media. After that, we're going to take the actual images and go into our Canva workspace
and start doing some editing to create the
print media that we want. It's going to be fun, and
I'm looking forward to seeing at the end some of the projects that
you all develop. So if you're ready, I'm ready, let's get to it.
2. DL Navigating Workspace: Hi, everyone. The best way to learn how to use
Canvas Dream Lab is just by diving into it and just working with it from the
start to access Dream lab, you have to access
your Canva account. You can use Canvas Dream lab, whether you have the paid
subscription or whether you have the free subscription.
It's available to all. Although, of course, with
the free subscription, you have less iterations
that you can use. To access Dreamlab in
your Canva account, Dream lip is going to be on your left hand panel on this
side, on the side panel. And it's normally the bottom, and you'll see with
this little icon, and it says Dream lab. This is the homepage
for Dreamlab. This is how you'll
know where you are. Take note of a couple
of things here. At the top right, this is where the number of iterations
you have is located. This tells you how many iterations you have
for the month, meaning how many it's
almost like having tokens, how many iterations of dream lab images you can
create within the month, and they regenerate each month. So at the top, the
first question you will see is what
will you imagine today? This is where your
prompt will be placed to get the
iterations of your images. Your prompt should be
at least five words. But of course, we know
when creating a prompt, it should be as descriptive as you need it to be to get
the images that you want. You can add an image for
a reference point by uploading the image and then adding the
prompt that you want. So basically what you're
doing is you're telling Dreamlab use this
image as a reference, and I'm going to add more
instruction for you. This next section is
your style section. You click on it, you will
receive a drop down, and you will have Options as to the type of style you would like to
use for your image. This is a really cool
section because in the previous text to image
feature that Canva offered, you did have styles, but you didn't have as
many to choose from. There are a lot of options here. And of course, you can
always choose none. This next section is going
to be your aspect ratio. You have choices one to one, 16.9, 16.9 is normally
your thumbnail. Size 916 is normally your reels. If you're doing
images for reels, then you have 4.3, 3.4 and 2.1. The more common of
these is the 1.1, the 169, and the 916. The 1.1 is really good for if you're doing things
like Instagram posts square. The rest of this page will
house all of your images. As you are creating your images, you will get at least four
iterations unless there's a problem with your prompt and it can't give
you an iteration. One image in an iteration, you'll see four iterations. And your iterations will
stay in this section here. So you'll always be able to go back to them,
which is great. Another thing that I really
like with Dream lab is the fact that your prompt
stays with your images. Once your iteration is complete and it's
placed itself here, on your page, the prompt
also stays with the page. Now, a feature that
they've added with Dream lab that's very
effective is the reuse prompt, which is this up arrow. The best thing about
the reuse arrow is that if you click on it, it will add the prompt to
the prompt box for you. So you don't have to
copy and paste it. All you have to do is click Reuse prompt and it'll put
it back up there for you. And your prompts stay
with your images. And just as long as you keep your images, will
keep your prompt. At the very end of your
images for each iteration, you'll have three dots here. You click on the three dots, you have another drop down box. One is to delete this
generation, also on iteration. You can delete the whole thing, or you could report it. As we know, AI sometimes shows inappropriate things
or things that are biased. That's when you will report
the image back to Canva, so they can follow up on
what the AI model is doing, or you can just delete
the generation itself. To download your image, you can click on the down
arrow on the image itself. And lastly, your edit. Now that we have explored
how to navigate dream lab, let's start making some images. I'm going to start with a
prompt that I've created, and this one is about fashion. And because it's about fashion, I'm going to go
to the style box, and I want to use the fashion style. I
think it's appropriate. Once I have my prompt in the
prompt box, in this case, it's a design, a
high fashion outfit, inspired by a blend of
nature and technology. Imagine garments with flowing organic shapes with
leaves or petals, integrated with
metallic accents, glowing threads, or
circuit like patterns, focus on bold textures,
innovative materials, and striking color contrasts
that merge the organic and futuristic into a wearable art piece,
that is the prompt. Let's create. Normally it takes a few seconds for the
iteration to complete. And notice, like I
said, the prompt itself is going to stay. Now, these are the images
that were created. Let's take a look at them. Now I have changed
the style to Smart. Let's see the images
that dream generates. I can't encourage you
enough to play with all of the styles using various
prompts. These are beautiful. Now, this is the Smart style
using the same exact prompt. Now, let's change it
up one more time. Let's do something fun but
not necessarily surreal. So let's use the
pop art style for the same exact prompt. Okay. And this is the pop art style
for the same exact prompt. Dream lab is a lot of fun. I love the images
are more robust. They're just more robust.
They're beautiful. They're colorful. Look at this. And there you have
it. The images are giving me everything
I've asked for, and the style is elevating the image.
Well, there you have it. That is how you use dream.
3. DL Printable Products: Okay, welcome back, everybody. Now that we have our images, let's go ahead and start
creating our print media. Now, a rule of thumb
for me and a tip for you is take your images, the images that you're
wanting to use, okay? If you think you're
going to use them, take them and download them. The reason that you want
to download them is because to create
the print media, you're going to have to create
a print media page, right? You're going to have to create an invitation page or
a greeting card page. And so if you click on Edit
with any of the images, it's going to take you to an open page for you
to edit on this page, not necessarily
for you to create, like, a greeting
card or invitation. And so to bypass all of this, the best thing to do is to download your images
from the beginning, and then you can upload
the images to use. Okay? And so I'm
just downloading a few of them to use
for the print media. Now, because the prompt that
I use is fashion forward, I think I'm going to create as my print media an invitation
to a fashion show. I mean, it's only
befitting, right? Okay, so I've downloaded several of the images that I
think I would like to use. I can always come back
later and pick up more, but I've downloaded them. Okay, so we are going
to do a folded card. Which we're turning
into an invitation. And as you can see here, I have created a blank folded card, which is going to be the
template for the invitation. Okay, so this is going to
have a front and a back, and then it's going
to have an inside. From the start, I'm going to add another page because I know it's going to have
a front and the back. And then to monitor
what you're doing, click on Print with Canva. If you click on Print Wi Clamva, you can see you can
use it as your eyes to see where your design is
going and what it looks like. You don't have to
print with Canva, but this is just a good way
to monitor the design itself. So this is going to
be an invitation. So to start, I want
to add my designs, put them in upload
mode so that they can upload I want to
upload all of them. And now, in my upload files, the images are over here. So let's start with
using one of the images. So I'm just going
to take this one. I want to put her over here. Okay? As we can see, that
is the front of the card. You can look over
here in this panel here and you can see this
is the front of the card. Okay? And so this is
the backup the card. And so as you can see
here where it says, select your page to print, you have your outside,
you have your inside. And your inside
is your page two. Which is down here, okay? But we're working on
the outside right now. Okay. So the front of the card is gorgeous because the
digital image is gorgeous. But I do think it needs more. If this is going to
be an invitation, it should have
something stating, you're invited or invitation
or something like that. The digital image provided
this text down here, and I don't want this here. So in the editing, what you can do is
click on Editing. Magic erase, and then just erase the elements that you are not interested in being
on your design. Okay? And click Ease. You might have to do
it a couple of times. There we go. It is
now gone. Okay. And so now in designing her, I just want something. I don't want to overshadow her. I just want to put text there letting people know
that this is an invitation. To do that, I need
to add a text box. And then after I
add the text box, I need to decide what
type of font I want to use to make it a clear,
cohesive design. So I'm going to create two textbox because I know that I wanted to
say, you are invited. And I want the second
textbox to say, Invite. Okay. And then now I just need to find the type
of font that I want to use. I'm gonna use Horizon
because it's bold. Alright. I'm not trying to
do anything complicated. I just really want to
show you how you can create this invitation
as a print project. Okay. We use that. We are going to change the colors to make
it more cohesive. And then we still want it to stand out
a little bit better. So there's a couple of
things we can do here. One is we can use an effect, a shadow, a lift, a background, which I
like the background. Even though I think
the background takes a little bit away
from the design, I do like the background. So now, it says,
You are invited. That lets you know
it's an invitation. Okay. So moving on
to the next page, we're going to keep
this heart here. I don't think it's bothering anything. It's the back part. We can do something like
just say, thank you. Okay. So now the front and
the back are designed. And so for the inside, you would add, of
course, your details, your date, and your
time, you know, the logistics, that type thing. But the design, again, is on the outside using your digital image that
you created with Dreamlab. And that's really all it is
to Okay, so for this poster, I want to use frames, the elements involving frames. And the reason why I want to use frames is because it's easier to slide the photos in a frame
and have it cohesive. And so this is a poster. I want the poster again
to be about fashion. So we're going to start
with adding the images. Now, I want to add
multiple images. And so I need to
find a frame that has the capability to deal
with multiple images. And here's one. This is
going to be a poster. And I build my posters, starting with the images
that I want to be involved. And so I'm going to
just start adding the images that I want
to have involved. And Okay. So these are the images that
I created in Dream lab. These are the images that
are now in the collage. I want the collage to have text. This is going to be a poster. And I'm just going to simply
say fashion is my passion. Okay. Of course, I
want this to fit. So I'm going to use some of
the other design elements. Okay. Change the font to something a little
bit more funky. Okay. Fashion is my passion. And I don't want the
background to be white. So I'm going to
change the background to stand out a little bit
more there. There we go. It can be any of these
gradients. Ah, that's beautiful. Okay, so now here's my poster
that's ready for print. And so if you go to print
with Cava, click on it, you'll see this is what it looks like as a printed product. And that's really it. That's
all you have to do to create printed products
using your digital images.
4. DL Course Project: If you have made it this far, that means you are ready
for your class project. So for your class project, I want you to develop
an invitation. So you're first
going to think about the type of theme that you
want for your invitation, whether it's wedding
or birthday, something festive, then you're
going to create a prompt. After you create the prompt, then you're going to
use that prompt to create your digital
image in Dream lab. Once you have an
image that you like, you're going to edit
that image to make it an invitation in CNFR. After you have edited the image, in Canva and made it an actual invitation that
could be printed. I want you to upload
the design in your project folder in your course project
folder in your profile. And if you're really daring, I want you to upload
your work as well. This is optional to the
discussion board so that other classmates can view your work and give you feedback, and you can do the
same on theirs. I can't wait to
see your designs.
5. DL Wrap Up: Hi, everyone. Well, if
you've made it this far, that means you've made it
to the end of the course. In this course, I covered how to navigate the dream lab
landscape, the actual workspace. We also discussed how to create a prompt that will provide the type of image
that you're looking for. We also looked at how to create the print media by editing your digital image in Canva and adding things
like texts and fonts, different typography, different elements
and images as well. So by now, you should be more confident in how to
create print media using your digital images for all types of projects to
include greeting cards, invitations, posters and
things of that nature. It's been a pleasure. Thank you for participating in my course. I do have other courses on Skill Share, so
check them out. You may find something that is of interest to you
until next time.
 Vanessa S., Graphic Designer & Contributing Artist