Transcripts
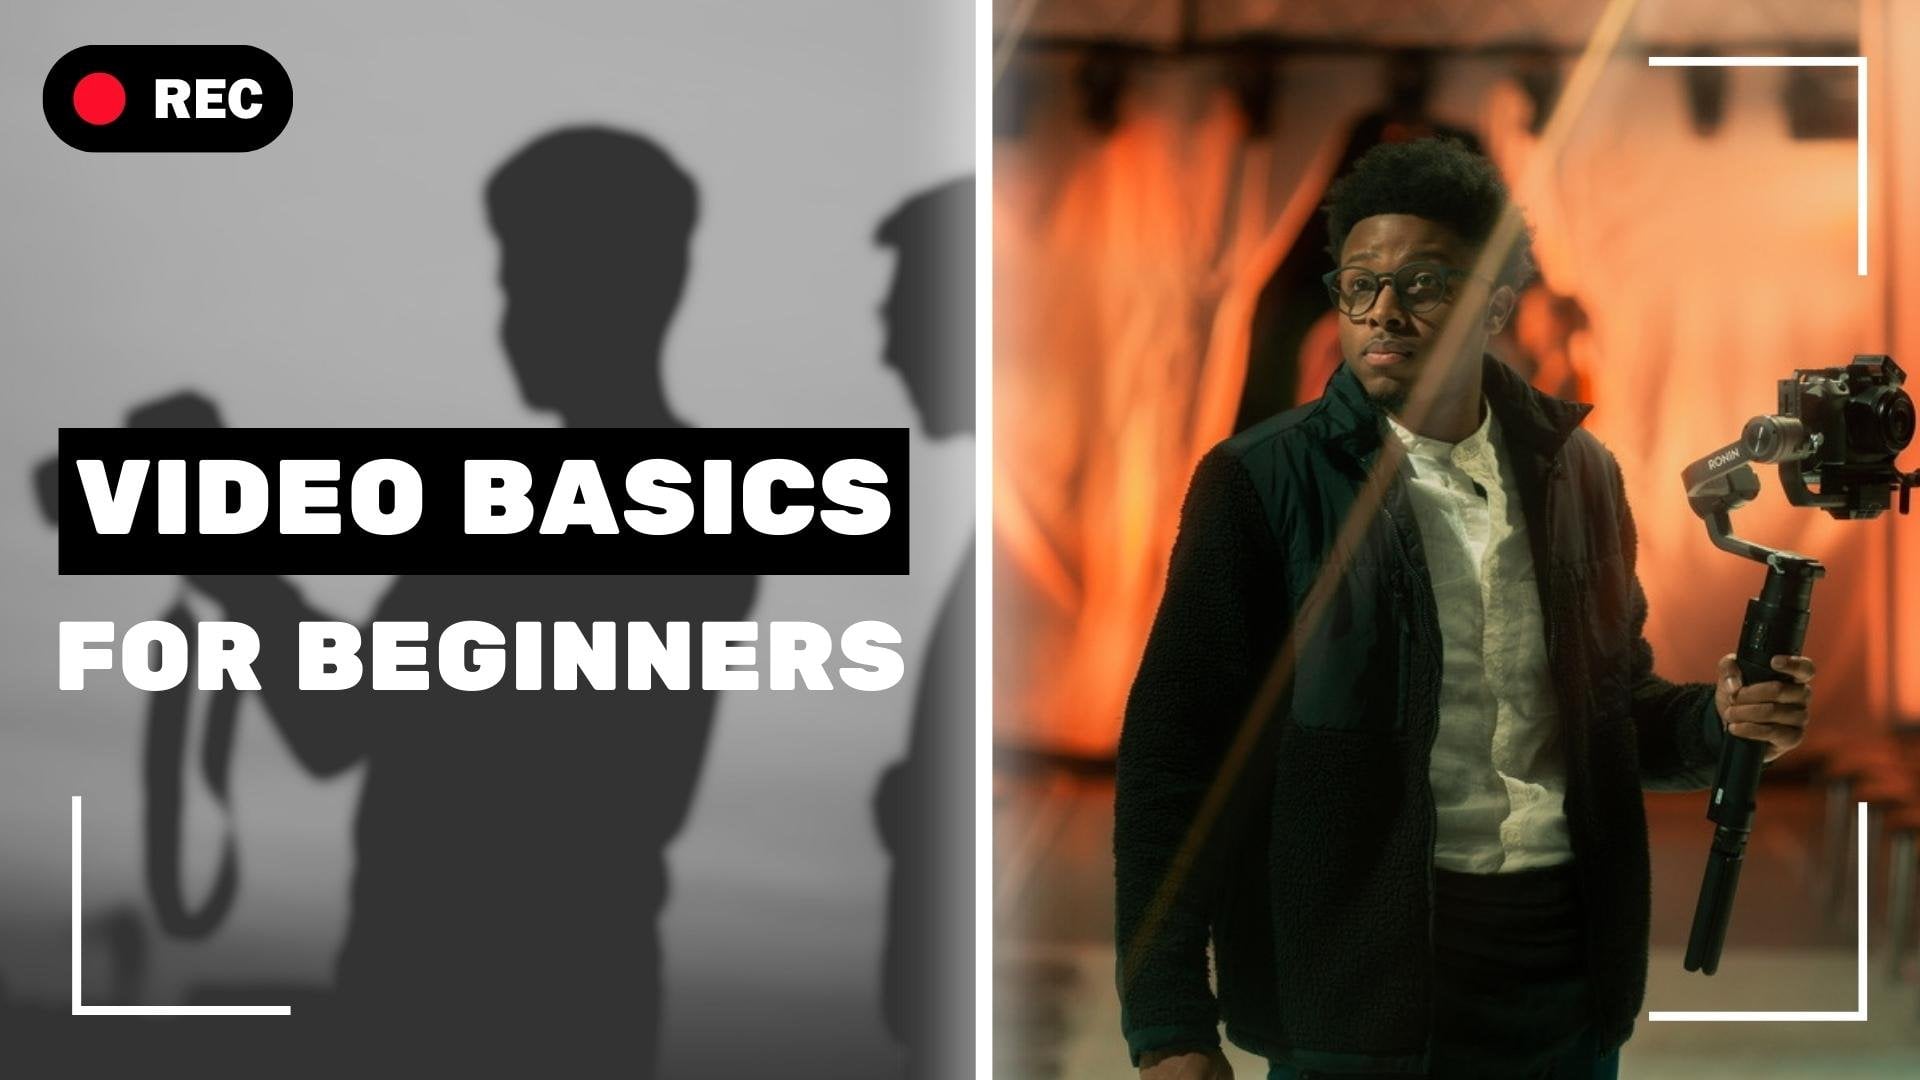
1. What To Expect!: The greatest part
about being a creative is doing just that, creating. You can take a 1000
different creatives, give them the same scene to
take a picture or video, and they will all come out
with different outcomes. It's truly amazing. But in order to ascend
to a creative mind, to creative way of thinking, you must first understand
your equipment. And that's what we're
going to talk about today. And we all know that
cranking that Dalen to automatic and just chill
and there is comfortable, it's safe, but it
does not give you for creative ability
over your camera. So today we talk camera basics. This class is going to be
composed of eight lessons. Lesson number one,
we're gonna go over the physicality
of the camera, buttons, settings,
things of that nature. Lessons number 234. We're going to talk
about the big three, aperture, shutter speed, ISO, and how they all work together. It gives you a good exposure, which is lesson number five, how to get that perfect exposure every time you take a picture. Moving on to lesson number six, we're going to talk about
the importance of color, the feelings that each
color conveys and invokes. Lesson number seven,
we're gonna go over seeing in black and white. That one is a very
important. And finally, Lesson number eight, we're gonna go over full manual mode. We're going to
take everything we learned and put it together in one lesson so we can take
control of our camera. Now as you learn in sharpening
your skills in this class, I would love for you
guys to share your work down in the projects
and resources. Let's interact with each
other in just a minute. Each other's beautiful work. So are you ready to take
control of your camera?
2. Lesson 1 | The Camera: All right, You guys, welcome to lesson one of camera basics. The camera. In this
lesson we'll be going over the physicality
of the camera, the buttons and attachments that most cameras will share
from brand to brand. Now my hand here,
I have a Canon T6. I, it was my first camera and I'm going to use
this to show you guys. First thing we're
going to touch over, it's the shutter control. This button is going to
allow you to take pictures, focus, one of the most
important parts of the camera. Now in this case,
almost cameras, the shutter is in
the same position. Usually, it's going to be
naturally where you grip the camera and it'll be
on your pointer finger. You're going to have
pressed the focus In one hard-pressed
to take a photo. That's all there
is to a shutter. Let's move on. Next. We have the on and off button. This one's pretty
self-explanatory. Most cameras are going
to have it labeled as on and off wherever
the switches, this one happens
to be on the top. I know that different cameras have them in different spots, but most times you can
figure this out on your own. So are you going to
do is flip the switch and the camera will power on. Now let's move on
to an area that's relatively close to
the on-off button, usually the mode selector. Different cameras do
this differently. Sometimes you will
have the round mode selector like this. And on other cameras
like my usr, you'll have a screen at the top. This is how you're going
to switch between modes. Pictures, video,
portrait, landscape, whatever your camera has. And it's as simple as
clicking, just like this. Now when you switch modes, you might see an explanation of what that mold does,
which is very helpful. Some cameras do it,
some cameras don't. But if you have that,
that's pretty cool. Alrighty, Let's move
on to the diopter. So I'm sure we've all
tried someone's glasses on that weren't ours and
it will super blurry. That's how it can
be sometimes when you look into a
viewfinder and what the director does is
basically changed the concentration of the glass. So this really helps
people that wear glasses. If you have a certain
type of lens in your glasses and
you don't want to use your glasses while
you're taking pictures. All you have to do is tweak the button and it's
going to change that for you. There are some buttons on here that are specific to canon, but you should have
something like these on your camera as well. So the info button will
bring up different displays while you're taking pictures and it'll show you
different things. So I press the info button
once I get my shutter speed, aperture, and ISO,
I press it again. And it'll show me all of
these ways I can change how I take my photo and what
the photo will look like. That's why balanced
picture profile, autofocus method metering modes. I press it a third time in here I'll get my
histogram reading. And then the fourth will knock everything off the screen and
we're back at square one. Next is the menu button. And obviously this will
bring up the menu. Now we're not going over
the menu in this lesson. We're not really going
over the menu at all. This is more of like a
self-education type thing. I do encourage you guys to
dive deep into your menu of your camera and get to know where everything is because it'll help
in the long run. Now this is definitely
different on some cameras, but you have your way of
navigating through the camera, these little buttons right here, there's either a set button in the middle and four
buttons surrounding that. And that's how you would
go up downside side. Or you have a little wheel that you can turn
with your thumb. And it's just as easy as that. Down here we have a button that looks like a YouTube sign. We press that and we
can see the pictures that we've taken
right next to that. You have a trash can. It'll pull up a cancel
any race option. And you would either
cancel or erase. On the top right of our camera
will have a Zoom button. And this helps with autofocus. If you can't tell what you
want and focuses and focus, you'll press this button, press it again, press a
few times, it'll zoom in. And then you can see if what
you want in focus is in focus is a good way to say autofocus definitely need
to know how to use that. Our next we have the
cameras hot shoe. It's at the top of the camera. Always. Obviously there are
some exceptions, but most every camera has one of these is you can
connect microphones, lights, camera receivers,
flashes, and stuff like that. This right here is
usually on most cameras. And what this is is usually
the shutter speed control. In the new cameras these days, you can change the
inputs of the buttons. This one right here does
not have that feature. If yours doesn't, don't worry about it,
use what you have. So now let's talk
about the viewfinder. Very powerful thing. I myself do not use
this camera anymore. It's more like a trophy for me. It's my first camera that
got me into photography. I use to mirrorless cameras
and they are great. I do not use the viewfinder
as much anymore, but if you find
it's very powerful. So when you look into the viewfinder, you'll
see your image. Of course, you'll see the little square where the
autofocus is working at. And then it'll show you the
settings you're currently holding In the exposure reading. Now, taking pictures
like this with a mirrorless camera is awesome, but sometimes it's
good to look inside of you find it if
recomposition purposes, when you're trying to
get symmetrical shots, centered shots, stuff like that. It's really hard to tell if
you're centered on something, if you're not looking
into the viewfinder, the viewfinder cuts everything out and it's just
you and your image. We look on the right side of the camera and you'll
see an SD card slot. You open that up and you'll
see your insert here. That is pretty self-explanatory. You just pop your
SD card in there, get to work. On
the opposite end. You have your HDMI input
and your mic input. All you do is pop
these out like this. You can insert your mic there. You pop this one out, and you have your HDMI input. The sun is setting very fast. So let's finish this lesson. We can't forget about the lens. The lens is also a physical
part of the cameras. So most, but not all lenses will have autofocus and manual focus. Rocker. Switch it to auto focus and the camera will do
the focusing for you. Switch it to manual
focus and you will have to do all
the focusing yourself. If you have a zoom lens, it will have a locking
mechanism so you can lock it into place when it's
all the way compressed. And that my friends is
the end of this lesson. I appreciate you
guys watching and I hope you guys got
something good from this. Let's move on to the next one. Oh, come down, come down. You're still here. You're still in the class. A different part of the class. We're in VR right now.
I'm not hard to actually. My name is Lucas
and he hired me to issue you guys homework
after every lesson. So we're gonna be spending
some time together. Please take a moment to admire my Krispy Kreme doughnut sign in my heart to plug visual
sign that I don't want there. I don't actually work for
this guy. I'm a contractor. So he was drawing near for
some reason on my board and we have a
love-hate relationship that's neither here or there. So after every lesson you
guys are gonna get shot over to me so I can issue
you guys some homework. He told me to look at the
lesson plan, but I didn't. So you guys learned about the
physicality of the camera. So for today's homework, I want you guys to
do a deep dive into all of the settings
on your camera gets nowhere everything is at, get familiar with it and
become best friends with it and that my friends will
help you in the long run. Okay. Thank you guys for
joining me today. Again, my name is Lucas and I can't wait to see you
guys in the next lesson. I'm gonna go talk with
your teacher now. Goodbye.
3. Lesson 2 | Aperture: Alright guys, welcome
back to camera basics. So this is less than two. We're going to talk
about aperture. So what does aperture? Aperture is basically
going to control how much light is able to
pass through your lens. Now if you look into
your lens and bring the aperture up and down, you will physically see the aperture blades
close and open. So the lower the aperture, the more open the
blades will appear in, the more light is able to
pass through the lens, the greater the aperture, the more the plays
will close and the less light is able to
pass through the lens. Most people refer to
aperture as f-stop, that is a photography term. Now the F for f-stops stands for focal if you
wanted to know that. And that's basically
how people will tell you what aperture
they were using. Now we haven't
covered lenses yet, but zoom lenses and prime lenses are two different
types of lenses, right? I'm lenses are lenses that are
fixed on one focal length. Basically, you cannot
do this right here. So right there I zoom the
camera end with a prime lens. You can't do that. This difference will cause the zoom lenses to be different
with aperture, right? So for zoom lenses, It's not at a fixed
aperture as you zoom in, the aperture closes down. So most zoom kit lenses will have F4 aperture as the lowest, but it'll say F4 through F7. And that's because at
the farthest use Zoom, it'll be at F7 instead of F4. It won't stay at F4
once you zoom in. So before we move on using a low aperture lets
in more light, using a greater aperture,
less and less light. Now, let's talk about
depth of field. So your aperture is also going to control
your depth of field. So if you've ever seen a
picture like this or like this, or like this, those
types of pictures. That is, what depth
of field is this? When something is in focus
and something is not. So usually when you
see a good portrait, you'll notice that the
model is in-focus. Her is blurred out, right? That is what happens when
you use a low aperture. Now let's talk about something
else you can do with abstract is pretty
cool in my opinion. So there's this thing
called plane of focus. But so plaintiff focus is
pretty cool because you can get really creative
shots like this, right? So when you focus on
something with your camera, you placed that little square around whatever you're
trying to focus on, everything on that
same plane will be in focus with what
you're focusing on, everything 1 third
in front of it, and 2 third behind
will be blurred out. So say if you're taking a
picture of two people, right, they're lined up side-by-side,
same distance away. You could focus on one and
it will focus on both. But if you take one person and they stepped
back a couple of feet, then the other person
on the back would be blurred out in the person in
the front would be in focus. Does that make sense? There's two types
of depth of field. There's a shallow and
there's a deep. Okay? Everything 1 third in front and two-thirds behind your
subject will be blurred out. That is a shallow
depth of field, is basically super compressed. And in terms of
your subject being in-focus and everything
else is not. So just remember the
lower your aperture goes, the more of that
blur you'll get. A deep depth of
field is going to be when you have a
higher aperture. So say you take a picture with
the aperture of 22, okay? And that's usually as high as
you can go on most cameras, there will be little to no blur because that is a
deep depth fulfilled. That is the basics
of aperture, right? There's a lot of stuff
you can do with aperture, but that is everything you
need to know to get started. This is why this
has camera basics. This is gonna be
the end of lesson two, which is aperture. I hope you guys learned a lot or something
that you didn't know. Like I said, this
is just the basics, so I'm not trying to go too
deep into anything really. I just want to get you out there shooting and taking
good pictures the fastest way I'm saying. So I definitely want you to
practice what you've learned today with your own camera. Whether you have a camera that goes all the way down to F12 or as low as you can go
is at 4, doesn't matter. You can do some cool
things with aperture. You have to trust me
with that being said, and have a great
rest of your day. And let's move on
to the next lesson. Alright guys. Oh my god. His mouth is open. He looks ugly right there. Okay, that's decent. Guys.
We can just do this. Welcome back to
the VR classroom. Looks like you guys talked
about aperture today. So for today's homework, we're going to have you guys
experiment a little bit. Okay, so let's take off our cameras and
play with aperture. The deep depth of field is
in the F22 is and the F 16s. The shallow depth of
field is in the F1. And the F1 point to very
wide open apertures. So go ahead and experiment with that and see what you
get and feel free to drop what you got
until the projects and resources so everyone
can see what you made. Okay, You guys have a great day and let's move
on to the next lesson.
4. Lesson 3 | Shutter Speed: Good morning, good
evening, good afternoon. Whatever time you're
watching this, I truly hope you've had a wonderful day or are
having a wonderful day. This is going to be
less than three of camera basics, shutter speed. Now I'm not here to waste
you guys this time. So to speed is super simple. So I'm going to take
you guys quickly to these notes and gets you
into the next lesson. So let's get into it. So
before I start every lesson, I'd like to give a synopsis
of what each thing is. So this is what
shutter speed is. Shutter speed is gonna
be the duration of time that light is exposed
to the image sensor. So your camera sensor is always going to be protected
by the shutter, shutters there to
prevent dirt, debris, all that stuff from
getting inside and damaging your sensor. So when you take a picture, it has to open to
expose light to the sensor and then
close back up. Now if you have a DSLR cameras, the shutter is going to open at the same time the mirror opens. And obviously if you
have a mirrorless, you don't have a mirror. The shutter would
just open by itself. So there's a tip I
wanna give you guys to get more familiar with
the shutter speeds. It's called TV mode. And no, it's not
like a television. It's actually a mode
on your camera that will pre-select the
shutter speed for you based off of how fast you're moving the
camera in your scene. So you will have control
over the aperture and the ISO in that mode,
not the shutter speed. The purpose for using this
mode is to get familiar with the shutter speeds you will use for different scenes. The camera does a pretty
good job at predicting what shutter speed to use
for what it's looking at. Now this has gone
on the video side of things and this
is not in my notes, but I decided to give you
guys this tip as well. Whenever you're recording video, whatever your frame rate is
that you're going to want a double your shutter
speed to that number. So if you're recording
in 29 frames a second, you're going to want
your shutter speed to be one over 60th. So you would just take 29, which will be basically
30 in times of B2. So you're so to speak
and start as low as 30 seconds to one over eight
thousandth of a second, depending on what
camera you have. The higher the shutter speed, the more you freeze action, the lower the shutter speed, the more you blur action. So if you're taking a portrait
of someone sitting down, you don't need to add
shutter speed, right? Because there's no motion. You can go as low as one
over 80th of a second. But if you're taking
a picture of someone running or doing
something in motion, you're going to want to up
the shutter speed, right? So if someone's running, I
will put it at around 500. If I'm trying to
freeze a car emotion, I would put it at around a
thousand so on and so forth. Now, that is all I
have in my notes, That's the basics
of shutter speed. Now I brought something to
demonstrate this to you guys. So here's the ball. Alright. This is the ball I'm going
to use and I'm going to show you how using a low and high shutter speed freezes and blurs this ball while I'm thrown in there like this
as you get it. So I'm going to use a shutter
speed of one over 20, and I'll show you
how that looks. Here's one over 60. Here's one over 500. So I said one over 20th actually
met one over 25th. Okay. But you saw what
the one over 25th at the camera shutter
didn't stay open long enough for it to
freeze that action. So the ball came out blurry
as we went up to 160th. You can already see
the difference. The ball is a lot
more clear and sharp. And then we went up to
one over five hundredths and you can barely tell
it wasn't even thrown. It looks like it was just
placed into the sky. So that is the easiest way to demonstrate for you
guys shutter speed, shutter speed blur, how
shutter speed freeze action. So when you start using
one over one thousandths of a shutter speed and
you go higher than that, you really start to not see a difference because it's
just catching everything. There's not a lot of
things that move that fast where you need that
higher shutter speed. But if you ever need one
over eight thousands, I don't know what you
will need that for you, but, you know, it's
there if you need it. And that my friends
is shutter speed. I appreciate you guys watching this and I hope you
guys learned a lot. I would love for you
guys to experiment with shutter speed
and show me what you've come up with
in the projects and resources that being said, that is the end of this lesson. Let's move on to
the next one piece. Calling heart. Hello. Hey, I'm so sorry to bother you. What shutter speed? Well, it does not look
at the lesson plan. No. I I looked at the lesson plan. You've heard it before. You never told me what any I don't know what any
of this stuff is, man, I'm not a photographer. I just sent you
something and email. Can you read? Yeah. Okay. We'll read that. It
hasn't all there. Yeah. Yeah. I'll do it. Okay. Oh, yeah. I can I can do that. All right. Don't don't call me currently. I got you. Sorry about that,
guys. First of all, welcome back to
the VR classroom. If I didn't tell you, I'm
not actually a photographer. He hired me to just
give you guys homework. I'm supposed to read
the lesson plan and just live a little bit. Look, look, look. I know it sounds bad, but he saving a lot of
money working with me. That's neither here nor there. It looks like you
guys had a lesson today about shutter speed. So what is today's homework? I want you guys to experiment with your shutter
speed. You guessed it. Let's take our cameras up
today and let's get motivated. Let's be particular
about this now. I want you to take a picture of something fast and you
freezing that motion. And in, Let's take
another picture of something fast,
but you blur it. How about that? Two pictures? Put it
in the projects and resources and let everyone
see what you created. Okay? You guys have a great
rest of your day, and I'll see you in
the next lesson. Goodbye.
5. Lesson 4 | ISO: Are you guys, as you can see, it is a beautiful day outside
here in Colorado Springs. Welcome back to camera basics. This is gonna be
less than four ISO. Iso is not really a
hard thing to explain. I figured, why not
do it outside again? And this time we don't
have to be so formal, we can walk around with each other and just talk about it. So what is ISO? Iso is gonna be your cameras
sensitivity to light. And it's also going to be
one of the things you'll be having to tweak to
adjust your exposure. And it actually comes
from the Greek word ISOS, which means that equal. And this will make
sense when I explain to you how ISO works. A lot of people
mistake it for ISO, but it's not
actually an acronym. So unlike shutter
speed and aperture, ISO is going to have a digital
effect to your images. Instead of a natural effect, shutter speed is changing how fast the shutter
opens and closes. Aperture is just changing if the aperture blades
are closed or open. What I saw was different because all it's doing is
changing your cameras, sensors sensitivity to light. So I thought it was really
cool because it basically gives you light when you
have none digitally. So if you're looking into
your viewfinder and you see like your images
a little too dark, you can use ISO to bring
some light until your image, but it does have a
negative effect. So when you start to
raise the ISL too high, it starts to introduce
what's known as a background interference
or a digital artifact. Both of these terms can
be referred to as noise. So what's the best
way to describe know, as we'll call it, a variation of brightness or colors that aren't
supposed to be in the image. So you ever see bright
spots in your image, dark spots, colors that aren't supposed to
be in that area. That's gonna be noise. Now that's going to happen
when you use a high ISO. Iso numbers can range
from about a 100 to 52 thousand or so depending
on what camera you have, different cameras have
different ISO ranges. Now, having ISO and your images usually looked at
as a bad thing, but it doesn't always
have to be okay. I saw can also be labeled as green and people use
grain all the time. So get a more cinematic look
on their photos and videos. So I want you to be ISO
as your last resort. Like I said, it ranges
from 100 to about 52,100 will ensure that
you will never have noise. The grain and your images fit the 2000s, you're going
to have a little bit. So say we take a picture
of this flower here, right by a cell
that has 100 ISO, where it's like physically visible to see the grain, right? The reason why I don't give
you a number for that, it depends on your camera. Again, some cameras can handle a higher ISO than other cameras. Basically, the more
money you spend, the better your images
look with a high ISO. So to an untrained eye,
you would say there's nothing wrong with either
one of those images. And you're not
technically wrong, but there is a bit of
grain in the second image. Now, I did leave something out. The grain is actually really
hard to see or noise because really hard to see when
there is a lot of light. So those were kind of
dark images when you have bright spots
for a bright image, and it'll be easier for
you to see the noise. So if you're looking at a dark image and you need more light, adjust your shutter speed and aperture is first
before you consider your eyes so you can prevent noise from getting
into your images. I noticed a couple of times
I kept calling an ISO. Iso is ISO. I still have a bad habit of
doing that because that's how I started calling it and
now I can't get rid of it, but it is what it is. Ar call it ISO. That is the correct term. But since we've
covered shutter speed, aperture and ISO,
I want you guys to try out using all
three together. We will be doing that
in less than eight, but it wouldn't hurt for
you to try to do it now. So don't be afraid to show us what you've got in the
Projects and Resources, and I will see you guys in
the next lesson. Be safe. How do I find myself here, man, I don't necessarily
want to work here, but I mean, he's
paying me get money. So I mean, I guess it's guys. Did you hear any of that? If you heard that, I
was totally kidding. I was trying to provide
some comedic relief, right? Because, you know, that heart
guy isn't funny at all. So he just talks and
talks and I mean, it doesn't really
entertain, but me. I'm the entertainer. Iso,
Let's take our cameras up. I love doing that. Let's get motivated. Okay,
remember that you adjust your shutter speed
and your aperture before considering your ISO. I read that in the lesson. So I know it's, I know
it's I know it's correct. Now, I want you guys
to go out at night or near sunset safely, of course, and see what
happens when you raise your ISO to a crazy high number. This is a good time to
test your camera limits. I want you to
experience the grain that you get when you
use a higher ISO. See how high of an
ISO you can get to before you start noticing
the noise or the grain. And take a photo of that and show us down in the
project and resources. We want to talk
about it with you. Once again, I'm Lucas, I hope you guys haven't forgot my name. I'm very important. So we're going to see you
guys in the next lesson. Okay, Be safe now.
6. Lesson 5 | The Perfect Exposure: Hi guys, Welcome back
to camera basics. This is going to be less than
five, the perfect exposure. As usual, I have my
notebook here with me. So we're going to run through these notes and
we're going to learn how to achieve that perfect
exposure every time. So if you're into definitions, I have the definition
right here, so I'll read it off to you guys. Exposure is going
to be the amount of light per unit area reaching the frame of the
photographic film or the surface of an
electric image sensor, as determined by shutter speed, lens f number, which is
aperture, which we talked about. And seeing luminance,
which is ISO, and all of those
combined is going to give you your exposure value. Now your exposure
value can range from 0 to plus three or Israel
to negative three. These numbers are simply
going to tell you if you're taking a
good-looking image. Now what do I mean by
good-looking image? Take this 1 first. You can see that the shadows
were taking too dark, so the information
in there was lost. And then this one, the
highlights are too bright, so information was lost. That's all photos are
just pixels and data. So if you take a picture
with the wrong settings, you can either lose data in the highlights or the shadows. So right before you
focus to take a picture, you're going to
see a meter at the bottom of your camera stream. That meter is referred
to as the light meter. In there. You will be able to see the numbers I was
telling you about. Pat ranges from 0 to plus
30 to negative three. So let's explain what
each space means. So I want you guys to act as if you're taking a picture OK, half press the shutter button so you can get that
light meter to pop up and bring your
attention to the middle. 00 is where you want to be all the time to explain why
when you're in the middle, that means that the image
is perfectly exposed. That means you won't
be losing any data in the highlights
and the shadows. Now let's go down to
the negative numbers. The numbers on the
negative side will signify a darker image. If you bring your attention
to the positive numbers, those numbers will
signify when you start to lose information and
your highlights. So basically you want
to avoid going into negative and positive
sides of that meter. One thing in the middle will
ensure that you don't lose information in either
part of the images. Now I'm going to tell you
guys to do something without telling you how we're going to switch this from GoPro footage. So remember I said
this light meter is controlled by your shutter
speed, aperture, and ISO. So that is how you're
going to control it. This is the beauty
of learning the three and using them together. Aside from that,
I'm going to set my settings to where
my light meter read 0, and we're going to
start from there. So every number on
this light meter signifies a stop of light. Now what is a stop
of light you ask? So a stop is the
photography term that describes a measurement
of light and that's it. So you see that I'm at 0. Let's click on our aperture
and we're gonna go from the aperture we are
at until the next one. And you'll see when I get
my next meter reading, we're not negative one. From one aperture to
another is a stop of light. We're gonna go from the
shutter speed graph and we're gonna go to the
shutter speed below that. So the left, bringing the shutter speed down
will brighten your image. And you'll see
that now I am back at 0 on the meter reading. This same rule applies to ISO. You'll see that there
are numbered as well. Each number is a stop
of light difference. Now the numbers for your
shutter speed, aperture, and ISO stops of light are not always in
chronological order. For shutter speed, you
can go from one over 100 to one over one 25th, and that will not bring you
down a whole stop of light. You have to go to the next whole number that you see labeled. And that is what's going to
change your stops of light. This applies to aperture
and ISO as well. So now you know how to
find the light meter, you know how to read it, and you know how to control it. Now let's go full circle
and let me explain to you the three types of exposure
and this will all make sense. Type one is gonna be
the correct exposure. That one is going to be when
you stay in the 0 area, you don't lose any
information in the highlights or the shadows
or the blacks, the whites, any of that underexposed, not enough light details and
the dark areas in the image, the shadows and the blacks
will be lost overexposed. This type means that you
have too much light, overblown highlights, details in the light
tones will be lost. If you don't take
anything else away from this lesson,
please take this. You never want to rely
on post-production. And what I mean by that is
when you're on a shoot or you're outside and you're just practicing or whatever
you're doing. And we had taken photos
and you notice that your image is too dark
or it's too bright, don't say I can
fix it in editing, you need to get in
the habit of taking the perfect exposure, which is around that 0
mark every single time. And that way you'll always be able to
manipulate your image. How you please say you take a picture that is a negative
three on that light meter. I want you to take that photo and bringing in a light room or whatever editing software
you use and try to fix it. And you're going to see
that the image destroys itself when you try to
bring the shadows back, and it's vice versa
with the highlights. If you overexpose
a photo that's in the plus three area
and you try to bring that back in
your editing software, you will see that the image
again will destroy itself. It will not work, it will
not correct yourself. It'll be above the
rules to shutter speed, aperture and ISO still
exists using a high ISO, though it gives
you light, it will corrupt her image with noise. So just remember that while you're adjusting your settings. So if you're looking at
a scene and you've drawn your shutter speed
up as much as you could in your aperture
down as much as you could. That's the time when
you use use ISO. I saw is always gonna
be a last resort. It doesn't matter what. Now using these three in
tandem comes with time. You're not going to wake up tomorrow and just fall asleep. Know how to use all
three of them together. So do yourself a favor
and practice with it. And eventually you'll be
able to look at any scene, anything you're
taking a picture at and quickly adjust
your settings, how you like it and
how you want it. Just like that. In guys, that is all I have for
the perfect exposure. I truly hope you guys learned a lot or something
that you didn't know. And I hope you
enjoyed this lesson. Let's go into the VR and
I'll assign you guys your own work. 321. Hey guys, I'm ready
for you this time. You're not catching
me off guard again, the perfect exposure. Okay? So I believe in this
lesson you guys learned about achieving the
perfect exposure. I'm pretty sure you remember
heart explaining to you that negative three is too dark. Positive three is too bright. 0 is where you wanna
be in the middle. So I want you guys to practice on landing yourself in the middle by tweaking
your settings. Let's pick our cameras up and let's take
control of our camera. Okay, so go ahead and
practice on getting the perfect exposure on every single one
of your pictures. Okay, It's very important, shared down in the
projects and resources. Maybe even show us
where it landed on that line from 0 to negative
three to positive three. And we can have a good
conversation about that. I think I will see you
guys in the next lesson. Let's go. Let's keep going.
7. Lesson 6 | The Importance Of Color: Welcome to lesson. Is this Jesus? Before we start this lesson, I want to welcome you guys back. So camera basics, this is
going to be less than six. The importance of color. I'm going to need a
chair to sit down on. Oh, that's not what
I was trying to do. On try again. Here we are. I will write as you know, we'd like our definitions. So let's see if there's an
actual definition of color. Because colors, one of
those things where it's like it's just colored, but there should
be a definition. So let's see colors defined as the property possessed
by an object of producing different
sensations on the eye as a result of the way the object
reflects an emits light, that is the definition of color. So we'll start off with black and white because those
are very important. Now shockingly,
the light that we see appears to us as white. And I know that doesn't make
any sense because we can see all these a range of colors, but all of it is white. And let me explain. So you have three
primary colors, which is red, green, and blue. And when you mix those together, you get your secondary colors. So basically these three colors make up the whole color array. And what happens
when you mix red, green, and blue
together, you get white. Now, black is the
exact opposite. Black is basically the
absence of all color. So pay attention. This is
very interesting to me. So when light travels
into our eyes, it reaches the retina. In your retina is
covered with millions of these cells called
rods and cones. And those are
light-sensitive cells that basically sends
signals to the brain. And that is what
it's telling you. This is red, this is
green, this is blue. The human eye can only
perceive reflected colors. So interesting enough, when
you look at an object, you're not seeing
what color it is. You're seeing what
color is it reflecting? All objects reflect
and absorb colors. So the ones that they reflect, that is the code
that you'll see, the ones that they absorb, obviously you will
not see those. So when we take how that works
and apply it to a camera, you get what's called
a Bayer filter. The Bayer filter
is a screen that lays on top of your
camera's sensor. And it is a color filter array. That's what it's called a CFA. And what it does is it takes
the colors that is given and arranges it on the square
grid of your photo sensory. So when light hits
the camera's sensor, the Bayer filter
is going to catch that light until all
the colors where to go. And I'm almost certain it's done with some type of algorithm. And that's what brings together a Cameras color
science, fun facts. Without that Bayer filter, everything will be
black and white. Cameras actually
sees in grayscale. So next, let's talk
about color space. So color space is a range
of colors that can be represented and displayed
in a given photo. So whatever color space you
will be using depends on what editing softwares and
stuff you use as well. So a few examples of
color space would be RGB, sRGB, sRGB, Adobe RGB, pro photo, CIE, RGB, and one that's used
for printing stuff per se, you would use CMYK. Rgb is a large color space, and sRGB is a condensed
color space to save memory for shooting like
jpeg and stuff like that. Now this is the part I've
been waiting to get to. This one. It's gonna be fun. I have my coloring pencils. So it's very important
for us to know what each color means so that we can convey the
right message that we want to convey
through our art, right? If you want people to feel sad, what colors would you use? If you want people
to feel happy, what colors would you use? We need to know these things. That being said, I'm gonna give you a couple of examples of this using these
colored pencils. So we're gonna go
through the colors that we see most days, the primary and the
secondary colors. Well, let me start
off by saying that each color can have a
positive and a negative two. So let's talk about green. Now. What is it that we think about
when you talk about green? Well, we can think like the environment,
trees, plants, growth. But on the negative side we can think greed, jealousy, money. Now what about the color blue? What do we think? When we talk about blue? We can think peace, harmony. But on the opposite side, we
can think code, depression. Gloomy. Blue also has a positive and
a negative side as well. And how about red? What do we think when
we talk about red? Well, it can be love, ****, but it can also
be death in danger. Even a caution. What does orange mean to us? Orange can mean
vitality, warmth, love, longevity, stuff like
that. Beautiful color. We all know what
pink looks like. This is kind of a
painful bear with me. What comes to mind when we
think about the colored pink? We can think things
like playful innocence. On the opposite end. We can think things
like gullible, naive, vulnerable even. Alright, and the purple. What comes to mind when
I think about programs? Well, we can think
nobility, royalty, wisdom. Oh, wise. Gray color. Even yellow has
two opposite ends. Yellow can mean summer,
joy, heat, happiness. On the other side it can
mean disease, famine. And also another caution. Now, what on earth
could black mean? Well, black could mean
sophisticated, fancy, modern. But as well, evil, death, destruction.
Dangerous color. Now why am I holding
the red, green, and blue together for white? That's why, remember I said, these two colors mix
together will make white. So what is Y? Y can mean things
like cold, winter, peace, tranquility
in cleanliness. And there's one more
thing that I want you to grasp before I end this lesson. Monochrome, monochrome
images does not always have to
be black and white. Basically, all it
is is when you have the same color with different
shades in the same image. Let me explain. So say I wanted to
take a picture of a red lipstick
capsule and saying, obviously the capsule
is going to be red. Lipstick is red. But I put it on top of
a box that is also red, but it's a different
shade of red. And maybe for the background, I'll have another
different shade of red. Now, all those are
the same color. They're just different
variations of the same color in
the same image. Therefore, it makes it
a monochrome image. And guys, that is all I have for their
importance of color. This lesson is over. Congratulations for making
it pass no less than five, even though there's
not ten lessons, five is always a
good 0.5, right? If you do so please,
and you want to further your experience and your
knowledge on color, I would suggest
that you go and do some research on color theory. I will make a lesson
on it later on. Color theory. Basically, he's
going to explain to you how all the colors
can fit together. The way that color
grading works, not in this class,
but in another class. It was just really help you with the editing side of things. And that is going to wrap
up this lesson guys, like I said, congratulations on making it to less than six. I'm proud of you. If you've
been taking pictures, make sure to share it down in the projects and
resources below. And like always, I have
some homework for you. Let's move over to
the VR classroom. You see, look at this guy. What did he say? That's a bit selfish. What happens if he gets hurt? And then you can pay me anymore? Is he, is he really just
thinking about themselves here? Is this you guys have
teacher, you know what? I take that back.
Don't tell him I say that because I don't I don't think I'm allowed to
say that actually, I signed a contract. I digress for me not being
a photographer myself. This lesson was actually
really interesting to me. I didn't know that there were so many definitions
and meanings to color. I just look that I'm like,
Oh yeah, that's right. And that's what I mean. I want you guys to think
of an emotion, okay? And I want you guys
to try to portray that emotion using color. Be creative, drop it down in
the projects and resources, and we would love to see
it and talk about it. Okay, you guys be safe. And we'll see you
in the next lesson. Lucas out. All right guys, I'm Robin. You happen to get
okay, I gotta go.
8. Lesson 7 | Seeing In Black & White: Oh my God. What are you all
doing down here? Come on somebody.
Sometimes we gotta, we gotta get thanks
to the class. Hi guys. Welcome back
to camera basics. This is gonna be
less than seven, seeing in black and white. So this is going to happen
to you quite a bit. Through your journey
in photography, you'll see something you
want to take a picture of. And it may be a fleeting moment that won't be there forever. And you're like, Oh, I got to get the
picture right in and you're fumbling
with your settings. And then you take the picture
and it doesn't look good, that will be a very
sad day for you. You'll probably
want to quit, but this technique will
help you with that. So unless the image is intentionally made
black and white, you always see most
images in color. But as a beginner photographer, it can be sometimes hard
to nail the exposure every time I had this problem
when I started as well. So I want you to click your
camera into manual mode and you'll see that there is a
option called picture style. You go into that and there's all these different styles that will change the saturation, the sharpness, all that stuff. Now you're gonna go to
the monochrome option, and that is going to
change your view to black and white or grayscale. Now it's important that
you have your camera shooting in RAW and JPEG. Jpeg will be saved
in the grayscale, in the raw image will
be saved in color. If you go to the image you just took and go to the
settings of that, you'll find raw
image processing. In there. You'll
be able to change the JPEG image to a raw image. So you're pulling the photo
from gray scale to color. So that is how you take in
control monochrome images. Okay, so to start
taking good photos, we need to understand tone. And this is where seeing
in black and white, using monochrome with
your camera is going to help someone you're looking
at an image in color. Sometimes it can be hard to tell if you know the toner not wear black and white
makes it clear as day if you did or didn't. So looking at an image
in black and white, you can tell instantly if
something is too bright, if something is too dark,
so on and so forth. So how to judge a
monochrome image if you can tell the differences, the grays, that is a
good monochrome image, that is a good color image. But if the grades
are run together, if there is a drastic shift, if it looks like it's
this all over the place. That's how you're
going to tell if it's not correctly exposed. Now, like in every other
photo, lighting is paramount. Making sure that there's plenty
of contrast in the image. And that's basically
like a gradual change from blacks to whites. Meaning you don't want
a super bright sky in a super dark subject. You want to make it look
as realistic as possible, like they are meant to be
in the same image together. Now let's talk about
the elements to make a good black and white photo or a photo in general,
of course, texture. Now texture adds more
depth to your photos. So having different
textures and one image, we'll separate things
from each other. Look for patterns. Patterns can make your
images really interesting, especially if they're
black and white really catches the viewer's eye. And then last but not least, shapes, just like patterns, shapes are very interesting
to look at as well and it provides an anchor
to your viewers eye. Now if you're looking
to shoot photos only in black and white
and keep them like that. These are a couple of things
that you can use them for in that I think
you will enjoy. Now if you're
working with models or a family member or anybody, you're taking a
portrait of someone. It adds drama to the image. It can help reveal
something about their character and
be very flattering. It's really good at creating
a timeless picture. A good way to approach a
black and white portrait. Simple background,
neutral clothing. So no bright colors or any kind, just earthy colors
and you're good. Now sometimes you
can get away with taking a landscape
photo in black and white and it can
look really good in Moody is the way
we're looking for. But for landscape photography, you will need things to assist you in taking these photos. Nd filter, a neutral
density filter. It's like sunglasses
for your camera lens, and that will help you
get the proper exposure if this guy is too bright in, like I said, the bottom is
completely in darkness, it will even it out for you. Let me show you. So you see this guy
behind me is too bright. I have my sunglasses here and I will simulate what an
ND filter would do. I put these sunglasses in
front of the camera here. And now you can see the clouds exposed behind me.
Nd filter does. It evens your exposure out so you don't have to
change any settings, including ISO, which we
don't want to bump up. Next is one of my
favorite things to photograph,
street photography. This is you're capturing
real life, real people, real moments, real action,
all the good stuff. You see a guy on the bench
snap picture of them. You see a couple
of people walking across the crosswalk,
snap a picture of him. You see people interacting
with each other. Snap a picture of them. Maybe you see people inside
of a restaurant having a good time and you kept
someone in the beginning. I'm trying to describe the
pictures that I know I've taken and I'm popping
up on the screen. But anyway, I digress. Street photography is amazing
because it has a chance to show people real
life in a photo. Is that not awesome? You can
add a lot of emotion and mood to street photos simply
by using black and white. All you have to do
is expose properly. Take the photo. Black and white. You're good. And last but not least,
something that I don't do too often, but wildlife, black and white is basically
like a medium to add mood and emotion to your images. So that's what you can take
away from black and white. So guys, that is all I have for seeing in black and white. I truly hope you guys
enjoyed this lesson. Like I said, this isn't a
hard concept to grasp at all, but it is very
important that you practice with this if you
see fit for yourself, if you're already kneeling
your exposures without seeing in black and white
and analyzing your pictures. Good for you. Keep
going, keep practicing. But if you need practice
on getting a sharp image, that looks good for
you every single time. Go ahead, switch your came into monochrome and get to work, man. So I'm pretty sure you already know what your
homework is gonna be, but let's go over to the VR
and Alice on your homework, I hope you guys have a
great rest of your day. And I will see you guys in the next lesson. What
are you doing down here? Come on probably sometime we go, we gotta get back to the class. Hi guys. Welcome. Okay. One thing I can say
about this guy, he knows how to listen. I think he heard me say that
he wasn't entertaining. And now look what he's
doing, all this funny stuff. I am an inspiration after all. Another interesting one, in my opinion, what
do you guys think? I thought it was pretty
interesting myself. So I think he
tailored this one to the inexperienced
shooters, right? So I was told that achieving the perfect exposure and
seeing in black and white go hand in hand or seeing in black and white can help you
achieve the perfect exposure. Basically, if you guys are
still not yet confident in your ability to achieve
the perfect exposure, go ahead and flip
your camera into monochrome so you can see the differences between
the shadows and the highlights, all
of that stuff, right? It will help you
better distinguish if something is too
bright or too dark if you're losing information in a certain part of the
picture, so on and so forth. Alright, so we want to
see two photos, okay, go ahead and set your camera
to shoot in RAW and JPEG. You'll have both files there. Show us the black and white one, and then show us
the one in color so we can see how it translates. Okay, You guys are awesome. Keep it going. Unfortunately. You will not see me again
after this that being said, I really enjoyed my
time with you all. And I hope you guys
enjoyed your time with me if you want to
see more of me, unfortunately, I'm nowhere
because this is my first job. But maybe if you convince heart to put me on his YouTube
channel or his Instagram, you'll see more of me.
Lucas for President. Alright, very good. Anyway, you guys have a beautiful rest of
your day. Stay safe. I love you all and
continue to grow for me. Okay.
9. Lesson 8 | Full Manual Mode: Alright guys, welcome
back to camera basics. We all know what less than
this is, less than eight. And yes, we made it to the end. And I just want to congratulate you guys
on making it this far. The reason for that
is that most people, when they start new things, they let time flyby, they, they procrastinate or
they don't start at all. But here you are. And I truly want to commend
you for going after something that you feel like is for you and that interests you. Because a lot of
people don't do that. I'm thinking you for doing something good for
you. I love that. I love to see people
chase their dreams. A lot of people
don't take advantage of this thing called chance. Everyone has a chance. And if you let it,
it will pass you by. And I truly don't want
that for any of you guys. So thank you for
sticking with this. And what would do me even better is to know that you
guys learned something of substance that you
can go out there and use and become a
formidable shooter. So that is what this lesson
is going to be about. We're going to take
everything we learned from this class and throw
it all into one video. Alright, so let's move
this out of the way. I have my phone here. They're going to be my
YouTube videos that I've recorded of the photo
shoots that I've been on. Basically, I want
to show you guys my thought process when it comes to approaching
different situations. So let's get into it.
So first category we're gonna happen too, is cars. So I'm going to show you this
video of this Mercedes AMG. And we're going to see if we
can learn something from it. So let's get into
it. Like I said, this is a AMG Mercedes
by turbo, I think. So. Really fun shoot. I think in this next clip here, I dropped my hat on, my head, almost flew off
my heels. Very windy. Yeah, there it is. That's great. But
basically these are called rolling shots or roller shots. And it's basically you're taking a picture
of a car moving. You're catching a car still
in the ground beneath it, and everything
around it is blurry. And that is the
shutter speed trick. Let's pause it there. I will show you guys really
quick those pictures. And I'm going to show you too, if you want to achieve
a photo like that, basically you're going to match your shutter speed with
the speed of the car. So we were only going about
30 to 40 miles an hour. So my shutter speed was
31 over 30th of a second. But it's not actually
freezing motion. But when you are painting with an object while having
a low shutter speed, that object will be frozen and everything
around it will be blurry. That's how you
achieve that photo. Alright, and let
me show you guys a second example of this. This time I was shooting a
BMW m4 and beautiful picture. But let's watch the
video really quick. We look at, look at the color
minute and I was living at right, awesome as positive. So we took till the road with
that car and like I said, you're going to
match the speed of the car with your shutter speed. So that time we were going
a little bit faster, 50 to 60 miles an hour. So my shutter speed was
sitting at about 50. And that got the ground
blurry enough in the BMW, perfectly in focus,
beautiful picture. Now I'm a firm believer
that the best way to progress and to get better at something is
to be uncomfortable. That may not always be the case, but in this case, let's talk about approaching random people. I do this a lot in my YouTube videos and my
TikToks and stuff like that. And it's really made me a better photographer because
it forces you, it forces you to be better at knowing what to
do, what your settings. So let's dive into this video. I'm gonna show you how
I approached this girl, took some pictures
over on the spot and they turned out pretty good. Hey, excuse me. Can I get a secondary zone?
Are you are you too busy? No, no. I'm just trying to
find a restaurant. He was super cool by
the way. Skirted never was pretty cool because
kind of treat it with her. And she was looking
for a restaurant, so we helped her find
it and in exchange, she let us take
some pictures over. Super cool person. We
saw a little weird. Just takes a lot of gusto. If you're nervous or somebody
just take introverted, you just might not work for
you really pretty years ago. So maybe we can get you
connected with people than 100%. Alright? You could do one of these. Doing it. He's like, like, like you to me, like it's only for a very down to earth. You
have to be very down. Are you already done
saying, I love your dollar? Love the jaw line. So
let's pause right there. And here I'll show
you the pictures. My ISO was at 1600, very high, but it's because I
had to compensate for the darkness, right? And like I said, an ISO lesson, it's okay to bump your ISO up if you have the capability to. Some cameras are better at
higher ISOs and others by ISO was at 1600,
f-stop was at 1.8. And then I think I was at
one over 200th of a second. So that was my settings there. The premise of approaching random people for me is to make myself a better and more
knowledgeable photographer. Because you're in a
different scenario. Every single time it requires you to know what
you're doing with your camera. So let's look at another example of that are, so in this one, I'm with my homie Nick, and we were doing some
street photography, but He's strictly a
street photographer and I want it to get him
out of his comfort zone. So I propose that we
approach random people. And he agreed. So this
is what came of it. I took some pictures
of this woman. He also did and they
came out great. So let's let's see. Excuse me. I had an
awesome address out. I think they were like cost
playing and some kind of way. I don't know what this
is, but okay, Cool. It was perfect.
Unnatural. That guy was awesome. It was awesome. All emotion for sure. Okay. Go back here. Honestly, I didn't think Nick
would do as well as he did. I was kinda setting them
up for failure because I know he doesn't deal
with people like that. All right. Let's
pause it right there. So you see what I
mean last time it was night, this time as day. So what do you think my settings where it was more doable, right? For the ISO part of things, my eyes on this one was at 100, the lowest they can possibly go, which is good, That's
where you want it to be. And that's because it was
plenty of light outside, right? I was at an F18 and I was at one over five
hundredths of a second. So higher shutter speed, just in case I need to
capture some extra motion. That's it. Our next we're going to dive into
my actual photo shoots. This is like a one-on-one
type of thing. One photographer, one model. Now these types of
scenarios are more controllable because you're
there for a purpose. You know why you're there.
You arrive to the photoshoot knowing I'm gonna be taking
photos of this one-person. Easy enough, right?
But whether you shoot natural light or
flash photography, that is when the
techniques in the skill, in the knowledge comes
into play, right? I am, I'm mostly
natural light shooter. So I'm going to show you how I approached indoors and
outdoors shooting. Okay. Well, let's get into it. So this is Janine. I've shot where they're like,
I think three times now, actually two or three times now. Every time it's been a
banger, me, her shoot a lot. But I consider all the models
I shoot with good friends. So it's a good photographer
model relationship I tried to have with all of
my clients a little bit more. That way. These were amazing. But there's a couple of things I
need to go over, right? So when you're indoors, you're relying on
either light from outside or a low
aperture number, right? And sometimes that's
not good because when you go into the
one-point 2s and stuff, it can be hard to
nail your focus. So what do you do? Well now you have to
bring your ISO up, right? So I hope you guys are catching
what I'm putting down. Basically it's like
when it's dark, obviously ISO is the
solution to that, but it should be your last
solution and every situation, you should never
bring your ISO up unless you absolutely have to. In this case, I did.
I was at an F18, very low, very wide
open aperture, right? My ISO was at 800, so it was a little bit up
there but not too bad. And then I was shooting
at a 125th of a second. So those were the
settings I used to get these pictures and they
turned out beautifully. And like I said, high
ISOs may not affect you in the same way as it may someone else because of
the camera that you have. So keep that in mind. But you can see that
we're in a hotel, right? You see all these windows
on the side there. What you need to do
when you're inside is stick to the natural light. If you're shooting
natural light, if you're shooting
flash, obviously you're gonna be
shaping your own life. You don't need to
worry about that. But if you're indoors and you're hurting for light and you don't want to
bring your ISO up, just move closer to a
window and that will give you more light to
bring into your camera. And secondly, it's
important to remember to add your own style to things. I liked doing cloning images. So I took this picture of her, put her in four different
chairs and merge them together. My editing style is a little
different from others. Have your signature, separate
yourself from others. Alright, let's move on
to another photoshoot. And this one was a while ago, but this one was with my friend Camilla. You come closer here. Backup a little bit. What's the K4 on your
on your key chain? My name of n. Now this is a funny like
you guys are interested. You should go watch
some YouTube videos. They're always funny, but you see the photos
that we get here? Amazing. Okay. I'm going to show you it separately right here. So yes, we're indoors and you see how dark it is in there, but you see how good
the pictures look. And this is what I was
saying about when you're inside and you're
hurting for light, you move closer to a
window and now you have this abundance of
natural beauty. Light. I was at f 1.8. Iso only get to 100, the lowest it can be because
I was so close that window, the natural light
was working for me. And then one over
200th of a second. Shutter speed, perfect
settings right there. So when you're shooting inside, move closer to some
natural light. That's it. And in case you
guys are still confused, I have another example. I got you. I got
you always find it. What's your Instagram? So this right here is Adrian. Beautiful Shoot I had
with her and she claimed that she had no
experience modelling. And I said There's no way
because she did an amazing job. Right. So yeah, I'll
pause it right here. You see me doing
there with the GoPro. I pause right there.
Look at these pictures. Now we are outside a little
closer to sunset, right? I'm at a f 1.8 for my
aperture, 100 ISO, and one over three 20th of a
second for my shutter speed, I'm able to have all the
settings where I want them because there's plenty
of light to play with. The time of day that you're shooting depicts what your settings are
going to look like. Now let's go back to that video and see that we moved inside
of a furniture store. It takes some more photos. You'll see in these that I
had to bump my ISO up because we're in a darker
area where inside there is a bit of natural
light coming through, but it's not enough light to
not have me bring my ISO up. So I had to F11 again. I saw was at 400 this time
because I needed more light. Then one over one 25th of
a second. Shutter speed. Alright, so let's see
how we would approach a landscape photo in a
product photography photo, both outside, there
is this thing called white balance
awareness. I'm just kidding. I just made that
up, but basically I just trying to tell you
that you need to be aware of your white
balance when you're outside and you're
taking photos, the photos need to be
coming out of your camera as realistic as possible. So cloudy days usually
give you a lot of bluish tones, cooler tones, I guess you would
call it selecting the cloudy white
balance option will raise your cameras
color temperature to a higher color
temperature to counteract those bluish tones to us watch this video and we'll take
a look at these photos. Yeah, casualty
smacking eyes with it, with my accent about
they're stuck. Stuck. There you go. Boom, there's the Axe. Awesome. So seeing those pictures, be aware of your white
balance when you're shooting, take a look what your
scene looks like and if it doesn't look like
that and your camera, or it looks odd,
maybe it looks a little too warm or too cold. You can change that
in the white balance. Make sure you do that.
And you always have to remember to have fun. By far, one of the funny sheets I've had car wash photoshoot. It's amazing. Deal with
two girls like I did. Maybe a couple. Water gun fights are mandatory. So we're not going to go to
the VR classroom today, guys. I don't have any
homework for you. I do. I want you guys to continue
and that's all I can ask. Continue. Whenever
gets hard, keep going. These are all the
magazines that have been published in I say
that to say this, that did not come easy and
it did not come quick. I had to invest a lot
of time and money into my education for me to be even considered to be in
these magazines, small victories lead
to something bigger. So I just want you guys to make sure you remain grateful
for where you're at, that you even have
the opportunity to partake in a skill and a craft. As this one continues to drop your work into the
projects and resources. I really want to build a safe and supportive community under there where we can
admire each other's work. So I would love to keep
seeing what you guys creating with the knowledge that you've picked
up from this class. And if you ever have any
more questions or you're unsure about something or something you didn't understand, feel free to send me
a DM. I will answer. Instagram TikTok, leave a
comment and my YouTube video, I'll make a whole
YouTube video for you. I'm really here for you
guys and I want to, I want to let you
know that there are other creators that
will be there for you. I'm saying as a role model, as a bank of information, just somebody just talked to
whatever you need me for. I am here for you 100%. So you can find me on
Instagram at heart, the plug, YouTube, TikTok is all the same. So hard to plug on
all three of those. I have a website, hard to
plug.com, easy to find. If you feel so inclined,
spray loved, beloved, and I will see you guys later.
 Kent Hart, Storyteller