Transcripts
1. Welcome & Course Introduction: Hello there. I want to start by welcoming
you to discourse. My name is erik Umar,
and I'm going to be your coach to roll
out this course. This course is designed for a complete beginner to
calendar management. If you are a virtual
assistant and you want to start offering calendar
management service to client, this course is exactly for you. In this course, I'm going
to teach you how to use Google calendar to add
a bent, manage a bent, and do anything that a
client will want you to do for them as a calendar
management, virtual assistant. If you are ready to get started, my advice is start
following the course, start following the
lessons one after another without skipping
some lessons and without jumping
through one lessons and going through the next
lessons and then coming back because this is
going to help you take advantage and get the
most out of this course. And always practice, practice anything that
you learn as we go. Don't wait until you finish the entire course before
you start practicing. Practice each lesson
that we went through. This is going to help
you memorize everything and you will not forget
something that you practice. So thank you for being here, and I will see you
in the first lesson.
2. What is Calendar Management?: What exactly is
calendar management? Calendar management is simply the act of managing a calendar. Most business owners and entrepreneurs have
an online calendar, and managing an online
calendar is a work that require for
decision and dedication, and it will require some time. It involves managing event, managing schedules, and
a lot of other things. And there are many
online calendar tools. There are Google calendar,
there are outlook. There are many online
calendar tools. Most popular one is
Google calendar, and that is where we are
focusing on it on this course. Generally, calendar
management is simply the act of
managing a calendar. You as a virtual assistant, you will be managing your
client online calendar, which include
managing their event, their online event,
managing bookings, managing all their appointment. This is the general meaning of calendar management,
per Batual assistant. The next lesson, we are
going to look at why do client hire a virtual
assistant to manage their online calendar
so that you'll know exactly what to focus on when
building your portfolio. I'm going to see you
in the next one.
3. Why Clients Hire VAs for Calendar Management: So why do client hire bachor assistant to manage
their online calendar? Well, the main reason
that there are two main reasons that client hire Bach assistant to
manage their calendar. The first one is they want to maintain a probational image. Let me give you an example. Let's say I am a consultant. I am working with client, and so since I am
working with client, anytime someone want to
have a call with me, they want to hire
me as a consultant, they are going to choose a time that they want to
have a call with me. And if they book a time that they want to have
a call with me, maybe tomorrow at
2:00 P.M. And someone else also check my website
and they want to book co me, and they book Ecolosm
at the same 2:00 P.M. So, you see, I'm going to have
to skip one call because I cannot be at acall with two
people at the same time. And if I have to go back and let someone know
that, hey, sorry, my calendar has a conflict, I cannot do that call,
we have to move it up. That is unprofessional. And if you have a calendar
that is not organized at all, people can book multiple
event at the same time, and maybe you have a personality that you are taking care of at a specific time and you are booking a call
with you at that time. So it will be too disorganized, and it will be easier for
me if I am a consultant. I have personal activities. I have to manage my business, I am having appointment
with client. It will be very easy for me to miss appointment
to forget things, to have a bent conflict. And that is why having
a virtual assistant to manage an online calendar
is important because it will help you maintain a professional image by being very efficient
with everything. And the next thing that client the next reason that client hire virtual assistant to manage their online calendar
is time saving. Because managing an online
calendar can take time, especially depending
on the type of person. If you are a consultant, you have your business to run. You are working with
client yourself. You have personal activities, there will be many things to manage on a continuous basis. So it will require you time. Maybe even if just 1 hour, maybe every day you are going
to have to sit for 1 hour, go through your calendar
update everything, make sure everything is
right, make sure you didn't forget anything, that
is going to take time. And if as a consultant, I have my business to run. I have other
important activities. Sitting down and
spending one or 2 hours every day on my calendar
is not really productive. So it will be best
to hire someone whose job is to just
manage my calendar, make sure everything
is good and efficient. And those are the two
main reasons why client hire virtual assistant to
manage their online calendar. In the next lesson, we
are going to look at the key responsibilities
of a calendar manager. So I'm going to see
you in the next one.
4. Key Responsibilities of a Calendar Manager: So what are the key
responsibilities of a calendar manager? If you start working as a calendar management
virtual assistant, what will be your key
responsibilities? The first one is scheduling
and rescheduling appointment, which include booking meetings. Your responsibility
is to book meeting on behalf of your client
and in case of a conflict or in case of any reason that maybe your
client will not make it to the meeting or the other party is
not going to make it. Your job is to
reschedule the event and notify everyone that is
involved in the event. So this is the main
key responsibility of a calendar manager. Scheduling and
rescheduling appointment. And the next responsibility
of a calendar manager is preventing double
bookings and conflict. Your job is to make sure before you book any
new appointment, you make sure there are
no appointment that have a conflict with the new one that you are going to
book for your client. And it is also your job to manage time zone to
make sure if maybe a client your client is
a consultant and they are having a call with a
client for themselves, maybe your client
is in the USA and the person they are having a
call with is in Australia. Have wildly different
time zones. If the client say
2:00 P.M. You make sure that the 2:00
P.M. Is what time in maybe central time USA so that you make sure
the time zone is right and there is not going to be any time conflict in
your client calendar. Your job is also going to
include sending reminders. If you book an appointment
on behalf of your client, maybe one day before the event, you send a reminder and notify everyone and remind
them about the event. Personally do this for some of my clients that I work
with who have a podcast. When we book a
podcast with someone, they are supposed
to have a podcast maybe on the 15th of the month. And so on the 14th, if the podcast was booked
maybe four weeks ago, someone might have forgot. So on the day before the event, maybe that is on the 14th, I will send a reminder
to my client, and I will also
send a reminder to the guest that we are
having on the podcast. Remind them, we are having a
podcast with them tomorrow, and in case someone have
something that come up that will prevent them from attending
the event as scheduled, then it is your job also
to take to note it down and reschedule the event and notify everyone
that is involved. It is also your
job to prioritize and organize event on
behalf of your client, which include blocking time for high priority event so that your client will
have enough time to complete this higher
priority event on their calendar it is your job also to
coordinate with others, especially if you are
working for someone who have a large team or even a small
team if they have a team, I will be your job
to coordinate with others on the team
to make sure nobody books something that
is going to have a conflict with your
client calendar so that anyone on the team if
they are interested in booking any type of event
on behalf of the client, they are going to have
to consult you first, and it will be your job to let them know the availability of your client and they
will let you know the time that works
for your client, and then you can set it
up on their calendar. Are just some of the most
common responsibilities of a calendar manager. In the next lesson,
we are going to start actually doing
the tutorials, and I will start showing you the interface and how to
access Google calendar. So I'm going to see
you in the next one.
5. Accessing Google Calendar: So in this lesson,
I'm going to share my screen and show you how
to access Google Calendar. I'm going to share my screen
so we can get started. So when you open your browser, you simply come to
the addressr and you search for
calendar.google.com. And when you search for
calendar google.com, you simply go to the address and it will take you to
Google Calendar. So this is homepage or
Interps of Google Calendar, and you can see you
have to be logged into your Gmail account in
order to access this page. If you are logged into
your Gmail account, when you come to this page, you are going to see the icon of the Google account that
you are logged in with. If you want to change the Google calendar,
the Google account, you simply click
this button and you can switch to a
different Gmail account. And so the GML account
that you are locked in, this is a homepage, and this
is your Google calendar. Right now, we have
an empty calendar, and this is probably
what you are going to see if you are starting
with a new calendar also. In the next lesson,
we are going to go over the layout and
the interface of Google calendar so
that you will have a good understanding of the first homepage that you
see when you logged in. So I'm going to see
you in the next one.
6. Google Calendar Overview – Interface and Layout: This lesson, we are
going to go over the layout and the interface
of Google calendar. I'm going to share my screen
so we can get started. So when you go to calendar gogle.com and you
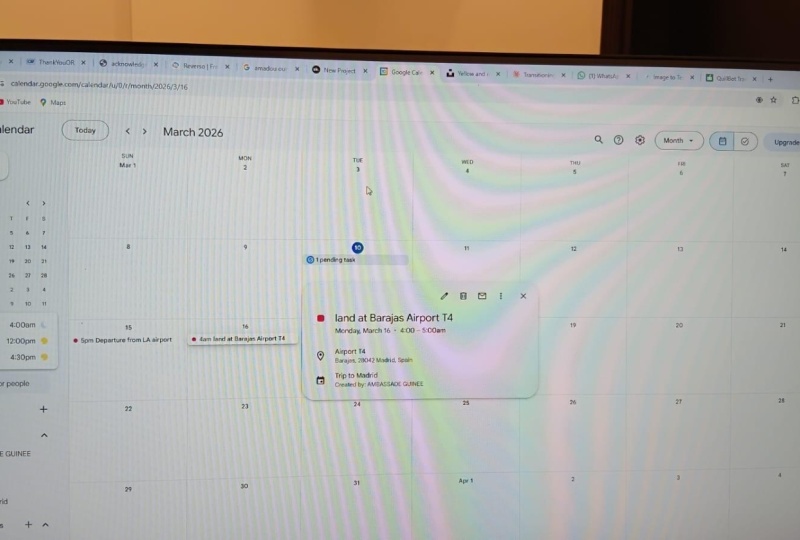
learn on this page, this is a calendar
view for the month. And if we look up here, this is a button for today
that if you click it, you are going to come back to
the day that we currently. For example, if you go
to the coming month, maybe you are checking
your calendar, your upcoming event. And if you want to come
back to the current day, you simply click this button and you are going
to come back here. If you go back maybe month previous month
and you are checking other things and you
want to come back to the time that you currently
are the current day, you click this button
and you come back to the current month
and the current day. Right here, you
see it said month. If we click on it, right now we are looking at
a monthly view. We are looking at
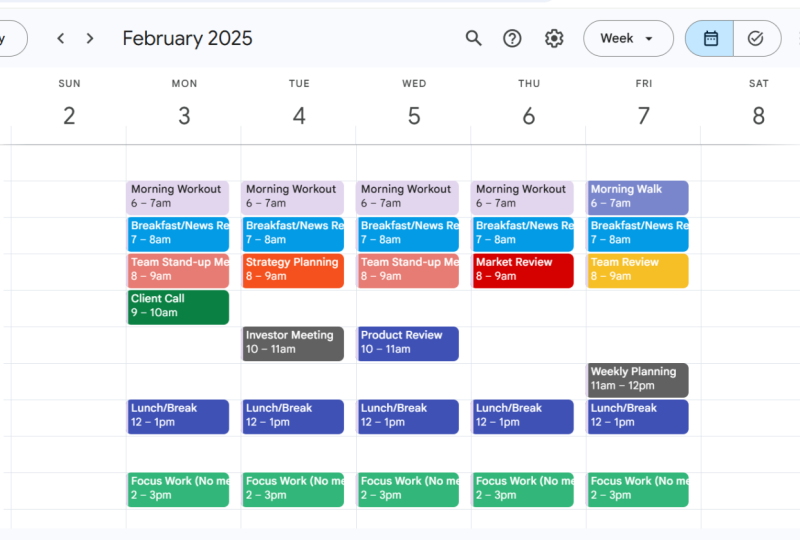
the entire month. If you change it to week, we are going to see the
week, the entire week. You see we have from
Sunday to Saturday. This is a week view. Right here, we are going to see all the event that we
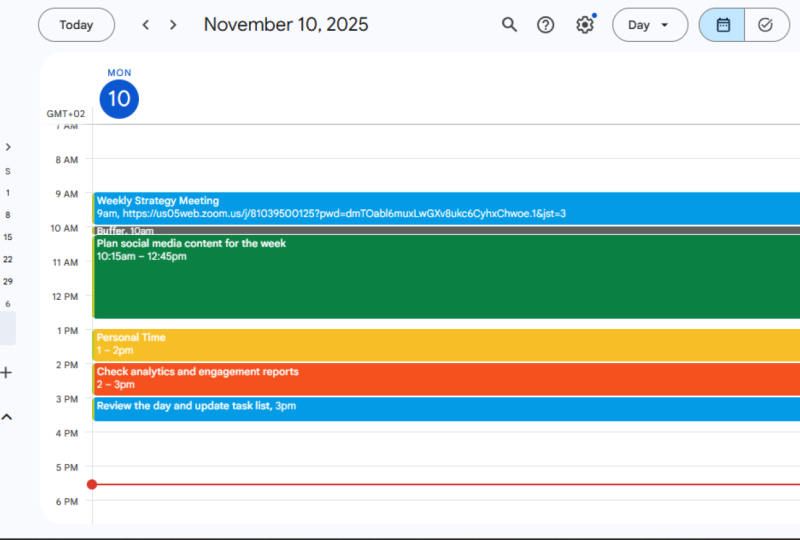
have for one week. If we change it today, we are going to
see all the event that we have for one day here. But if we change it, if
you change it to year, you are going to see
the entire year, which might not be that helpful. Most of the time I
work with AmontlyVew. So if you come back here,
this is EmontlyVew. You will see these two buttons. When you click here, right now, we are in
the calendar view. We are viewing the event
that are in our calendar. If you change it to task, you are going to see the task
that you have not event. There is a different
between event and tax, which we are going to go over
in the upcoming lessons. But for now, this button is going to be your
calendar debut. In case for whatever reason, you come to calendar at gole.com and you didn't see calendar, it's probably in tax view. So if you switch
to calendar View, you are going to come
back right here. And right here is where you are going to see the current month, the current month that we are. And this is a
button that you can use to create a new event or tax if we scroll down
here, see my calendar. This is where we are going
to have multiple calendar. We can create calendar for
maybe personal calendar. We can create work calendar. Any type of calendar
we can create here. If your client add you
to their calendar, you are going to see
their calendar down here. So down here, other calendar is where
you are going to see the calendar of your client if they give you access
to their calendar. So this is a general
overview of Google calendar. In the next lesson, I'm going to show you how to create event, edit event, and also
delete an event. So I'm going to see
you in the next one.
7. How to Create, Edit, and Delete Events: So in this lesson, I'm going to show you how to create an event, edit an event, and
also delete an event. So I'm going to share my
skedon so we can get started. So this is our Google
Calendar homepage. If you want to create an event, all you need to do is come
down here to this button, create and we click on
it and we choose event. And this pop up is where we are going to start
creating our event. But in order to
view other detail, I'm just going to
click more options so that it is going to
open in a pool view. And the first thing is
the title of our event. Let's say I am recording a video for YouTube
every Wednesday, and I want to add it right here. So I'm going to add the title. Maybe I will call it a
record video for YouTube. When I add my title, right here, I'm going
to choose a date. And if I click here, I'm going to choose the date. I'm recording maybe
on Wednesday, so I'm going to choose
next Wednesday. And the time that
I'm recording is maybe I'm recording
at 11:00 A.M. So I'm going to choose
11:00 A.M. Two, 2:00 P.M. So I'm going to pick 1 hour. I'm recording for 1 hour
from 11:00 A.M. To 2:00 P.M. And it is going
to end on July 9. So it is the same
day 1 hour event, and I can choose a
time zone right here. If I click here, I can choose a time zone that I want this event to be
added on my calendar. And this is my
difault time zone. If I want to change it, I can click here and choose
a dependent time zone. But since this is my
current time zone, I'm going to leave it as
dipult and click on Okay. And you see the time
zone had been added. And the next thing is this
button if you click all day, then the entire
day this event is going to take off the entire day and we don't want to that, so I'm going to
leave it for 1 hour. And this button that
said does not refit, it means this event
is only going to happen on Wednesday,
nothing else. So we are going to
leave it like this. I'm going to show you how to set up a recording event later. But for now we are going to set this event to happen
only on Wednesday. If we come down
here, this button is where you are going to add a Google met, a Google meet. If you want maybe if I
am having a meeting, if it's a team meeting and I want the team meeting
to be be a Google meet, I can click here, and I will
be able to add a meeting. So you see anyone that I add, if I share this link, if I share this
link with anyone, going to be able to join
the call at the right time. If they click this button,
it's all the same. And if I want to remove
it, I can click here. But for now, I'm
going to leave it. Or maybe I can remove it since I'm recording a
video for YouTube. I don't need a Google met link, so I'm going to remove it. And if we want to add a
location for this event, we can click here and type a location and we can be
able to add a location. If we integrate Zoom
with our calendar, we can set up this event
to add automatically to our zoom in case if we are
having a meeting via Zoom. And this is where we are
going to send a notification, which is simply a reminder. If we want to be reminded
before the time of the event, we can simply choose
a notification which is going to pop
off in our browser. If we choose email,
we are going to receive a reminder via email. And if we choose 30 minute, then 30 minute before
this event time, we are going to receive
a reminder via email. I'm going to leave it as email. If we want to add a
notification, we can do this, and we can add maybe a
notification so that we'll receive both email
and Epo notification. But I'm simply going
to remove this. And right here is where
we are going to choose a calendar or a category that we want this
event to be on. But since I don't have
many calendars for now, I'm going to leave it as
or only this one calendar, I can change the
color for this event. Maybe if I said anytime that I want to
record for YouTube, I want it to have this color. I select it, and I want my calendar to be busy
during this time, so nobody can book anything at this time
because I am busy. If I change it to pre, then I can have multiple
bookings on this time. Even though I am recording
for YouTube at 11:00 A.M. I can be able to
add something else. People can also be able to add me to another event
at around this time, and I don't want this, so
I'm going to choose busy. And right here is
where I'm going to write a description
for this event. I can write a
simple description. This is helpful if you are having an event
with many people. Maybe I am having
an empty meeting, and maybe I want
called TV Ba Zoom, and I can add even my Zoom link here so that people can join. And if I want to leave an instruction that people need to follow
before the meeting, I can add it right here. You can simply write
your description. And you can use this top bat, customize your this collection, I can highlight
and make it bold. I can make it underline.
I can add a link. If I say maybe
click here to join. Click here to join, maybe. And if I want to
hyperlink to a button, I can simply click here
and I will insert a link, and I can add the link that I want people to
go to when they click. Ap now, I will simply add my website for the
sake of simplicity. But if I want people
to join BRZoom, I will add my Zoom link
here and I click OK. So you see now people
when people click here, they are going to
be able to go to my website or any other
place that I add. The next place is adding guest. If I'm not doing it alone, I can add guest here that they will be able to join
the call with me. I can add maybe another
email like this. When I simply add
the email address of the person that I want
to invite to this call, I can give them permission to edit the
event and make changes. But probably you will not give people permission
to edit the event. I can allow them to
invite other people, and I can allow
them also to seize a guest list to see all the people that are
going to attend the event. And when I choose this
and when I finish this, I can simply click Save. And this is just asking
me if I want to send invitation email to the
people that I added, and probably you want to send an invitation email to
people if you add them. If you don't want to send them a Dupault invitation
from Google, you want to send
them an invitation, personal email, different email, then you can choose don't send. But if you want to
send them an email, you can choose send and they will receive an
email notification. For now, I'm simply going
to choose Don't send. And now you see our event
had been added on the ninth. If we click here, are going
to be able to see our event. If we click on it, we are going to be able
to see the event. So you see the
name of the event, the date and the time that
the event is going to happen, the guest that we have
added to the event, and this is a description
that we added. Pool can click to go to
the link that we add here, and we are going to receive a notification reminder
30 minute people, and this is the name
of the calendar that this event is on we can view our event if we maybe
come back if we change it from monthly
view to day debut, and we can choose the day that the event is supposed to
happen, which is the ninth. If we scroll, you see
the event right here, which is going to happen
from 11:00 A.M. To 2:00 P.M. So you see this is our event. We can come back to
our monthly view. And this is the event. So
the next thing I'm going to show you is how to edit and
make changes to this event. Let's say we want to change the description or we
want to add more guest, or if we want to change even
the color of the event, we can simply click on it and we can click
this pencil icon. If we click on it, the pop
office going too often. So this is the Edit patch. We can change the title. We can change the
date and the time. We can change whether
it is recording or not, we can add a location, add a description, click here to change the color of the
event, add more guest. Do anything the same way that we did when we are
creating the event. When we finish making all
the changes that we want, we can simply click
Sept to save the event, and all the changes will
be available right here. But if for whatever reason we
want to delete this event, we change our mind or
the people that we edit, the event is not
going to happen. We can click on it, and we can
come up here to this icon. We click on it, and
we can choose to send an email notification
to let the people that the guest that the event
had been canceled or not. But for now, I'm just
going to say don't send. The event had been deleted and
removed from our calendar. So this is how you are
going to create an event, edit an event, and delete an
event from Google calendar. In the next lesson, I'm
going to show you how to create a recurring event
in Google calendar. So I'm going to see
you in the next one.
8. Creating Recurring Events: So in this lesson,
I'm going to show you how to create a recording event. Recording event is an
event that happens on a continuous basis on a
specific day and time. Let's say I am having a team meeting every Monday
morning with my team. So instead of creating new event every
Monday and adding it, I can create it once, and it will happen every
Monday automatically. I'm going to share my screen
so we can get started. So let's say we are having a
team meeting every Monday. In order to create the event, we are simply going to come
to create and choose event. And we are going to go for more options to see
all the details, and the title is going to be team meeting and we can
choose the date right here. It is going to be every Monday, so we are going to
choose upcoming Monday, and it is going to
be maybe at 10:00 A.M. And it is going
to be for 1 hour. So 10:00 A.M. To
11:00 A.M. Is good. And instead of all day, we are not going to choose it. We are going to choose here. Instead of does not repeat, we are going to choose
weekly on Monday. You'll see if we choose
weekly on Monday, then every Monday we are going to have this
on our calendar. If we choose daily, and every day at 10:00 A.M. We are going to have
this on our calendar. If we choose monthly
on the first Monday, then the first Monday
of every month, we are going to have this
event on our calendar. If we choose annually on
July 7, then every year, once a year on July 7, we are going to have this event, and we can also
choose every weekday. If we choose every weekday, then we are going
to have this event from Monday to Friday, except Saturday and Sunday. So it depends on
the type of event. But for now, I'm just
going to assume we are setting it up once
every week on Monday. So I'm just going to
choose weekly on Monday. And we can scroll down here. Let's say we are hyping
the meeting via Google Mt. So I'm going to click here
to create a Google MIT ink. And this is eight up to
100 guests can attend. And we are not going
at a location, notification, I'm going
to leave it as dipled. And right here, I'm going to
choose maybe this yellow. For all our team meetings, we are going to be able to
identify it with this color. And I'm going to choose busy so that we will not be able
to book anything else. We are not going to
have a conflict, and I can add a
short description. This is our weekly team meeting. And if there is any other
detail, I'm going to add it, and I'm going to invite my
team members right here. For the sake of example, I'm simply going to
invite this email. And I will not allow the team
members to edit the event. I will not allow them
to invite others, but I will allow them
to see a guest list, and I'm going to click Save. I don't want to send
them a reminder. I will rather send it
to them personally, so I'm just going to
choose Don't send. And now you see we have
this event every Monday. You see, we have
it every Monday, we go to next month, you see we still have it
every Monday at 10:00 A.M. If we go to next month, we have it every
Monday at 10:00 A.M. So this is how you can set a recording event
that is going to happen weekly or daily or anywhere that you
want it to happen. In the next lesson, I'm
going to show you how to color code your
event and categorize them with labels so that
your calendar is going to be more visually a feeling and easier to really
understand every event. So I'm going to see
you in the next one.
9. Color Coding and Categorizing Events: In this lesson,
I'm going to show you how to categorize event and Cc your event so that your
calendar is good to look at. I'm going to share my sched
so we can get started. So let's say I have
my appointment and all my event for work, but I also have
personal event and personal things that I want
to add in my calendar. But if I didn't categorize them, I will not be able
to really see and understand what is for
work and what is personal. Order to do this, I'm
going to come down here in order to
create categories. You see right now
under my calendars, I have the name of
my main calendar, and I have a birthday and task. What I'm going to do
is I'm going to assume this my main calendar is
my calendar for work. If I want to have a
different category for personal calendar, I can come down here under other calendar and I will
click this plus icon, and I'm going to click
Create New calendar. So this is where we are going
to create a new calendar, which is going to
serve as a category. I'm just going to name it something like
personal calendar. And I can add a dis correction, but I don't want to time zone, I can leave it as dipled. I am the owner of the calendar, I can simply click
Create calendar. Okay, now the calendar
has been created, I'm going to come back here, click here to Comeback. And you see we have
our calendar here. I'm going to make
some changes to the calendar by clicking
this three dot, and I'm going to
choose a dipled colo for this calendar so that any event or anything
that had been added to this calendar is
going to have that colo. I'm going to choose this one. Or maybe I can choose
my main brand colo. I can click this polos. I'm going to add a custom colo. I can add a colour
code if I want to and I will click on Save. And now this personal
calendar have this column. So let's say I'm adding a
personal activity that I do, maybe let's say I'm having
lunch every day at 2:00 P.M. So I'm going to click here. There are two ways
to create an event. I can click here, which
is normal or I can click anywhere in the day that I want to create the event. If I click here, which is today, you see a new the pop of offen. I can click more option to see everything and I will write something like lunchtime maybe, and the day is today, and I will remove all day so
that I can choose the time, and maybe I'm having
lunch at 2:00 P.M. And maybe I'm having
lunch for 30 minutes, so I'm going to
leave it like this, and I will say maybe
repeat every day daily. And I can come
down here. I don't need to add a completens link. I don't need to add
anything like this. Maybe I don't even want to
add a reminder for this, so I'm going to
remove the reminder. This is where I'm going
to choose the category. If I click here, right now
it is on my main calendar, which is work calendar. If I choose personal calendar, you see it switched to
my personal calendar. You see the color also switched. I can change the color, but
I can leave it like this, which is the default color of the category that I created. I can leave it as busy
and any other details. I don't want to add a guest, I can simply click Save. Now you see every single day we have this event at 2:00 P.M. Every day on my calendar,
I have this event. And if I choose here, if I only check this, you see, I am not going to see any event that is in
my personal calendar. I will only see events that
are in my work calendar. If I select this
and I check this, then I will see only event that are in my
personal calendar. I'm not going to see events
that are in my work calendar. If I select all of them, I'm going to see everything. If I want to remove this having lunch every day,
I can click on it. I can click the delete
event icon and you see, since this is a recurring event, it is happening every day. If I choose this
event and click Okay, then I will remove the
event only for this day. But all the other days it
is going to be available. If I choose all event, then I am going to delete all the event that
are on this calendar. If I choose this and
follow of event, I will delete this current
event and the ones coming up, but I will not delete the
ones that have first, but I will simply click Delete
all event and click Okay. And now you see I simply deleted all the
events all at once. So this is how you
can categorize your calendar and color code your calendars and event so that your calendar is more
easier to look at. In the next lesson,
I'm going to show you how to use event and task and the different between event and tax in
Google calendar. So I'm going to see
you in the next one.
10. Using Tasks & Events inside Google Calendar: So in this lesson, I'm going to show you how to create event and task and the dipend between event and Tax and
Google calendar. Normally, event is
related to appointment, scheduling appointment, event that has to do
with other people. And task is something that you have to check up your list. I'm going to share my scheduling
so we can get started. So let's say I want to buy groceries tomorrow and
I don't want to forget. So I want to add it in
my calendar so that I know tomorrow maybe at 3:00 P.M. I want to go buy groceries. You see this was not an
event. This is a task. I can simply come to create
and instead of event, I'm going to choose task. I can simply add a turtle,
maybe buy groceries. And instead of event, it is set as a task, and I can choose a day. Maybe I'm doing it tomorrow, so it is going to
be on the fourth and maybe I'm doing
it at 3:00 P.M. So I'm going to choose 3:00 P.M. And I'm not going to choose all day
and it does not repeat. Maybe it's a one time thing. I can add a description or not. Doesn't make a
difference and my task because I only have
one calendar and I will click on save so now we see we have this
added for tomorrow. If we change our calendar to daily view and we
go to tomorrow, which is support, you see we
have our item right here. If we click on it,
we are going to see the tags that we
have to do for the day. Let's come back to
the monthly view. If we have multiple tasks
that we have to do, we can simply identify them
by this little check mark. Any item that have
this little check mark is a task, not an event. If maybe we complete it at 3:00 P.M. We go and
get our groceries, we can simply mark
it as complete. When we click here, it will
be marked as completed. So you see, now it
had been checked off our calendar because we
mark it as completed. If we didn't mark
it as completed, it is going to be right here. So this is how you can
create event and a task, and this is the difference
between an event and a tax. Mostly, generally, a tax is a personal thing that
you do with yourself, whereas an event is something that has to
do with other people. The next lesson, I'm
going to show you how to reschedule an event. If you already book
an event on behalf of your client and for
one reason or another, the event cannot happen,
you can reschedule it. I'm going to see you
in the next one.
11. Rescheduling and Cancelling Events Professionally: So in this lesson,
we are going to look at how to reschedule event and also how to cancel event professionally in
Google calendar. Let's say you are working
for someone who have a podcast and they book
a podcast with a guest. The guest is supposed to be
on the podcast tomorrow. But the guests send you
an email and they said they have something come up they will not be able to attend, so they want to reschedule
it to next week. How are you going to do that? Let me share my schedule
so we can get started. So this is our Google calendar. Right now we are in
the weekly view, and the podcast is
supposed to happen at 3:00 P.M. 3:30 P.M. To 4:30 P.M. And the person said they want
to move it to next week, and you check your
client calendar, and they are available
next week at the same time or next
week at a different time. What you just need to do is you don't need to
delete this event. You just need to edit it. You see we click
and open it here. We can click the pencil icon
to see all the options. What are the first thing we are going to do is come up here. Since the guest want to
schedule it for next week, that will be next Saturday. We are going to
change the date to next Saturday and we can
leave the time the same. But the client if the guest
also want to change the time, we can change it right here. But since they don't want to, we can leave it like this. If we want to change the
time zone, we do that. This is all we need to do
to reschedule this event. The guests are already here. Every setting is already
as it is previously, we simply change the date
and we click on Save. We can send them an email we can write some content and we
send it to them. But personally, I prepare
in order to make it more professional to send
them a direct email, so I will choose don't send. So right now you
see the event has disappear from this week because
we move it to next week. If we go to next week, you see the event is moved right here to the next week
next Saturday on the 12. So this is how you
can reschedule event. So the next thing
that you can do is simply write an
email and send it to the guest to let them know that the event had been
rescheduled to next week. And even though you didn't send them a custom notification, they are going to receive
a notification from Google calendar that they can click Okay to add the event
to their own calendar. Let me show you how they will
receive the notification. So you see this is an email that the guest
is going to receive. Anyone that had been added to the event in Google calendar, they are going to receive
this email with pull in British with the pull
details of the event. And as soon as they click, the event is going to be added
to their Google calendar. So this is how you
can easily do that. You can simply
send them an email to let them know that
the event had been rescheduled and
they will receive this email automatically
from Google calendar. The next thing we are
going to look at is how to actually cancel an event. Let's say this event right here, or for whatever reason,
it will not happen. It needs to be canceled. All you need to do is simply
click and often the event, and you can simply click the delete event
button and you can simply choose Don't
send or you can write an optional cancellation message that the guest is
going to receive, but we are not going
to write anything, and we are going to
click Don't send. Now the event had been canceled. But even though the
event had been canceled, they are going to
receive a notification. Even though we didn't write
a custom notification, they are going to receive a
default notification from Google calendar to let them know that the event had
been canceled. Let me show you the
email that they are going to receive
from Google Calendar. So this is a default email that they are going to receive. As soon as you delete the event, all the guest that have
been added to the event, they are going to receive
this cancellation email, and they are going to know that the event had been canceled, and the event is going to also be removed from their
Google calendar. So this is how you
can reschedule event and also how you can cancel event vocationally
on behalf of your client. In the next lesson,
I'm going to show you how to manage buffer time and also how to pro bent to double bookings on
your client calendar. So I'm going to see
you in the next one.
12. Managing Buffer Times and Preventing Double-Bookings: In this lesson, we are going
to look at how to manage buffer time and also
prevent double bookings. Buffer time, it simply means
the time between event. If your client have
an event at 2:00 P.M. And they have another
event at 3:00 P.M. Then it means they will
have an event from 2:00 to 3:00 P.M. And the minute
they finish this event, they are going to
get to the next one. That could be a little
bit challenging. Especially if your client is having meeting
with other people, and it will be hard to finish a meeting this minute and
jump to the next meeting. And that is why buffer
time is important. If you add a Buffer time, you can add 15 minute
before each event, so that if this event
finish at 3:00 P.M. Another event cannot start happening until after 15 minute. So the interval between event, that is what is
called a buffer time. I'm going to share my schedule and I'll
show you how to set this there are two ways
to set off a buffer time. And the first way is to
simply add it manually. Let's say we are having
a team meeting at 10:00 A.M. 10:00 A.M. We are having a team meeting
every Monday at 10:00 A.M. And I want a 15
minute of buffer time. That means free time
before the next event. So the first thing I can do is I can either often the event, I can edit the event by
clicking the Edit button. Since the event is supposed
to run for 1 hour, 10:00 A.M. To 11:00 A.M. If I want to have 15 minutes buffer time after this event, I can simply increase
it like this. I can change it from 1
hour or exactly 1 hour. I can change it to
manually to 11 15. Okay. Now that I change it
to 10:00 A.M. To 11 15, if I click Save, I will choose all
the event so that all the event are going to
have these exact changes. I click Okay, and I
will use Don't send. So now instead of 10:00 A.M. To 11 to 11:00 A.M. The event is going to run
for 10:00 A.M. To 11:15 A.M. So you see, nobody
is going to be able to book anything
at 11:00 A.M. Dot on my calendar. Anyone who want
to book anything, they will be able
to book from 11:16 A.M. You see I will not
have meeting after meeting, meeting after meeting
and event after event. After I finish my team meeting, I know I will have
at least 15 minutes of free time before I
jump to the next ten. So this is the first way
that we can set it up. The second way that we
can set up a buffer time is actually create
it as an event. I will show you how if
we click here, you know, we can add an event by
choosing the day or by clicking the create button
right here, it's all the same. So I will simply name it buffer. And I'm going to offer all
options. The name is Wafa. I'm going to choose
the next Monday, and I'm going on
a check all day, and I'm going to choose from 11:15 A.M. 1115-1130. And I will choose
weekly on Monday. And I don't need to
add any notification, so I will remove
the notification. Maybe for offer time, it will be helpful maybe to add this dark granite color so that it is more
visible to see, and I will simply click on Save. And when I do this, you see immediately
after this meeting, I have 50 minutes of fat. Immediately after this one, I have 15 minutes fret. So this way, nobody
can book anything. Immediately after I
finish this meeting, people can only book
anything after my Ofer time. So this is going to give
you client enough time to prepare between one
event to the next. The next thing we
are going to look at is preventing double bookings. Double bookings is simply if you have one event
that maybe you are using calendar and you have a calendari account
and people can book event on your
calendari account, and it will automatically be added to your Google calendar. The only thing you need to
do to make sure there are no double bookings is make sure each event you set
to yourself as busy. If we often this event, when you are creating the event, you see we are going to have
this this option right here. If you choose busy, then as soon as
someone book the event at this day because in
software like calendari, you can create an
event that people can book maybe on Monday and
Thursday at 11:00 A.M. So if someone want to
have the call with you, when they go to
your booking page, they will see the available
slot is Monday at 11:00 A.M. And maybe Tuesday at 11:00
A.M. And they will choose one. So if someone go and book
on Monday and someone also go to your calendari page
and try to book on Monday, if they book on Monday, you
see you have double weekends. Two people book the same
event at the same time. And in order to avoid that, you have to make sure you set the event type as busy so that when
someone book the event, as soon as they book it is
added to your calendar, it is going to be set to busy. No one can book an
event at the same time, and you have to make sure in
the platform you are using, if you are using calendar
or any other platform, you set it up to
look for Complict. And if you set it up
to look for Complict, then before someone book
anything on your calendar, it is going to look at your calendar to make sure
there are no conflict. And this where you are going
to prevent double bookings. And in the next lesson, I'm
going to show you how to set up an appointment
using Google calendar. So I'm going to see
you in the next one.
13. Scheduing Appointments in Google Calendar: So in this lesson, I'm
going to show you how to use Google Calendar
appointment scheduling. With Google calendar
appointment scheduling, you can create a booking
page so that people can book appointment with your client directly with Google Calendar. I'm going to share my screen
so we can get started. So in order to create an
appointment booking page, you have to come up here to
create. You click on it. Instead of event or tax, you choose appointment schedule. When you click on it, this
pop up is going to appear, and we are going to choose
a name for our appointment. Let's say I I'm
having consultations, so I'm going to just
name it Consultations. Or you can sell consultations with the name of your client or anywhere depending on
the type of appointment, and we can choose how long the appointment is going to be. We can choose 1 hour
or maybe 45 minute. We can come down here and we
can set our availability. What are the times
that we want people to be able to book
appointment with us? Let's say I don't want
people to be able to book on Monday so I remove it. I only want people
to be able to book appointment with me on
Tuesday and Friday. So I'm going to disable
all the other days. I'm going to only
leave these two days. I'm going to choose
the first time option. People can book a call
with me from 9:00 A.M. To 5:00 A.M. No, the time is wrong, so I'm going to choose maybe from 9:00 A.M. To 9:45 A.M. Since it's a 0.5 minute event. So from 9:00 A.M. To 9:45 A.M. But I want to give maybe
people three options. So I'm going to click
here to add another time. They can choose the
same day on Monday from 10:45 A.M. Maybe
or maybe we want them to be able to book from
something like maybe 2:00 P.M. From 2:00 P.M. To 2:45 P.M. Okay, so these are
the two options. And on Monday, we want people to book from 9:00 A.M. To 945. So I'm just going to
write it manually. And we want people to also be able to book maybe from 4:00 P.M. From 4:00 P.M. To 4:45 P.M. Okay, so these are
the two options. People can book appointments
with us on Tuesdays or Friday with this time that we choose. We can
come down here. We will choose a depaultT zone. I'm going to leave it as my
depault calendar time zone. And scheduling window
if we click here, we will expand the options. And you see the first
one is available now. If we choose it,
then people will be able to start booking
from the next day. Since I say people can book from Tuesday on Tuesday and Friday, then if I choose available now, then anyone can book from
this coming Tuesday. But if I choose maybe
start and end date, then I will choose the day that I want this appointment to start if I choose
can choose a date. So if I choose maybe the next Tuesday is going
to be on the eighth. But if I don't want
people to start booking until the last
week of the month, then I'm going to
choose this day. Then people will not be able to start booking
before this day, but I'm just going
to leave it now. And if I want this appointment
to end at a specific day, I can choose it right here, but I don't want to do that, so I'm going to leave
it as available now. I'm going to choose
available now. And this right
here maximum times advance that people
can book appointment. If I choose 60 days, people cannot book appointment
in the next 90 days. For example, if I
choose 60 days, someone can book an appointment
in the next four weeks. If they book appointment today, they can choose the
appointment to be in the next four weeks or
in the next eight weeks, people cannot be able to
book more than this time. If I choose maybe ten days, then people can only book
from today to ten days. But I will simply
lab it as 30 days. And minimum time before the appointments
start is if someone, I say maybe I'm having
this appointment every Tuesday from
9:00 A.M. To 9:45 A.M. So if someone come to my
booking fetch at maybe 845, you see 15 minutes
before the appointment, they will not be able
to book on Tuesday. The only availability
will be on Friday or the next Tuesday
because they will only be able to book 4 hours
before the appointment. This is going to
give me enough time to prepare for the event. If it is called consultation, if someone book the
consultation 15 minutes before the and your client might not be ready
for the consultation. So that is where you
can set the time. Probably this can be maybe
24 hours so that someone can only book appointment 24 hours before the
appointment time. And you can change you
can adjust availability. You can indicate
the specific date and time that you are available. Book appointment, if
you click right here, you can add more options,
more buffer time. If we select this, then we are going to
have a buffer time, the same way that I
explained to you previously, that we don't want to add this. Maximum booking spit. You can choose if you have
maybe ten slot on Monday, but you only want to
have two appointment. Maybe you want to
give people options. You want to give people
different options. So you add ten
different time options, but you don't want ten
people to book in one day. You can choose the maximum
number of bookings, maybe you can change it to two. So not more than two people can book an appointment
in the same day. Can choose whether a guest
can invite others or not, the same way that I showed
you how to collect an event, and this is where you
are going to choose a calendar that you want
the event to be added to. And this is going
to avoid having double bookings and any
conflict we can go to next. This is our event time. This is our booking
page information. People are going to say this put this our name and our picture, and we can add a description. We can choose a location. We want it to be in
Google Met or Pw cool if we want it to be VSM, if we integrate it, it will be available, but I'm just going to
choose Google Mt. We can write a description
for the event. I will say this is
your consultation, booking page with Cdig and
we can come down here, booking pm if we click here, we will see the information we want to collect from people. We want people to add
their first name, their last name, and
their email address. If we add another item, we can collect their p number or we can choose custom item. We can see something
like, why do you want to why do you want to
have this consultation? And if we choose required, people cannot book
the appointment without answering this question. We choose Add item. We can add more items. We can add many questions that people have to provide before
they book the appointment, and we are going to choose Save. And now our
appointment is saved. If we click here, we are
going to copy the link. The link for this
appointment page, we copy the link,
and I'm going to open it in a private window. So if you share this
link with other people, this is what they
are going to see. If they come to this page, you see they can book
a consultation on Tuesday 9:00 A.M. Or 2:00
P.M. Or on Friday 9:00 A.M. And 4:00 P.M. If I want to book the appointment
at 2:00 P.M. I will select it and I will
provide my first name. You see the name of
the consultation and the other information. I will add my name,
the last name, my email address, and I
will write my answer. I will quickly add
some Demi information. And I'm going to click book. So you see booking compomedemail sent to
the email I provided. If I check my email, I'm
going to see the Cfirmation and also the client is
also going to receive it. Let me just show
you how it works. So this is the email I receive after a books
or consultation. You see this is a
confirmation email from Google calendar, and I can choose to add
this to my calendar, and these are all the
other information. And if I check my calendar, if I come back to my calendar, I am going to see this
event have been booked. You see it had been added
already to my calendar. It means people can
book in this slot. And the last one, the
one that we book, I think, is on this
coming Tuesday. This is one consultation with Cdig and this is the
information booked by. This is the information I
provided when I book the event. This is the custom question
that I have added. This is how you can use appointment Scheduler directly
in Google calendar to create appointment
and allow people to book appointment
with your client directly in Google Calendar. In the next lesson, I'm
going to show you how to integrate Zoom and Google
mit your Google calendar. I'm going to see you
in the next one.
14. Connecting Zoom or Google Meet for Meetings: In this lesson, I'm going to
show you how to integrate Google Mt and Zoom to
your Google calendar. I'm going to share my screen
so we can get started. So, you know, Google Mt is a product that is
developed by Google. It's a Google product. So it is owned by
the same company. Google Calendar and Google Mt is owned by the same company, and for that reason, it is
automatically integrated. All you need to do is if
you are creating an event, you create an event, you will be able to choose to
add Google Mat right here. If you click Add Google Meat, it is automatically
going to create a Google Mat link that you can use for your
meeting with others. So it is very very easy to integrate Google Mat
in all your event. But when it comes to Zoom's
a little bit different because Zoom is not owned
by the same company. If we often Zoom, if you can book calls from Zoom, but it is not going
to be visible in your Google calendar until you integrate Zoom with
your Google calendar. And if you integrate Zoom
with your Google calendar, when you create an event
in Google calendar, it automatically be visible
in your Zoom account. And in order to do this, you simply need to come to meetings, and right here, you see connect. When you click on
it, you see Google, you just need to
click on Google, connect in your browser. When it often in your browser, you simply need to connect it from there and it
will be all good. So you see we choose
Google right here. We give it permission to write. If we give it
permission to write, it is going to read
automatically. This is all the
permission we need to give and we can click next. And we choose our Gmail account, the one that we are using, and we click Continue and
we simply select all. We click Continue again, and that is all we need to do. You see the notification, Google calendar already has
successfully been integrated. It had been connected with Zoom. If we come back to our Zoom, if we come down here, if we have any event
scheduled for today, we are going to
see it right here, if you have any Zoom event, and we can also create an event right here from
Google from our Zoom. If we click schedule, we schedule a meeting
right here in Zoom, it is automatically going
to be in our calendar. So in the next lesson, I'm going to show
you how to connect calendaring with
your Google calendar so that people can book from calendari and it is going to
be in your Google calendar. So I'm going to see you there.
15. Integrating Google Calendar with Calendly: In this lesson, I'm
going to show you how to connect your Google
calendar and alendii. Calendly is simply an
appointment scheduler. Similar to the
appointment scheduler for Google calendar that
I just showed you, but calendari is more opational
and that is what it does. So many people use calendly. There are other alternatives, but calendly is one
of the top ones. So I'm going to share my
screen and show you how to connect calendly with
your Google calendar. What you just need
to do is log into either your calendar account or your client
calendari account. But if you are
working for clients, most likely already have
a Calendly account. If you logged in already, you just need to come to
integration and apps. When you click on it, you can
come down here and scroll. You are going to see
Google calendar. When you click on it, you
see I already connected it. But if you click on it, it is going to bring
you to this page where you are going to
connect your calendar. Because I already connect it, you see it is right here. I can connect another calendar. I can connect
multiple calendars, but it is just very easy. It is as easy as I just showed
you how to connect Zoom. That is just a process. If you haven't connect it, you click Connect calendar
connect calendar account. You will log into
your Gmail account, choose the calendar that
you want to connect, and it is going
to be right here. And when it is added right here, when people book an event, let me show you an example. The event is going
to automatically be in your Google
Calendar account. So this is a test
event that I have. If I copy the link, maybe if you copy
the link and you send it to someone
who they are going to book a call with your
client or if the link is already on your
client website and people are clicking
it to book the call, when they click on it, they come to this page and they
choose a date and they choose a time and they
go to next and they call. They provide all the information and they schedule an event. The event is going
to be visibly in your calendar account
under availability. I'm sorry under meetings, the event is going to be right here under upcoming meetings, and as soon as it is
added right here, it is going to also be visible in your Google
calendar account. This is how you can connect Google calendar with calendarY. In the next lesson,
I'm going to show you how to do daily, weekly, and monthly review for your client calendar. I'm
going to see you there.
16. Daily Calendar Review and Updates: In this lesson, we
are going to go over daily calendar
review and update. Normally, when you are
working for client, if you are managing
their calendar, it is a good idea to do
daily review and update. What I normally do
when it comes to daily review and update is
at the end of each day, maybe today at the end of
today at maybe 4:30 P.M. I'm going to review
the calendar. I'm going to review the
event the event for the day. Is there any event that have been canceled or rescheduled? If there is any event that
is canceled or rescheduled, I'm going to make sure that I send a reminder to
everyone that is involved. So anyone, everyone know that this event is
rescheduled or canceled. If I'm sure everything is good, then I'm going to
look at the next day. What is the plan
for the next day? I'm going to look at
the next day's event. Do I have any event that I
have to send reminders to? Because if there is an event that is going
to happen tomorrow, and I need to send a reminder. I probably need to send the reminder today if the event is going
to happen tomorrow, so that all the people that are going to be attending the event, they are going to know that they are going to have
that event that day, because if I send a reminder
a 30 minute before, if someone completely
forgot about it and they are out doing
some other activities, they might not be able to
even show for the event. So that is why at
the end of the day, I review the event that are
going to happen next day. If I need to send any reminders, I'm going to send any reminders. I'm going to send the reminder today if the event is
going to happen tomorrow. And when I do this,
then the next thing I'm going to do is simply
wait until tomorrow. Tomorrow, anything
that comes up, then I'm going to deal with
it as the day goes on. And at the end of tomorrow also, I'm going to review anything
that happened that day. Is there any event that is
canceled or rescheduled? I need to send any reminders for the event that is going
to happen the next day or do I need to send any reminder for canceled
or rescheduled event? So this is how I normally
do daily review and update. I review the calendar, what happened today and what is going to
happen the next day, and I plan my course of action. Anything that happened the day that needs to be taken care of, then I'm going to
take care of it. But the things that are
pixed already scheduled, I'm going to take
care of them at the end of the day and at
the beginning of next day. And the next lesson,
I'm going to show you how I did weekly
review and update. So I'm going to see you there.
17. Weekly Planning: Setting Priorities, Reviews & Updates: In this lesson, I'm going
to share with you how I did weekly planning for
my client calendar. Normally, what I did is after
I finish every single day, I do daily review and update. But every week, the
beginning of the week, I'm going to do planning
and review and update. What I normally do is
on Monday morning, I'm going to look at
the client calendar, and I'm going to
check everything, everything that I know
we have scheduled for maybe four weeks ago
or three weeks ago. I'm going to write them down. All the items that are
going to happen within the week that are not something that happened
maybe every week. For example, if the client is a consultant and they are having consultations with
client every week, then that is something
that happens every week, so they know about it.
They are ready for it. But if we have anything like maybe a podcast recording
podcast session, that is something that
maybe it happens once a month or maybe
once in two months. So my client might
forget about it. So anything like this that
doesn't happen every week, I'm going to take note of it, and I'm going to send my client a reminder that we are having these activities this week so that the client will have
the time to look at them. They know they are going
to have these activities. If maybe they have troubling, they trouble they plan
to travel or they have other reasons why
they don't want to have these activities
that are in this week, they are going to
let me know and I'm going to either
reschedule or canceled because some things they have been scheduled
for a long time, it will not be professional to cancel them one day
before the event. It will not be professional. If we book a podcast recording with my client and someone else, and that someone else is
looking forward to it, and 24 hours before the event, we send them an email and say the client will not
be able to attend. It is not very professional and they are not going to
be very happy about it. But if we send them a notification few days
before the event, and we let them know
we want to reschedule, then we are not going to mess up their schedule
also because SPDs, they can change their schedule
and give us a better time. So that is why it is important to plan and prioritize weekly, and then you can do your
daily review and update. And the next lesson I'm going
to share with you how I did also monthly review,
planning, and update. So I'm going to see you there.
18. Monthly Overview and Planning Ahead for Clients: So in this lesson, we
are going to go over monthly overview and planning
for your client calendar. Normally, what I
did is every month, every month, we have things that are already
scheduled, right? We have things that are
already scheduled and we are going to schedule more
things within the week. So what I normally
do is every month, the beginning of the month, I'm going to ask my client, is there any change in
their schedule this month? Because we are going
to have specific things that are happening. Good example is if
they are consultant, people are booking
appointment with them. If people are booking appointments
on Monday and Friday, I'm going to ask
them, is the schedule still going to be
the same there? Is there any change
to the schedule? If maybe they plan to
travel this month and apply they plan to travel maybe on the third
week of the month. They will probably not be available for client
consultations. If I ask them if they
are planning to travel, then I'm going to remove all the time that
they are going to be a week so that people will not be able
to book a consultation, so that in the beginning of
the month, we sort it out. If there is anything that
you plan to do this month, we are going to update the
calendar and make sure everything is right in their calendar from the
beginning of the month. The next thing I normally
always do is after I do this, I review the previous calendar, the previous month calendar. Are there any canceled event? Are there any rescheduled event in order for me to see if there is any pattern that leads to canceled event or
rescheduled event. If we have many canceled
events at maybe Friday, then maybe it will
be a good idea to take away most of the activities on Friday for the client. So if the client book things on Friday and maybe two or
three times in that month. On Friday, the client
was not able to attend. We had to reschedule or counsel. Then I'm going to
advise the client if it will be a good idea to change all the
important activities, to take all the
important activities out of Fridays because
maybe on Friday, the client is not that available
or is not that active. And we have some
important activities that are happening
in the morning, and I notice in those mornings, maybe the client is always skipping some things
in the calendar, then I'm going to ask the client if it will be a good idea. To move all the
important activities that has to happen to maybe afternoon or
to the evening or in the noon so that we make sure we get the
important things done. And if we need to
move things around, we need to change anything, we need to cancel any event, that is the
opportunity for me to get all the details
from the client. Update every thing.
The goal is to stay proponal and make sure
we meet every deadline. And since that is the goal, then I have to keep an eye on what happened previous month. If we have any issues
previous month, how can we prevent those kind of issues in this coming month? If maybe we book event
and people didn't show up for the event,
previous month, then what can we do
this month to make sure if people book the event
they are going to attend? We can do a simple
thing like add a question in the booking page that
will say something like, are you sure you
will be attending or do you think you will
need to reschedule? And we can add the number of
reminders we send to people if we are having
many people book and not showing
up for the event. So this is why it is
very important to do this monthly review and update
for your client calendar. You update everything, make sure there are no potential problems, any problems that you have previous month going
to pick this month. If you had no problem
previous month, then probably you are
going to implement what you did last
month, this month also. And then you are going to keep an eye on the
calendar and continue doing your weekly review and
daily review and update. This is the end of this course. What you just need to do is if you don't have a client yet, you can create your
on Google calendar. Go through all the tutorials, implement things, try out tools, sign up for Zoom, sign Uo calendar,
sign up other tools, and try as much as possible
to try things out, create things to yourself, create test event
and everything so that you get very familiar
with Google calendar, and you get familiar
with other tools that you are going to be
using with Google Calendar. And this is going to help
you have the confidence. Present yourself to client as someone who know how
to do what they want. And, of course, if you
have any questions anywhere in this course, you can post your questions
in the comment section, and I'm going to try my best to respond to all your comment. I wish you the best of luck
in your career. Bye for now,
 Sadiq Umar, Virtual Assistant Coach