Transcripts
1. Introduction: Holy Gus, are you
interested in building and designing interactive TreeD
website using Webflow? If the answer is yes, then
the course might be for you. So firstly, we are going to get our Tree D model from Spline. Then we are going to integrate the Tree D model to the website. Then we are also going to
animate the Tree D model. Look at this, guys.
Very cool, right? So in the first project,
we are going to build a professional portfolio
website. So look at this. In the second
project, we are going to build a product landing page. Look at this. And in
the third project, we are going to build a
website for a restaurant. Look at this. In addition, we are
also going to build an online reservation form for our restaurant
website using Typeform. So if you click on this button, make an order, you
will be redirected to the online
reservation form. Okay. Once we've built the website, we are also going to be conducting SEO audit
using SEOptimer and Zambras and we are also going to build a company profile website using Webflow AI Site Builder. You just need to
write a simple prom and click Generate and
in less than a minute, AI is going to generate you a beautiful website like
this. Look at this.
2. Finding 3D Model on Spline: Holy gast, welcome
back to the course. In this video, we
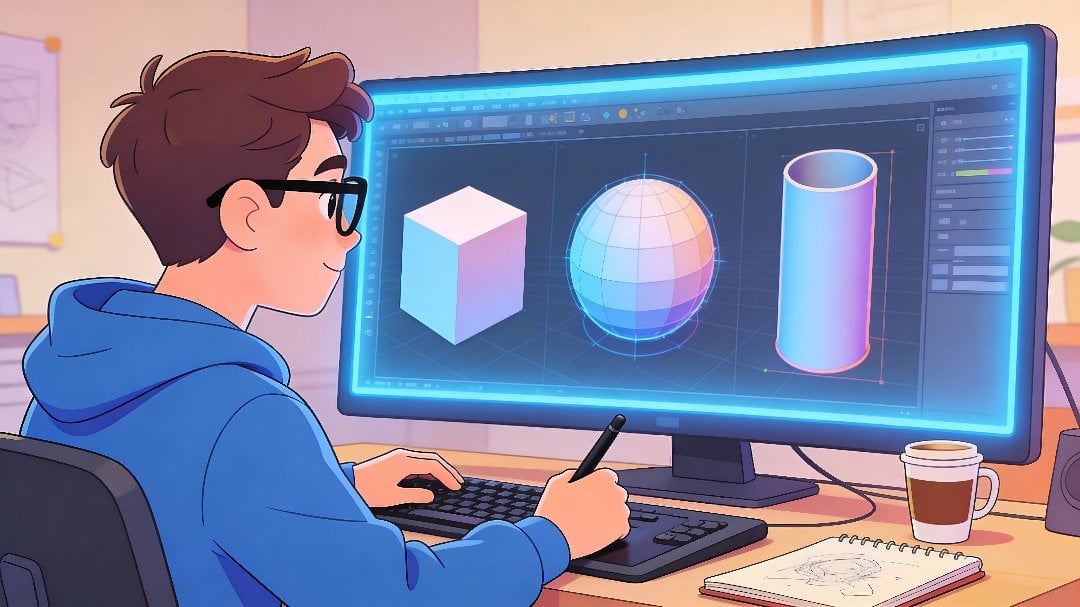
are going to build Tre models using Spline. Okay, so now, let's get started. Firstly, you will need
to create your account. So I'm just going to sign up using my email account, guys. Okay, as you guys can
see now we are going to be redirected to the dashboard. Okay, so if you scroll down, there are several
tutorial videos. So if you have free time, I really recommend you
to watch these videos. They are very helpful.
And down here, we also have several
cool projects that we're both using Spline. So if you are kind of curious, you can click on one of
these projects, guys. Okay, now let's begin. Actually, you have two options. So the first options is to build the trend
model from scratch. And the second option is to use one of the Triny models
in the library sections, and then you can customize
it however you want. You can change the color,
you can change the style. You can change the size. You can do whatever
you want, right? So just click New File, and you will be redirected
to the editing page. If you want to
start from scratch, just click this icon, and there are several shapes
that you can start with. For example, like rectangle, Ellipse, triangle,
Pentagon star. Can pick whichever
shape that you want. But if you don't have
prior experience in building TreeD models, I really recommend you to
use the library, right? So just click Library. As you guys can see, there are many TD models available
that you guys can use. Okay, so now we are going to
explore which TD model that we want to use for
our project, right? Well, actually, you can
also open library here, so just click Library. And I'm going to open
it on the other tab. As you guys can see, there
are two main sections. So the first sections is sins and the second
section is object. So I'm just going
to select object, guys, and there are many
different categories. For example, like Trey icons, back, bottles, boxes,
buildings, characters, Christmas cleaning,
clothing, cosmetic, cup, emoji, environment,
and still many more. Okay, so in this example, I'm going to select characters. And just scroll down, guys. There are many three D
models, guys. Look at this. Very cool TreD models. Okay, so I'm going to
select the three model. Feel free to select any
TD model that you like. Okay, so just click
that Tree D model, then you will be redirected
to the editing page. Alright? The process might take a couple seconds,
so just wait. Alright, so this is the
editing page you guys. So now we are going to restructure this Tren
D model a little bit. So the first thing
that you need to do is to group all of
these components. As you guys can see,
this T D model is consisted of several
components like shoes, headphones, chair,
computer, leg, body, cylinder, and heat. So what we are going to
do is to block all of these components and just press Control G if
you are on Windows. However, if you
are using MacBook, just press Command G. Okay. So what we're going to do next is to customize
this three D model. So in the metro sections, there are several components
like skinned, pens, shoes. For example, I want to change
the color of the shoes, so just click Shouse
and just click Dev, just click Color Okay, so let's say I want to
change the color to blue. Okay, so it's going to
look like this, guys. Okay, so you can feel free to customize it however you want.
You can change the color. And once you're
done, you can click Export and just click
Integrated Ambit. So what we are going to do is to copy and paste
this code, right? So when you're
going to integrate this three D model to
your Webflow website, you will need this code, right? Just make sure that
you remember that. Okay, guys, I think that's it. That's all you need
to know. I'll see you guys in the next video. Bye.
3. Exploring Webflow Features: Holy gust, welcome
back to the course. In this video, we
are going to explore all features on
Webflow editing page. So you're going to learn
to add the content, upload images, change color, change style, design,
eactr, right? So you're going to learn a lot. So make sure that
you pay very close attention to this video. Okay, so the first
thing that you need to do is to sign up, so just click Get started. Okay, so you have the options to sign up using GML account. So I'm going to click Sign
up with Google, right? So I'm signing up using my GML
account. Okay, here we go. As you guys can see
now, we are going to be redirected
to the dashboard. Okay. Alright, so this
is your workspace, guys. As you guys can see, I
have one project here. So this is a website that
I created like last year. Okay, so to create
a new website, you can click New Site, and you will be redirected
to this page. And just click Marketplace
and Templates. So there are many templates
that you guys can use. There are many options, guys. Some of them are free,
some of them are not free. So make sure that you se like
the free template, right? Because you don't want to
spend money on this template. So in this project, we are going to build a
professional portfolio. So I'm just going to type in
like portfolio like this. And just cerds. There are many options, guys. So I'm going to
select the free one. So just type in free like this, and we're going to find
the free template, right? Okay, so I'm interested
in this template, so I'm just going to
click on thetamplate. If you want to sit,
how it looks like, just click Preview
in Browser, right? It's going to open this
template on the other tab. Okay, so it looks like
this very cool, right? Look at this. Okay, so now I'm going to
click use for free. Okay, so just click Create side. You can name it. I'm
going to name it professional portfolio like this and just click Create side. And you will be redirected
to the editing page, right? The process might
take a couple seconds to us, so just wait. Hopefully it doesn't take
too long. Okay, here we go. Okay, so now we are
going to explore all fetters available on
these dit in kids, right? You don't need to know, every single one of
them because there are too many and you
might be overwhelmed. So I'm just going to teach you fetters that we will use
in the projects, right? So, make sure that you
pay very close attention. Okay, so the first one
is the navigator, right? So as you guys can see here, you have body you have
Navbar, you have slider. You have four sections. This is the first,
second sections, third sections, and
four sections, right? So this is going to make it easier for you to navigate
through this website. So for example, if you want
to edit the first sections, so just click on
the first sections, right, and you'll be
redirected to this page. Okay, so if you click on the first sections,
there are subcomponents. For example, container. If you click on Container, this is the container guys, and inside container,
we have columns. We have two columns like
column one and column two. Inside column one, we
have heading, right? So this is like the
subcomponent of column one. And the second column, we have Br graph and
also skill group. Okay, so this is the
skill group, guys. So when you want to edit
one of these sections, you can select Wiport
that you want to edit. For example, in this case, I
want to edit the paragraph, so you just click
Paragraph, right? And just double click and
you can edit the text. Okay, now you're going
to click element. So there are many
elements, guys. For example, like item button, typography, what else Media? This is the most
important part, Guy. If you want to upload image or maybe a video or maybe
a YouTube videos, you can use this filter. If you scroll don't, there
are forms. What else? Input. Next area
checkbox, capture. You can also like
embed code here. Okay, so now I'm going to teach you to upload
an image, right? So just go to the
media sections, scroll down a little bit
and just click Image. Okay, so right here, you
can click Just Image. And you have two options. You can either upload
your own image, right? So just click this icon. And in this example,
I'm going to upload a random image, guys. Maybe this image, right? So just click Open. Or
the second option is to use the image from the library, right? So it's
totally up to you. Okay, as you guys can see, we have successfully
uploaded the image. Okay, so now we
are going to learn to change the background colors. We're going to learn to change the phone type and
also the style. Okay, so now, let's begin
with the phone type. As you guys can see, the
phone type is Roboto. If you want to change
it, just click this, and there are many options. For example, I want to
change it to impact. So just click Impact. Or maybe you want to change it to bitter. So just click Bitter, right? Okay, so that's the font type. Okay, so let's say you also
want to change the font size. As you guys can see, right now, the size of the font is 14. So let's say I want to make
it a little bit bigger, I'm going to change
it to 16, right? Here we go. It looks a
little bit bigger, right? Okay, so if you want to change the font color, just click this. In this example,
I'm going to change the font color from
gray to dark blue, so just click dark blue. Okay, here we go. As
you guys can see, now we have successfully changed the phone color to
dark blue, right? Okay, so if you also want to change the
positions of the text right now, the text is on the left. If you want to make it on the
center, suggest click this. If you want to make it on the
right, suggest click this. Okay, so I'm just going to put the text on
the left, guys. And down here, you can
also customize the style. Okay, so just scroll
down a little bit. Now we are going to change
the background colors, right? Okay, so just click this
and you have many options. So let's say I want to change the color to light green, right? Look at this. Very cool, right? Or maybe I want to change
it to, like, light blue. So it's going to look
like this, guys. Okay, so if you want to
customize the border, just click Border, and then
you can customize this. With you can also
customize the color. Right now, it is
black. Feel free to change it if you want to. Okay, so lastly, you can
customize the effects. Right now, the effect is normal, but you can do experiments
with these effects. For example, like
darkened, multiply color, burnt, lightened,
strin color dodge. You have many
options, guys, right? I'm just going to use the
normal effect, right? You can also add transitions. So if you are interested
in animating the website, you can use these
transitions. Don't worry. I'm going to explain this
in the next videos, right? Okay, so if you want to
publish this websites, guys, just click Pablis, right? Right now the website has
not been published yet, but if you want to publish it, just click Publish to
selected domain, right? You can also add a custom domain if you have your own domain. Okay, so that's how
you publish the site. But obviously, in this case, we are not going to
publish these websites, right, because we're not
done editing this website. Okay, so I think that's it, guys. That's all
you need to know. I'll see gas in the
next video where we are going to start the
actual project, right? So we're going to build
professional portfolio websites. I'll see gas there.
4. Integrating 3D Model to Professional Portfolio Website: Hello, guys. Welcome
back to the course. In the first project,
we are going to build a professional
portfolio website, and I don't want to
start from scratch guys because it's going to be
very time consuming, right? So we're just going to
pick like one template, and we're going to clone
that template, right? So as you guys can see, we have, like, many
different templates. So I'm just going to select
this template, guys. The creator of this
template is Zack Kendall. Very cool template, guys. So only because I'm
using this template, it does not necessarily mean that you need to follow
me using this template. You have like many
options, so feel free to pick any template
that you want, right? Okay, so to clone this
template, it is very easy. All you need to do is to
click clone in Webflow. But before doing that,
it is better if you opened these websites
on the other tab first just to make sure that you really like this website, right? Okay, so here we go. Look at this guys.
It's very cool, right? It is a little bit minimalistic, but I really like the style,
to be honest with you. Okay, so now we are going
to clone the dmplate. So just click clone in Webflow. Okay, here we go. So now. Just click Create side. And don't worry guys
this is completely free, and you will need to
name this website. I'm just going to type in professional portfolio
project, right? So that's going to be the name. So just click Create side. Okay, so just wait the process might take
a couple seconds. Hopefully, it doesn't
take too long. Okay. Now we are going
to be redirected to the Webflow
editing page, right? So the first thing
that we are going to do here is to integrate the three D models that we created using Spline
to this website. And don't worry. The
process is very easy. Okay, so I'm going to click Add element
and just scroll on. Okay, so in the media sections, just click Spline scenes, right? So just click this. As you guys can see, we have
just created a Spline sind. Okay, so now let's go
to your Spline account. If you remember, we created
this tree model, right? So just click this And now we are going to copy
and paste the code, right? We're going to embed the code. Right here. Okay,
so just wait, guys. It is still processing.
Okay, very cool. So now we just click
Export and copy and paste. This code. Okay, so what we are going to do is to
click Copy Embed, and I'm going to paste
the code here, right? And I'm going to copy
and paste this part. And let's go back to the
Webflow editing page. And right here in the URL
sections, just page that code. Okay. So now, just
click Supply and send. As you guys can see,
we have successfully integrated these three
D model to the website. Okay, so what we are
going to do next is to name the class, so just click New class. The name is going to be Spline. The D model. You can name it whatever you want.
It's totally up to you. Then I'm just going
to hit Enter guys. Okay, so we have successfully
created this class. The next thing that
we are going to do is to make this a
little bit bigger. As you guys can see, this
three D model is too small. So I'm just going to
modify the heights. I'm going to type in
100 fg, like this. Okay, so next we are going
to direct this to the top. Okay. And next, we are going
to change the position. So right now it is static, so I'm going to change
it to sticky, right? We have successfully integrated this three the model
to the website. I'll see you guys in the
next video where we are going to animate this website, and we're going to do
more modifications. We're going to make this
website more beautiful. Okay, so I'll see
you guys there. Bye.
5. Animating 3D Model in Professional Portfolio Website: Holy guys, welcome
back to the course. In this video, we are going to add animations to
this three D model. But before adding
the animations, we are going to do some
modifications first. As you guys can see,
this three D model is too close to
the upper border. So we are going to relocate the three D
model to the center. Okay? So just scroll
down a little bit. In these position sections, just click Auto, and
I'm going to select 50. Or maybe 100, right? As you guys can see,
now, this three D model is on the center, right? Okay, so that's better. And let's click
this clay button. It's going to give you the
preview of the website. Okay, so it is still loading. As you guys can see,
this three D model has been integrated
to this website, and if you scroll down, this three D model remains
in the background, right? So that's very cool. The
only problem that we have is the color of the text. It is black, but the
background is also black, so you cannot really
read this text, right? So we're going to fix that in the next video,
guys. Don't worry. Okay, so now let's go
back to the editing page. All right, so now we are going to animate these three D model. So just click Spline three D
model, click Interactions. And on the Piterzation, just click this and click. Most Move in Viewport. Okay, so next, just
click Select Actions and click Play Most
Animations, right? Okay, so just click
Add A Animations. And now you will need
to name the animations. You can name it whatever you want. It's
totally up to you. In this case, I'm
going to name it three D model Animations. Okay, so just hit Enter and now I'm going to click
this and just click Spline because we got this three D
model from Spline, right? Okay, so now you can
scroll down a little bit. Next, we are going to select the object that we
want to animate. So in this case,
we want to animate the group, so just click group. Okay, so I'm going to rotate this three D model
on the white axis, right? So I'm going to direct this
a little bit to the right. I'm going to set it to be 1.5. Okay, so now just click
on the second layer. And we are going to
do the same thing. So for the object,
just click group. And we're going to do
the opposite, guys. So we want to rotate this three model to the
opposite directions, right? So I'm going to direct
this to the left. So I'm going to set this
to be negative 1.5. Okay, so we are done. Now just click Live
preview, right? So as you guys can see, if I dig my mouse to the right, then these three D model is
going to move to the right. And the same thing if I
direct my most to the left, these three D model is going
to move to the left, right? Look at this. Very cool, right? Okay, so now don't
forget to save it. So just click Save.
Okay, so we have successfully saved
these animations. Okay, so next, just
click display button, and we're going to see how the animation looks
like in the website, right? Okay, very cool. Look at this. Okay, so if
you want to scroll down, it's going to look
like this, guys. Free cool animations, right? Alright, guys, I think
that's it for this video. I'll see you guys in the
next video where we are going to add content
to the website. We are going to upload images to the website and make
it more beautiful. Okay, so I'll see
you guys there. Bye.
6. Adding Content to Professional Portfolio Website: Holy guys. Welcome
back to the course. In this video, we are going to add content to this website, and we are also going to upload new images to this website. Okay. Firstly, we are going
to do some modifications, so just click NAP. And I'm going to change the
color of the container, so just click container and
scroll them a little bit. So I'm going to
change the color from white to light blue, right? Okay, very cool. As
you guys can see, we have successfully changed
the color to light blue. Okay, so next, I'm
going to change the color of this box, right? So just click button. And as you guys can
see, right now, the color is purple, so I'm going to
change it to Black. So just scroll it
in a little bit and click this and I'm going
to select black, right? So now, as you guys
can see, the color of these blocks is black. Okay, so now let's go back. And what we are
going to do next is to add content to
this website, right? So just click Intro. Just click continuer and
Intro parent, right? So just click this Okay, so if you want to modify this text, just
double click on it. Okay, so in this example,
I'm going to type in. Welcome to my portfolio, right? Well, it seems like
this is too big, so I'm going to make it smaller. So I'm going to
change the font size, so just scroll
down a little bit. Okay, so this is smaller. Okay, so now we are going to replace this image down here
with my own image, right? All right, so now just click Intro Image and we're going to replace this
image with my own image. So just scroll
down a little bit. And just click Remove
Image and click at Image and click Just Image. Okay, so I'm going
to use this image. I generated this
image using AI guys, click this and just
click Just image. And just click Cover. Okay, so now let's go back Okay, it looks
very cool, right? Okay, so now we are going to
add content to this website. Firstly, we are going to add content to this
introduction session. Okay, so I have
my document here. I generated this introduction
paragraph using Chat GPT. Okay, so I'm just going
to copy and paste this. Okay, so let's go back
to the editing page. Just double click and
I'm going to replace this with my introductions.
Okay, very cool. Okay, so next, we are going
to edit these sections. Okay, so firstly, I'm going to replace this image
with my own image. So just click this
and just click Remove Image and click Add Image and just
click Choose Image. And I'm going to upload
my own image, guys. Okay, so I'm going to
select this image. So just click Open and I generated this image
using AI two guys. Okay, so just wait guys. Now it is still
uploading the image. The process might take
a couple seconds. Hopefully, it doesn't
take too long. Okay, so here we go. Okay, so now I'm going to click cover. Okay, very cool.
Look at this, right? Okay, so now we are going
to edit the content. Okay, so in the sections, I'm going to highlight my
skills and expertise, right? So in this example, I have three main skills. The first one is web design. The second one is
web development, and the third one
is data science. Okay, so now let's
edit this contents. I'm just going to copy
and paste this, right? Just double click this, block,
and copy and paste that. Okay, very cool. Next, we are going to edit
the second skill. So just click the
second Project parent. Okay, so firstly, I'm going to replace this image
with my own image. Okay? So I'm just going
to double click this. And I'm going to
click Remove Image, and I'm going to click at Image, click Joe Image, and now I'm
going to upload the image. Okay, so this time I'm going
to upload this cool image, I generated that
image using AI guys. For your information,
the tool that I use was Leonardo AI. It is very similar
to Mid journey. Okay, so don't forget
to click cover. Okay, so now let's
edit the content. Okay, so just click
Project text. Here we go. Okay, so I'm going to copy
and paste this guys, right? This is my second
skill, web development. So just double click this
and paste it here, right? Okay, so now we are
going to do the same to the third skill. So just click Project parent, just click Project Child. So I'm going to replace this
image with my own image, just click this. Alright. And I'm going to click Remove Image and
just click Adimage. Okay, so now we just
click Jose Image and I'm going to upload
my own image. Okay, so this time, I'm going to upload this image
just click Open. Okay, so now it is
uploading the image, guys. So just wait. The process might take
a couple seconds. Hopefully, it doesn't
take too long, right? And don't forget to click Cover. Okay, very cool. Okay, so now we are going to
edit the content. My third skill is not
photography. It is data science. Type in Data Science,
right? Here we go. And now we are going
to copy and paste this and just do the same thing. So just block this and paste it. Okay, very cool. Okay, so we're done. Now I'm going to click Preview. Alright, guys, so this is our Tre model. If
you scroll down. We have the
introduction session. I'm Chris Raharja, V of tall professionals with
expertise in web design, web development,
and data science. Beyond my technical
proficiency in my soft skills, including attention to detail, creative problem solving and
effective communications, ensure that each project
exceeds expectations. Let's collaborate
on turning ideas into impactful digital
solutions, very cool. And on here, I
highlight my skills. The first one is web design. The second one is
web development, and the third one is data
science. Very cool, right? Okay, so now let's go back
to Webflow editing page. Okay, guys, lastly, I'm going to fix the positions of the image. I'm going to make
it more beautiful, so just click contain, right? So it's going
to look like this. Okay, so now let's
click display button. And if you see this image, it looks much better than the previous one,
right? Look at this. Very cool. Akka, so we are
done with the first project. So Askas in the next video where we are going to start
the second project. So in the next video, we are going to build a
product landing page. So I'll see you guys there. Bye.
7. Integrating 3D Model to Product Landing Page: Holy host, welcome
back to the course. In this video, we
are going to build T D model using Spline, and we are going to integrate the TD model to Webflow website. For your information
in the second project, we are going to build
a product landing page for sneakers or S. Okay, so firstly, just
click on Libraries. Select objects and
click clothing. Okay, so in this case, I'm looking for a three
D models for. I'm going to select this one. If you want to pick other three D models,
feel free to do that. Okay, so now it is opening this three D model
on the editor page. So just wait because the process might take
a couple seconds. Hopefully, it doesn't
take too long. Alright, as you guys can see, the TriT model is ren. So now we are going to
customize the color. Okay, so just click
this TrinE model, and I'm going to change, the Bground color from
white to light blue, right? So just go to Google
and just type in color code for light blue. Okay, so just copy and paste
this Okay, here we go. Very cool. Now we are going to change the red part to black. So just type in coat
color for black. You can change it to any color, guys, so it's totally
up to you, right? Okay, so just copy and paste this Okay, it looks like this. Very cool. And now
what we are going to do next is to export
these three D models. So just click Export. Just click FEWR because we will need to get
this embed code. Okay, so just wait guys now
it is still processing, and now just click
Copy Embed, right? And I'm going to open
like a Google Docs. Okay, so we're done. The next thing that we
are going to do is to find the right templates for
the product landing page. Okay, so just go to Webflow marketplace and just type in shoes or
sneakers, right? You'll find many templates,
some of them are free, others are not free, so make sure that you
select the free one. Okay, so I'm going to select this template. I like it, guys. And if you scroll down and
just click on copyright Info, make sure that this template has a creative common public
domain license, right? It means that this
template can be used for personal and
also commercial work. Okay, so just click. Got it. So if you want to
clone this template, just click clone in Webflow. Okay, so just click that, guys. Okay, so now just
click Create Site, and right here, you will
need to name the site. I'm going to name it
Product landing page. You can name it
whatever you want. It's totally up to you guys. Okay, so just click Create Site. Now we will be redirected to
Webflow editing page, right? Okay, so the next thing
that we are going to do is to integrate the three D
model to this website. Okay, so if you
remember, previously, we already copy and paste
the amplet code from Spline. So we are going to
copy the sport Okay, so we're going to do the same thing like what
we did before you guys. So just click this icon and
just scroll it a little bit. And in the media sections, we are going to click
Spline scene, right? And we will need to copy
and paste the code. Okay, so just click
Reload, Spline scene. Okay, as you guys
can see, we have successfully integrated the
three D model to the website. So now I'm going to
dig this to the top. I'm going to put
this below NaFbar. So if you scroll up, you will see the three D
model on the top. So what we are
going to do next is to modify this three
D model a little bit. So scroll down. And as you guys
can see right now, the position is static, so we are going to change
it to sticky, right? This is the exact same thing
like what we did previously. And just click Auto,
and I'm going to select 5,100. Okay, here we go. Okay, so we are done, guys. We have successfully integrated this three D model
to the website. I'll see Gus in the next video, where we are going to
animate this three D model. I'll see you guys there. Bye.
8. Animating 3D Model on Product Landing Page: Holy guys. Welcome
back to the course. In this video, we are going to animate these three D model. Okay, so now let's get started. Firstly, just click
on Spline scene. Then click on Interactions. In the Bittreer sections, just click this and click
Mouse Move in Viewport. Okay, so just click
Select An Actions and click Play Mouse Animations. Next, just click at Animations. Okay, so right here, you will need to name the animations. You can name it
whatever you want. It's totally up to
you. In this case, I'm going to name it
house Animations. And just hit Enter. Okay, so next, just click this. And we are going to select Spline because we got this
three model from Spline. So just click this.
Okay, so next, we are going to specify which object that
we want to animate. So just click select
and I'm going to select the running hue Okay, so down here, you
have many options. You can rotate this
three D model on X axis. You can rotate this
three D model on Y axis. You can also rotate this
three D model on Z axis. So it's totally up to you guys. Okay, so in this case, I'm going to rotate this
S on the y axis, right? So I'm going to direct
this to the right. I'm going to set it to be three. And let's go to
the second layer. We're going to do the same guys, so you just select the object
that you want to animate. So in this case, it's
going to be running hues, and the directions of the rotation is going to
be the opposite, right? So I'm going to direct
this to the left, and I'm going to set it
to be negative three. Okay, so now just
click Life preview. So it's going to look
like this, guys. Very cool, right? Don't forget to save it, just click Save. Okay, so now we are going
to test these animations. Okay, so now let's
click display buttons. As you guys can see, this through the model has
been animated, right? Look at this. Look at the rotations. Very cool, right? Okay, so now let's scroll
them a little bit. Okay, so in the next video, we are going to add more
content to this website, and we're also going to replace these images with
our own images, right? And in this project, we are building a landing page. So as you guys know, landing page is very simple. You're displaying your product and also the product
descriptions, and that's it. So we're going to remove unnecessary part from
this website, right? So that's what we are going
to do in the next video. Okay, guys, I think that's it. That's all you need
to know. I'll see you guys in the next video. Bye.
9. Adding Content to Product Landing Page: Holy gas, welcome
back to the course. In this video, we are going to add content to the
product lining page, and we are also going to replace the product images
with our own images. Okay, so now, let's get started. The first thing that we
are going to do here is to replace the product's name
with our own products name. Okay, so in this case,
my product's name is Comfy Sneaker. So just replace it
with Comfy sneakers. Okay, here we go. And I'm
going to remove this. Alright, guys. So what we
are going to do next is to replace the product
image with our own image. So just click on Hero Sections and click on Hero Photos, right? Okay, so just scroll
it a little bit and click Remove Image
and just click Add Image and just
click os Image. Okay, so I'm going to replace that product
image with my own image. For your information, I generated this image
using AI guys. Okay, so I'm going to select cover Or maybe content, right? So just click contained. Okay, so next, we are going to change the lighting effect
of these three D model. So just click Spline scene and scroll all the
way to the bottom. And for the blending, we're going to change it from
normal to color bom, right? Okay, so now what
we are going to do next is to edit the content. So to make it easier, we are going to hide the
three D model first. Okay, so just click
Spline Send and scroll up and we're going to click Show all settings
and just click Hidden, right? Okay, so don't worry, guys. At the end, we are going
to make it visible again, but now we're going
to edit to content, so just hide that first, right? Okay, so now you just click hero sections and hero content. Just click top Heading three. Okay, so you can modify this. I'm not going to
change anything, guys, but I'm going to change
the product's name, right? Because in this
case, the name of my brand is Comfy Sneakers, not Nike or Jordan, right? So just double click on it, and I'm going to change
it to Comfy Snikers. Okay, so you can feel free
to change the phone color. You can feel free to change the phone size. It's
totally up to you. Okay, so down here, we are going to write the product
descriptions. So I generated a product
descriptions using JA JPT. So you can do the same thing, so I'm just going
to copy and paste that and put it here, right? Okay, here we go. And down here, we have
C collection buttons. So if you want to
modify the text, just click button and
just double click. And you can modify this text, but I'm not going to
change anything, guys. Alright, so we're done
with these sections, and now let's move on
to the next sections. Okay, so now let's click on about sections. Just
click About Us. Section title. Okay, so I'm
going to modify this text. So obviously, in this case, we are not selling Eri Jordan. We are selling coffee
sneakers, right? So just replace this with
coffee sneakers collections. Okay, so you can also
change this text. I'm just going to type in, like, a random stuff here, guys. Cup in sneakers is committed to produce high quality and
convertible sneakers. Okay. Maybe you can add your product slogan
or something like that. Okay, so we're done
with about sections. Now let's move on to
the next sections. So just click on horizontal
sections, click on frames. As you guys can see,
there are many items. So each item represents the product that
they are selling. So in this case,
we are only going to list like two products
on this landing page, so we're going to delete
most of these items, right? So just delete this. I'm going to delete it one by one, guys. So we are just going to
leave like two items, right? Okay, so just click this and first thing that we
are going to do is to replace the image with
our product image. Okay, good. So just
delete Hover Div Image six and Image eight. Okay, so next, just click at element and just scroll
down a little bit. We're going to
click Image, right, and make sure that you put the image above
the content wrap. Okay, so right here. And just double click on the image
and just click image, and I'm going to use
this product image, right? For your information. I generated this
product image using AI. Okay, so if you want to change
the size of this image, you can enter the size here. Okay, so we're done with this. Now, we're going to replace the second product image with our own product image, right? So we're going to
do the same thing. So just click on
the second item, and we're going to
delete the hover DIF. We're going to delete
image nine and Image six. Okay, so just do the
same thing, guys. Just click at elements and
just scroll them a little bit, and we're going to
clickimage, right? And make sure that you put the image above
the content grab. So just drag this to the
top. Okay, here we go. And just double click on the
image and just click image. And now I'm going to
upload my product image. So just click this and I'm going to upload
these image, right? Very beautiful sneakers. Okay, so now it is uploading
the sneakers image. So just wait guys. Hopefully
it doesn't take too long. Okay, here we go.
You are almost done. Okay, very cool. You can also change the size
of the image if you want to, you can enter the size here. It's totally up to you guys. Okay, so next, I'm going
to edit the content. I'm going to modify the
name of the product. So in this case, it
is not Eric Jordan W. So I'm just going to type in, like, a random name, guys. Lego sneaker, right? Because the pattern
looks like ego. And the price is going
to be in US dollar. So this snicker is going
to be sold at $120, right? Okay, so I'm also
going to modify this. So the name of the product is puzzle sneaker, a
random name, guys. And the price is also
going to be in US dollar. So the price of this
puzzle sneaker is $85.99. Okay, so now I'm going to change the color of
these background, so just scroll
down a little bit. I'm going to click this and I'm going to change it from dark blue to
light blue, right? Here we go. Okay, very cool. Okay, so we are done
with this sport. Thing that we're going
to do is to remove the sticky pern
and video sections because we don't
need them, right? Because we're just building
like a landing page, and I want it to be simple. So I'm just going
to delete this and also delete the video
sections, okay? Okay, so don't forget, guys. Previously, we hide
the T D model, so now we are going to
make it visible again. So just click on Spline scene. And just click on the setting icon and just
click on Show all settings. As you guys can see right now, the T D model is hidden, so now we're going to
click visible, right? We're going to make
it visible again. Okay, so we're done with now, just click this play button, so we are going to see how the website looks like.
So just click this. And let's scroll all
the way to the top. Okay, as you guys can see,
this is the TD model. It has been fully animated. And if you scroll
on a little bit, this is our product image and also the product
descriptions. Cf sneakers introducing a
sporty and stylist sneaker that semlessly
blends performance and fasiens with
its sleek design, vibrant color palette, and
advanced comfort technology. These sneakers are your
perfect companion for both active pursuits and
trendy casual outings. And down here, we have
the about us sections. As you guys can see, this
is my brands slogan. CofiSnker is
committed to produce high quality and
convertible sneakers, very cool and down here. We have the product catalog, so these are two products that I'm selling Logo sneaker
and puzzle sneaker. The price is $120.80
$5.99. Okay, guys. So we have successfully bought this landing page using
Webflow. Very cool, right? Okay, so I think that's it, guys. I'll see you
guys in the next.
10. Integrating & Animating Pizza 3D Model: Holy Gas, welcome
back to the course. In this video, we are going
to start the third project. So in the third project, we are going to build a
website for a restaurant. So we're going to do
the same thing, Gas. We're going to get the
TD model from Spline. Then we're going to integrate the TD model to the website, and we are going to
animate the TD model. Okay, so now let's get started. So, in this case, the
food that I'm going to sell is pizza, right? So just get the T D
model for pizza first. Just click on Library
and select Objects, and I'm going to type in pizza. Okay, here we go. As you guys can see,
we have three options. So I'm going to select this one. Pizza Pizza, just click on it, and you will be redirected
to Spline editing page. Okay, so we are going to
do some modifications, then we are going to export this through
the model, right? We're going to get
the embed code. Okay, so just wait,
guys, the process might take a couple seconds.
Okay, here we go. So this is our pizza. So I'm going to
block all of these. And if you are on Windows, you can press Control G. But if you are using
Macbook Clock me, you can press Command G, right? Okay, so now we have
grouped all components. What we are going to do next is to modify the color
a little bit, okay? So as you guys can see, like, the main color is yellow. Maybe there's a lot of cheese. I'm not really here, guys. Okay, so if you want to modify the color, it is very easy. Just click the pizza
and just click this. Just click color, and you can modify the
color. Look at this. Okay, so I'm going
to make this to be like light yellow because I want the cheese looks
kind of melted, right? It looks kind of like
Msarella cheese, I guess. Okay, so what we are
going to do next is to change the background color from dark gray to
transparent, right? So just click on Bkgroen color and just direct
this to the left. Okay, so as you guys can see, now the background
is transparent. Okay, so next, just click Export and just
click Play settings, and we're going to
hide the background. So just click Hide and just click Update
public URL, right? Okay, so now we are going
to click Overview and we're going to get the embed
code. Okay, so here we go. So just click FEWR
because we are going to use this code to integrate the three D model to the
Webflow website, right? So just click Copy Embit. Okay, so now we are done. Just open Google Docs. Just paste the code here. Okay, so next, we are going to find the wet full templates. Okay, so as you guys can see, there are many free templates
for a restaurant or cafe. So I'm going to
pick this template. You guys, feel free to pick
any template that you want. Just be aware there are some
templates that are free. There are others
that are not free. So if you don't want
to spend money, just make sure that you select
the free template, right? Okay, so we are going
to use this template. If you scroll down and
just click copyright Info, as you guys can read here we can use it freely for personal
or commercial work. Okay, so just click Got it. Okay, so now we are going
to clone this template. So just click clone in Webflow. Then we will be
redirected to this page. And what we are going to do
next is to click RID Site, and we will need
to name the site. So in this case,
I'm going to name it Bits website, right? Because that's the food
that I'm going to sell. Okay, so just click RED Site. Then we will be redirected
to Webflow editing page. Okay, so what we are going to do next guys is to integrate
the three model, right? The process is going
to be the exact same like what we
did previously. So we're going to
get this embed code. So I'm just going to copy
and paste this guys, right? This is the only part that
we need, so just copy this. Okay, so let's go to
Webflow editing page, and we're going to
create a Spline scene, right? So here we go. Okay, so now just click Add element and just
scroll down a little bit. And in the media sections, just click Spline
scene. Here we go. Okay, so now we
are going to copy and paste the embed code, and just click
Reload Spline scene. Okay, so we're done. As you guys can see,
we have successfully integrated this three D
model to the website. Okay, so what we are going to do next is to direct this
to the top, right? Okay, here we go. Very cool. Okay, so next. We are going to modify
this three D model, so just scroll
down a little bit. Okay, so in the
position sections, we are going to change it
from static to sticky, right? And just click Auto. I'm going to select 50 and 60. Okay, here we go. So now we are going to
animate this three D model. Okay, so just click
this Spline scene and just click Interactions. And we are going to click this and just click Mouse
Move in Viewport, right? And just click Select Actions, click Play Mouse Animations. Okay, so now just
click Add Animations. And you will need to name
the animations on this case. I'm just going to name it
Pizza Animations, right? You can name it whatever you want. It's
totally up to you. And just hit Enter, and
I'm going to click this and I'm going to select Spline because we got this
Trini model from Spline. Okay, so now just scroll down. Okay, so we will need to select the object that
we want to animate. So in this case, we want to animate this pizza
tree model, right? So just click Slec and I'm
going to select group, right? Okay, so there are
many options, guys. You can rotate this
pizza on the x axis. You can rotate it on the y axis. You can also rotate
it on the Z axis. So it's totally up to you guys. In this case, I'm
going to rotate this pizza on the y axis, right? So it's going to be like this. I'm going to direct
this to the right. I'm going to set it to be five, and let's click on
the second layer. We are going to
do the same guys. So just select the object
that we want to animate. So in this case, that's
going to be group. And for the directions
of the rotations, it's going to be the
opposite, right? So I'm going to direct
this to the left. And it's going to be
negative five, right? Okay, cool. So now just click. Live preview. So it's going
to look like this guys. Very cool, right? So you'll be able to turn the
pizza around. Very cool. Look at this. Okay, so I'm going
to click Save. Now we are going to test
these animations, right? So just click Display buttons. Okay, as you guys can see, these animations is working. Very cool. Okay, guys, I think that's it. That's
all you need to know. As gas in the next video
where we are going to add content to this website, and we are also going to upload our own images
to this website, right? Okay, so Asi gas there. Bye.
11. Adding Content to Restaurant Website: Holy guys. Welcome
back to the course. In this video, we are going to add content to this
restaurant website, and we are also going to replace the images
with our own images. Okay, now let's get started. The first thing that
we are going to do is to change the color
of the Snap Bar. So just click on Nath Bar twice, and as you guys can see, the color is blue, so we are going to change it
to yellow guys. Okay, so just click this, and I'm going to change
the color to dark yellow. Okay, so now we are going to edit the content
of this website. So to make it easier, we are going to hide
this through the model. Okay, so just click Spline scenes and just click on the setting icons and just click
Show all settings. Okay, so for now we
are going to hide it. So just click Hiddent
and at the end, we are going to make it
visible again, right? Okay, so now let's
get started, guys. Okay, so I'm going to
double click on this part, and I'm going to
replace this with my restaurant slogan, right? So it's going to be
a spatial pizza. For everyone. Okay, that's
going to be my slogan, right? And I'm going to
remove this image. Okay, so I'm just going to
make it like uppercase, guys. Okay, so here we go. Okay, so we're done
with these sections. Now let's move on to the
next sections, guys. So now we are going to replace this image with our
own image, right? Okay, so I'm going to remove this text because
I don't think we need that. So I'm
just going to remove. I. Okay, so what we are going to do next is to replace this
image with our own image, right? So just click this. And we're going to
click Replace image. And now I'm going to upload
my own image, right? So just click this, and I'm going to open
my projects folder. So just click Pizza website. For your information, I generated these
images using AI guys. So just click Open, right? So now it is
uploading the image. Just wait, guys. The process
might take a couple seconds. Hopefully, it doesn't
take too long. Okay, here we go. Okay,
very cool. Look at this. Tell you pizza, guys. Okay, so now let's move
on to the next sections. Okay, so right here, I'm going to modify
the text a little bit. I'm going to change it to
DLC Spizzo for everyone. Okay, so let's go
to these sections. And you can feel free to modify
this tax if you want to, but in this case, I'm just going to leave it away as it is. Okay, so now let's move
on to the next sections. Well, I don't really think
we need these sections, so I'm just going to remove
these sections, guys. So I'm just going
to click Delete. And let's go to
the next sections. Okay, so now we are going to upload the Pizza images, right? Okay, so I'm just going to remove this part
to Gus because I don't think that's necessary. The same thing with this part. I'm also going to
remove this board. Okay, so now we are going to modify these sections
a little bit. Alright, guys, so
just click this. Just click Petting Global and just click favorite
menu right here. Okay, and just click
on this image, right? And just click on
this setting icon. And just uncheck this box, guys. Okay, so now we are going
to click Jo's Image. I'm going to upload
my own image. So the first menu is a pizza
with spinach toppings. Okay, so just click Open. So now it is
uploading the image. So just wait, guys. The process might take
a couple seconds. Hopefully, it doesn't
take too long, right? So we are going to display
like four menus here. Okay, very cool. Look at this. Okay, so now we are
going to do the same to the second one. So just uncheck this box
and just click J Image, and I'm going to upload
the second menu. So it's going to be the pizza. Cheesy pizza with
seafood topping. Okay, so just click Open. Now we are uploading the image. Just wait, guys. Okay, so the second image has
been uploaded successfully. Now we are going to do the
same to the third image. So just click this and just
click on the setting icon, and just uncheck this box
and just click just image. Now we are going to
upload the third image. So the third menu
is the pizza guys, a cheesy pizza with
tomatoes topping. So just click upend. Okay, so now we are uploading this image. So just wait, guys. The process might take
a couple seconds. Hopefully, it doesn't take
too long. Okay, here we go. The third image has been
uploaded successfully, and lastly, we are going to do the same thing
to the fourth image. So just click this image, click this settings icon and just uncheck this box and
just click this image, and we're going to
upload the image. So the fourth menu is cheese pizza with
pepperoni topping. So it looks very
delicious, right? So just click Open, guys. Okay, so now we're
uploading the image. Just wait, guys. The process
might take a couple seconds. Hopefully, it doesn't
take too long. Okay, here we go. As
you guys can see, we have successfully
uploaded these images. Okay, so next, we're going to modify this textbooks, right? So just double click on it, and we're going to change the
name to spina pizza, right? And I'm also going
to modify the price, so just uncheck this box. Okay, so the price is
going to be $15, right? And you can also add, like, the descriptions for
the spinach pizza. So just uncheck that box and just double click
on these textbooks. So I'm just going to type in, like, a random thing, guys. This spinach pizza is made of cheese and spinats Okay, so we are going to do the same thing to the
second menu, right? So just click this. Just
click this setting icons, check this box, and just
double click on the textbox. Okay, so as you guys can see, this is a seafood pizza, so just type in seafood
pizza. Like this. I'm also going to modify the
price, so uncheck this box. And the price is going
to be in the US dollars. So the seafood pizza
is $15 or maybe $20, right, because seafood is a little bit more
expensive, I guess. Okay, so now we are going to
modify the food description. So just double click on it
and just uncheck this box, and let's edit the text. So I'm just going to type in, like, a random ten guys, the seafood pizza is made of cheese, butter, and seafood. Okay, so now we are going
to modify the third menu. So just click on the setting
icons, check this box. Double click on this textbox. And as you guys can see,
this is tomato's pizza. Okay, so now we are going
to modify the price, click on the setting
icons, uncheck this box. And the price is going
to be in US dollars. Tomatoes pizza is going to
be a little bit cheaper, so I'm going to sell
it at $8, right? Okay, so now we are going to modify the food descriptions. So just uncheck this box and double click
on the textbooks. So I'm just going to type
in, like, a random das. This pizza is made of garlic and tomatoes. Okay, so now we are going
to modify the fourth menu, double click on it,
uncheck this box, double click on the text box. As you guys can see this
is pepperoni pizza. I'm going to modify the
price a little bit. So just uncheck these books. And the price is going
to be in US dollars, and I'm going to sell
this pizza at $12, right? And lastly, I'm going to
modify the food descriptions. So just uncheck these books. Double click on these textbooks. I'm just gonna type
in random thing guys. So this pizza is made of
cheese, butter, and pepperoni. Okay. Okay, so the last thing that we are going to do is to
make the TD model visible. If you remember previously, we hide the TD model, right? So let's click on Spline scene, and just click on
the setting icons and just click on Show settings, and we are going to switch the visibility from
hidden to visible, right? Okay, so now let's click
on this play button. Okay, so now let's scroll
up. Okay, very cool. Look at this, guys. So the
animations is working. Now let's scroll
down a little bit. A special pizza for
everyone, right? So this is a very delicious
pizza, guys. Look at this. Okay, so now let's scroll down. Okay, delicious
pizza for everyone. And this is our menu, guys. Very cool. Look at this. So we have spinach pizza, seafood pizza, tomatoes
pizza, and pepperoni pizza. Very cool. Okay, so we're done. I'll see you guys in
the next video. Boy. I'm so sorry, guys. There's one thing
that I forget, guys. So if the customers
want to make an order, what you're going to do is to click on this button, right? And just click on
the setting icons, and you have several
options, right? You can connect this
button to Google Form. You can also enter
your email address. So if someone want
to order your pizza, he or she is going to
send you an email, or you can also add
your phone number here. So if someone want
to order the pizza, he or she can contact you
through this phone number. Okay, guys, I think that's it. That's all you need
to know. I'll see you guys in the next video. Bye.
12. Creating Online Reservation Form for Restaurant Website: Hello, guys. Welcome
back to the course. In this video, we
are going to create an online reservation form
for our restaurant website. Okay, so now let's get started. Firstly, just click Marketplace. Then click Overview.
Then click Apps. You will be redirected
to this page. Just scroll down a little bit. Then click on customer service
and Community Engagement. Then click Forms and Surface. Okay, so we are going
to utilize Typeform. So just click that
and click FE website. Okay, so don't worry guys. Typeform is completely free Ts. Okay, so just click Get started. So you have to OptionsCs you can sign up using
your Gmail account. You can also sign up using
your Microsoft account. So it's subtally up
to you. In this case, I'm going to sign up
using my GMLcom, right? So just click Sign up with
Google. Okay, here we go. As you guys can see, I got
redirected to my dashboard. Okay, so I'll just
click few plans. As you guys can see, Type
Form offers a free plan. Obviously, there are
some limitations. When it comes to the
free plan, for example, you can only have up
to ten responses, so that's your maximum limit. You guys, make sure
that you are fully aware of these limitations. Okay, so now, let's go
back to the dashboard. Okay, so now just
click Create New Form. You have three options.
The first option is to start from scratch. The second option is
to import questions. For example, if you already
have a Google form, you can use that,
and the third option is to create the form using AI. Okay, so in this case, I'm going to select
the third options. I'm going to create
the form using AI. And don't worry guys, the
process is very simple. So firstly, you will
need to write the prom describing what type of form
that you want to create. So in this case,
I want to create an online preservations Form for pizza restaurant. Okay. So now, I'm
going to continue. Okay, so now you
will need to specify questions or topics that you
need to ask in your form. Okay, because in this case, we are creating online
reservation form for a pizza restaurant, so obviously we will need to ask their name, their email address. Phone number, because we
need to contact them. What else? Pizza type. Because we want to know what type of pizza that
you want to order. Lastly, we also want to know when they
will arrive, right? Okay, so now I'm going
to click Generate four. Okay, so just click
that. The process might take a couple
seconds, guys. Hopefully, it doesn't take
too long. So just wait. Okay, so now Typeform is
generating the form for us. Okay, so this is the form, guys. This is like
the first page. What is your name? This
is the second page. What is your email address? This is the third page.
What is your phone number? And this is the third page. Which type of pizza would
you like to reserve, and this is the fifth page. When will you arrive
at the restaurant? Okay, so now we are going to do some modifications to this
form. So just click this. As you guys can see right now, this is still optionals, and I want to make
it to be required. So just activate this. Okay, so we are going to do
the same thing for the email. So make it required. And we are also going to do the same thing for
the phone number. Also make it required. And for the type of pizza, I'm going to change
the data type from drop down to multiple choice. Okay, so we're going to have
like four options, right? If you remember, we have
like four menus, right? So the first one is SinuchPizza. So just type in
Spina pizza, guys. The second options
is seafood pizza. So just type in seafood pizza. The third option
is tomato pizza, so just type in tomato pizza. And the third options is
pepperoni pizza, right? So just tap in pepperoni pizza. Here we go. Okay, so if you want to add more
options, just click add Choice. Okay, so now we just click this. And lastly, I'm going
to change the data type from calently to date.
So just click date. So in this case, the
customer is going to enter the date when they will arrive
in the restaurant, right? Okay, so I think we are done. Now just click Publish. Okay, as you guys can see, we have successfully
published this form, right? So now just clicks here.
You have two options, guys. So the first option is to integrate the code to
your Webflow website. So just click embed in a web page and just
click Start embedding. And in this case, we are building the website
using Webflow, so you just click Webflow. So you can copy this code and then just paste it on the
embed code sections, right? So just click this and
just scroll down a little And just
click Embed Code. However, this filter is not available for the
free plan users. So, unfortunately, if you
are on the free plan guys, you are not able to use
this filter, right? But don't worry, guys. There's another
alternative, right? So that's the first options. You will need to have
a basic plan, right? And it's going to cost
you like $14 per month. However, if you are on the
free plan, don't worry. There is another options. Okay, so you just click Share the link and just
copy this link, guys. All right? Just copy this link. And let's go back to the
Webflow editing page. And just scroll down. And just click on this
button, guys, right? Just click on this button and just click on these
setting icons. And what you need to do is to copy and
paste the link here. Okay, so if the customer
clicks on this button, he or she is going to be
redirected to the form, right? So let's test this. I'm going to publish
this website, so just click Publish
to Selected Domain. Okay, so it might
take a couple seconds to publish this website, guys. So just wait. Okay,
as you guys can see, this website has been published. So now just click this. Okay, so this is
the website, guys. Okay, so this is the T D model. And as you guys can see, the
animation is still working. Okay, very cool. So now if you click on this
button, make an order. So just click this,
then you will be redirected to the online
reservation form. Okay, so what is your name? I'm going to type
in my name, Chris. What is your email address? So I'm just going to type in my email address. Here we go. What is your phone number? Just a random phone
number, guys. Okay, so which type of pizza, what would you like to reserve? Okay, so I want to
eat healthy food, so I'm going to select
a spinach pizza. Okay, so when you will
arrive at the restaurant. Okay, so this month 25th or maybe 27th, 2024 this year. Okay, so just click Submit. Okay, as you guys get read, thanks for completing
this Typeform. And I got the notifications
from my email guys. Very cool, right? Okay, so that's how you create an
online reservation form, guys. Okay, so now, let's go back to the Type Form dashboard
and just click Result. As you guys can see, we
got one response here. This is for myself, right? Okay, guys, I think that's it. That's all you need to
know. I'll see you guys in the next video where we are
going to optimize the SEO. So I'll see you guys there. Bye.
13. Conducting SEO Audit with SEOptimer & Semrush: Holy gas, welcome
back to the course. In this video, we
are going to be conducting SEO audit
on our website. So the tools that we
are going to use are SEO optimizers and SNBRS. You might be wondering what is the objective of
conducting SEO audit? Well, the objective is to evaluate website performance and also to identify areas for improvement in search
engine optimisation. This process helps businesses
to enhance visibility, user experience, and
overall online presence. Okay, no, let's
get started, guys. And don't worry. The process
is very straightforward. All you need to do is to
publish your Webflow website. So just click Publish. In this case, I've already
published this website, copy and paste the URL, copy and paste the
link to this website, and just put it here, right? And just click out it. Okay, guys, the process
might take a couple seconds. Hopefully, it doesn't
take too long. I'm going to skip this part, and I'm going to return once
the process is finished. All right, guys. So
here is the result. The overall score is C. And down here, we
have the breakdown. So for the unpaid SEO, the score is C
minus for the link. The score is A plus
for the usability. The score is C for
the performance, the score is A plus, and for the social,
the score is F. You might be wondering why? Well, because we haven't added social media context
to the website, guys. That's the reason why we got F. Okay, so there are
23 recommendations to improve the SEO,
so just click this. As you guys can see here, we
have many recommendations. So the first one is to include
a method description text. This is high priority. And the second one is
implement a robot TXT file. This is medium priority
at canonical tech. Also medium priority. What else? Remove duplicate H one
text, medium priority. And we also have other recommendations,
for example, like, add all attributes
to all images, but this is low priority, right? Create and link
your Facebook page, create and link your
Twitter profile. And these two are also
low priorities, guys. Okay, so now let's use
SMRs to do SEO audit. Okay, so just go
to this website, sembrs.com slash Site audit, and we are going to do
the same thing, guys. So just copy and paste the
URL to your website, right? And just put the link here
and just click Start audit. And don't worry it
is completely free. Okay, so now just click
Start Site audit. Okay, so the process might
take a couple minutes, guys. Hopefully, it doesn't take
too long, so just wait. All right, guys, so
here is the result. The site health is 89%, which is pretty
good, in my opinion. There is zero errors, 24
warnings, 100% cability. For the ads DTPS, it's 99%. Okay, so for the
side performance, it is 98%, which is very good. For the internal
linking, it is 100%. For the markups, it has
not been implemented yet. And the same thing for
the core web fiddles. It also has not been
implemented yet, guys. Okay, so that's the result? I think that's it, guys.
That's all you need to know. I'll see you guys
in the next video.
14. Building Company Profile Website with Webflow AI Site Builder: Holy guys. Welcome
back to the course. In this video, we
are going to build a company profile website
using AI Site Builder. This is one of the newest
feeder from Webflow. Okay, let's get started. Firstly, you will
need to log in, and let's write the prom. Build a company profile website for Wat management service. This company offers
three main services. The first one is Way Set
up three times a week. The second surface is waste recycling,
medical waste disposal. Make the user interface design modernt, stylist,
and professional. Okay, so that's my prom, a very simple prom. And let's click Generate Okay, now AI is going to
generate the website. And here is your
website structure. And let's click Generate Site. Okay, now AI is
building the website. It will take few minutes, maybe two or 3 minutes.
So wait, guys. Hopefully, it doesn't
take too long, and I'm super excited
to see the result. Well, it didn't take
too long, guys. It only took a minute or
even less than a minute. Okay, so here is the website. Okay, look at this, guys. So here is the editing page. You can edit the website. You can edit the text. You can change the image. You can change the
Bground color. You can do whatever you want. It is totally up to you. And you can also change
the teams, right? You can customize it
however you want. Okay, now let's scroll
down a little bit. So here is the website, waste management,
compliance guarantee, professional waste
pickup recycling and medical disposal
for businesses, dependable, compliant, and eco focus solutions
tailored to your operations. Okay, very cool. So we
have two buttons here, request quote and few services. I really like this
style. Look at this. Modern waste
management simplify. So it highlights
all the services this company has to offer. For example, scheduled
waste collections, advanced recycling services, medical waste management.
Okay, very cool. And it also shows
some statistics here, which is very important. Let's scroll down.
And at the bottom, we also have the Q
and eight sections. Okay, very cool, guys. I think that's it. That's
all you need to know. I'll see you guys in
the next video. Boy.
15. Conclusion & Summary: Holi guys, welcome
back to the course. In this video, I'm going to summarize all things that
we've learned in this course, and I'm also going to see
our V tips and tricks on how to improve the
quality of your website. Okay, let's get started
with the first topic, SEO or searching
engine optimisation. So you need to implement
SEO friendly practices, including proper
use of meta texts, descriptive URLs
and semantic dTML. This helps search
engine understand and index the
content effectively. So if you want to increase
the traffic to your website, you will need to make sure that your website is
easy to discover. One of the most effective way is to optimize the keyword.
Use the right keyword. For example, you
can use tools like ETRf and just type
in the keyword. For example, waste management, and just click Find keywords. And ADSRf is going to display all the optimized
keywords for you. Okay, here is the
list of keyword, and you can see the
keyword difficulty. So it gives you
indications on how hard it is to rank in the top ten
organic search result. And you can also see the volume. So this is like
the search volume. So if you use the right keyword, you will have higher probability to rank on Google Search. Okay, now let's go
back to the mindmap, and let's talk about
the second topic. Three D model integrations. You need to ensure that
the three D models are responsive and adapt well
to different screen sizes. Test the model on various
devices to guarantee a consistent and visually
appealing presentation. For embedding techniques,
you have two options. You can use Webflow custom code or you can integrate with
third party viewers, especially if you add animations to your three
D model like this, you need to make sure the
animation is fully working. And if you are using Spline
to get your three D model, it is very important for you
to check the file format because not all file formats
are compatible with Webflow. Okay, now let's move
on to the third topic. Typography, best practices. Okay, you need to
pay close attention to typography choices, including fun style,
sizes and spacing. Consistent and
legible text enhances readability and contributes
to a cohesive design. Additionally, you also need
to ensure color contrast. For example, if the
background is black, do not use dark
color for the text. Do not use brown
or gray because it is going to be difficult for
people to read your text. Make sure to use light color like white or yellow or orange. And you also need to avoid
the decorative overload. Do not add too many
things to your website because it can potentially
make people confused. Okay, so this is the
end of the course. Thank you so much, and I
wish you all the best. Bye.
 Chris Raharja, Data Scientist & AI Enthusiasts