Transcripts
1. Introduction: Drawing every day is important. We know that daily practice helps you get better
at your craft. But building that creative habit is more difficult
than it sounds. There's a lack of time,
lack of inspiration. You know, life gets in the way. Well, in this class,
I'll show you a super simple way to stay inspired and
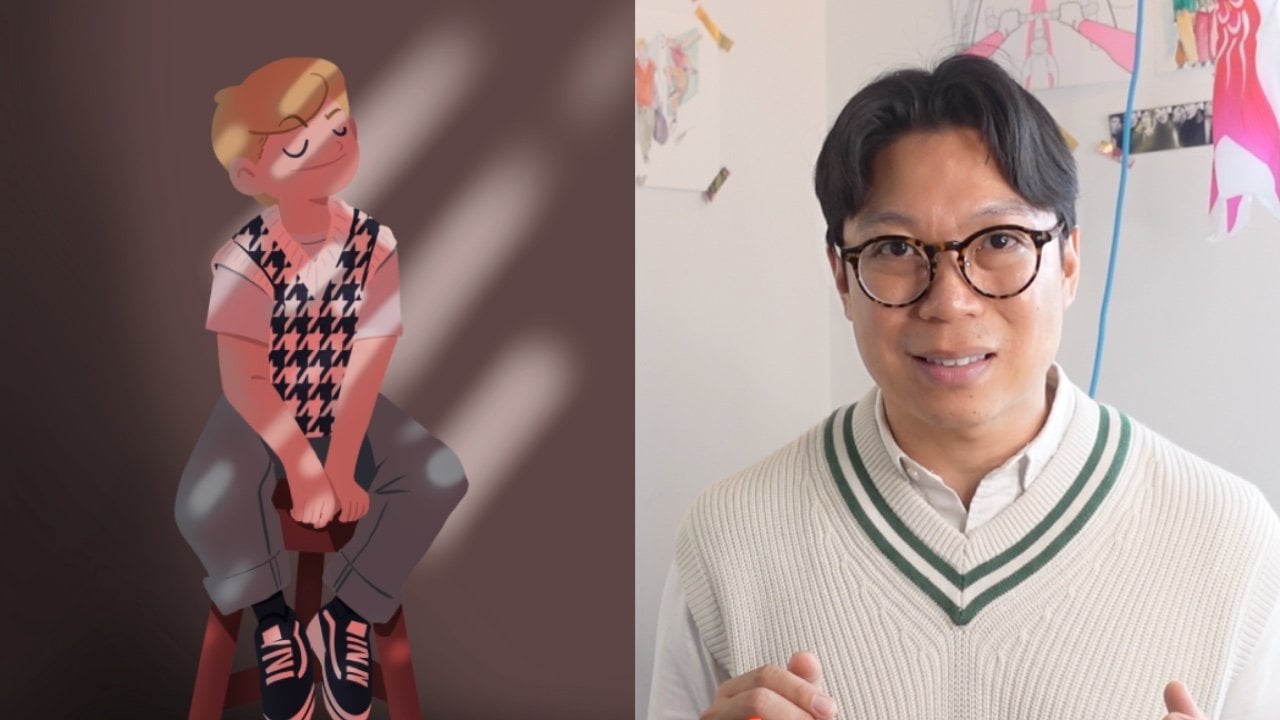
draw consistently. Hi, I'm Simon. I'm
an illustrator, animator, and a top
teacher on Skillshare. For many years, I
worked in an office, but because of daily stress, I slowly stopped drawing. By establishing a
sketching habit, I reconnected with
my creativity. And eventually, this led me to work as a
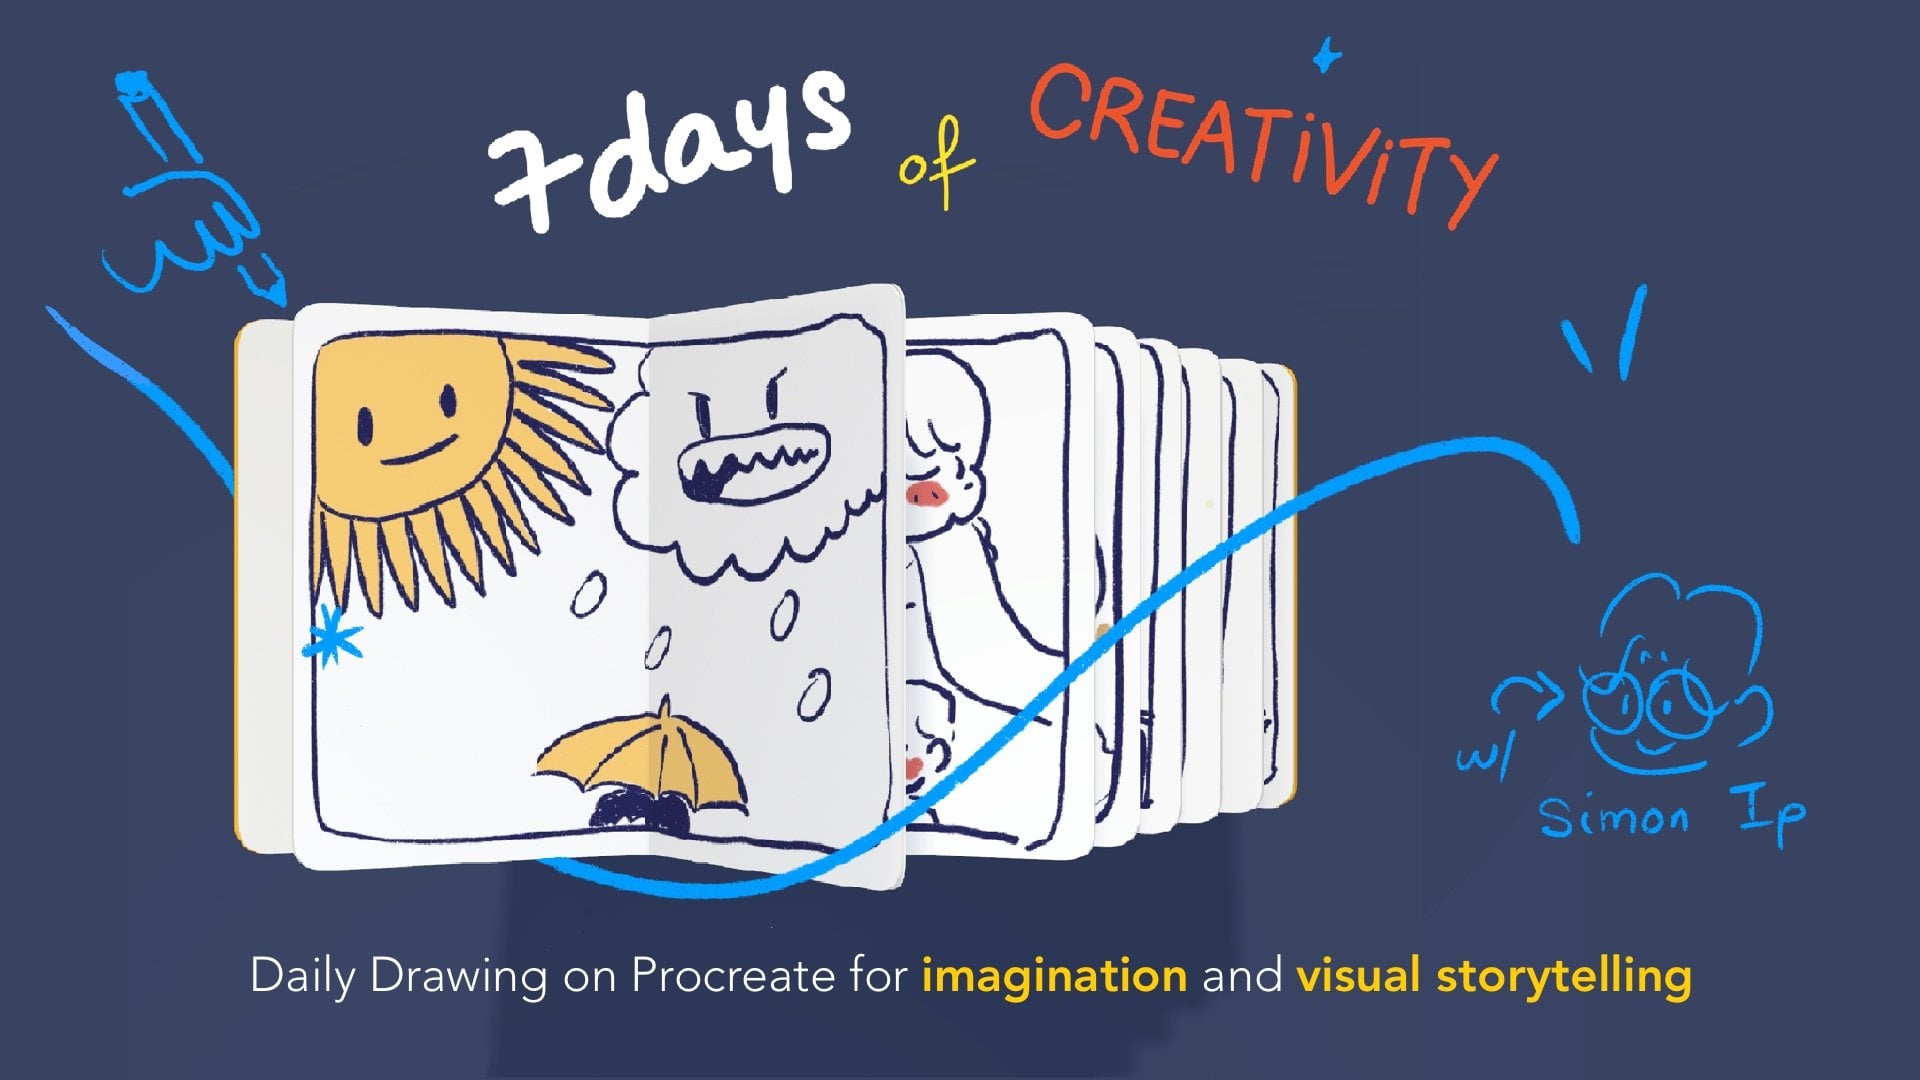
full time artist. In this class, you'll learn
how to build a drawing habit through a simple seven day sketchbook challenge
in Procreate. I'll show you how to generate ideas with playful
prompts, and don't worry. We'll keep drawing simple
and most importantly, fun. And this will only take a
few minutes of your day. This class is beginner friendly, and it's really for anyone
who feels creative. Basic knowledge of
Procreate helps, but this approach can also
work on a sketchbook. So don't worry.
You're in good hands. By creating these
daily fun characters, you'll train to
draw instinctively. This means drawing without
thinking too much, and you'll also train
your imagination, which is a super important skill to have, especially nowadays. By the end of this
class, you'll create seven original small
characters that you can place together in
one scene. And who knows? Maybe you'll have so
much fun that you'll feel like going beyond
the seven days. So if you're ready to dive into your creative
habit, let's begin.
2. Your Project: Three, two, one, go. So for this project,
the purpose is to create fun characters
over the next seven days. And read to start
establishing a drawing habit. Each day, with the help
of a different prompt, you'll be able to create
a brand new character. Now, each of these prompts are composed of two
different categories. The first one is a subject, so it could be an animal, a plant, an object. Because if you
simply put a pair of Googly eyes on top of it, well, it becomes a other one will be an action doing type of verb. This will allow your
character to have life, a backstory, a narrative, and also its own personality. In another video lesson, I'll show you how to create
your own list of prompts. But mine is available
under resources, so feel free to
take a look at it. So what should you
submit as a project? It's important to note that
you don't need to complete all seven days in order to upload your project to
the project gallery. Want to see your
work in progress, your way of thinking, your incomplete drawings,
share whatever you want. It's also a great way to connect with the
community of students. Well, you can submit any day of drawing
that you've completed. So it could be your first day or simply your favorite
drawing day and you can also submit your final collage with all the
different characters. So to submit your
project is quite easy. You go to Project and resources and then press
submit your project, and then you'll see your project upload date to the
Project Gallery. You can even add a note to let us know what is the
prompt that you use, which day you followed. And how was your overall feeling towards
this illustration? Remember that the purpose of this class is really
to help you create a drawing habit
through the means of creating on the consistent
level, fun character. So the purpose of the project is meant to be low pressure, flexible, and easy to repeat. Also, it's supposed to be fun. So just enjoy. I can wait to see what
beautiful drawings you'll make, and I'll see you in
the next video lesson.
3. About This Class: Alright, before we
start drawing together, there's a few things
I want to talk about. It's important to remember
that the objective of this class is number
one, to have fun. Yes, I actually put
this as number one because if we're not having
fun, why are we doing this? And number two, to create a drawing habit
through repetition. And a good incentives
if we're having fun, number one, be more prone
to repeat the process. So what I'm asking
you is to commit to draw with me for
the next seven days, and we'll create
seven fun characters based on a list of
random prompts. And as a disclaimer, I have no idea what we're
going to draw together because every day we'll
pick random prompt, so I'll discover at
the same time as you, and I'll be filmed now, the video lesson day
one to day seven, they're not step
by step tutorial. They're more like draw
along type of classes. Well, I'll share with
you my drawing process, my thought, also share with you some of my
favorite procreatives. So look at them as a starting
point to your own practice, not a definite guideline. The other thing is, in order
to create a great habit, we need consistency, and I like to focus
on two main things. One is space. Dedicate a specific
space where you'll be drawing every day for
the next seven days. Second, get rid of any
type of distraction. So put your phone in another room and also
let your family know, your partner, your friends, that you will be busy
during that specific time. Talking about time number three, make sure that you block
some time in your calendar. So if you're a morning
person and you think it's better to focus on
drawing in the morning, then dedicate this
time in the morning. If it's easier for you after
work, do it after work. Our objective is to remove as much friction as
possible to help you create this habit of falling in love
with drawing next, in terms of material, I'll use my iPad Pro as
long as Procreate. And I want to share with
you a fun tip on how to turn your iPad into
a digital sketchbook.
4. Your iPad as a Sketchbook: You turn your iPad into
a digital sketchbook, it's just a great way
to pick up your iPad, open Procreate to
a specific file, and just start drawing. So this is how I do it. All right. First,
let's open Procreate. I'm going to create
a new Canvas. I'm going to tap this button
on the top right corner. I'm going to call this
digital always in Chinese. Up. No, I'm going to call
this daily sketchbook. It's always a good practice to name every file that you create. We want to create
a square Canvas, so I'm going to put 3,000
pixel by 3,000 Pixel DPIs. I'm going to turn into 150. So then we have a
little bit more layers. The color profile can remain
at display P three RGB. I'm save it as a template so we can use it in
the future, as well. And here I have my
digital sketchbook. For the next seven days, I'll like to work
in a square format. I think it's much easier for creating a
collage in the end, but I'll talk a little bit
more in the next video lesson. Now, we want to create
a digital sketchbook. So I'm going to click
on the wrench tool, go to Canvas, and
then page assist. Now, you can see that at
the bottom of the iPad, there's a little footer that starts appearing where you
can have all different pages. If you tap on new pages, you see that you create new
pages through sketchbook. Remember that one layer, so one visible layer
is equal to one pages. If you need to work
with different layers, which is usually the case, we'll just create
different layers, group them, and
create a new folder. So now this new
group is, let's say, layer two is page two, Layer three is page three. And here you can start drawing and adding more
layers within your day one. Remember, by grouping
those different layers, these will all fall under
one page. Pretty neat. So we could use one
layer, let's say, for rough sketch, another
layer for clean line, and another layer for colors. In terms of my favorite brushes, they're usually under inking. It's just my own preference, but I love tinderbox. I think tinderbox has
such a nice taper to it, and you can see how
pressure sensitive it is. Another one that I
like is dry ink, still under inking.
There you go. Dry ink has a
really nice texture and a little bit of
a taper as well, which makes it look a little
bit more like using crayon. Other brush I like under
sketching include studio pen. Under calligraphy,
there's also chalk. Under sketching, there's
Procreate pencil. What I recommend to
new Procreate users is to really explore the default brush library because there's
so much to offer. Don't worry too much
about downloading or buying new brushes.
5. One Perspective for All: Drawing in perspective
can be very intimidating because you never know what's supposed
to be bigger, what's supposed to be smaller. I think it's also
a big deterrent for people to start
drawing beautiful scenes. But I want to show you that it's quite simple to do it with a simple way of drawing
called isometric perspective. Now, I don't want to scare you. So let's just take
it step by step. So the magic about isometric perspective is that it allows you to
create a drawing space where every object and
character are around the same size regardless of where they're
placed in the drawing. It's like drawing
inside a tilted box. It's clear, it's consistent,
it's easy to read. And that's why so many
engineer drawings and video games use it
because you can see a lot of detail at
a single glance. So how can you use a isometric perspective
guideline on Procreate? First, we're going to
tap on the wrench tool. Then we go under Drawing Guide. Edit Drawing Guide. And at the bottom of the page, you'll be able to see
some type of footer where you can select
isometric perspective. Here you can play
with the opacity and the thickness of the guide, as well as the color on top. If you zoom in, you'll
be able to see that the isometric grid is composed
of different tilted boxes. Box one, here's a box inside another box,
and to infinity. For every day that we
create a new character, it will be contained
within one of these box, and it will be super easy to
create a collage at the end, as you can see that those box simply stack on
top of each other. You can also see the
difference between isometric perspective
and linear perspective, where a linear perspective has a vanishing point or several, and each object
that is closer is bigger and the one that are
further away are smaller. Isometric, and then linear. A few things to remember with isometric perspective if you're not sure how to make it work. So these are three things
that you need to remember in order to make isometric
perspective work, and to realize that it's not so scary because a set of rules
is much more flexible. The first thing to
remember is to use the isometric grid to place your character in
that specific space. Sure that the feet
of the character sit flat within the box. This is a great way to
keep them grounded. As long as the character
fit within that box, the perspective will feel right. So the feet are
grounded in the box, and the head of the
characters can look forward, backward, or even
straight at you. Because isometric perspective
uses the same skill, it's really easy to move also the different characters
in order to create a collage by the
end of the seventh. So now that I bored you with
a lot of technical talk, let's go into something
much more fun, which is how to
find inspiration.
6. Finding Inspiration: Okay, so let's talk about finding inspiration
because, well, it can be difficult
to come out every day with something new to
draw. But don't worry. I have a really good system that I want to share with you. And well, it's pretty simple. All you will need is
a piece of paper, a marker or pen, two
bowls, and that's it. So let's say that this
bowl is for my subject, and this bowl is for my action. What we want to do is to create two categories of prompts, one for subject, where we're
going to write down a list of animal, plant,
object, anything. Because remember that by adding a pair of eyes and
a smiling face, well, your object comes alive. So creative. The other one is
a list of action, everything that ends in in
dreaming, eating, walking. What we want to do is
to have verbs in order to give our subject a backstory. And that's why we're going
to add personality to your subject or your character
for the next seven days. So every day, I will pick
one piece of paper from my list of subject and
match it with an action. And that will be your prop. I'm not a big fan of HAGBT, but it's quite easy to simply
ask HAGBT to come up with, let's say, ten
different subjects and ten different actions. What I really like about this, it's kind of like
improv drawing. You never know what's
going to happen, and you have to think yes and and start creating
your own story. And it's a great way
to stay motivated, but also to not overthink about what you're going to
draw on that specific day.
7. Quick Recap Before Drawing: All right, let's
do a quick recap. In order to create
a drawing habit, we need to make it fun and
we need to remove friction. We need to allocate
ahead of time a dedicated period of time
when you'll be drawing. I'd usually say 20, 25
minutes is good enough. You need to have a
room or specific space where you'll be drawing. So let people that
you're living with that you'd like to have this
dedicated time to draw. So not to disturb you and also feel free to throw your
phone in a different room. Because we'll be
drawing on Procreate, we've created a digital
sketchbook to alleviate some of the friction on knowing which
file to open. It's easy. We always go to the same file. We have dedicated pages for
all of our different days, and we'll just start drawing. And remember that one layer or one group of layers
is equal to one day, which is equal to one page. A list of prompts, also,
so you don't have to think too much about what you
have to draw ahead of time. And I think that's it. I have no idea what we're
going to draw for day one, but I'm super excited
to get started, and I'll see you in
the next video lesson.
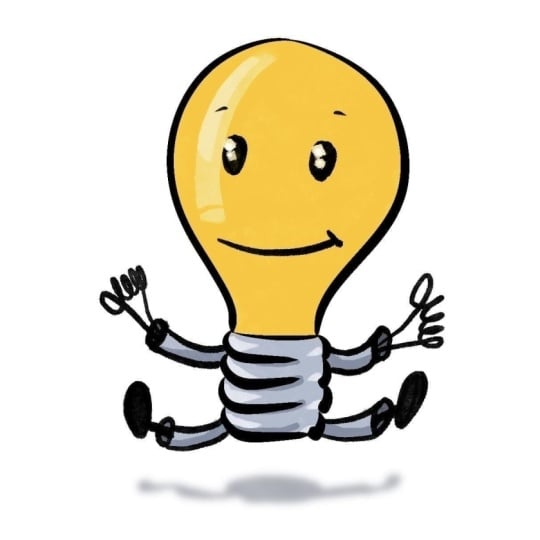
8. Day 1: Hi, welcome to day one. Hi, and welcome to day one
of your drawing practice. So as you remember,
here we have a bowl with a different list
of subject prompts, and here a list of
different action prompts. Now, I have no idea what's
gonna come out of this bowl. Well, I could have an idea. I created these prompts myself. So let's see what
today's prompts are. Up, gonna put this on the side. Um, we have a light bulb, so a light bulb for day one. Jumping in the air. Okay, so that will be
our day one prompt, a light bulb jumping in the air. I'm gonna use the brush
that I like the most. It's under my recent tinder box. Remember that we want the light bulb to fit
in that imaginary box. So I'm just gonna draw it
again as a point of reference. Up. Let's see. Yeah. That's why we want our light bulb to stand. Gonna reduce the opacity. It's a little bit
messy when I draw, but that's also the
joy of just sketching. I didn't put a timer, but I think we'll just allocate 15 minutes
to this practice. So one key to make sure
that your drawing is isometric is to make sure that the feet are anchor
within the box, and we'll have our character facing towards the
left hand side. So three quarter left,
let's say, like this. But no, it's jumping.
You're right. Oh, that's a tricky one.
So we have the bulb here. And if it's jumping, I
want the character to kind of be, like, super happy. I'll have the feet here, facing that plane and the
other one, the other plane. And when you're
jumping, usually Ah. Your hands are up in the air, so Okay, something like that. I like to tap on the
arrow from time to time. So that's the selection tool and play with the
proportions. A little. Play with the scale,
just a little tap here. And I really want
the head to be much bigger than the rest of the
body. It's a big light bulb. We're going to lower the
opacity by tapping once there. I go to remove that
box underneath. So that's my sketching. And I'm going to use, let's say, black to start drawing
that light bulb. Increase the size. What I like to do is always draw some big bubbly
eyes, small mouth. Big bulb for the head. Because it's a light bulb, we want it to shine bright. I don't know why I
see this character wearing a pair of suspenders, kind of, like, a
little bit geeky. So we're gonna give it pants, shorts that are a little bit. Well, long pants are a little
bit too short, let's say. Maybe not suspenders,
overalls. It's cuter. And a little bit of a belly. Now, the question is, what type of hand does a lightbulb have? Maybe I'll create some
type of wire hands. Okay, that could work. And
some wiggly line here. And because the
character is jumping, let's add a little bit
of shadow underneath. Now we're removing
the different layers underneath that act as
sketch or guidelines. And I think it's pretty cute. Let's try to color it now. Adding a new layer
by pressing plus. To color, I like to
use the Lasso tool, so free hand lasso tool. Let's pick a nice bright yellow. So now I'm coloring with
the tinder box brush, and you can see that it gives its nice texture a
little bit like a brush, like a paint brush,
where it's not uniform, the texture is not 100% uniform. Like, if you see here,
it's a little bit patchy. And that's what I like
about this brush, actually. I light purple t shirt. I'm going to use maybe a
primary color palette. So now we have a little
bit of violet, blue, yellow, some pinks
red for the shoes. And I just want to make
sure that there's no transparent that I just want to make sure that the white
that we see in the drawing is not transparent and is
actually white as a color. So then it will be easier to put all the different
characters in the same scene. Cool. Alright. Let's look at it with the white background. So this is my day one. It's a light bulb
jumping in the air. It's not jumping really high, but it's a light
bulb, so thanks. Alright. Thanks for today, and let's see what we come
up with next tomorrow.
9. Day 2: Everyone, welcome to Day two. Yesterday, we drew a beautiful light bulb
jumping in the air. And let's see what type
of froms we get today. We will Upa Falling asleep. Oh, that's going to be fun. Okay, let's draw our
mushroom falling asleep. We're going to
create a new group. Roop. And because I'll try to be a little bit better
today at naming stuff, I will call this one
sketch, color, clean lines. Rename Day two. So this is how it
would look like. I've just been bad yesterday at not naming my layers
for you guys. But it's quite simple. You have usually three layers
for this type of activity, sketch where we will reduce the opacity so we
can draw on top of it, color, and then clean lines. I like to draw in this order, sketch, clean lines, then color. Gonna pick any color. Like a nice blue, my tinder box. So as you remember,
we're going to try to put our character within that box to respect the
isometric perspective. I'm going to draw a mushroom
that's sleeping. Hmm. When I think of a mushroom
that dozing off, first, I'm going to draw the
feet here within the box, a little bit of a belly, a curve back, the hands kind
of leaning on the side. And then a giant bulbous head. Maybe I want to create
more of a face, so the head will be
a little bit bigger. Depend what type of
mushroom you're looking at. Could it be a venomous
mushroom and anoche? Okay, I think we have
enough sketching. Let's give it a shot,
go to clean lines. I'm gonna pick black
again, tinderbox. And then if he's dozing off, the head looking
down, so tired eyes. Head looking down. Huge hat. That's his mushroom hat. Draw some jogging pants
or a pair of sneakers. I think it's fun if we
add a little bit of z. So we can see he's
falling asleep. And let's do something
nice with the hat. Add some dots. Now, remember that we're focusing on isometric
perspective. Our character fits really nicely in that little box
that we've created. I want to have a little bit
of an environment for him, so I'm going to add
some patches of green. Perfect. I'm going to
use my free hand to contour the whole
character in white. The little hands. And the huge. Drop the color in another layer. I think mushroom, I think, red
and white dot immediately. So Is this red too strong? Maybe not. Create a new layer, create a clipping mask. That means that now
with this clipping mask will only drop within the
border of the layer underneath. We can also use the clean line setup as
reference and then drop it. Just make sure you always remove the reference after
little bit of, let's say, brown hair. The little wool sweater. Little bit of green. Alright, so now I
have my character. It's cute. It's leaning
forward. It's falling asleep. And I think I'm using
a little bit more of an earthy color palette
because I want to well, it's some type of
wooden creature. Right, Wood creature. I'm going to draw
out his sleeves. Actually, I like the white, but I'm going to use a very light yellow
to do those sleeves. Still drawing as
a clipping mask. Sample a little bit
of his skin color. Want a little bubble to be
blue, bubble coming out. Like snore bubble or something. I'm just going to color a
little bit of the green grass. There you have it. This is our little mushroom
that's falling asleep. Alright, thanks
for participating, and I'll see you tomorrow. Oh
10. Day 3: We're just going to
have a sip of coffee. Hi, everyone. Welcome to day
three of drawing together. Mm. Yes. Let's go straight into
appropriate file. Go to Day three, where I have
sketch color clean lines. Let's take our magic balls. And let's pick a
subject for today. A pencil. Skateboarding. Oh,
that's gonna be fun. Okay, let's draw a pencil. Skateboarding. Remember that you
want your character to fit within that box? I'm going to go to
the sketching phase. When I think of a
pencil skateboarding, have it being
elongated like this. The skateboard will
be along this plane. I drew my skateboard and I drew my pencil a
little bit too large, so I'm using the select tool to shrink everything
down a little bit. I want the pencil to
propulse itself forward, so one leg will be anchored
on the skateboard, and the leg is also following
the axis of the box. I can't have to imagine with
the leg that's anchored, the opposite leg
will be backward. This one is the one
that goes forward up, and this one is
the one that goes. And let's take this
whole structure, put it in the middle here. Okay, let's try it out. I'm going to reduce the
opacity of the sketch. Go stretch my clean
line, take black. I a sip of coffee. I always draw a
little bit too large. So remember when I tell you that nothing has to be perfect? Well, I feel like this
is one of those days where I am not really
satisfied with my drawing, but I'm still gonna
commit to it. And let's color it together. Gonna use your lasso tool to
outline it at some yellow. Kind of looks like
a banana, now. The eraser is pink. Phew. Add a little bit
of a darker yellow. So day three, this is my
pencil, skateboarding. Pencil skateboarding. Alright. Thanks.
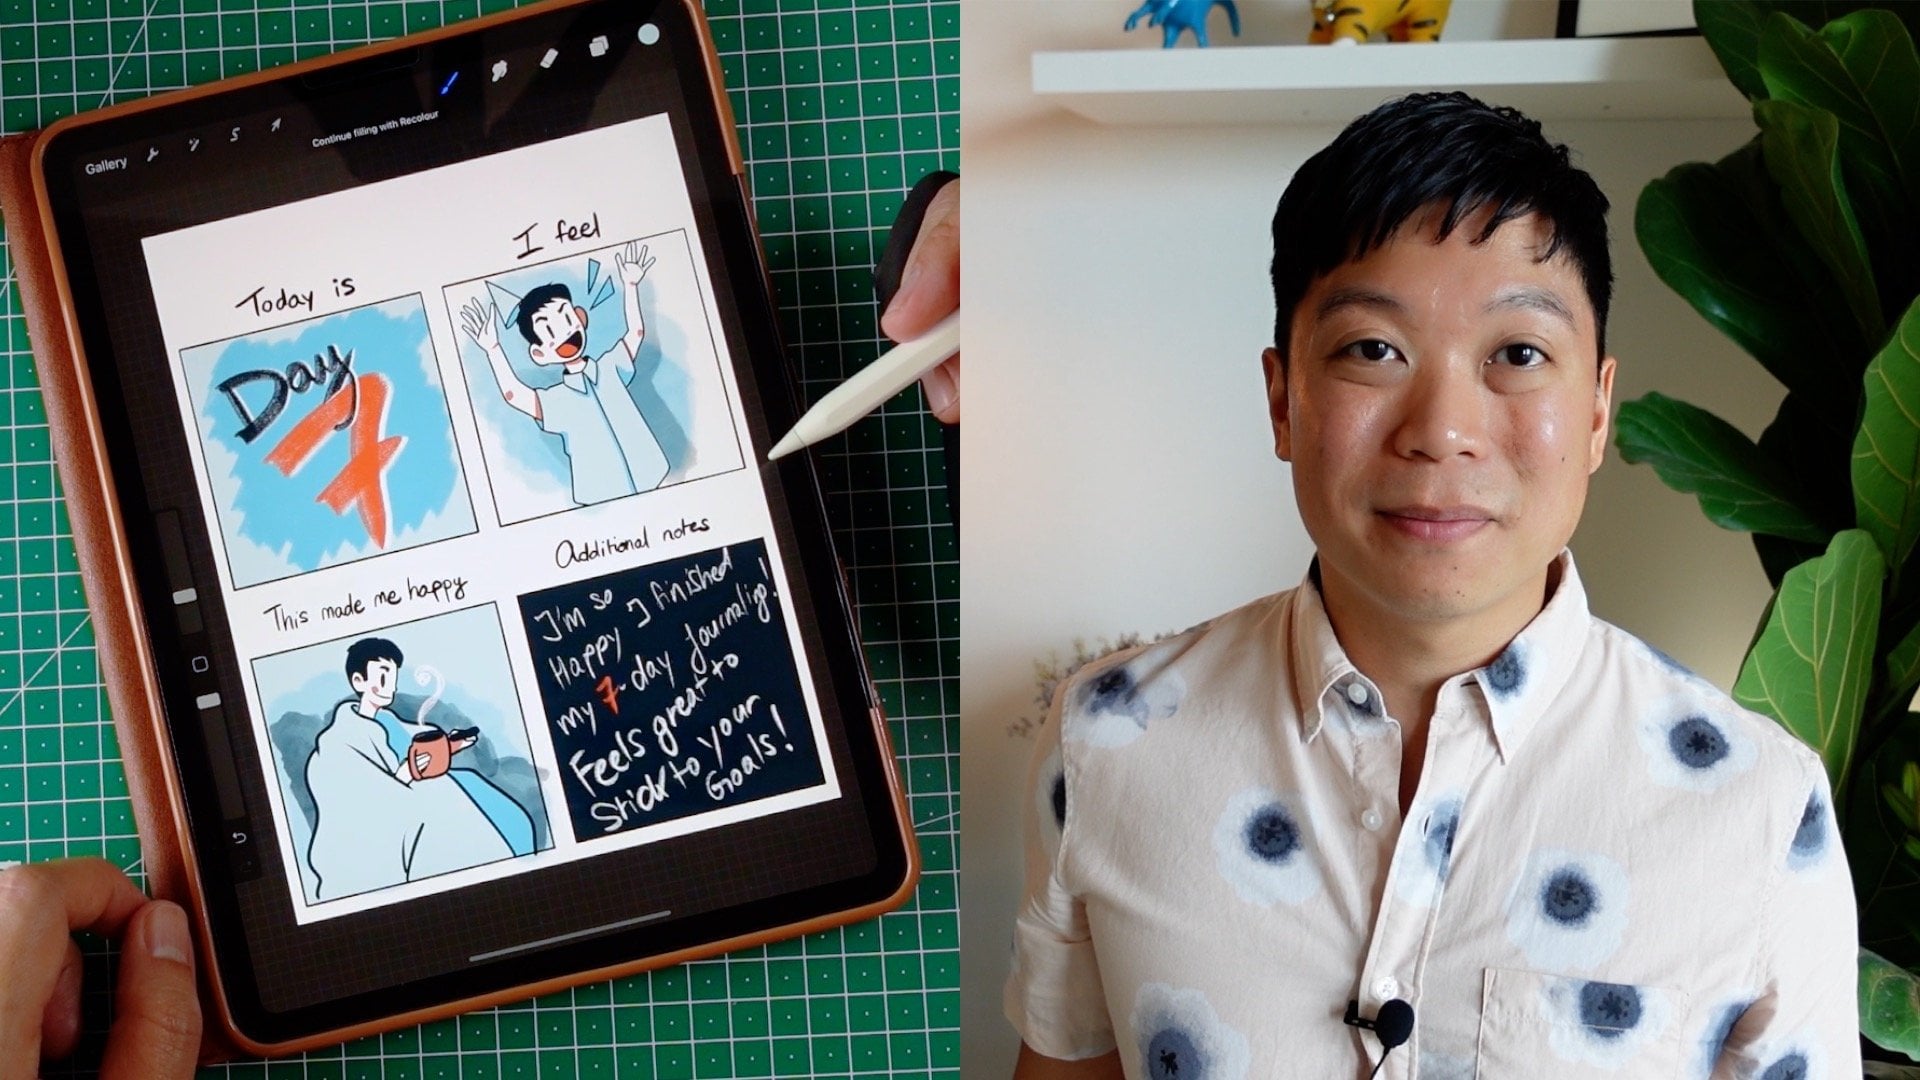
11. Day 4: Welcome to day four. Last time we drew a pencil
that's skateboarding. Let's see what we
will draw next. Yes, a piece of bread. Feeling proud. Piece of bread, feeling proud. Let's go a sketch, pick any
color that you'd like to. Um, let's remember box. And then something that
really makes you proud could be you have a
good grade at school. So Yeah, I like this idea. So it's a little piece of bread. It's really proud because
it passed its exam. And then when you're
proud, your eyes are close, a big smile. I'm going to exaggerate
the cheeks a little. Just gonna make the head
a little bit bigger. Now we're going to decrease
the opacity of the sketch. Don't know if we
need to box anymore. Go to clean line, pick a dark
color, and start drawing. So now I'm going to
do with size 15. I don't know. I want the bread
to be a little bit fatter. It's gonna be a big
piece of bread. I think that's pretty
good. I'm going to use my Lasso tool. And if you want you
could also remove the background color so you could resee a little bit better. See? My little loaf of bread. I'm going to use what's
a good bread color? A little bit of a yellow. This go to reference. White shirt. A blue tie. Mm gray pants. Greenish pants, actually. Yes, A plus. When you're proud, your cheeks are red. Remove reference.
Super important. You always remove the reference. Look at this piece of bread. Now, it's always good to add
a little bit of wiggle lines or little symbolism to show that this piece of
bread is really happy, really proud of its work. So I'm going to use
yellow a bright yellow this time to show, Wow. And some stars. Let's put back the background. And this is Day
four. It's my piece of bread that's really happy. Actually, no, sorry.
This is Day four, and it's my piece of bread
that's feeling really proud.
12. Day 5: So this is Day five. Let's see what are our
prompts today. Up. Oh, a cat. Love drawing cats. It's actually super fun. Carrying something heavy. A cat carrying something heavy. Let's start by sketching. So I'm gonna use my tinder box. I want the cat to face
maybe this direction. Let's draw the back
of the cat, actually. So we'll see the tail here. The feet will be facing the other side and
carrying something heavy. What would a cat carry
that's quite heavy? Maybe a bunch a bunch of pizzas. Alright, so this is a sketch. Going to lower
just a little bit. It fits within my isometric box. I'm going to reduce the
opacity, go to clean line, select a black color. And let's get started. Here I'm at 15% size. I want the cat to kind of
exert a lot of energy, a lot of sweat. Little shoes. When you draw the bug, the
isometric grid really helps. I need to draw a pizza logo, maybe just do one slice. Cute. Alright, let's color it. Coloring is often the
fun part I found. When I color, I like to
trace with the assu too. Let's pick what colour do
we want our cat to be? Like an orange cat. And we will want our pizza boxes
to be kind of bluish. So I'm gonna create a new layer
and tap on clipping mask. A delivery person? What color? Maybe a grayish uniform. Just so people know
it's not a prisoner. I like to use white
for the shoes. Let's use white. What I like about drawing
different types of animals is that they often come with
different type of pattern. And what I will do is
maybe for this cat, I might add some
type of stripes. But first, let's add some color to the
sweat on his forehead, just so we know that this cat is really carrying
something heavy. I'm going to use, maybe the spectra
brush, lower its size. Make the ears a
little bit darker. Let's add some stripe
to the tail to the bar. And this is my cat
carrying something heavy. I think I quite like it, so this is Day five. Up. Thanks, everyone
for joining in, and I'll see you
tomorrow for day six.
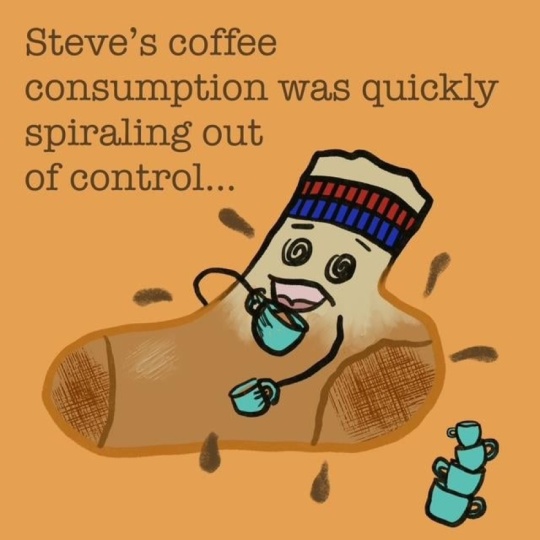
13. Day 6: Alright. We are
already at day six and look at all the little
posted that we have. I hope you're not
running out of idea. Let's see where we
can draw today. So for the subject today we have a sock That's running. Alright? A running suck. We'll access our
digital sketchbook and we'll go on day six. What if the suck is
running towards us, so I don't know what the sock
will be running away from. That could be fun. Up. And you know when you're
scared and you're running Ah, with your two hands forward. So usually I would put in a running position
one hand backward, opposite to the leg
that's forward. But in this case, I'm
thinking more like a kid screaming and running towards something because
they're scared. Let's make sure the feet
are on the right axis. Too. Okay. I think it's going to work.
Gonna lower the opacity. Go through my clean line, pick up the nice black brush. Tinder bucks, 15%. Haven't really changed
the way I draw. This is the top of the sock. I'm going to add a line here. Kind of like those old socks. I don't know why I
want these socks to look a little bit used, dirty, crying. Scared Now we're gonna draw both hands
on the same plane running towards something
because they are running away. Hm, I have my sock. I'm not so happy with
the sketch underneath, so let me just redo it. I'm happy with the face. Well, this is a reality. Sometimes you get it
on the first trial, and others, you're just
gonna fuss about it. Okay, let's do this. So I
changed it a little bit. We're gonna have both
hand extended, kind of, like, not pushing forward, but kind of propulsing backward. It could also be
perceived as like a kid crying to its mommy. Should a sock wear socks?
That's a question also. Okay. Much better. Yes, I told you not to fuss
too much about the drawing, and then I started fussing
about my own drawing. So I'm gonna add some blue, because the sock is
a little bit scared. And blue is a color
that shows scared. And I want my sock to have
a nice dry Pi pajama. I'm gonna add some purple to it. I'm going to use the dry ink. No, you know what? I'm going
to use Procreate pencil. Oh, yeah. Love the texture. A little bit softer. And some
purple aubergine slippers. Oh, no. On my tinderbox now. Often slippers, they are a
lighter color underneath. So just add a
lighter purple here, pinkish, and I want the sock to wear socks are
the same color. And the hands also to be the same color as
the body of the sock. Whoo. Alright,
there you have it. This is day six. This is a sock that's running more like a sock that's
running away from something. Well, we have one day left before we compile all
the drawings together, so see you in the
next video lesson.
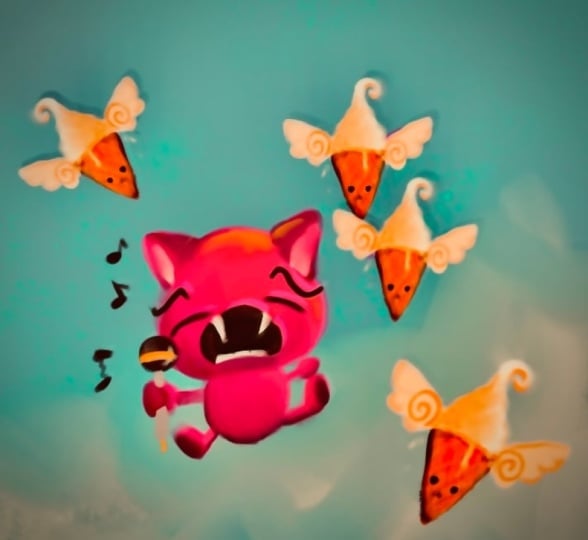
14. Day 7: Welcome to Day seven. Now we're
gonna pick a new subject. Frog. Drinking coffee. Okay,
let's get started. So for my frog drinking coffee, I'm gonna pick a color that's a little bit darker,
like this blue. I want it to face this area. When I think of a frog, I think a big mouth, maybe he's not happy. Maybe his tongue is
ticking out a little. I don't know. I get this vibe of maybe let's draw
a professor frog. The feet are facing this plane. The coffee mug is
here. Little cardigan. The other hand in the pocket. Maybe the feet are too far. Yeah. Yeah, I think
we got our frog, and I want a fly. Just flying on top to bother
bother our professor. I'm gonna pick a dark
color like a black. Use our tinderbox at 15%. Let's draw the glasses first. Our poor frog
vision's not so good. To nostril, big mouth. Maybe the tongue is
sticking out a little. I don't know why this frog
doesn't look so happy. And this little fly just on top. Okay. Now, with the fun part,
we're gonna color it. We're gonna pick a
nice green for a frog. Now, I always like
to color Hello. The ice should remain white. All right, so relaxing to color. I want a little
professor to have a recycle paper milk with him. A brown earthy cardigan. Poopi colour pants. I don't have fun with the shoes. Maybe the frog is a
little bit hipster. The last thing I want
to do is maybe add some light reflection
on the glasses, so lower the opacity.
Like this, it's good. And I realize that frogs throat are usually white
or lighter color, so I don't want people to
mistake it for a turtle. This is day seven, and we have a frog that's drinking coffee. Next, we're gonna put
all these characters into one scene just for fun. See you in the
next video lesson.
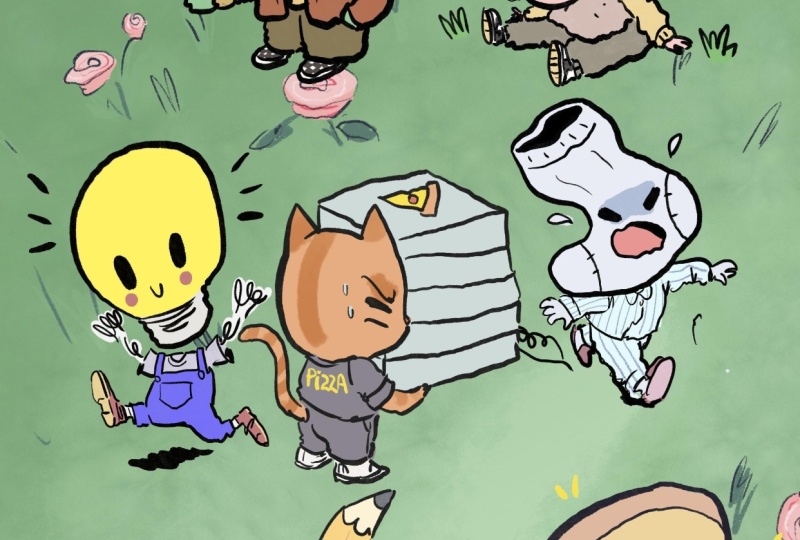
15. Creating One Scene: One sleeping, one skateboarding, feeling proud, carrying
something heavy. So now that we've completed our seven days of
creating fun characters, you know what would
be even more fun? It's if we could put
them in one scene. Well, we're in luck because
we started drawing them as separate isometric characters
that fits within a box. So all we're going to do
now is to take all of them and to put them into
the scene of our choice. So under Project and resources, I'm giving you two types of
scenes that you can use. After downloading them, all
you have to do is insert the photo and upload them
to your appropriate file. So, I like to duplicate
each drawing, flatten them. So like, all of them of the
other finger open gallery, and then drop them in
our background. Whoa. Pretty cool. And now we can just like a
set of stickers, we can put our characters
in different settings. Because all my
characters were drawn in isometric, they
all fit the seed. And what's fun also is that
we plan that each of them start facing different
area of the box, so then it creates
a more vibrancy. So look at this. It's quite fun. If you want, we can even change the setting. So just go around and play with the two different
scenes that are provided under Project
and resources. If you want, you can
also play with multiply, so then your characters really
blend into the background. And there you have
it. I hope you enjoy this class and let you know what you think
in the comments.
16. Thank You!: If you're watching this video, this means that you've completed your seven
day challenge. Congratulations, and thank you so much for watching
and participating. I really hope that
this challenge help you reconnect with drawing and also it helps you build
a small creative habit. Before you go, don't forget
to upload your project. You can share your favorite
illustration from the week, or even several
characters you created played together in a background
scene that I provided. If you enjoy the class, I would really appreciate
if you left a review. This helps other students
discover the class, and it also helps me create better content
for you in the future. I'm looking forward to
seeing what you've made, and I hope that I've
inspire you to draw more. Thank you so much and
stay creative. Bye.
 Simon Ip, Digital Illustrator