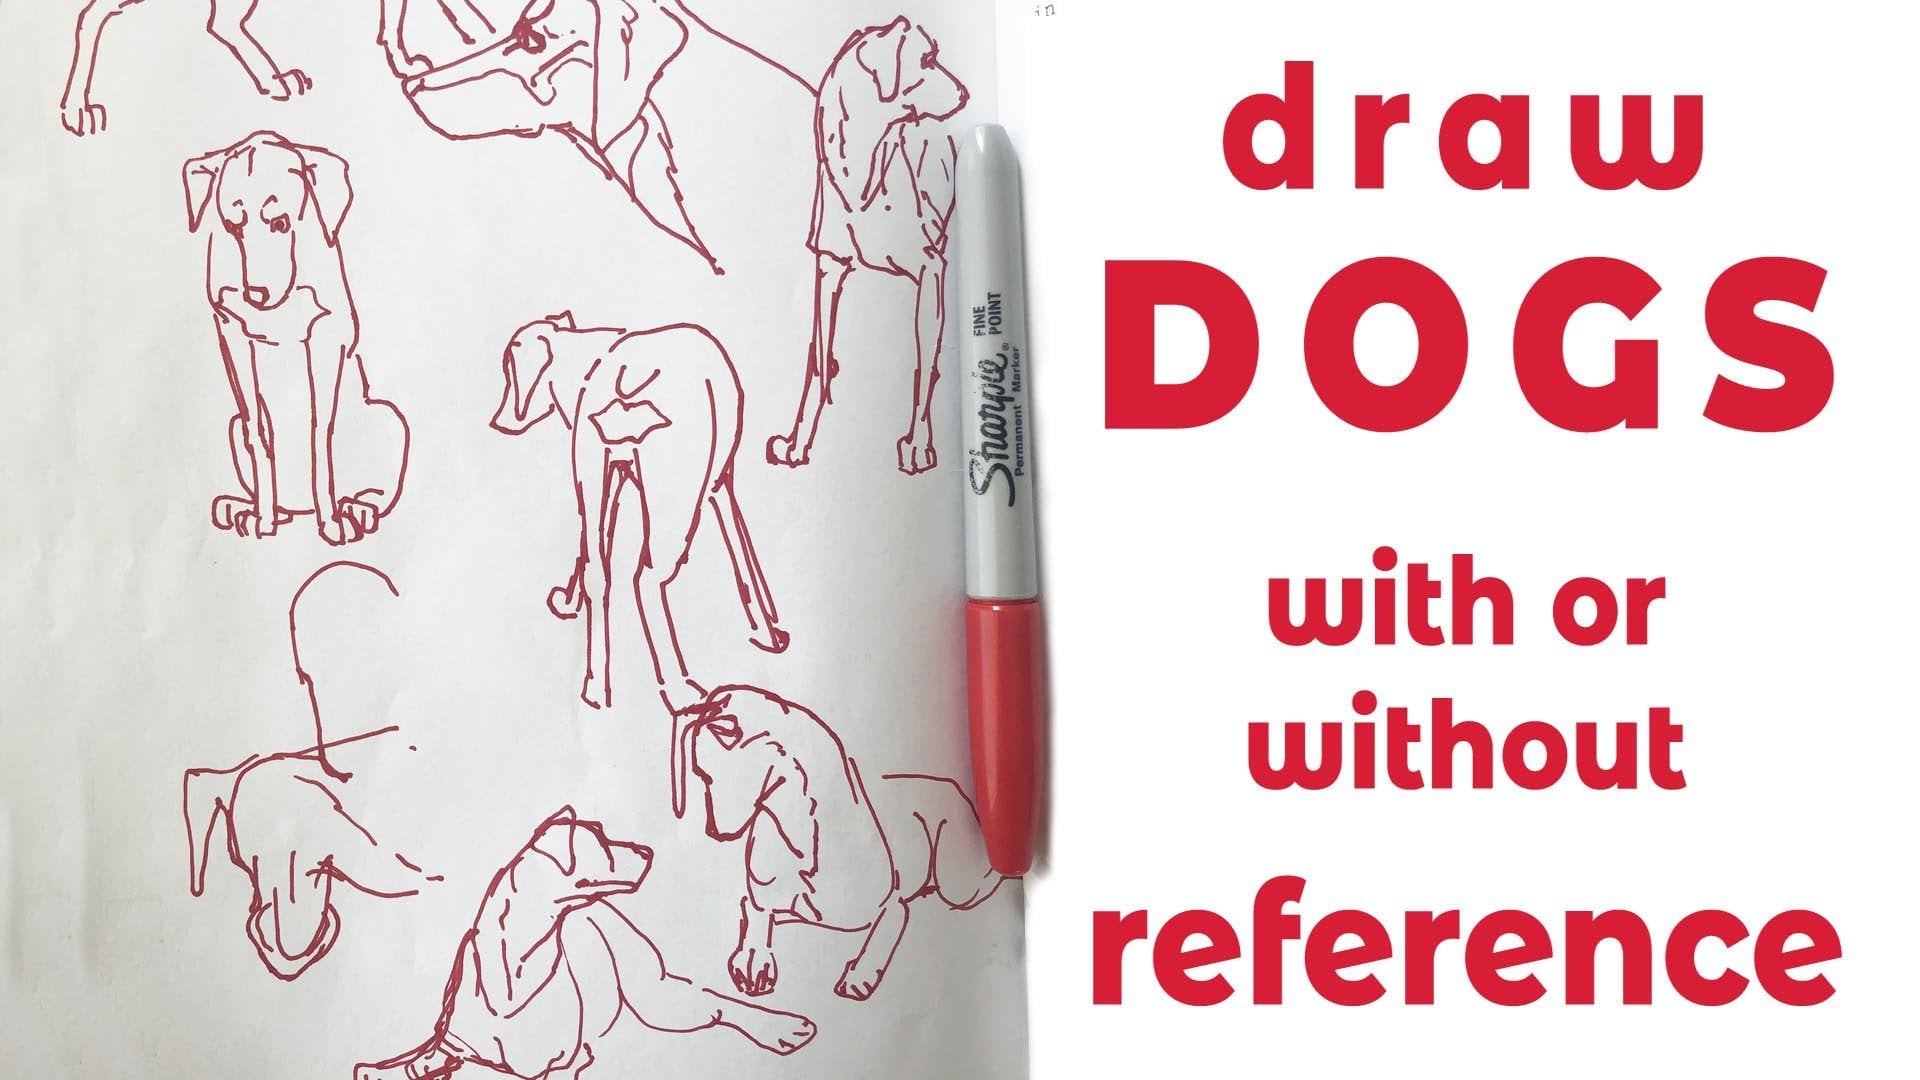
Transcripts
1. Drawing Boxes Trailer: Hi, I'm Steve Worthington and I've been working as a storyboard artist and illustrator for plenty more than 20 years in London, Hong Kong, and Los Angeles. I've done some classes using the constructive drawing approach. And they all start from the standpoint that the students are comfortable drawing boxes and other simple volumes, like filling a page with them and drawing them at different angles and in perspective. And it's come to my attention that that's not the case for a lot of people. And so they'd really like to be able to get up to speed. So that's what this class is all about. In this class we'll learn what's really important about points, lines, and planes, and how to put those things together into a three-dimensional box in perspective. And then we can learn how to take the three-dimensional forms that exist in reality and translate them onto a two-dimensional surface. Why boxes? I hear you ask, it's not like I want to draw a bunch of robots or something. You know, maybe I'd rather just draw figures. Well, the thing with drawing figures is they're composed of certain parts that are symmetrical. And having a good sense of their underlying structure can keep you more organized. Then you can put whatever you like over the top of that in terms of line quality and shading. But without that sense of structure, you'll just be doing with that over a wobbly shaped kind of like icing a cake list, just a big pile of view and using boxes in particular to develop a good sense of structure is perfect because they're so simple. They have eight points, 12 edges, six planes. So when you start to draw things a little wonky, it's pretty clear. And then you can correct yourself and move ahead much faster than if you're dealing with something more complicated. For the project will be drawing boxes, not just sitting on a flat surface but tumbling through space. And then you have a really good understanding of structure and a great foundation for wherever you might want to go in the future. So I'll see you in class.
2. Requirements: For this class, you're going to need a ruthless honesty with yourself and a comfort level with making mistakes and horrible drawings. Simple reason for that is that once you've messed up, you can analyze your drawing, figure out wave messed up, and make an effort to not mess up in that particular way again. Then you just repeat the process, figuring out more things you're messing up. Until eventually the number of things that you're getting right exceeds the number of things you're getting wrong. You're going to need something to draw with and something to draw on. I would say, don't use an eraser. Make mistakes. Be honest about it. Look at the mistakes. You can keep a pile of the drawings that you make and just go back and feel good about the fact that, Oh, I was making all these mistakes back then, not so much now. So make mistakes, be comfortable with making mistakes. It also need a bunch of boxes or blocks or something with right angled corners. So get yourself a bunch of those. And if you want to try looking at the world through a piece of plastic with a square that you've drawn on it. So if a piece of plastic and draw a square on it, That's all you need.
3. Points Lines and Planes: As we dig into understanding structure, we're going to deal with three main elements, points, lines and planes. And for our purposes, mostly lines will represent the distance between points, but that would also represent the edges of planes. If wherever concerning ourselves with the distance between two points that don't form an edge, be aware that that line is representing purely distance and not an edge. But most of the time the line will be doing double duty. Measuring a distance and also representing an edge. And a point serves one purpose. And that is to give us the location, a point in space. Those points in space, what it's all about, that's the first and most important thing to get your head around. When you're learning to deal with structure and representing structure that exists in a 3D world but onto a two-dimensional surface such as a piece of paper. So for example, here is a toothpick and I've put a little blob on each end to represent the point, has a point, but for our purposes, I will use a blob to represent a point since it's a bit easier to see. So what do we notice that makes these points change from at least our viewpoint? But let's just assume our viewpoint is a fixed viewpoint. And in this case it's the camera that I'm filming this width. If I move this towards the camera, those two points to us at least seem to move further apart. And when I move it further away, they seem to move closer together. And similarly, if I'm holding this and the two points fixed and stable, but then I rotate it. Those two points in space appear to get closer together. And if I was able to rotate it so it was pointing exactly at the camera lens, then they would just become a single point. So to make that point, again, perhaps a little clear, I would draw two points. Let's say these two points represent the ends of a toothpick. I haven't drawn a line because we're just concerning ourselves with the location of points. What happens if we want to make this toothpick on our page appear closer to us. We move the two points further apart. If we want to make it appear that it's moving further away, we move the two points closer together. And similarly, if it's at a fixed distance there and it's like flat across. And we wanna make the impression that it's rotated towards us but hasn't moved either closer or further away as a whole, then we just bring them together. And if it's pointing absolutely directly at us, at us, it just becomes a single point. And so the point gives us the position of a thing and a line, which we didn't see in this case, this one out, which has lines, gives us the distance, the length between them. So if we were to put this in front of the camera and bring it closer, the points would all spread apart from each other. And if we were to send it further away, they would get smaller. But also if we were to tilt it at an angle, the points closer to the camera appear wider, further apart, and the points further from the camera would appear a little bit closer together. Of course. They're all the same distance apart from each other, only around the edges, department. And I've done this one with two red lines and two blue lines. Because the other thing we're going to concern ourselves with when we're figuring out all this structure of boxes is the very important notion of pairs of parallel lines. So this is a plane. It's just a single side of a box if you like. But for right now we'll just consider it as a plane. It has two sets of parallel lines, a blue set and a red set of Rapa purposes. And as we move the say the corner towards the camera, what we need to be aware of is that as these parallel red lines move further away, they converge. And likewise, as these blue parallel lines move further away, they also converge to a vanishing point. So if we look at it like this, we will be aware that these two blue parallel lines heading further away from us in this direction. And so they will converge to a point off into space. And likewise with the red lines, they're moving further away from us as a pair because they're parallel in this direction. They would also head off to a vanishing point off in the distance. We'll go over vanishing points in a later lesson. But let's quickly recap what we've learned. Points give us position. Lions Give us a length. And a four sided flat plane with 90 degree angles in the corners, has two sets of parallel lines. And sets of parallel lines that recede away from us. Head towards a vanishing point. Objects as they get further away from us, get smaller. And so we would draw the points that represent the ends of two objects that are the same length, one of which is closer to us than the other. We would represent them. The closer one is points would be further apart. And the further one is points would be closer together. The points on the end of an object stick, say a distance between two points. As it rotates towards the viewer. The points that represent the ends get closer together and that's how you'd represent them in a drawing. So if that's your, that's your eye, you're seeing two points. So you draw those two points. And then as this thing rotates towards you, the two points, as you see them would be much shorter. So you put your two points more like that. So that's where one end of it is towards you and that's where it's just straight up and down for the project for this one, just take two objects. I mean, pencils, pens, Something like that. Just bring one of them closer to your eye and look at them from different distances. And start to really notice how, if you were to represent that on a piece of paper, how you compress the distance of the further away an object. And similarly, take an object, something long and straight, and focus on the points at each end. And just turn it towards you and just see how much shorter it gets as it turns. So how much shorter is it when it's turned that far? How much shorter is it, Windows 10 that far? You'd be surprised how often that is ignored in, in drawings. Next up, we're going to take a look at the picture plane.
4. The Picture Plane: Let me demonstrate the concept of the picture plane. Essentially, it is the notion that you have a piece of glass in front of you at 90 degrees to the direction in which you're looking. So if you're looking straight ahead, this is straight up and down. If you start to look down, this remains at 90 degrees to your angle of view. If you look up. So you'll view is going up that way. This is it 90 degrees to that. And from there, I have constructed this rather cutting device, which is a bit like one of those things you get when you go to the eye doctor, you can put your face in here and it keeps your eye steady so that you are looking through this picture plane right here. And you're seeing what's on the table in front. And in this particular instance of Person pieces of cod down, some of them are squares and the rest are rectangles, about half as long, again, uh, as i r square. So I think there are like four by six. And so what this gives us by maintaining a steady eye position is that you can see through the glass at the world beyond. And you would trace what exists onto the glass. And it would be an accurate representation of where everything is. And with this demonstration of the picture plane, you're seeing the world beyond as it actually exists. And then you're seeing the two-dimensional plane, or at least the moocs that you're making on it. One thing you'll notice is that once I'm tucked in here and looking down at the bits of paper on the table, my line of sight is actually angled downwards. And because we want our picture plane to be at 90 degrees to the line of sight. It's actually tipped forward a little bit. Okay. I think it's time I took it for a spin. So I get my arm through here. Chin down here, eyes nice and steady. And here we go. Here is one of the squares. And just trace that. When you look at something like a rectangle, which we know is longer in this direction and shorter in this direction. What we see and what we think we see a kind of a little different because we know this is longer. We think we see a longer line going in that direction. But if we actually measure it, we can take a pan, measure off. Let's say we'll measure it. There, There's my thumb. Now we're measuring that. And then we give up this way from the thumbnail. And we can see that the line of the long side is actually shorter than the line of the short side. So that's an example of where what you think you see messes with what you're actually seeing. And so you can make all kinds of mistakes as a result of that. Which is why you know, when you're starting out, especially drawing from life is useful to constantly take these flat measurements where you're seeing into space, but you're still measuring on a flat surface. So now you understand the concept of the picture plane.
5. How to Measure: So let's do how to measure when you're drawing from life. And life can be a bunch of dead boxes, that's perfectly fine. Still call it drawing from life. You've probably seen the old cliche of the artist holding out his pencil or a pencil and doing all of this kind of thing. Well, that's pretty legitimate. There are a couple of rules you need to bear in mind. The first is that the pencil has to be at 90 degrees to your line of sight. So if you're looking like the direction of the pencil now, your pencil has to be dead up or round at any angle you like. But as long as it's at 90 degrees to your line of sight, you're all good. The other thing is that you mustn't let it get any narrative you or further away from you. Which is why the standard procedure is straight arm. Don't move your head, keep the shoulder in the same place. Then what you use it for, you don't generally tend to take a measurement with your thumb and then transfer that measurement to your paper. What you're looking for are just comparisons. So for example, this box here. It's like about three times as long as the square on the end. So we might be curious to know, let's say the width relative to how long that length is in perspective. So we mark off the width and then keeping the pencil at 90 degrees to our line of sight. We can then measure. You can get all the way around like measure that. And it's like a little bit longer. But not massively longer. Yeah, it's a bit longer. Slightly third as long again or something. And you can do more overall measurements. You can take the full pencils length and see starting from, say, this, this corner down here. And then to see what would happen if you turn it up that way. Okay, So then you notice about level with here, so you can work out a square based on that. Speaking of squares, they're super useful for figuring out the overall. This is when you're looking at a scene and this could be like a bunch of buildings or something. I just put boxes out. And you want to sketch it on your pad or your piece paper, whatever Canvas. And you get a quick idea of, okay, what fits in a square if the square is like that size. And then you can go in, break it down further. Figure out, okay, so if my square stars in the top right corner there, or can I fit in? And then you can use this square to just really help you self breakdown the scene in front of you as, as flat shapes basically. Because when you're, when you're drawing something from life, you have to kind of cross-reference what you know, which is how long things are and that they're in perspective. And then what you're actually seeing, which a flat shape will give you this is an old were had strawberries in it. But yeah, just fish out some piece of transparent plastic from the trash or something and draw myself a square on it. You can draw different size squares depending on what you're drawing and how close you want to bring it to you. Dear I and stuff. But it's not important for this to always be arms-length. You're just moving it around, trying to find a good square to kind of figure things out from, because it's easy to draw a square on your piece of paper. And then it's easy to just bear in mind. Okay. I can see the box on the right is about a third of the way in. And just kinda break it down like that. Then sketch it on your page, having sketched in a light square first. And then you can concern yourself with the accurate placement of all the corner points and everything once you have abroad kind of overview the scene as a whole. So that's how you measure. You have to be careful when using the pencil method to always keep your arm out straight. If that would put it in an awkward position and you need it to be nearer, just be very aware that when you're moving around you're not bringing it in and pushing it out because that would totally mess up your measurements. As you know, when you bring something closer, the points appear further apart. And when you push them away, they appear close together. So like I say, that will mess up your comparative measurements. All you're doing is comparing this length, say, to this high and sort of thing. And that's where the pencil comes in handy. So for your project, just grab yourself a pencil, hold it at arm's length and just start looking around at things. And and just measuring like the width of a thing and then comparing it to the length of it and seeing how surprised you are. Because when you know a thing is a long way and then you see how short of a distance it is held in front of you, kind of at 90 degrees to your line of sight. You'll find yourself getting surprised a lot. So spend some time just comparing measurements, getting used to the idea of using the pencil to compare widths and heights and diagonals and so forth. And by amines grab yourself a piece of plastic from the trash or anywhere else, draw a square on it. And I used a Sharpie permanent marker and just start looking at the world with this square. Quite useful when you're out and about maybe sitting in the car in a parking lot or something. You can just start looking at vehicles and buildings and chunks of scene, and just seeing how they break into a square and how they fit into a square. And then you can further break that down when you're sketching on your piece of paper.
6. What is a Vanishing Point: So what is a vanishing point? We will demonstrate that with the aid of this plane here, which as we know, has straight sides with 90 degree angles in the corners. And we have two sets of parallel lines. So what we are concerning ourselves with is when this is existing in 3D space and it's tilted like away from you, from your, from your point of view, from your direction of view. And at least one set of these parallel lines will converge to a point in the distance. And that point in the distance would be the vanishing point. So a way to show you that would be, imagine we are looking and we're looking straight ahead. And in front of us on the ground, is that plane. Now because it's not standing up, it's lying down and it's in front of us. We're going to be seeing in perspective. So we know that the bottom edge will be closer to us than the top edge which has tipped over and he's lying down on the floor. So what we know from that is that the two points that represent the bottom edge will be spread further apart. That on a piece of paper. In reality, these two points are the same distance apart as the two points that represent the top edge. But for our purposes, because we're drawing it on a flat piece of paper, we have to draw those two points closer together. And also they would be if they were standing up straight this high above. But we bring them down as well because they're also laying down and a tiny bit further away. So we'll draw our sets of parallel lines. So the first set of parallel lines doesn't have any noticeable convergence because it's just dead straight in front of us. Whereas the pair of parallel lines that make up the two sides are heading off into the distance and where they end up, we can just extend. And where those two lines meet. That is your vanishing point. And there's another, another thing to notice here that because this plane is on the ground and the ground is level, meaning that if you put some water on the ground, it would not run off in any direction, just it would spread out because it's level. This plane is lying on that ground. And if it was not lying on the ground, but it was still parallel to it. So it was level. It's vanishing point would be on the horizon line of the ground plane. And you could achieve that ground plane taking this plane. And if you just extended the sides to infinity, like just to never ending distance away. And you took this front edge in this back edge and you just push them as far as they would go, you would end up with a horizon line. And just a flat plane that extended in all directions as far as the eye could see. So we would draw a horizon line. And this, as I said, is the horizon line of the ground plane. I'm going to just do that a little darker. The horizon line, which we will indicate with the letters h, l, is the horizon line of the ground plane. We could continue to like put another plane on the other side of this one. Bear in mind that the next horizontal line would be a little closer than this one because it's further off into the distance again. And then the next one would be a little closer than that. And then we could just keep making them closer together till eventually you end up with the old railway line effect and vanishing point all the way off into the distance. Now that vanishing point works because our plane is just like lying on the ground and it's not at any particular angle, it's just across in front of us, if we were to rotate it. So we took this plane and we just left it on the ground, but we just rotated it sort of 45 degrees or so. We could have a selves, a new vanishing points. So we could start with a couple of points and we could set a vanishing point, say. Here somewhere. And then we just connect those points and drive them to that vanishing point. So off they go to the vanishing point. There's one, another one. And so to draw our plane to look convincing, obviously we can't do these lines horizontally in front of us anymore. They would look weird. So we're going to have to angle. Like if we hold our little play in here and we rotate it that way, and I tip it up a little bit. We're going to have to rotate this line up in this direction a little bit. And that line heads towards, yep, you guessed it. Another vanishing point. So we'll just pick something that feels about right. Let's go with that. And the way we figured out our vanishing point is we just extend that line as far as it will go until it hits the horizon line. And that's right there. And so we can use this vanishing point to put down the further away edge of this pair of parallel lines. And it's because these lines are parallel, that they go to the same vanishing point. And it's because their level and parallel with the ground plane that, that vanishing point is on the horizon line of the ground plane. So we can just put that in a little darker. And again, if we, if we want to draw further planes along this pair of converging parallel lines to look like the railway tracks again. Then we just use this vanishing point to extend a line across here. And just bear in mind that as things get further away from us, they appear smaller. So we reduce the distance of each further edge a little bit each time. And I will just quickly free hand in the rest. And then we have our railway lines heading in that direction. So I'll just randomly pick one of our planes here and thicken up the lions and point out something. With regard to these two, these two vanishing points. You can use these two vanishing points to create another plane is rotated on the ground, like at the same angle as that one. So any other planes you draw using these two vanishing points will have the same angle of rotation flat on the ground as that one. These planes aren't the same size as these planes because all I've done is use the vanishing points to create planes that are oriented at the same angle as this plane. So let's say we wanted to move airplane back a little bit this way. We're not going all the way back to this one. And we're not all the way over to this one, but we want to go somewhere in between. How do we do that with our vanishing points? Well, we consider them a pair and we just slide them along the horizon line because we're not changing the tilt or anything of this plane on the ground. It's still flat on the ground and level. We just want to rotate it a bit further. So we just move both these vanishing points over a little way. And we move them both the same distance because they operate as a pair. Because all the corners of our plane are going to remain at 90 degrees. So that's more or less the same. Now we just use vanishing points to draw another plane. So we'll start with, start with a couple of red lines. And then we'll put in a couple of blue lines. Oops, see out, grabbed the wrong vanishing point there. And so that's why that line is matching this line because it's going to be parallel to it. Should he used this vanishing point. So that's what I would do. S1 and feels about right. There's another one. And because I, because I drew the wrong line there, I'll just darken these two lines up a little bit. And likewise, these two, so we have ourselves a new plane rotated a little bit more of an angle. And you could do, if you had enough room, you could slide a couple more. Your vanishing points can go off the page. So I could put these two further over still. And this would rotate round a little more so you can make a little flagstone path or something like that. Most of the time you just bear this in mind while you're drawing. But it's good to know what it is you're bearing in mind. So this is the mechanics of how it works. So we've learned that sets of parallel lines, as they head away from us, disappear off to a vanishing point in the distance. And that if something isn't dead square to us, then you end up with a pair of vanishing points for your flat plane. And if that flat plane is level and parallel to the ground plane, then those two vanishing points will be on the horizon line of the ground plane. And we've seen that if you slide that pair of vanishing points along the horizon line of the ground plane, you can then construct a new plane that is rotated. Have a degree is determined by how far along you split the pair vanishing points.
7. Connecting Planes to Make Boxes: So before we add the third set of parallel lines to create boxes from our planes, there is one thing we need to be aware of, which is this. Let's say we're drawing a box. This is a horizon line. Just put that in there. Let's say we're drawing a box and it's facing us. So we'll just list, just draw the plane of the top surface. So we'll just concern ourselves with planes. And since it's facing us, this edge is facing us. We'll put our vanishing point right behind it. The more, the more this plane approaches the horizon line, assuming it's level with the ground plane. The thinner this will get. So eventually if we have, say, another plane 0, so that's just dead facing us. So it's vanishing point would be right behind it. There. It gets, it's not getting any further back. It's just we're just raising it up higher. It gets thinner. And so if this same box, we're just bringing it along, like bringing it around to the side. So let's say we bring it all the way up to here. And because it's, this edge is facing us directly, we will put the vanishing point right behind it. And then we do a very thin plane until eventually you end up with a plane. This actually on the horizon line itself because we're looking straight ahead. We've lifted up our plane to be at our eye level. And so it would just be a line that was all my horizon line so you wouldn't even see the top or bottom surface. And the same thing goes for our plane if we push it up above the horizon line, remember our eye level is on the horizon line. We're looking dead straight ahead. And so, and you, and the plane which is this edge is facing us directly. So we'll use the same vanishing point. And there's a thin, very thin plane because it's angled and we're only seeing just a very slim view of it. It is a square, but it's rotated. So now we're seeing the top surface here and there, we're seeing the bottom surface here. And so when we connect these things, we end up with unit without boxes. So if we're going to make a box out of this, we can drop down some parallel lines, put in a new plane to represent the bottom edge of it. And so we can drop these lines down. But bear in mind, because it's lower down. It's going to be a little thicker. So thinner, the closer it gets to the horizon line, it doesn't get thinner physically. It just appears thinner. I should make that very clear. So we're going to end up with something that appears just a slight bit thinner than this one. So we could put it like and if we had, say, a taller box, let's say you wanted to make this one into a taller box. We will drop down, they're parallel lines. And we would make this plane that represents the bottom of the box quite a bit broader than this one. So we could go sort of here with that one. And we could drop down now parallel lines from here. And so this is how you draw objects using 2 perspective. And what this is actually 1 perspective because we're only having one vanishing point per plane on the top and bottom edge because it's dead facing us if we rotate it out box a little bit. So let's say we did a box like this. So this edge is facing us. Were then we'll just make sure that this edge is ever so slightly over this way than this one. So we can put down two parallel lines for the for the front and back edges of the box, for the side edges. Because we're keeping this into 2 perspective. We would drop down parallel lines, but we weren't converge them towards the bottom or anything like that. So remember that this shape here would appear to us broader because it's further away from the horizon line. And so we're seeing more of the surface of it. So instead of it being this thick, wicked, make it like this thick. So we will draw. Okay, so this, Let's be proper about. Using these vanishing points, we have one pair of parallel lines. And if they head off over to here, then our vanishing point is there. And so that's where we'll draw the bottom edge. And the same thing goes for this bottom edge, but we will put in this set of parallel lines first. So there's a vanishing point. We will go from here to here. And then we can figure out where the back edges of the bottom plane would go towards this vanishing point. We start from here and up here. And from this vanishing point, we'll start from here and end up here. So what we're looking at is, is a box that basically looks like this. And that's if it's made of gloss. Because withdrawing through. When you're starting to play with constructing boxes, it's good to do them as if they're made of glass or fish tanks or plastic, if you like. Just so that you get to draw through everything and work out where the vanishing points go, whether where the edges of the sides of the planes that you wouldn't see if it was say, a cardboard box. You want to be able to see them so you can draw them. So we've learned that a plane which is parallel to the ground plane, as in lying flat on it or hovering above it, but it's, it's level. If you had a marble sitting on it, it wouldn't roll off in any direction as it gets closer to the horizon line, which is the point at which when we're looking dead straight ahead is what's in front of us. You get to see less and less and less of the top edge of that plane. And as it passes and gets higher than our eye level, you get to see a little bit of the bottom of it. And then you get to see more and more and more and more and more as it gets higher and higher. And so when you're creating a box with two planes and connecting them with parallel lines. You have to bear in mind what you just learned there. So that any plane closer to the horizon line appears thinner, then its corresponding plane on the other end of the box. This further away from the horizon line, which would appear a bit broader. So for the project, draw some boxes starting with planes that are just having one edge facing debt to me, which means that they're vanishing point would be behind them and above them or below the mean if you draw them above the horizon line. Because these planes are all parallel to the ground plane. They're either sitting on it or hovering above it. But their level such that if you put a marble on top or little ball of some kind, it wouldn't roll off in any direction is it's just dead level. And then draw connecting lines between two planes and easy with the one vanishing point, just roll the two planes, use the same vanishing point and then connect them with lines. And do a few more boxes that you've rotated a little bit. You're keeping them level and on the ground plane. So we're not dealing with tilting them like this or anything. We're just rotating them so that they're still flattened level with the ground plane. So that you can do some two-point perspective. So you can work out these various planes. And the wider apart you put your vanishing points. You get a slightly more realistic look. If you're really close together and you get closer than this, the distortion that you get is, is it magnified. So I would put them a little wider than this. So have some fun with that. I'm posting to your project.
8. A Third Vanishing Point: So going back to the previous lesson, we will now add convergence to the vertical lines that connect the top and bottom planes to create a boxes. And I will begin by putting in the horizon line. And bear in mind, the horizon line. When you're looking straight ahead, is always directly in front of you. The horizon line of the ground plane. So it doesn't matter if you're standing on top of a building up in a hot air balloon, or standing in a hole in the ground with just your eyes peering over the top. If you're sort of looking directly in front of you straight ahead. The ground planes horizon line is directly in front of you, like halfway up and down your field of view. So let's draw a top plane. I'm just tracing over what was underneath of this box here. Put those two vanishing points in. Now instead of dropping vertical lines straight down with no convergence, what I'm gonna do is imagine a vanishing point this off the bottom of the page and quite a long way off the bottom of the page. And what that represents is the fact that when you're looking straight ahead at the horizon line, this plane is a bit lower than the horizon line. Next plane down indicates the bottom of the box will be lower down even than that. And so that puts it sort of further away from your eye or from the camera or whatever is viewing tool. And so because it's further away, one of the things we learned earlier was objects that are further away but at the same size in reality, appear smaller in a two-dimensional sense when you're representing them on paper. So to create the impression that this plane is further away from your eye than this one because it's lower down. We just make it a little bit smaller, squish it in that way. But because it's lower down and we're seeing more of its top surface. It appears a little fatter in that direction, so it has to go in a bit to accommodate the fact that it's smaller because it's a bit further away, but fatter a bit because we're looking down more on it and seeing more of a clear view of its top surface. And by its top surface, I'm referring to the plane that makes up the bottom part of the box. And so now we can use these vanishing points to put in the bottom edge of the box. Let's put that one in there. Starting from this point, we will drive and line up towards that vanishing point. And we can do likewise here because now we have a point in here to work from. And the final one would be, would be there. So that would be a glass box with a little bit of convergence of the vertical lines. And so this would be because there would be a green vanishing point way off down here. That would be 3 perspective. This earlier box we drew, which is in one-point perspective because it's facing us directly. And we just put a vanishing point behind here to converge this set of parallel lines. We're going to converge slightly the verticals on this one too. So that's going to move from being one-point perspective, two-point perspective. So we'll start with our horizontal lines here. And we'll put a vanishing point for this square. There. We'll put in the other set of parallel lines here. Now for the vertical lines, the set of parallel lines heading down again will converge ever so slightly because it's vanishing point will be quite far off the bottom of the page. So I'll just have to imagine where it is. Probably about a bit further away than my belly button in the direction away from the paper. So I'll put those lines in. So they're only converging and a little bit. And the next lines that we could put in would be, let's put our front edge of the bottom plane, the horizontal one. And then we can work out where the next one would be based on this vanishing point to establish where these parallel lines would cross the slightly converging vertical lines of the green set of parallel lines. So we'll just put that in there, put that in there, and put in our other one of those. And again, so this bottom plane is a bit smaller, so it's a little bit narrower that way as it gets further away from us. Because although it's the same size and shape in reality as the top plane out view of it shrinks because it's further away. So when we represent it on a two-dimensional surface, to convey that illusion, we draw it a little smaller. So in that direction we shrink it. And it also becomes a little fatter top and bottom in its proportion relative to the top one because we're seeing down on it more. So I'll just repeat the same process with this books over here. We have the horizontal set of parallel lines. Put a vanishing point back there just to get these this pair of parallel lines to complete the top plane. And then we will put in the vertical lines. And we're just treating each of these boxes independently. So we'll put the vanishing point for the vertical lines directly below it, all the way down below the bottom of the page. So it's just a slight convergence. And then we work out where the other lines go to make the bottom plane. So that's why we put our horizontal one here. Now we can figure out because we have two connecting point lines here, creating this point. We can put that one in there and this one being parallel, we'll put that in as well, thanks to the same vanishing point. So there we go. So this box that was in one-point perspective before, because it only had the one vanishing point. Now it's got a second vanishing point off the bottom of the page, even though you can't see it. It's there because these lines are converging towards it. So this is now in two-point perspective. And we also had a box here that books crosses the horizon line. And that can create problems which I deal with in my perspective course. But it's a little bit outside of what we're dealing with now. So I won't kind of confuse things by, by getting into that. So when you're drawing a box that crosses the horizon line, let's just keep the vertical lines vertical and not worry about any convergence. Put in airlines to create that box there. Say we've added convergence to a vertical set of parallel lines, which in some instances takes a 2 perspective drawing and makes it a 3 perspective drawing. And in other instances, takes a one-point perspective drawing. That makes it a 2 perspective drawing. So for your project, we'll just keep it simple right now. Just draw everything below the horizon line. Draws some planes here and there. And then draw ever so slightly converging vertical lines down and then work our way. A bottom plane would be and do that on all the cases and just fill up a sheet of paper with varying Lee shaped fish tanks and post those to your project.
9. Sets of Parallel Lines: I have some boxes where I've just put some colored tape on the three sets of parallel lines. So you've got one set of parallel lines in green, one set of parallel lines in blue, and another set in red. And each set of those parallel lines would head off to its own vanishing point. That is because the box is we're dealing with are all rectilinear, sort of square corners. We don't have any sort of wedge-shaped boxes or anything fancy like that going on. We're just keeping it simple. And this is an example of that. Here is another square box with three sets of parallel lines with tapes to indicate those. So this is just to, just to keep aware of the sets of parallel lines heading off to their own vanishing points. Now we could, if these two boxes weren't sitting flat, they were angled sort of randomly, then you'd have a vanishing point for each, each of the colors here. So you'd have three vanishing points and three more vanishing points that wouldn't line up with any of these vanishing points because they're not sitting on a shared surface. If this one's up like this and this ones I really like that, then they're going to be just independent of each other.
10. A Tilted Plane as a Base For Other Planes: So what if we have a plane which is not level with the ground plane? So let's put our horizon line for the ground plane in here. Actually, I'll make it a different color just so that we're clear about that. So this is the horizon line. This is the horizon line of the ground plane, and this is just some other plane that's kinda tilted. And so we would work at where's vanishing points go. So we can put one here. And this set of parallel lines would take us to a vanishing point. And that would be a little bit off the page. I can, can put my, the end of my ruler thing here where that would be. So this horizon line would be the horizon line of this plane, which isn't the ground plane, would be its own thing. And it would, it's vanishing. Points of this plane would be on that. So any any other boxes that you sit flat on this plane would have their vanishing points on the horizon line of this plane and not the ground plane. So for example, if I was to draw a plane here, Shares parallel lines with the edges of this plane. So they would go to the exact same vanishing point and to the exact same vanishing point over there. But if it was at a different angle, let's say we put it like slightly where we can slide this vanishing point over and it away and create a new, a new little plane on a surface here. And likewise, this vanishing point at the other end would be pushed over a little bit too. So I would end up with and with that. And so that box or that plane that could be the base of a box would be rotated around a little bit more. And so you're just ignoring the horizon line of the ground plane and using the horizon line of this plane for any planes that you draw on it that are parallel to this plane, like sitting on m. Why would you do that? Well, let's say this could be like a raft or something floating around in an ocean that is bobbing about. And it's got like boxes sitting on it. And you want the boxes to feel like they're actually sitting on this raft as if Bob's about say. So that's why you would use the horizon line of this plane for these boxes which are sitting on it. So we've learned that the ground plane that has its own horizon line is not necessarily the only horizon line that you could put in your scene. If you had a raft or surface that wasn't level with the ground plane, it would have its own horizon line and things sitting on it would conform to that horizon line rather than the ground plane. So have a little practice with that. Keep the plane that you create that is not level with the ground plane. Not too big because you're going to be chastened vanishing points that are miles away on either side otherwise. But then put some planes on it and turn them into boxes and have a bit of fun doing that.
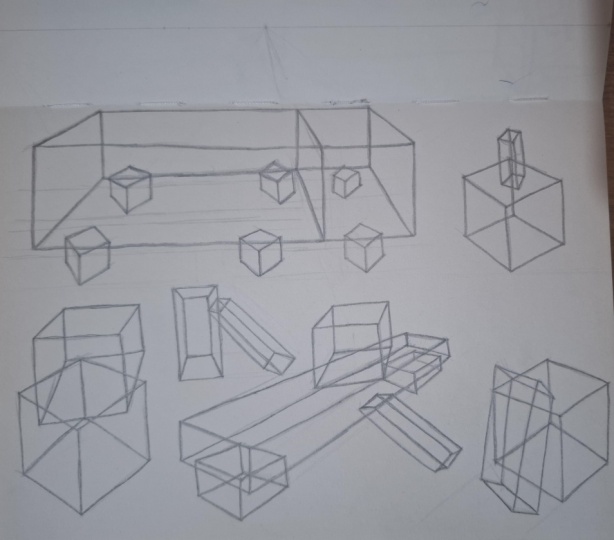
11. Tumbling Boxes: So let's say we want to draw some boxes tumbling through space. We're not worried about them being sat on a ground plane. We just want them to be kind of randomly tumbling. So we draw our first plane and we will just, what we need to make sure of is we decide on a point that's closest to us, which will make this one. And so when we draw the rest of this plane, if we have a line here like that, just measures the distance between these two points or connects them. We make sure that the next point we do is a little closer to the center line than this one, so that we know that this plane is in perspective. So here we have a plane that's a little bit in perspective, heading away from us in that direction. So this is the closest point. So we can draw a new point here with a line connecting them. And so now we know that this is heading away from us. So the parallel lines that matched up part of the set of parallel lines, this is also a one-off, will converge ever so slightly. So we're not worrying about any horizon lines and where exactly we're putting vanishing points. We're just concentrating on making sure they converge, even if it's just a little bit. So we can draw a line as part of this set of parallel lines that goes in a little. And the line that is part of this set of parallel lines again, but make it converge a little bit. And the same thing is true of this line. When we draw its counterpart over here, we bring it in a little bit, so we just convert it. And likewise, when we're drawing the parallel line to this one, we just bring it in a little bit, converge like that. And so we should be able to test that. And so we should be able to check on that. So this line between these two points here should be a little bit further than this line, which it is just a hair. And this line which it also is just a hair. And similarly, this line which we can measure between those two points should be a little bit longer than this line, which it is by just a hair. And this line between these two points should be a hair longer than this line, which is quite comfortably. So now we know we have drawn ourselves a box in perspective with this point being the one closest to us. So let's draw another box similar size. Again, we'll just draw two edges over plane. And this point here, we want to be the closest one to us. So we will just connect these two points so that we have a measuring reference. So we can take this point and move it across and make it slightly less far from the center line, the diagonal center line. So now we know this is the closest. When we draw a line here and we match a parallel line for this edge, we just converge, it converges towards a vanishing point over here somewhere. But, but they're moving away from us, further away from us. So they just converge slightly. And likewise with this one which just converge that one slightly as well. Push in a little bit there. And likewise with this one, we want to convert this way. And likewise for this one, we want to convert this way. So they're all going off to a vanishing point. They are going off to a vanishing point. It's far away. It's not going to be on the page. These two are going off to a vanishing point somewhere. And so you just do more and more of this drawing, lots of loss of boxes tumbling through space. And one thing to note is that the closer one of these boxes is to you, the the more dramatic the convergence of the parallel lines would be. There's a reason for that, which I will show you. So why, when things are closer to you, are the converging lines more dramatic? And when they're further away, let's have a couple of vanishing points. We will make ourselves a box. Okay, So this is a box fairly close to us. And its overall size takes its points closer to the vanishing points because it's bigger. Because it's closer. If we were to draw another box in the distance, it would be if it was the same size box, it will be a lot smaller to us. So it would look something more like this being further away. And because it's smaller, the angle of these parallel lines converging towards those vanishing points would be less pronounced. So if we made one even bigger than this one, Let's say we made one this big. And we took the vanishing point to draw in the sides. And we have another vanishing point way down here for the three-point perspective. And we get it this way. The bigger and closer it gets you the viewer, the more distorted perspective effect becomes. So you can see how this blue box is way more distorted look in this little red box here. And so what is useful to bear in mind is that when you're drawing things closer to you, you can exaggerate that effect. And when you're drawing things further off into the distance, you just downplay the convergence. And if they're quite far in the distance, then you can downplay the convergence to such an extent that you don't even notice it. I go into this kind of thing a lot more in my perspective course, but for now, you can just bear that in mind. So for the project, draw a series of boxes tumbling through space and have some of them be a little bit larger and closer. And have some of them be a little bit smaller because they'd be further away. So we'll just say that box, is that the same actual physical size box in all instances. But some you're going to put closer, some you're gonna put further away.
12. Practice: Something is really good to do is get squares of paper or cardboard, whatever. And just put them on a table surface so you have a bunch of them and practice drawing them from. There'll be angled differently. Some will be further away, some will be closer. To, pay careful attention to how much convergence there is. And just get used to drawing squares. It will really, really, really help you out in the long run. I wish I'd done more of this when I was kind of learning to draw earlier on. Because one thing that is like a super common mistake and I keep making it myself is when you're drawing like cubes or boxes generally, you always tend to make a three-quarter view, like say this. There's a tendency to always draw the side too long. It's just one of those things that happens a lot. And the more you get used to drawing what the shapes look like in perspective, just from life, just from putting them out in front of you and then drawing them. The better prepared you'll be for that. And also put boxes, just lay boxes out over a table and just practice drawing those from life. I mean, don't take a photograph and trace them. You, you're better off looking at them and drawing them from life, from observation directly. That's just fantastic practice. One thing that might be fun is to put some squares and rectangles of paper and card down on the table. And then use those as the basis to create kind of boxes like make them transparent, like fish tanks. So just draw a fish tanks all over the table. I mean, not necessarily as big as the real fish tank, but you get the idea. And then when you've done that, just start putting other ones on top of them and like rotating them and stuff and just see kind of how comfortable you are getting. So have some fun playing around. Just arranging boxes that you draw either from boxes you're actually looking at or ones that you just make up. Which kind of takes us back to the start, which is points and lines, points giving us the positions of the corners, lines giving us the distance between them. And also representing the edges of planes.
13. Class Project: So the purpose of this whole class is to get you comfortable drawing boxes. And comfortable enough that you can just kind of free hand them, draw them. But plotting vanishing points and everything. And draw from life as much as possible, laying boxes out in front of you. And eventually you'll just get the hang of water box looks like in perspective. And you'll just always bear in mind that these lines are converging ever so slightly in that direction. And these lines are converging ever so slightly in that direction too, because they're part of the same set of parallel lines. These word because they're below eye level, would be converting birds this point so far off the page that you can almost completely ignore it. Unless the box is really big and Ryan front of you. And so just, just draw a bunch of boxes and draw them as fish tanks. And once you've drawn a few, start leaning other boxes up against them. So you could draw, you'd have to extend this line to figure out where this point would be resting on the ground. And then if the if it's leaning on this box with the bottom of this box resting on the side of this one, then that's quite convenient because we can use this edge here to work out their perspective of the bottom. Behavior can just take it off to the same vanishing points. And the more books is you draw from life just on the table in front of you. The more time you spend drawing boxes and cubes, the more you'll just get a feel for them and get comfortable doing them. I should do it more myself. I wish I had done it more along time ago when I kind of started getting into this thing. It never hurts to do to do more of the drawing from life. And we can park and other stack and other blocks on top of this one. And remember what we learned earlier that the bottom plane of a box that's flat on the ground plane will be a little bit more enlarged in this direction. Then the top edge, which would be getting narrower in appearance, the closer it got to your eye level, which would be the horizon line of the ground plane. So you can see I've drawn three is fish tanks and two is just, I guess like cardboard boxes. Now let's draw some that are just kind of tumbling around. Don't forget the ever so slight convergence as the sets of parallel lines head away from us. So these would be converging ever so slightly. And I haven't yet decided which way this plane is facing which part of the box it is. So I'm going to decide right now that this is going to be the furthest. So this line, I'll be shorter than this one. And these will converge. Let's draw the rest of the box in here. So again, convergence heading off. And when you've drawn a box, you should be able to determine which is the closest point to you. And if you don't quite get your convergence is spot on first-time, just draw over them. I wouldn't worry about erasing or anything. You want to be aware of how, how well you're doing this. So make mistakes and don't feel bad about it. And we're not concerning ourselves with any texture or pattern or anything on shading or anything on these books is where purely concerned with structure and getting them to feel like they occupy space and they don't interfere with each other. By which I mean, if this box is leaning on this one, it wouldn't be occupying space in a way that you couldn't do in reality. And likewise, when this one sitting on top of this one and this one's leaning on this one. I've made this box narrower than this one. Which is why I came in here before I'm started heading out to figure out where this point went. And likewise, it connects with this edge a little in from the corner. And what might be kinda fun is to do a box this laying on this surface here and hitting inside this fish tank and lists. Let's do bottom edge of the box. And we can still be borrowing this vanishing point because these parallel lines are all parallel to each other, so they're heading to the same place. Now these bottom edge won't be connecting with this edge of the fish tank here if you'd like. Because it's got a side that's going to be coming up which will be connecting with this edge. So we'd have to stop it a little bit shorter. So if it would have been, say about here actually is pretty close to We just do these vertical lines coming up in the world. But relative to this line, if this is what you would consider horizontal for that box, we need to draw the other edge coming up this way. So let's say we can draw this box. And again, we can borrow this vanishing point for this edge here. That doesn't look vertical relative to this. To me, it doesn't look like 90 degrees. So just pull that in a little bit. So this is the purpose of developing this sense of structure. Like eventually you will be combining shapes and not just rectilinear boxes. And you'll be adding parts to other parts and chopping chunks out. But until you're comfortable drawing boxes and then you're comfortable leaning on each other and stacking them on each other. This is like the first steps towards starting to build using these shapes. And you can see this box is larger and closer. Draw some other boxes that are smaller and further away. And I'm just pulling the top edge here, this point here over this way a little bit. Bringing it in this way a little bit. Just to bear in mind the gradual convergence heading down this way. And you're noticing that this plane here appears narrower in this direction to us than this plane, because it's approaching at eye level. And eye level would be the horizon line of the ground plane. So you could, if you wanted to add some water to these fish tanks. And that would be you'd be noticing that the plane of the water surface would be somewhere in-between this in terms of how narrow it is and this one. So if this one is this much and this one is this much, this one in the middle would probably become halfway between like about there. But we'll just work it out with our vanishing points. We put our vanishing point there. And so yeah, you, you can see that that is in fact the case. We'll draw a line there. So I'd be mindful, like I've been pointing out of lines that converge away from you that a parallel, there's ever such a slight amount of convergence. If they're bigger and closer to you, the convergence would be a little more pronounced. And if they are far away and way off in the distance, you would hardly notice it a tool. And draw as many boxes as your comfortable drawing I'm in It's all good practice. And when you're comfortable drawing them, laying on the ground and also floating around in the air. Start stacking them up on each other and just build a little world of boxes. And that will get you well on your way to understanding structure and do, like I said, combine different forms to create more complicated objects later. But this is the foundation. This is absolutely crucial if you want to be doing constructive drawing. And doing constructive drawing is crucial if you want to be able to draw from your imagination, or at least from reference, but rearrange angles and things, objects and scenes for whatever purpose. And here I've gone very close to the horizon line. And in fact, I've gone just a little higher than it, just to demonstrate how thin this plane would appear relative to this one. And this box is leaning on this large books, which is sitting on top of this smaller box. So that's why when I was working at where the points of this box we're sitting on the ground. I extended the side of this box with a construction line which would correspond to the ground plane. And then just kinda pushed out another one to put this point in place. So when you've filled a page with boxes, some of which are sitting on the ground, some of which are floating around, some of which are leaning and resting on other ones. Post it to the project page.
14. Conclusion: Congratulations, you've now taken the first and most important step to developing an ability to draw constructively. You'll no doubt want to continue forward and deal with other simple volumes and figure out how to combine them to create other shapes. It puts you well on the way to being able to draw a pretty much anything you want. This constructive approach to drawing has been so helpful to me over the years. And I really hope you've got something from this introduction and that you continue and do great things. Thanks for taking my class. It means a lot to me and you can find me here and there on the Internet. Don't forget to post your projects so you can all see how you're getting along. And if you have any questions, post them in the discussions, I'll check back to see what's going on and help you alone. Thank you again and good luck.
 Steve Worthington, Storyboard artist/illustrator/sculptor