Transcripts
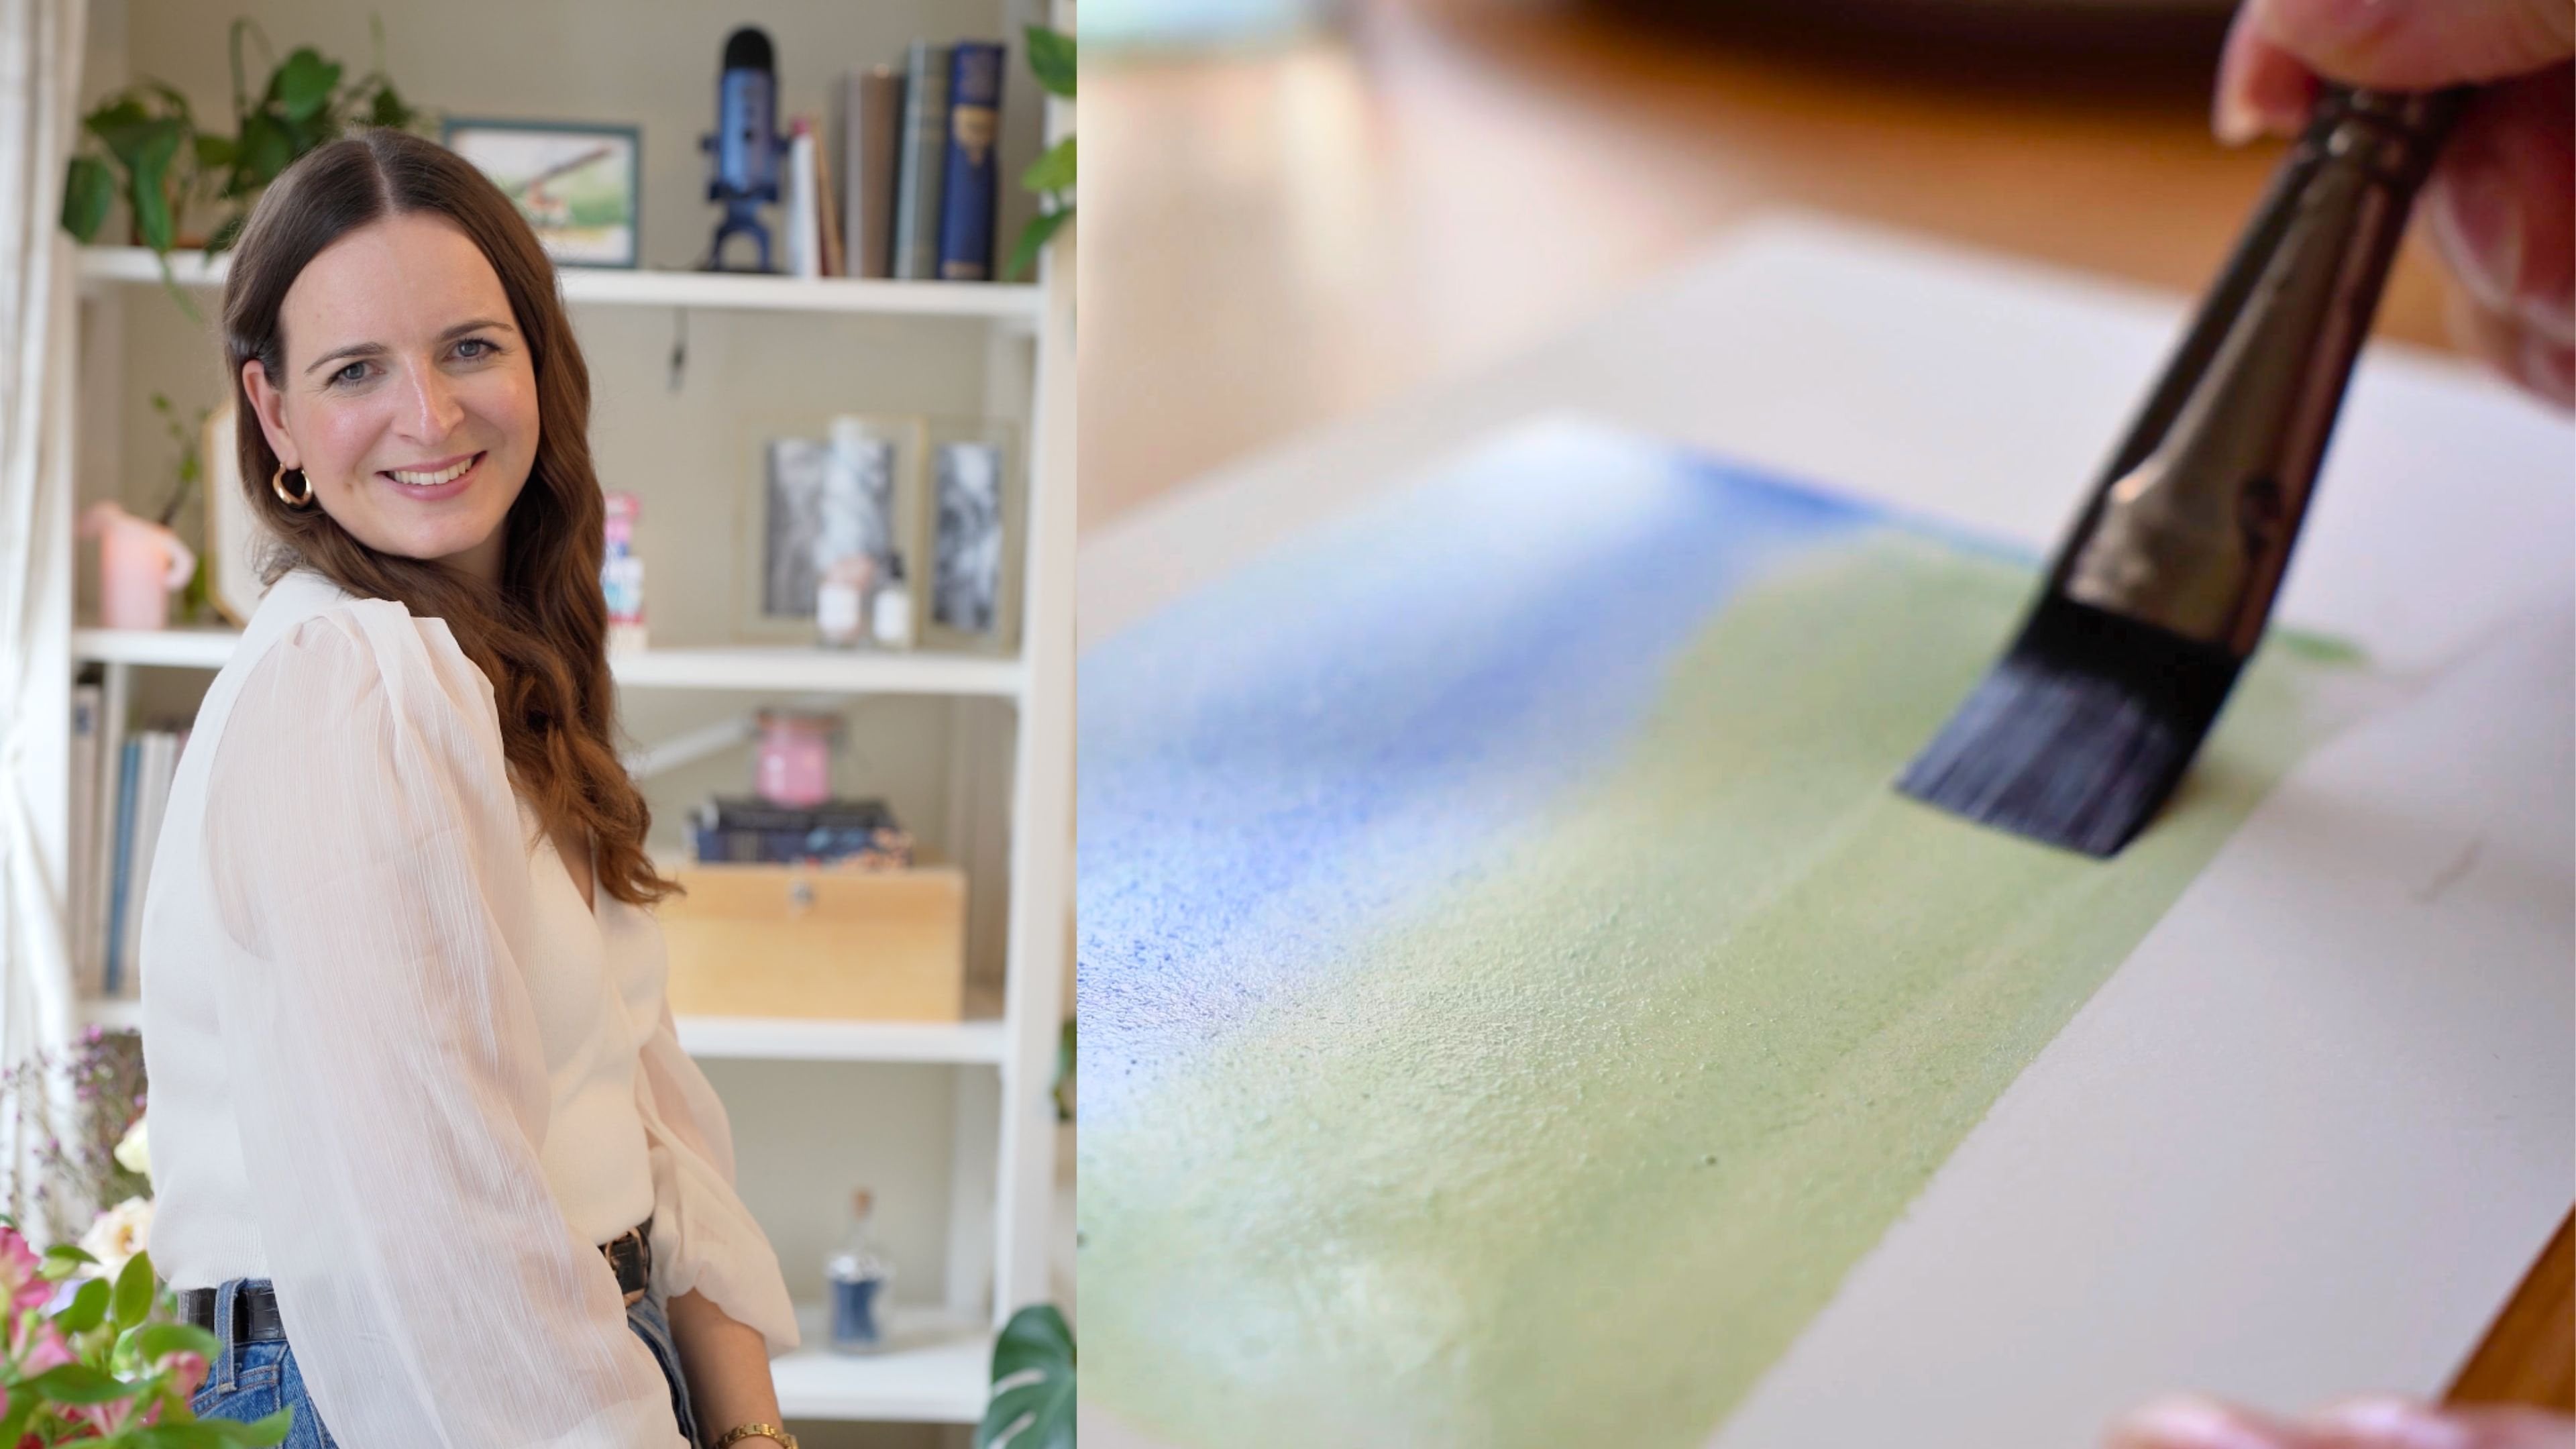
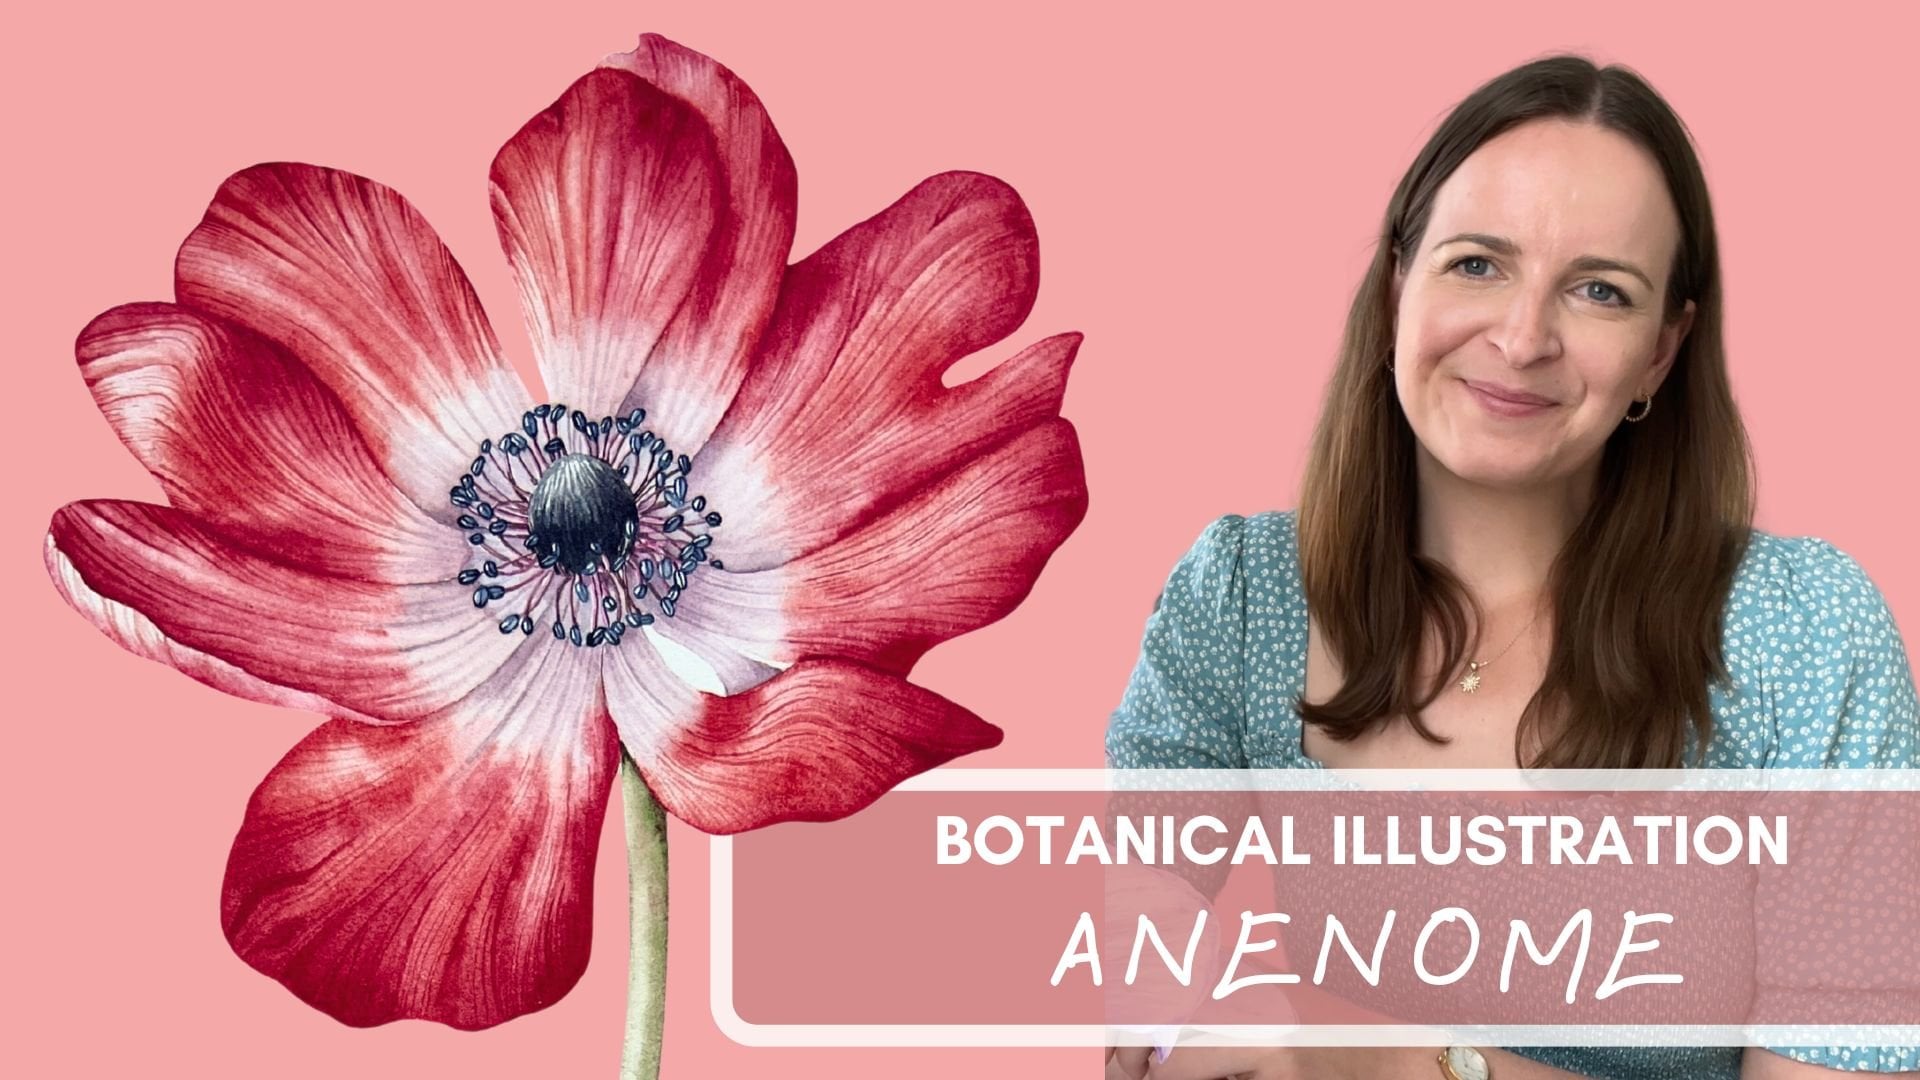
1. Introduction & Welcome: Hi everyone. My name
is Helen and I'm a botanical artist and teacher. And I've been painting botanicals
now for about 14 years. I'm so excited to welcome
you to my latest class. In this class, I'm
going to take you through all the
steps that you need to take to create this
beautiful painting of a rose. I'm going to take you through
the materials that I use, my process step by step, including my favorite
utter cal techniques so that you can end up
with a beautiful painting just like this. I really hope that
you can join me.
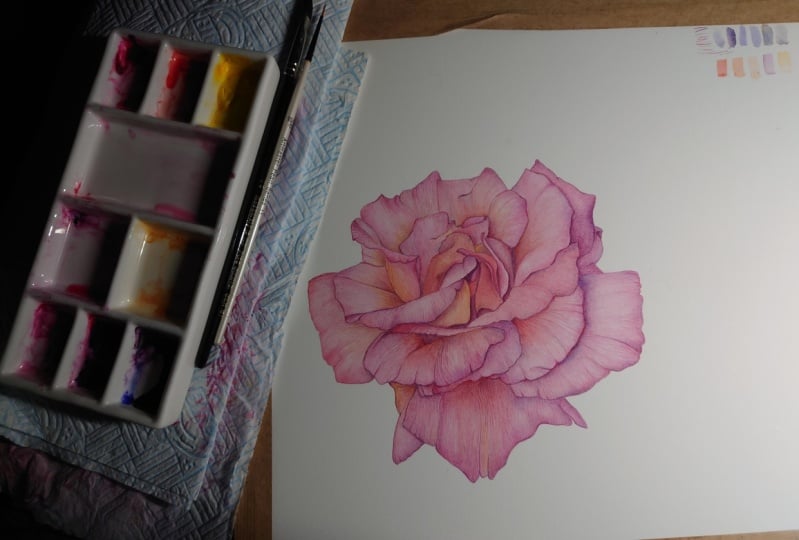
2. Materials: For this class, I am going to dive straight into
the painting itself. In my previous two classes, you'll be able to hear
in much more depth about the materials I use and about how I warm up before
starting a painting. I'd really recommend having a watch of these before
starting this project. But if you feel ready
to dive in with me, then let's go a little reminder to make sure that you have
the video playing back in H D. Which you can
adjust by clicking on the settings button at the bottom of the
playback screen. Don't forget to, to download
the reference image and the line drawing from the
project resources section. Let's move on to materials
for this painting. I am once again working
on a piece of Rs, hot pressed watercolor paper. This is stretched onto
a piece of plyboard. Again, if you'd like to see
how I stretch my paper, please do have a look at my first tutorial where I explain and demonstrate
this really, really easy process in depth. I have then transferred
my line drawing onto my watercolor paper
so I'm ready to paint. You'll notice I've
chosen to place the rose to the left
hand side of my paper. This just gives me a little
bit of space to test out paint colors or practice any techniques on stretched
watercolor paper, which personally I prefer rather than working on
a scrap piece of paper. The brushes I will be using, as in my previous classes, are the Rosemary and
series seven sizes, 42.0 I also have a Faber Castell putty
rubber I love to use to lighten any pencil
on my watercolor paper. I also have my reference
image close to hand for me, it's on my ipad. The paints we are going to
be using for this rose are Windsor and Newton
Professional watercolor paints in permanent rows. Windsor lemon and
French ultramarine. Just these three, it's amazing what a limited
palette can do. I'll tell you more about my
limited palette as we paint. You can see here too, my water
jar palette and a piece of kitchen roll which
protects my paper and allows me to block
my brush when needed. Now we've gathered
everything that we need. Let's get painting.
3. Mixing Grey: The way we are going to
approach this painting is actually with a gray
tonal underpainting. I will talk to you about why
I chose this method too. While we paint first though, I'm going to show you
how I mix my grays. This is a really great
skill to learn as it's so translatable across any subject you might choose to paint. Essentially, the botanical
gray we're going to mix is going to be made
from our three pigments. When you mix three
primary colors, you will eventually
end up with a gray. There are many reasons
I love mixing my own gray rather than
using one from a tube. Firstly, we're not adding another pigment to our
palette and our paper, we're using the colors that we know already will
be in our painting. This reduces the chance that our painting will end up
looking muddy and dull. Secondly, I love that we have scope to easily adjust the gray. If we feel we want
a pinker gray, then that's easy to do by adding a little bit
more permanent rose. Similarly, if we
want a bluer gray, we can add a little bit
more French ultramarine. We have so much more flexibility and more opportunity to
color match on the paper. For this painting, I'd like
you to do just this mix up, two gray mixes, one
that is a little bit more pink and one that
is a little bit more blue. We'll be varying
the colors across the flower to show areas
that are a little warmer, tending to be nearer the light, and those that are
a little cooler, usually areas in shadow. Now, it's very
unlikely that you'll hit upon the perfect
gray first go. It'll take some adjusting
and perfecting. It can be sometimes
quite hard to see the mix clearly when
it's really very strong. Try watering it down and
see what effect you get. Then test out your colors
on your paper As you go, you can see me doing that here. And once you're happy
with your mixes, we will move on to creating
this lovely tonal, underpainting across the rows to capture the shadows
and the highlights.
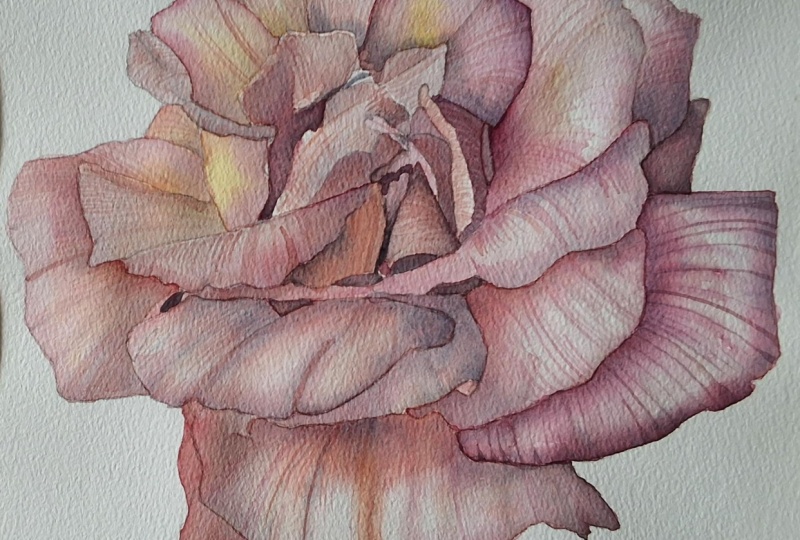
4. Tonal Washes: Now we have some
beautiful grays mixed. We can move on to starting
our underpainting. Now for the majority
of this painting, we will be using a wet on wet technique to apply
the color to the paper. If you've not used
this technique much, you might want to have a look at my previous classes
where I go through the wet or wet technique as well as other watercolor
techniques in more detail. But if you're happy to carry on, then I'll talk you
through my best tips for the wet on wet technique. As we go, as you can see here with the
wet on wet technique, we apply a layer of water first before we lay
down our paint. This allows the
paint to spread and blend beautifully
across the paper. The most important
thing to check is that both your water and
your brushes are clean. For this part of the process, it's so easy to accidentally have a
little bit of paint on your brush or forget that your water jar is
colored with paint. It may well show up. So it's best to start clean. You may know
already, but I paint with two jars of
water by my side, One that I use for messy
cleaning of my brush, and one that I try
and keep clean. It makes it a bit
easier rather than changing the water every
half an hour or so. Here I am now
starting to add some of the gray we have
mixed on our palette. I'm choosing to use
the bluer hued mix for this particular petal
as it's more in shadow. Being on the right hand side, if we are assuming that our light is coming
from the top left, try to ensure that you have a milky consistency
to the paint. You want it to be flowing
easily from the brush. I am using my size
too rush to apply the paint smaller than the size four I was using
to apply the water. Using the size four to apply
water means I can cover a relatively large area
with each brush stroke. Minimizing the number of times I touch the paper
with the brush, but also ensuring I can work quickly enough before
the water dries. The beauty of both
of these brushes is that they have a nice
point and are quite rigid. It's easy to still have
good brush control in finer areas for
adding the paint. Though I'm using a size
two for even more control. You can see here that
I am applying paint initially to the areas that are going to be most in shadow. These are the part
of the petal that is hiding under the one on top, so that left hand edge, as well as to the
right hand edge of the petal where it is bending slightly away from the light. This gives the petal
some shape and form and shows the viewer that this petal is underneath
the other one. The other way you can begin showing the shape and
form of the petal is to start to apply paint in the direction that the
veins will be traveling. As you can see me doing here. You can see already with just a few soft lines following
the shape of the petal, that it already appears to be curving as it leaves
the base of the flower. Now we repeat this process across each and every
petal in the flower. I know that this might seem a little bit daunting right now, but don't worry, it will all
come together beautifully. The most important
thing is to try and enjoy the process
of putting paint to paper when it comes to
repetitive processes like this. Once I have a feel
for what I'm doing, I like to put a
podcast on or some music and find that flow state. If we go back to thinking about that wet on wet technique, the way to ensure that the paint flows beautifully
across the paper, to ensure that you have covered the entire area that you
wish to paint with water. You want the paper
to be glistening, but with no puddles of water if you're working
in a hot climate. A little reminder that
you may need to even add a second layer of
water to ensure that the paper is saturated and you have time then to add
the paint before it dries. I'm always looking closely
at my reference photo, trying to translate what I
see as carefully as possible. But remember, this is art. This is your individual
representation of what you are seeing. You might notice that the
paints are separating a little bit on your palette and even a little
bit on the paper. Don't worry too much about this. This is actually the nature
of French ultramarine. Personally, I quite like
the effect as it gives another subtlety to the colors we are applying to the paper. If you do want to minimize this, just make sure
that you're mixing the paint on the palette well. Before you pick it
up onto your brush, you'll notice that
I'm not applying gray paint to the
whole of a petal. I'm keeping much of the
surface of the petals white. This is to provide contrast to the painting through the
balance of highlight. Shadow. Remember, it's
much harder to lift paint from the paper than it is to apply another
wash once it has dried. The white highlights
are what will make your painting glow as you
move from petal to petal, try to make sure that you're not painting next to a petal
that is still wet. This will lead to
messy and untidy edges that blur together and
that are hard to fix. The beauty of working
with a rose with this many petals is
that we can move around to ensure
that this doesn't happen and we have lots of
time to let things dry. Remember that you can adjust the colors slightly as you move to Those bluer hues are great for the bottom right
hand side of the flower, whereas you may find the pinker hues are
better for the top left. Hopefully you'll see as I paint the subtle variations I'm trying to capture
within each petal. One other tip I wanted
to pass on is about controlling the water and
the paint on the paper. If you notice that you have some water or paint
puddles on the paper, you can just take a clean
and dry brush and gently lay it in the puddle or glide the
brush across the surface. You will see as you
watch me paint that, I will often use my size
four brush for this. Whilst painting
with the size two, I often even paint
holding both of those brushes in my
hand at the same time. You can also use this
technique to lift out some paint if it creeps too
far into any white space. With this wet on wet technique, it's really important
to stop painting as soon as you notice that
the paper is starting to dry. This changes the technique otherwise to one of wet on dry. And you will end up with edges and lines if you're not careful, rather than that lovely, blended quality we are looking
for on the paper. I'm going to speed up the
video a little bit now, but remember that
you can always slow the video playback speed down at the bottom
left of the screen. I'm also going to skip the process of laying
down the water from this point on as this process remains the
same for each petal. The only exception to this is in the very fine areas in
the center of the flower. These smaller sections are
so tiny that you may find it far too tricky and unnecessary
to lay water down first. In these ******, you'll see me applying paint
directly to dry paper. I've chosen to keep
the entire painting included in this video, slightly sped up
in case there are particular parts that you find more challenging
than others. I'm thinking particularly of
the center of the flower, as the petals get smaller. I promised I would let you know why we are starting this painting with a
total underpainting. This isn't a technique
that I use often, but I felt it would be
perfect for this rose. Given the subtlety
of the colors and the gentle
fluctuations in color, I appreciate it's not easy to know when to use
which technique. Spent quite some time
thinking about this myself. For this painting,
my best advice is to learn as many techniques as you can as you're doing now. Until you feel that
instinct to kick in, which makes a choice
a little bit easier, just practice a small part of your painting with
different techniques. For example, in this rose, practice underpainting
with a few washes. Then try without and
see which technique you prefer and which gives you the best outcome
and overall effect. I'll let the video play
now without much talking, but I really hope you
enjoy the process. There we go. As we come to the end of our
first layer of washes, you should have a beautiful tonal underpainting completed. I really hope you're pleased. Now we get to move
on to playing with some of these beautiful
bright coral, pinks and yellows, and start to lay these on
top of our painting. This is when it
really comes alive. I suggest you take
a little bit of time now to have a
break, make a drink, stretch your legs and
your back and your arms, and then we can get back
into more painting.
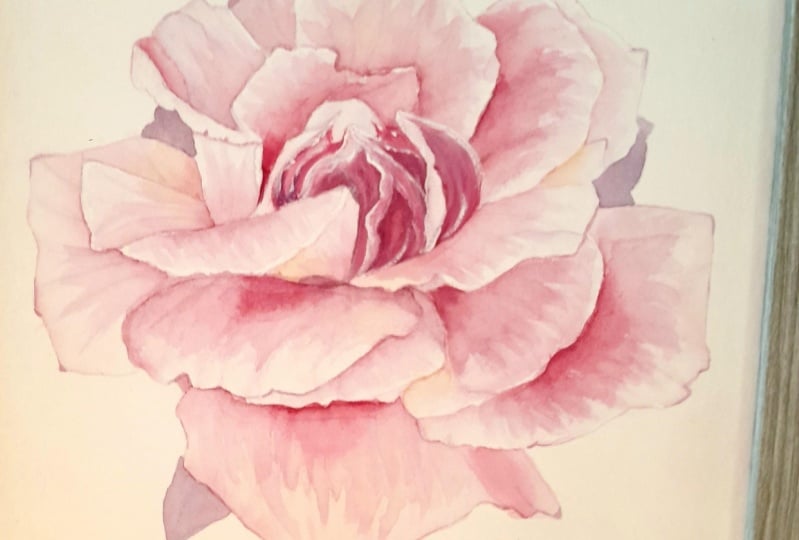
5. Adding Colour: We can now begin to add some
beautiful color to our rose. I start by clearing my palette. It's unlikely that we'll need
any of those grays again. Of course, if you have a
second palette, by all means, use that to save wasting any of the mixes you've made so far. Now we're going to mix up
three different paint mixes. A bright coral orange color using the Windsor
lemon and permanent rose. One that is permanent rose with a small amount
of Windsor lemon. And finally, a soft violet using permanent rose
and French ultramarine. I'm creating all of
these colors once again from the three
on our palette. I'm going to mix these as a strong pigment and then also
water them down a little. You can see how once again, I'm making samples of
each color on the paper, which lets me see more
clearly the color I've mixed and therefore allowing
me to make fine adjustments. I'm always looking at
my reference photo and trying to color
match as as I can. Finally, I'm going to
mix just some plain, permanent rose on my palette, as well as a fourth wash to apply in areas that are
that really vivid pink. Make sure to mix up enough of each color right
at the beginning. It's so much easier
than having to keep remaking your mix part
way through the painting. It's not the end of the world
if you do have to do this. But it gives me a bit
of peace of mind to know that I've got enough to
keep me going for a while. Once again, we're going to use our trusty wet on wet technique. This time applying
color over the top of our gray tonal painting down a wash of water,
just as before. And then looking carefully
at the reference photo, we can select which color
to apply across the petal. Do you see more of a yellowy hue like I'm seeing in this
part of the petal, or pink or violet? Gentle variations
in color will bring a lovely complexity
to your painting. You can start relatively
pale with your washes, as we can always keep layering. But in certain places of shadow, do be bold with the amount
of color you're laying down. Remember to make a darker color. Just have less water
added to the mix. You'll see as I
work, once again, I'm using a combination of
the size two brush to apply paint and the size
four brush to both apply the water and move paint around the
petal as needed. You can keep working
on a petal and adding more color until the
paper begins to dry. It's always best to stop too
soon rather than too late. Keep an eye on where
the paper is still glistening and
where it is drying. This will ensure you always
end up with a lovely, smooth and blended wash. Remember once again
that you do not need to cover the whole
petal area with paint. I'd recommend leaving some
areas completely white, even if perhaps you see color across the whole petal
in the reference photo. These highlights are what is going to make your
painting glow. Once again, I'm
going to speed up the video slightly and
remove the application of water to the petals to allow you the chance to see the
whole flower being painted. Don't forget though, to
do that water wash first. Do pause, slow down, or even rewind the
video as you need to. I promised you I would talk to you about my limited palette. It's amazing that
we can paint this rose with just three
paints, isn't it? 95% of the time I work
with just six paints. And these are the
permanent Rose, French Arch Marine, and Windsor Lemon we are
working with here. As well as Perreline maroon in danthrine blue and new gamboge. Also all Windsor Newton
professional paints, I truly haven't
come across a color yet that I can't match
with these six paints, you'll notice that
there isn't a black, a white, or even a brown
in this selection. That's because black
can come from mixing, a few strong mixes from
the color of the flower. Or a gray, for example, a very dark purple pigment. Grays, as we've
already discussed, can be mixed of our
three primary colors. White tends to come
from the paper itself. Every now and again,
you may see artists using some white go paint
on their water colors. Of course, this is an option. It's not one though, that I've
used in a very long time. Preferring to use the paper
to show any highlights. Using a limited palette
means that you really get to know your
paints with time, can instinctually
select the pigments you need to mix a certain color. It also reduces the chance that your painting might look
muddy or disjointed, which can happen if we add too many different pigments
into one painting. I'd really recommend having a little play on
a scrap piece of paper and seeing
just how many colors you can make with
just six paints. It really is amazing. Wonderful. Now you've
finished adding the color. The rose should really
be coming to life. Now the next step is to add some lovely
detail into the petals, trying to capture the veins and the more intricate
shadows on the petals.
6. Adding Details: Part 1: Now we can move on to adding some details onto our painting. The paint mixes
that we are going to use to add the
details you'll be pleased to hear are almost exactly the same as the
ones we've been using. To apply our first
layer of color washes, what we need to do is
just add some water to these mixes we have
on our palette already, thinning them down
to a nice pale color that will be visible
on our painting, but not so dark that they look harsh and too strong for
the delicate petals. The only difference
is the violet. To this you can see I'm adding a small amount of the
yellow so that we have a purply gray color
rather than the pure violet. Once you're happy
with your colors, we can move on to painting. Now, before painting veins, I always warm up once again. You can see how I do this
in my previous videos, but for the purposes of this, I will talk you through
my process as I go keep your painting nice and protected as I have here with some
tissue paper or tracing paper to prevent
any mishaps at this stage. To add the details, you can size naught
brush or a size two. So long as you have a good tip to the brush, you'll be okay. We then, whilst looking
at our reference image, want to try and capture those faint and
delicate veins and the shadows we can see
on the petal surface. The best tips here
that I can give are to try and be as
gentle as you can, just tickling the surface of
the paper with your brush, to paint very fine lines. You want to avoid bending the tip of the brush if you can. That means you're putting a
little bit too much pressure more than you need to
through the brush. Don't worry if you
are being that the brush actually lifts off the page at times, That's okay. Also have a play around with the speed that you're painting. Do you have more
control when you move slower or is it better when you move
a little bit quicker? There may be areas
where you want the line to be slightly
thicker, like here. This is where you
can put a little bit more pressure
through your brush. You can vary the paint color
that you use as you wish. Here I'm using more
of the purple gray, as this petal is more in shadow
than some of the others. But you'll see in
the other petals. I will adjust things, we
slowly build up these details. Here I am trying to show some of the very subtle undulations
in the surface of the petal. Be very mindful of the direction that your
brush is traveling in the veins tell a story as
to the shape of the petal. You might want to use this
opportunity too to add a little bit more shadow to
certain places as I am here. And then blending it out
softly with a damp brush. I'm going to keep this petal at real time speed so that you can follow along
with this process. But then I will speed
it up a little bit once again so that you can see
me paint the entire rows. I'll keep jumping in though, to talk through
some other parts of the rows that I found
a little bit more tricky or if I feel I can talk you through my
thoughts as I paint, When I work more quickly, like you can see here, I call this a
feathering technique. I'm applying many soft, fine brush strokes to build up some texture on
the petal surface. You can start very pale with
this technique and then build it up slowly if you
need to, with more color. You'll see me doing this a lot as we move across the painting. Note I still always move though in the direction of
the veins in the petal. It's a great way of adding some more depth of tone
into the areas in shadow. In addition to the lovely
washes that we can apply here, this may seem quite bold, adding this much color to
the edge of the petal, but look how it softens out beautifully
with a damp brush. The trick with this is
working quickly enough so that the paint doesn't dry before you've
blended it out. We'll move a little
bit more quickly now, but the process
remains exactly the same as we move across
all of the petals. You can see for this petal, if chosen a more
pinky color than the gray purple mix on
the previous petal, I'm being bolder with the amount of pigment on my
brush and areas of shadow much softer and paler in areas of the
petal that are lighter. My size Fe brush that is
damp and clean is always nearby to help me touch up and blend areas where necessary. There are a lot of
petals to work on here. Take your time and once again, just try and enjoy the process. It's so fun seeing it come together slowly, I promise you. When you step back
after completing all the petals and look at
your painting from a distance, you'll be amazed at how it's changed and increased
in complexity. It keeps coming alive
on the paper with every part of this process
that we work through. In this petal. You can see that I'm really focusing
on building up a little bit more depth of
color in this area of shadow. We will be adding some
more washes though, so it doesn't have to be
perfect at this stage. This petal is a bit
trickier to capture the lovely shape as it blooms out with the fold
there in the center. Just take your time and
build up the detail slowly, keeping a close eye on the direction that those
veins are traveling in. You'll see me correct
myself once or twice. We can go quite bold
down in the base of this petal where it
disappears into the flower.
7. Adding Details Part 2: Whilst I paint, I'll tell you a little bit
about this rose. This year I was
offered an allotment, which has been a huge
project it turns out, but a fun one, if you're not
sure what an allotment is. It's essentially like
a community garden. And I was given a plot of land that I could grow flowers
and vegetables on. This rose was present on the allotment already
when I took it over. It was a lot of
fun just observing this year and seeing what
bloomed over the summer. Now I know what's there.
Having gone through almost an entire
year with the plot, I can start to plan how to get things set up for
the year to come. So many of these
lovely roses bloomed. They were beautiful
as cut flowers, and its scent is gorgeous. I'm not confident with the
name though of this one, as I didn't plant it myself, but I do know that
the previous owner still pops by from time to time, so I'll try and ask her. If you're feeling a little bit lost in these small
center petals, don't worry, it's not easy. What helped me for this part
is to start by adding in the very dark areas of shadow to help me define
the other petals. Bringing them forward and helping me to gain clarity
as to what goes, where you can see here. I felt as I went a little
bit dark with my mix. I therefore use my
magic or mixing branch to lift that
highlight back out again. Then for extra help, I use some kitchen roll to blot
out any extra paint. This is a good trick to lift out areas where you feel paint
has crept in too far. But you do have to
be careful though, as you do risk damaging the surface of the paper
if you scrub too hard. Now stepping back
from your painting, you should be able to
see that detail has added some gorgeous
texture to your petals. The final thing I like to do at this stage is take
my magic brush, ensuring that it's completely
clean and just damp. And I use this to soften any edges that may have
become a little bit uneven. A very gentle scrubbing action
can be enough to even out the texture and just
help you achieve a clean and crisp
edge to your petals. There you have it. Your
details are complete. Now we have the opportunity
to go over our rows with a few more washes
to deepen our tones. But don't worry, not necessarily the whole rows. Let me show you.
8. Final Washes: For this final stage
of our painting, we are going to work on deepening the tones of
the rose even more. The best way to do
this is with washes. But as I said, don't worry, we aren't going to need
to do another layer of wet on wet washes across
the whole painting. This time we're going to select some key areas that need an increased
saturation of pigment. And just bolden these to
really make the colors pop. You'll see here I am
reawakening my washes of those same three mixes
we made a while ago. The orange, the pink with
a tiny bit of yellow. And the violet, once again, I'm adding a small
amount of yellow to the violet to find a more
natural shadow color. Finally, the plan permanent
rose may also come in useful. I'm mixing a bit
of that into those of you who have studied
water color with me before will know that I
talk a lot about tone. We want to make sure in
every painting that we have the whole tonal scale from white to as close as
black as we can get. This will really make
your painting stand out. Now, you've already
seen me demonstrating this technique in the detailed
stages of our painting. We are going to
use wet on dry For this part, your two brushes, the size two for
applying paint and the size four for blending
out with a clean, damp brush will be needed. Watch me closely here. I'm applying a good amount of paint directly to the paper. The paper is dry, then I am blending this out with
that size four brush. I'm being quite bold with
my application of color. We only really want to
do this process once, if possible, for this petal. I'm using the violet gray to represent shadow underneath
the petal above. Then I'm using a color towards
the edge of the petal. You can use whichever
colors you feel your flower needs to balance out what is already
on your paper. See here on this petal, how dark I'm applying the paint. This is what is needed for my painting to increase
my dark tones. This may not be the
same for yours, just make any adjustments
that you feel are necessary. This area here on my painting definitely
needed more pigment. Look how bold I am being
here. Don't be afraid. It will blend out well with a damp brush if
you work quickly, if you do find
that it is drying, then you should be able to
soften it with your damp size. For brush, it might just take a few more strokes to
tease away any harsh line. If you were still
struggling though, then you could always
use the magic brush for a little bit more rigidity
and pressure on the paper. I'm going to keep moving
around the flower now, looking for areas
that I feel when comparing to the reference
photo need more color. Yours may well be slightly
different to mine, but do follow along, obviously. If it's helpful. I'm going to speed up the
video a little bit now, once again, so that you
can see my entire process. Remember to keep your blending
brush nice and clean. Wow, and there you have it. We've finished our rose. I really hope you're pleased. That was a lot of painting, and if you've got to the end, then you've poured
a whole lot of time and love into this piece. I hope that you've
learned lots and that your final piece
is something that you can display
somewhere in your home. If you've enjoyed this class, don't forget to
subscribe so you don't miss the next one I put out and come and hang out with
me on Instagram where I post lots of shorter
videos and updates. Thanks so much for joining
me and I will see you soon.
 Helen Cousins, Botanical Illustrator & Teacher