Transcripts
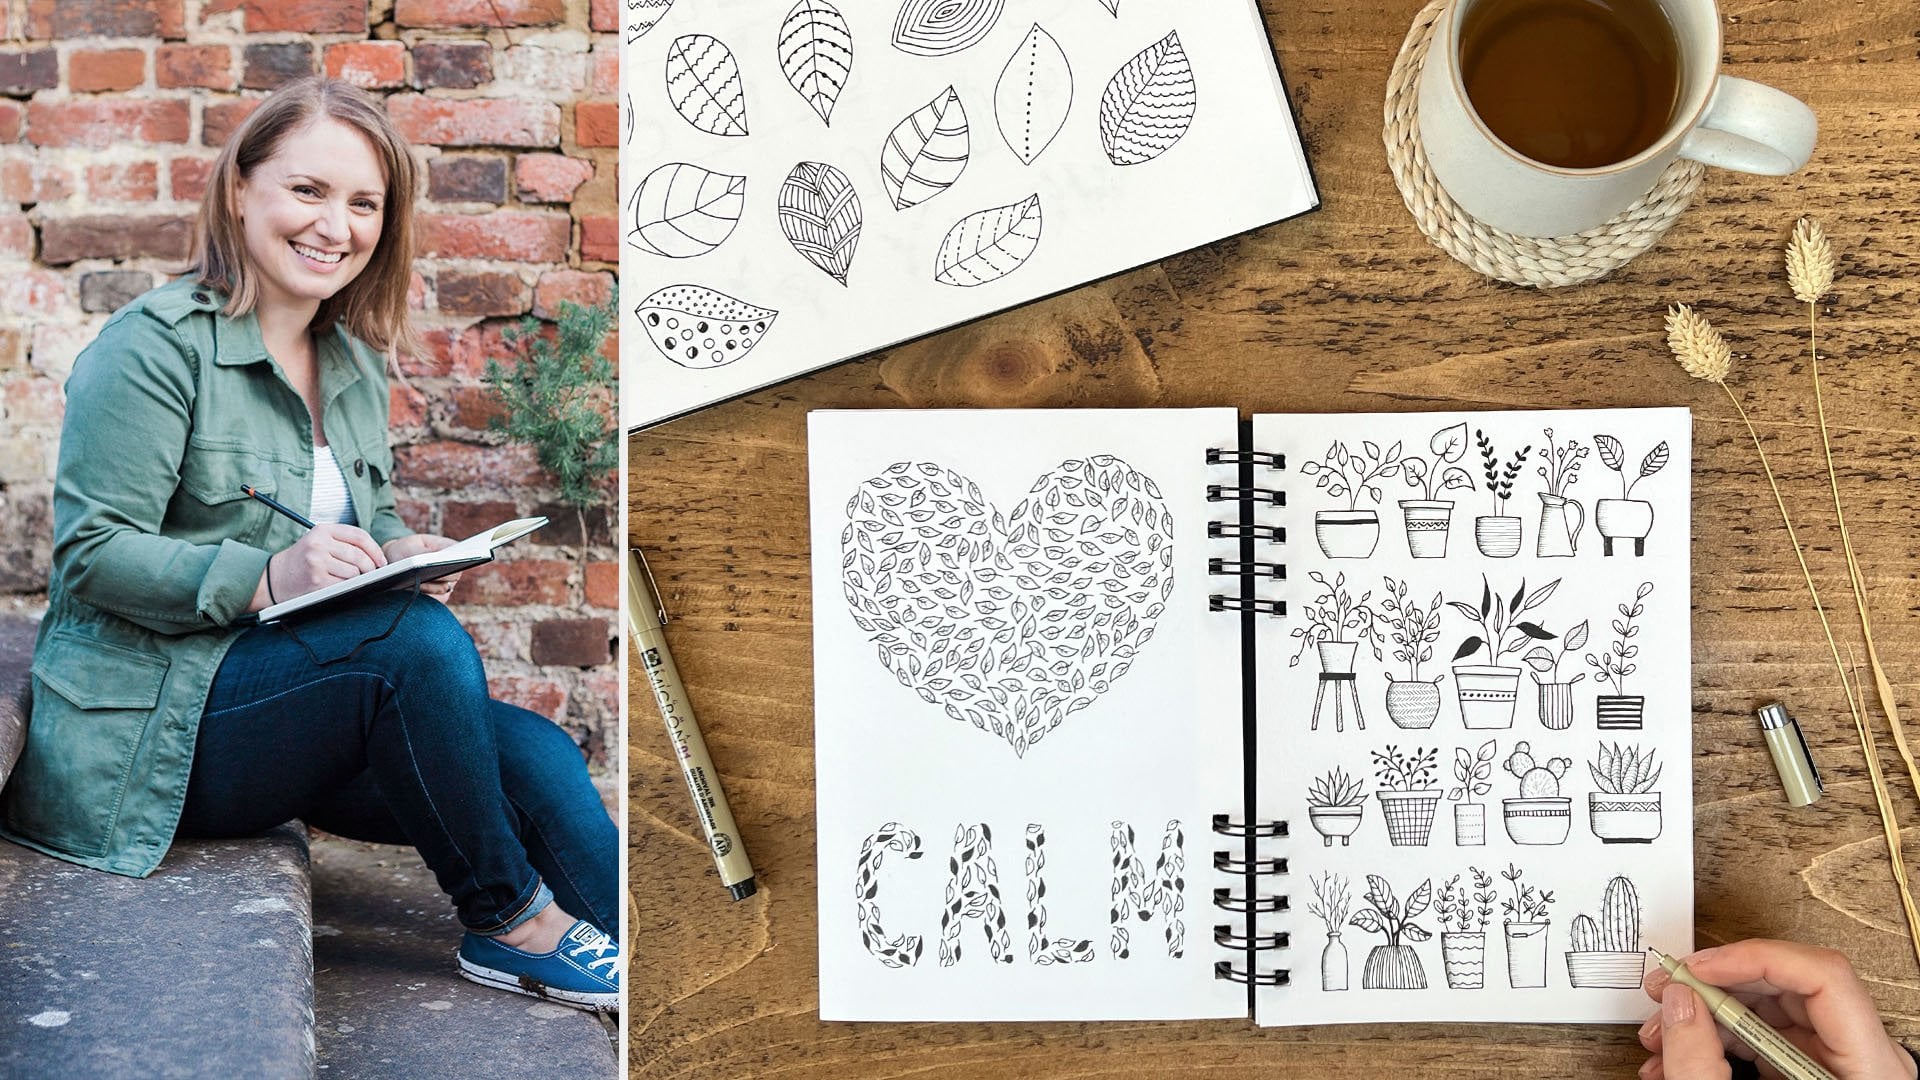
1. Introduction: Hi, I'm Sharon Stephens
and I am an artist and author specializing in watercolor illustration
and modern calligraphy. I love creating for joy and
relaxation and my mission is to help you make art or relaxing and fun part
of your life as well. In this class, you
will learn how to draw a variety of beautiful flowers, which you can draw or
doodle just for relaxation, or you can use to decorate everyday things
like your journal, homemade greeting cards,
gift tags, or bookmarks. I will show you how to break
your subject down into easy steps so that
you can have fun with your drawings and
enjoy the process. This first section, we'll
give you a foundation for understanding how to simplify your flowers and how to draw
them from different angles, which will allow you to create more interests and
dimension in your artwork. We will then focus on
10 different flowers. The dandelion, the
cosmos, anemone, daisy, achalasia, pansy, tulip,
daffodil, puppy, and hydrangea. I will show you how
to draw each of these step-by-step in real-time with variations to show
you how to draw them from different angles
so that you can have the confidence to
go away and create your own projects and
your own composition. All you really need
for this class is a pencil and some paper. You may also like to use some fine liner pens
like I will be using, and I will talk you
through my supplies in more detail at the
beginning of the class. I hope you're feeling
ready and excited to dive into drawing some
beautiful flowers with me. Grab your supplies and
let's get started.
2. Supplies: As mentioned in the
introduction what you really need to take in this class
is a pencil and some paper. But you may also like to use some fineliner pens
if you have them. For paper I'll be
using a couple of sketchbooks with plain
white cartridge paper. For the fineliner pens I will mainly be using
Pigma Micron pens. You can buy these pens
in a set with a range of sizes from 005 which
is the finest, to 08 which is the thickest. In the class I will be
mainly using a size 02 for the outlines and a size 005
for the shading and details. I will also be
using a size 08 to color in large areas
like in the pansy. These are all waterproof
pen so you can use them with watercolor
as well if you want to. I like to use the smallest
size pens because the finer lines make my flowers
look a bit more delicate. But if I want to create
something a bit bolder then I might use one of
the thicker pens instead. It's just a personal
preference so have a play around with the different sizes. I will also be using a pencil which I encourage
you to have for when we sketch our initial shapes and also an eraser to
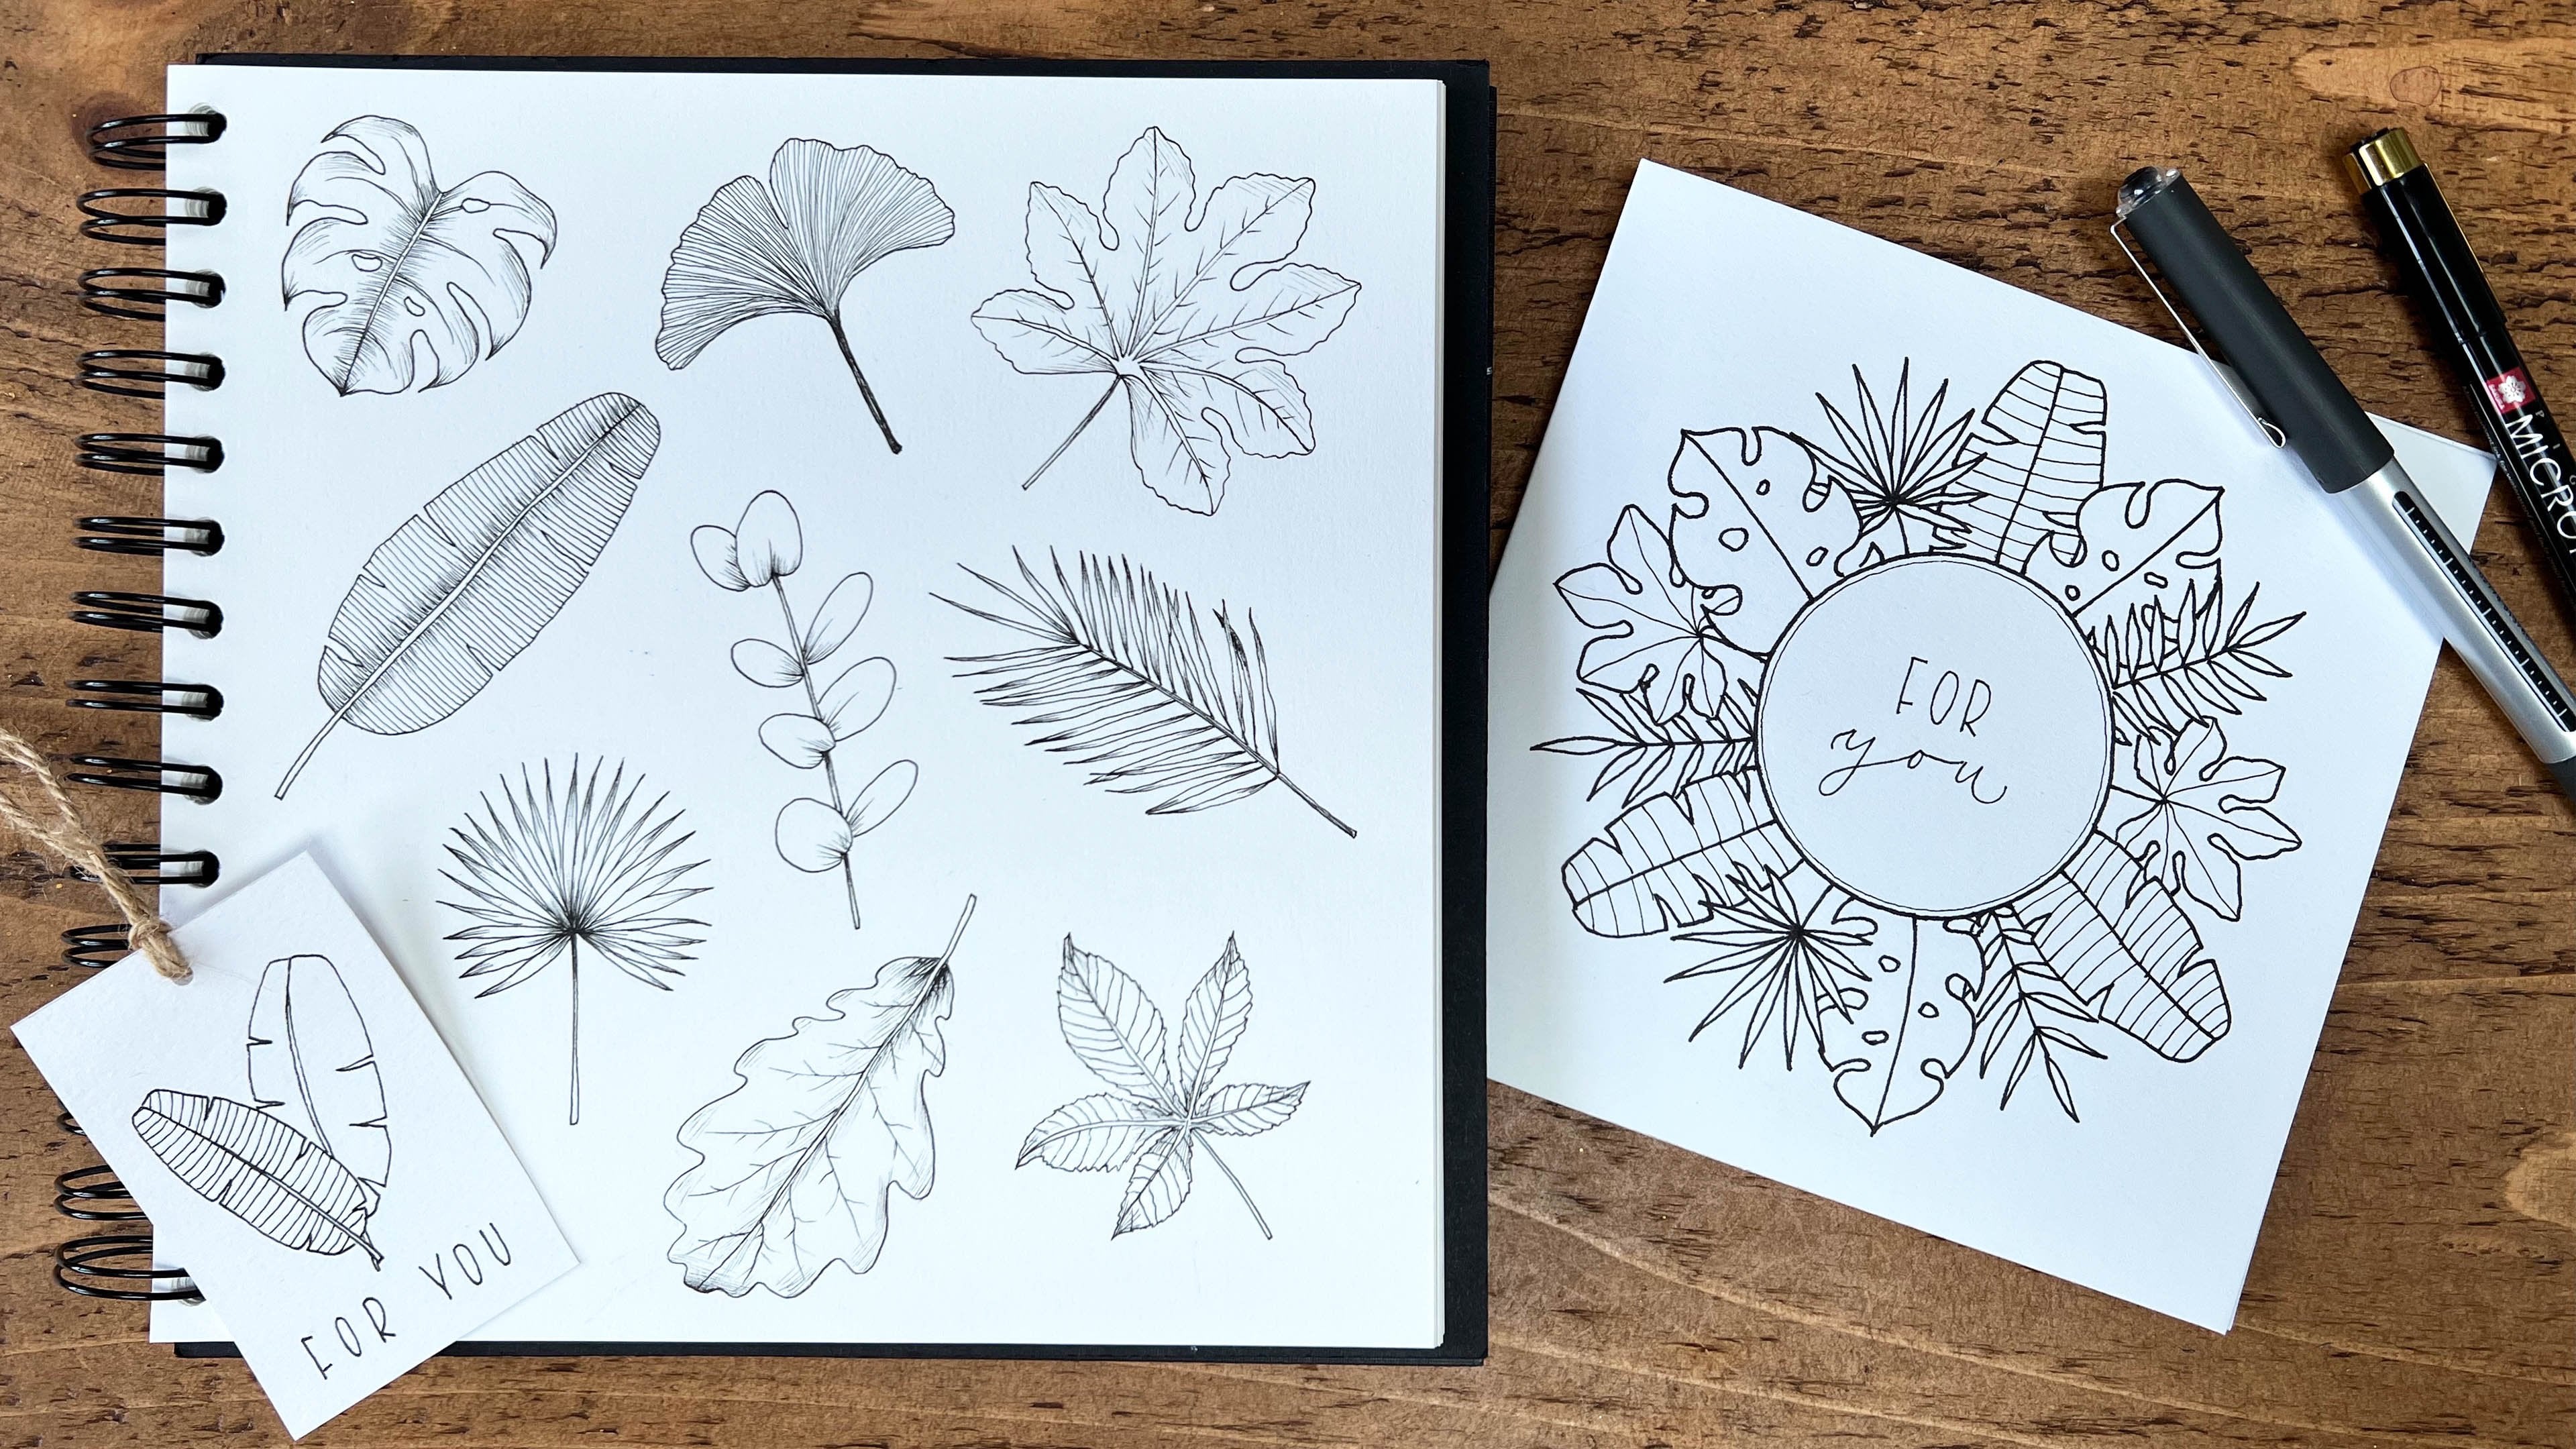
adjust your sketches. Throughout the class I'll be showing you some
examples of some of the projects in my journal and some gift tags,
bookmarks and cards. The journal I'm
using is a scribble and dot bullet journal
with dotted pages. For the gift tags and
bookmarks I tend to use either mixed media paper, watercolor paper or
Bristol card which are all thicker than the cartridge
paper I use in my sketchbooks. For the cards I've used some
pre-bought blank cards. Now we can move on to
some drawing tips.
3. Drawing Tips 1: Inspiration & References: In this first section, we will be laying
the foundation for simple botanical drawing
with some tips for how to get started and how
to approach your subjects. Some flowers can be
quite daunting to draw, so hopefully this will help increase your
confidence by giving you a process to fall back on for future drawings as well. There is so much
inspiration that we can use for drawing flowers. When you're first getting
to know your subject, it's always useful to
work from a reference. This may be a real life
flower or a photo. The big advantage of using real life flowers
is that you can really get a better
feel for the flower, you can look at it from
different angles and you can see the different parts of its
structure and anatomy. Another big advantage is
that it allows you to make your work unique and
completely your own. It can feel easy to copy
other people's art work, seeing how they've
turned the subjects into a drawing or a painting
when you're starting out. Other than the obvious
copyright issues with this, it also restricts
you from growing as an artist and improving your
own observation skills. For real life examples, you can find these
in your garden, out in walks, in a florist
or a garden center. I like heading down to
my local florist to see what seasonal flowers
they have in and buying a few single
stems to draw. Florist are also a great
source of information for how they combine the flowers
into an arrangement, what flowers work well together, and what compositions they use. I don't usually like to pick flowers when
I'm out and about, but just by looking around
more and seeing them, observing in their own
natural habitat can really improve your inspiration and understanding of the flowers. Of course, it's not
always possible to find real life examples
of your flowers. They may be out of season or
just not locally available, and so photos are another
useful resource for references. You can find plenty of photos
of flowers on the Internet, on Pinterest for example, or even just by
searching on Google, or you can use reference books. I have a few gardening and flower book that I like to look through for some information or inspiration for my flowers. The advantages of using photos, either your own or
from books or from the Internet or another source is that the image is flattened, which can be helpful
for beginners. It can make it easier to turn
the flower into a drawing. Just like with a
piece of artwork, you need to be aware of
copyright, of course, when copying from
someone else's photo. When using photos,
I like to look at a number of different
examples of the same flower. I can get to know it better. Also then I can pick and choose different elements of it, that will translate
well to the paper. You can, of course, take photos yourself to refer back to. I tend to take photos
of flowers if I see them on a walk or
when I'm out and about. As I said, I don't
like to pick them. Instead I usually take photos from a few different angles to understand their
structure so that I can recreate them
when I get home. It can also be good
to take photos of any buds or leaves
if they have them, if you want to add them
into a composition. I like to keep a photo
album on my phone dedicated to botanical
inspiration, which I can say the more
to and then refer back to.
4. Drawing Tips 2: Anatomy & Structure: Understanding the basic anatomy and elements of flowers
is going to really help us when it comes
to breaking down our subject so that we can
draw or doodle them easily. Some flowers can be quite
complex and daunting to draw, and in this class we want to be able to simplify
them so that we can take it one step at a time
and enjoy the process. When I start drawing
a new flower, I always like to know
a few basic things about it to help me
with the drawing. The things to look for with
a flower are the petals, and these are usually the most recognizable
part of a flower, and can come in a
wide variety of shapes and sizes and colors. We'll be looking at these
in much more detail in a couple of videos. You can also look
for the sepals, which are the outer
part of the flower that encase the flower bud as
it grows, protecting it. When the flower blooms, these sepals may
transform into what looks like just the rest of the
petals on the outer edge. For example, a tulip looks
like it has six petals, but it actually has three
petals on the inside surrounded by three
sepals on the outside. Some sepals are smaller
and green and you can find them at the base of the
flower once it has bloomed. Here you can see them at the
base of a cosmos flower. You can also look
for the reproductive parts of the flower, which are found in the
center of the flower, and this is where
the flower produces pollen to attract bees. Some flowers have both male and female
reproductive parts, and some just have
male or female. The male parts are
called stamens, which are made up of
anthers and filaments. The anther sits at the top of the filament and is where
the pollen is produced, and we can draw these
quite simply as an oval shape on top of a
line or two parallel lines. The female parts are
called pistils and are made up of the stigma
and the style. The style is a long tube and the stigma sits on top
and receives the pollen. We also have the stem and
the leaves of the flower. We won't be focusing too much on the specific leaves of each
flower within this class, unless it really adds
something to the drawing of the flower like with the tulips. Bear in mind that with
a lot of flowers, there are many
different varieties of the same flower and some can look quite different
to each other. When looking for references, do some research to find
features that appeal to you. Don't worry about
getting everything perfect or realistic, especially when drawing
for joy and relaxation. We can take note of the distinguishing features and create our own
drawings from there. The main thing is that we're
enjoying ourselves rather than feeling the pressure to
get things completely right.
5. Drawing Tips 3: Simplifying Shapes: Once you have your references or the information you need
to draw your flower, I always recommend starting
by breaking it down into its basic shapes
to start with and we'll be doing this throughout the class with each flower. First, I like to identify the overall shape of the flower, which you can then sketch in pencil as a guide for
your starting point. If you're looking
at the flower from a top-down view like this, this may be a circle for the outside shape with a
smaller circle in the center. Here is an example of a cosmos and a poppy from
this angle as well. If you're looking at the
flower from a slight angle; so now I'm just
tilting this flower, the oval-shaped
turns into more of an oval because we can
see less of it and the center becomes a
bit more of an oval as well from this perspective
and moves a bit lower down inside
that bigger oval because the petals come up. Here's an example
of another cosmos and an anemone from
this tilted angle. If we keep turning this
flower for a side view, the center moves to the
bottom and we can no longer see it because
it's inside those petals; it's now hidden, and the base
of the flower comes into view and now these petals form more of a semicircle shape. Here you can see this with an Echinacea flower and a
cosmos from the side view. For the Echinacea, we can use a rough semicircle
for the cone head and a larger semicircle for the
petals with a curved bottom. For the cosmos, you can see we can use a large semicircle for the petals and a smaller
semicircle for the base. It's really useful to start observing your
subjects in this way, breaking them down into their most simplest forms
and taking the drawing step-by-step because it makes
it so much easier for us. We can start by
practicing sketching these shapes using
our pencil nice and lightly so that
we can erase them later on once we've
finished our drawing. This practice is especially
useful if you're new to drawing just practicing
drawing those types of shapes; the circles, and the ovals,
and the semicircles. We'll start with a
fairly big circle for the outside and then I'm just going to add a
smaller one in the center. That is an example
of a top-down view. Obviously, with each
flower this is going to change and this circle
might be bigger, or might be smaller and even the shape
might be different, but this is just an
example of starting with a quite a generic flower shape
like a daisy or a cosmos. We'll be using these
a lot in this class because we're focusing
on simple flowers. From a tilted view we can
use more of an oval shape, and then again like I
said before we want to have the smaller
oval in the center sitting slightly
below the center. If this is a center line, we can have this about here. If we had this in the middle and the petals coming out of it, it would just look very
squashed and quite flat. But because petals tend to
come upwards from the center, this will make it look more
realistic and dimensional. Again, we can do it
a smaller oval and this is if the flower
is tilted even more. Again, just practice. You can practice these from angles as well because a lot of our flowers are not going
to be flat like this. I'm adding that smaller
oval in play at that center doing this
from the other direction. You can see these
are sketchy lines, I'm not trying to create
a perfect shape here. Then from the side view, we can draw in a semicircle. You might have a slight curve to the top where
it might be quite straight and then if it has
quite a permanent base, then you can add in a
smaller semicircle there. Again, you can do this from
an angle just to practice. Keep practicing sketching
out these shapes as much as you need to until you feel
comfortable doing this. It can be useful to just
grab a large piece of paper and just practice. Being able to draw the
flower from different angles like this is going to
make your drawing so much more interesting and dimensional especially
if you want to include multiple flowers in a drawing because it's going to add
a lot of movement as well. If you think about
where the stems are coming from in this top row, the stems are going to
be coming straight down. On these ones they
can curve round. This one would be straight. Again I'm just adding that curved stem imagining
where that will sit, and that's going
to add a lot more movement to your drawing. This is an example of
the starting point for our flower drawings
keeping it easy, like I said, giving ourselves
a guide to work with. This can take away a lot was
daunting elements of drawing a complicated flower taking this first step and
making it simple. The goal is to make it easy
for ourselves here and we can use our eraser
as much as we need to, so we're happy with our shape. But remember it's
just a rough guide, we're not trying to create
perfect circles or ovals.
6. Drawing Tips 4: Petal Shapes: So now let's focus on petals. These come in
different sizes and shapes depending on the flower. You can draw these
differently depending on how simplistic or realistic you
want your drawing to be. So using this Cosmos
as an example, we can start at the
base of the petal, where it joins into the
center of the flower. This is where the petal
is at its narrowest. Bring it up, curve it round, and then bring it back down. So this is the base of
the petal where it meets the center and it's always
the most narrowest here. So I've used a
fairly smooth line here to create this shape, which is great for a quick
simplified drawing or doodle. If we want this to be
a bit more realistic, we can pay more attention to the edges and those
organic lines. So if you have a look
at this Cosmos flower, you can see that
that top edge in particular is not
particularly smooth. It's got more dips in it. So we can practice just waving your pen or pencil slightly to create this more
organic, wobbly line. So then, let's try this
on the petal itself. So we're keeping the
sided is fairly smooth. But as we come up to the top, we can add in these
depths and bring it down. Just try this again. So coming out, curving round. We can practice these from
different positions as well. So looking at the
bottom petals starting, so saying the center is here, we'll start with the
narrowest point at the top, bring it around, and
adding in those lines. So just practice different
types of petals making these edges quite different because once it's all together, it will look really nice, and it will look much
more interesting if the shapes are slightly different than if
they're all the same. Unless of course you do want to create that simplistic Doodle, which is absolutely
fine as well. So this is a fairly rounded
petal for the Cosmos flower, which is quite a typical
generic petal shape that you would think of. Some flowers have longer, thinner petals like the daisy. So again, we can recreate this with a smooth line starting
again at a narrow point, bringing it up in a curve, and bringing it back down. But if you look a bit
closer at the petals, you'll see that it has
those dips at the top. So then we can just practice
adding a few of those in. It's something quite
simple like that. You can make your
overall drawing look much more interesting. Again, we can try this
from a different position. So with the center here, you can of course, try
these from the side. So other flowers like the
hydrangea can have shorter, rounder petals, which come
to a bit more of a point. So for these, will go out a bit
more, will come up. It has a fairly soft
point at the top, and then comes in again
to that narrow point. So imagine this is
the center here. So these tend to
have smoother edges. Practicing these
different shapes can also inspire you when you're
just doodling or making up your own
flowers looking at the different types of
shapes that you can use. So other flowers
like the poppy have much floppier petals so we can be a bit flair in using
organic lines for these. So say for example
the center was here, we can just come out
and practice being flair with our lines using less structured shapes.
7. Drawing Tips 5: Petal Perspective: Heading back to our guidelines now and looking at
the top-down views, which is this circle
at the top left. If we look back at this cosmos, all of the petals are
a similar shape and size and fairly flat-looking, which makes it
pretty easy to draw. Using these two
circles as our guide, we can then use a
line to represent the direction of each of the petals and for this one,
it's quite straightforward. It's just a very straight line, so we will just add
in those lines for however many petals
there are and where we want the petals to sit. For the tilted flowers, we would need to pay
a bit more attention to the direction of the petals, so using these guides is
really helpful for this. As I said before, the petals
tend to curve upwards. If we use straight lines here, the flower is going
to look quite flat, so these curves will give
the flower more dimension. These petals at the top
may go straight up, but the petals at
the side may curve upwards and these ones below will curve as well and then this
may come down again. You can just practice thinking about how
these curves will sit. This will obviously change
depending on the flower but generally petals
tend to curve upwards. You can practice
adding these lines in. With this side view, I can add in these curves and as we get
towards the center, it'll be straighter and then curving in the opposite
way on the other side. We can also see from using
these guides that the shape of the petals have changed
once we move from this top view to
this tilted view. Underneath this center now, we have less space to
draw the petals in, so there's a smaller gap here at the bottom than there is here. These petals are
going to be shorter. If we go back to this daisy, as we tilt the flower, we can see less of
these petals at the bottom and they get a lot shorter and
change their shape. These side petals may get
a bit thinner because, again, we can't see all of them. Going back to our petal page, whereas on a top-down view, the petal may be
quite flat like this. Once we tilt it, it may become quite shorter because that's
all we can see. On the side petals, so if this was on
a top-down view, we would see all of the petal. But then if we tilt it, this may become thinner. Again, going back to the guide, this is really useful because
it's going to roughly show us how long that
petal should be, the same with the side one.
8. Drawing Tips 6: Petal Folds: Moving on to a fresh page. As these petals gets shorter
or narrower at an angle, we can start including some
folds into some of them. You may not always see folds
in your reference photo, but it can be nice to add in some times in your
drawing to give more of an illusion
of perspective and make it look a
bit more interesting. Starting with the outline of one of these shorter petals, the simplest way to add
in a fold is just to add in an extra line inside. I'm going to start at the edge, trace over that line, curve upwards, use those organic
lines and then dip down and curve back in. You can see here and here is a curve which
meets the outer edge. It just helps it fly more. Then this space here
becomes up fold. The petal is then folding
upward slightly towards us. You can practice this with
different shapes of petals. Adding in the folds inside. I just practice this a few
times to get used to it. You can add different
size folds. This one is much
bigger than this one. Then when you're drawing
the petals at an angle, you can add this fold on
this lower edge here. Again, just curving it so it smoothly joins into
the outer edge. If we wanted to add a fold that goes outside of the shape, it can be easier to start
with a line that represents the center of the petal so
we can see how it's curved. If the petal started
from the center here and then curve
towards the right. This is the center line
of that petal now, then below this we can draw
the outer edge of the petal. Starting quite narrow
where it joins the center, I'll draw the center in
so we can visualize it. I'm going to bring this down, make it a bit wider. Then I'm going to
come up and cross over this central line, bring it down, and then
join it up with this line. This is the fold. Then bit below here, you can join in the other line. This is the petal curving round and this is the fold here. Let's just practice that again. This is the center, this is the way we want
our petal to curve. Starting quite narrow,
bringing the petal out, crossing over and
then joining it back. You're basically
creating a loop like this and then adding
the other edge in. You can change the size of the fold by changing where you're crossing
over this line. If I crossed earlier
and then put this in, it's a much bigger
fold to that petal. If I cross later, I just gave it a little fold, just slight fold at the end. Let's practice this in
the other direction. Just drawing that center circle and then the center line of your petal curving
upwards towards the left. Start this side. Remember narrow in the
center, bring it out. Crossing over, touching that
tip and then bringing it down so it joins
up quite neatly. We want this to
be fairly smooth. Then below this edge, can come out and then
bring it back in. You can practice
this a few times, creating different sized folds. This is going to be a larger one and then here I'm
going to create just a small fold
at the very end.
9. Drawing Tips 7: Shading: To give our petals more shape, and dimension, we can add
some simple shading to them. For my shading, I
always use a fine pen. If I've been using a border
pen for the outline, I might drop it down
to a size two or even finer to give it some
contrast, and delicacy. We can keep practicing
at the moment using our pencil just to get the
movement right at this stage. I like to use flicking
lines for my shading, so you can practice just dragging your pen
across the page, and then lifting it up so that the line gets fainter,
and tapers off. Practice these
different lengths, and then also practice these
with slight curves as well. The closer these
lines are together, the darker the area
is going to look. To help give the
petals more shape, and dimension is best to use curves instead of straight
lines for the shading, and to make them
almost parallel to the outer edge of the petal. If we start with a
basic petal shape, so this is a narrow base. We want the curves at this side to be parallel
with this, and to edge. I'm going to flip that round, and then on the opposite side, curving that way round, and then in the center, so just off to the
left of the center, I'm going to do a
long one, curving up. Adding in these slight curves, and varying the
length of them is going to create a
nice bit of shading. You can see these come
together towards the base, which makes it
look a bit darker. You can always add in
some shorter lines just to build up that
darkness as well. I like to add in some of these lines on the
top edge as well, especially if there's a dip, you can just bring
it down slightly. Again using those curves, it's just going to help give the illusion of that dimension, and show the shape of the petal. If the petal was at an angle, a side view petal coming in, for the middle line, we could have this
coming upwards, it shows that the
petal dips down, and curves upwards, and then curving round
at the edges as well. We might want this to
come around that way. Again, I'm just going
to add in a couple of lines at the top just to
help give it that shape. I'd add a few more here, to give a bit more shading. We can try another petal, so if this one was at the
base of a tilted flower, so it's fairly shortened, so this curving lines would come out parallel to the
edge, curving round, and the center, curve towards the direction
of the outer edge as well. Adding a few more flat shading, and then I just add in a few
lines at the top as well.
10. Drawing Tips 8: Details: Now we can practice
some mark-making, which will allow us to
add some of the smaller, more delicate details
to our flowers. This can help us add texture and those finer details like
the stamen in the center. We can use small
marks like dots. If we have the center, these are usually
fairly textured. Some of them have quite
close stamen together. We can use these dots
to create a texture. Then making these dots closer together on one side
and making them lighter further away from
each other on the other side is going to help give
it that rounded shape. Because these circles
in the center, they're not flat they're curved, which means that
the light is going to hit it at one point, making it lighter and creating a shadow
on the other side. If this has the shadow, we want this to be
darker on this side. We want more dots. As we move to this side, which is lighter,
will have less dots. That is just going to help us create dimension in that shape. We can also use
small see curves and M curves to create the
texture in the center points. Again, if we start
with a circle, we might find that the texture looks like
there's lots of little bumps. But again, we're keeping it lighter on one side so
we'll have less of them. Then they'll be more dense on the other side,
making it darker. Then you can also add in some hashing to add in a
bit of shading as well. I'm just drawing quick lines
like this to make it darker. That's the end of
the first section. I really hope
that's been helpful for you in laying
some foundation. Now we will move
on to our flowers. The first flower that we will be drawing is the dandelion.
11. Dandelion Part 1: We're going to start
with the dandelion, as it is such a simple flower
to draw to get us started. The seed head of the
dandelion is a bit different to the other flowers that we're going to be drawing, as it doesn't actually
have any petals. But it can be a really nice
one to doodle or draw. This is the final piece
that we'll be drawing for the dandelion so
we'll be keeping it quite simple with
just one version, and a few stems floating
off towards the right. Before we get started, I wanted to show you some
more examples that I've done. Here is a simple gift tag that
I made using this flower. This only took me a few minutes, so it was really easy to make. It can also be a nice
addition to greeting cards. Here I used a finer pen for more delicate look
with two dandelions, both with a slightly curved stem to show some nice movement
within the piece. It's also a fun one to do linear sketchbook just for
a little bit of relaxation. Again, creating that movement across the page with those curve stems so they're all going
in different directions, and they're all slightly
different heights with a few random stems
floating off at the top. Throughout these videos, I'm going to use two sketchbooks. One for some practice elements, and then one for the actual
flowers where we can also look at a little bit
of composition as well, using the entire page, so that I can
demonstrate a bit more of a finished piece
for each flower. I'll be flicking between
the two sketchbooks, but you can use whatever you have to practice these flowers. The main thing is that you're practicing and learning
without being too precious. Don't get caught up in
trying to create something perfect or finished
at this stage. Before we start the dandelion, we can just practice a
couple of the stems. The ones on the outer edge, we can draw from a
side view like this. They're just half full, and then the ones in the center, we can draw lines
all the way around. This will help give the
overall flower a bit of dimension as well as the
whole head is curved. Here I've done two examples
to show you the difference in delicacy when you're choosing which pen
you want to use. This first one is a 08, so it's much thicker, and you can see there
are less lines. This one is a 005, they're both Pigma Micron pens, so you can see this
is much delicate. On the overall flower, it will really transform
the finished piece. I'm going to be using a 02, which is still fairly delicate, but not quite as
delicate as the 005. To practice these,
we'll just start with a line and then start
with the outer one. Have it slightly curved
up with a flaky line, and then just bring it
around to the other side. These are for the outer edge. Then we'll just practice
one which is more central, so we can have these flaky
lines all the way around.
12. Dandelion Part 2: To start the Dandelion, just grab your pencil
and we can start by sketching out a circle
for the overall guide. I'm just going to have this
fairly central on my page and I'm just going to
have this stroke coming. If we mark a point
in the center and I'm going to have the
main stem curving off to the side slightly just to give it a
little bit of movement. Because this is such
a simple flower, I'm just going to go
straight to my pen now. I don't feel the need to draw in all of those lines
in pencil first, but it's completely up to
you if you want to do that. I'm going to start
by just making the center dot very prominent. Then I'm just going
to work my way around the edge, making some dots. These are where the outer
seed heads are going to sit. You don't have to
do it this way, you can draw the lines
and then add in the ends. But I like to do the end, the edge and then fill in. Then we can start with those
slicky lines going outwards. This is a really nice one
for relaxing with because it's a lot of the same
repetitive lines and work. You can focus on your breathing, focus on relaxing and some nice relaxing music. Once you've completed
them all the way around, you can connect each of those heads to the
center with a line. Now we've done the outer edge, we can fill in these gaps to split each pair with
the same side view. They don't have to sit exactly in the middle, you can have some which overlap to make it look
a bit more natural. Also move your paper
around as much as you need to so that
you're comfortable. Now as we move to the center, I'm going to start to add in
some of those full heads, so let's start with the
dot in the center and then use those slicky lines
all the way around this time. You can see I'm not trying
to keep these two uniform. I'm moving up and down a little
bit to fill in wherever I see a good gap where
they might fit in well. I think I'll just add in a few more a bit closer to the center. You may not need to
draw lines for all of these ones because there were
so many lines going in now. Then just when you're happy, just pause, take a step
back, have a look at it. See if there are anymore gaps
that you want to fill in. If there aren't, then we
can draw the stem in. I'm just going to use
a single line for this because this is quite
a simple drawing. I'm going to start from
the center and just follow that pencil curve down to
the bottom of the page. Then finally, I'm
just going to add a few of these stems, these seed heads that are
drifting off at the top of the page in the top
corner off into the wind. I'm going to have one
curving up to the left. Make this a half. I may have one
curving slightly to the right and then
maybe one down here. I'll give my pen a few
minutes to make sure it's completely dry and then I'll just remove
those pencil lines. That's our Dandelion finished. I hope you've enjoyed it. You can continue
to experiment with different styles of this using finer or bolder pens to make it more delicate or more
of a simple doodle. Here's a reminder of some
of the example projects you can use it for that I
showed you earlier. In the next video, we're going
to draw the Cosmos flower.
13. Cosmos Part 1: Cosmos flowers are so
beautiful and probably the closest to the classic
or generic type of flower that I love to doodle. They have eight delicate petals that usually overlap a little with a central disc and
sepals that sit underneath. This is the finished piece that we'll be drawing
for this flower, which allows us to practice the cosmos from three
different angles. The front view or the top view, the tilted view where we
can still see that center, and the side view. We'll also add in a
couple of these buds, which can be really nice to
add into the composition. Again, to show you a
few more examples, here is a simple gift
tag I made just using that tilted view and a bookmark using
two of the flowers, so the tilted view, that front view, and then
a few buds added in. Like I said, cosmos are one of my favorite flowers to draw. You'll find quite a few of
them in my sketchbooks. Here are a couple of pages
from my sketch books. Here I've done a few cosmos
from different angles, side view, tilted
view, the front view, and adding in those buds, varying the height to
create a nice composition. Then here I've just drawn one of the cosmos and then
added in some of those really simple leaves that
we practiced in the leaf doodling class which can add a nice contrast to the flower. We have already
practiced the shape of these petals during
the practice session, so we won't spend too
much time on these, but we can just quickly
practice the oval shape just to remind ourselves of
how to draw them. I'm going to use my zero too. Again, you can start with
your pencil and then go over it in pen or
whatever you choose. For the petal shapes, start at the narrow base, curve it round, and then add in those organic lines at the top
and then bring it back in. There are a couple of examples. These petals are where we
can add in those nice folds, so if we do a petal that
is coming downwards, bring it out to
the narrow point. We can add in organic line, the fold with those
curves bringing in. For the central disc
of this flower, this is where we're
going to be using those C or M curves to
create that texture. You can practice those again. Then for the side view, we'll also be adding
in the sepals, which will be able
to see underneath. As the stem of the
flower comes up, we can add in a
few pointy sepals at the very base of the flower. We can also add in a couple of simple buds to our composition
which can look nice, keeping these quite simple, so I'll start with the
pencil just to show you. This is an egg shape. It curves around the
bottom, bring it up, do a bit more of a
point at the top, and then add in the stem, and then adding these sepals, and then you can
also add in a line, and one off to one side
which is a petal folded in, and then go over
that with your pen. We'll do a couple of
those in the final piece, and I'll show you how to add the shading as well to those. With your pencil, we can just
map out my layout first. I'm going to start with a
circle for the top view, and I'm going to have
my flowers I think, coming slightly from
the left of the page. Starting with the
top view circle, then I'm going to add in an oval and this will
be the tilted view. Then at the top I'm going to do the side view which is going to be more of a semicircle. If I draw in the stems, so I want this one to curve
off slightly to the left. This one will be curving more, so bringing it over, and then I'll bring this one, and this will sit behind
this front flower. I'm going to add in
a couple of buds, we've got some nice space here. We have this
overlapping sitting at the front and roughly drawing in that egg shape for the bud that we just practiced, and then I think I'll
help bring one up here, curving off to the
left slightly. This looks quite good, I'm quite happy
with this layout. If you want to carry
on playing around, just use your eraser and your pencil to just get
these initial shapes. But I'm happy with the
movement of these stems, and we've got enough
space in-between. We can clearly practice each of the different
angles of our flowers.
14. Cosmos Part 2: We'll start with
the top-down view, just this circle one
and we're going to draw that circle in the
center for the central disc. Then the cosmos
has eight petals. We can then map out roughly
where these lines will be. We can draw a halfway
mark and then have four on each side, roughly. 1, 2, 3, 4, 5, 6, 7, 8. Take out the halfway lines, but don't get confused. Then you can either
draw these in with your pencil first and
go over with the pen, or you can jump
straight to your pen. I'm just going to
start by drawing this circle a bit
more in the pencil, so I know where to
start my petals. I'm just using this jaggedy line to give the illusion
of that texture. Now, I'm going to
go to my size 02 pen and draw in the petals. But again, if you're
more comfortable, do these first with your pencil, then you can go
over with your pen. Starting with the narrow
base, curving round, bringing it up, adding in some organic lines,
bringing it down. You can have some of
these petals overlapping. You can have some space
in between them as well, which makes it
look more natural. What I would do is I
would just do a couple of petals which are not
sitting next to each other. Otherwise, if you go
around one by one, you'll end up with them all
overlapping on the same side. I'm going to start
with this one now. I'll bring that down. Now I'm going to
go with this one. I'm going to make this a
little bit narrower, maybe. It's just touching that one. Then I think with this one, I'm going to have it sitting maybe slightly
underneath these two. I'll start a bit
narrower at the base, bring it in, so it's curving up. I'm going to just
follow the pen round. If you're using a pencil,
you can actually draw this in because you
can erase it later. I'm following this
round, bringing out, drawing the top, bringing it back round. Again, following it round
and bringing it in. I'm going to do the
same with this one. Then I think this one is
going to sit underneath. Then I'm not going to have
it touching that one, so I'll have a
little bit of a gap. I've got my outline of
my eight petals there. Even though this is a top view, you can add some
folds in if you want. I might add a small
folding in a couple of places just to add some
interest to the piece. Maybe just a small
one here as well. Then I'm going to
move to that center. I'm going to go over
this outer edge first. I'm using lots of small
C curves for the edge. Then I want to create a dome
shape with the central disk. I want this left bottom side to be darker than the
top right side. I'm going to use these C curves and make it quite dense
on that bottom left side. Then as I move up to
this top right side, we can make it lighter. We're creating more space in
between all of these marks. As you get to the outer edge, you can add in a few more. Then I'm just building it up on that lower left side to
make it even darker. It's just lots of C curves
on top of each other. Now I'm going to
draw in the stem. I've already drawn
this in in pencil. Always check your pencil lines. Once you've started drawing in some of the elements in pen, it may have shifted
a little bit. You just want to check it still works and this one
looks like it does, so I'm going to follow that
down with a slight curve with my pen and then
do another parallel, and a lot of it sitting
behind this petal, so I'm not going
to draw that in. Now, we've got our
main outlines. I'm going to switch to my finer 005 pen for the shading because I want this to have a
little bit of a contrast. I want this to look a
little bit more delicate. I'm going to start at
the base of each petal. Remember, we just
want to curve these and make them parallel
with that outer edge. Then go up at different heights to give that sense of dimension
within each petal. Then at the top
where it dips down, we can add in a
small line as well. As you get to either edge, remember to just have those curves parallel
with the outer edge. On this fold, I'm going to start from the outside edge and
then just flick it up. As it moves around, I'm going to go up as well. Straighter in the center. Remember, you can build up
the shading at the base with small lines as well and that
will just make it darker. Make it look like it's going in slightly
towards the center. We can also add a little
bit of shading to the stem, particularly at the top where
it sits under that petal, just to help distinguish it. Then I'm just counting some dashing lines
on the way down.
15. Cosmos Part 3: Now we can move on
to the tilted view. We've got our oval shape. It's leaning towards the right. The next one we want to do
is draw the central disc. Remember we're
going to keep this below the halfway point, and this is going to
be a smaller oval. Then we can map out where those
eight petals are going to sit and the direction that they're going
to go in as well. We can half this again and then draw some lines where the four petals
are sitting either side. Remember these will
come up slightly. Then again, if you
feel more comfortable, draw these in pencil first, particularly as these are a bit trickier because
we're going to add in some more folds and they're
different shapes and sizes. Start with this bottom one and I'm going to
add a folding here. This one is going to come underneath this
one a little bit. Maybe come round a
little bit more as well. This fold can sit about there. This is going to be
one on the side view, so it's a bit narrower. Now we've got a four lower
petals with the folds in. I'm really just
using the pencil to map them out roughly at this point and we
can tighten them up once we go over
them with pen, or if you want to
keep in pencil, you can just go over again. I'm going straight to
my pen now, my 02. I'm going to start
again with the center. Again with these
see lines around the edge to show that
it's not smooth. Then I'm going to just start
drawing in those petals over the top of those
pencil lines and perhaps adding in some more organic
lines particularly around these top edges where I've just roughly mapped
out with the pencil. I'm going to leave a slight
gap in between these, so these petals aren't
going to be touching. Just to give it a bit
more of a natural look. I've got my eight
petals mapped out now. We can do the central disc, similar to this one. We want to keep this
bottom left side darker and the top
right side bit lighter. We can start with those. Then I'm just
switching it over and making them more darker as
I get towards the bottom. Make sure these transitions from the light area to the dark
area is fairly gradual. That's going to help give it
that curved look as well. Now I'm going to
draw in the stem. Remember to check the
positioning in case it's moved. I'm going to work
from the center. I want this bud to sit in front. I'm going to leave a gap here, and then I'll fill it in later. That's going to give
plenty of space for that bud to sit in front. Now for the shading, I'm just moving to my 005. Again, I'm going to
work from the base and just remember to curve
these petals up. These petals are going to have even more curves
in the top view. If we start on this
left side petal, I'm going to curve this quite a lot and
from the top as well. Under the right side
this is going to curve around to the right. It just helps to show the
direction of the petals then. Move your paper around
as you need to. This one is slightly curving up. This is going to
have a left curve. Now we can just add
in a little bit of shading to these folds as well remembering to follow
these outside lines. Now we have our tilted
view of the cosmos, we can work on the side view.
16. Cosmos Part 4: With this side view,
we already have our semicircle shape
and we want to add the sepals into
the bottom as well. I'm going to do these in pencil. We can have a small flat
semicircle that we add on, and then just draw in
these long sepals. Then join them down to the stem. Then bring that down to wherever the petal sits on
the lower flower. With this side view, we're not going to be able
to see all of the petals. I'm just going to curve
this down slightly. We're not going to be
able to see all of these petals because
it's from a side view. Some of them are
going to be hidden. We can maybe have four or five that we see and
then we can have the tops of a couple of
them peeking through. These are going to curve around with this
semicircular shape. I'm going to do
four lines and then roughly draw these
in with a pencil. Then you can just add in the tops of the petals that
would be peeking through. Moving to my size two pen, I'm going to go over
these sepals first. Then we can start
drawing in these petals. Remember those organic
lines at the tops, and then bringing
it curving in so it's narrower at the base. Then we can just add in
some more peeking through. Now we can also just
follow this stem down, and draw in where it
goes to the bottom. You can see with mine this
is shifted over slightly. Now I'm going to move to my
005 pen for the shading. Then I'm just going to add
a little bit of shading, just using dashy lines
into the sepal as well to distinguish this by making it darker from the
rest of the flower. I'm not coloring
it in completely, I'm just adding
small dashy lines and then a little bit
down the stem as well. I've just realized we didn't
add it into this one, so we'll do that now. Now we have our three views. We can add in our buds. We have the two buds. Going back to the pencil, we can just refine
these a bit more. We can first check
the placement, check we're still
happy with them, because now we've
finished our flowers, we know what that
will look like. I'm going to keep this one here. I think this is quite a
good position for this. Then add in the sepals. Then draw that stem coming down. Then I'm going to shift
this over slightly to the right so that I can fit those sepals in front
of this flower stem. The stem is sitting
in front of this one, but then it's going behind this one because I've already drawn the end, which is fine. Once you're happy,
you can move to your pen and then just
go over these lines. Then I'm going to
go round this bud and bring it down a bit sooner. That's that petal fold, and then bring it out a bit more and then bring this stem. I'm going to have this
sitting behind this one. I'm leaving a little gap. Then we can just
draw this one in. Just going to fill
in these lines where there are some gaps. Now, move to my 005 to add in the final shading to the buds. Then we start at the top and just use those curved lines at different lengths to bring it down on both of these petals, adding a little bit more
shading to that right side so you can distinguish
between the two. Then do the same
from the bottom. Bringing it up using
those curved lines, making it a bit
darker on this side. Then again, just
adding shading with those small lines for the
sepals and the top of the stem. I'm going to do the
same with this bud. These curved lines from the top, making it a bit
darker on this side. Then shading in the
sepal in the stem. With these stems because
they're crossing over, wherever they sit behind
I'm just going to make them a little bit darker so
they stand out a bit more. The darkness will just send
that area back in the image, and it will bring the
lighter area a bit forward, making it look a bit closer. Once all the paint is dried, we can remove our pencil and then have a look
at our finished piece. Those are our cosmos
flowers finished. We've got the three
different perspectives which we know now how to draw, and a couple of buds added in. If we're doing a
bigger composition, we know that they can
look really nice just to add a little bit of
extra to our drawing. Here's a reminder of some of the examples I showed
you earlier on, which will hopefully give
you some more inspiration for how you can use them. In the next video, we're
going to learn how to draw the anemone flower.
17. Anemone Part 1: The anemone is a
beautiful flower with really striking features. There are a lot of
different varieties of anemone flowers in
various shapes and sizes. We're going to focus on
a six-petaled version. And in the center of this
flower is a mount of pistils surrounded by
a crown of stamen. So this is a finished
piece we're going to be drawing with the three
different views. Again, the front view, the tilted view,
and the side view. We'll also be including
a couple of simple buds. This is a lovely flower to
decorate your journal with. Here is an example of one
of my cover pages for July, where I've used a
couple of tilted view, this is a side view, and
a couple of buds again. And here's a simple gift tag
just using that front view, so keeping it really simple. And then a final example
is a greeting card I made. I drew these flowers onto
some card and cut them out, and then I just added in some really simple leaves
and stuck them all on. The petals of the anemone
are a little bit rounder. Again, with the organic
lines at the top, you can just make them a bit
rounder than the cosmos. We'll again be using
some of the folds. Then for the center
of the anemone, the central disc is
actually quite smooth. If we're looking at
it from a side angle, instead of using the texture with the C curves and the M curves that we use
for the cosmos, we can just use dots for this, and this is going to keep it looking really nice and smooth. Again, what we'll do is
create that dome effect by making these marks
fewer and further between to make it look lighter
in the top right corner, and then making them denser as we go down in
the bottom left. The anemone also has a lot of stamen which are a really
striking feature of the flower. These will be surrounding
that central disc. We can just draw these
with a simple line and coloring in the anthers
which sit on top. You can also do this just by
drawing that and then adding your shading outside to the petals to make
it really stand out. It's up to you how you want
to make your flower look, and you can play around
with those ideas. We can also draw buds in with our anemone into
our composition. These are a similar
shape to the cosmos, but we won't be including
the sepals in these ones. Quite straightforward, just that egg-shape
with the stem and then we'll add the
shading in as well. Okay, so for the flowers, for the anemone, we're going to do the same views as
we did for the cosmos. We'll do the top-down, the tilted where we can
still see the center, and then the side view, and then add a
couple of buds in. I'm using my pencil again to sketch out where the
placement of each will be. I'm going to start
with my top-down view, so this is the circle, and to add an oval facing
off to the left and then the side view will be facing off to the
right so that we're going to come down into
the center for this one. Then I'm going to do the
side view which is going to be more of a semicircle. I'll just draw the
rough stem coming down. This one is going
to be curving off. I want this to sit on
the left over here, so I'm going to tilt this a little bit
back the other way. Then this one will come down. Then we can add some buds. I'm going to add
one either side. Then I'm going to add one a bit higher so it's not
too symmetrical. I might make this a bit lower. I'm just going to bring
this down slightly. Play around with your guides and your positioning as
much as you want to. I'm happy with that.
18. Anemone Part 2: I'm going to start with this
top view, so the circle, and then we can add in our central disc another
circle, fairly large. This is just a central disc, and then we can draw
the stamen around this. Anemone has six petals and
these are quite large, quite rounded, and
they tend to overlap. So we want to see as many gaps
like we do in the cosmos. So we can divide
this up and then just add three marks
on either side, roughly where they'll sit. There are six marks
now for my petals. I'm just going to bring
these out, curve them round, adding these dips and
bring it back in. Make this one a bit bigger. Now I'm going to make zero to pen and I'm
going to draw in the center. Then I'm going to go
over those petals. We can draw that stem almost coming down in a straight line. So let's fill in the central
disc now with those dots. So again, keeping it darker
on the bottom left side, making them more
dense and together we'll come back and go
over this even more. Then as we move over
to the top right, just making them
sparser, a bit lighter. Then as you move back over, make sure it's a
gradual transition between this darker area
and the lighter area. So for this darkest area on the very left bottom we
actually add some hashing. So just some little dashes
which are going to fill in some of these areas and just keep going until
it looks quite dimensional. I'm building up this
left bottom edge. So it's almost a solid black in some areas to
make it look really dark. So I'm going to switch to my 005 to do the shading on the petals before
we do the stamen. So remember your curves and then I'll just
add it in a few of these curved lines from the top, especially where the petals dip in and anywhere that it's going to help give it
that illusion of shape. I'm just going to
add some shading to the top of the stem as well. So going back to my Size 02, because I want these
stamen to be quite bold. I'm now going to go around
this edge and just color in these dots that is
going to be quite a few very close together. These are what make
the anemone really recognizable in comparison to
some of the other flowers. You can make these more dense in some places by just adding a few more and then we can go in and just draw some lines connecting
these to the center. I'm not going from each one, I'm just drawing
some random lines just to give it that illusion
that they're all connected. That is our top view, complete.
19. Anemone Part 3: Next we can draw the tilted
view of the anemone, which is this one
on the top left. We have our larger oval. Now we can just sketch in that smaller oval
for the center. We'll be keeping this
below that middle line. Then we can just mark
and roughly where these six petals
are going to sit. I'm going to have one
coming straight down here, then two coming up
slightly either side. Then the final one above. I'm going to sketch these in
roughly with my pencil as well. Some coming out. I'm probably going to
do a fold on this one. Then this is going
to overlap this one. I'm going to bring this
out and then bring this underneath so we
can't see all of this one. Then the same for that. Do this top middle one next. Then some folds to these ones. Just check you're happy with your sketch and adjust
as you need to. I think I might have made
this petal down slightly. Now I'm going to my
size, there were two. I'm going to start
drawing these and I'll start with that center circle. Now I'm going to go to the central desk and start
drawing in these dots again, remembering to keep it darker
on this bottom left side. Then as I move upwards, I'm just moving those dots
slightly further apart. Then I'm just going
to keep going over this until it's as dark
as I want it to be. I'm using more dashy
lines now just to fill in some of these gaps on
that bottom left side. We can draw the
stem now as well. Remember just to check
the positioning. If you need to, you can
draw it in pencil again. I might actually do that. I want this to come down because I want it to sit
on the left side of this. Like before, I'm going
to do the shading first and then work on
those stamen over the top. For the shading, I'm
moving to my 005 pen. I'm working on
these curved lines. For these folds I'm
just making them parallel to that fold as it
goes up and as I move around, moving straight up and then
coming back the other way. Back to my 02 now. I'm going to draw in
all of these stamen. I'm going to have
some overlapping the central disc slightly, because I'll be sitting
in front of it. They're coming a
bit further out on the sides due to the angle. Just pause, take a step back slightly and have a
look to see if you need to add anymore in. It can be so easy to get lost in your drawings or your
paintings that it's good to just take a step
back and look at it overall to see if you need to add anymore
or make any changes. Now I'm just going to
add in those lines randomly to join the
anthers up to the center. Now I'm just switching
back to my finer pen, my 005 to add a little bit
of shading to this stem. Making it fairly
dark underneath, which is going to help
that stem look like it's sitting further back
than this front petal. A little bit here as well. Then just more of
those dashy lines, particularly on the left, to help give that
stem some dimension. That is our tilted
view complete.
20. Anemone Part 4: Now let's move on to this
side view of the anemone. We already have our semicircle. Here we'll be able to see probably about three
of the petals. We can sketch these in. I'm just going to draw the line further
direction of them. I'm going to have one
in the center here, and then the two on
either side will be a bit more hidden. Then we can add a little bit of the petals on the
other side as well. Then if you haven't got
that stem drawn in, you can just draw it in again. Moving to my pen, I'm
going to add a dip. I'll show you in pencil first to this the base of this petal. It's an upward step, which will just help show
how it will join the stem. This view is quite
straightforward. We don't need to worry
about the center because we can't see it. Now we can just add some
shading to those petals. I'm adding in lots of extra
small lines at the base just to make it darker to
show that it goes underneath. Then I'm just going to add some shading to the
top of this stem. Then on this lowest
stem as well, particularly to that
left side again. Now it's just the final
two buds to draw in. I'm going to go back to my 02 going to keep these
really quite simple. The focus is on
the main flowers. I'm just going to follow
this egg shape but round and then
draw in this stem. These ones are sitting behind the other stems and
the same for this one. That bud went a bit wonky, but I'm not worried about it. You just have to remember we're drawing things in
nature which are never perfect so don't get caught up in trying to
do everything perfectly. Switching to my 005 I just add some shading to the tops and bottoms of these buds to
help give it that curve. Then to the stem as well, just as we did before, making it very dark underneath. Then adding a little bit
more of those dashed lines, particularly on the
left, all the way down. Here where it sits behind
those other stems, you can make it darker
and that will push it back slightly in the
overall picture. That's our anemone finished. Once the pen has dried, once we're happy we've
left it a few minutes, we can just take all of the
pencil away and we're done. If you enjoyed this anemone, you can keep practicing
these angles, perhaps experimenting with different ways to do the stamen, like I showed you at the start, keeping them white
for more contrast, instead of coloring them in and looking at different projects
that you can use them for. Like for those simple
gift tax bookmarks, greeting cards, or
in your journal. In the next video,
we're going to learn how to draw the daisy.
21. Daisy Part 1: Daisies are common
and popular flower, which I couldn't leave
out of this class. They have a fairly
simple structure, they have a lot more petals and the other flowers
we've drawn so far, and can range from an average of 15 to 30 petals per flower
with a central desk. Here is the finished
piece that we'll be drawing and again, we're going to be drawing
a daisy from three views. We have the front
view, the tilted view, where we can still
see the center and then the side view where
we can see the base. We'll also be adding
in a few buds as well. This is a great
flower to do though, here's an example
from my sketch book, playing around with those different angles
and varying the height of the flowers to create a nice
meadow like composition. Here's a simple
gift tag as well, using the tilted view. I also like to use
really simple versions of this daisy in my journal. Here's an example where
I've added it into the corner of this
page as a decoration. These are simplified by
making them smaller, using less petals and
adding less details. Here's another example of using a really simplified version
of the daisy in my journal, just creating this bottom
border along the edge. The daisy is a birth flower for April so it can be
also great to use as the feature on a
journal cover page for that month or within
that month's layouts, or for gift tags for people
with birthdays in April. There are a couple
of bits that we can practice for the daisy. As we practiced
earlier the daisy has a slightly longer
thinner petal. Starting from a
[inaudible] point, go up and then when
you get to the top, can add in a couple of dips. When we're drawing the
daisy at an angle, those lower petals are
going to be much shorter. If we started at this
narrow point again, they might only come that far down when
the flower is really tilted and the ones
slightly at the side, at the bottom they're
going to be a lot shorter. The central disc has
a lot of texture, like the cosmos, so we'll be using those C curves again to create that texture. At the base of the daisy when
we're drawing the side view we'll have this kind of cup, then I can draw in all these pointy bit and the petals are going to come out from that. You can practice simplifying that and then also we can include buds as
well with these daisies. That's going to
have that cup with these dips and
then it'll come up into that kind of egg-shaped top where
the petals will be. As we'll be doing
the three views, the top view, the tilted
view, and the side view. We can arrange these in our composition and we've done a couple of
different ones are ready. One kind of coming off to the
left side for the cosmos. One coming up from the
center for the anemone. Feel free to play around with
these clusters of three. Here is good practice
to have a go at experimenting with
compositions and positioning of the flowers. I'm going to do these coming
up from the center again. I'm going to have the
top view over on site to the right [BACKGROUND] and then I'm going to
have the tilted view at the top [NOISE]. Then I'm going to have
the side view so it's kind of bending downwards. It will be facing
downward slightly. To add in that small
semicircle for that cup that we just
practiced as well. I'm going to add in these stems, so working from the center
to make sure it's lined up. This one is going to
crossover, go round. Then I'm going to add in
some of those buds as well, which are very small. They got one up the
top everyone here. Then I'm going to have
one lower down as well. On this left scientist
keep it balanced. I'm going to move this
one up a bit higher. Again, play around with yours
as much as you need to do. You're happy with
your pencil guides. It's a nice tall
composition now.
22. Daisy Part 2: Starting with this top view
lets draw in the center. Because there are
so many petals, I'm not going to
map them all out. I'm actually going to go
straight to my pen for these, but do feel free to carry on working
in your pencil first. I'm going to start by just
going over this circle with those C curves to make sure that we've got
that textured outline in. Then I'm just going to
start with the top petals so keeping these narrow. Adding these tips in. Turn your page as
much as you need to. I'm going to do a few
randomly and then start drawing the
ones around that sit underneath so they're not
too structured or uniform. You can have some which are
slightly different shapes. Here you can see this is
curving up a little bit, and it will just add a bit more interest
in the overall piece, having them slightly different. Now, I'm going to start
drawing some that sit behind the other petals. It's nice to take
your time with these. Can be really relaxing. Just focusing on
these pen strokes, not feeling like you
have to rush at all. I'm happy with how many
petals I've gotten there. Now, I'm going to focus
on this center disc. Again, with the C curves
keeping it darker, more dense on the
bottom left side, so that it shows that
it curves round. As we move up to the top right, draw them in slightly further apart so that there's more white showing through
on that top right. Then just make it
even darker with some dashing lines
on the bottom left. Now, we can draw a stem in. Just make sure it lines up. Then I'm going to switch
to my 005 for the shading. Some nice long lines work well, slightly curved for these. Then we can add in a little bit more shading for the petals that sit at the back. Push them back a bit more. I feel like this
shading is so simple, but it really transforms
your drawing. Then just add a
little bit of shading underneath to the stem as well, making it darker directly
underneath that petal, and then adding the dashy
lines all the way down, particularly on the left side.
23. Daisy Part 3: Now let's move on to this
tilted view at the top, which is our oval shape. We'll start by drawing
in this center circle, which is an oval for
this tilted view. Remember, keep it fairly
low within that big oval. Then if you wanted to, we can actually draw some
of these petals in first because the shapes
will differ to these ones. They'll be shorter and
the directions will be a little bit more curved. On the side, we want
to go upward slightly. It will roughly be like that. We'll have some shorter petals. Here I'm not actually going all the way to this
edge because I want to add some more petals underneath because we've got lots
of petals here which overlap some are sitting further up and some are
sitting just underneath. I'm going to make
these longer as they come out at
the angle and then add another one underneath here. We can make these fair bit
longer as we move to the side. I'm not going to
draw them all in, and that gives me a
good starting point. I'm just going to take away
that center one underneath. Moving to my pen now, I'm actually going to start
with this bottom petal. I want it to overlap that
central disk slightly. I'm going to bring
it up a little bit higher than that oval. Then bring this down. Same with this one next to it. Then we can draw the
rest of the oval in. That just helps to show
that these petals are sitting in front of
that central disk. I'm going to carry on with these petals that are
slightly underneath. Don't feel like
you need to follow your pencil lines exactly. You can see I'm
actually changing this slightly as I go along. I'm just using them
as a rough guide for where the petals could sit. Pause, take a step back, have a look, see if you need
to add any more petals in. I'm quite happy with
how mine looks. I'm going to start working
on this central disk now. With this side view, I want
this to sit further forward. I'm actually going to
wait to join the stem until I've done this
final side view flower. Switching to my 005, I'm going to start
on the shading. Again, with those
very long lines, making the ones
further back slightly darker as they join
into the base, which helps to push them back. Then curving these round and then curves on
either side here. Sometimes the pencil
lines can get in the way when you're doing
your shading so you may want to remove
them before you start doing the shading
so you can clearly see what you're adding in. I'm just going to go over
some of these areas now, particularly in the center, to add a little bit more depth. Just adding in that darkness by going over some
of these lines. That's going to really help the flower look like it's
dipping in at the center.
24. Daisy Part 4: For the side view now, I'm just going to adjust this a little bit and
refine it a bit more. Bringing up this cup and
then you can draw nice, pointy bits as well. Then we want these
petals to come outwards. It might not sit exactly
within this semicircle, which is absolutely fine, I will have the rough
direction at these petals. I think I'm going to
bring this down a little bit lower as well. With my 02 pen, I'm going to draw
in this cup first and then I'm going
to draw in the stem. I've brought this up
too high with the pen, so I'm going to have
to bring it down, curve it around a little bit more because I want it to sit in the middle. That's fine. If you want to,
you can draw some of these petals end first, particularly the ones on
the outer edge just to get that positioning
and the direction. Then I'm going to fill
in the rest of the pen. I'll go over these first. Now I can just add a few
petals that are sitting towards the other
side so you can just see the depths at the top. Once you have all the
petals that you want in, we can go and add
in our shading. I'm going to just take out
these pencil lines so I can see a bit clearer because
I've got quite a few. Starting with this base, I'm going to do a fair
amount of shading on here because it is actually
darker than the petals. Then it will just add a
bit more texture as well. Then I'll do the shading on the petals so
there's long lines. Then the shading on the stem. I'm going to color this in
quite dark to really give it some contrast then
add these lines. I'm just going to head back to my 02 now
to draw in the stem of this tilted flower which
is sitting at the back. Then just add some shading
into that stem as well. Now we have our three flowers, we can do the buds. The first thing I'm going to
do is check the positioning. I'm still happy with
where these are. I think I'm going to move
these two lower ones slightly. I'll take out the rest
of the pencils later. I've got this one up here, which I'm fairly happy with. I'm going to make
this one a bit higher and curving over slightly. I'm going to bring it around. I want it to cross
beneath the other stems so it looks a
part of the drawing. Then this one will
be a bit lower down. I'm happy with the positioning
of the three of them. We can roughly draw
in the base now with the zigzaggy lines and then move to the 02 to
finish drawing them in. Then I'm just going to
add in the final shading with my 005. Again, like the psi flower, I'm just going to add
in a bit more shading to this base, coloring in the very top of that stem to add that contrast, then add some curved
lines to the bud. Once your pen has dried, just remove the pencil line and then that's our daisy finished. Here is a reminder of some of those extra projects
I showed you at the start for how I've used
a daisy in more projects, which I hope will give you
some extra inspiration.
25. Echinacea Part 1: I love Echinacea
flowers as they are such a distinctive and
striking flower with a large central cone head
and downward facing petals. For this flower,
we're going to be drawing these two angles. This is the finished
piece that we will draw the side view and then a slightly more tilted
view where we can see those back petals, which are really nice to
add into a composition, to add a little bit of variety. This is one of my
favorite flowers. You'll find this a lot in my journals and in
my sketchbooks. Here's an example of a page
in my sketchbook and you can create some really
nice compositions and pieces by varying how these
petals sit a little bit. Even though these are
all at the side view, you can change some
of the petals, so some of them maybe
tilting upward slightly. These are curving
upward slightly, and then these ones
are coming down more. They all look
slightly different. Here's another example from
one of my sketchbooks. This is a slightly more
simplified version. Just using single lines
for the stems and adding less details into the cone head and using a few less petals. Here's an example of
a simple gift tag I made with this flower as well. It's coming off from
the left slightly, and because this is
a nice tall flower, it can work while on bookmarks. Here is another example
that I made where I added in just a couple
of really simple leaves. Finally, just to show you some decorations of
these Echinacea, I added into my journal
for a weekly layout. Again, as you can see, there's a really simplified and I've already cut down
on the details here. These didn't take very long, they just really fun,
simple doodles to add in. The petals on the
Echinacea will be a similar shape and size to
the petals from the daisy. They'll be long and fairly narrow coming to
that narrower point where they meet the cone head. They'll also have
that tip at the end. These petals will
be facing downwards or to the side and some
of the ones to the side, we can add a slight
curve into them. Flicking them up slightly at the end just to add
a bit more interest, but they can also curve around. It can be nice to vary
the petals like this just to make the flower look a bit more
interesting and natural. For the cone head, again, we'll be creating that
texture using those C curves and they'll all be facing downwards as we'll be drawing the Echinacea
from the side. Finally on the stem
for the Echinacea, we can also add in
these tiny hairs. Just using tiny flicking
lines on either side, which gives it a nice
bit of texture as well. Starting with our pencil
to draw our guides, we're going to do two Echinacea; one from a complete
side view and one from a slightly
tilted side view. I'm going to start with one
up here with a semicircle, having a curved face, and then adding in that
semicircle for the cone head. This one is going to curve
off slightly up to the left, and then I'll have
another one down here. This one making that top curve less deep and then having
the bottom a bit deeper, bringing that round a bit
deeper than the top and then curving this stem around. This cone head is
going to sit within those petals within
this bigger shape, because we want some
of these petals to be seen at the back. Semicircle with
another curved base. Once we've got our rough
placement and rough shapes, we can go back and refine these. I'm still using my pencil. I might make this
one a little bit bigger, this cone head, and then just bring that curve
at the base down as well. I'm going to make
this a bit shorter.
26. Echinacea Part 2: Now I'm going straight
to my 02 pen. I'm going to do the outline
of the cone head first with that texture, so using those C-curves
to create that dome. Then doing the same underneath. Now we can start adding
in the petals and feel free to do these
in pencil first. These ones will come
pretty much straight down and then they'll
start to come out. We start with one in the middle, adding these tips in at the end, curving round and then bringing
it up to a narrow point. I'm going to add one here now
and then bring it around. Then I'm going to add
one more at the edge. I'm going to curve
this up slightly, so it goes outside
of that guide, and then start on
the other side. Now we can fill in the gaps with a couple of sitting underneath. This one is going to
be underneath here. Not all of these petals
have to be touching. I'm going to do another
one on this side. That sits behind there. Then I think I'm
happy with that. I'm just getting back to
my pencil just to make sure I've got the stem
in the right place. Starting from the middle
of the cone head, I'm going to come down, and just draw that in with another parallel
line at the sides. I'm going to go over
that with my pen. You can see to get
that smooth line, I'm pulling my pen
down the whole page. I'm not moving from the wrist. I'm moving from the
shoulder instead, and that creates
a smoother line. That's something we practiced in the introduction
to doodling class. Now we've got our outline. We can draw in the texture
within this cone head. We are using those
upside down C-curves. Then again, we want to
create more darkness on this lower left side
and lightness on this top side so it looks
like the light is shining on. That is going to help create the dimension within this shape. I'm going to add a few in ready with some gaps in-between. Then as I move down, I'll make them closer together. I'm just going to start
going over these ones in the bottom-left corner to
make them even darker. Trying to take away more
of that white space. Then I'm just going to add
some dashing lines to fill in more space along the bottom. The more contrast
you have between this bottom-left side
and this top right side, the more is going to
stand out and the more curved it will look. I'm happy with that now, I'm going to move to my 005 pen for the shading of the petal. As with all the other
petals that we've done, just make sure you follow
these curves down. Keeping these lines at
different heights as well. Then I'm just going
to add some more at the top to make it look like these petals are
curving inwards. Adding more depth
with that darkness. Then we can do some
from the bottom, particularly where
the petals dip in. Then add some
shading to the stem, making it quite dark
underneath this petal here. Then just bringing
it down particularly on that left side, leaving that white stripe on the right side to help give that stem some curves as well. Then we can just add in these small lines for
some hairs down the stem. They don't have to be uniform, just spread them out randomly. That's our side view completed. Now we can move on
to the tilted view.
27. Echinacea Part 3: If we start with these
petals at the front, pretty much similar
to these ones. Then as we move around, we go up slightly. Then for these back ones, they're going to be quite a bit shorter because we
can't see them all. Then as we come back
around this side, we can make them longer again. Then I'm just going to move
that stem slightly over. Moving [NOISE] to my pen, again, I'll start with this
outline of this cone head and then draw the petals in. Now I'm just going to
draw that stem in. Let's do the markings in
the cone head [BACKGROUND]. Then just build that up
on this left lower side. Then again, just make it
darker using more shading. Now I'm going to switch to my finer pen [NOISE] for the shading of the petals
[NOISE], just like before. Then just add a little
bit more darkness next to the center with
some shorter lines. Particularly if there are some petals that sit
underneath another one. Just add like here, you can just add
that darkness in as an extra shadow and then just the lines
from the ends as well. Then finally the stem. Because I've got a fair amount that sits underneath
these petals, I'm going to make this very dark to distinguish
it from the petals. Then bring it down and then add in those small [inaudible]. Now we have finished
our echinacea. We can just erase
the pencil lines. We're finished. I hope you've enjoyed drawing
these echinaceas with me. Here's a reminder of some of the projects I showed you
at the start to give you some extra inspiration
for how you can use this flower
in your projects.
28. Pansy Part 1: Pansies are a lovely, uniquely, recognizable flower with
five rounded petals. There are three petals
that sit next to each other at the bottom, and then two slightly larger petals overlapping at the top. There can be a single color, have lines coming
from the center, or have a bold dark center. Here's the finished
piece that we'll be drawing with three views; the front view, a tilted view, where these petals
are slightly folded, and then a side view or
slightly behind view, where you can see those
sepals at the back. Within this piece,
I've chosen to add in those really dark markings
in the center of the petals, but you can also do these
in a few different ways. You can just add
in some shading, keeping it really simple, or you can add in some
of those bolder lines. Like I said, there were a
few different versions of the pansies which are
really nice to draw. But I feel like these ones
are the most recognizable, so I thought we'd
start with those. Here's an example, gift tag, I've used using the pansy, keeping it really simple. I simplified the
center a little bit more than how we'll be
doing them in this class. I just used a circle, and instead of those
bold markings, I just added a little
bit more shading. This is also a nice one
to turn into a bookmark, just using a single flower, keeping it really simple. Again, I've just added in
a couple of simple leaves. Finally, just to show you an example of a card I've made. I actually drew this on a
separate piece of white card, and then cut it out,
and stuck it on. You can see I've
used a front view, and then the side view
is towards the edge, to give the bouquet some
dimension so it looks like the flowers are
curving round into a bunch. For the petals on the pansy, the bottom petal is like an
upside down heart shape. It goes round, and then you bring it
in a little with a dip, and then bring it
around to the center. The other ones are
quite rounded as well. You can make these edges
a little bit more natural by waving the pen slightly, because these petals on the pansy, they're
quite delicate. Just by having it
a little bit less smooth is going to
look more delicate. For the center, if you were doing a doodle, you can just keep it really
simple with a circle. We could keep that white so it stands out in contrast to
the rest of the flower, or you can draw these two teardrop shapes with a little circle underneath. I do this a bit bigger
so you can see again. These to sit next to
each other touching. Then there's a
semicircle underneath. We'll do three angles
for the pansy, but the main angle that you
will probably use in most of your drawings will
be the front view. But it's nice to just
know how to draw the other two so that you can include them
in any compositions, particularly if you want to draw a bunch of pansies in vase so then you can have
a few at the sides going off in
different directions. We will start in the center with a circle for the
front view pansy. Then off to the right, I'm going to do an oval. This is going to
be a tilted view. Then I'm going to do a
slimmer oval on the left. This will be a side view
where we can see the base. I'll just draw the stems down. For this middle one, it's just going to
come straight down. This tilted view
is going to just curl round and sit next to that. Then the same for this. Side view is going
to come around. I'm going to move
this center stem over slightly so they're
not touching.
29. Pansy Part 2: For our front view, let's start just by
marking out where the center is with
a small circle. Then we're going to draw
in the bottom petal, which comes out to the side slightly and
then curves down, comes around, dips in, and then comes back up. Then we have two
petals either side, so you can go up
slightly curve it round, and then bring this down
underneath that bottom petal. Do the same on the other side. Then for the top two petals, they're going to sit
slightly above this circle. They're going to
be a bit bigger. For the first one, we'll start over at the top of
the left petal. You can do this either side. You can also trace your pencil along or at this
in roughly from the center, just to make sure you're
getting the shape right. I'm bringing this up and
round and then down, that's going to come in there. Then another one that's
going to sit behind this. So again, bringing this round. Moving to my pen, I'll start with the center, so again, we can keep
this as a small circle, or we can do these
teardrop shapes over the top and then add in
that semicircle underneath. Now can go over these lines, making them a little
bit more wobbly, a little bit more organic. Which will help give
the illusion that this petal is really delicate. Same for these just wobbling
that pen ever so slightly. Now we have our five
petals drawn in. Let's do the stem coming
down from that center. For the features of the pansy, we can just add the shading
onto the petals or we can add the more distinguished
dark markings which make the pansy
more recognizable. You get different
versions of these, so it's up to you
which one you choose. We know how to do the shading, so I'm going to show you how
to do the darker versions. So it's just on these
lower three petals. We can start by outlining it. You can use your pencil for
this or just use your pen. I'm just going up and drawing
jaggedy lines with my pen. I'm going to fill this in. I'm not touching the edge of the petal and then I'm going to do this on
the lower petal as well. Bringing it up the V-shape. If you have a boulder pen now, you can switch to
that to fill this in. I'm using my 08 now and I'm just going
to fill all of this in. Just going to make
this a bit wider. So now that's filled in, I'm going to switch to my
005 to add some shading. Because these petals
are quite delicate, we can add quite a few
lines coming in from the outer edge and then also from the center
going through that black area. So just making sure to curve around with the
shape of the petal. Then for this petal
which is sitting behind, we can add a bit of darker
shading in this area, which is going to
push that back, make it look like it's sitting
behind a little bit more. Then again, those lines
on the outer edge, particularly where it dips in. Then the same with this one. Then for the stem,
shading underneath, bring it down and then
carry on on the left side. That is our front view
complete of the pansy.
30. Pansy Part 3: Now we're going to
work on the side view. I'm actually going to move
it over slightly more, give it a little bit
more space between that and the front view flower. With my oval, I'm going to mark in where
the center is roughly, and then we can draw in this
bottom petal again fast. It's going to be a
bit more squashed, a bit narrower because we're not going to see as much of it. Then this right petal, that can come out, so we'll see a little
bit more of that. Then this petal we'll see
less of because it's on the, so we can bring that underneath. We can also add some
folds into these two, which will help make it look
like it's more an angle. For these bottom two, we can actually have these, so they're coming outside this
circle again to the back. Perhaps adding another fold and then add the other one quite small on the other
side so we can just see it. With my size 2, I'm going to start
with the center, making those center elements
narrower than before. Then bringing that outside
edge of the petal down. Then adding that folding. Then this one I run the left, so coming up slightly, and bringing it down and
adding that fold in as well. Now this petal on the right and add this fold in here as well, which helps to make it
look like it's more on a side angle and then
the last petal there. Just check your stem, the positioning going out from the center and then
bringing it down into a curve and then we can draw the outline
of these markings. This one is going to be
much bigger because we can see more of that petal. This one is going to
go slightly underneath that fold and then
come out there. I'm switching to my 08 again
now to color these in. Back to my fine art 005 just to add in the
shading again, so starting from the center going through these black lines and then also you bring
it up round the edges. Remember to curve with the outline of the
flower or the petal. Then for these folds,
just one edge, making it parallel with
that curve, coming round, bringing it in
straight as you get to the center and then curving
back the other way. Then adding in that dark bit of shading for those back
petals which sit behind. Then finally the
shading on the stem. That's our tufted
pansy complete.
31. Pansy Part 4: For the final side view, we are not actually going
to see the center features. We're just going to
see the back almost. We can draw in the sepals here. If we've got our stem coming in, can add in those
long pointy lines for the sepals at the back. Then going to starting
from the center, I'm going to draw in the back of that base petal
and bottom petal, and then adding these top two because
they're at the back. Then just add in one more
for one of the side petals. The petals are delicate so
they can get a bit floppy, especially when
they're bending over. You can be a bit freer with the way you
draw these as well. I'm actually going to
bring that sepal out. Starting with the 02, I'm going to start
with the sepals and then bring the stem down. Now I'm just going to go over these petals. This one is quite
simple because we don't have the added features. We can just add in the
shading so I'm going to start with the sepals
and just shade this in using hash lines just to make it a bit
darker than the petals. It distinguishes itself
and stands out a bit more. Then we can carry
on down the stem as well just on that left side. Then with the petals, I'm just adding these
lines for the shading. Now we can remove
our pencil lines. [NOISE] There's are
our pansies complete. I hope you've enjoyed drawing
these pansies with me. You can continue to practice and play around with
the different features. We added in those
dark markings on the petals but you can
try leaving them out or adding a few bold lines
onto the petals instead. Here's a reminder of some of the examples I showed
you at the beginning of the video which will hopefully inspire
you to create more.
32. Tulip Part 1: Tulips are one of my
favorite flowers. I love their shape and the beautiful colors as they
come in during the spring. They just make me feel
happier just looking at them. They have three petals on the inside and then three
sepals on the outside, which look the same. It looks like they
just have six petals, and then they have long
leaves clustered at the base. We tend to see and
draw tulips from a side view as the
flower stand upright, so the stamen in the
center are usually hidden. This is the final
piece we're going to be drawing for the tulip with three versions at slightly different
stages of bloom. From more closed,
where you can just see two petals to much more open, where you can see all
six of the petals. We'll also be adding in
some of these two leaves that cluster at the base with a couple of them folding over. Here's an example of a cute little card I
made using these tulips, keeping it really simple, so this didn't take long at all. Here's an example
of a gift tag I made using three of the tulips. Again, different
stages of bloom. Then because this is a
nice tool flower as well, it's a nice one to add
into a bookmark as just using a single
flower with those leaves. Then finally, just
an example from my sketchbook using a
variety of the tulips. Some of them have the
main petal in the middle, some of them have the
outer petal showing first, and then some are more
closed off and some much more open with those
stamen peeking through. You can add a lot of variety
into the drawings of tulips by changing
how the petal sit, so it's another nice
flower to experiment with, perhaps just filling a page
of different versions. If you happen to
have some real-life tulips as a reference, you can just turn them
around slightly and draw the way the petals sit
at different points. Let's start by
practicing a couple of the shapes of the
petals for the tulips. We're going to come round
and come up to a bit of a point and then bring it down. If this is on the outer edge, it may be more curved
round like that. With the tulips, we can also add in the leaves
because they were really nice additional
feature to add in. If we have the stem, we
can add in the leaves in front of or behind or next to, they're clustered
around the base. An easy way to position your leaves is just
by using a line. We can draw them going straight up or we can have
them flopping over. Then we can just lean where that leaf will
go with a nice curved line. With this one flopping over, we can bring that
up to the edge and then draw in the
rest underneath, and then we can refine
our shape as we need to. We're going to draw three different versions of the tulip at different
stages of it blooming. These are all going to
be from the side view. We'll start in the center with quite a wide cup-shape,
semicircular shape. Then on the left
we're going to have more of a teardrop shape. It's going to be tilted
slightly to the left. Then on the right we'll
have a narrower cup-shape, semicircular, and that one
is tilted to the right. We can bring these down
with the stem. [NOISE]
33. Tulip Part 2: For the petals starting
on this left one, this is going to
be fairly closed. Starting at the bottom, I'm going to bring
it around to the top , a bit of a point, curve it round slightly, so I'm leaving a gap for that second petal to sit
and then bringing it in. Then near the top,
I'm going to come up, dip down, curve it round and that's going
to be the second petal. This center one is
open much more, so I'm going to
start by drawing in the biggest petal that we
can see in the center here. Then have two either side, which we can just
see the side of, and then we can add in a couple of back petals
that we can see as well. Going to bring this down, make it a bit longer. On this side, we're going to see the two outer petals on
the left and the right, so I'm going to bring it up in the center, curve it round, dip it in a little bit, curve it round the outside. It'll slightly overlap, so I'm going to bring this
around on the outside as well. Then through those two
petals we'll be able to see a couple more petals. We can quickly sketch in our leaves as well where
we want those to sit. We can have one or two
coming off from the base, which looks quite nice. I'm just going to start by drawing a line to represent
where these will go. I'll have one flopping over on that side and then
one straight up. I'm just going to have
one in the center and then another one there. If you're happy
with how they look, we can start filling these out. I'm just going to draw in where these
leaves, which would form. I'm going to bring
them slightly off the bottom of the page as well. Actually both of these
are going to sit behind the stem, I think, and then this one will sit in front of this stem
and it will wrap around so you won't see that
bottom edge of the stem. I'm just going to make
this leaf a bit higher and then have this other one
coming from behind as well. I'm actually going to make
these two a little bit longer. Now I'm going to move on to
my 02 and draw these in, adding in these nice wavy lines. Now I'm going to draw in any of the leaves which are
sitting in front, so this middle one is going
to be sitting in front, so both of those leaves are sitting behind the stem and I think I'm going
to make both of these sitting in front as well. Now I'm going to
draw in the stem. This stem sitting in front. I can draw this all
the way to the end of the page and then add in
these leaves sitting behind. Now we have all of our outlines. I'm going to erase the pencil, and then we can clearly see where we can
add some shading. With my 005, I'm going to start with
the petals and add these curved lines
upwards to start with, adding in a few
more at the face. Then also bringing them
down from the top. Then on this other petal I'm
going to add a few more in, so it looks a bit darker. Then on the stem, make it quite dark underneath and then bring it down
on the left side. For the center, start with those curves and then bringing it down from
the top as well. Then on the outer petals, making slightly darker to
distinguish them again and then adding that
darkness at the top of the stem and then
bringing it down. Then adding these curved
lines for the final flower. Then we can add some shading
to these leaves as well, so where they curve over, I'm just going to add in some lines and then
from the tip as well. Then underneath, we can make
this a bit darker as well. Still remembering to curve it round into the direction
that the leaf is going to help with its shape, and I'm going to bring
some down from the top. You can just add in some random lines as well to give the leaves
a bit of texture. Then the same with
this folded leaf, making it darker underneath. [BACKGROUND] Now, just
take a step back, see if you need to add
anymore shading anywhere. Those are our two
leaves finished. I hope you've enjoyed them. Here's a reminder of some of the projects I showed
you at the beginning for some extra inspiration
for more drawings.
34. Daffodil Part 1: Daffodil is a lovely
bright yellow flower that shows us that
spring is on its way. It has a fairly
unique structure with its trumpet shaped center surrounding the
stigma and stamen, and then six petals
on the outside. We'll be drawing the
daffodil from three angles. The front view where we can
see the stamen in the center. A tilted view where
we can see more of the edge of this
trumpet shape and then the stamen peeking out. Then a side view where we can see this trumpet
coming out through those petals and also
this sepal at the base. We'll also be including some of these lovely long leaves and a couple of the buds
because there's such a unique shape
for the daffodil. Here's a simple gift
tag that I made just using a tilted view
of the daffodil. Then the daffodil is a birth
flower for March so it's a great feature for a
journal cover page. Here is an example
of one of mine. For this, I simply drew around a circle and then mapped out where my three
flowers would sit, so that all at a slight angle and they all come down to the
circle slightly. I then added in the leaves
and the buds, again, just overlapping this
circle a little bit and then drew them all [inaudible]
and then filled in the circuit in black
to add that contrast. The daffodils petals
are fairly rounded and then they come up
to a bit of a point, so we can just practice their shape and bringing it down to the narrower part
which meets the middle. Then we have this trumpet
shape in the middle, which has this frilly edge. We can either do
this fairly simply, so just with a wavy line, keeping it quite simple. Or we can do a bit
more realistic, bringing these curves
round a bit more. Adding in lots more
of these frills. It depends how much detail
you want to go into. With the center, we'll
be able to see that from the front view
and the tilted view. From the front view, we can just draw
in a few circles to represent those stamen and then when they're coming
up from the tilted view, we can draw them more as the tubes that come up
as they meet this edge, which we'll see a bit
more as we draw them. We can also draw in
buds of the daffodil, because they're quite
unique so they have long wavy soft lines. Bring back down into the stem. We can add another bud in here, and this is usually darker. We could add a lot of shading in here and then add
the stem underneath. Those are just a few of
the elements that we'll be using with our daffodils. With our pencil, we can
map out our layout. Will have the front
view, the tilted view, and the side view and then
we can add in some of those buds and a couple
of leaves as well. I'm going to start
with the front view, so a circle, very central, a higher higher than the center
and then we'll have the tilted view as an
oval on the right side and then on the left side, we can have the side view. This will be a
semicircular shape for the petals and then we can add in that trumpet shape for the center of a daffodil. Going back, once you're happy with the main positioning,
we can go back, so for this top one and
then going to sketch in the center and then on here, is going to be off-center. Another oval, I'm going
to leave a little bit of a gap on that side so we can see the petals and then the base of this trumpet shape is
going to come underneath. Then we can just map out where their stems are going to sit. Then I'm going to add
in a couple of buds so I'll have a bud maybe coming over here so adding
in that long petal, I have another one coming up through here
which will sit behind. Then we can just add
in a few leaves. At the moment, we can just
add some lines where we think they might fit in nicely and then we can
refine those a bit later. I'll add in another
one coming up here, and maybe one more
reaching up here.
35. Daffodil Part 2: Starting with this top view, we can refine this
circle in the center. We're going to use those
wavy lines and again, add as much detail
as you want to these so they can just be simple up and down waves or you can
curl them round a bit more. Then the daffodils
have six petals, so we can just mark out where
these are going to sit. Then because we can't see where the petals join the
base of this trump, because the base of this
trump is a bit smaller, these are going to be
fairly wide where we start. The petals are not
going to be really narrow and then we can bring them up to that point
and bring them down. These will all be slightly
overlapping each other. I'm going to make this one a bit bigger so it overlaps here. Then for the center, we can just draw
in these circles for the tops of the stamen , six of those. Switching to my 02 pen now. We can just go over these lines. I'm alternating these petals slightly so they don't always
overlap at the same point. This one now sits
beneath these two. I might do this one next. Then I'm going to do the stamen. Now we can switch
to our finer pen, 005 for the shading. Starting with the center, we can add a fair
bit of shading. It's all going to point
towards the center. Whenever there's a dip
in this frilly edge, we can bring it down and then we can always
add a bit more. Going round as well at the edge. These are slightly shorter
than the other ones. But just add to that shading. I'm going to leave the stamen with white centers
just as the outline. Then coming from the center, I'm going to add some shading
and it's going outwards. Now we can do the petals. We'll follow the curve of the outer edge round and then bring a few lines
down from the top as well. I'll just do the same
on each of them. Then we can always
make it darker around these edges as well. That's going to help distinguish the petals
from that center. Particularly for the petals
that sit underneath, we can make these
darker where they join. I'm going to leave
the stamen till the end because I want some of these buds and
possibly leaves to sit in front so we can
draw those in first.
36. Daffodil Part 3: So now we can move on to this tilted view of the daffodil. So again, starting
with this center, I'm going to draw
this frilly edge, and then just refine the base of that trumpet
a little bit more. Then we can draw the
direction of the petals. So we can have one out here, and they are curving
up slightly, and then we can draw those in. So you can see these
two are slightly narrower because they're
more on the side. But these two here, they're a bit wider
because we can see more of them as they're on
the outer edge. Then we can draw the stamen in. I'm just going to do
a few lines and then add some circles at the top. [NOISE] So now I'm moving to my 02 pen and I'm going to start by going over this frilly edge, and then bringing
this trumpet base in. Then we can go
over these petals. Now we can go over this stamen. Switching to my 005, we can start the shading. With the base of this
trumpet we can just have some lines going upwards
and then make them darker. At the base is some
shorter lines, and then also bring
them down as well. Then on the inside, any better dips in, we can just bring that
down towards the center. Then just add a little
bit more shading around the edge as well. [NOISE] For the petals
we'll do the same. So curving up in
the direction and then adding a bit more
shading where they join the center to give
that real depth of them curling in and
joining. [NOISE]
37. Daffodil Part 4: That's our tilted
view done as well. Now we can move on
to our side view. Using the pencil first, we have this trumpet shape, so we can go over this. We're just going to
see one edge of this, and then we can bring
it in a bit more. We're not going to see
all of this trumpet because some of the petals
are going to be covering it. We can bring a petal up here, and then curve it round as well. We'll probably see
about four of them. Then we can start
sketching these in. I'm going to make
this a bit higher. Then we can also
draw in this sepal which will cover a little bit of the bottom petal as well. That joins into the stem. Going to the size 02 pen, I'm going to start by
drawing over the sepal, and then the petals. This one at the edge is going to be really quite narrow because
it's just a side view. The same on this side. Then we can draw in this
trumpet and go over this edge. With a size 005 now, I'm going to draw
in the shading. We don't have to worry
about the center because we can't see it on this side view. It's just bringing down those
dips towards the center, and then adding in a bit
more shading at the top. Doing the shading on the petals, so curving it around as usual. Then when any petals sit
underneath anything, just adding in that
extra shading to give it a little bit more
depth to push it back. Got quite a few
pencil lines in here. Once I take them off
I'll just double-check that all my shading, I've got enough shading. Then for this sepal, I'm going to add
a bit more color because it's a bit darker, its got a bit more
texture to it, and it's got these
little lines down it. And this will distinguish
it from the stem as well.
38. Daffodil Part 5: Now we have our
three main views. We can go back to
our pencil and just check on the rest of the layout. I'm still happy where
everything is sitting. I can start to go
over these buds now. Making these a bit more defined, bringing it down where
it joins the stem. Then drawing that stem down. Then we've got another one here. Bringing that in to join the stem as well and
adding another little bud. This is where we
can decide which of these are going to sit
in front of which. I think this part I
want to sit in front, so that stem will go
behind and so will this bud that will go
behind both of those. This is going to come down next. Also sitting behind
that front bud. This is going to curve
around a bit more. Then we have a leaf
that's coming off here, so I'm going to
draw that in a bit more and that can sit in front, so it's going to cover up
a bit of this stem here. I'm going to draw
this round flip it over and bring
this back up so it joins and then I bring
it down on this side. We have another
leaf going up here. This is just a straight one
and this can sit behind. Actually, I might make
this sit in front of these two stems just to cover them up and make
it a bit neater. Then we've got one
more leaf coming out which I will put behind, that can just curve
over slightly. Going to my pen now, I know that this bud
is sitting in front, so I'm going to do that first and then this leaf is
also fairly in front. This is the next one. This is why I like
to switch between my pen and pencil
whenever I need to because it just
really helps you map things out a bit better. We can join these stems. Then we have this
bud coming up here and this stem. I'm going to add a line in there and that's
where this sepal stalks, curve this stem round and then we can add in
this leaf sitting behind it and to make this a
little bit narrower. Then we've got that final
leaf that we can draw in which is at the back. We've got a fair bit going
on there so I just need to add in the shading now for these buds and
anything on the leaves. I'm going to remove all
my pencil lines because I no longer need any of
those guides anymore. [NOISE] Now I've removed the pencil lines, I'm going to my 005 pen
to add in the shading. I'm going to start
with these buds and add some long lines in for the texture
of the sepals. It gives them a
bit of a contrast from the flowers themselves. Then you can add in a bit of darkness where it
joins the stem to distinguish it and then
add in your shading down the stem and carry on
with the other stems as well. Then we have this other bud, so I'll do the same here with these long lines to
create that texture. Then for this leaf
that's folding over, I'm just going to
add some shading underneath and then
from the tip as well and then here
just to help it show it's spreading over
and also from the base. We've also got this sepal here. This small part shall
add the shading too and then the
start of the stem. Then we've just got the two more leaves which I'll just add a little bit of shading
and texture to. I think we're pretty much done, so just take a step back, have a look at yours, see if there's any extra
details you want to add, any bits you want
to stand out more, so then you can just add
a little bit more shading like I'm doing here. I'm pretty happy with that. I hope you're happy
with yours too.
39. Poppy Part 1: The common poppy
is a bright red, easily recognizable flower with four big floppy petals
around the center, which has a central disc and
then lots of dark stamen. This is a really fun one to
draw as you can be quite free and organic with the petals as they
are less structured. This is the finished piece we'll be drawing for this flower. We'll be drawing
this front view, a tilted view where you can
still see the center and then a side view and
a few buds as well. Here's an example of
a simple gift tag I made just using one
poppy and a few buds. This can be also nice for adding two simple greeting cards. Again, just using
a single flower. Then it's also a fun one
to add your sketchbook, because you can just
play around with all of these different petals and the different angles
of the flower. We've got a couple
that are tilted, these two are more face on, then this is a side
view and then obviously adding in those buds
at different heights. Poppies are also the
birth flower for August, so are a great feature to use within journal cover
page for that month. I've got a couple of examples of how I've used them
in my journal. Here I've just used the side view for a
couple of flowers. It's really simple, just took me a couple of
minutes to add these in but they make a really
nice decoration. Then here I've added it
into a weekly layout. Again, I've used a couple of different
angles and I've really simplified the center here and I've added in some
shadow using my gray pen. I've made these slightly
different but they're still recognizable as puppies. As we practiced earlier, these poppies have these
lovely floppy organic leaves. We can be much freer
with our pencil lines here making no flow much more. We can just practice that
kind of movement again. Then for the center it tends
to have a circular center. You can draw these lines from the center all the way around. We'll also add some shading to this and then lots of stamen like the anemone
gets quite dark, so I'm just drawing lots of dark marks and would
do that all the way around. Then you can also join
these up to the center. Just like with the akinesia, we can also add some of these small flicking lines to the stem for some
small little hairs. Then we can also
draw in some buds, which look really nice as
well with the poppies and they tend to bend over so it kind of this egg shape and then you bring the stem
up and curve it down. We'll add a couple of those
into our drawing as well. We're going to have a
top view, a tilted view, and then a side view, and then a couple of
buds in this one. We'll start with our circle, I'm going to do this over
to the right slightly. This is for the top for you and then I'm going to have the
tilted view at the top. Tilting off to the left, have a side view maybe coming
down here a little bit. Then I think I'm going
to have a bad coming up here and then maybe
another one off here. I'm going to just
tone these stems now and then just
check, all looks okay. I'm going to move this
over slightly, I think, and then bring this over
a little bit as well. I can see there. [NOISE]
40. Poppy Part 2: We can start with top view now, this circle, and then add a smaller circle in the center. Then the poppy has four petals. So we can just start with one. These organic lines, bring
it roughly to the edge. Don't worry about
going outside of it. I'm going to have a larger
petal that comes underneath. Then one that perhaps
starts under this one, bringing it around
to the center. Then one over here. I might add a bit of a
fold into this as well. So going to my size 2, I'll start by going
over that circle in the center and then just going
over these petal outlines. Now I'm going to add that
detail into the center. With these lines coming out and then add the stamen
in around the edge. These are quite dense. It's quite a dark
center in the poppy. I'm just going back
over and filling in some of these whites
paces as well. Then you can just draw the
lines in connecting them. So many of them, you
don't need to be exact. I'm just drawing lots
of flicking lines. Get the suggestion
that they're all joined rather than joining
them in one by one. Now [NOISE] I'm moving
to my finer 005 to add in some shading. Start with the center and
particularly around the edge. I'm just going to use lots of flicky lines from
the outer edge. This is going to help
give it that dome shape. Then we can add some
shading to our petals. So using those long lines,
curving them around, and then also adding any lines, particularly where the petal
dips in on the outer edge. Then misfold, I'm
adding that shading in. It follows the curve
of that top line. Going back to my 02, I'm going to draw the stem in. Starting from the center, checking that pencil line, still lines up, I'm
going to draw a new one. I'm using the 005 to add in these small hairs
along the stem, and then I'm just going to
add in that shading as well. That's our first poppy complete. Now we can move on
to the tilted view.
41. Poppy Part 3: For this tilted view, I'll start with the
circle in the center, which is going to be a
bit more of an oval now. Now, it's tilted. Then we can think
about where we want those four petals to sit. I want quite a big
one facing us. I'm going to draw this curving round like that and then going to have
another one coming off to the side and that's
going to come underneath. Have a big one. This is going to reach
outside that circle, which is nice because we
don't want to keep to that oval shape or that circular shape completely
when it's such a lovely, organic natural structure
that this poppy has. Again, I've put
that underneath and I'm going to add a curve, a fold into the
side of this one. I'm actually going to draw this bottom petal going
over that center. It looks like it's
folding towards us. Then we can only see
half of this center, which I think will
look quite nice. There are so many
ways you can do this. You can just take
a whole page and just play around with
your pencil in ways that these four different petals can sit and it can be
really fun to do that. You don't even have to look
at a reference for that. You can just move them around, make them a bit floppy,
make some bigger, smaller, and it will still work. I'm going to start
with this bottom petal and then go over the center and then drawing the
rest of the petals. For the center, we
can draw these lines. I'm just going
down slightly from the top as the center point and then bringing them all down. Then we can join the stamen. I'm not going to have any
over this base petal. They're just going
to all be inside. We can probably
draw a couple over the center but mainly they'll
be around the outside. Just going over a bit more
to make it a bit more dense. Then I'm going to join
them up to the center. Where is my 005 now? I will start with
that shading in the center so bringing
it up from the bottom. These little lines
working my way around and then we can bring in the
shading for the petals. Curving this round and then, same direction, bringing
it up from the other edge. Then this petal is
curving inwards. I'm going to draw a line upwards to show that
it's dipping in, in the center before
it comes down here. Then again, this one
is dipping in as well. These lines are going to come
up and then for this fold, I'll just do the shading as normal following in that edge. I'm going to add a
bit more shading to this inner edge of
this base petal. It looks like it's
curving in a bit more. Then I'm going to add
some darkness just here as well I'll put a
bit more shadow. Anywhere that sits
underneath something else and just add a
bit more shading. It's going to help
with the dimension. [NOISE] Because we've got
this side view poppy to do, I'm going to wait to draw that stamen until we've finished.
42. Poppy Part 4: The side view of the poppy
is really quite simple. I'm not going to use my
pencil for this one, but you can if you want to. It's just going to have
two petals showing. I'm just going to start near the stem, bringing this round, making it nice and curved, and then bringing in. That is one petal. Then the other one,
I'm going to start about halfway from
the other petal, bringing it up
slightly, curving in, and then bringing it around, and then drawing that stem. It's really as simple as that. Then I'm just going to switch to my other pen to do the shading. Going to darken this
area here where this petal on the right
sits slightly underneath, and then do the stem, bringing it down
on the left side, and then adding in those
small little hairs. That was really simple. Just took a couple of minutes. We can go back now and draw in the stem of this tilted view. Starting from the center, just follow that line down. Then whilst I have this
pen, I'm drawing the buds, and then we can come back and do the shading for the stem
and the buds together. Just check you're
happy still with the positioning of where
you have your buds, and then just draw them in. I'm going to follow this down, and then add this
one in over here. I think I'm going to add
one more in over here just to keep it balanced
down, so fairly low. This can come up and just
sit behind this stem. Going back to 005, we can just finish
shading everything in. I'll start with the buds
with those curved lines, so we're keeping
these really simple, adding that darkness to this top of the stem to distinguish it, and then just
bringing that shading down on the left side, and then adding in
those little flicks of the pen for the hair. Just randomly, you don't need
to make them too uniform. Make this a bit darker
underneath here. Then finally, we've got the
stem as this tilted view. Nice little hairs. I just realized I didn't add
these onto here as well, so I'm just going to go back. Take a step back, see if there's any more shading, any more details you want to add and if you're happy with it, you can just take off
your pencil lines. That's all poppies complete. I really hope you've enjoyed drawing these poppies with me. Is a great flower
to loosen up with playing around with the different
shapes of those petals. If you find them
tricky or feel like the shapes are just
not working for you, then I recommend just
looking through lots of different photos
online of poppies and filling a page with
sketches of the way they sit so you can get more
comfortable drawing them. Sometimes it can feel
easier to draw petals on more structured as you
know how they should look, but I do love how you can
vary the poppies petals so much more with
these organic shapes. Here's a reminder of some of the projects that
I showed you at the beginning to give you some extra inspiration for
drawing more of these.
43. Hydrangea Part 1: The hydrangea is a
beautiful large bloom made up of lots of
clusters of petals. It may look quite daunting
to draw because of this, but don't be put off. Because once we break
it down into steps, it's actually really quite simple and can be a
really relaxing one to draw because of the
repetitive nature of drawing each of
these clusters. This is the finished piece that we'll be drawing
in this session. We'll be drawing
a nice big bloom of clusters and adding in the stem and two simple
leaves underneath. Here are a couple of extra
examples of the hydrangea. This is for a gift tag, and because it's quite small, I've kept it really simple. I've simplified
it a little using less clusters and less
details on the leaves, so using smooth lines
instead of jagged lines. Here's another example
from my sketchbook, which was really relaxing to draw one evening
just on the sofa. I've got three of these flowers and
then a few leaves underneath. I really like the way
these leaves contrast with the delicacy of the flowers because we can keep
them so simple. Finally, here is a cover page
in my journal for August, which is when these flowers
tend to be in bloom, so it's a great time to add
into your journal layouts. I made this one
slightly different by giving the stems some
contrasts, by coloring it in, and then also coloring in
the centers of each of these clusters just to balance it out with that darker stem. As you'll see in
the finished pace, we'll just be drawing
simple circles and leaving them white in this paste that we'll
be drawing together, so you have the option
of doing either. For the petals of the hydrangea, they're funny rounded
and then they come to a bit of a soft point. You can just
practice that shape. For the practice bit here, I just want to practice some of those clusters from
different angles. We'll start with a circle. These will be the top
view of the clusters, and these will mainly be in
the center of the flower. We'll start with a small
circle in the center. They have four petals each. Bring the first one round, and have another one underneath and then one on either side. I'm just tracing the
paper with a pen, so join up to the center and doing the same
on the other side. For a tilted view
of these clusters, we'll start with an oval. We can draw in that
center circle a bit lower down and then the
top petal as normal. Then this base petal is shorter. We can always add in a bit of
a fold here if we want to. Then the side petals
will curve up slightly. We can make this
even narrower using a narrower oval to add some nice variation
into the whole piece. Again, putting that
circle further down and making that bottom
petal just a bit flatter. It's changed shape
quite a lot from this petal and then the
top can be the same. Then these ones on the side, they're quite narrow as well. For more of a side view, you start with the oval again. This time we won't be
able to see the center because this bottom
petal is going to be curving upwards a bit more. We can draw this in like that. Then that top petal is
going to peak out above it. Then we have the side petals. We'll use these ones at the
outer edge of the hydrangea. That's really going to help
give it that domed effect, which will be really
nice and you can play around with
these petals as well. There's lots of
other ways you can do them so they're
not as structured. If we draw another oval, start with that circle. Then that'd be about
enjoying that bottom petal. We're doing the side petal and that can go
underneath slightly. Then the top one. Then we can have
this other side one curving up a little bit more
and maybe adding a fold. Moving the petals
around like that it's just going to make it
look much more natural. But you can also just keep
it simple just by using a couple of these and
that's still going to help give it
that perspective.
44. Hydrangea Part 2: With a pencil, we're going to sketch in a guide for
the whole flower first. We want a large oval shape. Then we can add in a fatty
thick stem in the center. Then you can also add
in a couple of leaves. We'll just map these
out roughly for now. We'll add a smaller one coming off to the
left to a point. Then another one on the right, which is going to be
overlapping this stem. It's going to be
a bit bigger and bring that round
so it will meet. That's just a rough
guide at the moment, we can work that out a
little bit more later. For the clusters of
the petals, as I said, we want the top
views in the center, which we can see more head on, and then the ovals, the side views and tilted
views around the edge. That's going to help give
it that curved effect. What we can do is just start by drawing guides for where
each cluster will sit. Some starting with
circles in the center. These can be touching or
overlapping slightly. Then as you move
to the outer edge, you can turn them into
ovals a bit more. This is a fairly wide oval. Then they can get a bit
narrower as you reach the edge. Don't worry about
leaving some small gaps like this because we
can just fill them in with odd petals at the end. Once you've filled
in most of the area, we can start drawing
our petals in. Don't worry about filling
everything because like I said, we can fill those in at the end. Feel free to keep using your
pencil to draw these in. I'm going to switch to my 02 because it's going to be
easier for you to see. Because I've done this
quite a few times, I'm much more comfortable with how to draw these
petals as well. I'm just going to
start in the center with these top views. Starting with a small circle and then drawing in the petals. Moving to the one next to it. Carry on. They might overlap, which is absolutely fine. Going to move this circle
a little bit closer. So they do overlap. [NOISE] I'm going to bring some of these circles down a bit
more so they're more overlapping to fill
in these gaps. This petal, I'm not going
to make it overlap. I'm actually going to push
it against this line. So it looks like
it's squashed in. Then this one can
sit underneath. Got a fairly big gap here, so I'm just going to draw in another one and how that
sitting underneath the rest? Another fairly big
gap here, so again, I'm just going to
draw that center in and the petals around it. Just tracing over the
paper to see where they would join up. Add one more circular in here. Again, you don't need to
follow the guidelines completely because your drawing will evolve so just go with it. I think that's most of the
central rounded view ones. I might add one more in
here because this is still fairly close
to the center. Then we can start
adding those oval ones, and so using those three or
four tilted and side views that we practiced.
45. Hydrangea Part 3: Now as we're moving
to the outer edge, we can start using those
tilted inside views that we practiced. I'm going to add one in here. I'm just bringing that line down to meet up with
the other flowers, so again, it looks
a bit squashed in [inaudible] adding
a bit of a fold. Then these side ones can
go upwards a little bit. [NOISE] This is where I start not keeping to
those guides as much. I'm just working with what I've got in
filling in these gaps. Here I'm going to
add that side view, so I'm going to join
that bottom petal first, then the top petal peeking out and adding
those side petals. Add another side view here and a really thin
base petal here. If you find it easier,
just move your page around so that
you're not drawing the clusters upside down. I'm going to move this one down. Then to keep that rounded edge, I want to have some
[inaudible] flatter. I've created a new
edge for myself which is below this original guide. I'm just going to
redraw that bit in now to keep it a bit
more consistent, just takeaway that top bit. I want a fairly
narrow one here as well from the tilted view. Adding a fold into this
one because I've got a bit more space making
it a bit less tilted. The nice thing about
these is that you can be quite free with them. You don't have to make
them really neat because these petals are going to be squashed and they are going
to move around quite a lot. As long as you follow
that rough structure, they're still going
to look really nice. I'm going to add a fold
into this side petal here. Maybe this one as well. This is a side view and that's the top petal peeking
over the top. I think I filled in
most of the edge now. I might add another one in here just to bring that out to the guideline a bit more, so it looks a bit more even. We do have a few gaps in here. But what I want to
do first is add in the shading of the clusters
that we've already got, so we can clearly
see where they are. That's going to help define each cluster and distinguish
them from everything else. I'm just going to take away
the pencil lines now just from the flower area leaving
in these leaves below. Now we can see a bit more clearly where all
of our lines are.
46. Hydrangea Part 4: With my 005, I'm going to start with
the shading and all I'm going to do is add some of these curved lines
flicking up from the center into each petal. Keeping it really simple. This is going to really
help distinguish the petals and the
clusters from each other and transform
the whole drawing. Then from the side
view clusters, just make sure you
do the shading from the base and then up above
for that back petal. Once you've added in all of the shading to the
existing clusters, we can then see a
bit more clearly where we've got some gaps. I'm just going to start from the center
and work my way out. If there's a big gap like this, you can draw in another circle and roughly add in where
these petals would sit. Or you can just add in a
point for a petal as well. In the smaller gaps, that's what I'm going to do. This is a bigger gap, so I'm going to add
in that center, so we can see a few
more of the petals. Same here. This is a bigger gap. This is a smaller one so
I'm just going to add a couple of petal
shapes in there. Now as you get to
the outer edge, just make sure these
are all filled in. It doesn't have to be exact. In a few of these
places I'm just adding the tips of petals in. Don't overthink it. Can just be a few little
lines that you're adding in. Here I've got a bit more space, so I'm going to add
in that center. I'm just adding in some curves to break up some of those
bigger white spaces, so it looks like there's
petals sitting underneath. Once you're happy just
grab your smaller pen again and then
just work your way through adding any shading to any of those bits
you've just added in. Don't worry about
catching them all. Really just if any white
spaces stand out that you want to fill in a bit more. I'm pretty happy with that. Once you've finished and you're
happy with yours as well, we can move on to the leaves. Now that we have our
flower filled in, we can just check
if we are happy with where these
leaves are sitting. I'm just going to go
over those a little bit. Bring this up and in so it comes round and then going
over that stem. You can keep these
leaves really simple, just with a solid outline. Or you can make the
edge slightly jagged which case it would
just come up, go back on yourself and
repeat all the way along. The same from this set. Come up, go back on yourself to a point and then come
back out to the edge. Then just keep doing that
until you get to the end. I'm going to go over
that with my 02 pen now. The same on the bigger leaf, and then tour over the stem line. Then finally with the leaf, I'm going to keep these
really simple because I want the focus to be on
the main flower. I'm just going to draw a
curve in the center for the middle of the leaf and it's going to point
towards that corner. Then we can remove
our pencil lines and that is our
hydrangea complete. That was our last flower. I really hope you enjoyed
it and discovered that it wasn't as daunting as
you may be thought.
47. More Inspiration & Conclusion: Now that we know how to draw all of these beautiful flowers, we can keep practicing
our favorites, looking at different references
and also at looking at applying the process of simplifying them to
any other flowers. As a bit of a recap, remember, the first step for drawing your flowers is to
find your reference, or ideally references, and then if necessary, you can do a little
research into the typical structure or anatomy of that particular
flower to help you. As it's not always
clear to see from a photo all of the different
parts of the flower, so this can really help
your understanding. Then is about simplifying
the oval shape, and sketching out a guide
to simplify the subject, it can be easy to feel daunted when approaching
something new, especially on your own, but if you concentrate on taking these small steps to make
it easy for yourself, and asking yourself, what is the next smallest thing I can do to move myself forward rather than jumping in at the deep
end and trying to sketch out details right away it will
make it so much easier. Once we have our guideline, then we can start to sketch out the biggest areas of the flower, for example the petals, and continue on
adding more detail, and then shading, and then any extra elements that
we want to add. Now we know how to draw so
many beautiful flowers. There are so many ways that
we can use them in projects. I've shown you some examples as we've been going
through each flower. We can decorate homemade
gift tags with our flowers, and add them to presence
for friends and family, and this can be a simple
individual flower or a pattern or an arrangement. We can make our gift
tags any size we like. If the present is quite big, we can make the gift tag bigger, and vice versa if it's small. I like to make the
circular gift tags which I cut out using punches or some simple
rectangular ones that I cut out by hand. We can also make some beautiful bookmarks using the flowers, and as we have more
space with these, there are so many different
designs that we can create, and these are another lovely
way to share your art with friends and family if you
want to give them as gifts. But they're also really
nice to use within your books at home just
to get you inspired, and feeling creative
in your everyday life. We can create beautiful greeting
cards with the flowers. Again, we can give to
friends and family, and we can draw these
straight onto the cards or cut flowers down
to make a collage. There are so many
different designs we can use from race with some lettering inside to
bouquets and other arrangements. We can use our flowers
and our journals. Whether this be decorating
a bullet journal or if you keep a personal art journal
for your bullet journal, there are 70 ways you can add these flowers in
from big designs on your cover pages using race or arrangements or borders around
the edge within a layout. Or just using them as
quick little additions to decorate the page that just
take a couple of minutes. These are just a few ideas for ways that you can
use your flowers, but there are so
many more as well, like decorating envelopes,
note book covers, creating your own
affirmation cards, decorating plane wrapping
paper, and so much more. I would love for you to share
your work from this class in the project section
here on Skillshare. Please do leave me a review. These are so encouraging
for me to see and to read, and also really helpful for other students who may be thinking about taking the class. If you're on Instagram, you can tag me in any work you share at
sharonstephensdesign. If you'd like to see more of my classes and more of my work, I have lots more classes
here on Skillshare, both in doodling and
drawing and in watercolor, and I also have a
watercolor book that is great for beginners, and for learning how to
use watercolor to relax, and that's called
Watercolor for the soul. That's it from me for now. I can't wait to see your
projects. Happy drawing.
 Sharone Stevens, Watercolour, Illustration & Lettering