Transcripts
1. Trailer: Unlock the Power of Shapes in Drawing: Shapes in drawing are a great way to make things simpler and easy to do. They help us bring what feels difficult, understandable. But knowing how to identify shapes is not enough. We need to effectively know how to draw them. That's why in this class, we will learn how to become great at shape drawing, to improve and upgrade our drawing skill. Through easy to do exercises, we will first see how to improve the drawing of circles, squares, triangles, and the result of these shapes when modifying and mixing them. So there's no need to have any kind of previous experience. By the end of the class, you'll know how to draw the basic geometric shapes their basic variations, and all kind of interesting and crazy shapes to make drawing easier. So! If you want to get more confident, and feel sharper and faster at drawing you came to the right place Let's get started!
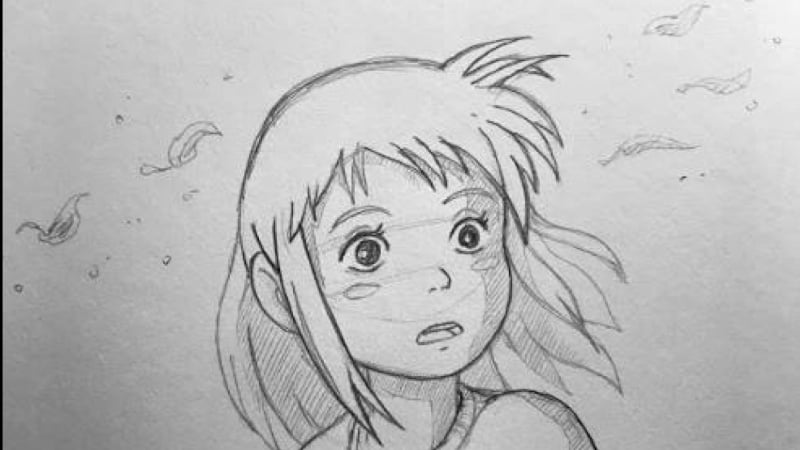
2. Leveling Up! Your First Exercise: The first exercise that I would like you to do: Pick on a character that you don't find intimidating. Pick on a character that could be from your favorite anime show or your favorite manga whatever you would like to. Just make sure that it's going to be fun for you and that you find it easy to draw, okay? The overall goal of this exercise is you to understand what's your current skill level with shapes. And at the end of the class, see what's the difference. How much you have improved from the beginning of the class alright? Once you have drawn this character unpause the video and continue with the demonstration. So, let's get started.
3. Why to Care About Good Shapes?: Okay, now it is time to talk about shapes. Shapes are the result of learning how to understand lines to connect between each other and form geometry. The first shapes that you actually know and that are highly used in any kind of man-made stuff are the circle, the square, and the triangle. These three shapes and all of its variations are the shapes an artist should understand and know how to perfectly draw in order to know how to draw better and understand better whatever he or she wants to portray. So on the screen you have the chance to look at different examples, starting first with real life examples where I break down the things that may seem a little complex at first but can be identified easily as different shapes. You can actually see in here how circles, triangles, and squares are working to create different forms, to create the different silhouettes that resemble what we are displaying. This goes from objects to people and you can actually see that not only geometrical but all of the variations as I mentioned before are also crucial to make the process of understanding whatever you want to draw on simple shapes. So, this is what we call simplification and it's very used as also another fundamental that we are going to be reviewing later on a different class. Just right now know that everything can be simplified into easy shapes and that you knowing how to control those shapes, how to tackle them each, how to know how to draw circles squares, triangles, their variations, and the mixture between them is going to speed up a lot the process of you when you are facing drawing. So that's the overall goal of this class, remember to improve the quality of your line work and to improve the way you approach shape control. So that's enough as an explanation and now let's proceed to learn how to draw circles.
4. Circles: Perfect Your Round Forms: I'd like to start with the circle as the first shape that we are going to learn how to draw because it's one of the most avoided shapes. I've been there as well it was difficult for me to draw it when I was a beginner, so I developed a method to actually learn how to draw them if you don't know how to do it. So the first thing is to start considering the circle as a half. You're not thinking about drawing the overall circle but you're thinking about drawing half a circle. I'm gonna use red color now just to differentiate each line it's not necessary for you to use it and now you just complete the other half of the circle with another arc. All right? This is not a perfect circle but it's a pretty decent one I mean, you just need to use two strokes and that's it. So what we're going to do on this exercise is just to complete the whole page, we're gonna fill the whole page with circles that are going to be made from arcs. Alright? You just draw the half and then the other half you don't... there's no need to seek for perfection, just try to do it as best as possible. You can also vary the tilting that you're using on each arc, for example I use first this tilt, then I use this one. That's completely fine too. So not all of the circles are going to be coming up perfectly that's completely fine this is something for you to practice so you can improve. Cool! We've completed this first exercise now we're gonna do the same but this time we're not going to draw it on two strokes, we're going to draw them on one. It doesn't matter if it doesn't come up perfectly, just try to do your best So there's one common technique which is called ghosting over, and consists of moving your hand trying to look out for a circle, for the size of a circle, and the spot where you're going to be placing it. Usually people use this to make circles... that are somehow loose, so that's a place to start if you still find it difficult, but, I will recommend I will highly recommend you just go straight forward and try to do circles at one stroke even if they don't come out perfectly you know practice is what makes it better. So just keep on practicing and just like this every kind of size fill with plenty of circles if you messed up that's fine, there's no need to erase, just make the adjustment and complete the circle. If you still feel like you should be doing circles by using two strokes go ahead and that's it for this piece of paper now if you are still having problems, if you are still struggling a lot then, there's just this remaining exercise that is going to make it easier for you. just divide, the paper into four even parts Alright? And create some arcs so what I like doing first is, alternate between the arcs so it challenges you a little more I'm starting with the vertical arcs there's no need to rush, and as always keep the pace. Now, let's do the same but going with arcs that are horizontal and finally just complete the remaining space by doing this, but now on the opposite direction as well Alright! So now let's test it out! I bet that they're gonna feel so much better to draw now and the quality probably also has improved. Great!
5. Ovals and Egg Shapes: Master Organic Forms: This time, I want to make this lesson about ovals and egg shapes since these two shapes are also highly used, to break down different things such as heads, objects, architecture, etc. So, a way I like to understand an oval is to know that it comes from squashing and stretching a circle. So if you stretch the circle the corners that you are using to be stretched are the ones that are going to dictate the shape. This time I'm doing it horizontally so this is how it stretches. The amount of stretchment is up to you. You can do it as extreme as you can or as low as you can. The important thing in here is just to give you an overall tool to understand how you should be thinking on ovals. So squashing and stretching a circle is actually a matter of perspective since you can actually interpret it as both. So this could be, I'm stretching it horizontally but also that I'm squashing it if I'm thinking that it came from a regular circle shape. So, just think about it as something that you have power on, that you can stretch it or squash it, whatever, what works the best for you. Alright, this is what corresponds to ovals. Now, an egg shape comes from you only stretching a bit of a corner. So we have firstly this shape. The egg shape will come from you applying force over this part. Alright? Which will result in something like this. This is what happened. You stretched. The same goes to any direction, let's say... you want to do it, to this way. So that's what will happen. So that's the direction you should be thinking about. So, this is the kind of shape that we get from stretching only one corner as seen in here and it's the one that we use a lot as artists to break down the head and the face. Okay, now let's proceed with some exercises. The first thing that I want you to do is to fill an entire page with a lot of different size ovals, alright? So, think about them in a lot of different directions, let's say for this one. There's no need for you to indicate this kind of arrows, this kind of lines. It's just for me to demonstrate how I'm thinking about them. Push it as extreme as you would like to, and variate the different sizes. As always, if there's something that is not perfect, just try to do it again. And don't freak out, just keep on continuing the exercise. Alright, this is the final result of this demonstration. Now let's do the same with egg shapes. Just fill the entire page with different size egg shapes and make sure that they are all being tilted to different directions also. Just make sure to fill all of the page and once you've done let's continue with the other lesson.
6. Squares and Rectangles: Nail Geometric Precision: Squares and Rectangles. These shapes are highly used on a lot of different environments from cityscapes to different objects to perspective drawing to a lot of furniture, to regular homes. Squares and rectangles are everywhere in our daily lives, that's why is very important for us to also understand how to be able to draw them. So let's just complete this quick and easy exercise. We're going to draw a lot of different squares and rectangles. And just make sure that you're applying different sizes to all of the shapes. Like thinner rectangles, thicker rectangles. They shouldn't be perfect, that's completely fine. And you should avoid erasing because that's allowing the door for you to start overthinking your strokes Okay now what we're going to do is to start filling all of the emptiness with more of the same shape. So for example in this square I made a smaller square inside and then I'm going to make another one like so until it is filled. Just take your time on doing this. As you can see there are some rectangles that are not actually... very straight. This because, you're always going to be facing different kind of shapes and, when simplifying a structure of different things that you would like to draw, you won't always find everything exactly like rectangles and squares, you're also going to find these kind of shapes. So that's fine to include some of them on this exercise. And that's it, guys.
7. Triangles: Utilize Angles for Dynamic Designs: Great! Now it comes the last shape, which are triangles. These last shapes are going to be the ones that are going to close up this exercise on understanding and drawing shapes so you can control them better and apply them over your artwork. This is pretty much similar like the one we did on squares and rectangles. And this time you can directly fill the triangle you're making. So what we are going to do over the whole exercise is mainly the same as the rectangle one. We're going to fill the whole page with the shape and we're also going to fill the shape itself when it's inside with the smaller shapes. The thing in here that I would like you to keep in mind is that just triangles are very easy to change. See how this one differs highly from this one. And so that is something that is very practical if you already know how to handle different shapes on the triangle right ahead and not just understanding like evenly triangles because although you can see them on nature it's not the general rule we always see every kind of triangle and we also can look in a lot of different shapes, triangle shapes, to break down things. They don't have to come up perfect just as best as you can possibly make them. I know these kind of exercises are a little boring that's why remember that at the same time that you are working on this class following the lessons at your own pace also focus on making producing the kind of art that you would like. So if you are already drawing different stuff also set some time aside and do it for fun. That's gonna bring so much energy for you to keep on practicing these kind of exercises because if you close your mind to think that you can actually move on to different stuff until you complete these kind of exercises, you're gonna burn out you're gonna feel very bored and I wouldn't like you to feel like that since, we all do drawing, we all do art for the sake of having fun. All right! With this exercise we conclude the part that we were focusing on understanding and controlling and learning how to draw shapes and its variations So now we're going to apply all of this on the final part of the lessons of the class to understand how to create more complex shapes understanding how to mix them between each other See you in the next lesson guys.
8. Deforming Shapes: Create Unique and Flexible Forms: This is so cool! You've made it to this part of the class. It means that you're really interested about drawing and understanding how to draw and improving the quality of your artwork. And I can see that you have a promising future. You want to get better and you're doing what it takes to do it. Alright, so now it's the time to learn how to draw different shapes, more complex shapes that are the result of understanding the different variations and mixture of the main shapes that we just learned. The circle, the square, and the triangle. Let me grab another piece of paper so I can demonstrate. As seen with the circle to create ovals and egg shapes we part from one main shape and then we make a variation from squashing or stretching it. Yes? So, now I want you to think the same, but this time with the squares see how I'm thinking about this. And with triangles. Just like this. So, if you understand not only how to make rectangles and different kind of triangles, but this mindset of understanding that these kind of variations that we are making come from squashing and stretching, that's going to improve the way you approach drawing because the mindset that you are now having includes you to be very accurate. So, now, let's proceed with this exercise so you start training yourself better into more specific stuff. Remember the egg shapes, where I explained that it comes from the circle and stretching just a part from the circle? We're going to do the same, but this time with triangles and squares as well. So, let's say I have this square over here and I'm stretching only this part. Something like this will come out. Right? Think it like, if you were actually grabbing it and pushing it, just like here. Same with this, let's say triangle. On this exercise, there's no need to think it as an overall shape to actually push it, but now we're thinking on specific areas. So, let's say I'm going to pull it from this place. Okay, this is what I'm getting. So, now that I have explained this, let's actually make the exercise. I'm going to fill the whole page with these kind of shapes that I'm going to be thinking in my head that are the result of pushing the original geometric shape. Okay, so this actually looks like if I stretch it from this part or in this one, I'm thinking about stretching these two sides. The key in here is to still apply all what we have previously learned. And keep in mind that the less strokes you're making, the better because the cleaner it will look, the more confident you will be, and the less time you will be spending. So, now let's say in here the process I had on mind was to stretch this part like this. If this was a circle this is how this will stretch on two parts simultaneously. That's how I'm thinking about it. Another way that you can also think about this is like somehow this was clay and you're just stretching parts of this Clay. Please just make sure that you're using all of the shapes. Circles, squares, and triangles. Great, this is one way to see how to deform shapes Now I want to show you another method that also helps you to sharp your mind. And is making different shapes, by combining straight lines and edges against curves.
9. Straights vs. Curves: Balance Hard and Curved Lines: Now, I want to show you another method that also helps you to sharp your mind and is making different shapes by combining straight lines and edges against curves. So if I think let's say on this shape that has a corner, it could be the half of a square and then I combine it with let's say these two deformed shapes that are actually resembling two circles is also another way to start sharpening the way you understand shapes. Let's say for example in here I have this very straight shape then I have this very curvy shape and I also have this straight shape now I have this curvy shape and now I have this straight shape. Do you see how you can actually create a lot of variation? This is pretty cool because it really allows you to start understanding better a lot of different shapes when you are observing and you are sketching. The main goal of this class is to teach you how to control, so you start gaining a lot of notion of how to use a little amount of strokes to describe things so they will look very sharp and very clear. Just allow your mind to explore different kind of shapes it will come from impressions that we already have from real life and from exploring, so that's completely fine. The more variated they are, the better for this exercise. Just always keep in mind that it's a combination of straight versus curved lines.
10. Adding and Subtracting: Refine Your Shape Techniques: Okay! The next way that you can actually use to understand better how to combine shapes is to also be aware, of shapes that can be created out of adding or subtracting another shape so for example here I have a circle and then here we have a square, and this is the shape that results over subtracting I'm drawing in here to see it cleaner or you can do it on the other way here you have a circle here you have a square and you can interpret it as, not subtracting but adding it I'm going to draw it over here cleaner and this is the resulting shape so this kind of mindset is the one that I want you to have on filling this piece of paper we're gonna combine all of the shapes we're going to use circles, oval shapes, egg shapes, triangles from all different kinds we're also going to use squares and rectangles in every kind of deformed rectangle, so the main thing in here is that you can acknowledge that you can create and generate a lot of different stuff, a lot of different shapes, only by thinking how to add and subtract them, alright? so... So let's begin for example in here I use the same shape to subtract so this will be a circle and this will be another circle that's subtracting this the more variated, the better and you can also go from two shapes, three, four, five whatever amount of shapes that you would like so for example I was thinking in here about adding this rectangular shape in here I thought about subtracting these two rectangular shapes and just the variation between those are the ones that are creating a lot of different shapes and all of those different shapes are training at the same time our way to approach drawing to understand better shapes while breaking down things and the most important one that we're actually understanding and seeking on this class, which is how to apply better line work, how to apply confidence how to make less lines to describe something how to make you comfortable with your hand and your pencil. For example in here I'm thinking about a circle but I want to add a square, but I want to subtract a triangle and then I want to add a little circle. Do you see how it works? That's the logic So... I previously did in here a circle, and I wanted to add a triangle so for example in here I wanted to create a rectangle or a square and then I subtracted in here a circle same in here I was thinking about a circle and then I added a triangle and that's the overall logic! I'm adding and subtracting shapes finally we went through all the main shapes, the main geometric shapes that exist within this world, we understood that they were key for breaking down things. to understand better when drawing, and we went straight ahead to understand also the kind of variations that they make, so we can sharp the way we approach drawing to draw them clean, to draw them smooth to draw them with the less amount of lines possible... now it's time for us to apply all of this! to actually your artwork to see how much this can improve the quality of all of your pieces.
11. Putting It All Together: Draw a Sharp Anime Character from Shapes!: Very nice guys! So for our class project, we're going to be redrawing the first drawing that you made at the beginning of the class. And now what we're going to do, is we are going to draw it by thinking in placing lines as smooth and as clean as possible and drawing the less amount of lines possible to create your drawing. So don't worry about it, if you don't feel confident about it right now you don't know how to start just check out how i'm going to be doing it, over my own class project. Perfect! So the first thing that i like to start with is just make a scan of the drawing with my eyes and start finding all the main shapes that the drawing had Okay? At this stage I don't want you to worry about how exact the drawing is going to come out for you i want you to worry about the quality of the line work you're applying the quality of the drawing will resemble the experience you already have so it's fine if it doesn't come out perfectly you know, if you are a beginner if you are an intermediate, it will resemble to your current skill level and that's completely fine there are more classes where I will be explaining how to observe better and how to create better drawing from observation also on drawing fundamentals, so don't worry about that. Okay, so i'm going to start by finding an egg shape that resembles... goku's face, and i'm gonna do it by placing very light strokes just make sure that they're very soft because this is the base of the drawing and you're gonna be doing some other strokes on top of that and... make sure that the line work that you're placing is well connected each, of the lines are well connected and that you're using as less lines as possible remember to keep your strokes very light the next thing that i want you to do is to start finding besides the head, all of the different shapes that create the rest of the body or the rest of the parts of your character the overall main shapes. By trying to keep the same size of the reference picture. You should be thinking, on how each of those shapes are related each other this is another very important drawing fundamental that i'm gonna be explaining better on different classes but that you should be start thinking about it right now. So I see in here for example that this shape that resembles the chest of this character is actually almost the same size as the head, so that's what i will be doing by considering it not going further from that just think of very very general shapes also analyze the straight and the curved lines and if you need to correct just like i'm doing it right now on the go while drawing, just feel free to do it. And now I'm gonna place the shapes that resemble the legs and I see that the pelvis is almost the same length just a bit smaller so i'm gonna use this size as a reference i'm gonna place a shape in here to draw the pelvis, even if it's not completely obvious on the drawing I see that the left leg goes to this point it's not going further from the wrist, so I use that as a reference to place the overall shape. Remember to don't go away with detail, we're just thinking on general shapes So! As you can see once I have completed the main shapes then i have started to think on all of the details the little details you know as being more accurate with all of the shapes such as, the facial features and all of the stuff that comes from the inside. I know that this drawing is not perfect, I know that there are a lot of mistakes that it does not resemble exactly as the drawn picture but, the main things that I wanted to teach that I wanted to show (are) already in here, (are) done and hopefully understood And... this is the, the first drawing fundamental that i think it's worth knowing because if you don't know how to control the most basic stuff you're gonna be having a lot of trouble with more complex things.
12. Bonus Demo: Another Sharp Character in Anime Style: Same, same (Music) (Music) (Music) (Music) (Music)
13. Final Thoughts: Your Shape Mastery: So the final advice over this class is that you must always remember that drawing is a process that it only comes through practice and the practice makes the master. So it's fine if you're not completely good right now or you're not at the stage that you would like to be on your artwork. It doesn't mean that you're not gonna get there, it means that you're just inexperienced and you gain that experience through practicing, that's all. Most of the beginner artists confuse this with inability they think that this is not for them because they don't have the talent but the truth is, it's just inexperience. So focus on practicing and focus on doing these kind of exercises whenever you have the time. If you need to rewatch any of the video lessons, go ahead and do it at your own pace. Remember, that this class is for you to take it easy, you shouldn't be approaching it just expecting that you're gonna become a perfect master at drawing shapes. You just need to know that you now have the knowledge you now have the tools to keep on practicing and so improving this specific thing. And finally, don't be afraid of mistakes mistakes are only telling you what to improve so just whenever you have a mistake, acknowledge it and tackle it, that's it. If you need to practice more about drawing circles, that's fine just keep on drawing circles until you start seeing the improvement. And sooner than later you'll start seeing all of your skill to improve a lot. Great guys, so that was it for the class. So, on the last demonstration you can see circular shapes rectangular shapes, oval shapes, all of the things that we previously seen. So I hope that this class has been helpful for you because that's what sets the foundation for being good at drawing in general. And thank you for completing the class!
 Sensei Teaching, Find How to Draw Anime Characters for Beginners