Transcripts
1. Introduction To The Class: Animation to me is all
about getting out of the world of reality and
going into the deep, imaginative worlds of our minds. My name is, I'm a Senior Animator in the
video games industry. I worked on a range
of AAA titles, bombed, heavily
sought motor stoma, apocalypse, Harry Potter,
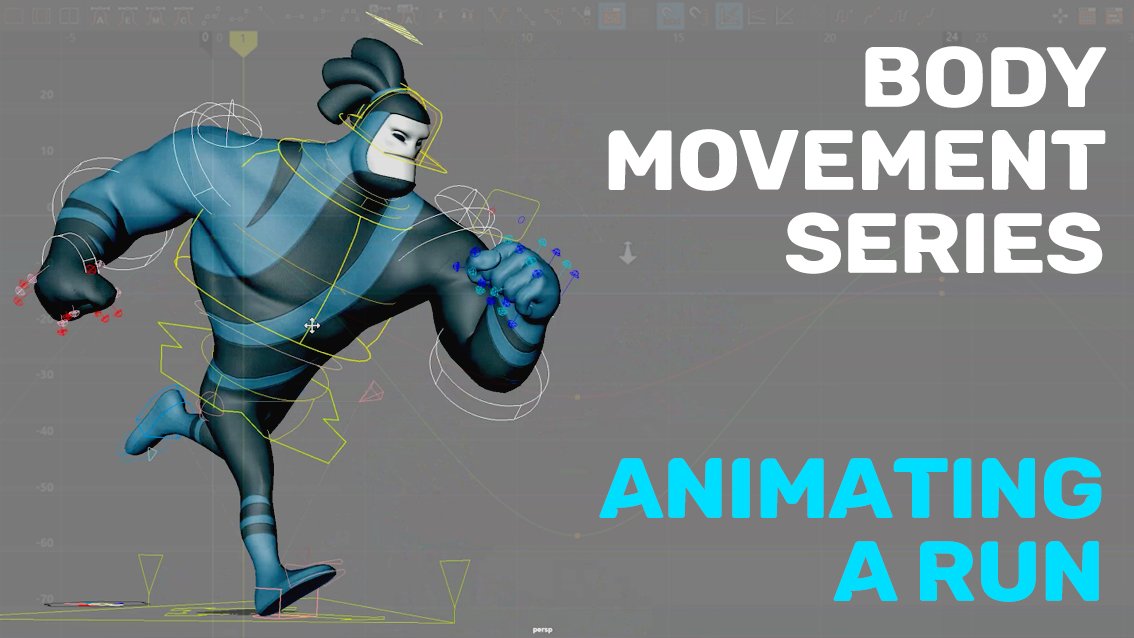
the Born conspiracy, and a series of lego games. And in this class we
will be going through the body movement series, where we will have a range of body mechanics
exercises to do. But the one we're gonna
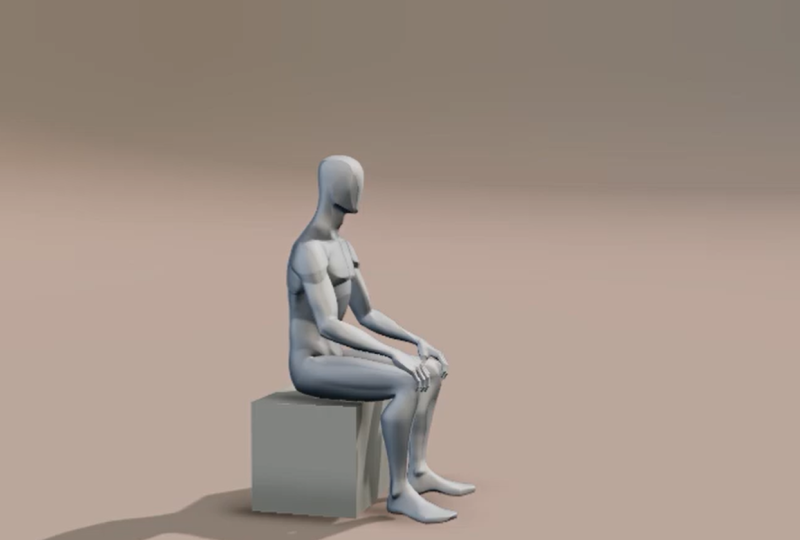
be doing in this class is the classic getting up
from a chair or a box. So basic body
mechanics which are so crucial when
you're animating. And again, I'll be using
pro rigs which are great, absolutely brilliant, or the body series, cartoony series. We'll be done with these
absolutely amazing rigs. And we're gonna be
having a lot of fun with these rigs in
the coming classes. So it doesn't matter if you're a beginner or a
seasoned animator. We can hopefully all learn
something from each other. And hopefully on this class you can pick something
up new as well. This class we'll cover the basic mechanics
of gain up my walk. So we'll do three or four
basic blocking poses. Then we'll work through
that, through blocking. Then we'll go on to planning. Then we'll polish all
the way right the way down to the
hands and fingers. So I'm very excited to start this body movements series
with this exercise, how to get up from
a chair or a box. So get your maya Blender
max, wherever you use. As we said, the
principles are the same. It doesn't matter
what source to use. And let's start animating. So I'm excited. I hope you're excited and
let's start animating.
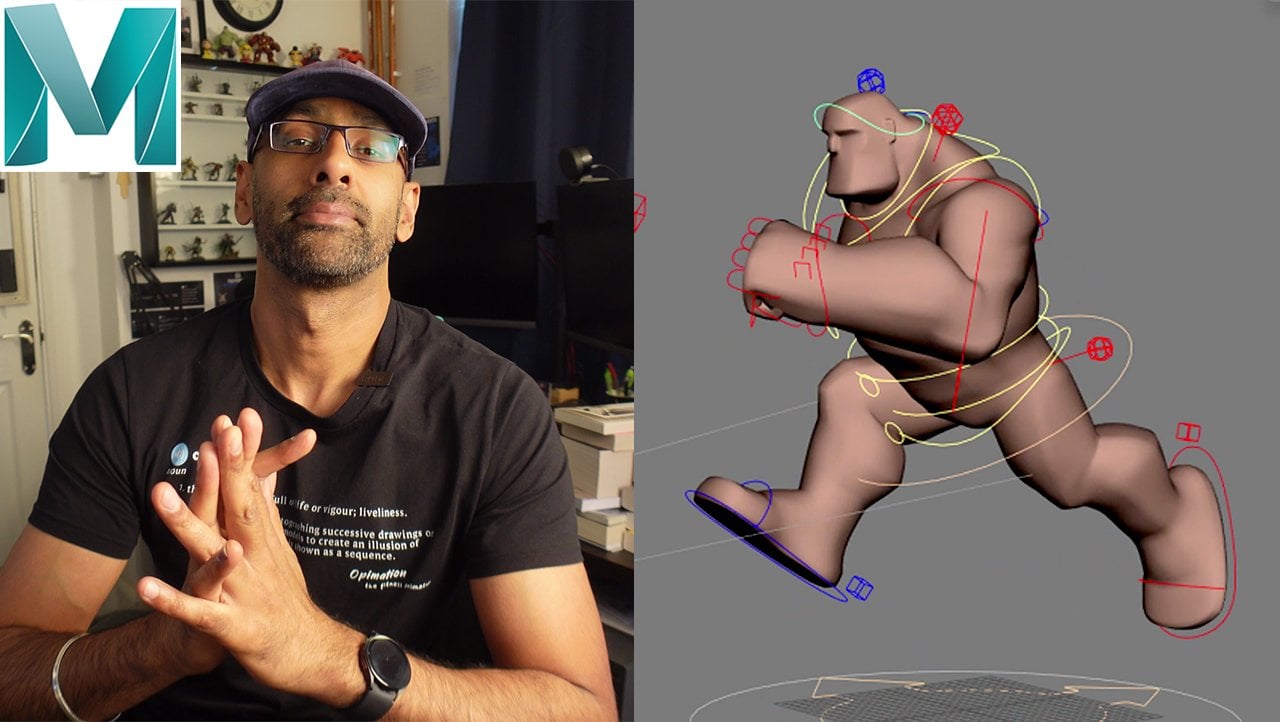
2. Where To Download Rigs: Okay, guys, this
is a quick video or where you can
get your ribs from. So I'm using these bricks. Now, there is a fee to
this as $20 a month, which is about 16 per month. But for that much and the characters
you're getting older code because again, you're getting all of these characters with
the right support. Even get pickers
like for the rig. You get the scripts, everything
license is well-worth it. All of these characters
look heavy, light, athletic, bigger
characters, robots. It's definitely worth it. I'm going to be
animating these now, the feature film rigs. So they're really
good to invest in. 16 pound a month, $20 a month is
nothing really got. You get older support you want, you can cancel the
subscription when you want. All right, guys, this
is a quick video where you can get
the rigs or you can just go to free rigs
and use any other rig. But I just for you anatomy, along with the civil irregular
can go and get these rigs. So great rigs. And I'll see you in the course.
3. Blocking: This is the pro rig. So what have already
sitting down? Now? We've got our reference
which we went over. So it's sitting down here. We're just going to
block your page, just going to block free poses. What we're going to get
the free key poses, and then we'll start working on the breakdowns in
the next videos. So if we look here, we know the standing straight. Then there's a rotation
right coming forward. And then there's an app. So we might put another
four frames for key, key poses, but you upright. Ben Dover then comes up and then start looking
at that reference. Let's start animating the poses. And so what we'll do, we'll just get all these characters here. The control key, it
like I normally do, come every four
frames is what I do. So what are we to zero this out? The timeline and just
bring that key-frame to one frame for the reference. There's a, there's
a vertical movement happening in the body, right? So it's almost like hips
are just rotating forward. When I come like this.
There's a momentum and that momentum is going to lift. That initial lift up is what we're trying to
get that showing, right? Yeah, we're just trying
to get that lift. Which were even if even if
you get up get back down, just feel the movement and that's how you
put it in your work. You feel ready, go away is
the weight, the heaviest? Then you adjust your
time into that. But let's get the
poses in first. Then we can work on that later. So we'll just go into the x. Rotate. Take that forward. Have to worry about the arms. Don't worry about the
arm's going forward. And then I'll just
select everything here. Everything is keyed. Form here. We're always, we're thinking, we're not thinking too
much oxbow just generally. Which way is the outgoing ray? Because we want to have the
character balanced as well. So we're just
getting that right. Don't worry about the timing.
We can sort that out. He comes up. What we'll do here, we'll
just key everything. Go to the next for friends. And then when this
is zero, the x. So we straight, moving
forward and up, we stand and we want to make sure that the character
is balanced as well. This is quite simple. Forward, a little bit
of a bend as far we go with overshoot that
the end when we stop. Okay. So you've got
That's your basis. Then you can try and
leave that how it is. Why I tend to do is select everything and just check out the argument and
see what's happening. What's happening in New York. We could just smooth
things out there. Doesn't really matter this
time with just a habit I have rotation to see here the
rotation is flat, flat. So we could even just ease this. Ease. Okay, Now it's all going to look a bit
robotic at the start, I know, but that's how
animations are at the start. Then know how you want it. But we just have to
get used to that. At the beginning,
the animation won't look how you want it to look. But we've got a
nice feeling there. The other, the only thing now is now that you've got opposes him, you can see it's a bit
more slower, right? So what we can do, we
can select everything. Stretch, Let's just what was it? Okay. Let's double it to
snap everything back. Okay. So you've got
that happening. So that's your main basic poses. Okay. That's short and sweet. We just get into poses in. Then what I'm looking
here, the reference. You can go back and start having a look at
the reference and below, alright, gets up. So as he's getting up, look at the neck.
Just getting up. He's kind of looking
a bit down so you can just I'm looking down
a bit, add that in. There's not really
moving that much. You can see it's not
moving too much. All the other subtleties in
the body we can add later. And then even here we can
just make it a bit food. The main thing is
we're getting there. Okay. And then because now
I know breakdowns later. All right guys. I'll see you in the next video.
4. Splining: We've got that working. So what we'll do when
we get to the end here, let's try and play around now. So let's move this
end frame further. As it's coming up. You
can see it's slow. So we can do with
less easy in a bit. So let's pick 21, middle click, move
it back to 17. Let go and press S is captured
that very much to anyone. But we've moved it to 17 because we want a bit of an
ease in here, isn't it? You might want to just
move that out a bit if you want to build a cushion. Now what we can do here is
if we have a look in there, we could have him come up a bit, overshoot and then back down. But we don't want the legs we don't want the legs to lock. Don't want it too much either. A bit of a cushion. Alright
guys, got that happening. That's cool. So let's
check out the trajectory. Let's go to Brazil. Okay, here we go, undecided you. Let's check this out
without their control. The motion trail. So we want to get a nice arc. So when we're looking at the
reference, what's the arc? Let's see. So it's kind of, it's kind of, you could do it either way this way or that way. We can go back here. You could have the
arc a bit back, following a nice
trajectory going up. Maybe back a bit here. So now you can do, you
can go in-between. Know I tend to just
go in-between. Alright, let me just
move this archive. It will go back here
and go into the curves. It's not moved there, so I go in and check the curves. And that's why I see
you smooth this out. Then the occupants mover there, now you're getting the
initial initially. So here you could even start, come here and put
a keyframe here. And we can come here and
be like, You know what? There's an initial,
does a little bit of an initial movement code
up a little bit there, as well as the rotation. So we could rotate, rotate this. Let's have a look. Little bit of movement. And then also in the rotation. Don't do that. Okay, we'll do it later.
To add a bit of momentum. Going back. Feels pretty cool coming up. Just trying to get done. Movement there. We believe this bit. I might want to make it a
little bit longer because he's just getting up as
low energy, they're right. Put it back a little bit of energy coming in. So notations, cool, coming in and go back to the reference
list, checked out. The reference. Let me open this reference
and it will be simple. If you have a smooth move coming up. So that's what
we're trying to get. A look now. Maybe. Okay. So he gets up here. We could even make
this go back on it. Yes. Just bit more of a
motion too, doesn't it? Really this key we don't
really need that key. Obviously I've put
it there. All right, so we've got a nice bit
more nice movement. They're going up and
conclusion at the end. Okay, that's cool.
Now we can do, we can start working with
the upper body, right? So I tend to do for this course, this simple exercise, flight, get the neck, head, and torso, all other controls. So it's going in. Now what I'll do a little
rotation backwards and then coming forward and then back in full. Happening there. Now, why
tend to do is I just offset, so I'll come in these frames. I'll just offset by one. The second one here
of all of these y12. And then the torso, 123, each time you are
offset in it by 11234 and then the
head 123-41-2345. Right. So you just loosen up? Loosen it up a bit and you
can see it's slightly loosen. But what I will do is now
unenlightened ahead, right? So if you look at the head, is a little bit off to me. So let's come back here. Yes, if you come
in here and then I'm going straight ahead
and I'd be like, alright, come in, rotate this forward. So now that we've
got the body moving, we can just key here, which is holding as it comes up, maybe slightly up,
and then back down. So always looking forward. But there's this
push happening here. This bit is a bit quick. We like that. Let's have a
look at the rotation was, I think is more to
do with the timing. So if we select everything, just move everything up. Don't worry about the
keys. Just move this. And now what you can deselect everything, go to the end frame. Select all of that. Clear
everything at the end frame. Move. Copy the end frame to 40. If you delete the end frame, Let's just put the foot back in. 50. I know it looks messy,
but it's just offset in your offset in your keys
are don't worry about that. You see, so you got that happening. Alright, so you've got a
little movement, not the end. You might want to
cushion this a bit more. So what I tend to do is you've got your final photo frame here, which is fine. We'll
move it to 45. Now as it comes out. You see all this movement. So what we can do, we can
delete all of these kids. You see that little
movement you're getting. What you can do. You can go to say 40, 40 frames, middle click that, bring it back to the three. So you get more of
a cushion there. You see, there's a
bit of a cushion that I just delete and
go back and forth. That's how that's
how a candidate for this simple exercise. Because you want, you
want that little movement at the end, a little cushion. Then you can start
deleting the head, which we'll do in the policy
page and I'll show you that. But for the meantime,
we're just trying to get the movement right
and a bit of cushion. So looking at this feels good. I'll just put this to 45. Okay, so we've got that
happened in movement. So that's called legs are not
locking out, which is fine. Ok, seems cool as well. All these little things
that are happening here, we can just lucky see on here
is going back quite a bit. So you just come back and
start toning it a bit. So it's not going as much. And then we'll do,
we'll fine tune it more in the next video. But this is just basically from blocking a bit more breakdowns, offset in the torsos, you know, when you select
everything that looks messy, but it's not you. All you're doing is
you go your hips, everything is still kid. And you've got the
lower hip or keyed. The reason why it looks
messy is when you select all of them, it's one after the other
because we offset them. They're all nearly everybody
offset. That's all it is. But we just want to get initial nice movement in a
mechanics happening. The balances, right?
And then we'll start working more
fine-tuning the torso. And we'll work on the
arms. And just to, just to keep everything simple. At the moment,
everything is simple. We have three keyframes
in the blocking. Then we just break, break
it down and offset it also. Okay guys, so in the next
video we'll start refining more and getting it
a bit more polished. So I'll see you in
the next video.
5. Animating Arms and hands: Alright guys, with
the next video. So let's check this. So now we've got a nice motion that we're happy with, right? So now what we'll do
in our reference, this is get these
arms and now yet, so if we come back here,
look our reference. The arms kind of stayed
for their cameras. On the knees and then up. Okay, Now we're going to use FK. We could use IK to really
press on and then switch. But just for this example sake, we use FK, right? So what we'll do now, remember we've got
keys on every frame. So what I'll do, I just, normally I get
older arm controls. I just delete delete
old key for the star. The star is its
forward like this. So what we'll do, we'll
just select the shoulders. Slowly, bring them down, and bring the arms
down. Near the laps. We just want to initiate. This is bring the arm down. Forearm has long been
to handle roll control. That one, please. This is not intersecting. Same thing ever bring the
hand down. I'm always here. We're going to
exaggerate this hand. We're going to add a bit of
wave effect and everything. And I noticed that there
were more in as well. When he's coming up, when I
was coming up in a reference, then you see is
intercepting here. So you just want to work
through the poses and get them. I'll make sure they're not
intersecting. Less fine. We can always polyester
layer was trying to get, you know what, let
me save this as well before it crashes. Okay, so there's a
bit of intersection there to consult
that because FK, so we just have the
forearms up a bit. Okay. Alright, Now what we're
gonna do at the end, we'll just put the end posing as well, and we'll put that in now. Okay, So what we do,
I just zero this out of zero this out. And the wrist. Basically the end frame. We want the end frame
to be relaxed here, like this. Maybe slightly in. Shoulders are fine. Same thing we just slept all of these controls and
zero everything out. It just makes it easier. And then we can start rotating. Relaxed, pose it. Okay. You see that
relaxed goes in or out. Now what we'll do
when it comes up, check out the reference again. So as it comes up,
slightly, just exaggerate. So as it comes up here, we'll just bring the arms out just to get a
bit more momentum. This is zero, this out.
A bit more momentum. Even have these come out
a bit louder if you want. Now there's a bit
of a push there. Don't like that. So what
we'll do is select this, select these controls
and other look. There's a bit of a push here. Comes out now. It's
been delete this. Let's say around 13. Let's bring that back to 11. And then what we can do, we can just start playing with this. Just bring this back of it. Bring the arms back
a bit as well. So we're just kinda
milking the pose before because if Slack
selected and copied, oppose a few friends
before the next one. If you know what that means. We just copied this
pose here to 11. Right from here now
what we can do because it's pushed up on the other
one, we can be Laura, let's bring this
back. Bring it back. This pack as well as
carrying on that. Right? Well, that's a bit too much. So what we'll do here
is we can select this, select all those keys on
the, all the controls. Play with the timing right? From here to here. That's quite a big one, right? In fact, what we'll do, let's delete this and
see how this looks. We can do, we can,
as it comes up. We can go to 36. Say this frame here. They fight. Middle click that,
bring it back to 21. And it can hit
that pose quicker. So let's hit that pose. And now we can do The top arm will just bring it back a bit. So it's overshooting,
overshoot and dairy, but it's going back
slowly to here. So what we can do, we
can again go back. So we want to basically
soften this from here. We want it to go back to the normal pause a bit
quicker, but still hold. Now the way I do that is
I've got the upper control. And I'll go to what is still
moving around here, right? 40 to 45. So I'll go to 40, middle click that, bring
it back to say 30. So I want to hit this
end pose quicker here. But still with a
little bit of a move. If I look now, this tail a little bit of
a move there, right? But if I wanted to
overshoot as well, so then what I'll do, I'll have a look at the Y translation.
You see how it's easing. If you want to overshoot, I'll just break these tangents. So it's individually. You can see in the fundamentals
how I do that. You can break it here. Break tangents, and then go
to weighted or unweighted. And that gives you
the option to be a bit more independence over the control are
now what I can do it, There's a few ways you
can bring this keyframe down like this and overshoot, like I said, this is the
overshoot coming back in. Now if you look at the
arm is going to go back, then set, we'll see there's a
bit of a settled, isn't it? Now you can have
exaggerated even more. Look, see is
exaggerated even more than even bring the next
one, previous one down. Bring it back up
however you like. If you want the end to
be a bit more softer, then all you do is I'll
select everything. And you could type in 50. And in the end frame,
bring it to 50. And if you look now, it's
a bit more softer, right? To me, that's a bit too soft
too. Let's go back to 45. And then you can also
start working on. So basically what we can do now, if I get the wrist,
delete this wrist. Yeah, that's better. Then this is a matter of going
back and forth like I'm going straight ahead now, let's try to sort the
ulna. So I come here. How's this? I'm looking. Let's delete this form here. And play the animation. And I play the animation. And I'll be like around,
want this to still be up there or play. And
you see it flips. I want that to be
softer, so I'll move that keyframe, say 30. But then let us delete this actually, let's look
at the upper arm. We're going straight ahead.
Your upper arm stops here. The upper arm stops here. But it zips into that
position, right? So maybe I want this
a bit more down than not to the space. Spacing them out
distances to travel is less because that
will make it a bit more. If we smooth this out, what I'm doing now I'm
just moving out this arm. I'm looking at this arm. Here. We can have it lower. That's not a problem. You CAC
or the arm is still moving. Say Hey, you can soften this. So you've got to say
42, middle click that to you for whoever,
wherever you like. Then it says about
matter of feeling. Again, see we come here,
Let's get overshoot. Let's try and get
over to the head. And if we see at play, There's elicit that
there's a little bit of a softness there. That's what we're looking for. And also when he's getting up, this seems to be a
bit more softer. And then the same
thing with the wrist. Remember, root, middle,
same as the leg. Root is head. Then gaba jointly are you just going back and forth and then
you're going straight ahead. So we can literally
delete all the key there. We can be like,
Okay, come in here, Let's have the rest
going up a bit. The risk goes up slightly because there's
a little bit of a drag. So then it might come back. Then when it comes in, they might drag a
little bit more. And then, and then we can do, again, come to 43, middle, click that to E7. And again, you see there's
a slight overshoot. There. Doesn't have to be
too much just to add a bit of movement there. Now if we see this, you'll get that nice
organic movement. They see. We can just
fine tune that now. Now that we've got
it moving nicely. Now that we've got
that moving nicely, even here, we can
bring this down. So we want the illusion is
we want it on the lap and we want the wrist on there too. So it's pushing off. But we can delete
that key in front. So we've got that. We can fine tune that in policy. But you've got the arm working. If you want, if you really want to become a look at the operon. Now, alright, push it
out a little bit more. Let's see how that looks. Then you just play
around. And that adds a bit more moment. Then you can bring the
second one down a bit more, and then maybe the
third one even more. So then we'll have
it a bit more. At the start. You might want to not want
to move this a bit down. New play, you play around, you decide got that little
movement happening. Then you do the same
on the other side. So we get the other one will
do the outer arm quickly. I can show you, but
that's what you're doing. You're just along
as the main body is animated and the mechanics
are working properly, the central gravity
is working properly, then you can just work. So again, I'll come in
with the upper arm first. We coming forward. Upper arm. Goes ahead. I'll just make sure we try will make
it a bit different too. The other one. So it's coming
back and then forward, and then it settles. So let's have a look at the why. Again, see here, same thing
with this overshoot and that's all we're doing is
just bringing it down. So if we look now, you've got valuable settle happening
there in the upper arm. Then we go back to
the upper body. Should I say the forearm? Coming down air.
Carry that momentum. Also the wrist. Maybe
having up a bit. And then we can animate
the fingers there. It's coming up. And I might just make this
article up a bit. And then as it comes back, maybe a bit more quicker. Move this before. Okay,
that's not working. So what you do, Let's
have a look at this arm. This arm goes back here. Then I reckon around here. Yeah. So then it
comes back and again, copy frame for E1, E2, E3, or anywhere near there. Because we want to
get that cushion. Again, we come in,
move that down, overshoot a little, See how much of the overshoot you like. A nice little
overshoot day, right? Nice little slide off. And then what we can do
is we'll get the rest, have a look how it looks
in the front as well. And then the same thing
with the rest will come here and are a little bit up because
it's a little bit. As it comes in. It goes back. And then again, pick a frame for it to
bring it back to 36. And then the little
overshoot we can put in. Let's see, as much as you like, you can break the tangents
much as you like. Just get it over to justify
a little bit of movement, to set to maybe
push it a bit more, and then maybe push
it back a bit. You see you've got
that little bit of a movement happening there. We should have also just
done a bit on the shoulder. So what we'll do, what I'll do, I'll select the upper let me select the upper
one of this, right? And it won't be honest gonna
go into every keyframe on the upper arm and
just key it fine. Okay, So I know that on the
shoulder, I've got keys. Then what you wanna do, you
wanna bring the arms forward and just get back, get the shoulder involved a
little not going up too much. And then back forward. And then it set
up that movement. And then again middle click
on the shoulders too. And you can add there as well. So it just adds a bit more
lush and I've done that first, but it's okay, you can go back and track it as well
as not a problem. Okay. That's a bit too much on the shoulder if
you look there. Let's just make that ease in a little bit of overshoot
gas works better, isn't it? Then you can reduce this as
void after bit too much. Just initiates the movement. And the same with
the other side. All you do, select the operon
control and the shoulder. Okay, let's see. The shoulder
is called key there. We can get rid of that.
And the shoulder and just key all the t's on the upper arm so you know
the position of the arm. If you come forward. Okay. Let's lean it forward. And even down if you want
down and then coming up and then back. What we'll do is
delete this and we can come down and then back food, and then settle. And then again, middle click. Move. Just play around with the
keys until it feels right. If you look at the x,
again, if you want, you can add an overshoot the end and just see how it
looks. See how it looks. Yeah, it feels nice
little settled. Might want to just
bring it in a bit. So you've got both
arms kind of work into the whites because the arms happen at the
same time later on with this offset it,
so it looks different. It's not tuning, as we say. You've got get up there. From the reference
body mechanics, everything is working properly. That's what you're
trying to get an a. Now what we'll do, now,
we'll start working on the torso a little
more fingers and add a little bit more of that policy and that will just bring it up a bit little drags
and all kinds of stuff. So that's the basic
body mechanics of getting up from a chair. And we'll start
polishing it a bit more, a bit more into the animation. Right guys, I'll see
you in the next video.
6. Polishing: Alright guys, so we are going to be polished enough.
Let's check this out. Was going through this. Money gets up. I just feel
the side view. It's not bad. It's not bad, but
I just feel that he could be forward
a little bit more. So what we can do, this thing, he's back a bit. Just the balanced
doesn't seem right. What I'll do, I'll just
try moving forward. And so if we see here
is going forward. So let's try and just move
it forward like this. I just feel maybe the back track a little bit. Maybe we'll create ease in and maybe it could be
a bit straighter there. And then we could
use this in a bit. Is this. Actually we only need
this key in the middle, which is good about this. Yeah, that feels a bit more. Imbalances is felt a
bit leaning back a bit. Okay, we've done that.
Yeah, feels better. So we're going to polish now. The only thing we can
really polish on, we can move out a little bit more movement
into these torsos. But I think is feeling
good at the moment. The handwrite, so we want
to polish the hands. So if we look here,
this intersection going on, you can
see that right? So what I tend to
do is go Let's see, Let's see what the
intersection is here. Yeah. So now if we
look at the fingers, I'm still working on these. So we've got here. Why don't we just start
animating these individually. So it looks like he's kinda
pressing off his foot. Let's check this out. Let's do this. Person off. School is a bit
of contact there. This is where you can go
like each frame and just try and polish it slightly. Let's get it out. When you comes off here. And we can get the control to keep everything
they only comes here. We could even have
a little push, Qi this back down, a little bit of that push, push, then it comes back up. Thinking here is,
as he comes back, they may be a little drag, so splay that space. Okay, so if we come here, here, we could have it slightly
like this going forward. And then we can
delete this or we can come back just slightly. And as he comes forward, goes forward, we can
delete this key previous. So just try to go ahead right there you can see it's
a little bit of a drag. So just follow what
the risks is doing. Just to give you
a bit more life. We can always turn that down. So if we look here,
we think is too much, which is the base. This one, right? So then we can just tone it down a little. Bring it down. It's just something that's there that would not
be the other way. You don't want to do it too much because fingers you could, you could go to the next view. We could do the next couple
of controls is or why not? Alright, so, alright, so
now what we'll do when I come here, come here. Let's just bring it down again. Yeah. Actually exaggerate
a little bit. Because you can see as it comes back, Let's check. Let's select these knuckles. And we're like, Okay, it's going forward,
It's going forward. And then back. We can delete this food again. And then it's going to say,
Okay, we can add the builder. And then the same for the
bottom controls, right? We're just adding that drug. So again, let's
delete all of these. And so straight ahead. So this is what you end up
doing, just deleting keys and still dragging a little
bit. And then back. This is lesson up. We don't want that. We want
this to still be dragging. This knuckle. Still want it. Mildly to delete that key. Bit of looseness the right. You don't need to exaggerate it too much. This is just e.g. purpose, but that obviously again, with the thumb as well, we can select both farms here. Delete everything. We
can be like, alright, here the thumb might be
going forward because, because it's dragging here. And then it comes back. Food. Then dragging back. Can delete this. And then just coming
forward again. You've got that loosen the soil. You can do with this one. You can just move it a
couple of rooms fluid. So it's kind of looser. Yeah. So we've got something
like that happening. So it's just adding a
little bit more movement just to make it a bit more. The whole fingers part of the armor as just a bit exaggerated. You
could turn that down. But obviously once you put the extreme movements
in, you can always, whoops, once you've got
this extreme movements in, you can always turn it down. And then we'll do the
same on the other side. So it will come to
the other side. Same thing we're doing.
Get the control. The base, right, that does
this quite into drag. Will just delete
everything here. So we will construct, we're
looking at the model. Again. Let's check out
what's happening here. Lighting up with
this light in mind. Never mind, we'll deal with that. We come to frame three table. We'll do this by
fingering, right? Actually, we'll keep
that where it is. We'll just rotate these
and then rotate this. So again, it's kind of got that pushing pushing him right. Let me come here. Yeah. So then we've got them become a welcome. Hey, let's go to
three key that day. Then we can use the curl. This kind of brush. You're brushing off. Just a little bit of exaggeration to show it's
put a bit of effort in. Ok. And then as
it comes up here, we'll just add a bit of a drag. And then obviously, as it's
coming forward, drag back. And you know what,
I don't think you even need that little cushion. We look at. It just eases
into the last pose. Which kind of works
like this. Even. Then what you can do again, go to the second control, the knuckles that we
did in the last one. Delete. Delete is coming up. We can delete this as
muscle as it comes out. Naturally, it's
going to still drag. And then just coming back. We're dragging back. And then we come forward
with a struggle a little bit forward and
then it should settle. Got that that last one. The last one. Last one. Just bring
that back a bit. Just getting that
little bit overfill. Let's check the tips. Let's check out the
fingertips here. Bring this mike and
a bit closer, guys. Last time was a bit of a complaint that the
mike was a bit too low, so sorry about that. But I will try and fix it today. Let's drag this. So let's delete these
first actually comes up. Come on, we know
is still dragging. And then we'll drag it back. You see them more
like offset there. So the shape is a bit. We can't really see
it when it's played, but there is a little bit
of distortion in the shape. You see that there. Then
you can just turn down. If you tone it down. The other thing you can do is
you could start offsetting. So if we come here, we can see that we can
leave the first finger is select the second finger. And we can select
the keys in it. Move it by one. Select the
next finger, select the key. Isn't it moving by 21
to select the last one, move it by 3123. So you're offsetting by it as you see the don't
stop at the same time. Then you know what
if it's too much, you just tone it down in the
graph editor has only two. So that is how you do it
from start to finish. Or get up, smooth, get up, looking at arcs, looking at the
mechanics and make sure the body is balanced. You know, even like back here. You've got this. Then you're making sure
everything's balanced. That's the main thing. You
don't want to be off this. Look at the balance of the character
because you don't want to be animating ideas coming up. You don't want it
to back either. You've got it all
forward is going to fall forward and lean back. So that's what you're looking
for. We're looking for the right central gravity, the cog, where it is, the position, how
it is in the front. Where's the way? Obviously
this is a bit neutral because they've got the
characters getting up straight. But you could get up and he might lean on this
side so the leg would you probably have
the Lego a bit more. Then he shifts and
then comes back. This weight shift exercises
in the fundamentals. Of course, this fundamentals
are really important. And everything else seems. Finally, you could
exaggerate the chest a bit more
if you wanted to, you know, as it comes up making, you could have it where you want is back to be more
like that set. You don't have to, but
you can just play around, but this is a basic
vanilla get up. And then you just play
around with the golf. Go ahead and play around
with the controls. Extremes, make the extremes
more and then come back. Give the character personality. Is he angry when
he's getting up? Is he sad when he's getting
up its side, it'll be angry. He might stop. From this basic fundamental. You can come up with all
these different emotions. So good exercises to do. Angry, gulp, sad gap, surprised to get up, happy gap. So from this you can try
all kinds of body language. And the way the posing is, this is a good way to just start off doing these
fundamental causes. All these exercises, fundamental
acts are so important. In optimist students, we end up taking on overambitious
animations. It's always good to do little
weekly small animations that will build
your confidence up. And then you can
start applying that to bit bigger projects, like a storytelling projects. Giving your character reason, what's in the shot, or what's the story
that could be anything, could be a character. He's lost his keys and
you're trying to find it. Danny can start applying the acting skills and body
mechanics to that Andy, emotion and everything
else that comes with the fundamentals of animation, you can
start playing it. But when you're starting
off as a beginner, it's always good to do this because it builds your
confidence episode, you know, because you know
what you're doing, you know, you're tracking deoxy know, you're checking out the poses, the negative, positive space, making sure that it's all clear. And you're portraying
the character clearly to the camera. So it's, the audience
can read it, read the poses with
everything costs. Or you might be right, but
you've got to think of it. Is it reading to the outsider? I think getting what I'm trying to visually tell as a story. Okay, guys, so go ahead
and keep polishing. Have fun, keep going back to these exercises, all
these fundamentals. Keep doing it again and again and applying it to the body. And before you know it, you'll be ready to animate
one of those longer. Since that you enjoy animated. Alright guys, so I'll see
you in the next video.
7. Conclusion: Congratulations my friends. You have just finished a get-up animation from a box or a chair
wherever you are using. And now you've got the
basic understanding of the fundamentals of the hips, how it's so important
to make sure that's right first
because obviously, as we explained in
all my classes, if that central gravity
is not working well, it's going to affect everything. So we did that. Then we started polishing. We worked on the
torso than we did the arms right down
to the fingers. And now all you can do is take that simple get-up exercise. Start adding. Okay, how is
the character is angry? How's it in a different
emotional state when a surprised, happy, happiness fee is excited, is it putting his hand up trying to answer something,
then he gets up. So you can try all these
different personality traits is endless, is
absolutely infinity. You can try all these
different options or different emotional states and just add a bit of
personality to, to get up. Now you could get up
and jump and then land. There's so many variables that
you can do in this class, we learned how to do that for basic poses at the
start, just to get up. And then we start
adding in-betweens. Then we started
polishing and going right down to the arms
and to the fingers. So remember to post
your projects. I'll be ended discussions,
I'll be giving feedback. Come on, let's get this
community together and we'll work together and try and uplift each other together
and get better animating. Or our guys, there'll
be more classes coming in this series
and the cartoony series. But in the meantime, check
out my fundamentals, check out my cartoon series, like I mentioned, we can also check out my video game series. Principles of Animation
does a whole lot of courses on Skillshare
that I've put up that will help
you get through each level and as you get better from beginner to
intermediate and advanced. And last but not
least, also have a YouTube channel where I share my tutorials on animation. I'll also share my
fitness journey, but those are not familiar with. And also I do reviews on and book reviews as well as paint miniatures as
well as my hobby. So in the meantime, until the next lesson,
happy animating. Most importantly,
enjoy animating. Make sure you're
having fun animating. And look after your health. Go out for a walk, get
away from the screen. Come back, have a
look at your work, refresh your eyes
so someone else get feedback and then you'll
improve your work, right? Again, the main thing
is look after yourself, live a life so that you can put that life into
your animation. Or our guys love you, and I'll see you
in the next class.
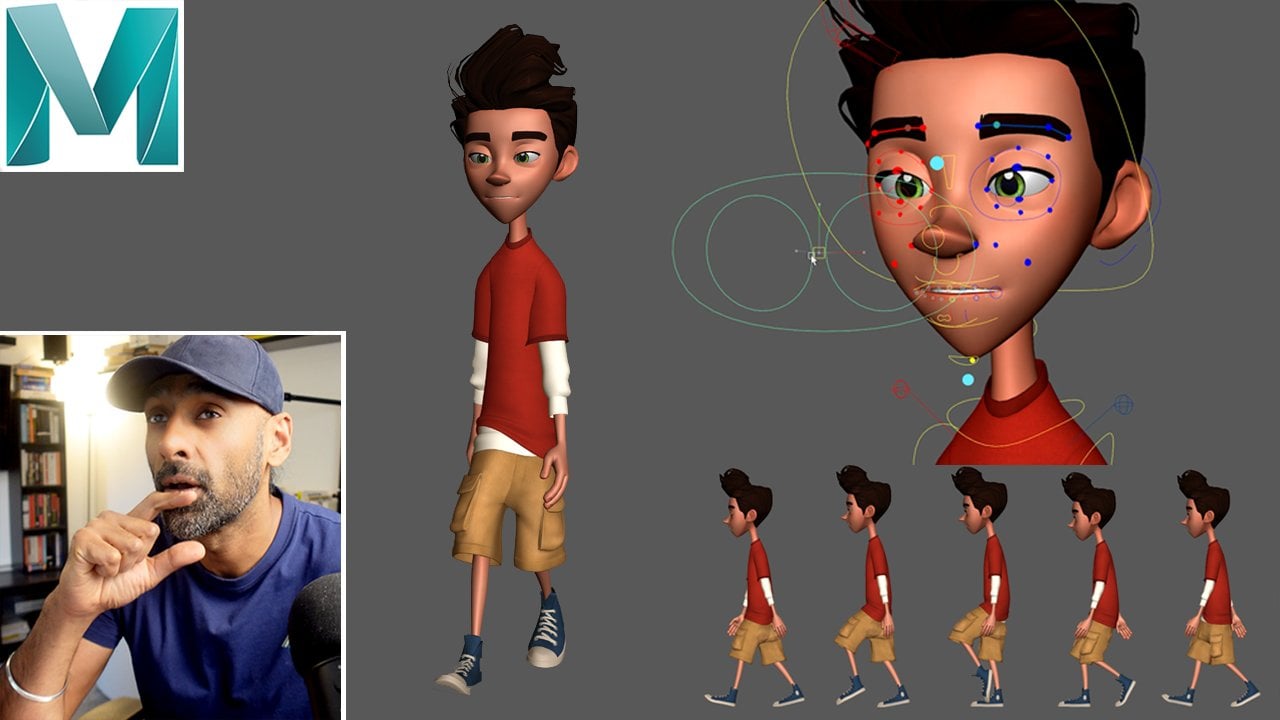
8. Maya Animation Mastery: Hi, everyone. Congratulations. This
is just something after the conclusion
that I just wanted to put into all my courses. If you're really serious about leveling up
your animations, I have a brand new course
that you can enroll in. It's called Maya
Animation Master. This course, I've redone
it with four K Good Audio, came out in January 2024. And this course is
designed in a way how I would have liked to be taught animation when I started. So it basically gets rid of all the pain pain
pressure points that I had when I
started animation. So I want to get rid of those
frustrations and give you a direct line to what that aha moment was for me when my mentor Steve Gagnon Katie taught
me about animation, something just clicked, and
I teach that in the course. So if you're interested
in enrolling, you can go to the
Ay page where I'll have a link there called
My Animation Mastery, and you can go
through the webinar, then the course breakdown. You can check that out. And then if you decide You
can enroll, if not. That's fine. There's a
private Facebook group. There's a link in there
about me for that as well. You can join that
where we get feedback, and there's a nice
community there. And also, when you enroll, there's a private Mystery, Maya Animation Mastery
inner circle group where it's just exclusive for students who
we give feedback. So, have a look at that webinar, and let me know your
thoughts as well. If not, you can join the Facebook group to
the private group. Obviously, the
inner circle group is for people who have enrolled, students who have enrolled,
but check it out, and it's just for
leveling up, and really, it's got all the
theory and practical, heavy on the practical
stuff, video game stuff. If you want to learn
about how to get a shot from reference to
blocking to spining, to polished, show real level. It goes
through all of that. And also, I talk a lot about networking and
how to get jobs and contexts that I have within the industry that I can
push your work out there so at least it's in the right
hands and people can see and at least consider
you for applications. F of my students
who have already got jobs in the industry
going through the course. So have a look at it. And yeah, let me
know your thoughts. So enjoy your animation journey, stay healthy, and
I'll see you around. I'll be around on the
Internet on YouTube and a, giving tutorials as usual.
I'll see you later.
 Opi Chaggar, Senior Animator + YouTuber