Transcripts
1. Introduction: Hi. I am Ada Rovai. I'm artist, illustrator, and educator. This is my Skillshare class. I am passionate about handmade things and I always find a way to apply the craft in my art works. In this class, I will teach you with fun, everything you need to know about handmade stamps, showing all the process from start to finish with tips and tricks to see how to get from your ideas to a beautiful handmade pattern. In the beginning, I will show how you build your ideas with personality and know how to choose the best reference to create a stamp design idea. Then next, be moving on to create your drawing, thinking on the engraving style way and to learn all the possibilities and techniques of engraving that you can do. For this class, I will be using Procreate to make my stamp design, but feel free to use any software or handmade drawing to make yours. As a special bonus, I will share my tips and tricks with you to quickly create a stamp. In the project of this course, you will create a fun and beautiful stamp for your work. Are you ready to have fun? Come and join me in this class? Let's get started.
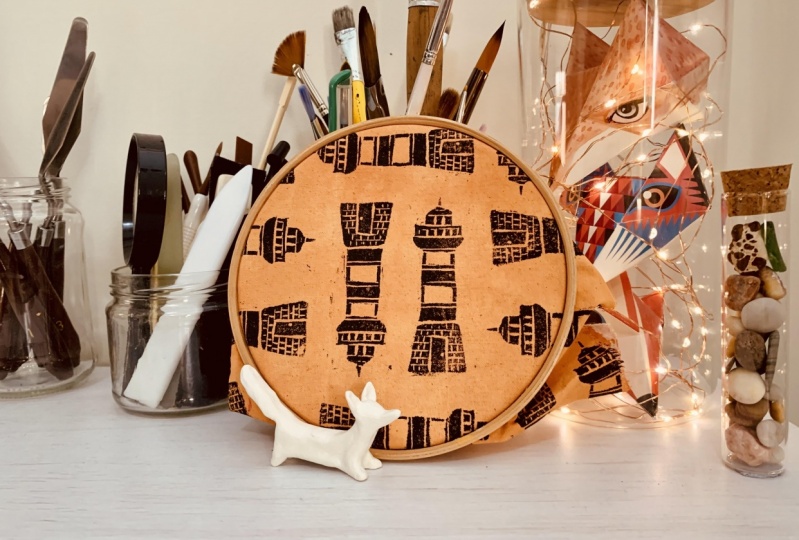
2. Materials & Project: In this video, we'll show all the materials you'll need for this course in the final project. The materials you need are adhesive tape, carve printing blocks or vinyl erasers, eraser, soft pencil 2B, precision craft knife, lino-cutting tools or gouges, inks for lino, or block printing, water or oil-based, stamp pad, sponge scourer, scissor, paint spatula or spoon, wooden block or a baren, and plastic dough scraper. But you also will need a blade or paint palette, paper 200 gsm or more, simple paper to drafts 80 or 90 gsm, and a wax paper or baking paper. For your class project, you will be making your unique stamp and make a beautiful butter ring with it. Let's start.
3. Getting Inspiration!: In this video, I will show one example to get inspiration. This method is sharing three parts; the top, middle, and base. The base is the topic, the middle are the references, and the top is the selection. The first part, the base. Do a brainstorm. Which means write down all the words and ideas that come up through your mind on a paper freely. Try to not think, just write. Those words and ideas will be things that interest you. They can be related to people, pictures, stories, memories, life, nature, culture and more. Maybe you are thinking, "But if I can decide which idea I want, what do I do?" Don't worry, just write all the ideas you are in doubt about in little pieces of paper, fold down and pick one. Just let the universe choose for you. Now, the middle part, after you choose your topic, you will search for some images for your references. That could be from your imagination, the Internet, videos, life, your photos or from social media too. Now, collect 5-12 examples of images that you need to represent what you want on your project for your stamp. In this case, I used Pinterest to collect and organize my references. To use Pinterest, you search and write your topic and collect all the images you want in the folder. If you prefer, you can create a new one for this class. To create a new folder you'll need to click on Create board when you save your pin. Don't forget to write the name you want for the board and make it secret just for you, or public, and create and start to save the pins on this board. Third part, the top. After you finish all your searching, now is the time for the selection. Ask yourself why you chose those images? What draw you to them? Why are they your favorite? Is it a size, color, shape, light, darkness or the textures? Think about the qualities you want. Choose those images that most represent what you want on your drawing. To organize, I create a selection side of my board on Pinterest. To create this new folder, click on the plus icon on your board's top and click on Add section. Write the name of this new folder and click on Next. Now we start collecting just to your main references based on your choices and click on Done. Well done. Now you're ready for the next video. See you there.
4. What is Stamp?: In this video, I will show an introduction to the world of stamping from their tools and how stamp and designs work. What is stamp? Stamp or rubber stamping is a printmaking process to make a relief print. The ink is applied to the prepared block's surface and then transferred under pressure onto another surface. The print is a mirror image of the block that can be replicated many times. Stamps can be made of any material, organic or inorganic. Here's some examples. Organic: Vegetables, flower, fruits, wood, and so on. Inorganic: Linoleum rubber, cork, metal, and so on. To engrave the stamp design, you can use gouges with different blades used to remove the matter from the block. When handling different gouges, it is necessary to adapt the way of holding and guiding the tool. Each gouge allow a different coding style and precision, cutting diverse lines and textures for the engraving. The precision tools can be used to cut away areas of final detail making two cuts at opposing angles, and the square gouge will carve a line of even width with square ends. The V-gouge will make lines of varying width from the finest to the wide line. The U-gouge carves a line of more even width with a rounded end on it. The tools must be comfortable in your hand, and your hand and arm should be fairly relaxed. Remember that the way you control the depth of the gouge line is by the angle at which you hold the tool. If you are a beginner, do a carving test to practice how to make the lines and textures [NOISE]. Okay. Wait. Before you start, a warning. [MUSIC] Always carve away from your hand. Now here are some of the possible textures you can try and how to use the tools. Cross-hatching is sets of hatched lines cross each other at different angles. Hatching lines are lots of parallel lines close together. To make dashes, flicking away tiny bits of lino with the gouge tape. For curved lines, move the tool from one to another direction. To create straight lines, you can also use a precision knife, making two cuts at the opposite angle to remove the lino pieces. But you can try with the tiny V-gouge too. For the dots, hold a knife at an angle of 45 degrees and rotate the block. When carving a curved line, try to rotate the block as you carve, but cut one section of the circle at a time. For clearing large areas, use large tools. But if an extensive area needs to be cleared completely, it can be cut out with a knife or scissors. As you can see on the examples, the drawing is mirrored, which means it is necessary to draw in an inverted way for the print to follow the original drawing. The engraving is thought on the negative space. This means all the material removed with the gouge from the block will have no color. Therefore, think before engrave about which parts must stay or not. One block means one color. Each matrix represent only one layer. To make more than one layer of shadows, textures, or colors, that will be necessary to engrave more blocks. That is all. See you on the next step. Always carve away from your hand.
5. Drawing: In this video, I will show how to make the drawing for your stamp. For this class, I use Procreate, but you can also use other apps of your preference, or make a hand drawing. The settings used for the drawing size was the A4, but it depends on the size you want on the final. For this one, doesn't need to be bigger than that. The brushes are 6B on sketching, and script on calligraphy. They are available in Procreate regular brushes set. I also choose the same brushes plus the Monoline brush for my eraser to keep the same style. For my stamp, I used my main reference image on a more transparent background layer to get a clear view of my lighthouse's proportion. [inaudible] I'm drawing. I add another layer on the front of my reference to draw freely. If you want another option to have close another reference, you can share the screen with two apps. You just need to drag with your finger in the bottom corner of the screen upwards and hold the chosen app and drag close to the one you are currently using. But this is just an option. You don't have to do it if you don't want to. My strategy to make a drawing is to think of the figure in geometric shapes, that is, to simplify the image in forms such as square, triangle, and circle. Then think about the style I want. For my drawing, I used a more frontal and geometric style. The lighthouses usually have many squares and rectangle shapes. As an example, look at my reference image. The top has a small half of a circle with another circle below and then another square next. For this drawing to have more symmetry, I used the Drawing Guide located on Actions. I chose a symmetry option with Assisted Drawing on. While you're drawing with the Assisted Drawing on, it will help you to have symmetry while drawing. Another tip is if you want to do a straight line, draw fast, but hold the end of your line and the app will transform the line on a straight one for you. If you want to fill a part of your drawing, hold the color circle and drag on the part you want to fill. But you can control as much as you want by keeping holding the color and the drawing and move from left to right to choose the amount of color you want. In the down part of the lighthouse, I chose a different way for drawing using the eraser tool. I realize that the brush Monoline was better for that. Drawing with an eraser is a good option because you can create a negative line that will be the linoleum that you cut from the block when engraving on your stamp. To help with the lines of the brick part, I changed the Drawing Guide for the true grid option and adjusted the great size I wanted for the bricks. Keep going. Let your imagination, intuition guide you. You don't need to do the same way that I do my drawing. This is just one way. But remember that the more you practice, the better you get. Mostly you will learn from your mistakes, and I must say they will be countless during their way, but it will be worth it. Now, is the time. After a lot of time drawing, now you're ready for the next step. See you there. The more you practice the better you will get.
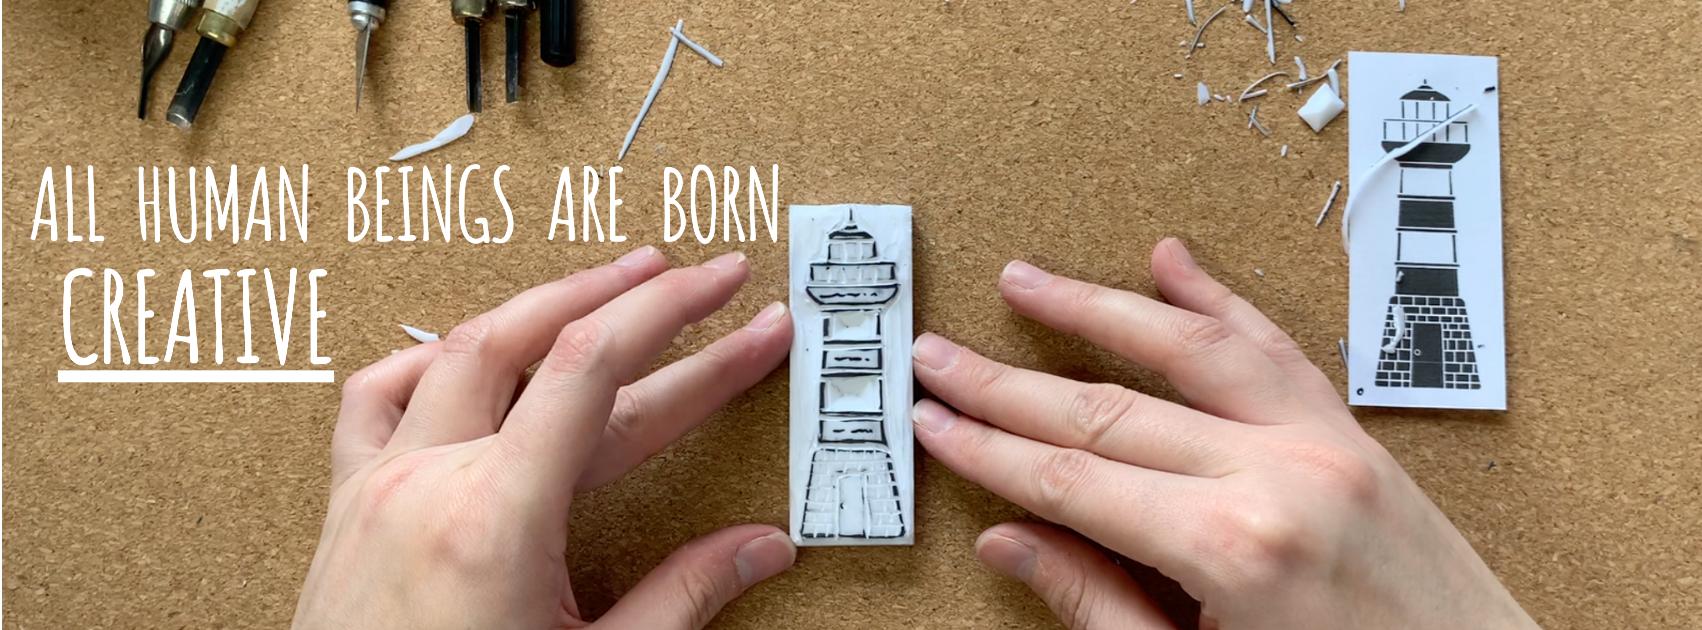
6. Transferring & Engraving: Now is the time of engraving. This video will show how you transfer your drawing and how to engrave your Leno block. Before transfer the drawing, you'll need to print on the size of your block. I will be using the Microsoft wall to do this. To start insert the image of your drawing and click on it. Next, click on the picture format and adjust the weight and the width of the image. After doing that, you're ready to print your drawing for the transfer process. Firstly, cut the Leno block to the size you want for the stamp with a knife. Using a soft pencil, trace your design on tracing paper. Following, choose the right scissor for cutting paper and cut the drawing template on your stamp block size with a bit of a margin around your design. Then place the traced artwork facing down on the block and secure it in a place with adhesive tape to prevent it from slipping. Draw over the traced design with a capped pen, a soft pencil, or something similar on all the artwork. After transferring your design, you may notice that the artwork on the Leno block will appear in reverse. This is fundamentally important because the final print of the engraving will be on the right side but this is just for artworks that need a right side as a test for example. One more thing, if you think the graffiti lines are too faint, you need to outline with a permanent pen over them to have a bolder lines. Now is the time to start engraving. But always remember what you learned from the other videos of this class, especially the security warnings. For my stamp, I used a double side rubber printing block because it's softer and easier to carve. You should start engraving from outside to inside. From delicate lines to thick lines and shapes next. That is why, in this case, I start using the craft knife for the drawings countering. Now about the tools, it is faster if you use one carving tool at a time. This means, carve all you need with one engraving tool, then change for the next one. If along the way you want to change the design and feel that you should, go ahead and try it, the final result of the stamp is never the same as we blend it at the beginning. The most important thing is to enjoy, enjoy this moment, and don't rush yourself. Do it with calm, attention, and love. Now that you know how to proceed, I will accelerate the video. After you finish all the carving, let's do a printing test to see how the stamp is now. You can use the stamp pad instead of the final ink off your project. Now, press the ink pad around off the stamp. If you see some imperfection or more lines appearing on the print or before, just come back and carve it out. To do a better print, you need to use a bearing or a woodblock to press gently and equally over the Leno matrix on the test paper surface. Now that you've finished all your artwork, grab a cup of tea, and let's go for the next video.
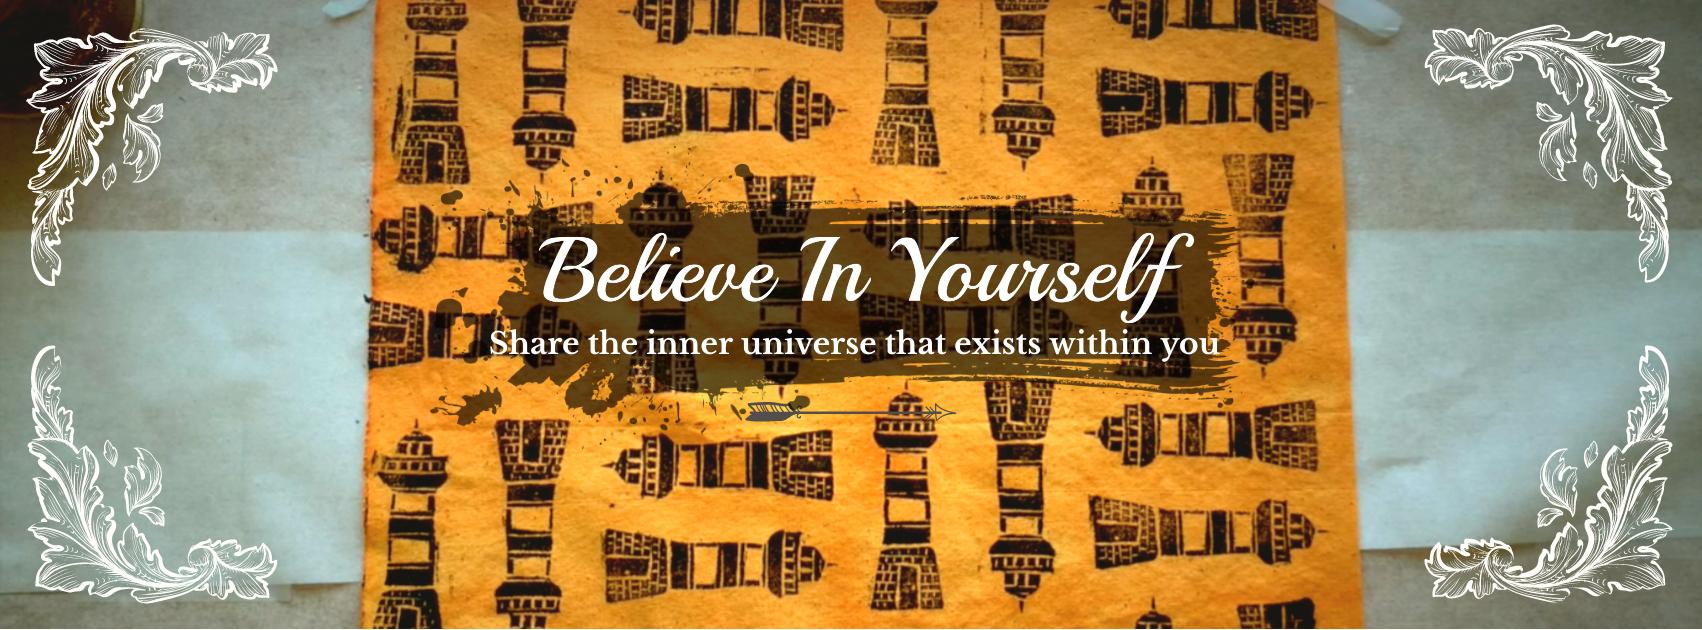
7. Pattern Composition: Now is the time to create patterns. This video will show how to compose your pattern leaf yard stamp. Now that you have your beautiful stamp, make some print copies and cut them. With those copies, play around and try different compositions, such as horizontal, vertical, diagonal but take pictures of them. After you have done all your composition samples, choose which one is your favorite to proceed to the final work. Now make a thin plate to help with the printing process. Just print on a paper, your chosen pattern following the example of the picture you took, then make outlines with a pencil around the printed stamps using your stamp block as a mold. Next, cut with a knife all the contour lines leaving the gaps. That's it. Now you're ready for the following video. See you there.
8. Printing: In this video, I will show step-by-step how you print a pattern into a surface using the template guide. Before you start preparing the ink, you need to organize your table and wear some old clothes just in case you get dirty while printing. To protect your table, you need to cover it with baking paper or newspaper. Then put the surface you will print on it and hold the surface edges with adhesive tape. But be careful if you're using paper, not to harm its surface. Instead of using squatted tape, you can place some heavier objects on the edge to hold them. How to rolling out the ink. First, place a small amount of ink with a spoon or spatula on the slab, that could be a plate, a piece of glass, or a paint palette. Now to spread the ink, we smoothly press with a sponge into the ink spot and spread it out by pressing on the slab surface close to the inks place. Your goal is to get uneven smooth squared layer of ink on the sponge and on the slab. Before printing the final work make some tests with your stamp to learn how to control the inks' amount into the sponge and on the stamp. Now, once the sponge is evenly covered in ink, gently press it on your block, but try not to touch the ink by holding the ends of the block. If necessary, re-ink the sponge and continue until cover all the blocks raised parts in an even layer of ink. When the stamp block is covered in, put the sponge down, but be careful to keep your hands clean. Now that you have all you need to know, let's start printing. Place the pattern's template over the surface that you will be printing. Then ink up the block and place it on the first template gap, hereafter press with a woodblock or a bearing on it. To use the bearing, hold with your fingers wrapped generally around the handle and use your body weight to push down, keeping your arms straight and rest your weight on the hue of your palm. Then moving around over the block doing the same movement. When you finish, take the stamp's block off and repeat the printing process until you get the full pattern. When you finish one square, move the template to complete the composition of your design. Now that you know how to proceed, I will accelerate the video. Now that you've completed all the patterns, let it dry and it will be finished. But before you go, I have just one more thing to tell you. So grab another cup of tea, and see you on the final video.
9. Final Thoughts: Hey, congratulations. If you got to this video, it means that you have completed the entire class. Thank you for joining in. I hope you had fun and please let me know if you enjoyed it or have any questions in the comments below. I will get back to everyone. Oh, and don't forget to share the final project photo and its process in the project section, and keep creating and have fun along the way. I hope to see you next time, so see you later.
 Ada Rovai, ARTIST | ILLUSTRATOR | EDUCATOR