Transcripts
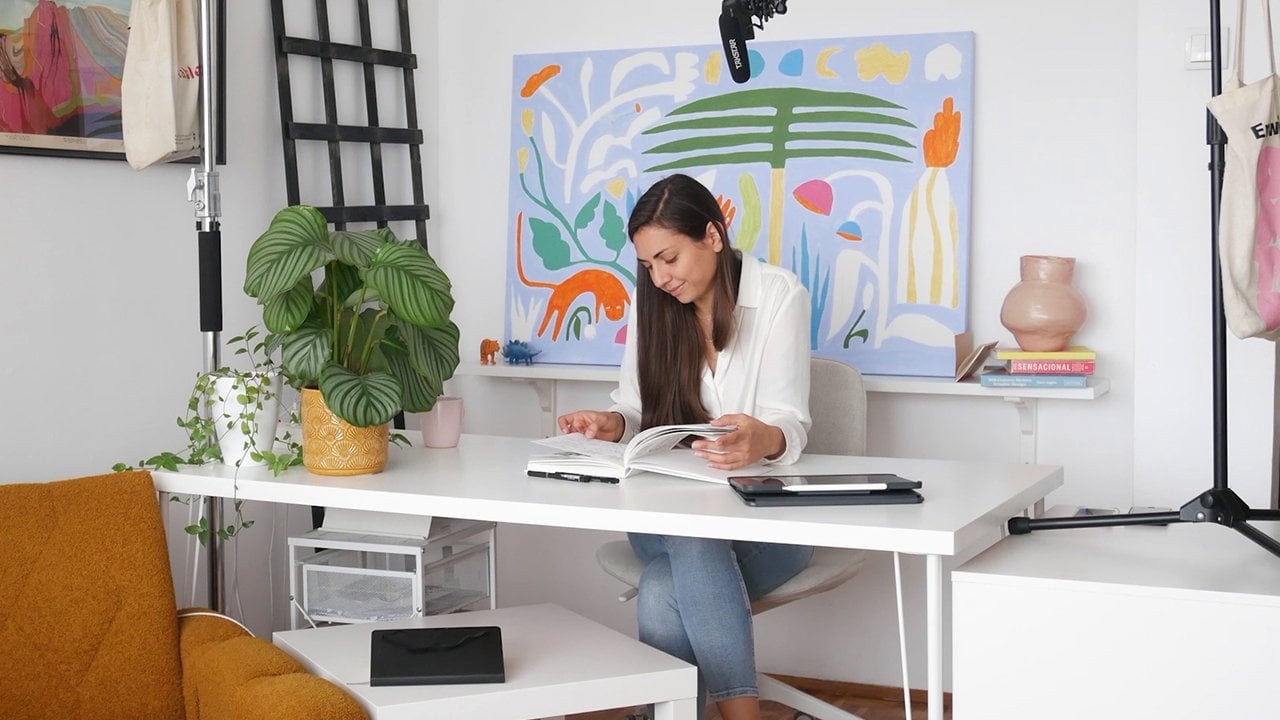
1. Welcome: Hey, welcome to the studio. I'm Nina also known as DOID an Illustrator and
pattern designer based in Belgrade, Servia. And in this class, I want
to show you how to create a pattern repeat using
paper and paints. I'm inviting you to step away from the digital
media you're used to and discover a process
of analog pattern making. As you'll see, we'll
start by sketching the repeat tile
directly on the paper. I'll show you how to plan ahead and prepare the design
to be traced in a way that you can preserve the repeat elements
without cutting them off. I'll use acrylic inks to paint the design and achieve
those lovely textures. And finally, I'll show you
how to assemble everything in Photoshop without
a lot of editing and create the final
pattern repeat. So if you're bored with what
you can create on your iPad, you're eager to work with your hands and create
with physical mediums, and you want to be more involved with a pattern making process, then this class is
definitely for you. Also, it will be super easy to follow what I'm doing
and recreate this design. So if you're a beginner, this class might
be a great start. Alright, I think
this all wraps it up nicely and we can get started.
2. Project: The project for this
class is to create a pattern repeat using
physical mediums. To practice, you
can follow along and recreate the
design I'm showing. And once you're familiar
with the process, make your own design,
try something new, experiment and see what happens. And most importantly, have fun. Here's a list of things you
need to create this project. Firstly, some paper. You can use a regular printing
paper to do your sketches. And later when you start
working with wet mediums, you need a thicker paper, at least 200 grams. A pencil, of course, one cannot do without it. An exacto knife or
scissors to cut the paper. Then you also need some paints. I'll be using acrylic inks. You can use guash, watercolors, or whatever mediums
you're feeling drawn to. Next, here's an important
one Light tablet. I'm using this to
trace the design. But if you don't have
that, you can use just a regular window
the only thing you need is a light source coming through on
the other side. And another option is if
you have a glass table, you can put a light
underneath and also then trace your
designs in that way. That's something I used to
use when I was a student. Next thing on the
list, a scanner. You need to scan these
paintings so you can transport them
onto your computer. If you don't have a scanner, you can also use a good camera
to capture the paintings, but you have to be mindful of the perspective and lighting. And the last one on
the list, a Photoshop, a program that we're
going to use to assemble all these things and create the final professional
pattern file. If you're not using
Adobe Photoshop, another good alternative
would be affinity photo. By the way, I'd love to see
what you're working on, so feel free to share
your work in progress and final designs in the project
section of this class.
3. Paper Repeat: Let me open this class
by saying, nowadays, when the world is getting
over flooded with digital AI generated artwork, it's good to shift our focus more towards physical mediums. That's why we're starting
this process by using paper, this lovely invention,
2,000-years-old. You can do so many
things with it, and we're going to use it today to create pattern repeats. Basically, you can start on either rectangular
or square paper. It doesn't really matter.
Just do what you prefer. But what you should think about is how you're going to
later trace the design. And for example,
I'm going to use a paper in the size of a four. And what I want is when
I have the design, I want to trace
it to this paper, I want to have
more space around, and you'll see later
why that matters. All right, let me now
show you how this works. The first thing we're going
to do is fold the paper. We're going to try and do it
as precisely as possible, but again, it's not
going to be perfect. Also, you can take
it to the center, but it doesn't have to be
exactly in the center. It's not going to make much difference.
Alright, let's fold. This edge and now I'm going to fold this
one. They should meet. So you see it's not
at all in the center, but it really doesn't matter. Now I'm going to open it up
and fold the other two sides. Alright, I'm trying to do it
as precisely as possible. But again, it's not
going to be perfect. Sure Alright, great. This will work. Now, let's open it up. And basically, we just prepared a pattern tile where we're
going to make the sketch. So I'm just going to
grab a pencil and make a very simple sketch so
you can see how it works. So let's just do
some simple circles. Also, you can start from
the edges or you can start from the center and
then work towards the edges, or you can just mix it
up however you like. Alright, making
something super simple so you can see how
we're going to do this. Alright, let's now
fill these two edges. I'm gonna fold the paper. And now I can draw
exactly on the edges. Let's open it up. See.
These parts are finished. Now let's work on
the top and bottom. I'm going to fold it again. Complete by putting the
elements on the edge. Maybe one here. And that's it. And now by
the power of video editing, let's see how this simple
pattern sketch repeats. I'm not seeing this
example right now. It's happening in the future, but I'm sure that there are some misalignments
along the edges. And this is absolutely normal
because it's really hard to fold the paper precisely so that there are
no misalignments. But as you will see later, that's not going to be an issue. Alright, let me now show
you a few pattern sketches, examples that I
have laying around. Here is this one. You
can see now how it's folded and how more
complex elements are meeting at the edge. Here's another one
I was working on. C I'm also making some edits. I'm going to also later
trace this and work it more. This is a great example of something that is
more intricate. And lastly, here
I have an example of the already painted
pattern sketch. This is something I worked on, and I already have it digitized. Alright, I think now we're ready to start working on our design.
4. Paper Sketch: Alright, here is the pattern sketch we'll be working
on in this class. It's made on a rectangular
paper in the size of 19 by 10.6 centimeters. The size is a bit odd, and the reason is I
just got this piece of paper by cutting a
larger A four paper, and this was just the leftover. And somehow it proven to be a pretty good size for this
type of pattern repeat. I got inspired to make
this design by watching a lecture about William
Morris' design. William Morris, of course, the one and only father
of beautiful patterns. And as you can see,
in this design, there is this prominent
feature or let's call it a technique he's using called
the S shape or S curve. It's something that is super easy to use on your
pattern designs, and it will provide the repeat with a lot of energy,
flow, and movement. And as you can see,
I also recreated something like that in this
design we're going to make. Now, let me grab
another piece of paper. It's in the same size. Of course, you don't have
to use the size I'm using. You can use something else, but it might be good to use the same one if you're
recreating the same thing. So as I said, the main base of this pattern is the S curve. So we're going to
start recreating it. I'm starting from the
bottom, but as you can see, I'm going to start
from here and end it somewhere here because I know the pattern is
going to meet here. And later when I fold
it, I can connect it. Alright, let's loosely
make an S shape. And now, just as I showed
you in the previous lesson, we're going to fold the paper, again, trying to be precise. But we don't have
to be because we're not machines. It's okay. Okay, here it is. Now, I
can just match this better. Here it is. All right. Now the S shape is connected. Alright, this way around. Okay. Now let's do more
of these branches. For example, this one, Oh. And this one. As you can see, all these branches are
somehow in their own s shape, it's very free and flowing. Now, let's fold so we can
connect the edges on the side. Okay, I think. We're good. Great. Now, let's
connect the edges. This one goes here. And this one can go here. And I think this one is
going to end in a flower. Alright, now I smudged it
a bit with my fingers, but you can still
see everything. Right. So this now is
the base of the pattern, and this is where
we're going to achieve that beautiful movement and
flow in the repeat design. So far, we talked
only about the stem. But let's now introduce
new elements, the flowers. Now, I created
something that would be a great and fun
exercise that you can do instead of just
drawing these flowers, what I thought would
be a good idea. Is to take a piece of paper. It can be this regular
A four printing paper, or if you have something
slightly thicker, you can draw the same flower, but do it multiple
times and then change it a bit and also
change the size of it. That's something
that really matters. And it's also something I'm
talking about and showing in my class key principles for
making outstanding patterns. So if we're going to repeat
this flower so many times, like you can see in this design, it needs to have
some difference. It needs to have some variety. And because we're
introducing variety, the final repeat will look
more rich and interesting. So a good exercise of doing this is that
you can always choose a different size and a slightly different flower when positioning it on your design. So before I do that, of course, I forgot I also need to work on these stems so
they're not just lines, but they become real stems. So let me just do
that for a moment, and then we'll position
these lovely flowers. Alright, the stem is finished. I can take the stencil and
start positioning the flowers. As you will see, the
flowers will be positioned, let's say randomly, but
it's never really random. Mostly what I'm looking for is a way to position them so I have a nice balance
in the repeat. But also take a little note right now because some
of these flowers, this one, this one. And this one are positioned deliberately to be
exactly on the stem. So they are covering the stem. And for now, just take
that as a little note. I will deliberately
place a few flowers exactly on top of the
stem to hide it later. But while I'm doing
that, it will become clear in the next lesson. All right. So now let's focus mostly on rotating the stencil and positioning the
flowers in a way that we keep a nice balance
in this design. All right. So this one
I can use this size. Now for the next one,
maybe next to it, I'm going to use another one
and rotate it differently. Alright. And let's
do this thing. Let's position deliberately
this one, for example, a big one here, so it covers the stem. All right, great. It's really good to have this
type of stencil and have different sizes of the flowers because the pattern later
looks more natural. And if you think about it, nothing in nature is in
the exact same size. So nothing is a pure copy paste. And if we want to make our design look
natural and beautiful, that's something we are
also going to keep in mind. All right, let's place another
one deliberately here. Another one here. This one goes on the edge. Alright, I think by now, you have a pretty good idea
of how I made this sketch. If I wanted to continue
working on this one, I'd have to do a
bit of refining. I might need to add
some branch here, maybe a few flowers as
well to fill it up. But to keep this ship moving, we're going to move this
quick example aside, and I'm going to continue
working on my main sketch. As you can see, it also
needs some refining, and I'm going to do that
by using an ink pan. The reason I'm using an
ink pan is, first of all, it's going to be
much easier to see the design when I start tracing it later on
a thicker paper. Now, if you want, you can do that on
top of this sketch. But if you want to
preserve it like I want, you can just grab another piece of paper in the same size, position it on top. Then I'm going to
use the light tablet to trace this design. Once again, if you don't
have a light tablet, just place these two papers on the window and
trace it like that. Once again, you don't
have to trace it. You can just go over it
right here on this paper, but I just somehow want to archive this and preserve
the sketch as it is. And this is why
I'm going through this little fiddly process of aligning these
papers perfectly. I'm going to grab some
leftover washy tape. It's pretty good when you have the leftovers because already the glue is kind of loose and the paper is not going
to be torn later. If you don't have a
leftover, wash your tape. What you can do is just
tap it around, you know, tap it with your fingers
or tap it on some surface, and then you're going to get
rid of that excess glue. Alright. I think this will
do maybe another one here. Alright. So I'm going to trace first with a pencil
to refine the sketch, and then I'm going to make
it bold by using an ink pen. As you can see, I traced the sketch lightly
with a pencil, but I didn't finish the edges. Now, when I start working with the ink pan and start refining
and bolding these lines, I'm going to fold the paper, and then I'm going to
connect the edges. Alright, so first, I might just fold the paper and be
ready for that step. Once again, this is a bit
of unnecessary extra work, just so I can preserve the sketch, but you
don't have to do it. You can just continue
working here. All right. Let's start
making these lines bolder. So once I get to the edge, I'm going to fold the
paper and continue this line. And that's it. I'll just spend some time refining this design
with an ink pen, and I'll see you in the next
lesson where we're going to make a plan on how to trace this design
and later paint it.
5. Trace The Design: And we're back. The
sketch is ready, and now we're going
to trace it on a thicker watercolor paper. But the main question is, how are we going to do that? One thing is for
sure, we're not just going to simply
trace it as it is. Why? Because there are going to be a lot of misalignments. And also, if you're
painting something that has a continuity like the stem, you do not want to
break it on the edge. You do not want to break the paint and texture
flow just like that. Is it possible to do it? Yes, it is, but it requires a lot of
editing in Photoshop, and I want to avoid
that at all costs. Now, to make it easier to understand what
we're going to do, I will go back to the example
of William Morris's work. What you're seeing here
is his design work. This is something he would
prepare for the artisans and later the artisans would carve
wood blocks to be printed. You can see here how he
painted or let's say, highlighted the repeat tile. He preserved the elements. He preserved the
flow of elements. The artisans wouldn't just carve a straight pattern tile and
then make prints like that. They would just follow
the flow of the elements. And that's exactly what we're going to do with this design. So here's my plan. I'm going to trace
this in two layers. Those two layers are stem. That's one layer, and the
second layer is flowers. So I'm tracing in two
layers, one for the stem, one for the flowers
because it's going to be easier to assemble that
in Photoshop later. Also, in that way, I can leave more room to make color edits another
thing I'm going to do, I'm just going to
trace the elements on the right edge and
on the bottom edge. It is possible to trace
them on all four sides, like you can, for
example, once again, see here. You can also do that. But for the sake of
this demonstration, to make it easier to
understand and follow, I'm just going to trace
along right and bottom edge. All right. Now, let's take
a look at this sketch. It is pretty hard to
visualize the entire repeat, so to make it easier for you, I'll show it on the screen. Now, let's do some
pattern gymnastics here. Let's focus on the stem, and let's see how we
can preserve the flow. Now I'll highlight in color the entire flow of the stem
I'm going to preserve. And I'm going to draw
your attention to the break points of the element. They are not obvious. They are not on the straight repeat edge, and most importantly,
they are not visible because I hid them
underneath the flowers. If you remember, while
sketching this design, I mentioned that I was
going to deliberately place a few flowers on top of
the stem to cover it, and now it becomes clear
why I was doing that. The flowers will hide the
breaking points of the stem. Now to make this step
even more clear, I prepared some examples. I already traced and
painted these two layers, and you can now see how
that is going to look. Right? We have the stem, and here are the flowers. So as I mentioned before, I'm going to work in two layers, one layer for the stem, one layer for the flowers, and I'm going to trace along
right and bottom edge. And this is how it's
going to look like. As I showed you in
the demonstration, I made a breaking point for
the stem here and here. And in this way, I have the
entire element preserved. Now, we're mostly talking about the stem because the stem
is the element that has the continuity and it's
really necessary to preserve it while the flowers are just
floating around detached. So just to trace it,
it's pretty easy. Alright, I hope this
all makes sense now, and we can move on, and I will show you
how I'm going to prepare a watercolor
paper for the tracing. Once again, I have
another example. It should look like this. We need to make guidelines
with the ruler. As you see, I'm positioning the paper on those guidelines, it's like a little box
where the paper fits. So those guidelines, of course, are in the same
size as the paper, in my case, 19 by
10.6 centimeters. As you can see, it's not at
the center of the paper. It's moved towards the side
because as I said before, my plan is to trace along
the right and bottom edge. And get, once again,
something like this. Okay? Now, since the design
is going to go to the back, so it can be traced, I need to make another
box on the other side. And once I do that, I can just stick this paper
with some washy tape, put it on the light
tablet and trace it. So now let's make another one because we're also
working in two layers. We need two papers, one for the stem, and one for the flowers. This should be as
precise as possible. I'm not the person who is
very good at precision, so I'm really always trying my best not to move things
by 1 millimeter. So to make the guidelines, we're going to start
from the edge, and I'm going to
measure 1 centimeter, and then once again
here 1 centimeter. And let's connect that. My head is going to go all the way in so
it can be precise. Wait. Another one here. And I'm going to measure. So this needs to be
10.6 and this 119. Also, make sure you're doing
this as lightly as possible because later you will
want to erase them a bit. Okay. One box is prepared, and we're going to do the
same thing on the other side. Alright, once we
have that ready, we're going to tape the sketch on the back
side in this little box. So here we should be as
precise as possible. And to tape it, I'm going to use
some washy tape, as I mentioned before, to make sure it's not too sticky so that the
sketch doesn't get torn. You can just, you know, move it around in your
fingers or you can do the same thing on this
on any surface around. You want to take
off a bit of glue. It's time for the light tablet. I hope I think that's
how it's called. A very cool piece of equipment. This one cost me $20, and I'm using it
very often nowadays. So if you're working
with physical mediums, this might be a very,
very good purchase. It's super fun to use. Of course, as I said before,
if you don't have that, you might want to put this on your window and then
just trace it like this. There's going to be a bit
of shoulder work involved. So if you have a very
intricate design, it might take some time, so
your shoulders might hurt. But it's still okay. All right. So the first thing I'm going to trace is the stem, and the stem is
going to later be painted with green acrylic ink. So I'm going to trace it very lightly with a green
colored pencil. It's good to match the
colors because later, when you go over
it with the paint, the color you trace with is
not going to be visible. So if you remember one, breaking point is
going to be here. So basically, this upper part, I'm not going to trace. I'm going to trace down, and then also to the right. Even though my colored
pencil is going to match, the acrylic ink
I'm going to use. I'm still doing
this very lightly. I don't want it
to be pronounced. And as you can see, I'm also
moving it slightly inside the flowers so that I don't have any visible breaking
points because later the flowers will
cover these stems. And also, you can see that
when I get to the edge, I don't finish it completely because later we're
going to move the sketch that is underneath so we can complete
the entire element. Alright, let's check
if I have everything. Right. That's it. Now we're going to turn it around and move the
sketch on this side. That's going to be
the right side. So we're going to move the sketch so we can
complete the element. So, once again, this
is where we want to be precise and put
it on the edge. Good. Now let's turn it around. Alright, let's turn this on. As you can see, this
is the part I traced. Now I move the sketch, and now I can
complete the element. Basically, we're now fixing those misalignments
because we're keeping the entire
flow of the element. And here is another breaking
point underneath the flour. That's it for the right edge, and I'm going to move it. Let's turn this off. And now I'm going to move the
sketch on the bottom edge. Alright, let's make
sure it's good. Alright. And here we come to the same breaking
point we made up there. See? So this is the first
breaking point, and this is the second
breaking point, both of them hidden
underneath the flower. And here we have
another breaking point. Now we finish tracing the stem, and we're going to do the
same thing for the flowers. Of course, it's going
to be a lot easier.
6. Paint The Elements: The elements are ready. As you've seen,
after I traced them, I went with the eraser and erase these parts where the
pencil guidelines are crossing the elements. And also, I added flower
centers in orange color. And now we are ready
to start painting. I will be using acrylic inks, but you can use watercolors, squash, or whatever
you feel drawn to. I'll start with the stem, and I'm going to use
the green acrylic ink. These colors are really
highly pigmented, so you do not need to use a lot because you
can dilute them, and we can add a touch
of blue, as well. This is too blue. So let's add a bit more green. I like using a
bigger glass vessel, so I can dilute the color more
and just spread it around. And then later when
I start painting, I will be using different
shades of green. Right? Let's test it out. Right, this looks nice. So if you're also working
with acrylic inks, they're really highly pigmented, so you can dilute them a lot. And you can always start with a slightly lighter color
and then add texture by, you know, getting
the pigment that is not that diluted, as
you can see here. I also have a napkin so I
can dry my brush if needed. Another thing is, for the stem, I'll be using a smaller brush. In this way, I can
achieve a gentle, subtle, streaky texture, which will be perfect
for the stem. I'm trying to be as
precise as possible, but if I make a mistake or
accidentally smudge something, I can always later erase
that or fix it in some way, shape, or form in Photoshop. So don't worry too much. So basically, what I'm
doing to get this texture, I'm painting one layer in a
slightly more diluted color, and then I'm going over
it with another layer. Again, it's still diluted. It's not a highly pigmented
part of the paint, and I'm making a subtle,
streaky texture. It's really a beautiful project. You're simply more involved when you're working
with physical mediums. You're seeing how the paint is reacting with the
paper you chose to use. And you're also
with each stroke, you're taking a different
amount of pigment. And in that way, you're
working the texture. It just feels like you're
more present in the moment. You're seeing what happens with the paper, with the paints. And sometimes, well,
not sometimes, most of the time, the things are slightly out
of your control. There's always more space to experiment and try different
things and see what happens. These days, the
world simply needs more human made,
hand drawn artwork, and also artists
need, once again, to feel in tune with the
process of making art. We're not machines. We're
not just producing. We're not just repeating. We are experimenting, inventing, and most importantly,
expressing ourselves. So try it out. Try out
the slow art process. Forget about selling,
competition, fast methods, and just see what happens when you're on your own
with paints and paper. As you will see,
after some time, those AI generated artworks
are going to be devalued. There's just going to
be so many of them, and they're going to
be super easy to make. And at that point,
the value will be exactly here in what you
can create with your hands. So the stemp is almost finished. Now I'm just going over a few spots to add more
color and texture. I'm doing this with
slightly dry brush. Don't want to add
a lot of color, needs to be very subtle. And also, since this ending and this ending are
going to match later, I want to have a
similar shade of green. So as you can see, the lower
part is slightly darker, so I'm going to work
a bit more texture and color in the upper part. Alright, the stem is finished. We can now move it away and
start working on the flowers. The flowers, I will use
this pink pastel ink. And this time I'm using a bigger brush because I want
to have a full coverage. I started using acrylic inks
recently, and I really, really love how these colors are so vibrant and
highly pigmented. When working with
physical mediums, what really matters is also
the paper you're using. I think I was mentioning a few times that I'm using
a watercolor paper, but now I remember this is actually not a
watercolor paper. It is thick. It has 250 grams, but it's sold as
mixed media paper. Now, I also tried some watercolor papers and also tried more
expensive papers. But this one somehow works best for what
I want to achieve. So the recommendation I
have for you is to try out different papers with the
medium you like to use and then find the one that works best for what
you want to create. So papers will absorb
the wet medium faster, and some papers will keep
them on the surface. And for example,
if they do that, you can then play more with
the texture of mixing colors, for example, And that's what I really love about
using physical mediums. If you change just one
ingredient in the recipe, for example, the type
of paper you're using, or even if you use the
same type of paper, but the brand that is
making it is different, you will always get a
slightly different result. And when your mindset is open to all the possible outcomes, that's when you start
having fun making art. Now I'm going to
finish the flowers by painting the orange centers. I'll be using orange acrylic
ink and a smaller brush. I just love how with
a brush and paints, you can make everything
loose and imperfect. And if you think about it, when you're using these
digital wet media brushes and Procreate, for example, what you're doing is
actually trying to make these so called mistakes or accidents where the
color bleeds into another, where the edges are a bit messy or some edges
maybe bleed out. But when you work directly
with the brush and paper, those things just
naturally happen. You don't have to plan them out. You don't have to fake
them, mimic them. It just happens, and it's really beautiful to
see it happening. Each tiny difference,
each tiny imperfection is exactly what makes this is exactly what makes
this piece beautiful. I really love looking at
these final painted elements. They're the true statement
of this entire process. Now, to take it
to the next step, let's see how we're
going to use them to assemble the final
pattern repeat.
7. Digitize The Repeat: We're now going to transport ourselves into the
digital world. We still need to use technology to create the final
pattern repeat. I'll be using a scanner to
scan the painted elements. You can also use a camera. As I mentioned, just be mindful of the lighting
and perspective. Also, the program I'll be
using is Adobe Photoshop, but you can also
use Affinity Photo, which is a good alternative. Alright, let's scan
these painted elements. I'm going to scan these
pattern elements as TIF files in the
resolution of 600 DPI. Now, let's open these images in Photoshop. Here's this one. I will just unlock it
and open another one. And once again, I will
also unlock this. So the first thing
I'm going to do is to create a new canvas
in Adobe Photoshop, and the size of that
canvas needs to be the same one I used
for the pattern sketch. So in my case, it's 19
by 10.6 centimeters. So let's go to file new I'm
going to select centimeters. So the width is 10.6 and
the height 19 centimeters, and the resolution is
going to be 300 DPI. All right, first of
all, let's save this. So first of all, I'm going to look at this left bottom edge. Here I have the information of the size of this
canvas in pixels. So I will just quickly grab a piece of paper and
write that down. It's going to be necessary for
the next steps. All right. It's 1,252 by 2,244
pixels. All right. Now I'm going to place
the guides at the edge. I'm going to place the
guides at each side. And the reason I'm doing
that is because I'm going to make this
canvas a lot bigger. So let's do that
now, go to image, Canvas size, and let's make
it three times bigger. So to do that, I can
calculate directly in Photoshop by placing a star and then three and
also for the height. Let's click Okay. And as you can see, we
have a huge canvas, and in the middle is where our pattern swatch
is going to be. Before we start placing
the images here, we want to make sure
that the guides are not going to move accidentally, so we're going to lock them. So let's go to view. Guides and lock guides. See? Now we cannot grab
them or move them. Alright, let's laze
the first image. Copy and paste. As you can see, it's a
lot bigger than we need, and that's because we
scanned it in 600 EPI, which means the size
of this image is twice the size of
the physical image. So we're going to
go to transform. And once again, I can
calculate here in Photoshop. So now I'm going to divide
it by two using a slash two. Alright, here it is, and
we can now place it. So what I want to do is match the pencil guidelines with the guidelines I've
made in Photoshop. Great. This looks good. Now let's place the other
layer. Copy and paste. And once again, I'm going
to divide it by two. And place it in the same way. Great. We have these two layers, and if we want to see
how they fit together, I can select this upper image. Just go to mode and change
it from normal to multiply. Now, if needed, I can
move it a bit up or down. So far, this looks perfect. Maybe I could put the flowers
a few millimeters up. Alright. I'm going to change it
back to normal again. And now we can start
editing the photos. Let's begin with the stem. Now, let's select the element without grabbing too much paper. I'm going to use
a selection tool. Select this area, and
then I'm going to invert the selection by pressing
Shift Command I, and now I can just delete. Great. Now deselect, Command D. So if you remember, we still have those
pencil guidelines. And before I do anything, I'm going to go and
grab an eraser, just press E, and I'm going
to erase those lines. Alright. Now, let's
see how we're going to remove the
rest of the paper, and there is a super
easy way to do it. So first of all, I'm going to go to image
adjustments and levels. What I want is to make
the white more bright. So basically, in this way, I'm removing the
texture of the paper. But I still don't
want to make it too bright so that the
element is lost. All right, let's
see how that looks. So you can see there is
still the paper texture. So let's do it again,
image adjustment levels. And now it looks good. Basically the paper
is almost invisible, but to remove it completely, we're going to go to
select color range, and we're going to
tap on the white. And here you can see there is
an option called fuzziness. This determines how close to the edges the mask
is going to be. So depending on the type
of element you have, you can play with the setting. So let's see if I
keep it at 100. Okay. Now we can zoom in
to see how it's selected. I think it looks good. And now we can just delete. I will now deselect it, Command D, and that's it. We isolated the entire element. Now, if I go here and
open a new color, let's make it blue, for example, you can see
better what happened. Alright. This was
pretty quick and easy. And now let's do the same
thing for the flowers. I will just turn off
the stem for now. Once again, I'm going to grab the eraser and remove
those pencil guidelines. Great. Now, let's remove the paper in the same way
as we did before. Image. Oh, but before I do that, let me just zoom in a bit so I can see what's happening
with the texture better. Image adjustments, levels. Let's make it brighter. All right, this is pretty good. Now to remove the paper, we'll go to select Color Range. Again, we're going to tap. And let's see what happens when the fuzziness is too big here. In this example,
you can see what happens if your elements are in a lighter color and you push the fuzziness further. So let's deselect
and do it again. Select color range. So because there is a lot
of white on these elements, I made them in a
pastel pink colors. I might need to push the
fuzziness a bit down. So let's see what
happens if it's 60. Right, this is much better. Let's see how the edges look. All right, this is perfect. While this is selected, I'm just going to
delete the paper. All right, the paper is deleted, but now I just realized I didn't cut the
rest of the paper. I was too quick to
do these steps, so let's just do it now, Deselect selection tool, select parts that are super
close to the elements, invert, shift command E, and let's delete the
rest of the paper. Great. Now let's
bring back the stem, and let's see how
that looks together. I really love what I'm seeing, and I'm super eager to start
creating the pattern repeat. But before we start doing that, I want to show you a few things you can do to modify colors. If you remember, the
reason I was painting pattern elements on
two layers was to, of course, make it easier to
assemble them in Photoshop. And the other reason is so we can play with color editing. So let's start this
example using flowers. So what I usually do is I basically just test things
out and experiment. And there are a
few things I use. One of those, let me first show you is hue saturation
and brightness. Here, if you want to change if you want to use this to change everything, you can
leave it like this. And then, as you can see, if I start moving it, both the stem and the
flowers will change color. But if I only want to do
this for the flowers, I'm going to select Hue
saturation layer and press Option Command G
to make a clipping mask. And the next cool thing for changing colors is
called color balance. Let me just place it here. No. All right. Let me just delete the hue
saturation, so it's easier. Select it and to make a
mask option command G. Alright. Now, let me show you
what happens here. Here you can be more precise and selective with how you
want to change the color. It's really cool.
Basically, what I use it for is to enhance some colors
and change them just a bit. So you can see in this way, I really enhanced
the pink color. This is without a mask. It looks slightly washed out. And with this color balance, I made it more
pronounced and vibrant. So let's play with it a bit. Right, this looks pretty good. I think now we're ready to
make the pattern repeat. I will just select the flowers
and the color balance, make a group because I don't
want to merge it right now. I want to preserve
the original one in case I changed my mind later. Alright, let's delete
this. We don't need that. And now we're going to
move the pattern elements. So to do that, we need
to first duplicate them. So let's start with the stem. I'm gonna duplicate it. Command C, shift, Command V, so it's paste in place. Alright, now, here is a
little reminder I have because I always forget where
I need to put the numbers. So let me show you. So
what we're going to do, we're going to move
the objects using the numbers that are
on the X and Y axis. I hope that's how
it's pronounced. If we put plus in the X,
we're going to move it right. If we put minus and
then some numbers, we're going to move it left. And then the same
thing for the Y, but with the Y, we're
going to move down and up. So if you put plus some numbers, it's going to go down,
minus some numbers, it's going to go up. Now let's see how that
looks in Photoshop. I duplicated this stem, and if you remember, we already made the repeat on the right edge
and the bottom edge. And that means the
only thing I have to do is move this pattern
element to the left, and later, I need to move it up. All right, so let's
move it left. Once again, let me get reminded. It's X minus. All right. So I'm going to press
Command T to transform. And in the upper left corner, you can see X and Y axis. Now in the X, I'm
going to put minus. And if you remember, I told you, let's remember the original size of the pattern tile in pixels. And in my case, it's
1,252 by 2,244. Alright, so if I want
to move it left, I'm going to put
the numbers that are the width of the canvas. So I'm going to put 1,252. Right, here it is. It's a match. Lovely. Now, let's
duplicate it again. The main one, Command C and then paste in place
Shift Command V, Command transform, and to
move it up into Y axis, we're going to place minus and then the
height of the paper, which is 2,244 pixels. Right, it's a match. Now let's see how that
looks. Wonderful. Now, if something
is not correct, you can check it now. If things are not
matching perfectly, you can cut and move them. What I can see here is that this element is not really
matching correctly. You can see it should
be slightly down. So what I'm going to do is
I'm going to cut the element. So I'm selecting
now the main one, Lasso tool, cut this element. Command X, shift command
V to paste and place. Now let's select this
pattern element. Once again, I'm
going to select it. Command X to cut, shift command V to
paste and place. Now I can select both
of these elements. And I'm going to move them
down just a bit, right? See. And that's perfect. All right. Now, since we change things in these
two duplicated elements, we didn't change it
on the third one. So for now, I'm just
going to delete it. I'm going to merge this element
I cut with the main stem, Command E to merge,
and once again, I'm just going to
duplicate it, Command C, shift command V to
paste in place, and once again, I'm
going to move it up. So that's Command
T to transform. And in the Y axis
minus the height. Alright. So that's it for the stem. Now let's move on
to the flowers. The flowers are in the group. So I'm going to command C, Shift Command V, copy and
paste the entire group. And now let's move
it to the left. Command T. And on the X axis, I'm going to put
minus the width. Looks great. Once again, let's duplicate the main one. And now let's click
Command T and place it up. Once again, minus the height. Wonderful. Now I'm just going
to zoom in a bit to check if everything
is as it should be. Oh, it's so beautiful. I really like it.
Now, let's bring the original size
of the canvas so we can create the pattern tile. I'm going to go to
image Canvas size. You remember, we multiplied it by three to make it bigger, and now we're going
to divide it by three to bring back
the original size. And here is the pattern tile. Okay, for now, I'm just going
to remove the guidelines. View guides, Clear Guides. Alright. This is the final step. Let's make the pattern. I'm gonna go to patterns. If you don't have
it open, just go to Window and Open patterns. And I'm just gonna click
this plus. Alright. Let's open a new Canvas so we can test it out
and see how it looks. Mm Alright, an A
four would be good. I'm going to go down
select pattern. And this is the moment of truth. Let's see how it looks. Whoops. Just gonna put
the scale a bit down. And here it is, you guys. It's really lovely.
Look at all the colors. I mean, look at all those
lovely hand painted textures. It has a beautiful flow. We've got this S shape. It's got energy. It
has that variety, not only because we used
flowers in different sizes, but also because it has all these different
shades of colors, and you can see it was
touched by a real hand. I really love it.
8. Final Thoughts: You guys, I'm so happy now. If you're watching
this, I want to say, thank you for spending time with me and watching this class. I hope by now your hands are itching to create something
new and different. Remember to have fun, to slow down and
enjoy the process. By the way, I'd love to
see what you're making, so feel free to share
your process and final designs in the project
section of the class. As always, to get notified
about my next classes, you can follow me
here on skill share. And if you want to
keep in touch with me, you can find me on
Instagram at DOD. I'm sending you lots of
love and good vibes, and I'll see you
in the next one.
 Di Ujdi, Illustrator & Art Explorer