Transcripts
1. Welcome: Welcome ladies and gentlemen to this blend up class. In this class we're going to be learning how to create this loan poly character model form a single key. We're going to be looking at using reference material, loop cuts and the manipulation of geometry. This course is intended for beginners and would last for approximately one hour.
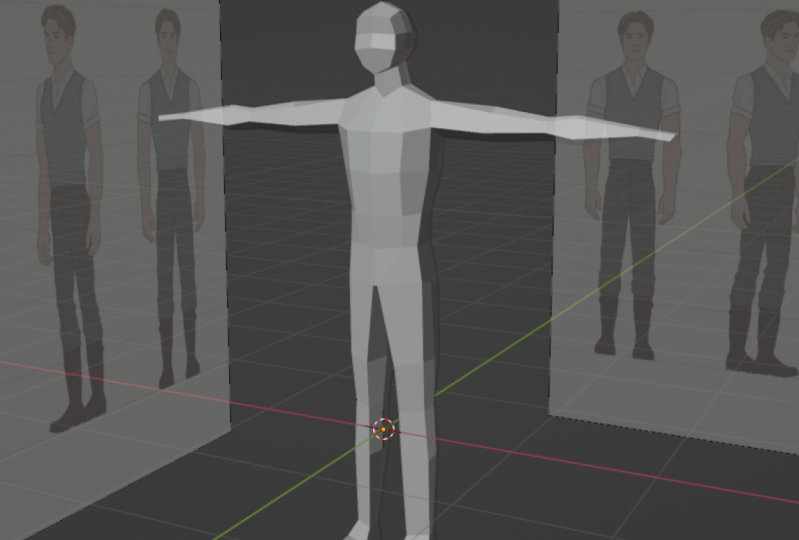
2. Reference Material: Before we begin modelling in Blender, we need to first of all, bringing some reference material. Now, this class is all about creating very low poly human characters that you can use for basically any purpose, including adding detail later on. So because of this, you can choose whatever reference material that you want and are actually advised that you not use the same reference material as me. However, another piece of advice that I can give is to use a specific type of reference image that you can find on the internet. So if you go to Google or any other search engine and type in the term character turnarounds, you will get images of character designs, form different views. So front view, back view, side view, et cetera. This is going to be extremely important when you are setting up your reference material in blender itself. So I advise you to use this term and then select any of the images that you find. So I'm going to be using this image here for my class, but you don't have to use the sine image. And again, I'd actually recommend that you use a different image as a means of helping to develop your skills further. So what I would like you to do is I would like you to save your image to a location that is easy to access on your computer. Then open up lender. Once we're in blender, we're going to add our reference material. Hitting one on your number pad to go into front orthographic view or go to View viewpoints and select funds. Then hit shift and I to add a new objects. The objects in question is going to be an image. You can choose either a reference image or I background image. I'm going to choose background. Then locate your reference image and load that background image. You should then see you image in the 3D view port. By default, this will only be visible in your front orthographic view if you have already positioned yourself in that view. So if we orbits our view, the image will disappear. I'm going to hit one on one number part again and then go to my object data properties. What we want to do is we want to set this up so that we can see both the image as well as the cube. To do this, we're going to set the depth option from back to front. Now we can see the image easily, but not the key. To see the cube. Click on transparency and reduce the opacity of the reference image. I often rights work with a value of around 0.4 or more reference images, transparency. This allows me to come to the see the image itself, but also work on y cube at the same time. In addition to this, the positioning of the characters is not correct. I want to get this counter image into the center of my world origin. To do that, I can manipulate the offset value on the x axis. Now the x and y-axis here represents the x and y axes into dimensions, not in fluid dimensions, which you might think would be the case with Blender. But the image itself is today, so it has an x dimension and the y-dimension. We can click and drag to manipulate the x offset. To reposition the image. I'm going to reposition it to around about here, a value of minus 0.16. Your offset value is likely to be very different if you are using a different reference image. So experiment to see what works best. You can adjust sizes Well if you wish. So I'm just going to reduce the size from five to two. Then I'm going to left-click to select my cube and scale it down by hitting S and scaling down to about here. Now I've scaled it down quite a lot. So what I'm going to do is I'm going to zoom in on y cube by pressing the period key online number pad. You can also go to View Frame selected. Then I'm going to zoom out a bit. He G, then z to grab and locked to the z-axis and move it up in front of the face. That looks about right for my reference image. Now before we finish and move on to the next step, we need to make sure that we are also using this reference material on our side view. If we press free on our number pad, we can't see and we'll reference image. The best way to do this is to select the reference image and create a duplicate by holding band shift. And they then hit the right mouse button to confirm our location. Hits are on your new image. C, It's a rocket to the z-axis and rotates it by a value of minus 90. Note it's minus 90, not positive 90 for this. Press enzyme to confirm and then press F3. Now, at the moment we cannot see our image because we're actually looking at it form the back, select, Change, the side view from funds to both. Then what we can do is we can move this image so that we are using this character as the reference. So movies alone the x offset until it lines up with the key. So something like this. Now we have our reference images set up. We have the cube in position. In the next video, we're going to set up the cube and the rest of the body by using the MVA modifier.
3. Setting Up The Head: In this video, we need to set up our object so that it is using the mirror modifier. Because human characters have a line of symmetry, we can use the line of symmetry to our advantage and reduce our workload by half. To do this, select your object and then go to the modifier Properties tab at modifier and select mirror. But before you click on this nodes that nothing is going to appear in our 3D viewport. It's probably going to look the sign. We use the objects origin as a means of using the mirror modifier to mirror on a specific axis. However, if we zoom in on our objects, you can see that it already looks the same on both sides. So what we need to do is we need to delete the geometry on this side of our origin. To do this, we need to first of all add a loop, cut down the center, the Tab key to go into edit mode for our cube. Then he controlled and R. To use the loop cuts hole. Move your mouse cursor over to here and left-click. If you move your mouse, you can see that we have created a loop cut, but we want this loop to end up in the center. So hit the right mouse button to do that. Next, left-click away from your model and then select the geometry on this side. Now the easiest way to do this and to ensure that you do select all your geometry both front and back is to toggle the X-ray option that is located. So left-click to toe x-ray and you will see the shading of the cube appears slightly different when we do that. So with this tool enabled, click and drag to select all of these vertices. If I orbit, you can see that we have the more selected hit x coordinates and then select vertices. Now we have cut 1.5 of our model. So in the Modifiers tab at modifier and select mirror to restore that half. But now if I left-click on a vertex and hit the G key to begin moving, you can see it's mirrored on the x axis. This is what's going to half our workload when it comes to creating the model. Before we finish with mirror modifier is self, we need to enable clipping to ensure that the behavior at the center of our model remains appropriate. So we don't want the vertices to cross over in any way. And we can avoid this by enabling the clipping option. Next, we need to add just a little bit more geometry to our cube of four. We can start turning, turning it into a head. Now there are a couple of ways in which you can do this. One method is to use subdivide told. So with everything selected, hit the right mouse button and select subdivide. This will create geometry evenly around your model. You can then increase the number of counts as high as you wish. The problem here is that it does not give us the maximum amount of control. And we can often end up with loop cuts in areas where we don't want Luke cuts. So for example, for me, I don't want these loops he at the front of my object. So what I'm going to do instead is I'm going to just add lw cut manually. It might be a little bit slower, but it also offers more control. So hit control Z to undo. To add the loop cuts, hold Control and then our sad Luka. And before you press anything, scroll up once on your scroll wheel to increase the number of cats. Wow, you are using the loop cut told. Left-click to absolute counts, and then right-click to confirm their position. Do you design on this side as well? Hit Control and our scroll up, left-click, and then right-click to add the loop. Cause now we have to loop cuts going this way and this way. But we've avoided creating the excess geometry. Dan he, with all of the geometry that sets up, we can now begin actually modeling the shape of our human head.
4. Modelling The Head: We now have everything we need to begin modelling the head. So the one thing I wanted to make sure before we get started is to have this option turned on. This is the toggle x-ray option. What this is going to allow us to do is it's going to allow us to select vertices that are behind other vertices. So for example, if I use the box led home to click and drag and release to select this vertex and then orbit more view. You can see that the vertices behind it have also been selected. However, if I turn this option off and trying to do the same thing, you can see that only the burst that C is going to be selected. So make sure to have the total X-ray option on. Next, we're going to be focusing on repositioning these vertices based on our 2D views. Now this is where we're going to start differing from each other when it comes to the positioning of effort sees, because if you followed my suggestion, you will be using a different reference image. And I do strongly recommend that you have different reference material which made, because then it won't just be a case of new copying. Where every single point goes. You don't learn as much copying as you do actually going out and creating your own models. Which is why I strongly recommend you using a different reference image towards iron. But for me, I'm going to just reposition these based on my fun over graphic view by hitting G. And then we positioning. And you can see we don't have anything selected, so we need to make sure everything is selected. If j and just reposition. Then we select these vertices and we position followed by these 1's, place them at the bottom of the year. And these ones can come up here. And these ones can come down just a little bit. And these ones can come up. Now I want to create a little bit of a shin at the side. So if I press three to go into my right orthographic, or just want to take this vertex and just bring it down slyly. Now, before we go into more detail on the side, I'm just going to take a look at things from above. So press seven to go top view. And all I want to do is I just want to make this objects a little bit more round. So I'm going to take these vertices, hit g and push them out. And then psych these vertices and push them out. Now if we give free, you can see that the shape is beginning to form. But at the moment, the cube is a bit too big for the reference image. So we're going to need to begin just lining Some of these vertices up with the reference material. I'm going to start by taking these vertices and bringing them up on the z-axis. Just a bit. Then we're going to take these vertices and bring them in. These vertices next. So pulling them in, in line with the face. Let's bring the nose in to the tip. And then he lets take our chin, move it to about there. And you can see it's all batches repositioning based on your reference material. It doesn't have to line up exactly. And if you think it looks a bit too weird, if it does line up exactly, then always make those little changes where needed. So what I want he is I actually want this face here to become the neck. And I want to basically make this face a lot smaller and just bringing it up. So that's going to be the back of the neck. So this is going to be the neck where we're going to extrude down form. Now at the moment the face is too small. So we're going to need to again readjust some of these vertices. And I'll just, we position them to line up with itself. To Then I'll take this one here. This is, position is here. And eventually you can kind of see where I'm going with this. So I'm almost creating like a curve, a loop of and here, if we go into phase select and select this loop, you can see that it goes all the way around. So in base legs are just held down the left click. And you can see the loop. And we want that to be visible when it comes to the flow of our geometry. So I'm just lining these up best I can. Bring this up here and then bring this up here. And now what we should have if we orbits our view is we should have a much better surface area for our neck. I think the one thing I'm going to do here is I'm just going to increase the length of this edge. Let's just take this and I'm going to use the vertex slide for this. So I'm going to hit g twice, T1 stingy again. And that's going to allow me to slide this vertex along with the connected edges. So we position this one here. And then He Ji twice and reposition this one here. So that is looking good. I think what we can also do is we can just bring this edge down. So select the edge with edge, select it g twice, and just slide to bring it down. Let's do the same with this vertex twice and bring it down. And now if we take a look at our model, you can kind of held this beginning to look like a heads. And we've been able to achieve that mainly thanks to the weapons material. I think the one thing I'm gonna do here is I'm just going to grab this and just reposition. It. May be moved up a bit closer up. Like so. Okay. So we're looking good. I think a couple more things that we could do here. We could take a couple of vertices here and just moved them out on the X axis just a little bit to create a little bit more roundness for our heads. I think the back also looks pretty good as well. So I'm just going to take this vertex implemented in just a little bit on the y-axis and the sign. But this one here. Let's take a look. That looks pretty good. I think we're ready to move on to the next step, which is going to be to extrude the neck.
5. Shouldes And Arms: Now that we have completed modelling the head, it's now time to begin with the upper parts of the body. So go to face, select He. Then select this face, the face that is going to be become your neck. Either in front or for graphic or white or for graphic. Hit the Iike to extrude. In my case, I think it's going to be easier if I do it from the side. So I'm going to hit into extrude the geometry down to bow. He. Then I'm going to take this edge. And he, G. And reposition. I'm gonna take this edge hg and reposition about here. And take this edge here. And then reposition to about here. Then I'm going to take this vertex at the front. And I'm just going to move it forward slightly. I'm going to do to sign with the vertex at the back. This is going to be to create that extra thickness towards the bottom of the neck. Again, it does not necessarily have to line up perfectly with your reference material. Next, we're going to go back interface select, and select the bottom face. Then I'm going to press one on my keyboard and zoom out just a little bit. I'm going to hit the E key to extrude down to about here. What I want to do next is I want to level out this face so that it is level on the z axis. So I'm going to hit S, then z, then I'm going to type 0. So that flattens the face on the z axis. Then I'm going to reposition this face. So hit F3 to go into right orthographic view. And you can see the well-being extrusion has been successful. It's not counselling big enough, it doesn't take up enough of the reference image. So what we need to do here is we need to take these vertices, it g, and just move them forward to about here. Let's take this vertex actually and just move it back. Kind of in line with the shoulder. Will take this vertex and move it back as well, as well as this vertex. Now if we take a look around our model, you can see that we've now got the head, the neck, and then we have the chest beginning to be formed. Now I think looking at it, I think I need to go back the other way just a little bit. About here. Again, you will find when you are doing this kind of modelling that you'll be going back and forth a lot, looking to reposition or your individual vertices to get the best result. Now, with the neck created here. This face is going to represent the shoulder. Now, this is a tip. A lot of your reference material is going to have characters with your arms facing down like this. Now, you might think this is a natural position. But if you wanted to wreak your characters, and easy way of doing things would be to extrude your arms level this way rather than what is shown in the reference image. So this is where I'm going to deviate from the reference material. I'm going to select this face here. Hit one, and then hit ie to extrude. So I'm going to extrude to about here. Then I'm just going to hit g and move it down just to flatten it out. So what we have here is we have what I'm also going to do here is I'm going to take this edge and just use the edge slide tall to bring it down. So hit G a couple of times. And then we position. I'm going to take this edge, Hit G a couple of times. And we position here. And I'm just going to bring this vertex in a little bit as well. So if I press F3 to just take a look at my character. At the moment, I think it's following along pretty nicely. Again. I will keep saying this throughout the class, but it's very important to remember because a lot of new artists, they fall into the habit of trying to make their models look exactly like the reference material. And often the reference material isn't perfectly accurate and isn't perfectly shapes to create 3D models. So that's why you use it as a guide more than anything else. Now, we have the geometry for the arm and shoulders. What I just want to do before I move on is I just want to add a couple of blue cuts here. Will come back to these. But what we're going to do is we're just kind of creates a loop cut here, which is going to be our elbow. And then I'm going to flatten this with S. Then x, then 0, just a planet on the x-axis. Then I'm going to create another cut here and another cut here. And again, I just want to flatten this on the x-axis. Now another thing that I could do is I could actually take these edges and I could flatten them if I tried to select the loop with alt. Left-click, you'll see that we will struck was, uh, do so because we don't have complete loops here. So we have a vertex at the tip of the shoulder that has five edges. Which is why you might find in this scenario that we are unable to create this loop. So what we can just do instead is hold down, shift out and click to complete the loop. Then hit S, x and 0 to scale it into position. Now we're going to come back later on to do the hands. But in the next lecture, we're going to move on to the rest of the upper body.
6. The Upper Body: Our next step is going speeds create the upper body. Now to do this, what I'm going to do is I'm going to create an additional loop cut. He, I want to have two loops going down the body, not including the one in the center. This is going to be important because we need to create extra geometry to separate the legs when we come down to the lower half. So what we're going to do is we're going to select these vertices here, hit g, and just move them in. We're going to do the same with these vertices, locked them to the x-axis. But we're not going to bring them in as far. Let's actually take these vertices and move them in just a little bit more. Something like this. Then we're going to create another loop. He left-click and position about here. I'm then going to scale on the x-axis by a value of 0 to lovely app. And just to get the shoulder a thickness, I'm going to take these vertices and you just bring them up. Let's take these vertices as well and pulling them up to about here. Now I think we can also look at this slide in these across ever so slightly. So that it lines up with the arm pit E. With the geometry here. Ready to go, we can now Extrude. One more thing I'm just going to do is I'm just going to take this vertex and just bring it out on the Y axis to about here. Take this vertex and just bring it out ever so slightly just to create a bit of added thickness. Come back, take this vertex and grab it along the y axis. Dude is saying with this vertex, but not as far. And just reposition how you see fit. So let's take a look at this from the front view. Looks pretty good. And from the side view also looks pretty good. So now what we can do is go face selects, and we can select these two faces by holding down the Shift key. Then he won. Zoom out a little bit. And he ie to extrude down to here. Then he E again, x2 dance a here. And then here one more time. And bring it down to about here. Now I'm actually going to pulling that down a little bit more and left-click. Now, at the moment, the body is far to strike. So a few things we're going to change here. We're going to take these three edges and we're going to just move them along the Y axis just a bit to make that part of the area, that parts of the body a little bit rounder. And let's also take these furry and just slide them using the vertex slides Hall just a little bit to about here. Then going back to front view, we need to reposition the vertices to create the hips. So the body naturally comes out widest. He then type is in, then comes back again for the chest. So we need to try and replicate that here. Select these vertices and then just move them on the X-axis to line up with the hips. I'm guys keep these vertices here. And then just move these vertices out on the X axis just a bit. And let's do the same with these ones as well. Then we're going to take these vertices and we're going to slide them in closer to the center. This is an important step because we're going to be using this face. If I just select it, we are going to be using this face to extrude the legs, not this space. Keep in mind that we are using the mirror modifier If we began extruding from here. You can see those aren't really legs. So what we're going to do is we're going to go back into funds orthographic view and select these vertices and slide them in towards the center. So I'm going to slide a means who about he? Not only does that bring those vertices closer to the center, it also makes the required face much larger, ready for extruding the legs. Now from here, you can just do it will touch ups to get a better shape for your model. So I'm just going to take these two and just move them just slightly on the y-axis to create a slightly rounder back. Let's take a look at our model from the front orthographic view and also from the side view. Now from the side view, we can see that there's still a little bit of work to be done. So the body seems to come out here, but our object does not do the sign, it comes out flat. So what we need to do is we need to just select the three edges going down a sensor here. And then just hit g to move it out a little bit. On the Y axis. Take these two edges, do the sign on the y axis to something like this. And then let's just hit a couple of times on this edge and just slide it across. So that's starting to take shape. Let's also do something similar at the back here. Just slide in just a little bit. We can do the same here as well. And just reposition the vertices. And as you do this, you start to notice one or two places where you might have to revisit. So here we can select this vertex and just bring it forward on the y axis to about here. And that should be pretty good to go. Now if we take a look at our model from the side view, it's looking pretty good at the front, but at the back you can actually see in the reference image that the body likes to our outs. And then in, select four and replicate this. Now, we're going to select these vertices, hit g and then y, and push them into here. Let's take these vertices and push them into about here. Then let's take these vertices here and push them out. And do the same with these vertices as well. So we create that arch shape with our model. Now, Wow, I think that's moving our geometry outs to match the reference image. Looks good from the side. I don't necessarily think that's the case from the front. So what I am going to do here is once again, I'm just going to take these two. And I'm just kind of move them in just a bit on the y axis. And then do the sign with this edge. And maybe this vertex. And I think that is a better looking result. Lectures type is back vertex each a couple of times. And just level things out. And then they should take that and slide it back here in just a little bit to get the shape we need. Okay, so we're pretty much there with the upper body. Make sure to do any touch ups that you need. The more time you spend on character models, the better the final result is going space. So always keep that in mind. I think the last thing I'm going to do here is I'm just kind of pulling it out like that. Maybe bring this out as well. Okay, so progress is being made bit by bit. In the next video, we're gonna be creating the legs for our counts or model.
7. The Lower Body: In this video, we're going to be doing two legs. Now this is going to be one of the easiest parts of our projects. All we need to do here is we need to select this face. And then in front of graphic view, extrude down. So hit E2 extrude and bring it down. You can either have this straight down or you can have it moving out slightly. I'm just kind of have it going straight down. And if you take a look with the Togo x-ray option turned off, you can see that the human body is coming along very nicely. Now, what we need to do next is we need to just add a little bit of geometry to the legs to help create the knees and then the fate. So to do that we're going to hit Control and our create free loops. So scroll up on your scroll wheel to increase the number of cats. Then likely to confirm the position. What you can then do is scale your selection, which are the free new loops. So he, s And then z. This will bring the top and bottom loops closer together. So bring them into position. And that's going to be the geometry to form the name. Now with this geometry, you can see at the moment that the need comes out with the leg, comes out just a little bit too far for me. So what I'm going to do is I'm just going to take these edges here. And I'm just kind of hit G a couple of times to use edge slide. So just bring them here. And then I'm going to do the same thing. These edges each tree a couple times. And pulling it back here. Next, I'm going to take this edge and I'm just kind of bringing out a bit. So if I go into whites orthographic view and then press the period key or my number paths assume into my selection. I'm just kinda hit g. So putting this up, then I'm gonna take this package, go back into what's over graphic view and hit g and just bring it out E. And that's going to create the shape of the need itself. Then I'm going to take the geometry at the bottom here. And I'm just going to scale it in so that it's better resembles the shape of the bottom leg. I'm also going to scale the need selfie with S and then y and scaly skin and add a bit of thickness to the top and bottom parts of the leg. Cipher the pops and power control our creates a loop. Then take a back edge e and just take Ci and why, and just bringing out just a little bit. Then at a loop cuts up here. Take this edge and then He Xi and Y, and bring it forward. Take the back edge and bring it back just a bit. If you rotate your view, you should now see that the geometry is starting to look a little bit more like legs because we now have the muscular areas for the top and bottom parts of the legs. We have the fibers, we have the hamstrings, et cetera. Now that we have the geometry, it's times two, a few touch ups and add a space between the legs is a bit too far for my liking. So I'm just going to do is I'm just going to select all of the faces down here. Then he G and X, and just move them in closer. This will also give the legs themselves a little bit of added thickness. Now in addition to that, I think that the legs are coming in just a little bit too much. It looks a little bit unnatural here. So what I am going to do is I'm going to just select with the taco XY option turned on. I'm just going to select everything. And I'm going to rotate it just a little bit. And then hit g to bring it up through bad here and hit the Escape. To scale. Now at the moment is also scaling up. But I also wanted to scale on the x and y axis rather than the zinc. The best way to do this is to scale on the z plane. So hit shift and z to scale on the z plane. And now we can get the thickness without the geometry pushing into the upper, upper half. So I'm going to push it out to about here. And left click to confirm. If we take a look at the model, we can now see that the thickness is good. It's now a bit too thick on the y axis, but just on the y axis. So let's fix that or heating them. Why? Just bringing in to bat he now let's check to see. And I think that's pretty good progress. So next, we're going to create the feats.
8. Finishing Touches: So we are almost finished with our first live reporting model. What we need to do is we need to create the hands and the states were not going to worry about fingers and toes. The idea here is low poly, keeping things as low poly as possible, just guessing the general shape. So we're going to start by taking this bottom face, as we have done before and hit the E key to extrude down. You can do this either in the white orthographic orphans, orthographic views. Then we just kinda it's hike this edge and just slide it in just a little bit. So he g twice and just slide it in. Let's take a look. And that looks pretty good because we want the beads come out at a slight angle. So we don't want this edge to be level with this edge. We just want it to be ever so slightly in front. Next we're going to extrude from this front face. So select it, it free. And then It's e to extrude out. We're going to extrude to about here. Then we're going to take this edge at the top and we're going to bring it down on the z-axis, just begin creating the shape. We're going to then select this vice and then hit a statistic extrude and bring it out to about here. And there we go. So that is creating the phase simple as she like. I'm also just going to create just a little bit more detail by moving this edge up and also moving this vertex in. It looks a little bit weird at the back here. So we're going to move this in this, in this, in this slide them in just a little bit. On that side. Maybe we position this edge is a little bit to around about e. Then it take this edge and just move it down just a little bit on the z-axis. Ok, so now that's the bottom half done. Let's move back to the top half and just create the hand. So to create the hands, which is going to extrude from this face. And while we don't want to create the fingers, it would be nice to create a bomb of sorts. So which is kinda, First of all, it's control and are to create a loop and position the loop by here. Then take this face, it's seven on the number parts go into top you and hit E2, Extrude. I'm just going to zoom in on why selection. And then I'm just going to grab it and reposition. Maybe rotate it. Goop is scaling. And then create one more loop solution. Lab. Rotate and Scale to create the thumb. We're also going to just scale it down on all axes. And let's do the same with the end of the hand as well. So that creates the starting point for a hand. The final thing that we're going to do when it comes to modelling is just to do with the elbows, What we did recently with the needs. So let's select this edge, Hit G, Then why? And move it back. Then, let's take this edge, it g, y, and move it back as well. Let's now take a look at our model, form the different views. So from the front view, it's looking pretty good. And from the side view, it lines up pretty nicely with our reference image. So we have now completed the modelling of our low poly character. From this point, you can do all sorts of things. You can begin sculpting using this geometry as the base. You can apply textures and materials to just create low poly humans of different varieties. You can even look at the process of rigging your models in order to perform things like animations. What I advise you to do is save your work as a base file. So this is now going to be your heritage base mesh. Any characters that you want to create in the future. Makes sure to rename it as such. So in the outline tab, double-click where it says cube and rename it as low poly base. This object is now the low poly base for any human galaxies that she will want to create in the future. And now you no longer have to start from scratch. If you want to add this point, apply the mirror modifier. You can. To do that and go into objects mode. Then click apply notes that you cannot apply modifiers in edit mode. So go objects mode and click apply. If we go back into edit mode, you can see that all of the geometry is there on both sides. And as I said from here, you could do all sorts of things. So for example, if you wanted to add more geometry around the entire model really quickly and make it look even more human. You could use something like a subdivision surface modifier to add more geometry to your model. Thanks guys. I hope you have enjoyed this class on creating low Bali human characters.
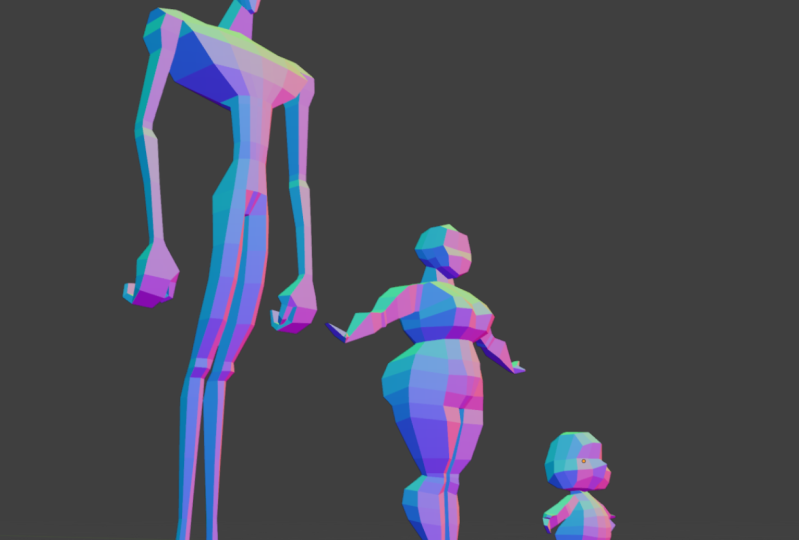
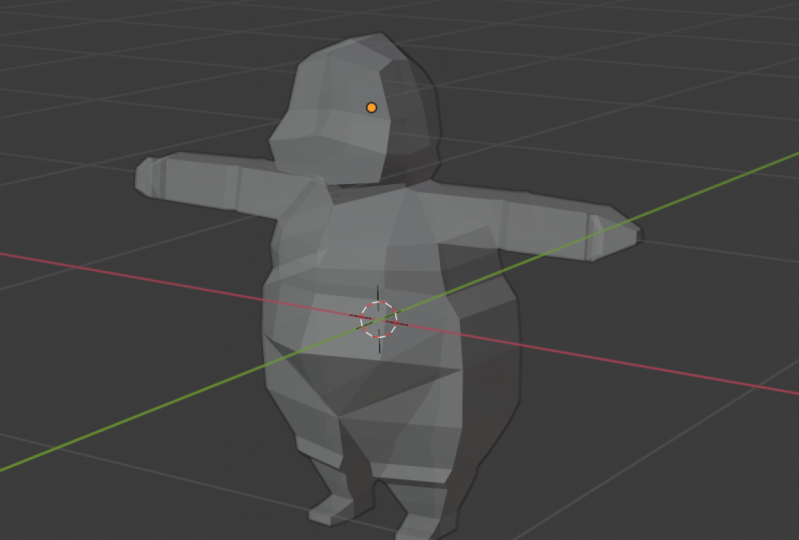
9. Your Homework: So guys, now that you have completed the class, it's time for your homework projects. Now, without going back to the course content, I want you to create a new model from scratch as best you can. But then want you to experiment with duplicates and begin adding detail to your models to improve on what you already have. See if you can create at least three different models for use in Blender. Remember, we only improve our skills, my practice, practicing them over and over again. So complete this homework task to improve your skills. And I will see you next time.
 Joe Baily