Transcripts
1. Welcome! Start here: You want to create
smooth, cinematic three D animations
that feel like they came straight out of a
professional short film or a viral social media edit? Then you are in the right place. This isn't another
blended crash course that teaches you how to
memorize endless buttons. This is where you mastered
the art of animation, bringing characters
and camera to life in ways that make you
videos unforgettable. This is the second class
in my Blender series. If you've already
taken my first class, Master three D Shortfam
Content and Blender, you've built the foundation. This class will take
things further with advanced character
and camera animation. This program is built for
content creators, editors, and beginners who want
pro level results without years of
technical study. With over ten years
experience editing videos for YouTube and managing two of the biggest channels
in their niches, I know what works
and spent years fine tuning the workflow
I'm about to share. This class, you learn
how to create and import custom characters
in blender and mix amo. Blend multiple motions
together into seamless, longer animations with non
linear animation editor. Use cinematic camera techniques
like the Dolly Zoom, low angle hero shots, and motion blur to add drama
and emotion to your scenes. Preview animations fast
with workbench and EV exports before committing
to final renders. To get the most
out of this class, I recommend watching
every video in order because every lesson builds
onto the previous one, pause and practice with dry is best learned by
doing, not just watching. You can also control
the volume and the playback speed of each video to learn at your own pace. If you get stuck or
have any questions, be sure to drop them in
the Q&A section below. Just make sure to check the questions first
because there's a good chance that the
question you want to ask has already been
answered in detail. At some point, you'll be asked to leave a review of the scores. Please wait until you had a really good chance to
experience the material. Your honest feedback
helps me improve the course and better serve
you and future students. Thanks again for joining me.
I'm genuinely excited to see the animations you
create and to give you the confidence to bring your
own three D stories to life. Let's jump in to
the first lesson.
2. Creating & Sourcing Characters for Blender Animation: Welcome. In this video, I'm
going to show you how to create and source your
characters for animations. There's a number of ways to create characters, for example, we have Human generator, we have Mix themo, which is what we're going to use to
animate characters. Das three D, make
Human blend swap, blender kit, sketch Fab, and so many more
different tools. And the most important
thing is for you to know that there are two
types of characters. They're rigged characters
and not rigged characters. So if you have a
rigged character, it means that your
character has a rig. It means that you're able
to move them around. If your character
does not have a rig, it means you're not able to
move the characters around. And it's super, super
important because it's a lot easier to work with a character
that already has a rig, and I'm going to
give you an example. Let's open blender. I'm
going to delete this. I'm going to delete this. The way I delete this, I
just selected and press X, and I'm going to press on
N to open the sidebar, and I'm going to open
the human generator. I use the human generator for
the kind of work that I do. It is absolutely the best in terms of creating characters
and then animating them. You can use it if you want
to create real people. For example, if you don't
want to create real people, or you want to create very specific
interesting characters, like game characters, that's
three D works really well. So Ma Human is
also kind of good. I don't remember which one
is paid, which one is free. To be honest, I use
Human generator. It is paid as either $128 or 68, by the way, I have no
affiliation with them, so they're just
really, really good. In terms of the Blend Swap,
this is definitely free. Blender kit, some of it is
free, some of it is not free. Sketchfab, also similar
to Blender kit, some of it's free,
some of it's not. And you can find links to all these tools in the
resources section. I'm going to open
Human generator, and I'm going to
create a character. Just any character
doesn't matter. And you will see that our
character, when I create it, it has this kind of orange
lines inside of them. And this is the rig, because
let's say I go into, like, the pose mode, I can
select part of it and I can move it around. You can see that it has a rig. But for example, if we use, let's go to Blender kit, and let's search for models. By the way, you can open you always have this bar at
the top with blunder kit, you can press on this specific shortcut
to open the Blender kit. And here we can go into the search filters and we
can select free first. And let's search for
a model that does not have a rig. For
example, this one. Let's put it in.
You can see that this model does not have a rig. By the way, if you don't have the add ons or you don't
know how to install addons, the way you go about this
is you go, for example, Blender kit, you download the blender kit for free.
This is the add on. You will download the Zip file. You don't need to unzip it, then you need to go into File. Preferences or it's
not in the file. It's in the edit preferences. You can also see the shortcut. So because on a MacBook, I have to press Command comma. But if you're on Windows, you need to press Control C. So it's very similar
instead of command, you have to use Control on
Windows, and that's it. So I can press the
shortcut open preferences. These are the add ons,
and you can click here, Install from disk and then
just go ahead and locate the zip file that you will
download, and that's it. Like, super simple. Okay, so have a rigged character and we don't have a
rigged character. What do we do if we don't
have a rigged character? Well, we have to
create a rig for it, and we have to do it by hand. And this is the
part that's taking. The most time, it's
not super precise, and that's why I don't
necessarily recommend it. So, for example, we have let me press to
get rid of this part. I'm going to press on Shift A, and I'm going to
create in armature, and we can either create
a single bone and it's going to be kind of like
a bone like this, right? We I'm going to press Comans to undo Shift A, we
can create a human, which is going to
have phase as well, which is not necessarily
what we want because we're not
going to animate the face here, for example. But if you want to
animate the phase, then you have to put all the things of the
phase in the right places. You know? So that
takes a lot of time. That's why it's a lot easier
to use rigged character. We can use a basic
Human, click like this. And let me get rid of
the human generator. I'm going to select
it, press on delete, then select all of this, press on X, delete. Okay. And let me
select this part, and I'm going to press Option G to put it in the
initial position. It was. Basically,
we just put it in the center of X and Y X is. And I'm going to press on one to have this sort of specific view. If you have any questions on how to do it, if you
don't have a setup, just let me know the
uni section below, and I'll be able to
help you with this. Let's select our rig and
we need to go into data, viewpoint display in front. What it does is it shows the bones in front
of our character. So you can see it's kind of in the middle of our character, but we can see the bones. So it's kind of helpful to
put it in the right place. Going to press on one again
to make sure it's straight. Now, we need to go
into the edit mode, and here we need to
edit our armature. So for example, I need to select these two dots into preson
G and move them around, like so then to press here, put it in the elbow point. This is the wrist, so I
need to press it here, and then this part, like so we need to do the same
thing for the other side. First of all, you can see
that it's time consuming, and secondly, you can
see it's not precise. That's why I prefer to have characters which
are already rigged. It's just a lot easier. The whole reason why
we're doing this is because when we
work with Mixamo, we will have to kind of
upload our character, then we have to download it, and then we have to take the Mixamo animation and put it on our
character and blender, because if we upload our
character to Mixamo, it loses the material quality. So for example, we can click on the materials and we can
see we have the material. But when we upload it to Mixamo and download
it from Mixamo, we will not have it.
That's the important part. Okay, something like that. Well, it's not very straight, but more or less. And now that we have this
done, let's come to object, and we have to let's disable our rig by pressing
on this eye icon. Let's select our
character, like so, we just want to
make sure we select the whole character because
you will see that if I, for example, hide the
helmet, we have the head. The way I can hide
is by pressing and the way I can
reverse hide, basically, unhide is pressing option
We can hide our rig, select our character like this because we want
to make sure we select everything that's
inside of our character. And then we have
to enable our rig. We have to press Shift
and select our ring, and then we have to press
Command P. And basically, we are now parenting our
rig to our character. So here we need to press
armature with automatic weights. Now, if we come
into the pose mode, you will see that if we move
like parts of it around, you can see it moves. Now, the problem becomes that, for example, with
this character, you can see this part
got activated as well for some reason,
although we why? We can move things around. We have mature of our character, basically the bones, but the problem is that
it's not precise. And that's kind of
the biggest issue. So we have our
character like this. Let's go into the object
mode and move them around. But if we use something
like human generator, once again, let's
generate our human. You can see we already
have our rig here. And by the way, in
the human generator, you can also go to, for
example, like pose, and you can rigify and you can generate like a Rigify rig. Which is another Rig, right? So if we go into pose mode
by selecting Rigifi here, suppose now we can kind of move things
around a little bit, you know, move every
finger, things like that. But we don't necessarily
have to do it. I'm just showing you
kind of different examples of what exists. So we have rigged characters
and not rigged characters. And you will see that it's a lot easier to use rigged characters. Let's take a look
at the websites. Again, human generator, super
good, really recommended. Mix and noise what
we are going to use. It already has some
sort of characters, but if you want to
customize characters, then it's easier
to create kind of create them and blender
and then upload it here. Das really good. You can see that DAS works with, you know, different applications
like Cinema four D, blender and other great stuff. Make human also pretty good. I do recommend you to take
a look at all the websites yourselves to make sure you identify whichever one
works best for you. Blender Swap. Blender Swap is actually pretty, pretty good. So if we go into, for example, like categories, we can
see characters here. And Blender Swap is basically
like a website where people just upload their characters and you can download
their characters. Basically, it's
like to exchange, not necessarily just
characters, but, like, a lot of different
and interesting things. So I remember, I used like
this model, for example, which is already rigged
and has an animation. So I click on Download, and when downloads,
I'm going to open it. So I'm going to
save this project as well to desktop entitled. Okay. Let's open this one. You can see that this one has a rig inside of them, right? And it's also already, like, pre animated with
the camera, as well. Like, very, very interesting. But we can also just
go ahead and use it. The only important thing
for us is that before we upload our characters to Miximo which is what we're
going to do in the next video, we need to make sure that
our character stays, in, like, a te pose where basically we can
see all their limbs. We can see their
chin, their limbs, the they're growing,
and that should be it. And in order to do that,
let's go into the pose mode, and let's press Command A
or Control A on Windows. Apply pose as rest pose. Now, the important
part is for us to now export while our character
is in this pose. So we need to go into file, export and we need to
export this OBJ file. So click here, desktop. Let's just export as OBJ
and we are good to go. We need to do the same
with the other file. So, for example,
with these guys, we're going to saves file. By the way, we can only
have one character at a time when we export
our characters. So, for example, let's
delete this guy. Let's select this
and press Option G, and let's file export OBJ, and we're going to save
it on desktop as well. Let's call this one, like robot, Export, and you are good to go. So if you have any
questions, let me know. But than that, I'll see
you in the next video.
3. Uploading Characters to Mixamo & Applying Animations in Blender: In this video, we're going to animate our characters.
Let's jump in. I'm going to open Blender,
press on human generator, create one of the humans
and make sure to delete, like, the camera, the box that's appearing in the
very beginning of blender. Now, the important
part for me here right now is to export our character. So for that, I'm
going to go into file export, export as OBJ. Now, this is super
important because if we don't export as OBJ,
it's not going to work. So remember, we need
to export this as OBJ. So let's go ahead
and click on it. I'm going to go to desktop and like the name
doesn't matter, so we can save it title or we can give it a
name, doesn't matter. So press on Export. And you will see it when we
export, we have two files. One is the OBJ, one is MTL. Basically, MTL is like material files because
you will see that when we upload just the OBJ file to Miximo we are going to lose
the material qualities. Let's go to Mixamo. Once again, the link is
in the resources section. Currently, for us,
the important part is to upload our character. So you can see on the right,
upload our character. So upload our character, and we're just going to drag and drop our OBJ file over here. It's going to take some
time to upload it. Great. You can see this is exactly
our model that we have here. We need to clock on next. And now we need to locate or place certain markers
at certain points. So one of them is chin. So let's put chin over
here, wrists like this. And by the way, if you
ever forget this, like, there's explanation
here on the right, you can always
take a look at it. So elbows, let's put
elbows in place. Let's put knees, like so, and let's put growing over here. Great. Now I want
to press on next, and it's going to take
some time to auto rig. Now, also an important part
is that you can actually upload uniged
characters to Miximo. But the problem becomes is that when you upload
characters to Mixamo, we lose the material qualities. So you can see this is the
kind of character we have. We don't have
character with, like, the shoes or any
kind of clothing. We have our naked character. And there are two ways
we can go about this. We can either add
materials later or we can just transfer the
animation to our character. And for the workflow that I've been using and
has been working great is transferring the
animation to our character. Let's take a look.
You can see like, how well is it animated? You can see even, like,
the fingers, right? Moves beautiful. Now we're going
to press in next. And because I had this
character selected in the background is just making sure that
if I click next, I'm going to disable
this character, and I'm going to work
on a new character, and I'm going to press, yes. So we have our character,
and let's go to animations. These are all the
animations that we have. Whatever we want to choose, we can just go ahead
and choose it. So let's okay, let's
go for this one. It's going to take a
lot of time to load. So let's try, like,
something like this. That's a little bit easier. Okay. Very interesting. Great. So we can customize
our animation here. The direction, style,
height, overdrive, different animations have different things that
you can customize. The way I usually do it is I don't customize unless there's, like, something super
specific that I'm going for. Other than that, like,
general animations are pretty well. So all you need to
do is click and download. Here's
the important part. Whatever kind of frame
rates you're working with, you have to download the
right number of frame rades. If you don't want
to kind of think about this and you want
to use the easiest route, then set 30 frames a second
and use 30 frames second. It's the best I
always recommended. So go ahead and select
30. Click on download. It's going to take
some time too, but it's usually pretty fast, and I'm going to
allow it to download. Now, I'm going to
come to blender, and I'm going to drag and drop the file that I've just
downloaded, as this one. You can see the name of the file is going to be the name of the
animation that we have. So joyful jump. It's the one that we selected here, right? And if we come into the files,
this is the one as well. So I'm going to dragonrop it. Like, so we are going to import, and you will think, like,
Okay, where's the animation? Well, the problem is
that when it's imported, it's imported, like super small. Like, it's tiny. You can
see like it's over here. But now if we go into the item and we take
a look at the scale, we can see the scale is small. So if we click here, press one, tab, one, tab, one tab. We have our beautiful
animation over here. Okay, so now we have two things. We have a character that
we initially created, and we have a character
that we downloaded from Miximo with the
animated character. We will use a tool
called Rococo. And you can once again, the link is in the
resource section and you can go ahead
and download it. What this tool does,
it allows us to transfer the animation of
one character to another. If we go into retargeting, we have our source and
we have our target. So for the source, we need to select the one that we
downloaded from Miximo. Basically, it's the one that has this triangle sticking
out of their head. And the target is
going to be this one. It's just select kind
of the orange stripes. Then we need to click
on the build bone list. Now, it might work slightly differently depending on
our setups computers, So for me, it works seamlessly. As I understand,
for some people, it might work slightly
differently to where some of the bones might be
slightly different. Basically, what we did is
we rebuilt the bone list by clicking here and you can see that the
spine is the spine. The list goes until the end. Basically, it was
just it matched all the bones in our characters. And now if I press on retarget, it's going to just
retarget the animation. Just go ahead and double
check when you do this. If you don't use Miximo,
you use something else. Go ahead and take a look at everything is fine
here in terms of, like, for example, the head is the head, the
shoulder is the shoulder. Make sure that is correct. If you build an armature
using, you know, by pressing Shift A in the pose mode and building
the armature by yourself, it works perfectly fine as well. So I'm just letting you know because it might work
slightly different. So I'm going to press on
retarget animation because all the bones are fine.
Let's see what happens. Now, we have our
exact animation. But you will see
that, for example, let's select our
human generator. I'm going to press G X to move it a little
bit to the side. So Perfect. And now we can go ahead
and delete this guy. I'm going to select
it, press and delete. Oops. So let's select Delete, select delete and delete Hmm. Interesting. I'm going
to select it here, okay? And we can select our human and press on Option
G to put it in the middle. And there you go. We
have our character, and we have the materials. But let me just control
that a little bit. You can see that when we have
our character from Mixamo, it doesn't have the materials. So this is exactly
why we're doing this. This is, it's not super
convenient, but trust me, when you get used
to this process, it takes a couple of
minutes to just go ahead, download the animation,
put it here. So it's pretty fast. I'm just going to undo this. And the great thing about
this is that, for example, if I select my character and I go into the human generator, I can still customize it. So I can add, like,
clothing, for example. Let's go ahead and put them in a costume. Yeah, there you go. And now we have the animation. And we still have the
costume, mind blowing. Yeah, when I, it's just
it's so great, so great. And we can still
customize their ahead, every single part that
we could customize. We can still
customize it. This is why I absolutely love this. Let's as an example, do it with this character,
as well, right? So let's delete this character. Something we did in
the previous video. Let's select it option H, sorry, Option G, put
it in the middle. Now, let's upload
this character here. So we're going to
click on Upload, and I'm going to drag and
drop our character here. You will see it doesn't work necessarily the best
way with this character because it's not like human because it doesn't
have, like, a neck. It doesn't have a
chin, for example, but you'll see, remember, this is the rig that we
build ourselves, right? So let's click on next. I'm going to put a
chin around here, you can see because it doesn't really have a chin or neck, so that's a bit of a problem. So wrists around here,
elbows around here, knees, something like that, groin, go ahead
and click on next. So it works exactly
the same way. I just want to show you
for you to make sure that this works as flawlessly as it works
with human generator. Okay, so, yes, this is the
part that you can see, because it doesn't have a neck. You know, this is what's
happening over here. So, let's go ahead
and click on next. Forget our previous character. Let's have our Rumba dance. Go ahead and click on download, third frames, second,
and download. Actually, we need to
allow the download first. Let's go ahead and
import Rumba dancing. So go to item one
tab one, tab one. I have to press tab to
go into the next line, press on G x so that we move
it a little bit to the side. We need to go into Rococo,
retargeting source. Once again, slag this
guy, target this guy. Once again, the reason
why we're doing is because this one
doesn't have material, and this one does. Build the bone list I
know everything is great, so I'm going to press on
Retarget and you can see that if I select this one, G, X moved a little
bit to the side. So, okay, some of the
parts were not selected. Once again, a disadvantage of having a custom built
rig by ourselves. But other than that, if
we play the animation, this is our Roma dancing. And you can actually see
some of the animations are let's hide this rig
by going to once again, data in front, and it's actually a little bit
better in some ways, and a bit worse in other ways. You can see the head doesn't, like, go crazy a
little bit here, but we can see that these parts do go a little
bit worse because, you know, for this animation, the
legs are really good, and with this animation, the legs are just
not super well. Well, I'm going to
show you how to fix some of these things
a little bit later. And you can see that it's
not super perfect because, for example, one of
the legs is floating. The other one goes below
the floor, let's say. And I'm going to show you ways
to kind of go round this, fix parts of it, go creatively round
this some of the ways. But we're going to cover that in one of the feature videos. Other than that, this is the process. This
is how you do it. So if you have any
questions, let me know. But that. I'll see you
in the next video.
4. Using Mixamo Characters Directly in Blender (Fast-Track Animation Workflow): In this video, I'm going
to show you how to use mixing of characters directly, which saves time, but then limits us in some other
ways. Let's take a look. For example, we have our
characters over here. So we can choose any
of the characters. All of these
characters are free. We can either search for
them over here, for example, let's search for a man, and we're going to have a
football player, for example. Let's use this
character, or we can use Monken. It's
as simple as that. Then we go into animations, and then we just select
our animation Okay, a football player
who's OC Spider Man. Let's go ahead and
click on Download. And we also need to
first of all, allow. Then we need to open
Blender, press on X. And let's import our
model by pressing, like so yeah, there you go. This is our model, and
the interesting part is that we do have our
materials here. Mm, something we
didn't have before. Well, there's a slight
problem with mixing if we upload our character. So if we go here, we can
see that it supports FBX, OBJ and Z files. And I've tried all the
different methods, and the only method that
works is using the OBJ files. We can take a look at how
to prepare our models. And we can read from
the Adobe website, you can see that
it allows the FBX, OBJ and Z files. Zip file is when you kind of compress your files together. This something that we
use to add the add ons. Now, the OBJ is what we've used. This is one of these is the models and the other
one is the materials. And the FBX file is
a combination of basically OBJ and MTL files
that we had previously, which is model and material. Now, the problem is that
it doesn't work with FBX and zip files if you
upload your own files. And that's why we're
not able to upload our models with materials or download them with materials. But if you use some of the characters
directly from Mixamo, then yes, it will
absolutely work. It's just a little quirk
with this website. Although the animations are super great and
it's free to use, it's just, you know, you have a bit of a
limitation with this. Now, the limitation that
we have when it comes to this website is that we're not necessarily able to
customize our models. There's no easy tool
for us to do this. And there's, like,
a mix Mo add on, but it doesn't necessarily
allow us to do that. And it also doesn't work with
latest versions of blender. So I do recommend
using Mixamo only and only if you plan to use these models and you
don't want to change them. But if you are
looking for a model that you want to
change in the future, then using your
own custom model, rigging it or just
having it rigged from the very beginning is the
best way to go about this. One of the things we
can do to make sure this looks absolutely real
is by pressing Shift A, going to mesh cube, we're going to create cube, going to press on one, G, Z to move it a little bit up. Like so so that kind
of touches the ground, going to press G X, and move it to the left. Go to press G Y and
move it to the front. Actually, I think we might
need to lower it a little bit. So let's take a look.
Yeah. Pretty good. Pretty good. So this
is how you do it. Now in the next videos, we're going to cover how to
combine these animations together because these are pretty short animations, right? We're talking, like, let's
sich like 50 frames, which is like one
to 1.5 seconds. How do we combine
these together? How do we adjust them
if something's wrong? Well, this is what we can
cover in the next videos. So if you have any
questions, let me know. Beside that, I'll see
you in the next video.
5. Adjusting Mixamo Animations in Blender (Action Editor & NLA Editor): This video, let's talk about how to adjust our animations. So I'm going to use a human
generator as an example. Let's say we import and quickly transfer our
animations once again, so we need to go into the item, make this one a
little bit bigger, move it to the side, Rococo, retargeting, select our object,
and select Randolph. Build the bon list,
retarget animation. Great. Now, let's
select our person, G, X. I'm going to
delete all of this. Perfect. Yeah, so
we have a person. And I had actually, I had this very
specific problem. That's why I'm going
to show this to you. So this is a person
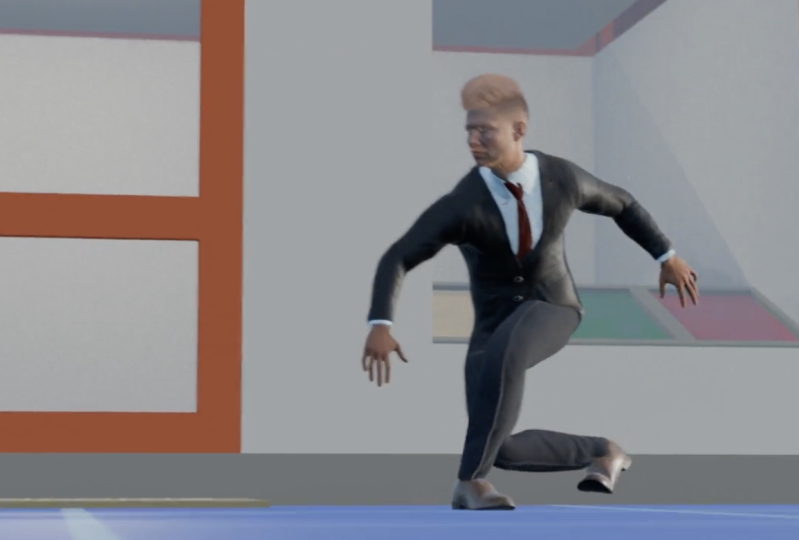
that's about to shoot. And the problem is that
this animation, like, if we select our
character, we can see, first of all, we have
so many keyframes. And for each of these keyframes, you can see that we have
basically each kind of each of these dots is animated for
each of the key frames. And one of the things
that we can do is we can go into the graph editor, right? We can open it up
and we can see, like what is it? Like, hundreds, thousands
of animations, right? Like, every single of these
dots is an animation. It becomes like a headache to change the
animations in any way. So, for example, the
issue that I had is I needed to make the arm
shoot a little bit lower. That was a huge problem. Like, how on earth do you like, make the person shoot lower when there are so
many keyframes already? Like, I still blows
my head and like, thinking of how to do
this, how to animate this. There's actually
a pretty easy way if we go into the graph editor, Wesley go into if we
go into the pose mode. Basically, we need to understand which part do we need to lower. So, for example, let's
select this part, present G, and we can see this is actually one
of the ones that we need. But even if we move it,
still, it doesn't work. We need to select one of
the bones to open it up. Let's come to this slider here
and kind of extend it like so so that we see everything
that we have like that. So this is basically the
animation of each of the axes. And if we double click on
each of these animations, you'll see that we select
kind of the line and the keyframes of each
certain axis animation. So for example, I
select this one, and you can see that you can already see
what's happening. Like, we can customize it
by moving it up or down, but I'm going to
press Command Z. And we just need to find the one out of these to move it around. Sometimes it needs to
be a couple of those. So this one is not necessarily
moving up or down. It's moving, like,
left to right, in a way, select this one. Also, not the best way Z. This is probably the
one that we need. Yes. Okay, so we need
it to be this one, and let's select this one. Oops. We needed to be in a
slightly different position. So you just have to
play around with this a little bit and trying to find which one of these
in to move up, move down. Okay. And you can
see this is kind of like instead of it
shooting straight, which is something that we have over here, let's take a look. So this is the
original animation. This is the person is
kind of shooting his arm, their arm is up. So it's kind of
like that. But on this animation, the
arm is already down. One of the ways that
you can easily, easily change some
of the animations. Because the armiature is
slightly different sometimes, like the arms, if you want
to put the arms, like, together or some things are
touching or not touching, because there's, like,
a little bit of space, this is the way you can kind
of tweak it a little bit. So you just need to
find the bone that responsible for the kind of movement that you
are looking to do. You can even press on Gene, kind of customize
it, and, you know, it's not going to
be saved unless you click on I and
save a keyframe. Other than that, you can, like, put it in a very weird position, but then it will just go back to its original position once you ind of scroll
through the timeline. Let's select a leg just for fun. And so, for example, Z actually, maybe we
need some Okay, yeah. Let's do thigh. So let's select it. Maybe
we need this one. Because we moved it, it's
going to stay like this. And even though we have the animation still in the process, we are just kind of changing
its position a little bit. We don't need to, like,
key frame anything. It's just a bit of adjustment
and works pretty good. So let's import our
it's going to item one. GX a little bit. So we can see kind of the
difference like this. And then if we go into the data, if you put in front, if we go into the post mode, we select each of
the bones and we can customize these bones
as well so that it's very similar to the animation that's basically the same customizations
we have for this, but we just have it here. So this is how you do it. Let's, so you can see we can
customize it here as well. Like so. If you
have any questions, let me know, but than that,
I'll see you next video.
6. Congratulations!: Congratulations. If
you're watching this, it means you've made it halfway through the
course content. I know you've covered a lot, so congratulations to you
for making to this point. And there's a lot more
valuable content coming soon. But before we get
to the next video, I want to simply ask you if I found value in this program
up until this point, to take 60 seconds to
leave you honest feedback. Of course, I will
immensely appreciate this, and this will also
help hundreds of future students in deciding
the best program for them. So leave you feedback now. And of course, if there's
anything I can help you with, please let me know in
the Q&A section below. You're doing great. Keep going. Without being said, let's
get to the next video.
7. Building Longer Character Animations in Blender (Blending Actions Seamlessly): In this video, let's
build longer animations. Let's combine different
animations together, make them super smooth. Let's use the animation that we previously had just in
the previous video, where the person is shooting and let's put an
animation of running. So let's do an animation where the person is
going to run first, and then it's going
to stop and shoot. So I just search for
a running animation. Let's choose this word one.
Here's the important part. We have our animation and
the person is running, and it's super important to
click this button in place. What this does is the
person is going to run, but it's going to run in place. Now, this is something
that's going to allow us to customize these
animations, make them longer. So, for example, we have this animation of
the person running, but we'll be able
to make it longer. The person is not going
to kind of run in space. We will animate it
running in space. This way, we have more control, and we just have this kind of sort of very smooth
fluid movement that we'll be able to customize. Other than that, it
becomes a bit of a headache to customize if you don't click
on this button. So go ahead and click
on that bottom, and we'll download this running
animation as well, right? Go ahead and click on Download. I'm going to create
a new blender file, and I'm going to create a new human doesn't matter
which human we have. Okay, let's start from or we're going to have our
shooting gun animation, we're going to imported
item make it big G, X to move it a little bit to
the side, FococRtargeting, select this object,
select this object, build bone list and
retarget animation. Let's press GX, move it a
little bit to the right, and there we have our
shooting animation grade. So let's select this now, we need to open this part. We're going to use
two new editor types. We're going to use
the dope sheet, and we need to go into
the action editor. We select our person. We'll see we have our kind
of key frames here and we'll need to come
to the bottom right. Drag it up like this so that
we have another screen. And here we need to select
the non linear animation. Here's what we can see.
I'm going to press on and to get rid of this
part or enable this part. You'll see that we have a number of keyframes
here, right? We have 150 160 keyframes. Let me press on and to get
rid of this part as well. First of all, we need to come here and we need to give
this animation a name. So let's call it like shoot. And you will see that the
name changes here as well. So I'm going to
pres Command set. Take a look. This is
what we had before. When we change the
name here, it changes the name here because this is
the animation that we have. Now, we need to go to action
and push Down action. You might have this
button like around here, slightly different location
in different blender types. But overall, you need to
find this push down action. By the way, if you cannot find
something, here's a hack. You can press FNF three and
search for different stuff. And you can call you can
search for, for example, push down Okay, this
one is not here, but sometimes you can
search for, like, for example, preferences, right? You can search for, like,
Edit, command comma or, like, we can do like
bake animation, for example, you can search
for it here. It's F three. If F three doesn't work, press FN F three or on Windows, the equivalent of FN. So action, push down action. And you will see that
we lost our keyframes. Our animation is
still in the process, but now our animation
comes from here, comes from this block here. Basically, our key frames
became this block. In order to combine different
animations together, we need to have a
number of these blocks. Let's add our running
animation import. Let's press N, come to item one, one, G, X, mode a
little bit to the side. Now we need to go to Rococo,
do exactly the same thing. For here, instead of
the source number one, we're going to Make sure
we click on this one. We have the same
person selected, so we can just leave it as is. Build bone list
retarget animation, and we have our running
animation. Perfect. Let's delete this. So if we select our person, we have our key frames. And you will see we
have our shooting, animation, and we
have our running. So let's call this one run, and we'll see that it changes here and here at the
same time, right? I'm going to press and Enter, so it changes run and run. Now, we need
to do the same thing. We need to go to action,
push down action, and you'll see that we have now two actions we have
run and we have shoot. Now, we have them on
two different tracks. The way you can add
tracks is you can press Shift A and it's going
to add a new track. Come to this part,
press Shift A. Actually going to
select a track, and we can add our
animations because these animations are now
saved in this file, right? But I'm going to
press Command So we don't have any
keyframes here. We have our
animations over here. I'm going to press on N
while hovering over here, and I'm going to select
one of our animations. First of all, what
we can do here is if we go into
the action clip, we can repeat, and we can select the number
of times it repeats. For example, if we want, we can see that our
person is running for, like, what is this? Like 23 second, 23 frames. But let's say we wanted
to run for longer. So we can call number
repeats like two. You can see the
animation became longer, and instead of it just
stopping after this, right? That's two, it's going
to continue running. Like, so this way, we can extend our animations.
Very, very useful. So, for example, our
person is running, how do we make him shoot? Well, here's how the non
linear animation works. The one that's on top is the
one that has the most power. And in order for us
to make this work, we need to press on auto blend, and we need to move this one
a little bit to the side, and you will see that well,
it changes the location. We're going to solve
this in a second. But you'll see that
when we press on auto blend on the top one, so we have this one here. I auto blends into
the new animation. So if we actually
moved like this. And basically, this is
the way we do this. And now you will see
the problem is that our person is moving
a little bit kind of to the side because we had our initial models
that we imported, we moved them a little
bit to the side, and that's why they were
a little bit to the side. And this is a little
quirk with this, as well as that we have
to keep our models in the center because it's going to take the animation
from the center, not from the place that it's
moved to slightly confusing, but let's do it kind of the right way because this might happen with you sometime and we don't want
this to happen. Let's start from the beginning. We're going to
delete all of this. I'm going to create
a new character, generate new human, and I'm going to add a
shooting animation. Go to item present 111. Now, without moving
both of these, we have to create our animation. Let's go to Rococo, select the armature, select our person, which is this one. Build the bon list,
retardet animation. Great. Now, we can
move our kind of test model or the model that has the animation, delete it. Now, keeping our
person in place, select the armature, call it
let's give it another name. Shoot L five, save by just
pressing in another location. Action, push down action.
We have shoot five. Great. Let's add
another animation, which is Runimport item one, one, one, Rococo,
select the armature. The person is the same,
so we can keep them same. Build the bone list,
retarget animation. Now select this one and move it a little bit to
the side. Like so. Let's select this armature, call it Run five. Let's push down action. We'll see that we have
two animations now, let's make this one
like three times long, and let's press on auto blending
and blend in, blend out. And let's take a look
at what we have. So we're going to have our
person running like this. Then it's going to
stop and shoot. And we can customize the
smoothness or the length, so you can see the blending is either a little bit longer,
a little bit shorter. Great. And now we can actually, if we take a look here. Let's add another track by
just clicking like here, Shift A NLA track, and I'm going to
select our track. Press Shift A, I'm going
to add run number five, and let's make it like
three times as long. So I'm going to select this one. Actually, we need
to move this one. No, we need to track
ordering down, track ordering,
actually, to bottom. We can say it like this. We can autoblend click on
this one, as well. So it just made a shot and
now it's going to run again. So this is our animation
where our person is running. It stops to shoot. Puts the gun away and then
starts starts writing again. Now, in order to animate
our person, at this point, we can go ahead
and right click in the separation here. Join right. So we're going to join this
big part to the left part, and we're going to get rid
of the part on the right. So join right, make this
one a little bit lower. And now we can just animate the position of our character. So it's going to
run a little bit. So we can put we can press
I to create a keyframe. Actually, this can be
the starting point, and then we can press
another I, press G Y. And move it a little
bit to the front. So we need to take a look if it looks kind of natural or not. We can get rid of
the camera for now. I forgot to press I. So let's start from
the very beginning. Number one, GY,
move to the front, press on I, and let's
see what we have. Moves a little bit
too fast, so into GY, I This is pretty good. Great. Now, if we
select the key frame, you will see that the
motion that we have when it's moving or
with any keyframes, the motion in blender
is always not linear. It means that the animation
starts slow. It progress. Like it starts slow, it progresses very fast,
and then it slows. Way we can customize this if
we go into the graph editor, we open this up,
and you will see that this is so it's
not linear, right? It's a bit kind of smooth. We need to select our keyframes, for example,
specifically this one, and we're going to press on and you can see we have
different options. So bezier this is the
bezier keyframes, but I'm going to press on
T and click on linear, and you will see that
it becomes linear now. So instead of starting smooth or ending smooth, it's abrupt. What I'm trying to
look at as well, is, if you can see, he's kind of, like, moving with his feet,
but he's sliding. In order to avoid sliding, we need to speed
up the movement. So if we go into the timeline and let's find our keyframe
where it's stopping, we need to move him a
little bit further. Press on I. Let's
see what we have. Yeah, this is actually super
well. So let's take a look. And when it starts
running later, for example, here, we can
add another key frame. For example, when you select,
add another key frame, and then or we can just go
ahead and copy this one. So we can just literally
command C or control C, and control V or command
V over here, right? So let's delete this keyframe. We can just go ahead and
copy it and paste it here. It's going to paste
where this playhead is, and now we just need
to make it run again. So I'm going to press G, Y, move it a little
bit to the front, press on I to create keyframe. Okay, something like that. So we have our running animation. We have our shooting animation, and then we are
going to run again. Perfect. Okay, so this is how you combine the animations
together in blender. You do exactly the
same use characters from Miximo or
from other places. The important part
is that you do have to use the ANA character. Once again, let's
do a quick recap. Let's go into the Anal
editor dope sheet into the action editor, right? We need to name the animation. Push down the action, and then we need to add here. We need to press on Auto Bland, and it's going to work. If you have any
questions, let me know. By adding that. I'll see
you in the next video.
8. Cinematic Camera Tricks in Blender for Viral Shorts: In this video, we're
going to cover cinematic camera tricks
for viral shortom content. You'll find this document in the downloadable
resources section, so you're free to use it,
and let's take a look. These are some of the
most common camera tricks that I currently see online
that are the most used, and sometimes these
are used together, sometimes they use separately. But overall, these are
the most used ones. You just change the order of how you use them
when you use them. If there are any other
tricks that are worth taking a look at min un section below, but than that,
let's take a look. First of all, is the dolly
zoom or the vertigo effect, and it's when the camera dolly
is back while zooming in. So you've seen this trip before when the person is kind of
staying in the same position, but the background changes. And it doesn't only
work this way. It also works the
opposite way where the camera moves forward
and it zooms out. The person once again staying
in the same position, but the person themselves
are changing slightly. Basically, we go from a
very zoomed in to a wthrod. We'll take a look
at this effect. Angle effect, it's
not necessarily when the camera is on top because we're going
to cover that later. But this effect is when
the camera is just kind of looking down
at our subject. It makes the subject
appear smaller, weaker and more vulnerable. True. Low angle is exactly the opposite
where the camera is positioned below the subject and makes our subject appear
more dominant and heroic. So when we go up, it's hero. When we look down, it's weak. The shots that are
at an eye level, like what you are currently
seeing right now, they don't show me
either strong or weak. It's just shows kind of
it shows me. That's it. These kind of shots
really help progress the story and show what's
going to happen next. Shoulder, you always see this in the conversations
where the camera is positioned behind one characters shoulder
framing another subject. Birds I view really
interesting as well. This one is when the camera is above our subject
looking straight down, so like looking exactly down. Like, one of the ways it uses it gives like
godlike perspective, but not only that, it's
just an interesting fact. And if you show it on
social media, like, it's so rarely used that
it stands out so much that it's just it catches the eye it's like a
thumb stopper right away. And then the focus trick
when the camera stays still, but the focus changes from
one subject to another. And as says here, it helps guide the viewer
attention smoothly. Uses to reveal the news story
information or surprise. It's pretty often used in the horror movies when
the main character, the two main characters
are, for example, like, talking, and then
in the background, there's some movement, and then the focus changes
from the foreground, from our characters
to the background, and it becomes a
little bit creepy, and you see what's happening. These are the main
camera tricks. If you have any
questions, let me know. But than that, let's go
ahead and take a look at these in action in
Blender. See there.
9. Animating Blender Cameras (Keyframes, Motion Blur, Depth of Field): In this video, we're going to animate the camera and blender. So let's jump into blender. First of all, when
you open the project, you always going to have the
camera on the left here. But we can always delete it
and then create, once again, the pressing Shift A and create camera by
person over here. Now, I'm going to delete
this camera as well, and I'm going to press
Shift A. I'm going to quickly create a plate. I'm going to make it
huge by pressing. As I'm going to quickly
go to Mixamo and search for a walk where the
person will be walking. Just for this example, I'm not going to set it
in place because we're going to use this
person as an example. If we were to use
actual animation, we would set it
in place and then animate it ourselves
because that way we'll have more control. And I'm going to import
our model over here, item one, one, one. Let's start with the
dolly Zoom effect. In order to animate the camera, I recommend you going with
the cursor to the bottom left corner until you have this cross until the cursor
changes into the cross, then dragging this part out and we are going to
create a camera, pressing Shift A,
create a camera. I'm going to press over
here in this viewer, and we're going
to press on zero, and we are going to
become the camera. Now, one thing I will do is because I'm doing this for
a vertical social media, we're going to go
into the output, and we're going to change the
resolution to 1080 by 1920. And you can see it
changes in real time. And you can also
see that it changes here in real time, right? So before, after going to press on N to
disable the pop up, and now all everything we're going to see here is
going to be the camera view. Now, there are a couple of
ways to move the camera. For example, we can click
on this move button and we can select the camera and we can move it like this. We can also move the camera
over here in the item. But the method that I prefer
the most and that I have the most control with is
by pressing in this view, Shift Til D. And I'm going
to become the camera. So as you can see, I'm
able to move around. Like so. I'm able to
fly around, like so. And that's I'm basically flying, like in the video games, and it gives me
the most control. First of all, if I press Tilda, I'm able to just move the
camera around, like so. It saves a ton of time
instead of, you know, having to rotate it like this and then a
bit of a headache. So just press Shift till day
and move with your mouse. Super easy. Now, I'm
also able to fly around front, back, right, left. And if I press shift
at the same time, it's going to make
the movement faster. So I'm going to fly
to the front faster, fly backwards faster, left
to right, front back. You can see I'm moving
faster right now. And now without pressing shift, I'm going to move a
little bit slower. Now, some of the other
important aspects about the camera is
if we go into data, we can enable the
depth of field. Depth of field will allow to add this blur in the
background or the foreground. It's called boke in photography. It's this sort of effect
when our subject, for example, in the foreground is in focus and the
background is out of focus. So this is something
that we can do if we enable the depth of. Other thing is we can
change the focal length, basically how zoomed in or how
not zoomed in the lens is. If you ever use the big camera, like DSLR or mirrorless cameras, and you have your lens, and you're able to zoom
in with your lens, not on an actual picture, not zoom in, with your fingers, but zooming in with lens. Because your lens has
different focal points. And the way the camera works in Blender is exactly the same
way as it works in real life. So if you have a head experience with cameras in real life, it works super similar. By the way, another
tip that I can give you the last
tip before we start, is if you go into Render
and if you put motion blur, it makes this real motion blur that makes the videos
just a little bit better. So you cannot really see it, but when we move with the camera, you'll
be able to see it. We're going to disable
it for now because it takes extra power
for your computer. So once again, Dolly, I'm going to go let's say
to something like this. One more tip is, if we select the camera and we go into
the viewpoint display, we can sert this value, and you can see what's
happening is it darkens the parts that
are around the camera. So the view of the
camera stays the same, and it just helps us to
focus on what we have. For example, if we have
a lot of stuff like, around and you're not sure what you will see in
the final export. This is exactly the way to
control the passport out. Not sure if I pronounce
it correctly. Basically the darker areas,
you can make them darker. We are going to put
our camera over here. Let's press on I to
create a keyframe. You can see everything that
becomes yellow is keyframed. One of the things that
we also need to do, let's say if we want to create a keyframe for the
depth of field, we don't have the key
frame because we need to press on I here and you can
see when it becomes yellow, we also get this animate property, basically
the keyframe. So it means that we
have the keyframe here. So we can set the focus
distance over here, right, and press on I over here so that we know our
subject is in focus. Now, let's move our camera
to something like 40, shift till day, and I'm
going to fly backwards. I'm going to press
on left click of a mouse to just set it here,
and I'm going to press on I. And you will see that we have
a camera move right now. Or focus distance, you can see our subject is not
in focus anymore. So while we are
on the ski frame, just to make sure that we put key frames in the same
location in the same frames. The focus distance here,
we need to put it, and we need to either press
here to animate property or we need to hover over the
values here and press on I. Our subject is now in
focus at all times. Great. Now, one thing we
didn't do is we did not animate the focal length. There's something
we need to do in order to achieve this effect. Well, I'm going to go
to frame number one, and I'm going to press
on focal length, going to person keyframe here. And by going to frame number 40, we are going to zoom in, and I'm going to put
another keyframe. And now let's take a
look at what we have. You can see that the
cameras moving back, but we're actually
sort of, like, zooming in, so we get
this interesting effect. You cannot really see how this effect is sold because we don't have anything
in the background. Let's add quickly something
to the background. Let's go into Sketchfab, and let's search
for, like, a house. And by the way, I'm
going to go into the cycles unteur because it's not going to
work otherwise. Okay, let's just
import this house. It doesn't matter what we add. Okay, it's absolutely gnomis. I'm going to press on
S to scale it down. I'm going to press G, Y
and move it a little bit behind us G and X to move it a little bit to
the right so that we can actually see
what's happening. Now I'm going to
switch back to EV because cycles takes more
power of our computer. Okay, perfect. You can see the
background is blurred. So let's take a look at what
we have. Interesting, right? It's like the background
is sort of growing. Let's the camera so that we can see the
keyframes here as well. And let me just look so also, an interesting fact about
the camera is that the more zoomed in you
are put the lens, and you will see
this effect here is that take a look
at the background. It's like, it's almost
in focus, right? I mean, it is a little
bit out of focus, but when we go to
frame number 40, it's a lot more out of focus. So this is the way
you can achieve this bouquet effect
even more is if we zoom in with the camera,
one of the ways to do it. And we can do exactly
the opposite. We can actually just change
the keyframes, right? Let's put it to 40. And we'll go from
Zoom Din to Whitens. But actually, I think it works better in
this case because we want to see the
background later as if it's like it's
being revealed to us. So actually, let's put it
to let's do it like this. We'll we'll start from here. We'll go to frame number 30. At frame number 40, I'm going to press Shift Til D, and I'm going to
actually, in this case, I think it's going to
be a little bit easier to just lift it up like so. I'm going to press Shift Til D and look down and press on I
and you'll see what happens. The camera becomes a
little bit higher, making our subject a
little bit weaker. So in the very
beginning, actually, what we had here is our
subject had more power. I was stronger. Now
that the camera is moving up has a little
bit less power. Actually, let's make it
even higher as well, like so and move it down. And we can see big
difference from going here from here to here, this one has a lot less power. It's like it's injured. But in this one,
okay, it's injured, but it's like a king is injured. But in this case, it's like
a child is injured in a way. Well, it's just
the way I see it. Of course, all this
creative stuff, it's like, it's so personal. People see things differently is just one of the
ways that I see this and it's an
industry standard to achieve a certain effect. Tracking shot. Let's
select our camera. Let's go to frame number 60, press on I first.
Press Shift till Day. Actually, we need to
go to frame number 70, for example, Shift Till
Day and Let's fly. So I'm just looking
at both viewers to make sure I'm going to press on here so that this
pop up disappears. So I'm looking both here, what
I see in the camera view, and I'm looking here to
see where the camera is. And I'm going to
press on I here, and let's move to
frame number 90, Shift till day, and I'm going to fly a little bit to the left, and I'm going to keep our
subject in the frame. Going to press on
I. So this way, you can see the
camera moves with the subject exactly what we
have in the tracking shot. I actually really
like tracking shots. The reason is because the shot becomes so much more
interesting and dynamic. Instead of staying in
the same position, like, the camera moves
and so everything relative to the camera moves, and it's it's subtle change, but the shot becomes
a lot more expansive. So if you ever choose to just track the subject or move the whole camera
with the subject, it's better to move the whole
camera with the subject. I mean, depending on the
style that you're going for it can be slightly
different, but actually really, really like this one so that
there's a bit of movement, and the camera is moving exactly as our subject is making a step. Now we're going to have
over the shoulder shot. I'm going to go to
frame number 100, going to press Shift Tilda
and we're going to fly like behind our subject
to see what's happening, going to go a little bit higher. Something like so, and
I'm going to press on I. And let's put something
in front of our subject. I'm going to press on N, and I'm going to go to cycles again. Let's do something mysterious, maybe like a coffin. Let's
do something like this. I'm going to press G, Y, and so now the camera, actually, you know,
let's go to EV. Let's come Let's come
to frame number 60. Let's come to camera. Keyframe for the focus distance. Let's select our
subject, like so. Put a keyframe. Go to frame number 70, select our subject. Put a keyframe 90. Select our subject,
put a key frame. And now let's select the
coffin and put a key frame. This is a very interesting
shot because we can see what's happening in front
of our subject and we can really
kind of feel it. It's powerful because we
also see the subject. One of the ways it's done
is to show dialogue, which is great in movies, but it doesn't have
to be dialogue only. We can show what's happening
in front of our character. For example, when something's happening in front
of the character, we see the emotion
of the character, which is great, but one of the other ways that
we can use this is we can show what's happening
in front of the character. So we don't see the
emotion of the character, we just see what's
in front of it. It gives us a little bit
of flexibility to react. So we don't just take a look at how the character
is reacting. We make our own assumption. So it's just one of
the ways that we can creatively go about this. Birds eye view. Let's put another
keyframe, press on I. Let's go to frame 120. The reason why I'm going
in tens is because it's just a little bit easier in terms of the
calculations in my head. So let's put a
keyframe, press on I, put a focal length and
the focus distance. Like the camera, press on I, and then for the focus distance, we can select our
subject, put a keyframe. And so it goes
from here to here. So that's the bird eye view
and the rack focus track. Put a keyframe here, go to
frame 160, shift till day. So I'm going to select
the focus distance on the coffin currently to see
the details of the coffin. I'm going to press on I
to select the key frame. And now I'm going
to go to frame 170, and I'm going to select
our focus distance or character. I'm
going to press on I. And so we can see how
the focus changes from the coffin to our subject. Beautiful. We would make
it a little bit longer. And if our subject
was moving here, it would like it would be it would really sell the
story of what's happening. Now, let's take a look at
everything we have here. So from the very beginning, It's an interesting
story, I would say. Some of the main
things, once again, just to recap, focus
distance, focal length. Make sure to key frame these if you want them
to change over time. Press on I when
you're hovering over the values or make sure
to press over here. And the best way to
animate the camera, in my opinion, is
through Shift till day. Make sure to give it a try. You might like some of these. You might not like some of these and choose whatever you like. Like, the directors don't necessarily use all the
techniques all the time. Some directors just prefer
specific techniques, and that's what
they are known for. So go and try it out. If you have any
questions, let me know, but other than that, I'll
see you in the next video.
10. Fast Preview & Export Settings in Blender (Workbench & Eevee): In this video, we're going
to talk about how to test and export your
animations. Let's jump in. First, we need to go
into the renderer, and we have three
renderers in blender. Basically, the difference
between the renderers is the quality that you're
going to see in the export. In simple words, this
is what you're going to see if you export in workbench. You can actually see kind of the preview of what you're
going to have here. This is the workbench, where you have
very little facts, you have, basically
nothing, no materials, nothing just easy to see
if movement is okay, if the measures are okay, if the camera is okay, it exports really, really fast. It doesn't take a lot of
power for your computer. So it's really good
to just kind of test and see how good it is. The EV is this kind of vendor. So if I export, this is the way it's
going to export. It's great for posting
things through social media, but it's not the
highest quality. Like, if you really want
the highest quality cycles, but tycles take the
most powerful computer. So you can see we get
the very best quality. Like, the quality is the
most realistic, like, it's really, really
good quality, but it takes a lot of
power for your computer. That's why I test things
in the workbench. I export in EV, and I do not export in tiles, even though cycles
looks the best, but you need to have a very
powerful computer to do this. You can give it a try and test the kind of computer
that you have, but trust me, even cycles is going to take a lot of
power for your computer. I'm going to select
the workbench. Then we go into the output
for the resolution, 1080 by 1920 is something
we've already set. In terms of the frame rates. I always recommend setting
the 30 frame rates, and this is the way you will calculate your
animations as well. So imagine we set it
to 60 frame rates. It means that this whole
animation is going to be twice as short because what you have
here, is the frame rates. I do recommend 30
60 is too smooth. Social media will lower the quality of
videos if you put it 60 because most of the videos
are 30 frames second or 24. So put it to 30. It's going
to be the best quality. Then for the file format,
if you want the video, I do recommend putting this video format that we
need to go into encoding. And we have this
Matrokaset here, but I do recommend
putting it to mpeg four, which is the video format. And then we're ready to export. Actually, before
that, we need to set the output where and
the kind of name. But if I go to, for
example, the desk clop, and I save it without a name, it's still going
to give it a name. And in the frame range. So we have 190 frames
of animations, and I'm going to put 190 frames to limit it to 190 frames. Otherwise, it's going to export until 250 where we have
no animations, right? What we wanted, we
want this part here. And I'm going to
export just to double check that everything's okay in terms of the
camera animation, in terms of the movement,
things like that. And the way I'm going
to export or render, is I'm going to go
into Render and we can render the animation by pressing in my case,
Command Ftwelve. But if you're on MacBook, you have to press
F and Command 12. On Windows, you have to press
Control instead of command. So it would be Control Ftwelve. So let's give it a try, press it, and you'll see that it renders it
pretty quickly. Like, it doesn't take a lot
of power for your computer. Boom, and it's
done. Now, if I go into my desktop, this
is what we have. This is the whole video
that we've just created. And you will see that we don't have the
focus here as well. That's why it takes
a lot less time. We just checked everything. Looks great. We are
ready to export. Now we will go to Render
and we're going to switch to IV and it's going
to export in EV. And this is going to
take a lot more time. So let's go into the output. We have our desktop,
and now at the end, I'm just going to say
something like final. I like to give it a little
a little different name. So you can see here
we have the number of frames in the name of our file, and we're going to
export and is going to have the final in
number frame rates. Okay, let's start exporting. I'm changing nothing
aside from the name, and yeah, you can see this
one's taking a lot more time. This is just four
frames. Great. I'm not sure how long that took, but it definitely
took a lot longer. You can see here that we
have the final the name and then the number of
frame rates, as well. So let's take a look at
everything we have here. Mm hmm. You know, let's take
a look like this. Perfect. One thing I forgot to tell you about the
key frames is, for example, we have our
model like this here. We can see them,
but then we go into the next frame and then
the model disappears. What if we want to keep
the model in the frame? Well, first of all, we can set the focus point to the model, but actually, I don't
prefer to do it. The way I prefer to do it is press shift till day like
somewhere in between. And then just go to the
model and put a keyframe, like so, and you'll see
this is what we have. And sometimes we got to do is
to turn on the motion blur. If we turn on the motion blur, let's see what we have. For example, you can see this motion blur
in the background. It kind of renders it while
I'm holding the mouse. If I stop holding the mouse and it will just
become like this. And one thing we
can do is we can render just one of the frames. So once again, if
I go to render, we can render image instead of rendering the whole composition. So if I press here a fan of
12, it's going to render. You can see the motion blur in the background where we do
have a bit of like blur or, for example, on the
hands here as well. So this is the kind of motion blurring I was talking about. And if you want to take
videos to the next level, Go ahead and experiment
with motion blur. It's so great. You can put it to basically a little bit
less and a little bit more. So if I put the
shutter to a lot more, you can see, we have a
lot more motion blurr. This is a bit too much,
sometimes even 50, like half is a bit too much. So D recommend putting
it to like 0.25. You can still see that
we have motion blur. I just a little bit less, and one thing is if you have a lot
of camera movement, it becomes a bit too much. And that's in terms
of the exporting, if you have any
questions, let me know. Bs than that, I'll see
you in the next video.
11. Capstone Project: Create a Viral-Ready Short with Blender Character & Camera: Come. In this video,
I want to quickly walk you through your project. To practice, I recommend
you two things. Create your character
and make sure to create not just one animation
but a couple of animations, put them together to make
sure you don't forget it because if you don't practice,
then you will forget it. So make sure to
create a character, create a couple of animations, two animations totally fine. Make sure to experiment with the camera is
the second thing. Of course, I recommend
experimenting with every single camera angle, but if you don't want to do it, then go ahead and try
at least one of those. The third thing would be to export and upload it as
your Skillshare project. Would be great to hear if you had any challenges or if there's anything else for you
to share because it doesn't just help
you learn better. It helps other students
learn better because if somebody is going through a
challenge that you overcame, then your experience would be
able to help that student. It's super valuable
and I also really appreciate taking a look at
the work that you guys do. It's absolutely amazing.
Please do that. If at any point you
have any questions, be sure to leave it in
the Q&A section below. But other than that, I'll
see you in the next video.
12. Last Step!: Congratulations.
You are nearly 100% done with this blender course. There are just two small
steps you need to take. First, take action.
As Kafuch said, a journey of 1,000 miles
begins with a single step. So if you haven't already, take your first step by editing
your first video and blender. All the best information
in the world means nothing if you
don't act on it, and small steps lead
to massive outcome. Lastly, if you found
value in this program, I would really appreciate
if you could take 60 seconds to leave
you honest feedback. I will immensely appreciate
this and your feedback will massively help future students in deciding the best
program for them. Although this
course is complete, your journey has just begun. I'm excited to see edits online, so be sure to keep me and
your fellow students posted. Remember, I'm here
for your success. So if there's anything you need, don't hesitate to reach out
in the QN section below. Thank you again for choosing
me as your instructor, wishing you all the
best and looking forward to seeing you
in future courses.
 Vladislav Sateev, Video Editor