Transcripts
1. Introducing Blender 5: So, you want to learn blender.
Well, I'm here to help. My name is Aaron F Ross, and I've been a three D artist, teacher, trainer, and
author for many years. My mantra is Zenmnd
is beginner's mind. That means I always try
to see the subject I'm teaching from the
perspective of the student. And I think that gives
me the ability to communicate difficult
topics more effectively. And let's not
pretend that three D is easy because it's not. And Blender is actually one of the most difficult
three D programs to learn because it's
unconventional. My goal with this series
of courses is to address those issues and make blender approachable and comprehensible. So whether you're
a total nub who's never touched three D before or a three D god who
needs to quickly get up to speed in
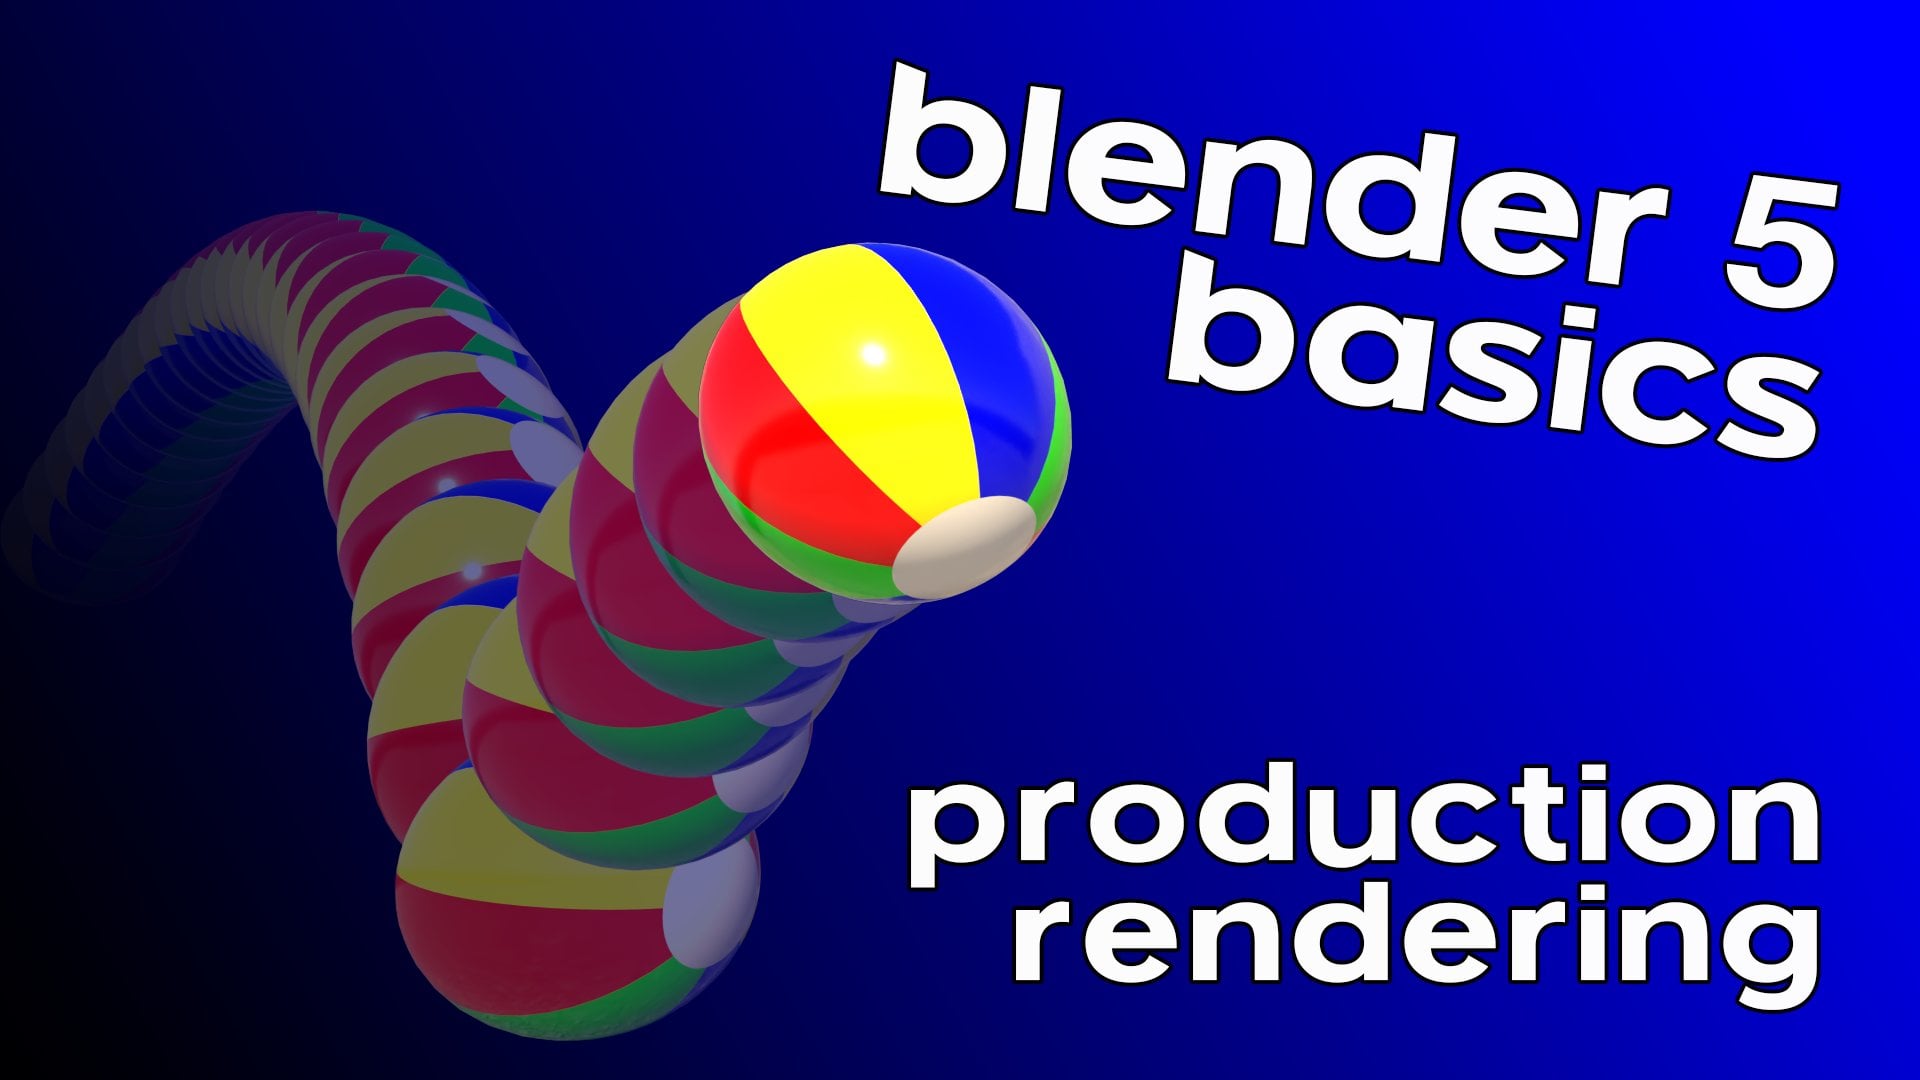
blender, I've got you. In this series of six courses, we'll cover the entire
animation pipeline in blender. That means we will animate something from start to finish, learning the basic three D production processes
along the way. You'll learn scene
layout, materials, lighting, animation, and
production rendering. Our project is a bouncing ball, which is a classic
beginner exercise in animation because it's
deceptively complex. There's actually a lot going
on with a bouncing ball. It's traveling through
space, in arcs, it's spinning and deforming. All six of these courses
fit together into a coherent sequence
that will get you grounded in the
basics of blender. I'm excited to share my experience and
perspectives with you. Let's get started with a tour
of the Blender interface.
2. Using the exercise files: With this course sequence, I provided some exercise
files in the form of blender scene files and also some textures and even some example
output renderings. Go ahead and download
those exercise files and then unzip the
archive on Windows, you would do that
by right clicking and choosing extract A. And then once you've
extracted those files, put them in some convenient
location on your hard drive. I've just put those
exercise files at the root level of one
of my hard drives. What we're looking at here is a very simple project
folder structure. And the idea here is to
keep all of the assets required for a particular
project within a container. And in this case, that's a
folder called exercise files. And within that
containing folder, I've created subfolders for
various types of assets. An asset is just a
file of some kind. I've got a folder
for three D scenes. Those are the blender files. They have the extension dot BEND I've also got
some input textures. These are image files. And finally, there's some
example output renderings. In this first course
in the sequence, we're only going
to be dealing with files in the three
D scenes folder. Let's go in there. And what
you'll see is there is a blend file for most of the movies in
the course sequence. Some of the movies, especially
at the very beginning, don't have any scene files
associated with them because we're not actually
saving or loading anything as we're just
learning the interface. Most of these flow
from one to the next. The begin state of the movie is stored in its
associated scene file. The end state of that movie is generally the begin state
of the following movie. So for any given scene file, that represents
the begin state of the current movie and the end state of
the previous movie. There are some
exceptions to that. If you see a scene
file labeled finished, it's there because it's the last scene file
in that sequence, and there's nothing after that. So those are the SEN files, and you'll see that
there are a lot of them. We're only dealing with the ones labeled 01 in this course. In the subsequent courses, we'll use these other SEN files, and they're all
numbered accordingly. The first number in
the scene file is the course number followed
by the chapter number, and then the movie
within that chapter. We see that we have scene files numbered all the
way up to oh six indicating the last course
in this series of courses.
3. Getting familiar with the interface: Let's start with a tour
of the blender interface. I'm going to briefly go into
the preferences and increase the size of all of the text
and icons on the screen, and that's found in
the edit menu under preferences right at the very
top in the interface tab, we have display
resolution scale. Set that to some value
larger than one, if you want to increase
the size of the interface. I'm going to turn
this up to a value of 1.25 press return, and that takes
effect immediately. We will come back to
this in the next movie, but I just wanted to increase the resolution of the interface so we can see things
a bit better. In the upper left,
we have the menus, but this is a very
limited set of menus. There's almost nothing in here
except for opening a file or rendering an image or
opening a new window. The main commands within
blender are going to be found within
various panels, which are known as areas. The main viewport is an area. We also have an area over
here called the outliner, which is a list of all
the objects in the seam. We have the properties panel,
which is another area. We can change the user interface with these workspace
tabs at the very top. The default workspace is layout, meaning setting up the positions of objects in your scene. I actually prefer to
stay in the layout workspace almost
100% of the time. I'll only go into one of these other workspaces
if I absolutely have to. When you click on
one of those tabs, your whole interface
is going to change. And it's not only going
to change the interface, blender is also going to
drop you into some kind of special editing mode in
some of these workspaces. So be aware you're not just changing the layout
of your panels. You're actually changing
the behavior of tools when you go into
these various workspaces. And these are all specialized
for various tasks, such as sculpting or
shading and so on. There are more workspaces
than can fit in this top row. There's a plus sign on the far right, and if
you click on that, you'll see that
there are a bunch of other workspaces that are
kind of hiding in here. And some of these are
pretty important, such as video editing. Okay, I'm going to go back
to the layout workspace. So as I mentioned,
this is the viewport, and that's where we
can view our scene, view the geometry or
objects in our scene. We can see things like
this polygon cube or this, which is a camera or a light. These are all things that are in the default blender scene. We'll go into more detail about the Viewport
controls later. But the basics are that we've got a header at
the very top here, and that will contain
not just icons, but also a menu. And the Viewport menu
in Blender is kind of unique in that it contains not just viewport
centric commands, like in most three D programs, but the Viewport menu
within Blender actually has a whole series of very
important scene commands. So we can create objects
or we can change the relationships
between objects within this viewport menu, which as I mentioned, again,
is not very orthodox. Most three D programs are
going to do this through the main menus or maybe
through some property panel. But in blender, the viewport
itself contains a lot of scene commands that are not actually related to the view, but rather to the scene data. At the bottom, we have controls for playback of animation. And there are a bunch
of other panels and areas that we will look
at later in the courses. I don't tend to
use those layouts, as I mentioned,
those workspaces. What I do is I go
to the main menu to the window menu and
open a new window. Within this new window,
we have an area, which is going to be whatever the currently
selected area was or whatever area had focus is going to be the new window area. But in the upper left of
every area on that header, we have the editor
type pull down. If I click on that, I can choose what to load
into this area. So instead of a
three D viewport, for example, I can load
in the shader editor. And if I have
something selected, I can see the shading network. I'll select this cube.
That's a basic introduction to the blender interface.
4. Setting Preferences: The previous movie,
we briefly looked at the blender preferences in order to increase the interface scale. I'd like to make a couple other changes to those preferences. I'll go back into the main
menus to edit preferences. And I want to go down to this navigation
tab, open that up. And there's a pretty
important command in here or option in here,
orbit around selection. You want to enable that so that when you orbit or
tumble in the viewport, you will orbit or tumble around the currently
selected object. And that really
makes things a lot easier in terms of
viewport navigation. If we go to the key Map
section, that page, there's another
option that I would recommend is to set the tool
keys to the active tool. This has to do with what
happens when you issue a key command for the transforms of move,
rotate, and scale. By default, if you use
those keyboard shortcuts, you'll be put into
Blenders traditional mode of transforms. And that is very, very unorthodox and really quite different from every
other program. And I actually
don't recommend it. If active tool is enabled, then those keyboard
shortcuts are just going to enable these tools
on the toolbar here. We'll talk about this
more later, but for now, we want to set the tool
keys to active Tool, and we'll come back later and explain what all that means. Going into the system tab, we have cycles render devices. Cycles is the
production renderer for Blender or the so called
offline renderer. It's what you will usually
use for your final output. When you render in cycles, you can render on the CPU
or central processing unit, or on the GPU or graphics
processing unit. The GPU is the graphics
subsystem on your computer. And if you render on the GPU, it's going to be
much, much faster. I mean, like ten times faster. So you basically always
want to render on the GPU. You need to choose the
appropriate setting here depending
upon what graphics hardware you have installed. So I have an Invidia
graphics card, which means I can choose
either CUDA or Optics. If you have Invidia hardware, then you want to choose optics, because that's going to take
full advantage of all of the optimizations
built into that GPU. If you have AMD hardware, you want to choose HIP. If you have an Intel
graphics system, you want to choose one API. And if you're on the Mac, you want to make
sure you've chosen the Apple silicon or M one or whatever setting
it says on the Mac. I'm on Windows, so I don't
have a Mac option here. So, in my case, again,
I'm going to use optics. Cool. Then we go down
into save and Load. I want to set the number
of save versions to zero. When that's set to one,
which is the default, every time you save
a blender scene, it's also going to save
an extra blender scene. The filename extension for a
blender scene file is BLEND. When save versions
is set to one, it's also going to
save a file with the extension dot BLE and D one. Your system is going to
get cluttered up with a ton of these blend one files that serve no
function whatsoever. So I'm going to turn
that behavior off, set the save versions to zero. Those are all the
settings that we really need to
look at right now. We'll come back into these preferences
later as we need to.
5. Installing Add-ons: One of the best things
about blender is the ecosystem of add
ons or extensions. These are plug ins to extend the functionality
of blender. They're not installed
with blender, most of them by default, but there is a very
active community of third party
developers out there who provide a vast number
of plug ins or add ons that will really accelerate your
production process. And in fact, some of these
are things you really can't do without or you wouldn't
want to do without. Also the economics of Blenders add ons ecosystem
is very favorable. So just to give you some
sense of the scale here, if you bought a plug in for a
program like Autodesk Maya, you might pay perhaps
hundreds of dollars, whereas a similar plug
in for Blender might be free or maybe cost
tens of dollars. I'm going to go into the
preferences and enable some of the most critical
add ons or extensions. Go to Edit preferences. If we go to the add ons tab, we see a list of all of the extensions or add ons
that are currently installed. And some of them
are not enabled. If they are enabled, they'll have a little checkbox
next to them. Some of these are installed but just not turned on right now. If we go to the Get
extensions tab, this is where we can go
to the Blender database. This is a system hosted by
the Blender Foundation, and it has a list of all
of these plugins or add ons that have been vetted
by the Blender Foundation. They've been tested to make
sure that they're free of malware and that they
operate as advertised. In order to install
any of these, we need to allow online access. And once we do that, then it's going to go out to that database and check
to see what's there. There are just a few that I really strongly
recommend you install, and in fact, you're
going to need to install these to progress
through these courses. They're hard to find
because there's so many. I mean, there are
hundreds of these here. It's just incredible. So we need to do a
search up at the top. Let's do a search for
the letters PRIM Prim. We want to install
the ND primitives. ND stands for non destructive. This will allow us to create
an object and then change its parameters later like its dimensions or its
number of segments. That's not a feature
that's available within blender by default,
which is very unusual. Blender is the only
major three D program that has that limitation, and it is a very
serious limitation. So the ND primitives
are really critical. You can't really
exist without them. So I'm going to
click on Install. It's only going to take a
second because these are tiny little script files in the Python
scripting language. So it's installed now,
and it's listed here. There are a couple others
we need to install. Let's go back to
our search engine and type in the word extra. And we see extra mesh objects
and extra curve objects. Well, especially the
extra curve objects are not even really extra. They're things that you
absolutely need to have. If you don't have
this installed, then you won't be able to, for example, create
a curve object that has a polygon shape. So we need to install
the extra curve objects. And we'll also install
the extra mesh objects. Those are less
critical because we've also installed the
ND primitives, but just for the sake
of completeness, let's install those as well. Once all that's installed, we can go to the add ons tab, and we see that
extra curve objects, extra mesh objects, and ND primitives are all
installed and activated. I can close the preferences. And I can test to
make sure that that's actually working by going to the Viewport menu
to the Ad menu. And if I go to mesh, I'll see ND primitives
listed there. Or if I go to curve, I'll see a bunch
of things in here. For example, we have
simple curve objects in various shapes like a polygon or a rhombus or trapezoid
or arc or whatever. So that tells me that, in fact, all those plugins or add
ons are actually installed.
6. Understanding scene scale: The very first thing that
we need to look at in any three D program is scale. What is the scale of our scene? What units of measurement are we using to measure our world? And really what is the
scale of the world? In other words, is
the world modeled at a one to one scale where the measurements we see in our three D program actually
correspond to real objects, or have we perhaps
modeled a miniature where objects are not at the same scale that they
might be in the real world? Well, I do recommend
that you work in a one to one or unity scale. And when I say unity scale, I'm not referring to
the unity game engine, I'm referring to a concept
where scale of one in the real world is scale of one
here in the three D scene. And you need to follow
that convention unless there's some really
important reason not to. This comes into play, especially
when you combine scenes. If you combine two scenes
that are at different scale, then you're going
to have problems, especially if it's a
character, for example, and it's got a complex rig or mechanism to animate
that character. It's really common that that rig itself is not going
to be scalable, so you may have to actually trash your work and
start over again. So you need to think
about scale at the very beginning before you even start to build anything. In the default blender scene, we've got a cube, and
it's 2 meters on a side. I know that just because I've
worked with Blender before. Over on the right side
of our interface, we've got the properties panel, and there's an orange tab which brings up the
object properties. And that shows the object's
position or location, the object's rotation,
the objects scale. If I select some other object, I'll see different values. This camera is at a
different position. The cube is actually
at the origin. It's at the center of the world, and it's got a location
X, Y, and Z of zero. This is not telling me the
actual size of this object. It's showing the scale
transform value, and that's a multiplier for
the shape of the object. So there's a lot going on here. We have an object, and it's got a shape that
determines its size. So the shape of this
object is a cube, and that cube has
a certain size. Okay, that size is
then multiplied by the scale factor in
the object transforms. So if I drag my
mouse across all of these and I set a value of two, I've scaled that object
up by a factor of two from whatever its
original shape was. Okay, I'm going to set
those back to one. In fact, a scale of one, one, one is the ideal scenario. If you have a scale
that's not equal to one, you might have problems later. But again, this is not
showing the actual size. If we want to
measure the object, then we can display
its dimensions. And we can do that by opening up the side bar in the
main viewport window. And there's a tiny
little arrow up here you can click on to
open up the side bar, but it's really small
and hard to see. You're going to want to memorize
this keyboard shortcut, which is N. And for nothing. Press the key, and that
opens up the sidebar. And that's pretty
universal across blender. You'll see that in a lot
of different panels. With this cube selected, I can see that its scale
factor is one, one, one. Is actual dimensions or the size of the object
is 2 meters on a side. We can display this in any
units of measurement we wish, and it won't actually change
the size of the object. Let's go to the
scene properties. That's another tab in
the property panel, and it's got a funny icon that has a cone and a
sphere and a dot. Go to SN properties and
open up the units section, and we have the unit system. And this is just the yardstick that we're using to
measure our world. Down below, we have the length, and that's in meters by default. So we can choose to display values in meters or some
other unit of measurement. I can choose centimeters, and now these dimension
values read out as 200 centimeters instead
of 2 meters. Okay. We want to, we can go to the
unit system and switch it over to Imperial or
US standard units. And you would do that if you are an architect or
interior designer working in North America. You might use imperial units. But in almost every other case, you're going to want to
use the metric system. If you are using imperial units, you will see values
displayed in feet or inches 2 meters
equals 6.56 feet. Or if I go to the length units, I can set that to inches, and it's now reading
out in inches. 2 meters is 78.7
", approximately. Okay, I am going to
use the metric system, and I am going to leave the length display at meters,
which is the default. Again, this doesn't change the scale or the
size of anything. It just changes how we
wish to measure things. If we change this
unit scale, though, we would actually change the absolute size of
objects in our world. For example, if I set
my unit scale to 0.1, now that cube is not
2 meters on a side, it's 0.2 meters on a side, or if I set the
unit scale to ten, now that cube is 20
meters on a side. I am going to set that back to a value of one and
leave it that way. You'll only want to change that unit scale in
extreme situations. For example, if you wanted to model something
that was very, very large or very, very small, because if you have
a scene that is extremely large or
extremely small, you can get round off errors because there's not
infinite precision to calculations here. So by way of example,
if we have a scene that's larger than
a few kilometers, then if we have an
object that's really far away from the
center of the world, points on that object
might be closer together than the margin
of error of calculations, which would cause those points to collapse to a
single location, crumpling your model,
corrupting your scene, or maybe making it so that
objects don't render. So in a case like that,
if you have a very, very large scene or a very, very small scene, you might want to change
that unit scale. But in any other case, you're going to want
to leave that alone. That's how to work with
scale and units in blender.
7. Navigating in viewports: One of the most fundamental
things we need to do in any three D program is
navigate in the viewport. We need to look
at our scene from some other point of view,
change our perspective. In blender, this
can be done from the viewport overlays in
the upper right corner. And at the very top, we have
the most important one, which is the three
D viewport axis. We can click in the center
of that and then drag, and that will allow us to orbit or tumble
around, in our view. We previously set the preference to orbit around the selection. If I select this camera and click in the center
of those axes, I can orbit or tumble around
that selected camera, or I can select this light. And again, click in the center, and I can orbit or tumble
around that selected object. If I click on one of
these labeled circles, for example, this why.
If I click on that. I'm taken to a different view, and this is actually a
different type of view. What we saw previously
was a perspective view, and a perspective
view works like a photograph or
works like our eye, in which if an object is farther away, it's
going to look smaller. Well, this is not a
perspective view. This is not a three D view, but it's a two D view. And it's called an
orthographic view, which means that the
view is orthogonal or at right angles to some
axis of the world. So our current view is a two D view in which there's
no indication of distance. If I had two objects
that were the same size, they would be drawn the
same size in this view, no matter how far
away they were. Okay? So that's important. We need these orthographic views in order to actually
analyze things like the absolute position or the absolute
size of something, because perspective views will introduce all kinds
of optical illusions. If I click on the Z axis here, I'm taken to a top
orthographic view. Now, I'm looking down on
a two D view of my world. And in architectural terms, this would be a plan view. If I want to go back
to a perspective view, I can just click
in the center of this three D viewport
access once again, click and drag and I'm taking
back to a perspective view. You'll want to orbit
or tumble around in your view 1 million
zillion times every day. And in fact, when
you're modeling, you're going to be constantly
orbiting or tumbling around in order to see your object from all
different angles. The three D viewport
axes are very useful for switching to
an orthographic view. But if you're just orbiting
or tumbling around, you are going to want to use the keyboard and
mouse shortcuts. And in blender, it's simply the middle mouse button
or the mouse wheel. You press the mouse wheel down, and it is the middle
mouse button. And that brings up the
fact that you must have a three button mouse to
operate any three D program. It's just not optional. You have to have a
three button mouse. And nowadays, all three button
mice also have a wheel, and the wheel operates as a scroll wheel and as
the middle mouse button. If we turn the wheel, that allows us to dolly
forward and back. And if we were in an
orthographic view, we would zoom in and out
just cropping the view. In a perspective
view, we're actually getting closer or farther away. That's the same as clicking
on this magnifier glass. If I click on that and drag, I'm also zooming or
dollying forward and back. Notice that if I turn the wheel, it's incremental, so it's
chunking through in increments. If I click on the
magnifier glass, I have finer control. Well, the best option for
zooming or dollying is actually using the keyboard
and mouse shortcuts, not turning the wheel,
but holding down the control key and pressing down the
middle mouse button. Control and middle mouse lets us dolly forward and
back or zoom in and out, not incrementally, but
with fine control. And finally, we can
change our position using this hand tool that allows us to change the position or the
location of our viewpoint. You could think of that
as moving the camera. When we click and drag
on this move tool, we can move our camera left
and right or up and down. Left and right movement
is also known as a track or truck or a crab shot. Up and down is a pedestal
or a crane shot. But again, you're
going to want to use the keyboard and mouse
shortcuts for this because going up to these icons all the time is really
going to slow you down. To change the position
of our viewpoint, pull down the shift key and
the middle mouse button, and that'll allow you to change your position left and
right or up and down. So in blender,
viewpoint navigation is all about the
middle mouse button. Middle mouse by itself
is orbit or tumble. Control middle mouse is
Zoom or dolly and shift Middle mouse is
going to allow us to change our position left
and right or up and down. So memorize those. You're going to need to do those a
zillion times a day.
8. Creating primitives: Now we're ready to start
laying out our scene. We want to create
some primitives. A primitive is a
building block object. This is a very simple scene. We only need three primitives. We need a ball. That's
our bouncing ball. We need a ground plane, and we need a background. So that's only three objects. Very, very simple layout. The default blender scene
has got some objects in it. I'm going to delete all those. I want my blender scene to start out just neutral
with nothing in it, and that's how literally every other three
D program works. Blender is the only program that has this stuff in
here by default, and we don't want it or need it. Up until now, these
things have been useful in order to teach you how to navigate in the
view and so on. But now we need to
create an actual layout, which means we need to
get rid of this stuff. I've got the Select
Object tool active, and I can drag a rectangle around all that stuff,
and it's all selected. Or I could go up here
to the outliner view. And I could click an
object to select it. I could hold down Shift and
then click the last object, and that object and
anything in between the current selection are
going to all get selected. So those are all selected. Notice, by the way, that
the camera is in yellow, and the other two
objects are in orange, and that's kind of special. The last selected object or the so called active object
is highlighted in yellow. And the other selected
objects that are not currently active are in orange. I can just press
the delete key on the keyboard and those
objects are all deleted. I want this to be
the new condition for all start up scenes. This is how I want all
my new scenes to begin. I'm going to go to the file
menu and choose defaults. Save startup file. I'm prompted. Do you really want to do this? Blender will start next
time as it is now. That's a little bit
awkward English, but what they're trying
to say is that whatever your current scene
conditions are going to be the scene
conditions for all new scenes. And we have the option
to overwrite or cancel. Well, if we've never
done this before, we're not actually overwriting. We're creating something
for the first time. But we have to click overwrite. So the next time I
create a new scene or next time I launch blender, these are the conditions
I'm going to have with none of that extra
stuff in the scene. Let's create our ball. We'll do that from the Viewport menus. As I mentioned previously, Blender is the only
program that has these scene commands
within the Viewport menu. Every other program,
the Viewport menu is just for the viewport. But in Blender, this viewport
menu is really critical because this is how we have to do things
like create objects. I'll go to the Viewport
menu and click on ad. We have all these different
categories of objects. I want to create a mesh object, which is a polygon mesh. And we previously installed the non destructive primitives. And I want to go here
and choose UV sphere. That's a sphere that has a north and south
pole. Click on that. A sphere is created at the origin or at a
position of zero, zero, zero, and it's got these circles around it and this blue
thing sticking out of it. These are manipulators. They allow us to change
properties of the object. And if I go over to
the property panel, and if I choose the
modifier properties, the icon that looks like
a spanner or a wrench, I can change those
properties here as well. I could, for example, click on the radius and set that
to a value of one. Now, it's a 1 meter in radius. Or, again, I could use these
manipulators or gizmos. I think these are distracting, they get in my way, and I
really don't want them. So I'm going to disable that. That's done from the
viewport header. A lot of controls
exist in this header. We have the Gizmos. These are manipulators. And if I click on the
down facing arrow, I can choose which gizmos
I want to be visible. I'm going to disable the
active modifier gizmos. That way, I can't
accidentally change some property by
clicking on that. I'll only be able to change those properties deliberately by going over here into
the property panel. My current units are meters. I'm going to set the
radius of this ball object to 0.15 and press Enter. Now it's 0.15 meters in radius. I can also rename it. It's got a name up
here in the outliner. I can click on that, and
that selects the object. But if I double click
on it, I can rename it. I'll just call it ball. I can zoom in and out as
we saw previously, using, for example,
control and middle mouse. I can also just zoom in
on the selected object. If my mouse has hovered
over the viewport, I can press the dot key on the number pad, the
numeric keypad. That is a different key than the alphabetic keypad, period. There are two different keys and they do different things. So I have to press
the number pad, dot or period or decimal point. And that will frame
the view so that the currently selected object
takes up the whole view. If you don't have a number pad, then you can't do this command. If your keyboard does
not have a number pad, then you either need to go into the blended
preferences and remap that key so that the dot key on the alphabetic keyboard does that function, or a better thing to do actually would be to
buy a number pad, a USB number pad that you can just plug
into your computer. So that's how to
create primitives. We'll create some more
in the next movie.
9. Transforming objects: Position rotation and scale
are collectively referred to as the transforms,
short for transformation. We can transform objects
in many different ways. One way is to use the
object properties. If I select an object, go to the object properties, we can see we've got
location rotation and scale, and we could, for example, type
in a value like a Z value of 1 meter
that'll move it up. Need to back out control
and middle mouse. There's my ball at 1
meter above the ground. I could also click and
drag on this slider, and that'll interactively move
that object in that axis. We can do that from these
tools on the toolbar as well. If I click on the move tool, now I get an axis tripod, and that is allowing
me to manipulate the object by clicking on one of these arrows, and
they're color coded. Red is X, green is
Y, and blue is Z. If I click on the blue axis, I'm moving in the Z axis. Okay, we can also move
in more than one axis at a time by clicking on these little squares
or brackets. If I click on the red square, I'm able to move in Y
and Z, but not in X. And we can see those values update in the properties panel. Okay, I'll send that back to
an X and Y position of zero. Now let's talk about rotations. It's going to be hard to see
a rotation for a sphere, so let's create another
primitive. I need a ground plane. I'll go up to the
Viewport header to the Viewport menu to add, mesh, and create a
non destructive grid. Under ND primitives,
click on Grid. That's created at the origin, and we see its
modifier properties. I want to change up the size. So this is going to
be a ground plane, it needs to be a lot larger. I'll set my size X
to be 4 meters and my size Y to be 2 meters and orbit around
with middle mouse. This is the conventional
layout in which the camera is in the negative Y quadrant of the world and pointed
towards positive Y. We can verify that if
we go to the Z axis, now we're in a top
orthographic view. Our camera that's going to render the scene
is going to be down here at the bottom of this
top orthographic view. And that's, again, in
the negative Y quadrant, and it'll be pointing in
the positive Y direction. That's just the
standard convention. Go back to the three
D viewpoart axes, click in the middle there and go back to a perspective view. So that's my ground plane.
I'll go to my outliner, double click on that
grid name and rename it. We'll call it ground. I need a backdrop
object as well, which will give me
the opportunity to show you how to
rotate objects. We can create another primitive, but we can also just
duplicate this one. With that ground
object selected, go to the viewport menus
to the object menu. And we want to choose
duplicate objects. That's going to create
a new copy that starts out being the same but has no
connection to the original. Now, when you duplicate
something in blender, you're going to be dropped into a mode where you're actually
moving that object, whether you want to or not. So we can tell
because the cursor is now a different cursor, it's not just a plain old arrow. And if I move my mouse
around, I haven't clicked. I'm not holding down a button, but I'm moving that
object in all three axis. And that is almost
never what you want. So when you duplicate something, you're going to want
to also immediately press the escape key, and that's going to
actually complete that duplication operation
without moving the object. So now I've got
two ground planes sitting right on
top of one another. The new one is called ground.o1. I'll double click on that,
and I'll call it backdrop. Now we're ready to rotate this. We can go to the rotate tool, and we get a different
manipulator. Like an orbit around
with middle mouse. And we can see this rotate
manipulator also has three axis color coded X Y
Z to red green and blue. And if we click and drag on one of those semicircular axes, we can rotate around that axis. And we can rotate
around Z as well. We want to see those
numeric values so we can go back to our
object properties. I don't actually
want to rotate in Z. I want to set that
back to a value of zero, but I do want to rotate in X, and it looks like I
just want 90 degrees, so I can just type that in here. 90 degrees rotation. I want to caution you
about clicking in the center of this
rotate manipulator. If you click in the
center of that gizmo, you're going to cause
the object to spin wildly out of control
in all three axes. And we can see that in
the object properties. And I want to tell you
that's never what you want. That's never, ever a good thing to have uncontrolled transforms. I'm going to undo
that with Control Z. Also we have this larger circle
around the rotate Gizmo, and that will cause rotations in screen space relative to
the current viewpoint. And in a perspective view, that means we're rotating
around all three axis, once again, completely
uncontrolled. And once again, you
never want that. Control Z to undo that. You only want to rotate
around one axis at a time by clicking on one
of these semicircles. All right, so that's rotation. I do need to move that backdrop into position so I can
go to the move tool. I want to move that
in positive Y. And up in positive Z, and I can back out,
control middle mouse. I can orbit around. Okay, we want to just
position that precisely. I'm going to set location, Y, and Z both to a value of one, drag my mouse across
those, type in one. And now that backdrop
is precisely aligned. Okay. Now, there is scale, but you're not going to
use scale that much. We'll talk about
this later maybe. But for now, we're not
actually scaling anything. If you click and drag
on one of these axes, you're going to
apply a multiplier to the original
size of the object. And again, you probably
don't want to do that. In later courses, when
we talk about modeling, then at that point, scaling
is going to be important. But for this simple layout, we don't want to scale anything. We just want to set all
the scale values to one. That's a quick overview
of transforms in Blender.
10. Transform hotkeys: Previously in the course, we changed our
preferences so that the keyboard shortcuts
or hot keys for the transform tools
will behave like a conventional three
D program and not use the default blender
methodology of transforms. I want to detour into that just to show you
what I'm talking about here and why you want
to change that preference. To refresh your memory, if we go into edit preferences, under Keymap, we've set the tool keys to be
the active tool. Okay. So if that's the case, if active tool is enabled, then if I go over to my
view port and I press, for example, the G key, that activates the move tool. G stands for grab. We see the tool
change over here. So I select an object. Now I've got the ability
to move that object. Okay, I'll undo that
with Control Z. Likewise, if tool keys
is set to active tool, if we issue the hot
key for rotate, it will simply activate
the Rotate tool. And the keyboard shortcut
for that is R for rotate. And if I select some object, I can rotate in the usual
way. All right, very good. Control Z to undo that. And finally, to scale, you'll use the a
key, ask for scale. Okay? And that just activates
that Gizmo or manipulator. Very straightforward. Undo that. Once again, Control Z. But if the tool keys are
set to the default, which is immediate,
then the behavior of the transform hot keys is
completely unorthodox. And the way it works is if
you press, for example, the G key, you're instantly dropped into
moving the object. Notice that the tool
up here didn't change, but now I'm moving the object, and I'm not holding
the mouse button down. So when you press the G key, no matter what tool is active, you're immediately dropped into moving or translating
the object. And additionally, you're
moving or translating it all three axis at once, which is really,
really problematic. So if you press the G key, then you also need to immediately
press either the X, Y, or Z key in order to constrain that movement to
only a single axis so you can actually
control what you're doing. If I press the Y key, and again, I'm not
holding the button down. I'm just moving my mouse around. I'm changing the Y
position of that object. If I press the escape key, I bomb out of that operation without having changed anything. As you can see, I'm
still in the scale tool. But if I select something
and press G, again, I'm moving in all three axis, not pressing the button
down on my mouse. If I want to constrain
to a single axis, I have to press X, Y, or Z. If I press X, I'm only
able to move in X. If I press Y, only move in Y, and Z, only move in Z. Okay? And if I escape, then no operation is performed. Same thing goes with rotate. I select an object,
press the R key. No matter what tool I was
in, now I'm rotating. And by default, I'm going
to rotate in screen space. That means I'm rotating in all three axis relative to the point of view of
my current viewport. And again, that's never, ever what you want because
it's totally uncontrolled. If you use this method, you
need to also immediately press either the X, Y, or Z key. If I press Y, I'm
rotating only around Y. If I press X, I'm
rotating only around X. But it's very
difficult to control. As you can see, it's kind
of flipping around and moving really kind
of uncontrollably, because it's expecting that
you're going to actually do a circle around the pivot point or the origin of
the object. Okay? That's all very unorthodox,
extremely nonstandardized. This is something that
only exists in blender. And again, I don't recommend it. So I'm going to hit escape I'm going to set my tool keys
back to the active tool. And now everything
works as expected. There's no unpleasant surprises. If I press the G key, that activates the move tool, and I can move. No surprises. Control Z to undo. I press the R key to rotate, select an object,
and I'm rotating. Control Z to undo. And finally, the S key, again, to scale. If I click on the circle on
the outside of the Gizmo, I'm going to scale equally
in all directions. Alright, Control Z to undo that. That's how to wrangle the
tool keys for the transforms. You can choose to use the
blender immediate method. But again, I don't recommend it. It's actually going
to slow you down. You're going to have to
think more about things. And if you ever go to any
other three D program, you will find that none
of that actually applies, and you're always
going to be using a Gizmo or manipulator, or maybe using the object
transform properties in order to control position
rotation and scale.
11. Viewport shading: Solid and Wireframe: So far in our viewport, we've been in so
called solid mode where we can see the
surfaces of objects. In the upper right corner
of the viewport header, we have our viewport
shading mode, and by default,
it's set to solid. And this uses a viewport
rendering technology called Workbench. Workbench is focused
on performance, speed, and not on quality. So in solid mode,
we're not able to see things like
materials and lighting. We'll get to that in the next
course in this sequence. For now, we just want
to see the difference between solid mode, and wireframe mode, which is right next
to it to the left. Click on wireframe and we see our objects
displayed in Wireframe. And they're in
black, by default, as determined by
the theme settings, the user interface settings, like an orbit around
here with middle mouse. We can select an object, and it's going to
be highlighted in orange or yellow
if it's selected. We can go back to solid
mode that's going to give us an impression of
the surfaces of things. But if we want to go deeper
into analysis mode in order to kind of see the internal
structure of objects, we want to go into wireframe. And if I press the dot
key on my number pad, I can zoom in to frame
that selected sphere, and we can see its
internal structure. We can actually see all of
the parts of the object. And wireframe mode in
Blender is very special and very unique because in blender, if you want to
select some part of an object that is not
currently visible, you have to be in wireframe
mode to select things. So by way of example, if
I go into solid mode, I don't see the
back faces, okay? There's no indication of
what's behind on this sphere. We'll look at Edit mode
in a later course. But for now, I'll just
briefly go into Edit mode, which is up here on the Vwport header's currently
set to Object mode. Click on that down facing
arrow and choose Edit mode. And now we're able to select individual parts of objects
in polygon Edit mode. If I drag a rectangle to select all those points and then tumble around or orbit around with the
middle mouse button, we'll see the backside
did not get selected. Okay, so that's really,
really important. If you want to select the
backs of things in blender, you have to be in
wireframe mode. There's no other option. You can't select things that
are back facing or behind or occluded by some other surface unless you're in wireframe mode. If I drag a rectangle now, I can select all those points and we can see it's
working as expected. This is a bizarre limitation of blender that only
exists within blender. In any other program, you could determine whether
or not you want backfaces or occluded surfaces to be selected
in a polygon edit mode. But in blender, you must
be in wireframe mode. Okay, I'm going to go
back into object mode, and that's how we
can switch between solid mode and
wireframe mode and why wireframe mode is so incredibly critically
important in Blender.
12. Level of detail with Modifier Properties: Blender is a polygon modeler
and a polygon renderer. That means that any renderable
object is a polygon mesh. And a polygon mesh is made up
of all straight line edges. There's no actual curvature
on a polygon object. We can get the illusion of
curvature by having lots of straight line edges that are at slightly different
angles to one another. We can see the polygon
structure of an object if we're in wireframe
display mode. I've got wireframe shading
enabled in my viewport header. And if I select this object, you can get in closer with
control and middle mouse. We can see it's made up
of all straight lines. We can make this
even clearer if we go to the modifier properties. And in the previous movie, I briefly went into Edit Mode. That had the effect of actually disabling this modifier
of the UV sphere. I need to re enable that
modifier by clicking on this little real time
button display modifier in viewport. That
needs to be on. And now, if we make changes to the segments and rings
or any parameter, we will see the effect
immediately in our Viewport. We can adjust the segments
or rings by clicking on this slider and dragging
from left to right. As I reduce the
number of segments, I get a blockier object. And the rings are the number of divisions in the other axis. You could think of the rings as being the number of lines of latitude and the segments being the number of
lines of longitude. So we are changing
the level of detail. This is just a metric of how many polygons
are on the object. Level of detail is sometimes confused with something
called fidelity. Fidelity is how well something corresponds to the thing it's
trying to represent. How well does your model match
the visual appearance of some reference material like
concept art or a photograph or some object
that you've got on your desk that you're
actually trying to model. So fidelity is the visual
appearance of things. Level of detail is the number of components or the number
of parts on an object. And there's no
direct relationship between those two things. This is an important concept. If I back out here with
Control middle mouse, I'll set my sphere
up to, let's say, 48 segments and 24 rings. And now that sphere
is going to look round pretty much at
whatever distance. But let's say we select one
of these other objects. I've got these non destructive
primitive grid objects. I've got the plane
for the ground. And again, I can back out a little bit with
Control middle mouse. So with that ground
plane selected, I can increase its number
of vertices in X and Y. Again, I can click and
drag on that slider there, and I can increase the
number of segments, and I can do that
in each dimension. So I can make this a much
more dense polygon mesh. This is going to increase
the level of detail. But for this flat surface, it's not going to
improve the fidelity. A perfectly flat
surface is going to be flat regardless of how
many segments there are. So segmentation is usually only important when you're trying
to resolve curvature. If I go back into
solid shading mode, we've got two objects here. I've got the ground plane
that has a lot of divisions, and I've got this backdrop, which has no divisions. It's only got two vertices
in each dimension. And I can't see any
difference between these two. They're the same in
every other way. This object has no
internal divisions. This object has lots
of internal divisions, but because they're
both perfectly flat, I can't see the difference, and they would render
exactly the same. This is a case where
those two objects have the same fidelity but have drastically different
levels of detail. You want to have just enough
detail on your model in order to resolve the fidelity that you're trying to achieve. And by the way,
there are other ways of achieving fidelity. We can apply a map onto a
surface that's going to make it look more detailed than the actual underlying
polygon mesh. I'll go back into
wireframe mode, and I'm going to
set my vertices X and Y for that ground
plane back to two. And again, that doesn't
change the fidelity. It only changes the metric of how many polygons
are on that object. But with this sphere, there is an indirect connection between the level of detail
and the fidelity. I can zoom in on that with
the number pad, period. And if I adjust the number
of segments or rings, I'm affecting both the level
of detail and the fidelity. So again, a level of detail
serves the function of adding more straight line
edges in order to resolve curvature or the
illusion of curvature. You want to have just
enough segmentation so that your object has
the correct fidelity, it has the correct
curvature or appearance of curvature at a particular size and at a particular distance. In other words, if I
was really far away, I wouldn't need as many
segments or rings. But if I get closer, the limitations of
the polygon format are going to become
more obvious, and I'll need to
increase the segments, bring that back up to 48 and the number of
rings up to 24. That's a basic introduction
to the relationship between level of
detail and fidelity.
13. Viewport Overlays: To wrap up our simple
course on setup and layout, I want to finally talk about
overlays in the viewport. We need to be able to control the overlays in order to
most effectively work. Specifically, we need to
be able to see level of detail at all times
in many cases. And we can do that by
being in wireframe mode. But if we go into our
solid shaded mode, we can't see level of detail unless we enable the
appropriate overlay. So let me back out here.
Control middle mouse. Take a look at our
entire layout. And I'll go into the overlays. Up here on the header of the
viewport, we have overlays. I can click on that down facing arrow and get a pop up window, and here's where I can control the visibility of these
various overlays. In order to see the level of
detail in a solid viewport, we want to enable
geometry wireframe. When that's on, we
can actually see all the internal
divisions of an object. We can do that if
we're in edit mode, as we saw previously, if we're in object mode up here, we want to see the level
of detail of our objects. We need to have that wireframe
enabled in the overlays. Another thing I want to
point out in the overlays is this little mysterious
icon or Gizmo. That's called the
three D cursor. And it's a screen element that is kind of
unique to blender. Other programs don't have this. It has to do with the
operation of tools, such as when you add an object, where is that object
going to be added? It's going to be
added at the location of that three D cursor. And I don't actually use
the three D cursor ever. And so I'm going to hide it forever because I'm
never, ever going to use it. So I'm going to go
into the overlays once again and disable
the three D cursor. There may be some extremely
rare circumstance where I may want to go back
in and re enable that. But really, 99.9% of the time, it's just a distraction. And actually, I
could accidentally move it, which I
don't want to do. I do want objects to always
be created at the origin. So those are just a
couple of the overlays. If we go back in there, we can
see there are other things like we could turn
the floor off. That means we're not able to see the grid divisions on the floor. We could turn that
back on again. Or we could change the scale
of the grid. That's helpful. If I bring that
down to like 0.1, now I see smaller divisions to the grid in all
the viewports. That's helpful. All right, so that's how to use
overlays in order to optimize the display
in the viewport.
14. Next Steps: We've learned about the basics
of the blender interface, and we've set up a
very simple layout. In the next course, we're
going to apply materials or shaders onto the surfaces of objects to make them
look like something. In the meantime, I recommend
that you check my website, which is
digitalartsgil.com because I've got some free
resources on there, including a cheat
sheet for blender that lists the most important
keyboard shortcuts or hot keys. I'll see you in the next
course on materials.
 Aaron Ross, Artist, author, educator