Transcripts
1. Vertex Introduction: Hello and welcome to this blender fundamentals class in which we will be taking a look at the powerful, yet often overlooked method of vertex modeling. There are many different ways to create models in 3D applications, ranging from simple box modeling techniques through to the new kid on the block, digital 3D scanning. Having a knowledge of the various modelling techniques available will help you to decide the most efficient and effective way to achieve your creative objective. We will look at how to get started, some of the tools available, and then move on to create in a couple of models using this method, you can quickly and easily get some great results. So don't Tang back gets involved. So why don't you join me for the short course and see where the modelling text2.
2. How to Add a Single Vertex: Hello and welcome to my blender fundamentals class, in which we will be taking a look at the text modelling. Okay, let's get going. So what is a vertex? So a single vertex is a point in 3D space. If we join two vertices together, we have an edge that connects them. And if we have three or more edges connected in a closed loop, we can fill the void between them with a fierce. These are the building blocks for 3D meshes and objects. So what is vertex modelling? Well, the idea is that we begin the process of producing our mesh from a single vertex by extrapolating or building on it. From there. We have a number of tools at our disposal to do this. And in the next lesson, I will cover some of the basics. But first, how do we add a single vertex? Well, there are a few wish to begin. When we add a mesh to our scene, it will be placed at the 3D cursor, which at the moment is right at the center of our scene, the world origin. I want to begin with a vertex at this point. If the 3D cursor is not there, we can use Shift S and choose cursor to world origin. We can move the 3D cursor anywhere in our same by selecting it and left clicking the point we want the mesh to be added. So let's move that back to the world knowledge in that shift as V2 world origin. And let's load a mesh cubed plus shift a mesh tube of toggle into edit mode. That's the Tab key on your key. And then from there Let's right-click and choose merge vertices. At center. We now have one single vertex, as you can see from the scenes statistics and have a starting point for our mesh. If you cannot see the scene statistics, if you right-click in this bar at the bottom of your screen, you can choose seen statistics from the. So when we emerged at the center, all of the vertices collapsed around the object origin of our mesh. This small yellow dot you can see at the middle of the screen, don't get confused between the objects origin and the vertex. They are separate items. If we select the vertex and move that in the y-axis. You can see that we have single vertex there, a non at the center. I'll use keyboard shortcut X and delete that vertex. So an easier method to load a single vertex is to use one of the add-ons that comes with your blender application. So let's add over to the edit tab, choose Preferences. And then from there in the search bar, Let's type extra add-on we're interested in is add mesh extra objects. Let's select that one and let's install it. And then let's choose install add-on. Let's close that out for now. So you will now see when we use Shift a to load the mesh, we have a number of other options. Ok, generator was the option to add gears, paint, joins, diamonds, the one we are interested in, a single vertex at single vert. And that will place a vertex at the 3D cursor, which of the min is at the center of our scene. Okay, so in the next lesson, we will produce a mesh from this single vertex using some of the tools available to us inside of Blender. Hopefully I'll see you there.
3. Building a Mesh From a Single Vertex: In this lesson, we will create a mesh from our single vertex. The vertex is a mesh in its own right. You can see in the scene collection that we have that highlighted. So let's start to create something from this. Okay, so let's make sure that we are in edit mode and make sure that vertex select is toggled. And let's toggle the snap function. I'll also toggle absolute grid snap. Now let's go into rad view and that's shortcut three on your numpad. And then this is where the format porn story of this single vertex selected. Let's use the keyboard shortcut for the extrude tool. And you can see now that we can extrude this vertex, we now have two vertices with an edge links between them. I'll left-click to apply the extrusion and then I'll repeat this unless that to form a closed loop, share. It doesn't have to be too complicated to use the little bit of imagination. Okay, that should do it. We now have two vertices occupying the same 3D space, both the starting and finishing vertices. If we make this selection, it appears from the scenes statistics that there is only one vertex. However, if we toggle x-ray mode, we can select the backfire same vertex. And you can see now that we have to select it with both vertices selected. Let's right-click and choose merge vertices, merge and center. And this will merge both vertices into one vertex, as you can see from the same statistics, right? Okay, I will undo the last few steps. An alternative method is to head over to this Options menu and choose TO merge with this activity vertices which come into close proximity to one another will automatically be merged. Providing the distance between them has met the criteria set by this threshold value. The lower the threshold value, the closer the vertices after baby before they will merge. If you set this value to high, you may end up merging vertices that you don't want merging. So if you are going to be using this function, non-regular bears is spend some time experimenting with the threshold value. I will extrude this vertex again. And now when we made two with the starting vertex, they merge automatically, which can be seen from the vertex number in the scene statistics. Right, let's continue with our mesh. Our left-click drag select all of the vertices and Lenin perspective view, let's say extrude them in the x-axis only. So that's shortcuts a followed by x. We don't need the snap function now, so I'll turn that off. And then with these edges still selected, we can add a face by using shortcodes F. Let's scroll around and I will toggle Edge Select and select this edge. Then under Select, I'll choose Select loops and edge loops. I'll use shortcut F and other face to this side too. Also toggle x-ray mode. That's shortcuts Alt or Option zed. And you can see using this vertex modelling technique, we have quickly and easily been able to produce a nice-looking bench S8. So when extruding vertices and not using the merge function, which is always a good idea to check your mesh for overlapping vertices. I will toggle vertex select and x-ray mode and then select all of our mesh. Let's right-click and choose merge vertices. Merge by distance. You can see at the bottom here that's in our case, we don't have any loose vertices. Okay, I will toggle out to the X-Ray mode and tap into object mode. And then let's right-click and choose shit smooth. And that will also toggle our tourists. Move on to the normals tab in the object data properties. To finish our model off our lab, a display color. Let's choose this green. I will also add a bevel modifier and set the width to width. Set the amount to 0.02 segments to three. And I will also toggle have the normals in the shading tab. Okay, in the next lesson, we will look at a few more tools we can use in vertex modelling. I'll see you there.
4. Vertex Editing Tools: Okay, let's take a quick look at some of the common tools we can use to edit our match. When we have vertex modeling, I'll add a single vertex. And then let's head into r9 view. So one of the first tools is the extrude tool, which we've already discussed that shortcodes a on your keypad. And then to add extra geometry to the mesh, we can select both vertices, right-click and choose sub-divide. And we can control the number of subdivisions in the subdivision Rollout by adjusting the number of calls. And this will have reached out the spacing of the codes for each increase. So the next tool is the move tool. So if you select one of the vertices and new shop cook j, we can move the vertex anywhere in our scene and left-click to apply the move. And if we want to move a vertex along an age without actually disturbing the edge, if we select the vertex u, j for the move tool, followed by G for the slideshow. And then left-click to apply the move. Do the same when there is an angle between the edges. Again, G for the move to follow by j for the Slight tool. And despite controlling our mouse, we can determine where the vertex is placed. Okay, let's delete those vertices. Okay, Let's extrude this vertex again. And let's extrude in the y-axis to begin with. So one of the most common tools to use during vertex modelling is the pebble tool. So can actually bevel individual vertices. And to do this, simply select the vertex, a new shift Control B. I'm not sure if you'll be able to save. There is a fan dotted line between the vertex and the mouse cursor. And we simply drag the mouse to split the vertex. While the tool is still active, if you use the scroll wheel on your mouse, we can add extra geometry as we're doing this. And then just left-click to apply the bevel. We can also control this across two vertices at the same time. So select two vertices, Shift Control B. And then let's start to split those vertices. And left-click to apply. And then finally one more tool which is useful is the smooth tool. So if we left-click drag, select these vertices, we can right-click and choose smooth vertices. And this will attempt to average out the angles between the vertices so that they appear more uniform. And by controlling the smoothness and repetitions, we can affect the profile to get the desired result. Okay, and the last lesson we will put to use what we've learned so far to make our final model blender gold. So stick around.
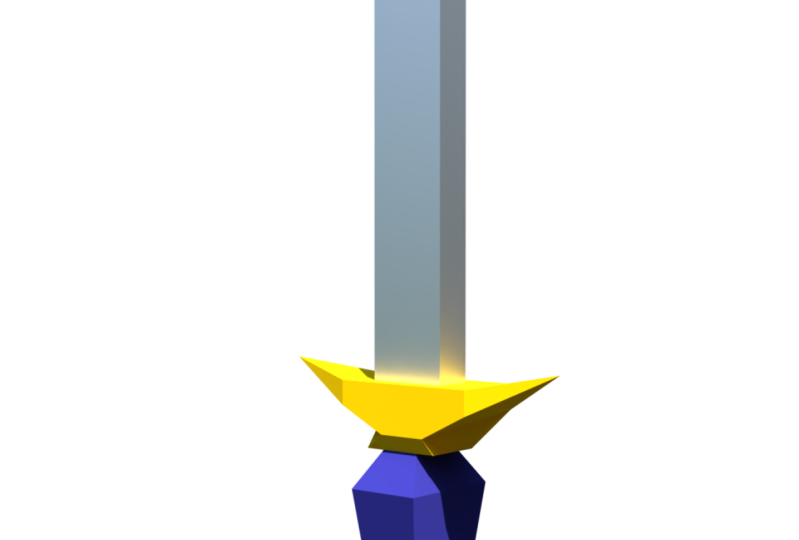
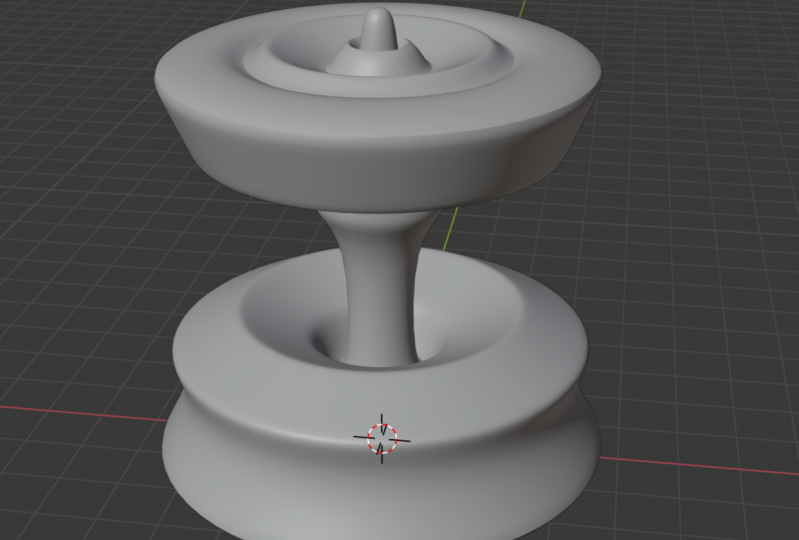
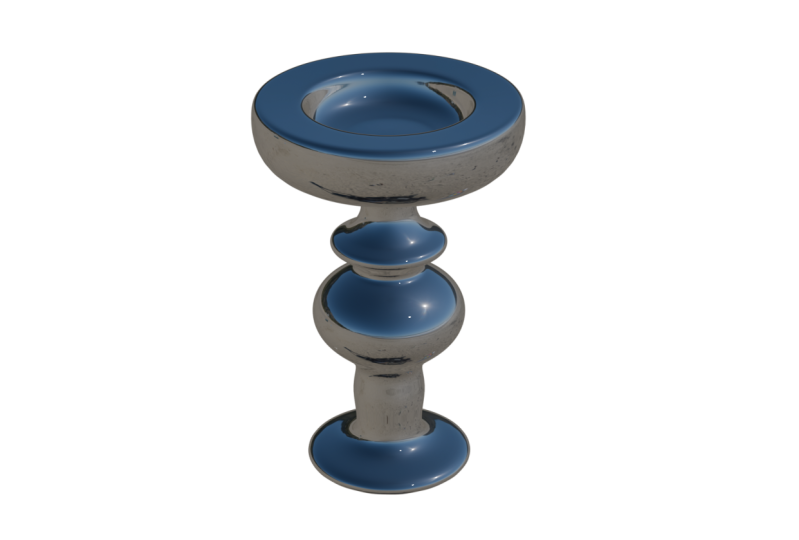
5. Blender Gold: In this final lesson, we're going to create a model using some of the techniques we have learned. I'm going to add a single vertex. I'll head into right view. I want to toggle the snap function and are also turn on absolute grid snap. And let's start to extrude this single vertex. So I'm just looking for a ship which I can have symmetry two, doesn't have to be too complicated, just something simple. And then if you want to create your own model using this technique, you choose your imagination and just see where it takes you. Okay, I think that should do it, right? Let's now start to bevel some of these vertices. So I'll select this one, hold Shift. Let's select this one, this one, and this one. And then let's choose Shift Control B, institution level. Those should do it. Let's now select this vertex, hold shift and this one. And let's do the same. We'll move that text to that that should do. Let's select this vertex, hold, shift, this one and this one. And then let's subdivide that. And then let's just move this one. Actually, I'll turn off grid snap for now. Let's move that one again. Let's also remove this one. And then let's select these vertices. Let's just move those. And I think that should do for that one. Let's now left-click drag, select all of the vertices and just make sure that we don't have any doubles. I'll also toggle x-ray mode. So we select the blackface and vertices. And I'll choose merge vertices, merge by distance. It doesn't look like with our DNA loops ones. And then let's toggle into object mode. And while these objects is selected, I'm going to add a modifier. Let's add a screw modifier. And you can see now quite simply and easily, we've got a really interesting shape and a model for our sane. Just make sure that you are revolving in the z axis, not the y or the x. We will get some really weird shapes going on. And then let's lock the viewport steps to 32. Let's also merge the vertices. And then for the purposes of this model, I'm just going to go ahead and apply this modifier. This is now an object in its own right. I'll just toggle out of x-ray mode. So you may say that the shading is looking a little bit strange. And the reason for this is not all of the normals, the direction of the face is accurate. So we can check this by going over to the view part, overlays tab and choosing face orientation. And you can see now that we have a mixture of red and blue. So discussing the face normals is a little bit beyond the scope of this class. However, to put it simply, you really want all of your model, all the paths that you want to see in blue. So to do this, let's head back into edit mode. And while our objects is selected, Let's head over to mesh, scroll down to normals, and choose recalculate outside. And you can see now that all of our mesh is blue, which means that the normals are facing correctly. I'll go ahead and turn off the face orientation. And then let's now add a subdivision modifier to this. I'll put the levels up to three. I'll toggle edge select. And then let's just to tighten up some of this geometry using the edge loop tool. So that's control. Let's add two quotes there. And then less scale them in the z axis. We'll have a couple of edge loops here. Okay, I will just speed up the video while I add some extra edge loops. Okay, let's select these faces. I'll toggle fair select. And we'll use the inset tool that shortcut. And let's just inset those fears is a little bit. Let's do the same. Appear. This will just turn up the geometry a little bit. I'll repeat that one more time. And then I think I'm just going to go ahead and delete these faces on a shortcut X. Let's toggle Edge Select and select this edge. Select edge loops. And then I'll just use shortcodes F to add a single phase in there. Let's select the geometry and choose View Frame selected. Then let's toggle back into object mode. And I think that should do it for the model. So you can see quickly and easily from a single vertex, we've been able to create a nice low-key model which we can map to our same. Let's just finish this model up. I'm going to add an HDRI Environment. Let's choose this one. I'm actually using an HDRI that is provided with Blender. So it's actually within your application. I'll put the address link to that in the project files so you can follow along. Let's now go into rendered view. And then let's turn off this environment background. So let's go to Render properties. And under film, choose transparent. Okay, So I did promise you blended goal. So let's go into the materials tab. I'm going to turn metallic OK, 21. We now have a metallic effect going on. Let's turn the roughness down to want to go with about 0.6. And then less and a little bit of gold. That's others turned the roughness down a little bit more. Okay, my friends, that's it. Blend a goal from a single vertex. I hope you've enjoyed the class and I hope you'll join me in future classes. Take care for now. Thank you.
 Foxcub CGI Richard Fox