Transcripts
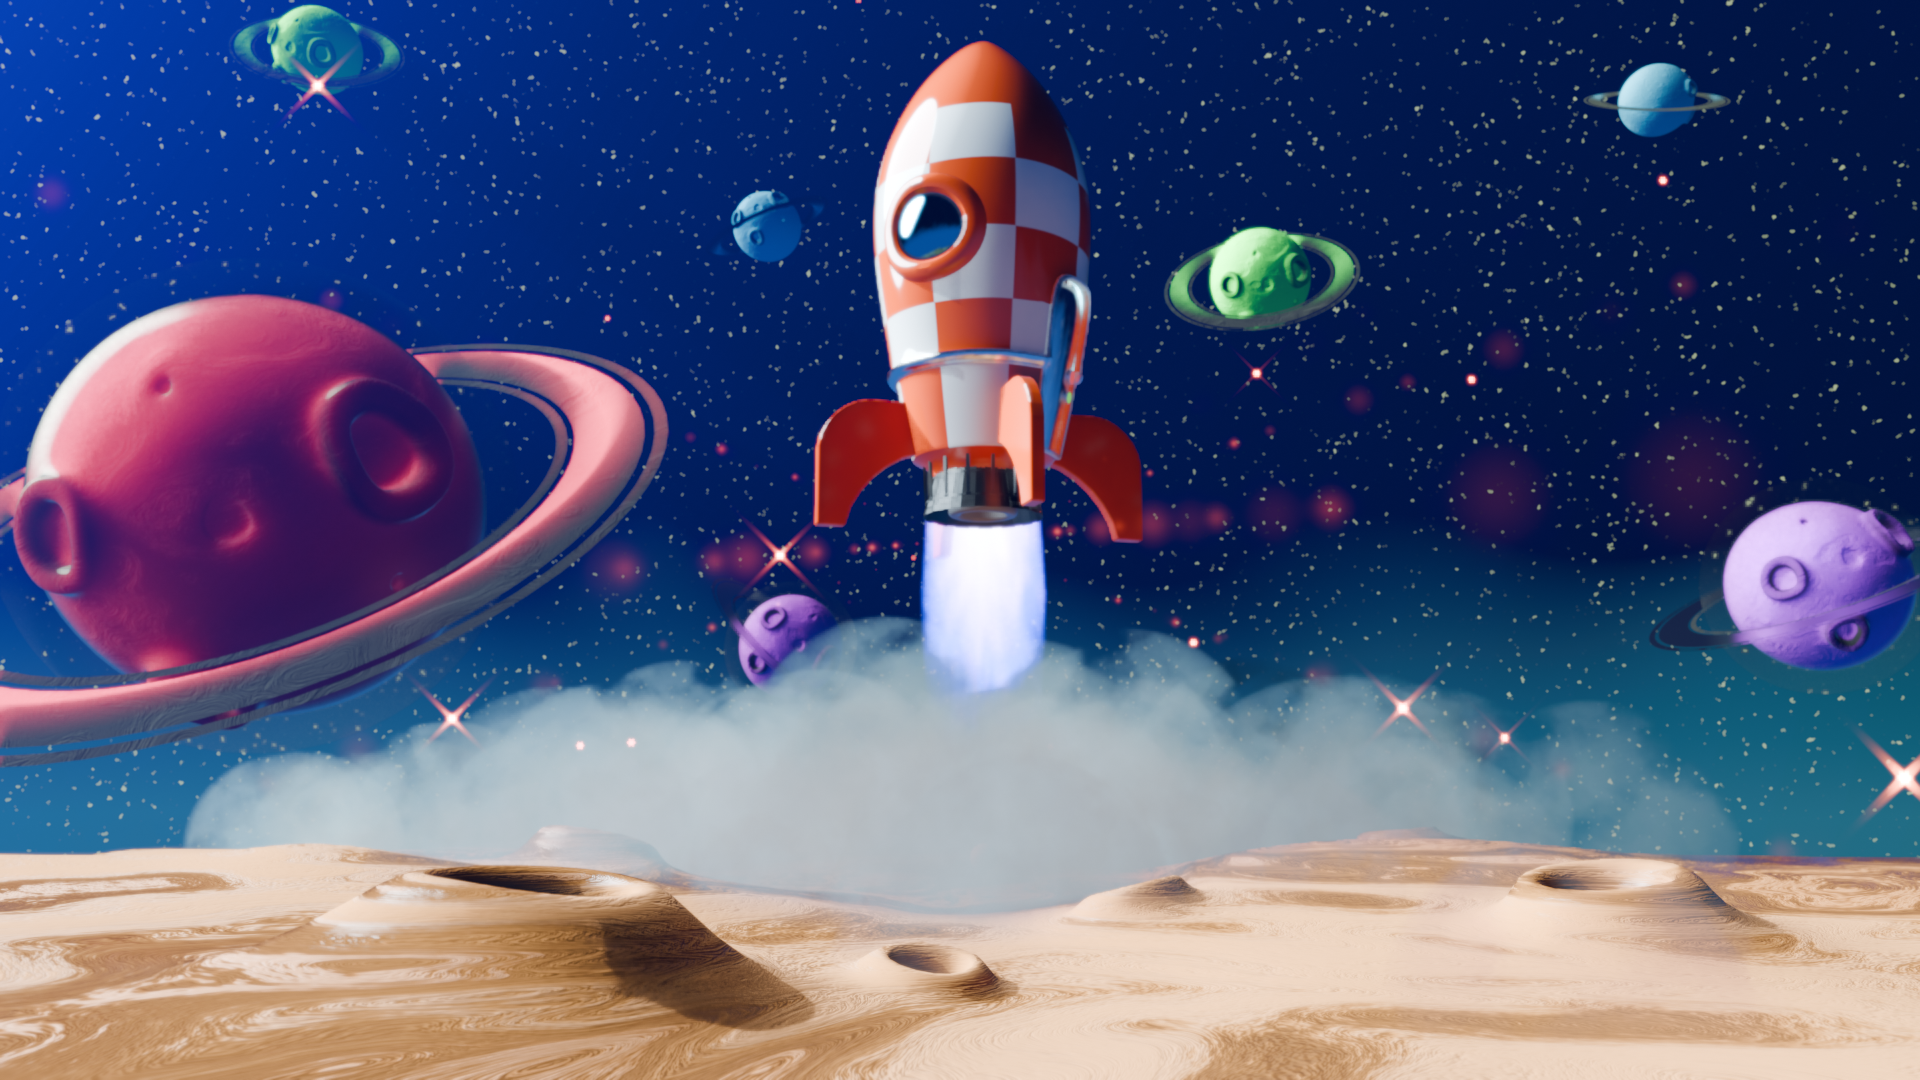
1. Welcome to the class: Welcome to mastering the
T D spaceship design and animation in Blender. If you've ever dreamed of
creating stunning space scenes, modeling spacecraft and
bringing them to life with professional
animation techniques, this course is for you. We'll start by turning
a TD reference image of a spaceship into a fully
detailed TD model. You learn how to set up
reference images for precision and model the space shape by blocking out the basic shape, refining the structure, and adding details like
the landing gear, the windows, and the engine. Next we'll dive into Texarin. You will create materials
for the spaceship, texturing the planets, creating a rocky surface
for Mars planets. You learn how to create
amazing textures that make your
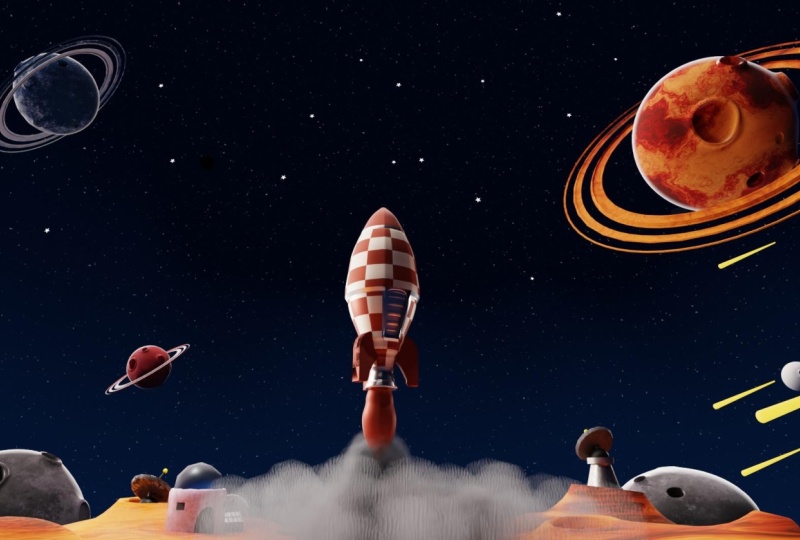
models truly shine. And once the models are ready, it's time to lighten
up your scene. You will master creating
an amazing space sky, adding sunlight and using volumetric effect to give your scene depth and atmosphere. Next we'll bring
our scene to life. We'll animate the
spaceship take off at a realistic smoke effect with particle system and
make your planet spin. You will also master
dynamic camera movements to capture every exciting
moment of your animation. And finally, you will render and composite your scene to create a polished professional
quality space animation that you can proudly showcase. Whether you are a beginner
looking to level up your blender skills or an
artist seeking new techniques, this course will guide you
in every step in the way. So join me and let's create the space animation
you've always imagined.
2. Importing and aligning your reference image in blender: So the first step
is going to be to delete everything that
we got in the scene. So I'd like to press A to
grab everything we got, and we can press
X and delete it, delete the selected object. So next, I'd like
to drag and drop the reference image
so we can simply drag it and drop it here. So we got the
reference image here, but it's facing us. So as you can see, it's
a little bit distorted. So as we do we can work on it in the transform panel
so we can press N to access the item here. Item tab and in the transform, we got the location and
we got the rotation. So I'd like to left
click and drag it down like this so that we can
let me just do it again. Let's click drag and
we can give it zero. So this way, we're going
to be setting up setting all these X Y and Z values
all the way to zero. So we can do the same
thing for the rotation. So left click and
we can drag down, and let's give it
zero, press Enter. So now it's laid
flat on the ground. So what we can do,
we can spin it on the X. I'd like to
work on the X axis. So we can just left it on
the X by let's give it 9090 degrees. So now
it's pointed up. So we can press
one if we want to switch to the front
or the graphic, and we can just move it up. We can just play with
the Z value here, or we can use the move tool, and I'd like to press shift in middle now so that we can
go up a little bit here. And I like to take it from the blue axis and
drag it all the way up until these lending years
are touching the red axis. So now if you notice we are
on the orthographic view. So the orthographic
view is a flat, non distorted view where objects appear
true to the scale. On the other hand,
the perspective view adds depth and gives a more realistic sense of how the object will look
in the TD space. So we can easily switch
between multiple views. So if you press
one on the numpad, you're going to be switching
to the front orthographic, three for the right side view
and seven for the top view. We have this shortcut
to control Alt Q. So this shortcut is going
to activate the quad view, which divides the TD view
port into four panels, each showing the front
view of your model, the front, the side, the back, and the top. So this feature is valuable
if you want to keep an eye on your model from multiple
angles as you work on it. Also, to exit the quad view, you can press the same
shortcut to control Alt Q. We have another shortcut,
which is the control space. So this shortcut is going to maximize the selected viewport. So for example,
here, if I hover on the TED viewport using my mouse and if I
press control space, so this is going to
maximize the TID viewport. It's going to allow
me to work in a distraction free
environment by hiding the other panels
and interface elements. If you want to revert back
to the regular layout, you can press again
Control space, and this will bring you
to the TED viewport. So the last thing to do is that we want to make it so we cannot select our reference image because you notice as
you start modeling, you're going to end up selecting the image and not the object. So what we can do, let me
just expand this window here. So we have this option here. I'm going to just click on
it, and I would like to select this at this
option, the selectable. So click on it. So this way we can make these objects
selectable or not. So this is our reference image. I'm going to just
double click on it. Let's rename it. Let's
call it reference image. And you can make
it non selectable by checking and checking
this button here. Now if you click, you cannot, you aren't going to
be able to select it. And basically, that's
it. So now we are ready to start modeling
our spaceship.
3. Shaping your spaceship with the screw modifier: In this lecture, we'll use the screw modifier to generate the shape of our spaceship. So back to our scene, we can
start by adding a plane, so Shift A, go to mesh
and choose plane. So all I need is just
one single vertex, so you can press Tab to
switch the edit mode. You can select one
of these vertices and add to delete the rest. So if you want to
select the rest, we can reverse the selection
so we can press Control I. As inverse and we can press X and delete
the other vertices. Now we are left with
just one single vertex. Let me x we can
press N to access the transform and I'd like to make it aligned with X axis. On the Y here, this
is the Y axis, it is far by -1 meter, so we can just set
it here to zero. Now it's completely
on the X axis. Let me just press one and we can take this
vertex and put it, for example, here. This
is the starting point. I'd like to press
shift and middle mouse so that we can go up like this. Extrude. So we can extrude, let me just exude here for the first time and
exude the second. I'd like to have this wobbling, so it's going to
help us to define the shape of the engine
of the spaceship. So here at the top, let's exude this
one up like this, and we can continue all
the way till the top. So here we can create some kind of a curvature,
something like this. And we can keep
exuding by pressing E. Until we reach the top. Here we need also to
stop here for this cut, the cocapit to define the
cockypit and let's continue. Extrude here and we can add two extrusions and
this one at the top. That's perfect. With
that's being done. Next step, it's going to be
to use the screw modifier. So we're going to be using it to turn around this shape
that we created. I'm going to just go back
here to the object mode. So as you can see the
center is exactly here. If it's not the case, you can
press Shift as and you can set the cursor to the word
origin. I already did that. Now we can jump here to
the modifiers and we can add so it's going to
be the screw modifier. Let's just click on it and
immediately going to see that we plug the shape
of the spaceship. So the angle is set at 360. This is exactly what we want
and for the iterations. So we're going to be
improving the iterations later using the
subdivision modifier.
4. Refine & optimize the spaceship geometry: So the next step is
going to be to refine and improve the shape
of the spaceship. So I'd like to do I'd like
to drag our reference image. We can drag it or we
can just duplicate it. We need to keep this
copy. So Shift D, let's duplicate our
reference image, and we can press X so
that we can move it only on the X axis,
something like this. So here we can
keep an eye on it. So I'd like to do first, I'd
like to select my spaceship, and we need to apply
that screw modifier, so we're done with it. So next, we need to add the
subdivision surface modifier. So it's going to
help us to define or add more details
to our spaceship. So next, we have to
define some edges. So, for example, here, we have
to define for the engine. We have to define these edges. So on the dige mode,
press we can switch first through the edge mode, and we can press Alt and left click here to
select these edges. Also, in order to see because
some vertices are hidden. So if you want to
see them better, you can check the cage on the subdivision modifier like this, you can see
the difference. So with this one selected, you can also select the bottom, so all shifts and left click. And let's do the
same thing here. So now we can press N, and here for the min increase, I like to increase
this value up. So this way, we're going to be sharpening these two edges. Going to see that they
look much better. Also, we can do the same thing
here, so let's press old. Let's increase the
increase all the way to one. That's nice. So I'd like to do the same
thing for this edge line. So on the edge mode, you
can press Alt Shift Alt. Let's select all of these edges, and we can increase the increase all the way
to one. There we go. So I'd like to define this
engine area even better. So what we can do here, let me just press Alt on this area, we can scale it a little bit up. We can also try to
increase the increase up. Let's increase it 0.75. Let's press one again
to face the front, we can insert another
edge loop here, so control R, and we
can scale it down. But also we can increase
the increase here. Let's increase it to one and we can scale it just a bit up. Something like that
it's going to be great. So let me just press, so
to the back to the solid. Let's investigate this. So I think here so
it's not sharp enough. So let me just
find a better way. So here, let's just take
it all the way to one. And let's go ahead and increase the level view port to
have more defined edges. So for the engine, I like
to make it its own piece, so we can separate it. I like to press Alt again here, and we can press V. So the V, it's going to separate
that edge line. So now it's completely
separated from the engine. The top, I'd like to define the cockpit. So let's press one. You can select the spaceship, switch the edit mode,
press, switch the Y frame. So this edge line
that we got here, we can bevl it. So
let me show you. So we can press
Control B to bevel it. That's a little bit too much. So something like that, but also let's increase
the increase up, something like 0.6, and we
can extrude it on the inside. So let's press E to extrude, and we can press all a to
go on the inside like this. And we can take that inner
edge a little bit up. That's nice. And
for these edges, we can press, shift old. Let's take it all
the way to one. Okay, maybe we can
give it some distance. So G, we can press Alt
on the bottom one and double G just slide
it down a bit. There we go. So now we got the cockpit defined on the top. We can also try to add
some new edge lines. So control R. So this way, we're going to define that area even better to make
them more sharp. Control R also on the bottom. There we go. So now it
looks much more clean. H.
5. Improve viewport shading with cavity feature: So now, I'd like to
show you how can we improve the modeling shading in blender
so that we can see our model even better. So on the top here on the top
right, we got this button. So click on shading
and down below, you're going to have this
cavity. I want you to check it. So if you check it,
you're going to see that the edges are more defined. So I can also increase this ridge value
all the way to two. Same thing for the valley. So you can see the
difference now. So the edges of our model
looks more defined.
6. Modeling spaceship landing gears: So the next step is
going to be to model the spaceship landing gears,
legs of the spaceship. So let's go ahead
and model them. So I'm going to be selecting
the spaceship on these mode. I'd like to grab only one
single vertex on the side here. Can start with this one here. Let's press one to
be facing the front again and we can
duplicate this vertex. Shift D to duplicate it, and we can move it
freely down here. And after that, we can
extrude and make that turn. Sound like this, we can press
easy and go all the way down here. Extrude again. We can press X so that we
can move it on the x axis. L's extrude up, extrude. So we can just follow
the reference image. And now that we are done, so let me just grab it only. We can press L to
select that unit, and let's sick this
side and operate on it. So first, I'd like to
extrude it on the Y, so we can press E Y, extrude it like this, and
you can fill these gaps. Let me just select these
two vertices shift to select all the vertices, and we can press F to fill that gap that
we got over there. After that, we can
press Alt on this edge. We can press F to fill it. Sending on the other
side, let's press Alt and press F to
fill the other side. But now we have to
improve its shape. So we can jump to the edge mode. Let me just press here
to grab that edge line, shift to select them both, and we can increase the
increase up all the way to one. Same thing for the other edges. So for example, the bottom
edge that we got here. So let me just find
the right edges. These, let me try to
increase the increase up to 0.85. Same thing on the top. Let me just track the reference. So the top here is smooth, but this top edge needs
to be a little bit sharp. This edge here, let's increase the increase up all
the way to one. Let's do the same thing here because this is a part that's going to be connected
to the spaceship. It needs to be flat. A to
next what we need to do, we need to bevel these edges. Let me just press Alt again, Shift Alt to select
both of those faces, and we can press Control B. And we can slide
our mouse just a bit to create that
beveling effect. Here. Perfect. Also,
we need to straighten up these edge lines. Let
me just select them all. But Same thing on
the other side. Not this control Z tag
back shift like this, this edge as well, and
the two on the bottom. And we can take them
increase all the way to one. All right, so we got it. So all we have to do right now is to do right click and sheet smooth
to have better shading. So now let's i it back and
connect it to the spaceship. So I'd like to press
one on the edit mode, we can press Alt A to make sure that everything
is deselected, and let's select only
the unit that we want, which is this leg. We can press L, and
we can simply drag it to the left side until
it touches the spaceship. Let me just press seven
to go to the top. You can just have
it centered here. So now I'd like to duplicate this landing gear three times. So the center point, it's
going to be this cursor. So the center point
that we need to pivot around is the
center of the spaceship, which is this cursor
that we got here. So what we can do, we can change the pivot point from the
origin of that object. You can do it here
from the median point to the tree dcursor. Now if you try to
spin this object, if we press R and Z, spin it on the Z axis, we're going to be
perfectly spinning around that center point, which is the two decursor. What we can do right now,
we can press Shift D to duplicate this object and
we can spin it around. But we need to calculate
the spinning angle. So what we can do, so
the total angle is 360, so we can divide it by
three. We have three likes. So we need to spin
each one by 120. So here we can press R, Z, and we can type one, two, zero. So this we're going to be
spinning it 120 degree. We go so now it's
perfectly here. Next, what we can
do, we can parahi D again to duplicate
this object and we can spin it so R Z and
spin it again by 120. So this way, we're going
to be having three legs perfectly distributed
on the spaceship side.
7. Modeling spaceship window: And I'm going to be modeling the spaceship windows
we got on the side. So let's go ahead and do that. So first, we have to start on is mode you can select the
spaceship on the dis mode. I'd like to switch back from the predecursor,
the pivot point. Let's switch it back
to the median point. We can press Alt A to make sure that everything
is deselected, and we can press Shift A. I'd like to start
with this circle. So this circle selected. So without clicking on it, we need to reduce its
number of vertices. So we are already using
the subdivision modifier. So here we can just cut down these vertices to
something like 12. All right, so that's been done. Let's take this circle. And we have to spin it on the X, so we can press R X, it's sp 90. So now it's spinned around. Let me just move it a
little bit forward, and we can ski it down. We can press E to check the Y frame so that you can be able to see the
reference image, and we can ski it down
until it touches or matches the window that we
got in our reference image. So next step, I'd like
to extrude it outside. Let me just switch
back to the solid. So we can press E Y. Exclude outside, we can
press E a, and scale down. And let's go on the inside. So E Y and go like this. And for the inner window, I'd like to make it
pop up a little bit. So to do that, we're going
to use a different object, so Shift S to select it. I'd like to let's press Alt A to this like
that edge line, and we can press Shift A.
I'd like to bring UV sphere. So again, I'd like
to reduce the number of segments so that we can be so that this object can be easily treated or easily modified. So for the segment se, let's
stick to something like 12, 28. It's going to be enough. So now let's spin it
around on the X axis, so RX I'd like to spin
it by nine degree, and we can scale it way down
until it's inside that loop. So I'd like to
scale it on the Y, so Y, and we can
make it really tiny. So I really like having a window like this
popping up like this. All we need is just the front, so let me just switch
to the face mode, and we can press Alt here and let's press X
to delete those faces. Same thing here, let's
press L to select this face or this
back of that curve, the back of that sphere, and you can press
X to delete it. Let me check if we
got some doubles. Yeah, I think we're all set. Now let's go ahead and connect this window to the
shape of our spaceship. So I'd like to select it by
person L and we can drag it way back, for example, here. But we should not be having any clapping, so I'd like to do. Let me just we can put it here and we
can push it outside, use the proportion in this dual. So let's activate
the proportion in this dual and we can
simply drag it out. But here we need to be
activating the connected only so that we won't going to be affecting the spaceship. So let me just
select switch here. To the vertex mode and you
can simply drag it outside. Something like that,
sat in here on the top. You can just keep selecting
those faces on the side here. Let's select these two versus, can push them a little bit back. You can scroll the
mouse to have that kind of curvature,
something like that. And in order to see inside, we can check here this mask, this toggle X ray mask. Let me just check it.
So this way we can grab this part can
push it outside. Something like that.
Let's do the same thing for this inner face circle. You can just push
this part outside. And basically, we got
it. We got the window, which is perfectly laid on
the side of the spaceship. So we can do rice
click and shade smooth to have it
smooth like this. So next, what I'd like to do, I'd like to duplicate
this window, and we can duplicate
it three times again. So on the edit mode, you can press Alt A to make sure that
everything is deselected. We can select only the window,
and let's duplicate it. But also what I'd like to do, I'd like to put the cursor right at the center
of the spaceship. So you can select
any curve, any loop. So, for example, can press
Alt here to select that loop, and let's put the cursor
right at the center here. So shift a cursor to select it, and let's do the same thing with it with these landing gears. So Alt A, select everything. We can select only our window. And for the pivot point, I would like to
switch therecursor and we can just disable
propution individual. So now what we can do, we
can duplicate the window, so Shift D to duplicate it. We can press R Z, and let's spin it
around by 120 degree. All right, something
like that, we can press Shift D again and RZ and let's spin
it by 180 degree again. And we got two E windows on
each side of the spaceship.
8. Create spaceship door & stairs: So let's go ahead and create the space shape door that's going to open and closes
in the animation. So first, I'd like to delete this window that
we got right here. You can delete any
windows that you like. So I'm putting here the
windows between those legs. So I'm going to just
delete or let me just better position them here. Just spin them around
just a bit like this. Let's say minus ten
degrees to have them right at the center between
these landing gears. So let me just select
this one here. You can press X in the licit. Also here for the pivot point, let me just go back
to the median point. Alright, so here, what I'd
like to do we can select these faces Let me just press C to select
in between here, and we can use this as window. But I'm not sure if we can add another make it white like this. I think yeah, that's the way. Alright so here what we can do, I'd like to press I to
create an inset first. So this is the first
step. Sounds like that. Also here for these
versus Cs or edges, you have to increase the
increase up all the way to one. All right. So with
that being done, let me select again
all these faces, and we can press B
separate selections. Now we have the door, it's separated from the rest. So next, I'd like to Bvl. We can try to select this
part and extrude it outside. Let me just press E. You can extrude it
on switch the local, the normal Okay, that's fine. You can just push it outside. Let's push it outside
just a bit like this. Alright, so that being done? Also, let's try to grab these
edges and slide them up. Actually, not that one,
but the other one. So we can press here, try to scale it down, press here, double G, or actually just scale it up. You just need to
create that frame. But here we have to fix again. You can press Alt, Shift Alt, and let's press B, increase the increase up.
Now it's perfect. All right. So now what we can do jump back to
the medium point. You can spin it around. Let me just see you. So it's
set can press Control I, apply the rotation.
Same thing here. Let's apply the rotation. You can spin it around by, let's say, 100 105. Alright. So next, we have
to work on the door. So for the door, I'd like to
add to solidify modifier. We need to give it some depth. So you can push
that on the inside. Something like that
it's gonna be accurate. It's gonna be opening like this. Alright, so now we need to
add need to add the stairs. So for the stairs,
I'm going to just select some of these
faces that we got here, let's push them back,
extrude them on the Z. You can select this part, press B, separate selection. Let's get rid of
the solidify here, and let's operate on
this so let's select it. You can skit it down.
Select the top. You can try EY EZ and EY
again to go on the inside. Alright, so let's press SY. You can press zero
to have that flat. And for these edges, press Alt, Shift Alt Shift Alt, we can straighten that up
using the mean crease. So I think something like
0.8 is going to be enough. All right, red
clack shade smooth. So we got the first unit. So what we need to do, we can use the array
modifier so let's add array so that we can
duplicate it multiple times. So we need to have
the array on the Y. So let's set the y to one
and the X factor is zero. Not xu is zero, but for the Z, so I think we got
a problem here. Yeah, problem with the rotation. So Control A, let's
apply the rotation. All right, so let's
increase take the Z up, and next we can you can just keep experimenting
with these values until we got what we want. Alright, so stick
it a little bit up. It's not like that, so that
looks good for the stairs. So I'm going to just
increase that count up. I think five it's
gonna be enough, but we have to scale it up. This mode, we can
press Alt here, and we can take that up. Let me try GZ. No
one's going to work. If you want to shorten that up, we can press Alt here
and GZ to take it up. Should not be
having any clapping whatsoever, and that's nice. So we got the stairs. So next, we have to
fill these gaps. So let's so lens control R's
insert an edge loop here. You can press F to
fill those gaps. Same thing here,
you can press F. And let me do the same
thing on the other side. So select these two, press F, and same thing here. You can straighten up those
edges again, as well. Press N, increase
the increase up 0.4. All right, so that's good. So I'm going to just
save a copy here. So let's duplicate
this, save a copy. And here we have to
tweak at the top. So to tweak at the
top, we have to apply the array modifier. But you got a problem here. Let me just take
the array first. Try to drag it a
little bit down. Don't think so. Let's just go
ahead and apply the array. Alright, so now
there is a trick. On the Z, you can
switch the Y frame. Let me select the last bag
and we can scale it down. And we can use the
proportion integent tool. Not corrected only, you can use the linear and let's
just sce it down. You can sce it on the X. So this way, we're gonna be
scaling everything down. But let me just try the
sharp X. There you go. This one looks much more better. So we're trying to
fit the stairs to the shape of the door. Let me just hide this. And we got the stairs. So here we got some clapping. Let me just check this
part up like that. Here what we can do, press. We can keep taking
these faces down. Z keep pushing it down. And be careful to have
no clapping like this. So the first is well set. So let's find this check here. So for example, here, we can track this part down. So we got the so let me just
combine the mi, Control J. Got some fluffy stairs. So you got the stairs, you
can just push them down. And basically, that's it.
So you got the stairs
9. Texturing spaceship 3d model: So the next step is going to
be to jeckre our spaceship. So I'd like to give
it this checka that we got here, red and white. So let's go ahead and do that. So I'm going to simply drag this reference, and
let's put it here. We can just split the scene on the right side and we can
switch it to the image editor. So on the bottom,
we can simply drag our reference and put it
here. So here I'd like to do. Let's start with
this checker juxter. So we can press Z to switch
the material preview. So I'm going to be
selexing the spaceship. Let me just expand
the bottom here. You can switch it from the
timeline to the shader editor. And we can just press N
to hide this panel on the right first
institutes can be to add a new material. So
let's click on you. We can call this spaceship
main, which is the main color. And we can just zoom on it. So let's go ahead and
start working on it. So first, I'd like to
add a checker taxa. So Shift A, let's search
for checker exer. You can go ahead and connect
color to the base color. And let's see it.
So there we go. So we got the checker applied
to the entire spaceship. But the UV mapping looks
a little bit weird, so we have to tweak
it a little bit. So what we can do, we
can add two other nodes. So also, there is
a quick shortcut. We can add here the mapping
and the texture coordinates. But we can simply
press Shift T here, but it's not working
because we have to activate the nod wrangular
that's going to allow us to access
these shortcuts. So you can go to Edit
here preferences. And under the add ons, you can search here
for wrangularT one here, the node wrangular. So just check it here. This node select it if you
press Control T, we're going to be
having access to the mapping and to the
texter coordinates. So now we can play with the
tuxorPosition, location here. For example, you can move
it on the Z or on the X. You can spin it
around if you want. But here as you can
see the checker is not working correctly, so this has to do
with the unwrapping. So what I'd like
you to do, I'd like you switch from the generated. So for the texter coordinate, we're going to need to use UVs. Also, here we can keep
an eye on the UVs. Let me just split my
SNE on the left side. We can switch it
to the UV editor. So if we press Tab to
switch it at this moment, so this is what we got for
the UVs of our spaceship. So what I'd like to do, I'd like to change it a little bit so we can press U. I'd like to use
the cylinder projection. And for its details, I want to be using
this align to object, not align two or view or
so aligned to object. So immediately you're
going to be having the best wrapping
for the checkers. So also here, what we can do, we can align or we can improve
lightly bit the scale. So the best ratio that
I found is to multiply the X the Y by two for the X. So for example, if
you give it here two, so the X needs to be four. So that's the best
ratio that I found. So here we need to get the size of these squares to be even. So what we can do, you
can fight the best ratio. Let me just keep tweaking
the X and the Y. So for example,
here, I found that if we give the Y
value, for example, 1.2, so the X needs to be
multiplying the Y by two, which is here, 2.4. That's the best
ratio that I found. So another thing
that I'd like to do, I'd like to take the chucker a little bit up until
it reaches this level. So we can go here to the X. Let me just try
to node X, the Y, so we can hold shifts
to go real slow, and we can stop right here. Perfect. So now let's work
on the checker colors. So the color number one
is going to be the white, which is exactly
what we got here. But for the second color,
it needs to be red. So you can click on
the second color, and let me just
use the red here. Just make it completely white. But I don't think we're
gonna need that sharp red. So something like
this gonna be great. Also, I'd like to reduce
the size of that checker. So I think let's use
122 for the ratio. Yeah, it looks better.
Alright, so now let's tweak the roughness
of that material. So first, I'd like to make it glassy, so to make it glass, you can reduce the roughness
down to something like 0.1. So now it's glossy. So we can also
increase a little bit the metallic to give it
that metallic touch. So let's use 0.15 for the
metallicness. That's good. And for the reflection, the IOR, let me try to see what's
going to be great. So I think we can reduce it
down to 1.25. So that's good. So the next material,
it's going to be to add, I'd like to make the
top completely red. So what we can do,
we can chew the UVs. So on the top here, we can
select only top the cockpit. Let's press d here, shift, shift old and keep
doing it until we select all the top. So
this is the top here. You can just ski it down, reel down, and
let's spot it here. You can ski it even down. So I'm just trying to
find that red spot. So here, just keep tweaking that until
you find the past UVs. Alright, so now you can see
the top is completely red. You can try to do
the same thing. Let me check at the bottom. So, for example, the legs
here, they need to be red. So you can do the same
thing with it with the top. So for this middle section here, it's completely metallic. So what we can do, we
can add a new material. So with our spaceship selected, we just add the new material. Let's call it steel. So space steel material, and for the steel, so it's applied first at
the right location. So on this mode, you can
switch to the face mode here, press Alt, Shift Alt,
and shift l here. And you can assign
that steel material. We can also assign it to
the frame of the door. Let me just find the
frame at the door here. Compress Alt to select it. Shift A to select
the inner frame. Let's apply that steel again. And I'd like to do the
same thing for the engine. So we can press L here
to grab the engine, and we can also assign to
it the spaceship steel. We can do the same
thing for the doors. So let me select the door here. You can select the steel. Alright so now let's tweak this material, the
steel material. So here in the principal BSDF, we can increase the metallic
up all the way to one and we can reduce the roughness
down to something like 0.25. And we got the steel material. Let me just collapse
this window. You can do red color
here, join area to the left. And let's check it. It looks nice. So next
we can add the glass. So the glass of our spaceship. So let's select the spaceship. We can add the new material. Let's call it spaceship glass. And on the S mode
by pressing tab, you can select only the glass. But also here, I'd like
to press Alt A to make sure that you select
everything else, the frame so Alt A, and let's select only the glass. Alright, let's assign it. Assign the material to it. And here we can tweak
can tweak that material. So first, I would
like to make it blue, so here on the base color, you can just pick some
kind of this blue here. Also make it a little bit dark. That's nice. Next, I'd like to do I'd like to
work on the roughness. So since it's glass, it
needs to be reflective. So let's use the
roughness of 0.1. And for the reflection,
we can reduce this value down.
Let me just see. I think we have to
increase it up. So let's increase it to 1.85. So we need to texter
some other elements, for example, here
for the stairs. So I'd like to create
some variations here. So let's select the stairs. I'd like to add
the new material, so let's call it emission. So stairs emission. So it's going to be
just like a light. So on the edit mode, we
can select, for example, here, just the bottom or I think that's going
to take too much. Let's select these instead, this frame of the stairs. So it's going to take a while
to select all these faces. Just take your time with it. And after that, we can
assign that stairs emission. Alright next, what we can do, we can tweak the emission value. So here in the principal PSD, you can scroll to the emission
and I'd like to increase the strength to let's say ten. So now we're going to be having some light here on this
frame of the stairs. You can also tweak the
color of the emission, so we can use some kind of a
blue, emit some blue light. Let's increase the
strength to 50. So for the door, so we can also animate or texture the buttons. So let me just close
the door first. So let me just press
N, jump to the item. So I'm going to try RX and let's spin it around by this value. And here I'd like
to add two buttons. Let me just press one
to be facing front. G press Z. We go to be rigging, fixing that in the
rigging process. So let me just scale the
door a little bit up. So a Z can scale it
up and move it down. To make it perfectly
fit the spaceship door. So here, I'd like
to add two buttons. So on the edge mode, we
can select this pace here, shift as curtage selected, and can press Shift A. We can start with the cylinder. So for this cylinder,
I'd like to reduce the amount
of vertices down to just 12 and we can
scale it down. So let me just scale it down. Also, we can spin
it on the X or X. Let's spin it by nine degree and we can scale it even down. Let me just press one to be
phasing it from the front. You can move it here, and we
can select this phase here. We can press I to create
an inset like this, and we can extrude it on
the inside by pressing E again to extrude like this. You can press E again and
scale that part down. Can do the right click
and shade smooth. And here on the back, we
can just delete that face. All right, so let's press
L to grab that unit, and we can drag it way back. Push it inside. We can try
to spin it a little bit. So RZ spin it round
to make it look good. Also, you can spin it X, push it a little bit back, and we can duplicate it two times. Shift D to duplicate this
and let's move it down. So once the door is
going to be open, so we're going to be
having the green light, and on the other side,
it's going to be red. So one red, and one is green. So let's add these
two materials, so I'm going to add
a new material. So it's going to be exactly
the serious emission, but we have to make
it a duplicate, so you can click
on this pattern, new material so that you can create a duplicate
of this material. So here, let's call it
steris emission, green. And here we can switch the
color and let's make it green. You can just play
with the saturation, not the saturation, but the hue. Take it back to the
side here, the green. And on the edit mode, we can grab only the
middle section, compress old, shift lt, like this part and we can
assign that emission. Perfect. And for the top
let's do the same thing. I think 50 is too much, so we can reduce it
down to just ten. All right. So let's do the
same thing for the top button. So I'd like to add
a new material. So it's going to be
the star is green, but we have to
duplicate it again, and we can call it
red instead of green. And here we can make it
red, pick the red color. On that this mode, we can
press Alt, shift old, select the middle, and let's
assign the emission red. There we go. We got two buttons. Alright, so here we are, so we finish texturing our rocket. So in the next coming lecture, we're going to be
working on the engine.
10. Creating spaceship jet engine: So the next steps can be to add the engine of our spaceship. So we need to add some
engine on the bottom here. Let's go ahead and do that. First I'd like to
select my spaceship. On the dis mode, we
can switch here to the edge mode and we can press all on the
bottom like this. Let me just press one since
you can be facing the front, can press Shift D to
duplicate this edge line, right click to cancel that
movement and we can ski it a little bit down to push it
inside that engine frame. Ski it down and you can
extrude press Z to go down. You can scale up and
keep extruded like this. So I'm not sure why
the subdivision is not working.
Let me just check. Yeah, it has to do with
these frames, these seams. We're going to fix
that later. Let me just keep extruding here. Extrude one more time,
press each go down, scale L like this, extrude, and scale all the way down. All right, so next we can press
L to grab this unit here, the entire unit,
and we can press N, and here for the increase, let's decrease it
down to just zero. Alright, so now it's not sharp. We can do color here and shade auto smooth so that you
can smooth those edges. Now I'd like to do,
I'd like to work on the material of our engine. So here on the bottom, so let's add a new material. Let's call it spaceship engine. And let's work on it.
So on the edit mode, we can assign it to that object, and let's work on
this new material. So here on the bottom in the shader editor,
we have two nodes. We have the principal BSDF. So in my case, I don't want to be using the principal BSDF. I'm going to just delete it
because we're going to be targeting the volume. So
you can press Shift A. Let's start with an emission,
which is the light, and we can use it as a
volume for this material. All right, let me
just go back here to the object mode so we can see our material coming into play. Let me just hide this
reference image. And let's see. So
this is what we got. So we can increase the strength up or we can play
with the color. You can make it orange, just
like the reference image. But we're going to be
working on this later. For now, let me just add
to improve the color, I'm going to be
using a camera ramp. So let's press Shift A. We can search for kettle amp. So as you can see here,
we have some variations. We don't have just a single
keto have a variation. So we can do the
same thing here. Let me just connect this
camera ramp to the color here. And what we can do, we
can tweak these handles. So, for example,
the black handle, let's make it blue. Use the blue color here,
and for the white, we can make it red like this
or a little bit of orange. Also the type, I don't
want to use RGB, we can switch to this SV hsV. This type is much more
better for the fire. We can tweak the
handle position. For example, the blue, I
like to put it at 0.3, and for the orange,
I like to put it at 0.6 for the position.
There we go. Also, we can
increase the quality of that volume to
see it is better. Here on the render properties, let me just scroll a
little bit down here until we find the rate racing, we can check the rate
racing here and also for the volumes for the volumes, I like to increase
the resolution up to let's say one, two. Now we have a much
better, clearer volume. You can also press
switch the render mode and we can work on it here.
It's going to be better. For the bottom here, I
don't like that part. So what we can do,
we can fill it, can press Alt at the bottom, and we can press F
to fill that gap. That's nice. Let me just go back to the material preview.
It's going to be better. All right, so next, I'd like
to handle these colors using a gradient color so
we can add gradient. So let's search for
gradient texture. You can connect the color
to the factor here. And for the type sauce,
now it's linear. We have the blue on the left
and the orange on the right. I don't want that. I
want it to be spherical. So you can switch the
type to spherical here. Alright, so we got that, but
we can tweak it even better. So we can spin it around. So to spin it around,
we're going to be king new those two nodes that we
used in the previous lecture, the mapping and
the textacordinan. So you can bring them back by selecting our gradient
texture and we can press Control T. So this we're going to be adding the mapping and the
textacordinate. So here instead of
using the generated, I like to use the object. We're going to use the object. And now we got it. So we got the red at the top and
the blue on the bottom. Also, we can tweak the scale. So for example, if you
reduce the scale down, we're going to be
pushing that fire down. So I think something
around 0.5 is going to be so for the fall
power of our engine, the 0.5, let me just
try to shut it down. You can also try to tweak the colors that we got
here. Let me just try. We can increase the Y to two. Center for the Xs
increases to two. We're just experimenting here, and here we can set
it to 0.75 for the Z. Here, I think that's
a little bit too low, so we can increase it up to one. Same thing here on the X,
we can increase it to one. But that's too much,
what about 1.5. There we go. You got
some nice colors. Also here, if you
want to increase the strength of our
fire that we got here, we can use a multiplier. Let me show you how
you can do that. So press Shift A, let's use a math node. And for the math, we have
to use a multiplier, so we can choose the
multiplier do we can connect the gradient color to the first value and
this value output, let's connect it
to the strength. Here we have the possibility
to increase that size. So you can increase it
up, let's say to five. Now it's much more
brighter or about ten. There you go. Now it
looks much more better. You can tweak the
colors if you want to match the same color
reference image. So for example, you
can exclude the blue and replace it with
some kind of a red. Also, let's make them a little
bit close to each another. Also we can add a
new color here, a new handle, and we can
choose a different color. Basically, we got it
so we got our engine. So to animate the engine, what we can do, we can
play with this Z value. If you take it up, for example, if you give it 50, you're going to be
shutting down that engine and if you reduce
it down slightly, you cannot be so going to
start with 25 with ten. So if we drag that value
down while in shift, going to be starting the fire. So this is how we're
going to be handling it. So we're going to be doing that in the next coming lecture.
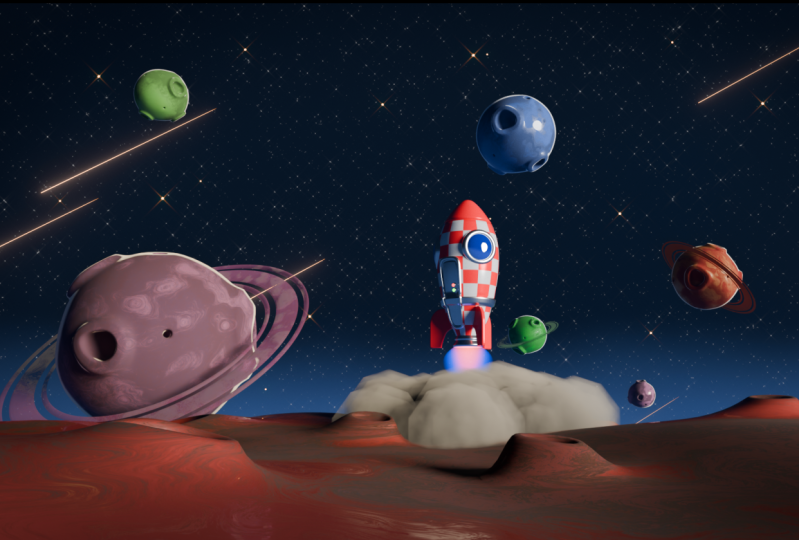
11. Creating space planet model: In this section, we'll create all the essential elements
of the space environment, the planet, the stars, the landing ground, and
the shooting stars. In this lecture, we'll start
by creating the planet. Let's get started. Here we
are back to our spaceship. So first I'd like to
hide so we can select the spaceship and we can press
H to hide it. H is high. If you want to bring it back,
so we have an eye shot, you can just open the
eye by clicon on it. Let's do same thing for the
stairs and for the planet. Now let's go ahead and start
by creating our planet. I'd actually put the cursor
at the center here so you can shift as a cursor
to the word origin. I'd like to start with a sphere. As you know, the shape of
our planet is spherical, what we can do, you
can press Shift A. Let's jump to mesh and
we can use a UV sphere. Down below here, we
have this panel, I'd like to expand it. We have 32 for the segments
and 16 for the rings. It's going to be really hard
to work with this sphere. What I recommend is
reducing the segments down. So we can reduce it to something like 12 and for the rings, we can set it to eight. At the same time, we can add the subdivision surface modifier to smooth out our sphere. We can jump to modifiers and
let's add a new modifier. It's going to be the
subdivision surface. First one. Next, we can do rice
click and shade smooth. To make it real
smooth, I would like to increase the
level view port two. You can see the difference here. You can see these edges here. If you increases up to two, it's going to be
completely smooth. Let's go ahead and
create these holes. Let me just zoom on them here. For example, this
hole as we got here. On the edit mode, you can press Edit tab to switch the edit
mode and you can select, let me start by selecting
four of these faces. So the first step is going
to be to create an inset, so we can press I
to create an inset, just to check them
inside a little bit. And the next step
it's going to be to make this shape
looks like a circle. As you can see the hole here
has the circle or shape. On the other hand, here we have a square, so we don't want that. What we can do, we can
select these edges, and we can scale them down
to form that oval shape. But this method is not the best. I'd like to show
you a better way. So let me just also here
on the subdivision, we can check this on cage so that we can see our
geometry even better. So we can scale it down here. But there is better way. We can use a built in add on. It's called the Loop tools. Let me just show you
you can go here to edit preferences and inside
the Get extensions. I want you to search
here for extensions. Let's search for loop tools. This one right here. I
already have it installed, so you can just click on this install that you're
going to be seeing it here. Next you can jump here to annals, and let's search for it. So loop tools, so make sure
that this box is checked. So now if we are on Davis mode, so this is the condition
for the loop tools to work. So if you press N, you're
going to be seeing this edit panel on the bottom. So let's click on it, and
let's expand these tools. So now we have plenty of tools, so the circle is the one that
we're going to be using. So I'd like to select all these the entire edge line and we can click on circle. Now we got it as a circle. It's not well shown
here, we go back, if you uncheck the engage, you're going to see that
it has that circle shape. Let me just bring it back here. Now what we can
do, we can select these four faces and you
can exclude them outside. You can see that shape the
shape is circular right now. After exuding it, we can
scale it a little bit down. Like this, and we need to create this inset
that we got here, this top part of the hole. So you can press I again
to create that inset. You can go a little bit
inside, and after that, we can extrude on the
inner side like this. And there we have it.
We have our hole. On the inside, we can just
sce it a little bit down. So the hole looks lit huge. We can ski it a little bit down. So on the dite mode, I
like to grab this edge. We can press old
left click here. Let me press seven to go to the top and we can
bring it inside. So you can hold G and let's stick it inside a
little bit like this. Next, if you want to
have some kind of a flat top like this, so what you can do,
you can tweak the top. So let me show you. So you can press Alt and you can
jump to the item. For the me increase, you
can increase this value up. So this way, you're going
to be sharpening this edge. So you can do the same thing
to the second edge line.'s press Aldu and you can
increase the increase up. So as you can see, we
have that sharp top. The last thing to do is going to be to randomize this hole, so as you can see,
it looks perfect. So it's not the case in reality. So what we can do
on the edit mode, we can select some
random vertices. For example, this one, and we can activate the
proportion edition tool. I would like to switch the
type to smooth and we can, for example, take it
a little bit inside. Let me just scroll the mouse up. Check this part up to have
some distortion here. That looks good. You can
select some random vertics. For example, this one we can push it a little
bit up like this, the one on the bottom, you can tilt it a little
bit to the left. Same thing here. For this, you can just randomize. The shape. There we go. So now we got some
random random hole. So in our space scene here, we have plenty of these holes. So doing it one by one is
going to take a lot of time. So instead of what we
can do, it's going to be wise if we can
automate these steps. So we can use the AI to create a script to automate the
whole creation process. And that's going to be the subject on the
next Cam of lecture.
12. Automating planets creation with ai blender scripting: In this tutorial,
I will show you how to use a Python script to automate the modeling steps for creating the planet holes. So let's get down
to it. So first, I'd like to start
with the sphere. So Shift A, we can jump to mesh, and let's use UV sphere. So to make it easier
to work with, I'd like to reduce down the
number of segments and rings. So for the segments,
I'd like to go with 12 and the rings, we
can go with eight. Alright, right
click Shade Smooth. So next, we can add the subdivision surface modifier so that we can bring
back the details. So now it's completely smooth. We can lift up that level
view ports value too. So now the edge of our sphere
looks pretty much smooth. So in the previous lecture, we created the planet holes
by following these steps. So first, we extrude up
the selected geometry, we scale it down. Third, we insert the selection, and finally, we exude it down. So I use Sha JBT to write
down the following prompt. So first, I tell the Sha JP to create a blender
Python script that adds a circular hole to a selected face
in the Edit mode. So the script should include settings for the following step. So extrude the face
upward by 0.1 meter, scale the face down
by 0.75 and inside the face by 0.0 25
meter thickness, and finally extrude the
face downward by -0.25. So here we got the script that's going to allow us
to generate those holes. So I'm going to just
copy it from here. So let's copy it. And we're going to find this in
resource down below. So next we can jump.
Next, I want you to split the scene here
vertically like this. So the left menu, we can switch it to the text
editor for the scripting. So here's what we do
we can click on you. And I'd like to call
this space kits. And we can paste our code here, this script that we got here. So this script is
going to automate all the modeling steps with
it to generate these holes. So the first step
is going to exuding up the selected geometry. After that, it's going
to scale it down. Next, it's going to insert
an inset, and finally, it's going to exude
down to determine how deep that hole
is going to be. So if we scroll
off the top here, you're going to be
seeing this play icon which is run the
scrit you can click on it. So now the script is running. If you press N, you're
going to be seeing here a new tab at the
bottom called Space kit. So you got generate
space planet hole. Next, I'd like to show
you how can we use this script to generate these type of holes
without modeling them. So I'm going to be
saving a lot of time. So with our planet selected, so this script is going to work only if you are on the EVS mode. So you can switch here to mode, or you can press tab
for the shortcuts. So now I'd like to do,
I'd like to select the places where you
put those holes. So we got the first hole that we modeled in the
previous utorial here. So I'd like to do right now, we can add, for example,
another hole here. So I like to press I
to reduce the size. I don't want to have
a big hole here. So you can press I
to reduce the inset, create an inset to reduce
the size of that hole. So we got that one over here. You can add another
one at the top. So let me just select
this part again. We can press I to
create another inset. So next which we
can do, let me just select these two faces. So one at the top and
one at the bottom. So next which we can do,
we can press N and we can colt on generate space
Planet before you can do that, I want to switch the piv
point here at the top. You can just scroll your mouse, and here you can
switch the Pivag point through these
individual origins. So now if you click on
generate Space Planet holes, you're going to be seeing
those holes that we got here. They will be generated. So we can tweak them a little bit
to make them look like this. So in real life,
they look like this. But if you want to make them
look a little bit funny, we can tweak these settings
that we got at the bottom. So for the scale factor, we can increase it
something like this, 0.90 is going to be fine. And for the thickness, we can increase it
also up to something like 0.11, something like that. So next, we can switch back
here to the edge mode, and we can grab only the edges, press Alt here, shift Alt, shift all here, to
select only those edges, and we can jump to the item. And you can increase this
value to let's say 0.45. So this way, we're going to
be having some sharp tops, exactly like what we got here. So all we need to
do right now is to randomize these holes. So under this mode, we can use we can go back
to the vertex mode. We can select some
random vertices and we can activate here the proportion in
this intral and we can try to make it
not so perfect. So just play a
little bit with it. Here at the top, can select these two edges and
we can bring it down. So now we have some
nice distortion here. So you can do the same
thing for the top hole. So let me just select these two, track it a little bit down. This part here, we can
push it on the x axis inside. Alright, so that's good. For example, here, we
can track it a little bit down, something like that. So now, I'd like to
show you how can we generate the second
type of holes, these small holes
that we got here. So again, on this mode, I'd like to select some
random faces so we can select these two
repass or these, one here, one on the right,
and one on the left. So next we can press
again that button, this urate space planet holes. And for the extrusion up, I'd actually reduce
it back to zero so that we can have flat holes, and for the scale factor, which is the size of the hole, you can just reduce it down. So 0.30 it's going to be fine. And as you can see, we created
the second type of holes. So this is the way to
generate these holes faster. So last thing that
I'd like to do, I'd like to create this orbit
in circle that we got here, so we can select our
planet on that mode. Let me just press Shift A. First, we have to
deselect everything. So let's press Alt
A to make sure that everything is deselected.
We can press Shift A. And we can add a circle. So let me just press
seven to go to the top. We can scale up that circle, but we should not be using
that proportion edition ule. So let's just scale it up. Here, I'd like to go back to the medium point instead
of the individual origins. You can just scale it
up, something like this. You can press E to extrude
but why we cannot extrude, let me just go back here
to the vertex mode. You can try E S, scale it up just a bit, Shift D to duplicate this edge, and you can try S to
scale it up just a bit. Try E again to extrude for the second time and you can
extrude it up like this. Again to create this last
layer of that big circle, we can press Shift D
again to duplicate this. You can try to ski it up, click, and we can exude it, press E to extude and extude
it up like this. So now we got that
orbitin circle. You can just spin it around
to have that famous look. So RX can just spin it
by let's say -30 degree. So we got our planet.
In the next hemlex we're going to be working
on the landing ground.
13. Creating the landing ground: So we got the planet,
so the next step is going to be to work on this landing ground where the spaceship is
going to be landing. So I'd like to
collapse this window that we got here so
that you can make room. So is collect here,
join area to the left, and I'd like to
select my planet. We can press H to hide it. So let's go ahead
and start by working on this landing ground
so we can press Shift A. And for the size of it, I'd
like to jump to the item. We can increase the size, for example, the dimensions. Here we can use eight
by 12 by 12 on the Y. So here, 12 or even up,
let's search to 14. We need to have a
wide lending ground. So next step, I would like
to add some subdivisions. So on the mode,
you can press Tab. I'd like to press Control E, and let's click on subdivide. And here we can increase
the number of cuts up so that we can
subdivide even more. So I think something around, let's go with ten. Ten
is going to be great. So next step is
going to be to add some ups and downs in
our lending ground. I should not be perfect
in a flat like this. So I like to select some
random pass here, versus Cs, for example, these three, and we can activate the
proportion in this in tool, and we can just take these up. I'd like to increase the size of that circle,
something like this. All right, we can select
also some other ones. You can increase the circle
up to have wide influence. So something like that's
going to be great. We can do click in shades mood. Next, I'd like to add the
subdivision surface modifier to this plane, so
we can do it here. Let's add subdivision surface. By the way, I'm on the
modifier stab here, and now we are ready
to add these holes. Next, let's go ahead
and generate the holes. We can press seven
to go to the top. Let me just spin around
by pressing five. I'd like to add some kind of
holes that looks like this. So I'm going to
press C and let me select I prefer to scale up. So we can select
the entire plane. We can try X to scale it a
little bit up like this. And now we can select
some random faces here, for example, one here,
this part like this. So here we can just
select these faces instead. These four phases. And after that, we can press
in to access our add on, which is a Spacekit and we can collect on generate
space planet holes. But I want you to make
sure that you are on this individual
origin. So just click. There we go. You can
tweak, for example, how deep those holes should be, and we can extrude them up, check them up a little bit, scale down the X factor. So that's good. We can tweak the up and down
hills even better, so we can switch here to the vertex mode with
the proportion enabled. For example, you can just
take this part down. I just scale it down
again. Same thing here. You can press, scale
down like this. We can press seven to go
to the top and we can tweak we can tweak these holes. All right, sounds
like this, just to not make them perfect. So let's take a look.
That looks good. You can also try to increase
the level viewport for the subdivision to two
to have better details. So the last step is going
to be to add our camera. So you can press Shift A. Let's jump to a camera. And I'd like to
position it here. So what we can do. So what we can do on we
find the best spot, we can press Control and zero. So this we're going to be bring the camera to the viewport. So next we can play a
little bit with it. So on the item here, we can better position
it, can move it up. So I think 92 reads
is going to be great. And on the Z, you can just keep it at -90 for the Y can keep it at zero. You just position it better. Also you can tweak the
vocal length of our camera. So with our camera selected, we can jump here to
the camera settings, and we can reduce the focal
length down to just 30. Something like that, we can
just move it forward again. Also you can try to
expand these borders. So under this mode,
you can press Ale. You can try EY and go. Same thing on the
other side, so EY, so we should not be seeing the
end of these borders here. And there we have it, so
we got the landing ground.
14. Stars & shooting stars: Let's create the stars and the shooting stars in our scene. So first, I'd like to start
by creating the stars. So I'd like to start by
circle so we can press. Let me just select my plane
here and the landing ground. You can just rename it to landing ground, and
we can just hide it. So next, I'd like to
start by a circle. So Shift A, you can jump to mash and you
can use a circle. So for the dimensions
of this circle, I'd like to reduce the
number vertic to just ten. You can press Enter
on the edit mode. So I'd like to jump
to select and we can select you can use this
check or D select. So now check this out
if you press scale, but without this enabled. So if you press S to
reduce the size down, you need to be on the
median point again. If you scale it down, you're
going to be having a star. So that's the co gase
way to create a star. So all you have to do,
you can press A and press F to fill that star. So let me just rename
it here for the circle. You can call it star. Next, we need to create our
shooting stars. I'm going to just
tight the star here, and we can start
again by sphere. So Shift A, we can jump to mesh, and we can use UV sphere. So for the dimensions,
I'd like to reduce them down
to just the half. So you can just go
with 16 to eight. And when the right
click shade smooth, we need to spin it on the Y, so we can press R Y. Let's spin it by nine
degree. Can press Enter. On this mode, I'd
like to select only, the second part here, can press, switch
to the Y frame. Let me select this area
and we can drag it here. After that, we can
scale it on the X, so we can try Sx and
scaled by ten or even up, so you can try SX again, and we can make it really
can scale it real big. Something like that. So
now we got that head, the head of the shooting star, and as you can see,
the end is narrow. So let me just switch
back to the solid, can investigate here,
right shade smoothly. So now we got our shooting star, you can just rename it here. So let's call it shooting star. And we can just scale it down. And I'd like to spin it on the
Ye so we can just spin it, let's say by -30 degree. So this is the shape
of that shooting star.
15. Blocking out key elements of the space scene: In this lecture, I'd
like to block out all the space element
that we created so far. So here in this editor, I'd like to bring
back all the head and parts so we get
the landing ground, our planet, the shooting stars, the spaceship, and
finally the stars. Alright, so now we have to
organize them we can price zero so you can jump
to camera perspective, and let me just organize these. So for the shooting
star, we have to scale it way down and we
can spin it on the Z. You can try RZ, and let's
spin it by -90 degree, can scale it a little bit down. For the planet, let me
select the planet here, can move it a little bit up. Center for the spaceship. Let me just find
the best position. I think something
like this, we can also try to scale
it a little bit down. And put it here. So all those gear should be
touching the landing ground. So let me just pay zero so that you can jump to the
camera perspective, so here we can drag
it a little bit to the right side so that you
can center the spaceship. You can also try
to spin it down, spin it around a little bit. Something like this
is going to be great. So for the shooting stars, let me just scale it even down. You can duplicate
it three times. You can have another
one here. St like that. Scale this one a
little bit down. Add two close to each another. Same here. And for the planets, let me just take this
planet a little bit down to give it the same position of this planet that we
got in the reference. And we can just keep
duplicating these planets or shift the duplicate
can take this one up, can just spin it around, give it a different spin. All right. And we can just
keep adding random planets. Scale this one up,
double, spin it around. So the double R is going
to be for the random spin. And we can add another one here. We can make it real tiny. And finally, for the stars, let me just find my star here. C just take it up. So we need to make it pace in the camera, so let me just spin it on the
Y like this by -90 degree, and we can just skip it down and we can just keep
duplicating it multiple times. Shift D to keep duplicating it. And we have it so now we blocked all the space elements
inside our scene. So in the next coming lecture, we're going to start
check soring them.
16. Texturing Mars planet: In this tutorial, we're
going to be creating a mars planet and we're
going to be using that same texture to assign it to the ground to the landing
ground that we got here. So let's go ahead and
start working on it. So first, I'd like to press
A to select everything and we can press H to hide
all the elements. Next, we can start
with the sphere. Shift A, we can go to Mash and I'd like to start
with the UV sphere. So you can press
period on the nam pad, right click and sheet Smooth. After that, control space to
go back to the scene here. And I'd like to switch. For example, here we
can focus on our here, and here we can
switch the menu to the shader editor
or let me press N, and we can click on
this new material. Let's call it Mars Mars planet. And let's start working
on this material. So first, here we can press, let me just press period on the numpad so that
we can reset the Zoom. We can pressE switch
the material preview. So to create a material that is similar to the Mars surface, I'd like to start first with the noise texture. So
you can press Shift A. Let's search for noise texture and I'd like to
connect it to a wave. So shift again, let's
use wave texture, this one here, and we can apply or connect the factor
to the vector here. And let me just go ahead and connect the color
to the base color. So I'd like to connect it not the vector, but to the scale. Let's connect it to the scale. Next, I'd like to increase
the distortion up this value. So I'd like to
increase it to five. And for the details, I'd
like to give it ten. For this third or fourth
value, this detail reference, I'd like to take it
all the way to one to add more details to our texture. So next, I'd like
to add a math node to tweak a little bit
the noise texture. So you can press Shift
A, search for math node, and I'd like to put it between
the noise and the wave. And here we can
tweak this value. So I'd like we can hold shift so that we
can go real slow. So to get the same value
that I that I got, you can set it to
-0.1. All right. So now we need to add a color
ramp so that we can give our material some colors. So here we can press Shift A. Let's search for color ramp, and I'd like to put it between the wave and the principal PSDF. So here we can tweak
these handles. I'd like to add
the third handle. We can put it, for
example, here at 0.9. Let me just reset
the position 0.9. And for the colors
so the first handle, I'd like to give it some light brownish color,
something like this. So we can do the
same thing here. I'd like to select
the second handle. We can collect here
and pick I'm going to use this eyrapper to pick the
same card that we got here. And for the middle one,
we can make it dark. So let me just again put or select the same
card we got here, and we can make it darker. Let me just drag
this part there. And as you can see our material
start to look like Mars. So our planet looks
exactly not exactly, but we can also add here
subdivision surface modifier. To make this sphere looks
more clean. All right. So the next step is
going to be to add the roughness. So
let's go down here. I'd like to start
with coram again. So Shift A, coram. So the roughness
is going to be how shiny or how rough our
material is going to be. So we need to make it
a little bit shiny. So let me just take
these points up. So I'm going to simply connect the wave to the factor here, and on the other
side, we can connect the car to the roughness. All right, so now we
got a glossy planet, but we don't want that, so we need to tweak it a little bit. So definitely we got
some water on Mars. So I'm going to just
take this handle. Let's push it to the right side. For example, let's
put it at 0.2. And for the is value, we can drag it way down. So this way, we're going
to be eliminating or reducing down the glossiness. So here let's set it to 0.25. And for its color, actually, the white is the roughness, the rough surfaces here, while the black is
the glossiness. So we can reduce the glossiness
by increasing that color, making it a little bit of gray. So now it's glossy and perfect. So the final step is going
to be to add some bumps. So as you can see
here, this surface looks completely flat. So what we can do, we
can add some bumps. So I'm going to be again using this wave texter and I'd like to connect
it to a bump node. Shift A, let's add bump node, and we can connect the
color to the height. And on the other side,
the normal to the normal. And you can just track these
nodes down here. All right? So you got some
bumps going on here, so you can try to reduce
the strength down to just 0.2. All right. And there we have it. So we got our material, our Mrs material. So we're going to be
using this material to texture the landing
ground of our planet. So I'd like to press
Oldge to bring back all the objects
in the scene. Let me also expand. You can press control space
to maximize this window. And I'd like to
select the ground. Actually, we are upside down. We can select the ground
control space to go back. And here we can pick with
the ground selected, we can jump to the materials, and we can select that same material that we just created, which is the Mars planet. And there you have it with
texture, the landing ground. So I'm going to just hide
my Mars planet here. So let me just find it. We can call it planet Mars.
And we can just hide it. Let's press Cal on
this eye to hide it. Let me just press zero, and we got the landing
ground textured
17. Texturing all planets in the space scene: In this lecture, I
would like to texture all the planets that
we got in our scene. So we're going to be
creating various materials for each planet. So we have the green, the red, the blue, and the purple. So let's go ahead
and work on it. So you can stop by this
planet that we got here. I'd like to split my scene
vertically like this. So it's lagging
because this material is demanding a little bit. So I'd like to switch the bottom to the shader
editor, the bottom window. For this material,
I'm going to be using the same Mars material that
we created for the ground. So we can just click on
this material browser and we can search
for Mars planet. So let's click on it. So we
can press to hide this panel. So we got our material here. So I'd like to duplicate it. I'd like to create
a new material for this, so it's
going to be red. So here, in the material shader, you can also do that here,
so they are the same. So you can click, for example, on this new duplicate
or new material, and we can call it Mars
or just plant red. You can call it the red color. And let's go ahead
and tweak this or am. So first, I'd like to delete
the third handle can just keep two handles to keep to make our material
look simple. And for this first handle, I'd like to pick you can pick the red color
that we got here. And for the second handle, let's pick the second
handle and also we can give it the same red color, but it should not be this dark, so we can just take that
darkness a little bit up. So we got so now we got our
so next order that you do, I'd like to show you how
can we make it shine a little bit on the edges.
So you can see that here. So, for example, we
have some shininess around the edges of our planet. I makes it look really good. So to do that, we're going
to be using the fernel node. So let me just show you the way. So here we can just take
the material output. I'm going to just
disconnect it for now from the surface, so
it's going to be dark. And I'd like to show you
this fernel on its own. So you can press Shift
A. Let's search for Fernel node this node
that we got here. Can connect so you can
connect the factor to the surface so that we can
see this fn on its own. So now you can see the
difference that it give us. It makes the inner dark
wild edges are white. We can also tweak, for
example, this IOR value. If you want to make
strong effect, for example,
something like this, 1.2 it's going to be great. So the edge that we got in our reference is a
little bit sharp, so it's not fading
well like this. So what we can do to
tweak this effect, we can use the color ramp. So Shift A. Let's
search for color ramp. And we can put it here. And for these two handles, we can just make them
close to each another. For example, you can
take the white and drag it to the right side
to the left side, and we can achieve this. You're going to be having
some sharp reflection on the edges of our planet. So now what do we can use
this setup as a mask. So on the inside for the black, we can replace the black with our material with our
red planet material. So what we can do, I'd like
to use the mix shader. So Shift A, we can
search for a mix. Shader node. This one, I'd like to put it here. So the fern going to
be using it as a mask. Let's just drag it
up for the factor. And for the principal BSDF, we can use it as
the second shader. You put it as second, and for the first shader, we can use anything
that you'd like. So in my case, I'm going to
just go with Cpresseshift A. You can search for glossy you can use a glossy color here. So actually, the principal ZF should be connected
to the first shader. So we need to have it replaced in the black, not the edges. So we can just take it and connect it to the first shader. All right, so now we got
it in the right place. So next for the second shader, we can use a glossiness, so let me just connect the
glossy to the second shader. So basically, this node is going to be shown on the edges here. So we can tweak it. We
can make it glossy, or actually, we need
to make it rough. I'm going to just take
it all the way to one. Also for its color, I like to make it dark. Give it some dark color. Let
me just check it from here. Alright. Also, we
can tweak cut Ramp. Let me just find the best spot. We can also play a little
bit with this material, so I'd like to reduce the
strength down to 0.1. Should not be having
strong bumps. And basically, that's it
for this planet material. So next step is going
to be to duplicate this material across all
these other planets. So you can do it manually. You can select each
planet and add, and you can add the mars planet, but it's going to
take some time. So the quickest way or
the shortcut is to select all the planets while
doing shift like this. And the last
selection needs to be the planet with the
material applied to it, this one that we got here. And inside our
material properties, so we got this dot here. If you click, you're going to be seeing this copy
material just selected. If you click on it, you're
going to be pasting this material that we got here across all these other planets. So now all you have to do
is to tweak the colors, for example, let's
select this one that we got here, this planet. So I'd like to duplicate it, we can click on
this new material. And since so the second
material is green, so you can just
change red, to green. And here, we can
tweak this color. Let me just find
this color ramp. So here, I'm going to just
be picking the green. Let's pick this screen here. Same thing for the
second handle. I'm going to be
picking this screen. There we go. So I'd like to do the same
thing for the third. So this one is blue. So let's just
duplicate it again. You can call it blue and
to repeat the same steps. So I'm going to be choosing
this blue here. Nice. The one on the bottom, let
me check it. It's purple. So let me select this planet,
duplicate the material, call it purple, and let's
tweak these handles. You can pick a purple color. And for the other materials, so you can just reuse the same material
that we just created. For example, this one
we can make it green. So let me just search
for the green planet. The one on the top,
can make it blue, and this one here we
can make it purple. And basically, we got it. So we textured all of our planets. So in the next come lecture, we're going to continue
with the shooting stars and the stars.
18. Texturing stars & shooting stars: Now we have to texture the
shooting stars and the stars. So let's go ahead
and texture them. This one's going to
be pretty much easy. Control space to go back to this view and with this
shooting star selected, we can add a new material to it. You can call it
here shooting star. And for the principal SDF, we can go to the
emission down below. You can change its
color. You can give it that fiery color, something like this,
and you can increase the strength to 25. Something like that it's
going to be accurate. All right, so let's do the
same thing for the stars. I'm going to be selecting
the stars here. We can choose the same material that we created the
shooting stars. So the last step to do
is going to be to assign the same material
to all the objects on the shooting stars. So let's select all the shooting star that we got in the scene. Shift left collects to
select them all. All right. And the last element is going to be the one that is juxta, this one, shift selected here, and here in the
material properties, you can go to this icon
here that's drop down, can collect and copy
material to select it. So this way, all
the shooting stars will have the same material. So let me do the same
thing for the stars. So let me just select all
the stars that we got here. And Shift select
the textured one. And we can click copy
material to select it. So let's press zero. So now the shooting stars and
the stars are textured.
19. Generate stars in sky: So now I'd like to start
working on the lighting. The first thing to do,
I'd like to generate some stars in the
background, the sky stars. Let's go ahead and
start working on that. I'd like to split my scene vertically like this
and on the bottom, can switch to the shader editor. So now we're going to be
working on the lighting, so we have to switch
from an object, the object mode to the word
mode. So this is what we got. We got the background color connected to this word output. I don't actually C
this material applied, we can press here and we can
switch to the render mode. So this is what we got.
It's completely gray. So we are using this color here. So if you try to change it, going to be having
different setup. So let's go ahead and start
improving the lighting. So first thing to do, it's
going to be to add the stars. So I'm going to just delete
this background node, and I'd like to start
with some noise texture. So Shift A, let's
search for noise. Texer. Let me just expand this
one a little bit further. So the noise texter needs to
be connected to color AM. So let's press Shift A, let's
search for color R And we can connect the factor to the factor of the color ramp and the color to the surface. So now we are seeing
the noise sector. So I'd like you to
tweak these handles, something like this,
can take this one up. So to be more precise, you can take the black and give it 0.7, while the white, you
can give it 0.8. And next, all you have
to do is just increase the scale of the noise
so it's increased up. So this way we're
going to be creating can be forming our stars. So we can increase the scale
all the way up to 300, and now you can see we are
creating the stars in the sky. So the next step is going
to be to add a fog layer here to make the
sky looks terrain. So now it's completely dark.
20. Adding Sun lighting: The next step is
going to be to add the sun to lighten up our scene. So we can press Shift A, shift A here, we
can go to light, and let's add the
sun. All right. So we got the sun. We can
press zero so that you can see the lighting from
our camera perspective. So I'd like to do to the sun, we can jump here to the abject data
properties so that we can play with the settings. So for the strength, I'd like to increase it up to let's say ten. Next, I would like to tweak
the position of our sun. I don't want you to be
straighten up like this. So what we can do,
we can press N. Let's jump to the item, and we can play with let me
just find the right settings. So we can play
with the rotation. So on the X, I'm going
to keep it at zero. So for the Y, we can give it
-80 degree and for the Z, we can give it 100. So this is the best
setup that I found, so feel free to make adjustments so you can keep adjusting with the position here to get
different lighting setup. So next step is going
to be to work on the angle, angle of the sun. So I'm going to just
increase it up. So let's say to 25 degree. Next, I'd like to
tweak a little bit these materials
on the spaceship, so they don't look that
good. So we can do. Let me just find
the spaceship main. So here, I'd like to
go back from the word, back to the object, and let's
check this checker texture. So I'd like to make the
red completely red so we can increase the saturation
all the way to one. And for the glass, so we need
to make it look like glass. I just to reduce the roughness
all the way to zero. And for this reflection,
the IOR reflection, we can increase it up
to something like 15. For the steel material that we got here, so it's
barely visible. So what we can do, let me
just work on it a little bit. So this is the
steel. Let me try. Yeah, this is the one. So we can decrease let me just find
the best way to handle this. We might want to
bevel this edge. We can press Alt, shift t. Let me just bevel
it a little bit. Control B, can
bevel it like this. While increasing, we can scroll the mouse so that you can add an extra edge loop on the side. So now we got some reflection
on that edge line, which is good. We can
do the same thing here. Let's press Alt on the bottom, shift old to grab both of those edge lines,
and we can bevel them. So Control B. Let's
bevel them like this. Alright, so let's go
back to the render mode. So now we got some
reflection here. It looks much more better. So you can also add
a new light source here to lighten this side here. It's completely dark.
So can press shift A. Let's jump to light, and I'd actually bring this area light. So let me just take it up. We can move it to the
right side and we can spin it on the X so
let's spin it sideways. Next, we can on the
object properties, we can increase the
power to let's say 150 watts. That's good. Spread zero so that you can see it from the
camera perspective. Also here for the size, we can reduce the size of the light. Make it really tiny,
something like 0.25 meters.
21. Add fog layer: Next step, I'd like to add a fog layer effect
and put it here. Let me show you that in
the reference image. So if you press Control space, you're going to see
that the bottom here looks a little bit light blue. So here we have dark blue and on the bottom, we
have some light blues. So first, we have to
switch to the word so that we can be
effecting the stars and the overall lighting. And I'd like to start by
creating that new layer. So we can just take
these two notes down. And I'd like to start
with the gradient color so you can press Shift A. Let's search for gradient color. You can go ahead and
connect the color to the surfaces so that
you can see it here. So let me just
scroll down so that you can see that layer, right. So now we have that gradient. So I'd like to do, I'd like to spin it around so you can we can add the mapping and the texto
coordinate to the gradient. So we can press
Control T so that you can have access to the mapping
and the texto coordinate. So previously we enabled the node wrangler
so that you can have access to this shortcut. So the quick way to do it
is go to Edits preferences, add ons, and you can
search here for wrangler, and you can check this box. So now I'd like to spin around that linear gradient
that we got here. So I'd like to play on the Y. So you can just turn it around. Let's type 90 degree. All right, so let's press
zero so that you can go back. So we got that line here. But this line looks a little bit perfect, so
it's straight line. So what we can do, we can add the noise sectors so that you can have some distortion
on that line. So here, let me just you can just tick these
two nodes down. And I'd like to
add noise texture. So Shift A, we can
add noise texture. I'd like to connect the noise to the scale of this mapping node. So let's connect the
factor to the scale, and we can reduce the
scale down to just one. So you're going to be
affecting that scale. Alright, so next, we have to give this gradient some color. So here I like to add notes. So Shift A, we can search for color ramp, and
we can put it here. So now what we can do
can tweak these colors. So for the black, so the black
is the one on the bottom, can give it the light blue. So I'm going to just pick
a light blue from here. All right. And for
the white color, and for the white, you can
give it the dark blue. So let's choose this blue
here and we can make it completely dark.
Sounds like this. So next, I'd like to drag
this handle and let's push it to the left side. There we go. So we
got that gradient. You can just stick it down. But I think I'm going to just
leave it here and instead, we can play with
the mapping again. So I'm going to just
play with the X so that you can reduce it down. Let me just increase it by 0.1. All right, so we
got it over there. Let me just take this
handle a little bit up. Something like this. Next, let me play with
that noise texture. We can try to increase
the scale here to have some noise because we
don't have any noise here. So let me increase
the scale to set 2.5. And we can add a math node here. Shift A let's search
for math node. Let's put it on top between
the noise and the mapping, and we can play with this
value. Let's see here. So I'm going to just reduce. Let me just I think I
found a way so we can just bring this node down here. Alright, so now we got that
noise, you can see it here. That's really good. We can see that if we try to
play with the scale here. Alright, so we added that layer, but I'd like to tweak
it a little bit. It should not be
strong like this. So what we can do, we can take this one a little
bit to the back. Something like that's
going to do it. Let me just see here. All right. For this color, we can make it a little
bit darker. Nice. So now we have to bring back those stars because
we lost them. So what we can do, we can mix between this color
ramp and the stars. So these two nodes
are the stars. So let's just bring them here, and we can add a mixer. So let's bring Shift A, we can search for a mixed
node or mixed color. We can drop it between the
color ramp and word output, and for the B, we can connect the stars. And we got it. So
we got the stars, and we got that layer
of fog on the bottom. You can play a little
bit with the factors. So, for example, if you want
to show only the stars, you can take it all
the way to one. If you want to show
the layer only, without the stars, you
can take it back to zero. So here I'm going to be
let's use, for example, 0.7. So you can make this handle
a little bit brighter, so let me just take it
up. Something like that. So for the sun, I'd like to
increase the strength of the sun to have
brighter colors here. So let's set it to 15, and let's see. What about 25. That's a little bit too much, so we can just bring
it back to just ten, 20, 20 is going to be fine. For the angle, let's see here. So for the angle, if you want
to have some sharp shadows, we cannot reduce
it down, so let's reduce it back to just ten. So this way, we're
going to be having some presence in
terms of the shadow.
22. Lighting volumetric sun: In this tutorial, I'd like to show you how can we make the sun volumetric like this to give it that nice, realistic touch. So let's go ahead and
start working on it. So first, we have to switch to the word lighting
on the bottom here. Let's jump to the shader editor. And for the mode, it's
going to be the word. So if you scroll up here
to the word output node, I'd like to add the
volumetric scatter. So right collect or Shift A, let's search for volume scatter, this one right here,
and we're going to be connecting the volume
to the volume. So it looks a little bit dim. So what we can do, first, I
like to so now I want you to increase this second
valid strophi to something like 0.98. And for the color, we can
increase the saturation. For example, we can
choose a red color. Let's make sure that the
saturation is set to one here. So this is a must. Otherwise,
it won't go to work. For the value, we can
keep it at one as well. All right, so now we're going to need to add a new object. So Shift A, we can go to mesh, and let's search for UVsphere. So I'm going to just move
this UV sphere here. You can just scale
it down way down. And for this object, we need to go back to the object so that
we can affect it. And I'd like to add a
new material to it. So it's going to be volume
volumetric lighting. You can call it any
thing that you'd like. The name doesn't
matter that much. So you can press A and period so that you can
reset the Zoom here, and I want you to just delete this principle PSDF
and what we can do, you can do we can do Shift A, and let's search for volume. So the same thing. So the
volume scatter and we can connect it to the volume
here. And there we have it. So now we got our lighting
our volumetric lighting. So for this object here,
it should not be visible. So what we can do, we
can add the transparent. So Shift A, search
for transparent node. And we can connect the
BSDF to the surface. So this way, one can be
visible in the render mode. So all we care about is just
this volumetric lighting. So you can go back
again to the world and we can adjust
here the color. So for example, the color here, you can give me some
color that makes sense. So let me just find so I'm going to just
go with the blue. I really like the blue
here, the blue sun. And this is a trick you can
reduce here the intensity, the density, if you
want to reduce it down. So I'm going to just
reduce it to 0.75. So in my case, I'm
going to just keep it at one because we're going to be working on the side from
here, not from the front. So here for the density, I'd like to reduce it
down to something like 0.01, really low value. And there we go. So we got
our volumetric sun lighting.
23. Animate spaceship taking off: In this new section,
we're going to be working on the animation. So this is the final result that's going to be
able to achieve. So we got the spaceship
going to be taken off, so the door of the
spaceships to closes, and after that we're
going to have the launch. Then we're going to be having some shooting stars in
the background animated. Same thing for the
planets. They will be spinning around
their local axises. For the camera, we're going
to be having some shaking, going to be adding some
shaking and it's going to be reverting a
little bit backward. So that's all that we
have for the animation, so let's go ahead and
start working on it. First, I'd like to make
this spaceship door opens. So on the bottom here,
I'd like to split my window vertically like this. So for the bottom, we have to switch it to the
timeline so that we can so the timeline is
where we're going to be animating our key frames. So let me just press T to hide this panel
on the right side. And let me select my door here. We can press period on the Nan panel so that
you can zoom on it. Let me also check the screen
caskes and we can open it. So in my case, I have
to open it on the y. We can press R. Y, but I'd like to open it
on the local axis so that you can have it perfectly
aligned with the spaceship. So you can just press
Y another time. And this way, so that's the
local axis, but not this way. So RX can press X double time. So the local axis is the X axis. So let me just spin
it around here. You can write, let's see. So I think around 105, you can see the clapping
right over here. So around 105 degrees, it's going to be
touching the ground. Like this. So I'm going
to be jumping to frame. Let me just press zero
so that you can see the camera. So let's
select the door. So I'd like to
jump, for example, to frame ten or even 20. So from 20, we're going
to be closing the door. So let's insert that
the X rotation. So you can do right click and insert single keyframe of the X, and we can jump to frame 40
and we can close the door. Let me just take it all
the way up back to zero. So you can write zero here. Let's do right click and
insert again single keyframe. So now if we start
from the beginning, if we set this value to zero, and if we press space, so at starting from 20, the door is going to
be close in itself. So now if you play the
animation by pressing space, so you're going to
be having the door closes. There we go. So maybe it's closing too fast, so we can do to make it slow. So let me just select the door. We can expand the closing. I'm going to just select
the keyframes on the right, and we can press G, X
to move them around. So you can move them
by 15 or 20 frames. So check this out. You
can do right click and shift so that you can
start from the beginning. The shortcuts you
can do here is zero, and les press the space bar. And this we're
going to be having the door closes really smooth. So after having the door closes, so I think around 90 from here, we're going to be
having the lift off. So we're going to be
seeing some smoke around 80 frame and around 90, so the spaceship needs
to be taken off. So let me just select
the spaceship. So the keyframe that we're
going to be animating is the Z location because
we need to take it up. So around 90 frames, we can do right click
on the Z value, and let's insert the
single keyframe. And we can jump all
the way till the end, so at frame 250, and we can just take Z location
up, for example, here. 9 meters up. Let's do right
click and insert key frames. All right, so let's press
zero and let's see. So the door closes,
and around 90, it's going to be taking
off. There we go. You get that slow
start, which is great. But the problem here is that so the spaceship is going
to be slowing down here. Should should be accelerating
instead of slowing down. So to fix this problem, we
have to work on the curves on the animated curves
so we can switch the timeline to
the graph editor. And with the spaceship selected, you're going to see
the curve that we got. So here it's starting
slow. That's nice. But also at the end,
it's going slow. So what we can do, we can select this handle and we can spin
it around. So let's press R. You can spin it like
this to make it curvy. So now we're going to be having an exponential curve that means the speed is going
to be exponential. We can also make it linear, but I don't recommend that
because if you make it linear, we're going to be having
those sudden movements. So let me show you can press A, press and we can change it to
linear. So check this out. If we press space,
so at the starch, it's going to be moving at a constant speed like this,
and we don't want that. We want to have some slow start. So let me just reverse
back control Z. All so now we got
some slow starch, and at the end, it
won't go to stop. It's going to keep
accelerating, like this. Also, I see that it's
a little bit slow, so we can increase its speed. Let me just select this handle. If you want to
increase its speed, you can take it up. You can press GY and let's
sick it up like this. So this way, we're going
to be accelerating faster. So I'm going to go with
this. So next thing to do, I'd like to add some
movement to the spaceship. It should not be
perfect like this. So we can make it spin around just a bit like
this as it goes up. Just a bit of rotation here. So you can see that
the rotation that we need to apply is on the Z axis. So let's jump here to frame. 100 and we can
insert this value. So right click insert a single key frame,
and, for example, at frame, actually we have
to start a little bit later. So let me just select
from here the z rotation, and we can take this handle
and we can move it a little bit until the
spaceship is taken off. So I think round 125 it's going to be fine,
so you can just move it. We can press GY or act GX, and let's move it here. So here, Round 130 frame, you can just spin it around by, let's say, 60 right
collect insert key frame. Let me just select
the Euler protation. Yeah, but that's a
little bit strong. So the next step to do it,
it's going to be to add some rotation to the
spaceship once it takes off. I don't want you to keep
it completely straight. So you can have this
effect by spinning it around just slightly
like this as it goes up. So to achieve this effect, we can jump, for example,
to frame, let's see. Frame 130 So if you
want to move like this, you can press Shift
and write click, so you can move
around these frames. Round 130, let me just use the right row on the
keyboard to move one frame. So here we can insert
the Z rotation. So te click insert
single keyframe, and here we can select
that Euler rotation. You can press A, period,
to zoom on that. So this is the key
frame that we got. All right, so we can
jump, for example, to frame 50 and we can spin
it around like this and at frame 70 you can bring it
back. I have a better way. We can make it random. We can use the noise
modifier to make this animation on
the Z access random. So first, let's select
the Z rotation, and we can jump
here to modifier, so we can press N to
access this panel. And here we can add the noise
modifier, this modifier. So let's add it. So now
it's going to be noisy. So if we press space, we're going to have rotation,
but it's not well set. So what we can do, we can play with the scale and the strength. So let me just
increase the scale. Let's say to 15. Let's press space. So now we
have some better wobbling, but that's a little
bit too much. So let me increase
the scale to even up. So let's say 30. All right. And we can
reduce the strength down to 0.25 to have just some subtle rotations,
something like that. We just doesn't need so it just doesn't
need to be perfect. We just need to have
some slight rotations. And next, we should not be having that
rotation at the start, so here should not
be rotating around. So what we can do,
we can check here the restrict frame range. And we can make
the start at once the spaceship is going to
be taken off around 125. So it's going to start with 125, and it's going to end at 250, which is the end here. So let's press space here. Alright, we got it. But
here, if you zoom in, you can see that we
have some sharp start. So we should not be
having this sharp here. It's going to move sundly here. So to fix this problem, we blend we can affect
the blend in. So you can just
increase the value here to have a smooth curvature. So let's press the space bar. So now we're going to be
having some slight movement. Also here, we can
increase the strength. Let me just bring
it back to one. One is too much,
so let's take 2.5. There we go. So here we can press Control space
to maximize this window, and let's check out animation.
24. How to rotate planets on the local axis: In this storial I'd like
to show you how can we animate an object
on its local axis. So this planet that
we got right here, if you try to animate
it around the Z axis, so it's going to
be spinning like this. So we don't want that. We want to animate it
around its local axis, which is around here. So if you press R, Z, and Z another time, we're going to be moving around the Z axis. So this is what we
want. Unfortunately, if we try to animate it like this, so let's press
shift right click. If you start, for
example, at frame zero, let's press N. So we can
press R Z double time. If you press I
creating insights, which one is going
to be happening. So you can see the
rotation here. So all the values are
moving at the same time. So it's going to be a real
challenge to animate them all. So the way to
animate this planet around the local axis is
by adding a new object. You can add any new object. I prefer to add an empty. So you can use, for
example, this plane axis. Where is it? It's here. Let
me just delete it from there. We can just make it as close
as possible to the planet. So Shift A, empty and
spring plane axis, stick it up here, scale
it up in order to see it. Now we're going to be
making a connection between the planet
and this axis. So let's select our planet, and we can add a new constraint. So here in the
constraint properties. So that's a transformation,
transformation constraint. So the target of this
transformation is going to be this axis that we just
created, this empty. So we're going to be
converting the rotation of this object to this locally. So let's select our planet. And here on the bottom, we have the map two
and the map from. So the map two is the axis, and the map from is the planet. So since we want to
copy the rotation, so let's set here both rotation. And like I said, the map
two represent the planet, so we need to make it
on the Z axis locally. So here, let's jump
to the Z axis. So for the owner,
it needs to be on the local axis. Like this. So now if we try to play with
so we can increase here. So the minus needs
to be -360 degree, and the max is going to be 360. And we can do the same thing on the Z axis of the map two. So 300 or -300 for the -260. So check this out. If
you select this axis, if we try to spin it
on the Z axis here, so we're going to be having the planet spinning
around the Z axis. So this is exactly what we want. Now it's going to be easy. All you have to do is
to animate this axis. So let me just move it
here to the center. So on the Z axis here, we can do right click
insert single keyframe and we can jump all
the way to frame 250, and we can make it 260. Right click insert
another keyframe. So let's press space,
and let's see. So now it's going to
be spinning around. So we're going to be
having that issue again with the slow start
and the slow end. So we can press A to select all the keyframes
here and can press T, and let's make it linear. So this way, we aren't
going to be having any slow down movement. So now we'd like to do the same thing to the other planets. So the quickest way to
do it is by selecting all the planets
that we got here. And next, this one, too. Next, we can select the planet that we animated to
be the last one, so shift let's
click to select it. And here for the transformation, we also apply to
the entire planet. So here we can
click on this icon, and we can do this
copy to select it. So this way, we're
going to be copying the same transformation
constraint to all the other planets. So if you press space right now, all of them will be spin. I'd like to have
different rotation. So all of these planets,
they have the same rotation. So if you want to
make, for example, this one, if you want
to make it slower. So what we can do, you
can select this planet, and here for the influence,
you can play with it. So if you reduce it down to
let's say 0.25 just quarter, it's going to be spinning
by 75 less, 75% less. So check this out. So now, this one is spinning faster and this one is spinning slower. So this is the way to add some variations in the
animations. So let's press zero. Let's go back, and we
can start from here. So also for this one, it
looks a little bit too fast. So we can just reduce
it down to just 0.15. So let's start
again. There we go. We got some slow start here. So let's press space here. So to start from the beginning, we can press Shift
and left a row on the keyboard and we
can press space. And there we have it.
So now this plant is spinning very slowly. Perfect.
25. Add Smoke particles: In this tutorial,
I'd like to show you how can we create some smoke? So the space shape
ones can be taken off. We need to create
some smoke here. We're going to be using the particles to
create this smoke. So let's go ahead and do that. So first, I'd like to jump
to the first earlier frames. So here, I'd like to create an object right
here at the bottom. So we can press Shift
S, Curt just selected, here can press Shift A. I'd like to go to mash and
we can bring UV sphere. So for the dimensions,
you can just reduce them down to just 12 to eight. He for the ranks. Can the
rag collect shade smooth. At this mode, we can
scale it real down. Let me just press
switch the Y frame, and we can push it down here. So this objects going to be
emitting the smoke here. So as you can see it's pretty
much close to the engine. So you can just drag it a little bit down, scale it down here. So next we can jump to
the particle system here, and we can add a new particle. So let's call it
spaceship, smoke. So for the number, I'd like to experiment with lower number. So let's try 200 to start with. For the starting
frame, so basically, we need to have the
smoke after a little bit before the
space is taken off. So the space is the
spaceship is going to be taken off around 90 here. Let me check this your location. So it's going to take off at 90. So we need to emit the
smoke right before, so we can go back
by let's go to 75. So we're back 15
frames backward. So let's select the
sphere that's going to be emitting the smoke and we can
do the starting position. So the start frame
is going to be 75. And the smoke is going to end. Let's see. So once the spaceship
is going to be reaching, for example, this level, I think 200 is going to be fine. So for the end, so once the spaceship is going to be
reaching this level here, so let's say 160. So you won't go to
be having any smoke. So let's set the
end here to 160. So for the lifetime,
it means how long these particles
they will live. So for example, at 75, so these first particles, they will die after 60
frames, after 50 frames. So you can increase the
lifetime, let's say, to 60 can keep them
a little bit longer. Alright, so let's scroll
a little bit down, and we can be on the
dynamics to see the result. So if you press space here, we're going to be seeing those
particles come into play. But we have to work on them. They should not be like this. So first, we need to
make them interact with this landing ground here. So what we can do, we can select here this landing ground and
we can make it a collision. So we can jump here
to the physics, and I want to trick
click on collision. So let's select
again the particles, and we can redo that baking.
So let's scroll here. We can delete all the bikes, and let's pick all the dynamics. Ar shift right click
and we can press space, and let's see. So there we go. So now they are colliding
with the ground. So let me try to
increase the size. I'm going to try to
increase. Let me first. So here, this is the scale. So in the render,
we have the scale. We can increase it up to
point let's see here. 0.3. As scroll a little bit up, delete all the bakes. And we can press space
here to see that. Okay. All right, so
we got the particles. So I'd like to do
I'd like to replace these elements
with some objects. So you can press Shift
S cursor to select it. Shift A can go to mash, and I'd like to bring
a new UV sphere. You can keep the same segments
and rings 12 to eight, or actually, let's just reduce
them down to ten to five. Because we're going
to be duplicating this sphere multiple times, so it's good to
keep it optimized. Let me just take it here. Sideways, we can do Ric
click and shade smooth. So for this object here, we
can press F two and we can call it smoke poticles. You can add the name units
smoke particles, units. Units. All right, so now let's select the
particles that we got here, and I'd like to emit this sphere instead of these objects. So you can scroll down.
Let's delete on the bakes. And if you scroll
down to the render, so instead of
rendering it as halo, so this is the halo objects, you can just switch it
to an actual object. And here for the
instance object, we can pick you can
just search for it, which is sort of search
for smoke particle units. Now we're going to be replacing those hail objects with
our sphere objects. All right. So next, what we can do, we
can tweak the scale. So now we can tweak
the scale here. I'd like to increase the
scale here to, let's say 0.5, and also we can increase
the randomness so that you can have different scale. Each one is going to
have different scales. So let's give it 0.75
here for the randomness. All right, so let's start
from the beginning. We can set the frames here to
zero and let's press space. All right, so the door closes. So we got some particles, and the spaceship is
going to take off. So you can see that
they are dancing here. I don't want that. So what we can do, we
can tweak a little bit the dump value. Let me
just find it first. It's inside the physics,
the forces here. So we can increase the
dump to something like 0.01 to reduce that
bounciness of these elements. So let's start again from here, press space, and let's see. So now, I don't see
much of a change. Let me just try to increase
that value to 0.1. Start from the
beginning. But they stick together. We
don't want that. So let's just reduce it down
to 0.0 25. Press space. So I'm going to decrease
the gravity factor, so we can only scroll a little
bit down to the gravity. Let's give it 0.5. So we need to make them
a little bit fly. Alright, let's start
from the beginning here. Okay, we can decrease the gravity even down
to something like 0.15. So with particles, you just
need to keep experimenting. All right, so we got
some nice effect here. So let me try to
increase the number of these units instead of 200. Let's give it 500. And let's start again.
Alright, so that looks good. So as I like to
animate the scale, so I want to scale
up those smoke site, the size of the smoke. So here for the scale, you can increase it with time, something like this until it's
going to reach the camera. So the goal here is to
create a loop animation. So one's going to be
reaching the end here, so we're going to be
having a big smoke like this and we can start
again the animation. But I think I'm
going to just get rid of that dump,
this dump value. Let me just reduce it back to
zero. And let's try again. Okay. Also, I'd like to increase I'd like to
increase the lifetime, so you can give it
100 for the lifetime. We need those particles
to stick with us a little longer. All right,
something like that. All right, so we got the
particle, they are expanding. So for example, once
we're reaching 200, I want to increase the size of them even more so that they can cover the
entire camera frame. So here in the particles, let's scroll down until
we find the scale again. So here we can do click
insert a key frame, and at the end here
at 200 and let's say, 240, so you can
expand it even up. 26 again. Right click
insert key frame. All right, so now
let's start from the beginning and
let's see that change. Alright, so they are
expanding. All right. So here, nope, I
don't like that, so they will be expanding too
fast. We don't want that. So I'm going to just
delete this frame at 200 Right click
Delete key frame. Also, you can delete this one. So we can tweak this
animation better if we jump here to the graph editor. So we can select here the size. Let me press A period so that you can reset
the zoom on the curve. So we're going to be
skiing like this. So here, what we
can do, we can spin around this handle, this trR. You can spin it
like this. So now it's going to be
going exponentially. So this is the way to
get the smoke skiing up. So it's following,
as you can see, it's following that engine. Perfect. So what we
have to do right now, we have to give this particle unit material so that we can make it transparent and
look like the smoke. So if you press Z right
now, what should render. So this is how it's
going to look like. So you have to work on it. So I'm going to be selecting the smoke particle unit object. And here, I'd like to
switch to the shade editor, and you can give
it a new material. So let's call it here smoke. So in my case, I won't going to be using the principal SDF, so I'm going to just
select it and delete it. And instead, I'm going to be
using the volume scatter. Shift A, let's
search for volume. Scatter this one right here and you can connect the
volume to the volume. All right, so now it's
start to resemble to smoke, but we can work on
it even further. So we can reduce the
density here down. But I'd like to control the
density with a cameram. So let's press Shift A. We can use a cameram then we connect the
color to the color. So here you can tweak the
colors so you can make it red, and give it any
color that you like. Also, I'd like to give it
some kind of noise texture. So I don't want
it to be perfect. So you can press Shift A. Let's search for
noise, noise texture. But before connecting
it, as you can see here, the quality of the
smoke is really bad. We can improve that, Let's go
to the rendered properties. So if you scroll down here, you're going to
find the volumes. So the resolution is
such a one to eight, which is really low. So what you can do,
you can take it up. So the best setting is
going to be one to one, but it's going to
be a little bit hard for the computer
to generate. But that's fine. So
now we got it here. So it's going to see I'm
experiencing some lagging. I'm going to just
go with one to two. So next, I'm going to
connect the factor of the noise to the factor here. And let me try to play with the smoke with the scale here. I'm going to just reduce
the scale down to 2.5. And also, in order to see it, we have to add let me try to add the mapping
and textarcdinant. So with this noise,
texas selected, we can press Control T. So now we got the mapping and
the textile coordinatet. So now let me work on this camp. So what we can do, we
can take the black. So now you can see that
noise comes to play. If you play with
the noise texture, the scale, you're going
to be seeing that change. So I'd like to take the black
to the right side and the white here. Alright,
so that's fine. The best way. Also
here for the type, I'd like to switch it
from linear to constant. So I think I'm
going to just bring back so something here. Also, I'd like to tweak the
rotation of the particles. I don't think they are so
they look the same here. So down below, you have to
check here in the object. In the instance object you can
check the object rotation. So this way we're
going to be having some random sizes with random rotations of the
smoke, which is great. So the last thing to
do is going to be to make this sphere transparent, which should not be
appearing in our render. So let's select the smoke
and here on the bottom, you can switch the timeline to the shader integer and we can give it can add a new material. Let's call it transparent. Transparent. You can press A period to get
this node set up, and we can just reduce the
Alpha all the way to zero. So as you can see, we
don't have that object. So it's here, it's the object
that's given us the smoke, but it's not shown
in the render. So the last thing
to do is going to be to bake the animation, so let's go back here to the timeline so that we won't
go to lose it like this. So select the smoke here and you can scroll down and we can
bake all the dynamics. So now it's baked. So
let me just press Z, switch back to solid. So now it's going to be baked. I
26. Mastering camera movements: The next step is going to
be to animate the camera. So we're going to be having some shaking when the door is
going to be closing here. So I'd like to shake the
camera just a bit like this, and we can slightly
move a little bit back. So let me select my camera
here and we can jump here to the camera data properties
and we can focus, we can tweak a little
bit the focal length. So at frame zero, we can right click insert
keyframe and we can jump all the way to
frame let's say, we can go till the end, 250, and we can give it 25, right click in search key frame. Also, to make it linear, we can press T and
search it to linear. So now we're going
to be having some movement backward like this. So next we need to
add the shaking. So once the door is going
to be closing here, we need to add that
shaking around 58. So here we can animate
the Z location. So let's press N. So I'd
like to animate it on the Z. So I'd like to animate
here the X rotation, right click insert key frame. So now we can add
the noise modifier so that we can animate
this rotation here. So let's switch the timeline
to the graph editor. And here I'd like to
select the object transform the Euler rotation. You can press A period to reset the Zoom here. So the red one. So here we can press
N, go to modifiers, and let's add the noise
modifier. So now it's noisy. But we have to limit or
restrict the frame range. Let me just restrict it. So we need to start from 58 58, let's say 63, only five frames. Let's see. We got it, but we need to reduce the
strength down to 0.15. Let's try that again. That's
good. Maybe too much. So what about 0.05?
Sounds like that. But I'm seeing some other
noise come to play here. So why do we have another noise? Let me just remove this
noise here, and let's see. So we still have
another noise going on. Let me check the focal length. Yeah, we also have noise for the focal length. I'm
going to just remove it. I don't know how it was added. And let's bring back the
noise of the rotation. Let me scroll back here. Press space. There we go. So next we can add another noise when the spaceship is
going to be taken off. So we can start, for example, from 105 or actually, we can start from 100.
So let me just do that. So I'm going to just
collap this noise. We can add the second
noise modifier, send them to this
Euler rotation. And we can start so
let's strike the frame. So you can start from 100
and it's going to be 200, 250. So let's see. There we go. Let's reduce
strength down to 0.05. There we go. You
got that shaking, but that's a little
bit too much. So we can decrease it again
to 0.01. There we go. So we got that shaking. Also another trick
if you want to keep the camera looking
at the spaceship, so I'm going to show you
the ways to do this. If you want to make the camera, focuses on the spaceship. So the track that you do it,
you can select the camera. You can go to the
constraint here and you can add the track to constraint. So for the target here, it's going to be the spaceship. You can just use this eyedropper and select the spaceship here. So check this out. So now
the camera is going to be focusing completely
on the spaceship. So it's going to take off, it's going to keep
focusing on it like this. Also, you can apply or you
can affect the influence. For example, you can put
it to 0.5 so that we can have some not mics perfect. Alright, so that's really good.
27. Rendering & compositing: In this tutorial,
we're going to be rendering our first shot. Let's set the settings
for the rendering. So we can jump here to
the render properties and we can start first by increasing the rendering
samples so that you can have higher resolution,
higher details. So you can increase
the resolution here, the samples to let's say 500. And I want you to
check the shadow. We need to have some
shadows in our render. Next, for the rate raising, we're going to need the
rate as for the resolution, I'd like to increase it up to one to two for the
factor of one to two. Also, down here, we
can check the volume. So for the volume, I'd actually increase the quality
to one to two. And for the second tab,
we have the output. So for the output here,
I'm going to just use 1920 pixels by 1080. And for the dimension,
going to keep it at 100% of these resolutions. So now let's go ahead and
give our scene a render. So on the top here, you can
go to the Render tab and render image. And
just switch for it. Alright, so we got our render, so next I exchange
the composite sitting so that we can
improve our render. So let's go back
to our scene here. We can jump to the
compositon on the top. And I want you to check here
the nodes and the backdrop. So in order to see our
render in the background, we can add the viewer nodes. So Shift A, let's
search for viewer. There's no there and you can
connect the image output to the image input
of our viewers. So this way we're
going to be seeing our ender in the background. If you want to move it,
you can press Alt and middle mouse so that you
can move it like this. If you want to zoom
in, you can press V. Actually zoom back,
you can press V, if you want to zoom
in, you can press Alt V to zoom N. So I'm going
to just keep it like this. So the first thing
that I'd like to do, I'd like to add some
glare so that you can make these stars shiny. So you can press Shift A.
Let's search for glare node. I'm going to just put it
between this line here, and we can also
connect the output to the viewer so that we
can see the effect here and immediately going
to see this nice effect, but we have to work
on it a little bit. So first, I'd like to
reduce its effect. So to do that, you can
increase the threshold here, so you can increase it
up to, let's say 25. So this way we're
going to be reducing the effect of this glare. We can even increase it up, so let's say 35 or even 50
or something like that. And if you want to
spin it around, you can spin this glare effect. So here for the angle,
we can give it, let's say, 45 degree. So this we're going
to be spinning our stars by 45 degree. Also, for this color modulation, we can decrease it down to 0.1. So next we can add
another glare. Shift A, let's search
for a glare again. So let me put it first here. So for the type,
I'd like to switch from streaks to ghost. So we're going to be
having this ghost effect. Also here for the quality,
let's increase it up to high. And for the threshold, I'd
like to increase it up. So let's give it 25. So we're going to increase it up to, let's say the threshold. I can increase it up to 50
exactly like the first glare. So now we got this line here. So this is the ghost glare. And finally, I'd like to add
another glare for the fog. So I'd like to add
some fog here. So Shift A, let's add the glare. Let's put it on the
first line here. And for the type, you can switch it from
streaks to fog glow. Let me try first the bloom. All right, we can increase
the threshold again to 50. That's too much. What
about 25, just half. I even like this effect here. So let me just try
35 or about 45. All right. I like this.
Also, for the size, we can reduce it
down to just six. So next step, I would
like to add some foglow. So can press Shift
A, let's search for glare again. Let's put it here. And for the type, we can switch it from streaks to fog glow. So now we got some fog here. So I'm going to just change
the quality to high, and for the threshold, we can increase it up to
reduce the fog. So let's start with 25. Let's see. All right,
so this one looks good. So finally, I'd like to add
some color balance so that we can give different
feeling to our render. So we can do it here at the end. So Shift A let's add color
balance. This node right here. You can put it between the
final layer and the composite. And also, in order to see it, you can connect it
to the viewer node. Alright, so now we
can tweak the color, so let me just
choose a blue color. So I'll just wait for
it. So now we are changing the mood of our render. Also, we can give
it a warm color. There we go. So
now it looks red. So, now it looks red, but I
prefer to go with the blue. The blue looks better. If you'd like to increase the
brightness of your rendering, can use the brightness
contrast node. So Shift A. Let's search for brightness. This node here,
and we can put it again between the viewer and the last node that
we got on the left. So you can also connect
it to the viewer here and we can play
with the brightness. So let's increase it to 0.1. So it's barely visible. What about 0.5. All right. Also for the contrast, let's set it to minus zero
point minus two. Just want to see the effects
here. Okay, what about two? Can case it up? Okay. I think I'm going to just stick
to the brightness. Let me just remove the contrast, bring back to zero.
Sounds like this. And once you finish weaken
your render, what you can do, you can switch to the
image editor from here. And here, I'd like to
pick the render output, so let's search for
render result here, and you can just go
ahead and save it. Soimage and save
it as your desks.
28. Production of final animation: The final step to
doing our course is to render our
final animation. So to render our
final animation, we have to render all the frames starting from zero
all the way to 250, and we're going to
be combining them. So to do that,
first, we can go to the render output properties. And for this, I'm using
these for the resolution. So for the resolution, I'm using this for resolution right here. So if you want to
have fast render, you can just cut this by half. You can use 50% here. So for the frame rate, I'm using the default 24 FPS
frame per second. And I'm going to scroll a
little bit down to the output. So here for the output, you
can choose any folder where you're going to be saving
rendering all these keyframes. And for the file formats, I'm going to keep it L PNG. So we might want to
switch it to a video, but I don't recommend
that because you might have some faulty renders. So it's going to
be easier to fix that but if you
render it as a video, it's going to be a
little bit difficult. So the last step is
going to be to go to render and let's
render animation. So once the rendering
is completed, if you check the directory
that you assigned earlier, you're going to find that
it has all the renders, starting from zero
on the way to 250. So now all we have to do is
to combine all these frames, so we can go back
here to our scene. And if you scroll a
little bit at the top, you're going to find
this plus icon. So I want you to
click on it, and we can switch to the video editing. Alright, so let's jump to the
first frame, which is zero. And what I'd like to
do, I'd like you click on add Image sequence. Add Image sequence. And I want you to
choose a directory where we have all the renders. Then you can press
A to select the M and you can click
on Add Image strip. So this way we're
going to be having the entire strip here. So all you have to do is to
render it as a single video. So now for the settings here, so on the outpost properties, we can scroll a little bit down until we find the outspot again. And here for the format
for the file formats, we have to switch it from
PNG to FF N PG video. For the encoding here, I'd like to make it P format, so we can choose this one here and for the encoding speed. So it's better to make it I'm going to just
keep it at default. For the Os patch quality, I'd like to make
it high quality, and for the keyframe interval, I'd like to take it all the way to the end so that you can reduce the size of
our final video. So now let's just
give it a name. You can call it final animation. And you can go ahead and render our final animation to
render render animation. And there you have it, we have our final
render animation video.
29. Conclusion: And there we also we've
reached the end of this class. So you've learned how to model a stylized spaceship model, build a complete
space environment, animate a fun loop in spaceship launch into
space, all from scratch. You've taken a fall to the
project from start to finish, and that's something
to be proud of. So if you enjoy this class, it would be great if you
could leave a review. It really helps, and let's Micky creating more
content for you. So feel free to share
your final project. I'd love to see
what you've made. And remember, you
can always rewatch the lessons and reach out
if you have any questions. So thanks again for joining
me, keep practicing, stay creative and see you
in the next coming project.
 Abdelilah Hamdani, 3D Photorealistic Designer