Transcripts
1. Introduction: Welcome to Bible journaling digitally, where we'll combine the powerhouse app, GoodNotes with the creativity of Procreate to give you an entirely new experience in Bible, journaling. And GoodNotes will explore every aspect of the program so that you can take part in inductive Bible study. You can add in your so pages, your gratitude pages, your daily scripture writing. I've included fun images for you to download into your Bible so that you can get started right away. I'll even teach you how to take sermon notes and make a place for them within your digital Bible will wind up in Procreate, where we'll create a spread together. And we'll end by making a custom cover for your new digital Bible. We have lots to do and I can't wait to get started. I'll see you in class.
2. Hardware Needed: Hello, hello and welcome to Bible journaling digitally. My hope is that this class absolutely transforms how you think about Bible journaling. It is amazing to use your iPad as a tool to study the Scriptures. So let's get started. The first thing I want to talk about is what physical hardware do you need to do this class? I'm going to be using for this class, an iPad. There are different years makes and models of iPads. And you can get any iPad. It's up to you whether or not you want to have the stylist or the Apple pencil. So I have the Apple Pencil 2 and my iPad is the iPad Pro 12.9. So I prefer journaling with the Apple pencil or a stylus. Now you can use Procreate with your finger, a program that we're going to be using. You can use it with your finger. I prefer stylus. Now the Apple pencil is a little bit more pricey. And make sure if you have an iPad and you have to purchase a pencil, make sure that your iPad, which pencil goes with it. The Apple Pencil 2 goes with the newer models of the iPads. And the Apple Pencil one goes with the older versions. Either one will work beautifully for this, whether you have the Apple pencil one or an Apple Pencil 2, or whether you purchase a stylus someplace else, it will all work fantastically. So for class, hardware needs are going to be bare minimum, will be an iPad. That's your bare minimum. You can do all of this with your iPad and a finger. If you have an iPad and a stylus, you'll be better off. And I think you'll enjoy the process more. It feels a little bit more intuitive and more like what you're used to. Just using your pen to cry, create, to draw. It's just, I think more what we're used to. I'm not used to using my finger to do all of that, but it can be done. So I have my iPad, I've got my pencil at optional. Another thing that I use is I do use a drawing glove in. When I'm drawing. I draw all day long. And what I do is my MyMathLab you see has a little bit of suede on it. So as I'm drawing and I'm working on my iPad and I actually wiping my screen clean, which is just a beneficial because we can deposit oils on our screen. If you're ever going along singing as entrepreneurs can be in your on your digital and you're writing your drawing, and you get a skip in your line that can be assigned that there's some sort of a residue on your screen. So just give a good wipe with like an eyeglass cloth, wipe it off. And then also if you have an Apple pencil, just make sure that that tip is really screwed on. Well, if this screw, if this tip loosens up, you'll lose your line. It'll skip on you. So two places. So I do like the drawing glove for for joining. The last thing that I have that is completely optional is I do use a matte screen protector on my iPad and their paper like Mac screen protectors. And you can just search for that matte screen protector of paper like, and you'll come up with hundreds and millions of options. But what it does is it just takes away the kids if you're writing on glasses, which is what you're doing without the matte screen protector gives a little bit of tooth and resistance. So it just feels more like you're writing on paper and it's just lovely. So these, the iPad is necessary. This the glove and the screen protector or all optional. If you really enjoy the process, it might be something that you want to look into and you want to invest in down the road. So in our next video, what I want to look at is what software do we need in order to get on this journey? So join me on the next video and we'll look at the three different softwares that you're going to need to do this. I'll catch you in the next video.
3. Software Needed: Hello, hello and welcome back. So the first thing that I want to talk about is Procreate. And we're going to use Procreate as our drawing app. Now there are hundreds of other drawing apps that you can use. For my class here, I am going to use Procreate. It is a program that I am most familiar with and then I absolutely adore. It is, the user interface is friendly enough that anybody can get a hang of it. But it's complicated enough that I illustrate books with it. It is a lovely program and just a delight to use. So Procreate can be found in the App Store on your iPad. So procreate is about 999 last time I checked it. And it's a onetime fee. It's not a monthly fee. It doesn't you don't have to rebuy it. It doesn't run out. Its 999 and every time they do an update, you get the update. I think I got Procreate. I think horse-drawn wagons were still going through Oregon when I got Procreate. I've never had to buy it again. So once you get it, you go and you are part of it and you have Procreate. So first thing you're going to need is a procreate from your app abstract. If you can even do this on your phone. If you're going to be working on your phone, you'll need pocket Procreate. And then you can use your finger or you can use the Apple pencil again either way. But you can't do this on your phone as well. But for this class, I'll be using my iPad and Procreate. And the next thing you're going to need, the second software that's necessary is good notes five, good notes, five. And I can write that for you here with a quick note. I can write in the App Store, you will look for good notes. Five. Now there is a good notes for, but it's an older version. If you have it, you can use GoodNotes for you don't have to update. But if you're just coming into it and you need to buy the app, I would go ahead and get good notes five for now and just have it have it ready to go rather than get the older copy of it. So we've got Procreate, we've got good notes five. And the third thing that you're going to need is a digital Bible. So this can get a little bit daunting and a little bit a little bit difficult. The first thing I want you to do is just locate the digital bible that you love. So I don't know about you, but when I want to buy a new Bible on buying a new friend. So I like to go into the store. And I open up every Bible and I flipped through the pages and I feel that paper and I, I smell it. I love the smell of a new book. I just this whole tactile experience that I haven't in picking a new Bible. I think it's the same digitally. So I'm just going to give you some options and your homework before our next class is to find the one that you love and have it ready, just haven't purchased and have it ready. And then I'll go through how to import it into GoodNotes in the next class. So let me give you a couple of options that I have found. So Etsy has 1000. You can just kind of scroll through ETC and kinda find anyone. But what you want to find is one that is compatible with GoodNotes five, because that's what I'm going to be using in this class. And then they'll note it in the shop if it's compatible with good notes five, and usually they are in a PDF format is what you're looking for. So I purchased this one off. Oops, hold on. I just want to get out of here. There we go. So this one was purchased off of Etsy and you see that it's got the normal quote unquote, like to buy seven margin that you can work in. It's got all the tabs on the side, which is just absolutely lovely to hop around in. And then I can do my artwork in Procreate whatever Bible you choose. It's going to be that we do our artwork in Procreate and we bring it over into our digital Bible. Really, really, no matter what Bible you choose, everything that I do, you'll be able to do. So it's truly about finding one that you love and that works for you. So I don't know if you want landscape or if you want portrait. There's a lot to think about, but this is an example of one that I found in, in ETC. So I can write my notes on it. I can put an extra scripture references if I'm doing, if I'm doing scriptural verses, first mapping here, I can put in my artwork. So let me give you an option of another one. So this one is sort of fun if you go to Cross way.org and you become a member for free of the site. There is an SVP Digital. Let me go to the beginning of it. There is an SVP digital bible that you can purchase. Hold on 1 second. Of course it's not going to work now. All right, let me come to Genesis. Let me come to Genesis one. Really, really. Okay, So here this is the name of the Bible. It's the ESV digital scripture journal. So this is the portrait one. So let me let me go back. So you go to crossways.org. You become a member of the site for free. You now get 50 percent off every eBook that you purchase. So this digital Bible would now it goes from 2999 to 1499. Now this is the light. You get four Bibles. With that 1499, you get a portrait light, a portrait dark, a landscape like a landscape dark. So this is the portrait life. Now, if you're doing, these are all just instructions. If you're doing a comes with a chapter where you can jump around and you can get to any verse that any page that you want a chapter. If you're doing an inductive Bible study, if you're doing verse mapping, this would be great. Lots of room for notes and colors and whatnot. I am an artist. I like to do. I like the artwork part of it. I like telling his revelations through pictures. So and I get these pictures in my head that I want to bring out. So I always say that when we have this visual conversation, it's sort of like an Old Testament where they would lay rocks to say that they had an interaction with the Lord. Well, for me, when I do this visual journaling is visual conversation that I've had. It's me laying rocks and it's a reminder of the conversation that I had and the revelations that I got. So this particular format does not work for me. I'm not a fan of this, but I want to show you verse mapping inductive, fantastic, wonderful. So then there is coming back to my table of contents and I'll teach you how to do all through GoodNotes. This one is, this is the one that I love. So this is the ESV, same crossways.org bible, but this is the landscape light. Now we're going to make a cover for your Bible. Regardless of what's Bible you choose, we can make a cover for that Bible. So this is a cover that I made for my Bible. And it is the same as the other. It has the same table of contents that I can jump in. Let me just show you what I mean that I can jump. So if I want to go to Matthew, I can jump over to Matthew. And I can say I want to go to Matthew for and I am in Matthew 4. There is this little over here on the side, there are these three little buttons. I press those buttons and come back to my beginning. I can go back to Genesis and come back to Genesis 1. So it's very easy to navigate around this Bible. So this one I like because check this out. So it's landscape. And I get a whole page, every page of the Bible. I don't know if I have my luck on. Every page of the Bible has an extra page on the side for journaling. So, and there's a lot of room in between the text as well from lots of notes. So for me, I get notes and I get a whole page to do our work. So for me this is, this was my end all be all. I don't like being stuck in a two by southern margin. I just want, I want to explore, we're going to make this page for in the beginning, in the course of our class or stay tuned for that, stay tuned for the artwork. But so this is the crosswind.org landscape light Bible. The last one that I want to show you, sorry, sorry, sorry, sorry, sorry. Is the is the landscape dark? And there's also a portrait dark. So just imagine this one in portrait, but let me just show you the dark. It is dark. It is just a hits a black bile IS felt personally and you might think this is the coolest thing in the world. I just felt like I would be working against the black background constantly and just fighting with it. And that was just more than I wanted to take on. So I really did like this. Yes. Be landscape light Bible by Cross way for 1499. So your homework for next week. And just to give you a little bit of a teaser, what we're going to do in the class are going to make a cover for your Bible because I just think that's just fun. And then we're going to work on how to navigate through good notes in the class. And we're going to kind of just sort of drop in some fun artwork and different things to start bringing Genesis to life. So next class, I'm going to need you to have your Bible ready to go. I'll help you get it into GoodNotes. Just haven't purchased and have it accessible on your iPad. Great question. What does that mean? So for me, I keep all of my files in Dropbox. So I need to import something. I have it on Dropbox or on your Cloud, put it into Cloud so that you can access it from your IPad. Homework, get about a digital Bible and put it on your iPad in a file somewhere that you can access it. And I will see you next time. Thanks guys.
4. Intro To Goodnotes : Hello, hello, hello. Oh right, let's get started with getting. First thing we're going to do is we're going to get good notes onto your iPad. So I am in the App Store here and I'm going to just type in GoodNotes five and then do a search on it. What's going to happen is good notes. Five is going to come up. I have already purchased it. So up in my corner here, mine says open. Mine says open here. If you have not purchased it, it's a minimal fee to purchase it. You go into have the opportunity right here to say a purchase it. And you'll have to double-click or whoever your iPad is set up, but you can purchase good notes here, five from the app store. And once it says download, there'll be this little dial as it's going through and as it's thinking. And then it will say just like on mine open. So once it's downloaded, it's on your iPad, it lives on your iPad. You can now press Open and you come into the Documents section of good notes. The first thing that I want to do is make the, make the program your own. And the way that we're going to do that is I want to come up here to this little arrow key and we're going to come down into settings. So here in Settings, I want to make sure on backup data. I want to make sure automatic backup that I've got auto backup on. This is off and then this is on. And you have to choose here for your Cloud storage. Let me see if I come up here. Cloud storage, mine says Dropbox. So you have to decide where you're going to store all of your files. So I think I mentioned this a number of times that I've got my Dropbox setup so that I can go from my iPad and I can grab everything that I need to grab off of Dropbox. You might just have your iCloud storage, that's okay. But here you have to pick what is your Cloud Storage going to be. And I've chosen Dropbox. And then I think this is a very important one because I don't want to lose the thoughts of revelations that I have as I'm working in my bible end. I mean, your bible is going to become so excited. It's only going to just become your, your Bible journal, but it becomes a gratitude journal, it becomes a prayer journal, it becomes averse mapping journal, it becomes a soap pages. So it becomes like your entire spiritual process is going to be housed in GoodNotes. You don't want to lose it. Turn on auto backup. So once again, let me come up here. I'm on auto backup. I've added on auto backup, and then I choose where I want it to be. So also in here there's some cool things that you can kinda check out. Azure coming up over here and they come this way. So in my settings, I think a cool one is stylus and palm rejection. In stylists and palm rejection, you can pick, do you tend to like really right hard, then you want to choose here medium, soft, medium, low, high, medium, low. I think medium is kind of, you know, you can't go wrong with a medium setting. It's just the middle of the road so that those are your settings and that's kind of where you can make it your own. So you've got good dot's now, like you need your Bible. So the way that you're going to bring in your Bible is you've got this little plus over here coming back up again so you can see you've got this little plus here, so you're going to press that plus. And then I'm going to come down and I'm going to come into Import. Now this is where your yours is going to be different than mine and mine is going to be different from yours. You have to now it's going to open up all of your files and you're going to have to find where you place that Bible that you purchased, that you found. Maybe you family for free. Maybe you've got a PDF version of the Bible that you want to use. How ever you want to do it is absolutely fine. But you have to find it now in your files. So I've already got mine, I've got my ESV landscape light that I've got in. So you're going to take it and you're going to just press it and it's going to come into your, into GoodNotes. Okay? So once you get your Bible in, once again, just a quick, you press New, go to Import, find your Bible, press it and bring it in. Okay. All right. I'm going to press Cancel there. All right. So I'm going to come into my Bible here. And there's just a very quick interface that I want to show you a very, very quick, because I want you to kinda play around with the, with the interface a little bit before we go on to our next lesson. So in the interface here, there is, let's look at the top here. There is this little arrow button here. If I press that little arrow button, it's hard to do it. Well, I'm watching my camera. So if I press that little arrow button, they come back out to my documents. I come out to my main screen, going to come back into my Bible, press the Bible, not the words. And on back in again. Do you see these four little boxes? I'm going to press these four little boxes. And look what happens here. When I press the four boxes up on top here it says Thumbnails favorites and outlines. Again here. Thumbnails, favorites and outlines. What I love about this is that all of your books of your Bible are here. So you can come in here. So you can outline anything like so I can add in an outline feature, add it to my outline like so pages when we get there, gratitude, journaling, I can add everything into my outline so that I can just come and say I want to go Zachariah. Let's go on to Zechariah. And then here I am. Okay. So in the cross way Bible, There's one other way to get around in within the program. Remember, I showed you here, there's these three little buttons that you can grab hold of. And you should be able to press them and get around. The problem is this, oops, I don't want to do that. The problem is this is that right now I've got on my iPad, all of my tools are open here and that every single one of my tools open so that I can write in my Bible. Two-finger tap will get rid of that. I can erase in my Bible. I can highlight in my vial, two finger tap gets him. So everything here is ready for me to study. When my study tools are opened, my navigation tools are closed. Let me say that for him one more time. When my study tools are open, my navigation tools are closed. So in order to navigate again, one, I can come right back into my outlines and I can go to Ruth or I can let me just show you up here. I'm going to bring it up so you can see it right here. When this is on. I'm so sorry. Let me get it there. Do you see right here in this corner, this little guy here, It's a pencil with an X through it. When I touch that, my navigation tools go off. When my navigation, when my tools are off, then my study tools are off. Then I can come in and I can move around. So again here, coming up to this little corner up here, now it looks like a little circle, a little pencil with a circle around it. I press that. So when my study tools are on, I have a pencil with an X through it. This means that I'm in study mode and I can write, I can highlight, I can put in my pictures, I can do everything I want. I can erase. When I want to go into navigate mode, I need to get rid of all of those. I press that and I come into I can't draw it here. It's a circle. It's a pencil with a circle around it. And then here I can get around all my wherever I want. Here I'm in film. So that's how you kind of navigate and get around in GoodNotes for right now that, that's all that I want you to do. I want you to practice writing, practice highlighting, practice, your outlines, practice your thumbnails. These are, these are all the books of the Bible, but they're just in thumbnail version of visual rendition. The outlines, you'll note in the middle there, there's a favorites. You can now also put different pages or scriptures. How's your favorite scriptures in them? Oh my God. That the amount that you could do it, this tool is absolutely unbelievable. So that's good notes for right now. Then I would also like you to come into, back into your app store. And if you can make sure that you have Procreate, I think I just write Procreate. I think we're on five, but there's about to be a brand new, a brand new update. So once you come into Procreate, here is Procreate, it's this black and white little note like it's a black square with the little rainbow on it. You also want to have Procreate on your iPad. So I've got good notes now. I've uploaded good nights, GoodNotes. I've uploaded my Bible into GoodNotes. You're going to start trying to navigate around with your study tools and with your navigation tools. I want you to come in and look at your main menu page. Get around in there, get used to that. Practice your settings, take your settings and do what you need to do with them. And the next time what we're going to do is we're going to delve in a little bit further into GoodNotes and just start working with that just a little bit more to get you comfortable. Okay, I'll see you on next class. Thanks guys.
5. Importing Covers Goodnotes: Hello, hello, hello. And are you ready to get started in good notes, you guys are going to be amazed at how incredible the system is. Before we get started. You guys know, this is our visual representation of all of our all of our notebooks, of everything that we've got going on. You can also list them over here. If you use this little teeny, tiny little lines here, you can list them this way as well. So whichever way you want it, I kind of go for the whole visual representation. So this is sort of my opening page and I pick where I want to go and I go in there. In the resources. First thing we're going to do here is in the resources there is a list, there is a website that says how can I get more templates for good notes? So if you go here, there's all of these great resources that GoodNotes gives you and hear principal paper dotnet, you would be amazed at what you can find over there. So anything that I kinda share with you today, have fun with this experiment. Look around, play with it, find the paper that you want. There's so many options that are free. So this list is over in the resources so that you can go and you can grab it. So right here it says access more templates. So when I come into access more templates, I get custom covers, custom, custom paper templates, and GoodNotes for legacy. So here if I come in, I get all of these different covers. So I can The way that I personally handle this is I go to this website on my computer and I access more templates on my computer. I download them onto my computer and then I put them in my file storage. That makes sense for me. I've got in my in my files, I've got skillshare folder and then I've got bible journaling. And in that Bible journaling than I have good notes, resources. So with all of that together, I can get everything where I want it to be. So I'm going to trust that, you know, you're filing system and you can get this somewhere where you can access it. So what I'm going to do now is I'm going to come back into my main page here. And if I come up here to this little gear at first for one hears his notebook templates. So I'm going to press notebook templates. And I'm going to go to cover. And right down here it says import. So I will import, I will import from files. Let's say I want this one. This is a free one that came with GoodNotes, classic school cover. I download it and boom, I've got it now as a cover. Let me do it one more time. This is why it's important for you to have a system where you know where you're storing things so that you can find them and access them and grab them. So here, import from files. Let's go into office tie. Some of these are fun in office style. Let's see. This is fun. It looks like an envelope. More landscape. So that's kinda fun. I'll do one more import from files. Let's go back to resources bundles. Turquoise, turquoise blue bundle. And here I get my turquoise blue. And then I just change my default. I tap it and it changes my default to anything that I want. So that's how and then you just say done. So that's how I can bring in new covers to my, to my to GoodNotes.
6. Using Text Features: Let's open up our Bible, whatever Bible you have. And I just wanna kinda share some of the great attributes that this program has. So I'm right now kind of working through Genesis as I'm, as I'm preparing this class, I'm the largest dealing with my heart on Dennis's. So I'm kind of in the beginning in the beginning where we're starting a brand new journey here. So I can come in. And let's come up here to this toolbar. Here. Let me start right here. I can press text and I just press where I want it to be. I have a keyboard underneath here, but let's say I don't have a keyboard. I'll just press it and I can say, I can write text here. So let's say you hate your handwriting. I hear that all the time. You can just open up your well, if you're listening to a sermon, which was I was doing this morning, I was listening to a podcast and I was just taking notes as I was doing it, just typing along, listening and taking notes. So let me do that one more time. Text. I saw the light. Oh my gosh. I don't want to say that, but I've already closed it out. Come back to text, open it up, double-tap. It'll get you where you want to be. Double tap it again. And now I can delete. If you have a keyboard, it's a lot easier to do this. So here with my keyboard and we tried to do it this way. I don't know if I come I saw the light and then I can close it out. I can come back and again, double-tap, text, double-tap. And then here I can just delete it. So same thing. Don't need a keyboard at all. I just take a lot, a lot, a lot of notes.
7. Brush, Eraser, And Highlighter: So as I've said, this is the brush icon and this is where you change your pen color. I can change any color I want, and I can come in and I can do a custom color coming in here and change it to anything I want. And this is very similar to Procreate. So this is kinda fun. So these are your presets colors, and nobody likes that presets. Why not do a custom? So here I can just tap that and it will give you all of your colors. If you want to add it, you can add it to your presets right here. So there's always use black if there's a color that you always use. I have black here. So coming in to Genesis here, I'm going to pick a color and I can write or draw. If you come in and you press and hold it, it will make a straight line. Press and hold joy. Your lines can change your color. Okay? And then here, let's add just want to create sort of a flower. I would not do a lot of this in good notes because procreate is really the place where we're going to create some really cool things. But I'm a doodler. If you are a doodle are by nature and you are in a sermon and you're taking notes and you want to do at all, you can doodle in GoodNotes. So that's the pen. So tapping the pen, you have fountain pen, so sorry, fountain pen, ball pen or brush pen. You have choices. I like the brush pen. I like a bigger pan and bigger strokes. So I liked the brush pen pressure sensitivity. I've got mine at 50 percent draw and hold. So what draw and hold does is it does that snap where it will take your line and it will snap it. So I have that on and snap to other shapes. Again, that's all found by just tapping that brush pen and then go to draw and hold. So here let me show you that I can do a triangle and I can do fantastical things with my triangle. Because I've got that snap and hold on. If I don't like it, a two-finger tap will undo. There's also an undo button right here. So sorry, an undo button right here, and a redo button right here. Undo redo. So that is the brush. Let's come over to the next one. And I want to come to the eraser. So I don't erase entire stroke because that gets me in trouble. I like to have more control over everything. So here I make a great big mess. I grab my eraser and I can sort of erase what I want to erase and where I want to erase it. Okay? Brush or eraser, highlighter, highlighted. You can pick what color choice you want to highlight in.
8. Lasso, Elements, and Photos: And then these are shapes. So sort of in a style of inductive. I, I was kind of circling good day night, good day night, good day night. In coming down here. It was a study on work. What does work look like biblically? So I kind of just use it to set to circle what I'm highlighting, what I want to pay attention to, what words I keep hearing. You know, they say if you hear the word once, um, it's pay attention, but the word three times, what really pay attention? So that's kind of the idea here with that is the same thing. So I've got brush, I've got an eraser, I've got highlighter, I've got shapes. I'm going to show you this one, this crazy little circle guy here. You see that crazy little circle guy right there. The light's getting you. So what I can do here, so I'm going to show you how to bring things in from procreate in another video. But let's say I've got this apple tree that's over in your resource section. So I've got this.
9. Adding Pages : Hello, hello and welcome back. So we are now going to look at how do we add pages into our Bible. So why would we have to add pages? So I want you to think about how many different journals you might have for all the different ways that you walk out your spiritual life. So you might have a gratitude journal. I became an avid fan of gratitude journaling years ago. I think it's just one of the most incredible things that we can do for our spiritual journeys and our spiritual faith. So let's say you have a gratitude journal and you've got a prayer journal where you're writing down all of the prayer requests because goodness gracious. And today's day world, there are a lot of them. So you've got a gratitude journal and got a prayer journal. Maybe you have a soap journal where you're doing Scripture soap S, scripture, observation, application, prayer. So maybe you're doing like a in-depth kind of so pages every day on maybe a book of the Bible that you're reading. Maybe you do sermon notes, maybe you have another by a journal where you keep sermon notes. So we can have a lot of different places where we're storing all of the different conversations that we're having with, with fellow believers, with, with the Lord. There's just a lot of different places that we can store information. I want to introduce that you can do everything right here on your iPad. So over in your reference pages, I have a couple of PDFs of so pages. So what I'm going to do here is I'm going to come out to my main where all my journals are kept. And I want you to come in here to the little setting, to the little gear box up here, oops, low gearbox. And the first one here is notebook templates. So I'm just going to press notebook templates. So this you've got your essentials. Writing, planners, music. Just take a minute and kind of look through what's here. Like you could use, let's say the little monthly planner and put that in there and maybe just do a little box a day of Scripture that you want to memorize. That would be a great page to add for Scripture memorization. Prayer requests, I kind of like in looking in writing papers, these column ones because you can have the prayer request and then on the other column the answer. So here let me come kinda come up so you can see, so here you see how you got the, you can have the prayer and the answer. And then here like look at that. That's just a great place to just write a little itty-bitty scripture that you're memorizing. So great, so many resources that are already here for you. But what I've done is that I added right up here, there's a little plus, I added a new template and I called it Bible journaling. And now what I can do is I can keep on just press Import and you can bring in all of those different PDFs that I have for you have a landscape, I have a portrait, and you can bring them in and you can store all of your pages here. You can make one for granted to journaling. You can make one for us. So pages you have, you can do, we can decorate this for your daily scriptures. So everything can be stepped set right here in this new category that you create for Bible journaling. Alright, so I'm going to come in now to my, my Bible and I'm in my Genesis. So let's say that here I need to add a picture and I want to have a new soap page in here. So I'm going to come right in here to this little plus, and I'm going to press that. And then you'll see. So here I have my soap pages are already loaded in there. But what you can do is you can pick, hear more from templates. And then boom, your Bible journaling template comes up. I put that in. I say Apply. Lucky there. You've got a place to do Scripture, observation, application, and prayer. Amazing, right? You could do another one. So let's say I want to add another one. And now more from templates I want to put in for this month, I want to do a monthly scripture to still a little bit of scripture writing so I can put in my calendar and every day for the next 30 days, I'm doing one little scripture that I want to memorize. Boom, right there. Let's say that I wanna do I wanna do a prayer journal. So here I kind of like I'm keeping everything landscape just because just because I might Bible I prefer the landscape over the portrait. So let's look at this one. Let's look at the accounting one. If you're not verbose, you're writing, you could use this. And you can just kinda keep a record of the prayer request and whether or not this was in accounting. Let's just sort of a ledger to sort of see if that prayer request has been answered or not. So right there I've just I've just gone down and done how many journals or just right here in my day-to-day in my daily reading. It's a snapshot of what I'm doing right here and right now. So let's say that you think, Oh my gosh, this is just too much work I cannot do. My monthly scripts are writing and I am so stressed out that I've got this monthly calendar here. Do not fear. Come into let me move this guy. I want you to come in here to these little four squares. And that opens up your entire book visually though. So I can say, I can select, and I can say, I don't want this one, I don't want this one. And I'm going to get rid of that. I would like my SO page. I'm gonna get rid of those two. And I press Done. I'm so sorry. I press Oh my gosh. That sounds great. Okay, so I press Select and I pick this one, and I pick this one. And then I pick trash that I'm going to throw those away. Everything gets reorganized and done. And then I've just got my SO page. Amazing. So let's say you go to church and your pastor is speaking out of Romans. Well, we can do that. We can turn off, remember to go to, we have to turn off our tools to navigate. I turn off my tools. I come up to the three bars here. For this, for this Bible I could do come to this one here. I come into Roman. Was a Roman SPIF, come up. I go into Romans 5. And here I want to add a page because, oh my gosh, she's just speaking and it's just wonderful. And I just love it. So I'm going to bring back my toolbar and I'm going to add a page. And I'm going to make it just be a blank page. Apply. And now I've got a place that I can put in my sermon notes. So let me go back to Genesis. Turn off my tools, come in to navigate. Sometimes it doesn't want to work with me, come into Genesis command to Genesis 1. So for me, I've been listening to a podcast on Genesis. What I've been doing is it's just been so amazing. So I just put in, excuse me, an extra seat. And I just sit listening to the podcasts and I'm just typing away. And I'm just writing in notes on what I'm learning through the podcast. So every thing is right here. You can add as many pages as you want within your Bible. And remember we said it already so that it's being backed up automatically. So everything is housed right here. Okay, so as next time up we're going to go into procreate. So get ready and I will meet you in Procreate on the next class. Thanks guys.
10. Adding Images: So I wanted to show you how to get in some different images. If you look in the resources for this class, you'll see that I have listed the tree, the apple and Eve. How in the world do you get them in? So remember what I told you that what I do personally is I go into my computer and I take all of those resources. First I create a folder. I've got Skillshare on my hard drive, on my computer. So I'm on my hard drive. I create a folder in my file tree and its Skillshare. Then I create a folder for this class, Bible journaling. And then I can take all of these on my computer and put them into Dropbox. So I take everything, I put the fire, the tree IV, the apple. There's some brushes, There's two. So pages. I take all of those resources one-by-one and I put them into Dropbox on my computer. Because Dropbox can be accessed by all of my digital means. I now have access to it here on my iPad. So it's in Dropbox. It's all of those resources are waiting for me. And what I'm going to do here is come into the picture icon. And down here it says insert from now you can grab any one of the pictures that you want. But down here it says insert from mind goes right to Dropbox because that's just where I'm always pulling from. If there's a place, if you're always pulling from your photo gallery, from your iCloud, that's probably where it's going to go to. But if it's not, then you can come in here and you can browse for where everything is going to be. So I live in Dropbox on going to come to Skillshare. Skillshare. And then right here, I've got my resources folder. And here you see all of my resources are listed. So let's say that I want to grab IV. I simply grab IV here. She is brought in. Remember that I can resize by coming in on those little dots, the side dot, I can move her over. I can move her into the middle of my text. I can do anything I want. And that's how you're going to bring over your apple, your tree and your apple tree and Eve. If you don't want her, you just press U, they go no, no, no, I don't want that. Just press that little x and it She is gone. All right. Good job.
11. Procreate: Hello, hello, and we have finally made it into Procreate. So when you come into Procreate, yours is not going to look like mine. There might be some pieces of artwork that you see. If you want to ever get rid of artwork just in your gallery. Take your finger and slide to the left and you see here how it says share, duplicate, and delete. So you're able to delete your artwork here. Now, I can come in and I can say delete and Photoshop's as a Photoshop, Procreate says, Whoa, whoa, whoa, whoa, whoa. Are you sure? So I can press Cancel or yes, for sure. For sure I want to delete. I can take like see here I have three different kinds of so pages. I can take my so pages or anything that is kind of similar and I can add them on top of each other, will stay there so that you get this file. This guy does not want to go over, come on, behave yourself. So coming here. And I can then have like a little file folder of things that are similar. So everything can say very organized in your procreate gallery. I can also pick which one I want to be on top. So see here I've got my portrait on, and then here I can keep my landscape on so I can pick which one I prefer to have on top. So let's come in. Let's see one more thing that you can do. Here. I've got this stack over here. So let's say I want to see what's in my stack, but I really want to kinda get up-close and see it. I can come in and I can pull out on it. And I get the big picture and I can scroll through to get that back down again, just take your two fingers and pinch back down again. Okay, so let's create a canvas. So come up here into this little plus button, and you're going to see all different kinds of sizes. Now my sizes are going to be different from your sizes. But what I'd like to do for the landscape ESV that I'm using. A 5 by 7 works well, now you might have to tweak your pages a little bit and get your size right depending on what Bible you're using. But the nice thing about GoodNotes is remember you can resize. So I'd say more importantly than getting the size just right is making sure that if it's a, if it's portrait, you make a portrait pick Canvas. You may get longer on the height and less on the width. And then if you've got one where it's more landscape, you make it longer on the width and height. So that would just be my, my main area advice. Mine is really kind of like buy a five by seven. So I'm going to come in here and I'm going to do the little plus button here. And here you've got pixels. I'm going to change this to, oops, oops, oops, come back inches. Inches. And I'm going to say five inches by seven inches. Now this is a very important number right here, DPI or dots per inch. This means how much ink is actually on your Canvas. Always make sure that this is set at 300. If this is lower than 300, it's very hard to take your artwork off of your iPad and do anything with it physically, you have to have a 300 DPI in order to print your work, make postcards, make stickers, anything physical stickers. So just I would just make sure I'm at 300 DPI just so that I know whenever I create, I can do something else with it. And then up here on untitled canvas, you could write five by seven Canvas and then press Done, create. So here what happens? So let me just go back to the gallery for a second. What's really great? What happens here is you see right here it says five by seven Canvas. So once you do that, the canvas is saved in the gallery and you can come back and always use it, always use it, always use it. All right, So quick introduction to procreate on this one. I'm just going to kind of explain the user interface to you so you kind of get an idea. So here I can wiggle, wiggle, wiggle, wiggle, wiggle, jiggle my paper. And then I can go back to full screen with a snap coming over to hit. Maybe it would be easier on this one. If I do it this way. Well done. So sorry, so sorry. Okay, So here this will snap in better. All right, So now coming in over here, this is your color wheel. Every color in the rainbow is around on this outside color wheel. This insight color wheel, you can blow it up a little bit. And what it has is all of the values this way, values from light to dark of this one color. These are not additional colors. It's that one color. All your values and then left to right or your saturations. This is low saturation. This is a fully saturated color. So let's just look at there are three shortcuts on this inside value wheel. So I can double tap at six o'clock and I get true black with my opacity up, I get two lac, I can double tap. And about 11 o'clock, I get to white. Obviously you can't see why it if I'm drawing, if I have a white background and double-tap at two o'clock. And you get the pure saturated color. So that is my purest color, my brightest fullest color that I have there. So pure black or pure white? Pure color. It doesn't matter what color you do it on. It always will be pure black and pure white, pure color. I can take it. This is like Bob Ross is palate where he would have all of his paint down and he would create the color for the happy little tree. This imagine is the paint pot where I'm taking my brush and I'm dipping it in there so that I can come out and I can dip and I can draw. This is the palate. This is your paint. Okay. There is one shortcut up here in your paint pot. I can press and hold. And let me go back to one color. I can press and hold, and I can go back one color, green, purple, green, purple. It only goes back one color. One more Magic Trip of the paint pot is I can let me just pick a different color altogether. I can take this paint pot and I can just pull out and draw my paint. And it goes everywhere. Again, pull out and drop and it goes everywhere. You see how right here I've got this white mess. That's because remember when I did Chu black to white to color, I drew white on my canvas. You can see here that white takes up space on your Canvas. You can't erase with it. It will leave a mark on your canvas. It's not invisible. Okay? All right, so that pretty much gets that color wheel. I want to erase this and kind of come back into a clean slate. So I can do a two finger tap to undo. I can do a three finger tap to redo though so long. Comeback, two-finger tap, three-finger tap. Sometimes when you're working your fingers and your iPad or fighting, don't get involved in the fight. Here's what you do. Right over here. Let me choose a different color. Right over here, there is a button that looks like this, and this is the same as a two finger tap. Right below it is another button that looks like this. It's the same as a three-finger tap or a redo. Okay. So one more shortcut that I can do is I can take three fingers, 123, left, right, left, right, left, and I can scrub my canvas clean. You saw how I'm going to switch back over to this. It's a better shot for you. You saw how my my canvas wanted to come with me on that. So sometimes like I said, your your fingers and your iPad or not working, That's okay. Come over here into this little, these two little squares. Press them. Pull to the left and you can clear out that as well. So we've got our layer panel, we've got our color wheel. These are your brushes. So this is where we're going to work. We're going to, in the next video, we're going to import one of the brushes, toothbrushes that I gave you. This is all of your brushes. These are the ones that come with iPad and they are fantastic process to buy a million different brushes because I, I teach, Procreate all day online. So I use these brushes all day, every day. I very rarely depends on the brushes that I bought. I really do use the ones that come with the program. They're phenomenal. So coming in here, I'm going to go into the inking folder and grab hold of the studio pen. Inking folder, studio pen. That's what I draw with. I do 99 percent of my inking and my sketching with the studio pen. Solid. It works in you can color fill it easily. All right, so coming in over here, I've got this slider bar. The top of the slider bar is my brush size. As I come up, that brush size gets bigger. As I come down, the brush size gets smaller. This one over here is opacity. But for the eraser and this much tool, it also counts as strength. How strong and I are racing, how strong and my smudging. Okay. So as I come down, it goes from OPAT opaque to more and more transparent until it's gone. Here's an interesting tidbit. A lot of times I get from students that I'm drawing my iPad is good, saying I can't do it's broken. The whole robot and program did it. I didn't know until Acts hold on and check. Is your brush size up and as your opacity up, if your brush size and your opacity all the way down, you didn't give ONE Procreate anything to work with. So there's that. So I'm going to do a three fingers grab 123123. What do you see how it doesn't? Just wash my hands so it doesn't want to have 1, 2, 3, root 3, one. Well, there you go. You saw an argument between my fingers that an iPad in prison. So I've got my brush size, I've got my opacity, I've got my brush. I'm going to snap out of shape. Don't pick up your pen for three seconds. 1, 2, 3, and it will snap out of shape. If I want a circle, 1, 2, 3. But let's say I want to make sure it's perfect. Just take your other finger and press the iPad. This only works as long as this pen is touching the glass if it's not working, I promise you, you broke contact with the glass. Now magic only happens as long as these two are touching. Okay? So I can step out of line and I can move it anywhere I want. Okay. So that is all with the brush, three fingers swipe. Let me now I'm going to snap out a square. I'm going to fill it. We know how to do that. Sometimes with Procreate, if you leave a hole in the bucket. It is just like in the real-world, if you try to pour paint into a bucket with a hole in it, I pour my paint. It goes all over the floor. Does two-finger tap it away, find the hole, and fill it. Interestingly enough, if you also draw with an opaque studio pen is really good about it. But if you draw with your line, didn't realize that you are joined with such a light line. It's not enough to hold it the damn, there's too much air in there and procreates as none, No, no, no, it's not going to work. Always chug brush size, opacity when something is going wrong. First place to check is brush size and opacity. All right, so let's come over here to this little smudge tool, and that is the finger pointing down. So in the real-world, if I'm painting, let's say with pencil, I could take my finger or tortilla on, or bees or toilet paper and I could smudge my edges and kind of make it nice. I can do the same thing on Procreate. So a great smudge brush is in your airbrushing folder, soft brush. And it's comes with the program. All of the brushes that I recommend come with the program unless I provide them for you. So airbrushing soft brush and watch your brush size with the airbrush. The airbrush gets huge. Look at my brush size here. So I could just get rid of everything and get it gone. So some of the brush sizes get big. Remember now, this is not opacity, I kind of consider it strength. So here what I'm doing is I'm taking my paints and I'm moving it around into each other. I'm not painting, I'm just manipulating the paint, blending my edges, softening it up. This is a, this is really when you're using this tool, this is really like painting on the iPad because here you see you've gotten just like in the real world, if I black and white, I would wind up with gray. Same thing happens in Procreate. The same thing is going on here. I'm creating new colors based on two colors mingling together. Last one here. It looks like a band-aid. It is not a bended, it is your eraser and you can come in and you can erase full on. But remember this is also strength. You can also erase just a bit. I can also use my eraser and I can erase in with a texture. So here I can come in and erase with a texture. So very cool. So that introduces you're pretty much to the entire beginning part of the interface. And on the next video, I'm going to do a three-finger swipe here. On the next video, we're going to come back in and import one of those brushes and create a spread. Thanks guys. See you on the next video.
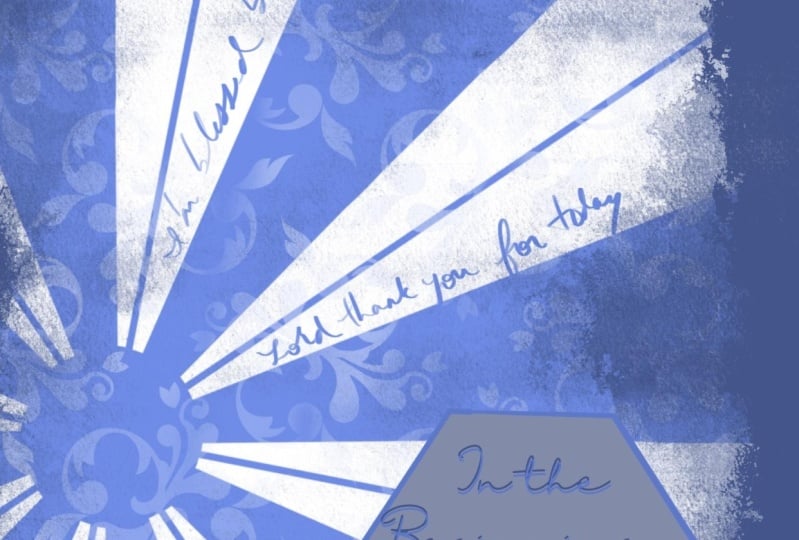
12. Importing Brushes : All right. All right. Are you guys ready to make our first page for our journal Bible? So I've opened up that five by seven canvas that we just created in the last class and I'm ready to go. So what I wanna do is I gave you over and the resource files. There's a sunburst brush, There's a sun brush, and those are flowers brush. So how do we import a brush? I want to remember, I save everything over on my Dropbox. You've got to figure out that that personal system that works for you, that you can access your folders from your iPad. So I'm going to trust that you have figured that out by now and you're good to go on that. So what I'm going to do here is come into my brush library. So if you pull all the way down here, you see there's a little plus right here. So I want you to go ahead and press that plus and you can create a whole new set. Okay, so I just have mine listed as Lisa brush. Okay. So once I've got that done and I've got your name and your brush set. So this is where you're putting your brushes that you create. I want you to come over to here to this little plus. So we're going to press a plus there. And I'm going to come in here to import. So here I've got my all of my folders, everything I need, and I'm going to come into my resources. And you see how the procreate brushes look just a little bit different. So I've got the flowers brush and I've got the sunburst. I'm going to import it. Import that sunburst. Okay, so now I am I've got my sunburst brush. Now mine came in down here, I believe. Yeah, it came in under imported. So let's say that happened to you and sometimes Procreate, we'll put an extra file down here for imported. I just want you to come over to here. And you can grab this and you can put it over into that new set that you just created, that new category. So now I've got my category, I've got my brush and the world, is it a good place? Okay? So remember this is our color wheel. I have it as yellow. You can do this any color that you want. Let's do like a blue. I'll just do a different color than what I have in the intro video. So here I can do a blue and I'm going to go kind of big on the brush and I can get a full two-finger tap it away. Not bad. Two-finger tap it away. Can move it any which way I want. Completely up to, you know, see here how I've got this top up here. My brush did not make it to the end. Let's say I wanted to be down here. I want you to come over to this little arrow right here. And you're on uniform and just pull out so that it comes, It's just like in GoodNotes, it works exactly the same. And then press your brush key to get, get that gone. So just like that, I've created a great spread. Let's say I would like a little bit of yellow in the background there. I can come into my, into my layers and you see right here has background color. I'm going to choose that layer. I'm going to choose a very, very light yellow. And I'm going to say Done. So now I've got it's not white, whites, a little bit of yellow, it's the blue. I'd like to add a little bit of detail in here in the beginning. So let's say that I wanted, there's a couple of the different things that I can do here. Let's say that I want to, first, I want to shade it. I want to put some details and I want to have some fun. If I choose. Let's have some fun with a go to your, let's go to textures. You guys will love this. Let's go to textures and go to Victorian. And this is a fun one. So let's say I'm going to go with a white here, a little bit lighter if I come in here? No. Do you see how I just went over into and they go darker so you can really see it. So if I try to go like I'm gonna make a mass, it's just going to make a mess. Maybe I don't wanna do that now. Of course you can do that. What I want you to do is come into your layer here and press it again. And you can go 1, 2, 3, 4, 5, 6, two Alpha Lock, alpha lock. What that does is it locks the color and I could only put color right on that blue. There's another way to do that. I can take two fingers and bounce to the right. Alpha lock off on, on, alpha lock off. When alpha lock is on, you've got that grid. Let me just show you something though. There's confuses a lot of folks. Let me pick a better brush. So let's say that I've got my home. I'm so sorry. So sorry. Start inking. See that? Okay. So let's say I've got. My gosh, I can't can't thinkings duty open. There we go. Okay. So I've got this horrible white spot in the middle of it and I've got to fill it. But my alpha lock is on. I'm going to I need my pink up here, but I need this blue. Take your finger and hold it. This color on the bottom is the color that's in your paint pot. This color on the top is the color I need to change it to. I can pick any color on my palette. This way. It's a color picker. I'm going to pick it to blue. And I'm going, I've got my brush on my opacities all the way up my brush sizes all the way. My color is correct. Why can't I fill in that hole? Because alpha lock is on. Alpha lock locks it in so you could only put color here, take your alpha lock off, fill in the problem, come back in, put alpha log back on again. So let's look at what Alpha Lock does. So I think let me go back into textures Victorian. I'm going to do a light and then bring it down a little bit. So now what I can do is I can come in and put in this great. And I know that I like it on these little ones I think I'm going to do in here. The secret is not to pick up your pen once you get onto array because that will keep the pattern intact. Let me show you what happens if I pick up the pen. So here I'm going along singing a song, I pick up my pen. You see it doesn't line up anymore and it goes, we're getting giddy over each other. So just so I like that, I think that's kind of fun. And let's say, I want to add, okay, so I've got this, this I love. But let's say I want to write in the big O. Okay, let's do that. Let's say I want to write some prayers in there. In the beginning, maybe things that I'm praying about, maybe in here I could write names. So here I'm going to add a layer. Layers are like pages in a book. Layers are, I can only buy like two layers. I can delete that one. I'm on this page of the book. I'm on this page of the book. This page, this page. Layers are also like shoes and socks. This is my socks layer. This is my shoes layer. I would never put my socks on top of my shoes. And I'll show you what that means in a minute. So let's say I want to write some names in here in the beginning. So coming into your calligraphy folder, there's a lot of great pens. I'm going to use my brush pen. And let's say I want to write, I'm going to grab hold of this blue. I think I want to kinda keep it the same. And I'm going to bring my brush size down. And I'm just going to write some names in here, some prayers, make it completely your own. Maybe something that you've been studying that you want to document. But I can come in here and write whatever I want to do to document this day in my, in my journey. So that's good. Now let me show you what happens when I put my socks on. My socks. Note my shoes on first because it's a background layer. Let me try that. I'll try to show you that it's because I've got, I thought I had this as a layer. I have added a background layer. Let me do this. I'm so sorry, that was silly of me. I'm going to bring this layer down and I'm going to make this layer blue. Okay, so now I just added a layer on and had gotten in blue if I put my socks now over my shoes, oh no, I lose everything. So I have to keep everything in order. It's almost like building a sandwich. You start with your bread, you put on the Mayo, you put on the cheese. You would never put your Mayo, your bread, and then your cheese, everything would get out of order. So this again is what happens when your socks go over your shoes. I don't need that layer. I just wanted to make sure you understood layers. Okay, so I've got prayers, I've got this cool little vibe going. Let's say that I want to add, let's not have it just attention, tad bit of fun. Let's say that I want to add on a border on here. Super fun way to add a border. So let's add a layer. Okay? I'm going to do it. I think I'm gonna go with a darker blue. So this is the color that I'm using. So I think I'm down is darker on your values, up is lighter. So I'm going to go down to like sort of a darker color. And I'm going to drop it on there. So my shoes and my socks are okay. And then I'm going to come in with my eraser. Go to artistic. No, no, no, no, sorry, sorry, sorry to go to textures. I love the signal. It almost looks like paint splatters. So I've got my eraser Amman signal that I'm going to bring this strength down a little bit. And here I can come in and kind of start claiming back. And I'm going to leave that kinda border out on the, on the edge there. Can kind of look into g if you'd like in the beginning or you can have a break. Just want to give you guys options and things. Just run a play with and kinda get used to working with. So I'm going to get that son really bright in there and sort of bring that down a little bit. So I like that. It looks like a like a vintage page out of an old Bible. So all right, so I've got all my layers. Now let's say I want to write in the beginning. You can write in the beginning here or whatever you want to write. I'm just saying in the beginning, whenever you, if you want to write something on here, you can write just like you did before writing your parents or your names. You can use calligraphy or any brush you want and you can write. But let's just practice writing in text. So here, come on over to the top over here, and I'm going to come to the wrench and press Add and Add Text. Here. I've got my text. I'm not going to use my keyboard. I'm just going to use my pen and the keyboard that comes in here. So it says text. I'm just going to cross touch that and I'll come to keyboard. Keyboard, keyboard. It doesn't want to do it. Keyboard. All right, So let's see, I'm going to go back here. Oh, I'm gonna write in. I think I'll do in the beginning. Okay? So we've got in the beginning. And I'm done with that. So here, oops, I do not want it bar. All right, so I'm going to come over, press I closed it out and I'm going to move it sort of where I want it. Use your arrow key to move it kinda down where you want it. So I don't like the way it looks right now. Come into your layer panel, touch it, and here I can edit text. Don't rasterize your text. Rasterized makes it into a picture that you can't, you can't do anything with it anymore. It takes it from this editable state where you can move it around to a place where you're stuck and you had to use it as a picture. So I'm going to edit text here. I'm going to come in here. I don't want this to be capital in the beginning. Okay, that's good. Right? And then here too, I want it to be I think I like it. I like it just like that. Alright, so I'm going to now come in to the little a and a text. So coming in here, there's a and a and this is where I can change everything around so I can make it smaller. Obviously, I have to make it smaller. I'm going to change my fonts. Okay, I want to change my color too. I might go. I think I did a darker, I'm going to go to a darker color. I do have different fonts that I've added in. So I don't know what I want. That's very light. I'll just pick a documents so that you can really see it. So I've got in the beginning, I might make my size a little bit smaller. Font size. And having a moment, I'll pick that. You can see it. So I can make my size bigger or smaller. My current in here, I can make my letters go out. Sometimes, some other funds, they're funny, you can't really read them very well. You have to turn on that kerning to get it right. Other things will play with later on here, I can make it all caps or not. So I lost my caps here though. So here I'm going to come back in and to capital I, capital T, capital B in the beginning. And then maybe here, put a dot, dot, dot. Okay? And I think I'd like letting, I wanted to just be a little bit closer, smaller, kinda play around with these to get it how you like it. Okay, so that's perfect. I press Done. I press my arrow key and I can move that down to where I want it. You could put it up here. I just two-finger tap will undo that. So here I can move it where I like it, down here, appear wherever makes you happy. So and when you're done moving it around, press your arrow key and boom, you've got a spread. So now how do I move this? How do I take this and export it into GoodNotes? Great question. I'll catch you on the next video.
13. Exporting From Procreate 1: All right, so I've got this great page done and I want to bring it over into GoodNotes and drop it into my Bible. But before I do that, I did change my font over. But I feel like it's not really very, it's hard to see against all that's going on in the background there. So let's do this. Let's come into our layer panel. And here, remember that I've still, I'm able to edit my text. Don't rasterize just yet. So here I'm going to duplicate that layer. Stay on your top layer here. And I'm going to come in and it should straight away allow me to change my color. So maybe I'll go over just a writer. So it's there but no See what happens is they're right on top of each other. So here, come over to your arrow. And now I can move this off of it just a little bit. And to get it really precise, you can just app to move it exactly if you just need little bit increments and look at that. I feel like that is a lot more obvious. Okay, So I think I want to do just one more thing in that I think I want to put like a little rectangle or some sort of a shape behind it to get it to really pop. Now this is the thing with layers and shoes and socks. Imagine a sandwich. If this was a sandwich, this would be my brand, my mayonnaise. I'm putting everything in. I need this shape to fit in underneath that text and then for the text to sit on top of it. So what I'll do is I'll add a layer under the text. And I'm going to choose sort of a nice bright orange I think. And I'm using my studio pen, going to come in and sort of snap in a fun shape and fill it. I think I might go a little bit lighter. Maybe a little bit later. Yeah. And then I'm just going to change the size of that a little bit so that I have in the beginning. All right. So I'm happy with it now and I want to move it over into into GoodNotes. So again, you've got this place that you're pulling and pushing from and where you can save things too. So come over to the wrench. Now there's an option here, you're going to press Share. There's an option here to export to GoodNotes. I don't do that because it opens up a whole new book. I just think it's more complicated. So I'm going to export my pictures as a JPEG. And see here you have all of these different places where you can save too. I always Save to Dropbox. But you see how right here it says open in good notes. If you open it in GoodNotes, it, it opens up like a new notebook, almost which you can do. But I just, that's more complicated for me. So I'm going to Save to Dropbox. I'm going to pick my folder. I'm going to skill share. And this is, I'm going to put this into my resources. And I press choose Save to Dropbox, save, uploading. Perfect. All right, so now let's go over to GoodNotes. I'm going to open up my Bible. I'm going to, I already have one in here. But now let's say I want to put it right here. I'm going to tap my picture. I'm going to say insert from Dropbox comes up. Again. I have to find it skews skill share resources. And it's right there. It comes in and it's pretty well size to my page. I can make it just a little bit bigger or smaller or maybe you want the white outline on it? Maybe don't. So I get it in and boom, I've got my first page done in the beginning. All right, guys, I'll check you on the next one and we're going to make our cover and as our final class for this final session for this class. All right, see you in the cover one.
14. Making A Cover 1: All right, so let's do this thing. Let's go ahead and make a cover. Now, this cover we can do, but what I want you to notice is that it is landscape. Because if we come over to, if you're using the same Bible, I am. We have this landscape here, so we're not going portrait, we're going landscape. So let's create a new canvas. And what I'm going to do is I'm going to make my top number 651 px or pixels. Bottom 407 px or pixels. And then make sure your DPI is at 300, always, always at 300. I'm going to call this one good nodes landscape. And remember now this will be saved in your gallery so that you can use it time and time again. And I will create, all right, so I have my landscape and I created a cover that you could just put some text on it and make it your own if that's what you want to do, let's just do that. So I'm coming into the wrench. I'm going to do add. And I will insert a file. And now here, right here is cover. So here I've got my cover. You see, I've got these marching ants around it. I just close that out with the arrow key up here. Now let's say I want to put my name up here, but I really like a rectangle. There's a really easy way to make a rectangle. Come into this ribbon, the selection tool. And on the bottom here you'll see rectangle going to change my color up a little bit. Maybe I'll go more on. And here I can draw out a rectangle and try it now that is a very bright color. So what I can do is while those marching ants are still around that I can play with and sort of get it to be the color that I want. Okay? So there is how to make an easy rectangle. Now the problem is, is that I did that on the same layer. So if I now want to see how right here it's coming in on top of the flower. I can't move it. Let me show you the beauty of layers. If I add a layer here and I come into selection, and this time let's make an ellipse. Let me change my color to something different. I can make an ellipse. I can change my color just like we did before. And when I'm done, I can press my selection tool but you don't want I just thought I'd like it to be up or over. So I can move this by coming into my layer, making sure I'm on. There's nothing else on my layer. Come to this arrow and you get these dots just like we had on good notes. But there's also this little green guy right up here that allows me to rotate as well. So that's the beauty of layers. So now I've got this, but let's say that you really want to import this brush and you want to create something that is all your own. So what I can do is I can put these two layers together by just pushing them down. And I can add a layer. One canvas can operate exactly like a sketchbook. So what I can do is turn this layer off and I have a fresh page right here. Okay? So let's go to another brush. Let's try. In elements. Elements clouds are kind of a fun one. So I'm going to build up my tones with my clouds always start darker. So I'm gonna go with a more of him. Maybe it'll come in or out here. So I'm gonna start with a little bit of a darker color for my clouds. And then you want to increase and go lighter so that you'd get that depth in there. And then I'm gonna go even lighter, even to pure white. And just kind of tone it down a little bit longer than that. So fantastic and it was so easy, right? So now I want to put on that flower. There's a flower brush in the resources. I don't wanna do it on this layer though, because then I cannot manipulate it. So you guys guessed it, add a layer. And let's go into our brush panel. I'm going to stay in this new brush category and minds called Untitled SAT. But yours is probably your name plus, you know, set. So I'm going to pick that and I'm going to add. So coming in here, I will import my brushes are gone. And shrew resources because I've already, I've just, I've got one flower brush, so sorry, flower brush. And here it is, but it's down here. Again in my imported file. You guys are pros at this by now. I'm going to come in here, put it over here, and it's right. There is my brush. Alright. Important, my brush layer. I'm going to go to black. I don't know. I might see if I like that. And I'm going to snap in my flower. Now what I can do though, is I can move it where I want it. You see what happened here? Anything that falls off the canvas on Procreate gets erased, it's gone. So let me show you here. If I put this flower right here in the middle, I have all leaves and everything else. I put it up here in the corner and I try to move it, it's gone. So if anything goes off your Canvas, if you're okay with it, then it's gone. You could also just use it to delete things. Easy way to just get rid of things. So not sure that I love this color though. Maybe try a different color. I think I like that nice and light. So here it's going to happen is I'm going to do a color fill. Now. I'm just going to show you something really quick. I'm gonna put this on. Let's say you did a colored fill and it went everywhere. I want you to look up here when I do this and you can change how much color you're dropping. So I put it in here and it goes everywhere. My color drop threshold is at 81%. I want you to keep your brush on the glass and pull back. You have to do it again because I came over to and pull back until it behaves itself. Okay, I can even go a little bit more so that I get a little bit, oops of those lines. And now I can do a color drop easily, easily. I've got this done, but now I have to add in some depth to that. Do you guys remember how to do it so that I move locking that layer. What I can do is I can do an alpha lock here. And all I have is this one color and I can, I can work that one color. So let's do I don't want it to go too dark. Let's see what. Oops, I should change my brush. I think I'm going to do Let's go to airbrushing. Soft brush will do an airbrush, soft brush. I'm going to bring it down the opacity and just sort of bring in some shadows in here. And you can kinda see where the petal is, just sort of work in that in now that looks a little bit like a hot mess. I don't know that I necessarily love that. So what I'm gonna do here is use this finger because if I could just take my finger and some much needed all be gorgeous. We can take your finger and go to airbrush, soft brush as well. And then bring your opacity down and bringing brush size down. And just start working that in and blending it in a little bit MOOC, how gorgeous that looks. I think then that I would like to add a little bit of a highlight as well. I'm going to go, I have to go wide. I've got such a light color. You might not have to, but and then I'll smudge that back-end as well. Now, in future classes, I'll teach you more about layers and how to do this so that it stays nice and neat always. But for right now that, that is absolutely perfect. So I need to add this inside part in here, so I need to put it underneath that petal. So I'm going to add a layer in. I think I might be up to almost like a darker brown here. I'm going to bring my brush size down. I can do this in my with my airbrush. And I'm just going to pick out different pieces and sort of color them in. Opening up another one over here. And a different color. Now look, three finger tap to undo it. So I might like these colors just a little bit darker. Yeah, beautiful, beautiful. These down here are more of the same. I could kinda put this in on the same layer. I'm kind of just adding in this color. And then what we'll do is we'll shade this as well. I think these are would all, I'm going to claim them as weaves. So here on this one, again, I will Alpha Lock it and come into a darker color, smaller brush size, and just grab hold of some shading. And and sort of make it works. Can you stand it? Do you think here and my tech take a little bit of this brown and maybe just get a little bit of that in just so it all sort of matches and make sense with the inside a little bit. So last layer, I'll add one more layer. I'm going to pick a green. I want it because I've got like this muted blue. I feel like I want more of like a swan, be kind of a green. I'm going to pick a different brush because I want to grab some texture. So going into sketching, I'm going to choose peppermint. Sketching, peppermint. Oops, bring my brush size down. And then coming in here. First, I'm just going to put down my one layer. Here. I can go kind of bigger. This would be darker. This would be darker. Because this is under you don't have to be careful. You can just kinda get right in and do that flower. I'll put some in over here too. We will address this whole thing with the stamped. That may be and I think this is all part of a leaf or it's part of a flower. I don't know. I made a brush but I don't remember. So I'm just going to claim that all is a leaf. Right? And then I'm going to come in with a little bit of a lighter color and kind of come in here. And then darker because this would be dark, I made a mess. This would have some dark coming into it. These dark dark over here. So I don't necessarily love this part here where I've got where I got the stamp. And I'm going to do is come in on this top layer now. And just tone that back down a little bit with the same color. And see how that's sort of just goes back down again a little bit. So I can do that with all of them. And I don't know, it looks almost magical. You know, if you don't like the brush, of course you don't just change up the brush. If you want it to look sort of just more. Not so texture. I'm going to get in some dark in here too though. You're just sort of make that a little bit. Here. I can get rid of that one. And then here, I'm just going to tone that back. A little bit of a pop of a lighter color in there. So we have this flower that you just created. Okay, so now let's say that I want to come in and I want to put in a wreck. I went about my name in, but I wanted to be on tucked under that Rose. I can take my whole rows now and let's just merge that together. So I've got the clouds, I've got the nuts on a rose. I think it's like a pansy maybe. So I need to be under, so I'm going to create a layer underneath new color. I'm going to come into my rectangle here, create a rectangle. I'm not a big lover of green, but I might just take that green. I like. And I think I know who I am, I am, I think I like the brighter color, even better. Go figure. So I have my text here. I could put a little bit of a shadow around here. So it looks like my roses, sort of my rose, good lord, my peony is kind of sitting there. I put a shadow layer here, airbrush soft and just pick a gray, bring my opacity down and sort of just add in shadow. And then I'll just work it back down a little bit so much at him, look at how that looks like it's there. So then I kind of love it to you, so that here you can add in text and text. I'll do lease. Lease. Is return Bible. Really like it. Sorry, sorry. Edit text. Don't rasterize. Go to my big a little a. I'm going to highlight the whole thing. Is a font I love. Kinda nice. I'll make a little bit bigger. I'll change my color to be pretty. If I go back to that pinkish color, pink, I can't talk. Ok, Mike, guys. Yeah. And then bring it down over here. And I can duplicate it. This top one. I can make it darker. I can push it over a little bit. And here I'm going to pull it down below. So the top one is, oops. So the top one is the one that is lighter as on top. So I have all of that. They're told to feel like you need just a little bit, a pretty, pretty kind of in here. So what I can do, Let's go to, go to organic. This one's kind of fun. Paper daisy. Here, I might make this Bible a little bit lighter. Yeah, I like that better. Okay. So coming into paper days ago. Oh, no, cancel. Create layer. Yeah. I wanted to be underneath my main flower, so I'm gonna create a layer on top of my text and thanking, come in and bring it down. Well that say It's a little bit unpredictable. This one. I'll do it. Well, and there I have this as Bible. So to export this one more time, go to your wrench. Or you can keep playing with this, just keep playing with layers and have some fun with those brushes and do it. So here I will share. I will do it as a JPEG. I will Save to Dropbox or saved to iCloud or wherever it is that you save. I'll save it to resources and I'll call this cover to save. Saved. Going over to here. Photo. Insert from cover to make it bigger. Guys it that is it. Watch for. Next class is where we will do more spreads together and I will teach you more and more and more ways to use these two programs together for an incredible faith journey. Thank you for spending time with me. Good luck. Thanks guys. Bye.
15. Thank you!: Thank you for joining me on this digital journey. I hope that it blesses you and that you find a new way to enter into your faith and into worship. Join me on praise heart.net, where all things Bible journaling can be found. See you soon. Bye.
 Lisa Albinus, Digital artist and Illustrator