Transcripts
1. 01 - Introduction: Hey, guys, welcome to Beginning Photography
Comprehensive Start. This class is designed to launch you into the photography world, providing you with the
technical knowledge and creative techniques to create your first
desired result from Capture to publish. In this course, you will learn all the fundamentals you need to know to start your
photography journey, such as exposure control, in manual mode, white balance
for color correctness, and then from composition to simple lighting
fundamentals and editing. Of course, we live
in a world where documenting has
never been easier. Technology is getting
better and efficient. It makes your life
easier in taking photos. Unfortunately, those
technology is somewhat a double edged
sword too for those who understanding
in fundamentals. And that is why I'm
here to help you gain more camera confidence
as fast as possible. We'll be giving you
both theory and how to apply the skills in
practice to save you time. With that said, no
prior knowledge beyond basic photography
concept is required, making this class accessible
to a broad audience and ideally from a total of bigous into aspiring
photographers. My name is Edwin, and please enjoy the class.
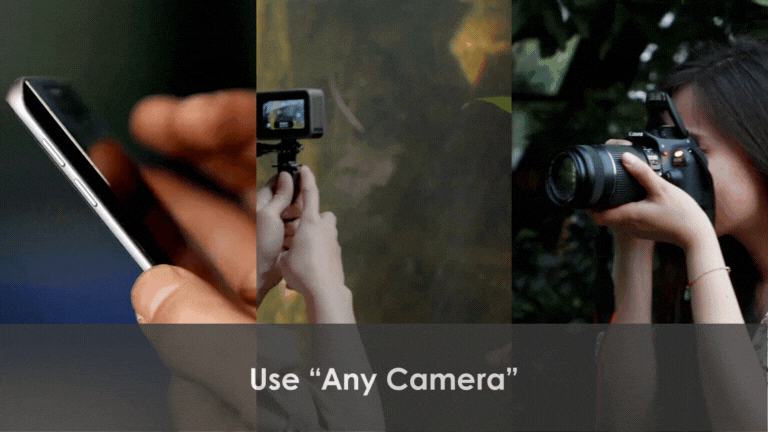
2. 02 - Class Prep: Hey, guys, for you to effectively going
through this class, you will actually need a few
things such as any cameras. You can use your phone
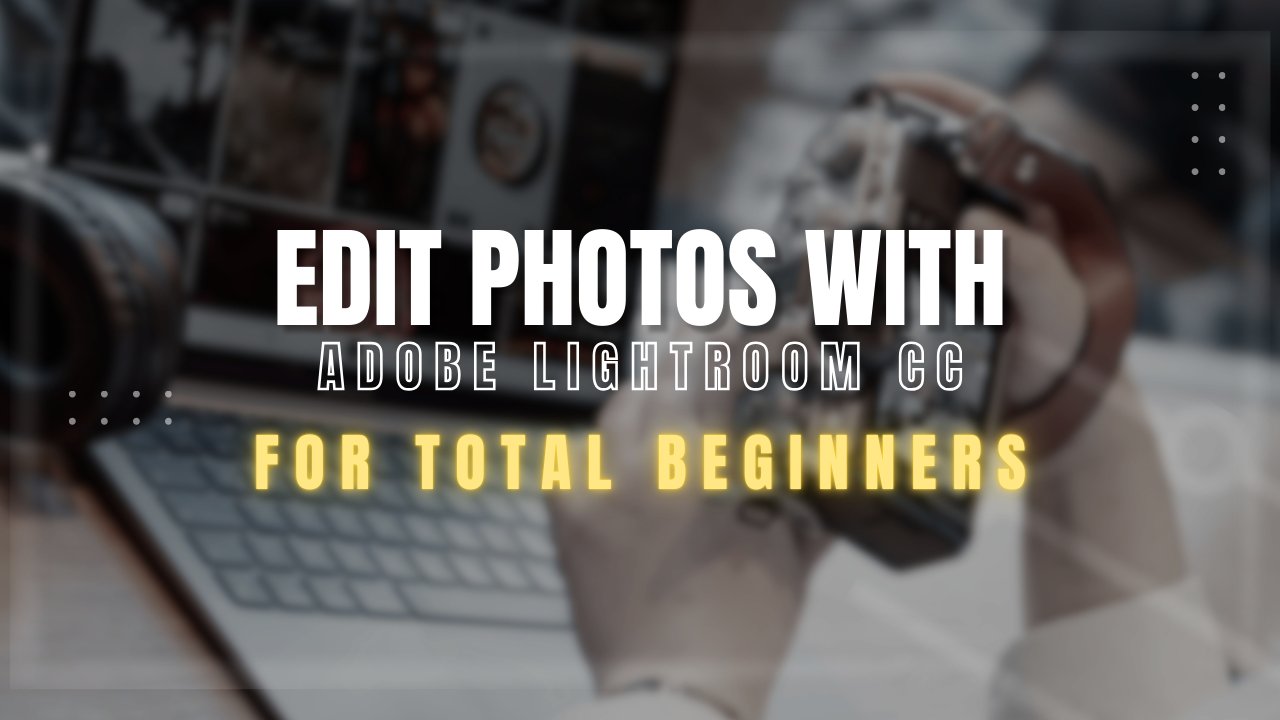
or compact cameras, DiselR, or even
mirrorless cameras. For those of you who
actually use mobile phone, I do recommend any kind of app available that allows you to modify your ISO and or shut a speed for
your phone camera. You will also most likely need other basic photography
gears such as lenses, tripod, and memory cards
to do the exercises. For editing, you may use editing suites such
as Canva or Snap set, which you can also get for free. Now, without further ado, please enjoy the class.
3. 03 - What is Photography?: So, what is photography? In most cases, photography
is the ot of capturing a still image using light and a medium such as sensor or film. Photography is a powerful
and versatile art form that has the ability to capture
the essence of a moment, convey emotions, tell stories in a way that transcends words. It can also capture something
that is not seen as usual, such as soft water streams, aurora, star trails, and minimo. The only problem is, photography requires so
many things from planning, capturing, editing,
publishing and printing, which is why it can be
confusing from time to time. Let alone, we often get helped by our automatic
settings in our phone, which can lead to a lot
of confusion when we are trying to get to a more
advanced manual settings. Now, as we don't
want to deal data into history and how
great photography is, let's move on with the next.
4. 04 - Whole Approach: In this lesson, I want you to understand a whole
approach in photography, which includes four step
iteration process called Plan, Capture, edit, and publish. This approach is
necessary to get a bigger picture of how to come up with a cohesive workflow from the first step to the end. Now, a lot of
beginners tend to be one sided with the
mindset of fix it and pose a separate
process to fix all of the mischief they have
done on their camera. But I want you to have a concept of editing
as an extension of the camera as it allows you to be more creative during capture. Now, let's go through
it one by one. Shall we? The first one
being plan pre production. In planning, you would be asking questions like,
where will this go? Social media, Whatsapp,
prints. What is the format? Is it going to be
landscape or portrait or square? What is the mood? Is it happy or sad or cool or mysterious? What about color? Which color should I choose to incorporate the right mood? Where is the location? When is it set? L lighting
direction and quality? Now, you want to incorporate as many questions in
the planning phase so you know what you want to achieve in capture and editing. Number two, capture
or simply production. This is where your camera
and lighting skills are tested to the limit? It is often required for you to be flexible with how you set them up as different areas will require different settings
from time to time? This course is mostly
intended for you to be more confident in this
section of the production. Number three, edit
or post processing. An edit may not necessarily mean to
make your photo better, but also an extension of your camera by using
softwares like photoshop, light room, Capture
one, and more. Now, it might sound new to you, but there are a lot of things in the camera that you cannot do, such as scrambling your
face parts around, removing unwanted colors
or objects, et cetera. Most people get it wrong
here, where they say, fix it in post instead
of enhance it in post. Yes, of course, you
can fix it in post, but that gives us the mindset of being sloppy during
capture is okay. And I don't want you to
be sloppy because it removes a lot of
homework in post. Number four, publish. Learning where you are publishing
it on will, of course, give a lot of decision making pointers in all the
previous steps, because sometimes you may
need a landscape format, another more portrait,
square, and so on. Now learning the final engine is a mass for most photographers as it will dictate how we capture and edit
for these mediums.
5. 05 - Exposure: In this lesson, we are going
to learn all about exposure. Now, exposure refers to the amount of light that
reaches the camera, sensor or film,
determining how bright or dark an image will appear
after we capture an image. The main reason to nail this
is due to the fact that exposure is a
fundamental concept that affects not
just the quality, but the look and
feel of an image. It involves balancing
three main elements, Io, shut a speed, and aperture, which are often referred to as the
exposure triangle. Each element has
its own impact on the exposure and the final
look of the photograph. Now, most classes out there will have different ways
of explaining this, but my version goes a
little bit like this. This is the same exposure
triangle as per user, but I want you to
know that since we will be dealing with
full manual exposure, not even semioo, I want you to know that each of these
parameter has two traits. The first being each
and every one of them, able to make a picture
look brighter or darker. The second one,
as stated before, has different unique
effect to its own. So in short, we can
make any kind of settings we so desire
as long as we know the unique results that
we want or can achieve by adjusting the unique look first before the
exposure or brightness. The brightness pot can
be achieved later with the settings that are less
prioritized out of the tree. For this part of the class, since we will be using
manual mode in our camera, I will briefly explain
how to achieve that in both pro camera
and on your phone. For your pro camera,
simply find the knob at the top with all the
different dials and then select the appropriate
mode usually seen as M. Which stands
for manual mode. Now, don't forget the fact
that manual mode can still be semi auto if you set your
ISO on auto that is, simply move the ISO setting
to anything other than auto, and we are good to go. Now, we need to identify each of the nobs
by moving them to one direction and
seeing which one of the settings are affected
stated in the title. Usually, the ones in
fractions are shutter speed, the ones in commas
are apertures, and the ones in hundreds
or thousands are ISO. As for the foam, it is
a little bit tricky, and I want you to
use an app that can make you able to set your
camera setting manually. I personally use mera, not because it is the best, but because I already
own its full feature. Now, as soon as I start the app, I can see that there is
an exposure setting, so I'm going to go there first
and set it to custom mode. Now, notice that there is no
apter setting as this is one of the downfall of having no
adjustable lens in our foam. Not because it can, but because of the sheer amount
of buck it creates. We are starting to see
foam with lens attachment, but it is still debatable
whether the function really will beat its
portability function. Now, we are starting to see
phones with lens attachment, but it is still debatable whether the function really will beat the function of having
a portability of a phone. So now that you know how to
set up your camera manually, let's move on with the
next lesson. Shall we
6. 06 - ISO: In this lesson, we're going
to talk about ISO and how it affects our brightness and also a unique effect
called noise. The ISO is just basically stands for international organization
of standardization. And in our camera, it basically controls how much
our sensors absorbs light. So the ISO in our
cameras can be numbers like 100, 200, 400, 800, 1,630 200, and it can be up to like two thirds of a
value of these, right? You can find them
in your own cameras like we previously did
in our previous lesson. And this means that we
have the ability to control how much amplification we actually apply to our image. Now, as the settings
go higher, of course, the brightness of the
image will go up, and so does with the thing
called the digital noise. So this is the unique effect of what I so will actually
do towards your image. It will affect the amount of digital noise that
is in your pictures. So the more value you put
in your amplification, you get more noise
in your image, just like the analogy of sound, when you actually
amplify sound a lot, you actually get a lot of
noise in the background. So it also happens here when it comes to light because
light is also energy, and when we amplify, we get a lot of noise, okay? Now, the thing with noise is
that noise is very different when in comparison with grain when we actually use
film back in the days, because noise is simply
just a variation of brightness and color in each pixels when they are
placed next to each other. So noise is a little bit more
nasty compared to grain, whereas it is a little
bit more random, there's less variation of color, just lots of scratching
like grains. That's why they call it grain. And noise is just nasty because of the
variation of color, and it degrades the quality of the picture by making it
look like there is less and less and less of quality or sharpness
due to the fact that there is a lot of variation with color and also brightness. Now, so if you want to have
the best looking image, it is often desirable
to actually only use the lowest
ISO possible. So, of course, using the
lowest ISO possible, will really depend
on where you shoot and the amount of light that is available in that location. Now, as explained,
we're actually trying to say that ISO can
actually absorb more light, but in fact, it cannot. What ISO does to your image, it actually just amplifies. So it does not actually
do an enhancement or make more light
into your sensor. It just means that there is more light being
amplified in your image.
7. 07 - ISO Exercise: All right, guys,
this is going to be the exercise for changing ISO. Now, for those of you
who has a mobile phone or even a pocket
camera or even a DSLR, just like this or a mirrors, we will get through
them one by one, and for now, we're going to
do with the pro camera first. Now, with the pro camera, a lot of the dials are already built into the system itself. So there's a lot of
buttons here like the ISO, the, the front, and
also iris at the back. Now, what I want you to do
because we're changing ISO, you need to press and find a
button within your camera, either a mobile phone
or a pocket camera, or even your mirrorless, and it's usually located
somewhere within the camera. What I want you to do is
now to choose a low ISO and a high IO and make a picture for each
one of these settings. So you need to set
your ISO at a 100 or even at your highest ISO
available inside your camera, and see the result for yourself. So I'm going to take a picture
right now with my ISO 100. I'm just going to take
a picture over here. Although this is a
very boring scene. However, I just want to
show you what it means to have high ISO and low ISOs. So I've taken a picture
of the bushes right here in ISO 100 and ISO 16,000. And as you can see,
the result here, that both pictures have different qualities in terms
of their digital noise. Now, before we continue, I want you to be able to
set your own ISO and figure out which highest
ISO that you're comfortable with a lot of
the photographers out there, they like to debate
whether or not to use the lowest setting or
even the highest setting. The noise itself,
it really depends on where your end
result will be, usually if it's on Instagram. Noisy images tend
to disappear when you compress them
into a smaller image. So another tip that I would like to give is this Sonny 16. And usually whenever you're outdoor like here in
the middle of the day, you would usually
use an ISO over 100 and shut a speed
1/100 and in F 16. Just bear that in mind
that when you're outdoor, you're going to be using
low ISO most of the time. Play around with your image, see which one is good
for you and good luck. That will be the exercise that's continue on
with the lesson.
8. 08 - Shutter Speed: In this lesson today,
we're going to learn all about shutow speed. Basically, shuto speed
is just all about the amount of time your
camera accepts light. Now, a camera have many
parts included in them, which is a lens and a camera. But inside the camera, there exists a lens, an aperture, a shutter, and also a sensor. Now, the light actually goes
through them one by one. And there's this thing
in the middle here just between the aperture and the sensor is
called the shutter. Now, this shutter right here, this box is actually something that will block light
out from the sensor, and it actually has a door in the middle that
can go up and down. By the amount of light that is required for you
to capture light. And it can also close back down. And as Shadow Speed
deals with time, it is Ashley counted
with time denominator, which is seconds and is usually
denominated in 1 second, half a second, 1/4, 1/20 fifth, 1/100, 1/1000, et
cetera, et cetera. Now, the thing with time is that the
lesser diffraction is, there will be less and
less and less and less. This is where most
people get it wrong. I'll tell you later in
the future lessons, why? You need to get this straight. You need to know that if you actually increase
the fraction, you are actually getting
less and less light. So, in a sense of way, right, because we know that shutter
speed involves duration. So the more duration we actually put in
our shutter speed, the the more brighter
the picture gets. And the faster that we
actually open up the shutter, we will actually
get a darker image. However, the opposite is also true when it comes
to the unique effects. When you actually open
up more with more time, you actually take in more
motion blur because you're opening up more lights to
have more streaks in them. And you will actually
get less motion blur if you actually
have less duration. And this is called the
freezing of motion, and the opposite is
motion blur, right? So just like this scenario where I'm actually taking a picture
with less and less time, you actually start
to see the freezing of motion of this swell, and this will be very handy
when it comes to shuto speed. So simply put, if you
want more motion blur, you simply open up a lot longer. And if you want less
motion blur and get a crystal sharp image
of a moving object, just reduce the amount of time you require for you
to capture an image. Now, there is another name
for a slow shutow speed, which is called
the long exposure. Is kind of the same. But anyway, let's move
on with the exercise.
9. 09 - Shutter Speed Exercise: So now we're back in the
exercise, and this time, we're going to be
changing shutter speed, which is our second parameter
in our exposure triangle. These settings, you can find
them in your pocket camera. You can also find them
in your mobile phone, but of course, you would need an app to actually change it. Pro cameras like
the A seven here, you can actually change
your shutter speed in one of these dials here, whichever has been set to
set your shutter speed. There's a lot of cars coming
here and I'm going to take a picture of them with
a slow shutter speed first. I'm going to go slow
shutter of one tent. Alright, here comes a car, and I'm just going to
take a picture of it. And it's gonna be a bit
blurry from my experience. Now, he's actually a bit blurry. Now, there's another car coming. I'm going to actually
make it faster. So now, this time,
this car is not actually having any
kind of motion blur. So you want to play
around with the motion. There's, of course,
from the slowest, which is not moving
at all or stationary. And then there's
people walking around. There's also people running,
there's cars moving. You need to get yourself familiarized with how
the objects move. Also, how when you're moving, let's say when you're in a car, or even when you're on a boat, this will definitely affect
the way that you want to actually use your shadow speed depending on your situation. Now, since this is a perfect
spot for me to pan a bit, I'm just going to try
and wait for a car. I know there's a tree here, but we're going to try and do some panning with a
slower shutow speed. There's one going
there. Almost got that motorbike in
terms of panning. He comes the another
car. All right. P. Alright, I actually got that. As you can see the result, you can do this kind of panning. Of course, you can
actually do this kind of effect inside the
editing as well. Practice and get yourself familiarized with this parameter called the shutter
speed. All right. I'll see you again
in the lesson.
10. 10 - Aperture: In this lesson, we're going
to talk all about aperture, and this will be
our final parameter in our exposure triangle. Now, aperture is very
similar to shutter speed. However, it is a hole
that is in the middle, and it can actually
make itself bigger or smaller depending
on how much light we actually want to
go through the lens. Now, when it comes to aperture, the number is represented
with an F at the front. Now, it's a little bit different when it comes
to everything else. It just seems that when the number is smaller,
it gets bigger. That's because this
is also a fraction. So F is meaning focal
length divided by two, so let's just say the F is one. So 1/2 is half, 1/16 is, of course,
a lot smaller. Now, back to the topic
at hand, aperture, when you actually open up, right, you will get
a brighter image. And when you close down, well, of course, you get
a darker image. However, there is a
significantly unique effect that is done when it
comes to aperture. When you open up your aperture, you actually get a
shallower depo field, meaning that
anything that is not in focus of the lens
will not be in focus. But if you actually close
down your aperture, you will actually
get a bigger dep of field like shown here in the diagram that
you can actually start to see the
duck more and more, even though the duck at the
back is not being focused. Now, as you can
see, the picture on the left shows a very
shallow depo field, and the picture on the right
shows a bigger depo field. Now, in this case, we want to be able to control our depo field, not because we want shallowi bouquet or anything like that, but we just need to know whether the things that we are
capturing is crystal clear, sharp, and in focus on it. So a lot of the time,
people actually get confused whether
they should be in Shallow Depo field or
bigger depo field because bigger Depo field just sounds like capturing image
from a mobile phone, which is not interesting,
but trust me, there are times when you
need a bigger depo field, depending, of course, on
what you are shooting. So let's continue on with
the exercise, shall we?
11. 11 - Aperture Exercise: So in this exercise,
we're going to change our last perimeter, which is called the aperture. And frankly speaking, for those of you who are
using mobile phone, most of the time, this
is not available yet. I know there's actually
a student of mine, who actually told me that there is the one with
the lens attachment. But of course, it is
still a bit bulky, and there's not enough
lenses out there that can actually give out good
result in the end. But overall, you can actually change it in your pocket camera. You can also change it
in your pro camera, and most of camera, other than mobile phone, of course, has this setting. Now, I'm going to use
the Shallow depo field, which is going to be on F 2.8. I'm just going to
take a picture of this camera right here
with a shallow depo field. So I'm now on F 2.8. I'm going to take a
picture of this and boom. There you go. Now, I'm going to use a deeper depth
of field this time, and I'm just going
to shift in between. So I'm just going to go
from F 2.8 to F 5.6. And then I'm going to go F 11. And then I'm going
to go to F 22. Now you can see a lot of
changes within the depo field. So there's a few
other things that you do need to know
about aperture is that when it comes to
having very sharp images, you really need to be picky
about your focus point, and you really need
to nail that focus. And not to mention
that you actually need to also not forget about
thing called aberration. Now, aberration is
basically when an image goes a little bit more not sharp and you get a
lot of purple fringing, and then the edges get
a little bit unsharp. Now, this is because some lenses needs to be adjusted
with a software, or you can actually bump up your aperture up from
your highest opening. So let's say you have a 2.8, you need to go from
F four or F 5.6 to actually reduce this aberration and increase sharpness
of the edge. Of course, aberration
happens a lot when you have a reflective object such as
diamonds or even glasses, anything that is very shiny
and highly reflective. This often happens to jewelry.
12. 12 - Exposure Triangle: In this lesson. We're finally
going to get to know how to put all the three parameters together inside the
exposure triangle. Now, an exposure
triangle is just basically this triangle
right here on my right now. The problem is that there's three parameters
that we need to set. Now, this is a bit
problematic when it comes to newbies or even newcomers
like you, basically. Now, you need to choose two out of the three, that is the most priority when it comes to the unique effect. Now, let's just forget
about the brightness first. Like I've told you in
the previous lesson, we want to know which one
that we want to prioritize. Is it noise? Is it motion blur? Is it depo field? Now, out of the three, let's
just say that I've chosen, I need to have the
best quality picture. So I do not want to know. So that's my first priority, which is IO, right? So I put my IO down onto the lower setting. Now, my next one would be, Hey, I need to have
a shell de field, so I'm going to set that into a let's say F two
inside my camera. And that will be two most prioritized parameter
inside my setting. Now, the least prioritize in this case would
be shutow speed. Now, I would find my brightness using shutow speed this time because I've
already set my ISO, I've already set my aperture. And then now I'm trying to find my brightness using
the shuto speed. Now, It can also be the same if you prioritize IO and
then shadow speed, then you would need to
sacrifice your aperture, and if you sacrifice IO, then you can also prioritize
shadow speed and aperture, and so on and so on. It's just make things so much easier because
you don't really care which one should I adjust according
to the situation. You just want to be focused on the unique effects
that it creates before you move on towards adjusting your brightness
using these settings. Of course, there's
a couple of tricks and also a couple of things that you might have to
adjust during using or, you know, when you're
using this technique, we'll get to that in the
exercise, all right?
13. 13 - Capture Modes: So in this lesson, we're
going to talk about capture modes and how
our camera behaves, when we actually use them, so we don't want them
to misbehave, only. Okay, let's go Now, as I've simply explained, a capture mode is just
basically how a camera behaves, when we are taking pictures. Now, in a capture mode, there are three main things
that you should know, which is shoot,
drive, and focus. And in shoot is just basically
how the exposure behaves. In drive is how the capture rates behave,
so how many frames, et cetera, I focus, it's just basically how
focus works, right? Now, The first one being shoot. There's actually a lot of mode, you know, in shoot in drive
and focus of obviously. But we want to start with shooting mode
first because this is important on how we
handle our exposures, right? So shooting modes, right? There are three major groups, which is auto, scene program, aperture priority,
shadow priority, manual, memory,
et cetera, right? But the big groups are, there are full auto, semi auto. Full manual or
static and memory. Now, the thing is that most
of the time when you start, you always start in full auto, and there are things that are called the aperture priority AV, TV, name it, right? These ones, they are called
the semi auto because some function of the aperture or the parameters are being
set by the camera. And it can also be when you are also under manual settings, because sometimes when
you're on manual settings, you can still set your
ISO as automatic. And this can be
considered as semi auto. And the camera will
actually behave very differently when we
are on different modes. So, you got to be careful here when we're choosing
the modes, right? Now, when we are
doing full auto, you can either select
auto or scene, right? And this is basically just automatic versus
pre set automatic. Right? In semi auto, it's just basically
aperture priority, shatter priority
program, or manual when you are under
automatic ISO. Now, this is where
everything begins to shine. You want to control everything, and all the parameters,
the triangle, the exposure triangle
is all being set manually according
to what you want. Course, you can also set them
up in a static or memory. Usually in canons stated
as C one and in Sony, things like that, it's stated in M. Camera behaves differently. They have different
abbreviation, they have different numbers, they have different letters. But of course, the
function of this mode is to store a setting either
on auto or on manual, and you get to recall
it at the memory side. You actually store
the setting first and you can recall them
in the static or memory. Now, drive is very important. Because Ashley defines on
how you take your shots. You can either take
a single shot, you can either take
continuous time shot or even bracketed shots. And it's just basically
the amount of clicks that you make
during your shots. Now, I personally
like single shots, and I like continuous shots. Of course, if you
want to do selfie, you can do time shots, right? Te shots can often be used as a remote trigger
if you don't have one, and you don't want
your camera to shake whenever you press
that shirt button. Usually, we use
continuous shot when we shoot moving objects that are really fast or even events
that doesn't happen twice. It just happens once, right? And you want to take as
many pictures as you can get during those
momentous events. Of course, back then, when I used DSLRs, I can use single shots
like a continuo shot. You just keep clicking
and click and clicking. But nowadays, a mirror
list is a bit more clunky, and you might want to
use continuous shots, but on a lower setting, so you actually get lower frame rates when it comes to how many
shots you get, right? Of course, sometimes it
just gets really crazy. You can do like 100
frames per second, or 60 frames per second
with the A nines and the higher N mirror
les these days, right? Sometimes you don't
want to do that. Next one, being focus mode, you want to be able to
control your focus as well in terms of whether you're moving or
the object is moving, you want to be able
to control that. So it really depends whether the subject
will move or stay, or you, the photographer
will move or stay, or both of you are moving. If none of you are moving it's best to
stick with single focus, because you can select
a single point, and that will be it. That will be the
end of the focus. If one of you is moving, it's actually best to stack
with a continuous focus mode. And basically, it
just goes like this. Single focus, when you press it, it finds it once, and
continuous focus, whenever you're on
the half press, it's always looking
for a focus point, and basically hybrid focus and many more focus modes are in there obviously in
cameras these days. But the best part for me in my experience is to stick with single or continuous
from time to time. So, that will be all for
focus at this stage. We will be dealing more with
focus later in the lesson, but I just want you
to get through so that you're able to handle your camera
really well before, you know, moving on to
more advanced features. Of course. This helps
in exposing image, but for now, let's
continue. Shell.
14. 14 - 6 Unique Effects Exercise: Now we've come to
this and you've already known all the
three parameters. You need to be able
to make images that are low noise and high in noise. And then you will need to
make images that has a lot of motion blur and
also no motion blur such as freezing motion, and you need to be able
to make images that has shallow depo field and
also deep depo field. So what usually
happens in the field? This is the kind of common cases that you would actually met. Hey, man, what's your setting? Am. My setting is. All
right. Let me try. It's dark. It's
not what I wanted. Nana, I got it right. It's okay. But it's not right. It's not right at all.
I'm getting it dark. Are you sure it's
not your camera? I think your camera sucks. Now, of course, it doesn't
have to be this way, does it? So we're going to
do something like take two and then forget one set your two initial parameters according to your
unique effects, and then you will actually
use the last parameter to find the correct brightness for the image that
you are looking for.
15. 15 - Lighting Basics: In this lesson, we're going
to learn lighting basics. Now, lighting is important in imaging for photography
or videography because light is basically the paint that we want
to paint on our canvas, which is our camera. But the problem with
lighting is that it can be misleading
time to time, and it's hard to analyze if you don't know what
you're looking at. Now when we want
to learn lighting, we actually have to know
these five properties, which is direction, quality, color, power, and fall off. But for the sake of
it, being basic, we only need to
learn two right now, which is called
direction and quality. Now, the thing with lighting, I really like this sentence. It's called the
shadow. Never lies. And most people, when
they first try to analyze lighting in an image
or even in an environment, they always look at the light, but never or ready
see the shadow. Now, The shadow never lies because the opposite of
light is always shadow, and the opposite of
shadow is the light. Now, if we actually try
and analyze this ball, the light actually comes
from the top left, just like this, right? So there's the light,
and then there's the shadow right there
at the back of the ball, directly the opposite
of the lighting. And the same is also true
if there is a shadow, and there's always
the opposite side is where the lighting from. Now, if we actually want
to analyze this picture, we can do so by looking
at the shadow first. So now let's look at the bottom left here where my mic stand is. There's the high light
here at the top, and there is the shadow. So the direction of the light is actually from above me, right? And if you can see how
my face is shaped, the shadow is directly
underneath my chin. And also underneath here. So this high light here. So obviously, the light
is coming from here. Okay? So, and this is
where my lighting is actually coming directly from
45 degrees up here, right? So you can actually analyze
lighting of how things are. The second one, being quality
is not really about brand. It's not exactly
about power as well, but it gets a little
bit difficult unless you truly understand
what it is, right? So there's two main variations of quality when it
comes to light, which is heart and soft. Heart, being heard itself will actually create a shadow
that is not graduated, is just a straight cut, okay? So soft being soft itself, the shadow that is casted on anything has a little
bit more of a gradation. So it's not a very hard edge, it's a very soft edge. You got to look at the edge, not the actual shadow. So the edgia, right
is very edgy. It falls straight away
from dark to light. Okay? But this one, has a
little bit of a gap, right? So it's a lot more wider, and the shadow itself is a lot softer when it
comes to the edge. The thing with art and soft
is that hot lighting is created by a small light in
comparison with the object. So if the lighting is actually a lot bigger
compared to the object, it will be soft. Now, soft boxes can also be hot. And that's a problem because
sometimes we actually take a photograph of something that is a lot bigger
than the soft box. Yes, it's very misleading
because it says soft box, it should be soft. No, wrong. If your soft box is smaller than the object
you're taking photograph of, let's just say a human. Of course, your image or
your lighting will be hard. Not as hard as it used
to be, but just harder. Also a second variation
when it comes to lighting. There's specular and diffuse. Now, the true difference is that when it comes to
specular lighting, there's a lot of more hot spots involved in these lighting. Whereas diffuse, it sort
of looked like that everything is more spread out, and there's less high
light being formed on one spot or any kind of
form because in lighting, you can actually have a
specular hot lighting, and you can also have a
specular soft lighting. Can also have a
diffuse hard light and also a diffuse soft light. Now, the thing with this is that that's why it kind
of makes it hard to actually analyze a light
because there's actually four variations that you can make depending
on what you use. Now, let's just say
that we actually have our torch and
our soft box, right? And the thing with
torches and soft box is that they have
different materials on how to handle light. So the torch itself, being a torch will actually direct light directly
straight forward. That's why this actually creates this specular look
because the direction of the light is actually moving forward straight
into the object. This is how it becomes specular. While the soft box
being diffuse, will actually spread
the light beam around, creating this fill in look when it comes to having
use a diffuser, right? So again, because of the material that is being used inside a soft box
and inside a lamp, you will actually get
a different result. Usually, the one that is more
specular is usually being reflected directly while In soap boxes or a diffuse setting, the light gets spread around, something like this, right? Where the light is coming, it gets reflected straight
away in a straight line. Whereas, if you
are reflecting it on a white background
or a diffuser, you would actually
spread the light around. So you have a direct
reflection and an indirect reflection that actually spreads the
light everywhere. So that's why when having a
directly reflected right, you would get a specular light, where as if your lighting
gets spread around, either being bounced off a non reflective material or going through a very
diffuse material, you would spread
the beam around. Now, the number one denominator that will determine
the softness of the shadow is the area of the lighting in comparison
with the object, like I said, previously, if you actually have a big lighting that is a
lot bigger than the object, you would actually
get a soft light. In this example, we actually have a large diffuser, lighting, a small subject,
meaning that we will actually get a soft
diffuse lighting. If we actually make
the soft box smaller, we actually in turn, make the lighting
a lot more hot, but it is still a
diffuse lighting. Now, there's another
factor that will determine on how soft or how hot
a lighting will be. And that is the distance between the lighting
and the object. So if you actually
increase the distance, it will actually make it a lot. Harder in comparison with
the ones that is closer. So let's re analyze
my photo again. We actually have a soft lighting because of the gradation
of the shadow. And when it comes
to specularity, it's not exactly that specular,
because, as you can see, it's a lot more diffuse
because I actually have a decently large soap box
right in front of me.
16. 16 - Torch Light Photography: So, we are back in the studio, and we are going to do slow shutter light painting
exercise that I'm going to show you just to show
the power of lighting and how it can make a
difference in your picture. So we actually have a simple
object right in front of me, and I've actually set up
my camera right here to be capturing this
in front of me, but without actually
using any kind of, like, funky lighting, but we are going to actually
use the small ing. That big lighting is only for the sake of
this video right now. This one will be mostly the one that we are
going to use to light up this subject to make
it look like there's a softbox lighting this subject. And of course, we're going
to need to have some kind of editing later to
combine them all together. But before we do that, we're going to make it look
like there's going to be a big softbox coming
right out of it. Okay? So let's get on with it. Now, I'm going to turn
the light off here. Put in the darkness. I think we're going to need
to use a very high ISO. Whoa. Even even the camera right now, I can't even see it
because it's just so dark. So, we're going to use a slow
shutter speed of 1 second, and we're gonna put
this on a timer. Okay, we're going to
have to put this on a two second time, and then it's going to take pictures for us for a
duration of 4 seconds, right? Now, I'm just going to
take a picture first and get the result straightaway. I'm going to play. It's still dark and nothing
is inside. Okay. Now, I'm going to
start the timer again. But this time, we're going
to use our lighting, okay? Like this. So we're going to use this lighting to actually
light up the sides, and then this side
as well. Okay? So we're going to do a
bit of light painting. Now we're going to
press the shutter. We'll see the result.
Whoa. Look at that. This is madness. Alright. If you guys can't see it, I'm gonna show it to you
a bit. There you go. Wow. This looks like
it's been caught by something that is not with
a torch light like this. And this is just showing you that even with
something so simple, you can get something so
amazing that it looks like it's been caught
with a true soapbox. Now I'm going to try
and do this, right? And I'm going to try and get it like it's
gonna be back lit a bit. So I'm going to take
a picture here. All right. And then I'm going
to see what's happening. This looks like so back lit. Okay? I'm going to
take another picture, and then I'm going to back
lit everything, okay? I'm going to play around
and see whether or not I can actually use
a longer duration, and I'm going to use
8 seconds this time. Okay, so we have
more exposure time. I'm just going to put
the light down here. And I'm gonna expose
more of it to the life. Ah, I still had more time, okay? So I'm sorry it's gonna be a bit dark looking
at this because, you know, Things
are things, right? Ah. Fantastic. So I'm just gonna get more
exposure out of this. I'm gonna take my one last
chance on this, right? One, two, three, four, five, six, seven, eight. I still had more,
but it's all right. We can be done with that, okay? So, This one is actually a single exposure because I've only taken
a single exposure. So I'm just going to do
8 seconds on the left. So I'm going to do
a back light here. And then I'm going to do
actually You know what? We're going to do a three
point lighting with this, and then we're going to edit
it inside Adobe photoshop. Okay? So we're going
to take first picture. Here's our first exposure. Our first soft box. All right. We're going to take another
one. Here's our back light. Alright. And then we're
gonna take one last picture. And it's gonna be our other back light from the other side. All right. I guess we are done
with that, guys. Let's go to Photoshop.
Shall we? All right. Now, I guess we're done there. Now, let's go to photoshop and
edit this ph so we can get a looking image
with just a fight.
17. 17 - White Balance: In this lesson, we're going to talk all about white balance. And pretty much,
white balance is just about how to make
white becomes white, and white balance can make
white more bluish or red. Now, in our camera, there's three main groups of
white balance that exists, which is auto,
preset and manual. Basically, in automatic mode, you basically let
the camera take care of it for you
automatically. In presets, there's an
amount of preset based on the situation according
to the description that has been given by the
manufacturer of the camera. In manual, we actually choose a nominal value according to the available option based
on something called Kelvin. Now, in auto, of course, the option being auto, there's usually AWB or Auto. And in preset, there's Tungsten, Florsen, Daylight,
Underwater, cloudy and Shade. And of course, these
are names of lights. Of course, also names of condition like Underwater,
Cloudy and Shade. But in Manual, there's Kelvin. Calvin is just a name of a person who invented
this nominal, right? And it basically is a measuring unit of
light temperature. Now, when it comes to Kelvin, the problem with this
is that I often find my student tend to be a little bit flip flop when it comes to understanding this. The reason for that is because
the lower value it is, the colder it is,
but our humans, our humanizes, are actually
seeing the light as reddish. But when it's actually
hotter, is actually bluish, as you can see on
the chart here, with the fire on your stove are actually bluish
if you do notice. But in something like campfires, you would see the
flame to be red. Now, this is because the flame on the campfires
are actually a lot colder, even though it's red, right? And The ones in the stove are actually blue because it is
actually hotter. Now, the basic sense is that
you would actually cook a lot faster if you are actually cooking it
with a stove or, you know, cooking your meals. And this can be a little bit confusing when it
comes to imaging. So just just hang on tight, make sure that when you
see a bluish light, right, it can actually mean that
it is a hotter temperature, so you want to crank up
your light temperature on your white balance if
you see a bluish white. Even though even though
you're seeing it like white, but the camera is a little bit less
sophisticated than the eye. So yeah, just crank it
up or crank it down. Now, the way we do this is either we remember the
presets of each light, like the ones here, like candle, Tungsten, flucen, daylight,
shade, and Cloudy. I usually typically
remember only tungsten, flusen, daylight and shade. The rest I don't
really remember. I just do it like this, right? So you have the white balance of your light in the middle, and then you have the
correct image at the top. And you also have
the white balance that you sat on your
camera at the bottom. If you would get the same
white balance on the image, right, you would actually get the correct
image, just like so. However, if your camera is lower than the actual white
balance of the light, you would get something
a little bit more blush. So you make a cross
like that, right? And also, you can actually
do the opposite as well. So if your camera is a lot higher than the
light white balance, you would get a reddish picture. Now, it is also true. So and vice versa. So let's just say that you have a reddish kind of like white, then, yeah, you're
a bit too high. And if if and if your
picture is bluish, you have a slightly
low white balance that is set on your camera in compared with the light that
you are currently using. Course, you can
actually make effects such as using false
white balance. In here, we're actually using the white balance of
3,200 on the camera. And the front light
that is lighting up the couple here at the front is changed with a
gel to be 3,200. So that means we are leaving
the sky to be 5,600, which is a lot higher in
comparison with the camera. Now, this effect gets
used a lot when we are using the technique
called day to night, and we're basically turning daylight or broad
daylight into night time. So that will be it
for this lesson, and let's continue on with
the exercise. Shall we?
18. 18 - White Balance Exercise: This time in this exercise, we're going to talk about white balances and how to change them. Now, in most cases, all of the cameras out there, including your mobile phone
and your pocket cameras, and even your
professional camera has a white balance setting. Now, just like we
previously mentioned, they all come in three
different group, which is called Auto
preset and Manual. Since we are in
daylight at the moment, we want to use the
daylight balance as I'm going to actually take a picture of this park surrounding this parking area. Now, I'm just going to
set my white balance from auto white balance,
AWB into daylight. Now, I'm just going to
take a shot right here. So we actually got the
correct white balance for this daylight settings or sunshine in the
middle of the day. Now, what usually happen is that when you are actually
doing manual, you often get into problems like when the scenes are too
blue or either too red. When we get to a scene,
we don't actually know what kind of white
balance we actually have, and we actually want to identify
it if it's too red ish. That means the camera is a lot higher than the
needed white balance. And vice versa, if we actually getting the image too bluish, we are actually using the
white balance too low. So I'm just going to use the lower white
balance right now, so we're just going
to go to Kelvin, and then we're going
to go to Kelvin 3,300. I'm going to take a picture. All right, and it's going
to be a bit bluish, and I'm going to change the
Kelvin again 8,000 this time. Be daylight is 5,600, and I'm just going to
take a picture bang. It's going to be a lot redder. It's going to be a lot more
orange because the Kalvin itself is too high in
comparison with the sunlight. Now, you can actually
use white balance to your advantage depending
on how you want to use it. A lot of people actually in
the filmmaking industry, they actually use a
lower white balance to actually make day to night. So let's just say, I
want to take the scenery and turn it into night scene. So I'm just going to under
expose it by a lot, right? So I'm just going to put
this on minus three, right? And then I'm just going to
change the white balance to Tungsten, which
is incandescent, which is obviously 3,200, and I'm just going to
take a picture again, and it looks like it's
going to be like moonlight. Although it's not moonlit. So it's going to
be really bluish. It's going to look like it's almost dawn or even like in
the middle of the night. And this is how cinematographers use these kind of techniques to actually fool you into thinking that this is
actually nighttime. So hopefully, you get to exercise a bit and see
in the next lesson.
19. 19 - Basic Composition: Composition can be really
powerful in photography and videography because it's not
just all about perspective. It's not just about making
an image looks good, but it can also tell
the story very, very differently with
different angles and also different perspective. Now, when it comes to my
composition right now, because I'm on a wide setting, it's generally be It's generally going to feel like
I'm inside my own studio, and it has a
different feel to it. And it actually tells
a different story. When it comes to the
close up, however, I'm actually trying to emphasize me and the background here, having the condition
that, Hey, you know what? I'm powering up your idea. So because I'm actually
limiting a lot of information out in the image, the story, the feeling, and the information
differs a lot, a lot more, okay? Usually, when it comes to composition in photography
or ideography, people tend to explain
it with the rules first. But I really want to explain in a very different way where the word composition
really comes from is just basically
composed of. So, let's just say that we have a picture of a
spaghetti, right? The spaghetti itself
is composed of pasta, meatball, tomato
sauce, and basil. But since this is
a meat spaghetti, would it be okay to put a fish in there or
even a dead fish? Not really, right? So, we want to say, that composition is
just basically what your picture consists
of inside the frame. Now, composition itself inside
the frame can be anything. Now, let's just go back to
that spaghetti example, right? So first, we have a spaghetti. And then apparently,
we have a fish on top, so this is a spaghetti meatball
with fish on top of it. And apparently,
it's a dead fish, so it's a stinky dead
fish spaghetti meatball, which has a different feeling towards what you're looking at. So it's got to do
with that emotion, it's got to do with information, and it's got to do what we
are seeing currently, right? But let's just say that the composition now
has become, Hey, someone is being served a spaghetti meatball
with a dead fish on top. This, in turn, will create a different feeling
and a different emotion, of course, when it comes
to the image itself. Thing with imaging is that content will be equal
to information and information will be
equal to emotion and emotion will be
equal to perception. So whatever you put inside this frame or
the picture itself, you really need
to choose wisely, what should be in the picture, and what shouldn't be
inside the picture. So let's just go through
that picture once again. So let's just say
that this time, I'm actually more focused or more zoomed in
towards the fish, even though that exists, someone sitting
right next to it, the information will only apply towards the dead fish
spaghetti, right? Now, we are actually
reframing our camera. Now we're actually
taking a picture of Bob. Now Bob has become the subject, and the dead spaghetti fish does not really matters
anymore in this picture, because it just has a
different information. But we can actually
start asking question, what is Bob doing
in this picture? Because no other information is actually included
in this composition. We could also go down, and we start to wonder, what this picture is all about. But apparently, Bob is eating dead fish
spaghetti meatball on top of Mount Everest, and we did not know
because there's a lack of information
inside the picture. This is why we really need to choose our composition
really wisely. Now, when it comes
to perspective, we can also turn around and
see it from the other side. But because we are seeing
it from the other side, the dead fish is now less seen, and the information
itself can be a little bit different when it comes to what we are looking, because it is less
seen, so therefore, the information is less, and there will be
less perception. So we can say that when
it comes to composition, We can make an illusion happen. Now we're going to start
talk about the rules. When it comes to the rules, there's just too many
of them out there, but I want you to know five of the most common rules
that I do use myself. And they are Rule
thirds, center framing, negative space,
and leading lines, which can also be sometimes the same with forse perspective. When it comes to composition, there's always lines that are
forming inside the picture, and there is always a hot spot that people
generally tend to see because of these lines meeting with the other horizontal
or diagonal lines. And we can actually put stuff inside the hot spots
or we can put lines on one of these horizontal
or vertical lines to actually make the
image more appealing. We can also use center, which is generally just
putting stuff in the middle, generating a
perception that hey, this is the most important
topic of the image. We can also put framing
inside a frame. Basically, a photography
or video is a frame, and we can actually deliberately put a frame
inside these frames, creating a very hot zone or an area that is perceived
to be important. Now, negative space
gets used a lot to depict the environment
around the subject. However, negative space
can also be used when we want to input a lot of
text inside our photos. So just bear in mind
that having enough space for a background
will actually tell more information
about the subject. Leading line, usually lines
that are being formed around the environment
will generally make the eye lead towards something. So it can be used with So
it can also be used with forced perspective where there is a line forming a perspective, sort of like going inside
an object or a subject. But usually, we can actually
get this effect when we have a hallway or anything
that is very long, and we can use a telephoto lens to create this perspective. So those are some of the
basics of compositions. Let's move on with the
exercise. Shall we?
20. 20 - Compose & Recompose: So now we've come to this
exercise of composition. Now, I've explained
to you before that composition involves a lot of rules like rule of thirds, center, yada, yada, whatsoever. However, what I really want you to focus on in composition is how the image gets
done and what is inside the image and what
is not inside the image. And it also involves a lot with zooming
in and zooming out, and of course,
composed recompose. You got to move a
lot of the time, so you can't just stay
still in one position. You got to move up,
down left and right, and really depending on how
you want to take the picture. Everything will change when
it comes to the context, when it comes to information, when it comes to the look
and feel, et cetera, right? So I'm just going to go and
turn this camera around, and I'll get you to see
what kind of picture we are actually getting when
we actually move around. So I'm just going
to take a picture of my camera right here, and we're going
to go from above, mid level and lower level, and you can see almost
the difference when it comes to changing
perspective at all the time. So I'm just going
to take a picture of this from high above. Okay. And then I'm going
to take a picture here. I'm going to take a
picture like this. Okay. We're gonna pan. The side. Now, since I'm on the other side of now since I'm
on the other side, it's going to look
a lot different. So the context of
the image itself is very, very different. Now, I'm just going to go
in and take the picture. Now, as you can see, there's going to be a car at the back, there's going to be
different kind of, like lighting as well. And of course, the scenery is a lot different in
comparison to before. And of course, you
got to move around. You got to look at
your background. This is a reminder when
talking about composition, every time you
recompose your shot, always make sure you also adjust your exposure
settings accordingly, or you would get a
result like this. So, of course, you're
going to need to look at your background, you're going to need to
look at your subject. Of course, the higher
the subject is, you're going to need to actually level up with their eye level. Of course, this is why I'm
squatting down, right? So when I'm actually
at the eye level, it is actually desirable, and you often quite see the image as the
same level as you. And when I'm below, it's actually going to be
a lot lower perspective. So it's like looking
down on a child, and when I'm higher, it's going to be
like you looking up. So Just a tiny bit bit of
movement left and right, up and down is going to
change the image by a lot. All right? So we're
going to move away to the next
lesson. Bye bye.
21. 21 - Focus Mode: Now, if you get
your focus wrong, you might have the wrong
context of the image, and you want to avoid this at all costs unless it is
intentional, like this video. This lesson, we're
going to talk all about focus and white matters. So first of all, you actually have a choice where to focus on, depending on your
context, right? So a lot of the time, when we're actually
taking pictures, we actually need to select, which are the subject, especially when it comes
to shallow depo field. It really matters
which one you choose. And the ones that are in focus are generally to be
called the subject. Now, let's just say that
we have the camera, flower, diamond, and the
background the mountain. So we have the foreground,
subject and background. Now, we actually are in focus right now
for three of them. But as we move the
focus forward, we are actually not
focusing on the background. And so forth, when we are actually moving the
focus further away, the ones that are
in the foregrounds are not actually in focus. Now, the question
that you should be asking when we're dealing
with focus is that, will the subject move or stay, or will you, the photographer
move or stay or both? Now, it is crucial to know
that inside our camera, there are multiple focus modes that we can choose,
either single, continuous, hybrid
or even manual, like the ones that I
use for my camera. Now, inside our camera
photography cameras, usually, we have the
single focus mode, which actually tries to find
the focus once you half press your shutter button
halfway through the shutm. Now, usually, you can find
your focus by pressing your shutter button halfway
on your shutter button. And this will actually
find your focus depending on the zones and depending on
your modes as well. And if you're on
continuous focus, when you're actually halfway, it keeps continually trying
to always find focus for you. And this is really helpful
when there's moving subject or when you're moving inside
the vehicle and or running, depending on the situation. So it's really good for let's say sports or
wedding, et cetera. Now, single focus might
help you when it comes to doing product photography or things that are
just not moving, and the camera just simply
doesn't move at all. But a lot of the time,
they find the focus first using the camera's
help or intuition, and then they manually refocus using the
manual focus ring. Now, of course, there's also manual focus like the ones that I'm using on my video
camera right here. And it really helps when the movement of the subject
is never moving at all. And you don't want
it to kind of, like, refocus all the time when you're recording or even stationary when you're doing photography. So now, let's get on
with the exercise for focus mode, shall we?
22. 22 - Focus Mode Exercise: So now we're going to
talk about focus mode for those of you who are new, don't worry about this
device right here, it's basically going to record what I can see inside my camera, and you can see all of the menus that I'm actually
fiddling with my camera. Now I'm going to actually
shoot the camera again. So we're going to go
here. Now single will actually get you a single point. Now once you half press, we'll actually stay
locked there, right? So it doesn't move
anywhere else again. Now, if we actually
change this one to AFA, which is automatic. Of course, it's going to relock itself again once you
get to somewhere else. So it's automatic, and
then it's going to keep finding the
scene around you, and it'll just keep
on doing that. Now, of course, you can actually do this with
other stuff as well, like AFC and DMF,
and manual focus. Now, manual focus, you're
going to need to use the lens, and it's going to actually
help me with the Zoom as well. So this is built in, and
once you find no focus, then you can take your picture, and then it will be done. For those of you
who are actually doing this inside a
mobile phone, of course, you need to tap on your screen on whichever zone
that you actually want to select as the focus if you're actually taking
a picture of somebody, you would actually need to tap on their eye or their face. Now, for pocket
cameras, of course, there's also this kind of
like focus modes as well. If they're not available, you can always use other focus modes just depending
on your situations. Now, for those of you
who doesn't actually have focus modes
that can help you. Let's just say manual focus
mode, things like that. And you actually need to
shoot to a certain distance. Let's just say something
like my camera right here. I need you to find
a distance that is equivalent towards the subject
that you're looking for. So, for instance, in my case, it's going to be this
ground right here, so I'm just going to turn
this into single focus again, I'm going to find
the focus here. And then I'm going to recompose to my camera and
then take the shot. Now, it's going to be pretty perfect when it
comes to the focus, not just because I'm actually
using deeper dep of fields. I'm also using the distance
and the focus point that is closer to the distance within
the intended subject. Now, of course, you
also need to switch around depending on
what you do need. If the subject is moving
in and away from you. Of course, you're
going to need to be in auto mode I really like to use single mode a lot of the time before I actually
get into the shot. But of course, if
it's a moving object, I get into auto focus continuous straightaway
from the get go. See again in the next lesson.
23. 23 - Focus Zones: Now, this one is important because sometimes when
you take pictures, you actually have typical spots where you want to
search for focus four. And sometimes things
can get in the way when you're actually using
automatic modes or a very wide zone. So, let's say, for example, in this picture, you are
actually looking for me. But since there are also
other images on the back, it might look for
images other than me. So zones are really
important if you want to nail your focus depending on your
framing all the time. Now, for focused
zones in our camera, we actually have a few ones that we can actually look for. Usually, in general,
there's white, medium, small spot, and track. The thing with white, it usually covers big
area, medium, some area, and it gets smaller and smaller until you get to
a point where nowadays, cameras can actually track
something within the frame. Now, the problem with this
is that as wide as you go, sometimes wider areas
look for areas that might not be suitable or the exact subject that
you are looking for. So it might actually look on this side instead
of on the subject. Now, when it comes to medium, you can actually select
zones like these as well. And there are smaller spots and smaller and smaller zones that you can choose from
within your camera. I like to use the spot
better because it actually pinpoint a lot of the subjects
that you try to find. And usually it's
really helpful when it comes to searching for
eyes and et cetera. As well, when you
actually take pictures, you usually use a composition
rule such as Role thirds. Now, you can actually
put the spot on a single spot near
where the hot spots are, and you can actually
find those spots to be focused on when you're actually
using spot focus zones. You can always track as well. So let's just say that
the subject moves, and the tracking of
these focus zones will actually help you to
keep track within the subject to stay in focus. And this can be
really helpful if the subject is moving away
from you or coming into you, but tracking can be a
little bit tricky when it comes to multiple
subjects inside the frame. And just something
extra when it comes to focus is Ashley has two different
methodology when it comes to searching for focus. First one is being
face detection. And the second one is
contrast detection. And usually, the first one will actually be more useful when it comes to fast moving subjects, and contrast detection will
be helpful when it comes to non moving and
contrasty objects that appears to have more contrast with colors and also brightness. So the cameras
that we are using, such as our mobile phones are mainly using contrast detection. Now, this is Why? A lot of the time when you're actually against a background, let's say, like a dark
background like me, it is a lot harder to find
focus because there's not a lot of contrast in
between me and the background. And thus making automatic focus
seems to be a lot harder. And that's why we need
to be in manual mode. So, let's get to the
exercise again. Shall we?
24. 24 - Focus Zones Exercise: Now, we've talked
about focus mode, but we haven't really
talked about focus zone. Now, focus zones will
actually help you determine which subject you actually want to stay in focus or which area you
actually want to stay focused. In general, most of the time, your camera will actually
be set on a white zone. If you actually see it here, we are actually on the
white zone at the moment, so the focus area is on white. And as you can see, sometimes
it may struggle to find which one we actually want to shoot either the
car or the camera, the car, or the camera, and it gets really hard. Now, we actually
need to determine which area we want to shoot in. So, we're going to go
with a smaller zone. Let's just say this
is the center. Now we can actually set this at the center or that
at the center. Now we actually
have other places as well like this zones. And we can actually move the zones towards where we
actually want it to be. So we can actually
put it back to the center or left, right? And it's still struggling
a little bit because the car is still on the zone. But if we're going to move here, it's going to find the camera. It's going to find the car. It's going to try to
find the camera again, and still struggling because the area is still quite wide. We're going to make it
a lot smaller as well. We're going to choose
a flexible spot, and we're going to use this. And of course, it's going
to lock on all the time. We're going to move
again, recompose. It's gonna keep
on locking again. It's going to lock.
It's going to lock. It's gonna lock.
It's gonna lock. Now, this is really helpful for those of you who are
actually want to shoot in a rule of that kind of
like composition where you actually have a hot
spot on the top left. So let's just say, we
are actually going to put the flexible focus
spot right here, right where the hot spots are. And then we're
going to recompose, and we're going to
shoot this and bang. Now, this is really
helpful for those of you who actually want to
shoot a certain spot, and there's a lot of background,
there's a lot of noise, and the camera
sometimes struggles a lot when it comes to
finding focus for you. Now, you're going to need to
be able to do this manual or even force kind of like manual
override to your camera, so you can do this more sick. So you can do this much more
effectively and efficiently. So the key here is to not go to white depending
on how you want this. So the key here is never really go to white
on your auto focus, as the camera
really struggles to find a focus zone that
you actually want. Or if you're actually
using a mobile phone, just simply tap on the area
that you wish to be in focus, and that will be your zone. There's no such thing as a white zone usually
camera like mobile phone, auto focuses on a
certain spot first, and it's usually on
the wider area before you actually get into a smaller area when you
actually tap on the screen. All right. Let's move
on to the next lesson.
25. 25 - Changing Focus Exercise: Now, in this exercise, I want you to imagine
the scenes that would actually involve you
to change your focus a lot. Let's just say you're
shooting a stationary object, you're on a tripod, and nothing moves around. What kind of focus would
you actually need for that? Now, post this
video for a moment, and I want you to look at your own camera to
find which focus modes and zone is appropriate for a non moving
object like this. The object is moving, but you're not moving, you're shooting something like a spot. You as the photographer,
is not moving, but the subject is moving
in and away from you. Now, what kind of focus would you need for
this kind of situation? Now, what do you think
you will set for this scenario where
the subject is moving? Now, the third
situation would be, there is a movement in
you as the photographer, and also the movement
of the subject. Let's just say you're
inside a vehicle, and the subject itself
is running around, let's just say a wild animal. What kind of focus
would you need and what kind of
composition would you need? So because you
actually need to cater where the focus zones
are supposed to be. Now, because this will
actually depict on how accurate the focus
will be in focus. Again, same with the previous, but this time,
everything is moving. What kind of focus settings
would you need to set? Now, of course, there's technology, there's
better focusing, but I don't want you as the photographer
to just depend on the technology as this leaves a lot of room and
gap for errors. Now, this is where
photographers need to be skilled in their camera
handling, and of course, this is one of the key skills that you
need to master because you need to be able to change focus modes and
zones on the fly. The other trend that also happens within
cameras like these is the face, auto
focus function. Now, it is magical
when there's actually only one person
inside the picture, but trust me, if you're doing group shots where there's actually multiple
layers of people, and there's plenty of paces. You don't want to
trust this technology. You want to trust yourself as the photographer to actually
set the depth of field and set the focus and
nail it so that all of the faces that are
supposed to be within the pictures
are always sharp, no matter what kind
of groups they are. So hopefully, folks, that helps, let's move on without
a lesson, shall we?
26. 26 - Editing Basics: Now, in this lesson, we're
going to talk about editing, and why editing can
be important and also why it can also be
neglected at some point. But in this lesson, we're going to talk about
three main editing techniques. You will learn on how to crop your image to match
your composition, color, correct your image, so it matches
towards your style. And then we will add
elements into it, such as texts or even frames. So, in theory, the reason why we edit is that we want to crop or recompose to what we
actually need in our image, such as when we
see this image,'s say we want to crop to where
the person is still eating, and we don't want
the whole mountain. We can do that straightaway
in our editing. And of course, we can also do other things such as editing
the whole look and feel. Let's say you want it to
be more cold or even to be much warmer or
even bold or muted, really depending on how
you want this to be. And then you can also add
elements like I've said, like, let's say we want to
add a heart or even add text inside our image. Now, with those three
things in mind, let's move on with the
exercise. Shall we?
27. 27 - Crop Color Element: In this lesson,
we're going to do all about cropping an image, correcting the color of
an image and also adding elements to a picture that we have taken before like this one. So as you can see
in this picture, the horizon is a
little bit crooked, and the color is a bit muted, of course, and it's a
little bit over exposed. We're going to add
some elements to it, and we're going to
put my name into this and let's go on to photo, and we're also going to do
the same in C anva as well. So we are now in photoshop, and we are actually going
to first crop this image, okay before we actually do the coloring and add
elements into this picture. Okay? We're going to do
it later again in Canva, but this time we're going to
do it in photoshop first. So first of all, we want
to transform the one here. Follow along here first. So we can do transform and We can actually set
this to be like this, so it can be more tilted. Now, in photoshop, it is fortunate that we can actually have this tool
such as the grids, so we can go to guide
new guide layout. And this will act as if there is a rule
third inside our image. Now, I'm going to try and
crop the image again, right? I'm going to enlarge it. And then I'm going to
set the horizon space according to the rule
of third here, a. And also, I'm going
to put the picture of the tree here
according to the line, so it looks a little bit better, and then we'll just
follow along there. Okay? So we're going
to click Enter, and we'll have that
as our first crop. Now, we actually want to adjust this image with a
bolt look first. Okay? So we can actually go
to filter camera row filter. I love camera filters
in photoshop. And as you can see, the histogram is a little
bit more towards the middle. So we kind of mean that we need to adjust the
exposure a little bit, and then we're going to need to drag the shadow a little bit. And then we're going to need
to increase the contrast. Now, as you can
see, the histogram goes spread a bit more, and this will actually increase
the difference between the dark areas and
also the light areas. Okay? Now, we're going to
increase the saturation. So we can increase two, such as to vibrant and the
saturation of the image. We don't want it to
be over saturated. So when we
oversaturate an image, it doesn't look as good as when we just give it a
little bit of a kick. And then, photoshop actually has a very advanced function
such as the color mixer, we can actually go to this
one on the color mixer, and we can put on saturation. Let's just say we want to have the red a little bit
more popping out, the green and the yellow
also pop out a bit more. So the grass and the leaves actually pops
out a little bit more. And we actually want to put
the red on aluminums, a? So if we actually can do the red a little bit more dark or a little
bit more light. We can actually put it a
little bit more lighter, and then put the grass
a little bit more darker to give it a little
bit more of a kick. Okay? So I kind of like that, and we'll set that
as our bolt look. Now, we're going to do
our muted look, okay? So we're going to
duplicate that. And then this time, we're
going to use a different look. So we've nailed our exposure
with il a contrast, but this time we
want it to be less contrasty to get a muted look, you want to lift your
black a little bit. So you're actually pushing up. So there's less black
that is visible. So you don't want
to push it too far, but you want to
push it up again, so it actually has a
little bit more mute. Now, because this image on the first place has
already been over exposed, we can actually
have a little bit much more easier when it
comes to the muted look. Now, the vibrant, we can actually reduce it
a little bit more. Okay, we can reduce the
saturation to minus this time, and then with the
color mixer to, we actually want to
reset everything, so we can just reset, reset can double
click it and reset on saturation, et cetera. We can even decrease the
saturation a little bit. Okay? So that's the muted look and
the bolt look at the back. And now, we're going to add some elements here.
Let's just say a text. We're going to click the
text toolbox, text tool. And then we're just going
to add my name here, k? You can increase the size. And as you can see,
with pictures, sometimes you need a little bit more of an empty
space where you can put pictures or other elements
or even texts inside. And it's a good idea
to actually think in the first place where
you're going to put these elements
inside the picture. Now, I only have space
here where we can put a white text on top
because this part of the background is actually more darker in comparison
with the other places. So we can actually put
it here down here. Now we can add more Stroke to increase
the visibility of this text or we can actually
add go we go layer. We can add drop shadow to actually increase
the feasibility of this text because we're actually adding more dark
areas behind the text. Okay? When it comes to editing, there's other suites such
as Canvas, snap set, and they have a pretty
common work flow when it comes to editing
images like this, especially with cropping and editing colors and
also adding elements. However, some tools
might be limited when it comes to a more advanced
tool such as grids, and some Tools may not have
them just so you know. So we're going to go to Canva. Okay? So I've already
uploaded the same image. We're going to put
the same image, and then we're going to crop. However, because as you can see, I don't actually have
settings that I can use, okay, to actually use
it to have grids. I have no other choice
when it comes to this. We can go rule of third. We can try a rule of thirds. Okay. Then we're going
to add this one. We're going to add
rule of thirds here. As our fake rule of thirds. Then we're going to
position itself on back, and then we can
actually lock it. And then we can do
opacity at the front. Now, we can start to use this tool to actually
do our editing. So we want to rotate
this a little bit, so it is a little
bit more straight. And then we want to use the Rule of third kind
of like editing style. Okay. So we've done
pretty much the same. So we're just going to go this, and then we're going to
increase the opacity, so it doesn't show up. And then we're going
to go to edit image, adjust select area,
the whole image. As you can see, some
of these sliders are pretty much the
same like the ones that we have in photoshop. We can increase the contrast, we can reduce the highlights, the blacks needs to be
reduced a little bit, but sometimes it's a little bit edgy when it comes to
some of these tools. It may not look the same, but you can do pretty
similar things when it comes to editing color. Now, that's the
bolt look, and you can actually reduce the vibrans, and also the saturation
to get a similar look. You can also reduce contrast
to have a lesser muted look. And there you go. You have
your muted look and your bolt. And you can also add
elements, as well. So what I really like about
this is the fact that you can add elements that is available
in the market already. So we just want
to go for a logo. Let's just go for a
gimmick logo, right? And then let's just say we
want to give it a shadow. Okay, shadow We're
going to go for drop, and pretty much the same, using two different tools. So that's it for this lesson. Play around with the
tools that you have, and I'm sure you actually have those tools that you need
to do this exercise. All right? I'll see you
again in the next lesson.
28. 28 - Combining Altogether: Now, as I've said
in the beginning, we need to have an
approach of photography as a whole process,
not just capture. So we actually plan, capture and edit in mind before we actually do
any kind of photography. Now, having a crop in mind, you can actually plan to have something like
this, let's say, for instance, angle B, and also angle A within
your perspective. Can also crop and recompose on how you want your image to be according to your composition or rules or where you want
the subject to be in. Of course, if the color and the styles don't match
to what your style, you can always edit in the end, not just in camera. So it's actually very crucial
and important for you to know on how to capture
correctly first in camera, so you don't have to do
an extensive editing or you can actually apply
your editing and styling to your capture, which is
kind of back and forth, and you will get
this much later on as you progress to your
photography journey. So I do recommend for you to reiterate the whole
process as much as possible so you can get used this whole process
of photography. So with this in mind,
we're going to close this class with a project
that you can do on your own. And you can basically take a manual exposed picture from either your
phone or your DSLR. But what you have
to keep in mind is the end product where
it's going to belong in. It's either Instagram, Is it going to be digital
publishing or printing? It's really up to you,
but you need to match your photo with the
existing platform that you wish to post on. You may use any editing
software as you like as this project requires you
very minimal editing, and it's just basically as we want to progress more in
the photography first, but not forgetting
about the edit.
29. 29 - Prep Capture Publish: Welcome to Prep
Capture and publish. In this lesson, we're
going to talk all about how we're going to apply
what we've learned so far, including the whole process, and also how I've taken the pictures from the
Torchlight photography, and I'm going to edit them
in photoshop and then make it ready for publication in
Instagram as a square post. Now, if we actually look here, we actually have three
different images that we've already taken so far. So we have the first one, second one, and third one. Now, we're going to put
them all in photoshop, so we're going to do our
first one right here. Just going to go click
and drag, Pless enter. Click and Drag, plesenter. Click and dg, press enter. Now, they're all
perfectly aligned images. And all we need to do in this photoshop is a little bit of magic called Blend Mode. Over here, there's Blend mode, and then we're going to
choose lighten at the top. And then we're going to choose
lighten again at the top. Walla, and we are
pretty much done when it comes to our editing, okay? But we need to remove
the camera at the back because We don't want
that to be in there. So now we're going to flatten
our image as a top layer. And then we're going to
go do our selection. We're just going
to go with object selection tool, okay, this time. So we are pretty
much done with that. We want to select
that and the carpet, but we don't want
to select the risk. So we go to select inverse, and then we have the
inverse of that. And we're going to go grab
our brush, select size, k. Now we're just going
to go with black, okay? So we're just going to
paint over it, like, making it disappear, do a bit
of a photoshop magic here. And a. So now, we're actually
going to need to use our grid first, okay? But this time we can
actually use our crop tool. Which can show our grids, okay? So we're going to
have al thirds, and then we're going to have content ware fill if we
are actually cropping it a little bit more further
because this time we want it to be a bit
straight, okay? We want it to be a bit larger. Now as you can see
at the bottom here, there's more places where
we can actually grow. So once we press enter, photoshop is actually going
to fill that in for you. Okay? All right. Now that is actually
ready for publication. So please do your
own version of this, see what you can do, and let's
move on with the lesson.
30. 30 - Closing Remark: So now we are finally at
the end of our class, and thank you so much for
watching until the end. My name is Edwin Offendi. You can always follow
me on my social, which is always
at Ed Ed Offendi, which is available here. And I'll see you again in my next future classes. Bye bye.
 Edwin Effendi, Relevancy in the Rapid Tech Era.