Transcripts
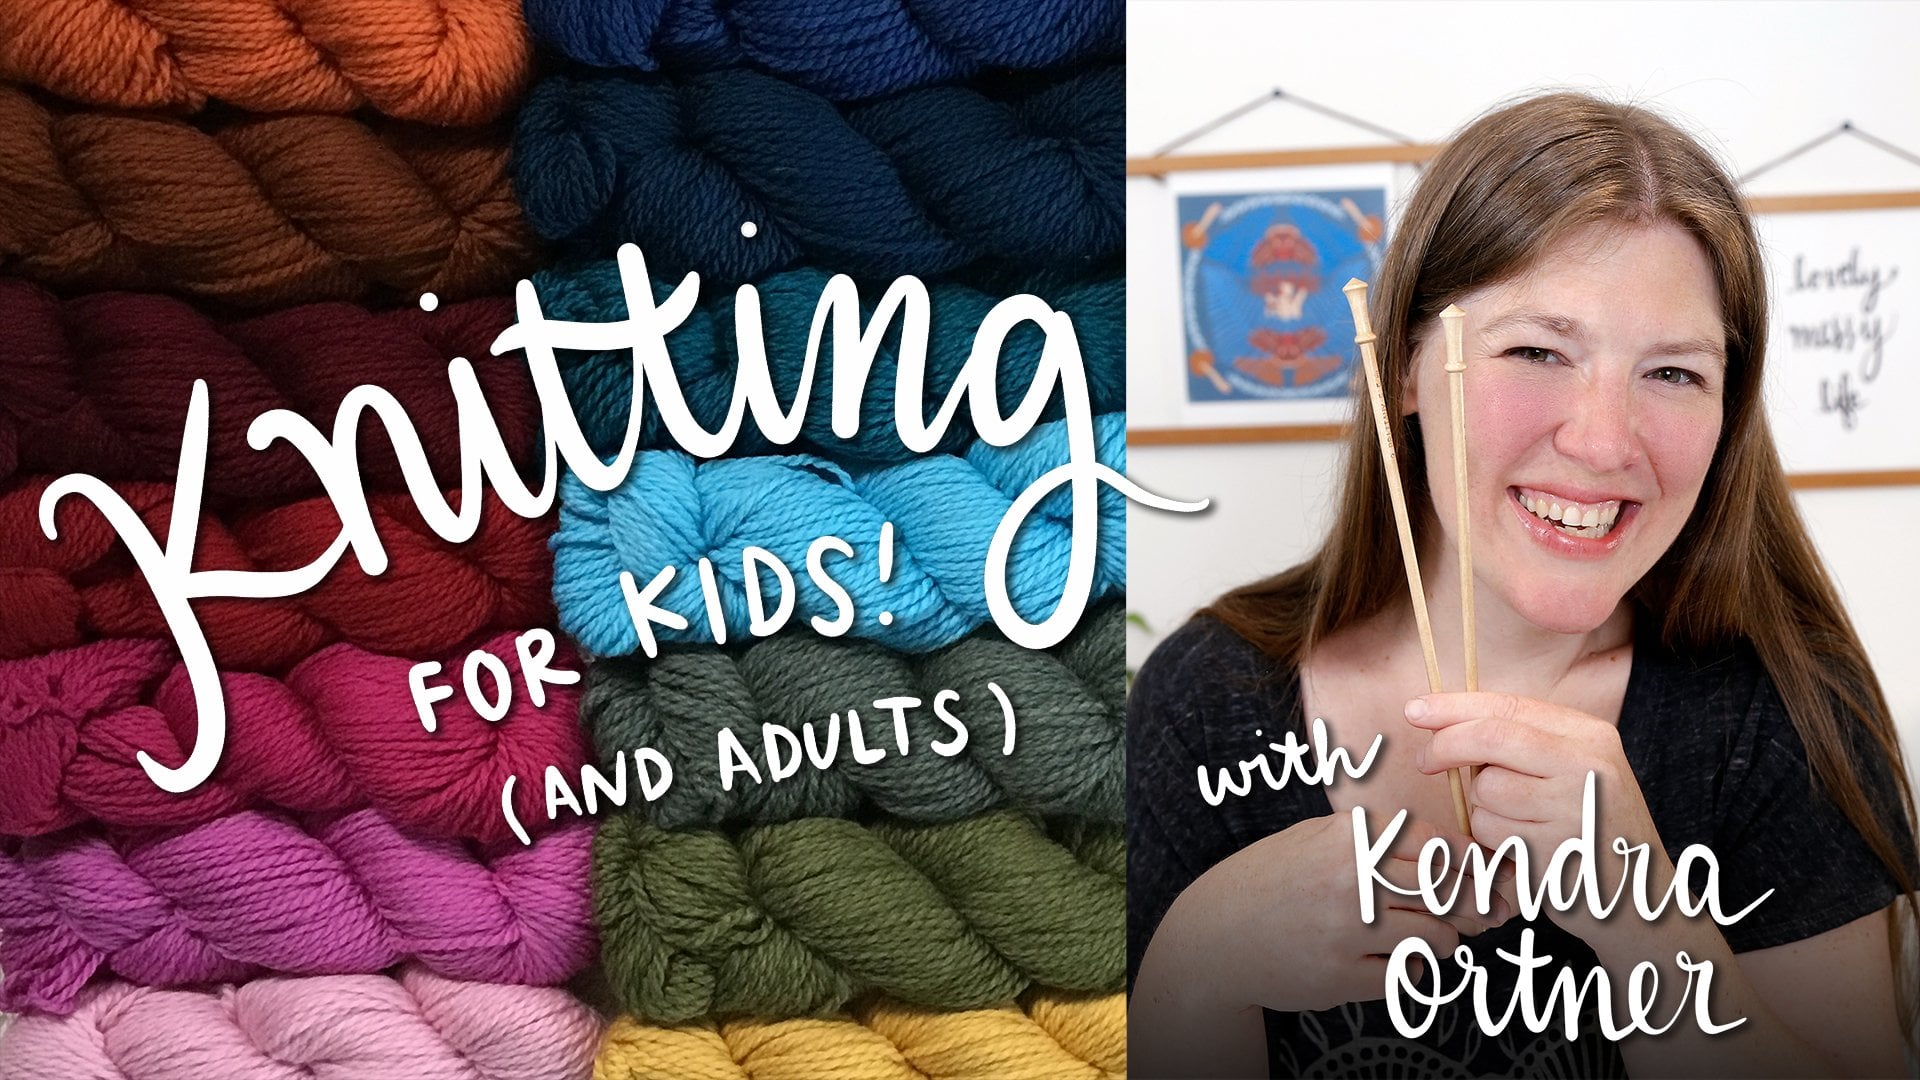
1. Crochet for Kids! (and Adults): Hi, my name is Kendra Ortner and I'm an artist. I work with yarn, textiles, fabric, illustration, painting, clay, watercolors, fibers, just about anything you can imagine. And I'm here today to teach you how to crochet. In this class, you'll learn the fundamentals of crochet. Finger crochet is appropriate for very young children, especially with the help of an adult. And in using a crochet hook, we'll be making fingerless mitts which are customizable to fit your hand exactly how you like it, short, long or anything in between. I hope you'll join me and see what crochet will open up in your world. There are limitless possibilities of creation, as well as it being a really grounding and lovely handcraft. I hope you'll join me and thank you for checking out my skillshare class.
2. How to Choose Yarn: The first thing you'll need when you learn to crochet for your finger crochet project, you will want to select a yarn. I recommend using a thicker yarn. Sometimes these are called bulky or super bulky. Smaller, thinner yarn, like worsted weight or sport weight will also work. But it's just a little bit easier when you're working with a thick yarn. You can also use even an old shoelace or a strip of fabric to try to practice your crochet. I would also suggest that you use something with a little elasticity. Wool is a good choice because it is naturally elastic. But there are also some blends that offer a little bit of pull to them. This is helpful when you're first learning because it can even out the tension of your project. So choose your yarn and get your fingers ready to finger crochet.
3. How to Slipknot: So first we're going to start with finger crocheting. And I'm going to make a slipknot and show you one way of finger crocheting. So I'm going to start crocheting by pulling my yarn out and making the slipknot. I'm going to show you right here how you take the yarn and just loop it back on itself. So you can see it's just making the little criss-cross here. What you want is to take your little birdie and go in the hole and get that working yarn. The one that's coming from the ball is the working yarn. And pull it through. And we'll cinch this part up by pulling it as well and kinda tug on both ends. And now you have your slip stitch.
4. How to Finger Crochet: So I'm going to have my yarn going this direction. And my fingers will be the little birdie. And the birdie goes in the hole, goes through and catches the worm. And your birdie goes through and catches the worm. You want to continually make sure that your yarn is going the same direction and not getting twisted. So as you crochet, you can move your fingers up, keeping that flat. Keep them on the yarn the whole time so I can keep my finger knitting looking nice and neat. Tweet, tweet. That birdie goes in the hole, catches the worm. Whenever you start crocheting, you want to leave a tail that you can work with too. So that when you decide you're done with your finger crochet, you'll have enough to work with to tie it up. Now the other nice thing about crochet is if you don't like the way it looks or you want to start over, you can pull it right out and start over.
5. How to End Your Finger Crochet: Now I'm going to show you how to end your finger crochet. So you'll make as long of a string finger crochet as you want. So I'm gonna start that now and maybe speed up this video so I can show you how you'll end whenever you're ready. Okay, now, I'm just going to choose to end this here, since I have a nice long tail, that I started with, I can tie it together and make a nice little bracelet for my wrist. So I am going to make sure I leave a nice long tail on the other side so that I'll be able to tie it and adjust it how I want. And I just need my scissors to cut the like nice long tail here. And then I will take the end of my working yarn and put it right through the loop and pull it kinda tight. So now I have my completed piece and I can go ahead and get some help tying this on however tight or loose I wanted. And these can always be trimmed up to whatever size you want. There you have it.
6. How to Finger Crochet - Another Way!: Another way to make a slipknot is to loop the yarn over your finger. And this finger points around the room while I'm holding this end. And you'll go through and get the working yarn. And that makes a perfect little slipknot and you can adjust the size. Let me show you that again. So I'm gonna pull it out. It goes right over my finger. And then I'm kind of just pointing around. Oops, I gotta hold my yarn. That was a good troubleshooting spot. Hold my yarn, go in a loop and then pull the working yarn right through that loop I've made. So right here. And that way I get a lovely slipknot and I'm going to pull it in a little bit so it will be smaller. And with the working yarn facing me, put this on my finger. And I'm going to hold down with my thumb and middle finger to keep it in place. And then there's a nursery rhyme for this other style of finger knitting. It goes over the log and I want to hold that down off jumps the frog. Pull your crochet down, and run back to town. So you might have to adjust this on your finger. You don't want to pull it too tight or your finger knitting and will take you a long time. And then when I loop it, I'm going to loop it in the front. Over the log. Off jumps the frog, pull the crochet down, not too tight and run back to town. That just makes the loop a little smaller. Over the log, off jumps the frog, pull the crochet down, and run back to town - a few more times so you can see it. It makes a much tighter finger crochet. So I often find the birdie method is a little bit easier. Over the log. Off jumps the frog, pull the crochet down. Run back to town. If you're doing this with a little one, sometimes it works better for you to hold the yarn and do the motions and have them just do the leap-frogging part. So they just do the frog. And then you do this part. Pulled the crochet down. Run back to town. Ok, I'll do this for a little bit.
7. How to Finger Crochet - Two Colors!: Once you've gotten the hang of finger crochet, another fun thing to do is use two colors at once. So I'm going to show you how to do two colors. Same at a time. It helps me to give myself a good length of yarn to start with. So I'm just spreading this all out on my desk right here. And I'm going to spread out both colors side-by-side. So they won't get tangled, but I still have plenty to work with. And then what I'll do is take the tips of each of these, make them into one working yarn. Make my slipknot, and start finger crocheting. You can go as looses or as titus yuan. I like to do it not too tight. Because then I find it easier to pull out if I make a mistake because mistakes happen. So if I notice that my yarn got twisted or there is a little bit of lint in there. I can just pull it right out and go again. And you can do three. You could even try four yarns. It depends on what you're making and what kind of look you're going for. Just experiment, try all kinds of things and see what works for you and what you like. So there is two - two yarns at once.
8. How to Crochet With a Hook: This section is about crocheting with a hook. So you'll need a hook. And I'm going to use a size i. And there are so many different options with crochet hooks, you can get metal, wood, plastic. I really like the metal ones because they come with this nice finger hold right here. So you kinda hold it like a pencil. And you can also measure your stitches on the little finger hold. They're all different sizes for whichever type of hook you're using. Any kind of crochet hook will work as long as it fits your yarn. The yarn itself will have a tag that will give you a recommendation. My yarn says 6.0 millimeters, but I'm going to be using a hook that's 5.5 millimeters. So you might want to select one your yarn recommends, and one lower, or one higher, or both. Just have one hook at least and check in with your yarn. Because if you're using a smaller yarn, you'll want a smaller hook.
9. How to Chain: So now we're going to begin crocheting. And you'll start with your slip knot. Again. That's just a little twist of your yarn and you pull a loop through. Now most patterns will start with a chain. And the first loop, the slipknot doesn't count as part of your chain. So in my pattern, I chain 17 stitches and that's for an adult-sized mitt. But for a child-sized mitt I chain 15. And for a little kid mitt, I chain 12. So this is something that is very adaptable. Depending on how big your chain is, and how big your yarn is. And remember with crochet, you can always take it out if it's not working. So first, I'm going to put it right on my hook. And like I said, this, this little part here you can measure. I like to have it a little looser than whatever the gauge is so that it can slip easily because if it gets too tight, it won't work very well. And then a lot of people like to loop this on their hand like this. But so I always think of it as making an I love you sign and putting the yarn right across. So then you have your yarn, you're working yarn right here. I often hold the yarn like this too, just how I learned how to do it. And then when you're making your chain, take your thumb and your ring finger and hold the knot. And you want to rest your hook right here on your hammock and grab the yarn and pull it through. And then we'll do it again when you rest the head of the hook right on our hammock and then grab the yarn and pull it through. So that was two chains. And I'm going to show you again how to do it. You're going to do the I love you sign. Put your yarn over the top of that. And the yarn just moves freely here too. You might have to unroll your yarn ball a little so you have enough yarn to move freely. Make the I love you sign. And then, oops, I did it backwards. That's something it's good for me to show you because I often have this happen in class when I was teaching and then it doesn't, it doesn't work that way, has to go up through the fingers to be useful. Now, we're going to use our thumb and our ring finger. Or you could use your middle finger to hold onto the knot, lay our head on the hook. Our lay our head on the hammock and pull through there. So now that's three chains on here. When I do it like this, it's a little faster for me because I usually hold my yarn this way and go 456. At this point I would inchworm my fingers up 789, inchworm my fingers up 10, 11, 12, 13,14,15, 16, 17. So that's how many I need. And I can kind of measure around my hand. Being really careful with this loop so it doesn't slip out. I can see that that's going to fit my hand really nicely. So that's what I go with for an adult-sized mitt.
10. How to Slip Stitch: Now we're going to be doing our slip stitch. This allows us to crochet in the round so there's no sewing required and our project will be ready to go when we weave the ends. And you want to make sure your yarn is going the same direction. So I use my fingers to straighten it out and put it back into a loop. It's all going the same direction now. And I can see right here and my last little stitch, actually my first little stitch, my slip stitch. I want to put the hook under the first two yarns and over the last one. And then I'm going to grip those together. Whoops, wanna make sure that tail does not get in my way. So a lot of times I'll hold it down with the pinky of my right hand. So I've got these two together and gripping them with my thumb and my ring finger so that I can pull yarn straight through. And now I have one loop, one big loop to crochet and in the round. I'll show you that again. Let me take it out. Since it's so easy to take out. You have your working yarn here and you will loop it back on itself. The right direction. Come to the end, put your hook in. Make sure the tail's out of your way. Because you want to pull through that working yarn right here. Pull it, I've got my pinchers here so I can see there's a nice little hole that I'm pulling the yarn through. And there's my slip stitch.
11. How to Single Crochet: So now I'm ready to crochet in the round. I'm keeping this tail. Because the more there is to work with, the easier it is to weave in later and secure. So now I'm going to go into the next loop and you can see where you slipped the stitches together. You're not working with either of those will work in the very next one, which is right here. And we have a little rhyme. For crocheting, it's under the bridge of two. And that refers to the two yarns right here. Catch a fish, pull it through, catch it again, and pull through two. So let me do that again. You can see the next bridge right here, the next stitch under the bridge of two, catch a fish. Pull it through. Catch it again. Pull through two. And it's okay to use your fingers to pull. If you, if you earn gets caught or if you can't quite find the bridge. I usually hold with my pinkies to keep the crochet nice and open so I can see and I kind of count along with my fingers how many So under the bridge of two, lay your head on the hammock, Catch a fish and pull through. And catch a fish and pull it through. Catch it again and pull through two. I think I'm mixing metaphors. It's the same motion as chaining with the head on the hammock. But you have to go into your crochet stitch before you rest your head on that hammock and pull the stitch through. And then you pull it through both of them. So I'm going to keep going all the way around. So now you have your loop That you're going, that it's going to become your fingerless mitt and you can try it on. So this is a pretty good size for me. I don't want it to be too tight. I want it pretty loose and I want it to fit all the way down into my thumb. So that's perfect for me. If it's not right for you, you can easily take it out. Just pull your yarn back, go all the way back to your chain. Before you do that fully, you might want to measure. So pull it all the way down and say, hm, I think I might, I might take out two or three. You could count to see how many you might take out. Oh, it looks like, Looks like I could do two fewer stitches. And then when you get back to your chain, just pull out two stitches and slip it again. That's an easy way to find your gauge, find your fit. So now I'm just going to keep crocheting once I've got my fit. I want to make both the top and the bottom equal so you can measure how long you've made it. This is pretty short right now. I usually do seven rows, right now I've got, you can count them 1, 2, 3, 4 rows. So I'm gonna do three more before I will chain to make my thumb hole. I misspoke earlier. I make six rows for a big kid's glove or the teen-size glove. For the adult size, I usually make eight rows. I've made them before with seven rows, but eight is usually what I go four. So right now there's 1, 2, 3, 4, 5, 6 rounds. I can tell when I come to the beginning of around because they go right past that tail again. So I'm actually going to do two more rounds. Okay. Now I've got eight rounds. I go a couple of stitches, pass the tail before I make my thumb hole. And I'm just going to count and make sure there's 1, 2, 3, 4, 5, 6, 7, 8 rounds.
12. How to Skip Stitches: To make my thumb hole, i'm going to chain three. So without going into the loops, I'm just going to go ahead and do 1, 2, 3. And I'll skip 1, 2, 3, and go in to this one. And then I just continue going all the way around with my crochet. Here's another look, close up. So you can see my rounds of crochet. This is where I started round 1, 2, 3, 4, 5, 6, 7, 8. I went a little bit past the tail, just three stitches or so. And now I'm going to chain for the thumb hole. So it'll be 1, 2, 3. And I'll count on my stitches. Not the one the yarn is coming from. The next one, 1, 2, 3. I'll skip those and go into the next. My normal crochet stitch, under the bridge of two, catch a fish, pull it through, catch it again, pull through two, and I'll keep going to make the other half of my fingerless mitt.
13. How to Troubleshoot: Here's a few things you might run into and how to fix any problems that you have with counting your stitches, increasing or decreasing. One thing is, that is pretty tricky, is learning to read your yarn. So you can usually see where you've just crocheted, and where you need to go into the next hole. And that's part of why I like to crochet with a pretty loose tension. Because then you can see pretty easily there's the yarn, it's coming from this stitch. It goes into the next one. But sometimes what people will do is they'll say, oh, look, that looks like the next stitch. That's still looks like the next stitch. And they'll end up making three stitches into one hole. And what could happen then is your yarn, your piece, your mitt will start to flare out. Alternatively, someone might have a problem seeing where their next stitch is and saying, oh, it looks like the yarn must be coming out at that, right? So I'll just skip that and go into the next one. And this could make your piece start to taper off and have fewer stitches than what you need. You can tell by how many stitches you have and what your project looks like, whether you're getting the right amount of stitches. So one way to make sure you're going a full round and you're counting your stitches is to place this at the beginning. A stitch mark, stitch marker like this can slip right into one of your stitches. So you can tell that's 123 and you can go all the way around and count to make sure you have the same number of stitches every time you make a round. If you don't have one of these little stitch markers, you can buy them at a craft store like Joann's or Michael's or you can also just make one yourself by using a little bit of yarn and pulling it through. So that every time you go around, dot yarn will be there. If you use it, a yarn of a different color. That's a good technique if you don't have your own stitch marker.
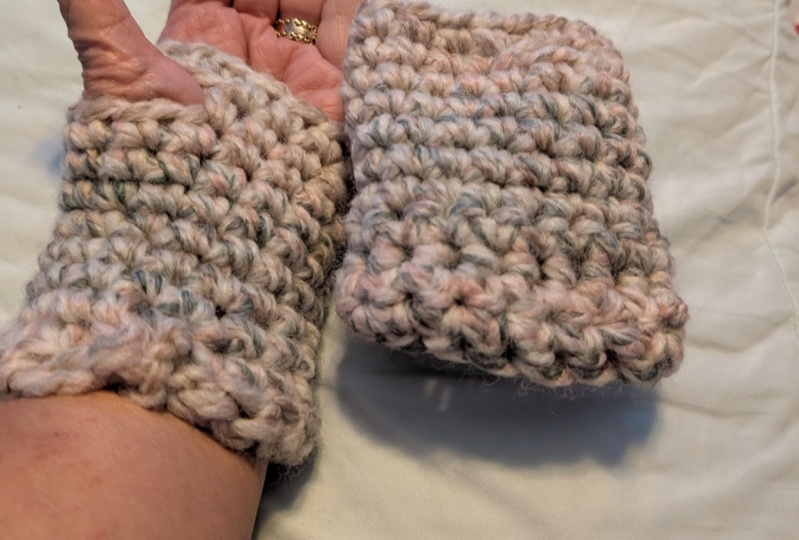
14. How to End Your Crochet: Now I'm going to show you how to end your mitt. So you should have a thumb hole and an even number of rows on both sides. You can make it shorter if you don't wanna do eight rounds. Or you can, you can even use just a chain of two if you're making a mitt for a really small child like a five-year-old. And I like to always make my last round go a little past the thumb so that its ending right here above. You can see that I've gone just about three stitches past where the thumb hole is. And what I'm going to do now is take a pretty long tail and cut. So I'll just cut it right here so I have enough yarn to work with. And what I like to do is weave it in on the inside a little bit. So I'll turn it inside out even. And I'll put my hook underneath a couple of these sides stitches. And then through the remaining loop and then pull a new loop all the way through. And then I have plenty that I can weave in later. And I just will weave it in under a few more stitches. Sometimes even tie a knot so that it'll be super secure and won't stick out anywhere. And I like to keep it under at least four stitches just so I have a really sturdy ending. So I might do right here a little, not pull it under one stitch and pull the tail through the loop to get my knot. And then I'll pull it under another stitch. And these are just the sides stitches. This way it'll get tucked under. So I won't feel it, I won't see it. You can't really tell where the ending of this crochet work is, it's all tucked in. And then I'll go ahead and trim that. And you're finished on this side. This side I'll do the same thing. I often use a dirty needle so that it's just a little bit easier to get the tail tucked. But you can also use your crochet hook and do the same thing. Just pull the yarn through. And since we've got the slip stitch there, it's already pretty well knotted. I wouldn't worry about knotting it again for the tail on this end. You know that it'll be secure because there's already that little slip stitch. Knot, one more I think. And then I'll trim it. There we go. And now I have a perfect fingerless reversible mitt, since it's totally the same on either side, I can put it on that hand or I can slip it on this hand. There is no up or down. It fits equally well, whichever way you put it. And I just need to make one more and I'll have one for each hand. Well, there you have it. Now you have your very own pair of finger lists, myths, and you're ready to explore the limitless possibilities of crochet. I'm Kendra Ortner. And thank you so much for visiting my Skillshare class on crochet. You can visit me at my website, www dot by hand at home.com to see more of what I'm up to and to even by your very own pair of mitts. I've been making these for about ten years and I love them so much. They're great for typing in a cold office or bracing yourself against a cold steering wheel or even making your little fingers inside. So I hope that you've enjoyed this and thank you so much for coming. Bye!
 Kendra Ortner, by hand at home