Transcripts
1. Introduction: My name is Anne Sorensen and I am an embroidery and beating artist. I've dabbled in a lot of different art forms over the years. But as soon as I found embroidery, I just absolutely fell in love. I love the tactile experience of stitching away. And it wasn't long before I was doing anything from tiny little miniature three and tubes to something ten times bigger than that for a massive commission. And I've absolutely loved every second of it. If you look at my art as a whole, you'll definitely see them. Nature is a huge inspiration to me, and especially the human interaction with nature. But I'm always looking for inspiration from a lot of different places. Him WE always looking to expand my artistic practice that way. And lately, one of those ways has been teaching. So I'm moving from not just creating artwork, but to actually teaching others how to create artwork. So part of that is of course, through skill share, which you are enjoying the benefits of right now. But also through creating instruction manuals and full size kits that include all the materials you need, as well as instructions. I absolutely love making this art form accessible to more people and showing them that it's not so intimidating and you can definitely do it yourself at home and create your own beautiful artworks. And that's a little bit of what we're going to do today. So I'm definitely excited to start teaching you guys. I hope you are excited to learn. So let's get started. If you want to see more of my artwork, I definitely recommend checking out my Instagram app, analyse ill underscore. It's where I post my most recent projects and experimental things, news update. It's the whole shebang. You can also go to my website and Sorenson.com and pretty much see all the exact same stuff, but also see what I have available for sale or any upcoming events I have going on. So that's pretty much all about me that you need to know. I think.
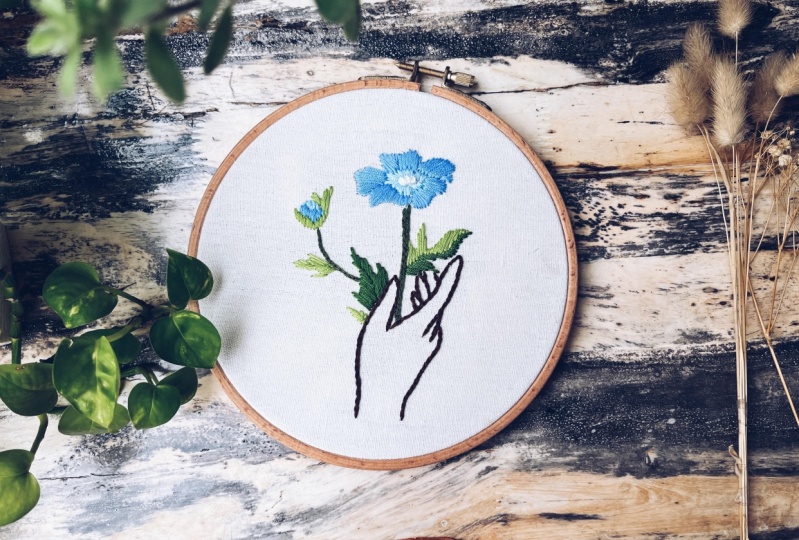
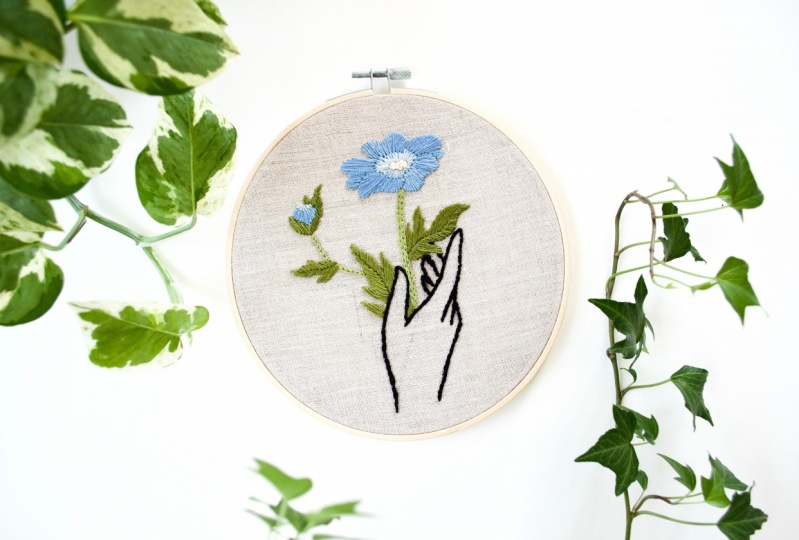
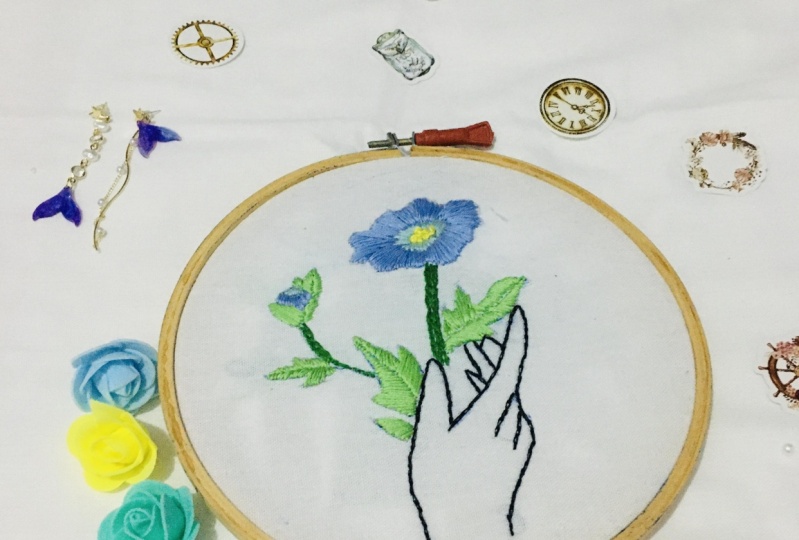
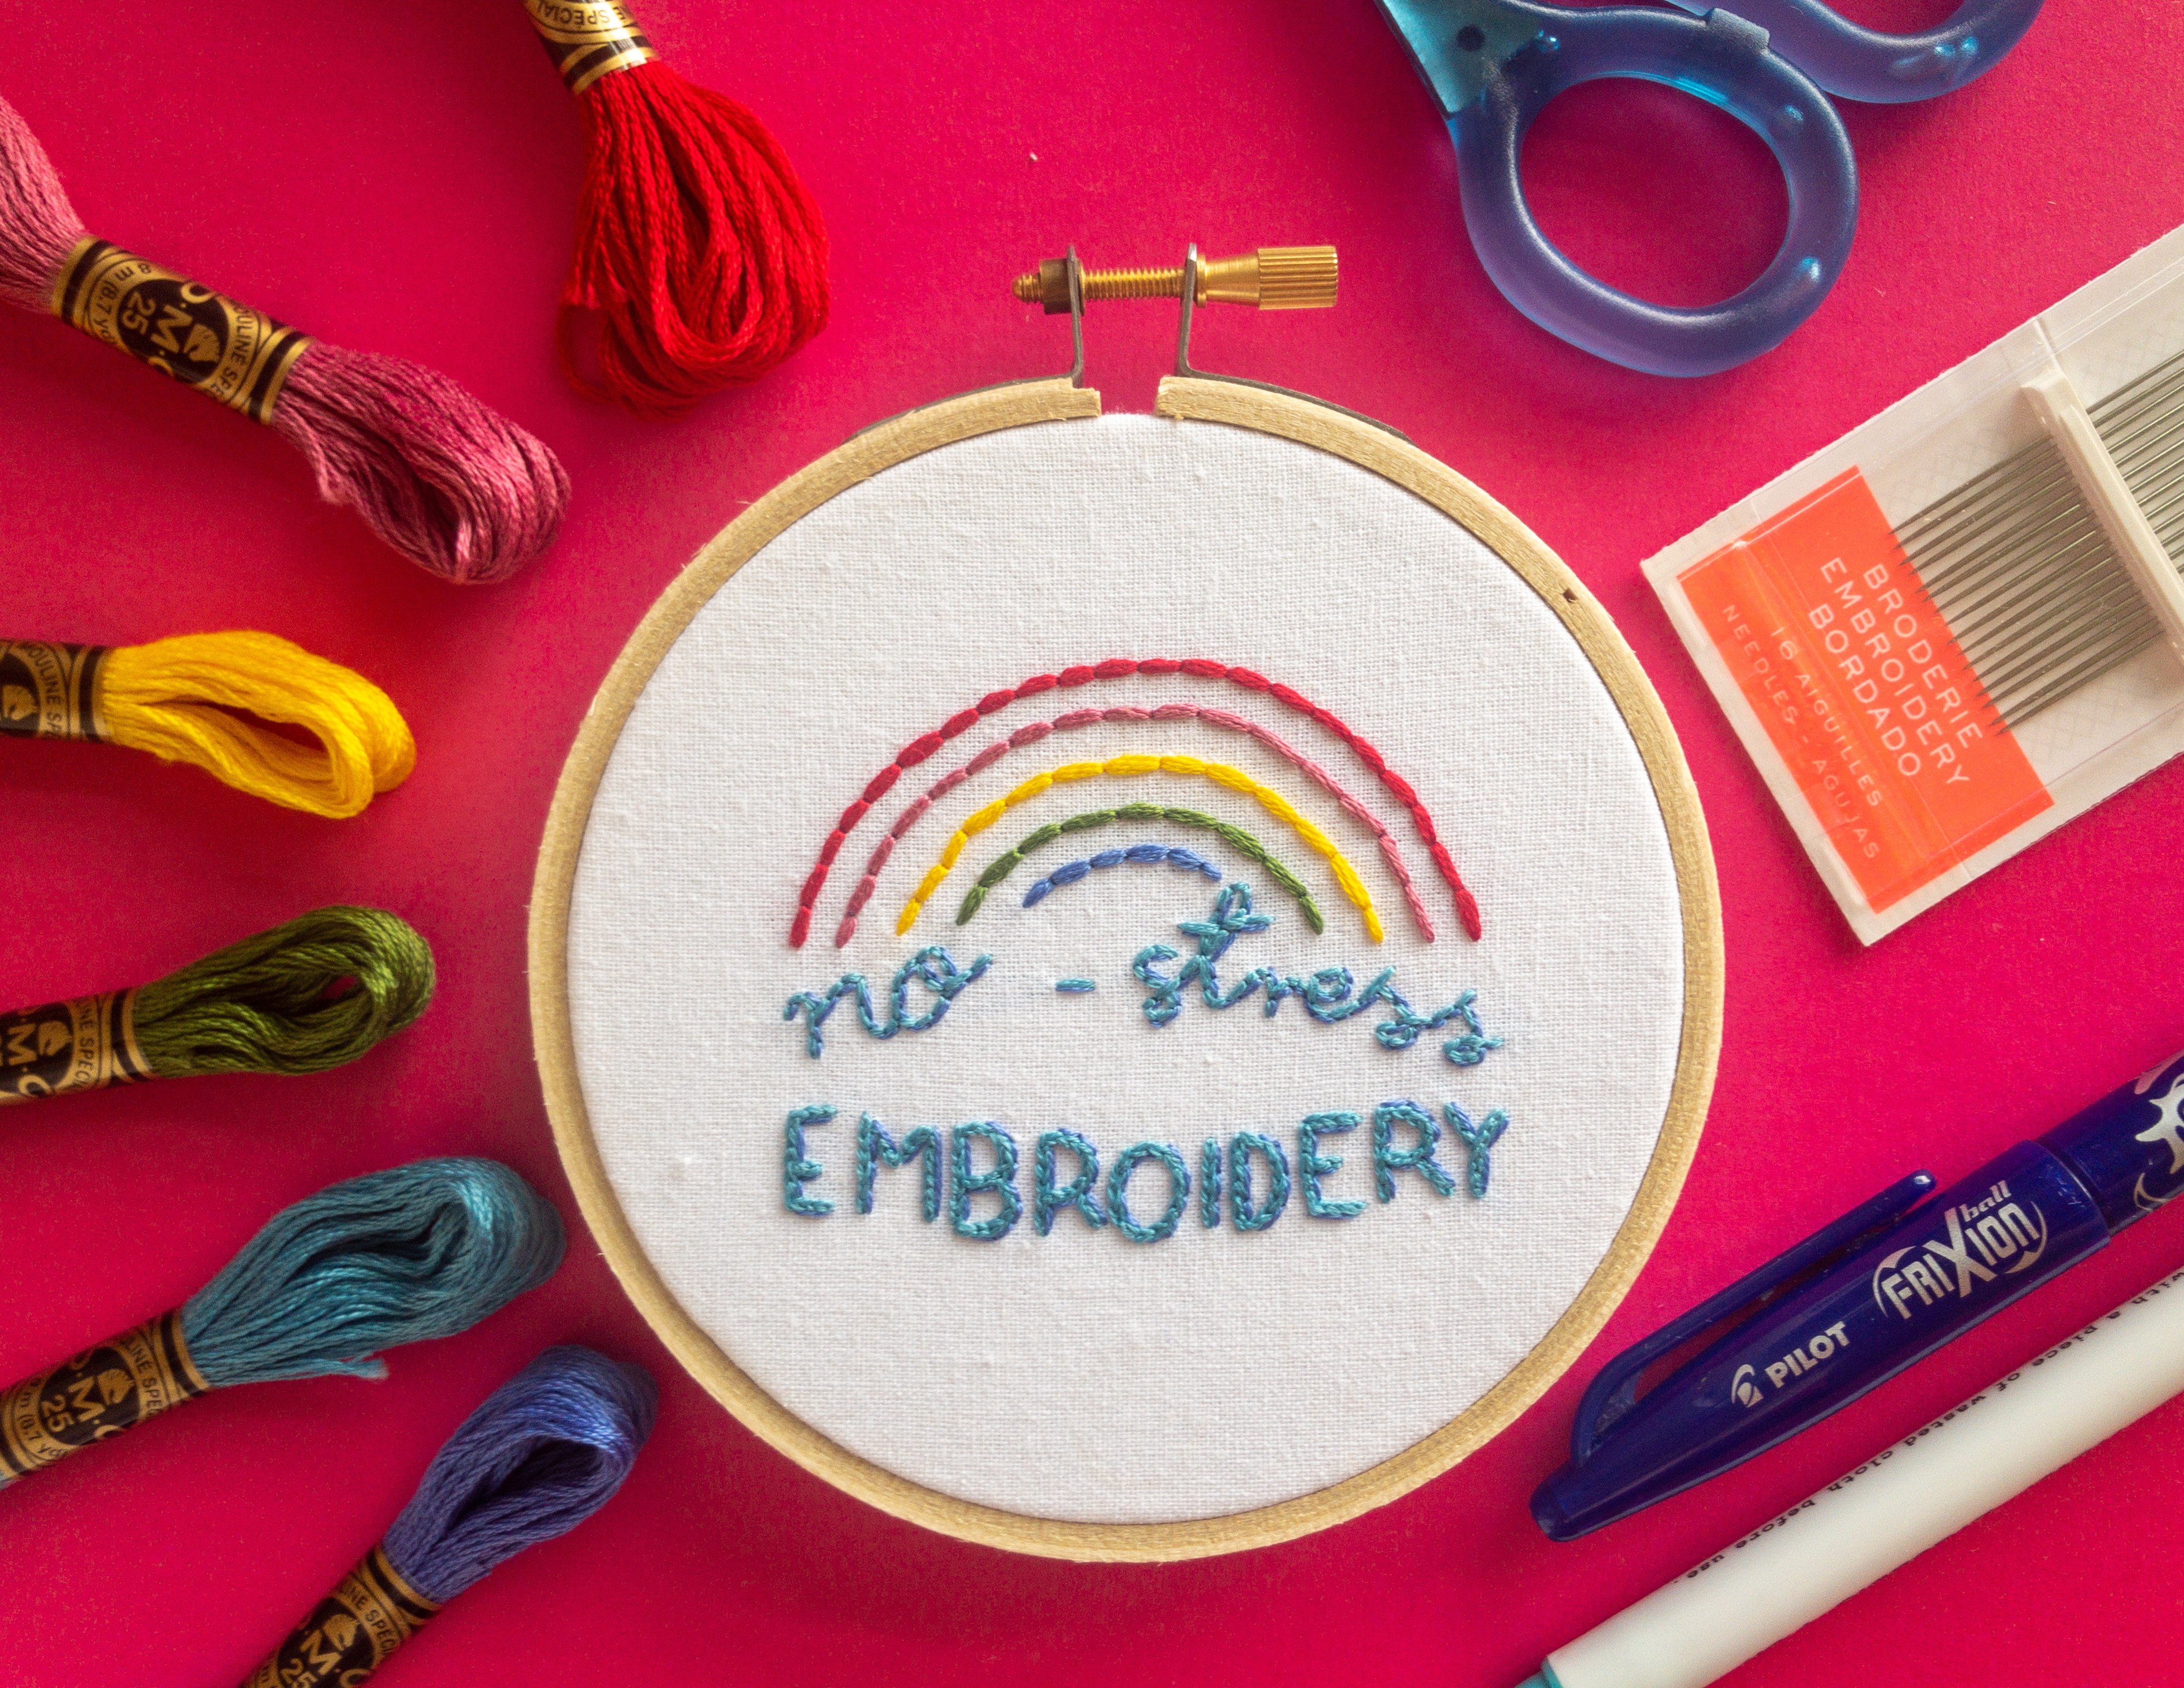
2. Class Project: The class project we're gonna be working on together is this anemone in hand design? So it's, it's really pretty simple flower with a little bud growing out of a hand outline. And if you'd like to work on the exact design with me through this class, you can find the digital download of the pattern for this project, right in the projects and resources tab that you see underneath this video. You can also definitely just use your own design if you have on, personally, I recommend doing something floral or very similar to this. If you'd like to work on something with me through this class. Because I'm definitely going to be teaching these stitches in a context of how they apply to this floral design. And the reason I really love this pattern for a beginners class is that even though it's super simple line designs and very simple shapes, It's going to allow me to not only teach you three different stitches, but a couple of different ways to use those stitches. So you're actually going to walk out of this class having finished this project and really gained a lot of knowledge. And this class with this project, it really is intended for beginners. So if you've never embroidered before or you've never even picked up a selling needle before. This is going to be a really great jumping off point for you because I'm going to teach you everything from the materials that you'll need to gather to how to prepare all those materials and starting that very first stitch. And then I'll walk you through all three of the stitches that we're going to learn. That being said, if you're not totally new to embroidery, but you just want to learn a really fun project. This is still a good class for you. I don't think people grow out an embroidery. I still enjoy doing really simple designs myself. So I definitely encourage everyone to take part in this class and this project together. My main recommendation for especially those who have never embrace her before, it's just have patience with yourself. Embroidery is not a quick art. It's slow. It takes time. So don't pressure yourself to feel like you have to rush or you have to get it finished in a certain amount of time. If you mess up or you get a knot or a tangle and you have to undo some stitches. That's completely normal. I I do that all the time and I do this professionally, so so don't feel bad about anything like that. Please just give yourself a lot of credit for, for even doing this. So without further ado, let's jump right in.
3. Materials: Before we get started on actually embroidering, We need to talk about the materials that you'll need to buy. Before we do that, I do want to remind you that the pattern we're gonna be working on is available for free download from my website. So if you want to work on this patterns specifically, definitely go right to my website and download that. If you don't want to go by all of these materials, you can also buy a full kit from my website, which will include everything you see here. But most of this stuff is easily available at your local craft stores. You can absolutely go shopping yourself. So I want to start talking about the embroidery needles. So when you go to the craft store, all you need to do is make sure you specifically get something that says embroidery needle. Just because it's going to have a nice sharp point. And that's very important. They do come in a variety of sizes. So if you're new to embroidery, I maybe recommend getting a variety pack so that you can feel out the size that's best for you. I personally use a size five, you can see here. Alright, next, we're gonna talk about embroidery floss. So you can see for the pattern here I have six different colors. If you are shopping for your own embroidery floss, you can absolutely get creative with the colors that you want to buy. I just recommend having a lighter and a darker color for the leaves. A lighter and darker color for the flower. I'm going to use blue, but you can definitely use whatever colors you want. Make it purple, make it pink, doesn't really matter. And then a different color for the center of the flower. I'm here using a really pale yellow and then also a color for the outline of a hand. So I'm just doing simple black. I think it stands out really well. So these are the colors I'm using. If you're shopping for your own, I definitely recommend DMC brand. It's just a really reliable brand that's available almost anywhere. The next thing we're going to talk about is the embroidery hoop. So this is going to be what holds your fabric in place while you're working. And then also sort of the final frame at the end. So make sure you do get one that you like. This is a seven inch embroidery hoop. If you're using the pattern from my website, it is designed for a seven inch hoop. So that's the size I recommend getting. This is a simple bamboo wooden hoop. You can also get plastic ones. Nicer looking wooden ones. There's definitely a variety, so get whatever makes you happy. And then we have talked about the fabric. So my absolute recommendation is linen. However, there's gonna be some cottons and denim works pretty well as well. The important thing is to look for is that it's a woven fabric. So that means the individual threads are woven together. That makes it very easy to put the needle through the fabric. You also wanna make sure there's no stretch. So you can see here this fabric doesn't stretch at all. If you're fabric stretches too much when you put it in the hoop, it's really going to strain the fabric. There's gonna be a lot of awkward puckering when you're done. So just make sure you get a fabric that doesn't stretch. I'm using a very natural colored linen here. But again, if you're shopping for your own materials, you can get creative and get whatever makes you happy. So lastly is the transfer method that you're going to use. This is going to be how you get your pattern onto your fabric. This is what we're going to talk about in the next section. Right here I have some water-soluble stabilizer, but we're also gonna talk about other methods of transferring in the next section. So let's continue.
4. Transfer Methods: So before we can actually get started, The last thing we need to talk about is just how you're going to transfer the pattern onto your fabric. So there are a ton of different ways you can do this. And if you wanna do a quick Google search, feel free. What I'm gonna do is just talk about the two methods that I use most often. So the first is what I give you if you actually order a kit through my website, It's going to be this water-soluble stabilizer, which is really great to use because you can print the pattern on one side right from your at-home printer. And then on the other side is just a peel off that reveals a sticky underneath the you can see you can literally stick it right onto your fabric. So super easy to use. You then just sew right over its u. So not just through your fabric, but also through this that you've stuck to it. And then when you're done, you rinse it under water. You kind of stick it in a bath basically. And this stabilizer will actually completely dissolve. So it's like it was never there. So that's I loved to use that because it's just super easy and super convenient. Another method is to use a water-soluble marker. So this is a little easier if you're gonna freehand draw something, which I'm sure a lot of you aren't. That being said, if your fabric is thin enough, you definitely can put a printout of the pattern underneath it. And then if you need, maybe hold it up against a window and draw over it with the water soluble marker. And so that end result is going to be the same. You just rinse it with water and the markings will completely disappear. So the reason I like both of these is because they are non-permanent. You just wash them away with water. You can obviously trace with a normal pen or something like that if you want. But you do have to remember that that marking is permanent and that is going to be on the fabric even after you're done. So these are the two methods that I recommend. The water-soluble marker you can definitely find at your local craft store. It should be super easy. The water-soluble stabilizer is sometimes a little bit more difficult to find. I had to order it online. A couple of brands I can recommend. Dmc has a product called magic paper that's going to work. And then there's also a brand which is a bit of a mouthful, but it's called sulci sticky fabric, salty. And that's going to be the exact same thing as well. So those are the options that I would recommend. But again, there's so many different ways that you can do this. So if you even do just a quick Google search, you can often find a lot of alternatives. So that's it for my lecturing and now we can actually get started on the project.
5. Preparing Your Fabric: Alright, so the first step in this project is going to be to prepare your fabric. So when you buy fabric for this project, you're probably gonna get just like a half yard or less unless you think you're gonna do a lot of embroidery in the future. And then you can always get more. But a half yard or even a little less, allows you to have extra fabric in case something goes wrong. But obviously it's going to be way, way more than you need for just this one project. So you're going to want to cut a piece of fabric that's just a little bit larger than the hoop. So you have to remember the fabric is gonna go in here, so it's going to have to cover that ridge. And then you also just want extra so that if the fabric is fraying or anything like that, it doesn't go all the way up to the hoop and you just have that extra to play with and it will get trimmed later on. So I'm just going to cut inch and a 2.5 inches around here. You can see I'm starting in a corner so I don't have to cut too much and I don't have to operatively cut in the middle of some fabric. And when you are cutting fabric, it can be nice sometimes to have scissors that are specifically meant for cutting fabric. You can use just your regular houses there is I'm not saying that they won't work. It's really just that fabric scissors are specifically very sharp, so they leave a really nice clean edge, as you can see here. Alright, so once you have your fabric cut out, actually put it in the embroidery hoop. So the hoops have these little screws here at the top. So you're just gonna wanna loosen that. Just like so. And you're going to pop the inner part out. So the screw is on the outside and the inner part is just going to be a plane hoop. You're gonna put that plane hoop without the screw underneath the fabric and try to kind of keep it centered. And then the part with the screw, the outer hoop again, making sure it's relatively loose, is just going to fit right over the top. Just like so. So that's kind of what you're going to start with. You're then going to want to go and tighten the screw quite a bit. You want it to be really pretty much as tight as you can get it. So you can see here I'm, I'm really almost forcing it because you don't want your fabric to slip out of the hoop, that really defeats the purpose. So once you have it as tight as you can get, you're gonna go around and kind of pull at the fabric from the outside. And this just makes sure that the fabric that's in your hoop is relatively taught, relatively pulled as tight as you can. Because if you leave it loose, you're gonna end up with a lot of puckering around your stitches and it's just not going to look as nice. But so you can see here I've pulled it relatively tight. It doesn't really give at all when I hit it like that. And so this is a reason again, why I talked about in materials that you want a fabric that doesn't stretch because we're really pulling it here. And if your fabric stretches at all, then when you take it out of the loop, it's going to contract again. And it'll look really weird around your stitches when you're done. So once you feel like it's pretty evenly tight, just go again, you know, check that screw, make sure it's really, really good and secure. And that's about what you should be working with to start with for your fabric.
6. Getting Started: Alright, so you can see that I have my pattern on my fabric now. So that means it is finally time to start stitching. Yea, and no more lectures. Alright, so the first thing you're gonna need to do is take the black thread. That's what we're going to start with. Or if you're not using the same colors as me, we're gonna start with the outline of the hand. So whatever colour you'd like to use for that. And you're just going to measure out a length of thread that you're comfortable working with. So I'm going to take about my full arm span. I recommend anywhere from like the length of one arm to your full arm span. That kind of guarantees that you aren't constantly running out of thread, but also that it's not getting table all the time. And then next we're just going to have to thread the needle. I'm just gonna take the thread here. You can see I'm pinching it pretty close between my thumb and forefinger. And then it's kind of gross, but I like to kind of put it in my mouth and just like bite down on the end. So that kind of ensures that all the threads are together. And it just makes it a little easier. So you can see now I have this nice sharp little edge and you're just going to carefully read it through the eye of the needle. Don't feel bad if it takes a couple tries. I mean, I still sometimes have difficulty. And I've been doing this for quite awhile. And I just wanna make sure that all the threads go through and there's none hanging out at all. And you're going to leave a short little tail, just like I have here. So just make sure you're pulling everything through when you do start stitching. Alright, and then I'm going to show you a couple methods for tying a knot at the end. The first one, I don't even know the name of it, a super unprofessional, but it was taught to me when I was a kid and it's just really stuck with me. So you're just going to hold the very tip, like so. And you're going to wrap it around your pointer finger. And then right where they crossover. Just roll your thumb and you're going to end up see how they're all twisted together now. And then you just pinch and pull. And you can see you end up with this nice little knot, very secure. And it's big enough that it won't pull through the fabric at all. So that's one option. I'm just gonna cut that off so I can show you the next option. And for this one you are actually going to put the needle through the fabric first. So you're going to start at the end of the line here, and you're just going to put your needle from the back to the front. Just carefully through the fabric and pull but don't pull the thread all the way through. So you're going to then flip your hoop over and just pull a little bit until you have a tail. Just about like you see here, that's about two or three inches or so. And then this thread is actually called Sixth strand embroidery floss because it is made up of six individual threads. And so what we're gonna do is we're going to split those so that we have two chunks of three threads each. And then it's kind of just twist it around. So you're just gonna untwisted a little bit. Just until you get to the point where it enters the fabric there. And you're going to have these two little strands. And then we're going to tie it in a square naught, which is just a super simple, super secure. Not the way I remember. It is just saying right over left, left. Oops, there we go. Left over right. Makes everything tidy and tight. And so there you can see we have that nice little knot. And I'm just going to trim the ends here so they don't get tangled. And then whatever way you decide to start your thread, the end result is you're going to have it nice and secure. Anchor down at the beginning of the line to start stitching the hand outline.
7. Split Stitch : So we left off with our black thread or whatever color you're using for the hand outline, secured and ready to start. And we're going to learn the split stitch to create the outline of the hand. It's going to be really great for making lines, but also for filling in areas sometimes. So I'm actually going to show you both of those techniques. To start out, you're gonna make a single stitch just about an eighth of an inch long. You want to keep it pretty compact but not too small. And we're gonna pull that through. And then we're going to bring the needle back up to the front of the fabric about another eighth of an inch away from the stitch that you just made. So just really carefully poke the needle through. You might have to give it a couple of tries and just make sure that you're staying on the line that you are trying to follow. And then we're gonna go back and you're going to actually put the needle right through the center of the previous stitch. So you can see here I've, I've literally split the stitch right down the middle. And you're gonna pull that through all the way as well. And basically you're just going to continue in this same pattern, bringing the needle up beneath that MIT inch away, splitting the previous stitch. And that's you just continue all along the line until you've completed the line that you want to make. So we're going to use this ditch for the entire outline of the hand. So I'm just going to speed things up here, but show you the overall process. You can see I'm just following the line carefully. Definitely want to try to keep your stitches relatively even because it's going to make the line look really nice and smooth. And then if you get to the end of one line, you literally just jump to the beginning of the next line. The back of your embroidery might look just a little bit sloppy, but the front is going to look beautiful and that's the important part. And then at some point you're going to reach the end of your thread. So you're gonna run out of, out of thread to stitch with. So I'm gonna show you how to finish off the end of the thread when you need to switch to a new one. You can see I just have a little bit left, so I still have some to work with, but not really enough to stitch with. One option is to tie a square, not just like I showed you at the beginning as a way to start a thread. So you're just going to trim and amount that you're comfortable using to tie the knot and then tie square naught, just like I showed you before. The method that I like to use is just weaving the thread through the backs of the stitches you've already made. So you can see here I'm just going to gently put the thread through the backs of the stitches and pull the tail all the way through. Now doing that just one's honestly is probably secure enough, but I'm gonna do it a second time just to make sure. And just be careful that you're only weaving through the back of the stitches and not pushing the needle through to the front of your embroidery. And then once you feel that you've done that enough times that it's not going to slip out or anything, you can trim the rest of the thread off. And I love this technique because it just keeps the back of your embroidery looking relatively neat and orderly. But tying a knot works just as well. And so once you've done that, then it's just time to thread the needle again and start in the same way you did before, and continue on with your stitching. So when you're doing the handout line, just make sure you don't forget any of the lines. You've got those fingers in the back there, you don't want to miss out on those. Are your hand might look a little bit odd. And once you fish without them, we are done with the black thread and we're going to move on to, I'm using the light green. So we're gonna use the split stitch for the stem of the flower. And this is going to be a little bit more filling in rather than just creating a line. So I'm going to go up one side of the flower stem and come down the other side, keeping the stitch line right next to the previous line I just made. So you can see here it really just creates this block of color. And then for the smaller stem, I'm actually just going to use one single row of the split stitch. But once you've done that, you're done with the split storage. And we're going to move on to our next embroidery stitch.
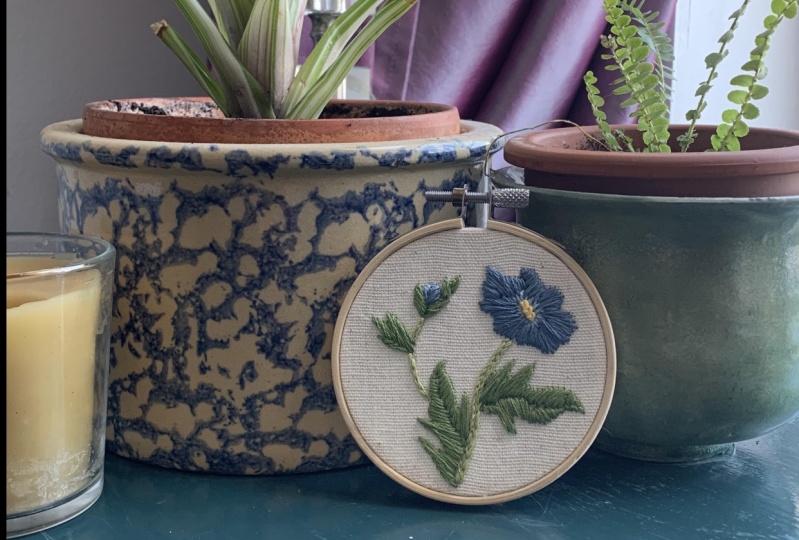
8. Satin Stitch: The next stage we're going to learn is called the sentence ditch. And we're going to use this stitch for all the leaves on our flower. So I'm using just a slightly darker green than the stem. I just like a little bit of contrast. Now, the sound stitches really great for filling in an area. And basically we're going to work from line to line. So we're gonna start on the edge of the leaf and go to that center line. And I like to work at a slight angle. I just think it looks more natural. Now to begin, we're going to bring the needle through to the front of the fabric at the edge of our leaf. I like to start just a little bit away from the end of my area, just liking create the base angle that I'm going to follow. So I chose my angle and I'm going to put my needle back through at the other end of the area I'm trying to fill. So you can see I just went straight across and created a stitch that goes all the way across the area I'm working on. And then essentially what we're gonna do is just do that same thing over and over again. And you're going to create a bunch of parallel stitches, All right, next to each other. And so that's going to create this really beautiful filling for the area that you're working on. And now as we work over the whole leaf, you can see that I'm just going to adjust the length of my stitch in accordance with the area I'm working on. I have my drawing here and I'm just going to follow the lines, create longer or shorter stitches wherever it's necessary. And you're just going to go up one side of the leaf and then down the other side of the leaf, just filling in that area. Now one of the great things about the satin stitch is that if you feel that you've left a gap or you didn't fill in an area as much as you want to, it's really easy to just go back and fill in that area with more stitches. Now sometimes you might get a little knot. This is a really common thing to see where the thread sort of loops around itself like this. Generally if you just hold the loop and then TAG gently on one of the string ends, it will just pop right out like that. And you can continue on with your stitching. And again, like with the splits ditch, how we wanted to make sure all our stitches were really even. Here. You're going to want to make sure your stitches are evenly spaced. You don't want kind of a wider gap between some stitches and a really tight gap between other stitches you wanna relatively even stitch all the way across. But again, the length of this edge is going to vary. And you can see I kind of always do my mike satin stitch at an angle, especially if I'm working on a plant, I just think it looks more natural. You don't see a lot of straight lines in nature. And that is going to be all for the satin stitch when it comes to the leaves, we are going to continue on and do more of the satin stitch for the petals of the flour as well. And we're gonna do a slightly different technique than we did here. We're going to start working with the lighter of the two colors you've chosen for the flower. So for me that's going to be a light blue and that's going to be for the central sections of the petals. And then we're going to use the darker color on the exterior part of the flower. And we're also going to be working on the small bud over here as well. So when doing the satin stitch of the lighter color on the inside, you're going to start with that outside line. And, and at the very center circle there are basically going to do a slightly fanned out satin stitch. So as you go around where you start, your stitches are going to be a little more spread out. And then as you come to the center, those stitches are going to come together and it's going to be a little more fanned out then the sentence did you use to make the leaves? But that's okay because when we use the darker color, we're gonna come back and kind of fill in those gaps. So as I work around here, you can see that there is just a slight gap between the stitches on the exterior side. And then they're all really close together on the central side. Gonna continue around in that manner. The light blue or the lighter color that you're using. And you're going to use that for all of those interior sections on the flower petals. Now you can continue on and do all of the sections in light blue. But I'm just going to demonstrate on this pedal how we're going to come back with the darker blue and fill in the rest of the flower petal. So when we're working with these sentence ditches, we're going to overlap in some areas with the lighter color you can see here I went in-between two of the light-blue saddened stitches. And that's not going to be for every single stitch. But every few stitches you're gonna go in between the light blue. For every other stitch. You're just gonna go right up to where the blue stitches. And you can see here, I'm basically going in almost the same hole that I started, the lighter blue stitch width. And this will just create a really nice slight gradient appearance so that it's clear. This is all part of the same pedal. There's slight overlap to help with the continuity. And now that we're working with the darker blue, you're going to want to make sure that all your stitches are right next to each other again, just like how you were working when you made the leaves. So the fanned out separation is only going to be for the light blue, for the darker blue, we want it to be a solid block of color. So we don't want any gaps between the stitches. Now since the petals are obviously wider at the outside and narrower towards the center of the flower. We're gonna need to sort of fan out that satin stitch without actually making any gaps between this digits. So the way that I do this is I'll start like normal on the exterior and then stop the satin stitch just about halfway short of where I normally would. And then when you move on to the next stitch, you can angle it in a little bit more. Now sometimes you only need to do this once. I'm having a pretty severe change of angle at this point in the petals. So I'm actually gonna do two shorter stitches. And then with this third stitch i'm going to come back and I'm going to basically cover up those ones. And that allows me to angle this last stitch in a lot more then I was previously. And it creates a nice little fan satin stitch while still filling in the whole area with color and without leaving any gaps at all. And when you're working on the petals, This is something you're probably gonna wanna do multiple times. For each petal. There's no rule that I'm using. If I just feel like my stitches aren't quite going in the direction I want them to and I want to bring that direction in a little bit more. Then I'll just do that short little stitch and cover it up with a longer stitch afterwards. And so you can see after doing that a couple times, I am able to still go from the outside to the center of the flower. As opposed to getting stuck in a place where the direction of my stitches goes from the outside of the flower to the outside of the flower because that's not really a direction that makes sense for us in this design. So you can see where I started the stitches on the right hand of that pedal, they're going almost vertical up and down. But now on the left side of the pedal they're going much more almost horizontal. So using that short, long stitch technique, I was able to create that change in angle without leaving any gaps in the stitching at all. So it's still all nice and smooth and fields very cohesive. So now I'm just going to speed this up. You can see I'm doing all of the light blue stitching first. And then I'm going to come back in with the darker blue stitching for the bud on the left there, I personally decided to use the lighter color on the top and the darker color on the bottom. Little subjective, if you wanted to reverse that, I think it would look at as well. This was just the way I decided to do it. Sorry if you can hear my cat meowing plaintively in the background there. She doesn't like it when I don't pay attention to her. And if you're noticing even sped up, you can see I'm doing that short, long technique every once and awhile, pretty much on all of the petals. So I can really get that nice fanned out appearance. And that is where you should be left when you're done, you can see we've got a lot of Saturn stage going on on this design. All of the flower petals and the leaves are this stat and stage. And I hope you learned a couple different ways of utilizing it and that you can may be used in the future. And we can now move on to the very last ditch that we're going to learn.
9. French Knot: The last stitch we're going to learn is called the French not. And that's what we're going to use for the very center of the flower here. And for this particular stitch, you're getting both of your hands. So you can see I have my coop secured in a clamp here. But for most of you who don't have something like this, you're just kind of want to work with your who, like set down on a table or something so that you don't drop it while you're working because you will need both of your hands to actually make the stitch. So to begin per usual, we're going to bring the needle through to the front of the fabric. I'm just gonna start right in the center here. And you're going to hold your needle in one hand. I'm right-handed and I'm going to be holding my needle on the left hand. And then with your other hand, wrap the thread around your needle. You can see here I'm going to loop it twice. And then while pulling that thread taught, you're gonna put your needle back through the fabric where you originally brought it out. And you're just going to pull that tail through, still holding the thread taught until kind of the last minute. When you have to let go to let it loop through. And you can see here just makes us a nice little knot. And so we're basically going to do a bunch of those for the center of the flower. Most of my, I'm actually only going to wrap the thread once. So you can see me do that here. Just once around and then back down into the fabric. And again, just always make sure you're holding that other end of the thread pretty taught while you're pulling through. So I'm just gonna do a couple of the larger knots in the very center of that circle. And then I'm gonna do a bunch of smaller single wrap nods all around it. And as he started to fill its area and you can see it just makes a really nice textured surface that very much feels like the center of a flower. So I feel that it's really appropriate. And this is a stage that you can adjust as you need. So I've already shown you, I've done wrapping it twice around wrapping it once is obviously the minimum, but you can even go up to three. I've never done for but if you're careful, I think you could do it. So you can adjust the size of the French, Not that you wanna make, depending on the area you're filling, the texture you're looking for or what have you. And I really loved this, not I think it's really fun. So I loved leaving it to the end is just as sweet little accent right in the middle of our embroidery. And then once you finish that, you can tie that last thread off and we are done embroidering. And so next I'm going to show you how to finish off your hoop and get it ready to hang it up.
10. Finishing Your Hoop: Okay, so the last step is just going to be to finish off our hoop to make sure it's ready to hang up and looks really nice on the wall. So you can see I've rinsed away the stabilizer that I had my pattern on. If you were using that water-soluble stabilizer, I definitely recommend giving it a really thorough rents first and kind of massaging it with your fingers and then letting it sit in a bowl of water. Maybe you just for a few hours because that will kind of dissolve any last adhesive that's hanging out in your stitches that they're not too stiff with any residual adhesive when you're all done. Now before I do anything else, I'm just gonna give it one last good tug around the edges just to make sure that my fabric is still nice and secure. Sometimes when you're stitching, the pressure of your needle going through over and over again will loosen up your fabric a little bit. So I just want to make sure it's still nice and tight. And there that should be good. Feels good. Alright. And then I'm going to use my nice fabric scissors here. Just cut around the edge of the fabric here. Now I'm not gonna go right up against the hoop, about maybe a half inch away. It's now you see I've got this nice little extra fabric around the edge here. And we're going to flip our hoop over. And basically what we're gonna do is we're going to be folding this fabric over and gluing it down. So I've got my glue here. Fabric glue is maybe the best option. However, you can probably use pretty much any glue you have laying around. And I'm gonna put it on with a little paintbrush here. And basically I'm just going to be applying it to the inside of the hoop here. So I'm not going to try to avoid getting an igloo on the fabric as much as possible. Because some glues will soak through to the front or leaves staining or something weird. So just apply your glued to the inside of the hoop here. And you wanna make sure you're getting this done relatively fast. Obviously. You don't want to rush too much and get sloppy, but you don't want the glue is dry either. So then once we're done applying all the glue, you're just gonna go around and pinch the excess fabric down over the glue. And you'll probably feel the glue so gain through the fabric a little bit under your fingers when you're pinching. That's going to be good because it means that your glue is going to be really secure once it dries. And obviously it does need to be a glue that it's tacky enough to hold the fabric down even before it's dry a little bit. That's what the back should look like when you're done with the glue. And then you can flip it back around. And you have this lovely hoop that you can then hang up on your wall. Now obviously, if you had decided to embroider on clothing or something else, you, you won't be doing this step. You'll just be removing the hoop and enjoying your embroidered clothing. But I'm kind of assuming most people are probably going to go for this option. So I definitely wanted to cover how to finish up with that. So congratulations, you just made a beautiful embroidered wall hanging for yourself. I hope you had a lot of fun learning this. I definitely had a lot of fun teaching. And I hope to see you guys in another class sometimes zoom.
 Anne Sorenson, Embroidery and Beading Artist