Transcripts
1. Trailer - Beginners Introduction to Cinematic Sci Fi Sound Design Synthesis : Welcome to the beginner's
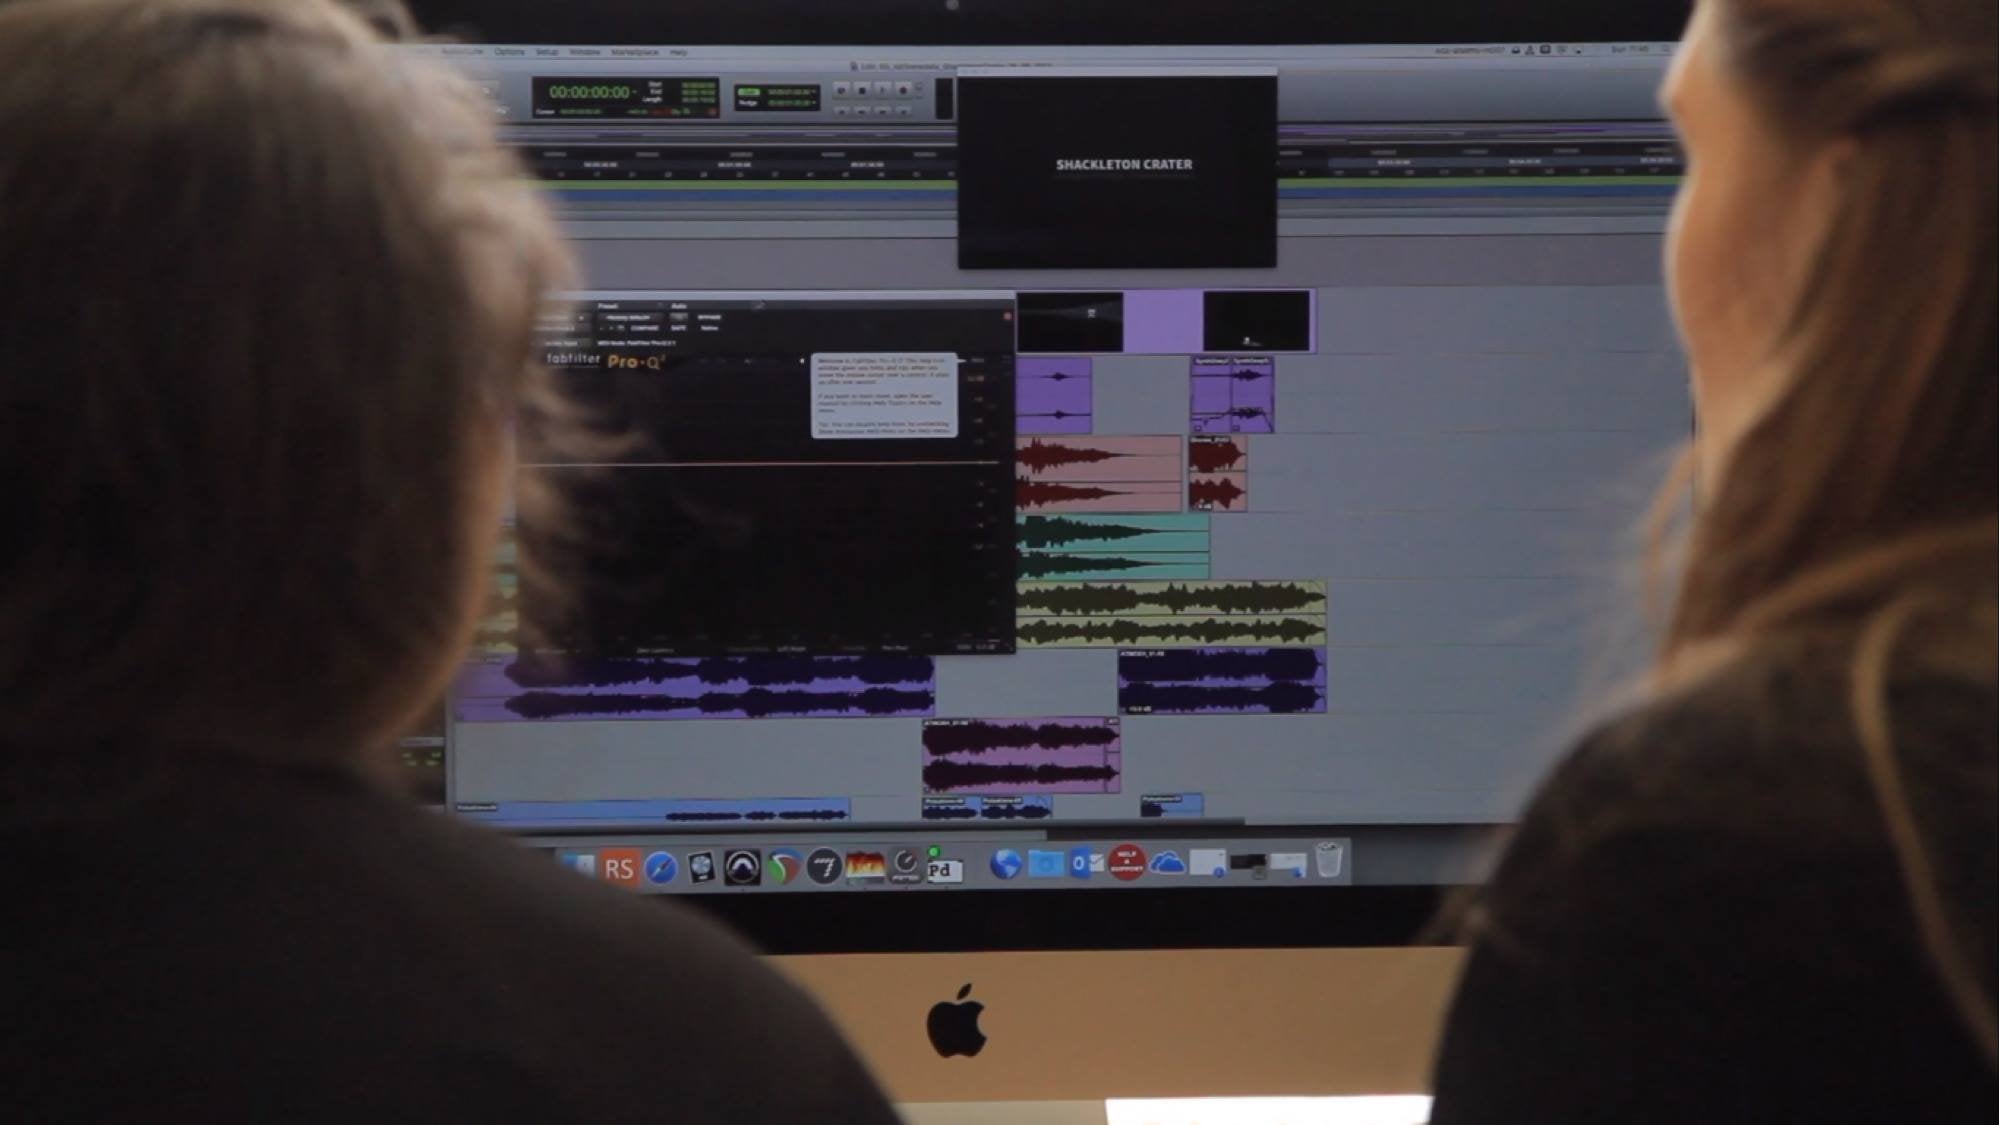
introduction into cinematic Sci Fi sound design
with the pigments sin. We believe in stripping
away the complexity of sound design with
more hands on approach to take you from a blank canvas to the audio and
sound that you want. So you'll find the tutorials in this video will guide
you through and give you the toolset you
need to then shape that particular sound into exactly what you need
for your visual. We're using the incredibly
versatile AtoriaPigment sent, which we start with
a nice breakdown of all the features
we'll be using. But it would help if you were familiar already with
the basics of synthesis. We're going to help you
unlock the engines, the filters, the modulators, and to navigate
around it to build particular sounds and get the
baseline for what you need. All of the sounds you
can hear building in this trailer are sounds that we are going to make
throughout this course. We build the sonic universe
from the ground up, giving you the tools you need to generate it exactly the
way that you want it. You will discover the secrets of crafting immersive
synthetic room tones, designing ground shaking subs and layers to fill
out the space. We'll guide you
through a synthesis of sweeping ethereal textures, show you how to create
intricate robotic and UI sounds and even the
classic computer keyboard. You'll learn to shift gears with dynamic vehicle
engine synthesis, interpret mysterious
Sci Fi radio signals or tear through space
with a futuristic whoosh. Whether you're scoring film, building a game or
producing electronic music, these fundamental
techniques will help transform your workflow and stop you searching for samples and creating unique sounds
tailored by you. Synthesizing your own world. Start this Skillshare
course today.
2. Introduction to Pigments Synth: Welcome. In this
introductory video, we're going to go over the
basic workflow of pigments. Please note this is
not a deep dive into every single feature
of pigments, as that would be an
entire course in itself. But this is just to ensure that you're familiar
with the workflow before we begin on the
basic synthesis course. So when we open pigments, this is the display that
we're presented with first. And we're going to work
ourselves from the top left to the right hand side and go through the
different layers. So the first thing is we have
a little burger icon here. This allows us to do things
like save our presets, open up other presets. And importantly,
for this course, you have the import option. So you'll be able
to download and import all of the presets
created throughout the course. So you have them to hand
to visually work with, start from, and see how you
get on with following across. Next, we have the library, which opens up our
wider preset library. If at any point you can't find a preset after
you've imported it, we can use the
search terms here, and the presets are named after the video lessons
for the most part. Or you can search
for Black goblin, which will be the author
of all of the presets. We can press the cross to go
back to our main display. If you find a preset
you particularly like, we can use the heart icon, and that will give it a
nice short list for us. At the moment, it says welcome and welcomes the default preset, which just gives us
a base sine wave and everything set up
very, very plainly. We are going to use this as our initialized preset
for the entire course. Next, we have up
and down arrows, which let us jump
to the next preset in line. Here we have play. Play changes our
main synth window to a much more
simplified version. And once we've found a sound, we like our macro controls and key things we might
want to adjust live here. For this instance,
as we're going to be learning to program and
build specific sounds, we are going to remain in the Synth window for pretty
much the entire course. Next, we have the
effects window, which has another
icon next to it, meaning we can press
here and disable all of the effects in a single click without having to
go to the window, individually turn them off. If we click on the
actual word effects, this will change our top panel here to the effects section. We'll go over this shortly. Secondly, we have the same
thing for the sequencer. We can switch it on directly
from here or off and open the sequencer window to
set it up within here. We're going to return this
now to the Synth display. Next, we have this
little light icon. Switching this on will mean
anytime we hover over, some kind of descriptor
is able to appear, and we can get a little
guide through pigments. The drop down next to
it allows us to show the tips or the advanced
tips if we need those. This is our main output control. By default, it's -14.1. And generally, we will
need to be dialing it back as the sounds we create
will fluctuate a lot more, and they all have their own
volume controls within there. But should we need to, we
can boost this up or down. A double click will reset it to the actual default,
which is -12. Here's a little output meter, and when we generate sound, you can see that that fills up. And then we have our
settings options, which opens up a new
settings window. We won't be needing this much
as we go through the horse. So next, we have
the main section, which changes with the
play synth effects or sequence options
as seen above. Our main section is where we're going to be
spending most of our time. And in here, it's broken
down into three main parts. We have our main synthesis
section where we are able to drop down and change
our different engine types. We have a secondary
engine which we can select and it will change
the tab to that engine. And much like we've seen
with EX and sequencer, we can switch those on and off without having to
directly access the page. Our third engine is
a utility engine, which contains three
different oscillator. Two noise and one of
a base oscillator. We can disable all of these, but if we want to enable
an individual one, we do need to go
over to that page. But all can be disabled with
a single click up here. Next to our filter sections, we have two filters, and menu can open up and
select our filter type. We can enable the second one, and we can have a separate
filter type in there. From any of our
oscillator sections, we can choose what
goes to what filter. See here, we have filter mix, and this is available across all of our generators
or engines. All the way to the left, we'll
send the sound to filter. All the way to the right,
we'll send it to filter two, and in the middle will
be a blend of both. Double click, we'll always
reset it to filter one. We then have some basic rooting. At the moment we have
filter rooting and filter one feeds
into filter two. For example, if we take noise one here and we send
it to filter one, currently, it goes
into filter one, and filter one goes
into filter two. But we can bypass
filter one and send noise one directly to
filter two by doing this. We can change the filter
routing by bringing the control all the way over
to the right hand side. We now have filter one and filter two completely separate. So filter one will now go to the output rather than
feeding into filter two, and filter two will
also go to the output. There are more complex
setups here where we can do and we can send to
different effects chains. And if we use those
throughout the course, I'll explain that as we go. We have our amp
modulation linked to velocity, our voice panning, and a send level to send to one of the effects channels,
which can be seen here. That's the Send effect.
The effects window has effects AB and
our send effects. We can select each
one from here, and where we currently
have none is a drop down for our
effects chains. We'll make a lot of use of the reverb and delay
throughout this course. So it's useful to know
how to load these in. Our sequencer, once switched
on, enables the page. It's a very complex sequencer. We will utilize some basic features of it
as we go through, but for the most part,
it will be disabled. The named and color grouped. For example, if we click on Vo, our bottom section changes. If we click on our expression, it stays within
that same window. You'll notice that below this, the color coding remains, and we can actually change
our bottom window to be relevant to those
functions or routings. For example, the combinate
here can be selected, and all three are available
here for editing for us. Whichever one we're
hovering over is also highlighted with a little
colored box above. For example, if we
go to the LFOs, we can see which VO is selected. And that we're working on with a nice visual representation. In terms of linking
any parameter, pigments does this
in a fantastic way without requiring a
complex mod matrix. If we would stick LFO one, for example, here, and
link it to the cutoff. When we hover over, we
get the option to assign. If we click and hold, we can drag and drop that to
the parameter we wish. Once it is assigned, we get a little icon that
shows our movement, and if we hover over, we can see that connection and we can
push it up however we need. That is a basic overview of the functionality we will
be using in pigments.
3. Synthetic Room Tone Synthesis Part1: In this first video, we're
going to look at making Scifi synthetic room tones. And the one we're
going to build in this video sounds
just like this. Welcome to part
one of the series. Where we going to look at
creating synthetic room tone? These are the kind
of sci fi tones that will underpin all of
the other sound design, the kind of alien, unsettling or the kind of alien or unsettling world
building that exist that we can't necessarily
record to create an atmosphere and ambience
of a sci fi world. Each time we load up a project
throughout this series, we're going to start
with the welcome preset here in pigments, which just gives us
a base sine wave. And we'll build from
here each time. So if you're following along, begin here with
the welcome presa. We're going to begin with some basic explaining as
we go over the synth. But as we progress
through this course, if we reuse any of
those features, we will explain
them less and less. So we don't have to tread the same ground for
you over and over. Now, let's get to the tutorial. For this first sound, we're going to make
use of a different engine than the wave table. On pigments here, we have
engine one and Engine two and the utility engine
all selected together. For this instance,
we're going to disable the utility engine by clicking on the on off icon right here. On Engine one, we're going to change this over to harmonic. Harmonic allows us to create our own waveforms by morphing two different
shapes together, but it also allows
us to modulate the individual harmonics
of those tones. This is really, really useful for generating these kind of other worldly room tones that we're going to
utilize in this. Now, if you have a midi
keyboard connected, you can very simply press a key, and you're going to hear what
is effectively a saw wave. For the purpose of the tutorial, I'm going to put a single note into my DAW so that we can
play that over and over. But I recommend you use your midi keyboard if
you have one available. The note I'm using
here is C two. So to begin shaping this tone, in harmonic, we set in harmonic, we have a set of tools
across the bottom that change from our
usual parameters, the window, phase mod, shape, periodic, and modular. We're going to utilize all
of these to some degree, but we are going to change
periodic to random. Random allows us to modulate the harmonics that
are generated over time, allowing them to warble
and move up and down. And you'll see how
this can be really useful for the generation
of these tones. First, we're going to
begin by creating a shape. In the shape section here, we can change our
waveforms by clicking on the waveform themselves or
the arrows on either side. For the sound we're
going to generate here, we're going to utilize
W comb and notch. Now, when we move
the shape control or the morph control
in the middle here, we're going to dial
it to around here. We'll see that there's
currently no change. That's because the other
control at the bottom here will help us adjust
this morph between the two. At the minute, we still just
have our default saw wave. But when we begin to adjust
things like the tilt offset, which works like a
high pass filter. I'm gonna give ourselves
some extra high end. The parity, which is the blend of the
different harmonics. And then the depth, we start to get drastically
different shapes. Now we'll see that our
morph does a lot more. I'm going to use this
almost square tone. But we get this harmonic
generated here in the middle. Consistent and persistent tone. By adjusting the morph, we can adjust how harsh that is. And by adjusting the depth, we can balance that
to sound how we like, create more harmonics, less. Or we can adjust the morph. I find our balance here. I like a relatively complex wave with some kind of
persistent tone, like you would find in a room. That would be the modal
tone of the room. Remember, you can always
adjust the key, as well. Now we're going to see what
random really does for us. Now, we need depth
for random to work, and the rate is the speed
at which it operates. We're going to push the
depth all the way up. Now we can see how
those harmonics are moving and changing
shape consistently. We dial the rate right back. That process is a lot slower. And if we push it all the
way up, it's a lot faster. And we're going to go for
something around here. Now we're going
to use our window to adjust some FM
modulation into the tone. We're going to bring our
position up and we can see it's highlighted here with
this white section. And we'll want it somewhere around this region where we
can pick up these tones. We'll want the window size to be a little bit larger as well. We can see that expands as
we move the control upwards. Then gain is how much
of that is applied. You can see that levels up
those harmonics in that area. Then FM pushes those to
modulate themselves doing this. You can certainly hear something we'll do later in the video. With creating computer
generated towns. Adjust this to the
balance that you desire. We're going to go with
something around here. Now, we're going
to apply a filter to this sound to shape
it even further. Filters are in
this section here. We have filter one
and filter two. It's important to make sure
that over here in our engine, we have filter mix set
all the way to one. If we bring it to the middle
to blend between the two, and all the way to the right
is going only to filter two. We just want filter
one in this instance, and we're going to make use
of the cob band pass six. So we can go down to
comb, band pass six. And this really filters
out a lot of our sound. But we can bring the
frequency right down. Increasing the volume
drives the came a lot more. Now we're going to take
dampening back off, it's going to give us a lot
of our lower tones back. Now, for me, I
think the rate that the random is moving
is maybe a bit much. I want to bring that back. There's our constant moving
electrical hum, if you will. Now what we're going to
do to really set that in our space is utilize the FX. Then FX A, where it
says none currently. We're going to go to revab we're going to take the
wet dry to mostly wet. Now we can adjust the size and things like the pre
delay in this instance. We want it to be very quick, all the way down to zero
milliseconds. The size? Well, that depends
on our visual. Is it a big spa space or is
it quite a tight corridor? Long decay is quite nice. Again, the dampening will be a real adjustment
of our high end. I think we can have the lower frequencies in here for sure. Now, this gives us a
whistling, uncomfortable tone. If in the second
effect, we put shimmer, we can start to really play with that room node and feed
it back into itself. Increase its size, make
it very uncomfortable. Now, that's the basic
setup for the preset. And it modulates itself. It doesn't require any really external modulations
or any linking. Now, remember, you can
download all of the presets we build from the resources
here in the course. So if you are struggling to
follow along in any way, please download those resources, and you can match the presets
like for like that way.
4. Synthetic Room Tone Synthesis Part2: This part, we're going to
make a different type of room tone that's a lot
more low end based. And well, it sounds like this. This time, we're going
to go for something that's a little
bit more of a bed, has more low end and can
just kind of sit there and set that kind of electric
spaceship sort of tone, but you can still freely shape and design
completely as you like. So this time, we're starting again with the welcome presets. We're just on default sign. But we're going to make use of the wave table
section this time. And specifically, if
we go where it says, basic waveforms, we can choose from a whole host
of other waveforms. If we go down to FM, inside the FM folder, we have one called mechatronic. Once we've selected
it, it'll turn blue, and we can click Close
or just click off here. If we play our tone, we've
kind of got something already. But the beautiful
thing about the wave tables is that we can use our position control to move through different
parts of the tone. It's like a small sample, and we're playing back single
cycles of that sample. Now, what we want is sort of the bottom third of this particular
wave cycle here. All of this. And we're going to make
it so that that position naturally moves rather than sticks on a single
cycle like so. So to do that, we're going
to utilize the LFOs. So we've put the position
here roughly in central, as we're going to have
the LFO work in bipolar, meaning it goes up
and goes back down. So this would be approximately
our middle point. If we select LFO one, we actually get all three LFO controls here at the bottom. We'll utilize LFO one as it's
the only one that we need. To link it to our position,
we can hover over, and it will say a
sign, and we can drag LFO one over to our position. As you can see, it's now cycling through that part of
the waveform for us. The yellow icon here will let us adjust how much of that
it cycles through. Now we know we want
roughly this cycle here. Now, this is a little
bit quick for me. So in our rate here on LFO one, we're going to bring that down. So it moves a lot more
slowly through the tone. You can see now that mine's
constantly resetting each time my note in my
DAW reaches its end. We can stop that
happening by going to Polly keyboard and put
it on free running. It will now continuously run, even though the note keeps
resetting every 1 bar here. Now I'm going to bring
the position down a bit because I actually don't want that high
frequency buzz when it gets a little bit higher
up to be too much. Just going to use maybe even just this bottom 20%
of this wave cycle here. Now let's look at something
else we could add into it. Let's make use of our
utility engine over here. Here we've got two noise
generators and an oscillator. Currently all disabled
in our welcome preset. If we turn on noise one
using our on off switch, we'll immediately get a
burst of white noise. We can make use of the filter
and maybe take away some of that high end and just let there'd be a low
noise sitting in there. We can double click to
turn that filter back off. If we click where it
says white noise, we can choose from a whole
host of different things. I find something
like pink noise can generally be more useful in
these kinds of instances, as it's already got
somewhat of a filter. We can just let that
sit there in that mix. We can blend other things
in like analogue noise. Maybe we want to high
pass that have the hiss, but then tune it down. Create that kind of
particle. So energy there. Now, we could send our
noises to filter two, and we could treat them
separately from the rest. So if we take the filter mix and push both to filter two
and turn filter two on, we can now control them
without affecting other hum. Maybe a bit of resonance. Let's make use of our LFO on
the cut off on filter two. So let that move a
little bit more. Now, LFO one is very, very slow. This might fit your scene, but
now if we adjust the rate, it'll adjust that filter cutoff and our wave table
rate at the same time. I think now perhaps the
range is even too much here. I would bring it up slightly, but I'm going to narrow
it down even more. Now, our tone here goes
into only filter one. We can utilize these cutoffs to control the top end
of that tone as well. If we want everything
to move together, we can link that to LFO one. But let's try
linking that to LLFO two and giving it a
different movement. We get a little bit more
out of the sound this way. I'll set this to free
running as well. It now moves at a
different rate. We've got those same
room tone effects, a nice bed of sound for
everything to sit on. If we want to put it in a place, we can use the same reverb
trick that we did before. If we go fully wet, it'll take some of
our original tones out and just give us the reverb. We can use the same
thing where we push into shimmer and use the feedback to generate
a room node and tone. If you'd like to generate a
really unsettling feeling, we can take the
feedback on shimmer, use one of our
envelopes or functions. In this case, we'll
use Envelope two. Connect it to the feedback, give it a really
long attack time and tell it to push
up that feedback. We'll end up with an
effect like this.
5. Sub Bass Dips and Layers Part1: Tutorial, we're going to look
at making a sub bass drop. This can be placed
under other sounds to create a sudden swoosh down into the low
harmonic rumble or can be used as an
effect of its own. And you'll hear this
heavily utilized in many, many sci fi films. It's going to sound a
little bit like this. Mm. Let's begin making
our sub sweep. We're going to start as we have always on our welcome preset, which just gives us the
very simple sine wave. In this instance,
we are going to utilize that as the
sine wave being a single fundamental frequency
is our best option for a solid sub base that we can use to sweep down or layer
under something else. The method that we're
going to create this sweep down is
really quite simple. As before, I'd recommend if you have a mini
keyboard attached, that you utilize that and able
to simply press your note. For the purpose of the tutorial, I've put a single note in my DAW, so I can just play back. So from our welcome preset, we are going to switch
utility engine off, although everything
should be off inside. And we're going to stick with
just the simple wave table here with the sine wave. I currently have
placed in note C two. But we're going to move
that up one octave, so we're starting 12
semitones up on C three. One way that we can cause the sudden pitch drop is to use the course tune and
link it to an envelope. If we take envelope two here and drag it to assign
to the course, and we can pull it down, as you can see here, it's
just giving us a percentage. It doesn't give us
the value in tuning. If we do want to see a
specific tune amount, we need to note that say, here, for example,
is two octaves. So we can hear that pitch down happens very, very quickly here. We need to adjust how the ADSR here works
on envelope two. We need to give it
more of an attack time so it happens over
a longer period. And we don't want it
to return back here. So we give a consistent
sustain of 100%. The attack amount will define how long this
takes to pitch down. The amount of course
that we pull it down determines where
the final note lands. Now, the linear progression
here feels quite unnatural. We kind of want
this to ramp up and then curve into our adjustment, something like this,
perhaps, or much faster. Now, as we move into
really low frequency, if we were to take the
standard logic EQ, for example, here
with the analyzer on. This is becoming nice and low, but we can also
continue to adjust this down lower and lower until
we're in the sub frequency. While perfect for cinema, this won't necessarily
translate across all mediums, and we may need to add
some extra harmonics in. We can make use of our
wave table position with our envelopes to do this. For example, if we bring
this down to the sub, this is barely perceptible
in my headphones. On the subsystem would be fine. If we adjust our position, we can start to bring
some extra harmonics in. We can see that extra
harmonic here at 100 hertz starting to appear. If we make use of
our third envelope, we link that to position. We can to push that
up ever so slightly. We can adjust the curve to be similar to what we
have on envelope, too. But we may wish that that comes in a little quicker
or a little later. Depends what we want
out of the sound. But that will now generate
for us some extra harmonics and make it audible as it
moves into those lower tones. With what we've set up here, you can adjust your
attack times and your curves to perform
with whatever you need. Mm. Your particular we
can make use of the additional
position adjustment to create those extra harmonics and maintain that low tone. Now at the minute, this
requires a note to be pressed and held
for it to work. We would adjust the note length depending on how we want
the note to be held. However, if we change the ADSR mode so they are
both just simply ADR, a single press of a key will
trigger the performance of the sound with the release
being the end of it. Mm.
6. Sub Bass & Dips Sound Design Part2: Time, let's have a
look at how we can add a sub harmonic layer to a sound we've already
created to make use of, say, that 5.1 cinematic. This may be the only
time in this series that we deviate away from
starting with Welcome, but we're going to load a
preset and then look to add a sub harmonic layer or sub
harmonic texture into that. We'll use this preset here. I was going to try and
pronounce it Bu de bar. Either way, if you
can't find this preset, we can go into here and you have a search preset
option at the top. So there are two
fundamental ways we can go about creating
sub harmonic into this. The first and most simple is
to take the utility engine, and we can take the bottom
sciilator and switch that on. We're going to take the
output option here. Instead of going to filter,
we'll use direct out. And we'll ensure it
stays on the sine wave, and we drop that down one
or maybe even two octaves. To give us that tone. Now, we may not wish that
to always be there, so we have our
output control here, and we can utilize
that output control. We could take our envelopes. We'll use envelope three here as it's unassigned
in this preset. We can take our output back, use our four sustain, and use our attack time to bring that sub
harmonic in over time. And obviously, the
inverse is possible here. We may wish to take it out, establish with the low
rumbling time, but remove it. We would start with
our output nice and high up and dial the polarity of this to
take it out over time. Now, a second way to do
this is to make use of the other engine if it's not being used for the
fundamentals of the sound. In this case, it's
being utilized. However, we take
this preset here. And however, if we take the
wooden Oracle sound here, that doesn't utilize
engine two at all. So if we switch
engine two on and we make use of our
analog option here, we don't need oscillator
two or three, so they can be
dialed down fully. We'll make sure
that Oscillator one here in analog is set
to the sine wave. And we can bring that
down again in frequency, say two octaves, 24 semitones. Giving us that sub frequency.
7. Etherial Textures Synthesis: In this section, we're going
to look at how we can create those ethereal pad sounds that are heard throughout
Sci Fi cinematics. As with all the other videos, we're going to give you the
tools and ideas you need, but then take those and shape
them into your own sound. So let's reset to our
welcome preset as always. We'll disable the
utility engine, even though we know everything
should be turned off. And for this sound design,
we're going to make use of the granular engine
that's inside pigments. It's available in
the engine sampler. So if we go to our
engine and go to our drop down, choose sample. Below the sample loader. We have the granular option. If we switch this, we now have the granular synthesis control
over the above sample. Granular synthesis
works a little bit like the wave tables
in that it will take small cycles of
the sample and use those to cycle through as
if they were waveforms. The difference with
granular is it can pick multiple different places from the sample and
create those cycles, allowing us to create
really deep rich textures all from the same sam source. There's a whole host of samples available to us
in pigments if we click where we have
the default E pnoC three and we go to Pads. For this instance, we're
going to subtle tension. We can double click
to load that. Let's get a rudimentary
understanding of the granular controls,
starting with scan. Scan shows the area that
can be taken or scanned for for the granular synth to take wave cycles
from Backwards allows it to scan backwards, forwards allows it
to scan forwards. And by up to 200% Of leaves
it in its tiniest area. The area that can be scanned
is controlled via the size. Can we take the size back? How much smaller
snippet can be scanned. If we amp this ride up, a considerably larger
area can be scanned. And you may have noticed that multiple notes seem to be ripping through the sound
one after the other, that's all from a
single note trigger. This is the density. If we were to bring
density down, we'd now get a single cycle, the more we bring it up, the more cycles we're
able to get in. Density can work with hertz or it can be tempo
sync to your DAW. This can be really
nice if you need some musical sync to the sound. Next, we have a shape
somewhat like an ADSR, we have specific shapes, and then we're able to adjust how sharp or effective they are, much like an envelope control. For example, here
is a classic saw. And you can hear that
ramp down happen. If we push this all
the way up, though, the curve of the release
becomes much sharper. We have multiple
different shapes. And they can adjust the
field dramatically. Below these main controls, we have the random controls. These allow some randomness between all four of
these various controls. And that's what makes granular
a little bit special. Start, for example,
allows us to start in a different position on the sample with different notes. As you can see, it's now
randomly scanning across the sound with its start points. We can dial this in
with the scan and start controls to get a specific
area of the sound. If your sound has multiple points that
you don't wish to use, we can go into Edit
and we can use the two handles here to
narrow down what we're after. When we go back to Maine, we'll only be working with
that part of the sound. Pitch allows for
variations in pitch. Makes it incredibly
easy to create very unsettling atonal sound. Very small variation can
be really nice though. Density. Again, this is a variation in the
amount of density. We can have it be
denser or less dense. If we have put our density up
significantly higher here, we may wish to reduce it with
a variation of randomness. I personally prefer to
work the other way around. I find a nice start point. I it to add a couple
more in as and when. Size allows variation in the size of the sound
that can be scanned. This can be a nice way to
get sometimes short notes, sometimes slightly longer notes. In this instance,
we kind of always want each sound to blend
one into the other. So let's have it so we can
only ever go longer on size. And now we won't get
the sound dropping out. Lastly, a volume control. Variation in volume just from
pressing the single note. We have some effects built in. Can switch these on right here. Bit crush can be quite nice. Just moving the
sound down to 12 bit can add a bit of top end noise. Maybe a little bit
of distortion, too. There is a softer mode. If you click to smooth. There's a range of
effects in here. We're going to make
use of the resonator here and add a bit of course. Giving us that
ethereal vocal tone. We can use in harmonics
as well to adjust that. Once you played around
with your settings and found a balance
that really works, we can really turn this into
that deep pad by utilizing the effects to make use of tape echo and we can give
this a balance of 50 50. That means we'll hear the full
sound and the full effect. I'm going to take this off
of sync and go to time. Can just dial this
back a little bit. I'm gonna up the
intensity a little bit, so we hear a bit more
of those reflections. I'm going to send this tape echo directly into the regular delay. This time, I'm keeping the
dry most of the signal. But I really want
to up the feedback. Let's listen to
what that's doing. Let's bring that to around 30%. Now we can give this a sense of space by placing it on a reverb, but we want a lot less
of the wets time, maybe all the way down to
20% and quite a small space. Having a pre delay of sort
of ten to 15 milliseconds, just kind of lets the delay come in before the reverb
then washes out. Playing a chord
gives us that deep, sci fi, uncomfortable
ethereal tone. We can make this even more
uncomfortable, though. Using the time here, if we use our LFO
to manipulate it, let's link it to LFO one. We only want this to go
really small amount. Maybe something like this.
And we want it to happen slowly over time and
then suddenly drop out. So we can take the symmetry
on LFO one and ramp it up, so we become closer to a
sow wave but not quite. And we're going to take
the rate write down. So now this will slowly
adjust the time that pushes into the delay in the reverb and then
suddenly drop it out, and it gives us an
effect like this. Take what you've
learned in this video, utilize the two
patches that have been Take what you've learned in this video and
create your own patch. There are two
example patches for this tutorial for you to
get your head around, and would love to
hear what you've created using this tutorial. Okay.
8. Computer Sounds and UI Sound Design Part1: In this section, we're
going to look at how we can use pigments to create things like UI and computer sounds that fit in the
Sci Fi cinematic space. And in this first
one, we're going to look at using
something completely different to what we've
done before and create a keyboard foly player that you can play from your
midi keyboard like this. All inside pigments really, really quickly, starting
from our default patch. The first thing we're
going to do here is actually switch off engine one. We don't need that this time. And instead, we're
going to navigate over to the utility engine, and we are going to
turn on noise one. We're going to make use of
this functionality here. Currently, it's
just white noise. But inside pigments, there are a whole suite of useful noises. And in fact, if we go in here, we can go down to Foley, and there is a computer
keyboard loop, which is just a sound loop of someone playing a
computer keyboard. But we're going to set this
up so it can work for us. Now, when we've loaded
this, it by default, has moved from key to
random, which is perfect. This allows us to start at a random location in
the sound itself. And that's absolutely
what we want. The next thing we need
to do is adjust this, so it's just a single keystroke
for each time we press. ENV amp, that is our envelope for our amplitude
is automatically linked. If we take it from
ADSR to just ADR, so a single press will
always be one key. We can then just
reduce our sustain, our release, and our decay
to make a single keypress. We wanted to bring our
attack. I was very quick. And we'll shape our
decay, our stain to fit. If we need a bit of release, we can leave that there as well. Now, to give a slightly more mechanical feel to these keys, as we might find in something like the classic alien films, I tuned it down around
seven semitones. That gives a heavier,
clunkier sound. As we've restricted the envelope of the amplitude so much, we can actually add some gain back in here on our main output. Let's maybe give this a
slight bit of attack. That seems about right here. Now as we have before,
we can use effet, make use of our reverb
here to place it in a space directly
within pigments. This time, we can
use the presets. And we'll just give it a
tiny bit of space like so. Dial it into our scene. That's one really useful option for making use of the utility
engine and the sampler and the randomis to create our own custom
keyboard foly machine.
9. Computer Sounds and UI Sound Design Part2: In this tutorial, we're
going to look to create some Sci Fi computer
type sounds, utilizing the functions
and the wave tables. And it sounds a
little something like this. Let's get into that. So starting with our
welcome preset as always. This time we need to make a
waveform that's got kind of a bleep bloop kind of effect
to it or sound to it. We also want it to
change slightly. Now, we can use a couple
of different options here. We can use the wave table or we can create our own
with the harmonic. First, we'll look at using the wave table option.
If we press this. And we want something
that can give us the right kind of sound. The Sing triangle square is probably a good
place to start. And we'll give a little bit of movement on the position between the triangle as the
starting point and a little bit into the sine and a little bit into the
surface and variation. We can just use LFO one to
do that and dial it back. We just want a slight change in tonality each time it presses. Now, by default,
envelope amplitude is always linked to the output, but we can control the volume
with any other control. So we're going to use
something to give this sporadic bleeps and bloops and very quick automation
just at the press of a key, and we can then dial that
into be however we like. If we use something
like the random assign, we can bring the random assign over to the volume control here. As you can see, though,
the note is always held. So we're going to
take the polarity and have it so it's just plus, and we can take the level
all the way to zero, and we can dial it up to
the appropriate volume. Then we need to
establish how it plays. So at the moment, it's either on or off at certain levels. Let's take that and
put it to hertz. Now, smoothing allows us to control how smooth that is rather than being
directly on or off. Distance affecting the amplitude between those different points, so our lowest and our
highest point and the smoothing affecting
the ramp up between those. This is all very
musical at the minute. Bit of jitter will give us
some distance between the two. We can make this free running, so it's never
affected by keypress. But it doesn't quite
do what we're after. We need to combine this
with something else. This is where our functions
can be the most useful. If we bring function in and we remove the value
here for the random, as you can see the function
works like an LFO. And it loops over as well. We can turn that for one
shot or to an envelope loop. If we take it to one shot,
it'll only affect it one. Now, the beautiful thing
about this is we can click here and we
can add points in, and we have complete
control over these. Meaning we can choose precisely when volume
will come in and out. We can choose the curves. We can choose amplitude
and everything in between. We can also adjust the rate
at which these perform. So if we go to Hertz. We can find what's right
and we can really dial in exactly how fast we want
each of these sounds to be. Do we want it to have a ramp up? Let's try pitching
this per octave. And now we're really
starting to get somewhere with our Sci fi
computer bloops and bloops. This is a really
good opportunity to make use of the cob filters, something like the
high pass here. With the dampening pull back. Do you notice we still have
a lot of tone leftover, even though we're just opening
this up into the output. Can we link our function
to volume here as well? Now, the way we've
done this here, it leaves a constant
tone below the bleeps. A simple way to
resolve that is to make use of a noise
gate in your DAW, which gives us a
result like this. From here as a preset, we can dial this in and
adjust the tonality really, really simply using
different waveforms. Adjusting the position. Then we can make use of the
built in effects. Let's have a look at
another way we can do this, making use of the additive
engines in pigments.
10. Computer Sounds and UI Sound Design Part3: In this video, I'll show
you the techniques to make the classic digital
computer sounding bleeps heard in every
single sci fi film ever. And it's really, really
simple here in pigments. It will sound a little
something like this. And once made, you can dial it in to be exactly as you need. Let's start from our default. For this, we're going to
use the utility engine. So we can turn off
our wave table here. Currently, nothing's playing.
We turn on noise one, and we get our white
noise burst. Perfect. As we've seen before, there are multiple noise layers
that we can load in. If we go into digital here, there's a really good one called alias Eror That does
most of the job. But to get that pitching
up and juttering effect, we're going to make use
of our random modulators on the tune and the filter. So as you can see,
we're on random here, and if we select random one, we'll be able to see
those at the bottom. Now, random one, we're
going to change to something called
sample and hold that allows us to very quickly move between different places
and hold it in a set. So we're going to assign
one here over to the tune. And we then need to set
a rise and fall Now, each time we press the trigger, we get a different
tuning of the sound. But we don't want to
press that trigger over and over and over
for this to work. So let's go over into
our sequence option. We're going to switch
the sequence on. And now, it will trigger
for us changing each time. We can adjust this to
whatever paste that we like. Well, let's dial this
tuning in a bit. Bringing it down about eight semitonsGives us that result. Now to add a little
further texture. Let's use random two. We're gonna take
the smoothing down, so it's more of
like a square wave. We're going to assign
that onto the filter. That gives result a
little bit like this. We can now dial that and tune that in
to whatever we like. Now to adjust the
sample and hold. We might want to change
the pacing to say AFO one. We can now use ALFO one as our rate control
for the sample and hold. From there, adjust
as you desire. Once we've got the
preset set up, it's very easy to
just switch through different sounds and
get a different effect.
11. SciFi Engine Sound Design with Synthesis: This tutorial, we're going to
look to make engine sounds, but specifically Sci Fi
orientated engine sounds, something like a
spaceship taking off. The patch we've built just
here sounds like this. This patch here and the one we'll make
during the video will both be available
as downloads for you as a starting point and to reference when
creating your own. So let's reset back to
the welcome preset. Now, to start with,
we're just going to utilize the saw or
even the square or somewhere in between the two to start building the sound out. And we're going to build
a customer function, which is going to
control multiple parameters to make
this sound work. Going to get into function here. We need to go off from
sync and into her. And we're going to create
something that ramps up and dips down multiple times. So we can just flatten it off. Like so. We're going to take the magnet off so we can put
points wherever we want, and they don't
stick to the grid. And we want to slow
this hertz rate down so we can make use of long gevity over
a series of bars. Now, to get an idea for
how the sound works, the first thing that
I'm going to link it to is the coarse tune over here, and I want to bring the coarse
tune down a little bit. So if we play on note at
the minute, which is C one. I actually want it
to start even lower, maybe half an octave down or so. What I want to happen
here is it quickly start to ramp up in pitch. We're going to put
a point in here and we'll give it a bit of a curve so we want something like this
to start to happen. Now, we would like to be
a bit quicker and we can utilize either
bringing the point back here so it happens faster. Or we can make it so that the Hertz rate is quicker,
whichever works for you. If you want to utilize the
full space of the grid, that can be a good
way to go we could put it on the point
here and then we know we're going to have enough
space for each part of the sequence and then
we'll up the hertz. I only want this to pull
up to about here, really. I think I want that
to go about here, and then I want another
point afterwards. I want it just to drop
down a little bit more. They I want this
to ramp up again, but over a slightly
different sequence of time by roughly
an equal amount. Then the same again, we
want it to drop back down just a little bit and then
ramp back up some more. Give it a slight bit
of a curve each time. And then let's
repeat that again. We want to give it
a tiny little drop back and the curve ramping up again. We end up
with something like this. So I want these to be a little bit sharper and to simulate a very fast gear
changes the sound that we're used to an engine will
get up to its maximum revs, then the very quick
gear change will drop it down a little bit before
it starts to ramp up again. Now, more we do this curve
if we put the curve, say up like this, it'll
ramp up very quickly. We actually want it to kind of recover a little bit and get back up to that point relatively quickly and then surpass
the previous point. Now, if we give a
positive curve like this, you'll find it starts to have its two natural ramp ups and then it builds up
faster and faster, much quicker and gives
a different feel. You could completely design this to whatever works
in your visual. U Now, we're going to use
the same function to control movement of
the waveform as well. We're going to take function one and link that to position. What we want this to
do is to begin to ramp up into a harsher tone or
ramp down into the saw, whichever we decide
as the gear changes. We could do something
like this, for example. You can really hear how
that starts to change if we really exaggerate
that position. No, it's now because we get
that wave shape change. The gear change and
the sudden jump becomes a lot more pronounced. It's a far more interesting
and somewhat realistic sound, even though we're going for
a sift kind of element here. Now we're going to do
something to shape this really basic wave into something more resembling
an engine sound. We're going to
utilize the filters going one into the other. So we can keep the filter mix
here on one and filter one, we can utilize
something like the mini and really dial that back. Use the drive, potentially, or what I like is
the resonance here. And we're going to use
our function one again to control this cut off of
this particular filter, so it sits and
moves up and down, and we get more high end as the engine pushes a
little bit harder. So we're take function one, assign that to the cutoff and have that so it pushes upwards, which means in the lower tone, I want this to be as low
as it is at any point. So there's probably good. Now, into filter two, we can do some extra shaping. This is completely up to you, but there are some great options in here that we can utilize. Yeah. Something like the
cluster notch can be really, really useful, as well. So if we find right sort
of tone we want here, we're going to link function to the cut off on here as well. We have that so it pushes up. We'll give that quite
a big bit of range. So as it ramps up, it can
move across the frequency. And again, we get a
really lovely shift with everything moving in
the different tonality. Listen. Now, we're not restricted
in doing it this way. We could absolutely have it. So it starts up higher, and we decide that we're going to go to inverse here and we start to pull this back
as the pitch gets higher, and we ramp up different parts of that
frequency spectrum like this. Oh Now, we can add something
to this that really gives quite a good
engine feel as well. The spread here can give us a really
lovely pulsing sound. Now, if we take, say, an LFO, let's go to our LFOs, and we'll take LFO one and
link it to the spread, and we'll let that
open and close it. We're going to leave it unhurt. If we do something
a little harsher, like a saw, get a snapshot. Maybe we get that slightly off. And we up the hurts
a little bit. Give it a bit less
on that spread. So we're now getting a kind
of policing feeling going. Let's make use of
our function again. But this time we're going
to take function one and assign it to the
hertz in LFO one. So as it ramps up, the hertz and the repetition of this ramps up on that spread
so we get this effect. Let's push these ts and the
spread much, much higher. I also want it to not sit
in such a vocal frequency, so I'm gonna allow it to
not pull down as far. So at the moment we're
just using a square into a saw wave, we can absolutely
use other waveforms, and it will completely change
the overall engine sound. So there's a very simple
option just using the MxBPulsewidth
modulation one. We'll leave it there for now and we'll look at using
some other things, give it a little bit of texture before going to
the effects chain. So in utility, I'll generally put something like a little bit of noise in the background, and we'll make use of
the tune and the filter, again, utilizing that function one so everything moves
and works together. At the minute, white noise
is going to be far too loud, but we have multiple
options inside of pigments that we can make use
of that might work for us. This kind of rumbling
sound might work. I really quite like this
electric distortion, but with the high
end of it taken off, we start with that quite low, and we'll take the tuning here, use our function one, and
we'll pitch that up over time. I may also start with it louder, bring the volume back as
it gets the high end. So we'll use function
one for that as well. So we'll bring it back slightly. And let's see what
we get with that. Okay, let's mix it in
with the wave table. Okay, so less on the
volume at the start. So, in fact, we want to go
quieter and make it louder. I think that's quite
nice right there. So this is just our base sound. We're now going to shape
this utilizing the effects. So in the effects section, we have some options that
we can play around with. First and foremost,
distortion can really help us shape this into a much
more aggressive sound. So if we just take
something like soft clip, You can take that drive. We can do a similar thing with the drive like we
did to the spread on the LFO and make it so
that distortion happens at an extremely rapid
rate by doing this. And now it's kind of
simulating a lot more of that piston drive of an engine. Um Now soft clips nice because it just
takes off the tops. If we do something a
little harsher, like, full on distortion
or the hard clip. Or geranium. Much more
aggressive responses. Sound more like an engine. A little less elegant sci fi. And Now, one of the
things that can really, really bring these
out is the multiband. That allows us to shape
the sound a lot more. I find we'll have to take
the low back quite a bit and potentially
the mid as well. The high will probably
add a bit too much. So I tend to bring the
high much further back. A really nice thing
we can do is use again our function
one on the mid out and let it push the mids
more as it gets harsher. If you're finding a lot of
high ends coming through, you can take this
right the way back. But you'll still be getting
some from the distortion. We'll handle that in a moment. Another couple of options
that we can utilize here, the super unison can allow
us to do some great things. If we bring the D tune
really, really tight, and we can again use the low pass frequency on here to narrow things down
a bit more if we need to. Rate right down. It gives this
great sound design option. Equally, I do like
putting things in a space as well with
a bit of reverb, making it really, really
small. No pre delay. Nice and nice and tight.
It's literally this, which if that doesn't
remind you of a race track, I don't
know what will. You can blend that
in. Get really, really nice effect
stick it away. It's super noticeable, even though it's a
really small effect. Now, the way the
effx inserts set up the minute insert
A goes into B, so we can actually Now, the way the FX is set up at
the minute, A goes into B. So if we were to move
all of these over to A, we could also add a little
bit of control just at the end with a compressor,
as well. So let's do that. Let's save these effects so we can utilize them
in other presets. We can go into presets save, and we can call this engine disk we'll do the same for the
multiband and reverb. So on FX A now, we can put in our distortion, go to our presets, move
those over nice and easily. Same for our multiband
and same for our reverb. So now on FX B, we can just remove these, and we just need to repair
LFO one to our drive. But so now on FXB we can
take the compressor here, bring the threshold down, give ourselves a nice ratio. W to be quite a fast
attack because of just how quickly the
sound shifts changes. Then just give ourselves
a little bit of control. We can use the autogain here just to kind of glue
that whole sound together. So then our final engine sound that we've built here
sounds like this. One final step I'm going to take in this instance
is I'm going to add the multi filter and put the slope
on really harsh 36. I just want to take off some
of the high end distortion that is coming through from that very rapid
distortion modulation. It's happening there around two K. We just roll
that off, like so. You could use external plugins
to do this even finer, but it's lovely to
be able to do it all within the one tool. So our final engine sound we've
created sounds like this. H
12. Synthetic Weather Environments: In this tutorial, we're
going to look at making synthetic weather events like the wind and debris preset that you can
hear playing right now. So let's reset to our welcome default patch and create something
a bit like this. So we are back as
ever with welcome. And our sine wave. We are going to make use
of engine one in this. However, we're going to
begin with the utility. So for the moment, I'm
going to disable it and jump over to the
utility section. First off, we're going to use noise one, so we switch that. Now we've got the white noise. Now, for this
particular instance, pink noise works
really, really well. So if we click, we can
go back to pink noise or a few taps on the back
arrow will take you to there. And pink noise has just got the high end of white
noise rolled off, really. Now, we're going
to do a couple of things to modulate
this pink noise, and that's actually going
to become a big part of our wind and movement
in the background here. The first thing
we're going to do is we're going to take our randoms, which you can see we already
have at the bottom here. I'm going to assign random
one here to the tune. I'm actually going to de tune the pink noise a little
bit and bring it down So we're in a bit more
of the wind line here, but at the moment, it's
jumping all over the place, and that's definitely
not what we want. So in random one here, I'm going to change
the sync to t and dial the Hertz back a
good, fair amount here. I only want the tune to be able to pitch it
up from where it is. So polarity, we're going to
change so that's just a plus. So we've dialed the tune back
and it can now only push back up to its original
pitch, as we can see there. And I'm going to take
the smoothing and push that really quite far up here. So now we end up with something
a bit more like this. Where it ebbs and flows
back and forth in pitch. We might put a little
bit of jitter in, we may slow the rate
down even more. You may wish to pitch
it down further, Bunce it to where
you feel is best, and we can adjust how
far it can move as well. We may want to
increase the distance and really smooth out
those bumps as well. I'm now going to apply the
same thing to the filter. So I'm going to take the filter here and pull down
to the low part. I want it to where it becomes
kind of a lowish rumble. And I'm going to link random
one onto the filter as well. I'll take that back a
little bit further. What I want to happen now
is when it pitches up, like the wind is
blowing and pushing and the pitch of that rises, I want it to then also open
the filter a bit, too. So, so this is easiest
to demonstrate. I'm gonna put the
hertz up a bit. So now we end up with make that I would want to slow
that down naturally. And I'm going to take the
sauce here off of pollen. We'll have it as free running, and that will just leave that
random oscillator always cycling regardless of key
presses or the DW stopping. So we've started to
get our wind effect there quite nicely. Now we can build into that by using another noise
oscillator, as well. Now let's have a look at
creating some of our rain noise. Let's move over to engine one. Now, let's have a look
at creating some of those debris and that kind of blowing in the wind and that small particles
blowing in the wind. Let's move over to engine one,
and we'll switch that on. We're going to make
use of the sample and granular again here. So let's go into sample
and switch on granular. We need to find something
that has the right kind of tonality for what we're after for
getting those debris. Noise section. There's quite
a few good things in here. Burning vinyl can give
a really nice response. And we've looked at
using the scan start and everything already in
the previous tutorial. So let's look at moving this up, maybe increase the
density a little bit. We've got a few different
parts going on here. Now you notice that
they're all quite long in terms of the sound. We're going to take
ratio off here. We'll put it to milliseconds. Something below the
50 millisecond range generally starts to
feel about right. And we can make use
of our shaping tool here that we looked at
in the previous video. If we use the exbodic, we can make this a really
simple little particle. We're going to take the
volume, just bump it up a bit so it cuts through the wind. Now, it seems a bit static and pulsing at the
moment, right? So what we're going to
do here, we're going to take this and on our filter mix, we're going to push this all
the way over to filter two. And we're going to
take our sum here and adjust this filter one
and filter two separate. And we're going to
take random two and assign it to the
pan of filter two. That allows us to
have a little bit more movement around
with that sound there. Now, we don't want
any of the low end in the vinyl sound either, so we can go into here, into our filter, and we'll take something
like the high pass 24. Just bring that back until we start getting our debris there. Our density here gives us sort of the amount of
things that are going on. I'm going to ramp
up the speed of the pan we've got lots of
little debris happening, but the pans quite slow at the minute and they
still seem rhythmic. But if we really pump up the rate at which the
panning is happening here, they'll become a lot more
sporadic in the stereo field. Something like that
sounds pretty good to me as a starting point. Just going to go
back to the utility and take the filter down
a little bit further. Why don't you give this the
full stereo spread, as well. Jitter. Once we've set that up, if you find that the burning vinyls not quite doing
what you're after, there's plenty we
can flick through. I found this to be
quite useful as well. If you're getting really
sporadic kind of impact sounds, if we get into edit, we'll just narrow it down a little
bit as to what it can use. There's not so many silent gaps. You might want to increase the density here of it as well. If we go back to
our utility engine, we can add in a little
something extra here. Take something like
the vinyl dense here, make use of the high pass. And we could send that
to filter two, as well. We have a blend of it. Tune that to where it fits. Find old there gives us really lovely effect of
that kind of being rain on foliage with some harder bits hitting and the wind
in the background. And we can just dial
those in or dial in the rate at which
the wind fluctuates. What do we dial back
the panning rate? It's a very simple preset
that you can build. It does a really
nice weather effect, or just by holding
down a single key, and then you've got a few parameters that
you can adjust and tweak or automate with your
visual that work really, really nicely, making
use of those filters for internal exterior
scenes, et cetera. And once we've done that,
it's a case of you can just mix and match
the pink noise, the old vinyl, or the
bursts decay here, and you can get multiple
different effects. There'll be a version of
this preset saved for you. Then let's just have a look at how simple it is
to flick through some other sounds and build up different
environments like this. Let's say we particularly
like this warm transmission, but having the constant
fluctuation is a bit much. What we can do here is
create a volume filter, so it only comes in in
really sporadic drops. We can use our
random three here. Take the volume down. We'll take the volume to where we need it. We'll change you
to random as well. Polarity, so it's only plus. Take our volume control here, and we could give it
something like a function. Oh brings it in in level. If we take the dusty vinyl
preset here on loop. You can create the kind of movement that we're after
and just dial that in. You can take the time and create your own exact filters as well. And bear in mind, we
can change the rate. If we don't have it so
it's quite a musical. We could take our volume control here and link it to
something like envelope two. See how that opens it up. We can maybe have that triggered
by, say, random three. And if we make this
really, really short, Random three will determine
how frequently it occurs. We can really take
the smoothing away. Got the jitter. So now we're starting to
get a relatively convenient and
constant rain drop here out of the
worn transmission. Now, if we take our filter mix and we send it to
filter two like before, start to get that
stereo field as well. That's up the rate. That where we like
with our rain amount. We just continue to
keep dialing it in. Then we can make use of random again on the tune to give
it a bit of variety. Our density on here. Then we've started to build a rainy environment with
some slight adjustments. The things we can just tweak. Just by adjusting the
sounds as we go through, I really hope you enjoy
utilizing this preset. Let's move on to the next
type of weather effect.
13. Electronic Synth Braams: We are going to look to
make the synthesized bram, which sounds a little
bit something like this. Wow. Heavily in horror, Sci Fi, and for many other
sound design choices. Now, the beauty of the
way we're going to make this particular
preset is that once you've made it to
match your project, all you really need
to do is adjust the attack times to
suit your visual, and you can flick through the different wave tables
to adjust the tonality. Everything else can stay as is and will work pretty
well for you. So to begin, let's start with a fresh version of pigments. Go to our little
Burger, New preset. That will give us
the base sine wave. So first thing, let's
set up our oscillator. We want this to
be on wave table, and the wave table we used for the example was one
called scanner. Now, scanner can be found by
clicking on the waveforms, going to harmonic, and then we scroll
ourselves down to S, and scanner is right there. So now we have yet not quite the sound that we were hearing before,
but we'll get there. One of the first things
we want to do is grab our position in the wave table. We can do that just up here. We went for something
around this region. What we want to do is
we want that to move. When we press upon it, and we also add a
little bit of movement, so it kind of starts in a random spot every
single time, as well. So the way we do that,
we use the combinate. Now, if we go over
here to combinate, we've got com one,
two, and three. This allows us to
have things like a filter envelope and an
LFO working together. Instead of using one of our envelopes and
one of our LFOs, we've got them built into one thing called these combinates. In this instance, we're going
to have both of them set to lag with varying amount, and you'll see that
they're currently both doing absolutely nothing. We need to give them a source
to create that source, we're going to use one of
the random oscillators. Random one, in this case, they'll do absolutely
fine for us. So if we go into here and we set random one and random one, you can see that
we're already getting two different values just
because of the amount changes. If we were to have
exactly the same amount, then they would look
almost the same. By having different amounts, we get a different value over. It gives us different output. We can have an idea
of what's going on with this by taking C one, hovering over. We've got a sign. We can drag that over
to our position, and as you can see now,
it's causing that to move. Every time we press a key, However, we don't want it
to move so frequently, and we certainly don't
want it to move so far. So we can limit
that in our random. So for this, we're going to take sync off and have it to hurt, and we're going to
dial it right back. So it's a lot lot slower. We're gonna change
it from random to something called touring, and we're going to change
the poly keyboard to legato. So we get a nice smooth movement between different
notes, for example. As you can see, it's doing a little bit
more of what we want already in that it's not
constantly bouncing around. It moves every so often to a slightly different
part of the wave. Now, we actually want to
limit that even further, so we're going to really dial it back here on the position. We can flip length on this
random where they are, as it's now doing its job, we've just given us slight variations each
time we press it. Now that shape our tone a little bit in the
window up here, first thing I'm going to do
is actually knock it back an octave, about 12 semitones. I'm not interested in the
stereo amount either. Well maybe have that ons
2% as we're going to introduce some voices
to thicken it up a bit. Somewhere in this kind of
range where we start to get that high ringing tone. I think we need to open
up our position a little bit more here. There we go. In phase transform,
we're going to make use of skew and put just
a little bit in. Let's listen to what that does. So we can press a key and skew mod starts to give
us that fast ring, so we can just put a
tiny bit of that in. Let's get the sound
we're after there. Bring the position back a bit. So I don't want it to
sit up in that high until we modulate it
through that area. The modulator on ratio
absolutely fine here. As we increase the volume,
listen to how this changes. Giving us that nice sub
harmonic ring through now. Play around with
the wave in here. I can find it really useful
sometimes to use a sawtooth. Get really thick tone, like say. If you want it to really
rumble put it's a 0.5. Oh In this case, we're
going to use the sign. Let's give that deep sub. Okay. Let's start
to shape our sound. Let's have a look
at the envelops. The first thing I want
to look at here is the overall ENV amp. This is our main amplitude. I want to switch this
from ADSR just to ADR. That means we can
press and hold a key, and it's always
going to just follow our amplitude rather
than sustain. So using this, we can build the one keypress that will
do the whole bram movement. One millisecond attack
is maybe a bit quick. We can pull this
up a little bit. I get something like this. Decay, is going to determine how long
our overall sound is. That's going to
really be dependent on how you want it to sound. But it also includes our sustain from our high to our peak. Now, you have the sustain
putting roughly at the plus. It gives us a nice
ramp in the decay. I'll release at about 12:00. Now we're starting to
get the shape of it. I'm getting a slightly
different tone each time. For the sake of this recording, I'm going to turn this up a bit, but we will actually be giving the sound some effects later
that keep it a lot louder. So let's start to shape the sound a little
bit with a filter. I not engine section. We need to make sure that
we're going to filter one. The filter mix over here
being set fully to the left means it's going directly into filter one, which
is just up here. And we're going to use a pretty aggressive filter
called the mini. It's pretty
aggressive in the way it drops off quite
dramatically here. If we play our noteb we can kind of hear where we want to start with that low tone, and we want to bring
everything in. So we're going dial it
back to where we want it. We'll use Envelope two here
to control the filter. So we can take Envelope two, assign it to the cut off, and use our control
here to push it open. The minute, it's
obviously far too quick. We are going to
leave this on ADSR. That's the overall sound
will still respond with our envelope on the
amplitude anyway. We're going to encourage this to grow a little bit slower. We can hear that's
doing the job, but we want to take that decay back a little bit and we want to give a lot more to the sustain and the
release in this instance. So we can little
something like this. I think the way this is moving, we can bring this cut off even further back and start
down in the hundreds. Encourage it to open
up a touch more. I think a bit of resonance,
but not too much. We'll do it some good as well. See, now that's made too harsh, but there's definitely a
line somewhere in here. If you want again some
distortion into the sound, a bit of drive as well, I add great effect
to that sweep. Now, in a similar way to how we have a slight bit of movement going on
in our waveform. So each time it's a
slightly different key. So each time it sounds
just slightly different. We can do a similar thing with the starting
point of our cut off. And we can use the same
Combi and pop that on here and give it a
really tiny adjustment. So it's kicking off
from a slightly different start point each time. Okay, so another part of
the kind of Wa aspect of the brams if you remember the modulator that
we pulled up before, we're going to
automate that to dial back as the filter opens up. So we start with all that
sub energy in there, and then as the filter opens up, we pull that back and
let everything open up. So we'll take Envelope three
and we'll connect that to a. And we're going to
dial that so it goes backwards like this. But that's going to have
an even slower attack. That's going to have no decay, and then we're going to hold
the sustain on that for a similar kind of
time and release. Wow. Wow. Hopefully you can hear that. If you're unable to
hear the sub aspect, let's try popping this
onto the saw tooth. You can hear how it dials
that back as it comes in. I remember how right at the
start of the video I said. See, I did say that. You
can just then adjust these attack times based on what you've got
on the visual. So we're going to go back to
the sign for this instance. Wow. Have it dial that back, right? Something else I want
to do to this sound. It's just the voices slightly.
What we're going to do? We're going to use the
random here again. We'll take random two this time. We'll assign it over
here to the voices. We don't want it to swing quite that wildly,
I don't think. But we did want to give it
a little bit of variation. Now, up here was
the highest point, so we're going to
dial that back. So now the new high reaches
about where we were before we can move around
in that space a little. Now I want this to be
in sync with the sound. Again, we can do it in hertz, but in this case, I'll sync
it to the BPM of the DAW. And then we get some rhythmic
adjustment in those voices. If we really detune it, you can now hear
the wobble, right? When it's just slightly detuned, It's within a tolerance that
we can hear a difference, but it doesn't sound like it's wobbling all over the place. So we can hit this
over and over again. And each time, it's ever
so slightly different. So it's still the same
sound and the same note. All right, so those
are the basic things that build this sound up. The things that
really take it to the next level are
the built in effects. So let's have a quick look at those and what we
can do with them. To be flip over to
effects here in pigments. And the first thing
we're going to pop on here is a reverb. Already. I can hear where
we're going with this. We can really open
everything up here. The reason we can do that because we're going to
automate the wet dry. We're going to have
it so the wet dry is affected with our envelopes. Now, it's going to be
best to that's going to be best and not have the
sub push into the reverb. Now, we've set up an envelope
that pulls that sub back. If we utilize that the other way on our wet dry, we'll
get something like this. I ramps up quite nicely. With our reverb tail there. Now the thing I used
to bring this to a ridiculous level now is going to be the multiband compressor, and I'm going to
ask you to really probably cook the
mids and the highs. Like so. Now, I personally like quite
a slow attack on here. And because it's
such a slow attack, all the warmth of the low end that we have in there at the start gets through, and then it crunches down on the highs and helps it ramp up. And I then tend to put
a nice long release on, so it also crunches
and clamps down on that tail of the
reverb. Like so. Wow. W. Et's try giving ourselves an even longer attack
on that filter. Yeah. Now, we've got an
interesting sound, it's not quite aggressive
enough for me just yet. So let's have a look
at the filters and see if we can do something
utilizing filter two. Now, important here is to
look at the filter routing, and we've got filter
one into filter two currently or filter one
filter two in parallel. And we want it running
like this as a sum. Let's get the
aggressiveness here. We're going to use
split that lets us run filter one into FX A
and filter two into FX B. If we switch on filter two now, I want to try utilizing a
probably a peak filter, maybe with a bit of distortion. And then we'll look
at doing some effects on that as well to
crunch that even harder and give
that a nice effect. Um So if we look at maybe the
classics and we take a really steep band pass, maybe the 24 DB, maybe even the 36.
And we drive that. Now, we need to make
sure that we've got a balance between
the two filters, so one and two. So now the sound
will go to both. So you can hear now, we've got the movement
of both filters. If we drive this, it'll
become a lot more pronounced. Yeah. So that's clearly too much,
let's style it back a bit. Now, what I want to do
is have this move around the same kind of
movement as the mini, so we could link it to the same so we could link it
to the same envelope. Which we didn't date. Wiki link, it's in the same envelope here. Oh. We can have it
so it moves further. And also, I want to incite that slightly different
start position. So what I'm going to do
here is take LFO one, put LFO one on the cutoff. I'm going to take LFO
one in hertz nice and low and not give it nearly as
much range to move around. So now it's going to start off in slightly
different positions. I'm going to put it
onto free running instead of trigging
with the keyboard, so it's always going to start off in a slightly
different space. Now we're getting that
extra bit of movement. You know, we could pronounce
this a lot if we wanted to. That's really quite
cool right there. We can make this even
harsher with resonance. That's really cool. If we go back into our effects, now on effects slot B, we could do a similar
set of things. So we could put a reverb
on here or other effects, perhaps like a phaser to give us a nice spread or
the chorus here. Combine this with the multiband again and crunch the middles up. We're starting to get a really
interesting sound design. Everything else
from here is just tweaking and adjusting it to the visual you've
got on the screen. This is all we
require setup wise. Now, remember I said right at the start of the video that. Well, we can absolutely do that. So if we take our preset here. So if we take our
finished preset here. If we just dial our attacks in, we can get a completely
different bram effect each time. And if we want the
overall sound to change, once we've got that, we can quite easily just flick
through the wave tables. And the performance works with almost any sound
we've got in here. We can make use of the
sawtooth trick from before. I really hope you've enjoyed an introduction to
cinematic synthesis, and we really look forward to hearing the sounds
that you have created. Thank you very much for
watching and see you in future classes
here on Skillshare. H.
 Black Goblin, Sound Design & Techology Company