Transcripts
1. Welcome!: Sound not only adds to film but it's
an essential part of the narrative As a sound designer, being able to create sound for
Film is really rewarding, but if you're a director or a video editor having a basic understanding
of how sound works, in particular post-production will help take your project to the next level
Hello everyone! I'm Gabby and, welcome to "An Introduction to Audio Post-production"
in this class we will cover all the basic aspects of audio post that you need to know in
order to get the best results for your work. Audio post-production is where all
the elements of sound come together, and you might have seen our previous courses on
pre-production and production sound and, in this class we bring all that knowledge and the results
from those stages together, to create a final polished piece of film. The key components to audio
post and the areas that we're going to cover the basics on in this class are: dialogue syncing and
editing, ADR, sound effects editing and sound design, foley, music editing and mixing.
Film post-production is one of the longest phases of producing a film, there are a lot of elements
that need to come together, at different stages throughout the post-production process, in order
to deliver a final cut ready for distribution. Throughout this class, I will demonstrate the
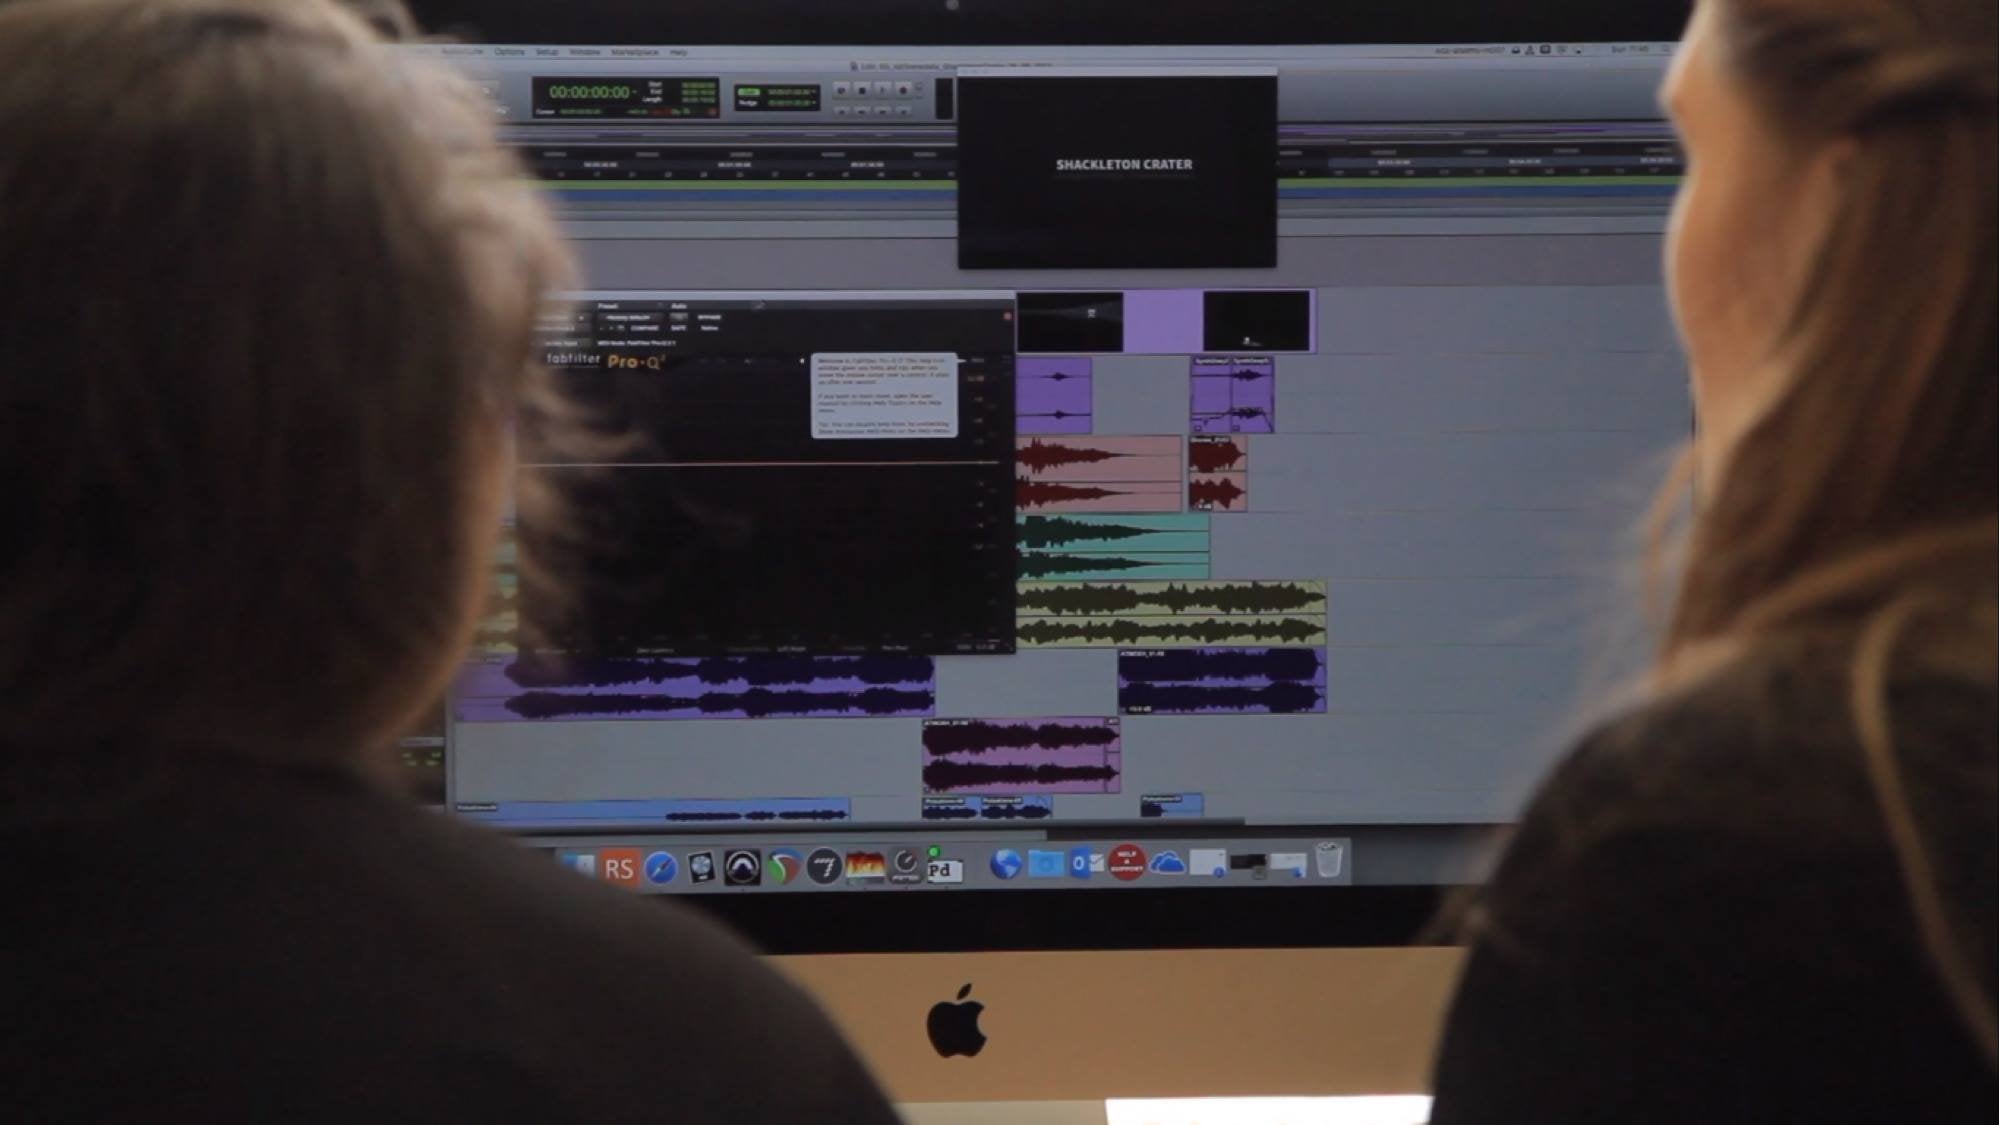
techniques discussed and give you examples before and after each step and, for the sake of this class,
all my demonstrations will take place within Pro Tools as this is industry standard but, if you
use a different program or piece of software, what I show you in Pro Tools is completely
transferable to the software you are using as long as the features are available. Also
it's worth to mention that there is a free version of Pro tools you can also use if you
need to. For the class project, you will get to unlock your creative self by working on a
short scene where you'll be able to practice all the techniques learned in this course,
from dialogue editing to sound effect design. Everything that you need can be found in the class
materials. Whether you're a filmmaker, new to this or a filmmaker that's been working on films
for a long time but have never stepped inside the world of audio post-production, this class
will help you step up your creative knowledge. I'm so happy that you've joined this class. Now,
let's get started and thank you for watching.
2. Picture Lock and Spotting Sessions: In order to begin the audio
post-production for a film, picture lock needs
to be completed. This is so that you can
work off a piece of footage that will not
undergo any changes. This is because if,
visual changes are made, i.e cutting scenes, then all previously
synced audio will no longer be in the right
position on the timeline. And in many cases, fixing this goes beyond just moving all the audio
on the timeline. Shaving frames here and
there might mean a full modification of sound
effects, foley and more. Once you have your locked film, it's time to start
the spotting sessions. A spotting session
involves a director and the sound design team. And during these
sessions they will discuss the sonic
elements of the film by watching the film
and, marking points for recording,
editing, and creation. This is a crucial part of
the process as it allows a clear communication of the director's vision
to the sound team. Things that should be
discussed with the director are: general tone and aesthetic,
world building so, what is the world like with
the characters are living in? What's the timeframe,
things like that. Any specific moments for
sound design and flagging up any problematic areas such as bad production sound
or dialogue. I've added a template for the spotting sheet to
the class materials. So, feel free to use this for the class or for any of the
words that you might do, too.
3. Sound Sync: Before picture lock
and just after the production sound team has delivered audio to
the film editor, sound sync usually occurs. Sounds sync is usually
performed by the film editor. However, if your project is a one-person show then you might find yourself
doing this on your own. During the film, the sound
and photography crew must have ensured
that they were both capturing audio and video at the same frame rate and, agreed
on a synching system. A clapperboard is a must and having this reference both for picture plus the
traditional clap, will allow editors
to synchronize audio to video without a problem, regardless of any other
implemented syncing system and any problematics that
might arise from their use. Using technologies which enable video and audio devices to sync includes synchronization
by a jam sync, which uses SMPTE time-code
in which a master device informs time to a
device which depends on it. This can be done in
a variety of ways, such as using a device
like the tentacle, which communicates
with the camera and audio recording device via Bluetooth or via
connecting a BNC cable just to mention a few. All of these work great, but they can also bring
unexpected issues so, always having a low tech
clapperboard is key. Once the film editor
has all the footage, they will use the video
editing software of choice. Software like Premiere,
will allow you to merge video and audio clips by identifying the waveform
created by the clapper board. And there are some other
smart features now, that sync based on time-code. Whichever the way,
if you're an editor, arriving into a project shortly after the production
has commenced, or even a little bit later on, make sure that you ask
for all the notes. done by the sound crew
and the script supervisor.
4. How to Edit and Clean Dialogue: Once you've been
through the spotting sessions with the
team, or by yourself if you are directing
and working on the post-production on your own, it's time to move
on to the dialogue editing. During the
picture lock stage, the editor should have synced all the production dialogue
along with their video edits. This includes ideally not only one source like the shotgun mic, but also any other sources captured like the
radio or room mics. At this point, the
dialogue editor can select which production
dialogue tracks, work or sound the
best for the scene and begin cleaning and
editing these as needed. Having said that, it
is not uncommon for the film editor and director to
make choices of audio takes. This is also a good way to work however it is always
best practice to put these takes at the top of the session and keeping the other synced audio
at the bottom. If your team is big
enough that you are working with the five
elements audio separately, then a session
with only dialogue organised in the manner I just explained is given to the dialogue editor
with no sound effects, ambience or music
tracks required. However, if only
one person is working on the audio for your film, then colour coding these
dialogue tracks is advised. Once you have checked
the sync or done the sync of the dialogue
for yourself, you need to ensure that any
unwanted noise is removed from tracks and that they are trimmed down to the
required length. With dialogue cleaning,
we'll begin with what could be described as
a low tech solution. Rather than getting overly excited and jumping to the use of plugins and other
auxiliary tools like EQs and compressors right away. We first need to clear
the way by cutting unwanted and unnecessary
bits of audio. And performing
volume automation. Always taking care that there
are no dramatic audio dips, cuts that make the dialogue
sound overly artificial. An example of this is
this bit right here. Here the solution
is quite simple. A cut of this bit at
the end of the audio and a very short fade
out does the trick. Another very important and basic concept is that of replacing
gaps with room tone. Throughout our other courses on pre-production and
production audio. We've told you about room
tone and the importance of capturing as much as
possible when filming. Dialogue editing is not the only reason, but it's probably one of the most important
reasons why we do this. Take for example,
this section here. We will need to
remove this noise. However, if we just cut it out and even adding
a fade out at the end of the audio clip and a
fade in at the beginning. The silence is really noticeable and makes the audio
sound artificial. Fortunately, because
we have room tone at our disposal, we can fix this. Remember, dialogue needs to
be clear and intelligible. If you have found during the
spotting phase that this is not the case for some of
the production dialogue. You may need to think
about doing ADR, which is automated or Additional
Dialogue Replacement. If there are some noises in the background of the
dialogue, recording it may be possible
to remove these. A good sound mixer will ensure
a recording is taken of any noise pollutants
that could not be avoided during
the filming phase, for example, and a noisy portable battery
that's used to power the lights or the humming
of a refrigeration unit. Capturing a recording of these sounds on their own can allow audio editors to filter out these sounds
in post by using plugins such as Izotope's,
spectral de-noise. we solved This is another very
important use of room tones we solved With all your dialogue nicely synced and cleaned up. You can now move onto ADR if that is a step that is
required for your project.
5. How to set up an ADR session: Quite often you'll
find that some of the audio recorded onset
is either too noisy, corrupted, missing, or
just not the quality needed and ADR is the way
to resolve these issues. ADR is the process of recording new dialogue in a
studio environment to sync with the video. It will require the
actor to lip-sync to the original performance
as closely as possible. The actor should make
sure to try and deliver the same emotion
and power that they expressed during the
original recording. Broadly speaking an ADR
session is comprised of a screen relay and a
microphone of choice for the actor to perform
with. The ADR recordist will prepare a
session with the picture and sync any audio as
reference for the actor, as well as set up a room for
the actor to perform in. Which is usually void of any electronic noise that's coming from the audio equipment. Once you have this, the actor
can decide whether they wish to perform hearing
their reference audio, or if they prefer to
do it in silence, only watching the
screen as a cue. Particularly for smaller
budget projects, it is common to
have the director attending these sessions to make sure that the actor
can be guided or coached, in an attempt to deliver
something as close to the original
performance as possible. To prepare your audio
recording session, consider the same
aspects that we discussed on the
dialogue editing module. You must deliver only
our dialogue tracks with the selected takes at the top
and the rest of them below. And while you might be
informed about aspects such as bit depth and sample rate
by the production sound. Do bear in mind that the minimum
requirements should be 24-bit and 48 kHz. These days sound recordists and sound designers do tend to use 96 kilohertz as
almost a standard, as this allows for
better processing of the recordings without
artefact noises and so on. While setting up an
ADR session and running it could be a
class on its own. I will just brush
upon a couple of the aspects that should be
taken into consideration. The most important is
having a queuing system. Nowadays there are
software such as EdiPrompt or the
Colin Broad system. In either case, you can
choose between using audio beeps to queue your
actors before the scene plays, or you can use visual
wipes to do the same. Going really low tech, you could program
these queues manually, but this could be
extremely time-consuming, particularly for a film
that requires a lot, of ADR. Whatever your choice, the important thing
to remember is that you need to
have a system in place so your actors can know when the action
is happening. Other aspects to bear
in mind is monitoring. As I mentioned before the
actors will usually be in a recording room with a
recordist in a control room. So it's necessary to create a monitoring mix for the actors to be able
to hear themselves, as well as any feedback from the control room and if needed, any aspects from
the recorded audio of the film that
they wish to hear, like a previous performance or specific sound effects
or ambient sounds. We will be releasing
an ADR focused class in which we will go over each
step of setup in detail.
6. The Basics of Sound Design: Sound design is the process of creating audio effects for picture. Sound designers will
add wild tracks and field recordings to create
ambience for each scene. And along with
that, they will add any specific or special sound
effects that are needed. Sound effects can be created
in a number of ways. It's usually a mixture of
recorded sound which are layered up and sometimes have light to heavy
processing applied, depending on the sound effect
and the genre of the film. It is a sound designer's job to bring the scene to life
through sound. And sound has a huge part
in telling the story, and a great sound
designer can add much more to the story than what the image can convey on its own. Sound design can be as simple or as detailed and
elaborate as you want, but it needs to make sense
for the type of film. In this class, we will go
through basic sound design, which is generally
the foundation for nearly all films
that are produced. That is because to some level, all films consists of
the same types of sounds in my own experience
and from what I've heard and seen from
other sound designers. The key to creating
great sound design is collecting and using
nice organic materials, so sounds, which on their own may not sound like
anything special, but once layered up together, create a dynamic and sonically interesting
moment for the listener. Likewise, a correct
understanding and use of silence is also required. Take for instance,
this sound here. These are the layers
that are involved. Next time you're watching
your favourite film. Listen, particularly
those scenes which are the most compelling. What is happening sound-wise? How is the film using
layers or even silence to convey motion
or lack thereof? Now think about how you can
apply this to your work.
7. What is Foley and why do we need it?: Foley is similar to
sound design as it is the process of creating
sound effects to enhance the picture
and make it seem more realistic to the audience . Foley however refers to human-made sound effects
such as footsteps, clothing movement, and prop handling by the
characters on screen. The Foley artists will perform actions along
with the footage. And in a similar way to ADR, it needs to be in sync and match the performance given on screen. It can then be edited to make sure that the sound
matches the scene, not only in terms of sync, but in terms of space
intention and more. A lot of Foley sounds
are relatively straightforward and a foley artists can simply use similar objects to what is being
used by the actor. But for some sounds a
Foley artists needs to get creative with the materials that
they have around them. As in a lot of cases,
the actual object, may not actually sound like how
you would expect it to. Just how a sound
designer will layer up multiple recordings to
get the sound they need. A Foley artists may hold
multiple objects at the same time and move them around to get the
desired sound effect. From the world of foley we get a lot of the
most well-known tricks in cinematographic sound, such as coconut shells for
the sound of running horses, boiling bacon for rain. And many other fun, yet super useful tricks
to think about that Foley artists
have developed over the years and that our ears as spectators have just
grown accustomed to. You might be wondering if
the sound recordist and the boom operator did a good job during
the filming phase, then why do we need to
foley in the first place? Well, the reality is that
during the filming phase the sound recordist
will try to capture all the sound to the best
of their ability. But priority will always
be given to dialogue. If you've seen our classes on production and
pre-production sound, you will know that there
are many different elements that might affect
audio during filming, including noises from
several sources that can't be controlled like traffic, passer buys
electronic noises, just to mention a few. So recording techniques and microphone placement will always be focused on trying to capture
clean and crisp dialogue. Meaning that for those
noisy environments, capturing footsteps, clothing, movements, and so on,
it's just not a priority, but it's ill-advised
to be honest. For this reason, if a sound
recordist did a good job, what you will often hear is very clear dialogue with little to no other sources
of sound on it. In terms of budget, creating foley is a very
standard part of postproduction. And it means that costs
are not significantly elevated as opposed to having
to do ADR, for instance. Also bear in mind that creating and foley in
post-production can actually be an advantage
as it allows for sound designers to control the circumstances under which these foley sounds are recorded, allowing for a clean
sound that can then be transformed in any way desired
for the film purposes.
8. Music Editing: Music is a very important
element of the narrative. When composed and used correctly, it can add to the visceral
elements of a film. Music editing is crucial, and it is a role that acts as a bridge between the sound team, the music composer and picture. A music editor will
help the director achieve their musical
vision for the film. And depending on the
size of the project, the music editor will work
closely with the composer, director and even the
editor to achieve a consistent rhythm that aligns video and music to
the same pace. Some of the main
responsibilities of a music editor early on
is to create a cue sheet for the musicians or
composer to follow when performing the music so that it
matches the editing rhythm. Additionally, choosing
and understanding where the music
comes in and out of a particular scene are decisions that a music
editor can help make. This also extends to utilising
silence in a smart way and when there
is music that is sourced in a royalty free basis, the music editor can help decide what are
the best pieces of music to suit each scene and
important narrative moments. In bigger projects, the music
editor will then work with the music supervisor to
ultimately accomplish this task. Editing music is a complex
and beautiful process, which involves not only
knowledge of rhythm, but also of musical
composition and style. Creative cuts and edits to compress relevant
musical themes, as well as to bring in phrases
of music together that are not normally in sequence
in a seamless manner, all require this
previous knowledge. Look at the class resources
to see an example of music editing and the
positive impact on film.
9. Dialogue Treatment: We have discussed cleaning
and syncing dialogue before, but is there anything else
that we can do with it? The answer is yes. The work of a dialogue editor goes beyond making sure that any silence gaps are filled and that the dialogue
is always intelligible. As human beings, our ears are designed to recognise
a subtleties in other human beings voices. We can recognise intention, emotion, and even in
certain situations, overall health levels and medical conditions based
solely on the voice. When working with dialogue, there is a lot of creative
elements to bear in mind. Who are the actors speaking on stage and what are
their motivations? In a recent film that my team and I had a
chance to work with. We had a character
whose qualities were charming,
smart, reassuring. And this was despite the
fact that development of their storyline ended up showing the audiences that the character wasn't so good after all. As such, it was important to
make sure that the voice of this character was
appealing and pleasing to the characters ears. To do this, we made sure
that a special EQ mix was created for this
character's voice and one for each source. So in this case, a shotgun mic and a lavalier
microphone. The EQ mix helped
reduce some of the more shrill like frequencies
on the actor's voice. While subtly
increasing the mid, mid to high frequency
bands to give the voice a warm,
honey like texture. A couple of preset options of reverb and compression were also created for this
character to make sure the voice was always
soft yet present. On the other hand, a
different character needed to make the audience
feel uncomfortable. And the characteristics
were more nagging, petulant, and
poignant as such, almost an opposite
approach was taken using compression
and equalisation to make sure that there
was a slight boost on those frequency bands that our nasal cavities resonate with when voices are more
high-pitched and shrill. All of this had to be done in a subtle way, yet big enough the effect was felt but
the audio wasn't distorted or modified in a way that
made it sound like these characters were both
in different places. This is just an example
out of many on what can be done in dialogue to convey
more about the characters. If doing ADR, you must also take this into consideration
so that when you record, you should choose the
right microphone and equipment help you
with this process.
10. Ambient Sounds: Before getting deep into mixing, I want to talk a little
bit about ambient sounds. Foley, sound effects,
and music receive quite a lot of attention when
it comes to sound design. And for a long time, and particularly in
the early stages of film and also with the
rise of television. Ambient sounds were seen as fillers or portions of
audio that could be used to get a bed to the rest of the sounds and dialogue, as a way to trick the ear into hearing
everything in context. However, when
talking about film, ambiences can push the narrative forward as much as any
other sound element. Because ambient
sound is something that our ears are used to interacting with or sometimes even neglect
in favour of spoken sounds. And opportunity is
presented to use ambiences to introduce a less obvious element
to the narrative. Soft changes in room tone, introduction of
specific elements in space like leaves
rustling or dogs barking, crickets, or any other
environmental aspect can tell us where we are. And cue us subconsciously as to what is about
to happen next. Natural phenomena
expressed through ambient sounds such as rain, running water, cold or hot wind. can make us empathise
with the characters on screen and set the mood for a change in emotional content. On the other hand,
ambient sound can also be used in a much
more forward manner. Ambiences created with soft droons, rumbles
and even changes in wind can help overtly tell audiences something bad
is about to happen. More artistic atmospherics are a huge part of what is done
horror films for example. An important thing to
remember when working with ambiences is that similar
to a sound effect design, setting up an ambient for a scene might
require many layers of recordings to achieve
the desired effect. In real life, our
ears are constantly receiving many layers of
complex sound information. And our brains make the
work or prioritising different layers depending on our state of mind and
emotional contexts. When working with ambiences, we're adding these
layers and we're doing the exciting task of choosing what we should
prioritise for the audiences, adding meaning and
even getting into the character's
psychology by doing this.
11. Mixing: One of the last stages in post-production is mixing. At this point, all
the other components that we discussed are brought together and combined by the dubbing mixer or
re-recording mixer. During this stage, the audio is balanced to create
final audio mix. This requires levelling on every single sound
from all sources, effects, foley, dialogue, music and ambiences need
to be blended seamlessly. It is an arduous
and long process, that requires the extensive use of automation and
other tools such as EQ and compression to make sure that all the relevant
sounds can be audible, rather than a mash of noise from which no specifics
can be set apart. Alongside levelling decisions
on usage of silence, as we discussed
previously, are also done. The director will be involved
in several sessions with the sound mixer to make sure that the overall
vision is achieved. The sound mixer is
also responsible for adjustments such as
positioning and loudness levels. This last aspect
is perhaps one of the most technical ones
to bear in mind when mixing. Sound for the purposes of film and any audio
visual material that is presented in any medium be it cinemas, television,
or streaming platforms needs to be
measured in loudness levels. Several standards have been developed and should be
followed according to the platform in which
the film will be played and your
geographical location. The truth is, we could
dedicate a whole class to loudness standards and
the preparation of mixes for their reproduction
in different mediums. And we will have a course focused on this
area in the future. But for now, I will focus on two standards used for
film projection in cinema. The EBU R 128, the ATSC. Before I do that, I think it's important
to talk about loudness and how it is
different to volume. Volume, which is a
concept that we use in different contexts and
very often is simply put, the scientific measurement
of power in sound. We talk about volume when
we regulate the level at which the sound is played on our computers or televisions, we can increase the
volume and as a result, we hear the sound
come in as louder. Loudness, however, is a
very different thing. It refers to our
subjective perception of sound and is a much more
complex thing to measure. This is because not only the amplitude and power
of the sound is measured, but also the frequency,
composition and duration. For example, the way we perceive how loud a high pitch sound is versus a low pitch sound
is very different. And bear this in mind. That is only one sound, add the thousands of sounds together that you'll be
hearing on a film. And it becomes a whole different ordeal. Standards to measure loudness in cinema
projection rooms have already been
developed and tested. The same applies for standards for online streaming platforms, media players on
computers and television. Which takes us back to the EBU, R 128 and the ATSC. Both of these are
loudness standards which ensure that sound mixers
follow a protocol so that all films that are published in cinema have the same
perceived volume throughout. The EBU R 128
is the European standard. While the ATSC, which stands for Advanced
Television Systems Committee, is more commonly
used in America. Their loudness levels are
measured in LA UFS or LLF KS. which stands for a loudness unit, only vary by one or two points. Admittedly, a couple of points louder in Europe than
it is in America and this has to do with
the average construction of the cinema rooms and
projection equipment and much more complex
aspects which we won't get into in this
introductory class. It is sufficient to
know that the industry standard loudness plugins come integrated with these
measurements already in. For example, insight, which is a Mastering plug-in from a
company called Izotope, that message levels in your project according to
the standard of your choice. Izotope is not the only company that produces these kinds
of measuring tools. We have Waves, Nugen Audio
and many, many others. A film should have an average program
level of around -27 LF KS with a true peak
of -1 dB maximum. Both these measurements will
be shown in your plug-in, so exercise caution
with your film if it's over or under these levels
and adjust if necessary. Ear and experience also
come in handy as adjustments required
by the standards will need the sound mixer to make
use of their ears so as not to lose the desired effect when it's just in
the overall levels. Once the film is mixed. The next part depends on
your distribution platform. If your film will be showcased
in commercial cinemas, then it is very much likely that your film will go
through encoding and the creation of
a digital cinema package will be required. Look at our course
resources to learn more about the specifics on a
digital cinema package, which might need to be
created if you are sending your film to say,
international film festivals. For a larger budget film, your film alongside the
synced mix can be sent to a digital cinema encoding
facility to create a DCDM or digital cinema
distribution master. But this is a more
advanced topic which we will go into more detail
on future courses.
12. Final Thoughts: We've come to the
conclusion of this class. Congratulations and thank you for taking this journey with me. I hope that what
we've covered here has given you an overview of how crucial
post-production sound is to the success of any film. But also that you've found
the concepts here and the craft as interesting
and as beautiful as I do. We have covered basic concepts
on sound synchronization, how to clean and treat dialogue, as well as how foley and
sound effect design work. We have also learned
about mixing and the preparation of a film
for sound and its distribution. In the future, we will be
releasing new classes with much more advanced concepts
on audio post-production. And we will go into
even more depth about specific editing and sound design techniques
that can be used when working on a variety
of genres of film. In our course exercises
and resources, you will find the materials to complete your class project, which we'll see you
cleaning, editing, and performing basic levelling on a scene from the
documentary 'Finding Sid'. Additionally, you will
find a couple more of optional exercises to practice sound effect and
ambient layering. Please share the results
with the rest of the class. Good luck, and I'll see
you again very soon.
 Black Goblin, Sound Design & Techology Company