Transcripts
1. Introduction: In this class, we are going
to paint this wild landscape. You learn how to draw a wet-on-wet technique
in the background. How to draw these blobby trees. And then how to sparkle
use guy with some stress. And then I'm also giving you a lot of tips and
tricks what you need for watercolor and how you
get the right results. This is a total beginner class. So if you have no
experience with watercolor, this class is just for you. And we're going to start somewhere and you're
getting a result. So if you would
like to draw this, please join me in this class.
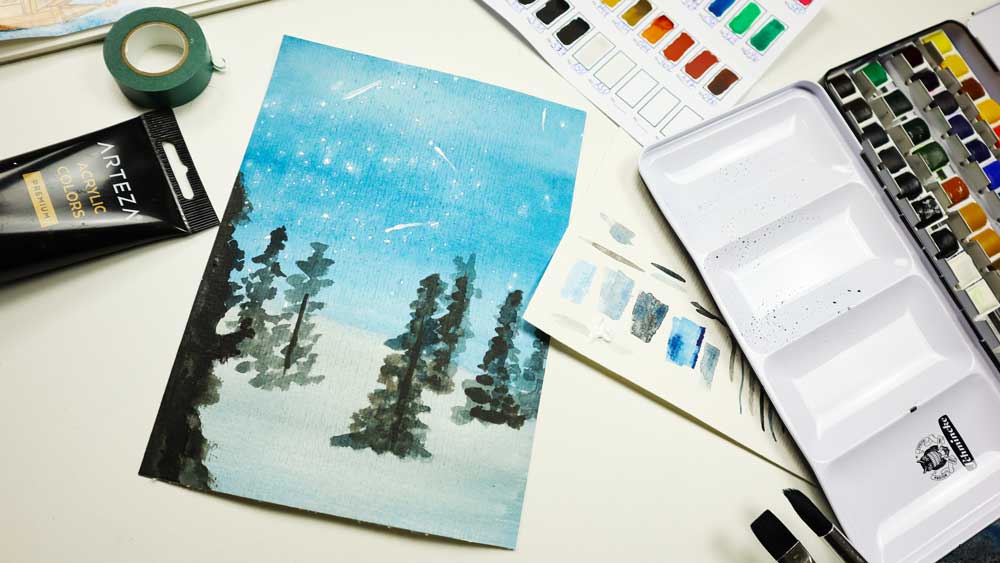
2. Material & Preparation: For this class, here you can see all the material
we are going to need. So here's a pot of water was two areas because any to
wash out the British. Of course. Then I have three brushes. This is a very white one. You can see because I need to fill the
whole piece of paper. And then I have three more
of them for the detail. This one is a two. Here comes an 86. Most probably, I
will just need one, maybe the Sikhs,
but we will see. So I just have them handy. And I usually have a towel
here so I can dry the brush. And I also have something like that here,
the tissue paper. So for the same reason in my
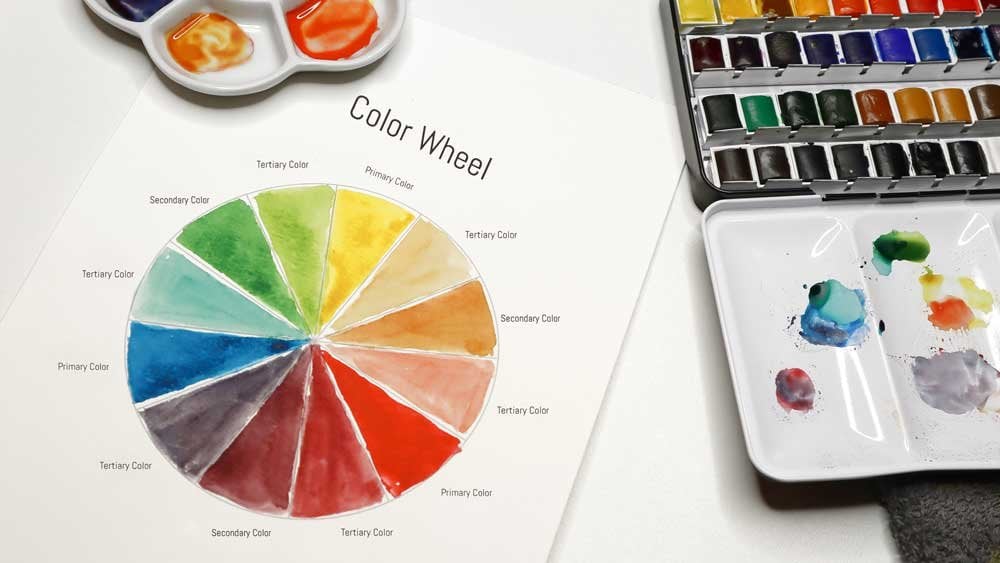
box here there is a lot too, mix my colors, and I also
have a color swatch. This is really helpful, and you can easily do that. I'm going to add that
here to the class. You get a sheet and you
can print it out and use it for your color palette. So no matter how many
colors you have, you just wash them so you take the pure color and fill these little squares
here or rectangles, and right under
them the number of your cows or you don't do
that and just watch them. So the reason why I
do that is because usually my color here is much different from the
color I have here. I can easily make sure I have the right
color when I'm drawing. So when I'm using
this color and I have to go here and I have to put this one and say it said you usually don't
know really if it were. So. So that's why and I haven't
always Henley and with me, next thing I have a little
piece of watercolor paper. Here you go. So I can, before you go
on to my to my sheet, I can just try it out here
and see if it's okay. Let's say I have a
little piece of paper. Why I need that is
because I wanted to sparkle later some
stocks over the paper. And for that, I will have something which is
not so smooth here. So I put some color on it and brush over it for the paper. And that's why I have
those sinks here handy. You see, that's all
nearly all beside that. I also have washi tape
and why I need that, I'm going to get the paper from my luck here and then put
it here on the table. And I can easily release it
later for use washi tape. That's why. Yeah, I believe it's
much more handy. Anyway, so we can get started. There's a little bit of
work to do before we can. First thing is I need to get
the paper for my look here. If you need to be a bit careful, you can also use a ruler
and go on the reef, but usually it's so sick
that you don't have to. You're just Yeah. You know what paper I use. Show you. It's a Brittania. This one. I believe it's a
really good one. It's tests 300 gram, a 140 LPS, as you can see you. So I believe it's
a really good one. And I'm also using Winsor
and Newton colors. No matter if it says
Sri Lanka here, it's just the box. And these colors are from Winsor and Newton
is student quality, and that's totally fine. You do not need to
tube soft all you can have them and
I'm sure a buyout, they glue a little bit more and they most
probably better. But for our purposes
totally enough, it's absolutely fine if you
have these kind of colors. So now I need to decide how I'm going to draw my landscape. Now. So here's my
little sheet of paper. I'm going to put that here on the table just because
it gets pretty wet. So I need to be careful. I have my paper really healed.
3. Painting the Background: Wet on Wet: So that's it. And now we first
need to water of paper because we have put it here on the
table is pretty easy. Know, make sure you have clean water and then
go over your paper. We're going to draw
wet in wet for now. And that's why I'm have
to wet my paper first. Never put the brush
down in your plot. Just always make sure it's sending all
lays on the ground. So just showing you because I'm going to need that
brush and I'm going to use this color here
because it's a nice blue. And this might be a little
bit too strong to see. I have a lot of blues here. And I could even add a little bit black or brighten
them up a bit, but I won't. I just, I'm going
to use that color. And of course I
have that swatch. I know where it is
in my box here. So I need to wake up these
colors a little bit. So I need to add
some, watch her, and then I'm going to add
that here to my palette. He sees pretty strong color. So that's why I'm going to
add some water for now. You always start super light. And then you can be I can
add more color later on. And then you Yeah, you can decide what
you want to do, but I want to start
lighter and go on later. You see, that's how
it looks right now. And I'm going to brush it
here over the backward. Since it is a sky in the night, I'm going to make
it darker for sure. But for now that should be fine. Just going adding a bit more water anymore. Now, I won't put into my palette and just use the whole thing so
they get it ready doc. But if something
shines through now, so a little bit of white
from the paper or something. It doesn't really matter because it is
already live blues. So that's why it's a good
idea to have it first of being filled
just with a color. So now we're going to
add a bit of black here. I want to have some mountains, but I'm not getting completely rid of the blue
adding that as well. So I think it's a nice way
from the top to the bottom. Shangqing. More color. What I want do that with a big
brush to swaying a second. For a night sky, a little bit darker. Usually use your brush
just in one direction. You see me doing right now. And if you feel you
have too much color, just go over it. You can take some off here. You see it gets a
little bit lighter. And depending on what you want, That's how you go
on the paper again. You can always get darker. Okay, Now we need to wait a little bit to
make sure it dries. You see here is a little bit
of white left. I'm tears. It is comes in a little bit
darker but he has to lose. So we really just need to wait a few minutes to make
sure it's dried. And then I go over it again. Okay. So we need to get a little bit darker
as we said, Sorry, go over it once again and
you see it gets dark. But I will say because we have the dark
trees in the background. So I'm going to have the
same bit lighter here.
4. Shooting Stars on your Watercolor Landscape: Okay, Before we go on, I'm going to sparkle the sky. So let me use a mention of this acrylic color and put
it here on my paper piece. Already too much, I guess. So you really don't need a lot. And then you use
something like that. Russia, that here. It would be better if
you have another brush. And it's okay. Now sparkle
use guy onto you see recurse. I haven't waited before. It's completely dry and
walks a little bit more. The color.
5. Painting with Watercolor: Trees in the Wilderness: Okay, Next, we need to get
the trace into our painting. Some freshwater, nearly black. The blue. Why? Because I
don't want to have such a huge contrast here. So I'm going to make that
a little bit brighter. This is what I call
the block technique. So I'm going to draw this
here and then I'm going to just go over age and move
my along the stem here. It's fair if you start
on the top and then go down to the bottom so
you can get wider here. You can also have really
super polite trees in the background that I decided not to have
these trace here. And we might go over it in a bit and it just takes
a bit to dry again. So let's see how it turns out. And then we go over it again. You see I'm using
different techniques. So whether it's a wet
on wet or wet on dry, you need to be
flexible with that. So now it's wet on dry, crispy already have some
dry in the background. I always catch myself by
starting on the bottom. Go up again. And don't be afraid to
leave it as it is for now. A bit more later. Your first try, you can go
over and have a trace here. You might also want to add a
stem here, the background. So we can pretty thin brush. Getting dark. Student Try again. So I will need a little
bit more of a white color. Okay. So far.
6. Your Watercolor Project: You might have guessed,
that's also your project. You're going to start growing the breadth ground and
Cusa wet on wet technique. Then add the dark blue and edit a little bit
of a lighter gray. Maybe you as a little bit
more gray, darker gray. That's totally up to you. And then you start
with light trees in the background and draw in the foreground
even darker one. Go ahead and sparkle. Of course here the sparkles, I think they give the whole
thing a very nice touch. I might want to have had
it a little bit darker. You. That's not how I turned up. So go ahead and use
a little bit of that crude color or maybe
you have another color, some wide and sparkle
the background. Yeah. Please go ahead and post whatever you have
created and the gallery, I would love to have a look. And if you have any questions, please at anytime contact
me and let me know.
 Monja Wessel, Graphic Designer and Teacher